
FS20 - Refrigerator Gamko - Free user manual and instructions
Find the device manual for free FS20 Gamko in PDF.


| Product Type | Commercial Ice Machine |
| Model | FS20 |
| Brand | Gamko |
| Climate Class | Indicated on serial plate (temperature and humidity range) |
| Sound Level | 57 dB(A) |
| Refrigerant | R134a or R404A (hermetically sealed system) |
| Global Warming Potential (GWP) | R134a: 1430; R404A: 3922 |
| Electrical Connection | Requires Residual Current Device (RCCB or RCBO) |
| Power Supply Voltage | As per serial plate (e.g., 220-240V or 380-415V) |
| Water Supply | 3/4" connection to cold water supply; shut-off valve recommended |
| Water Drain | 20mm inner diameter flexible pipe; minimum 3% fall |
| Ice Cube Adjustment | Adjustable via screw (clockwise larger, anti-clockwise smaller) |
| Self-Cleaning Function | Yes, with citric acid solution (quantities based on model) |
| Cleaning Kit Part Number | 16251859 (optional) |
| Condenser Cleaning | Periodic cleaning with soft brush or vacuum; avoid wire brushes |
| Water Inlet Filter | Clean periodically; accessible after shutting off water valve |
| Ice Bin Cleaning | Use warm water and sodium bicarbonate; rinse and dry |
| Safety Warnings | Do not store flammable substances; keep ventilation clear; no living bodies inside; use PPE on cold surfaces |
| Installation Requirements | Flat, level surface; castors locked; adequate ventilation; avoid dusty environments |
| Number of Models Covered | FS20, FS40, FS50, FS90 |
Frequently Asked Questions - FS20 Gamko
User questions about FS20 Gamko
0 question about this device. Answer the ones you know or ask your own.
Ask a new question about this device
Download the instructions for your Refrigerator in PDF format for free! Find your manual FS20 - Gamko and take your electronic device back in hand. On this page are published all the documents necessary for the use of your device. FS20 by Gamko.
USER MANUAL FS20 Gamko
Her Majesty Queen Elizabeth II
Suppliers of Commercial Refrigeration
Foster Refrigerator, King's Lynn
English
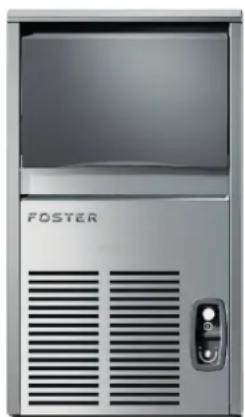
natural_image
Front view of a server unit labeled 'FOSTER' with ventilation grille and control panel (no readable text beyond label)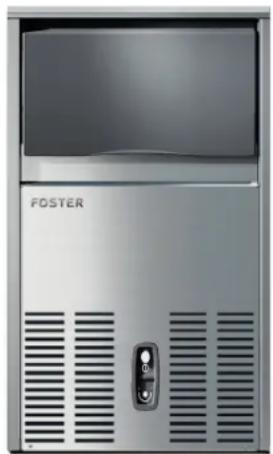
natural_image
Front view of a modern server unit labeled 'FOSTER' with ventilation grilles and a central control knob (no additional text or symbols visible)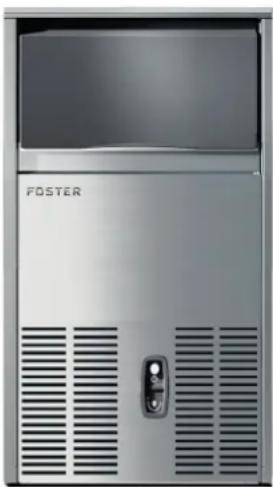
natural_image
Front view of a modern server unit labeled 'FOSTER' with ventilation grilles and a central control knob (no readable text beyond branding)
natural_image
Front view of a stainless steel industrial refrigerator with ventilation grilles and a door (no visible text or symbols)
Call: +44 (0)843 216 8800 Fax: +44 (0)843 216 4700
Foster Refrigerator
Oldmedow Road
King's Lynn
Norfolk, PE30 4JU
United Kingdom
A division of ITW Ltd
Email:support@foster-uk.com
Models applicable to this manual
FS20
FS40
FS50
FS90
Climate class
Climate class indicated on the serial plate, shows the temperature & humidity at which this appliance has been tested, for the purposes of establishing values in line with European standards.
Important Note to the Installer:
Please ensure that this document is passed to the user as it contains important guidelines on operation, loading, cleaning and general maintenance and should be kept for reference.
Warnings
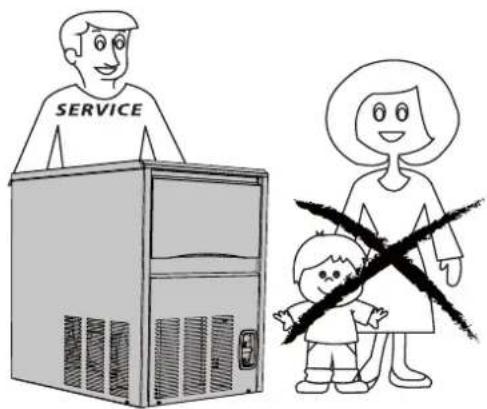
This manual provides all necessary information for the correct installation, use and maintenance of the machine. The user must read the manual carefully and always refer to it for the use of the machine. It should be kept in a safe place, and be accessible to all authorised operators (installer, user, maintainer). All safety information must be adhered to.

- The equipment contains greenhouse effect fluoride gas governed by the Kyoto protocol, in quantities indicated on the registration plate. The type of refrigerant gas present in the refrigeration circuit of the equipment is detailed on the registration plate (on page 10). The GWP (Global Warming Potential) of the HFC R134a gas is 1430. HFC R404A is 3922.
• The system is hermetically sealed.
• The equivalent CO2 data is displayed on the registration plate (On page 10 of the manual) - According to Regulation (EC) 1272/2008, gases R134a and R404A are non-flammable and non toxic gases. In different concentrations, they may be asphyxiating. Contact with the liquid can cause burns and freezing.
- The gas in the system is under pressure and may explode if heated.
Electrical safety
Foster Refrigerator recommends that the equipment is electrically connected via a Residual Current Device; such as a Residual Current Circuit Breaker (RCCB) type socket, or through a Residual Current Circuit Breaker with Overload Protection (RCBO) supplied circuit.
Should it be necessary to replace the fuse. The replacement fuse must be of the value stated on the serial label for the cabinet.
General safety
Do not store explosive substances such as aerosol cans with a flammable propellant in this appliance.
Keep all ventilation openings in the appliance or in the structure of a built in unit clear of any obstructions.
The appliance is air tight when the door is closed therefore under no circumstances should any living body be stored or 'locked in' the appliance.
The moving of the appliance should be carried out by competent personnel, ensure that two or more people are used to guide and support the appliance, the appliance should not be moved over uneven surfaces.
The emitted sound level for these appliance are:-
| FS20 | is | 57db(A) |
| FS40 | is | 58db(A) |
| FS50 | is | 59db(A) |
| FS90 | is | 62db(A) |
To ensure stability the appliance should be located on a flat, level surface, correctly loaded with the castors locked.
If the supply cord is damaged, it must be replaced by the manufacturer, it's service agent or similarly qualified persons in order to avoid hazards.
Care should be taken to avoid prolonged contact with cold surfaces with unprotected body parts, Correct PPE to be used at all time.
- This appliance is intended to be used in household and commercial applications.
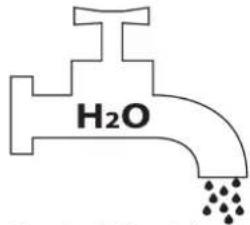
- Connect only to the drinking water supply.
- Use the new water pipe supplied with the machine. We recommend that any water pipes used previously are not re-used
Do not start the appliance prior to the installer confirming that the installation is complete.

Locating the appliance
Max 32^ (90°F)
H_2O
Min 10°C (50°F)
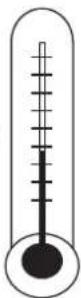
chemical
Diagram of a water molecule (H₂O) in a faucet with particles below, likely representing an electrolyte or solution.Max 0,5 M Pa (5bar) Min 0,1 MP a (1bar)

natural_image
Illustration of a server tower, a window with X marks, and a fire extinguisher (no text or symbols)
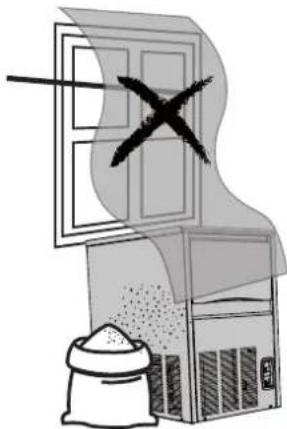
Install the machine so that the ventilation of the cooling unit is not obstructed in any way.
Avoid installation in a dusty environment, this can block the cooling condenser and prevent the machine from operating.
To prevent the ice from becoming contaminated, never store food, bottles, etc in the container.
Do not leave the ice container open, unless retrieving ice.
natural_image
Illustration of a window with a cross symbol above a storage unit and a sack of grain below (no text or symbols)
ection to the water supply and drain
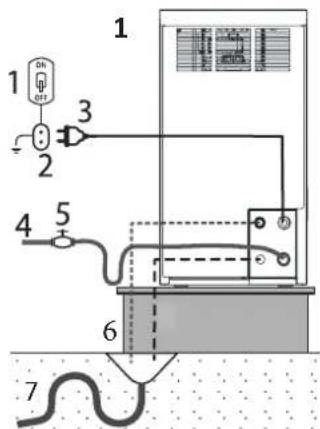
Install the water connection before the electrical connections. Connect the 3/4" supply pipe (supplied) to the machine and to the cold water supply.
For practical and safety purposes, it is advisable to install a shut-off valve (not supplied) (fig 1: 1.Switch; 2.Socket; 3.Electrical Plug; 4.Water Supply (one per unit); 5.Valve; 6. Water drain from the container: 7.Water drain with open siphon.). Apply the flexible pipe (supplied)with a 20mm inner diameter and of adequate length (not more than 1 metre from the machine) to the water drain fitting of the machine.
Before starting the machine ensure the following is carried out before starting the unit.

Note: A minimum fall of 3% is needed to ensure adequate water flow from the machine. Care should be taken to ensure the drain pipes are not restricted in any way.
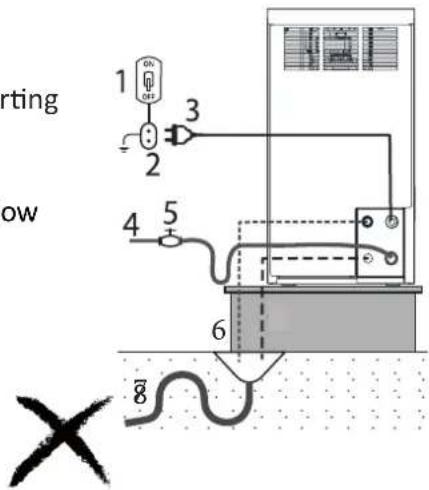

necting the power supply.
If the power supply cable is damaged, it must be replaced by qualified personnel to prevent any hazards to persons.
Connect the machine to a suitable power supply.
When connecting the machine, ensure hands are dry and the socket is switched off
Connect the machine to the power supply only after having verified that the mains voltage corresponds to that on the serial number plate on the rear panel of the appliance.
(On page 10 of the manual)

maximum voltage variation tolerance allowed is ± 10% of the rated value.
It is recommended that the machine is installed with its own isolator switch as all pole contact separation.
All cables and isolators must be sized according to the rating indicated on the serial number plate. (On page 10 of the manual)
The socket must be easily accessible.

al start up
Prior to using the machine.
-
Ensure that the machine has not been damaged during transport
-
Remove any items from the ice bin
-
Clean inside the container with a damp sponge with warm water and a little sodium bicarbonate; rinse with clean water and dry carefully

natural_image
Illustration of a desktop computer tower with a magnifying glass beside it (no text or symbols)
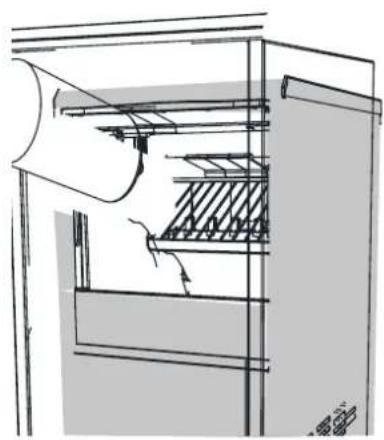
Warning: When switching on for the first time or after a prolonged period without use or after cleaning, the tray in the evaporator area must be filled with water (Fig. 2). In order to carry out this nation , lift the door , slide back the curtain and pour clean water into the evaporator tray. Subsequent cycles this will not be necessart.
Check the connections to mains water and electricity, open the water supply tap. To start the machine, press the illuminated switch (Fig. 3). It is recommended to not use the first five cycles of ice.

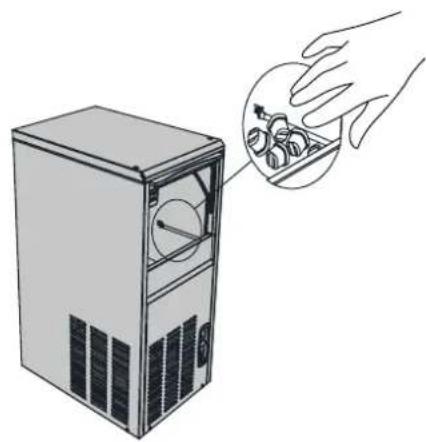
ice maker is equipped with a thermostat inside the ice cabinet (Fig. 4), which stops the machine and the production of ice when the sensor comes into contact with the ice accumulated inside the cabinet. Never switch off the water supply when the machine is on, do not obstruct the intake ducts.
Note: After removing ice, free the control bulb from any ice residue to ensure that ice making restarts swiftly (Fig. 4).
2
natural_image
Technical line drawing of a mechanical device with internal components and no visible text or symbols3

4
natural_image
Illustration of a desktop computer tower with a hand inserting a cable into its case (no text or symbols present)Cube adjustment
Cube dimensions can vary depending on varying conditions. To adjust the size of the cube, rotate the adjustment screw (fig.5) clockwise to increase the sizeant anti-clockwise to decrease the size.

Malfunction
In the event of a Fault, it is recommended to disconnect the electrical and water supply
- Check that the water supply tap is on.
- Check that power, that the plug is correctly inserted, and that it is switched on and the fuse has not failed
- Check that there are no abnormal vibrations.
- If there is a water leak, stop the machine first before making any adjustments.
- If ice production is low, check that the condenser is clean, check for the build up of limescale accumulation of the sprayer nozzles.
- To Check that the cabinet sensor is working: rest an ice cube on the bulb inside the container. This should stop ice production within 1 minute, when the cube is removed. Ice production should restart within 1 minute.
- Between summer and winter the cabinet thermometer may vary the maximum quantity of ice in the cabinet, in order to adjust this value, contact an authorised installer.
Cleaning and maintenance
Disconnect the electrical power supply from the appliance to perform maintenance and cleaning operations
Use a cloth dampened with a specific chlorine-free product for stainless steel to clean the case.
Cleaning the air condenser.
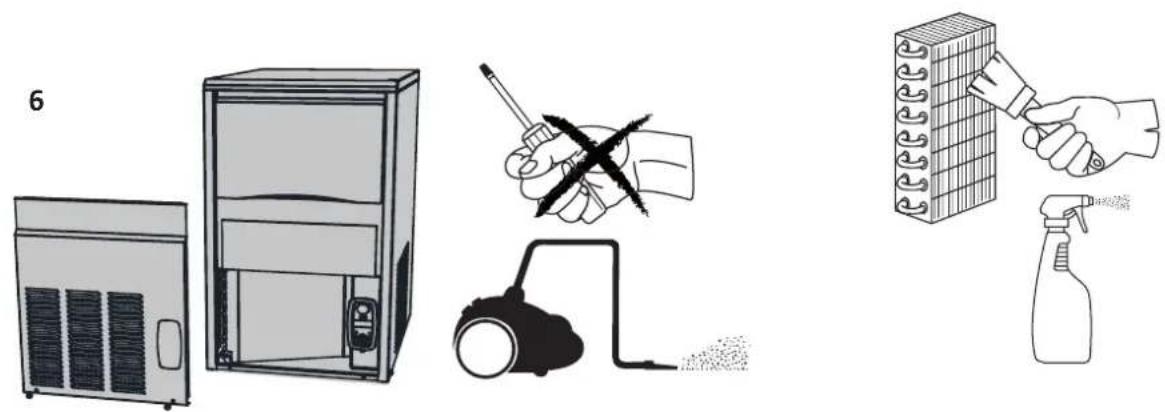
To maximise the efficiency and life of you machine, the condenser at the front of the machine must cleaned periodically (Fig 6)
Do not use wire brushes or blunt objects to clean the condensor, use a soft brush or vacuum with a suitable nozzle. Where a condenser requires cleaning with a cleaner other than a brush or vacuum. This should be out by competent engineer.
natural_image
Illustration of household appliances including a refrigerator, washing machine, hand tools, and spray bottle (no text or symbols)Cleaning the water inlet filter
It is recommended that this is carried out by a competent engineer.
Close the water shut-off valve, disconnect the water inlet pipe and remove the filter valve with a pair of pliers.
Clean the filter with a water jet and then reassemble it.
Cleaning the ice bin
Remove the ice from the ice bin. Clean inside the bin with a sponge dampened with warm water and a little sodium bicarbonate.
Rinse with clean water and dry carefully.
Cleaning and Sanification
The "Self Cleaning" function should be used regularly to remove the limescale build up.
Cleaning should be carried out three to four times a year, however in areas of very hardwater more frequent cleaning maybe necessary
| Quantites of citric acid to be mixed with water in the bottle to obtain the mixture | |
| MODEL CITRIC ACID QTY | |
| 20-25 Kg 200g | |
| 30-40 Kg 250g | |
| 50 Kg 350g | |
| 70-90 Kg 500g | |
Cleaning kit (optional)
The kit is composed of one confection of acid citric (1 kg), and instructions for the cleaning procedure.
Part Number 16251859

natural_image
Black-and-white photo of a gas cylinder with coiled tube and a bag of white material on a wooden surface (no text or symbols visible)Starting the wash & sanitation Cycle

When handling citric acid and citric acid solution

- Turn the machine off.
- Remove all ice from the container
- Prepare the solution by dissolving the citric acid in warm water (max 40°C), according to the quantities shown on the Previous table.
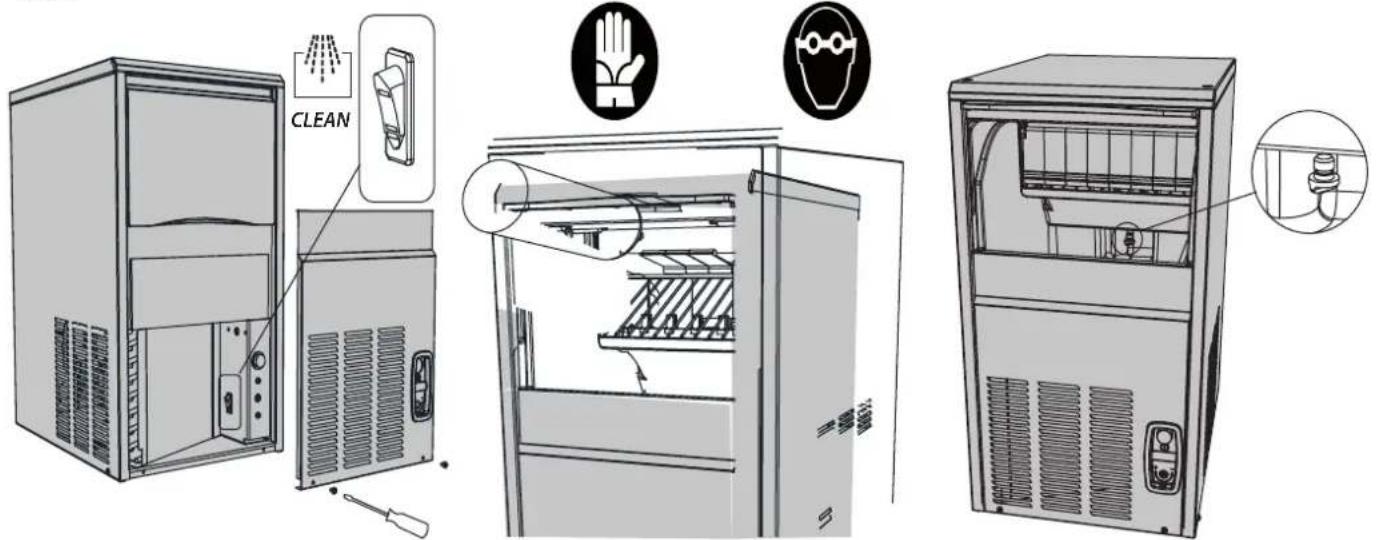
- Position the internal switch in the cleaning position (fig 7).
- Pour the cleaning product into the evaporator tray (fig 8)
- Turn the power to the machine on and wait for at least 2 hours.
- After two hours, switch the machine off and drain the solution in the evaporator tray into the cabinet (Fig 9)
- Replace the cap and pour clean water into the tray to fill it to capacity, and start the machine again.
- Repeat the operation at least 5 times to eliminate the presence of citric acid and sanitiser.
- After this time has elapsed, switch the machine off and remove the cap to discharge the water in the evaporator tray, then replace cap.
• Finally, return the switch to ice mode.
• After the cleaning function, rinse the cabinet well. - If the machine remains unused for long periods: Switch the machine off;
Remove all ice from the container;
Discharge all water;
Clean carefully;
Leave the container door ajar.
789
Before calling your supplier or enginner please make sure that:
a. The plug is located in the socket and the mains power supply is on i.e. is the controller illuminated?.
b. Check to see if the unit is in standby.
c. The fuse for the cabinet has not failed.
d. The cabinet is positioned correctly – as detailed in the rear of this manual
e. The condenser is not blocked or dirty
f. Defrost is not in progress or required
If the reason for the malfunction cannot be identified, disconnect the electrical supply to the unit and contact your supplier. When requesting a service call, please quote the model and serial number which can be found on the white label located on the back of the unit (Serial Number starts CMA.....).

CODE CM96908583/0
MODEL
S/N CMA1001500
V1 380-415V/3 50Hz 13,0A 247W
V2 220-240V 60Hz1 ,0A 123W
GAS R134a 2,000 Kg
CO2 Equiv. 1,00 Kg / dm3
CLASS ST IP IP22
-W-99999 W ⊗ 99999 W ♠♠♠99999 W
CE
a Division of ITW (UK) Ltd
Tel: +44 (0)843 216 8833
Fax: +44 (0)843 216 4707
Email: support@foster-uk.com
Website: www.fosterrefrigerator.co.uk


- English
- Models applicable to this manual
- Climate class
- Important Note to the Installer:
- Warnings
- Electrical safety
- General safety
- Locating the appliance
- ection to the water supply and drain
- necting the power supply.
- al start up
- Cube adjustment
- Malfunction
- Cleaning and maintenance
- Cleaning the air condenser.
- Cleaning the water inlet filter
- Cleaning the ice bin
- Cleaning and Sanification
- Starting the wash & sanitation Cycle
- Before calling your supplier or enginner please make sure that:
Brand : Gamko
Model : FS20
Category : Refrigerator