
445580 - Measurement Extech - Free user manual and instructions
Find the device manual for free 445580 Extech in PDF.


| Product Type | Digital Multimeter |
| Model | 445580 |
| Brand | Extech |
| Measurement Functions | AC/DC Voltage, AC/DC Current, Resistance, Continuity, Diode Test |
| Display | 4000 counts LCD with backlight |
| Auto-ranging | Yes |
| Data Hold | Yes |
| Max Voltage | 600V AC/DC |
| Max Current | 10A |
| Resistance Range | 0.1 Ω to 40 MΩ |
| Continuity Buzzer | Yes, threshold < 50 Ω |
| Diode Test | Yes |
| Power Supply | 2 x AAA batteries (1.5V) |
| Battery Life | Approximately 200 hours |
| Auto Power Off | Yes, after 15 minutes |
| Dimensions | 140 x 70 x 30 mm (5.5 x 2.8 x 1.2 in) |
| Weight | 200 g (7.1 oz) including batteries |
| Safety Rating | CAT II 600V, CAT III 300V |
| Operating Temperature | 0°C to 40°C (32°F to 104°F) |
| Storage Temperature | -10°C to 50°C (14°F to 122°F) |
| Accessories Included | Test leads, carrying case, manual |
| Maintenance | Clean with dry cloth; replace batteries when low battery indicator shows |
| Repairability | No user-serviceable parts; contact Extech service center |
Frequently Asked Questions - 445580 Extech
User questions about 445580 Extech
0 question about this device. Answer the ones you know or ask your own.
Ask a new question about this device
Download the instructions for your Measurement in PDF format for free! Find your manual 445580 - Extech and take your electronic device back in hand. On this page are published all the documents necessary for the use of your device. 445580 by Extech.
USER MANUAL 445580 Extech
Hygro-Thermometer Pen
Model 445580
Introduction
Congratulations on your purchase of the Extech Hygro-Thermometer Pen Model 445580. The 445580 can measure Relative Humidity from 10% to 90% and Temperature from 14 to 122°F (0 to 50°C). Advanced features include MIN/MAX Memory, Push-button Calibration, Display Hold, and Automatic Power Off.
Meter Description
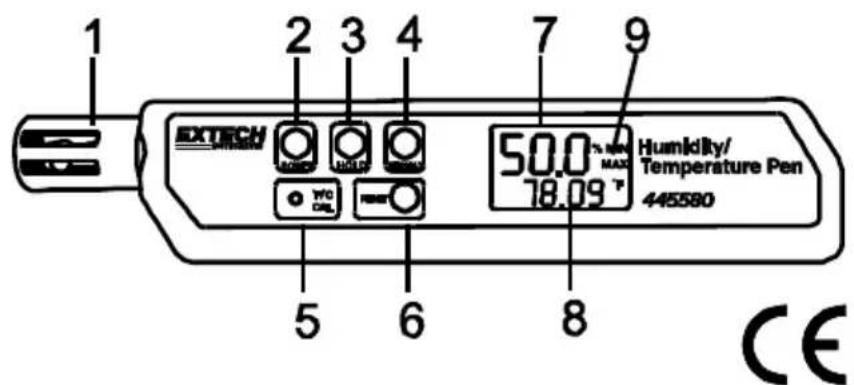
- Humidity/Temperature Sensor
- POWER ON/OFF button
- Data HOLD button
- MIN/MAX Memory button
- Calibration and units select button
Operation
Press the ON/OFF button to turn the meter ON. After a 5-second initialization, the Relative Humidity reading will appear in the upper display and the Temperature reading will appear in the lower display. Allow time for measurement readings to stabilize when moving the meter from one area to another.
Displayed Error Messages
An error message will appear on the display if the meter fails an internal diagnostic test.
E2: Calibration error. Recalibration is necessary.
E5: Relative Humidity sensor failure. Repair/replacement is necessary.
Data Hold
- Press the HOLD button to freeze the displayed reading. The display icon 'HLD' and the held reading will appear on the display.
- To return the meter to the normal operation mode, press and hold the RESET button until the 'HLD' icon switches off.
MIN-MAX Memory
- Press and hold the MIN/MAX button until 'MIN' appears in the display. The reading will then represent the lowest humidity and temperature measurements recorded since the meter was turned on or last reset.
- Press and hold the MIN/MAX button until the 'MAX' appears on the display. The reading will then represent the highest humidity and temperature measurements recorded since the meter was turned on or last reset.
- Press the MIN/MAX key again to return to normal operation.
- To reset (clear) the MIN/MAX memory, press and hold the RESET button until '88.8' appears in the display.
Automatic Power OFF (Sleep mode)
The meter will automatically shut off after a period of approximately 20 minutes. To defeat this mode, press and hold the MIN/MAX button while turning the meter on. Release the ON/OFF button after the display initializes. 'n' will appear on the display indicating that the non-sleep mode has been activated. Note that Sleep mode will be re-activated when the meter is turned off.
Selecting Temperature Units (C or F)
Caution: Follow this procedure carefully. Accidentally pressing the RESET button during this procedure will compromise the meter's calibration.
- Ensure that the meter is off.
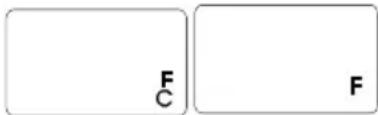
- Press and Hold the recessed F/C button (use a paper clip or similar object) and then press the ON/OFF button. The unit will power up and the display will flash once. When only the 'F' and 'C' icons appear together in the display, release the F/C button.
- The display will then show either 'C' or 'F'. Press the MIN/MAX key to select degrees 'C' or 'F'. The display will reflect the change.
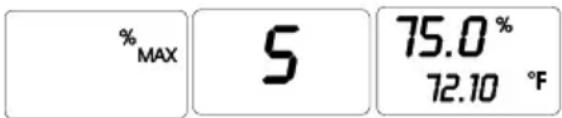
- Press the recessed F/C button to store the selection. 'S' will appear in the display.
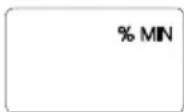
- The display will then show '%MIN'. Turn off the meter to complete the operation.
The following procedures require 33% & 75% RH references available through Extech. The meter should be placed in a room temperature environment for the duration of the calibration.
Verification (Checking the 33% or 75% RH Calibration)
Skip the verification and go directly to the Cal procedure below if it has already been determined that the meter calibration is compromised or if the E2 display appears.
- Insert meter's sensor into the 33% or 75% salt reference bottle
- Wait 40 minutes and then check if the reading is within the published specifications
Relative Humidity Calibration (33% and 75%)
The 33% and the 75% calibrations must both be performed.
- Start with the meter OFF.
- Insert the meter's sensor into the 33% salt reference bottle. Allow the meter to stabilize for 40 minutes. Note that for diagnostic purposes the stabilization process can be shortened to 5 minutes.
-
While holding down the recessed CAL button with a paper clip, press and release the ON-OFF button. Continue to hold down the CAL button, the unit will turn ON and the display will flash once.
-
When only the F and C icons appear, release the CAL button. After releasing the CAL button, the display will indicate either F or C (depending on which one was selected).
-
Press and hold the RESET button for 3 seconds. %MIN will appear in the display after the RESET button is released.
-
Press and release the CAL button. 'S' will briefly display followed by %MAX display.
-
Turn the meter OFF. Insert the meter sensor into the 75% salt reference bottle and wait 40 minutes.
-
While holding down the recessed CAL button with a paper clip, press and release the ON-OFF button. Continue to hold down the CAL button, the unit will turn ON and the display will flash once.
-
When only the F and C icons appear, release the CAL button. After releasing the CAL button, the display will indicate either F or C.
-
Press and hold the RESET button for 3 seconds. %MIN will appear in the display after the RESET button is released.
-
Press and hold the RESET button again for 3 seconds. %MAX will appear after the key is released.
-
Ensure that %MAX is displayed and then press CAL. 'S' will appear briefly and the meter will return to normal operation. Turn the power OFF; calibration is complete.
natural_image
Diagram of a device with ports and control buttons, no text or symbols present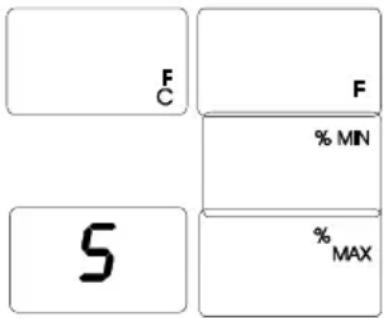
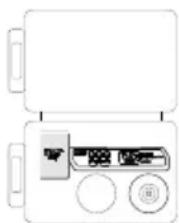
Use a coin to remove the battery compartment cover on the rear of the meter. Replace the 2032 lithium battery; install the new battery face up (+) in the battery compartment.

Never dispose of used batteries or rechargeable batteries in household waste.
As consumers, users are legally required to take used batteries to appropriate collection sites, the retail store where the batteries were purchased, or wherever batteries are sold.
Disposal: Do not dispose of this instrument in household waste. The user is obligated to take end-of-life devices to a designated collection point for the disposal of electrical and electronic equipment.
Specifications
| Relative Humidity Sensor | High Precision thin-film capacitance type |
| Temperature Range | -10 to 50°C (14 to 122°F) |
| Relative Humidity Range | 10 to 90% Relative Humidity |
| Resolution | Temperature: 0.1°; Relative Humidity: 0.1% |
| Accuracy (32 to 122°F & 0 to 50°C) | Temperature: ±1.0°C (±1.8°F); RH: ±5% |
| Power | 2032 button battery (150 hour battery life) |
| Response time | 120 seconds |
| Dimensions | 175 x 42 x 16mm (6.9 x 1.6 x 0.6") |
Brand : Extech
Model : 445580
Category : Measurement