
Soundtrack Pro 2 - Software APPLE - Free user manual and instructions
Find the device manual for free Soundtrack Pro 2 APPLE in PDF.


| Product Type | Audio Post-Production Software |
| Version | 2.0 |
| Developer | Apple Inc. |
| Category | Sound Editing & Mixing for Film/Video |
| Compatible Operating System | Mac OS X |
| Supported Audio Formats | AIFF, WAVE, CAF, MP3, AAC, Dolby Digital Professional (AC-3), QuickTime |
| Supported Multichannel Formats | Up to 24 channels per file; 5.1 surround support |
| Key Features | Nondestructive waveform editing, multitrack timeline, actions-based processing, frequency spectrum view, surround mixing, multitake editor, conform to picture, OMF/AAF import/export |
| Effects Included | Space Designer convolution reverb, Channel EQ, Stereo Spread, Delay, Reverb, Distortion, Dynamics processors, etc. (over 30 Audio Units effects) |
| Mixing Capabilities | Stereo and 5.1 surround mixing, submixes, busses, sends, automation, control surface support (Mackie/Logic Control) |
| Video Support | Import video (QuickTime-compatible formats), external video monitoring, synchronize audio to picture, Multipoint Video HUD |
| Integration | Seamless workflow with Final Cut Pro, DVD Studio Pro, Motion; Conform for syncing picture and sound edits |
| Recording | Multitrack audio recording (up to 24 channels), multitake recording, support for audio interfaces via Core Audio |
| Language Support | English (manual available in multiple languages) |
| System Requirements | Intel- or PowerPC-based Mac, 1 GB RAM, 1 GB disk space for installation, DVD drive for software |
| User Interface | Customizable layouts, docking panes, HUDs (Heads-Up Displays), toolbars, keyboard shortcuts |
Frequently Asked Questions - Soundtrack Pro 2 APPLE
User questions about Soundtrack Pro 2 APPLE
0 question about this device. Answer the ones you know or ask your own.
Ask a new question about this device
Download the instructions for your Software in PDF format for free! Find your manual Soundtrack Pro 2 - APPLE and take your electronic device back in hand. On this page are published all the documents necessary for the use of your device. Soundtrack Pro 2 by APPLE.
USER MANUAL Soundtrack Pro 2 APPLE
natural_image
Illustration of a film clapperboard with green audio waveforms on a dark screen (no text or symbols)Apple Inc.
Copyright © 2007 Apple Inc. All rights reserved.
Your rights to the software are governed by the accompanying software license agreement. The owner or authorized user of a valid copy of Soundtrack Pro software may reproduce this publication for the purpose of learning to use such software. No part of this publication may be reproduced or transmitted for commercial purposes, such as selling copies of this publication or for providing paid for support services.
The Apple logo is a trademark of Apple Inc., registered in the U.S. and other countries. Use of the "keyboard" Apple logo (Shift-Option-K) for commercial purposes without the prior written consent of Apple may constitute trademark infringement and unfair competition in violation of federal and state laws.
Every effort has been made to ensure that the information in this manual is accurate. Apple is not responsible for printing or clerical errors.
Note: Because Apple frequently releases new versions and updates to its system software, applications, and Internet sites, images shown in this book may be slightly different from what you see on your screen.
Apple Inc.
1 Infinite Loop
Cupertino, CA 95014-2084
408-996-1010
www.apple.com
Apple, the Apple logo, Apple Cinema Display, AppleScript, DVD Studio Pro, Final Cut, Final Cut Pro, Final Cut Studio, FireWire, iPhoto, iPod, iTunes, Logic, Mac, Macintosh, Mac OS, QuickTime, and Soundtrack are trademarks of Apple Inc., registered in the U.S. and other countries.
Finder and Apple TV are trademarks of Apple Inc.
AppleCare and Apple Store are service marks of Apple Inc., registered in the U.S. and other countries.
iTunes Store is a service mark of Apple Inc.
Dolby Laboratories: Manufactured under license from Dolby Laboratories. "Dolby," "Pro Logic," and the double-D symbol are trademarks of Dolby Laboratories. Confidential Unpublished Works, © 1992–1997 Dolby Laboratories, Inc. All rights reserved.
NeXT is a trademark of NeXT Software, Inc., registered in the U.S. and other countries.
Other company and product names mentioned herein are trademarks of their respective companies. Mention of third-party products is for informational purposes only and constitutes neither an endorsement nor a recommendation. Apple assumes no responsibility with regard to the performance or use of these products.
Production stills from the film "Koffee House Mayhem" provided courtesy of Jean-Paul Bonjour. "Koffee House Mayhem" © 2004 Jean-Paul Bonjour. All rights reserved. http://www.jbonjour.com
Contents
Preface 11 An Introduction to Soundtrack Pro
11 Overview of Soundtrack Pro
13 Using Soundtrack Pro in Your Post-Production Workflow
15 Notable Features in Soundtrack Pro
18 Resources for Learning About Soundtrack Pro
18 About This Soundtrack Pro Onscreen User Manual
19 Apple Websites
Chapter 1 21 Setting Up Your System
21 System Considerations
23 Connecting Equipment
24 Video and Audio Input and Output Devices
25 Video and Audio Interfaces
25 External Audio and Video Monitoring
27 Example Hardware Setups
32 Setting Up a System for Stereo Mixing
32 Setting Up a System for Surround Mixing
Chapter 2 33 The Soundtrack Pro Interface
34 Soundtrack Pro Window Organization
37 Project Pane
38 Toolbar
38 Transport Controls
39 Timeline
43 File Editor
44 Mixer
46 Multitake Editor
47 Conform
48 Bin
49 Meters Tab
50 Recording Tab
51 Browser
52 Search Tab
54 Favorites Tab
55 Video Tab
55 Project Tab
57 Details Tab
60 Effects Tab
61 Tracks Tab
62 Actions Tab
63 Analysis Tab
64 HUDs
Chapter 3 65 Setting Up Soundtrack Pro
65 Two Kinds of Projects
67 Setting Up Your Workspace
71 Playing Projects
75 About Changing Values and Timecode Entries
78 Locating and Adding Audio Files
91 Previewing Audio Files
93 Using Undo and Redo
94 Using Snapping
96 Reconnecting Media Files
97 Setting Soundtrack Pro Preferences
Chapter 4 105 Working with Multitrack Projects
105 Creating and Opening Multitrack Projects
106 Creating a Multitrack Project from Final Cut Pro Clips or Sequences
106 Closing Multitrack Projects
106 Setting Project Properties
110 Setting the Project Length
111 Saving Multitrack Projects
112 Setting Default Locations for Saving Media Files
113 Adding Files to a Multitrack Project
114 Viewing and Editing Clip and Track Properties
124 Tracks, Busses, Submixes, and the Master Bus
Chapter 5 127 Working in the Timeline
127 Working in the Timeline
128 Moving Around in the Timeline
135 Working with Tracks, Busses, and Submixes in the Timeline
147 Selecting Audio Clips in the Timeline
149 Selecting the Entire Contents of a Track
150 Selecting Partial Contents of One or More Tracks
151 Cutting, Copying, and Pasting Audio Clips
153 Spotting Clips to the Timeline
154 Moving Clips
156 Snapping Clips to Clips on Adjacent Tracks
156 Resizing Audio Clips
157 Changing the Offset of an Audio Clip
158 Creating Fades and Crossfades in the Timeline
162 Truncating Overlapping Audio Clips
162 Editing Audio Clips in the Multitrack Timeline
164 Using the Timeline Editing Tools
165 Timeline Editing Tools HUD
166 Editing in Place
166 How Clips Are Affected by Media File Editing
166 How Source Audio File Editing Works in a Soundtrack Pro Multitrack Project
167 Modifying a Clip Without Affecting Its Source Media
168 Using the Multitrack Timeline and the File Editor Together
170 Spotting Sound Effects from the File Editor to the Timeline
170 Splitting and Joining Audio Clips
174 Editing with the Timeslice Tool
179 Using the Lift and Stamp Tools
183 Working with Markers
185 Using Markers with Video
188 Working with Tagged and Looping Clips
189 Replacing the Source Audio in a Clip
Chapter 6 191 Editing Audio Files
193 Audio File Projects
193 Editing Audio Files Directly in a Multitrack Project
195 Editing in Place
195 How Clips Are Affected by Media File Editing
196 How Media File Editing Works in a Multitrack Project
196 How Source Audio File Editing Works in an Audio File Project
197 Modifying a Clip Without Affecting Its Source Media
198 Editing Audio Files in the File Editor
198 Opening Audio Files in the File Editor Tab
199 Playing Audio Files in the File Editor
199 Soloing an Audio File in the File Editor
200 Linking the File Editor Selection and the Cycle Region
200 Scrubbing Audio Files
202 Selecting Part of an Audio File
206 Cutting, Copying, and Pasting in the File Editor
207 Zooming In and Out in the File Editor
208 Editing Audio Files Graphically with Waveform Editing Tools
212 Choosing the Sample Units in the File Editor
212 Editing Multichannel Files
214 Using Frequency Spectrum View
219 Processing Audio Files
230 Working with Actions
236 Analyzing an Audio File
240 Using the File Editor Project View
Chapter 7 251 Using the Multitake Editor
251 About the Multitake Editor
252 What Is ADR?
252 Multitake Clips
252 Creating Multitake Clips
253 Overview of the Multitake Editor
254 Editing in the Multitake Editor
255 Slipping Take Regions
256 Adding and Deleting Takes
256 Renaming Takes
257 Reordering Takes
257 Example: A Multitake Editing Workflow
Chapter 8 261 Basic Mixing in Soundtrack Pro
262 Steps in Mixing
263 Structuring an Audio Post-Production Project
263 What Is a Submix and How Do You Use It?
263 Basic Signal Routing in Soundtrack Pro
266 Example: Mixing a Project with Dialogue, Music, and Effects Submixes
270 Using Sends and Busses
273 Using the Mixer
273 Working with Channel Strips in the Mixer
284 Working with Effects in the Mixer
286 Working with Sends and Busses in the Mixer
288 Setting the Overall Project Volume Level
290 Using the Master Bus
290 Listening to a Temporary Mono Mix
291 Recording Audio in the Mixer
291 Recording Automation in the Mixer
292 Creating Multiple Mixes
292 Things to Keep in Mind While Mixing
Chapter 9 293 Mixing Surround Sound
293 What Is 5.1 Surround?
294 Creating a Surround Project
294 Setting Up for Surround
294 Setting Up Soundtrack Pro for Surround
298 Surround Speaker Placement
299 Using Surround Panners to Create a Surround Mix
299 The Mini Surround Panner
300 The Surround Panner HUD
303 Surround Panner Automation
303 Modifier Keys for Moving the Puck
304 Surround Metering
306 Surround Mixing Strategies
306 Mixing Surround Files
307 Converting a Stereo Mix to 5.1 Surround
309 Placing Dialogue and Voiceover in a Surround Mix
310 Placing Stereo Music in a Surround Mix
310 Using the Center Channel
310 Using Surround Channels
311 Using Surround Effect Plug-ins
311 Limitations of the LFE Channel
312Accommodating Stereo Playback
312 Exporting and Delivering 5.1 Surround Projects
312Mixdowns
313 Project Files
Chapter 10 315 Working with Video in Soundtrack Pro
315 Supported Video File Formats
316 Adding a Video to a Project
317 Playing the Video
320 Viewing Video Details
321 Working with a Video's Audio
321 Using the Time Display and Time Ruler with Video
322 Scrubbing and Spotting with the Multipoint Video HUD
325 Removing a Video from a Project
Chapter 11 327 Working with Audio Effects
327 Processing Effects and Realtime Effects
330 Working with Effect Presets
331 Audio Effects Included with Soundtrack Pro
343 Working with Realtime Effects
353 Working with Processing Effects
Chapter 12 355 Working with Automation
355 Working with Envelopes
365 Recording Automation Data
Chapter 13 367 Recording Audio in Soundtrack Pro
367 Getting Ready to Record
368 Recording Audio in the Timeline
374 Recording Audio in the Mixer
375 Recording Audio in the File Editor Project View
Chapter 14 377 Creating Podcasts in Soundtrack Pro
378 Podcasting Media Production
379 Using the Podcast Track and Podcast Markers
379 Displaying the Podcast Track and the Details Tab
380 Podcast Marker Information in the Details Tab
381 Adding Markers to a Podcast
384 Adding Images to a Podcast
387 Exporting Podcasts
387 Exporting Audio Podcasts
388 Exporting Video Podcasts
390 Using Post-Export Actions for Podcast Production
Chapter 15 391 Using Control Surfaces with Soundtrack Pro
391 Connecting Control Surfaces
392 Adding and Deleting Control Surfaces
393 Premapped Controls
393 Mapping Commands to Control Surface Buttons
394 Recording Control Surface Automation
Chapter 16 395 Exporting Multitrack Projects
396 About the Export Dialog
397 Exporting and the Cycle Region
397 Exporting a Master Mix
414 Exporting Tracks, Busses, and Submixes Separately
415 Exporting Multiple Mono Files
416 Using Post-Export Actions
418 Using Export Presets
419 Exporting to AAF
419 Saving Multitrack Projects
419 Distributing a Multitrack Project and Its Media Files Together
Chapter 17 421 Using Soundtrack Pro with Other Applications
421 Using Soundtrack Pro with Final Cut Pro
421 About Soundtrack Pro Audio File Projects
422 Methods for Sending Audio from Final Cut Pro to Soundtrack Pro
422 Sending Individual Audio Clips from Final Cut Pro to Soundtrack Pro
428 About Soundtrack Pro Multitrack Projects
428 Creating Soundtrack Pro Multitrack Projects from Final Cut Pro Clips or Sequences
432 Using Soundtrack Pro with DVD Studio Pro
434 Using Soundtrack Pro with Motion
435 Using Soundtrack Pro with Third-Party Applications
435 Exchanging OMF and AAF Files with Other Applications
437 Exporting Audio Files
Chapter 18 439 Using Conform with Final Cut Pro
439 About Conforming Manually
439 Using Soundtrack Pro Conform
444 Reviewing and Approving the Changes in the Conform Result Project
Appendix A 449 Soundtrack Pro Keyboard Shortcuts
449 General and File
450 Layouts, Tabs, and HUDs
451 Navigating the Timeline
451 Project Playback
452 Cycle Region
453 General Editing
453 Editing Audio Clips in the Timeline
454 Moving Audio Clips and Envelope Points
455 Viewing the Timeline
456 Timeline Tools
456 File Editor Project View Tools and Commands
457 Processing and Editing Audio Files
458 Tracks, Busses, and Submixes
459 Markers
459 Selecting Audio Clips in the Timeline
460 Video Out
460 Recording
461 Using Arrow Keys to Move the Playhead
461 Working with Timeslices
Appendix B 463 Audio Fundamentals
463 What Is Sound?
463 Fundamentals of a Sound Wave
465 Frequency Spectrum of Sounds
467 Measuring Sound Intensity
469 Signal-to-Noise Ratio
470 Headroom and Distortion
470 Dynamic Range and Compression
471 Stereo Audio
473 Digital Audio
474 Sample Rate
474 Bit Depth
Appendix C 477 Working with Professional Video and Audio Equipment
477 About Video Interfaces, Signals, and Connectors
477 Video Interfaces
480 Video Signals and Connectors
485 About Audio Interfaces, Signals, and Connectors
485 Setting Up an Audio Interface
490 Audio Connectors, Cables, and Signal Formats
494 About Balanced Audio Signals
496 Tips for Choosing Speakers and an Amplifier
497 Frequency Response and Dynamic Range
497 Self-Powered Versus Passive Speakers
498 Amplifiers and Signal Levels for Unpowered Speakers
498 Connecting Professional Video Devices
498 Connecting Professional SD Video Devices
501 Connecting Professional Component Analog Video Devices
501 Connecting Consumer Analog Video Devices
501 Connecting Non-DV Devices to a DV Converter
503 Connecting Professional Audio Devices
503 Connecting Professional Digital Audio Devices
503 Connecting Consumer Digital Audio Devices
503 Connecting Professional Analog Audio
504 Synchronizing Equipment with a Blackburst Generator
506 Synchronizing Soundtrack Pro to External Timecode
Appendix D 509 Working with Apogee Hardware in Soundtrack Pro
510Global Parameters
511 Units Parameters
514 Setup Buttons
Appendix E 515 Solutions to Common Problems and Customer Support
516 Solutions to Common Problems
517 Calling AppleCare Support
Appendix F 519 Using Apple Loops Utility
519 What Is Apple Loops Utility?
520 The Apple Loops Utility Interface
526 Opening Files in Apple Loops Utility
527 Tagging Files in Apple Loops Utility
528 Working With Transients
530 Saving Changes to Files
530Removing Files From the Assets Drawer
531 Apple Loops Utility Preferences
532Apple Loops Utility Keyboard Shortcuts
Index 537
An Introduction to Soundtrack Pro
Preface
Soundtrack Pro gives you the tools you need to create high-quality soundtracks for your film and video productions.
Most experienced film and television producers know that "audio is more than half the picture." The art and techniques of sound recording, dialogue editing, sound effect recording and placement, mixing, and sound design play a substantial role in how audiences perceive the (visual) quality of a film or video.
Soundtrack Pro is designed to serve the art of motion picture sound post-production. Like the other applications in Final Cut Studio, Soundtrack Pro was created for the film and video industry. Soundtrack Pro gives you many specialized tools and powerful features that you can use to create high-quality audio.
Overview of Soundtrack Pro
Soundtrack Pro provides film and video professionals streamlined workflows for editing everything from individual audio files to large multitrack sound projects, including synchronizing audio and video, editing sound in place, working with automatic dialogue replacement (ADR), analyzing and fixing common audio problems like clicks and pops, and creating stereo and surround sound design. Add interoperability with the other applications in Final Cut Studio to this list of features, and you have a professional-quality audio application designed to meet the needs of the most discerning audio editors and mixers.
Soundtrack Pro features two types of projects: audio file projects and multitrack projects. You use audio file projects to edit individual audio files. This is sometimes known as waveform editing. However, unlike most waveform editing applications, Soundtrack Pro allows you to edit your audio files nondestructively by keeping track of the actions you have performed on your audio file. You can edit down to the file's individual sample level and perform tasks ranging from audio repair to sound design. You can perform edits nondestructively using actions, which include processing effects and other operations. You can analyze audio files for a range of common audio problems, including clicks and pops, hum, and phase issues, and automatically fix problems that are found.
Multitrack projects look and function similarly to Final Cut Pro projects. You arrange a multitrack project's audio clips on the tracks in the Timeline. Multitrack projects contain the features you expect from a high-performance and professional-quality audio editor, including features to synchronize audio and video, work with ADR and multitake editing, and automate volume, pan, and other changes over time using envelopes. You can record over multiple channels to the Timeline or the File Editor or to multiple tracks in the Timeline.
Most audio applications focus on multitrack editing or waveform editing, but not both. Furthermore, most waveform editing applications handle media destructively—making permanent changes to your media files. Soundtrack Pro provides the best of both worlds: nondestructive waveform editing while working in a multitrack project.
You can edit audio clips in a variety of ways in the Timeline. You can select, cut, copy, and paste clips; move, resize, transpose, split, and join them; and edit them in other ways. You can also apply any actions to and process menu operations for any clip directly in the Timeline.
You can organize your multitrack project for the final mix by creating busses and submixes, adding realtime effects and actions, and adding surround panning. When you're ready to mix, you can mix in the Timeline or in the Soundtrack Pro Mixer. The Mixer models a traditional hardware mixing board and includes a channel strip for each track, bus, and submix in the project.
Soundtrack Pro includes a large library of stereo and surround sound effects and music beds that you can use for Foley effects, background ambience, sound effects, and music transitions in your audio and multitrack projects. Soundtrack Pro also includes a generous selection of professional-quality effects plug-ins, like Space Designer and Channel EQ that you can add to tracks, busses, and submixes.
You have numerous options for exporting your project. You can export your mix (or selected tracks, busses, or submixes) in a variety of audio file types including WAVE, AIFF, MP3, AAC, Dolby Digital Professional, and as a QuickTime movie. You can export your mix with Compressor, Apple's high-performance encoding application. You can also pick from a variety of post-export actions that automatically open the mix in a Final Cut Pro sequence, or export it to Motion, Logic, or Waveburner.
Using Soundtrack Pro in Your Post-Production Workflow
On its own, Soundtrack Pro is a powerful audio editing application. As part of Final Cut Studio, Soundtrack Pro becomes an integral part of your post-production workflow.
You can easily share media projects between Final Cut Pro and Soundtrack Pro. When you send a sequence from Final Cut Pro, your audio files and a compiled video file arrive in a Soundtrack Pro multitrack project, ready for you to edit. After editing and creating your final mix, you can automatically send a mixdown back to the original Final Cut Pro sequence. The Soundtrack Pro Conform feature allows you to quickly sync up the picture editor's cut with the sound editor's version of the same sequence.
Unlike many audio editing applications, Soundtrack Pro was created specifically to produce sound for motion picture audio projects. This means it has many specialized tools and features that simplify and enhance the sound-for-picture editing process.
Here are some examples of how you can use Soundtrack Pro to enhance your motion picture sound editing and mixing experience:
- To quickly synchronize a sound effect with the picture using the Multipoint Video HUD For more information, see "Scrubbing and Spotting with the Multipoint Video HUD" on page 322.
- To edit audio dialogue replacement (ADR) recordings, combine them with production sound files, and create perfect voiceover narration For more information, see Chapter 7, "Using the Multitake Editor," on page 251.
- With the Soundtrack Pro Conform feature, to quickly merge two versions of the same sequence: the picture edit (from Final Cut Pro) and the sound edit/mix (from Soundtrack Pro) For more information, see Chapter 18, "Using Conform with Final Cut Pro," on page 439.
- To perfect and clean up individual audio files. You can go straight into a clip's waveform to correct a click or pop or add an effect. Soundtrack Pro makes it easy for you to move between editing individual clips and arranging your overall multitrack project for a quick back-and-forth workflow. To learn more about editing individual audio files, see "Editing Audio Clips in the Multitrack Timeline" on page 162 and Chapter 6, "Editing Audio Files," on page 191.
- To lift effects from one clip and apply them to other clips using lift-and-stamp tools and the Sound Palette, and to create palettes of sound processing for future use. For more information, see "Using the Lift and Stamp Tools" on page 179.
- To organize your multitrack project for professional sound effect editing and mixing For more information, see "Basic Signal Routing in Soundtrack Pro" on page 263 and "Using Sends and Busses" on page 270.
- To prepare your multitrack project for distribution and final delivery, such as foreign language versions (for example, to create separate submixes for dialogue, sound effects, and music)
For more information, see "What Is a Submix and How Do You Use It?" on page 263 and "Example: Mixing a Project with Dialogue, Music, and Effects Submixes" on page 266. - To use advanced editing techniques and tools in the multitrack Timeline for streamlined sound editing
For more information, see "Using the Timeline Editing Tools" on page 164, "Moving Around in the Timeline" on page 128, "Selecting Audio Clips in the Timeline" on page 147, and "Editing with the Timeslice Tool" on page 174.
• To create a podcast from a video edited in Final Cut Pro
For more information, see Chapter 14, "Creating Podcasts in Soundtrack Pro," on page 377 and "Exporting Video Podcasts" on page 388. - To create stereo and surround mixes for the same project
For more information, see "Mixing Surround Sound" on page 293 and "Converting a Stereo Mix to 5.1 Surround" on page 307. - To set up your sound-for-picture editing system to display video on an external video monitor or use Digital Cinema Desktop on the Apple Studio and Apple Cinema Displays For more information, see "Setting Up a System Using a Video Output Device" on page 30 and "Video Out Preferences" on page 103.
- To adjust the selection for an action. For example, you may have applied an effect to a portion of a file, and you might like to move that effect to a different portion of the file.
For more information, see "Selecting Part of an Audio File" on page 202, "Editing with the Timeslice Tool" on page 174, and "Working with Actions" on page 230. - To use the resizable Timecode HUD to display the current project timecode (for a client sitting across the room)
For more information, see "Timecode HUD" on page 64. - With the Frequency Spectrum view and the Frequency Selection tool, to make selections of frequency ranges as well as copy, paste, delete, and adjust the amplitude of frequency selections
These tools help you visually pinpoint specific frequencies, for example, some noise that you want to remove. For more information, see "Using Frequency Spectrum View" on page 214. -
To send a mixdown back to Final Cut Pro automatically
Soundtrack Pro can send a new copy of the Final Cut Pro sequence that looks just like the original sequence but has additional audio tracks that contain your mixdown.
For more information, see "Sending a Mixdown Back to Final Cut Pro Automatically" on page 430. -
As you drag clips to the Timeline, to separate the channels of stereo and multichannel clips into individual clips, or combine separate clips into single stereo or multichannel clips
For more information, see "Separating Channels by Option-Dragging" on page 122 and "Combining Separate Clips to Create Multichannel Clips" on page 123.
- To arrange background music or add FX and Foley in stereo or surround sound. For more information, see Chapter 18, "Using Conform with Final Cut Pro," on page 439.
Combining these Soundtrack Pro features creates your sound-for-picture project, a balanced sound design that enhances your video or film project using tools that look like and function similarly to the tools you know from using Final Cut Pro.
Notable Features in Soundtrack Pro
Soundtrack Pro provides a powerful set of tools for your motion picture sound editing and mixing projects, including the following features.
Audio editing features:
- Powerful audio editing: You can edit audio files nondestructively in Soundtrack Pro. You can edit audio files graphically with sample-accurate precision and process files using actions, which can be reordered and turned on or off individually.
- Analysis and repair of common audio problems: You can choose which problems to analyze the file for, then fix the problems detected by analysis either individually or in a single operation. Selected problems are highlighted in the waveform display for easy viewing.
- Multitake Editor: Use the Multitake Editor to edit multitake and synced audio that is created by performing multitake recording (such as in automatic dialogue replacement, or ADR).
- Edit in place: Edit and process a file's waveform directly in the Timeline and hear the changes in the context of your whole multitrack project. Simply select a clip in the Timeline and it appears in the File Editor tab below. Any changes you make to the media file are updated in the Timeline immediately.
- Ability to add professional-quality effects: Soundtrack Pro includes high-quality effects plug-ins from the Logic Pro effects library that you can use in your projects, including the Space Designer convolution reverb. You can also install third-party effects in the Audio Units plug-in format.
-
Frequency Selection tool and Spectrum View HUD: Use the Frequency Selection tool in the Frequency Spectrum view to make selections of frequency ranges as well as copy, paste, delete, and adjust the amplitude of frequency selections. The new Spectrum View HUD provides extensive controls.
-
Tape-style scrubbing: The Scrub tool provides detailed scrubbing that realistically approximates the "rock-the-reels" scrubbing on analog tape decks to help you quickly find a particular sound or event in a long audio file.
- Multichannel support: You can edit up to 24 channels in a single audio file, and play back and record up to six channels in a single audio file in the Timeline. Soundtrack Pro 2 supports the following types of multichannel files: AIFF, WAVE, Broadcast Wave, QuickTime, CAF, and single folder/multi-mono file AIFF.
Multitrack project features:
- Advanced multitrack editing features: Soundtrack Pro includes the ability to lock/unlock, enable/disable, and color-label clips and tracks in the Timeline; an advanced Timeslice tool for marquee time selections; enhanced marquee clip selection; Final Cut Pro-style J-K-L transport controls; the ability to spot clips from various media tabs to the Timeline; the ability to move clips numerically; blade tools for splitting clips; region markers; and a mode for selecting and moving envelope points with clips.
- Record and edit automation tools: You can record movements to sliders and other onscreen controls, play back the automation, and edit it in the Timeline.
- OMF and AAF support: Soundtrack Pro can use these industry-standard project interchange formats to import the editing decisions from other video and audio editing applications. You can also export a multitrack project from Soundtrack Pro as an AAF file.
- Sophisticated export options: You can export an entire project, or selected portions of it, to a mono, stereo, or multichannel audio file using the following audio file types: AIFF, WAVE, NeXT, Sound Designer II, MP3, AAC/Podcast, and Dolby Digital Professional (AC-3). Soundtrack Pro has a direct link to Compressor, the Final Cut Studio transcoding application, for exporting to numerous other audio and video formats. Other options include a variety of post-export actions, the ability to add your own custom AppleScript actions using the Export dialog, as well as custom export presets.
- Lift and Stamp tools and the Sound Palette: Soundtrack Pro includes time-saving tools for applying work you have done on one clip to one or more other clips. Use the Lift tool to copy properties from selected clips. Create a processing template in the Sound Palette that can be applied to other clips with the Stamp tool.
Final Cut Studio workflow features:
- Send clips: You can send clips from the Final Cut Pro Timeline to Soundtrack Pro and edit the clips in the File Editor. When you save the clip, it is automatically updated in your Final Cut Pro project. Soundtrack Pro includes similar support for Motion and DVD Studio Pro.
-
Send sequences: You can also send clips or entire sequences to a Soundtrack Pro multitrack project to complete your final mix, adding additional tracks of sound effects, voiceover, and music. Both stereo and surround sound mixing are supported.
-
Conform: You can use the Conform feature in Soundtrack Pro to quickly merge two versions of the same sequence: the picture edit (from Final Cut Pro) and the sound edit/mix (from Soundtrack Pro).
- Automatic mixdown return: When you export a mixdown of the multitrack project originally sent from Final Cut Pro, you can choose to open a new copy of the Final Cut Pro sequence that looks just like the original sequence but has additional audio tracks that contain your mixdown.
Mixing features:
- Advanced mixing capabilities: You can mix multitrack projects in the Mixer, which displays a virtual mixing console for a project. Using the channel strips in the Mixer, you can adjust levels, mute and solo tracks, and add realtime effects. You can create submixes using busses, and send audio to multiple physical outputs using submixes.
- Surround editing and mixing: Soundtrack Pro provides an elegant and easy-to-use toolset for creating and adjusting projects in 5.1 discrete surround audio including surround panning, mixing, and automation; unparalleled flexibility with surround sources; and the ability to easily switch between stereo and surround mixes.
- Support for control surfaces: In addition to recording movements of onscreen controls, you can connect a supported control surface and record automation of control surface movements.
- Synchronized video display: You can add a video to a project and view it in the Video tab or display the video on an external video monitor. Audio/video synchronization is accurate both onscreen and on the external monitor, up to HD resolutions. You can accurately place audio clips to sync with specific frames or points in time in the video.
Other features:
- Audio recording capability: You can record audio directly into multiple tracks in the Soundtrack Pro Timeline, including recording multiple takes.
- Powerful Inspector tabs: These include the Tracks tab for easily viewing, selecting, and grouping tracks, busses, and submixes, and the Bin, a hierarchical display of information about all open projects.
- HUDs: Heads-up displays (HUDs) are semi-transparent floating windows with controls and displays that you can use to accomplish specific tasks. The HUDs include the Fade Selector HUD for quickly applying and adjusting fades and crossfades, the Multipoint Video HUD for providing visual context when you are positioning audio clips in a video-based project, and the Timecode HUD, which displays the current project timecode.
- Podcasting : With Soundtrack Pro, audio creators can quickly and easily produce extremely high-quality audio and video podcasts directly from their Soundtrack Pro projects.
Resources for Learning About Soundtrack Pro
This manual describes the Soundtrack Pro interface, commands, and menus, and gives step-by-step instructions for creating Soundtrack Pro projects and for accomplishing specific tasks. It also includes information on setting up your system and on audio basics. It is designed to provide the information you need to get up to speed quickly so you can take full advantage of the intuitive interface and powerful features of Soundtrack Pro.
If you want to start by learning how to set up audio hardware to use with Soundtrack Pro, read Chapter 1, "Setting Up Your System," on page 21. If you want to learn about the features and controls in the Soundtrack Pro interface, read Chapter 2, "The Soundtrack Pro Interface," on page 33. If you want to jump right in and start using the application, skip ahead to Chapter 3, "Setting Up Soundtrack Pro," on page 65. If you want to read about editing audio files, turn to Chapter 6, "Editing Audio Files," on page 191. If you want to start using the multitrack Timeline, read Chapter 5, "Working in the Timeline," on page 127.
Soundtrack Pro provides several different sources of support.
About This Soundtrack Pro Onscreen User Manual
The Soundtrack Pro onscreen user manual allows you to access information directly onscreen while you're working in Soundtrack Pro. To view this information, choose Help > Soundtrack Pro User Manual. The Soundtrack Pro onscreen user manual is a fully hyperlinked version of the Soundtrack Pro User Manual, enhanced with many features that make locating information quick and easy.
- The homepage provides quick access to various features, including Release Notes, the index, and the Soundtrack Pro website.
- A comprehensive bookmark list allows you to quickly choose what you want to see and takes you there as soon as you click the link.
In addition to these navigational tools, the Soundtrack Pro onscreen user manual gives you other means to locate information quickly:
- All cross-references in the text are linked. You can click any cross-reference and jump immediately to that location. Then, you can use the Preview Back button to return to where you were before you clicked the cross-reference.
- The table of contents and index are also linked. If you click an entry in either of these sections, you jump directly to that section of the user manual.
- You can also use the Find dialog to search the text for specific words or a phrase.
Apple Websites
There are a variety of Apple websites that you can visit to find additional information.
Soundtrack Pro Website
For general information and updates, as well as the latest news on Soundtrack Pro, go to:
- http://www.apple.com/finalcutstudio/soundtrackpro
Apple Service and Support Website
Go here for software updates and answers to the most frequently asked questions for all Apple products, including Soundtrack Pro. You'll also have access to product specifications, reference documentation, and Apple and third-party product technical articles.
To access the Apple Service and Support webpage, go to:
- http://www.apple.com/support
To access the Soundtrack Pro support webpage, go to:
- http://www.apple.com/support/soundtrackpro
To access the Soundtrack Pro discussion webpage, go to:
- http://discussions.info.apple.com
Other Apple Websites
Start at the Apple homepage to find the latest and greatest information about Apple products:
- http://www.apple.com
QuickTime is industry-standard technology for handling video, sound, animation, graphics, text, music, and 360-degree virtual reality (VR) scenes. QuickTime provides a high level of performance, compatibility, and quality for delivering digital video. Go to the QuickTime website for information on the types of media supported, a tour of the QuickTime interface, specifications, and more:
- http://www.apple.com/quicktime
FireWire is one of the fastest peripheral standards ever developed, which makes it great for use with multimedia peripherals, such as video camcorders and the latest high-speed hard disk drives. Visit this website for information about FireWire technology and available third-party FireWire products:
- http://www.apple.com/firewire
For information about seminars, events, and third-party tools used in web publishing, design and print, music and audio, desktop movies, digital imaging, and the media arts, go to:
- http://www.apple.com/pro
For resources, stories, and information about projects developed by users in education using Apple software, including Soundtrack Pro, go to:
- http://www.apple.com/education
Go to the Apple Store to buy software, hardware, and accessories direct from Apple and to find special promotions and deals that include third-party hardware and software products:
- http://www.apple.com/store
Setting Up Your System
1
The way you set up your system depends on the audio equipment you plan to use.
You can use your computer's speaker or headphone jack to monitor the audio output from Soundtrack Pro. For better results, you may want to connect external monitors or speakers to your system, so that you can monitor the audio output at a higher level of quality. You may want to connect other external audio equipment such as an audio interface or a mixer, particularly if you plan to record your own audio in Soundtrack Pro.
- For information on system and hardware requirements, see the Read Before You Install document on the installation DVD.
- For information on installing the software, see the Installing Your Software booklet.
System Considerations
To achieve the most effective results, you should consider the following issues when setting up your system.
Processor Speed and RAM
Digital audio files require intensive processing by your computer. If you plan to work on longer or more complex projects, or use multiple effects plug-ins in your projects, a computer with a faster processor can facilitate your productivity.
Soundtrack Pro is optimized for use with computers that have a multiprocessor architecture. Working with Soundtrack Pro projects on a multiprocessor-equipped computer can make your workflow more efficient, especially when creating longer or more complex projects.
If you plan to work on large projects, it's useful to have extra random-access memory, or RAM, installed in your computer. Additional RAM allows you to play back more files simultaneously, use a greater number of effects plug-ins, and keep several multimedia applications open at the same time.
Hard Disks
It's also a good idea to have a large hard disk with plenty of available space to store the media (audio and video) files you use with Soundtrack Pro. As you work with the application, you'll likely want to acquire a large collection of sounds to use in your Soundtrack Pro projects. Hard disk performance is a critical aspect of your editing system: the storage capacity and data rate of your disks must match or exceed the requirements of the audio (and video) formats you are using.
If you store media files on an external hard disk, make sure the disk has a fast enough seek time and a high enough sustained data transfer rate for use with video and audio files. Consult the manufacturer's specifications.
Dedicated Hard Disk
Every minute of stereo digital audio (recorded using a 44.1 kHz sample rate and 16-bit depth) requires roughly 10 MB of hard disk space. If you plan to record large amounts of audio in Soundtrack Pro, you may want to record to a hard disk dedicated to storage for your Soundtrack Pro projects.
Setting the Audio Input and Output
You can set the default input and output devices for Soundtrack Pro with the Audio MIDI Setup utility.
To select a default output device:
1 Double-click Audio MIDI Setup in the Utilities folder.
2 Choose the device from the Default Output pop-up menu.
Note: Optionally, you can choose Apple menu > System Preferences, click Sound, then click Output. Select the audio interface in the list that appears.
To select a default input device:
1 Double-click Audio MIDI Setup in the Utilities folder.
2 Choose the device from the Default Input pop-up menu.
Note: Optionally, you can choose Apple menu > System Preferences, click Sound, then click Input. Select the audio interface in the list that appears.
Audio MIDI Setup
The Audio MIDI Setup utility is a program that comes with the Mac OS X for adjusting a computer's audio input and output settings and managing MIDI devices. You can select audio channel input and output devices, configure output speakers, set clock rates, and control levels. You may also be able to open a configuration utility provided by your audio device.
For more information, go to:
http://www.apple.com/macosx/features/coreaudio
Adding Audio Units Plug-ins to Your Computer
Soundtrack Pro includes an extensive set of professional-quality effects plug-ins. Soundtrack Pro uses effects in the Audio Units plug-in format, the native plug-in format of Mac OS X.
Audio Units plug-ins are also available from third-party manufacturers. When adding third-party effects to your computer, be sure to read the documentation, including any Read Me and installation files, that came with the plug-in. Supported Audio Units effects plug-ins appear in the Effects window under the manufacturer's name.
Soundtrack Pro does not support VST, ASIO, MAS, or RTAS effects plug-ins.
Connecting Equipment
You can use a variety of audio equipment with Soundtrack Pro for both recording and playback. For information on connecting a specific piece of equipment to your computer, read the documentation that came with the equipment.
Final Cut Studio editing systems can be configured to meet the most demanding professional requirements. An advanced editing system can be built by expanding the basic system described in the Final Cut Pro User Manual. The following list includes equipment commonly used in Final Cut Studio editing systems:
• Macintosh computer with Final Cut Studio installed: The core of your editing system
- Professional video and audio devices: For capturing footage and outputting finished projects. (For more information about video and audio devices, see Appendix C, "Working with Professional Video and Audio Equipment," on page 477.)
- External video and audio monitors: For viewing and listening to your program in its final image and audio quality
• Video and audio interfaces: For connecting professional and non-FireWire devices to your editing system
- RS-422 serial device control interfaces: For remote device control during capture and output
- Video, audio, and remote device control cables: For separate video, audio, and remote device control connections. Unlike a basic DV editing system that uses a solitary FireWire cable to transfer video, audio, and remote control signals, many professional configurations require separate cables for each of these signals.
- Additional scratch disks: One or more internal or external hard disks, a RAID, or a connection to a storage area network (SAN)
- Control surfaces: Hardware controls that let you mix and edit your projects with greater flexibility and precision than using a mouse to move onscreen controls
Video and Audio Input and Output Devices
An input device is used to transfer footage into your computer. For output, you record your finished movie to an output device. Basic editing systems use a DV camcorder or deck as both an input and output device. Professional editing systems may use multiple video decks to capture and output to different video formats. While Soundtrack Pro does not support video capture from devices such as camcorders or VTRs, it does support recording from a variety of digital audio devices.
To connect non-FireWire devices to your computer, you also need a third-party video or audio interface. For more information, see "About Video Interfaces, Signals, and Connectors" on page 477.

Video Device
This is a VTR or camcorder you connect to your computer to capture and output media. The connectors and signal format on your video device determine what kind of video interface your computer needs to connect to your device.
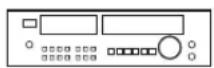
Audio Device
This is a device, such as a digital audio tape (DAT) recorder or multitrack audio recorder, that lets you capture or output audio independently from video.
Note: When using external audio devices, it's a good idea to connect them before opening Soundtrack Pro.
Video and Audio Interfaces
An interface is a device that adds physical video or audio connectors to your computer so that you can connect your Final Cut Studio system to other professional equipment (such as video or audio decks and monitors).
Interfaces provide input and output connectors that aren't included with your computer. For example, if you want to output multiple audio channels to an analog audio mixer or digital multitrack, you need an audio interface that has XLR, 1/4" tip-ring-sleeve (TRS), AES/EBU, or ADAT Lightpipe output connectors.
You may also want to consider adding a third-party interface to your system if:
- You need to capture or output many audio channels at once
- You are integrating Final Cut Studio into a professional broadcast environment that requires SDI, HD-SDI, or other non-FireWire video and audio connections
- You need to capture, edit, and output full-resolution, uncompressed video signals instead of DV video (which is compressed)
- You are digitizing video from an older analog VTR (such as a Betacam SP deck) that does not have digital video outputs or remote control via FireWire
Third-party video and audio interfaces can be installed in one of your computer's PCI slots, connected to the USB port, or connected via FireWire.
For more information about selecting and connecting an audio interface for use with Soundtrack Pro, see "Setting Up an Audio Interface" on page 485.
External Audio and Video Monitoring
In the final stages of post-production, external video and audio monitors are essential to ensure the quality of your movie. Editing systems focused on these final phases of post-production are often called finishing systems.
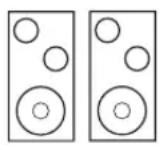
External Audio Speakers and Monitors
You can play back audio through your computer's speakers or headphone jack, but the audio output may not be high enough for you to evaluate your music at a professional level of quality. Connecting external speakers or monitors to your system allows you to hear the audio output with greater fidelity and a wider dynamic range. During the final mix, it is important to monitor your audio so that it matches the listening environment where the final project will be shown. For detailed information on connecting external speakers to your audio interface, see the documentation that came with the speakers.
Setting Up a Proper Audio Monitoring Environment
Room shape and material are just as important as the quality of the speakers themselves. Every surface in a room potentially reflects sound, and these reflections mix together with the sound originating from the speakers. Rooms with parallel walls can create standing waves, which are mostly low-frequency sound waves that reinforce and cancel each other as they bounce back and forth.
Standing waves cause some frequencies to be emphasized or attenuated more than others, depending on your listening position. When you mix in a room that creates standing waves, you may adjust certain frequencies more than necessary. However, you may not notice until you play back your audio in a different listening environment, in which those frequencies may sound overbearing or nonexistent.
Tip: A much cheaper alternative to building new walls is to mount angled pieces of material to the existing walls to eliminate parallel surfaces.
If the material in a room is very reflective, the room sounds "brighter" because high frequencies are easily reflected. Mounting absorbing material (such as acoustic foam) on the walls can reduce the brightness of a room. A "dead room" is one that has very little reflection (or reverberation). Try to cover any reflective surfaces in your monitoring environment.
Amplifiers
If you are recording audio from microphones and are not running the microphone's signal through a mixer with a microphone pre-amplifier, you need to connect an amplifier to boost the microphone's signal before sending it to the computer. If you are connecting monitors or speakers that are not self-powered, you also need to connect them through an amplifier.
Mixers
Connecting a mixer to your system allows you to record audio from multiple microphones or instruments simultaneously, to play back the output from your computer through connected monitors or speakers, and to control the volume levels of both the audio input and output. Professional-quality mixers have a number of additional features, including equalization (EQ) controls, auxiliary sends and returns for adding external effects, and separate monitor and mix level controls. Mixers may also include inboard pre-amplification for microphones, making the use of a separate amplifier unnecessary.
Control Surfaces
Soundtrack Pro supports control surfaces that use the Mackie Control and Logic Control protocols. For information on connecting and using control surfaces, see Chapter 15, "Using Control Surfaces with Soundtrack Pro," on page 391.
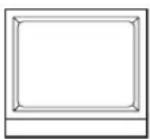
External Video Monitors
When you design and edit a video soundtrack, it's ideal to watch the video on a monitor similar to the one you will use for the final screening. An external video monitor can display color, frame rate, and interlaced scanning more accurately than your computer display. (For information on connecting professional video devices, see "Connecting Professional Video Devices" on page 498.)
If you are working on an NTSC or a PAL project, you should watch it on an external video monitor that shows the video interlaced. For more information about external video monitoring, see the Final Cut Pro User Manual.
Example Hardware Setups
The following sections provide several examples of different hardware setups.
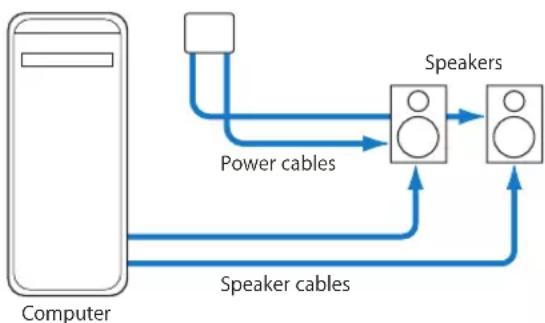
Setting Up a System Using Powered Speakers
With this setup, you can monitor the audio output through a set of connected powered speakers.
This setup uses the following equipment:
- Your computer and display
- A set of powered speakers, including speaker wire and a power adaptor
With this setup, you can record audio input from microphones and musical instruments, and monitor audio output, through a USB audio interface.
This setup uses the following equipment:
- Your computer and display
- USB audio interface (from 2 to 8 channels) with USB cable to connect to your computer
- Microphone
• Musical instruments (guitar, bass, and keyboard)
• Cables to connect microphones and instruments to the audio interface - Set of monitors or speakers

flowchart
graph LR
    A["Computer"] -->|Power cables| B["Monitors"]
    B --> C["Speaker cables"]
    C --> D["Audio interface"]
    D --> E["Instrument"]
    E --> F["Microphone"]
    F --> D
    D --> G["USB cable"]
Setting Up a System Using a FireWire Interface and a Control Surface
With this setup, you can record audio input from several sources simultaneously and monitor audio output channels independently, through a mixer connected to a FireWire audio interface.
This setup uses the following equipment:
- Your computer and display
- FireWire audio interface with FireWire cable to connect to your computer
• Control surface and MIDI interface with USB cable to connect MIDI interface to your computer
• MIDI cables to connect control surface to MIDI interface - Set of powered monitors or speakers
- Speaker cables
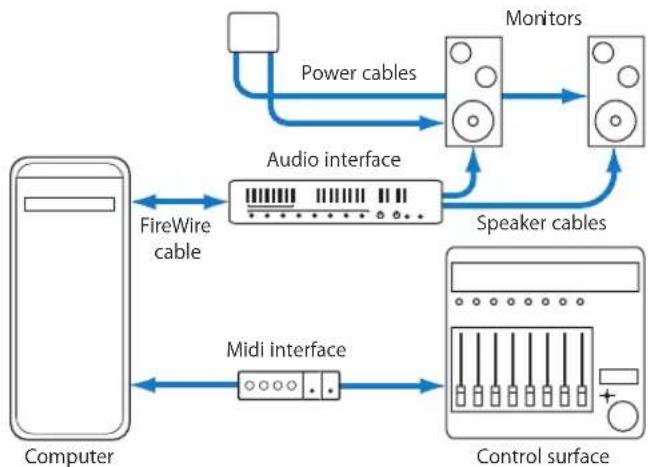
flowchart
graph TD
    A["Computer"] -->|FireWire cable| B["Audio interface"]
    B -->|Power cables| C["Monitors"]
    C -->|Speaker cables| D["Control surface"]
    D -->|Midi interface| E["Computer"]
Setting Up a System Using a Video Output Device
With this setup, you can play video and audio through an external video output device. Because using a video output device can result in increased latency, you may want to combine this setup with an audio-only setup (as shown in the preceding pages), and switch between the two setups.
This setup uses the following equipment:
- Your computer and display
• Video output device (FireWire device or PCI card)
• High-quality video monitor - Audio monitors

flowchart
graph LR
    A["Computer"] -->|FireWire cable| B["Video output device"]
    B --> C["Mixer"]
    D["Video monitor"] -->|FireWire cable| B
    E["Audio monitors"] -->|Speaker cables| C
Setting Up a System Using a PCI Video Interface Card with Breakout Box
Many PCI cards aren't big enough to fit all of the necessary video and audio connectors. In these situations, a breakout box is connected to the PCI card via a multipin connector on a long cable, and the connectors are accessible on the breakout box instead of on the back of the PCI card. A breakout box is also useful because it allows you to place the connectors somewhere more convenient than the back of your computer, such as on an equipment rack or a desktop.
This setup uses the following equipment:
- Your computer and display
• Video interface (PCI card with breakout box)
• High-quality video monitor - Audio speakers

flowchart
graph LR
    A["Computer (with PCI card)"] <--> B["Breakout box"]
    B <--> C["BNC connector"]
    C --> D["Analog or digital VTR"]
Setting Up a System for Stereo Mixing
By default, Soundtrack Pro is set up for stereo mixing.
Stereo Speaker Placement and Listening Position
Most video editing suites use nearfield monitors, which are speakers designed to be listened to at fairly close range. Speakers should be at least a foot or two away from any walls to prevent early reflections of sound that combine with and muddy the original sound.
Position the speakers as far from your listening position as they are from each other (forming an equilateral triangle). For example, if the distance between the speakers is six feet, you should place yourself six feet from each speaker. The apparent width of the sound stage, or stereo image, increases as the distance between the speakers increases. However, if the two speakers get too far apart, sound information appearing in the center (between both speakers) starts to disappear.
Setting Up a System for Surround Mixing
For complete instructions on setting up the surround mixing tools in Soundtrack Pro, see "Setting Up for Surround" on page 294.
The Soundtrack Pro Interface
2
In Soundtrack Pro, you work in multiple windows and tabs that you can arrange to suit your workflow.
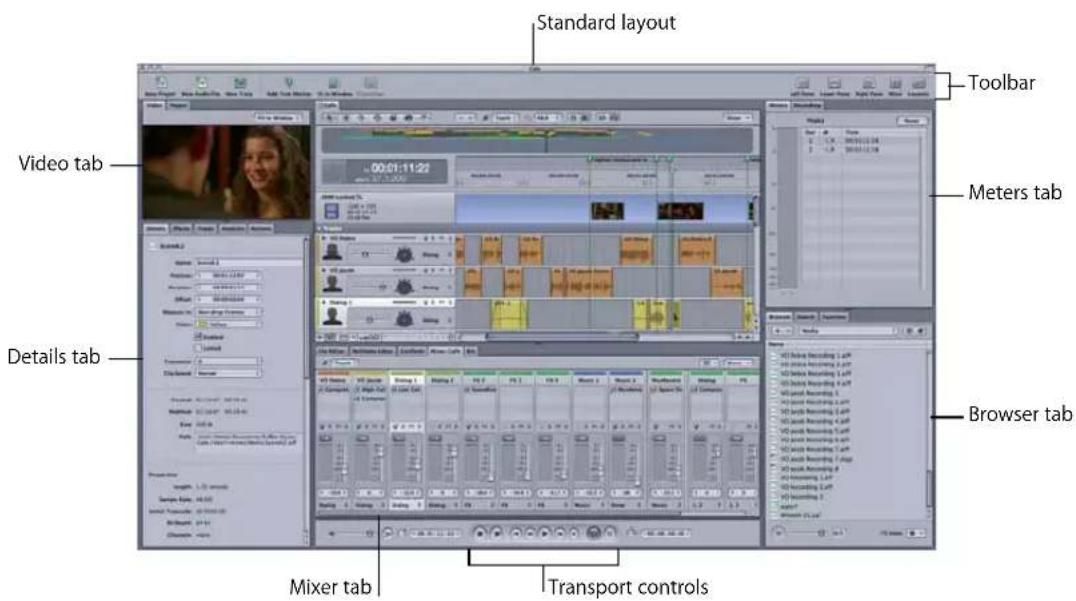
Soundtrack Pro is designed to handle every aspect of creating audio for a video or film project, from multitrack recording to advanced audio processing and mixing. You can use Soundtrack Pro together with Final Cut Pro as a complete audio post-production solution that is powerful, yet also elegant and flexible.
Soundtrack Pro Window Organization
The Soundtrack Pro window is arranged into several areas: the project pane and three surrounding panes: the left pane, the lower pane, and the right pane. The project pane is reserved as the central “canvas” for the multitrack Timeline and for individual audio file projects. Use the transport controls at the bottom of the window to play back projects that you open in the project pane. Task-specific tabs are docked in the left, lower, and right panes. By default, the tabs are grouped by function and are laid out for a streamlined audio post-production workflow. Nonetheless, you can easily rearrange the tabs and resize the panes to suit your needs and then save the custom layouts for future use.

Showing and Hiding the Panes
The tabs are grouped by function to optimize your workflow. For example, the media I O-related tabs (Meters, Recording, Search, Browser, and Favorites) are located in the right pane by default. When you are finished with media input, you can close the entire right pane by choosing Window > Toggle Right Pane, and thereby allow more horizontal space for the project pane and the lower pane.
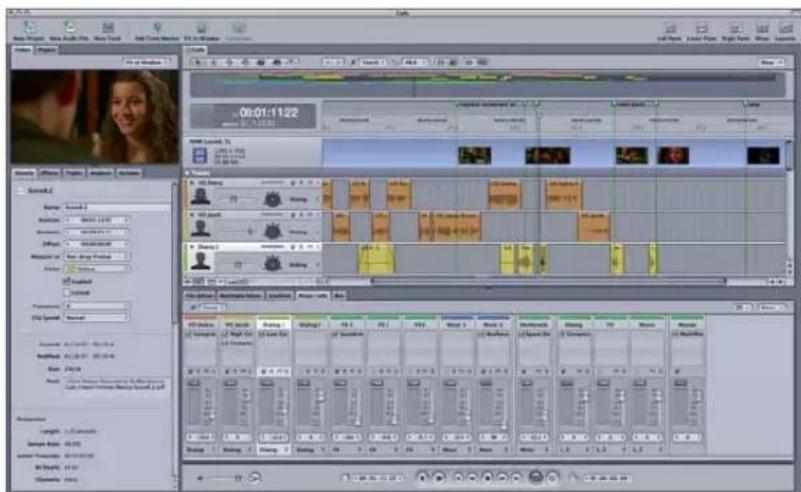
Or, for example, you may wish to work exclusively in the Timeline or the File Editor project view and dedicate the entire Soundtrack Pro window to that view.
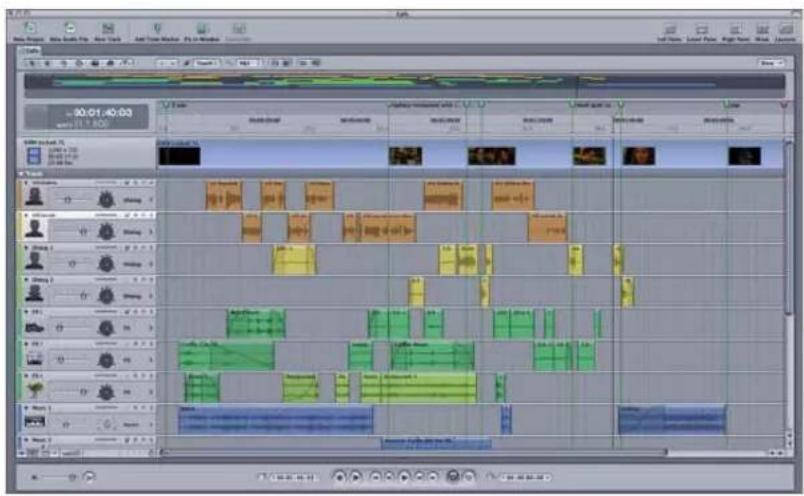

Because hiding and showing different panes of the Soundtrack Pro window is so convenient, you will probably use this feature frequently during the course of a project. Here are the keyboard shortcuts for hiding and showing the various panes.
| Pane Keyboard Shortcut | |
| Left pane | control 4+ □ |
| Lower pane | control s+ □ |
| Right pane | control p+ □ |
Rearranging Tabs
At any time, you can rearrange the layout by tearing off individual tabs and docking them in other panes, or simply have them float over the Soundtrack Pro window. There are numerous possible combinations. Mix and match the tabs to suit your particular workflow needs.
The Meters, Search, and Browser tabs have been moved from the right pane and docked in the left pane.

Note: At any time, you can revert to the default layout by choosing Window > Layouts > Standard, or pressing F1. Also, you can save any custom layouts you create. For more information on managing layouts, see "Using Project Layouts" on page 68.
Project Pane
The project pane is the central "canvas" where you work on your projects in either the multitrack Timeline or the File Editor project view. Use the Timeline (shown below) to arrange audio clips in multitrack projects. Use the File Editor project view for individual audio file projects.

- Toolbar: Includes tools for common functions. You can customize which tools appear in the Toolbar.
- Tabs: You can switch between any projects open in the Timeline or File Editor project view.
- Transport controls: Control playback and the position of the playhead, and turn recording on or off. (For more information, see "Transport Controls" on page 38.)
- Monitor Volume slider: Adjusts the overall monitor volume when you play the project. The volume level defaults to 0 dB when you create a project. Adjusting the Monitor Volume slider does not affect the mix signal or the export volume.
- Mono Mix button: Click to listen to a temporary mono mix of the project.
- Playhead Location value slider: Displays the current playhead position. You can move the playhead by clicking the arrows, dragging, or typing a value.
- Selection Length value slider: Displays the length of the current Timeslice (in the Timeline) or selection (in the File Editor). You can change the Timeslice or selection length by clicking the arrows, dragging, or typing a value.
Toolbar
The Toolbar is located at the top of the Soundtrack Pro window. When you first open Soundtrack Pro, the Toolbar includes buttons for creating a new project, creating a new audio file, creating a new track, and other common functions. You can customize the Toolbar, adding buttons for functions you want to access frequently. For information about customizing the Toolbar, see "Customizing the Toolbar" on page 69.

Transport Controls
You use the transport controls to control playback, set the position of the playhead, start recording, and activate the cycle region.

- Playhead Location value slider: Displays the current playhead position. You can move the playhead by clicking the arrows, dragging, or typing a value.
- Record button: Starts and stops the recording process, and arms tracks for recording when no tracks are pre-armed.
- Play from Beginning button: Starts playback from the beginning of the project.
- Go to Beginning button: Moves the playhead to the beginning of the project or to the beginning of the cycle region if it is active.
- Play/Pause button: Starts playback at the current playhead position. If the project is playing, stops playback.
- Go to End button: Moves the playhead to the end of the project or to the end of the cycle region if it is active.
- Cycle button: Activates the cycle region, if one is set in the Time ruler. If no cycle region is set, loops the project.
- MIDI Sync button: Synchronizes playback with incoming MIDI Clock and MIDI Timecode (MTC) signals.
- Selection Length value slider: Displays the length of the current Timeslice (in the Timeline) or selection (in the File Editor). You can change the Timeslice or selection length by clicking the arrows, dragging, or typing a value.
For information on using the transport controls, see "Controlling Playback with the Transport Controls" on page 77.
Timeline
The Timeline gives you a visual representation of a multitrack project, showing the position of clips, the playhead, and other items in time. The Timeline is organized into three groups of horizontal rows called tracks, busses, and submixes, as well as a video track, a podcast track, and a Master bus. You can add and arrange audio clips in the audio tracks, use sends to create auxiliary busses, and route audio to physical output channels using submixes. You can control the sound of each audio track, bus, and submix using the controls in its header.

- Previous and Next Selection buttons: Move backward and forward through Timeslice selections you've made in the waveform display.
- Timeline editing tools: Select items using the Selection (arrow) tool, make time-based selections with the Timeslice tool, split audio clips using the Blade and Blade All tools, copy and paste attributes with the Lift and Stamp tools, and scrub the Timeline with the Scrub tool. For more information, see "Using the Timeline Editing Tools" on page 164.
-
Automation Mode pop-up menu: Choose the mode for recording automation using either the onscreen controls or an external control surface.
-
Project controls: Set the project's sample rate and other properties using these controls.
- Show pop-up menu: Choose whether the video track, podcast track, audio tracks, busses, submixes, and master envelopes are visible in the Timeline.
- Global Timeline view: Shows a miniature view of the entire Timeline and the playhead position, and lets you move quickly to different parts of a project.
- Time display: Shows the current playhead position in both Time-based and Beats-based formats. You can set the playhead by typing a new playhead position in the time display.
- Time ruler: You can precisely position clips, the playhead, and other items to a specific point in time (minutes, seconds, frames) or to a musical beat using the Time ruler.
- Track area: Includes horizontal rows for tracks, busses, and submixes. Also includes the playhead, envelopes, and markers.
- Headers: Each track, bus, and submix has a header with an icon, name, volume slider, and other controls. (For more information, see the next section.)
- Timeline controls: Include controls to show the master envelopes, turn snapping on or off, set the track height, and zoom in or out. (For more information, see "Timeline Controls" on page 42.)
- Scroll bar: Moves the Timeline horizontally so you can see different parts of the project.
Headers
Each track, bus, and submix in the Timeline has a header that includes the track name, track icon, and a set of track controls.

- Color label: Indicates the track color, which is applied to any clips on the track (unless you choose to override the color for individual clips).
- Icon: You can choose an icon for the track, bus, or submix, making it easy to quickly distinguish it in a large project.
- Name field: You can type a new name for the track, bus, or submix in the name field. You cannot rename the Master bus.
-
Bypass Effects button: Select this button to hear the track without any of the applied realtime effects.
-
Arm for Recording button: Enables (or disables) the track for recording when you click the Record button. Only tracks have Arm for Recording buttons, not busses or submixes.
- Mute button: Mutes (or unmutes) the track, bus, or submix.
- Solo button: Solos (or unsolos) the track, bus, or submix. Soundtrack Pro supports both multiple solo and exclusive solo.
- Envelopes disclosure triangle: Shows the track, bus, or submix envelopes in the area directly below the track.
• Volume slider: Sets the track, bus, or submix relative volume in the overall mix. - Submix pop-up menu: Choose a submix for the track or bus from the menu. (Tracks and busses only.)
- Input Device pop-up menu: Use the Input Device pop-up menu to choose the recording input device, and its Channels submenu to choose the channel (or set of channels).
- Input Routing buttons: Use the Input Routing buttons to confirm or change recording input signal routing.
- Output pop-up menu: Choose the physical outputs for the submix from the menu. Submixes only. (Not shown in the illustration.)
- Panner: Sets the pan position of the track or bus. Has two modes: stereo slider or surround panner. Appears in track and bus headers only, not in submix headers or the Master bus header.
Note: The Input Device pop-up menu and Input Routing buttons are visible only when the track height is set to Medium or Large.
For detailed information on using the track controls, see "Using the Track Controls" on page 142.
Timeline Controls
The lower-left corner of the project pane contains controls for various aspects of Timeline display and operation.

- Master Envelopes button: In the Timeline, shows or hides the master envelopes. In the File Editor project view, shows or hides the envelopes for the current audio file project.
- Snapping button: Turns snapping on or off.
- Snap To Value pop-up menu: Sets the value to which items in the Timeline snap.
- Height control: Sets the height of tracks, busses, and submixes to one of four settings, from Reduced to Large. In the File Editor project view, sets the height of the envelopes for the current audio file project to one of four settings, from Reduced to Large.
- Zoom control: Click the control or drag the slider to change the zoom level. You can zoom in to edit clips precisely, or zoom out to display more of the Timeline.
For information about using master envelopes, see "Master Bus" on page 364. For information about snapping, see "Using Snapping" on page 94. For information about using the Height control and Zoom control, see "Moving Around in the Timeline" on page 128.
File Editor
You can edit individual audio files in the File Editor using actions. Actions give you a powerful and flexible way to edit audio files nondestructively using professional audio processing effects and other operations. You can turn individual actions on or off, reorder actions, flatten actions, and compare the project with and without actions. You can also analyze audio files in the File Editor and fix common audio problems, including clicks and pops, hum, and phase problems. The File Editor can take two forms: the File Editor project view, for detailed work on individual audio files, and the File Editor tab, for convenient editing within the context of a multitrack project.
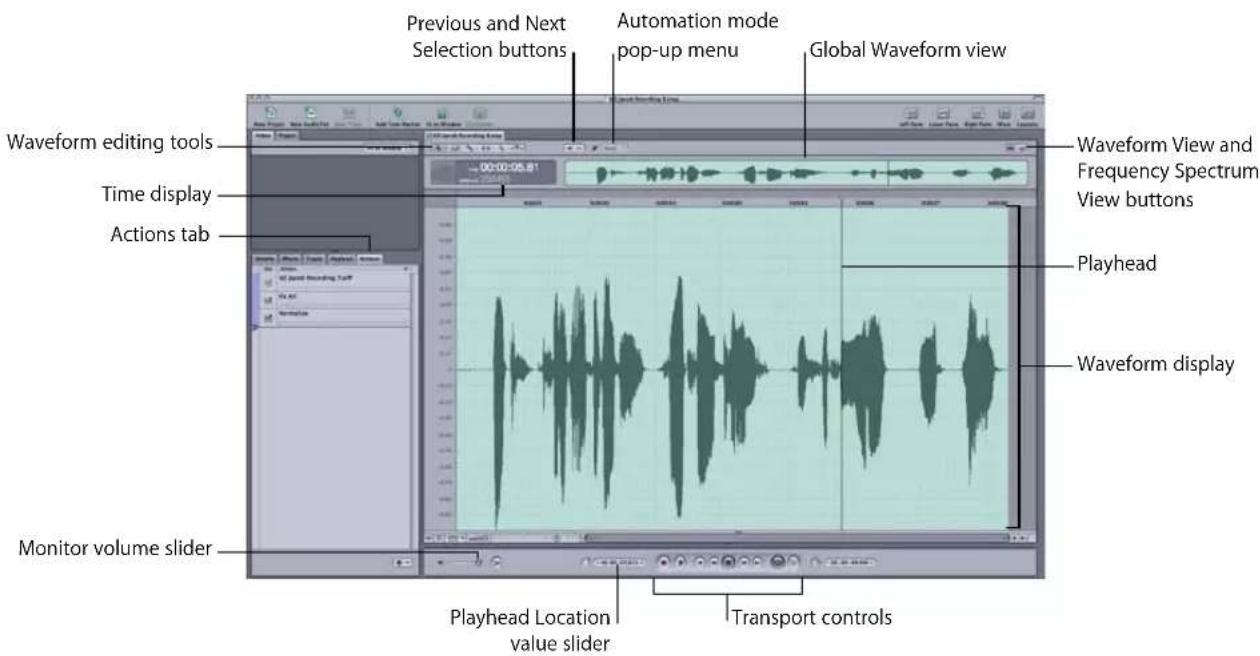
- Waveform editing tools: Include the Selection, Sample Edit, Audio Stretching, and Zoom tools that you can use to graphically edit audio files.
- Automation Mode pop-up menu: Choose the automation mode from the pop-up menu.
- Previous and Next Selection buttons: Move back and forward through selections you've made in the waveform display.
- Waveform View and Frequency Spectrum View buttons: Change the display between Waveform view and Frequency Spectrum view.
• Time display: Shows the current position of the playhead. - Global Waveform view: Shows you a miniature view of the entire waveform and the playhead position, and lets you move quickly to different parts of an audio file.
-
Waveform display (and editing area): Shows the waveform of the audio file (or its frequency spectrum in Frequency Spectrum view). You can select parts of the audio file to apply different actions to.
-
Transport controls: Control playback and the position of the playhead, and turn recording on or off. (For more information, see "Transport Controls" on page 38.)
- Playhead: Shows the part of the audio file currently playing.
- Monitor Volume slider: Adjusts the overall monitor volume when you play the project. The volume level defaults to 0 dB when you create a project. Adjusting the monitor volume slider does not affect the mix signal or the export volume.
- Mono Mix button: Click to listen to a temporary mono mix of the project.
- Playhead Location value slider: Displays the current playhead position. You can move the playhead by clicking the arrows, dragging, or typing a value.
- Actions tab: Displays the currently applied actions.
Mixer
You mix your project in the Mixer. All tracks, busses, and submixes (as well as the Master bus) have channel strips in the Mixer with volume controls, mute and solo buttons, slots for adding effects, and other controls. You can view the levels for tracks, busses, submixes, and the Master bus using level meters in their channel strips. You can also record audio and automate volume and pan changes in the Mixer.

- Automation Mode pop-up menu: Choose the automation mode from the pop-up menu.
- Channel Strip and Mixer pop-up menus: Show or hide different sections of the channel strips and of the Mixer window.
- Channel strips: Each track, bus, and submix has a channel strip with controls and level meters.
Each channel strip includes the following controls:

• Color label: Indicates the track color, which is applied to any clips on the track (unless you choose to override the color for individual clips).
- Name field: You can type a new name for the channel strip.
- Icon: Icons let you visually distinguish channel strips in the Mixer. Double-click an icon to change it.
- Effects slots: Show the effects and sends for the channel strip, and let you add effects and sends.
- Panning controls: Set the pan position of a track or bus. In surround mode, drag anywhere inside the black circle to position the puck. In stereo mode, drag the pan slider left or right or change the value in the value slider. You can automate pan changes by setting the appropriate automation mode for the project. These appear in track and bus channel strips only, not in submix channel strips.
- Volume fader and value slider: Set the channel strip's volume level by dragging the fader or changing the value in the value slider. You can automate volume changes by dragging the slider with the project set to the appropriate automation mode.
- Level meters with peak indicator: Show the volume level of the channel strip in real time as the project plays. The peak indicator shows the highest level played and changes color to indicate that clipping has occurred.
- Arm for Recording button: Click to enable the track for recording. When you click a track's Arm for Recording button, the Recording tab appears, showing the track's current recording settings. The button appears in track channel strips only, not in bus or submix channel strips.
- Mute button: Click to mute (or unmute) the channel strip.
- Solo button: Click to solo (or unsolo) the channel strip.
- Submix pop-up menu: Choose a submix for the track or bus from the menu. (Tracks and busses only.)
- Output pop-up menu: Choose the outputs for the submix from the menu. Submixes only. (Not shown in the illustration.)
Multitake Editor
Use the Multitake Editor to edit multitake and synced audio that is created by performing multitake recording (such as in automatic dialogue replacement, or ADR). This tool allows you to easily mix and match parts of different takes. Once you are done editing a multitake clip, you can collapse it into a single clip, hiding the constituent edits that are not relevant to the surrounding multitrack Timeline.
For more information about the Multitake Editor, see Chapter 7, "Using the Multitake Editor," on page 251.

Conform
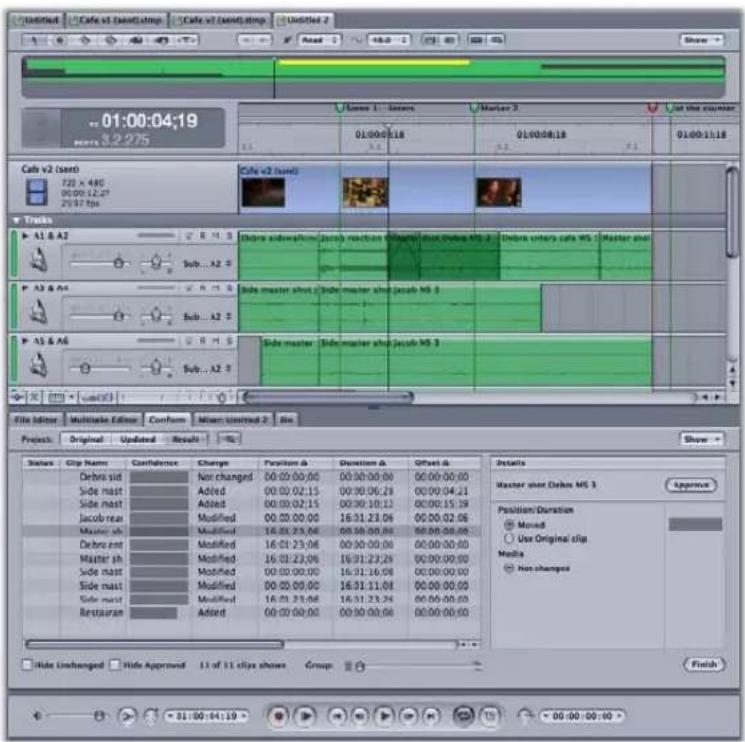
The Conform tool helps sound editors handle picture changes. Conforming a sequence is the act of incorporating changes sent from the picture editor into a different, changed version of a sequence being used by the sound editor. The sound editor revisits all of the audio edits, ensuring that they line up with new video footage and inserting or deleting any added or deleted media. Soundtrack Pro Conform makes this merging procedure more efficient and less tedious.
For more information about the Conform tool, see Chapter 18, "Using Conform with Final Cut Pro," on page 439.
Bin
The Bin tab lists information about items in all open projects. The Bin provides a hierarchical display of projects, their media files, and other information about each item, including duration, timecode, sample rate, Timeline information, and so on. You can drag files from the Bin tab to the Timeline. You can add files to the Bin for easy access at any time. The Bin also features sort and search functions to help you locate an item in any open project.
For more information about the Bin, see "Using the Bin" on page 87.
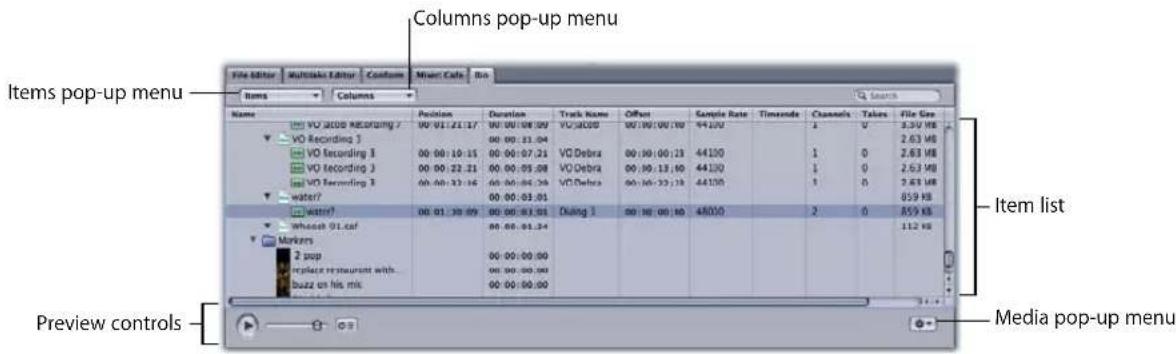
- Item list: Displays the files, clips, markers, and podcasts in the currently open projects.
- Items pop-up menu: Choose what types of items (files, clips, markers, or podcasts) to display in the Bin.
- Columns pop-up menu: Choose what types of columns of information (Timeline information, audio clip information, file information, metadata tags, or music information) to display in the Bin.
- Preview controls: Include a Play button, a volume slider, and a "Preview on selection" button. For information on using the preview controls, see "Using the Preview Controls" on page 91.
- Media pop-up menu: Choose menu items to Show in Timeline, Spot to Timeline, open a file in the File Editor, and perform other functions.
Meters Tab
The Meters tab displays mono, stereo, multichannel, and surround level meters that you can use to observe the volume of all submixes assigned to physical outputs or the overall output for an audio file project.
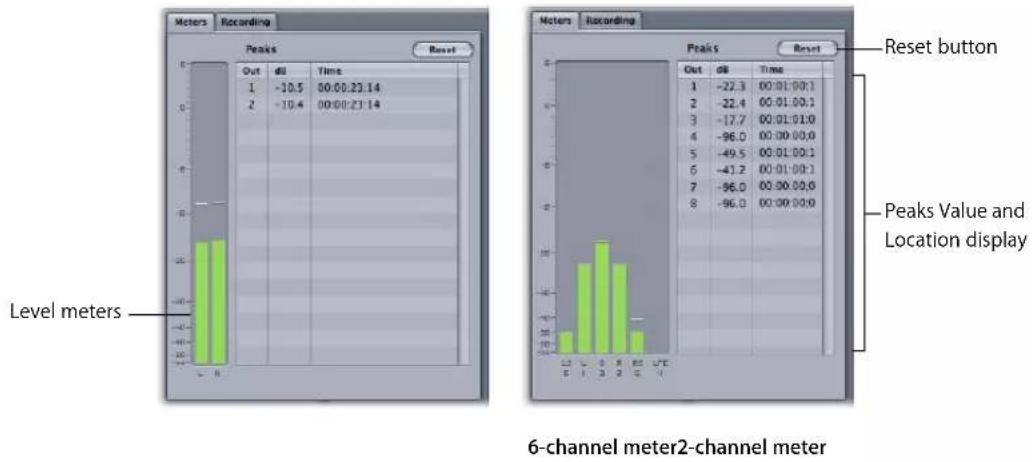
bar
| Level meters | Peak Value | | ------------ | ---------- | | 1 | -10.5 | | 2 | -10.4 | | 3 | -96.0 | | 4 | -96.0 | | 5 | -96.0 | | 6 | -96.0 | | 7 | -96.0 | | 8 | -96.0 |- Level meters: Show the output volume of the overall project as the project plays.
- Peaks Value and Location display: Displays the highest (peak) value played for each jack, and its timecode. Double-click any item in the Peaks Value and Location display to move the playhead to that point in the Timeline.
- Reset button: Resets all items in the Peaks Value and Location display.
Recording Tab
The Recording tab is where you edit a track's recording settings. When you click a track's Arm for Recording button, the Recording tab appears, displaying the track's current recording settings.
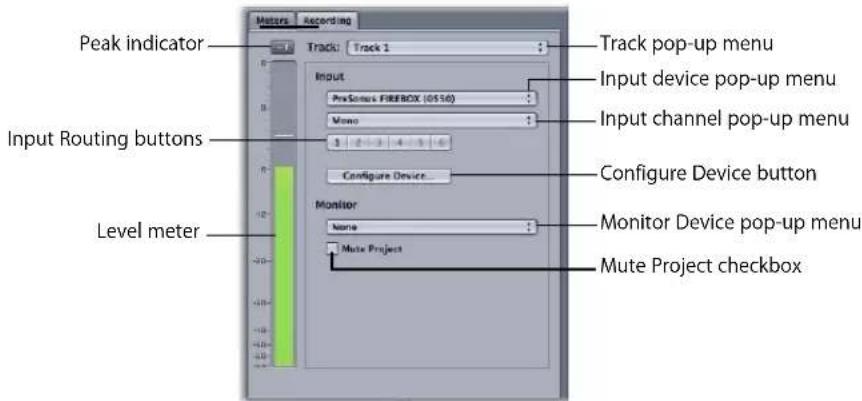
- Peak indicator: Shows the highest level reached by the recording input signal. If the level rises above 0 dB, the peak indicator becomes red to indicate clipping.
- Track pop-up menu: Displays the recording settings for the selected track.
- Level meter(s): Show the input volume for the selected track during recording. Adjust automatically to the number of channels and the channel valence selected in the Input Channel pop-up menu.
- Input Device pop-up menu: Choose the input device for recording.
- Input Channel pop-up menu: Choose the input channel (or channels) for recording.
- Input Routing buttons: Use the Input Routing buttons to route the input signal to different channels.
- Configure Device button: Opens the Audio MIDI Setup utility for adjusting the computer's audio input and output configuration settings, or setting up software specific to your audio interface.
- Monitor Device pop-up menu: Choose the output device and output channel (or channels) for monitoring during recording.
- Mute Project checkbox: Select to mute the project during recording, so you hear only the sound being recorded.
Browser
The Browser tab displays the disks connected to your computer in a view similar to the Finder's list view. You can also preview files in the Browser tab and drag them to the Timeline.

- Back and Forward buttons: Move through previously viewed levels of the folder hierarchy.
- Computer button: Displays your computer's hard disk and other storage media connected to your computer.
• Home button: Displays the contents of your home directory. - Path pop-up menu: Displays the levels of the file path to the current location, letting you move back to a previous level.
- File list: Displays the files and folders at the current location.
- Preview controls: Include a Play button, a volume slider, and a "Preview on selection" button. For information on using the Preview controls, see "Using the Preview Controls" on page 91.
• Media pop-up menu: Choose menu items to add a Favorite, add a file to the Bin, open a file in the File Editor, and perform other functions.
Search Tab
The Search tab lets you locate audio files using a variety of criteria. You can perform text searches and search for Apple Loops and other tagged file formats using keywords for instrument, genre, mood descriptors, and other categories. Matching files are displayed in the Search Results list. Once you locate the files you want to use, you can preview them in the Search Results list or drag them to the Timeline.
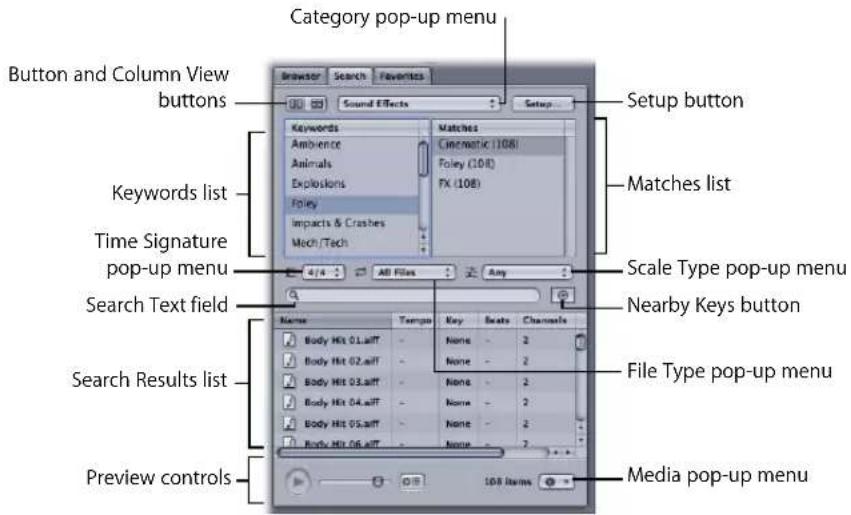
The Search tab has two views, Column view and Button view. Column view features a Keywords list containing keywords and a Matches list with subcategories you can use to refine your searches. Button view displays a matrix of keyword buttons you can click to see matching files.

- Button and Column View buttons: Change the view to either Button or Column view.
-
Category pop-up menu: Restricts the available keywords to a particular category.
-
Setup button: Displays the Search Setup dialog, from which you add items to the Search database.
- Time Signature pop-up menu: Restricts search results to files with the selected time signature.
- File Type pop-up menu: Choose whether to display all files, or only looping or non-looping files.
- Scale Type pop-up menu: Restricts search results to audio files using the selected scale.
- Keyword buttons (Button view only): Displays files matching the keyword in the Results list.
- Keywords list (Column view only): Displays files matching the keyword in the Results list, and displays subcategories in the Matches list.
- Matches list (Column view only): Displays subcategories of the selected keywords.
- Search Text field: Type text in the field to display matching files whose filename or path contains the search text.
- Nearby Keys button: Restricts search results to keys within two semitones above or below the project key.
- Search Results list: Displays the files matching the selected search criteria, in alphabetical order. Includes columns displaying the tempo, key, and number of beats of each file. You can click files to preview them.
- Preview controls: Include a Play button, a volume slider, and a "Preview on selection" button. For information on using the preview controls, see "Using the Preview Controls" on page 91.
- Media pop-up menu: Choose menu items to add a Favorite, add a file to the Bin, open a file in the File Editor, and perform other functions.
Favorites Tab
You can store frequently used items in Favorites so that you can easily access them directly. You can also preview files in Favorites and drag them to the Timeline.

- Back and Forward buttons: Move through previously viewed levels of the folder hierarchy.
- Path pop-up menu: Displays the levels of the file path to the current location, letting you move back to a previous level.
- Favorites list: Displays the files and folders at the current location.
- Preview controls: Include Play button, a volume slider, and a "Preview on selection" button. For information on using the preview controls, see "Using the Preview Controls" on page 91.
- Media pop-up menu: Choose menu items to remove a Favorite, add a file to the Bin, open a file in the File Editor, and perform other functions.
Video Tab
Use the Video tab to add a video to a project and view the video.

- Video Scale pop-up menu: Choose the scale of the video in the Video tab from the pop-up menu.
• Video viewing area: You add a video by dragging it into the viewing area, where you may also watch it play.
Note: You control playback of the video within the project using the transport controls at the bottom of the Soundtrack Pro window. For more information about the transport controls, see "Transport Controls" on page 38.
Project Tab
This tab contains controls and information for the currently active project as well as any metadata (tags) associated with the project.

The Project tab features the following controls and categories of information:
- General project information: This information includes file size, creation and modification dates, and location on the hard drive.
- Pullup/Pulldown pop-up menus: Use these menus to adjust the video and audio playback to compensate for film-to-video and video-to-film conversions as well as international television standards conversions.
![Pullup/ Pulldown Audio None 0.1% Up [NTSC to Film] 0.1% Down [File to NTSC] 4% Up [Film to PAL] 4% Down [PAL to Film] 4.1% Up [NTSC to PAL] 4.1% Down [PAL to NTSC] Properties Length Sample Rate: 43.000 Hz](/content/2026/05/894656/images/d6a62be50ce33dbe330159aea02a0e0f5fb560c126b54428a7c80a6f7e3bb860.jpg)
- Project properties: Includes project length (duration) and sample rate.
- Initial Timecode value slider: Use this slider to set the timecode for the first frame of the project. For more information about value sliders, see "About Changing Values and Timecode Entries" on page 75.
- Ruler Units pop-up menu: Use this menu to set the project ruler to be either Time-based or Beats-based.

Each multitrack project has a project time format, which can be either Time (seconds)-based or Beats-based. Setting the time format controls the appearance of the Time display, Time ruler, Timeline gridlines, and available Snap To values. For projects set to Time-based format, time is displayed using the Time Ruler units chosen in the View menu. For projects set to Beats-based format, the time is displayed in measures, beats, and beat divisions. The default format is Time-based.
For information on setting the project time format, see "Project Time Format" on page 109.
- Document file management: Use these controls to set project preferences for file saving and media management. These controls are available for multitrack projects only. For more information, see "Saving Multitrack Projects" on page 111.
- Metadata: Use this area to add metadata to your project or to view your project's metadata. If you export this project to certain output formats (such as a podcast), Soundtrack Pro passes through the metadata to the target output file. Metadata categories include Name, Copyright, Origination Date, Keywords, and so on.
- Music settings: Use the controls in this area to set music properties (including tempo, time signature, and key) for the currently active project. Tempo, time signature, and key are important for projects set to Beats-based format. For projects set to Time-based format, you can usually leave the tempo, time signature, and key properties at their default settings. For more information, see "Setting Project Properties" on page 106.
Details Tab
The Details tab shows information about the currently selected media file, clip, marker, envelope point, cycle region, or Timeslice selection, and gives you a way to edit details about each. You can also view and edit details for a selection in the File Editor.
![VO Jacob Recording 4.xx Name: VD Jacob Recording 4 Position: 00:00:44.12 Duration: 00:00:13.02 Offset: 00:00:04.19 Measure in: Non-Loop Frames Color: Cold Unlmated Locked Transgender: 0 Clip Speed: Normal Created: 01:30:07 12:50:32 Modified: 01:30:07 12:50:32 Size: 1.38 MB Ratio: [Users/Home/Documents/Coffee House/ Cafe_Video/Control/Media/VD Jacob Recording 4.xx] Properties Length: 18.45 seconds Sample Rate: 44.100 Initial Timescale: 00:00:00.00 Bit Depth: 16 bit Channels: mono](/content/2026/05/894656/images/0ec7c264a9d42c177dc09771ff3cae478ced1ea176b887ad1458e9882f232300.jpg)
File and Clip Details
• Name: Name of the selected clip.
- Position value slider: Sets the position (start point) of the selected clip.
• Duration value slider: Sets the duration (length) of the selected clip.
- Offset value slider: Sets the offset of the selected clip.
- Measure in pop-up menu: Sets the units shown in the Position, Duration, and Offset value sliders.
• Color pop-up menu: Sets the color of the selected clip.
- Enabled checkbox: Enables or disables the selected clip. For more information, see "Enabling and Disabling Clips" on page 118.
- Locked checkbox: Locks or unlocks the selected clip. For more information, see "Locking and Unlocking Clips and Tracks" on page 118.
- Transpose pop-up menu: Sets the number of semitones to transpose a looping clip.
- Clip Speed pop-up menu: Sets the playback speed for a looping clip.
- Created: Displays the creation date.
- Modified: Displays the modification date.
- Size: Displays the file size.
- Properties: Displays the following information for the clip or file: duration, sample rate, the timecode for the first frame of the clip or file, bit depth, and channel valence.
- Metadata: Use this section to view the metadata for a file or a clip. Metadata categories include Name, Copyright, Origination Date, Keywords, and so on.

- Music: Use to view music information for a clip or file, primarily music loops in the Search tab. The music information includes tempo, time signature, key, scale type, looping (yes or no), beats, instrument, and loop genre.
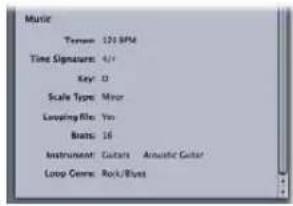
Marker Details
- Type buttons: Select whether the marker is a beat marker or a time marker.
- Name field: Enter a name for the marker.
- Position value slider: Sets the time position of the selected marker.
• Duration value slider: Sets the duration for the selected marker. - Comment: Enter comments or notes for the marker.

Envelope Point Details
- Position value slider: Sets the time position of the selected envelope point.
- Measure in pop-up menu: Sets the units shown in the Position value slider.
- Value value slider: Sets the value of the selected envelope point. In some cases, this control is a pop-up menu (for envelope types that only allow specific values).
- Minimum and Maximum value: Displays minimum and maximum values for the selected envelope point.
- Copy from Previous Point button: Sets the value of the selected envelope point to the value of the preceding one in the envelope.
- Copy from Next Point button: Sets the value of the selected envelope point to the value of the next one in the envelope.

File Editor Selection Details
- Measure in pop-up menu: Sets the units shown in the Beginning, End, and Duration value sliders.
- Beginning value slider: Sets the start position of the selection.
- End value slider: Sets the end position of the selection.
• Duration value slider: Sets the duration (length) of the selection.
Effects Tab
You add effects and sends to your project and adjust effect parameters in the Effects tab. When you select a track or a bus in the Timeline or the Mixer, you can add and adjust the following effects and send settings. You can also apply effects to audio file projects.
![Category list Add Effect button Remove Effect button Effect list Add Send button Reset Effect button Add Send Add Effect button VO Jacob Name Parameter Auto High Cut Advanced... Presets None: Frequency [Hz] 7.000.00 Compressor Advanced... Presets User Presets Threshold (dB) 20.000 Reset (LS) 2.0000 Attack (ms) 0.0000 Release (ms) 980.000 Main Up (dB) 0.0000 Softbox 1.0000 Peak/Max On Off Auto Gain On Off Output Dropoff... 6.5554 Link Mode 0.0000 Add Send](/content/2026/05/894656/images/2eb12b2fca12846a7161e115e832987dd7e05084f3d242610a1a6cb30a5afa6d.jpg)
- Category list: Lists the categories of available effects. Click a category to see the effects for that category in the Effect list.
- Effect list: Lists the effects in the selected category. Double-click an effect to add it to the track, bus, or submix.
- Add Effect (+) button: Adds the selected effect to the current effects chain.
- Remove Effect (−) button: Removes the selected effect from the current effects chain.
- Effect Parameters area: Displays the parameters for effects in the current effects chain. Click an effect's disclosure triangle to see its parameters. You can adjust effect parameters using the controls in the Effect Parameters area.
- Add Send button: Adds a send to the end of the current effects chain for the track. You can add sends only to tracks, not to busses or submixes.
- Reset Effect button: Resets the selected parameter or group of parameters to the default value (or values).
Tracks Tab
Use the Tracks tab to easily view, select, and group tracks, busses, and submixes. Groups provide another layer of organization and a way to easily make changes (such as volume adjustments) to many tracks, busses, or submixes at once.

- Mixer Objects outline: Displays an outline view of the Timeline.
- Groups outline: Displays an outline view of any grouped tracks, busses, or submixes in the project. You can use the Groups outline to group Mixer objects, disable or enable groups, rename groups, delete groups, and delete items from groups.
- Channel strip: The Tracks tab channel strip is a quick way to access the mixing controls for a particular Mixer object. This channel strip is identical to the corresponding channel strip in the Mixer in every way, including all controls and current settings.
Actions Tab
Use the Actions tab to perform edits nondestructively using actions, which include processing effects and other operations. You can also turn off or completely reorder actions.
- Actions list: You can add, select, and reorder actions in the list.

- Actions pop-up menu: Choose menu items to flatten actions, delete actions, and perform other operations.
- Actions list: Shows the actions you apply to the project. You can add, select, and reorder actions in the list.
- Action Insert bar: Shows where new actions will be added in the Actions list and which actions are heard when you play the project.
Analysis Tab
Use the Analysis tab to analyze audio files for a range of common audio problems, including clicks and pops, hum, and phase issues. You can fix the problems detected by analysis either individually or in a single operation. Selected problems are highlighted in the File Editor waveform display for easy viewing.

• Analysis Type list: Lists the types of analysis you can select.
- Parameter list: Some analysis types (Click/Pop and Silence) have parameters you can adjust before analyzing the file. The parameters appear in this list.
- Analyze button: Click to analyze the file for the problems selected in the Analysis Type list.
• Analysis Results list: Lists items found by analyzing the file.
- Clear Fixed button: Removes fixed items from the Analysis Results list.
- Magnify button: Zooms in on the selected item in the Analysis Results list for as long as you hold down the button.
• Fix All button: Fixes all items in the Analysis Results list.
- Fix button: Fixes the selected items in the Analysis Results list.
HUDs
A heads-up display (HUD) is a semi-transparent floating window with controls and displays that you can use to accomplish specific tasks. All of these windows float over the main Soundtrack Pro window. To open any of these windows, choose Window > HUDs.
Timecode HUD
The resizable Timecode HUD makes reading current timecode very easy, particularly from a distance. You can also use the Timecode HUD to navigate in the Timeline or the File Editor by dragging the displayed hours, minutes, seconds, or frames up or down.
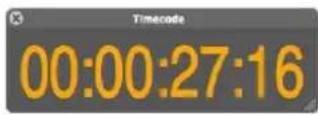
Sound Palette
You can use the Sound Palette HUD to lift attributes from selections in the Timeline and apply them to one or more clips (or regions of clips). For more information on the Sound Palette HUD, see "Using the Lift and Stamp Tools" on page 179.
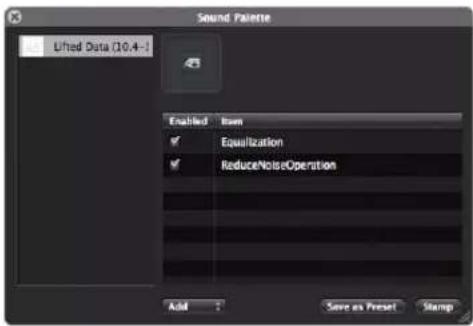
Multipoint Video HUD
You can use the resizable Multipoint Video HUD as a visual guide for precisely spotting (placing) sound effects and other audio clips to specific frames of a video program. For more information on the Multipoint Video HUD, see "Scrubbing and Spotting with the Multipoint Video HUD" on page 322.
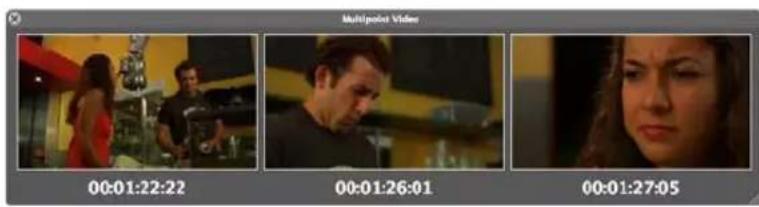
Setting Up Soundtrack Pro
3
This chapter describes two kinds of projects you can create in Soundtrack Pro and how to work with windows, use layouts, play projects, and set Soundtrack Pro preferences.
Two Kinds of Projects
Soundtrack Pro has two native project file formats to support state-of-the-art multitrack audio editing and powerful nondestructive audio waveform editing.
Project File extension Description
Multitrack project .stmp Similar to a Final Cut Pro project, this file contains multiple tracks with clips that refer to media files elsewhere on your disk.
Audio file project .stap Allows nondestructive editing of audio files.
Multitrack Projects
Multitrack projects contain multiple audio tracks in the Timeline. As in a Final Cut Pro project, importing a media file creates a clip in Soundtrack Pro that then refers to the original media file. You can arrange audio clips within tracks and synchronize them to a single video clip in the video track.
You can mix a multitrack project using track controls for volume, pan, mute, solo, effects, and effect parameters. These controls are available both in the Timeline and in channel strips in the Mixer. You can create additional audio busses for effect sends. You can group audio track outputs together with submixes. Tracks, busses, and submixes can be exported to individual audio files, or a mixdown of all the tracks can be exported to a stereo or multichannel audio file. These exported files can then be imported into Final Cut Pro.
For more information, see:
- "Creating and Opening Multitrack Projects" on page 105
- Chapter 5, "Working in the Timeline," on page 127
- Chapter 8, "Basic Mixing in Soundtrack Pro," on page 261
Audio File Projects
Soundtrack Pro allows you to edit individual audio files (sometimes known as waveform editing) using Soundtrack Pro audio file projects. However, unlike most waveform editing applications, Soundtrack Pro allows you to edit your audio files nondestructively by keeping track of the actions you have performed on your audio file.
For more information about Soundtrack Pro audio file projects, see Chapter 6, "Editing Audio Files," on page 191.
You can remove, disable, or reorder past actions at any time or save actions as AppleScript documents that you can use to batch process other audio files. Actions you can perform include trimming audio, copying and pasting parts of the waveform, normalizing or amplifying levels, applying effects, and applying noise, pop, and click reduction.
Soundtrack Pro audio file projects are stored in Mac OS X packages (or bundles). A package appears to be a single file in the Finder but actually contains a collection of files such as the original audio file, temporary render files, and the list of actions applied to your audio file.
Important: So that you benefit from nondestructive editing, the default option for saving edited audio files is as a Soundtrack Pro audio file project. Soundtrack Pro usually does this automatically any time you apply any command or effect from the Process menu or the Edit menu to a clip in the Timeline. For more information on when Soundtrack Pro automatically creates audio file projects, see "How Source Audio File Editing Works in a Soundtrack Pro Multitrack Project" on page 166.
You can open the following audio file formats in the File Editor:
• Soundtrack Pro audio file project
• AIFF
• WAVE
- Sound Designer II
- NeXT
- QuickTime movie containing audio tracks
• CAF (Apple Core Audio Format)
Compressed formats such as MP3 and AAC files are also supported, although these must be internally decompressed to a linear PCM format.
Soundtrack Pro supports audio files with any sample rate between 8 kHz and 192 kHz and any of the following bit depths: 8, 16, 24, 32, and 32-bit floating point. Up to 24 audio channels are supported in a single file. Audio files can be a maximum of 4 hours in length.
Note: When you set a sample rate and play a file, Soundtrack Pro plays at the nearest sample rate your hardware can support.
Setting Up Your Workspace
You can choose from several ways to set up the Soundtrack Pro workspace to suit your display size and workflow, depending on the type of project you are creating. You can arrange, reorder, and detach tabs throughout Soundtrack Pro and add and reorder buttons in the Toolbar. You can show and hide different panes (areas) of the Soundtrack Pro window. You can also create layouts for different tasks and switch between them.
Basic Window Controls
You can move, resize, or minimize a project's windows. Most windows feature tabs, which give you flexibility in arranging the visual elements of a project.
To move a window:
- Drag the window by its title bar to a new location.
To resize the Soundtrack Pro window:
- Drag the resize control in the lower-right corner of the window until the window is the desired size.
To minimize the Soundtrack Pro window to the Dock:
- Click the minimize button in the window's title bar.
To close the Soundtrack Pro window:
- Click the window's close button (or press Command-W with the window active).
Using Tabs
Soundtrack Pro uses tabs so you can quickly access different project views and controls. You can switch between projects and between different tabs. Clicking the tab you want makes it active and brings it to the front. You can rearrange and reorder the tabs to easily access the ones you use frequently.
To reorder tabs:
- Drag a tab left or right in the window's tab area.
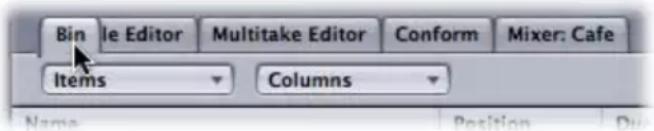
You can also detach a tab from its docked position, which creates a separate resizable window for the tab that can be dragged or resized. For example, you can drag the Favorites tab to a new location so that you can easily move items from the Search tab to the Bin tab.
To detach a tab:
- Drag the tab out of its docked position in the window to create a separate window for the tab.
To attach (dock) a tab:
- Drag the tab to the top of any pane of the Soundtrack Pro window (except the top-center project pane, which is reserved for the Timeline and the File Editor project view).
Using Project Layouts
Soundtrack Pro lets you save and recall preset window arrangements called layouts, so that you can optimize your workspace for different tasks and different display sizes. You can show, hide, and resize windows, then save each window arrangement as a layout.
To save a project layout:
1 Arrange the application windows as you want them to appear.
2 Choose Window > Save Layout.
3 In the Save dialog, type a name for the layout, then click Save.
The layout is saved, and appears in the Layouts submenu.
Note: By default, layouts are saved to the location /Users/username/Library/Application Support/Soundtrack Pro/Layouts/. Do not change the location or Soundtrack Pro may not be able to find and use your saved layouts.
To switch to a saved project layout:
- Choose Window > Layouts, then choose the layout you want to use from the submenu.
To delete a saved layout:
1 Choose Window > Manage Layouts.
2 In the Manage Layouts dialog, select the layout you want to delete.
3 Click the - (minus) button to delete the layout, then click Done.

To transfer a saved project layout file to another computer:
1 Locate the layout file in /Users/username/Library/Application Support/Soundtrack Pro/Layouts/.
2 Transfer a copy of the file to the corresponding location in the second computer.
Customizing the Toolbar
The Toolbar at the top of the Soundtrack Pro window contains buttons for frequently used commands. You can customize the Toolbar, adding buttons for the actions you use most often, and can return to the default set later.

The default set of Toolbar buttons includes buttons for creating new projects, opening project tabs, adding markers, and other common commands. You can customize the Toolbar with additional buttons for adding fade-ins and fade-outs, processing an audio file, playing the current project through a video output device, and other commands. You can also hide the Toolbar to maximize available screen space. You customize the Toolbar by dragging items from the Customize dialog to the Toolbar.
To show the Customize dialog, do one of the following:
- Choose View > Customize Toolbar.
■ Control-click the Toolbar, then choose Customize Toolbar from the shortcut menu.
The Customize dialog appears, and spaces between buttons in the Toolbar are outlined in gray.

To add a button to the Toolbar:
- Drag a button from the Customize dialog to the Toolbar.
If you drag a button between two existing buttons, the buttons move to make room for the new button.
To move a button in the Toolbar:
■ Command-drag the button to a new location on the Toolbar.
You can also rearrange the Toolbar using set-width spaces, flexible spaces, and separators.
To add space or a separator to the Toolbar:
- Drag a space, flexible space, or separator from the Customize dialog to the Toolbar.
To return the Toolbar to the default set of buttons:
- Drag the default button set, located at the bottom of the Customize dialog, to the Toolbar.
You can also change the Toolbar so that it shows only icons or only text.
To show only icons in the Toolbar, do one of the following:
■ Control-click the Toolbar, then choose Icon Only from the shortcut menu.
In the Customize dialog, choose Icon Only from the Show pop-up menu.
To show only text in the Toolbar, do one of the following:
■ Control-click the Toolbar, then choose Text Only from the shortcut menu.
In the Customize dialog, choose Text Only from the Show pop-up menu.
To show both icons and text in the Toolbar, do one of the following:
■ Control-click the Toolbar, then choose Icon & Text from the shortcut menu.
In the Customize dialog, choose Icon & Text from the Show pop-up menu.
To dismiss the Customize dialog:
- When you have finished customizing the Toolbar, click Done.
To hide the Toolbar:
- Choose View > Hide Toolbar. When the Toolbar is hidden, the menu item becomes Show Toolbar.
Using the Shortcut Menu
You can quickly and easily access many Soundtrack Pro features with the shortcut menu (also known as the contextual menu). Using the shortcut menu by Control-clicking items in the Soundtrack Pro interface is often more convenient than using the menu bar at the top of the screen. If you have a three-button mouse connected to your computer, you can right-click to access the same controls specified by the Control-click commands in the user documentation (for example, "Control-click the Toolbar, then choose Customize Toolbar from the shortcut menu").
Playing Projects
You can play both multitrack and audio file projects as you work, so you can hear the audio in the project along with the changes you've made.
To play the project:
- Click the Play button in the transport controls (or press the Space bar). Click the Play button (or press the Space bar) again to stop playback.
As the project plays, the playhead shows the point in the project currently playing.
Soundtrack Pro lets you set the playhead and control playback of your projects in several different ways. You can use the transport controls or keyboard commands to start and stop playback and set the playhead to different points in time. You can also set a cycle region to repeat playback of a specific part of the project.
Setting the Playhead Quickly
The playhead appears as a thin black line running vertically through the Timeline in multitrack projects, and through the waveform display in audio file projects. Where it crosses the Time ruler, the top of the playhead has a triangular handle that makes it easier to see its position onscreen and drag the playhead.
To set the playhead, do one of the following:
- Click anywhere in the Timeline (in a multitrack project) or the File Editor (in an audio file project) to set the playhead to that position.
- Drag the triangular handle at the top of the playhead to the position you want to set it. As you drag the playhead, you hear the audio at the current playhead position.


When you set the playhead, it snaps to the nearest Snap To position if snapping is turned on. For information on setting the Snap To value, see "Using Snapping" on page 94. You can also set the playhead by using the transport controls or the Playhead Location value slider.
Note: If you click the Time ruler, you may accidentally activate the cycle region. Press Option-X to remove the cycle region. Press C to turn the cycle region on or off. For more information about using the cycle region, see "Working with the Cycle Region" on page 134.
Setting the Playhead Using the Time Display
When a project is playing, the Time display constantly updates to show the current position of the playhead in both Time-based and Beats-based formats. You can also set the playhead to a new position by entering the position in the Time display.
The arrangement of the Time-based and Beats-based positions in the Time display changes depending on the time format of the project. The position matching the time format of the project appears in large, white numerals in the upper part of the Time display, and the other position appears below it in smaller, gray numerals. Each position is labeled for quick visual recognition.
For information on setting the project time format, see "Setting Project Properties" on page 106.
To set the playhead using the Time display:
- Select either the Time or Beats position in the Time display, then enter a new position. You can select the entire position or part of the position.
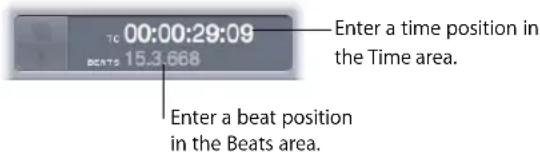
Entering Time-Based Units
When you set the playhead by entering a Time-based position in the Time display, you don't need to enter all of the punctuation. Soundtrack Pro automatically adds the correct punctuation for the format of the Time display.
For example:
- If you enter 01234321, Soundtrack Pro interprets it as 01:23:43;21. This stands for 1 hour, 23 minutes, 43 seconds, and 21 frames.
If you enter a partial number, Soundtrack Pro formats it with the rightmost pair of numbers as frames and with each successive pair of numbers to the left as seconds, minutes, and hours. Numbers omitted from a complete time position are interpreted as zeros. For best results, always enter delimiters to separate each division of time.
For example:
- If you enter 01.23, Soundtrack Pro interprets it as 00:00:01;23. This stands for 1 second and 23 frames.
You can select only part of the position in the Time display and enter a new number for that position. For example, you can select only seconds, or minutes and seconds. The other categories keep their present values. You can enter a time position in timecode format, in a way similar to the way you enter timecode in Final Cut Pro.
Entering Beats-Based Units
When you set the playhead by entering a Beats-based position in the Time display, you enter periods between numbers to separate measures, beats, and beat divisions. Soundtrack Pro fills out the digits in the beat division category with zeros.
For example:
- If you enter 123, Soundtrack Pro interprets it as 123.1.000. This stands for the 123rd measure, 1st beat, with no added beat divisions.
- If you enter 12.3, Soundtrack Pro interprets it as 12.3.000. This stands for the 12th measure, the 3rd beat, with no added beat divisions.
- If you enter 1.2.3, Soundtrack Pro interprets it as 1.2.300. This stands for the 1st measure, the 2nd beat, and 300/1000ths of a beat (because each beat division is 1/1000 of a beat).
You can select only part of the position in the Time display and enter a new number for that position. For example, you can select only measures, or measures and beats. The other categories keep their present values.
Setting the Playhead Using the Playhead Location Value Slider
Below and to the left of the transport controls is the Playhead Location value slider. When a project is playing, the Playhead Location value slider constantly updates to show the current position of the playhead. You can set the playhead by entering a new position in the Playhead Location value slider.

About Changing Values and Timecode Entries
Soundtrack Pro includes several types of value entry methods. Most of them have features that can make changing the values or timecode fields easy to do.
Using Value Sliders
There are two methods used to enter general numeric values: traditional sliders with separate numeric entry fields and value sliders that combine the slider with the numeric entry field.
![Separate slider and numeric entry field Threshold (dB) 20.511 Ratio [1] 2.0000 Attack (ms) 0.0000 Value slider with combined slider and numeric entry field Position: 00:00:11.67 Durations: 09:00:10.72 Offset: 00:00:00.78](/content/2026/05/894656/images/7d1c4565ff3f8b7d2199da2dde01a0c9558a655124173c7a43482087c74e897d.jpg)
Value sliders allow you to enter a specific number in the value field or to drag in the value field to set a value. When using the value sliders, you can use a modifier key to make normal, small, or large value adjustments. Dragging in the middle area (where the number is) works the same as an ordinary slider; dragging to the right increases the value and dragging to the left decreases the value. Additionally, you can click the right or left arrow to change the value one step at a time. You can also double-click the number itself and type a new number to enter a specific number in the value field.
To change values in normal increments, do one of the following:
- Drag left or right in the value field.
- Click the left arrow to decrease a value, or click the right arrow to increase a value.
If you have a three-button mouse with a scrollwheel, click in the value field and use the scrollwheel on the mouse.
To change values in fine increments, do one of the following:
■ Option-drag in the value field.
- Option-click the left arrow to decrease a value, or Option-click the right arrow to increase a value.
■ If you have a mouse with a scrollwheel, Option-scroll in the value field.
To change values in coarse increments, do one of the following:
■ Shift-drag in the value field.
- Shift-click the left arrow to decrease a value, or Shift-click the right arrow to increase a value.
If you have a mouse with a scrollwheel, Shift-scroll in the value field.
When a value slider or value field is active (highlighted), press Tab to move to the next field.
Using Timecode Value Sliders
Soundtrack Pro uses timecode value sliders for timecode entry fields. In addition to being able to enter timecode values directly, you are able to scrub the timecode value by dragging.
If you place the pointer over a segment of the timecode, small arrows appear above and below that segment.

You can drag up or to the right to increase the value in that segment (values in segments to the left also increment if your dragging causes the selected segment to roll over). Dragging to the left or down decreases the value. You can hold down the Option key to make the value changes slower or the Shift key to make them faster.
Alternatively, you can click the up and down arrows on each side of the timecode value or press the keyboard's Up and Down Arrow keys to increase or decrease the timecode value.

You can control which segment is affected by the up and down arrows by selecting a segment so that a caret (^) appears below the segment. You can also use the keyboard's Left and Right Arrow keys to select other segments.
Scrubbing Audio
You can scrub a multitrack project in the Timeline or scrub an audio file project in the File Editor. Scrubbing the project lets you hear the audio at the playhead position as you drag the playhead, so you can find a particular sound or event in the audio file.
You can scrub audio using either the Scrub tool or the playhead. For information about scrubbing, see "Scrubbing Audio Files" on page 200.
Scrubbing Video
In projects containing a video file, the video scrubs in the Video tab in sync with the audio as you scrub in the Timeline or the File Editor tab.
As you drag audio clips, markers, envelope points, or other items in the Timeline or the File Editor tab, the video scrubs at the start point of the item being dragged. Dragging multiple items scrubs the video at the start point of the item under the pointer.
You can use the Multipoint Video HUD as a visual tool for precisely positioning sound effects and other audio clips in a video program. For more information, see "Scrubbing and Spotting with the Multipoint Video HUD" on page 322.
Controlling Playback with the Transport Controls
You use the transport controls to control playback of your project. The transport controls let you set the playhead to various points in time, start and stop playback, activate the cycle region, and start a recording session to record your own audio.

- Record: Starts recording at the playhead position on the track you have enabled for recording. If no track is enabled, a new track is created when recording starts.
- Play from Beginning: Starts playback from the beginning of the project. Playback begins immediately, whether the project is playing or is stopped when you click the button.
- Go to Beginning: Sets the playhead to the beginning of the project. If the cycle region is active, and the playhead is after the beginning of the cycle region in time, the playhead is set to the beginning of the cycle region.
- Previous Frame: Moves the playhead backward by one frame.
-
Play: Starts playing back the project from the current playhead position. Clicking the Play button again stops playback at the current playhead position.
-
Next Frame: Moves the playhead forward by one frame.
- Go to End: Sets the playhead to the end of the project. If the cycle region is active, and the playhead is before the end of the cycle region in time, the playhead is set to the end of the cycle region.
- Cycle: If a cycle region is set, clicking the Cycle button toggles whether the cycle region is active or inactive. If no cycle region is set, clicking the Cycle button sets the project to repeat from the beginning when the playhead reaches the end of the project. For information on setting the cycle region, see "Working with the Cycle Region" on page 134.
- MIDI Sync: Synchronizes playback with incoming MIDI Clock and MIDI Timecode (MTC) signals.
Controlling Playback Using Keyboard Shortcuts
There are a number of keyboard shortcuts you can use to control playback of your project. To use keyboard shortcuts, the pointer cannot be in a text field.
- Space bar: Plays back the project from the current playhead position. If the project is playing, pressing the Space bar sets the playhead back to the point from which the project started playing. This is equivalent to clicking the Play button.
- Return: Sets the playhead to the beginning of the project. If the cycle region is active, pressing Return sets the playhead to the beginning of the cycle region. This is equivalent to clicking the Go to Beginning button.
- Shift-Return: Sets the playhead to the beginning of the project, and starts playback if it is stopped. This is equivalent to clicking the Start from Beginning button.
- Option–Right/Left Arrow: Moves the playhead forward/backward by one frame.
For more tips on keyboard shortcuts for playback, see "Using the J, K, and L Keys for Shuttling" on page 130. For a complete list of Soundtrack Pro keyboard shortcuts, see Appendix A, "Soundtrack Pro Keyboard Shortcuts," on page 449.
Locating and Adding Audio Files
You can locate audio files to use in a project using the media tabs, or drag files from the Finder. There are three media tabs for locating audio files: the Browser, Favorites, and Search tabs. You can also store media files for a project in the Bin for easy access in a project. The Bin also features a search function to help you locate an item in any open project.
Supported Audio File Formats
You can add audio files in the following formats: AIFF, WAVE, Broadcast WAVE, Sound Designer II, NeXT, QuickTime (.mov) audio files, and CAF (Apple Core Audio Format). Compressed formats such as MP3 and AAC (except protected AAC) files are also supported, although these must be internally decompressed to a linear PCM format. You can also add the following types of multichannel files: AIFF, WAV, Broadcast WAVE, QuickTime, and Single Folder Multi-mono AIFF and WAV. You can import audio files with any combination of the following sample rates and bit depths:
Sample Rates
- Any sample rate from 8 kHz to 192 kHz
Bit Depths
- 8 bit
• 16 bit
• 24 bit
• 32 bit (both integer and floating point)
Note: Files with lower bit depths or sample rates do not have the same playback quality as formats with higher bit depths or sample rates.
Supported Video File Formats
Soundtrack Pro supports standard QuickTime-compatible file formats. You can import a QuickTime movie (.mov) file into a Soundtrack Pro project, and you can import an MPEG-2 (.m2v) file if you have installed the QuickTime MPEG-2 Playback Component. Video files using NTSC, PAL, HD, and other formats supported by QuickTime can be imported into Soundtrack Pro. Imported video files can be up to four hours in length. For more information about importing video files, see Chapter 10, "Working with Video in Soundtrack Pro," on page 315.
Looping and Non-Looping Files
Soundtrack Pro supports two types of audio files: looping and non-looping files. Most audio files are non-looping files unless they contain tags for tempo, key, and other information.
Many of the Apple Loops that come with Soundtrack Pro, as well as other tagged audio files, can be looping files. Looping files may contain music, rhythmic sounds, or other repeating patterns. You can resize a looping file to fill any amount of time. Looping files adjust to the project tempo and key, letting you use loops recorded in different keys and at different tempos in the same project.
Non-looping files do not adjust to the project tempo and key. You can shorten or lengthen a non-looping file, but lengthening it beyond the size of the original file adds only silence to the lengthened part. You can search for non-looping files in the Search tab using the Search text field.
Both looping and non-looping files can contain tags with information about the file, including mood, genre, and musical instrument. Soundtrack Pro recognizes tags in audio files intended for use with loop-based music applications. You can open an audio file in Apple Loops Utility and add tags, and can convert a looping file to a non-looping file, or convert a non-looping file to a looping file. For information about tagging audio files using Apple Loops Utility, see the Apple Loops Utility User Manual.
Using the Browser to Locate Files
The Browser tab shows the hard disks and other storage media connected to your computer, and lets you browse through the file hierarchy to find audio files located on disk.
To locate audio files using the Browser:
■ Double-click a volume or folder in the Browser to view its contents.

You can move back through the previous locations in the Browser using the Forward and Back buttons, or through the levels of the file hierarchy using the Path pop-up menu.
Using Favorites to Locate Files
Favorites let you store frequently used file locations, so that you can access them directly. You can add and remove Favorites from the Media pop-up menu at the lower-right corner of the Favorites tab.
To locate audio files in Favorites:
■ Double-click the disk or folder you want to open.

You can move back through the previous locations in the Favorites tab using the Forward and Back buttons, or through the levels of the file hierarchy using the Path pop-up menu.
Using Search to Locate Files
Using Search, you can search for media files to add to your project. Search has two views: Column view and Button view. You choose which view to display by clicking the Columns View or Button View button in the upper-left area of the window. In both views, the files matching your search criteria appear in the Search Results area, along with columns displaying additional information for tagged files. You can sort these columns by clicking the heading on top of each column. You can also perform text searches in both views, and refine your searches.
If you use Apple Loops or other tagged audio files in a project, you can search based on a variety of criteria, including musical instrument, genre, time signature, mood descriptor, and scale type. You can also search using specific keywords.
To search for items:
- Click the Search tab.
The Search tab becomes active.
Searching for Files in Column View
In Column view, the upper area of the Search tab displays two columns: Keywords shows the categories of files that meet the search criteria, and Matches shows the total number of matching files and any subcategories containing matching files, with the number of matching files in each.
Clicking a keyword displays the files matching that keyword in the Search Results area. You can refine your search results by narrowing the criteria using the subcategories in the Matches column.
To search for files in Column view:
1 Choose the type of keywords to display in the Keywords list from the Keywords pop-up menu.
You can use the Time Signature and Scale Type pop-up menus to restrict matches by those categories.
2 Select a keyword in the Keywords list to display matching files in the Search Results area.

The hints, tempo, key, and number of beats for each matching file are also displayed.
You can also perform text searches, which can be especially helpful for non-tagged files. When you type text in the Search Text field, any files with the text in their file path or filename appear in the Search Results list. The number of files appears in the Matches column under "No Category."
To search using the Search Text field:
■ Enter text in the Search Text field.
As you type, files matching the characters you type appear in the Search Results field.
Refining a Search in Column View
There are several ways you can refine your searches in Column view. You can select items in the Matches column to add the matching files for each category to the search results, and you can enter text in the Search Text field to narrow your search to files that include the text in their file path. Selecting multiple keywords in the Keywords list narrows the search results to files matching all the selected keywords.
To refine your search using the Matches column:
- Click to select a match category, or Command-click to select multiple match categories.

To refine your search by selecting multiple keywords:
Shift-click to select adjacent keywords, or Command-click to select nonadjacent keywords.
Searching for Files in Button View
In Button view, the upper area of the Search tab displays a grid of buttons, each of which is labeled with a keyword. The keywords displayed are determined by the Keywords pop-up menu; the choices are Music Beds, Instruments, Genre, Descriptors, and Custom. The keywords for each choice are fixed, and appear whether or not matching files for the keyword exist. Keywords for which no matching files exist are dimmed.
To search for files in Button view:
1 Choose the type of keywords to display on the keyword buttons from the Keywords pop-up menu.
2 You can optionally use the File Type, Time Signature, and Scale Type pop-up menus to restrict matches by those categories.
3 Click a keyword button to display matching files in the Search Results area.
Click a button to display the matching files in the Search Results area.
Search Text field
You can also perform text searches, which can be especially helpful for non-tagged files. When you type text in the Search Text field, any files with the text in their file path or filename appear in the Search Results list.
To search by file path or filename:
■ Enter text in the Search Text field.
As you type, files matching the characters you type appear in the Search Results field.
Refining a Search in Button View
There are several ways you can refine your searches in Button view. You can select multiple keyword buttons to narrow your search results to files matching all the selected keywords, and you can enter text in the Search Text field to narrow your search to files that include the text in their file path.
To refine your search using multiple keywords:
- Click multiple keyword buttons.

Adding Custom Keywords
You can add custom keywords, which appear in the Keywords list in Column view and on the keyword buttons in Button view. Custom keywords can be added only in Button view.
To add a custom keyword:
1 Choose Custom from the Keyword Type pop-up menu.
2 Control-click one of the buttons in the grid, then choose a custom keyword from the shortcut menu.

Adding a Directory to the Search Database
Search looks through all indexed directories (volumes and folders) for files that match your search criteria. Before a file can appear in Search, you must add the directory containing the file to the Search database and index the directory.
Note: The Search database does not update automatically. If you add files to an indexed directory, you must index the directory again before the files will appear in the Search tab.
To add a directory to the Search database:
1 Click the Setup button at the top of the Search tab.

2 In the Setup dialog, click the Add Directory button.

3 In the file dialog, navigate to the directory you want to add, then click Open.
The directory appears in the list in the Setup dialog. You can resize the Search dialog if you need to see more items in the list.
4 Select the directory in the list, then click the Index Now button.
Note: Indexing a large collection of files may take several minutes. The bottom of the Add Directory dialog displays the progress of the directory being indexed. If you need to interrupt the indexing process, click the Stop Indexing button. You can re-index the directory later. You can deselect items you do not wish to re-index.
5 When Soundtrack Pro is finished indexing the directory, click Done to return to the Search tab.
Removing a Directory from the Search Database
If you move or change your collection of audio files, you can remove a folder from the Search database. Removing unneeded folders from the database can shorten search times and eliminate extraneous results.
To remove a folder from the Search database:
1 Click the Setup button at the top of the Search tab.
2 In the Setup dialog, select the directory you want to remove, then click the Remove Directory button.
Click the Remove Directory button to remove the selected directory.

3 Click Done to return to the Search tab.
Once you have added the folders containing your audio files to the Search database and indexed them, you can use Search to find the files. In both Column view and Button view, the audio files that match the search criteria appear in the Search Results area in alphabetical order. You can preview files in the File list and drag them to the Timeline. You can also add a folder to your Favorites from the Search tab.
Using the Bin
The Bin is a hierarchical list of all of the items in each open project. You can also add files to the Bin for easy access at a later time. Files appear in the Bin alphabetically by project and hierarchically within each project.

The Bin Hierarchy
The items in the Bin are organized by project. In this hierarchy, projects contain media files, and media files contain clips.
| Objects Description Contents | |
| Projects Projects make up the top levelof the hierarchy. You can view multiple projects at once. | Media filesProject markers |
| Media files Audio and video source files Clips | Markers (File Editor only) |
| Clips If the source media file is usedten different times in theTimeline, it will have ten clips nested in the Bin. | None |
To add a file to the Bin, do one of the following:
- Drag the file from the Finder to the Bin.
- Drag the file from the Browser, Favorites, or Search tab to the Bin.
Viewing and Editing Projects in the Bin
The Bin can display the following categories of information: audio clip information (looping, transposition, and so on), file information (timecode, sample rate, file size, and so on), Timeline information (duration, position, and so on), metadata tags (author, copyright, and so on) and music information (beats, key, and so on).
To control the display of information categories in the Bin:
- Choose a category from the Columns pop-up menu.
Searching Bin Information
You can search across all information displayed in the Bin. Matching text and numbers from any of the fields causes that item to appear in the list.
To search information categories in the Bin:
1 Click the Bin's Search field.
2 Enter the search text.
3 Press Return.
Using the Shortcut Menu and the Media Pop-Up Menu in the Bin
You can use the shortcut menu and the Media pop-up menu in the Bin for a variety of tasks. One of the most common tasks involves removing unused items from a project. This simple step will keep the media associated with a project to a minimum. You can also rename clips, markers, and podcast region markers that you've selected in the Bin.
To use the shortcut menu or the Media pop-up menu to affect an entire project:
1 Select a project file in the Bin.
2 Do one of the following:
- Choose Removed Unused from the Media pop-up menu.
- Control-click the item, then choose Removed Unused from the shortcut menu.
To use the shortcut menu or the Media pop-up menu to affect an individual item in the Bin:
1 Select an item in the Bin.
2 Choose an option from the Media pop-up menu. You can also Control-click the item, then choose an option from the shortcut menu.
• Show in Timeline: Selects the corresponding clip in the Timeline.
- Spot to Timeline: Spots the clip to the Timeline with the Spot to Timecode dialog.
- Spot to Playhead: Spots the clip to the playhead position in the Timeline.
- Open in Editor: Opens the file in the File Editor project view.
- Reconnect: Allows you to locate and reconnect any offline files.
- Rename: Selects the item in the Bin so that you can enter a new name.
- Reveal in Browser: Selects the item in the Browser tab.
- Show in Finder: Selects the item in the Finder.
- Replace Selected Clips with: Replaces the clip with a clip of your choosing.
Bin Column Information
The following list describes the contents of the various Bin columns. Many Bin columns change their display style to match the settings of the dominant ruler (such as drop frame, non-drop frame, and so on). Much of this information can also be seen in the Details tab.
- Name: Displays the icon and name for the various objects (projects, files, clips, markers, and podcast marker regions).
- Position: Displays the position of the object, in the dominant ruler setting. Displays values for projects, clips, markers, and podcasts. Some items do not have a position. Others do not always display a position. (For example, a multitrack document only shows the position when the Initial Timecode value in the Project tab has been changed from the default 0 value.)
- Duration: Displays the duration information for projects, files, clips, markers, and podcasts.
- Track name: Lists the current track name for audio clips.
- Offset: Shows the slip offset value: the difference between the start of the original file and the start of the clip (using the dominant ruler setting). Clips that start from the beginning show 0; others have a positive time value.
- Sample rate: Shows the native sample rate of the item, in Hz (projects, files, and clips).
- Timecode: This is the embedded timecode of the file, if present (in the dominant ruler setting). Displays the initial timecode for items (projects, files, clips).
- Channels: The number of channels in the item (files, clips)
• Takes: The number of takes in the item (files, clips) - File size: The disk size of the item (projects, files)
- Path: The path to the item on disk (projects, files)
- Annotation: Displays annotation metadata (projects, files, clips).
• Author: Displays author metadata (projects, files, clips).
• Copyright: Displays copyright metadata (projects, files, clips). - Tempo: The tempo of the item, in beats per minute (projects, files, clips)
- Time Signature: Displays time signature data (projects, files, clips).
- Key: Displays the musical key of the item, being the letter (A, A#, B, and so on), or "None" (projects, files, clips).
- Scale: Displays musical scale type (projects, files, clips).
- Looping: Indicates a looping file (Yes/No) (files, clips).
- Beats: Displays the number of beats in the file (projects, files, clips).
- Instrument: Displays instrument type, from Apple Loop tagged information (files, clips).
- Genre: Displays genre name, from Apple Loop tagged information (files, clips).
- Hint Quality: Displays the quantitative display of the amount of information saved in the file—keywords, beat information, and transients (files, clips).
Previewing Audio Files
You can preview files in the Bin or any of the media tabs. When you preview files, Soundtrack Pro matches the sample rate of the file to the project sample rate. When you preview looping files, Soundtrack Pro matches their tempo and key to the project tempo and key.
To preview an audio file:
■ Select the file in the Bin or any of the media tabs.
The selected file starts playing. If the project is playing when you preview a file, Soundtrack Pro starts playback of the previewed file on the downbeat of the next measure of the project. You can turn preview playback on and off by holding down Option and pressing the Space bar.

Audio files tagged as loops play back repeatedly when previewed. You can control the playback of the file being previewed using the preview controls. You can only preview one audio file at a time.
Using the Preview Controls
The preview area at the bottom of the Bin and the media tabs contains controls you can use when previewing audio files.

- Play button: Starts playback of the preview file. If the file is playing, stops playback.
• Volume slider: Sets the playback volume of the preview file. - Preview on selection button: When activated, triggers immediate playback of the selected clip.
• Media pop-up menu: Choose whether to add the file to Favorites, open it in the File Editor or Apple Loops Utility, or reveal it in the Finder.
To preview an audio file with a project:
1 Click the Play button in the transport controls to play the project.
2 When the project reaches the point in time where you want to hear the preview file, select the file in the Search tab.
To preview a file without the project (solo):
1 If the project is playing, click the Stop button in the transport controls to stop playback of the project.
2 Select the file in the Search tab to preview the file.
You can also preview a video file using the preview controls. For information about previewing a video file, see "Playing the Video" on page 317.
Viewing File and Clip Information
You can view information in the Details tab about audio and video files and clips in the Bin, the media tabs, and the Timeline. When you select a file or clip in the Bin, the media tabs, or the Timeline, the Details tab displays the file path and other information about the item.

For a complete description of the items listed in the Details tab, see "Details Tab" on page 57 and "Viewing and Editing Clip and Track Properties" on page 114.
Note: The information that is displayed depends on whether or not the file is tagged. Untagged files may not display information for all categories.
Using Undo and Redo
As you edit clips and perform other operations in both multitrack and audio file projects, you might need to use the Undo and Redo commands. For example, if you don't like the last change you've made to a project, it can usually be undone. Then, if you decide you prefer to keep the change you just undid, you can redo the command immediately after using Undo.
You can also use the Undo and Redo commands as a quick way of trying out changes to your project. You can make changes to any aspect of the project, then use Undo to step back through changes you don't like to the project's previous state. If you change your mind after undoing a change or set of changes, you can always use Redo to recover the changes. At any point, you can save a new version of the project using the File > Save As command.
You can use the Undo command repeatedly to undo every change made since the project was last saved.
To undo the last change:
- Choose Edit > Undo [item] (or press Command-Z).
The [item] in the menu changes to show the last command or operation.
You can use the Redo command repeatedly to redo every undone change since the project was last saved.
To redo the last change:
- Choose Edit > Redo [item] (or press Command-Shift-Z).
The [item] in the menu changes to show the last command or operation.
Using Snapping
When you move and resize clips in the Timeline, or select part of an audio file in the File Editor, you usually want them to start and end at a specific point in time. To synchronize clips with a video, you may want to position them in line with a specific frame. In a music-based project, you may want to align clips with measures and beats. Soundtrack Pro includes a snapping feature that causes clips, the playhead, and other items in the Timeline and File Editor to "snap" to the nearest Snap To position.
Snapping applies to the following operations:
- Moving audio clips
- Resizing audio clips
- Setting the playhead
- Setting the cycle region
- Inserting markers
- Moving markers
- Selecting Timeslices
- Adding envelope points
- Moving envelope points
- Moving crossfade edges
- Dragging audio clips to the Timeline
You can use snapping to ensure that audio clips are synchronized to a measure or beat, that they begin playing back at a precise point in time, and that they are precisely aligned with other clips in the Timeline.
When you turn on snapping, the item you are moving snaps to the nearest Snap To position in the Timeline. The available Snap To values depend on the time format of the project. For projects set to Time-based format, the available Snap To values are:
- Ruler ticks
- Seconds
- Frames
- Clips on Adjacent Tracks
- Markers
For projects set to Beats-based format, the available Snap To values are:
- Ruler ticks
• 1/4 notes
• 1/8 notes
• 1/16 notes
• 1/32 notes
• 1/64 notes - Markers
• Clips on Adjacent Tracks
To turn snapping on:
- Choose View > Snap (or press G).
A checkmark next to the menu item indicates that snapping is turned on. Choose View > Snap again to turn snapping off.
To set the Snap To value:
- Choose View > Snap To, then choose a value from the submenu.
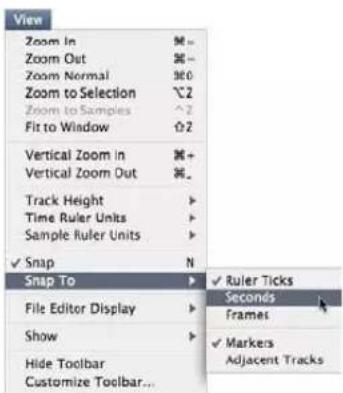
You can temporarily reverse the current snapping state while you work in the Timeline.
When snapping is turned on and Markers is chosen in the Snap To submenu, clips in the Timeline snap to the playhead as well as to markers.
To temporarily reverse the snapping state:
- Select the item in the Timeline, then hold down the Command key as you drag the item. If snapping is turned on, Command-dragging lets you move the item without having it snap to the nearest Snap To position. If snapping is turned off, the item snaps to the nearest Snap To position. When you release the Command key, items moved in the Timeline follow the normal snapping state.
Reconnecting Media Files
Because Soundtrack Pro multitrack projects contain references to media files, and not the files themselves, a multitrack project cannot play back if the media files it uses are erased or moved. When you open a multitrack project in Soundtrack Pro, the application checks to see if the media files it uses exist in the same location as they did when the project was last opened. If the media files are not in the expected location, Soundtrack Pro displays a Can't Find File dialog with three choices:
- Skip All: Opens the project without reconnecting any missing files.
- Skip File: Opens the project without reconnecting the missing file.
- Locate: Presents a dialog that lets you locate the missing file and reconnect it to the project.
If you choose to open the project without reconnecting its files, you can reconnect individual audio files from the Timeline or the Bin tab and reconnect a video file in the video track in the Timeline.
To reconnect an audio file:
1 Do one of the following:
- Select the clip in the Timeline, then choose Clip > Reconnect [filename].
- Control-click the clip in the Timeline, then choose Reconnect [filename] from the shortcut menu.
- Select the clip in the Bin tab, then choose Reconnect [filename] from the Media pop-up menu.
- Control-click the audio file in the Bin tab, then choose Reconnect [filename] from the shortcut menu.
2 In the dialog that appears, locate the audio file you want to reconnect.
3 Click Open to reconnect the file.
To reconnect a video file:
1 Control-click the video clip in the video track, then choose Reconnect Media Files from the shortcut menu.
2 In the dialog that appears, locate the video file.
3 Click Open to reconnect the file.
Setting Soundtrack Pro Preferences
You set preferences for various aspects of both the appearance and operation of Soundtrack Pro in the Preferences window. Some preferences apply to the current project, and some apply to new projects you create. You may want to specify some preferences before you begin working in Soundtrack Pro.
To open the Preferences window:
- Choose Soundtrack Pro > Preferences.
General Preferences
The General preferences include program startup behavior, Timeline defaults, and options for alerts, saving, fades, and handles.
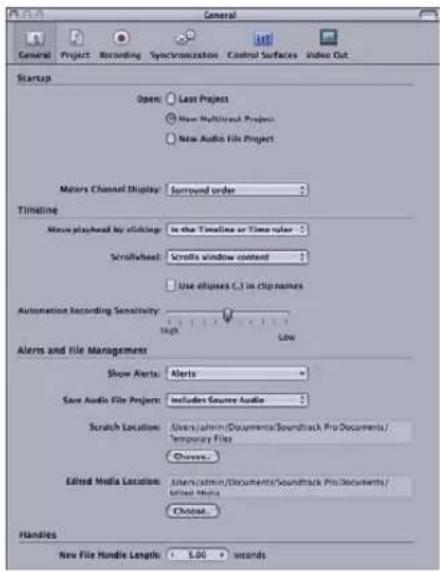
Startup
These preferences let you set the startup behavior when you open Soundtrack Pro.
- Last Project: Reopens the last project on startup.
- New Multitrack Project: Creates a new, blank multitrack project on startup. This is the default behavior.
- New Audio File Project: Creates a new, blank audio file project on startup.
- Meters Channel Display pop-up menu: Choose whether meters display labeled channels in surround order (Ls, L, C, R, Rs, LFE) or output order (1, 2, 3, 4, 5, 6).
Timeline
- Move playhead by clicking pop-up menu: Choose whether you can move the playhead by clicking in both the Timeline and the Time ruler or only in the Time ruler.
- Scrollwheel pop-up menu: Choose whether an attached mouse with a scrollwheel scrolls the Timeline or zooms in or out at the playhead position.
- Use ellipses(...) in clip names checkbox: When selected, clips in the Timeline with long names are center-truncated with an ellipsis. "Use ellipses (...) in clip names" is deselected by default.
Note: Selecting "Use ellipses (...) in clip names" can impact the speed at which the screen is redrawn during playback.
- Automation Recording Sensitivity slider: Drag to set the level of sensitivity with which onscreen and control surface movements are recorded. Setting the slider to High results in all movements being recorded.
Alerts and File Management
- Show Alerts pop-up menu: Choose whether to show the alerts when various conditions occur (such as disk overload, unsupported sample rates, and so on).
- Save Audio File Project pop-up menu: Choose whether saved audio file projects include the source audio file in the project or reference it. Note that if you move or delete the source audio file from a project that references source audio, the project cannot play.
- Scratch Location button and display: Click this button, then browse to the location of the disk or folder you want to use as the location for storing temporary files. The current location is shown in the Scratch Location display.
- Edited Media Location button and display: Click this button, then browse to the location of the disk or folder you want to use as the location for edited media such as audio file projects. The current location is shown in the Edited Media Location display.
- New File Handle Length value slider: Enter a handle length (in seconds) for new files. For more information, see "Modifying a Clip Without Affecting Its Source Media" on page 197.
Project Preferences
These preferences let you set project properties and other default settings for new projects you create.

- Tracks pop-up menu: Sets the default number of tracks for a new multitrack project.
- Track Height pop-up menu: Sets the default track height for new multitrack projects. The choices are Mini, Small, Medium, and Large.
- Snapping: Sets the default snapping mode for a new project.
- Move Envelope Points with Clips checkbox: Sets the default envelope selection mode.
- Overlap Mode pop-up menu: Sets whether overlapped clips are crossfaded or truncated for new multitrack projects.
- Default Fade Type pop-up menu: Sets default fade type.
- Audio Pulldown pop-up menu: Sets default audio playback compensation.
• Video Pulldown pop-up menu: Sets default video playback compensation. - Sample Rate pop-up menu: Sets the default sample rate for new projects. The choices range from 32 kHz to 192 kHz.
- Starting Timecode field: You can set the starting timecode for new projects to a value other than 00:00:00;00 by entering a timecode value in the Starting Timecode field. You can only enter positive values in the field. When you open the project, the Time ruler and time display start from the starting timecode value.
- Timescale pop-up menu: Choose whether the overall project uses Time-based or Beats-based time format.
-
Export Bit Depth pop-up menu: Sets the export bit depth for the current project and new projects. The choices are 16-bit (CD-quality audio) and 24-bit.
• Video Frames per Second pop-up menu: Choose which video frame rate to use for new projects. -
Tempo value slider: Sets the default tempo for new projects in beats per minute (bpm). The range is 60 to 200 bpm.
- Key pop-up menu: Sets the default key for new projects. The range is any key in the chromatic scale from A to G#, or None.
- Time Signature pop-up menu: Sets the default time signature for new projects. The choices are 3/4, 4/4, 5/4, 6/8, and 7/8.
Recording Preferences
These preferences let you specify settings for recording audio.

- Input pop-up menu: Displays the available devices for audio input. Choose an input device from the pop-up menu.
Note: For more information about setting inputs and outputs, see "Setting the Audio Input and Output" on page 22. - Channels: Use these buttons to confirm or change default input signal routing settings.
- Monitor pop-up menu: Displays the available devices for monitoring audio output. Choose an output device from the pop-up menu.
- Latency Compensation slider: Sets the amount of latency compensation in milliseconds. If recorded audio is late, drag the slider right. If the recorded audio is early, drag the slider left.
For information on eliminating latency, see "Eliminating Recording Latency" on page 516. - Recordings Location display: Displays the default location to which recording sessions are saved. You can set the save location by clicking the Choose button and navigating to a new location.
To select an audio interface as the output device:
- Choose Apple menu > System Preferences, click Sound, then click the Output button. Select the audio interface in the list that appears.
Synchronization Preferences
These preferences let you specify synchronization settings.

Input
- Sync To MIDI Clock checkbox: Sets Soundtrack Pro to receive MIDI Clock signals from a MIDI application or external device.
- Sync To MIDI Time Code checkbox: Sets Soundtrack Pro to receive MIDI Time Code (MTC) signals from a MIDI application or external device.
Output
- MIDI Clock pop-up menu: Choose the device to send MIDI Clock to, or choose None.
- MIDI Clock Virtual MIDI Device checkbox: Sets Soundtrack Pro to send MIDI Clock signals to MIDI applications as "Soundtrack Sync Source."
- MIDI Time Code pop-up menu: Choose a device to send MTC signals to, or choose None.
- MIDI Time Code Virtual MIDI Device checkbox: Sets Soundtrack Pro to send MTC signals to MIDI applications as "Soundtrack Sync Source."
- Frame Rate pop-up menu: Sets the frame rate for outgoing MTC signals. (Note that Soundtrack Pro automatically detects the frame rate for incoming MTC signals.)
Time Code Offset
- Bar 1 At field: Sets the offset of Measure 1 of your Soundtrack Pro project in SMPTE format. The offset affects both incoming and outgoing MTC signals. This should be set to the same value in all applications and devices.
Control Surfaces Preferences
These preferences let you specify settings for communicating with attached control surfaces.

- Control Surfaces field: Shows the control surfaces connected to your computer. Channels and banks are assigned to control surfaces in the order they appear in the field, starting from the left.
- Add and Delete buttons: Add or delete the selected control surface so that Soundtrack Pro no longer connects to it.
- Previous and Next buttons: Change the order of the selected control surface in the Control Surfaces field.
- Summary information: Displays information about the selected control surface including type, input port, and output port.
- Control Surface Buttons button: Click to show the Control Surface Mapping window, where you can assign control surface buttons and other controls to specific commands and operations.
For information about connecting and using control surfaces, see Chapter 15, "Using Control Surfaces with Soundtrack Pro," on page 391.
Video Out Preferences
These preferences let you specify settings for video output from Soundtrack Pro.

• Video Output Device pop-up menu: Choose a video output device, or choose None.
- Use Quarter-size Frames checkbox: Select to send video to the output device as quarter-size frames. Quarter-size frames require less data throughput and can be sent more efficiently than full-size frames.
Working with Multitrack Projects
4
You can arrange and mix audio clips in a multitrack project. Multitrack projects include tracks, busses, and submixes you can use to create sophisticated signal routing and mixes.
Creating and Opening Multitrack Projects
When you open Soundtrack Pro, a new, blank project appears. You can change the default startup behavior in the Preferences window. For information about setting preferences, see "Setting Soundtrack Pro Preferences" on page 97.
To create a new multitrack project:
- Choose File > New > Multitrack Project (or press Command-N).
A new, untitled project appears. You can name the project when you save it. For information on saving projects, see "Saving Multitrack Projects" on page 111.
To open an existing project:
1 Choose File > Open (or press Command-O).
2 Optionally, to view only multitrack projects in the dialog, choose Multitrack Document from the File Type pop-up menu.
3 Locate and select the project, then click Open.
You can also open a recently open project by choosing it from the File > Open Recent menu, or open a project by dragging it onto the Soundtrack Pro icon in the Dock.
You can have multiple projects open in Soundtrack Pro and cut and paste between them, but you can only play one project at a time. You can open projects created with earlier versions of Soundtrack and Soundtrack Pro, but you can only save them as multitrack projects (with the extension .stmp).
Creating a Multitrack Project from Final Cut Pro Clips or Sequences
A convenient and powerful audio post-production workflow for any film or video project is sending a Final Cut Pro sequence or clip to a Soundtrack Pro multitrack project. For example, when the picture edit in a Final Cut Pro sequence is near completion, you simply choose File > Send To > Soundtrack Pro Multitrack Project. Soundtrack Pro opens a new multitrack project with the tracks, clips, and edits from the Final Cut Pro sequence, including the synchronized video.
For information on sending Final Cut Pro sequences and clips to Soundtrack Pro, see "Using Soundtrack Pro with Final Cut Pro" on page 421.
Closing Multitrack Projects
At any time while you are working, you can close a multitrack project.
To close a project:
- Select the project's tab in the project pane, then choose File > Close Project (or press Command-W).
Setting Project Properties
Each project has a set of project properties that include sample rate, overlap mode, selection mode, timecode, file management, and music-related properties. You can change the project properties for a particular project using the multitrack project controls at the top of the project pane or the Project tab.

Each project property has a default setting. You can also change the default project properties for new projects in the Project pane of the Preferences window. For information on setting preferences, see "Setting Soundtrack Pro Preferences" on page 97.
Automation Mode
You can automatically record movements you make to faders, sliders, and other onscreen controls using the pointer. You record automation in Soundtrack Pro by selecting either Touch or Latch automation mode in the project controls, then changing volume, pan, and effects settings as the project plays.
To set the automation mode:
- Choose Read, Latch, or Touch from the Automation Mode pop-up menu.
Automation Mode pop-up menu

For more information about the automation mode, see "Recording Automation Data" on page 365.
Sample Rate
The project sample rate determines the number of samples per second Soundtrack Pro uses for audio playback and export. When you add audio files to your project, their sample rate is matched (upsampled or downsampled) on the fly to the project sample rate with no change to their pitch or file duration. The available sample rates are 32 kHz, 44.1 kHz, 48 kHz, 88.2 kHz, 96 kHz, 176.4 kHz, and 192 kHz. The default is 48 kHz, which is the standard for digital video and DVD projects.
Note: When creating a soundtrack for a video, be sure you save and export your project at the same sample rate the final video project will use.
To set the sample rate:
- Choose the sample rate from the Sample Rate pop-up menu. The choices are:
• 32.0
• 44.1
• 48.0
• 88.2
• 96.0
• 176.4
• 192.0
Note: If you open your project on a computer that cannot support the project sample rate, the project is resampled to the nearest rate the hardware supports for playback. When you export your project, it is exported at the project sample rate, regardless of hardware limitations. For more information on hardware sample rates, see Chapter 1, "Setting Up Your System," on page 21.
Overlap Mode
The project overlap mode determines what happens when you move an audio clip so that it partially or completely overlaps another clip in the Timeline. There are two overlap modes: crossfade mode and truncate mode.
In crossfade mode, when you drag an audio clip so that it partially overlaps another audio clip in a track in the Timeline, a crossfade is created for the overlapped part of the two audio files. You can adjust the boundaries of the crossfade in the Timeline. In truncate mode, when you drag an audio clip so that it partially overlaps another audio clip in a track in the Timeline, the overlapped part of the clip is truncated.
To set the project overlap mode:
- Click the Crossfade Mode button to set the project to crossfade mode, or click the Truncate Mode button to set the project to truncate mode.
Envelope Selection Mode
The project selection envelope mode determines whether, when you select or move a clip in the Timeline, the associated envelope points are also selected or moved with the clip. You can set Soundtrack Pro to either the Select Only Clips mode or the Select Envelope Points With Clips mode.

To select and move clips and envelope points together:
- Click the Select Envelope Points With Clips button at the top of the Timeline.
To select and move clips and envelope points independently of each other:
- Click the Select Only Clips button at the top of the Timeline.
For more information about the envelope selection mode, see "Selecting and Moving Envelope Points with Clips" on page 359.
Project Time Format
Each multitrack project has a project time format, which can be either Time (seconds)-based or Beats-based. Setting the time format controls the appearance of the Time display, Time ruler, Timeline gridlines, and available Snap To values. For projects set to Time-based format, time is displayed using the Time Ruler units chosen in the View menu. For projects set to Beats-based format, the time is displayed in measures, beats, and beat divisions. The default format is Time-based.
Setting the format to Time-based lets you align clips and other items in the Timeline with specific points in time, for example, specific frames in a video file. Setting the format to Beats-based lets you align items in the Timeline with measures, beats, and other musical units of time, regardless of tempo. You can switch between Time-based and Beats-based formats while working on a project. You can also set individual tracks to use a different time format than the project's time format. For information on setting a track's time format, see "Changing Track Time Format" on page 146.
Setting the Project Ruler Units
You can switch the ruler units for a project in the Project tab and define the details for the ruler units in the View menu.
To choose the ruler units for a project:
In the Project tab, use the Ruler Units pop-up menu to choose either Seconds or Beats.
When you import a video file into a Soundtrack Pro project, the Time display and Time ruler adjust to show the timecode format of the video. The Time display and Time ruler can display time in seconds, frames, drop frames, or non-drop frames. You can choose the format for timecode display, and you can set the video frame rate for projects not containing a video file. You can also set the default frame rate for new projects in the Project Preferences pane.
To specify the details of the units shown in the Time display and Time ruler:
- Choose View > Time Ruler Units, then choose one of the following time formats from the submenu:
• HH:MM:SS
- Seconds
• Samples (Audio file projects only)
- Frames
- Drop frame (timecode)
• Non-drop frame (timecode)
Additionally, you can specify the following settings for your project if it does not contain video:
- Set Video Frame Rate: Choose from the following: 23.98, 24, 25, 29.97, 30, 59.94, 60.
- Set Starting Timecode: Enter the timecode for the first frame of your project.
Time Ruler Units and Grid Lines
The number of grid lines drawn will depend on the dominant ruler type and zoom level. For example, when the dominant ruler is Seconds and the Timeline is zoomed out, grid lines appear only on the hour marks. As you zoom in, grid lines are drawn on the minute mark. Zoom in more, and grid lines are drawn on the second marks, and so on.
Setting the Project Length
By default, the length of a project depends on the media in the project. The project length is set to the end of the last clip in the project. If the project uses a time-based effect, and the effect extends past the end of the last clip, the project length extends to include the effect's "tail." Adding a clip to the end of the project, or adding an effect that produces a "tail," extends the project length to include the new clip or the effect's tail. You can optionally set the project to a definite length.
To set the project length:
In the Timeline, place the playhead at the point where you want the project to end, then choose Mark > Set End of Project.

You can move the end-of-project marker to change the length of the project, or delete it if you decide you no longer want it in the project.
To delete the end-of-project marker:
- Select the marker in the Timeline, then choose Edit > Delete (or press the Delete key.)
Saving Multitrack Projects
To save your project:
1 Choose File > Save.
2 In the dialog that appears, enter a name for the project in the Save As field.
3 Navigate to the folder in which you want to save the project.
4 Select any of the following checkboxes:
- Save Compacted: Saves the project without display data, which can save disk space, but the project may take longer to open.
- Collect Audio Files: Saves a copy of every audio file the project uses to the selected location. This makes it easy to move projects between computers, and ensures that all needed audio files are available for playback. When you select this checkbox, the setting is retained for any subsequent saves. In other words, the File > Save menu option changes to File > Save (Collected), and any new media you add to the project is collected the next time you save the project.
Note: To play a project on another computer, you must install the audio files the project uses on that computer, or on a disk it can access. If you remove the audio files used in a project so that your computer cannot access them, missing files will not play.
- Collect Unused Audio Files: Includes media files you have deleted from the project but that remain in the Bin. If you do not want to include these media files, deselect this checkbox.
Note: Optionally, you can open the Bin, select the audio files you want to remove, then choose Remove Unused from the Media pop-up menu.
- Collect Video File: Saves the project's video file in the same folder as the project.
- Save Edited Media Locally: Saves the project's edited audio files in the same folder as the project (in a subfolder named Media). If this checkbox is not selected, edited media is saved to the edited media location defined in Soundtrack Pro preferences.
Note: Multitrack projects are saved as documents with the extension .stmp.
5 You can optionally click the New Folder button to create a new folder for the collected project.
6 Click Save to save the project.
If the folder already contains any of the media files, an alert appears, asking if you want to replace the existing files.
Note: Since video files can be very large, if you save a multitrack project collected (by selecting the Collect Audio Files or Collect Video File checkbox in the Save As dialog), it may take several minutes and may require a large amount of disk space to save the project.
Setting Default Locations for Saving Media Files
During the course of a large sound editing project, you may generate numerous project files, clips, render files, and audio recordings. Soundtrack Pro helps you manage all this media by saving the files to default scratch locations. You can change the scratch locations using Soundtrack Pro preferences.
Edited Media Location
When Soundtrack Pro creates and saves audio file projects, the default location for those files is: /Users/username/Documents/Soundtrack Pro Documents/Edited Media/Project Name/.
To change the edited media location, do one of the following:
- Choose Soundtrack Pro > Preferences > General, then click Choose to enter a new location.
In the Project tab, choose one of the following in the Create Media section:
• In Edited Media (from Preferences)
• In Media folder with project
Scratch Location
When Soundtrack Pro creates temporary render files, the default location for those files is: /Users/username/Documents/Soundtrack Pro Documents/Temporary Files/.
To change the scratch location:
- Choose Soundtrack Pro > Preferences > General, then click Choose to enter a new location.
Recordings Location
When you record audio with Soundtrack Pro, the default location for those audio recordings is:/Users/username/Documents/Soundtrack Pro Documents/Recordings/.
To change the recordings location:
- Choose Soundtrack Pro > Preferences > Recording, then click Choose to enter a new location.
Collecting Media for a Project
When you save a Soundtrack Pro multitrack project, you have the option to collect the associated audio and video files in one folder, alongside the multitrack project. You can make these choices at the time you save a project, or in the Project tab in the Project File Management section.
For more information on these options, see "Saving Multitrack Projects" on page 111.
Adding Files to a Multitrack Project
Once you've located and previewed an audio file you want to add, you drag the file to the Timeline to add it to the project. When you drag an audio file to the Timeline,
Soundtrack Pro creates an audio clip from the audio file and adds the clip to the project. An audio clip does not contain the actual audio data; instead, it contains a reference to the file stored on disk. Editing an audio clip in the Timeline does not change the source audio file.
To add an audio file from the media tabs, do one of the following:
- Drag the file from one of the media tabs to a track in the Timeline.
- Drag the file from the File list to the strip between two existing tracks.
A new track is created and the clip is added to the track.
- Drag the file from the File list to the empty part of the Timeline below the Master bus.
A new track is created and the clip is added to the track.
- Drag a file from the File list to a track or to the part of the Timeline below the existing tracks.

To spot the clip to the playhead, do one of the following:
- Select the clip and choose Clip > Spot to Playhead (or press Command-).
■ Control-click the clip, then choose Spot to Playhead from the shortcut menu.
To spot the clip to the Timeline, do one of the following:
■ Select the clip and choose Clip > Spot to Timeline (or press Command-Shift-).
■ Control-click the clip, then choose Spot to Timeline from the shortcut menu.
For more information, see "Spotting Clips to the Timeline" on page 153.
To add an audio file from the Finder:
- Drag the file from the Finder to the Timeline (to a track, between two existing tracks, or to the area below all existing tracks).
When the Bin tab is active, the Bin shows all of the audio clips in the project. You can drag a clip from the list to the Timeline to add a new clip from the same audio file at a different point in time, or to a different track.
To add an audio file from the Bin tab:
- Drag the file from the Bin tab to the Timeline, either to a track or to the area below the existing tracks.
Note: When you drag an audio file to the Timeline, the file snaps to the nearest Snap To position if snapping is turned on. For information on setting the Snap To value, see "Using Snapping" on page 94.
Viewing and Editing Clip and Track Properties
In Soundtrack Pro, you can easily view and adjust the specific details about individual clips and tracks.
Clip Properties
When you create an audio clip by dragging an audio file to the Timeline, the audio clip has a set of properties. These properties are specific to the clip and can be different for two clips created from the same source audio file.
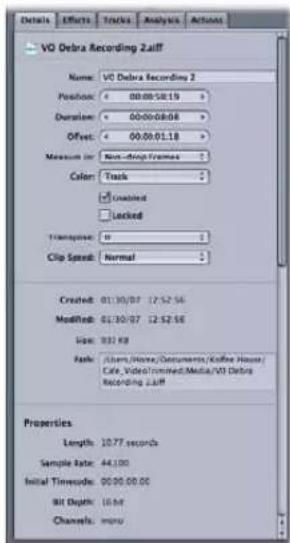
The following properties for the selected clip are displayed and can be edited in the Details tab:
File and Clip Details
• Name: Name of the selected clip.
- Position value slider: Sets the position (start point) of the selected clip.
• Duration value slider: Sets the duration (length) of the selected clip.
- Offset value slider: Sets the offset of the selected clip.
- Measure in pop-up menu: Sets the units shown in the Position, Duration, and Offset value sliders.
• Color pop-up menu: Sets the color of the selected clip.
- Enabled checkbox: Enables or disables the selected clip.
- Locked checkbox: Locks or unlocks the selected clip.
- Transpose pop-up menu: Sets the number of semitones to transpose a looping clip.
- Clip Speed pop-up menu: Sets the playback speed for a looping clip.
- Created: Displays the creation date.
- Modified: Displays the modification date.
- Size: Displays the file size.
- Properties: Displays the following information for the clip or file: duration, sample rate, the timecode for the first frame of the clip or file, bit depth, and channel valence.
- Metadata: Use this section to view the metadata for a file or a clip. Metadata categories include Name, Copyright, Origination Date, Keywords, and so on.

- Music: Use to view music information for a clip or file, primarily music loops in the Search tab. The music information includes tempo, time signature, key, scale type, looping (yes or no), beats, instrument, and loop genre.
Some properties can be changed by editing the clip in the Timeline. For detailed information on editing audio clips, see "Selecting Audio Clips in the Timeline" on page 147.
The name of an audio clip appears on the clip in the Timeline. By default, the entire name appears on the clip if the clip is long enough to display it. You can change the default behavior in the General pane of the Preferences window, so that long clip names are truncated from the center. For information on setting preferences, see "Setting Soundtrack Pro Preferences" on page 97.
Setting Clip and Track Colors
Soundtrack Pro allows you to set colors for clips and tracks. Setting a clip or track color is a useful way to differentiate a set of clips from the rest of the clips or tracks in the Timeline. For example, you could color-code your clips by category: dialogue, music, and effects. This helps you organize your project visually. By default, video clips are set to blue and audio clips are set to green, but you can change the color of audio clips and tracks at any time.
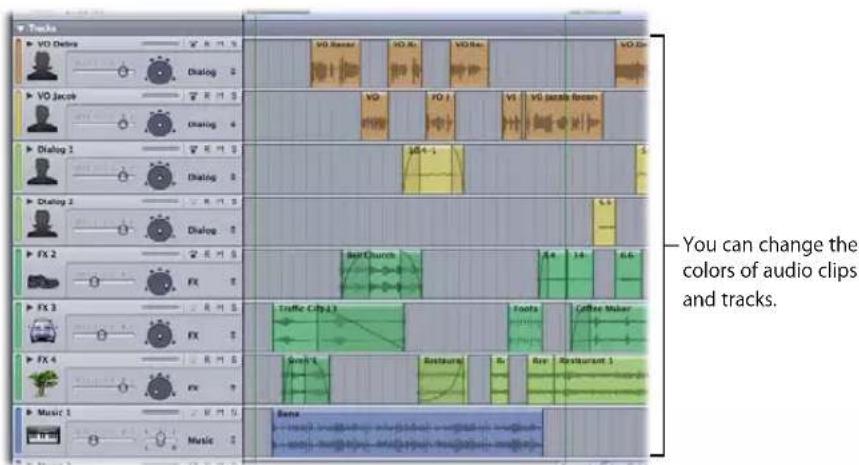
There are four ways to set the color of a clip or a selection of clips.
To set the color of a clip, do one of the following:
- Select the clip in the Timeline or the Bin, choose Clip > Color, then choose a color from the submenu.
■ Control-click the clip in the Timeline or the Bin, then choose Color from the shortcut menu and choose a color from the submenu.
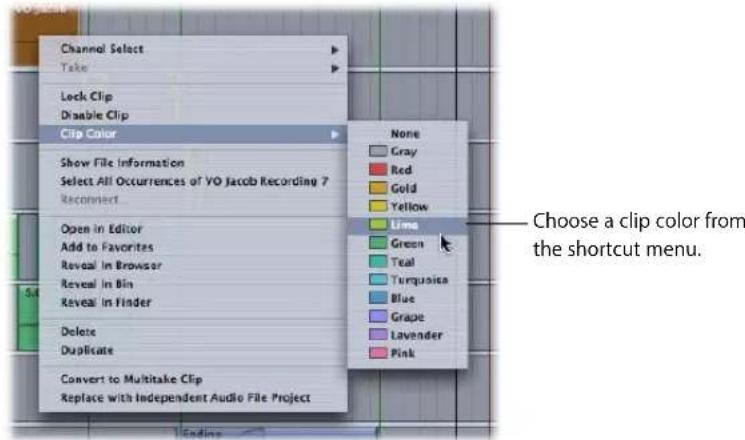
■ Select the clip. In the Details tab, choose a color from the Color pop-up menu.
- Drag the clip to a track that already has a color.
The clip takes on the track color.
Note: If you have already applied a color to a clip, the clip does not take on the track color.
You can set the color for a track, so that any clip you add to the track takes on the track color.
To set a track color, do one of the following:
- Select the track, then choose Multitrack > Track Color, and choose a color from the submenu.
■ Control-click the track, then choose Color from the shortcut menu and choose a color from the submenu.
Enabling and Disabling Clips
In addition to muting entire tracks, you can disable (mute) individual clips in the Timeline in Soundtrack Pro.
To disable a clip in the Timeline, do one of the following:
■ Select the clip, then choose Clip > Disable Clip.
■ Control-click the clip in the Timeline, then choose Disable Clip from the shortcut menu.

- Select the clip. In the Details tab, deselect the Enable checkbox.
To enable a clip in the Timeline, do one of the following:
■ Select the clip, then choose Clip > Enable Clip.
■ Control-click the clip in the Timeline, then choose Enable Clip from the shortcut menu.
- Select the clip. In the Details tab, select the Enable checkbox.
Locking and Unlocking Clips and Tracks
You can prevent any changes to a clip or a track by locking it.
Locking Clips
A locked clip cannot be moved, resized, or otherwise modified in the Timeline. A locked clip can be enabled or disabled. A clip can overlap a locked clip. The envelope points under a locked clip are locked based on the envelope mode: if attached to a clip, envelope points are locked; if not attached to a clip, envelope points are unlocked. For more information about attaching envelope points, see "Adding Envelope Points" on page 357.
To lock a clip in the Timeline, do one of the following:
■ Select the clip, then choose Clip > Lock Clip.
■ Control-click the clip in the Timeline, then choose Lock Clip from the shortcut menu.

■ Select the clip. In the Details tab, select the Locked checkbox.
To unlock a clip in the Timeline, do one of the following:
■ Select the clip, then choose Clip > Unlock Clip.
■ Control-click the clip in the Timeline, then choose Unlock Clip from the shortcut menu.
- Select the clip. In the Details tab, select the Locked checkbox.
Locking Tracks
When an audio track is locked, the clips on the track cannot be moved, resized, or otherwise modified in the Timeline. Clips and effects cannot be added to or removed from a locked track. Effects and other parameters (such as pan, gain, and output) are not editable on a locked track.
To lock a track, do one of the following:
■ Select the track, then choose Multitrack > Lock Selected Track.
■ Control-click the track, then choose Lock Selected Track from the shortcut menu.

To unlock a track, do one of the following:
■ Select the track, then choose Multitrack > Unlock Selected Track.
■ Control-click the track, then choose Unlock Clip from the shortcut menu.
Making Clip Channel Selections
A production sound recording often results in a stereo file or a multichannel file that contains distinct data on different channels (for example, a lapel microphone on one channel and a boom microphone on another channel). In such cases, you may want to adjust a stereo clip so that it represents just one of its two channels in the Timeline. You can also adjust a multichannel clip to represent just one of its channels, an adjacent pair of its channels, or six channels. Soundtrack Pro provides two different ways to make these channel selections in a clip.
Using the Shortcut Menu to Make a Channel Selection
Once a clip is in the Timeline, you can select (solo) an individual channel of a stereo file. Or you can select an individual channel or various pairs of channels of a multichannel file. The clip retains this channel selection throughout the life of the multitrack project. If you duplicate the clip, the copy also inherits the same channel selection. Changing any one instance of a clip does not affect any other instance. For stereo files, there are two options: channel 1 and channel 2. For six-channel files, there are nine different options.
Note: You can change the channel selection at any time by repeating the following steps.
To use the shortcut menu to make a mono channel selection from a stereo clip:
■ Control-click the clip in the Timeline, then choose one of the following options from the shortcut menu:
• Channel Select > Mono > 1
- Channel Select > Mono > 2

The clip waveform display changes to a single (mono) waveform, and the clip functions in the project as a mono file.

To use the shortcut menu to make a channel selection from a multichannel clip:
■ Control-click the clip in the Timeline, then choose one of the options from the shortcut menu.
If you choose a mono option, the clip waveform display changes to a single (mono) waveform, and the clip functions in the project as a mono file. If you pick a stereo option, the clip waveform display changes to a stereo waveform, and the clip functions in the project as a stereo file.
Separating Channels by Option-Dragging
You can separate the channels of stereo and multichannel clips into individual clips as you drag them to the Timeline. When adding a clip to the Timeline from either the Browser, Bin, or Finder, holding down the Option key while dragging will automatically generate mono clips from a stereo or multichannel file. The dragged clip becomes a vertical stack of clips, with the first under the pointer and the rest on subsequent tracks.
To convert the channels of a stereo or multichannel clip into individual clips as you add it to the Timeline:
1 Option-click the clip in any of the Soundtrack Pro media tabs.
2 Continue to press the Option key as you drag the clip to the Timeline.

The dragged clip becomes a vertical stack of clips, with the top clip under the pointer and the rest on subsequent tracks. If you dragged a stereo clip, the stack consists of two clips, one for each channel. If you dragged a six-channel clip, the stack consists of six clips, one for each channel.
Combining Separate Clips to Create Multichannel Clips
In Soundtrack Pro, you can create a single multichannel clip by combining separate clips.
To create a single multichannel clip from separate clips:
1 Select up to 24 separate source clips in any one of the Soundtrack Pro media tabs (Bin, Browser, Search, or Favorites).
2 Drag the clips to a track in the Timeline.
The clips are combined into a single multichannel clip.


Note: This feature is available for mono source files only.
Tracks, Busses, Submixes, and the Master Bus
Multitrack projects contain tracks, busses, and submixes. Tracks, busses, and submixes appear as horizontal rows in the Timeline and as vertical channel strips in the Mixer. In both the Timeline and Mixer, tracks, busses, and submixes are grouped together, with a separator between each category. You can move each type within its own category but cannot move it to either of the other categories. Each track, bus, and submix has a header with its icon, name, and a set of controls. The Master bus represents the final mix that goes to physical outputs. The Master bus has no icon or editable name.
Tracks
Tracks contain the audio you add to your project in the Timeline. Each track has a color label, a name, an icon, and a set of controls that appear in the track's header in the Timeline and in its channel strip in the Mixer. Track controls include a volume slider, a pan control, a submix pop-up menu, and buttons to mute or solo the track, bypass effects, and enable the track for recording. In addition, each channel strip includes level meters you can use to watch the track's levels and a set of effects slots where you can add and order track effects and sends.
Busses
In Soundtrack Pro, a bus is a separate but parallel audio signal created with a send. A send can tap an audio signal and create a separate signal known as a bus. (Some might call this an auxiliary bus.) Busses can be processed or combined independently of the main signal. They can be combined with other signals in a submix or at the final mix, or they can be routed to altogether separate outputs.

flowchart
graph LR
    A["Track"] --> B["1"]
    B --> C["Send"]
    C --> D["Bus"]
    D --> E["Submix bus"]
    E --> F["Audio clip"]
    E --> G["Effects"]
    E --> H["Volume fader"]
Each bus has a color label, a name, an icon, and a set of controls that appear in the bus's header in the Timeline and in its channel strip in the Mixer. Bus controls are the same as track controls, except that a bus does not have an Arm for Recording button (because you can't record audio to a bus). The bus controls affect the audio of every track sent (routed) to that bus.
For example, you could route every dialogue track for a particular actor to a bus with the actor's name. You could adjust the volume of all the actor's dialogue using the bus volume fader and add an EQ effect that brings out the actor's voice in the mix. You could then route that audio bus to a particular submix. The main reason to apply effects this way (rather than directly on the track) is so you can control the amount and characteristics of the effect on multiple tracks using one set of controls.
For more information about using busses and sends, see "Using Sends and Busses" on page 270.
Submixes
Submixes let you combine the audio from different tracks and busses and route the audio to physical outputs. If you are using external audio hardware that supports multiple physical outputs, you can add submixes to a project and choose the physical output to which each submix routes its audio. For more information about signal routing in Soundtrack Pro, see "Basic Signal Routing in Soundtrack Pro" on page 263.
For example, you could route the audio from the dialogue tracks for each actor to a submix called "Dialogue" and then route all of the dialogue from that submix to a single output jack. You could route all music tracks to another submix and all effects tracks to a third submix. Then you could adjust the volume or add effects separately to each submix. For a final stereo mix, you could route all submixes to the same pair of physical output channels (channels 1 and 2, for example), or to separate outputs. In the case of a surround mix, you could route all submixes to channels 1–6. For a detailed explanation of this example, see "Example: Mixing a Project with Dialogue, Music, and Effects Submixes" on page 266.
Each submix has a color label, a name, an icon, and a set of controls that appear in the submix's header in the Timeline and in its channel strip in the Mixer. Submix controls include a volume slider, a pop-up menu where you can choose the physical output channels for the submix, and buttons to mute or solo the submix and add effects. Each submix channel strip includes level meters you can use to watch the submix's levels and a set of effects slots where you can add and order effects and sends. Submixes do not have pan controls or Arm for Recording buttons.
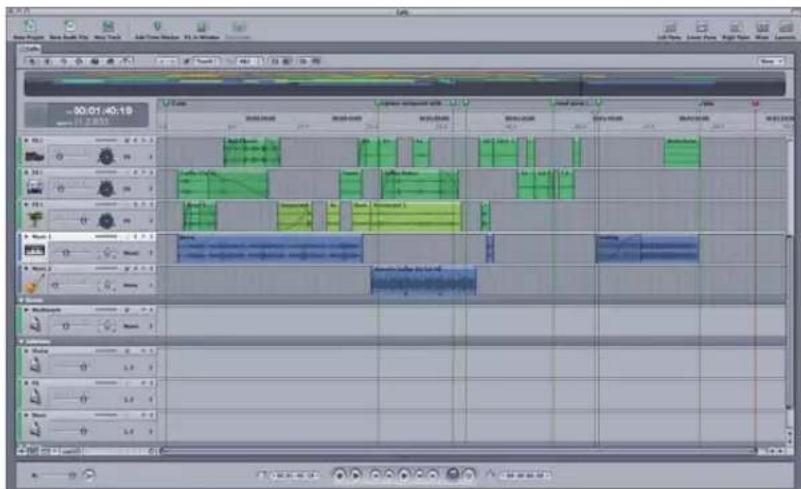
Tracks, busses, and submixes in the Timeline

Tracks, busses, and submixes in the Mixer
For information about working with tracks, busses, and submixes in the Timeline, see "Working with Tracks, Busses, and Submixes in the Timeline" on page 135. For information about working with tracks, busses, and submixes in the Mixer, see "Using Sends and Busses" on page 270.
The Master Bus
The Master bus represents the final mix from Soundtrack Pro: what will be heard from physical output jacks. On a signal routing basis, the Master bus is practically a mirror image of the connected hardware output device. It has a single volume control but does not have panners. You can apply effects to the Master bus, but you cannot automate those effects. Effects applied to the Master bus are placed across all channels.
For more information about the Master bus, see "Using the Master Bus" on page 290.
Working in the Timeline
5
The Timeline is where you arrange audio clips to build your soundtrack. You can also adjust volume and panning, add effects, and edit envelopes to control automation.
Note: This chapter covers the mechanics of working with clips, tracks, busses, and submixes in the Timeline. For strategies on setting up a sound-for-picture post-production project, see "Example: Mixing a Project with Dialogue, Music, and Effects Submixes" on page 266. For information on signal routing in Soundtrack Pro, see "Basic Signal Routing in Soundtrack Pro" on page 263.
Working in the Timeline
The Timeline displays a visual representation of a project, showing the point in time when audio clips start playing and their duration. You control when and how long clips play by moving and resizing them in the Timeline.
The Timeline is arranged in three sets of horizontal rows: tracks, busses, and submixes. You add audio clips to tracks, create submixes using busses, and send audio to physical output devices using submixes. For information about working with tracks, busses, and submixes, see "Tracks, Busses, Submixes, and the Master Bus" on page 124.
The Timeline also displays vertical gridlines that make it easy to position clips precisely in time. The gridlines correspond to the divisions of time in the Time ruler. The units of time the gridlines display change depending on the Ruler Units setting in the Project tab and the current zoom level.
Moving Around in the Timeline
Soundtrack Pro provides several controls that let you change the view of the Timeline and move to different parts of your project. You can zoom in or out for a closer or wider view of the Timeline, control how many tracks are displayed in the Timeline, and change which part of the project is currently visible using the scroll bars and project controls. You can split the Timeline view and use the Global Timeline view to quickly move to different parts of your project.
Using the Scroll Bars
If the entire project cannot be displayed in the Timeline, you can scroll through the project using the horizontal scroll bar located at the bottom of the Timeline. Drag the horizontal scroll bar left or right to move the visible part of the Timeline.
If your project contains more tracks than can be displayed in the Timeline, a vertical scroll bar appears along the right edge of the Timeline. Drag the vertical scroll bar up or down to change which tracks are visible.

In the lower left of the project pane are the Timeline controls, including the Track Height control and Zoom control.
Using the Zoom Control
You can zoom in to make precise edits in the Timeline, or zoom out for a wider view of your project using the Zoom control.
The Zoom control features a slider on a graduated scale. Moving the slider to the left or clicking the left side of the control zooms in for a closer view, displaying a smaller area of the Timeline close up. Moving the slider to the right or clicking the right side of the control zooms out for a wider view, displaying a wider area of the Timeline.
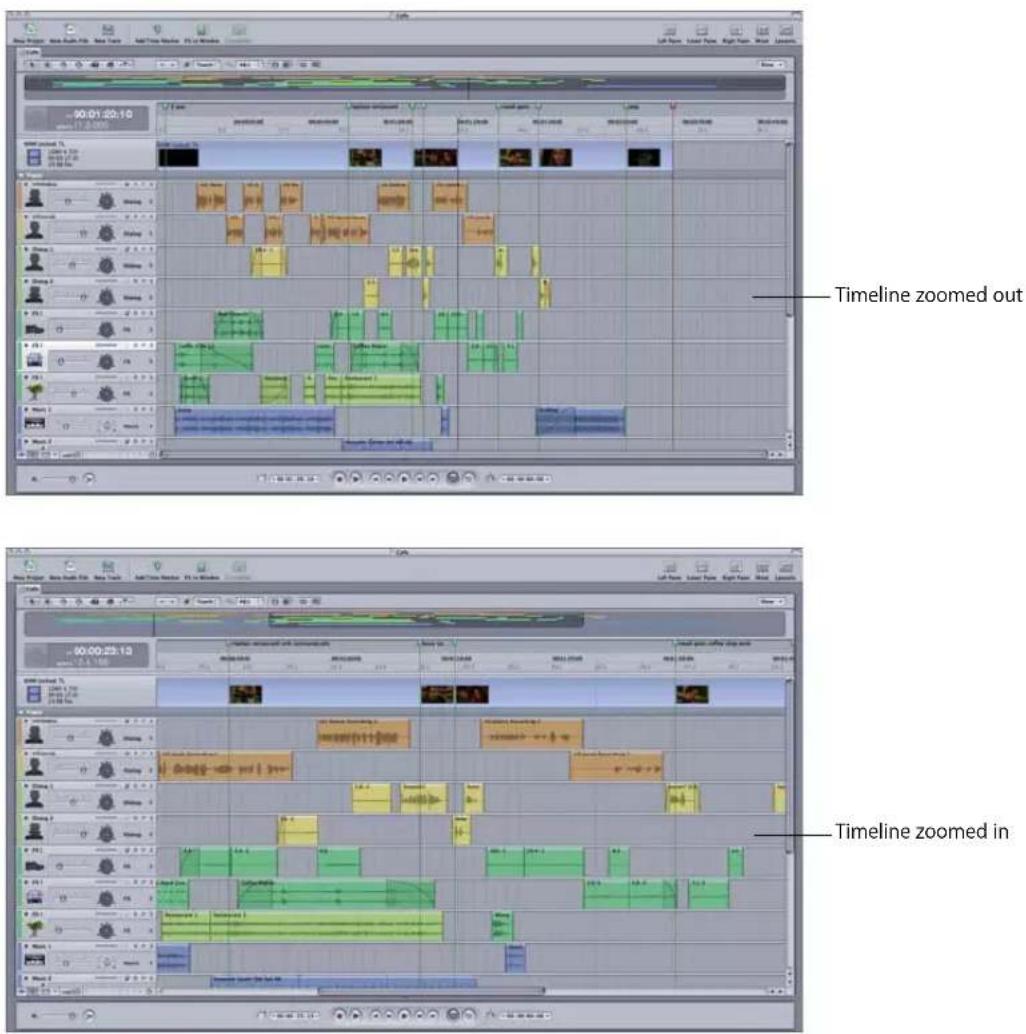
You can also zoom in and out using menu commands or keyboard shortcuts. If your mouse has a scrollwheel, you can use it to zoom in and out. You can also fit the entire project in the visible area of the Timeline.
To zoom in, do one of the following:
■ Move the Zoom slider to the left.
■ Click the left side of the Zoom control.
- Choose View > Zoom In.
■ Press Command-plus (+).
If the mouse connected to your computer has a scrollwheel, position the pointer over the Zoom control and move the scrollwheel.
To zoom out, do one of the following:
■ Move the Zoom slider to the right.
- Click the right side of the Zoom control.
- Choose View > Zoom Out.
■ Press the Down Arrow key.
■ Press Command-minus (−).
If your mouse has a scrollwheel, position the pointer over the Zoom control and move the scrollwheel.
Note: Optionally, you can change the default scrollwheel behavior in the General pane in Soundtrack Pro preferences to zoom in to the playhead in the Timeline or the File Editor using the scrollwheel.
To fit the project in the visible area of the Timeline:
- Choose View > Fit in Window (or press Shift-Z).
Using the J, K, and L Keys for Shuttling
You can use the keyboard commands (the J, K, and L keys) to speed playback up to eight times normal speed. When you use the keyboard shortcuts, the only speed available under 1x is 1/2x.
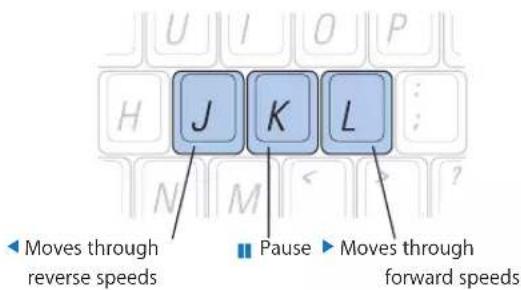
To begin forward playback at normal (1x) speed:
Press L.
To begin reverse playback at normal (1x) speed:
Press J.
To pause playback:
Press K.
To double the current playback speed:
■ Press L or J again.
You can play back up to eight times normal speed, switching from 1x to 2x to 4x to 8x normal speed (pressing either key a total of four times).
Pressing the key for playback in the opposite direction halves the playback speed, slowing down playback in that direction until it reaches 1x playback. Playback then begins doubling in reverse, starting from 1x.
To immediately reverse the playback direction:
- Press K to pause, then press the key for the direction you want.
To move the playhead one frame at a time:
■ Hold down the K key, then press J or L.
To move the playhead at below 1/2x speed:
Hold down the K key, then press and hold down J or L.
Moving the Playhead with Keyboard Shortcuts
Soundtrack Pro provides a variety of keyboard shortcuts to move the playhead.
To move the playhead to the previous edit:
■ Press the Up Arrow key.
To move the playhead to the next edit:
■ Press the Down Arrow key.
To move the playhead to the previous edit and toggle the clip selection:
- Press Shift–Up Arrow.
To move the playhead to the next edit and toggle the clip selection:
- Press Shift–Down Arrow.
To move the playhead one gridline to the left:
■ Press the Left Arrow key.
To move the playhead one gridline to the right:
■ Press the Right Arrow key.
For a complete list of Soundtrack Pro keyboard shortcuts, see Appendix A, "Soundtrack Pro Keyboard Shortcuts," on page 449.
Note: The gridlines correspond to the divisions of time in the Time ruler. The units of time the gridlines display change depending on the Ruler Units setting in the Project tab and the current zoom level.
Setting Track Height
You set the height of tracks, busses, and submixes in the Timeline using the Track Height control. The Track Height control has four settings. The smallest rectangle sets the track height to a minimized setting, with each track (and track header) reduced to half-height, allowing more tracks to be displayed in the Timeline.
To set the height of tracks, busses, and submixes, do one of the following:
- Click one of the four rectangles on the Track Height control.
■ Press Command-6, Command-7, Command-8, or Command-9.

Note: Track header controls for setting up recording appear in the two tallest track heights only.
Using the Global Timeline View
The Global Timeline view, located above the Time display and Time ruler, shows a miniature view of the entire project. The playhead appears as a black vertical line with a triangular handle. The part of the project currently visible in the Timeline is indicated by a blue rectangle in the Global Timeline view.
To move to a new area of the Timeline using the Global Timeline view:
- Drag the visible area rectangle to a new position.
Drag this rectangle to a new position.

natural_image
Pure electrical circuit lines without any symbolsYou can quickly move to different parts of the Timeline by dragging the blue rectangle. This is especially useful when working on longer projects. You can also drag the rectangle up or down to move vertically in the Global Timeline view. This is useful if your project contains more tracks, busses, and submixes than can be displayed in the project pane.
Using the Time Ruler
The Timeline has a Time ruler that shows the divisions of time in a project. You can set the playhead to a precise frame, point in time, or sample number using the Time-based units on the Time ruler, or to a specific musical measure or beat using the Beats-based units, to synchronize playback of audio clips in the Timeline.
The Time ruler changes depending on the time format of the project and the Time ruler units. If the project is currently set to Time-based format, Time-based units appear in the upper part of the ruler. If the project is set to Beats-based format, Beats-based units appear in the upper half of the ruler.

You can use the Time ruler to position clips or the playhead at a precise point in time, including synchronizing them to a specific timecode reference in a video file.
To set the playhead to a specific point in the Time ruler:
- Click the Time ruler at the point where you want to set the playhead.
Working with the Cycle Region
You can create a cycle region in a project, an area that plays back repeatedly. This is sometimes called cycling or looping playback. A project has only one cycle region, but you can move and resize it as often as you want. Additionally, for selecting, marking, and exporting purposes, the cycle region functions much like In and Out points in Final Cut Pro.
You also use the cycle region when recording multiple takes. For information on recording, see Chapter 13, "Recording Audio in Soundtrack Pro," on page 367.
To set the cycle region, do one of the following:
- Drag in the Time ruler from the beginning of where you want the cycle region to the end.

- Position the playhead and press I to set the cycle region In point. Position the playhead and press O to set the cycle region Out point.
- Press X to set the cycle region In and Out points at the boundaries of the clip that currently intersects the playhead. The clip on the uppermost track is used.
Note: For a complete list of Soundtrack Pro keyboard shortcuts, see Appendix A, "Soundtrack Pro Keyboard Shortcuts," on page 449.
The cycle region is lighter in color than the rest of the Time ruler, with triangular markers indicating its start and end points. If a cycle region already exists, you can drag anywhere in the Time ruler outside of the current cycle region to set the cycle region to a new position.
If cycling is turned off, you must turn it on for the cycle region to be active. The Cycle button darkens to indicate that the cycle region is activated.
To activate or deactivate the cycle region, do one of the following:
- Click the Cycle button in the transport controls.
Press C.
To move the cycle region:
- Click in the bottom half of the cycle region and drag it to a new position in the Timeline.
To resize the cycle region:
- Drag either the In point or Out point handle in the Time ruler to resize the cycle region.
To remove the cycle region, do one of the following:
- Choose Edit > Cycle Region > Remove Cycle Region (or press Option-X).
- Control-click the cycle region, then choose Cycle Region from the shortcut menu and Remove Cycle Region from the submenu.
Working with Tracks, Busses, and Submixes in the Timeline
The Timeline is arranged sets of horizontal rows: tracks, busses, and submixes. You add audio to tracks in your project, use busses to create effect sends, and route audio to physical output channels using submixes.
The tracks in a project appear in the upper part of the Timeline. Busses appear below tracks, and submixes appear below busses. The Master bus appears below submixes. The Master bus represents the final mix that will be heard from physical output jacks. It has a single volume control and no panners or meters. You can apply effects to the Master bus.
A separator between each set of Timeline rows helps visually distinguish them, and disclosure triangles on each separator let you show or hide the different sets. Tracks, busses, and submixes in the Timeline correspond to channel strips in the Mixer. When you add a track, bus, or submix, adjust its controls, or add effects, the same changes appear in the corresponding channel strip when you open the Mixer.
Tracks, busses, and submixes are described in greater detail in "Tracks, Busses, Submixes, and the Master Bus" on page 124.
Adding Tracks, Busses, and Submixes
There are several ways to add tracks, busses, and submixes.
To add a track, do one of the following:
- Choose Multitrack > Add Track (or press Command-T).
■ Control-click an open area of the Timeline, then choose Add Track from the shortcut menu.
■ Control-click a track, then choose either Add Track Above or Add Track Below from the shortcut menu.
To add a bus, do one of the following:
- Choose Multitrack > Add Bus.
- Control-click a bus, then choose either Insert Bus Before or Insert Bus After from the shortcut menu.
To add a submix, do one of the following:
- Choose Multitrack > Add Submix.
■ Control-click a submix, then choose either Insert Submix Before or Insert Submix After from the shortcut menu.
Selecting Tracks, Busses, and Submixes
You can select a track, bus, or submix in order to move, copy, or remove it, and you can also select tracks, busses, and submixes to export. The headers of selected tracks, busses, and submixes appear darker in the Timeline.
To select a track, bus, or submix, do one of the following:
- Click in the header for the track, bus, or submix.
- Click anywhere in the row for the track, bus, or submix in the Timeline.
■ Press Control-Up Arrow or Control-Down Arrow.
The selected track is highlighted.

You can select multiple tracks, busses, or submixes in the Timeline.
To select adjacent tracks, busses, or submixes, do one of the following:
- Shift-click in the header of each track, bus, or submix.
■ Press Shift-Control-Up Arrow or Shift-Control-Down Arrow.
To select nonadjacent tracks, busses, or submixes:
■ Command-click in the header of each track, bus, or submix.
Grouping Tracks, Busses, and Submixes
You can create groups of tracks, groups of busses, and groups of submixes. Groups provide a way to easily select and make changes (such as volume, mute, solo, and lock adjustments) to many tracks, busses, or submixes at once. When Mixer objects are grouped, selecting one item in the group selects all items in that group.
Note: It is not possible to group Mixer objects from different categories. For example, you cannot group tracks with busses or tracks with submixes.
To group tracks, busses, or submixes:
1 Confirm that grouping is enabled by choosing Multitrack > Groups Enabled.
2 Do one of the following:
- Select any combination of tracks.
- Select any combination of busses.
- Select any combination of submixes.
3 Choose Multitrack > Group Tracks (or press Command-G).
The selected items are grouped.
Applying Changes to Groups of Selected Tracks, Busses, and Submixes
When multiple tracks, busses, or submixes are selected (whether they are officially grouped or not) you can apply the following changes to all the selected items at once:
Changes in the track header or the shortcut menu:
- Toggling the envelopes
• Volume - Effect bypass
- Mute
- Solo
- Setting track color
- Track locking
- Remove track
- Switching between stereo/surround panner
Changes in the Timeline:
- Blade tool
- Creating a Timeslice selection
- Marquee-selecting multiple clips with the Selection tool
Managing Track Selections with the Tracks Tab
The Soundtrack Pro Tracks tab is a convenient tool for selecting and grouping tracks, busses, and submixes. The Tracks tab consists of three sections: the Mixer Objects outline, the Groups outline, and a channel strip for the currently selected item.

Mixer Objects Outline
The upper left of the Tracks tab displays an outline view of the Timeline, including all tracks, busses, and submixes. Use this outline to quickly manage, select, and group Mixer objects (track, bus, or submix) without having to view the entire Timeline.
To select an individual Mixer object (track, bus, or submix) in the Tracks tab:
- Click the track, bus, or submix in the Mixer Objects outline.
You can also use the Up and Down Arrow keys to navigate through individual Mixer objects.
To select adjacent Mixer objects in the Tracks tab:
Shift-click the adjacent tracks, busses, or submixes in the Mixer Objects outline.
To select nonadjacent tracks, busses, or submixes:
Command-click the nonadjacent tracks, busses, or submixes in the Mixer Objects outline.
Groups Outline
The Groups outline displays an outline view of any grouped tracks, busses, or submixes in the project. You can use the Groups outline to group Mixer objects, disable or enable groups, rename groups, delete groups, and delete items from groups.
To group tracks, busses, or submixes in the Groups outline:
1 Confirm that grouping is enabled by choosing Multitrack > Groups Enabled.
2 In the Mixer Objects outline, do one of the following:
- Select any combination of tracks.
- Select any combination of busses.
- Select any combination of submixes.
For more information on selecting, see "Selecting Tracks, Busses, and Submixes" on page 136.
3 Choose Multitrack > Group Tracks (or press Command-G).
The selected items are grouped and the new group appears in the Groups outline.
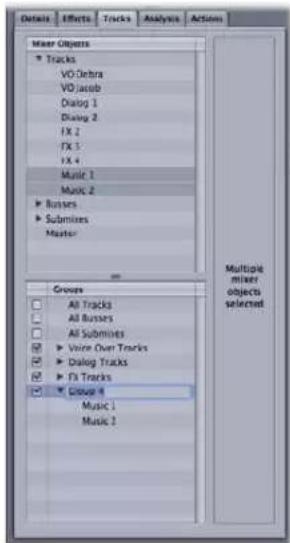
To enable or disable groups in the Groups outline:
- Click the checkbox next to the group in the Groups outline to enable or disable it.
Note: Three standard groups (All Tracks, All Busses, and All Submixes) are disabled by default.
To rename a group in the Groups outline:
1 Double-click the name.
2 Enter the new name.
To delete a group or remove an item from a group:
1 Select the group or item in the Groups outline.
2 Press Delete.
Channel Strip
The right side of the Tracks tab displays a single channel strip for the currently selected track, bus, or submix. (This channel strip is identical to the corresponding channel strip in the Mixer in every way, including all controls and current settings.) It is a quick way to access the mixing controls for a particular Mixer object.

Note: The channel strip is displayed only if a single track, bus, or submix is selected.
For more information about channel strips, see "Working with Channel Strips in the Mixer" on page 273.
Moving and Copying Tracks, Busses, and Submixes
As you work on your project, you may want to rearrange tracks, busses, and submixes. You can move and copy them to change their vertical arrangement in the track, bus, or submix section of the Timeline. You cannot move one to the area for another (as indicated by the rows labeled "Tracks," "Busses," "Submixes," and "Master" in the Timeline).
You can only move or copy one track, bus, or submix at a time.
To move a track, bus, or submix:
- Drag the track, bus, or submix header up or down to a new vertical position.
A light blue horizontal line in the header area indicates the place the track, bus, or submix is moved to when you release the mouse button.
To copy a track, bus, or submix:
- Option-click in the header for the track, bus, or submix, then drag it up or down.
A copy of the track, bus, or submix appears when you release the mouse button.
Renaming Tracks, Busses, and Submixes
By default, tracks are numbered when created and take the name of the first audio clip you add to them. Busses and submixes are numbered starting from 1 (Bus 1, Submix 1, and so on). You can rename a track, bus, or submix and use the names to distinguish the type of audio it contains (for example, dialogue, voiceovers, music, or sound effects), its part in the overall project, or to identify it in some other way.
To rename a track, bus, or submix:
- Click the name field in the header for the track, bus, or submix and type a new name.
Note: You cannot rename the Master bus.
Changing a Track, Bus, or Submix Icon
You can choose a new icon from the icon grid or add your own image to the grid.
To change the icon for a track, bus, or submix, do one of the following:
■ Double-click the icon, then select a new icon from the icon grid that appears.
- Drag a graphics file from the Finder to the icon.
Using the Track Controls
Tracks, busses, and submixes have headers, located along the left side of the Timeline. Each header contains track controls that you can use to mute or solo the track, bus, or submix, adjust its volume level and pan position, add effects, and show or hide its envelopes.
Adjusting Volume
The volume slider controls the volume (the loudness relative to other tracks) of the track, bus, or submix.
To adjust the volume level of a track, bus, or submix:
- Drag the volume slider left or right.
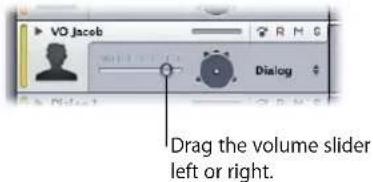
The range is -96 dB to +6 dB, with the default at 0 dB. Double-clicking the slider resets it to the 0 dB position.
Adjusting Pan Position
Tracks and busses also include panning controls. The stereo pan slider controls the stereo pan position (the left-to-right placement in the stereo field) of the track. The surround panner controls the surround pan position, placing sounds in a multidimensional space defined by 5.1-surround speaker systems.
To adjust the pan position of a track or bus, do one of the following:
In stereo mode, drag the pan slider left or right.

The range is -100 (full left) to +100 (full right), with the default at 0 (center position). Double-clicking the slider resets it to the center position.
In surround mode, drag anywhere inside the black circle to position the puck.

For finer panning adjustments and other surround controls, double-click the surround panner to open the Surround Panner HUD.
For more information about using surround panners, see "Using Surround Panners to Create a Surround Mix" on page 299. For more information about the Surround Panner HUD, see "The Surround Panner HUD" on page 300.
Muting and Soloing Tracks, Busses, and Submixes
The Mute button mutes (silences) the track, bus, or submix. You can mute multiple tracks, busses, and submixes, which allows you to hear only the remaining, unmuted ones. Muting lets you compare the sound of the project using different combinations of tracks, busses, and submixes, and hear the result of changes you make to them.
To mute a track, bus, or submix:
- Click the Mute button. Click the Mute button again to unmute the track, bus, or submix.
Muted tracks, busses, and submixes appear darker in the Timeline and their clips appear translucent, making it easy to identify which tracks are currently audible.

The Solo button solos the track, bus, or submix, muting all others. Soloing a track, bus, or submix lets you quickly isolate it from the rest of the project, so you can adjust the sound of the soloed track, bus, or submix and make changes.
Soundtrack Pro supports multiple solo and exclusive solo. Clicking the Solo button for multiple tracks, busses, or submixes solos them and mutes all others. When you exclusively solo a track, bus, or submix, all others are muted, regardless of whether they are soloed.
To solo a track, bus, or submix (multiple solo):
- Click the Solo button. Click the Solo button again to unsolo the track, bus, or submix.
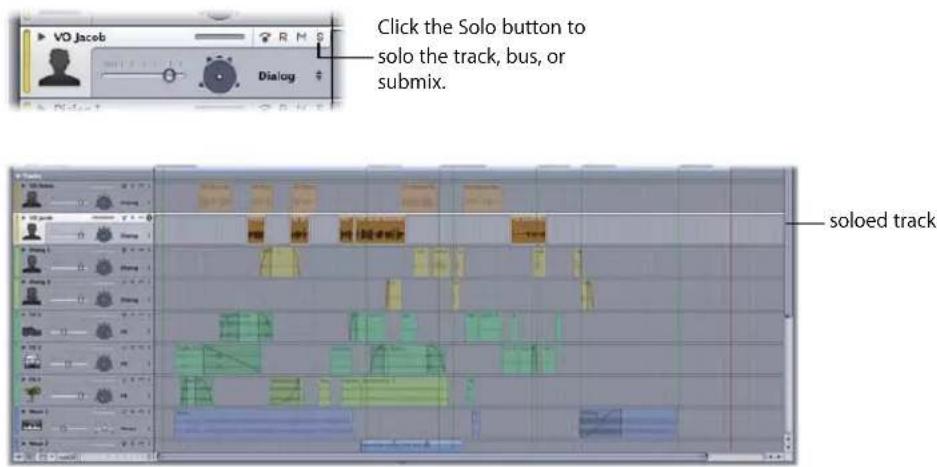
To exclusively solo a track, bus, or submix:
Option-click the Solo button. Click the Solo button again to unsolo the track, bus, or submix.
When you solo tracks, busses, or submixes, the ones not soloed appear darker in the Timeline, and their clips appear translucent.
Adding Effects to a Track, Bus, or Submix
You can use the Effects tab, which you use to add effects. The Effects tab also displays any effects currently assigned to the track, bus, or submix.
To add effects to a track, bus, or submix:
1 Do one of the following:
- Control-click the header for the track, bus, or submix, then choose Show (Track, Bus, or Submix) Effects from the shortcut menu.
This activates the Effects tab.
- Click the header for the track, bus, or submix to select it. If it is not already active, click the Effects tab to activate it.
2 Select a category in the Category list to display the effects for that category in the Effect list.

3 In the Effect list, do one of the following:
- Double-click the effect you want to add.
- Select the effect name, then click the Add Effect button.
- Drag the effect to the Effect Parameters area.
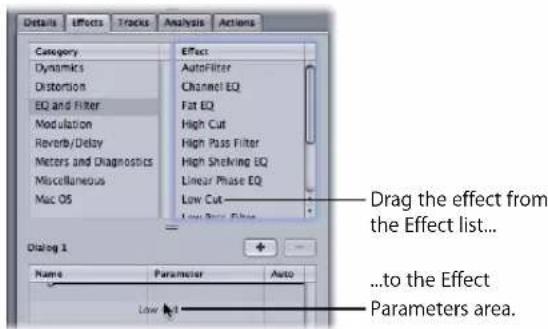
The effect's advanced settings window appears, and the effect name appears in the Effect Parameters area with its checkbox selected.
For detailed information about adding and adjusting effects, see Chapter 11, "Working with Audio Effects," on page 327.
Showing and Hiding Track, Bus, and Submix Envelopes
Clicking the automation disclosure triangle for a track or bus shows the volume and pan envelopes, which you can use to automate changes to pan position and volume level over the course of the project. Clicking the triangle for a submix shows the submix's volume envelope. The envelopes appear in the Timeline below the track, bus, or submix. You can also add envelopes for effect parameters, which appear below the other envelopes. For information on adding envelopes for effect parameters, see Chapter 11, "Working with Audio Effects," on page 327.
To show or hide the envelopes for a track, bus, or submix, do one of the following:
- Click the envelopes disclosure triangle in the header for a track, bus, or submix. Click the disclosure triangle again to hide the envelopes.
■ Press E to show envelopes for any selected tracks. Press E again to hide the envelopes.


Note: If you automate controls or effects using envelopes, you hear the results whether or not the envelopes are visible.
For information on automating changes to volume, pan, and other settings, see Chapter 12, "Working with Automation," on page 355.
Changing Track Time Format
By default, tracks use the same time format as the project (Time-based or Beats-based). You can change the time format of a track, which changes the behavior of tagged clips when you change the project tempo.
When the track time format is Time-based, clips remain at the same time position (the same second or frame) when you change the project tempo. When the track time format is Beats-based, clips remain at the same beat position (the same measure, beat, and beat division) when you change the project tempo.
When you set a track to Beats-based time format, a metronome appears in the corner of the track icon.
To change a track's time format:
1 Select the track.
2 Choose Multitrack > Track Time Base, then choose a format from the submenu.
Removing Tracks, Busses, and Submixes
You can remove a track, bus, or submix if you decide you no longer want it in a project.
To remove a track, bus, or submix, do one of the following:
- Select the track, bus, or submix, then choose Multitrack > Remove [item] (or press Command-Shift-T).
- Control-click the track, bus, or submix, then choose Remove [item] from the shortcut menu. The [item] changes depending on whether a track, bus, or submix is selected.
Selecting Audio Clips in the Timeline
You select the audio clips you want to edit. You can select a single clip or multiple clips, including clips in different tracks. When you select a clip, it appears darker than unselected clips, and it has a white border. Selecting individual clips is as straightforward as clicking, as long as you are clicking with the right tool. Also included here are the tricks you need to know for selecting multiple contiguous and noncontiguous clips quickly.
To select an individual clip:
1 Click the Selection tool at the top of the Timeline (or press A).
2 In the Timeline, click anywhere in a clip.
To select multiple audio clips in the same track:
1 Click the Selection tool at the top of the Timeline (or press A).
2 Do one of the following:
- Hold down the Command key while selecting the desired clips using the Selection tool.
- Drag from a point in the track before the first clip you want to select to a point after the last clip you want to select, encompassing the clips.
- If the clips are adjacent, select a clip item, then hold down the Shift key and select another clip item farther down on the Timeline. All of the clips between the two are selected.
To select multiple audio clips in different tracks, do one of the following:
Shift-click the clips in the Timeline.
All clips between those two tracks are selected as well.
■ Command-click the clips in the Timeline.
- Drag across multiple tracks to select the clips.

Note: If there is no track background available because the tracks in your project are too dense, you can also make the selection by dragging in the track separator.
To deselect an individual clip item within a selection:
1 Select the Selection tool in the Tool palette (or press A).
2 Command-click the item you want to deselect.
To select all clips using the same source audio file, do one of the following:
- Select the clip in the Timeline or the Bin tab, then choose Clip > Select All Occurrences of [filename].
■ Control-click the source audio file in the Bin tab, then choose Show in Timeline from the shortcut menu.

Selecting the Entire Contents of a Track
Sometimes you may find that you want to select all of the clips on a track in order to drag them to close a gap or to create space to accommodate new clips in your project. After selecting a track's contents, you can perform different operations on all the track's items at once, such as moving, copying, or deleting them. This feature also works with multiple tracks.
To select all the clips on selected tracks:
1 Select one or more tracks.
For more information on selecting tracks, see "Selecting Tracks, Busses, and Submixes" on page 136.
2 Choose Edit > Select > Across Tracks (or press Shift-T).
All clips in the track are selected.
If you make this selection in Selection tool mode, all clips on currently selected tracks are selected. Any clips that were selected before choosing the menu item are included in the new selection.
Note: Double-clicking a track in Selection tool mode selects all clips in that track. Any previously selected clips are not included in the new selection. Triple-clicking a track selects all clips in the Timeline.
If you make this selection in Timeslice tool mode, any existing Timeslice selection is extended horizontally to cover the entire duration of the project. If there is no existing Timeslice, Soundtrack Pro creates a Timeslice across the entire length of all selected tracks (or all tracks if none are selected).
Note: Double-clicking a track in Timeslice tool mode creates a timeslice over the double-clicked area (either a clip or the gap between two clips). Triple-clicking a track creates a Timeslice across the entire track.
Selecting Partial Contents of One or More Tracks
When there are many clips in a multitrack project, it's difficult to see and select many of them at once, especially if you don't want to zoom in and out frequently. The Select Forward and Select Backward commands let you easily select all clips before or after the playhead.
To select all the clips to the right or the left of the playhead on selected tracks:
1 Select one or more tracks.
For more information on selecting tracks, see "Selecting Tracks, Busses, and Submixes" on page 136.
2 Position the playhead in the Timeline.
3 Do one of the following:
- To select everything to the right of the playhead in the selected tracks, choose Edit > Select > Forward (or press Shift-End).
- To select everything to the right of the playhead in the selected tracks, choose Edit > Select > Backward (or press Shift-Home).

If you make this selection in Selection tool mode, all clips to the right (Forward) or left (Backward) of the playhead in the selected tracks are selected. Any clips that were selected before choosing the menu item are included in the new selection.
If you make this selection in Timeslice tool mode, any existing Timeslice selection is extended to the end of the project (for the Forward option) and to the beginning of the project (for the Backward option). If there is not an existing Timeslice,
Soundtrack Pro creates a Timeslice across selected tracks starting at the playhead and extending to the end of the project (for the Forward option) and to the beginning of the project (for the Backward option).
Note: If you hold down the Option key, the menu items read Select > All Forward and Select > All Backward and behave the same as described above except the selection is across all tracks instead of just the selected tracks.
Cutting, Copying, and Pasting Audio Clips
You can cut, copy, and paste audio clips in the Timeline. You can also paste multiple copies of a clip.
To cut an audio clip:
- Select the clip in the Timeline, then choose Edit > Cut (or press Command-X).
The clip is removed from the Timeline and placed on the Clipboard.
To copy an audio clip, do one of the following:
- Select the clip in the Timeline, then choose Edit > Copy (or press Command-C).
- Option-drag the clip to the position where you want to copy it.
To paste an audio clip:
- Set the playhead at the position where you want to paste the clip, then choose Edit > Paste (or press Command-V).
The clip is pasted in the currently selected track, starting at the current playhead position. If no track is selected, the clip is pasted in the track from which it was cut or copied.
When pasting clips cut or copied from different positions in the Timeline or from multiple tracks, the following conditions apply:
- Pasting clips from different Timeline positions: The clip closest to the beginning of the project is pasted at the current playhead position, and the remaining clips are pasted at the same positions in time relative to the first clip as when they were cut or copied.
- Pasting clips from multiple tracks: The clip from the topmost track is pasted in the currently selected track, and the remaining clips are pasted at the same positions relative to the first clip as when they were cut or copied. If there are not enough tracks to accommodate the clips being pasted, a dialog appears asking if you want to create new tracks for the clips. If you choose not to create new tracks, only the clips for which tracks already exist are pasted.
When pasting audio clips, you can choose to paste multiple copies of the clip in succession. Using the Paste Repeat command, you can paste any number of copies of a clip in the selected track.
To paste multiple copies of a clip:
1 Cut or copy the clip.
2 Set the playhead to the point where you want to paste the first copy of the clip.
3 If you want to paste the copies in a different track, select the track.
4 Choose Edit > Paste Special > Paste Repeat (or press Option-Command-V).
5 In the Paste Repeat dialog, enter the number of times you want to paste the clip.
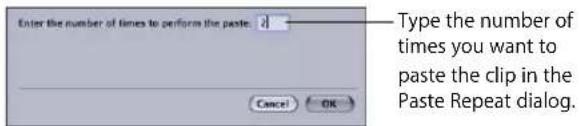
The copies are pasted in the selected track, starting at the current playhead position. If no track is selected, the copies are pasted in the same track as the cut or copied clip.

Removing Audio Clips
As you work on a project, you may decide that a clip that sounded great on its own no longer fits with the overall composition. You can remove clips from a project by deleting them from the Timeline.
To remove an audio clip:
- Select the clip, then choose Edit > Delete (or press the Delete key).
Spotting Clips to the Timeline
Soundtrack Pro allows you to easily spot clips to the Timeline. You can spot clips to the playhead location or you can spot clips to the Timeline based on timecode information inherent in the clip or that you enter in the Spot to Timecode dialog.
To spot a clip to the playhead:
1 Position the playhead where you would like to spot the clip.
2 Select the track on which you would like to spot the clip.
3 Do one of the following:
- Select the clip in one of the Soundtrack Pro media tabs (such as the Bin, Browser, Favorites, or Search tab), then choose Clip > Spot to Playhead (or press Command-).
- Control-click the clip in one of the Soundtrack Pro media tabs (such as the Bin, Browser, Favorites, or Search tab), then choose Spot to Playhead from the shortcut menu.
The clip is added to the Timeline at the specified playhead location.
To spot a clip to the Timeline using timecode:
1 Select the track on which you would like to spot the clip.
2 Do one of the following:
- Select the clip in one of the Soundtrack Pro media tabs (such as the Bin, Browser, Favorites, or Search tab), then choose Clip > Spot to Timeline (or press Command-Shift-).
- Control-click the clip in one of the Soundtrack Pro media tabs (such as the Bin, Browser, Favorites, or Search tab), then choose Spot to Timeline from the shortcut menu.
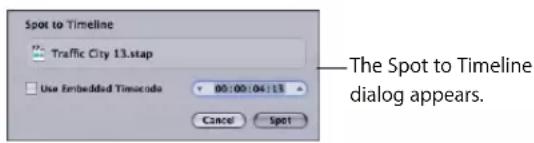
3 Do one of the following:
- Select Use Embedded Timecode if the clip contains timecode intended to place it in the proper location in the Timeline.
- Enter the target Timeline timecode location.
4 Click Spot.
The clip is added to the Timeline at the specified timecode location.
Moving Clips
As you work in Soundtrack Pro, you may want to move tracks to new positions. There are several ways to do this: dragging clips, entering timecode values, and using keyboard shortcuts.
Moving Audio Clips
You can move an audio clip in the Timeline by dragging the clip to a new position. You can also move the clip to a different track.
To move an audio clip to a new time position:
- Drag the clip left or right to a new position in the Timeline.
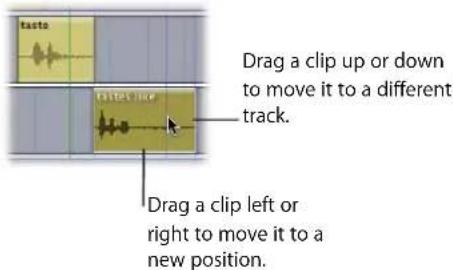
To move an audio clip to a new track:
- Drag the clip up or down to a different track.
You can also move an audio clip using the Left and Right Arrow keys with various modifier keys. Using the Option key with the arrow keys moves the clip by one pixel at a time; using the Option and Shift keys with the arrow keys moves the clip to the next gridline in the Timeline.
When you move a clip by one pixel, the amount the clip moves in time depends on the current zoom setting.
You can lock the horizontal (time) position of an audio clip when moving the clip between tracks in the Timeline. This makes it easy to keep the clip's start point when moving the clip or copying it by Option-dragging.
To lock the time position of a clip as you move it between tracks:
- Hold down the Shift key while dragging the clip up or down to a different track.
Moving Clips Numerically
When you want to move clips precisely, you can move them by entering positive or negative timecode values.
To move an item by entering a timecode value:
1 In the Timeline, select the clip item or items you want to move.
2 Type a relative timecode value for where you want the clip to be positioned.
For example, type +48 (or simply 48) to move the item 48 frames forward. To move 48 frames backward in time, type -48. When you type a number, a Move field appears at the top of the Timeline.
Note: Don't click in the Current Timecode field before you do this, or you'll move the playhead instead.
Moving Clips with Keyboard Shortcuts
Soundtrack Pro provides a variety of keyboard shortcuts to move selected clips.
To move a selected clip up one track:
■ Press Command-Option-Up Arrow.
To move a selected clip down one track:
■ Press Command-Option-Down Arrow.
To nudge a selected clip one video frame to the left:
■ Press Command-Option-Left Arrow.
To nudge a selected clip one video frame to the right:
■ Press Command-Option-Right Arrow.
To nudge a selected clip one gridline to the left:
■ Press Command-Left Arrow.
To nudge a selected clip one gridline to the right:
■ Press Command-Right Arrow.
To move a selected clip one edit point to the left:
■ Press Command-Up Arrow.
To move a selected clip one edit point to the right:
■ Press Command-Down Arrow.
Note: These commands are also available as menu commands by choosing Edit > Move Selection.
For a complete list of Soundtrack Pro keyboard shortcuts, see Appendix A,
"Soundtrack Pro Keyboard Shortcuts," on page 449.
Snapping Clips to Clips on Adjacent Tracks
If snapping is turned on, you can snap a clip to the edges of a clip in an adjacent track (the track either directly above or directly below the track containing the clip). This is especially useful when the start and end points of clips do not fall on the current Snap To value.
To snap a clip to adjacent clips:
- Choose View > Snap To > Adjacent Tracks.
Resizing Audio Clips
You control the duration of an audio clip (the amount of time the clip plays back) by resizing the clip. When you add a clip to the Timeline, the clip has the same duration as the source audio file. You can shorten clips to play back only a part of the source file. When you lengthen a clip with looping playback mode, it repeats the source file multiple times.
To resize an audio clip:
1 Place the pointer at either the left or right edge of the audio clip.
The pointer changes to a Clip Resize pointer.
2 Click the edge of the clip and drag left or right to resize it.
When you lengthen a regular, nonlooping clip beyond its original length, Soundtrack Pro adds blank space at the end of the clip.

When you lengthen a clip with looping playback mode, the notches at the top and bottom of the clip indicate the end of each repetition of the source audio file.
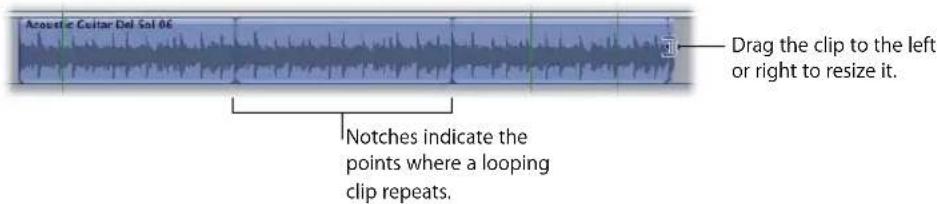
When you resize a clip by shortening its left edge, you change the point in the source audio file at which the clip starts playing, making the earlier part of the source audio inaudible. When you resize a clip by shortening its right edge, the part you shorten becomes inaudible. You cannot lengthen the left edge of a clip with non-looping playback mode beyond the beginning of the source audio file.
When you resize a clip, the edge being resized jumps to the nearest Snap To position if snapping is turned on. If you want to resize the clip independently of the Snap To value, change the Snap To value or turn off snapping before you resize the clip. For information about snapping, see "Using Snapping" on page 94.
Changing the Offset of an Audio Clip
When you add an audio clip to the Timeline, the clip plays back from the beginning of the source audio file. The point in the audio file where the clip starts playing is called the offset. By default, a clip's offset is zero, the beginning of the source audio file. You can change the offset so that the clip starts playing from a later point in the source audio file. (In Final Cut Pro, this is known as a slip.) This allows you to use the audio from a later part of the source file without splitting the clip.
To slip (change the offset of) a clip:
- Select the clip, then Command-Option-drag left (toward the beginning of the project).
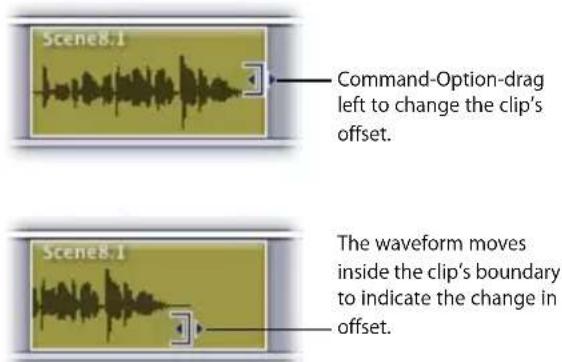
Once you have changed the offset by dragging to the left, you can also drag to the right to change the offset.
Note: You can only drag the offset to a later part of the clip's source audio file, not to a point before the beginning of the file.
When you change the offset of a clip, the waveform moves inside the clip's boundary to indicate the change in offset. The length of the clip stays the same. If the clip has not been resized, it will reach the end of the source audio file and start looping. As you move the offset by dragging, the clip's notches move to show the point at which the clip will start looping.
Creating Fades and Crossfades in the Timeline
One of the most common tasks of a sound editor is adding fade-ins and fade-outs to individual clips and crossfades between clips to smooth the overall sound of a video or motion picture soundtrack.
Creating Fade-Ins and Fade-Outs in the Timeline
Soundtrack Pro lets you easily add fades and crossfades and adjust the fade type directly in the multitrack Timeline.
To create a fade-in or fade-out on a clip in the Timeline:
1 Move the pointer Over the top-left edge of the clip (for a fade-in) or top-right edge of the clip (for a fade-out).
The pointer becomes a fade pointer.
2 Drag from the corner toward the center of the clip.
A fade is superimposed over the clip.

3 Drag the edge of the fade left or right to adjust the fade duration.
To adjust the fade type:
1 Double-click the fade in the Timeline.
The Fade Selector window appears.
2 Click one of the four buttons on the left side of the Fade Selector to select a fade type.
- Linear: The rate of attenuation stays constant over the length of the fade.
- Logarithmic: Starts quickly, then slowly tapers off toward the end.
- Exponential: Starts slowly, then moves quickly toward the end.
- S-curve: Eases in and out of the fade, with the midpoint at 0 dB.
Note: This list describes the different types of fade-ins. The reverse behavior is true for fade-outs in the logarithmic and exponential cases.

The fade in the Timeline is updated to reflect your choice of fade type.

Note: The default fade type is +3 dB. Choose Soundtrack Pro > Preferences > General to change the default fade type.
Creating Crossfades Between Audio Clips
Crossfades let you create smooth transitions between one audio clip and the next and avoid clicks or sudden changes in loudness that can result when placing audio files one after another.
To create a crossfade between audio clips, you set the project to crossfade mode, then drag an audio clip so that it overlaps another clip. A crossfade is created for the length of the overlapped area.
To set the project to crossfade mode:
- Click the Crossfade Mode button, located above the Global Timeline view.
In crossfade mode, when you drag an audio clip so that it partially overlaps another audio clip in a track in the Timeline, a crossfade is created for the overlapped part of the two audio files. You can adjust the boundaries of the crossfade in the Timeline.
To create a crossfade:
In the Timeline, drag an audio clip so that it overlaps another audio clip.
The crossfade appears in the overlapped area of the two clips.

You can adjust crossfades in several ways. You can change the edges of the crossfaded clips or move the position of the crossfade without changing its length.
To adjust crossfade boundaries:
1 Move the pointer over the left or right edge of the crossfade.
The pointer becomes a crossfade pointer.
2 Drag the edge of the crossfade to adjust the crossfade boundary.
To move the crossfade without changing its length:
- Drag the lower area of the crossfade left or right.
As with other edits you make in the Timeline, creating a crossfade between two audio clips does not change the source audio files.
To adjust the crossfade type:
1 Double-click the crossfade.
The Fade Selector window appears with two columns of the four fade type choices.
Note: For descriptions of the four fade types, see "To adjust the fade type:" on page 159.
2 Click one of the four buttons in the column on the left to select a fade-out type for the left clip.
The crossfade in the Timeline is updated to reflect your choice of fade type.

natural_image
Pure geometric line patterns without any text, numbers, or symbols3 Click one of the four buttons in the column on the right to select a fade-in type for the right clip.
The crossfade in the Timeline is updated to reflect your choice of fade type.

natural_image
Abstract geometric shapes including curved and straight lines within a grid, with no text or symbols present.Tip: Fades and crossfades can be applied using keyboard shortcuts. For a complete list of Soundtrack Pro keyboard shortcuts, see Appendix A, "Soundtrack Pro Keyboard Shortcuts," on page 449.
Truncating Overlapping Audio Clips
You can have Soundtrack Pro truncate the overlapping part of audio clips in the Timeline instead of crossfading them. To truncate audio clips, you set the project to truncate mode, then drag an audio clip so that it overlaps another clip.
To set the project to truncate mode:
- Click the Overlap Mode button, located above the Global Timeline view.
In truncate mode, when you drag an audio clip so that it partially overlaps another audio clip in a track in the Timeline, the overlapped part of the clip is truncated.
To truncate an audio clip:
In the Timeline, drag another audio clip over part of the clip.

Editing Audio Clips in the Multitrack Timeline
Most audio applications focus on multitrack editing or waveform editing, but not both. Furthermore, most waveform editing applications handle media destructively—making permanent changes to your media files. Soundtrack Pro provides the best of both worlds: nondestructive waveform editing while working in a multitrack project.
You can edit audio clips in a variety of ways in the Timeline. You can select, cut, copy, and paste clips, move, resize, transpose, split and join them, and edit them in other ways. You can also apply any actions and process menu operations to any clip directly in the Timeline.
You can view and modify a clip's media file in the File Editor tab without losing the context of your multitrack timeline. This is called editing in place. Simply select a clip in the Timeline and it appears in the File Editor tab below. The playhead in the Timeline and the File Editor tab are synchronized so you can play the media file within the context of your whole multitrack project. Any changes you make to the media file are updated in the Timeline immediately. You can also solo any item in the File Editor tab.


If you prefer, you can also double-click a clip in your multitrack project and its media file opens in the File Editor project view, ready for waveform editing. Changes you make to the file are instantly reflected in the multitrack project.
Using the Timeline Editing Tools
The Timeline includes editing tools you can use to edit and adjust clips in the Timeline.
Selection Tool
When you open the Timeline, the pointer is a selection pointer (arrow). You can use the Selection tool to select clips and tracks by clicking them and use it to make marquee selections across multiple tracks. When you are done using another Timeline editing tool, you can return the pointer to a selection pointer by clicking the Selection Tool button or by pressing A.
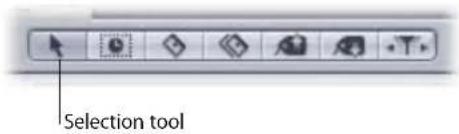
Timeslice Tool
You can use the Timeslice tool to make time-based selections. Timeslice tool selections are entirely time-based, so you can use the Timeslice tool to select portions of clips or portions of multiple clips. (This is unlike selections across multiple tracks with the default Selection tool, which can only select whole clips.) Timeslice selections in the Timeline will also appear as selections in the File Editor tab. For more information about the Timeslice tool, see "Editing with the Timeslice Tool" on page 174.

Blade and Blade All Tools
Using the Blade tool, you can perform many splits consecutively without moving the playhead each time. Use the Blade All tool to split across all tracks. For more information about the Blade and Blade All tools, see "Splitting and Joining Audio Clips" on page 170.

Lift and Stamp Tools
The Lift and Stamp tools provide an efficient way to transfer properties from one clip to one or more other clips. Use the Lift tool to copy properties from selected clips and create a processing template in the Sound Palette that can be applied to other clips. Use the Stamp tool to apply those properties to the other clips. For more information about the Lift and Stamp tools, see "Using the Lift and Stamp Tools" on page 179.
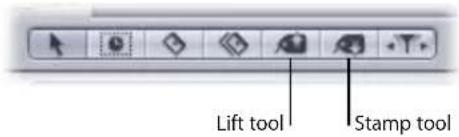
Scrub Tool
The Soundtrack Pro Scrub tool provides detailed scrubbing that realistically approximates the "rock-the-reels" scrubbing on analog tape decks. For more information about the Scrub Tool, see "Scrubbing Audio Files" on page 200.

Timeline Editing Tools HUD
The Timeline includes a handy HUD that provides all of the graphical Timeline editing tools at the stroke of a single keyboard shortcut. This saves you the time and effort of having to move the pointer up to the top of the Timeline whenever you need to select (or deselect) a Timeline editing tool.
To use the Timeline Editing Tools HUD:
1 Press the grave accent key ( ).
The Timeline Editing Tools HUD appears at the pointer location.

2 In the HUD, do one of the following to choose the Timeline editing tool that you want to use:
- Click the tool's icon.
- Press the corresponding number key (1–7, left to right).
- Use the Left and Right Arrow keys and press Enter.
When you have finished using a Timeline editing tool, it is a good idea to immediately return to the default Selection tool.
Editing in Place
Editing a clip's media file in place (directly in the Timeline) is nearly identical to editing any other media file in the Soundtrack Pro File Editor. All of the same effects, editing tools, and waveform views are available. However, there are a few differences:
- Timeline and File Editor playhead synchronization: When you edit a clip's media file in place, the Timeline and File Editor playhead are synchronized so you can work with the media file within the context of your multitrack project.
- Multiple region markers: Because a media file may be referred to by multiple clips in a multitrack project, you may see multiple region markers above a media file in the File Editor. Each region marker shows the In and Out points of a clip in the Timeline that refers to this media file. This alerts you to the fact that changes you make to this media file may affect multiple clips.
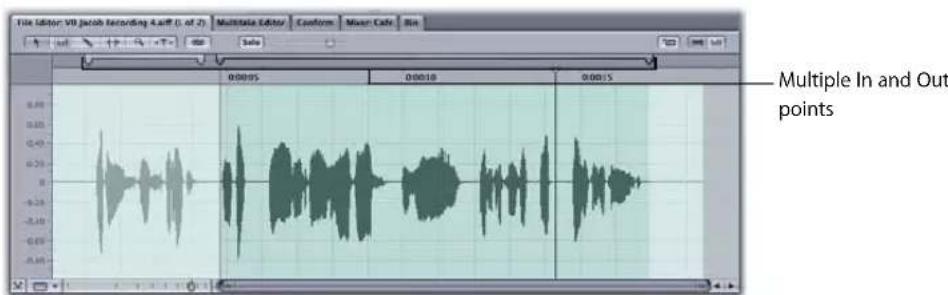
How Clips Are Affected by Media File Editing
When you modify a media file in a multitrack project, all clips that refer to that media file are updated simultaneously. For example, if you have ten clips referring to the same media file and you double-click one of the clips to modify its underlying media file, any changes you make to the media file affect all ten clips.
How Source Audio File Editing Works in a Soundtrack Pro Multitrack Project
When you edit a clip in place or open a clip in the File Editor tab, the way the source audio file is handled depends on its file format.
- If the clip's audio file format is a native Soundtrack Pro audio file project: The audio file project is opened directly in the File Editor tab, allowing you to make nondestructive changes to the media.
- If the clip's audio file format is a flat file such as an AIFF or WAVE file: Soundtrack Pro automatically creates a Soundtrack Pro audio file project for the flat file and relinks all clips in the project to the new audio file project. This allows you to work with this media nondestructively. Each time you save your multitrack project, any newly created audio file project media files are saved to the Edited Media Location on your hard disk. (You can change this location by choosing Soundtrack Pro > Preferences and then clicking General.)
Modifying a Clip Without Affecting Its Source Media
Any time you use multiple instances of the same clip in a multitrack project, the clip refers to the same source media file. This means that any time you modify the media file, all of the clips that refer to the media file are affected. How do you edit just one clip without editing its source media? In cases where you only want to make changes to a single clip, you can make a new copy of the clip's media file in a new audio file project and link this clip to the new audio file project.
To create a copy of a clip's media file and link the clip to the new audio file project:
1 Select the clip whose source media file you want to copy.
2 Control-click the clip in the Timeline, then choose Replace with Independent Audio File Project from the shortcut menu.

A new Soundtrack Pro audio file project is created that includes a copy of the original audio file. Only media between the clip's In and Out points is copied, plus handles on either side for later trimming, if necessary.
The new audio file project opens in the File Editor tab and the clip now links to the new audio file project.
Note: The default handle duration is 5 seconds. To adjust the handle duration, go to Soundtrack Pro > Preferences > General.
Using the Multitrack Timeline and the File Editor Together
One of the unique advantages of Soundtrack Pro is the combination of nondestructive waveform editing in the context of a multitrack Timeline. This section focuses on how you can exploit this powerful toolset in your sound editing project.
Making Changes in the File Editor and Hearing Them in the Timeline
When you arrange a multitrack project, you frequently need to edit and adjust individual audio files, and immediately hear the results in the context of the larger multitrack Timeline. You can do this by using the Timeline and File Editor in tandem.
To make changes in the File Editor and hear the results in the Timeline:
1 With the File Editor tab active, select a clip in the Timeline that you would like to adjust. The waveform for the clip appears in the File Editor.

2 Make adjustments and edits to the clip in the File Editor.
For information on making basic edits, see "Editing Audio Files in the File Editor" on page 198. For information on processing effects, see "Processing Audio Files" on page 219. For information on analyzing files, see "Analyzing an Audio File" on page 236.

3 As you make changes to the clip in the File Editor, the Actions tab records the changes. You can adjust, edit, and reorder the actions as needed.

For information on using actions, see "Working with Actions" on page 230.
Note: Any time you apply a command from either the Edit menu or the Process menu, Soundtrack Pro creates an audio file project (.stap) for the source audio file if one doesn't exist already. Clips that reference the audio source file all have their audio source replaced with that audio file project.
4 Play the clip.
Soundtrack Pro plays the clip together with any other active tracks in the Timeline.
5 Make any other adjustments and edits to the clip in the File Editor (or to the actions in the Actions tab) and play the clip again. Repeat as necessary.
Spotting Sound Effects from the File Editor to the Timeline
A common task for sound editors is adding sound effects or ambient clips to a multitrack project. Often you will use one or more small sections from a longer source file. You can make quick work of this by using the File Editor tab in conjunction with the Timeline.
To add small sections of a longer audio file to a multitrack project:
1 Open the multitrack project in the Timeline.
2 Drag an audio file to the File Editor tab.
3 Select a portion of the audio file in the File Editor tab.
4 Drag it to a track in the Timeline.
5 Select another portion of the audio file in the File Editor tab.
6 Drag it to a track in the Timeline.
Optionally, you can open the Multipoint Video HUD to give you visual context for spotting the sound effects to the Timeline. For more information about the Multipoint Video HUD, see "Scrubbing and Spotting with the Multipoint Video HUD" on page 322.
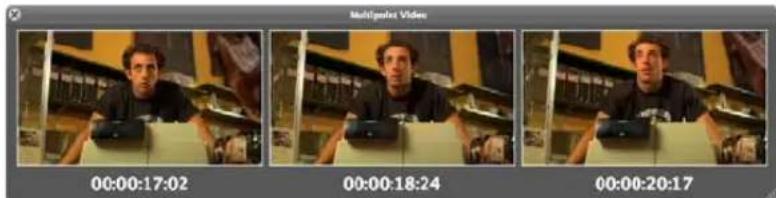
Splitting and Joining Audio Clips
You may want to use only part of the source audio file in an audio clip. Soundtrack Pro lets you split the clip into segments and use the segments in the Timeline as independent clips. You can move the segments, edit them, and split each one into additional segments. You can also easily (re)join clips.
You can split clips by using the Split command or by using the Blade (razor) and Blade All tools. Each method has advantages, depending on the situation.
Splitting Clips with the Blade Tool
Using the Blade tool, you can perform many splits consecutively without moving the playhead each time.
To split audio clips with the Blade tool:
1 Click the Blade Tool button above the Timeline.

The pointer changes to the Blade All pointer.
2 Click a clip at the point where you want to split it.
The clip is split at the point where you clicked.

Splitting Clips Across All Tracks with the Blade All Tool
Use the Blade All tool to split across all tracks.
To split audio clips on all tracks with the Blade All tool:
1 Click the Blade All Tool button above the Timeline.

The pointer changes to the Blade All pointer.
Note: To toggle between the Blade and the Blade All tools, hold down the Shift key while either tool is selected.
2 Click anywhere in the Timeline where you want to split clips on all tracks.
Note: If you use the Blade All tool in the podcast track, it cuts the podcast track as well as any audio clips that are also under the Blade All tool. However, if you use the Blade All tool in an audio track, it does not make a cut in the podcast track.
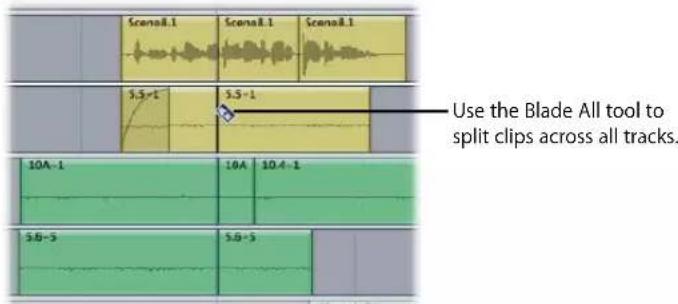
Splitting Clips with the Playhead
Using the playhead, you can split clips while a project is playing, split clips on selected tracks, and split clips without having to use the mouse.
To split selected audio clips with the playhead:
1 Set the playhead at the point where you want to split the clip, then select the clip or clips you want to split.
You can split multiple clips in the same operation.

2 Choose Clip > Split (or press S).
Every selected clip under the playhead is split into two segments. The first segment ends at the playhead position, and the second segment begins at the playhead position.
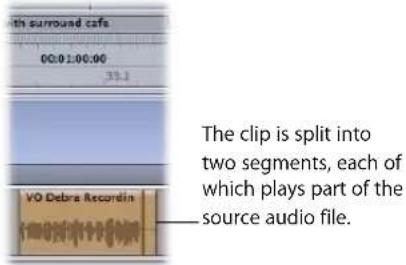
You can split an audio clip into three segments with the Timeslice tool by making a selection in the middle of the audio clip (any part not including either the beginning or the end), and then pressing the S key. The clip is split into three segments, defined by the beginning and end of the selection. For more information about the Timeslice tool, see "Editing with the Timeslice Tool" on page 174.
To split audio clips on selected tracks:
1 Set the playhead at the point where you want to split the clip or clips.
2 Select the track or tracks containing the clip or clips you want to split.
3 Choose Clip > Split (or press S).
Every clip under the playhead on the selected tracks is split into two segments. The first segment ends at the playhead position, and the second segment begins at the playhead position.
Note: Any clip selections will supersede track selections: if both clips and tracks are selected under the playhead, Soundtrack Pro will split only the clips.
To split audio clips while playing a project:
1 Do one the following:
- Select the clip or clips you want to split.
- Select the track or tracks containing the clip or clips you want to split.
2 Play the section of the Timeline containing the clip or clips you want to split.
3 While the project is playing, press S as often as you like.
The clip or clips are split at the playhead each time you press S.
Joining Audio Clips
You can join clips from the same original audio file, including segments of split clips. Clips being joined must be adjacent to each other and in the same track.
To join audio clips:
1 Place the clips next to each other in the same track.
2 Select the clips, then choose Clip > Join (or press Option-S).
When you join looping files or segments of looping files, the joined file plays to the end of the source audio file before looping. The notches in the joined file indicate the end of the source audio file.
Editing with the Timeslice Tool
You can use the Timeslice Tool to make time-based selections. Unlike selections of multiple clips with the default Selection tool (which can only select whole clips), Timeslice tool selections are entirely time-based. This means you can use the Timeslice tool to select portions of clips or portions of multiple clips. You can also easily move and adjust the size of a Timeslice tool selection and add or remove entire tracks from the selection. This is most important for processing effects.

Use the Timeslice tool to select any combination of the following:
• One or more clips or tracks and their envelopes
- Portions of one or more clips or tracks and their envelopes
To make a selection with the Timeslice tool:
1 Click the Timeslice tool at the top of the Timeline (or press W).
2 Drag across any portion of the Timeline to make a Timeslice selection.
A Timeslice selection rectangle appears over the area. By default, the selection includes all of the clips within the rectangle and their envelopes.
To select a portion of a clip with the Timeslice tool:
1 Click the Timeslice tool at the top of the Timeline (or press W).
2 Drag across any portion of the clip with the Timeslice tool.
A Timeslice selection rectangle appears over the portion of the clip and the File Editor tab displays the same selection in its waveform view. By default, the selection includes all of the clip's envelopes.

To adjust the size of a Timeslice selection, do one of the following:
- Drag any of the four edges of the selection to extend or shorten that side of the selection rectangle.
Shift-click any track you want to include in the Timeslice at the opposite end of the area you want to select.
To move a Timeslice selection:
- Click the center of the Timeslice selection, then drag it to a new location in the Timeline.
To add a noncontiguous track, bus, or submix to a Timeslice selection:
■ Command-click anywhere in the track, bus, or submix.
Note: You can add tracks, busses, and submixes that are not adjacent to or contiguous with the selection.

To remove a track, bus, or submix from a Timeslice selection:
■ Command-click anywhere in the track.
You can select a master Timeslice that includes the audio content and the envelopes of all tracks, busses, and submixes, including the video's audio track. (Only a master Timeslice contains busses and submixes.)
To make a master Timeslice selection:
- Using the Timeslice tool, drag in the selection bar of the video track, located above the Time ruler.
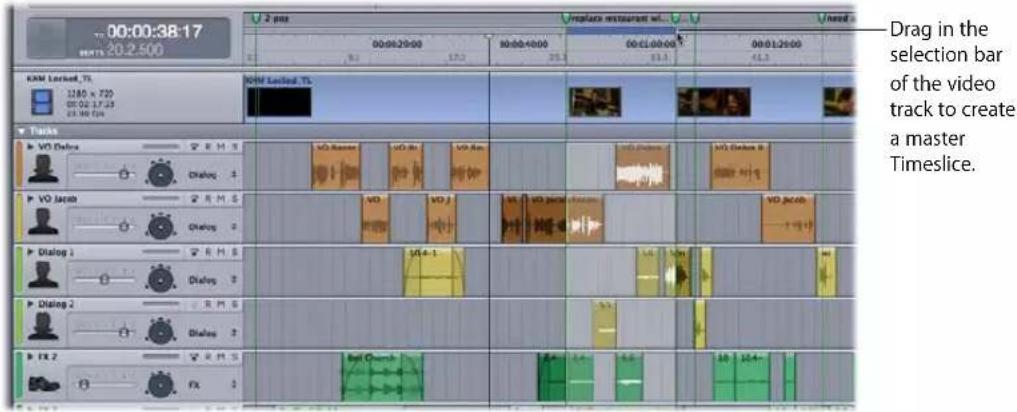
Cutting, Copying, and Pasting Timeslices
You can cut or copy a Timeslice and paste it at a different position in the Timeline.
To cut a Timeslice:
■ Select the Timeslice, then choose Edit > Cut (or press Command-X).
To copy a Timeslice:
■ Select the Timeslice, then choose Edit > Copy (or press Command-C).
To paste a Timeslice:
- Set the playhead at the position where you want to paste the Timeslice, then choose Edit > Paste (or press Command-V).
If the Timeslice is from a single track, it is pasted in the same track at the current playhead position. If the Timeslice includes multiple tracks, the topmost track of the Timeslice is pasted in the currently selected track, and the remaining tracks are pasted in the tracks below the selected track. If not enough tracks exist for the number of tracks in the Timeslice, a dialog appears asking if you want to create additional tracks.
Deleting the Contents of Timeslices
To delete the contents of a Timeslice selection:
■ Select the Timeslice, then choose Edit > Delete (or press the Delete key).
Changing the Timeslice Selection Area
You can change the height or the length of a Timeslice selection area to include more of the Timeline, either graphically or numerically.
To extend the Timeslice selection area graphically:
Shift-click any track at the point to which you want to extend it.

To change the In point, Out point, or duration of a Timeslice numerically:
1 Make a Timeslice selection in the Timeline.
The Details tab displays Timeslice controls.
2 In the Details tab, type a new value in the In value slider, the Out value slider, or the Duration value slider.

3 Press Tab or Enter to confirm the new value.
Note: To the right of the Timeline transport controls is the Selection Length value slider. When a Timeslice is active, the Selection Length value slider shows the length (duration) of the active Timeslice. You can use this value slider the same way you use the Duration value slider in the Timeslice section of the Details tab.
For more information on how to use value sliders, see "About Changing Values and Timecode Entries" on page 75.
Using the Timeslice Tool with Keyboard Shortcuts
Soundtrack Pro provides a variety of keyboard shortcuts to adjust Timeslice selections.
To extend the left edge of the Timeslice selection by one gridline:
■ Press Shift-Left Arrow.
To extend the right edge of the Timeslice selection by one gridline:
■ Press Shift-Right Arrow.
For a complete list of Soundtrack Pro keyboard shortcuts, see Appendix A, "Soundtrack Pro Keyboard Shortcuts," on page 449.
Using the Lift and Stamp Tools
The Lift and Stamp tools provide a time-saving way to apply work you have done on one clip to one or more other clips. Use the Lift tool to copy properties from selected clips and create a processing template in the Sound Palette that can be applied to other clips. Use the Stamp tool to apply those properties to the other clips.
You can use the Sound Palette to customize the processing template by enabling and disabling various properties, naming the template, and saving it as a preset. You can also add a thumbnail image to represent the preset. Presets are saved in the Sound Palette so that you can select and edit them and apply them in multiple multitrack projects.

To lift properties from a clip in the Timeline:
1 Click the Lift tool at the top of the Timeline (or press UU).
The Sound Palette appears. As you move the pointer over clips in the Timeline, it changes into the Lift pointer.
2 If you want to limit the type of properties lifted, deselect either of the two checkboxes at the top of the Sound Palette:
- Lift Analysis Items: These include Clicks and Pops, Power Line Hum, DC Offset, Phase, Clipped Signal, and Silence.
- Lift Process Items: These include processing effects in these categories: Dynamics, Distortion, EQ and Filter, Modulation, Reverb/Delay, Miscellaneous, and Mac OS.
3 Click a clip in the Timeline whose properties you want to lift.
Soundtrack Pro creates a temporary template named Lifted Data (Track Name) with Track Name being the track holding the source clip. The clip properties appear in the list on the right of the Sound Palette HUD. The pointer immediately changes to the Stamp pointer, ready for you to stamp the template of lifted properties to another clip. The properties in the Sound Palette template appear in the same order they appear in the Actions tab for the source clip.
To stamp properties on one or more clips in the Timeline:
1 If you are stamping on more than one clip, select the target clips in the Timeline.
2 In the Sound Palette, select the template or preset containing the properties you want to stamp. (This is only necessary if there are already presets on the left side of the Sound Palette.)

3 Choose one of the following from the pop-up menu at the center-bottom of the Sound Palette:
- Add: Adds the properties selected in the Sound Palette to the list of actions in the target clip's Actions tab.
- Replace: Replaces the actions in the target clip's Actions tab with the properties selected in the Sound Palette.

4 Do one of the following:
- Click the Stamp tool at the top of the Timeline (or press U), then click the target clip or clips in the Timeline.
- If the target clip is already selected in the Timeline, click Stamp in the lower-right corner of the Sound Palette.
Actions appear in the target clip's Actions tab for each property listed in the selected template or preset in the Sound Palette. They appear in the same order as they appear in the Sound Palette.
Note: By default, Soundtrack Pro applies equalization every time you use the Lift and Stamp feature. This equalization automates the Match EQ effect, which matches the average frequency spectrum of the target clip to that of the source clip.

When you first lift properties with the Lift tool, Soundtrack Pro creates a temporary template in the Sound Palette named Lifted Data (Track Name), with Track Name being the track holding the source clip.
To save a Sound Palette preset:
- With a template loaded on the right of the Sound Palette, click Save as Preset in the lower-right corner.
The template is listed as a preset on the left of the Sound Palette.

To enable or disable properties in a Sound Palette preset:
1 If there are already presets on the left of the Sound Palette, click the template or a preset to edit it.
2 In the Enabled column, click the checkbox next to the property you want to enable or disable.
To name or rename a Sound Palette preset:
1 If there are already presets on the left of the Sound Palette, click the template name or a preset name that you want to name or rename.
The template or preset details are loaded on the right of the Sound Palette.
2 Click the name field at the top-right corner of the Sound Palette.

3 Enter the new name.
4 Press Return or Tab to confirm the new name.
To attach a thumbnail image to a Sound Palette preset:
1 Click the preset name in the list on the left of the Sound Palette.
2 Do one of the following:
- Drag a still image from the Finder or from iPhoto to the image well at the top of the Sound Palette.
- Copy an image in an image editing application and paste it into the image well at the top of the Sound Palette.
The image appears in the image well each time you select the preset.
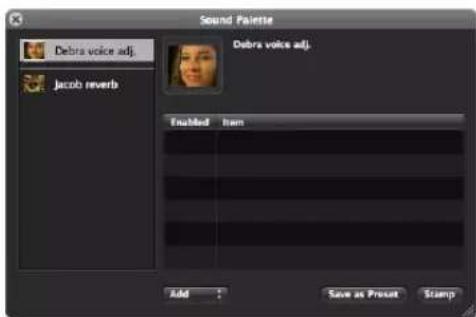
To delete a Sound Palette preset:
■ Control-click the preset name in the list on the left of the Sound Palette, then choose Delete from the shortcut menu.
Working with Markers
Markers have a variety of uses in the Timeline and the File Editor. For example, you can use markers to:
- Mark the start and end points of major sections in your project
- Indicate places you want to come back to and work on later
- Mark points where you want to synchronize the audio with the picture in a video
- Indicate where particular sounds begin and end in an audio file
Markers extend vertically through the Timeline, like the playhead. Each marker has a handle in the area above the Time ruler, letting you position the marker precisely in the Timeline.
Types of Markers
Soundtrack Pro displays Final Cut Pro scoring markers, and lets you add your own markers to a project. You can add two kinds of markers: time markers and beat markers. The two types can be distinguished by their handles: Time markers have green handles, and beat markers have purple handles. Final Cut Pro scoring markers have orange handles. By default, time and beat markers can only occupy a single frame of time, but their duration can be extended to any length.
This section discusses how to work with time markers and beat markers in a project. For information about working with Final Cut Pro scoring markers, see "Using Final Cut Pro Scoring Markers" on page 185.

Inserting Markers
You can insert a beat marker or time marker at any point in the Timeline.
To insert a time marker:
- Set the playhead to the point where you want to add the marker, then choose Project > Insert Time Marker (or press the M key).
To insert a beat marker:
- Set the playhead to the point where you want to add the marker, then choose Project > Insert Beat Marker (or press Option-B).
Naming Markers
You can name time markers and beat markers, so that each marker can provide a unique visual cue to a specific point in the Timeline or File Editor. For example, you can name markers to define sections of your project (Introduction, Verse, or Chorus), to reflect what's happening in the music (Latin Rhythm or Fast Groove), or to serve as reminders for your workflow (Add Horns Here, Transpose to D, Insert Delay Effect).
To name a time marker or beat marker:
■ Make the Details tab active, select the marker, then type a name in the Name field of the Details tab.

To view marker titles in the Timeline:
- Choose View > Show Marker Titles.
Moving Markers
You can move a marker either by dragging the marker's handle, or by entering a new position for the marker in the Details tab.
To move either a beat marker or time marker, do one of the following:
- Drag the marker by its handle, located in the area above the Time ruler, to a new position in the Timeline.
■ Show the Details tab, click the marker you want to move, then enter a new position in the Position field.
You can also select and drag multiple markers. When you move a marker by dragging, the marker's position snaps to the nearest Snap To position if snap is turned on. For information on setting the Snap To value, see "Creating Fades and Crossfades in the Timeline" on page 158.
Adjusting a Marker's Duration
By default, Time markers and Beat markers have a duration of zero, but you can create Time or Beat region markers by changing the duration of any marker. You adjust a marker's duration either by entering a new duration for the marker in the Details tab, or, if it is already a region marker, by dragging the ends of a marker handle.
To adjust a marker's duration, do one of the following:
- Show the Details tab, click the marker you want to adjust, then enter a new duration in the Duration field.
- Adjust a region marker by dragging the end of its handle.

Deleting Markers
If you decide you don't want a time or beat marker that you've added, you can delete it at any time.
To delete a marker:
- Click the marker handle to select the marker, then choose Edit > Delete (or press Delete).
Note: You cannot delete Final Cut Pro scoring markers in Soundtrack Pro.
Using Markers with Video
Soundtrack Pro displays Final Cut Pro scoring markers included in a video file imported from Final Cut Pro. You can add time markers at points in time corresponding to specific timecode positions in the video clip, and align audio clips with markers using the snapping feature. When you add a marker to a project containing a video, the video clip displays the frame of the video that occurs at the marker's position in time.
For more information about adding and moving markers, see "Working with Markers" on page 183.
You can score both Final Cut Pro scoring markers and time markers to the playhead, letting you synchronize the audio with specific points in the video.
Using Final Cut Pro Scoring Markers
When you import a video file from Final Cut Pro or Final Cut Express HD,
Soundtrack Pro displays any Final Cut Pro scoring markers included in the video file in the Timeline. Scoring markers have an orange handle in the area above the Time ruler.
You cannot move or edit Final Cut Pro scoring markers in Soundtrack Pro.
Using Markers to Align Audio Clips to Timecode
You can add a time marker at a specific timecode position in a video clip, and align audio clips with the time marker or with a Final Cut Pro scoring marker.
To add a time marker at a specific timecode position in a video clip, do one of the following:
■ Type the timecode position where you want to add the marker in the Time display, press Return, then choose Mark > Insert Time Marker (or press M).
■ Make the Details tab active, add a time marker, select the marker handle, then enter a new position in the Position value slider in the Details tab.
In order to add a marker at a specific timecode position, the Time ruler units must be set to the timecode format of the video in your project.
To align an audio clip with a marker:
■ Make sure that snapping is turned on and that Markers is selected in the View > Snap to menu, then drag the clip to the position of the marker in the Timeline.

Note: You can momentarily toggle snapping by pressing N.
Scoring a Marker to the Playhead
For tracks set to Beats-based time format, you can score a time marker or Final Cut Pro scoring marker to the playhead, so that you can synchronize the audio with the video. Scoring a marker to the playhead adjusts the tempo so that the required number of beats exactly fills the amount of time between the last tempo change and the marker's position in the Time ruler.
When you score a marker to the playhead, a set of special envelope points is created in the project's tempo envelope, from the previous envelope point (or the beginning of the tempo envelope, if no previous envelope point exists) to the position of the marker. These special envelope points are locked and cannot be moved (but can be deleted). The locked envelope points, and the segment of the tempo envelope between them, appear red.
The tempo change created when you score a marker to the playhead is always instantaneous; that is, the tempo changes from the previous tempo immediately, without ramping. The distance between the two envelope points determines whether the resulting tempo change can be heard easily. If the resulting change in tempo sounds too abrupt, you can edit the tempo envelope to make the tempo change less noticeable.
To score a marker to the playhead:
1 Select the marker's handle at the top of the Timeline, above the Time ruler.

2 Choose Mark > Score Marker to Playhead.

You can also adjust the tempo relative to a marker's position by Option-dragging the marker in the Timeline. As you drag, the red segment of the tempo envelope moves vertically as the tempo changes. By Option-dragging a marker, you can synchronize the marker's position with the Beats-based units.
Note: If you score a marker to the playhead, and the tempo change resulting from the scoring operation sounds too noticeable or extreme, you can undo the scoring operation. After undoing the scoring operation, add an envelope point to the tempo envelope at a point after any audio clips you do not want to be affected by the tempo change, but before the marker to be scored, then repeat the scoring operation.
Working with Tagged and Looping Clips
Soundtrack Pro includes a large selection of Apple Loops that you can use to add Foley effects, background ambience, sound effects, and music transitions to your projects. Apple Loops tagged as looping files automatically match the tempo and key of the project.
Transposing Tagged Audio Clips
When you drag an audio file tagged with key information to the Timeline,
Soundtrack Pro transposes the clip to the project key. You can transpose tagged clips to another key to create chord progressions from the same audio file or to achieve other musical effects. You can transpose a tagged clip to any interval from one octave above (+12 semitones) to one octave below (-12 semitones) its current key.
Note: Soundtrack Pro uses the key tag in the audio file to transpose it. In order to be correctly transposed, the file must be tagged.
To transpose a tagged audio clip, do one of the following:
- Select the clip, choose Clip > Transpose, then choose the number of semitones by which you want to transpose the clip up or down.
- Select the clip, open the Details tab, then use the Transpose pop-up menu to choose the number of semitones by which you want to transpose the clip up or down.
Changing a Clip's Playback Mode
Audio files you add to the Timeline can be either looping or non-looping. Looping files are special audio files that can be used to create repeating patterns, and include musical phrases useful for creating music beds. Audio files containing discrete, non-rhythmic sounds, sound effects, and other non-musical sounds such as dialogue or sound effects should be used as non-looping files in most cases.
When you add an audio file to the Timeline, the audio file is added as a clip with non-looping playback mode unless the audio file is tagged as a looping file. You can change the playback mode of a clip after you add it to the Timeline.
To convert the playback mode to looping, do one of the following:
■ Select the clip, then choose Clip > Convert to Looping.
■ Control-click the clip in the Timeline, then choose Convert to Looping from the shortcut menu.
To convert the playback mode to non-looping, do one of the following:
- Select the clip, then choose Clip > Convert to Non-Looping.
- Control-click the clip in the Timeline, then choose Convert to Non-looping from the shortcut menu.
Replacing the Source Audio in a Clip
Each audio clip in the Timeline has a set of properties specific to the clip, including duration, speed, and transposition. You can replace the source audio in the clip while preserving the clip's properties. This feature has a variety of uses, such as letting you try out similar audio files (for example, music beds or sound effects) while maintaining the clip's duration, position in the Timeline, and transposition.
For information about properties of audio clips, see "Reconnecting Media Files" on page 96.
To replace the source audio file for a clip:
1 In the Timeline, select the clip for which you want to replace the source audio.
2 In any media tab, Control-click the audio file that will replace the selected clip's audio, then choose Replace Selected Clips With [filename] from the shortcut menu.

Select a clip,
Control-click the audio
file that will replace the
original audio...
...then choose the Replace option from the shortcut menu.
When you replace the source audio in a clip, the clip's duration and offset stay the same. Only the portion of the new source audio file equal to the clip's length plays. If the new source audio file is a music loop and it is shorter than the clip's length, the clip loops when it reaches the end of the new source audio file. Notches appear on the clip to indicate the point at which the clip starts looping.
You can replace the source audio in all clips using the same source audio file with another source audio file by using the Select All Occurrences and Replace Selected Loops commands together.
To replace the source audio file in all clips using the same source file:
1 Select all occurrences of the clip for which you want to replace the source audio file, following the steps described in "Selecting Audio Clips in the Timeline" on page 147. Every clip using the same source audio file is selected.
2 In the Timeline, select the clip for which you want to replace the source audio.
3 In any media tab, Control-click the audio file that will replace the selected clip's audio, then choose Replace Selected Clips With [filename] from the shortcut menu.
Editing Audio Files
6
In Soundtrack Pro, you can edit audio files nondestructively, analyze and fix common audio problems, and create AppleScript documents to batch process other audio files.
The Soundtrack Pro File Editor gives you extensive audio file editing capabilities. You can open and edit an audio file with up to 24 channels in the File Editor, view it in Waveform or Frequency Spectrum view, process the file using actions, analyze it for common audio problems, fix analyzed problems individually or together, and then save the edited file as an audio file project or as a standard audio file.

Waveform view

Spectrum view
And you can do all this while working interactively with same audio file in the multitrack Timeline and while hearing (and seeing) the file in the context of other audio files in a multitrack project.
In addition, the File Editor project view includes realtime effects and effects automation, AppleScript droplet creation, and other useful features. For more information about the File Editor project view, see "Using the File Editor Project View" on page 240.
Important: In order to edit nondestructively and save a file with actions, you need to convert standard audio files (such as AIFF or WAVE files) to Soundtrack Pro audio file projects (with the .stap file extension). You can easily do this by opening an AIFF or a WAVE file in Soundtrack Pro and then saving it as a Soundtrack Pro audio file project.
You can open the following audio file formats in the File Editor:
• Soundtrack Pro audio file project
• AIFF (including Apple Loops)
• WAVE
• Sound Designer II
- NeXT
- QuickTime movie containing audio tracks
• CAF (Apple Core Audio Format)
Compressed formats such as MP3 and AAC files are also supported, although these must be internally decompressed to a linear PCM format.
Soundtrack Pro supports audio files with any sample rate between 8 kHz and 192 kHz and any of the following bit depths: 8, 16, 24, 32, and 32-bit floating point. You can edit up to 24 tracks in a single file. You can play back up to six channels in a single file in the multitrack Timeline. Audio files can be a maximum of 4 hours in length.
Note: When you play the file, Soundtrack Pro plays at the nearest sample rate your hardware can support.
Audio File Projects
Soundtrack Pro allows you to edit individual audio files (sometimes known as waveform editing) using Soundtrack Pro audio file projects. However, unlike most waveform editing applications, Soundtrack Pro allows you to edit your audio files nondestructively by keeping track of the actions you have performed on your audio file.
You can remove, disable, or reorder past actions at any time or save actions as AppleScript documents that you can use to batch process other audio files. Actions you can perform include trimming audio, copying and pasting parts of the waveform, normalizing or amplifying levels, applying effects, and applying noise, pop, and click reduction.
Editing Audio Files Directly in a Multitrack Project
Most audio applications focus on multitrack editing or waveform editing, but not both. Furthermore, most waveform editing applications handle media destructively—making permanent changes to your media files. Soundtrack Pro provides the best of both worlds: nondestructive waveform editing while working in a multitrack project.
You can view and modify a clip's media file in the File Editor tab without losing the context of your multitrack Timeline. This is called editing in place. Simply select a clip in the Timeline and it appears in the File Editor tab below. The playheads in the Timeline and the File Editor tab are synchronized so you can play the media file within the context of your whole multitrack project. Any changes you make to the media file are updated in the Timeline immediately.

If you prefer, you can also double-click a clip in your multitrack project and its media file opens in a new File Editor project view, ready for waveform editing. Changes you make to the file are instantly reflected in the multitrack project.
Editing in Place
Editing an audio file directly in the multitrack Timeline is nearly identical to editing any other audio file in the Soundtrack Pro File Editor. All of the same effects, editing tools, and waveform views are available. However, there are several differences:
- Timeline and File Editor playhead synchronization: When you edit a clip's media file in place, the Timeline and File Editor playheads are synchronized so you can work with the media file within the context of your multitrack project.
- Multiple region markers: Because a media file may be referred to by multiple clips in a multitrack project, you may see multiple region markers above the ruler in the File Editor tab. Each region marker shows the In and Out points of a clip in the Timeline that refers to this media file. In addition, the display of the name of the file in the File Editor tab changes to reflect the number of clips that refer to this media file; for example, "Scene8.aiff (1 of 4)." These indications alert you to the fact that changes you make to this media file may affect multiple clips.

How Clips Are Affected by Media File Editing
When you modify a media file in a multitrack project, all clips that refer to that media file are updated simultaneously. For example, if you have ten clips referring to the same media file and you double-click one of the clips to modify its underlying media file, any changes you make to the media file affect all ten clips.
How Media File Editing Works in a Multitrack Project
When you edit a clip in place or open a clip in a new File Editor tab, the way the media file is handled depends on its file format.
- If the clip's audio file format is a native Soundtrack Pro audio file project: The audio file project is opened directly in the File Editor tab, allowing you to make nondestructive changes to the media. When you save the multitrack project, Soundtrack Pro automatically saves all of the associated audio file projects.
- If the clip refers to a standard-format audio file (such as AIFF or WAVE): Soundtrack Pro automatically creates a Soundtrack Pro audio file project for the file and relinks all clips in the project to the new audio file project. This allows you to work with this media nondestructively. Each time you save your multitrack project, any newly created audio file project media files are saved to the Edited Media Location on your hard disk. (You can change this location by choosing Soundtrack Pro > Preferences, and then clicking General.)
How Source Audio File Editing Works in an Audio File Project
When you edit an audio file in the File Editor project view, the source audio file is handled as follows:
- If the clip's audio file format is a native Soundtrack Pro audio file project: Any changes you make are saved to the audio file project, allowing you to make nondestructive changes to the media.
- If the clip refers to a standard-format audio file (such as AIFF or WAVE): Soundtrack Pro automatically creates a Soundtrack Pro audio file project for the flat file. When you attempt to save the changes to the audio file project, the default File Type is Audio File Project, which retains the nondestructive changes in the form of an Actions list. If you change the File Type in the Save dialog to a flat file format (such as AIFF or WAVE), you lose the nondestructive characteristics of a Soundtrack Pro audio file project. For more information about the File Editor project view, see "Using the File Editor Project View" on page 240.
Modifying a Clip Without Affecting Its Source Media
Any time you use multiple instances of the same clip in a multitrack project, the clip refers to the same source media file. This means that any time you modify the media file, all of the clips that refer to the media file are affected. How do you edit just one clip without editing its source media? In cases where you only want to make changes to a single clip, you can make a new copy of the clip's media file in a new audio file project and link this clip to the new audio file project.
To create a copy of a clip's media file and link the clip to the new audio file project:
1 Select the clip whose source media file you want to copy.
2 Control-click the clip in the Timeline, then choose Replace with Independent Audio File Project from the shortcut menu.

A new Soundtrack Pro audio file project is created that includes a copy of the original audio file. Only media between the clip's In and Out points is copied, plus handles on either side for later trimming if necessary.
The new audio file project opens in the File Editor tab and the clip now links to the new audio file project.
Note: The default handle duration is 5 seconds. To adjust the handle duration, choose Soundtrack Pro > Preferences > General.
Editing Audio Files in the File Editor
You can edit audio files in many different ways in the File Editor tab and File Editor project view. You can edit the entire file or select part of the file to edit. You can cut, copy, and paste audio, and graphically edit audio files using a variety of tools in the File Editor.
Opening Audio Files in the File Editor Tab
You can play an audio file in the File Editor so you can hear the file and any changes you make to it.
To open an audio file in the File Editor tab, do one of the following:
■ With the File Editor tab active, select a clip in the Timeline.
The waveform for the clip appears in the File Editor tab.

- Drag a clip into the File Editor tab from one of the media tabs.
The waveform for the clip appears in the File Editor.
Note: You can drag from the Bin, Browser, Search, and Favorites tabs. If there is already a clip in the File Editor, it is replaced by the new clip.
Playing Audio Files in the File Editor
You can play an audio file in the File Editor so you can hear the file and any changes you make to it.
To play an audio file:
- Click the Play button in the transport controls (or press the Space bar). Click the Play button (or press the Space bar) again to stop playback.
You can set the playhead in the File Editor in the same way you set it in the Timeline, by clicking in the waveform display or in the Time ruler, using the transport controls, or using the Playhead Location value slider. For more information, see "Setting the Playhead Quickly" on page 72.
Soloing an Audio File in the File Editor
You can use the Solo button in the File Editor tab to mute all other tracks so that you can hear the audio file outside the context of the multitrack project.
To solo an audio file in the File Editor tab:
1 With the File Editor tab active, select a clip in the Timeline.
The waveform for the clip appears in the File Editor tab.
2 Click the Solo button in the File Editor tab.
All other tracks in the Timeline are muted and the Preview Volume slider next to the Solo button becomes active.
3 Play the file and adjust the volume using the Preview Volume slider, as needed.

Linking the File Editor Selection and the Cycle Region
You can link the File Editor tab to the Cycle Region so that when you make selections in the File Editor tab (or selections of clips in the Timeline with the Timeslice tool), Soundtrack Pro automatically adjusts the Cycle Region to match the selection.
To link the Cycle Region to File Editor and Timeslice selections:
1 Click the Link button in the File Editor tab.
2 Make one of the following kinds of selections:
• Make a selection in the File Editor tab.
- Using the Timeslice tool, select a portion of a clip in the Timeline.
The Cycle Region adjusts accordingly.
Scrubbing Audio Files
Scrubbing an audio file lets you hear the audio at the playhead position as you drag the playhead so you can quickly find a particular sound or event in the audio file.
The Soundtrack Pro Scrub tool provides detailed scrubbing that realistically approximates the "rock-the-reels" scrubbing on analog tape decks.
To scrub an audio file with the Scrub tool:
1 In the Timeline or the File Editor, click the Scrub tool or press H.
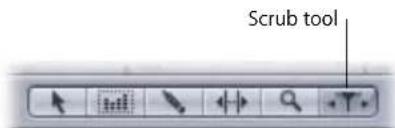
2 Drag the Scrub tool left or right across a clip in the Timeline or across the File Editor.

When you use the Scrub tool in the multitrack Timeline, you can only scrub one clip at a time. To scrub multiple tracks at once, scrub with the playhead.
To scrub an audio file with the playhead:
1 Press and hold the triangular part of the playhead.
2 While holding the playhead, drag left or right at the speed you want to scrub the audio file.
Scrubbing is useful to help identify the part of an audio file that you want to edit. While you are scrubbing an audio file, you can also select the part of the file that you want to edit.
To make a selection while scrubbing with the playhead:
■ As you move the playhead, press and hold the Shift key.
For projects containing a video file, dragging to create a selection scrubs the video at the selection point.
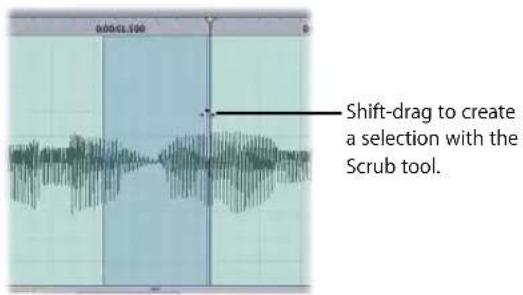
To scrub using keyboard shortcuts:
As you move the playhead, press and hold the Shift key.
For projects containing a video file, dragging to create a selection scrubs the video at the selection point.
Selecting Part of an Audio File
When you apply an action to an audio file in the File Editor, the action is applied to the entire file unless you select part of the file. You can select different parts of the audio file and apply different actions to each selection.
To select part of an audio file:
In the waveform display, drag horizontally across the part of the waveform you want to select.

Some actions can only be applied to a selection. The selection can contain the entire audio file.
To select the entire audio file:
- Choose Edit > Select All.
You can select one channel (left or right) of a stereo audio file and apply actions to only the selected channel. You can also select only part of one channel.
To select the left channel of an audio file:
1 Move the pointer near the upper edge of the waveform display.
The pointer changes to the letter "L."
2 Drag the pointer to select the part of the left channel you want to work with.
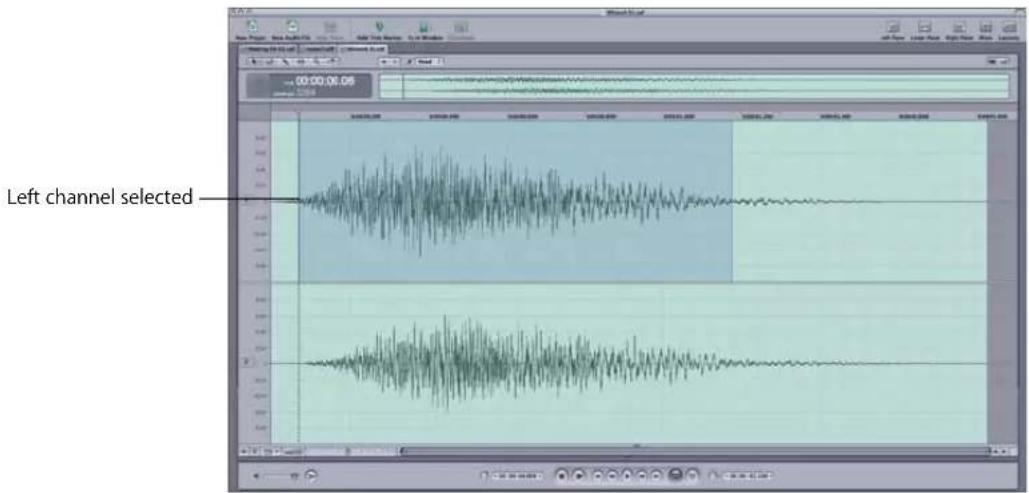
As you drag, the right (lower) channel of the audio file becomes darker in the waveform display. You can also double-click in the upper part of the waveform display to select the entire left channel.
To select the right channel of an audio file:
1 Move the pointer near the lower edge of the waveform display.
The pointer changes to the letter "R."
2 Drag the pointer to select the part of the right channel with which you want to work.
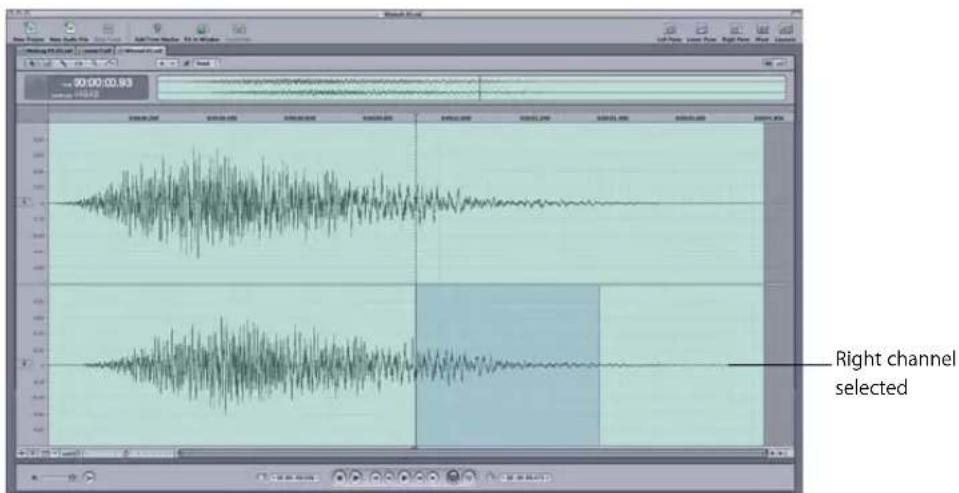
As you drag, the left (upper) channel of the audio file becomes darker in the waveform display. You can also double-click in the lower part of the waveform display to select the entire right channel.
If you have added markers to an audio file project, you can select the area between two markers.
To select the area between two markers in the File Editor project view:
- Double-click the waveform display in the area between the two markers. If there are additional markers, you can expand the selection by dragging toward them.
To select the entire contents of one or more channels:
1 Click the File Editor tab or the File Editor project view to make it the active window.
2 Choose Edit > Select > Across Channels (or press Shift-T).
If there is an existing selection, it is extended across the entire duration of the file (but only for the currently selected channels). If there is not an existing selection, Soundtrack Pro creates a new selection across active channels for the entire length of the file.
To select the partial contents of one or more channels:
1 Click the File Editor tab or the File Editor project view to make it the active window.
2 Position the playhead.
3 Do one of the following:
- To select everything to the right of the playhead in the active channels, choose Edit > Select > Forward (or press Shift-End).
- To select everything to the right of the playhead in the active channels, choose Edit > Select > Backward (or press Shift-Home).
If there is an existing selection, the selection is extended to the end of the audio file (for Forward) or to the beginning of the audio file (for Backward).
If there is no existing selection, Soundtrack Pro creates a new selection across active channels from the end of the audio file (for Forward) or from the beginning of the audio file (for Backward).
Note: If you hold down the Option key, the menu items will read Select > All Forward and Select > All Backward, and behave the same as described earlier except the selection will be across all channels instead of just the selected channels.
Adjusting Selections to a Zero Crossing
A zero crossing is a point in an audio file where the amplitude is zero. When you edit an audio file in the File Editor, if the beginning or end points of your edit do not occur at a zero crossing, the edited audio file can have unwanted noise at the beginning and/or end of the edited area. Subsequent editing of the file, such as normalizing or increasing the gain, can increase this unwanted noise.
Once you have made a selection in the File Editor, you can fine-tune the selection so that it begins or ends at the nearest zero-crossing point.
To adjust a selection to the zero crossing:
1 Make a selection in the File Editor.
2 Choose Edit > Adjust Selection to Zero Crossing and choose one of the following from the submenu:
- Inward
- Outward
- In Point to Left
- In Point to Right
- Out Point to Left
- Out Point to Right
The edit point is adjusted to occur at the specified zero-crossing.
Moving Between Selections
You can select different areas of the audio file to apply different actions or to play different areas. Any selection can include the same part of an audio file as another selection. As you work on the audio file, you can move back and forth between selections.
Previous Selection button
Next Selection button
To move to the previous selection:
- Click the Previous Selection button above the waveform display.
The previous selection becomes the current selection. The selection area appears darker than the rest of the waveform.
To move to the next selection:
- Click the Next Selection button above the waveform display.
The next selection becomes the current selection. The selection area appears darker than the rest of the waveform.
Cutting, Copying, and Pasting in the File Editor
You can cut, copy, and paste audio in the File Editor. Cutting, copying, and pasting can change the length of an audio file.
To cut part of an audio file in the File Editor:
1 Select the part of the file you want to cut.
2 Choose Edit > Cut (or press Command-X).
The selected part of the file is removed, and the file shortens by the cut amount.
To copy audio in the File Editor:
1 Select the part of the file you want to copy.
2 Choose Edit > Copy (or press Command-C).
You can paste audio in the File Editor. You can paste at the playhead position, paste mix, or paste repeat.
To paste audio in the File Editor:
1 Set the playhead to the point where you want to paste the audio.
2 Choose Edit > Paste (or press Command-V).
The cut or copied audio is pasted starting at the playhead position. The audio after the playhead in the file moves to accommodate the pasted audio, and the file lengthens by the pasted amount.
You can also paste mix in the File Editor. When you paste mix, the pasted audio is mixed (or blended) with the existing audio in the audio file. You can control the mix of the pasted audio and existing audio and can crossfade the pasted audio.
To paste mix audio in the File Editor:
1 Set the playhead to the point where you want to paste the audio.
2 Choose Edit > Paste Special > Paste Mix.
3 In the Paste Mix dialog, drag the Original Material Level slider to set the mix level of the existing audio in the pasted area.

4 Drag the Clipboard Level slider to set the mix level of the pasted audio.
5 Optionally, you can crossfade the pasted audio by selecting the Crossfade In and Out Points checkbox and typing crossfade values (in milliseconds) in the Fade In Length and Fade Out Length fields.
6 Click OK.
The cut or copied audio is mixed with the existing audio.
You can also paste repeat in the File Editor. When you paste repeat, the cut or copied audio is pasted the number of times you specify in succession, so that each copy starts at the end of the previous one.
To paste repeat in the File Editor:
1 Set the playhead to the point where you want to paste the audio.
2 Choose Edit > Paste Special > Paste Repeat.
3 In the Paste Repeat dialog, type the number of copies you want to paste in the field.
4 Click OK.
The copies are pasted starting at the playhead position. The audio after the playhead in the file moves to accommodate the pasted audio, and the file lengthens by the pasted amount.
Zooming In and Out in the File Editor
You can zoom in on a specific part of an audio file to make precise edits and perform other tasks.
To zoom in or out, do one of the following:
- Drag the Zoom control left to zoom in for a closer view, or drag right to zoom out for a wider view.
- Choose View > Zoom In to zoom in one level.
- Choose View > Zoom Out to zoom out one level.
If you have a mouse with a scrollwheel connected to your computer, you can set Soundtrack Pro to zoom in or out when you move the scrollwheel. You can select part of the audio file and zoom in on the selected area, zoom in to see individual samples in the waveform, or zoom out to peaks.
To set Soundtrack Pro to zoom the waveform display when you move the scrollwheel:
1 Choose Soundtrack Pro > Preferences.
2 If the General preferences pane is not visible, click the General button.
3 In the Timeline section of the General preferences pane, choose "Zooms at playhead" from the Scrollwheel pop-up menu.
To zoom in or out using a scrollwheel:
■ Move the scrollwheel up to zoom in, or move it down to zoom out.
To zoom in on a selection:
1 In the waveform display, select the area you want to zoom in on.
2 Choose View > Zoom to Selection.
To zoom in to see individual samples:
- Choose View > Zoom to Samples.
Note: If you have previously zoomed in to a level where individual samples are visible in the waveform display, choosing Zoom to Samples zooms in to the same zoom level.
To zoom out to see the entire waveform:
- Choose View > Fit to Window.
To return to the original zoom level:
- Choose View > Zoom Normal.
You can also zoom in on a selected area using the Zoom tool. For information about using the Zoom tool, see "Zoom Tool" on page 211.
Editing Audio Files Graphically with Waveform Editing Tools
The File Editor includes waveform editing tools you can use to graphically edit the audio file in the waveform display.
Selection Tool
You can use the Selection tool to select part of an audio file, as described in "Selecting Part of an Audio File" on page 202. When you open the File Editor, the pointer is a selection pointer (arrow). When you are done using another waveform editing tool, you can return the pointer to a selection pointer by clicking the Selection Tool button.
Selection Tool button

Frequency Selection Tool
You can use the Frequency Selection tool to make selections in Frequency Spectrum View not just of time ranges but also of frequency ranges. You can copy, paste, and delete frequency selections as well as adjust the amplitude of frequency selections. For more information, see "Viewing an Audio File in Frequency Spectrum View" on page 214.
Sample Edit Tool
You can graphically edit samples in the audio file using the Sample Edit tool. To use the Sample Edit tool, the waveform display must be zoomed in enough to see individual samples, which appear as small squares connected by a thin line.
Sample Edit Tool button
To edit samples using the Sample Edit tool:
1 Click the Sample Edit Tool button above the time display.
The pointer becomes a Sample Edit pointer.
2 Zoom in on the part of the waveform you want to edit.
3 To graphically edit samples, do one of the following:
 Drag a sample up or down to a new value.
 Click directly above or below a sample.
 Drag left or right to reshape the waveform.
Use the Sample Edit tool to reshape the waveform.
You can also edit samples numerically in the waveform display.
To edit samples numerically:
1 Control-click a sample, then choose Set Value from the shortcut menu.
2 In the dialog that appears, type a new value for the sample.
3 Click OK.
Audio Stretching Tool
You can time stretch all or part of an audio file to change the amount of time it occupies. When you stretch an audio file, the length of time changes but not the pitch (letting you fill dialogue, music, or other audio to a specific amount of time). For audio files with music or other repeating patterns, stretching the file changes the tempo of the music without changing the key. The range of the Audio Stretching tool is limited to between 25% to 400% of the length of the original audio.

To graphically time stretch an audio file:
1 Click the Audio Stretching Tool button above the time display.
2 In the waveform display, drag horizontally across the waveform to select the part you want to time stretch.
3 Move the pointer over the right edge of the selection.
The pointer becomes a Stretch pointer.
4 Drag the right edge of the selection left to shorten the selected area, or drag it right to lengthen the selected area.

When you shorten a selection of an audio file using the Audio Stretching tool in the File Editor, the empty part of the selection area is filled with ambient noise if an ambient noise print exists. If no ambient noise print exists, the empty part of the selection area is filled with silence. Shortening a selection using the Audio Stretching tool does not change the length of the audio file.
When you lengthen the selection using the Audio Stretching tool, any audio overlapped by the lengthened selection area is deleted. Lengthening the selection past the end of the file changes the length of the audio file.
If you hold down the Option key while dragging the selection with the Audio Stretching tool, the audio following the selection area ripples forward when you lengthen the selection and ripples backward when you shorten the selection. In both cases, using the Option key changes the length of the audio file.
Note: Stretching an audio file by a large amount can degrade the sound quality of the audio file.
For information about stretching an audio file numerically using the Process menu, see "Time Stretch" on page 224.
Zoom Tool
You can zoom in on a specific part of the waveform display to make precise edits.

To zoom in using the Zoom tool:
1 Click the Zoom Tool button above the time display.
The pointer changes to a Zoom pointer.
2 In the waveform display, do one of the following:
- Click to zoom in.
- Option-click to zoom out.
- Drag horizontally to select the part of the waveform you want to zoom in on.
The waveform display zooms in on the selected area.
For information on other ways to zoom in and out in the waveform display, see
"Zooming In and Out in the File Editor" on page 207.
Choosing the Sample Units in the File Editor
Along the left edge of the File Editor is a scale of sample units for the audio file. You can set this scale to any of the following sample units:
- Sample Value
- Normalized
- Percent
• Decibels
To set the sample units in the waveform display, do one of the following:
- Choose View > Sample Ruler Units, then choose a format from the submenu.
■ Control-click along the left edge of the waveform display where the sample units appear, then choose the sample units you want from the shortcut menu.

Editing Multichannel Files
In Soundtrack Pro, you can edit multichannel files with up to 24 channels, including the following types of multichannel files: AIFF, WAV, Broadcast Wave, QuickTime, and single folder/multi-mono file AIFF.
Each channel row is identified by a number.

Selecting and Editing Channels in Multichannel Files
Editing multichannel files in the File Editor is similar to editing in a multitrack Timeline.
To make a selection across all channels:
- Drag in the bottom 90 percent of any channel.
To make a selection in an individual channel:
1 Move the pointer to the top 10 percent of a channel row.
The pointer changes to indicate the channel name or number.
2 Drag in the channel row over the area you want to select.
To make a selection in multiple, adjacent channels:
1 Move the pointer to the top 10 percent of a channel row.
The pointer changes to indicate the channel name or number.
2 Drag in the channel row to the area you want to select.
3 Continue dragging up or down to include the adjacent channels.
To make a selection in multiple, nonadjacent channels:
1 Move the pointer to the top 10 percent of a channel row.
The pointer changes to indicate the channel name or number.
2 Drag in the channel row over the area you want to select.
3 Command-click in the bottom 10 percent of any nonadjacent channels.
Note: Nonadjacent selections must be within the same time range.
To disable or enable an individual channel:
■ Control-click a channel, then choose Enabled from the shortcut menu to toggle it on or off.
To enable all channels:
■ Control-click a channel, then choose Enable All from the shortcut menu.
To disable all channels:
■ Control-click a channel, then choose Disable All from the shortcut menu.
To reorder channels:
- Choose Process > Reorder Channels, then use the dialog that appears to rearrange the channel order.
For more information, see "Reorder Channels" on page 229.
Creating a New Multichannel Audio File
You can create a new multichannel file and specify the number of channels and the sample rate.
To open a new multichannel audio file:
1 Do one of the following:
- Choose File > New > Audio File (or press Command-Shift-N).
- Click New Audio File in the Toolbar.
2 Choose an option from the Channels pop-up menu:
- Mono
- Stereo
- Surround (5.1)
- Other
Note: If you choose Other, use the value slider to enter the number of channels for the new audio file.

3 Enter a sample rate in the Sample Rate field or choose one from the pop-up menu.
4 Click OK.
Using Frequency Spectrum View
When you first open the File Editor, it shows the audio file in Waveform view. You can also view and edit an audio file in Frequency Spectrum view. Frequency Spectrum view gives you a way to find areas of significant frequency change that aren't visible in a waveform.
Viewing an Audio File in Frequency Spectrum View
In Frequency Spectrum view, the display shows the frequency spectrum of each channel of a stereo audio file on a scale from 0 Hertz (Hz) to half the sample rate of the file. For example, for a 48 kHz audio file, the scale progresses from 0 Hz to 24 kHz.
To view an audio file in Frequency Spectrum view, do one the following:
- Choose View > File Editor Display > Show Spectrum.
- Click the Frequency Spectrum View button in the upper-right corner of the File Editor tab or the File Editor project view.

The display changes to show the audio file's frequency spectrum.
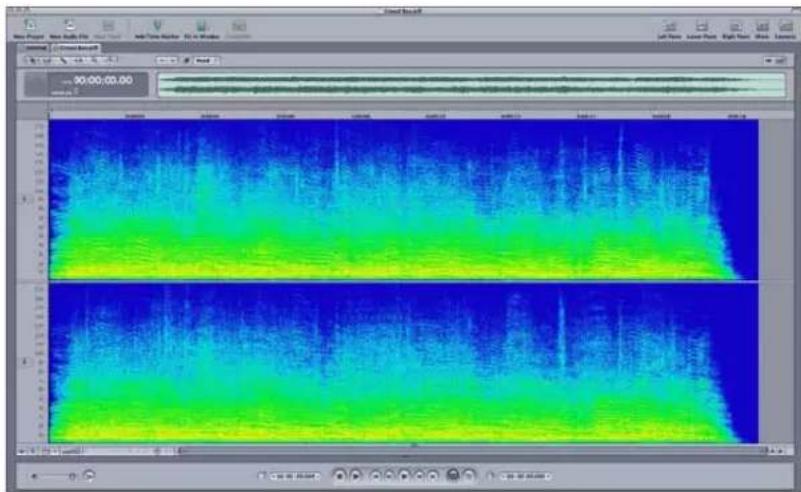
You can select parts of the audio file, apply actions, and edit the audio file in Frequency Spectrum view in the same way as in Waveform view. In addition, you can make selections of frequency ranges as well as copy, paste, delete, and adjust the amplitude of frequency selections. You can also change the Frequency Spectrum view display to show the frequency spectrum linearly or logarithmically, use different analysis windows, and change the number of samples used to calculate the view.
To return to Waveform view, do one the following:
- Choose View > File Editor Display > Show Waveform.
■ Click the Waveform View button.
Using the Spectrum View HUD
The Spectrum View HUD is a floating window that provides extensive controls for Frequency Spectrum view.

- Preemphasis: Applies gain per octave. Drag the slider to the right to emphasize high frequency content.
- Minimum Frequency: Allows you to view a subset of the frequency range (for example, only the frequencies over 1 kHz).
- Maximum Frequency: Allows you to view a subset of the frequency range (for example, only the frequencies under 9 kHz).
- Minimum Power: Defines the bottom of the scale (where the blue portion of the gradient starts).
- Maximum Power: Defines the top of the scale (where the red portion of the gradient ends).
- Analysis Window: To display the audio file in Frequency Spectrum view, part of the audio data for each given point in time is analyzed. Each method of analysis represents a slightly different compromise between frequency resolution and spectral leakage. You can choose between several different analysis methods, called analysis windows, used to display the frequency spectrum in Frequency Spectrum view.
- Window Size: The number of samples used for Frequency Spectrum view. This parameter trades off frequency resolution for time resolution. Smaller window sizes are more accurate timewise, but smear frequency information across adjacent frequencies (vertical lines, or transients, appear sharper). Larger window sizes provide a more accurate frequency display, but will smear things horizontally (horizontal lines appear sharper, but transients are smeared).
- Frequency Scale: Use Frequency Scale to switch between linear display (in which harmonics appear evenly spaced) and logarithmic display (in which octaves appear evenly spaced).
- Color pop-up menu and gradient slider: Use the menu and slider to customize the gradient for Frequency Spectrum view.
- Reset button: Resets all controls to their default values.
To open the Spectrum View HUD:
1 Turn on Frequency Spectrum view.
2 Do one of the following:
- Choose View > File Editor Display > Show Spectrum Controls.
- Control-click the spectrum display, then choose Show Spectrum Controls from the shortcut menu.
Adjusting the Frequency Spectrum View with the Shortcut Menu
You can also Control-click the Frequency Spectrum view to change the settings.
To show the frequency spectrum on a logarithmic scale:
■ Control-click the Sample ruler along the left edge of the display, then choose Logarithmic from the shortcut menu.
To show the frequency spectrum on a linear scale:
■ Control-click the Sample ruler along the left edge of the display, then choose Linear from the shortcut menu.
To display the audio file in Frequency Spectrum view, part of the audio data for each given point in time is analyzed. Each method of analysis represents a slightly different compromise between frequency resolution and spectral leakage. You can choose among several different analysis methods, called analysis windows, used to display the frequency spectrum in Frequency Spectrum view.
To choose an analysis window for Frequency Spectrum view:
■ Control-click the spectrum display, then choose an analysis window from the upper part of the shortcut menu.
Frequency Spectrum view changes the display using the analysis window you selected. Experiment with these options to see which one shows the data the best.

You can also choose the number of samples used to calculate the spectrum display.
To choose the window size (number of samples used) for Frequency Spectrum view:
■ Control-click the spectrum display, then choose a number from the lower part of the shortcut menu.
Editing in Frequency Spectrum View
Use the Frequency Spectrum view and the Frequency Selection tool to select frequency ranges as well as to copy, paste, delete, and adjust the amplitude of frequency selections. You can also select parts of the audio file, apply actions, and edit the audio file in Frequency Spectrum view in the same way as in Waveform view.
To select a frequency range:
1 Turn on Frequency Spectrum view.
2 Click the Frequency Selection Tool button at the top of the File Editor tab or the top of the File Editor project view.

In general, editing in Frequency Spectrum view uses the same conventions as editing in Waveform view. For more information about editing in Waveform view, see "Using the Global Waveform View" on page 249.

Frequency Selection Tool Guidelines
Here are some further guidelines for editing in Frequency Spectrum view with the Frequency Selection tool:
- All paste edits, including paste, paste mix, and paste repeat, are supported for frequency selections.
- Pasting to an ordinary (full frequency range) selection follows the same conventions as in the Waveform view.
- Pasting to a narrow frequency range causes the contents of the Clipboard to be filtered before being pasted. This filtered result is added to the result of applying the complementary filter to the original audio with any necessary truncation or zero-padding if the length of the selection is greater than or less than, respectively, the length of the Clipboard audio data.
- When you switch between Frequency Spectrum view and Waveform view, ordinary (full frequency range) selections are preserved, but any narrow frequency range selections are reset.
Processing Audio Files
You can process audio files in the File Editor in a variety of ways. You can choose processing effects and other operations from the Process menu and apply them to an entire file, or select part of the file and apply the effect to the selection. When you choose an item from the Process menu, the item appears as an action in the Actions list. The Process menu contains the items described in the following sections.
Choosing Processing Effects
The Effects submenu contains an extensive set of professional audio effects you can apply to an audio file or a selection. The audio effects in the Effects submenu are the same as the realtime effects you can apply to tracks, busses, and submixes in the Timeline. For information about individual effects in the Effects submenu, see “Audio Effects Included with Soundtrack Pro” on page 331 and the Soundtrack Pro Effects Reference document, available in the Help menu.
The effects included with Soundtrack Pro are categorized by type in the Effects submenu. Below these effect categories is a submenu for Mac OS effects. If you have installed third-party Audio Units effects on your computer, additional submenus for the third-party effects appear at the bottom of the Effects submenu.
When you apply a processing effect from the Effects submenu, the floating advanced settings window for the effect appears. Processing effects windows are nonmodal, allowing you to click a window behind the effects window (for instance, the Timeline or File Editor window) to move the playhead or adjust the selection range.
The advanced settings window contains controls for previewing the effect in the File Editor, bypassing, applying, or canceling the effect, resetting effect parameters, and applying effect presets.
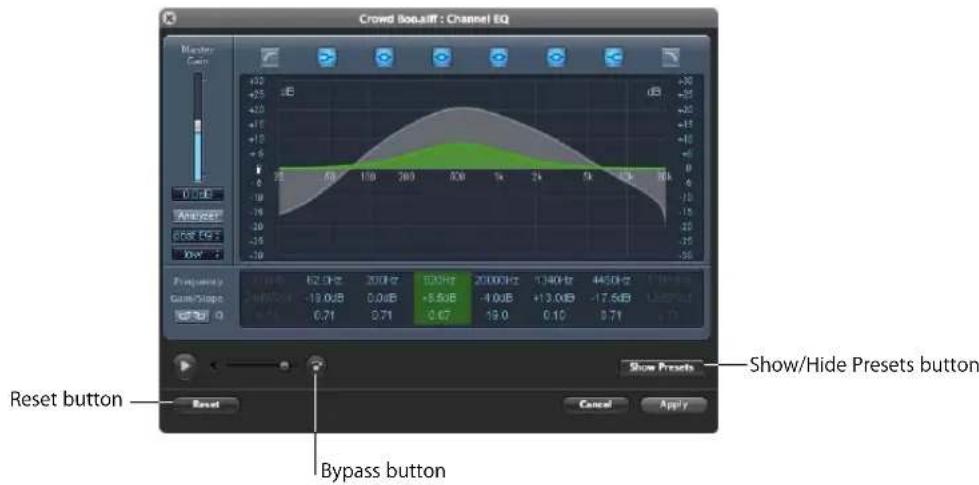
- Play button: Plays the audio file or selection with the effect.
• Volume slider: Controls the volume of the audio file or selection as you play it. - Bypass button: Bypasses the effect so you can hear the difference in the sound of the audio file or selection with and without the effect.
- Reset button: Resets all effect parameters to their default values.
- Cancel button: Closes the advanced settings window without applying the effect.
- Apply button: Applies the effect to the audio file or selection and closes the advanced settings window.
- Show/Hide Presets button: Shows or hides the Presets drawer so you can apply effect presets.
For information about applying effect presets in the File Editor, see "Working with Effect Presets" on page 330.
For information about the effects in the Effects submenu, see Chapter 11, "Working with Audio Effects," on page 327.
Fade In
Choosing this command fades in the audio file or selection. The fade-in progresses in linear fashion from the beginning to the end of the audio file or selection.
Fade Out
Choosing this command fades out the audio file or selection. The fade-out progresses in linear fashion from the beginning to the end of the audio file or selection.
Normalize
Choosing this command normalizes (adjusts the gain of) the audio file or selection to the decibel level shown in the Normalization Level field. The highest peak in the file is raised or lowered to the level you set, and the rest of the audio file is raised or lowered by the same amount. When you choose Process >Normalize, the level is set to 0 dB.
To set the normalization level:
1 Choose Process >Normalize.
2 In the Normalize dialog, drag the Normalization Level slider or select the value in the Normalization Level field and type a new value.
3 Click OK.
You can preview the audio file at the normalization level before closing the Normalize dialog. This makes it easy to set the level before normalizing the file.
To preview the file at the normalization level:
In the Normalize dialog, select the Preview checkbox.
Adjust Amplitude
Choosing this command raises or lowers the gain of the audio file or selection by the amount shown in the Amplitude Level field. When you choose Process > Adjust Amplitude, the level shown in the field is zero (0) dB, or unity gain.
To set the amplitude level:
1 Choose Process > Adjust Amplitude.
2 In the Adjust Amplitude dialog, drag the Amplitude Level slider or select the value in the Amplitude Level field and type a new value.
3 Click OK.
Silence
Choosing this command replaces the audio file or selection with complete silence.
Invert
Choosing this command inverts the phase of each sample in the audio file or selection. Each sample's amplitude is unchanged, but the phase is inverted. In the waveform display, the wave's crests become troughs and vice versa.
Reverse
Choosing this command reverses the order of the samples in the audio file or selection so that the first sample becomes the last and vice versa.
Insert
You can insert silence, noise, or a waveform in an audio file or selection. When you choose Process > Insert, then choose one of the three items from the Insert submenu, the silence, noise, or waveform is inserted at the current playhead position. The remainder of the audio file ripples so that it continues after the inserted silence, noise, or waveform.
Inserting Silence
When you choose Process > Insert, then choose Silence from the Insert submenu, the Insert Silence sheet appears. You can set the length of silence to insert, and choose the format for setting the length of the silence (any of the Time Ruler Units formats).
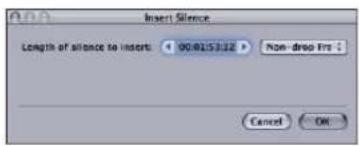
To set the length of the inserted silence:
1 In the Insert Silence sheet, choose the format you want to use from the Format pop-up menu.
2 In the "Length of silence to insert" value slider, do one of the following:
- Click the left arrow to shorten the length of the inserted silence, or click the right arrow to increase the length.
- Click the center of the value slider, then drag the slider that appears left or right to change the length of inserted silence.
- Click the value in the value slider, then type a new value.
3 Click OK.
Inserting Noise
When you choose Process > Insert, then choose Noise from the Insert submenu, the Noise Generator dialog appears. You can set the type of noise to insert, set the length of the inserted noise, choose the format for setting the noise length (any of the Time Ruler Units formats), and set the volume of the inserted noise.
The inserted noise can be white noise (emphasizing higher frequencies) or pink noise (equal distribution of frequencies).

To choose the type of noise to insert:
- In the Noise Generator dialog, choose the type of noise from the Waveform Type pop-up menu.
To set the length of the inserted noise:
1 In the Noise Generator dialog, choose the format you want to use from the Duration pop-up menu.
2 In the Duration value slider, do one of the following:
- Click the left arrow to shorten the length of the inserted noise, or click the right arrow to increase the length.
- Click the center of the value slider, then drag the slider that appears left or right to change the length of inserted noise.
- Click the value in the value slider, then type a new value.
3 Click OK.
To set the volume level of the inserted noise:
In the Noise Generator dialog, drag the Volume slider left or right to set the noise level. You can also type a level (in decibels) in the Volume field.
Inserting a Waveform
When you choose Process > Insert, then choose Waveform from the Insert submenu, the Wave Generator dialog appears. You can set the type of waveform to insert, set the length of the inserted waveform, choose the format for setting the waveform length (any of the Time Ruler Units formats), and set the volume of the inserted waveform.
The inserted waveform can be a sine, sawtooth, square, or triangle wave.

To choose the type of waveform to insert:
In the Wave Generator dialog, choose the type of waveform from the Waveform Type pop-up menu.
To set the frequency of the inserted waveform:
In the Wave Generator dialog, drag the Frequency slider left or right to set the frequency. You can also type a frequency (in Hertz) in the Frequency field.
To set the length of the inserted waveform:
1 In the Wave Generator dialog, choose the format you want to use from the Duration pop-up menu.
2 In the Duration value slider, do one of the following:
- Click the left arrow to shorten the length of the inserted waveform, or click the right arrow to increase the length.
- Click the center of the value slider, then drag the slider that appears left or right to change the length of the inserted waveform.
- Click the value in the value slider, then type a new value.
3 Click OK.
Time Stretch
You can time stretch an audio file or selection. When you time stretch an audio file, you change the duration (length) of the file without changing the frequency (pitch) of the file. For example, for a file containing music, the tempo of the music is changed, but not the pitch. When you time stretch an audio file, you can choose the format for time values you enter.
To time stretch an audio file:
1 Select the part of the file you want to time stretch (it can be the entire file).
2 Choose Process > Time Stretch.
The Time Stretch sheet appears.

3 In the Time Stretch sheet, choose the format for setting the amount to time stretch the file from the Format pop-up menu.
4 In the "Length of selection" value slider, do one of the following:
- Click the left arrow to shorten the length, or click the right arrow to increase the length.
- Click the center of the value slider, then drag the slider that appears left or right to change the length.
- Click the value in the value slider, then type a new value.
5 Click OK.
For information on stretching a file graphically using the Audio Stretching tool, see "Audio Stretching Tool" on page 210.
Noise Reduction
Some audio files contain unwanted noise, making it difficult to hear the voices, music, or other content of the file. Soundtrack Pro features two commands, Set Noise Print and Reduce Noise, that you can use together to reduce noise in an audio file or selection.
Set Noise Print
The Set Noise Print command lets you select part of an audio file containing only the noise that you want to remove as a "noise print." The noise print provides a signature of the frequencies to reduce or remove from the file.
Setting the noise print before reducing noise is optional. If you do not set a noise print before using the Reduce Noise command, Soundtrack Pro extracts a noise print from the selected part of the audio file. If there is an existing noise print, it will be used, even if it is from a different audio file, unless you set a new noise print.
To set part of an audio file as a noise print:
1 In the waveform display, select the part of the audio file containing only the noise you want to reduce.
2 Choose Process > Noise Reduction > Set Noise Print.
The selected noise is stored as a noise print.
Reduce Noise
The Reduce Noise command uses the frequency content of the noise print to reduce noise in the audio file or selection.
To reduce noise using the noise print:
1 In the waveform display, select the part of the audio file in which you want to reduce noise.
2 Choose Process > Noise Reduction > Reduce Noise.
The Reduce Noise dialog appears. In the Reduce Noise dialog, you can optionally set the noise threshold and tone for noise reduction. You can also preview the noise reduction with the dialog open.

The noise threshold determines the level below which audio in the noise print is considered to be noise. Lowering the threshold results in only very low signals being reduced, while raising the threshold results in more high-level signals being reduced.
To set the threshold of the noise reduction:
In the Reduce Noise dialog, drag the Noise Threshold slider left to lower the threshold, or drag it right to raise the threshold. You can also type a value (in decibels) in the Noise Threshold field.
To set the amount of noise reduction:
- Drag the Reduction slider left to decrease the amount of noise reduction, or drag it right to increase the amount of noise reduction.
To change the tone of the noise reduction:
In the Reduce Noise dialog, drag the Tone Control slider left to preserve more low-frequency content (bass), or drag it right to preserve high-frequency content (treble) during noise reduction.
You can preview noise reduction with the Reduce Noise dialog open and adjust the threshold and tone of noise reduction. You can also hear the audio file or selection with and without noise reduction, or hear only the noise to be removed.
To preview the file with noise reduction:
- Click the Play button in the lower part of the Reduce Noise dialog.
To set the preview volume level:
- Drag the Volume slider in the lower part of the Reduce Noise dialog left to lower the volume or right to raise the volume.
To compare the file with and without noise reduction:
- Click the Bypass button to hear the file without noise reduction. Click the button again to hear the file with noise reduction.
To hear only the noise to be removed:
■ Select the Noise Only checkbox.
To use a noise reduction preset:
1 In the Reduce Noise dialog, click Show Presets.
The Presets drawer appears.
2 In the Presets drawer, select a preset from either the Factory Presets or User Presets list.
3 Click Apply.
Adding Ambient Noise
When editing an audio file, you may want to remove some sounds from the file while preserving the room tone or other ambient background noise in the file. Soundtrack Pro features commands you can use to set a selection as an ambient noise print and add the noise print to existing audio or replace the audio with the noise print.
Set Ambient Noise Print
The Set Ambient Noise Print command lets you copy part of an audio file containing only ambient noise that you want to add to another part of the file (or another file).
To set part of an audio file as an ambient noise print:
1 In the waveform display, select the part of the audio file containing only ambient noise.
2 Choose Process > Set Ambient Noise Print.
The ambient noise is stored in a special buffer separate from the Clipboard, and is saved to the project.
If you have copied audio to the Clipboard, you can set the contents of the Clipboard as an ambient noise print.
To set the contents of the Clipboard as an ambient noise print:
- Choose Process > Set Ambient Noise From Clipboard.
Add Ambient Noise
The Add Ambient Noise command adds the ambient noise stored in the ambient noise buffer to the audio file or selection.
To add ambient noise to an audio file:
1 In the waveform display, select the part of the audio file to which you want to add the ambient noise.
2 Choose Process > Add Ambient Noise.
The ambient noise is added to the selected audio. If the selection is longer than the copied ambient noise, the ambient noise repeats to fill the selection.
Replace With Ambient Noise
The Replace With Ambient Noise command replaces the selected audio with the ambient noise stored in the ambient noise buffer.
To replace existing audio with ambient noise:
1 In the waveform display, select the part of the audio file you want to replace with ambient noise.
2 Choose Process > Replace With Ambient Noise.
The ambient noise replaces the selected audio. If the selection is longer than the copied ambient noise, the ambient noise repeats to fill the selection.
Equalization Matching
Equalization matching matches the average frequency spectrum of the target clip to that of the source clip.
Set Equalization Print
The Set Equalization Print command lets you select part of an audio file and create an equalization print from it. The equalization print provides an equalization signature that you can apply to other files.
To set an equalization print:
1 Select the audio file (or part of the audio file) containing the equalization you want to match.
2 Choose Process > Equalization Matching > Set Equalization Print.
The selection is stored as a equalization print.
Apply Equalization
The Apply Equalization command uses the average frequency spectrum of the equalization print to match the equalization in the audio file or selection.
To match equalization using the equalization print:
1 Select the audio file (or part of the audio file) in which you want to match the equalization.
2 Choose Process > Equalization Matching > Apply Equalization.
The equalization print is applied to the target file.
Convert to Mono
Choosing this command converts a stereo audio file to mono. You can choose whether to convert the file to mono by using only the left channel, using only the right channel, or combining the two channels. Combining the left and right channels sums them as an equal gain mix.
To select how a stereo file is converted to mono:
1 Choose Process > Convert to Mono.
2 In the Convert to Mono dialog, select the button corresponding to the method by which you want to convert the file to mono.
3 Click OK.
The Convert to Mono action converts the entire stereo file to mono. You cannot convert only a selection of a file to mono. The Convert to Mono action flattens the file, removing existing actions from the Actions list. For information about flattening actions, see "Flattening Actions" on page 233.
Resample
Choosing this command resamples the audio file to a new sample rate.
To choose the new sample rate:
1 Choose Process > Resample.
2 In the Resample sheet, choose a sample rate from the Sample Rate pop-up menu. You can also type a sample rate (in Hertz) in the Sample Rate field.
3 Click OK.
The Resample action flattens the file, removing existing actions from the Actions list. For information about flattening actions, see "Flattening Actions" on page 233.
Swap Channels
Choosing this command swaps the left and right channel of a stereo audio file or selection. If the file is mono or multichannel (more than two channels), Swap Channels is disabled.
Reorder Channels
This command opens a dialog that allows you to rearrange the order of channels in a multichannel file. If the file is mono, Reorder Channels is disabled.
To reorder channels in an audio file:
1 Choose Process > Reorder Channels.
2 Drag the name of the channel to a different location in the channel list.

3 Click OK.
Render to Action
This command renders realtime effects to actions. It is available in the File Editor project view only. For more information, see "Rendering Realtime Effects to Actions" on page 243.
Applying Realtime Effects to Individual Audio Files
In addition to processing effects, you can apply realtime effects to an audio file project. You can apply realtime effects in the Effects tab, and you can automate realtime effect parameters in the File Editor project view. For more information, see "Applying Realtime Effects in the File Editor Project View" on page 242.
Working with Actions
Actions give you an extremely flexible and powerful way to edit audio files in the File Editor. You can apply an action to an entire file or a selected part of the file, including applying an action to only one channel of a stereo audio file. You can turn individual actions on or off and reorder actions in the Actions list, changing the sequence in which the actions change the audio file. You can adjust action settings after applying the action, and can flatten actions.
Applying Actions
You start working with actions by applying an action to the audio file or the currently selected part of the file.
To apply an action:
1 With the file open in the File Editor, choose an item from the Process menu.
The item appears in the Actions list.

2 Some actions have a dialog that appears when you choose the item from the Process menu. Adjust the settings in the dialog, then click Apply.
The action is added to the Actions list, and the waveform display updates to show the change to the audio file. You can hear the change when you play the project. Some actions may take a moment to apply. In this case, a progress bar appears, indicating that the action is being applied.
Some effects, including reverb and delay, add audio that extends past the end of the file. This is called an effect tail. When you apply a processing effect that produces an effect tail to an audio file in the File Editor, the file is lengthened to include the tail until the point at which the tail falls below -96 dB. If you apply a processing effect that produces a tail to a selection, the tail is mixed with the audio following the selection. If the tail extends past the end of the file, the file is lengthened to include the effect tail until the point at which the tail falls below -96 dB.
When you apply an action that adds a short (0.1 second or less) tail to an Apple Loop, the tail is shortened to preserve the overall length of the loop.
Editing Actions
Many actions have settings that you can edit. When you apply an action that has editable settings, a dialog appears, letting you edit the action's settings. You can edit an action's settings any time you are working in the File Editor.
To show an action's settings, do one of the following:
In the Actions list, Control-click the action you want to edit, then choose "Edit Settings For [action name]" from the shortcut menu.
■ Double-click the action in the Actions list.
In the Actions list, select the action you want to edit, then choose "Edit Settings For [action name]" from the Actions pop-up menu.
If the action has no editable settings, the Edit Settings menu item appears dimmed.
Adjusting and Applying Action Selections
You can adjust the selection for an action or set the current selection in the File Editor to an action's selection.
To adjust an action's selection, do one of the following:
- Make a selection in the File Editor, then in the Actions list, Control-click the action, then choose "Set Selection For [action name]" from the shortcut menu.
■ Make a selection in the File Editor, then in the Actions list, choose "Set Selection For [action name]" from the Actions pop-up menu.
The action is shifted to the selected region.
To set the File Editor's current selection to the action's selection, do one of the following:
In the Actions list, Control-click the action, then choose "Selection For [action name]" from the shortcut menu.
In the Actions list, choose "Selection For [action name]" from the Actions pop-up menu.
The action's selection becomes the current selection in the File Editor.
Turning Actions On and Off
You can turn individual actions on and off in the Actions list and hear the result when you play the audio file. The waveform display updates to show the change to the audio file. Depending on the length of the file, turning actions on and off can take time.
To turn an action off:
In the Actions list, deselect the checkbox next to the action name.
To turn an action on:
In the Actions list, select the checkbox next to the action name.
Reordering Actions
You can reorder actions after applying them to an audio file. The order in which effects and other actions occur can drastically change the resulting sound of the audio file. Depending on the length of the file, reordering actions can take time.
To reorder actions:
In the Actions list, drag the actions you want to reorder up or down to new positions. You hear the change when you play the audio file. The waveform display updates to show the change to the audio file.
Using the Action Insert Bar
The Action Insert bar appears as a purple marker along the left side of the Actions list with an associated bar that extends across the list. As you apply actions, the Action Insert bar moves below the last action applied.

You can move the Action Insert bar up or down to a new position in the Actions list. Only actions before the Action Insert bar are heard when you play the project, so you can control which actions are heard by moving the bar. The purple strip to the left of the checkboxes in the Actions list indicates the actions that are heard when you play the project.
When you choose an item from the Process menu, it is applied directly following the Action Insert bar. By moving the bar, you set where in the list the next action is applied.
To set the position of the next applied action:
- Drag the Action Insert bar up or down in the Actions list to the position you want.

Reversing the Order of the Actions List
You can reverse the order in which actions are shown in the Actions list, so the last action applied appears at the top of the list. This is useful when your project has a large number of actions.
To reverse the order of the Actions list:
- Click the triangle at the upper-right corner of the Actions list. Click the triangle again to return the list to its default order.

When you reverse the order of the Actions list, the Action Insert bar appears at the top of the list instead of at the bottom. You hear actions below the Action Insert bar in the list, rather than above it. When you choose an item from the Process menu, it is applied directly above the position of the Action Insert bar.
Reversing the order of the Actions list affects only the visual appearance of the list. The order in which actions are applied to the audio file is unchanged.
Flattening Actions
You can flatten the actions in a project to a single action. Flattening actions renders the actions into the file, reducing the complexity of the file and the file size. When you flatten actions, all existing actions are removed from the Actions list, and you can no longer reorder the actions or edit their action settings, unless you undo flattening the actions.
Some items in the Process menu, including Convert to Mono and Resample, flatten all actions in the project.
To flatten all audible actions:
1 Move the Action Insert bar directly below the last action you want to flatten.
2 Do one of the following:
- Choose Process > Flatten Audible Actions.
- Choose "Flatten audible actions" from the Actions pop-up menu.
To flatten all actions, do one of the following:
- Choose Process > Flatten All Actions.
- Choose "Flatten all actions" from the Actions pop-up menu.
Comparing the Project With and Without Actions
When you are adding and adjusting actions, you may want to compare the results of your changes to the original file.
To hear the file without actions:
1 Choose "Play without actions" from the Actions pop-up menu.
2 Click Play or press the Space bar.
To hear the file with all actions:
1 Choose "Play with all actions" from the Actions pop-up menu.
2 Click Play or press the Space bar.
To hear the file with only selected actions:
1 In the Actions list, deselect the checkboxes for the actions you do not want to hear.
2 Click Play or press the Space bar.
When you deselect an action, its settings are saved and are available when you select the action again.
Comparing the Last Two Actions
You can quickly compare the last two actions applied to an audio file or selection. This is helpful when you want to try out two similar actions, and hear which one you like better.
To compare the last two actions:
1 Do one of the following:
- Choose Process > A/B Last Two Actions.
- Choose A/B from the Actions pop-up menu (or press Command-F1).
2 Click Play or press the Space bar.
You hear the first of the two actions. The checkbox of the second action appears deselected in the Actions list.
3 Do one of the following:
- Choose Process > A/B Last Two Actions again.
- Choose A/B from the Actions pop-up menu (or press Command-F1) again.
You hear the second of the two actions. The checkbox of the first action appears deselected in the Actions list.
Deleting Actions
You can delete an action if you decide you no longer want it in the project.
To delete an action:
- Select the action in the Actions list, then press Delete.
Limitations of Actions That Change the File's Length
Some actions change the overall length of the audio file by inserting or deleting audio. These include inserting silence, noise, or a waveform, time stretching, and deleting part of a file. Recording audio, pasting, and adding an effect with a "tail" can also change the file's length. In the Actions list, the selection checkbox for each action that changes the file's length appears red, making it easy to visually distinguish those actions.
Each selection you make in the File Editor applies to a specific range of time, and each action applies to a range of time defined by the selection at the time the action is applied. Because selections and actions apply to a range of time, changing the file's length can change the audio to which a selection or action applies. In the File Editor, you see the selection remain in the same place (the same range of time as shown in the Time ruler) and see the waveform under the selection change.
When you apply an action that changes the file's length, any existing selections apply to the same range of time, but the audio occupying that range of time may be different than when you applied the action. For example, if you select a range of time beginning five seconds after the start of an audio file, then insert one second of silence at the beginning of the file, the selection still begins five seconds after the start of the file, but the audio at the beginning of the selection corresponds to what was previously four seconds after the start of the file.
If a project includes an action that increases the file's length, and you turn off or reorder that action, any selection that includes audio added by the length-changing action may extend past the end of the shortened file. In this case, the selection applies to the remaining audio in the selected range of time, but has no effect past the end of the file. For example, if you have a five-second project that includes a one-second Insert Silence action at the beginning of the project, and you select the last half-second of the project, then turn off the Insert Silence action, the selection applies to the last half-second of the project. However, the remaining half-second of the selection is empty.
Analyzing an Audio File
Soundtrack Pro includes a set of audio analysis tools. You can analyze an audio file for common problems such as clicks and pops, hum, phase issues, and clipping, and fix them individually or in a single operation. When you analyze an audio file, you can select which types of analysis to perform.
To show the analysis lists and tools:
In the File Editor, click the Analysis button.
The Analysis Type list, Parameter list, and Analysis Results list replace the Actions list in the window.
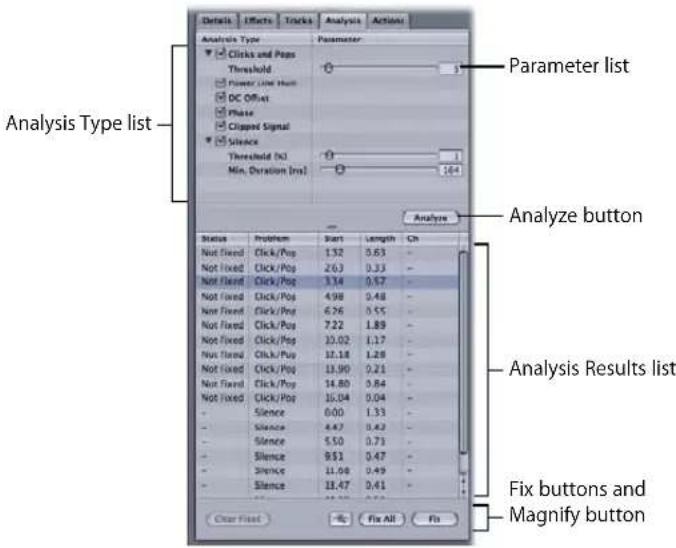
To analyze an audio file:
- Click the Analyze button, located below the Parameter list.
Types of Audio Analysis
The following types of analysis can be performed in the File Editor:
Clicks and Pops
Sudden, short peaks in the audio file can result from a variety of causes, including mechanical defects in analog recordings. You can set the threshold above which Soundtrack Pro considers peaks to be clicks or pops.
(Power Line) Hum
Power lines and other electrical equipment can produce a steady hum, often at 50 or 60 Hz. The hum can also include low-order harmonics of the fundamental frequency.
DC Offset
DC offset is a shift in the audio, causing the positive and negative parts of the signal not to average to zero. DC offset can limit the dynamic range of an audio file.
Phase Issues
Phase issues can result from a distorted or inaccurate stereo image, caused by poor microphone placement or other issues. When converting a stereo file to mono, the presence of phase issues can cause the left and right channels to cancel each other out partially or completely.
Clipped Signal
A clipped or overloaded signal can result from several causes, including poor gain staging in a preamp during recording, bad electrical cables, or surface damage to an analog recording. If analysis identifies a clipped signal, Soundtrack Pro gives you the option to soften the abrasive nature of the truncation.
Silence
Silence detects the parts of the audio file at which the audio signal falls to zero (0). You can set the threshold below which Soundtrack Pro considers the signal to be silence.
To select the types of analysis to perform:
1 In the Analysis Type list, select the checkboxes next to the types of analysis you want to perform on the audio file.
2 To analyze the file, click Analyze.
When analyzing an audio file in the File Editor, some analysis types might produce better results if you select a part of the audio file instead of the entire audio file.
The Power Line Hum, DC Offset, and Phase analysis types determine whether the audio file or selection exhibits these problems. Because hum, DC offset, and phase issues tend to last for long times, up to the entire length of the file, better results might be achieved when analyzing the entire audio file or the part of the file you think has the problem.
On the other hand, the Clicks and Pops, Clipped Signal, and Silence analysis types tend to be momentary and isolated rather than constant. If part of an audio file or selection contains a large number of clicks and pops, for example, the analyzed waveform might display the entire region as being problematic, rather than each individual click or pop. However, when you fix these problems using the Fix button, Soundtrack Pro correctly fixes each individual click or pop.
The Clicks and Pops Threshold slider uses an algorithm to detect transients that are clicks or pops. Moving the slider to the right results in fewer clicks or pops being detected. The Silence Threshold slider ranges from 0% to 10% of the full-scale level of the audio file, which corresponds to a range of -infinity dB to -20 dB.
Setting Analysis Parameters
The Clicks and Pops and Silence analysis types have parameters you can set. Each type has a Threshold slider you can drag to set the threshold for detecting clicks and pops or detecting silence.
To set analysis parameters:
1 In the Analysis Type list, click the disclosure triangle for the analysis types for which you want to set parameters.
2 Drag the Threshold slider left to lower the threshold or right to raise the threshold. You can also type a value in the Threshold field.
Reading Analysis Results
When you analyze an audio file, the problems detected through analysis are shown in the Results list. For each item, the following information appears in the Results list.

• Status: Shows whether the problem is fixed or not fixed.
- Problem: Shows the analysis type to which the problem belongs.
- Start: Shows the point at which the problem begins.
• Length: Shows the duration of the problem.
- Channels: Shows whether the problem occurs in the left channel (L), the right channel (R), or both channels (LR) of a stereo audio file.
You can select items in the Results list. When you select an item in the Results list, the part of the audio file to which the problem applies becomes red in the waveform display, making it easy to see where in the audio file the problem occurs. If you select multiple items, the parts of the audio file to which any of the selected problems apply become red.
By default, the region shown in red in the waveform display includes some extra time before the first sample with the problem and some extra time after the last sample with the problem. This extra time is included so that when you play or loop the problem area, you can hear the problem in context.
You can narrow the problem area to include only the samples identified as having the problem, with no extra time.
To narrow the problem area to include only problem samples:
■ Option-click the item in the Analysis Results list.
Zooming In on Analyzed Problems
You can zoom in on an item in the Results list using the Magnify button, so you can see the problem area of the audio file closely.
To zoom in on an item in the Results list:
1 In the Results list, select the item.
2 Press and hold the Magnify button, located at the bottom of the Results list.

The waveform display zooms in on the problem area for as long as you hold the Magnify button.
To zoom in and stay at the new zoom level:
1 In the Results list, select the item.
2 Option-click the Magnify button.
Fixing Analyzed Problems
You can select items in the Results list and fix them individually, in groups, or all together. When you select a single item, the part of the waveform where the item occurs becomes red.
To fix an item:
- Select the item in the Results list, then click the Fix button.
You can select multiple items to fix by Shift-clicking or Command-clicking. You can also fix all items in a single operation.
To fix all items in one operation:
- Click the Fix All button.
Once you have fixed a problem, you can remove it from the Results list, so that you can focus on remaining problems.
To clear fixed items from the Results list:
- Click the Clear Fixed button.
Using the File Editor Project View
You can open the File Editor so that it appears in the top-center pane of the Soundtrack Pro window (in place of the Timeline). The File Editor project view has several unique properties that allow you to:
- Apply realtime effects and automation to an individual file and render those effects to actions
- Save an individual audio file as an audio file project
- Save an audio file project as a standard audio file
- Create AppleScript droplets from Soundtrack Pro actions
• View and navigate the Global Waveform view - Add and edit markers in an audio file project
Opening the File Editor Project View
You start working in the File Editor project view by creating an audio file project, opening an existing audio file project, or opening an audio file in the File Editor.
To create a new, blank audio file project:
- Choose File > New > Audio File.
You can create an audio file project from a clip and open it in the File Editor. Audio file (.stap) projects let you edit nondestructively.
To open an audio file project in the File Editor project view, do one of the following:
- Choose File > Open (or press Command-O), locate and select the project or file, then click Open.
- Drag the project or file over the Soundtrack Pro icon in the Dock.
In the Timeline, double-click the audio clip.
In Final Cut Pro, select a clip, then choose File > Send To > Soundtrack Pro Audio File Project.
In Motion, select an audio track, then choose Edit > Send Audio to Soundtrack Pro.
You can also open the original file in its native format in the File Editor. Editing the original audio file means that when you save your changes, you overwrite (replace) the original file with the edited one.
To open an audio file in its native format in the File Editor project view, do one of the following:
■ Select the clip, then choose Clip > Open in Editor.
In the Timeline or in one of the media tabs, Control-click a project or file, then choose Open in Editor from the shortcut menu.
In Final Cut Pro or Motion, Control-click an audio clip, then choose Open in Editor from the shortcut menu.
When you open a clip from the multitrack window, if the clip is part of a larger audio file, the File Editor zooms in to the length of the clip. A marker is added to mark the start and end points of the clip.
When you open a stereo audio file in the File Editor, the left channel appears in the upper part of the waveform display, and the right channel appears in the lower part.
You can have multiple audio file projects open in Soundtrack Pro and cut and paste between them, but only one project can play back at a time.
Setting the Time Ruler Units in the File Editor Project View
You can set the Time Ruler units in the File Editor project view to any format in the Time Ruler Units submenu.
To set the Time Ruler units in the File Editor project view:
- Choose View > Time Ruler Units, then choose a format from the submenu.
For more information, see "Setting the Project Ruler Units" on page 109.
Closing Audio File Projects
You can close the project when you no longer want to work on it, or close the Soundtrack Pro window and close all open projects (both multitrack and audio file projects).
To close a project:
- Choose File > Close Tab (or press Command-W).
To close all open projects and close the Soundtrack Pro window:
- Click the close button in the upper-left corner of the window.
Applying Realtime Effects in the File Editor Project View
Using the File Editor project view, you can apply realtime effects to an individual audio file project and automate those effects. You can also render realtime effects to actions.
To add a realtime effect to an audio file project in the File Editor project view:
1 Open an audio file or audio file project in the File Editor project view.
2 In the Effects tab, select a category in the Category list to display the effects for that category in the Effect list.
3 In the Effect list, do one of the following:
- Double-click the effect you want to add to the track.
- Select the effect name, then click the Add Effect button.
- Drag the effect to the Effect Parameters area.
The effect's advanced settings window appears, and the effect name appears in the Effect Parameters area with its checkbox selected.
For more information on applying realtime effects, see "Working with Realtime Effects" on page 343.
Automating Realtime Effects in the File Editor Project View
Once you have applied realtime effects to an individual audio file project, you can automate those effects in the File Editor project view.
To automate a realtime effect parameter:
1 In the Effects tab, select the Auto checkbox next to the parameter's control.
2 In the File Editor project view, click the Master Envelope button (in the lower-left corner of the project pane) to show the envelopes for the audio file project.

3 Add and adjust envelope points in the effect's envelope.
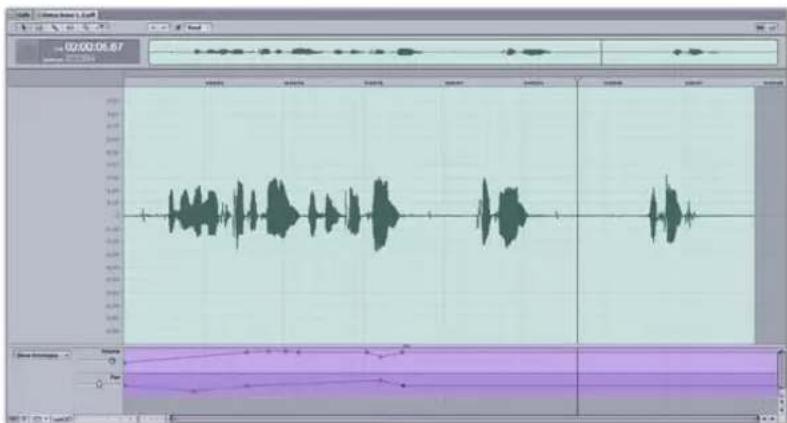
For information on adding and adjusting envelope points, see Chapter 12, "Working with Automation," on page 355.
Rendering Realtime Effects to Actions
Choosing this command renders any realtime effects applied to the audio file project and the project's envelopes to an action in the Actions list, letting you turn these effects and envelopes on or off, reorder them in the list, and save them with the audio file project.
To render realtime effects and envelopes to an action:
- Choose Process > Render to Action.
Once you render realtime effects and envelopes to an action, the realtime effects are deleted from the project, and the envelopes are reset to their default values.
Some effects, including reverb and delay, add audio that extends past the end of the file. This is called an effect tail. When you render realtime effects to an action, if any of the effects creates an effect tail that extends past the end of the audio file, the file lengthens to include the effect tail.
Saving Audio File Projects from the File Editor Project View
You can save a project as an audio file project or as a standard audio file and can choose other options when you first save the file. Audio file projects are saved with the extension .stap. Saving a project as an audio file project lets you make changes to actions and other edits when you reopen the project in the File Editor.
To save a project as an audio file project:
1 Choose File > Save.
2 In the Save dialog, type a name for the file and browse to the location where you want to save it.
3 Choose the file type for the project from the File Type pop-up menu.
The available choices in the Save dialog change depending on whether you choose Audio File Project or an audio file format as the file type.
4 Optionally, select the Update Multitrack Documents checkbox to switch all instances of the original file in open multitrack projects to the new audio file project.
5 Click Save.
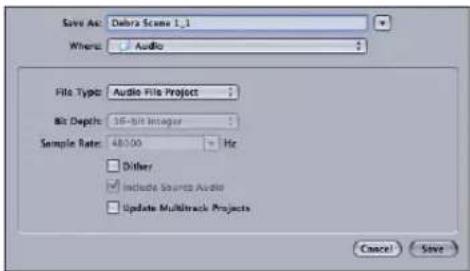
Saving Audio File Projects Containing Video
For audio file projects containing video, the video file is saved as a reference movie. If the video file is moved or deleted, or if you copy the project to another computer, the video may be missing when you open the project. To add the video to the project again, drag the video file into the Video tab or the video track of the Timeline.
When you open a QuickTime movie in the File Editor as an audio file project, or send an audio clip from Final Cut Pro to an audio file project, by default the source audio is referenced. When you save the project by choosing File > Save As, you can include the source audio in the project. If the source audio is moved or deleted, or if you copy the project to another computer, the audio might not play correctly.
The first time you save an audio file project with referenced audio, a dialog appears asking if you want to include or reference the source audio. Your choice becomes the default behavior for new audio file projects and can be changed in the General preferences pane.
About Saving QuickTime Movies and File Size
When you lengthen or shorten the duration of a QuickTime movie in the File Editor by adding or deleting audio, the file size of the movie might be larger than expected when you save the movie. For example, if you shorten the duration of the movie by deleting audio, the file size of the movie does not decrease.
When you change the sample rate, bit depth, or number of channels in a QuickTime movie, the file size of the saved movie might be larger than expected. Also, when saving to a QuickTime movie that uses a compressed audio format, the audio is saved uncompressed and the file size might be larger than expected.
In all of the above cases, saving the movie to a different location results in the file being saved at the correct file size.
Saving Audio Files from the File Editor Project View
You can also save a project as a standard audio file from the File Editor project view. In this case, the edits you have made are rendered into the audio file and cannot be changed or undone the next time you open the audio file in the File Editor.
To save a project as an audio file:
1 Choose File > Save.
2 In the Save dialog, type a name for the file and browse to the location where you want to save it.
3 Choose the file type for the project from the File Type pop-up menu.
You can save a project to any of the following standard audio file formats:
• AIFF
• WAVE
- NeXT
- Sound Designer II
- Core Audio File
- QuickTime Movie
4 Choose the bit depth for the project from the Bit Depth pop-up menu.
5 Choose the sample rate for the project from the Sample Rate pop-up menu.
6 Optionally, select any of the following checkboxes:
- Dither: Select to dither the file. Dithering is useful when saving a project at a lower bit depth or sample rate. In general, you should dither a project only when saving it as a standard audio file, and only when you have finished all bit depth or sample rate conversions. Dithering is not appropriate for 32-bit files.
- Include Source Audio: Select to include the source audio in the project. If you don't select this checkbox, the project refers to the external source audio file. Referenced files must be present to open the project correctly.
- Update Multitrack Documents: Select to switch all instances of the original file in open multitrack projects to the new audio file project.
7 Click Save.

When you save an audio file with the same name, location, and extension as the original audio file, you overwrite the existing audio file.
Using the Timeline Controls in the File Editor Project View
You can use the Timeline controls, located at the lower-left corner of the project pane, while working in the File Editor project view.
Some of these controls have slightly different functions in the File Editor than they do in the Timeline.
• Master Envelopes button: You can show or hide the envelopes for the audio file.
- Snapping button: You can turn snapping on or off in the File Editor.
- Snap To button: You can choose the Snap To value that the playhead and other items snap to. In the File Editor, the choices for snap are Ruler Ticks and Zero Crossings.
- Track Height control: This sets the height of the envelope rows when you show envelopes in the File Editor.
Scripting Actions in the File Editor Project View
You can save a series of actions in the File Editor project view as an AppleScript droplet and use the droplet to modify other audio files. You can apply the actions in a saved droplet while you are working in Final Cut Pro using the Send To shortcut menu. You can also drag files or folders onto a droplet, making it easy to batch process files.
You can edit the droplet in the AppleScript Script Editor to adjust action settings. This is especially helpful when you want to apply the same series of actions to multiple files, or when you want to apply actions repeatedly, changing one or several settings each time. You can apply a droplet to another audio file, or group of files, by dragging files or folders containing a group of files onto the droplet.
To save a series of actions as a droplet:
1 Open an audio file in the File Editor.
2 Apply the actions to the audio file.
3 Choose File > Save as AppleScript.
4 In the Save dialog, type a name for the droplet.
By default, droplets are saved to the location /Users/username/Library/Scripts/Soundtrack Pro Scripts/. Do not change the location or Soundtrack Pro and Final Cut Pro may not be able to find and use your saved droplets.
Applying a Saved Droplet to a Clip in Final Cut Pro
You can apply a series of actions saved as a droplet to a clip in Final Cut Pro.
To apply a saved droplet to a clip in Final Cut Pro:
In the Final Cut Pro Timeline or Bin, Control-click the clip, choose Send To > Soundtrack Pro Script from the shortcut menu, then choose the droplet you want to apply from the submenu.
Soundtrack Pro opens with the clip visible in the File Editor. The actions are applied to the clip, the clip is saved with the changes, and the File Editor moves to the background, behind the Final Cut Pro windows.
Using the Global Waveform View
The File Editor includes a Global Waveform view, located directly above the main waveform display. The Global Waveform view displays a miniature view of the entire audio file and shows the current playhead position. The part of the audio file visible in the waveform display appears inside a blue rectangle. You can quickly move to different parts of the audio file by dragging the visible area rectangle.
To move to a different part of the audio file using the Global Waveform view:
- Drag the blue visible area rectangle to a new position.
Drag this rectangle to a new position.

natural_image
Audio waveform visualization with no visible text or symbolsUsing Markers in the File Editor Project View
You can insert markers in an audio file project in the same way as in a multitrack project. Markers can be useful for indicating where a specific sound, cue, or event begins or ends in the audio file. They can also be useful for indicating an area of an audio file you want to time stretch.
When an audio file project has two or more markers, you can select the area between two markers by double-clicking in the waveform display. For more information, see "Selecting Part of an Audio File" on page 202.
For information about inserting, naming, moving, and deleting markers, see "Working with Markers" on page 183.
Using the Multitake Editor
7
The Multitake Editor presents a new way of dealing with layered audio clips.
About the Multitake Editor
You use the Multitake Editor to edit multitake (multiple-take), synchronized audio that is created by performing multiple-take recordings (such as in automatic dialogue replacement, or ADR). With this flexible tool, you can mix and match parts of different takes and make adjustments at any time. Once you are done editing a multitake clip, you can collapse it into a single (composite) clip, hiding the constituent edits that are not relevant to the surrounding multitrack Timeline, and move it anywhere in your project as a single item.

What Is ADR?
Automatic dialogue replacement (ADR) is a process of re-recording dialogue in the studio in synchronization with the picture. There are at least three roles in the ADR process: the actor, the recording engineer, and the sound editor. The actor has to recreate his or her performance and perfectly match up his or her speech to that of the film. The recording engineer has to recreate acoustic spaces so that it doesn't sound like an actor is in a recording studio. The sound editor has to pick and choose the best parts of multiple takes, combine them into one composite clip, and keep everything synchronized to the picture. The Multitake Editor in Soundtrack Pro was created to address the needs of the sound editor in this scenario.
Multitake Clips
A multitake clip is a "layered" audio clip. This means it contains multiple versions or "takes" of the same audio material, such as a line of dialogue. Generally, these takes represent overlapping spans of time in your program. In an ADR recording session, an actor may repeat the same line many times. A single multitake clip can contain all of those takes as distinct items.
Creating Multitake Clips
You can create a multitake clip by either recording one or converting a standard clip to a multitake clip.
Recording Multitake Clips
For information about recording multitake clips, see "Recording Multiple Takes" on page 372.
Converting Standard Clips to Multitake Clips
You can convert any clip to a multitake clip.
To convert a standard clip to a multitake clip:
1 Select a clip in the Timeline.
2 Do one of the following:
- Control-click the clip and choose Convert to Multitake Clip from the shortcut menu.
- Select the Multitake tab and click the Make Multitake Clip button that appears in the center of the Multitake tab.
The new multitake clip appears in the Multitake Editor.
3 Add any additional takes, as needed.
For information on adding takes, see "Adding and Deleting Takes" on page 256.
Overview of the Multitake Editor
You can think of the Multitake Editor as a simplified multitrack Timeline that is focussed entirely on the contents of a single multitake clip. In the Multitake Editor, you can audition and choose which take will be used for each section of dialogue. The top row in the Multitake Editor is the comp (or composite) track. This track represents a combination of all of the edits that you make in the Multitake Editor. The other tracks represent individual takes. You use the Blade tool to split the takes into regions. Use the Selection tool to select the active take for each region. Use transition points to adjust the timing and to create crossfades between the selected portions of takes.

- Selection tool: Use the Selection tool to select take regions by clicking them.
- Blade tool: Use the Blade tool to split takes into regions.
- Scrub tool: Use the Scrub tool to quickly find a particular sound or event in the audio.
- Comp track: Represents combined edits that you made in the Multitake Editor.
• Take tracks: Represent individual takes. - Solo button: Solos the take track.
- Snapping button: Toggles snapping for the Multitake Editor.
- Snap To pop-up menu: Sets Multitake snapping to Ruler Ticks, Seconds, or Frames.
- Track Height: Sets the height of tracks in the Multitake Editor.
- Zoom slider: Drag the slider to change the zoom level.
Note: When a multitake clip is displayed in the Multitake Editor, the Action Insert bar is moved to the top of the Actions list. When you deselect the clip or you click a different tab, the Action Insert bar is restored to its original position. For more information about the Actions tab, see "Working with Actions" on page 230.
Editing in the Multitake Editor
Fundamentally, there are three steps in making any multitake edit: splitting, selecting, and adjusting.
First, you split the takes into regions using the Blade tool.
To split a take using the Blade tool:
1 Select the Blade tool by clicking the Blade tool in the upper-left corner of the Multitake Editor or by pressing B.
2 Click one of the take tracks using the Blade tool pointer.
A transition point appears in the Multitake Timeline at the point where you clicked.

After you have split the takes into regions, select the active take for each region with the Selection tool.
To select an active take for a region:
1 Select the Selection tool by clicking the Selection tool in the upper-left corner of the Multitake Editor or by pressing A.
2 In the region, click the take track you want to select.
The take you clicked becomes the active take for that region.

Next, use transition points to adjust the timing and to create crossfades between the selected portions of takes. Slip (offset) take regions to synchronize them with the picture.
To adjust a transition point, do one of the following:
- Drag the vertical transition point line left or right to adjust the timing of the cut.
- Drag the left or right arrow handle at the top of a transition point to create a crossfade between two takes, then double-click the fades to use the Fade Selector.

You can also adjust the fade type by double-clicking either part of the crossfade. For more information on fade types, see "Creating Fade-Ins and Fade-Outs in the Timeline" on page 158.
To delete a transition point:
1 Select the vertical transition point line.
2 Press Delete.
Slipping Take Regions
Because it's common for a particular take to be good but out of sync, you can slip (offset) an individual take region.
To slip a take region:
1 Command-Option-click the take region.
2 Without releasing the mouse button, drag to the left or to the right.
For more information about slipping (the offset of) a take region, see "Changing the Offset of an Audio Clip" on page 157.
Adding and Deleting Takes
You can easily add audio files to a multitake clip. Added takes can be any audio files that Soundtrack Pro supports and that match the sample rate and channel valence of the takes already in the Multitake Editor. The takes do not have to be from the same recording session. It is just as easy to remove takes from a multitake clip.
Tip: Optionally, you can add a take from the original production audio to use a guide track. The waveform in this original recording can be a good reference point during your multitake editing session.
To add a take, do one of the following:
- Drag a file into the Multitake Editor.
- Choose Add Take from the pop-up menu in the upper-left corner of the Multitake tab. In the dialog that appears, navigate to the audio file you want to add and click Open.

Note: The sample rate and the channel valence (mono, stereo, surround, and so on) of the files you want to add must match the sample rate and the channel valence of the files already in the Multitake Editor.
To remove a take:
- Choose Remove Take from the pop-up menu in the upper-left corner of the Multitake tab and choose the take you want to remove from the submenu.

Renaming Takes
By default, Soundtrack Pro names takes according to the order in which they were recorded and the track in which they were recorded. For example, "Take 3 - Track 1 Recording 3.aiff." You can easily rename any take to suit your needs.
To rename a take in a multitake clip:
- Click the name field in the header for the take and enter a new name.
Reordering Takes
You can vertically rearrange the order of takes in a multitake clip.
To rearrange the order of takes in a multitake clip:
1 Click the track header of the take you want to move.
2 Drag the take vertically to a new position in the list.
A blue bar indicates where the take track will be positioned.
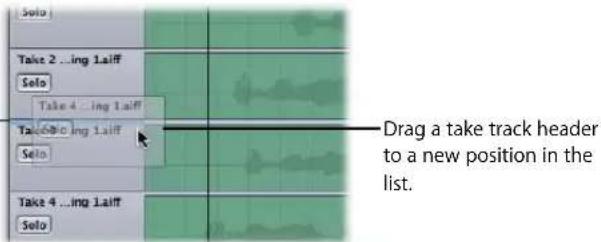
Example: A Multitake Editing Workflow
The following example demonstrates how you might create a comp from multiple takes of an ADR session using the Multitake Editor. In this case, there are four takes of the same line: "Would you like to try a sample of our organic Peruvian blend?"
To edit multiple takes of a line of dialogue using the Multitake Editor:
1 Select the multitake clip in the Timeline.
2 Control-click the ruler at the top of the multitrack Timeline, then choose Cycle Region from the shortcut menu and Create Cycle Region from Selection from the submenu (or press Shift-A).
3 Click the Multitake Editor tab to open it.
The comp track and, in this example, four take tracks, appear in the Multitake Editor.
4 Click the Solo button on the Take 1 track and click the Play button to listen to the first take. Take 1 plays.
5 Repeat this playback for each take to familiarize yourself with how they sound.
6 Optionally, you can choose to add a take from the original sync-sound production audio to use a guide track. (See "Slipping Take Regions" on page 255 for more information.)
7 When you are ready to make the first cut, click the Blade tool in the upper-left corner of the Multitake Editor (or press B).
In this example, Take 3 contains the best version of the first few words ("Would you like to...").
8 Using the Blade tool, click just before the waveform for the word "try" in the Take 2 track. A transition point appears in the Multitake Editor Timeline at the point where you clicked.
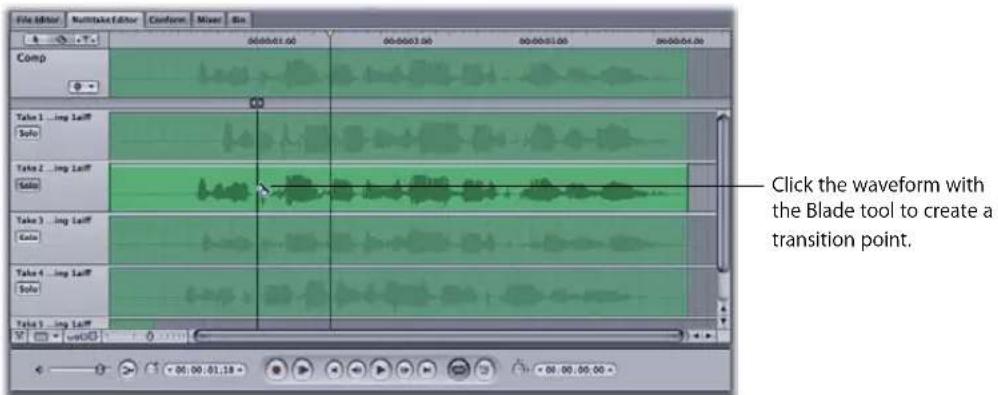
9 Click the Selection tool in the upper-left corner of the Multitake Editor.
10 In the Take 3 track, click the waveform for the word "try" to select it.
The take you clicked becomes the active take for the region.
![File Editor Multitake Editor Custom Inner Bin 00:00:01:00 00:00:01:00 09:00:01:00 00:00:04:00 Comp Take 1 ...ing Laiff Sale Take 2 ...ing Laiff Sale Take 3 ...ing Laiff Sale Take 4 ...ing Laiff Sale Take 5 ...ing Laiff X: [17] - var(0.3) The Take 3 track becomes the active take for that region.](/content/2026/05/894656/images/38019627d7e9a4990d7224eccc3390239d771f2015c2ff4ad8a9099f69367913.jpg)
11 Repeat steps 6 to 9, selecting the best takes for each of the other phrases or words in the line of dialogue.
12 Slip (offset) individual take regions, as needed, to synchronize them with the picture. (For more information, see "Example: A Multitake Editing Workflow" on page 257.)
13Do one of the following to adjust any of the transition points:
- Drag a transition point left or right to adjust the timing of the cut.
- Drag the left or right arrow handle at the top of a transition point to create a crossfade between two takes.
Drag the transition point handles to create a crossfade between takes.
![File Editor MultiTake Editor Custom Mixer Bin 00:00:01:00 00:00:02:00 00:00:03:00 00:00:04:00 Comp Take 1 ...img Laiff SoVo Take 2 ...img Laiff SoVo Take 3 ...img Laiff SoVo Take 4 ...img Laiff SoVo Take 5 ...img Laiff X: [F] X: [m] X: [m]](/content/2026/05/894656/images/103285a1f9f641caf4ddfca73efca84d0cd70f07a2c5bdce451f0f0049df2d77.jpg)
Note: You can also adjust the fade type by double-clicking either part of the crossfade. For more information on fade types, see "Creating Fade-Ins and Fade-Outs in the Timeline" on page 158.
14 When you are satisfied with the edit, use the multitake clip in the main multitrack Timeline as you would use any other clip.
If you need to make additional edits or adjustments to the multitake clip, repeat Steps 1 to 3.
Basic Mixing in Soundtrack Pro
8
Soundtrack Pro gives you the tools to create sophisticated audio mixes for your projects.
When you have added audio clips to your project and placed them in the Timeline, you mix the project. Mixing is where you balance different elements, such as dialogue, music, and sound effects, bring focus to key moments and events in the project, and create a sense of perspective by placing sounds in space. When you finish mixing, you have one or more final mixes that you can export.

Soundtrack Pro offers you professional mixing capabilities, including the abilities to create busses and submixes and to send audio to multiple physical outputs. The Mixer provides a visual representation of your project in a virtual mixing console, with channel strips where you control different aspects of the sound. You can adjust volume and pan, mute and solo tracks, choose track submixes, add effects, and observe levels as the project plays. This chapter covers basic mixing. For information about mixing surround sound, see Chapter 9, "Mixing Surround Sound," on page 293.
Steps in Mixing
Mixing a project typically involves the following tasks:
• Balancing relative volume levels
- Panning tracks to create perspective
- Adding EQ, compression, and other processing using effects
- Using automation to create changes over time
- Setting the overall project volume and eliminating clipping
You can perform these steps in any order, and move back and forth between them as you create the mix. In most situations, you finish mixing the individual tracks before making changes to the overall project. The following suggested order provides a guideline that may be useful for common situations:
Step 1: Mix main dialogue tracks
Solo the main voice tracks and pan to your liking. Add any EQ, compression, or other processing. Adjust relative volume, leaving some headroom (typically around -6 dB) for peaks in the signal, in case you need to raise levels later.
Step 2: Mix other dialogue and middle ground tracks
With main voice tracks still soloed, solo the other dialogue, ADR, and voiceover tracks one at a time and adjust volume and pan relative to the main voice tracks. Add any processing if needed.
Step 3: Mix background tracks
With the previously mixed tracks still soloed, solo the background tracks one at a time and adjust volume and pan relative to the other tracks. Add any processing if needed.
Step 4: Make changes to the overall mix
Once you have mixed all the individual tracks in your project, add any EQ, compression, or other processing to the overall project. Adjust the overall volume to an appropriate level and remove any clipping before exporting the project.
Structuring an Audio Post-Production Project
To organize their projects, most video and motion picture sound editors combine the signals of related tracks and busses into submixes (also known as stem mixes). Then they combine these submixes to build a final mix. Soundtrack Pro is designed with this workflow in mind.
What Is a Submix and How Do You Use It?
In Soundtrack Pro, you use a submix to combine (or "sum") the audio from different tracks and busses, and route the audio to physical outputs. The name of this feature implies its purpose—to mix the audio signals of a subset of the tracks and busses in your project. If you are using external audio hardware that supports multiple physical outputs, you can have multiple submixes in your project and then choose the physical output to which each submix routes its audio. By default, all tracks are routed to Submix 1, and Submix 1 is routed to the Stereo 1, 2 outputs. You can easily add more submixes, reroute audio, and change the hardware output setting using the Output pop-up menu in each submix.
Basic Signal Routing in Soundtrack Pro
At a minimum, any audio that you edit in the Soundtrack Pro Timeline passes through the following "mixer objects" on its way out to the physical audio outputs: a track, a submix, and the Master bus.
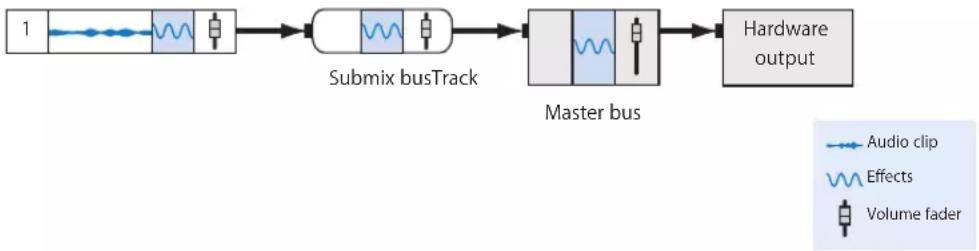
flowchart
graph LR
    A["1"] --> B["Submix busTrack"]
    B --> C["Master bus"]
    C --> D["Hardware output"]
    style A fill:#f9f,stroke:#333
    style D fill:#bbf,stroke:#333
    note right of A
        Audio clip
        Effects
        Volume fader
    end
Audio post-production projects typically include many tracks and submixes. The following diagram shows the signal flow of multiple tracks to just one submix. While this is an unlikely scenario, it illustrates the fact that you can route as many tracks to a submix as you like. See "Example: Mixing a Project with Dialogue, Music, and Effects Submixes" on page 266 for a typical example.
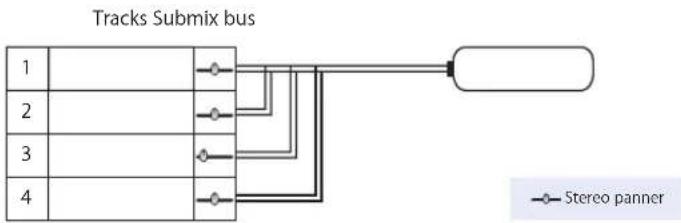
flowchart
graph LR
    A["1"] --> B["2"]
    C["2"] --> D["3"]
    E["3"] --> F["4"]
    G["..."] --> H["..."]
    I["Stereo panner"] --> J["Output"]
Setting the Submixes for Tracks and Busses
To be included in a project, the audio signal of each track and each bus must be routed to a submix. By default, in new multitrack projects, there is only one submix (Submix 1) and all tracks are routed to Submix 1. You can add as many submixes as you like and route as many signals from tracks and busses to those submixes as you want.
To create a more elaborate project (as described in "Example: Mixing a Project with Dialogue, Music, and Effects Submixes" on page 266), you create additional submixes.
To add a submix, do one of the following:
- Choose Multitrack > Add Submix.
■ Control-click a submix, then choose either Insert Submix Before or Insert Submix After from the shortcut menu.
Once you have created multiple submixes, you can route any combination of tracks or busses to any submix.
To set the submix for a track or bus:
- Choose the submix from the Submix pop-up menu in the track header or at the bottom of the Mixer channel strip for the track or bus.
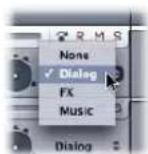
If you choose None from the pop-up menu, you are effectively removing that track or bus from the mix and from the final output.
Setting Hardware Outputs
Use the Output pop-up menu in each submix to choose an output channel or set of output channels. Your choice defines the output of that submix as either mono, stereo, or surround.
To select the hardware output jacks for a submix:
- Click None, Surround, Stereo, or Mono from the Output pop-up menu in the track header of each submix, then choose a channel or set of channels from the submenu.

The available choices within each of these output categories depend on the number of available physical outputs and number of submixes in your project.
Note: You can create submixes independently of the audio hardware connected to your computer and can route audio to an output that does not correspond to a physical output. In most situations, each submix in a project should correspond to a physical output on the audio interface or other hardware connected to your computer. Submixes that do not correspond to a physical output will not be heard. You may set as many submixes in a project to the same physical output device or output channel as you like.
If you choose None from the Output pop-up menu, you are effectively removing that submix from the mix and from the final output.
For more information about system output settings, see "Setting the Audio Input and Output" on page 22. For more information about connecting an audio interface, see "Setting the Audio Input and Output" on page 22.
For more information about working with tracks, busses, and submixes in the Timeline, see "Tracks, Busses, Submixes, and the Master Bus" on page 124 and "Working with Tracks, Busses, and Submixes in the Timeline" on page 135.
Example: Mixing a Project with Dialogue, Music, and Effects Submixes
A classic audio post-production practice for film and video is creating separate submixes for the dialogue, the music, and the sound effects. This provides an appropriate degree of flexibility, both in the mixing phase and in distributing the final product.
Creating Submixes
In this example project, all tracks containing dialogue are routed to a submix called "Dialogue." The tracks containing sound effects are routed to a submix called "FX." The tracks containing music are routed to a submix called "Music."

The following diagram shows how audio signals from tracks in each category are routed into their respective submixes.

flowchart
graph LR
    A["VO: Debra"] --> B["Submix bus"]
    C["VO: Jacob"] --> B
    D["Stage Mic"] --> B
    E["FX: Foley"] --> B
    F["FX: Background"] --> B
    G["FX: Boom"] --> B
    H["Music: Music 1"] --> B
    I["Music: Music 2"] --> B
    B --> J["Dialogue"]
    B --> K["Effects"]
    B --> L["Music"]
    style A fill:#cce5ff,stroke:#333
    style C fill:#cce5ff,stroke:#333
    style D fill:#cce5ff,stroke:#333
    style E fill:#cce5ff,stroke:#333
    style F fill:#cce5ff,stroke:#333
    style G fill:#cce5ff,stroke:#333
    style H fill:#cce5ff,stroke:#333
    style I fill:#cce5ff,stroke:#333
    style J fill:#e6f7ff,stroke:#333
    style K fill:#e6f7ff,stroke:#333
    style L fill:#e6f7ff,stroke:#333
Once the audio signals are organized in this way, you can apply (and automate) volume settings and effects on any of the submixes, rather than on the individual tracks or busses. You might, for example, add a compressor or EQ effect to a Dialogue submix to enhance all of the dialogue signals at once. Obviously, this saves a lot of time and effort (when compared with applying all of these settings to each dialogue track individually). Using submixes to segment your project provides you with greater control over all aspects of your final mix.
Creating a Stereo Mix
The next routing decision is the choice of hardware outputs. The following example diagram shows the routing for a traditional final product: a stereo mix. To do this, you would simply choose the Stereo 1,2 output for each of the three submixes. (This also happens to be the default output for every submix in Soundtrack Pro.)

flowchart
graph LR
    A["Tracks Submix bus"] --> B["Dialogue Channels 1,2"]
    A --> C["Effects Channels 1,2"]
    A --> D["Music Channels 1,2"]
    B --> E["Master bus"]
    C --> E
    D --> E
    E --> F["Hardware outputs"]
    F --> G["Left"]
    F --> H["Right"]
    style A fill:#f9f,stroke:#333
    style F fill:#ccf,stroke:#333
In this case, the left and right channels for each submix are routed to the left and right (1 and 2) channels of the hardware output device. All three submixes are combined into one stereo (left and right) signal. This is a “stereo mixdown,” suitable for any stereo-capable playback device. At this stage, the Master bus presents a (final) opportunity to make volume adjustments and apply effects. For information about the Master bus, see “Using the Master Bus” on page 290.
Creating a Separate Music and Effects Mix
Using submixes in your workflow becomes very powerful when you consider the many different ways you might be delivering the final program. One common practice is creating a separate music and effects (M & E) submix for foreign distribution. This gives distributors the option to create versions of the program with the dialogue dubbed in foreign languages but to still include the program's original music and effects in the dubbed versions.

flowchart
graph LR
    subgraph Tracks
        A1["1"] --> B1["Submix bus"]
        A2["2"] --> B1
        A3["3"] --> B1
        A4["4"] --> B2["Effects"]
        A5["5"] --> B2
        A6["6"] --> B2
        A7["7"] --> B3["Music"]
        A8["8"] --> B3
    end

    subgraph Submix bus
        B1 --> C1["Dialogue"]
        B2 --> C1
        B3 --> C1
        B1 --> D["Master bus"]
        C1 --> E1["Hardware outputs"]
        C2["Effects"] --> D
        C3["Music"] --> D
    end

    subgraph Hardware outputs
        D --> F1["Output device"]
        D --> F2["Output device"]
        D --> F3["Output device"]
        D --> F4["Output device"]
        D --> F5["Output device"]
        D --> F6["Output device"]
        D --> F7["Output device"]
        D --> F8["Output device"]
    end

    style Tracks fill:#f9f,stroke:#333
    style Submix bus fill:#ccf,stroke:#333
    style Hardware outputs fill:#cfc,stroke:#333
    style Output device fill:#fcc,stroke:#333
As in the stereo mixdown example, the Dialogue submix is routed to the Stereo 1,2 output. But the Music and Effects submixes are routed to the Stereo 3,4 output channels, isolating the dialogue signal from the music and effects signals. Technically, only one output channel is required for the dialogue, because the Dialogue submix is made up of mono signals. But in practice, it is usually routed as two identical mono signals to channels 1 and 2. Most likely, producers making the foreign language version will use the original dialogue as a guide track and then replace it with their edited foreign language track in the final mix.
This M & E case is just one simple example of how you can structure a project for an efficient workflow. Each mix project comes with its own particular quirks. The good news is that Soundtrack Pro has a lot of flexibility. For example, the sends and busses features in Soundtrack Pro offer additional options for structuring a project. For more information, see "Working with Sends and Busses in the Mixer" on page 286.
Signal Routing for a Separate Music and Effects Mix in Surround
When you shift from a stereo project to surround, you need to keep in mind some minor signal routing consequences. This section discusses what changes you would make to the submix and output settings. (For information about creating a surround version of a stereo project, see "Converting a Stereo Mix to 5.1 Surround" on page 307.) First, assuming that the music and effects are mixed over six surround channels, those submixes must be routed to the Surround 1-6 output. The Dialogue submix could either remain routed to the Stereo 1,2 output jacks to be added to the Surround 1-6 mix or routed to the center channel at the submix, or could be panned to the center channel in a surround signal, as shown below.
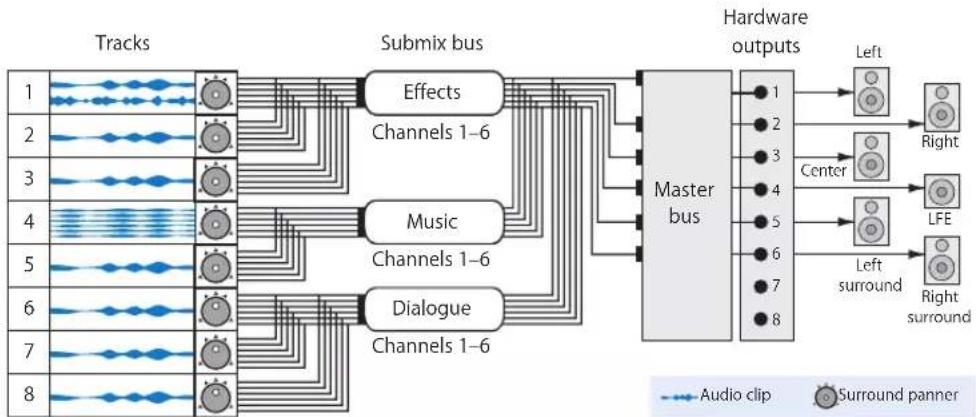
flowchart
graph LR
    subgraph Tracks
        A1["1"] --> B1["Effects"]
        A2["2"] --> B1
        A3["3"] --> B2["Effects"]
        A4["4"] --> B3["Effects"]
        A5["5"] --> B4["Effects"]
        A6["6"] --> B5["Effects"]
        A7["7"] --> B6["Effects"]
        A8["8"] --> B7["Effects"]
    end

    subgraph Submix bus
        B1 --> C1["Channels 1–6"]
        B2 --> C2["Channels 1–6"]
        B3 --> C3["Channels 1–6"]
        B4 --> C4["Channels 1–6"]
        B5 --> C5["Channels 1–6"]
        B6 --> C6["Channels 1–6"]
        B7 --> C7["Channels 1–6"]
    end

    subgraph Master bus
        C1 --> D1["Master bus"]
        C2 --> D1
        C3 --> D1
        C4 --> D1
        C5 --> D1
        C6 --> D1
        C7 --> D1
    end

    subgraph Hardware outputs
        D1 --> E1["Left"]
        D1 --> E2["Right"]
        D2 --> F1["Center"]
        D3 --> G1["LFE"]
        D4 --> H1["Left surround"]
        D5 --> I1["Right surround"]
    end

    subgraph Audio clip
        A7 --> J["Audio clip"]
        A8 --> K["Surround planner"]
    end
To create the surround version of the separate music and effects mix (as described earlier), you route the Dialogue submix to any output channels other than 1-6. This example uses channels 7 and 8, the last two available output channels, thus isolating the dialogue from the music and effects.

flowchart
graph LR
    subgraph_Tracks_Submix_bus["Tracks Submix bus"]
        A1["1"] --> B1["Effects Channels 1-6"]
        A2["2"] --> B1
        A3["3"] --> B1
        A4["4"] --> B2["Music Channels 1-6"]
        A5["5"] --> B2
        A6["6"] --> B3["Dialogue Channels 7,8"]
    end

    subgraph_Hardware_outputs["Hardware outputs"]
        C1["1"] --> D1["Output device"]
        C2["2"] --> D1
        C3["3"] --> D1
        C4["4"] --> D1
        C5["5"] --> D1
        C6["6"] --> D1
        C7["7"] --> D1
        C8["8"] --> D1

    end

    A1 --> B1
    A2 --> B1
    A3 --> B2
    A4 --> B2
    A5 --> B3
    A6 --> B3
    A7 --> B4
    A8 --> B4

    style Tracks_Submix_bus fill:#f9f,stroke:#333
    style Hardware_outputs fill:#ccf,stroke:#333
Using Sends and Busses
You can use sends to split an audio signal into two or more separate signals. A send taps a track's audio signal and routes it down a separate but parallel path. In Soundtrack Pro, these separate paths are known as busses. (Some might call these auxiliary busses.) This process is analogous to diverting a portion of a river to an alternate (but parallel) stream. Busses are like alternate streams of audio. They can be processed or combined independently of the "main river." They can rejoin the main signal further "downstream," at the final mix, or they can be routed to altogether separate outputs.

flowchart
graph LR
    A["Track 1"] --> B["Send"]
    B --> C["Bus"]
    C --> D["Submix bus"]
    D --> E["Audio clip"]
    D --> F["Effects"]
    D --> G["Volume fader"]
By preparing these alternate versions and combinations of track audio signals, you give yourself more options at the final mix stage, when all of your project's media elements and adjustments are in place.
Example: Adding Effects with Sends and Busses
The following example shows how you could add a reverb effect to a music track using a bus. The main reason to apply effects this way (rather than directly on the track) is so you can control the amount and characteristics of the effect (in this case, reverb) on multiple tracks using one set of controls.
To accomplish this, you do the following:
- Create a new bus. (In this example, the new bus is named "MusicReverb.")
- Add a send to the music track.
- Route the new send to the MusicReverb bus.
- Apply a reverb effect to the MusicReverb bus.
For specific information about how to add sends to tracks and route them to busses, see "Adding Sends to Tracks" on page 349.

flowchart
graph LR
    A["Music"] --> B["Track"]
    B --> C["MusicReverb bus"]
    C --> D["Submix bus"]
    D --> E["Audio clip"]
    D --> F["Effects"]
    D --> G["Volume fader"]
    C --> H["Send"]
    H --> C
    style A fill:#f9f,stroke:#333
    style B fill:#ccf,stroke:#333
    style C fill:#cfc,stroke:#333
    style D fill:#fcc,stroke:#333
    style E fill:#ffc,stroke:#333
    style F fill:#ffc,stroke:#333
    style G fill:#ffc,stroke:#333
As the diagram shows, the new MusicReverb bus represents an alternate version of the Music track audio signal. Once created, this bus appears as a row in the Timeline and a channel strip in the Mixer. It becomes a resource to draw from during the final mix. Rather than having to tweak the effects settings of individual tracks in the mix, you can simply adjust the volume fader on the MusicReverb bus to increase or decrease the amount of reverb on that music track.
By default, new sends are pre-fader sends. This means the signal is tapped before the track's output fader. In this example, if you used the default pre-fader send setting, adjusting the Volume slider on the Music track would have no effect on the music level in the MusicReverb bus.
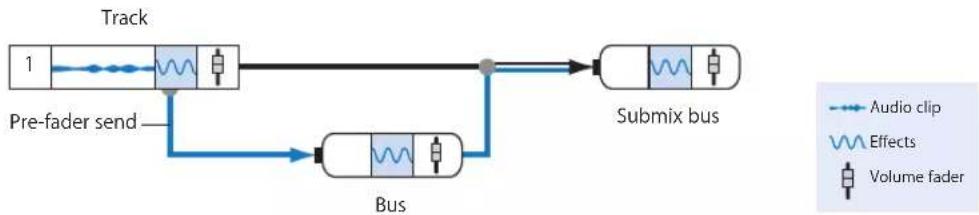
flowchart
graph LR
    A["Track 1"] --> B["Pre-fader send"]
    B --> C["Bus"]
    C --> D["Submix bus"]
    D --> E["Effects"]
    D --> F["Volume fader"]
    style A fill:#f9f,stroke:#333
    style B fill:#bbf,stroke:#333
    style C fill:#bfb,stroke:#333
    style D fill:#ffb,stroke:#333
    style E fill:#fff,stroke:#333
    style F fill:#fff,stroke:#333
In contrast, a post-fader send taps the track signal after a track's output fader. You can change a send to a post-fader send.
To make a send a post-fader send:
- Click the disclosure triangle for the send in the Effects tab, then select the On button next to Post-Fader.

flowchart
graph LR
    A["Track"] --> B["Post-fader send"]
    B --> C["Submix bus"]
    D["Bus"] --> B
    E["Audio clip"] --> B
    F["Effects"] --> B
    G["Volume fader"] --> B
In the post-fader case, adjusting the Volume slider on the Music track would have a direct effect on the music level in the MusicReverb bus.
Example: Combining Track Signals with Sends and Busses
You can also send the signals from multiple tracks to a single bus, creating "intermediate submixes." For example, you could route every dialogue track for a particular actor to a bus with the actor's name. You could adjust the volume of all the actor's dialogue using the bus volume fader and add an EQ effect that brings out the actor's voice in the mix. You could then send (route) the bus to a particular submix.
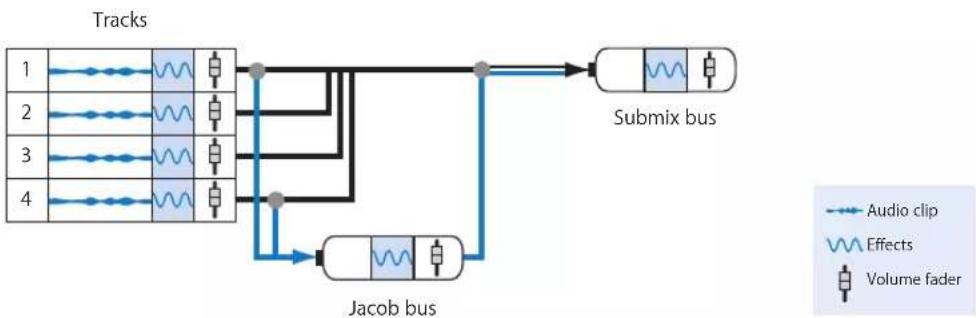
flowchart
graph LR
    A["Tracks"] --> B["1"]
    A --> C["2"]
    A --> D["3"]
    A --> E["4"]
    B --> F["Waveform"]
    C --> G["Waveform"]
    D --> H["Waveform"]
    E --> I["Waveform"]
    F --> J["Submix bus"]
    G --> J
    H --> J
    I --> J
    J --> K["Jacob bus"]
    K --> L["Audio clip"]
    K --> M["Effects"]
    K --> N["Volume fader"]
In the above diagram, tracks 1 and 4 contain dialogue from the actor, Jacob. Each of these tracks has a send applied to it that taps the signal and routes it to a bus (named "Jacob"). This bus is effectively an intermediate submix. Now, any effects and fader adjustments applied to this bus will be available during the final mix as a single channel strip (named "Jacob.")
For more information about using sends and busses in the Mixer, see "Working with Sends and Busses in the Mixer" on page 286.
Using the Mixer
While most mixing tasks can be accomplished in the Timeline and elsewhere in the Soundtrack Pro interface, the Mixer offers an interface analogous to hardware mixing consoles found in most audio post-production facilities. Another advantage of the Mixer is that you can view levels on all (or at least many) tracks simultaneously in real time.
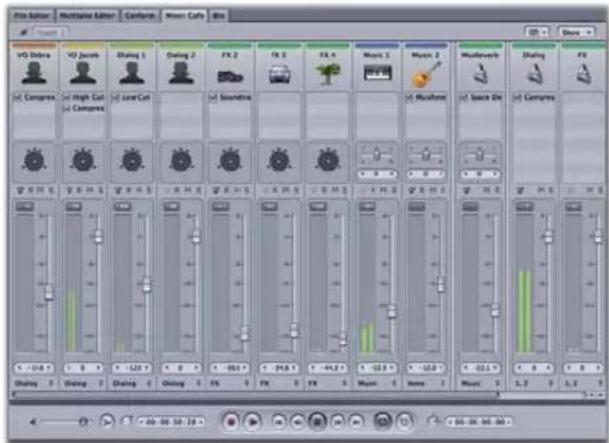
Working with Channel Strips in the Mixer
The Mixer features a series of vertically arranged controls called channel strips, like the channel strips in a hardware mixing console. The channel strips in the Mixer correspond to the horizontal tracks, busses, and submixes in the project Timeline.

The controls a channel strip contains depend on whether it is a track, bus, or submix channel strip. The controls for each type are as follows:
Track channel strips Bus channel strips Submix channel strips
| Color label Color label Color label | ||
| Icon Icon Icon | ||
| Effects slots Effects slots Effects slots | ||
| Output pop-up menu Output pop-up menu Output pop-up menu | ||
| Panners (stereo or surround) Panners (stereo or surround) — | ||
| Volume fader and value slider Volume fader and value slider Volume fader and value slider | ||
| Level meters with peak indicator | Level meters with peak indicator | Level meters with peak indicator |
| Arm for Recording button — | — | |
| Mute button | Mute button | Mute button |
| Solo button | Solo button | Solo button |
| Name | Name | Name |
The channel strips in the Mixer make it easy to see the settings for all the tracks, busses, and submixes in your project at once and to adjust those settings relative to each other as you create the overall mix.
In the Mixer, the channel strips appear in order corresponding to their order in the Timeline. Top-to-bottom order in the Timeline corresponds to left-to-right order in the Mixer. You can reorder tracks in the Mixer and have the new order reflected in the Timeline. Changes you make to controls such as volume and pan also show up in the track controls when you open the project in the Timeline.
Using Custom Layouts for Mixing
You can rearrange the Soundtrack Pro layout to suit your particular mixing workflow. There are numerous possible combinations. You can tear off tabs and have them float over the Soundtrack Pro window or show them on a second display. One default layout (in addition to the standard layout) floats the Mixer and the Video tabs as separate windows. This allows you to further resize the Mixer and the Video windows to an arrangement that is convenient for mixing.
To display the Mixer and Video tabs as separate windows, do one of the following:
- Choose Window > Layouts > Separate Mixer and Video (or press F2).
■ Using the pointer, drag the Mixer and Video tabs out of their docked positions.
The Mixer and the Video tabs float over the Soundtrack Pro window as separate windows.
Another useful layout to consider is one showing just the Timeline and the Mixer. This arrangement is convenient for visually positioning the playhead during a mix.

Once you have resized or moved the windows to a comfortable arrangement, you can save the layout as a custom layout for future use. For information about saving custom layouts, see "Using Project Layouts" on page 68.
Adding Channel Strips to the Mixer
You can add a channel strip for a track, bus, or output in the Mixer in the same way you add a track, bus, or output in the Timeline.
To add a track channel strip:
- Choose Multitrack > Add Track.
To add a bus channel strip:
- Choose Multitrack > Add Bus.
To add an output channel strip:
- Choose Multitrack > Add Output.
Selecting Channel Strips
You can select a channel strip in order to move, copy, or remove it. Selected channel strips appear darker in the Mixer.
To select a channel strip, do one of the following:
- Click any empty part of the channel strip.
You can select multiple channel strips in the Mixer.
To select adjacent channel strips:
- Shift-click the channel strips you want to select.
To select nonadjacent channel strips:
■ Command-click the channel strips you want to select.
Reordering Channel Strips
You can change the order of channel strips in the Mixer. When you open the Mixer, the order of channel strips corresponds to the order of tracks, busses, and submixes in the Timeline. Because channel strips are oriented horizontally in the Mixer, top-to-bottom order in the Timeline corresponds to left-to-right order in the Mixer. Reordering channel strips in the Mixer also changes their order in the Timeline.
In the Mixer, as in the Timeline, channel strips of the same type (track, bus, or output) are grouped together. You can reorder a channel strip within its own group, but cannot move it to a group of a different type. You can only move one channel strip at a time.
To reorder a channel strip:
- Drag the channel strip left or right to a new position.
Copying Channel Strips
You can copy channel strips in the Mixer. You can copy a channel strip within its own group, but cannot copy it to a group of a different type. You can only copy one channel strip at a time.
To copy a channel strip:
- Option-click the channel strip, then drag it left or right.
A copy of the channel strip appears when you release the mouse button.
Setting Channel Strip Volume Levels
You set relative volume levels to balance the various parts of the project. You set the volume level of a channel strip using the channel strip volume fader or value slider.
Different sounds can have different apparent loudness at the same volume level, so perceived loudness does not precisely correspond to numeric values on the volume faders. You determine the appropriate volume level by listening to the track and adjusting its level in the overall mix.
To set the volume level of a channel strip, do one of the following:
- Drag the volume fader up to raise (increase) the volume, or drag it down to lower (decrease) the volume.
- Click along the length of the volume fader at the point you want to set the volume level.
- Click the left or right arrows on the edges of the volume value slider.
- With the pointer over the center of the volume value slider, hold down the mouse button and drag left or right.
- Click the center of the volume value slider, then type a new value.
The scale is from -96 to +6 dB. The default level is 0 (zero) dB.

To return the volume fader to the default level:
■ Double-click the knob in the volume fader.
As you adjust track volume, watch the level meters next to the volume fader to make sure that the track is not clipping. For information about preventing clipping, see "Setting the Overall Project Volume Level" on page 288.
Setting Channel Strip Pan Position
You pan sounds to different positions to place them in the stereo or the surround field. You set the pan position of a track or bus channel strip using the stereo pan slider and value slider or the surround panner. You can't pan a submix or the Master channel strip.
To set the stereo pan position of a channel strip, do one of the following:
- Drag the pan slider left or right to the pan position you want.
- Click along the length of the pan slider at the point you want to set the pan position.
- Click the left or right arrow on the edges of the pan value slider.
- With the pointer over the center of the pan value slider, hold down the mouse button and drag left or right.
- Click the center of the pan value slider, then type a new value.
The scale is from -100 to 100, with 0 (zero) as the center value. Negative values are left of center, and positive values are right of center. The default is 0.

To return the stereo pan slider to the default level, do one of the following:
■ Control-click the slider, then choose Set to Centered from the shortcut menu.
■ Double-click the knob in the stereo pan slider.
To switch the panning controls from stereo to surround in the channel strip, do one of the following:
- Select a channel strip in the Mixer, then choose Multitrack > Use Surround Panner.
■ Control-click the stereo pan slider, then choose Use Surround Panner from the shortcut menu.

To set the surround pan position of a channel strip:
- Drag anywhere inside the black circle to position the puck.
To return the surround panner to the default level:
■ Control-click the panner, then choose Set to Centered from the shortcut menu.
For finer surround panning adjustments and other surround controls, double-click the surround panner to open the Surround Panner HUD.
For more information about using surround panners, see "Using Surround Panners to Create a Surround Mix" on page 299. For more information about the Surround Panner HUD, see "The Surround Panner HUD" on page 300.
Setting Channel Strip Output
On a hardware mixing console, you can send signals to different busses and physical outputs. You can create submixes and busses in Soundtrack Pro, assign tracks and busses to different submixes, and assign submixes to physical output channels on connected audio devices. You can send audio from as many tracks and busses to the same output as you want.
To set the submix for a track or bus:
- Choose the submix from the Submix pop-up menu at the bottom of the channel strip for the track or bus.

- Submix pop-up menu
For submixes in the Mixer, the Output pop-up menu lists the available output channels.
To set the output for a submix in the Mixer:
In the channel strip for the submix, choose the output channel or set of channels from the Output pop-up menu.

The options listed in the Output pop-up menu depend on the number of available physical outputs and the number of submixes in your project. For more information about setting the output, see "Setting Hardware Outputs" on page 265.
Note: You can create submixes independently of the audio hardware connected to your computer and can route audio to an output that does not correspond to a physical output. In most situations, each submix in a project should correspond to a physical output on the audio interface or other hardware connected to your computer. Submixes that do not correspond to a physical output will not be heard. You may set as many submixes in a project to the same physical output device or output channel as you like.
To select an audio interface as the output device:
- Choose Apple menu > System Preferences, click Sound, then click the Output button. Select the audio interface in the list that appears.
For more information about these settings, see "Setting the Audio Input and Output" on page 22.
Muting and Soloing Channel Strips
You can mute and solo channel strips in the Mixer in order to hear or silence specific tracks, busses, or submixes.
To mute a channel strip:
- Click the channel strip's Mute button. Click the button again to unmute the channel strip.
To solo a channel strip:
- Click the channel strip's Solo button. Click the button again to unsolo the channel strip.

To exclusively solo a channel strip:
- Option-click the Solo button. Click the Solo button again to unsolo the track, bus, or output. When you export a project, all unmuted tracks, busses, and submixes are included in the exported file. If you export a track, bus, or output that is muted (including being muted by having another track soloed), the exported file contains no audio.
Enabling Track Channel Strips for Recording
You can enable a track channel strip for recording. When you enable a track channel strip for recording, audio will be recorded on the track when you click the Record button in the transport controls. You can't record to a bus or output channel strip.
To enable a track channel strip for recording:
- Click the Arm for Recording button in the channel strip. Click the button again to disable the channel strip for recording.
You can record only to a track, not to a bus or an output.
Renaming Channel Strips
You can rename a channel strip to help you remember its content or purpose in the overall mix.
To rename a channel strip:
- Click the channel strip's name (at the top of the channel strip) to select it, then type a new name.
Changing a Channel Strip Icon
You can change the icon of a channel strip. Icons do not affect the sound, but are useful as a quick visual reference for the channel strip, particularly for projects with many tracks, busses, or submixes.
To change a channel strip icon:
- Double-click the icon you want to change, then choose a new icon from the icon menu.
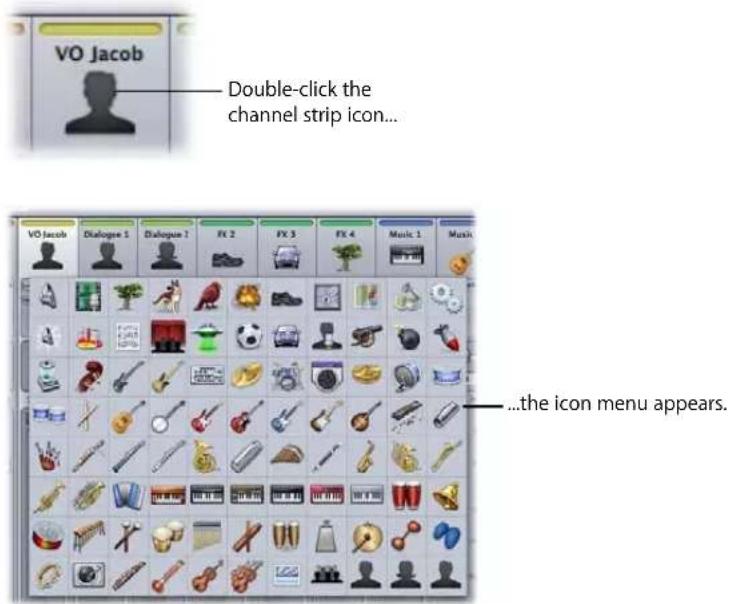
Showing and Hiding Sections of the Mixer
You can show or hide sections of the Mixer window and sections of channel strips. Hiding sections of the Mixer and the channel strips can be helpful, especially when using Soundtrack Pro with a smaller computer display or when working on projects with a large number of tracks, busses, or submixes.
You can show or hide any of the following sections of the Mixer:
- Audio tracks
- Busses
- Submixes
To hide a section of the Mixer:
- Choose the section you want to hide from the Show pop-up menu, located at the upper right of the Mixer.

To hide sections of channel strips:
- Choose the section you want to hide from the Channel Strip pop-up menu.
The visible sections of the channel strips appear with a checkmark in the Channel Strips pop-up menu.
You can show or hide any of the following sections of the channel strips:
- Icons
- Effects slots
- Output pop-up menus
- Pan controls
• Volume faders and level meters
Using the Channel Strip Level Meters
Each channel strip includes level meters to the left of its volume fader. You can use the level meters to observe each channel strip's level as the project plays. The level meters range from -96 dB to +6 dB, moving from bottom to top as the level increases. The segments of the level meters run from green through yellow to orange as the level increases.
Note: For surround signals, the channel strip meters show the signals in this order: Ls, L, C, R, Rs, LFE. This matches the surround order in the Meters tab. (See "Setting the Overall Project Volume Level" on page 288 for more information.)
At the top of each set of level meters is a peak indicator. As the project plays, the value in decibels of the highest level reached appears in the peak indicator. If the level rises above 0 dB, the peak indicator becomes red. The values shown in each peak indicator remain until you play the project again, close the project, or reset the peak indicator.

To reset a peak indicator:
- Click the peak indicator.
To reset all peak indicators, do one of the following:
- Option-click the peak indicator in any channel.
- Click the Reset button in the Meters tab.
The peak indicators can help identify where clipping occurs in the project. For information about removing clipping, see "Setting the Overall Project Volume Level" on page 288.
Removing Channel Strips
You can remove a channel strip from the Mixer if you decide you no longer want it in the project.
To remove a channel strip, do one of the following:
- Select the channel strip, then choose Multitrack > Remove [item].
■ Control-click the channel strip, then choose Remove [item] from the shortcut menu.
The term indicated by [item] changes in the menu depending on whether a track, bus, or output is selected.
Note: If audio from a track is sent to a bus or output, and you remove the bus or output, the audio from the track will not be heard when you play the project.
Working with Effects in the Mixer
You can add effects to a channel strip in the Mixer, show effects settings, turn effects on and off, replace an effect, and delete effects. You can also adjust effects settings in the Effects tab or in the effect's advanced settings window.
Adding Effects to a Channel Strip
You can add effects, turn effects off and on, and reorder effects in a channel strip.
Note: Before adding an effect to a track, it's a good idea to solo the track so that you can hear how the effect changes its sound, separate from the other tracks in the project.
To add an effect to a channel strip:
- Control-click an empty effects slot in the channel strip, choose Add Effect from the shortcut menu, then choose one of the available effects from the categories in the submenu.
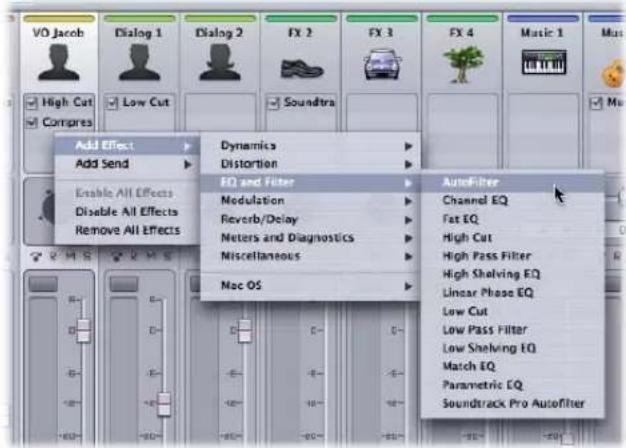
Showing Channel Strip Effects Settings
Once you add an effect, you can view and adjust its settings in the Effects tab.
To show an effect's settings in the Effects tab:
In the channel strip, Control-click the effect, then choose Show [effect name] Settings from the shortcut menu.
The Effects tab becomes active, and shows the selected effect's settings.
Some effects have a floating advanced settings window with sliders and other controls you can use to adjust effect parameters.
To show advanced settings for an effect, do one of the following:
■ Double-click the effect name in the channel strip.
■ Control-click the effect, then choose Show [effect name] Advanced Settings from the shortcut menu.
The effect's advanced settings window appears.
For information on working in the advanced settings window, see "Automating Realtime Effect Parameters" on page 351.
Reordering Effects in the Mixer
You can reorder effects in the Mixer as well as in the Effects tab. When you reorder effects, you change the order in which the audio is processed by each effect, which can change the sound drastically.
To reorder an effect in the Mixer:
- Drag the effect up or down in the effects slot area to change its order.
Turning Effects Off and On
You can turn off a channel strip's effects. Turning off an effect lets you hear the channel strip without the effect, while preserving the current effects settings.
To turn off an effect in a channel strip, do one of the following:
■ Deselect the checkbox to the left of the effect name.
■ Control-click the effect, then choose Disable [effect name] from the shortcut menu.
To turn off all effects in a channel strip:
■ Control-click an effects slot, then choose Disable All Effects from the shortcut menu.
To turn on an effect again, do one of the following:
- Select the checkbox to the left of the effect name.
■ Control-click the effect, then choose Enable [effect name] from the shortcut menu.
To turn on all effects in a channel strip:
■ Control-click an effects slot, then choose Enable All Effects from the shortcut menu.
Replacing an Effect
You can replace an effect in a channel strip with another effect. When you replace an effect with another effect, the new effect has its own default settings, regardless of the settings of the previous effect.
To replace an effect in a channel strip:
■ Control-click the effect, choose Replace [effect name] from the shortcut menu, then choose a new effect from the submenu.
Deleting Effects from a Channel Strip
You can delete an effect if you decide you don't want to use it in a channel strip. You can also delete all effects from a channel strip.
To delete an effect from a channel strip, do one of the following:
- Select the effect, then choose Edit > Delete (or press the Delete key.)
■ Control-click the effect, then choose Delete [effect name] from the shortcut menu.
To delete all effects from a channel strip:
■ Control-click an effects slot, then choose Delete All Effects from the shortcut menu.
For more information about working with effects, including information on uses of different effects and adjusting effect parameters, see Chapter 11, "Working with Audio Effects," on page 327.
Working with Sends and Busses in the Mixer
This section covers using sends in Mixer channel strips. For more general information about sends and busses, see "Using Sends and Busses" on page 270 and "Adding Sends to Tracks" on page 349.
Adding Sends to a Channel Strip
You can add sends to a channel strip, show send settings in the Effects tab, bypass a send, or remove a send in the Mixer.
To add a send to a channel strip:
- Control-click an empty effects slot in the channel strip, choose Add Send from the shortcut menu, then choose one of the available busses in the submenu.
The new send is added. When you add a send, the audio is routed from the send to a bus. By default, the first send you add to an effects chain is routed to Bus 1, the second send is routed to Bus 2, and so on, if the default bus exists. You can choose the bus to which a send is routed.
By default, new sends are pre-fader sends. You can change a send to a post-fader send.
To make a send a post-fader send:
- Click the disclosure triangle for the send in the Effects tab, then select the On button next to Post-Fader.
Reordering Sends in the Mixer
You can reorder sends in the Mixer as well as in the Effects tab. When you reorder sends, you change which effects are routed to the send, which can change the sound drastically.
To reorder a send in the Mixer:
- Drag the send up or down in the effects slot area to change its order.
Showing Send Settings
You can show the settings for a send in the Effects tab. Send settings include volume, pan, and the bus to which the send is routed.
To show settings for a send:
In the Mixer, Control-click the send, then choose Show Send Settings from the shortcut menu.
The Effects tab becomes active, with the settings for the send visible in the Effect Parameters area.
Turning Sends Off and On
You can turn sends off, and turn them back on. When you turn off a send, the audio is not routed to the send bus, and is not heard.
To turn off a send in a channel strip, do one of the following:
■ Deselect the checkbox to the left of the send name.
■ Control-click the send, then choose Disable Send from the shortcut menu.
To turn on an effect again:
- Select the checkbox to the left of the effect name.
Setting the Overall Project Volume Level
As you finalize a project mix, you set the overall project volume to the appropriate level. Certain formats or methods of distribution may require that the project conform to a particular maximum level. In general, you set the overall volume of the project to the highest level at which no clipping occurs at any point in the project.
Clipping occurs when the digital audio signal exceeds the maximum level that can be reproduced accurately. Unlike analog audio, digital audio is completely unforgiving of clipping, which creates sharp distortion of the audio signal. Soundtrack Pro projects clip whenever the output displayed in the level meters exceeds zero decibels (0 dB). It's important to eliminate clipping from projects before exporting the final mix. For more information about digital distortion, see Appendix B, "Audio Fundamentals," on page 463.
You can monitor audio output levels using the level meters in the Mixer, the Meters tab, and in individual track headers. In the Mixer, each channel strip has level meters that show the levels for that channel strip. In the Meters tab, the level meters show the levels for all submixes assigned to physical output channels.
For more information about setting up physical outputs, see "Setting the Audio Input and Output" on page 22.
The Meters tab includes additional controls and displays to help you maintain proper audio levels and eliminate clipping.

bar
| Level meters | Peak Value | | ------------ | ---------- | | L | -12.1 | | B | -12.1 | | C | -96.0 | | D | -49.5 | | E | -41.2 | | F | -96.0 | | G | -96.0 |As a project plays back, the levels in each channel change constantly with the rising and falling of the audio signal. The level meters show these changes both as bars rising to varying heights and as changes in color from green to yellow.
In each channel's meter, a white horizontal bar displays the current signal level; bars below the white bar display successive levels in a scale that rises from green to yellow as the signal increases. The meters peak at red when the signal clips (rises above 0 dB).
Note: The meters can be configured via Soundtrack Pro preferences to display either surround order (Ls, L, C, R, Rs, LFE) or output order (channels 1-n). To change this setting, choose Soundtrack Pro > Preferences > General.
To change the channel order in the meter display:
- Choose Soundtrack Pro > Preferences > Startup, then select the order using the Meters Channel Display pop-up menu.
For more information about Soundtrack Pro preferences, see "Setting Soundtrack Pro Preferences" on page 97.
Using the Peak Indicators in the Mixer Channel Strips
At the top of the level meters in the Mixer channel strips is a rectangular peak indicator that lights red when that channel clips (exceeds 0 dB). The peak indicators are "sticky," meaning that if clipping occurs in either channel, the peak indicator lights red and stays red until you reset it, or reset all peak indicators.
To reset a peak indicator:
- Click the peak indicator.
To reset all peak indicators:
- Option-click any peak indicator in any of the Mixer level meters.
Using the Peaks Value and Location Display in the Meters Tab
The Peaks Value and Location display in the Meters tab displays the highest (peak) value played in each output channel in decibels (dB) and its timecode. The Time column shows the location in the Timeline where the peak occurs. You can use the Peaks Value and Location display to quickly locate a section of your project that is clipping or peaking.
To move the playhead to the highest (peak) value played in a channel:
■ Double-click any item in the Peaks Value and Location display.
The playhead moves to the corresponding point in the Timeline.
The Reset button located in the upper-right corner of the Meters tab display resets the Peaks Value and Location display to a minimum value (-96 dB) and resets the Time column to the beginning of the project.
To reset the Peaks Value and Location display values:
- Click the Reset button.
Using the Master Bus
The Master bus represents the final mix from Soundtrack Pro—what will be heard from the physical output jacks. On a signal routing basis, the Master bus is practically a mirror image of the connected hardware output device. It is as wide as either the hardware device or the number of channels used in the project, whichever number is smaller.
Master Bus Details
The Master bus includes envelopes for volume, transposition, and tempo. By default, only the Volume envelope is visible. For more information, see "Master Bus" on page 364. The Master bus does not have panners or meters.
You can apply effects to the Master bus, but you cannot automate those effects. Effects applied to the Master bus are placed across all channels. You can bypass effects on the Master bus. For more information about bypassing effects, see "Bypassing Realtime Effects" on page 349.
Adjusting the Master Volume
The steps you take to remove clipping depend on the cause of the clipping. You can lower the master volume of a project by the amount the highest point in the project (as shown in the Value display) exceeds 0 dB. You can also use the Go buttons to locate where clipping occurs and use a different audio clip or lower the volume of individual tracks until clipping no longer occurs. Sometimes adjusting the gain on effects can remove occurrences of clipping as well.
Listening to a Temporary Mono Mix
In some situations, even where the final mix is stereo, you may want to listen to the mix in mono as well as stereo. If the final project is likely to be viewed using equipment with mono audio output (for example, many television sets have mono output), you may want to make sure the mix is suitable for mono output. Listening to a mono mix can also help identify phase issues that can occur when a stereo project is played in mono. Soundtrack Pro makes it easy to listen to a temporary mono mix of the project so you can hear how it will sound in mono.
To listen to a temporary mono mix:
1 Start the project playing.
2 While the project plays, press and hold the Mono Mix button, located to the right of the Monitor volume slider below the Mixer.

Mono Mix button
The Mono Mix button becomes darker to indicate that it is active. When you are finished listening to the temporary mono mix, release the button to hear the project mix.
In addition to listening to a temporary mono mix by holding down the Mono Mix button, you can "latch" the Mono Mix button. This keeps the mono mix active until you click the button again or switch to a different project.
To latch the Mono Mix button:
■ Option-click the Mono Mix button.
Recording Audio in the Mixer
You can record audio while working in the Mixer. When you record audio in the Mixer, recording starts from the current playhead position. Although the playhead is not visible in the Mixer, you can set the playhead position using the transport controls or the Playhead Location value slider located at the bottom of the Soundtrack Pro window.
For more information about recording, see Chapter 13, "Recording Audio in Soundtrack Pro," on page 367.
Recording Automation in the Mixer
You can record automation for volume and pan changes in the Mixer. You record automation in the Mixer by choosing either Touch or Latch automation mode in the project controls, then changing volume or pan settings as the project plays. You can record automation either using the onscreen volume and pan controls, or using a control surface connected to your computer.
For more information about working with automation, see Chapter 12, "Working with Automation," on page 355.
Creating Multiple Mixes
You might want to create multiple mixes of a project for one of the following reasons:
- To optimize the project for different playback situations
- To try out different settings of the various track and master controls using the same arrangement
- To try out changes to the arrangement using the same basic material
You can easily create multiple mixes by giving the project a slightly different name when you save each mix, or by using different combinations of tracks, busses, and submixes for each mix. If you are saving the project and its media files together, the different versions can be saved to the same location if they all use the same media files. For information about saving projects and their media files together, see "Saving Multitrack Projects" on page 111.
Things to Keep in Mind While Mixing
The following are intended as guidelines or suggestions to follow when mixing your projects, not as "hard-and-fast" instructions.
- Consider the importance of each element in the overall mix.
- Keep related tracks close together (in the Timeline and the Mixer).
- Don't create a final mix until the picture is locked.
- Listen to the mix with the best possible equipment.
- Also listen to the mix as the audience will hear it.
- Don't change output/monitor levels while mixing.
- Mix by what you hear, not what you see.
Mixing Surround Sound
9
Soundtrack Pro gives you the tools to create sophisticated surround mixes for your projects.
Surround sound uses more than two speakers to expand the spatial experience of audio playback to three dimensions. Surround systems can be found in movie theaters, home entertainment systems, video games, and a growing number of other applications. Soundtrack Pro offers an easy-to-use approach to surround panning, mixing, and automation, including a high degree of flexibility with surround sources and the ability to easily switch between stereo and surround mixes. Soundtrack Pro also includes numerous surround sound effects and surround music beds, as well as a collection of professional surround-specific effect plug-ins for shaping your surround mix.
What Is 5.1 Surround?
The most common surround format is a six-channel system called 5.1 surround. This format is the standard surround configuration in major motion pictures, music, and digital television. The format consists of three speakers across the front and two speakers in the rear. The .1 is a sixth channel for low-frequency effects (LFE). A typical 5.1 surround layout features left and right speakers (from a traditional stereo system) plus a center speaker, a left surround (rear) speaker, a right surround (rear) speaker, and an LFE speaker, more commonly known as the subwoofer.
There are other surround standards that range from three channels to seven channels and nonstandard surround formats that use as many as ten channels.
Creating a Surround Project
The following steps outline a general workflow used for editing and mixing surround sound files.
Step 1: Acquiring the sound
As with any audio track, the first step is finding and recording the sound that you want. Soundtrack Pro is flexible in terms of what kinds of files you can use in the surround mix. Input files can be mono, stereo, or surround. While Soundtrack Pro also includes numerous surround clips for music and sound effects, the production audio for most film and video projects is typically either mono or stereo files.
Step 2: Editing and arranging a multitrack project
The workflow for editing audio files and arranging them in the multitrack Timeline is very similar for stereo and surround projects. For more information, see Chapter 4, "Working with Multitrack Projects," on page 105, Chapter 5, "Working in the Timeline," on page 127, and Chapter 6, "Editing Audio Files," on page 191.
Step 3: Mixing surround
Soundtrack Pro provides a flexible toolset for creating and adjusting a surround mix. For more information, see "Surround Mixing Strategies" on page 306.
Step 4: Exporting and delivering surround projects
Soundtrack Pro supports a variety of workflows and formats for delivering your final surround mix. These include separate audio files for each channel or single multichannel sound files for the entire mix.
Setting Up for Surround
In order to hear your surround project through a surround speaker system, you need to adjust settings in Soundtrack Pro and set up the related hardware.
Setting Up Soundtrack Pro for Surround
In Soundtrack Pro, the difference between mixing in stereo and mixing in surround hinges on three different elements: the panner type, the submix output, and the number of physical output channels. All three of these items must be configured correctly to achieve surround playback. If one of these three conditions is not met, playback will be in stereo. (For more information about stereo mixdown, see "Stereo Mixdown" on page 297.) Use the instructions that follow to start using the surround mixing tools in Soundtrack Pro.
Using the Surround Panners
You use the panning controls in the track headers to set the pan position of a track or a bus. By default, the panning controls are set to stereo. You can easily switch between stereo panners and surround panners.
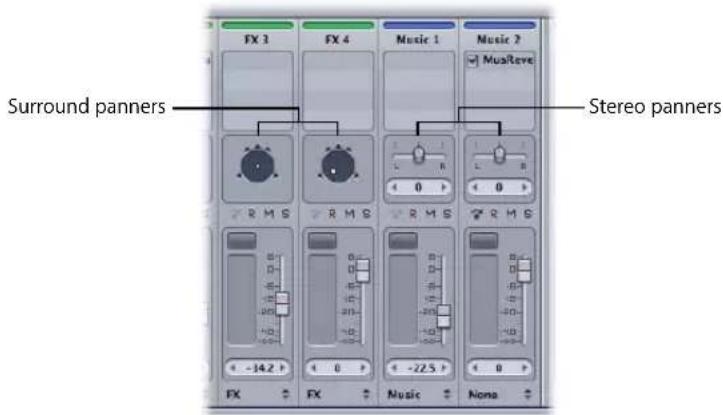
For surround playback, you must set the appropriate tracks or busses to use the surround panner.
To switch the panning controls from stereo to surround, do one of the following:
- Select a track or bus in the Timeline, then choose Multitrack > Use Surround Panner.
- Select a channel strip in the Mixer, then choose Multitrack > Use Surround Panner.
■ Control-click the stereo pan slider in a track header, then choose Use Surround Panner from the shortcut menu.
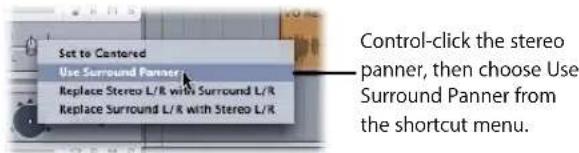
■ Control-click the stereo pan slider in a Mixer channel strip, then choose Use Surround Panner from the shortcut menu.
The surround panner replaces the stereo panner.

As far as tracks and busses are concerned, switching between surround mode and stereo mode is that simple. At this point, you are mixing this particular track or bus in surround. Any surround panning adjustments and automation that you apply are saved with the current project.
Important: To hear these changes through your speakers, make sure you also set the submix outputs to surround and connect the physical outputs. For more information, see the next two sections, "Setting the Submix Outputs to Surround" and "Connecting Physical Outputs."
Setting the Submix Outputs to Surround
In Soundtrack Pro, you route the audio from tracks and busses to physical outputs using submixes. By default, all tracks are routed to Submix 1, and Submix 1 is routed to the Stereo 1, 2 outputs. You can easily change this hardware output setting using the Output pop-up menu.
To switch the hardware output setting from stereo to surround:
- Choose Surround from the Output pop-up menu in the track header, then choose 1-6 from the submenu.

The menu displays 1-6, indicating that the audio is now routed to the physical output jacks 1 through 6. At this point, the signal is routed to those six outputs, whether or not the hardware to support those channels is connected.
Important: To hear these surround signals through loudspeakers, you must also connect the physical outputs. For more information, see "Connecting Physical Outputs," next.
Connecting Physical Outputs
To hear the six discrete channels of surround sound that Soundtrack Pro can provide, you need external audio hardware that supports multiple physical outputs. At a minimum, this would include a multichannel audio interface and a 5.1-channel surround sound speaker system (totaling six speakers). For more information about audio interfaces, see "Setting Up an Audio Interface" on page 485.
To connect physical outputs for monitoring surround sound:
1 Connect the audio interface to your computer.
For detailed information on connecting your audio interface to your computer, see the documentation that came with the audio interface.
2 Double-click Audio MIDI Setup in the Utilities folder, then choose the audio interface from the Default Output pop-up menu.
For more information, see "Setting the Audio Input and Output" on page 22.
3 Connect your 5.1-channel surround sound speakers to the appropriate outputs of your audio interface.
Soundtrack Pro uses the SMPTE/ITU standard for routing output channels.
Audio Interface Output Speaker
| 1 Left |
| 2 Right |
| 3 Center |
| 4 LFE |
| 5 Left Surround (Ls) |
| 6 Right Surround (Rs) |
For detailed information on connecting external speakers to your audio interface, see the documentation that came with the speakers.
Stereo Mixdown
If you have set up a project for surround mixing, including surround panners and surround channel assignments, but you do not have sufficient output jacks for surround playback, Soundtrack Pro automatically provides a surround-to-stereo mixdown of what would otherwise be sent to jacks 1-6. This stereo mixdown follows the Dolby guidelines: the Ls and Rs channels are attenuated by 3 dB and mixed into the Left and Right channels. The Center channel is also attenuated by 3 dB and mixed evenly into the Left and Right channels. The LFE channel is discarded.
Surround Speaker Placement
There are several ways you can arrange 5.1 surround speakers for playback. You can follow the International Telecommunications Union Operational Bulletin No. 775 or the "ITU Standard" for 5.1 surround sound. Here are the basic points of this recommendation:
- Place all the speakers on the same plane. In other words, if you place some speakers on the floor and mount some on the ceiling, you will defeat the psychoacoustical benefit of having surround speakers in the first place.
- With the center speaker directly in front, the Left and Right speakers should be positioned 30 degrees away from center at about a 60-degree angle aiming for a spot 3 to 6 inches behind the mixer's (or listener's) head.
Note: This angle can be reduced to 45 degrees or extended out to 60 or even 90 degrees and still provide satisfactory results.
- Place the surround (rear) speakers at about 110 degrees off center (to the sides and somewhat behind the listener). To ensure one cohesive soundfield, do not position these speakers too far to the rear.

Ls Left surround speaker Place to the left and slightly behind your listening position.
Left speaker Place in front and to the left.
C Center speaker Place on top of or below your viewing screen.
R Right speaker Place in front and to the right.
Rs Right surround speaker Place to the right and slightly behind your listening position.
LFE (LFE) Subwoofer Can be placed anywhere.
Note: It isn't always possible to place the speakers where they're supposed to go due to obstacles in the room (doors, furniture, and so on). You can overcome some bad speaker placement by calibrating your system with a sound pressure meter and a calibration DVD. This way, you can make sure each speaker is providing the appropriate volume.
Using Surround Panners to Create a Surround Mix
This section explains how to use the surround panners in Soundtrack Pro to create a surround mix. The surround panners provide a straightforward and flexible way to control and monitor panning settings. By changing the panner type in the track header, you can easily switch any track or bus from stereo to surround, or from surround to stereo. Soundtrack Pro offers two different versions of the surround panner: the mini surround panner and the surround panner HUD.
The Mini Surround Panner
Use the mini surround panner to switch between stereo and surround mixing, to make simple surround adjustments, and to quickly check the pan setting for a track or a bus.
To switch the panning controls from stereo to surround, do one of the following:
■ Select the track or bus, then choose Multitrack > Use Surround Panner.
■ Control-click the stereo pan slider in the track header, then choose Use Surround Panner from the shortcut menu.

The surround panner replaces the stereo panner. This is the smaller of two different views of the surround panner. To use the larger Surround Panner HUD, see "The Surround Panner HUD," next.

The Surround Panner HUD
The Surround Panner HUD offers finer panning adjustments, a graphic representation of the current surround setting for the selected track, and other surround controls.
To display the surround panner HUD, do one of the following:
- Double-click the surround panner in the track header of the track or bus you want to adjust.
- Double-click the surround panner in the Mixer channel strip of the track or bus you want to adjust.
The surround panner HUD appears in a floating window over the Soundtrack Pro window.
The dominant feature of the Surround Panner HUD is the black circle that represents the virtual surround space. The puck, a dot inside the circle, is the primary surround pan control. Input channels are represented by color-coded, semi-circular, translucent arcs emanating from the inside of the circle's circumference. These arcs indicate the input channel's gain (by the height of the arc), the channel's spread (by the width of the arc), and location. Overlapping sounds are represented by overlapping arcs, summing (combining) to white where all channels overlap.

The surround pan controls include the following:
- Position: The puck is the main control in the panner. To pan the audio, move the puck by clicking anywhere inside the black circle or by dragging the puck to a different position in the circle. The speaker icons around the edge of the circle represent the five main surround channels: L (left), C (center), R (right), Ls (left surround), and Rs (right surround). The closer you move the puck to one of the speaker icons, the louder the sound will be from that speaker. For more information about moving the puck to adjust the position parameter, see "Modifier Keys for Moving the Puck" on page 303.
Note: In automation envelopes, this Position parameter is expressed as Surround Pan X and Surround Pan Y.
- Rotation: Use this slider to alter the angle at which each signal starts out. This slider ranges from -180 degrees to 180 degrees and affects the input signal. For example, with no other panning, the right channel emanates from a location 45 degrees to the right. With rotation at +65 degrees, the signal appears at 110 degrees—directly out of the right surround speaker.
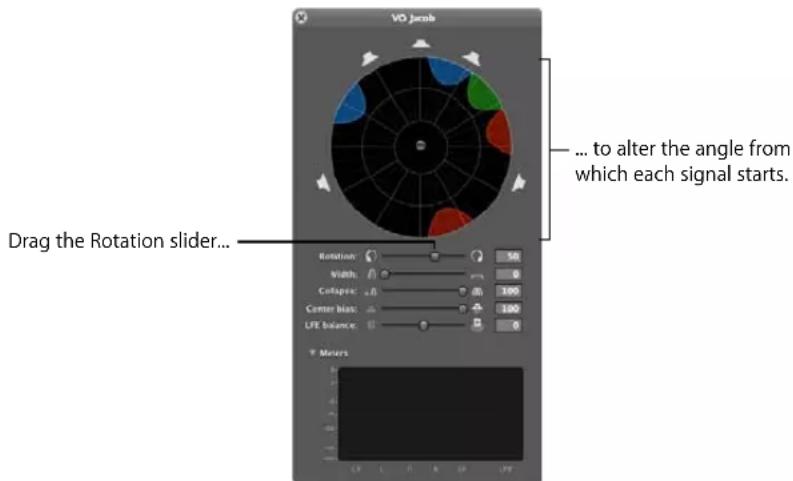
Note: This setting interacts with the position parameter when the panner mode is not fully attenuating.
- Width: Use the Width slider to create a widened surround image. This slider is intended primarily for stereo sources in that it spreads the left and right inputs into adjacent channels. This creates the illusion of a widened sound stage without the hole at the center that moving the puck rearward would create. For some movie theaters, it may be necessary to use the Width slider to bleed the center signal in to the left and right speakers. At 0%, all inputs go to their respective outputs. As you drag the Width slider to the right, L and R inputs start to bleed into Ls and Rs respectively, and to a lesser extent, L and R bleed into C, C bleeds slightly into L and R, and Ls and Rs start to merge.
- Collapse: Typically, panners are either of a collapsing style (panning folds input signals into output speakers) or an attenuating style (panning simply turns down the gain of speakers further from the pan location). The Collapse slider goes from a fully attenuating style, through a hybrid style, to a fully collapsing style. At full attenuate (0% on the slider), no input bleeds to any other output; each channel remains at its original speaker position. The only change is to output gain. At full collapse (100% on the slider), no input gain is changed—instead, inputs have their output divided over adjacent channels. At 50%, a given input channel panned away has its input attenuated by 50% and distributed between the two adjacent channels.

Collapse at 0
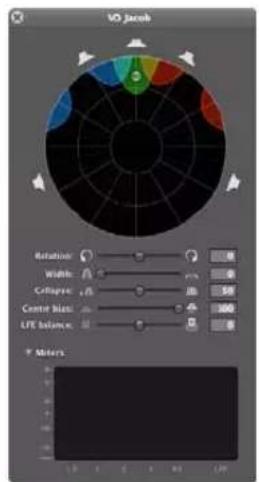

Collapse at 95Collapse at 50
- Center Bias: Use this slider to determine how the center channel interacts with the left and right channels. At 0%, all sound that would have gone to the center speaker is equally distributed to the left and right speaker. At 100%, the center is used fully, just like any other speaker. This means that if you move the puck directly in front of the center speaker, all sound emanates exclusively from that speaker. If you move the puck halfway between the center channel and an adjacent channel (yet still on the perimeter of the black circle), the sound is equally and exclusively divided between those two speakers.
- LFE Balance: Use this slider to balance control between LFE and the other five channels. At -100, nothing is output from the LFE speaker, even if there was LFE input, and all other channels pass through at unity gain. At its midpoint (0), all six channels passes through at unity gain to their respective speakers, meaning that LFE input passes directly to LFE output. At +100, all six signals get summed to the LFE speaker.
- Speaker Disable: Click a speaker icon once to disable or enable it. If you disable a speaker, its output goes to adjacent speakers. Each speaker supports a single-click on/off for that speaker's output.

natural_image
Circular diagram with colored segments (green, red, green) and directional arrows, no readable text or symbolsClick a speaker to disable or enable it. A dim gray color indicates the speaker is off.
Surround Panner Automation
Automating surround pan settings is very similar to automating stereo pan settings: a track or bus set to use the surround panner has at least seven different panning envelopes, and a stereo track or bus has only one pan envelope. Automation for the Position parameter (the puck) is reflected in two envelopes: Surround Pan X and Surround Pan Y. These are Cartesian X & Y values referring to the puck position within the black panning circle. All other surround panning parameters are expressed with one envelope each, except for Collapse and Speaker Disable, which cannot be automated. For more information about automation, see Chapter 12, "Working with Automation," on page 355.
Modifier Keys for Moving the Puck
Hold down any of the following keys as you move the puck to constrain its movement. These modifier keys offer finer control as you make adjustments to the position parameter.
- Shift: Fine adjustment
- Option-click: Reset control
- Option-drag: Straight movement, restricted to diversity, constant angle
- Command: Circular movement, restricted to angle, constant diversity
- Command-Option-drag: Restricted to either X or Y movement
Surround Metering
Soundtrack Pro provides a variety of level meters to monitor output levels as you make surround panning adjustments.
Surround Panner HUD Meters
The Surround Panner HUD includes level meters that show volume information from the specific track or bus that you are panning. These meters can be hidden or displayed by using the disclosure triangle. Track-specific meters are a useful reference given the possible psychoacoustical “illusions” in surround mixing, such as the phantom center.
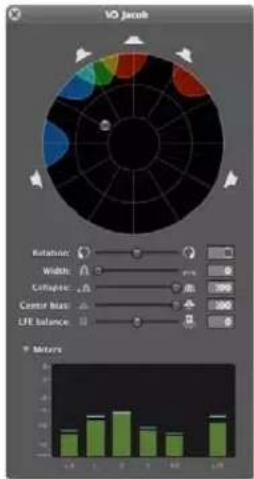
Meters Tab
The Meters tab displays levels for the current multitrack project. The channels displayed in the Meters tab and in the Mixer meters (described in "Mixer Meters" on page 305) depend on the audio interface connected to your computer, the current panner settings, and the current output settings in System Preferences.
For more information about output settings, see "Connecting Physical Outputs" on page 297.

Mixer Meters
Each channel strip in the Mixer includes a levels meter capable of displaying up to all six channels. The Mixer is the only place you can view the levels for each track, bus, and submix as well as the Master bus.

Surround Mixing Strategies
This section includes guidelines and tips for mixing surround projects.
Mixing Surround Files
The basic steps in mixing are almost the same for stereo and surround projects:
• Balancing relative volume levels between tracks
- Panning tracks to create a balanced stereo spread
- Adding EQ, compression, and other final processing effects
- Setting the project's final volume and eliminating clipping
- Creating a sense of perspective by placing sounds in space
While the creating a sense of perspective step is also a part of stereo mixing, it is what really sets surround apart from stereo. When mixing, you can enhance the video action by dynamically moving the sounds within the surround field. To give your listeners a “surrounding” audio experience, your sound must be created with that goal in mind. For example, if you want the sound of an explosion coming from behind the listener, you need to put the sound in the rear channels during mixing. Surround mixing adds not only two rear channels, but also includes the subwoofer or LFE channel, which would probably play a part in any onscreen explosion. You’ll have to spend some time planning what elements go where and how much boom you want in your soundtrack.
The following are some common approaches to multichannel sound:
- Use the surround channels for effects only. Create a stereo mix, then add "sweetening" sound effects in the surround channels. Sound effects and Foley recordings can be placed in stereo space or specifically located where they occur onscreen or offscreen.
- Create special sounds for the rear and low-frequency channels (the rumble of an earthquake, the pounding of drums, an airplane buzzing overhead, and so on) and add them to a standard stereo mix. (To create sound for the LFE channel, you can extract low frequencies from the rest of your sound using band-pass filters.)
- Position instruments, effects, and voices anywhere in the sound field.
Converting a Stereo Mix to 5.1 Surround
Many post-production projects require both a stereo mix and a surround mix. This section reviews some best practices for converting projects from stereo to surround. You can reverse the steps below to convert a project from surround to stereo.
Important: When you switch between stereo and surround panners, panning automation (envelope) settings are not automatically copied over to the new panning mode. Volume information is automatically copied over between stereo and surround panners. The recommended workflow for making a surround version of a stereo mix is to maintain at least two separate versions of the project: a stereo version and a surround version.
To create a separate copy of your stereo mix for surround mixing:
1 Choose File > Save As in your stereo project to save a separate copy.
In the dialog that appears, indicate in the filename that this is the surround version. (For example, "My Great Mix_surround.")
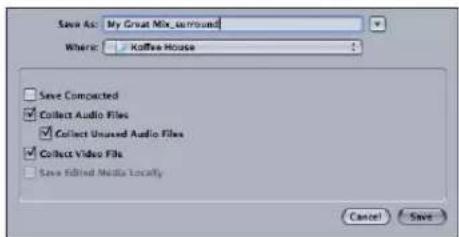
2 Use this copy of the project to make all the necessary surround panning adjustments.
In particular, you Control-click the stereo panner in the track header (or Mixer channel strip) of each appropriate track or bus and choose Use Surround Panner from the shortcut menu.
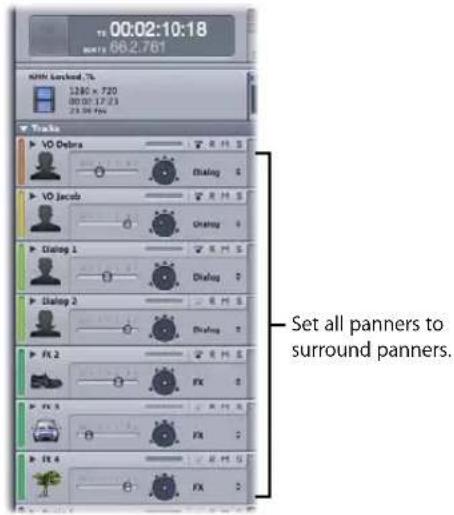
Tip: To save time, you can select or group all tracks or busses in the Tracks tab. When you change the panning settings of one of the tracks or busses, the panning settings on all the grouped items change as well.
3 If you previously applied any left-right panning to any tracks or busses in the stereo version of the project, do the following:
a Select the tracks or busses.
b Control-click the panner in the track header, then choose Replace Surround L/R with Stereo L/R from the shortcut menu.

Any panning automation (envelope) information is copied from the stereo left-right pan to the surround left-right pan (specifically, to the Surround Pan X parameter) in the selected tracks and busses. These settings can be used to provide a starting point for your surround mix.
Note: If you are converting a surround project to a stereo project, you can choose Replace Stereo L/R with Surround L/R from the shortcut menu to do the reverse of Step 3.
Placing Dialogue and Voiceover in a Surround Mix
In a surround mix, dialogue usually goes directly into the center channel. This is particularly true for voiceover narration, which is best left out of the left and right channels. (This is called stereo plus center.) Soundtrack Pro allows you to place sounds exclusively in a specific channel or just outside that channel, which would allow some of the sound to leak into the other speakers. As you get more comfortable with surround mixing, you may want to experiment with alternative placements to further reinforce the voices that you place within your mix.
To place dialogue and narration in the center channel:
1 If you haven't already done so, Control-click the stereo pan slider in the track header of the dialogue track (or bus), then choose Use Surround Panner from the shortcut menu.
2 Double-click the surround panner.
The Surround Panner HUD appears.
3 Drag the puck to the center speaker icon.
Depending on the current Collapse slider setting, the arc at the center speaker icon either turns white to indicate exclusive output or is elongated to indicate the increased gain.


Note: You can hold down the Option key as you drag the puck to constrain its movement to a straight line.
Placing Stereo Music in a Surround Mix
The simplest option for stereo music in a surround project is to just leave it in stereo. If you just use the stereo panner for a music track, the left and right signals remain in their respective channels. However, some surround mixes include a hint of music in the rear channels as well. With the Surround Panner HUD, you can place the right music channel somewhere between the right front and right rear position, with more emphasis on the front speaker. Do the same with the left side and listen to the mix. Make adjustments as needed.
Using the Center Channel
In a multichannel system, there are three ways to achieve a centrally placed sound image:
- Create a "phantom center" (mix sound to the left and right equally, as with stereo). This is a common strategy, but it assumes the listener is seated exactly between the speakers. The timbre of sound is not the same as from a direct speaker because of cross-cancelation effects.
- Use the center channel alone. This creates a stable center image for listeners in any location. (To prevent the audio from sounding too focused or narrow, its reverb can be spread to the left and right channels.)
- Use all three front channels equally or in various proportions. This method allows for greater control of the range of spatial depth and width. The phantom center can be reinforced by additional signals in the center channel, which can be enhanced by signal spread into the left/right pair. The disadvantage is that sound from all three speakers may not blend well or may not arrive at the listener at the same time, causing side effects such as comb filtering, shifts in tone color, or smearing. To counteract these side effects, you can first process the additional signals to change their spatial character, timbre, or prominence relative to the main center signal.
Using Surround Channels
Subtle surround effects can greatly enhance the listener's sense of depth compared to conventional stereo. Popular music often benefits from creative use of surround. But don't overdo it. The film industry guideline for visual effects applies equally well to surround effects—don't let effects distract the listeners from the story.
Using Surround Effect Plug-ins
Soundtrack Pro includes a collection of professional surround-specific effect plug-ins for shaping your surround mix, including Surround Compressor, Delay Designer, Space Designer, and Multichannel Gain.
For a complete list of these true surround effects and a full description of each, see the Soundtrack Pro Effects Reference document, available in the Help menu. For information about using processing and realtime effect plug-ins, see Chapter 11, "Working with Audio Effects," on page 327.
Limitations of the LFE Channel
Use the LFE (Low Frequency Effects) channel to enhance the low frequencies of a film or video so you get the extra boom out of an explosion, thump in a car crash, and so on in dramatic scenes involving plenty of low frequencies. The low frequency effects (LFE) channel is a separate signal with a limited frequency range (about 25 Hz to 120 Hz). It is created by the mixing engineer and delivered alongside the main channels in the mix.
In soundtracks comprised entirely of music, the LFE channel is not necessary. (An exception to this rule might be the famous cannon shots in Tchaikovsky's "1812 Overture.") The LFE signal is also discarded in the downmix process, so that intense bass signals do not stress small stereo systems. Be sure not to include vital information (such as dialogue) in the LFE channel that would be missed in mono or stereo playback.
Because LFE is separate from other channels, its ability to blend with higher frequencies can be affected by filters used to generate the LFE signal. To ensure a cohesive audio signal, keep the entire signal together in the main channel or channels.
Note: If you are creating Dolby Digital Professional (AC3) output, avoid creating an LFE channel for material originally produced without one. Dolby Digital Professional's five main channels are all full-range, and the LFE channel does not increase the frequency response. Dolby Digital Professional decoders offer bass management, directing low frequencies to a subwoofer or other suitable speakers. An LFE track may interfere with bass management. For more information about Dolby Digital Professional, see "Frequently Asked Questions about Dolby Digital Professional," available at the Dolby Laboratories Inc. website: http://www.dolby.com.
Accommodating Stereo Playback
Even with the popularity of 5.1 systems, you should always address stereo reproduction. There are three basic ways to do this:
- Prepare a new stereo mix from the original multitrack elements (using conventional stereo-mixing sessions).
- Prepare a studio-adjusted downmix from the multichannel mix. This method takes advantage of the work that has gone into mixing the 5.1 version. It retains flexibility in the exact proportions of each channel represented in the final stereo mix.
- Let the decoder derive a stereo downmix, based on preset formulas in the decoder. Downmix options and dynamic range control effects can be previewed and adjusted in the production studio, and a range of adjustments is possible.
Tip: Always check the mix on an inexpensive surround system to evaluate how well it sounds on modest playback systems.
Exporting and Delivering 5.1 Surround Projects
Delivery of your finished surround mix can take many forms. Different clients have different file format requirements. In general terms, your options include two broad categories: mixdowns and project files.
Mixdowns
In this scenario, you would export one of the following:
- Six audio files, one for each of the six surround output channels
- An interleaved multichannel audio file containing all six surround output channels
- A single flat mixdown file either as an exported file or one sent to Final Cut Pro or Motion
Soundtrack Pro supports the following file formats for six-channel audio export (either as a set of mono files, or as an interleaved multichannel file):
• AIFF
• WAVE
- NeXT
- Sound Designer II
You can also encode your surround mix directly to the Dolby Digital Professional (AC3) format, which is a very common compressed audio format for DVD-Video discs.
For more information about exporting projects, see Chapter 16, "Exporting Multitrack Projects," on page 395.
Project Files
You can also deliver either an exported AAF file or a copy of the Soundtrack Pro project file.
- AAF: Like the Final Cut Pro XML Interchange Format, Advanced Authoring Format (AAF) is an industry-standard project interchange format that contains the editing decisions of nonlinear editing projects.
- Soundtrack Pro project file: For the greatest flexibility, you could deliver the entire project file with its associated media. This would allow for further adjustments in Soundtrack Pro, as needed.
For information on saving projects, see "Saving Multitrack Projects" on page 111 and "Distributing a Multitrack Project and Its Media Files Together" on page 419.
Working with Video in Soundtrack Pro
10
You can import a video into a multitrack or audio file project, view the video as you work on your project, edit the video's audio, and use markers to synchronize audio and video.
When you import a video, the video appears in the Video tab. When you import a video into a multitrack project, a video clip also appears in a video track in the Timeline. The video's audio appears as a clip in an audio track in the Timeline and can be moved and edited like other audio clips. You can mute, solo, and adjust the volume and pan of the video's audio, add effects, and automate changes. You can also open the video's audio in the File Editor and perform actions or analysis on it.
When you import a video, you can set the Time Ruler units to match the timecode format of the video. Any Final Cut Pro markers contained in the video appear as markers in the Soundtrack Pro Timeline. You can also add markers in Soundtrack Pro and export them to Final Cut Pro with the video file. You can score markers to the playhead, using them to synchronize your soundtrack to the action in the video.
You can work with video in Soundtrack Pro in several ways. You can add audio clips for dialogue and voiceover, music, ambience, and sound effects to the Timeline. You can make exchange files between Final Cut Pro and Soundtrack Pro as you work on both the video and the soundtrack, or bring the final video into Soundtrack Pro to finalize the project. When your soundtrack is complete, you can export it as an AIFF file or save it as part of the video.
Supported Video File Formats
Soundtrack Pro supports standard QuickTime-compatible file formats. You can import a QuickTime movie (.mov) video file into a Soundtrack Pro project and can import an MPEG-2 (.m2v) if you have installed the QuickTime MPEG-2 Playback Component. Video files using NTSC, PAL, HD, and other formats supported by QuickTime can be imported into Soundtrack Pro. Imported video files can be up to four hours in length.
Adding a Video to a Project
You can import a video file by dragging the file from a media tab or from the Finder. You can import only one video file into a project.
To import a video file into a project, do one of the following:
- Drag the video file from a media tab or the Finder to the Video tab.
- Drag the video file from a media tab or the Finder to the video track in the Timeline.


The video is displayed in the Video tab in its correct aspect ratio, and a video clip appears in the video track (the top track in the Timeline), letting you see the duration of the video in the project. The video clip starts at the beginning of the project and cannot be moved to another point in time. Any Final Cut Pro scoring markers included in the video file appear in the Timeline with an orange handle.
If the video contains audio, new audio tracks are added below the video track for each audio track in the movie, and the video's audio tracks appear as audio clips in the new tracks. You can move, resize, and edit these audio clips like any audio clip in the Timeline, and can use the track controls to control volume and pan, mute or solo the track, and add effects or automation.
When you add a QuickTime movie containing video or a Broadcast Wave (BWF) file to the File Editor, the Time ruler shows the file's timecode format if the Time Ruler Units menu item is set to either Frame or Non-drop Frame.
Playing the Video
When you play the project, the video plays in the Video tab in time with the audio in your project. You can also control playback using keyboard shortcuts.
To view the video, you can make the Video tab active or detach it and move it to another location onscreen. You can also view the video using an external video output device.

Controlling Video Playback Using Keyboard Shortcuts
There are a number of keyboard shortcuts you can use to control playback of the video in the Video tab. To use keyboard shortcuts, the pointer cannot be in a text field.
- Space bar: Plays the video from the current playhead position. This is equivalent to clicking the Play button.
- Return: Sets the playhead to the beginning of the video. If the cycle region is active, pressing Return sets the playhead to the beginning of the cycle region. This is equivalent to clicking the Go to Beginning button in the transport controls.
- Option-Left Arrow: Moves the playhead back (closer to the beginning) one video frame. This is equivalent to clicking the Previous Frame button.
- Option-Right Arrow: Moves the playhead forward (closer to the end) one video frame. This is equivalent to clicking the Previous Frame button.
- J, K, and L keys: You can use the keyboard commands (the J, K, and L keys) to speed playback up to eight times normal speed. For complete information on using these keys see "Using the J, K, and L Keys for Shuttling" on page 130.
For a complete list of Soundtrack Pro keyboard shortcuts, see Appendix A, "Soundtrack Pro Keyboard Shortcuts," on page 449.
Resizing the Video Tab
You can detach the Video tab and resize it (to any size, up to filling your entire screen).
To resize the Video tab:
1 Detach (undock) the Video tab by clicking the tab at the top of the video frame and dragging it from its pane.
2 Drag the resize control at the lower-right corner of the Video tab until the tab is the size you want.
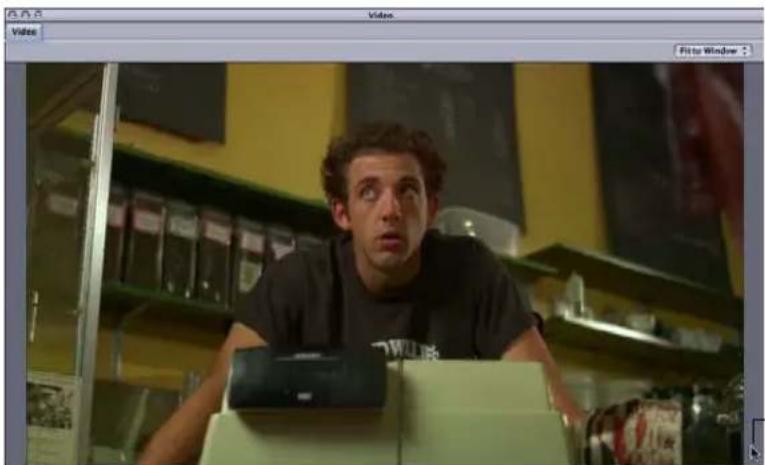
natural_image
Man sitting at a desk in a café with shelves and products in the background (no visible text or symbols)Use the window's resize control to make the video larger.
Using Video Output Devices
You can connect an external video output device to your computer and play your project through the video output device. This can be especially useful in cases where you are using Soundtrack Pro as the final step in producing the overall project, or when you want to show the current version of the project to a client or other party while working on the project in Soundtrack Pro.
When you use an external video output device, the quality of the output is as high as the device can support. If you connect an output device capable of broadcast-quality output, the video is displayed with more accurate colors than on a computer display, with true interlacing, correct pixel sizes, the correct aspect ratio, and broadcast-quality refresh rates.
Some broadcast-quality video output devices receive both the video and audio from a project. When you use a video output device that supports both video and audio output, Soundtrack Pro automatically routes your audio output to this device to provide the best possible synchronization of the audio and video.
You can also play a project's video externally using Digital Cinema Desktop. Using Digital Cinema Desktop, you can connect an Apple Cinema Display to your computer and play the video full-screen through the Cinema Display while using another monitor for editing.
To play the video through a video output device, you must configure Soundtrack Pro to use the device in Soundtrack Pro Video Out Preferences.
To configure Soundtrack Pro for a video output device:
1 Choose Soundtrack Pro > Preferences, then click the Video Out button.
2 In the Video Out pane, choose the device you want to use from the Video Output Device pop-up menu.
The menu lists only devices that are connected to your computer.
3 Optionally, select the Use Quarter-size Frames checkbox to reduce the frames sent to the video output device. Sending quarter-size frames can result in better performance, especially for devices using FireWire DV output.
4 Click the Close button at the upper-left corner of the Preferences window to close the window.
You can switch the output to the video output device on or off when the project is not playing. The video appears in the Video tab whether output to the video output device is switched on or off.
To switch off output to an external video output device:
- Choose View > Show > Show External Video.
If you have added the Video Out button to the Toolbar, you can also click the button to switch off the device.
To switch on output to an external video output device:
- Choose View > Show > Show External Video.
If you have added the Video Out button to the Toolbar, you can also click the button to switch on output to the device.
A video output device can only be controlled by one application at a time. If you hide Soundtrack Pro or bring another application to the foreground while playing video through a video output device, Soundtrack Pro maintains control of the output device and continues playing. If you hide Soundtrack Pro or bring another application to the foreground when video is not playing through a video output device, Soundtrack Pro releases control of the output device.
Viewing Video Details
You can view details of a video file, including the video file's name, dimensions, length, frame rate, and other information. You can view details of a video file that has been added to a project or of a video file in a media tab.
To view details of a video file:
1 If the Details tab is not visible, click Details to make it active.
2 Select a video file in a media tab, or select the video clip in the Timeline.
The video file's information appears in the Details tab.
![KHM Locked.btm2 Dimensions: 1245 x 726 Size: 14.13 M Length: 31 seconds Frame rate: 23.08 fps Audio Tracks: 1 Rind: Quick Time Created: 02/22/07 15:05:18 Modified: 02/22/07 15:05:18 Path: [Users/Home/Documents/RioNet House/Cafe, Video] Limited Media/XMM Locked.Btm2.mov](/content/2026/05/894656/images/3fbe8af0c9b6e02f26574e2fa618768624aa32d30e95ffafd193f15a4bcb944c.jpg)
Working with a Video's Audio
You can edit the audio clip of the video's audio as with any audio clip in the project. You can move and resize the video's audio, split and join it, or open it in the File Editor for processing or analysis. You can also change the name or icon of the track containing the video's audio and use the controls in the track header to adjust volume and pan, mute or solo the track, change the time format, or enable the track for recording.

If you remove the video from the project, the audio clip of the video's audio is not deleted, but remains in the project. You can delete the clip separately if you want to remove it.
Using the Time Display and Time Ruler with Video
When you import a video file into a Soundtrack Pro project, the Time display and Time ruler adjust to show the timecode format of the video. The Time display and Time ruler can display time in seconds, frames, drop frames, or non-drop frames. You can choose the format for timecode display, and can set the video frame rate for projects not containing a video file. You can also set the default frame rate for new projects in the Project Preferences pane.
To choose the units shown in the Time display and Time ruler:
- Choose View > Time Ruler Units, then choose a time format from the submenu.
To choose the video frame rate for projects not containing a video file:
1 Choose View > Time Ruler Units > Set Video Frame Rate.
2 In the dialog that appears, choose a frame rate from the Frame Rate pop-up menu.
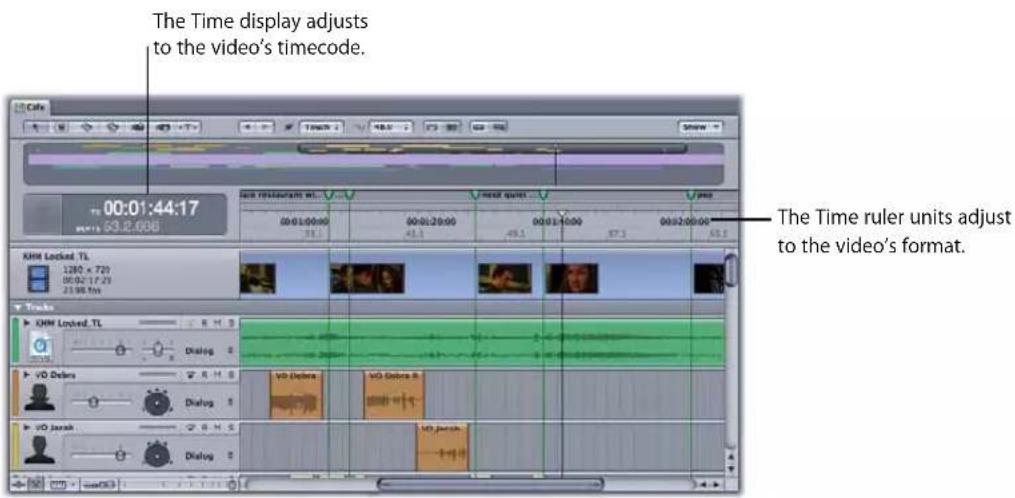
For more information on the Time ruler, see "Using the Time Ruler" on page 133.
Scrubbing and Spotting with the Multipoint Video HUD
The Multipoint Video HUD provides context when you are positioning audio clips and making selections in a video-based project. The window intelligently tracks the movements of your pointer as you work in the Timeline and the File Editor, and it shows multiple frames of video, each labeled with its timecode.

Opening and Closing the Multipoint Video HUD
Use the following methods for opening and closing the Multipoint Video HUD.
To open the Multipoint Video HUD:
- Choose Window > HUDs > Multipoint Video (or press V).
To close the Multipoint Video HUD, do one of the following:
- Choose Window > HUDs > Multipoint Video (or press V).
■ Click the close box in the HUD.
Working with the Multipoint Video HUD
The following sections describe some examples of situations in which the Multipoint Video HUD can provide useful context for your sound editing tasks on a video project.
Making a Selection in the Timeline or in the File Editor
When you make a selection of multiple clips or a Timeslice selection, the Multipoint Video HUD displays the video frame at the start of the selection and the video frame at the end of the selection.

Dragging a Clip into the Multitrack Timeline
When you drag a new clip into the Timeline, the Multipoint Video HUD displays the video frame at the start of the clip and the video frame at the end of the clip.

Tip: You can also press the V key while dragging a clip to show the Multipoint Video HUD just until you release the clip. Once you release the clip, the Multipoint Video HUD closes automatically.
Dragging a Clip Around the Multitrack Timeline
When you drag an existing clip around in the Timeline, the Multipoint Video HUD displays the video frame at the start of the clip on the left, the video frame at the end of the clip on the right, and the video frame at the current pointer position in the middle. In the case of dragging multiple clips, the first frame of video would be from the leading edge of the earliest clip in time and the last frame of video would be for the trailing edge of the last clip in time.
For example, if you wanted to synchronize a gunshot sound with the frame in the video when the flash from the gun is visible, you would do the following:
1 Click on the gun shot sound effect at the point where the large transient can be seen in the waveform.
2 Drag the clip in the Timeline. Press V while dragging the clip.
3 Drag the clip until you see the flash in the center frame.

Resizing a Clip in the Multitrack Timeline
When you resize a clip in the Timeline, the Multipoint Video HUD displays the video frame at the start of the clip and the video frame at the end of the clip. As you resize one edge of the clip, that frame updates.
Nudging a Clip in the Multitrack Timeline
When you use the nudge keys to nudge a clip, the Multipoint Video HUD displays the video frame at the start of the clip and the video frame at the end of the clip.
Horizontally Moving an Envelope Point in the Timeline and File Editor Project View
When you move an envelope point horizontally, the Multipoint Video HUD displays the video frame at the current envelope point position. If you select multiple envelope points, two or three frames are shown: one for the first envelope point, one for the last envelope point, and one for the envelope point you are dragging, if it is not the first or last point.
Time Stretching in the File Editor
When you use the Time Audio Stretching tool, the Multipoint Video HUD displays a single frame of video that follows the pointer location.
Dragging the Cycle Region
When you modify either end of the Cycle Region, the Multipoint Video HUD displays the video frame at the start of the Cycle Region and the video frame at the end of the cycle region. You can quickly remove the Cycle Region at any time by pressing Option-X.
Dragging Markers
When you drag a single marker, the Multipoint Video HUD displays the video frame at the marker position. When you drag two markers, the Multipoint Video HUD displays the video frames at both marker positions. When you drag three or more markers, the Multipoint Video HUD displays three video frames: the first marker, the marker being dragged, and the last marker.
Removing a Video from a Project
You can remove a video if you decide you no longer want to use it in the project.
To remove a video clip from a project, do one of the following:
- Select the video clip in the Timeline, then choose Edit > Delete (or press the Delete key).
■ Control-click the video clip, then choose Remove Video from the shortcut menu.
When you remove the video from a project, the audio clip of the video's audio is not deleted, but remains in the project. You can delete the clip separately if you want to remove it.
For information about using Soundtrack Pro with Final Cut Pro, including transferring a project back and forth between Soundtrack Pro and Final Cut Pro, see Chapter 17, "Using Soundtrack Pro with Other Applications," on page 421.
Working with Audio Effects
You can modify the sound of your project in many ways using audio effects. Soundtrack Pro includes a complete set of professional-quality audio effects you can use in your projects.
You can use audio effects to add both subtle and dramatic changes to audio clips in a multitrack project or to an audio file project. Soundtrack Pro includes effects for equalization, compression, reverb, and other effects you can use to clean up audio, perform sound design, and enhance the sound of your audio. You can also use third-party Audio Units effects plug-ins in both multitrack and audio file projects.
Processing Effects and Realtime Effects
Soundtrack Pro gives you two ways to use audio effects in your projects: processing effects and realtime effects. Audio effects can be applied as processing effects to entire audio clips, or regions of audio clips, resulting in nondestructive actions that can be adjusted at any time. Audio effects can also be applied as realtime effects to tracks, submixes, and busses as real-time effects, enabling parameters of the effects to be automated so that they change over time.
Applying Processing Effects
You can apply processing effects to clips and regions of clips in the multitrack Timeline and well as to audio file projects (or regions thereof) in the File Editor. The Process menu includes an Effects submenu where you choose processing effects to add to your project. Processing effects are added as actions, which you can turn on or off, reorder, and adjust in the Actions list.
To apply a processing effect to a clip in the Timeline:
1 In the Timeline, select one or more clips, or portions of one or more clips.
For more information about selecting clips, see "Selecting Audio Clips in the Timeline" on page 147 and "Editing with the Timeslice Tool" on page 174.
2 Choose Process > Effects and select one of the effects from the submenu.
The effect's advanced settings window appears.

3 Make adjustments in the advanced settings window.
You can adjust the effect's parameters by moving the controls in the window. Each advanced settings window may have unique controls in addition to sliders, buttons, and value fields.
For detailed information on adjusting the parameters of specific effects, see the Soundtrack Pro Effects Reference document, available in the Help menu.
4 Optionally, do any of the following:
- Click the Play button to hear the effect and your adjustments to it.
- Click the Reset button to reset the parameters to their default values.
- Click the Toggle Effect Bypass button to hear the audio without the effect.
- Click the Show Presets button to display the available presets.
For more information about presets, see "Working with Effect Presets" on page 330.
5 Click Apply.
A corresponding action appears in the Actions tab for the clip.
For more information about working with processing effects, see "Processing Audio Files" on page 219. For information on working with actions, see "Working with Actions" on page 230.
Applying Realtime Effects
You can add realtime effects to entire tracks, busses, and submixes in a multitrack project or to an entire audio file project. You can automate realtime effects parameters to create changes over time. Realtime effects modify the audio as it passes through them, so you hear any changes you make, or any new audio you add, through the sound of the effect. Each realtime effect has effect parameters you can adjust to control how the effect modifies the audio.
You can create effects chains on a track, bus, submix, or audio file using realtime effects. An effects chain is a series of effects that modify the audio in a set order. Using busses in the Timeline and Mixer, you can create submixes, and apply the effect to all the tracks in a submix with one set of controls.
For information on working with realtime effects in both multitrack and audio file projects, see "Working with Realtime Effects" on page 343.
Note: This chapter describes the various categories of effects included with Soundtrack Pro. For complete information on the details of each realtime effect, see the Soundtrack Pro Effects Reference document, available in the Help menu.
Rendering Realtime Effects to Actions
You can also convert any realtime effect that you have applied in the File Editor project view to an action in the Actions list, which enables you to turn these effects on or off, reorder them in the list, and save them with the audio file project. For information about rendering realtime effects to actions, see "Rendering Realtime Effects to Actions" on page 243.
Working with Effect Presets
Many effects come with several combined parameter settings called presets. Presets are a handy way to get up and running with Soundtrack Pro effects without having to learn a lot of details about their various parameters. For example, the MatrixReverb effect (in the Mac OS category) has presets for various sizes of room, hall, and chamber settings, as well as Plate reverb and Cathedral settings. If an effect has presets, the presets appear in a Factory Presets pop-up menu in the list of effect parameters.
You can show an effect's presets, add and delete presets, apply a preset, adjust preset parameters, and create your own presets.
To show effect presets from the advanced settings window:
- Click the Show Presets button in the advanced settings window.
The Presets drawer appears at the bottom of the advanced settings window.

To add a preset:
1 Click the Add Preset (+) button.
A blank, untitled preset appears in the User Preset list.
2 Click the name "Untitled" and type a name for the preset.
To apply an effect preset:
1 Select the preset you want to apply from either the Factory Preset or User Preset list in the Presets drawer.
2 Click the Load Preset button.
To adjust effect preset parameters:
- Adjust the controls in the advanced settings window for the preset.
To delete a preset:
1 Select the preset in the Presets drawer.
2 Click the Delete Preset (−) button.
To hide the Presets drawer:
- Click the Hide Presets button in the advanced settings window.
To apply a preset to an effect from the Effects tab:
In the Effect Parameters area, choose the preset from the Presets pop-up menu.
Audio Effects Included with Soundtrack Pro
Soundtrack Pro includes the following types of audio effects:
- Dynamics: Dynamics effects let you shape the volume of your projects over time. Bundled dynamics effects include Compressor, Multipressor, Adaptive Limiter, Noise Gate, Expander, and Limiter.
- Distortion: Distortion effects change the tone of the audio signal to re-create the sound of overdriven tube amplifiers or digital distortion. Bundled distortion effects include Bitcrusher, Clip Distortion, Distortion, Distortion II, Exciter, Overdrive, and Phase Distortion.
- EQ and Filter: EQ (short for equalization) effects let you change the level of selected frequencies. EQ provides a powerful way of shaping the sound of your projects. Bundled EQ effects include AutoFilter, Fat EQ, High Cut and Low Cut, High Pass and Low Pass filters, Channel EQ, High and Low Shelving EQ, Linear Phase EQ, Match EQ, Parametric EQ, and Soundtrack Pro Autofilter.
- Modulation: Modulation effects delay an audio signal and shift (modulate) when the delayed signal plays back relative to the original signal. Bundled modulation effects include Chorus, Ensemble, Flanger, Modulation Delay, Phaser, Scanner Vibrato, and Tremolo.
- Reverb and Delay: Reverb effects can be used to simulate the sound of acoustic spaces, both realistic and unnatural. Delay effects can be used to add echoes and other recurring sounds. Bundled reverb and delay effects include PlatinumVerb, Soundtrack Pro Reverb, Stereo Delay, Tape Delay, and Space Designer, a powerful tool for sound design.
- Meters and Diagnostic: You can use realtime diagnostic effects to clean up audio files in a variety of ways, including pitch, intensity, and phase problems. Bundled diagnostic effects include Correlation Meter, MultiMeter, Test Oscillator, and Tuner. These are only available as realtime effects, not processing effects.
- Miscellaneous: Miscellaneous effects fall outside the other categories, providing additional ways to modify your audio. Bundled miscellaneous effects include Delay Designer, Denoiser, Direction Mixer, Enveloper, Gain, Multichannel Gain, PitchShifter II, Ringshifter, Spectral Gate, Stereo Spread, SubBass, Surround Compressor, and Vocal Transformer.
Dynamics Effects
Dynamics effects let you adjust the dynamic range (the range between the softest and loudest sounds) of your projects. You can use dynamics effects to make sounds more focused and to optimize the sound for specific playback situations. Dynamics effects include compressors, limiters, and noise gates.
Compressors
Compressors work like an automatic volume control, lowering the volume whenever it rises above a certain level, called the threshold. But why would you want to reduce the dynamic level? By cutting the peak levels, the compressor lets you raise the overall volume of the signal. This gives the sound more focus by making the foreground parts stand out while preventing the background parts from becoming lost in the mix. Compression also tends to make sounds tighter or "punchier." Because the peaks are lower, the maximum volume is reached more quickly.
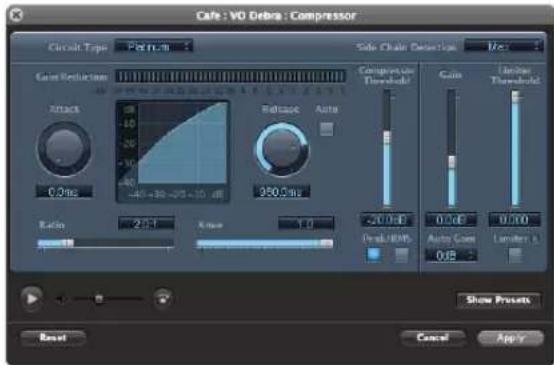
Compressor plug-in
In addition, a compressor can make a project sound better when played back in different situations. For example, the speakers on a television set or in a car sound system typically reproduce a narrower dynamic range than does the sound system in a theater. Compressing the overall mix can help make the sound reproduce more clearly in lower-fidelity situations.
Compressors have two main parameters. The threshold lets you set the amplitude above which the compressor lowers the volume. The ratio lets you control the amount by which sounds above the threshold will be lowered, as a percentage of the original signal.
For example, if you set the threshold to -12 dB, and the ratio to 2:1, a sound at -7 dB (5 dB above the threshold) is reduced by 2.5 dB, and a sound at -2 dB (10 dB above the threshold) is reduced by 5 dB.
Compressors can also include parameters for attack and release. These parameters let you set how quickly the compressor reacts once the threshold is reached (for attack) or once the signal falls below the threshold again (for release). Use these parameters to make the compressor's effect more subtle or more pronounced. Another parameter on some compressors is the knee (or soft knee), which lets you control how gradually the compressor transitions between no compression and the compression ratio at the threshold.
Compressors are typically used on vocal tracks to make the vocals prominent in the overall mix. They can also be used on music and sound effects tracks, but are rarely used on ambience tracks.
Limiters
Limiters (also called peak limiters) prevent the audio signal from exceeding a maximum volume level. A compressor gradually attenuates levels above the threshold, but a limiter puts a hard limit on any signal louder than the threshold, usually at a high ratio. You use a limiter mainly to prevent clipping.
Noise Gates
A noise gate alters the signal in the opposite direction from a compressor. While a compressor lowers the volume of sounds above the threshold, a noise gate lowers the sounds below the threshold. Loud signals pass through unchanged, but softer signals, such as the decay of a loud instrument, are cut off. Noise gates can be used to eliminate low-level noise or hum from an audio signal.
Distortion Effects
Distortion effects simulate the sound of analog and digital distortion. After working to eliminate the digital distortion caused by clipping from a project, why would you add distortion as an effect? The distortion produced by overdriven vacuum tubes (which were used in amplifiers and music recording equipment before the development of digital recording technology) produces an effect which many people find pleasing, and which is integral to many styles of popular music. Analog tube distortion adds a distinctive warmth and bite to the signal.
There are also distortion effects which intentionally cause clipping and digital distortion of the signal. These can be used to modify vocal, music, and other tracks to produce an intense, unnatural effect, or for creating sound effects.
Distortion effects include parameters for tone, which let you shape the way in which the distortion alters the signal, and for gain, which let you control how much the distortion increases the output level of the signal.
EQ and Filter Effects
EQ is likely the most common audio effect used in postproduction. You can use EQ to shape the sound of a project by adjusting specific frequencies or frequency ranges. Using EQ, you can create both subtle and extreme changes to the sound of your projects.
Most EQ effects make use of filters. As the name suggests, a filter allows certain frequencies to "pass through" to the output while stopping or attenuating other frequencies. EQ effects include highpass, lowpass, and band pass filters.
When the audio signal passes through an EQ filter, the frequencies that pass through can be raised or lowered in volume. Raising and lowering frequencies using EQ is often referred to as boosting and cutting frequencies. You can create many changes to the sound of your project by boosting and cutting various frequencies.

Channel EQ plug-in
Frequency Ranges Used with EQ
Sounds can be categorized into one of three basic frequency ranges: bass, midrange, or high (also called treble). These can be further divided to include low bass, low and high midrange, and low and high highs. The following table describes some of the sounds affected by each range:
Name Frequency range Description
| High High 8–20 kHz Includes cymbal sounds and highest harmonics of instruments. Boosting frequencies in this range slightly can add sparkle and presence. |
| High 5–8 kHz This range corresponds roughly to the treble tone control on a stereo. Boosting frequencies in this range can add brightness and shine. |
| Low High 2.5–5 kHz Includes the higher harmonics of voices and musical instruments. This range is important for adding presence. Excessive boosting in this range can sound shrill or harsh. |
| Name Frequency range | Description | |
| High Midrange 1.2–2.5 kHz Includes the consonants of voices and the high harmonics of musical instruments, especially brass instruments. Excessive boosting in this range can create a pinched, nasal sound. | ||
| Midrange 750 Hz–1.2 kHz Includes the vowels of voices and the harmonics of musical instruments that create tone color. | ||
| Low Midrange 250–750 Hz Includes the fundamentals and lower harmonics of voices and musical instruments; careful EQing of each can keep them from competing. Excessive boosting in this range can result in muddy and unclear audio; excessive cutting can produce thin-sounding audio. | ||
| Bass 50–250 Hz Corresponds roughly to the bass tone control on a stereo. Includes the fundamental frequencies of voices and of musical instruments. Excessive boosting in this range can sound boomy and thick. | ||
| Low Bass | 50 Hz and below | Also called sub bass. Very little of the sound of voices or musical instruments falls in this range. Many sound effects used in movies, such as explosions and earthquakes, fall in this range. |
Note: The frequencies shown for each range are approximate. Any division of sound into frequency ranges is somewhat arbitrary, and is meant only to give a general indication of each range.
Roll-Off Filters
The simplest types of EQ effects are roll-off filters, which include lowpass, highpass, bandpass, and shelf filters. Lowpass filters affect all frequencies above a specific frequency, called the cutoff frequency. Frequencies above the cutoff are attenuated or "rolled off" gradually, usually by a fixed number of decibels per octave. Highpass filters, by contrast, affect all frequencies below their cutoff frequency. Bandpass filters exclude all frequencies close to their center frequency. You can set the center frequency, and also set the bandwidth or Q, which specifies how wide a range of frequencies around the center frequency is affected.
These EQs include parameters for setting the cutoff frequency. Shelf filters add parameters to control the gain (the amount of boost or cut). You can use roll-off filters as "broad brush" effects to boost or cut a large range of frequencies.
Graphic EQs
Graphic EQs give you a set of filters (often with 10 or 31 filters), each with a set center frequency and bandwidth. Using a graphic EQ, you can shape a wide variety of frequencies throughout the frequency range. Graphic EQs can be used to shape the sound of the overall project mix.
Parametric EQs
Parametric EQs are similar to bandpass EQs, but provide a greater amount of control, and can be used for extremely precise adjustments. With a parametric EQ, you can set the center frequency, the gain, and the bandwidth. Used carefully, a parametric EQ can help a track cut through the mix, or help a track or project sound fuller. Parametric EQs can also be used to remove specific, unwanted frequencies from a mix.
Modulation Effects
Modulation effects begin with a delayed signal, like time-based effects, but vary (or modulate) the delay time, typically using a low-frequency oscillator (LFO). This can be used to double a sound, making it seem stronger and "fatter," to simulate a group of voices or instruments playing together, or to add a distinctive character to the sound. Modulation effects include chorus, phase shifters, and flangers.
Chorus
Chorus effects play back multiple repetitions of the delayed signal (like reverbs), but vary the delay time for each one, using an LFO. As the name implies, this effect can strengthen the sound, and create the impression that the sound is being played by many instruments or voices in unison. The slight variations in delay time created by the LFO simulate the subtle differences in timing and pitch heard when several people play together. Using chorus also adds fullness or richness to the signal, and can add movement to low or sustained sounds.
Phase Shifters
Phase shifters produce a characteristic "whooshing" sound by combining the original signal with a copy of the signal that is slightly out of phase with the original. This means that the amplitudes of the two signals' sound waves reach their highest and lowest points at slightly different times. The time between the two signals is modulated, typically using an LFO. As the two signals go in and out of phase, certain frequencies, called notch frequencies, are created, which give phase shifters their distinctive sound.
The main difference between chorus and phase shifting is the amount of delay time. Chorus effects typically use delay times between 20 and 30 milliseconds (ms), while phase shifters (and flangers, discussed next) typically use shorter delay times, between 1 and 10 ms.
Flangers
Flangers work in much the same way as do phase shifters, but additionally change the pitch of the delayed signal slightly. Flanging is typically used to create a more extreme change than phase shifting, sometimes described as adding a "spacey" or "underwater" effect.
All of the modulation effects include parameters for the delay rate (also called speed or frequency), which let you set the minimum delay time; depth (also called width or intensity), which you use to set how much the LFO modulates the delay time; and mix, which you use to control the ratio of the effected (wet) signal to the original (dry) signal. They can also include parameters for feedback (or regeneration), which add part of the output back into the input signal.
Reverb and Delay Effects
Reverbs and delays work by copying a part of the audio signal, delaying it for a brief period of time, and then playing it back with the original signal. The delayed signal can be played back multiple times, and can be modified in a variety of ways.
Delay
A delay effect stores the audio signal, and then plays back each repetition at a regular rate of time after the original signal. Delays can be used for doubling individual sounds (for example, making it sound as if a group of instruments is playing the same melody), to achieve echo effects (making it sound as though the sound was occurring in an immense space), and to enhance the stereo position of tracks in a mix. Delay effects are not commonly used on an overall mix except to achieve special effects (such as to create an “otherworldly” sound).
Delay effects let you set the delay time, the time between the original signal and the delayed signal. Delays often provide parameters for feedback (also called regeneration), which let you set how much of the delayed signal is fed back into the delay's input, creating more repetitions of the delay (like the number of "bounces" in an echo). Specific types of delay have other parameters: Tap tempo delays let you set the delay time by physically tapping a key or controller; stereo delays include parameters for the pan position of the output signal, which can be shifted over time using a low-frequency oscillator (called an LFO).
Reverb
Reverberation, usually shortened to reverb, simulates the sound of acoustic environments such as rooms, concert halls, caverns, or the sound of infinite space. In any acoustic space, sounds echo off the surfaces of the space (the floor, walls, and ceiling) over and over, gradually dying out until they become inaudible. Reverb effects consist of thousands of delays, of varying lengths and intensities, that simulate these natural echoes. Reverb helps define the sense of space in which sounds take place, and can be used to simulate both realistic and fantastic acoustic environments.
![Debra Scene L-2aiff : Space Designer Input Reset Alt voltage sin filter raw density raw LO Reverse Output IR Sample sample size LTM 1.000 Length: 2.000 pressure length Symbol output: IR Synthesized IR [2.100s] Long: 15.00 10.00 Volume compensation defining: 150 S 2.100 end compensation Volume Coverage Initial level attack time - decay time sin lin end level 10 % 0.00 % 2.20 % 0% 38 Start Spread Time: 6.10 Time: 7.100 % Show Presets Reset Cancel Apply](/content/2026/05/894656/images/9d2eb1ef25fb62181f613985eb7f6a415dee35fd6a03bddd30cc46118b6c4918.jpg)
Space Designer plug-in
The first form of reverb actually used a room with hard surfaces (called an echo chamber) to add echoes to the signal. Mechanical devices, including plates and springs, were also used to add reverberation to the output of instruments and microphones. Digital sound recording has made it possible to use digital reverbs, which use complex algorithms (sets of equations) to simulate various acoustic environments with greater accuracy and flexibility.
Simple reverb effects provide parameters for the decay time or reverb time, which let you set how long the reverb lasts before dying away, and the mix or level, which you use to set the ratio of the effected signal (called the wet signal) to the original (the dry signal). More sophisticated reverbs can include the following parameters:
- Room type: Lets you set the type of space the reverb will simulate: a small or large room, a hall, or another type of acoustic space.
- Predelay time: In an acoustic space, there is a short period of silence between a sound and the time when the initial echoes of the reverb begin. Different spaces have different amounts of predelay, which helps "tell" our ears how large the space is. Longer predelay settings also help separate the original (dry) signal from the effected (wet) signal, making it sound clearer and sometimes larger.
- Early reflections: The first echoes to arrive from the surrounding surfaces in a space are determined by the size and shape of the space, and “tell” our ears what type of space it is.
- Diffusion: Lets you set the number of the echoes in the reverb. Hall reverbs typically have low diffusion settings, while plate reverbs typically have high diffusion settings.
- High-frequency and low-frequency reverb time: These parameters let you specify the decay of higher and lower frequencies separately. Different surfaces, such as wood floors and concrete walls, absorb high and low frequencies at different rates, and these parameters let you simulate the sound of different environments more closely.
- Reverb envelope: Lets you control how much the volume of the reverb changes over time. In natural acoustic situations, the reverb echoes decay gradually over time. You can re-create this gradual decay, or gate the reverb so that it cuts off more abruptly.
Meters and Diagnostic Effects
Diagnostic effects help you analyze and clean up audio in a variety of ways. Each type of diagnostic effect provides a different way to "look at" an audio clip or file, and each has a unique set of parameters. These effects are available only as realtime effects in the Effects tab and the Mixer, not as processing effects.
Correlation Meter
The Correlation meter displays the phase relationship of a stereo signal. A correlation of +1 (plus one, the far right position) means that the left and right channels "correlate" 100% (that is, they are completely in phase). A correlation of 0 (zero, the center position) indicates the widest permissible left/right divergence, often audible as an extremely wide stereo effect. Correlation values less than zero indicate that out-of-phase material is present, which can lead to phase cancellations if the stereo signal is combined into a monaural signal.
MultiMeter
The MultiMeter combines the functions of the Level Meter and Correlation Meter (as described above) with several other analysis tools:
• A Spectrum Analyzer
- A Goniometer for judging the phase coherency in the stereo sound field
The control panel to the left of the display allows you to switch between the Analyzer and Goniometer and contains parameter controls for the MultiMeter. The Stereo Level and Correlation Meter are always visible.
Spectrum Analyzer
The Spectrum Analyzer divides the audio signal into 31 independent frequency bands. Each frequency band represents one third of an octave. The filter curves comply to IEC document 1260.
You turn on the Spectrum Analyzer by clicking the Analyzer button. Turning on the Spectrum Analyzer turns off the Goniometer. The four buttons below determine what portion of the input signal the Analyzer is displaying. You can choose between Left or Right channel only. LR max shows the maximum band levels of either channel, while Mono displays the levels of the stereo signal summed to mono.
The View options determine the level represented by the top line of the scale in the display (Top; range: -40 to +20 dB) and the overall dynamic range of the Spectrum Analyzer (Range; range: 20 to 80 dB). These two parameters can also be set directly in the display: By dragging directly on the bar graph, you can shift the top line of the display. Dragging directly on the dB scale allows you to compress or expand the scale's range. The View options are useful when analyzing highly compressed material as you can identify smaller level differences more easily by moving and/or reducing the display range.
There are three display respond modes: RMS Slow, RMS Fast, and Peak. RMS Slow and RMS Fast modes show the effective signal average (Root Mean Square) and offer a good representation of the perceived volume levels. Peak mode shows level peaks accurately.
Goniometer
The Goniometer helps you to determine the coherence of the stereo image. Using the Goniometer, you can see phase problems as trace cancellations along the center-line (M=mid/mono). Goniometers developed when early two channel oscilloscopes first appeared. Users would connect the left and right stereo channels to the X and Y inputs while rotating the display by 45 degrees, resulting in a useful visualization of the signal's stereo phase.
The signal trace slowly fades to black, imitating the glow of the tubes found in older Goniometers, and at the same time enhancing readability.
Clicking the Goniometer button turns on the Goniometer and turns off the Spectrum Analyzer. You can use the Auto Gain display parameter in order to obtain a higher readout on low-level passages. Auto Gain allows the display to automatically compensate for low input levels. You can set the amount of compensation with the Auto Gain parameter, or set Auto Gain by dragging directly in the display area of the Goniometer.
Note: Auto Gain is a display parameter only and increases the display for better readability. The actual audio levels are not touched by this parameter.
Miscellaneous Effects
Miscellaneous effects don't fall into any of the other categories. They include denoising effects, pitch shifting effects, stereo enhancers, bass enhancers, and effects used to transform the sound of vocals. Each effect gives you a different way to modify the audio, and includes a unique set of parameters.
Denoiser
Using the Denoiser, you can eliminate or reduce many kinds of low-level noise (noise floor) from an audio signal. The main parameters of the Denoiser are Threshold, Reduce, and Noise Type. The Threshold parameter sets how high the noise floor is for the audio signal. The recommended method for setting the Threshold is to find a passage where you hear only noise, then set the Threshold so that signals at this volume level are filtered out.
The Reduce parameter sets the level to which the noise floor is reduced. You use the Noise Type parameter to set the type of noise that the Denoiser reduces. There are three choices of noise type:
- Setting the Noise Type to 0 (zero) causes the Denoiser to reduce "white noise" (all frequencies reduced equally).
- Setting the Noise Type to a positive value causes the Denoiser to reduce "pink noise" (harmonic noise; greater bass response).
- Setting the Noise Type to a negative value causes the Denoiser to reduce "blue noise" (hiss, sibilants, tape noise).
The Denoiser recognizes frequency bands with a lower volume and less complex harmonic structure, and then reduces them to the desired dB value. This method is not completely precise, and neighboring frequencies are also reduced. Using the Denoiser at too-high settings can produce the “glass-noise” effect, which is usually less desirable than the existing noise.
There are three smoothing parameters that you can use to minimize the "glass-noise" effect: Frequency smoothing, Time smoothing, and Level smoothing. Raising the Frequency smoothing slider results in a smoother transition of denoising to the neighboring frequencies. When the Denoiser recognizes that only noise is present in a certain frequency band, the higher the Frequency Smoothing parameter is set, the more it will also change the neighboring frequency bands to avoid glass noise.
By adjusting the Time smoothing slider, you can set the amount of time the Denoiser takes to reach maximum noise reduction. By adjusting the Level smoothing slider, you can set a factor for a smoother transition between adjacent volume levels. When the Denoiser recognizes that only noise is present in a certain volume range, the higher the Transition smoothing parameter is set, the more it will also change similar level values to avoid glass noise.
Stereo Spread
The Stereo Spread plug-in is a useful effect for sound design or audio clean-up. It enhances the perception of stereo by extending the stereo base. Some stereo enhancing algorithms function by changing the phase of the signal, which can distort your mix and produce unpredictable results. Instead, the Stereo Spread plug-in extends the stereo base by distributing a selectable number of bands in the middle frequency range alternately left and right. This increases the perception of stereo without causing unnatural-sounding distortion of the mix.
The main parameters of the Stereo Spread plug-in are Order, Upper Intensity (Upper Int.), and Lower Intensity (Lower Int.). The Order parameter determines number of frequency bands into which the signal is divided. The Upper Intensity parameter controls the intensity of the base extension of the upper frequency bands. The Lower Intensity parameter controls the intensity of the base extension of the lower frequency bands.
Human beings perceive stereo placement of sounds mainly in the middle and high frequencies. If very low frequencies are distributed between the left and right speakers, the energy distribution for both speakers will be significantly worse. Therefore, it is always best to select a lower intensity setting for the lower frequency bands, and avoid setting the Lower Freq. below 300 Hz.
Working with Realtime Effects
You can add realtime effects to a track, bus, submix, or the Master bus in a multitrack project, or to an audio file project, and then adjust the effect parameters to control the way in which the effects alter the sound of the track or project.
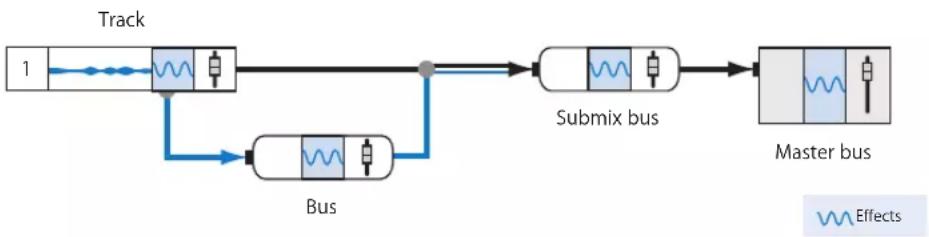
flowchart
graph LR
    A["Track"] --> B["Submix bus"]
    B --> C["Master bus"]
    D["Bus"] --> B
    B --> E["Feedback Loop"]
    style A fill:#f9f,stroke:#333
    style C fill:#bbf,stroke:#333
    style D fill:#dfd,stroke:#333
    style E fill:#dfd,stroke:#333
For more information about signal flow in Soundtrack Pro and the various points in the signal flow where you can add effects, see "Basic Signal Routing in Soundtrack Pro" on page 263 and "Using Sends and Busses" on page 270.
Working in the Effects Tab
The Effects tab is where you add realtime effects and adjust realtime effect parameters.
To open the Effects tab, do one of the following:
- Choose Window > Tabs > Effects (or press Command-5).
- Click the Effects tab to make it active.
The Effects tab becomes active and displays the current effects settings for the track, bus, submix, or project.
The upper part of the Effects tab contains lists of available effect categories. When you click an item in the Category list, the available effects in that category appear in the Effects list, where you can select and add them to the current effects chain.
The lower part of the Effects tab shows the effects and sends in the current effects chain. You can show and edit effect and send parameters in the Effect Parameters area.
Adding Realtime Effects
You can add realtime effects in the Effects tab. You can create effects chains, which are a series of effects in a specific order. You can reorder effects in an effects chain at any time, and hear the results immediately.
To add a realtime effect to a track, bus, or submix in the Timeline:
1 Select a track, bus, submix, or the Master bus in the Timeline.
2 Do one of the following to open the Effects tab:
- Choose Window > Tabs > Effects (or press Command-5).
- Click the Effects tab to make it active.
3 In the Effects list, select a category in the Category list to display the effects for that category in the Effects list.
4 In the Effects list, do one of the following:
- Double-click the effect you want to add.
- Select the effect name, then click the Add Effect button.
- Drag the effect to the Effect Parameters area.
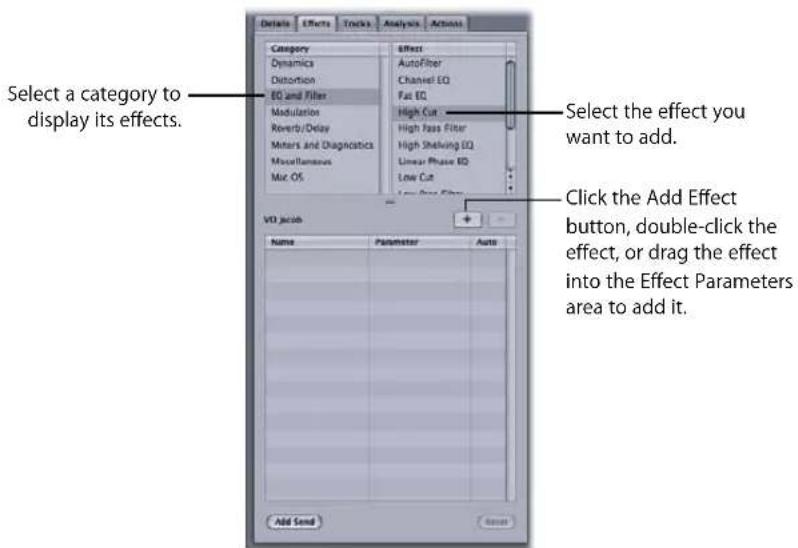
The effect's advanced settings window appears, and the effect name appears in the Effect Parameters area with its checkbox selected.
Note: For information about applying effects to individual audio files, see "Applying Processing Effects" on page 328.
To add a realtime effect to a track, bus, or submix in the Mixer, do one of the following:
■ Control-click an effects slot in the channel strip of the track, bus, or submix, then choose Add Effect from the shortcut menu and an effect from one of the submenus.
- Select the channel strip in the Mixer for the track, bus, or submix and follow the steps in the previous task.
To add a realtime effect to an audio file project in the File Editor project view:
1 Open an audio file or audio file project in the File Editor.
2 In the Effects tab, select a category in the Category list to display the effects for that category in the Effects list.
3 In the Effect list, do one of the following:
- Double-click the effect you want to add to the track.
- Select the effect name, then click the Add Effect button.
- Drag the effect to the Effect Parameters area.
The effect's advanced settings window appears, and the effect name appears in the Effect Parameters area with its checkbox selected.
Important: Some effects, including reverb and delay, add audio that extends past the end of the file. This is called an effect tail. When you export a project mix, or export a track, bus, or submix with an effect that produces a tail, the exported file is lengthened to include the effect tail until the point at which the tail falls below -96 dB. Also, when you choose Process > Render To Action for an audio file project with a realtime effect that produces a tail, the rendered project is lengthened to include the effect tail until the point at which the tail falls below -96 dB.
Adjusting Realtime Effect Parameters
Once you've added a realtime effect, you can adjust the effect parameters to change the way the effect alters the sound of the track, bus, submix, or audio file project. Each type of effect has its own parameters, as discussed earlier. Many realtime effects have an advanced settings window. The advanced settings window appears as a floating window with related controls grouped together, and may provide an appearance that simulates a hardware effects device. Effects with an advanced settings window have an Advanced button at the top of the Effect Parameters area in the Effects tab.
Note: Generally, you use the advanced settings window to make adjustments to the effect. While you can also make adjustments in the Effect Parameters area of the Effects tab, its primary purpose is to enable automation, to chain, reorder and bypass effects, and to add and adjust sends.
To adjust realtime effect parameters in the advanced settings window:
1 Do one of the following to open the window:
- Apply the effect to a track, bus, or submix and the effect's advanced settings window appears automatically.
• In the Effects tab, click the Advanced button for the effect. - In the Mixer, Control-click the effect name, then choose Show [effect name] Advanced Settings from the shortcut menu.
• In the Mixer, double-click the effect name.
The effect's advanced settings window appears.

2 Play the audio in the Timeline or the File Editor project view.
Optionally, you can apply a cycle region or solo the track, bus, or submix in the Timeline.
3 Make adjustments in the advanced settings window as you play the audio.
You can adjust the effect's parameters by moving the controls in the window. Each advanced settings window may have unique controls in addition to sliders, buttons, and value fields.
For detailed information on adjusting the parameters of specific effects, see the Soundtrack Pro Effects Reference document in the Help menu.
4 Optionally, do any of the following:
- Click the Reset button to reset the parameters to their default values.
- Click the Toggle Effect Bypass button to hear the audio without the effect.
- Click the Show Presets button to display the available presets.
For more information about presets, see "Working with Effect Presets" on page 330.
5 When you are finished, close the advanced settings window.
The changes are applied.
To adjust realtime effect parameters in the Effect Parameters area of the Effects tab:
1 Click the disclosure triangle next to the effect in the Effect Parameters area to display its parameters.
2 Adjust the effect parameter by dragging the slider, selecting the checkbox, or choosing an item from the pop-up menu. You can also adjust the parameter by entering a valid value in the field to the right of the parameter's control.
Click the disclosure triangle to display the effect's parameters.

Chaining and Reordering Realtime Effects
You can add more than one realtime effect to a track, bus, submix, or audio file project. Adding multiple effects to an effects chain is called chaining effects.
When you add multiple effects, the effects are applied in sequence, meaning that the output of the first effect becomes the input for the next effect, and so on, for each effect in the chain. The order in which effects are applied is important, because each alters the input signal, which includes the output of previous effects in the chain. You can reorder effects and hear the difference in the way they alter the sound.
To add multiple effects to an effects chain, do one of the following:
■ Double-click the effect you want to add in the Effects list.
■ Select the effect in the Effects list, then click the Add Effect button.
The effect appears in the Effect Parameters area below any previously added effects. You can now set the parameters of the added effect.

Note: Adding more than a few effects to an effects chain can cause extreme changes to the sound of a project. This may be what you want, but in some cases can produce undesirable results. Listen to the project as you add effects to be sure you are satisfied with the results.
To reorder effects in an effects chain:
In the Effect Parameters area, drag the effect up or down in the list to change its order.

Bypassing Realtime Effects
You can turn off an effect in the Effects tab, which "bypasses" the effect in the effects chain. When you bypass an effect, the effect is not heard, but all effect parameters are retained. To hear the effect again, reselect the effect's checkbox. This lets you hear how each effect in a chain alters the sound.
Deselect the checkbox next to the effect name to bypass the effect.

To bypass an effect:
In the Effects tab, deselect the checkbox next to the effect.
Adding Sends to Tracks
You can add sends to a realtime effects chain. When you add a send, the send is added at the end of the current effects chain. You can move the send to another place in the effects chain, choose the bus for a send, adjust send volume and pan, and bypass a send. For more general information about sends and busses, see "Using Sends and Busses" on page 270.
To add a send to a track, do one of the following:
■ Control-click the track in the Timeline or the Mixer, then choose Add Send from the shortcut menu.
In the Effects tab, click the Add Send button.
A send appears below the last effect in the track's effects chain. You can assign the send to a bus in the Effects tab or the Mixer.
Choosing the Bus to Which a Send Is Routed
When you add a send, the audio is routed from the send to a bus. By default, the first send you add to a track is routed to Bus 1, the second send is routed to Bus 2, and so on, if the bus exists. Once you add a send, you can choose the bus to which the send is routed.
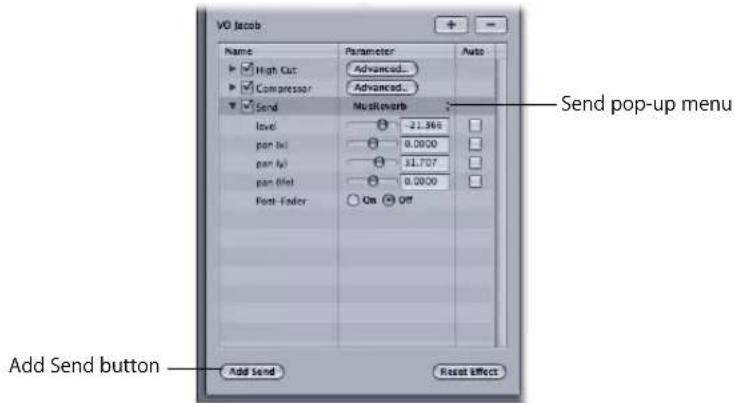
To choose the bus to which a send is routed, do one of the following:
- In the Effect Parameters area of the Effects tab, choose a bus from the Send pop-up menu.
In the Mixer, control-click an effects slot in the channel strip, choose Add Send from the shortcut menu, then choose one of the available busses in the submenu.
Note: If no bus exists, the menus will read "Unconnected." You must first create a bus by choosing Multitrack > Add Bus.
Adjusting Send Volume
You can adjust the volume level for the audio routed through a send.
To adjust send volume:
1 If the send volume slider is not visible, click the disclosure triangle for the send.
2 Drag the send volume slider left to lower the volume level, or drag it right to raise the volume level.
Adjusting Send Pan Position
You can adjust the pan position for the audio routed through a send.
To adjust send pan position:
1 If the send pan sliders are not visible, click the disclosure triangle for the send.
2 Drag the send pan (x) slider left to pan the send to the left, or drag it right to pan the send to the right. Drag the pan (y) and pan (lfe) sliders to adjust the surround pan settings.
Note: For information on surround panning, see Chapter 9, "Mixing Surround Sound," on page 293.
Reordering Sends
You can reorder sends in the Effects tab or in the Mixer.
To reorder a send:
In the Effect Parameters area or in the Mixer, drag the send up or down in the list to change its order.
Bypassing Sends
You can bypass a send. When you bypass a send, the audio is not routed to the bus for the send, and is not heard.
To bypass an effect:
In the Effects tab, deselect the checkbox next to the send.
Automating Realtime Effect Parameters
You can automate realtime effect parameters using envelopes. When you automate an effect parameter, you can change the value of the parameter over time. You are basically “recording” effect parameter changes into parameter automation envelopes that can then be edited and re-recorded. For more information about automation, see Chapter 12, “Working with Automation,” on page 355.
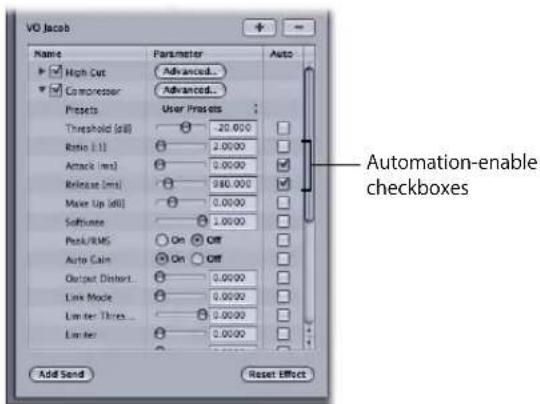
To automate a realtime effect parameter:
1 In the Effects tab, select the Auto (Automation-enable) checkbox next to the parameter's control.
2 In the Timeline or in the File Editor project view, show the envelopes for the track, bus, submix, or audio file project.
In the Timeline, you show the envelopes for the track, bus, or submix with the effect. In the File Editor, you show the envelopes for the audio file project.
3 Add and adjust envelope points in the effect's envelope.
For information on adding and adjusting envelope points, see Chapter 12, "Working with Automation," on page 355.
When you automate an effect parameter with units of time (seconds or milliseconds) or beats per minute (BPM) for values, the parameter is linked to the project tempo. If the tempo changes, the value of the parameter changes to keep the same relationship to the new tempo.
Resetting Realtime Effects to Their Default Settings
Every realtime effect has default parameter settings that are displayed in the Effect Parameters area when you first add the effect. You can reset an effect to its default parameter settings, or reset an individual parameter to its default setting.
To reset a realtime effect to its default settings:
In the Effects tab, select the effect name in the Effect Parameters area, then click the Reset button.
To reset an individual effect parameter to its default settings:
- Select the parameter in the Effect Parameters area, then click the Reset button.
Removing Realtime Effects
You can remove a realtime effect from an effects chain.
To remove an effect:
- Select the effect name in the Effect Parameters area, then click the Remove Effect button on the right edge of the Effects tab (or press the Delete key).
Working with Processing Effects
You can apply processing effects to an audio file or a selected part of a file in the File Editor. In the File Editor, you apply a processing effect by choosing the effect from the Effects submenu of the Process menu, as described in "Applying Actions" on page 230. Processing effects are applied as actions and appear in the Actions menu of the File Editor. You can reorder processing effects, turn them on or off, and perform all of the operations for actions described in "Working with Actions" on page 230.
Advanced Settings for Processing Effects
You adjust processing effect parameters in the advanced settings window for the processing effect. When you apply a processing effect by choosing the effect from the Process > Effects submenu, the advanced settings window for the effect appears in front of the Soundtrack Pro window. You can also show the advanced settings window if you want to adjust processing effect parameters.
To show the advanced settings window for a processing effect:
■ Double-click the effect in the Actions list.
When you open an advanced settings window for a processing effect, the window includes controls to play the project with the effect, adjust volume level, apply the effect, reset effect parameters, and cancel applying the effect.
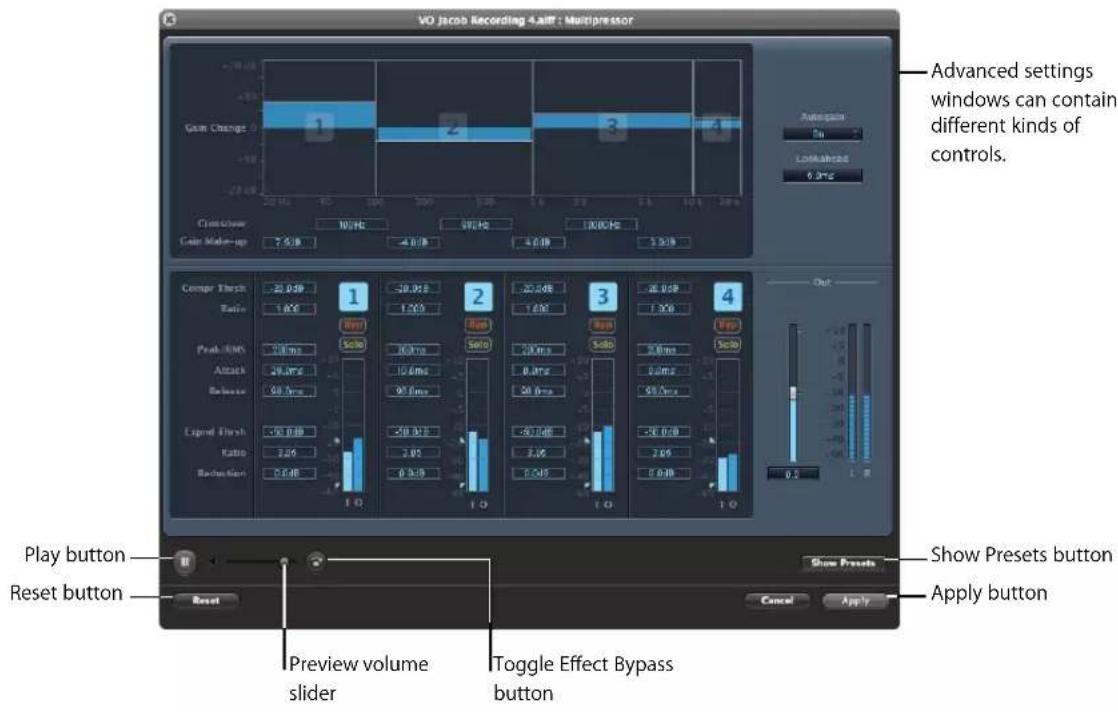
For information on using the preview controls in the advanced settings window, see "Choosing Processing Effects" on page 219.
Automating Processing Effect Parameters
For the effects in the categorized submenus at the top of the Effects submenu of the Process menu (not including Mac OS effects), you can add an envelope for an effect parameter by Control-clicking the parameter in the advanced settings window. You can add envelope points to the envelope to automate changes to the effect parameter.
Working with Automation
12
Using automation, you can create changes over time to volume, pan, effects, and other controls.
Automation offers a powerful way to add drama and interest to your projects. You can automate volume and pan changes to tracks, busses, and submixes and automate changes to effect and effect send parameters in multitrack projects. You can also automate volume, pan, and effects changes in audio file projects.
Soundtrack Pro gives you three ways to work with automation:
- You can add and adjust envelope points on envelopes in the Timeline and in the File Editor.
- You can record changes over time to sliders, faders, and other controls in the Timeline, the Mixer, and the Effects tab.
- You can record movements with faders on a control surface connected to your computer and mapped to Soundtrack Pro commands and functions.
Working with Envelopes
In the Timeline, each track, bus, and submix has a set of envelopes. The envelopes appear as horizontal lines stretching across the length of the project directly below the track, bus, or submix. You adjust an envelope by adding envelope points and moving the envelope points to new values at different points in the Timeline.
For video editors accustomed to working in Final Cut Pro, envelopes provide the same type of functionality as keyframes. The difference is that you can edit envelopes at a finer level of precision than you can using keyframes, allowing extremely powerful control over automated changes.
Track, Bus, and Submix Envelopes
Each track and bus has envelopes for volume and pan, and each submix has a volume envelope. By default, the envelopes are hidden. When you show the envelopes, they appear in rows below the track, bus, or submix in the Timeline.
Click the envelope disclosure triangle.
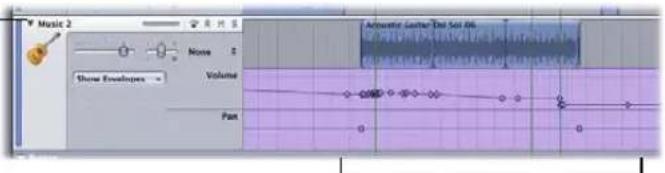
The envelopes are displayed below the track, bus, or submix.
When you add effects to a track, bus, or submix, you can automate the effect parameters by adding an envelope for any parameter to the envelopes for the track, bus, or submix. The envelopes are different for each type of effect. For information on adjusting effect parameters, see Chapter 11, "Working with Audio Effects," on page 327.
To show the envelopes for a track, bus, or submix:
- Click the envelope disclosure triangle in the track header. Click the disclosure triangle again to hide the envelopes.
Default Stereo Envelopes
The default envelopes for tracks using stereo panners are Volume and Pan. The ranges of volume and pan envelopes are equivalent to the ranges of the corresponding track controls:
• Volume envelopes: The range is from -96 dB to +6 dB.
- Track pan envelope: The range is from 100% Left to 100% Right pan, with Centered at the midpoint, 0 (zero).
Default Surround Envelopes
The default envelopes for tracks using surround panners are as follows:
• Volume
- Surround Pan X
- Surround Pan Y
- Rotation
- Width
- Collapse
- Center Bias
• LFE
- Left Speaker Disable
• Center Speaker Disable
• Right Speaker Disable
• Left Surround Speaker Disable
• Right Surround Speaker Disable
For a complete description of each of these surround parameters, see "The Surround Panner HUD" on page 300.

Adding Envelope Points
You create changes to an envelope by adding envelope points to the envelope, and moving them to different values.
To add an envelope point to an envelope:
- Double-click the envelope at the position where you want to add the envelope point. You may want to zoom in to work more precisely.

When you add envelope points, they snap to the closest Snap To position if snapping is turned on. For information on setting the Snap To value, see "Using Snapping" on page 94.
Selecting Envelope Points
You can select a single envelope point or a group of adjacent or nonadjacent envelope points.
To select an envelope point:
- Click the envelope point.
To select multiple envelope points, do one of the following:
- Drag from an area in the automation row before the first envelope point you want to select to an area after the last envelope point you want to select.
If the envelope points are adjacent, Shift-click the first envelope point, then the last envelope point you want to select. All envelope points in between are also selected.
■ Command-click each envelope point you want to select. You can select adjacent or nonadjacent envelope points by Command-clicking.

To deselect a selected envelope point, do one of the following:
■ Command-click the selected envelope point.
- Click in the automation row or somewhere else in the Timeline to deselect all selected envelope points.
Moving Envelope Points
Once you add an envelope point, you can drag it up or down to change its value. As you drag an envelope point up or down, its value appears to the right of the pointer. You can drag an envelope point left or right to change its position in time. You can also select and move multiple envelope points at the same time.
When you move an envelope point, the position of the envelope point snaps to the closest Snap To position if snapping is turned on. For information on setting the Snap To value, see "Using Snapping" on page 94.
To move an envelope point:
■ Select the envelope point, then drag it to a new position.
Each envelope has an envelope point, at the beginning of the Timeline. You can make adjustments by moving this envelope point up or down. If no envelope points have been added, dragging the envelope's handle adjusts the envelope for the entire project.
If you add more than one envelope point to an envelope, you can move envelope points using the corresponding slider. When you move the slider, the envelope points closest to the playhead (the closest before and the closest after) move by the same amount as the slider.
Selecting and Moving Envelope Points with Clips
By default, when you select or move a clip in the Timeline, the associated envelope points are not selected, and they do not move with the clip. You can set Soundtrack Pro to do the opposite: to select associated envelope points when you select a clip. In this case, if you move the clip, the envelope points move with it.
To select and move clips and envelope points together:
- Click the Select Envelope Points With Clips button at the top of the Timeline.
To select and move clips and envelope points independently of each other:
- Click the Select Only Clips button at the top of the Timeline.

Note: If you have the Select Envelope Points With Clips mode turned on, and you overlap a clip with envelope points on another clip with envelope points to create a crossfade, the moved clip's envelope points will overwrite the static clip's envelope points.
The Timeslice Tool and the Envelope Selection Mode
If Soundtrack Pro is in Select Envelope Points With Clips mode, any Timeslice selection rectangle includes all envelope rows within the selection. If Soundtrack Pro is in the Select Only Clips mode, no envelope rows are included in the Timeslice selection.
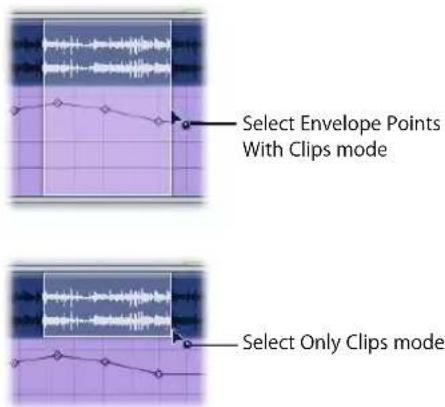
Note: If you change the envelope mode after you have already drawn the Timeslice marquee, the Timeslice will change to match the current setting.
For more information about the Timeslice tool, see "Removing Audio Clips" on page 152.
Viewing and Editing Envelope Point Details
You can also view and edit the value, position, and other details for an envelope point in the Details tab.
To view envelope point details:
1 Click the Details tab.
2 Select the envelope point for which you want to view details.
The details for the envelope point appear in the Details tab, including its value and position. You can edit the value and position in the Details tab, change the format for the position, and copy the value of the previous or next envelope point (if one exists).

To change the value of an envelope point in the Details tab:
1 With the Details tab active, select the envelope point.
2 In the Details tab, do one of the following:
Click the left arrow in the Value value slider to decrease the value, or click the right arrow to increase the value.
- Click the center of the value slider, then drag the slider that appears left or right to change the value.
- Click the text in the value slider to select it, then type a new value.
To change the position of an envelope point in the Details tab:
1 With the Details tab active, select the envelope point.
2 In the Details tab, do one of the following:
- In the Position value slider, click the left arrow to move the envelope point back (toward the start of the project) or click the right arrow to move the envelope point forward (toward the end of the project).
- Click the center of the Position value slider, then drag the slider that appears left or right to change the position.
- Click the text in the Position value slider, then type a new value.
To change the units shown in the Position value slider:
- Choose the units you want to show from the pop-up menu next to the Position value slider.
To copy the value of the previous envelope point:
1 With the Details tab active, select the envelope point to which you want to copy the value.
2 In the Details tab, click Copy From Previous Point.
To copy the value of the next envelope point:
1 With the Details tab active, select the envelope point to which you want to copy the value.
2 In the Details tab, click Copy From Next Point.
Changing the Values of Envelope Points Numerically
You can also change the value of an envelope point numerically.
To change the value of an envelope point numerically:
1 Control-click the envelope point, then choose Set Value from the shortcut menu.
2 Enter a new value for the envelope point in the dialog that appears.
The envelope point moves to the new value. You can set the envelope point to the same value as the previous or next envelope point on the envelope from the shortcut menu.
Changing the Position of Envelope Points Numerically
You can change the position of an envelope point in the Timeline numerically.
To change the position of an envelope point numerically:
1 Control-click the envelope point, then choose Set Position from the shortcut menu.
2 In the dialog that appears, click the left or right arrow in the value slider, click the center of the value slider and drag left or right, or double-click the value slider and type a new position.
The envelope point moves to the new position.
For more information about value sliders, see "About Changing Values and Timecode Entries" on page 75.
Nudging Envelope Points
There are several ways in which you can nudge envelope points using the arrow keys:
- Hold down the Command and Option keys and press the Left or Right Arrow key to move the envelope point to the previous or next video frame.
- Hold down the Command key and press the Left or Right Arrow key to move the envelope point to the previous or next gridline.
- Hold down the Command key and press the Up or Down Arrow key to move the envelope point up or down by one coarse value.
- Hold down the Command and Option keys and press the Up or Down Arrow key to move the envelope point up or down by one fine value.
Cutting, Copying, and Pasting Envelope Points
You can cut and copy selected envelope points and paste them at a different position in the automation row.
To cut envelope points:
■ Select the envelope point, then choose Edit > Cut (or press Command-X).
To copy envelope points:
■ Select the envelope points, then choose Edit > Copy (or press Command-C).
To paste envelope points:
- Set the playhead to the point where you want to paste the envelope points, then choose Edit > Paste (or press Command-V).
When you paste envelope points into an automation row, the new envelope points replace any existing envelope points, and the automation takes the shape of the cut or copied envelope in the pasted area.

When pasting envelope points, the following conditions apply:
- Envelope points can only be pasted into an envelope of the same type as the envelope from which they were cut or copied. For example, envelope points from a volume envelope can only be pasted into a volume envelope, not a pan or tempo envelope.
- Envelope points for an effect parameter can only be pasted into an envelope for exactly the same effect parameter in exactly the same type of effect. You cannot paste envelope points from one effect into another, even if they have parameters with the same name.
Deleting Envelope Points
After listening to the results of your edits, you may decide to delete some envelope points.
To delete envelope points:
1 Select the envelope points.
2 Do one of the following:
- Choose Edit > Delete.
- Press the Delete key.
- Press Command-X.
When you delete envelope points, the envelope adjusts accordingly, moving evenly from the preceding envelope point to the next envelope point. If there are no other envelope points, the envelope becomes horizontal, maintaining its initial value for the entire project.
Automating Effect and Send Parameters
You can automate effect parameters for tracks, busses, and submixes and for audio file projects by adding envelopes for the effect parameters and then adding and adjusting envelope points. You can also automate send parameters for tracks by adding an envelope for the send parameters, then adding and adjusting envelope points.
To add an envelope for an effect or send parameter:
1 Open the Effects tab and select the effect you want to automate.
2 In the Effect Parameters area, select the Auto checkbox for the parameter.
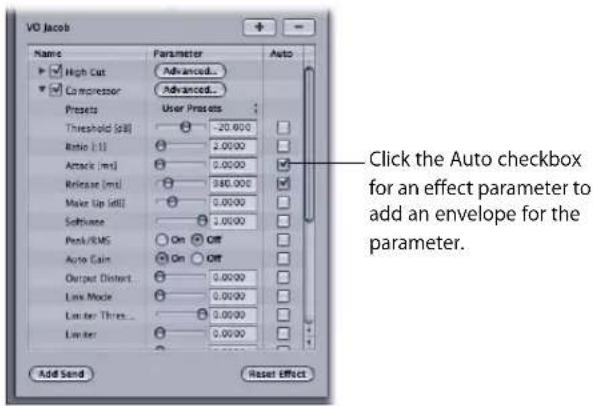
To remove an envelope for an effect parameter:
- Deselect the Auto checkbox for the parameter in the Effect Parameters area of the Effects window.
The range of values for an effect or send parameter envelope is the same as the range for the parameter in the Effects tab.
For detailed information on adjusting effect parameters, see "Adjusting Realtime Effect Parameters" on page 345.
Master Bus
Each project has a Master bus that includes envelopes for volume, transposition, and tempo. By default, only the Volume envelope is visible because Transposition and Tempo are specifically for projects containing only tagged and looping clips.

To show or hide the Master bus envelopes, do one of the following:
- Click the Master bus disclosure triangle in the Timeline.
- Choose Master Envelopes from the Show pop-up menu at the upper-right corner of the Timeline.
Repeat the procedure to hide the Master bus envelopes.
To show the Transpose or Tempo envelopes:
- Choose Transpose or Tempo from the Show Envelopes pop-up menu in the Master bus track header.
The ranges of the master envelopes are as follows:
- Master transpose envelope: Ranges from -12 semitones to +12 semitones.
- Master tempo envelope: Ranges from 60 bpm to 200 bpm.
For more information about the Master bus, see "Using the Master Bus" on page 290.
Recording Automation Data
In addition to working with envelopes, you can record automation data in Soundtrack Pro. You can record movements you make to faders, sliders, and other onscreen controls using the pointer. You can also connect a supported control surface to your computer and record movements to controls and faders on the control surface. When you record movements to onscreen controls or control surface controls, the corresponding envelope in the Timeline (or File Editor) changes to display the recorded automation data. You can edit the envelope to fine tune the automation data after recording.
Automation Modes
Soundtrack Pro provides three modes for using and recording automation. The automation modes determine whether automation data is recorded, and what happens when you release the control being recording.
- Read: In Read mode, existing automation data is active when you play the project, but no new automation data is recorded.
- Touch: In Touch mode, movements to controls are recorded when you play the project, overwriting any existing automation data until you release the control. When you release a control in Touch mode, the control returns to the value it previously had at the point in the Timeline where you release the control. No envelope points after that point are added or changed.
- Latch: In Latch mode, movements to controls are recorded when you play the project, overwriting any data from the point you start recording until you stop playing the project. When you release a control in Latch mode, the control maintains the same value at which you released it.
To record automation data for movements to controls:
1 Choose either Touch or Latch from the Automation Mode pop-up menu.
2 Set the playhead to a position before the point where you want to start recording.
3 Click Play (or press the Space bar) to start the project playing.
4 While the project plays, move the control you want to record.
Once you have recorded automation data, you can show the envelope for the control and add and adjust envelope points on the envelope to fine tune the automation. For information on working with envelopes, see "Working with Envelopes" on page 355.
For more information on working with control surfaces, see Chapter 15, "Using Control Surfaces with Soundtrack Pro," on page 391.
Thinning Envelope Points in Recorded Automation Data
Recording automation data can generate a large number of envelope points. The number of envelope points recorded can make editing envelopes difficult, and in some cases affect playback performance.
You can reduce or "thin" the number of envelope points recorded from a control surface in the Project Preferences. You set the amount of thinning using the Automation Recording Sensitivity slider. The automation data is thinned when you finish recording automation.
To set the amount of thinning:
1 Choose Soundtrack Pro > Preferences, then click the General button.
2 In the General pane, drag the Automation Recording Sensitivity slider to adjust the amount of thinning.
When the slider is set to High, no thinning occurs. The envelope contains every movement of the control. Dragging the slider to any position other than High results in some thinning of envelope points. By default, the slider is set to a moderate amount of thinning.
For more information about Soundtrack Pro project preferences, see "Project Preferences" on page 99.
Recording Audio in Soundtrack Pro
13
You can record your own audio on one or more tracks in the Timeline, the Mixer, or the File Editor project view as a mono, stereo, or multichannel file.
You get ready to record by setting recording preferences and checking that your audio equipment is working. For multitrack projects, you enable a track for recording or record audio in a new track. You can record a single take or record multiple takes. If you record multiple takes, you can review them after recording and choose which one to use in your project or assemble a composite take using segments of each recorded take using the Multitake Editor.
Getting Ready to Record
Before you start recording, make sure that any audio equipment you plan to use in your recording session (such as microphones, musical equipment, mixers, or external processors) is connected to your computer and is working.
When you record, the recorded audio is saved to disk at the location set in the Recording pane of the Preferences window. Audio files, while smaller than video files of comparable duration, can be quite large (each minute of 16-bit, 44.1 kHz stereo audio requires roughly 10 MB of disk space), so you should make sure you have enough free disk space to store your recordings before you start. You can set the input device and output monitoring device for recording in the Preferences Recording pane, or change them in the Recording tab. For detailed information on Recording preferences, see
"Recording Preferences" on page 100.
For audio file projects, you record in the File Editor. When you record in the File Editor, the recording replaces (overwrites) any audio over which you record. If you record for a longer duration than the current length of the file, the file is lengthened to include the recorded audio.
Recording Audio in the Timeline
You record in the Timeline by enabling a track for recording, setting the playhead, then clicking Record. You can record a single take or record multiple takes by turning on cycling before you start recording. When you finish recording, your recorded audio appears in a track in the Timeline. If you record multiple takes, you can audition each take to choose which one you want to use in your project. You can also assemble composite takes by splitting and combining your recorded takes.
Enabling Tracks for Recording
Before you start recording, you enable the tracks you want to record to. You can record audio only to tracks, not to busses or submixes. If no track is enabled for recording, a new track is created below the existing tracks, and the take appears on the new track when you click the Record button.
Note: For details on multitrack recording, see "Multitrack Recording" on page 371.
To enable a track for recording:
- Click the Arm for Recording button (the red letter R) in the track's header (or Mixer channel strip).

The Recording tab becomes active and shows the current recording settings. You can adjust recording settings before you start recording or between recordings.

Adjusting Recording Settings
Before you click the Record button, you may need to configure the input device, the choice of input channels, and other device and monitor settings.
To adjust recording settings:
1 In the Recording tab, choose the input device from the Input Device pop-up menu.
The available choices include your computer's Built-in Audio, plus any other installed audio interfaces.
Note: You can also access the Input pop-up menus from the track header, but only if the Timeline Track Height is set to either medium or large.

2 Use the Input Channel pop-up menu to choose the channel (or set of channels).
The available choices are Mono (one channel), Stereo (two channels), 3 channels, 4 channels, 5 channels, 6 channels, and Surround 5.1.

The Recording tab adjusts the level meter display based on the channel (or set of channels) you choose. For example, for the default Stereo setting, the Recording tab displays the Left and Right level meters. If you choose the 4-channel setting, the Recording tab displays level meters 1 through 4. If you choose the Surround 5.1 setting, the Recording tab displays the standard surround level meters.

3 Confirm the channel routing in the input routing buttons below the Input Channel pop-up menu. If necessary, click any of the active input routing buttons and use the pop-up menus to route a different channel from the input device to the channel in the recorded audio file.

If your audio interface allows labeled inputs, the input routing button pop-up menus display the names.
4 Optionally, you can click the Configure Device button to open the Audio MIDI Setup utility. For more information, see "Audio MIDI Setup" on page 23.
5 Use the Monitor Device pop-up menu to choose the device for monitoring the recorded audio.
6 If you want to record without hearing the existing audio clips in the project, select the Mute Project checkbox.
The level meters in the Recording tab show the level of the audio signal in the input channels. Before recording, you may want to watch the level meters and set the input level to ensure a high enough signal level and to avoid clipping.
Recording a Single Take
You record a single take by setting the playhead to the point where you want recording to start, then clicking the Record button. Recording starts at the playhead position, and ends when you click either the Record or Play/Pause button.
To record a single take:
1 If you want to record to an existing track, enable the track for recording.
2 Set the playhead to the point where you want recording to start.
You can set the playhead using any of the procedures described in "Setting the Playhead Quickly" on page 72.
3 Click the Record button in the transport controls to start recording.
As you record, the level meters in the Recording tab show the levels of the input signal being recorded. If the input signal clips (rises above 0 dB), the peak indicator lights red.
4 To stop recording, do one of the following:
- Click the Record button again.
- Click the Pause/Play button.
- Press the Space bar.
You can punch in and punch out while recording a single take using the Record button. For example, you can start the project playing, then punch in at the point where you want to start recording by clicking the Record button. To punch out, click the Record button again. When you click the Record button while recording, recording stops, but the project continues playing. You can punch in and punch out multiple times while the project is playing.
When you click the Pause/Play button, both recording and playback stop.
Multitrack Recording
You can record audio to multiple tracks simultaneously.
To record to multiple tracks simultaneously:
1 Click the Arm for Recording button on each track you want to record to.
2 For each track you want to record to, choose the track from the Track pop-up menu at the top of the Recording tab and follow these steps:
a In the Recording tab, choose the input device from the Input Device pop-up menu.
b Use the Input Channel pop-up menu to choose the channel (or set of channels).
c Confirm the channel routing in the input routing buttons below the Input Channel pop-up menu. If necessary, click any of the active input routing buttons and use the pop-up menus to route a different channel from the input device to the channel in the recorded audio file.
For more information, see "Adjusting Recording Settings" on page 369.
3 Set the playhead to the point where you want recording to start, and click the Record button.
The audio is recorded to the armed tracks.

4 To stop recording, do one of the following:
- Click the Record button again.
- Click the Pause/Play button.
- Press the Space bar.
Recording Multiple Takes
You can record multiple takes in the Timeline. You can record multiple takes using the cycle region to define where each take starts and ends, or you can record for the duration of the project. When you record multiple takes, the takes are "stacked" in a single multitake clip in the Timeline. You can audition each take and create composite takes using the Multitake Editor. For information about the Multitake Editor, see Chapter 7, "Using the Multitake Editor," on page 251.
To record multiple takes:
1 If you want to record to an existing track, enable the track.
2 If cycling is turned off, click the Cycle button in the transport controls to turn it on.
3 Set the cycle region to the part of the Timeline where you want recording to start and end.
For information on setting the cycle region, see "Working with the Cycle Region" on page 134.
If no cycle region is set, recording starts at the beginning of the project and lasts until the end of the last clip in the project. If the project contains no clips, a single take is recorded, starting at the current playhead position.
4 Click the Record button in the transport controls to start recording.
As you record, the level meters in the Recording tab show the levels of the input signal being recorded. If the input signal clips (rises above 0 dB), the peak indicator lights red. The playhead advances to the end of the cycle region, then returns to the beginning of the cycle region for the next take.
5 To stop recording, do one of the following:
- Click the Record button.
- Click the Pause/Play button.
- Press the Space bar.
When you record multiple takes, the takes are recorded sequentially to an audio file in the recording location set in Recording preferences. The takes appear in a single multitake clip in the Timeline.
The current take number appears in the lower-right corner of the clip.
Editing Multitake Clips
You can do some simple multitake editing directly in the Timeline, for example, splitting the clip and choosing the take for each split segment.
Note: For sophisticated editing of multitake clips, see Chapter 7, "Using the Multitake Editor," on page 251.
To choose a take in the Timeline, do one of the following:
■ Select the clip, choose Clip > Recording Take, then choose the take number from the submenu.
■ Control-click the clip, choose Take from the shortcut menu, then choose the take number from the submenu.

You can split a recorded clip and choose the take for each segment of the split clip to create a composite take. You can also copy a clip onto several tracks, split the copies, and choose the take for each split copy of the clip.
Recordings Location
When you record audio with Soundtrack Pro, the default location for those audio recordings is: /Users/username/Documents/Soundtrack Pro Documents/Recordings/.
To change the Recordings location:
- Choose Soundtrack Pro > Preferences. Click the Recording button, then click Choose to enter a new location.
Note: When you save a multitrack project and select the Collect Audio Files option, a copy of every audio file the project uses (including recordings) is saved with the project file. For more information, see "Saving Multitrack Projects" on page 111.
Recording Audio in the Mixer
You can record audio in the Mixer in a similar way to recording audio in the Timeline. You can record a single take or record multiple takes.
To record audio in the Mixer, you follow the procedures described in "Recording Audio in the Timeline" on page 368, with the following differences:
- To enable a track for recording in the Mixer, click the Arm for Recording button (the red letter R) in the track's channel strip.
- Depending on the layout you are using, the playhead may not be visible as you record in the Mixer. In this case, you can set the playhead using the transport controls or the Playhead Location value slider. If you want to record multiple takes using a cycle region, you may need to set the cycle region in the Timeline before you start recording in the Mixer.
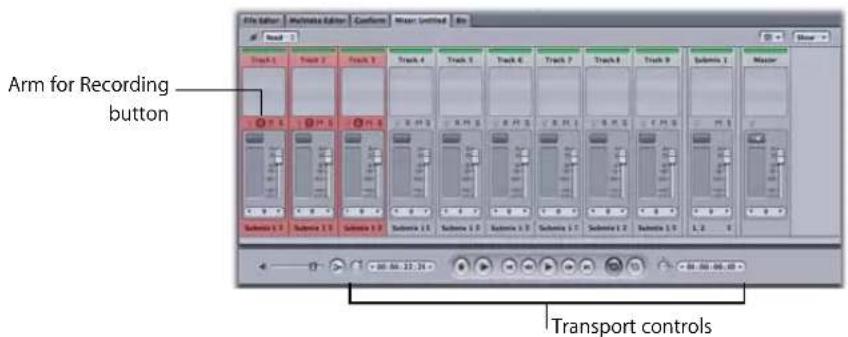
Recording Audio in the File Editor Project View
You can record audio to an audio file project in the File Editor project view. When you record audio in the File Editor, you replace (overwrite) any existing audio in the audio file or selection you record to.
You can select part of the file in the File Editor to record to. When you record to a selection, recording starts at the beginning of the selection and ends at the end of the selection. The part of the file after the end of the selection is unchanged.
If no part of the file is selected, recording starts at the playhead position, and lasts until you stop recording. If your recording extends past the end of the audio file, the file is lengthened to include the recording.
To record audio in the File Editor project view:
1 Open an audio file project in the File Editor project view.
2 Select the part of the project you want to record to.
If no part of the audio file is selected, recording starts at the current playhead position and proceeds until you stop recording.
3 Click the Record button in the transport controls.
As you record, the recorded area appears red in the waveform display. The level meters in the Recording tab show the levels of the input signal being recorded. If the input signal clips (rises above 0 dB), the peak indicator lights red.
Creating Podcasts in Soundtrack Pro
14
Soundtrack Pro gives you the tools to create professional podcasts of your projects.
You can quickly and easily produce audio and video podcasts directly from within Soundtrack Pro projects. And you can take video projects from Final Cut Pro and make podcasts from them using Soundtrack Pro. Podcasts are audio and video broadcasts available on the Internet. Unlike traditional radio and television shows with set schedules, podcasts can be listened to at any time in the iTunes application or on an iPod. You can even publish your podcast to iTunes and reach a potential audience of millions. Besides democratizing what used to be known as radio, the podcasting movement provides new avenues of distribution for recorded lectures and educational materials, audio tours of museums, conference meeting updates, and so on.
Soundtrack Pro provides professional and prosumer podcasters the tools to create extremely high-quality podcasts. And with the podcasting workflow built right into Soundtrack Pro, audio post-production personnel can easily lay off iPod-ready versions of their sound for picture mix or edit. This way, a small audience of clients and colleagues can enjoy the convenience of listening to or watching the programs using iPod or iTunes.
Podcasts fall into three broad categories:
- Audio-only podcasts: At the very least, a podcast contains an audio file. For information about types of compressed audio files, see "Exporting Audio Podcasts" on page 387.
- Enhanced podcasts: The audio content may have one or more associated images and web links that can be synchronized with the audio track. Also, chapter markers can be embedded that allow listeners to jump to specific sections of the content.
- Video podcasts: Video podcasts typically include both video and audio content. The technical requirements for video podcasts are more specific. For information about video file formats for podcasting, see "Exporting Video Podcasts" on page 388.
Podcasts are typically published in a series of episodes. Soundtrack Pro supports the creation of episodes.
Podcasting Media Production
Producing podcasts has a lot in common with producing any other audio or video program. Soundtrack Pro can help you with the audio production, editing, and mixing steps as well as with some other tasks unique to podcasting.
There are two main ways to create podcasts:
• Take a Final Cut Pro project and create a podcast from it in Soundtrack Pro.
- Create a podcast from scratch in Soundtrack Pro.
Both of these scenarios involve some version of the following steps:
Step 1: Record the sound (and video)
There are many different ways to record a podcast, ranging from one-person shows, to conference calls, to live events on location, to studio recordings. You can record multitrack and multichannel sound directly into Soundtrack Pro, or you can import pre-recorded files.
Step 2: Edit and mix the sound, video, and images
Soundtrack Pro gives you many specialized tools and powerful features that you can use to create high-quality audio. And the ability to exchange projects and information between Soundtrack Pro and Final Cut Pro makes video podcasting a very streamlined process.
Step 3: Podcast-specific editing and authoring
Podcasts range in complexity from a simple audio or video file to enhanced podcasts with chapter markers and associated web links. Besides its many sophisticated audio editing and mixing tools, Soundtrack Pro includes a dedicated podcast track for adding chapter markers, URL links, and images.
Step 4: Compress the audio (and video) files
Soundtrack Proincludes a robust set of export and compression options for both audio and video podcasting. For complete information about exporting from Soundtrack Pro, see Chapter 16, "Exporting Multitrack Projects," on page 395.
Step 5: Upload the compressed files
Once your podcast is complete, you upload the file to your web host using a file transfer protocol (FTP) utility. You can trigger post-export actions (AppleScript documents) to do this automatically as a part of the export process. For more information, see "Using Post-Export Actions" on page 416.
Using the Podcast Track and Podcast Markers
You can add chapter markers, images, and web links to your podcasts using the podcast track and the Details tab in Soundtrack Pro.
Note: If you want to make a simple audio or video podcast with no markers, images, or web links, skip to "Exporting Podcasts" on page 387.
Displaying the Podcast Track and the Details Tab
You use the podcast track in conjunction with the Details tab to add enhanced podcast features to your podcast. Any Soundtrack Pro multitrack project can include information on how to output the project as a podcast. This podcast-specific information can be viewed and edited by showing the podcast track.
To display the podcast track:
- Choose Show > Podcast Track from the Show pop-up menu in the upper-right corner of the Timeline.

The podcast track appears near the top of the Timeline, just above the audio tracks.
By default, the podcast track appears just below the video track (if you have one in your project) with a single blue podcast marker "region" that spans the entire length of the project.

To make the Details tab active, do one of the following:
- Choose Window > Tabs > Details (or press Command-I).
■ Click the Details tab.
To view or enter information for a podcast marker:
1 Select a podcast marker region in the podcast track.

2 Enter or view the information in the Details tab.
Podcast Marker Information in the Details Tab
Use the Details tab to enter and display podcast marker information and attributes. The Details tab sets properties for the podcast marker region (e.g. what image will be shown until the next marker in an enhanced podcast) and optionally sets a chapter marker.

- Name field: Enter a name for the marker.
- Measure In pop-up menu: Sets the units shown in the Position value slider.
- Marks a chapter checkbox: Identifies a region as a podcast chapter.
- Position value slider: Sets and displays the time position of the selected marker.
- URL: Enter a web link for the marker.
- URL Title: Enter a name for the website listed in the URL field.
• Image Source pop-up menu: Sets the displayed image for the marker.
Note: The image can be a still image added to the project or a frame from a video clip, if there is a video track for the project.
Adding Markers to a Podcast
Markers can provide visual interest and navigational convenience for your podcast audience. Podcast markers are frames in a podcast that can display an image or a web link synchronized to the audio in the podcast. Chapter markers are podcast markers that provide enhanced navigation. Chapter markers make it easy for listeners and viewers to skip ahead to the section they want. Chapter markers appear in the chapter list in both iTunes and QuickTime Player. To adjust markers, including their respective web links and images, see "Podcast Marker Information in the Details Tab" on page 380.
Using Podcast and Chapter Markers
Using the podcast track, you can add as many markers as you like. By default, the podcast track makes the first frame of the project a chapter marker.
To add a marker:
1 To display the podcast track, choose Show > Podcast Track from the Show pop-up menu in the upper-right corner of the Timeline.
2 Click the Blade tool at the top of the Timeline (or press B).
The pointer changes to the Blade tool.
3 Using the Blade tool, click anywhere in the podcast track.
The podcast track is split, creating a new chapter marker at the point you clicked.
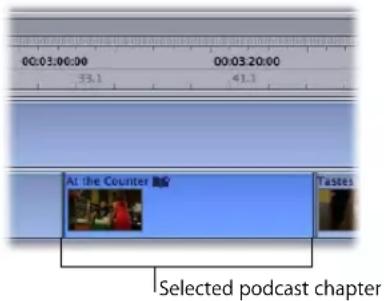
Deleting Podcast and Chapter Markers
Deleting markers is as easy as adding them.
To delete a podcast marker or a chapter marker:
1 In the Podcast track, click any marker region.
2 Press Delete.
The marker is removed from the podcast track.
Moving Podcast and Chapter Markers
Use the Position value slider to move markers in your podcast.
To move a podcast marker with the pointer:
In the podcast track, drag the edit point between any two marker regions.
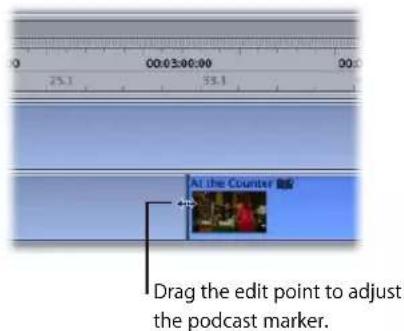
To move a podcast marker or a chapter marker using the Details tab:
1 In the podcast track, click any marker region.
2 In the Details tab, use the Position value slider to adjust the marker position.
For information on using value sliders, see "About Changing Values and Timecode Entries" on page 75.
Editing Podcast and Chapter Markers
By default, all new podcast markers are chapter markers named "Untitled Chapter." You can rename markers at any time. You can also easily change chapter markers into regular podcast markers or podcast markers into chapter markers with the "Marks a chapter" checkbox in the Podcast Marker section of the Details tab.
Note: Chapter markers are special markers that tell the playback software (iTunes and QuickTime Player) to list navigational and image marker information in the chapter list.
To name a chapter or podcast marker:
1 In the podcast track, click any marker region to select it.
2 To make the Details tab active, do one of the following:
- Choose Window > Tabs > Details (or press Command-I).
- Click the Details tab.
3 In the Details tab, enter a name in the Name field.
To change a chapter marker to a podcast marker:
■ Deselect the "Marks a chapter" checkbox in the Podcast Marker section of the Details tab
To change a podcast marker to a chapter marker:
■ Select the "Marks a chapter" checkbox in the Podcast Marker section of the Details tab.
To enter web link information for a marker:
1 Enter a web address in the URL field. For example: http://www.apple.com/.
2 Enter a descriptive title in the URL Title field. For example: Apple Inc.
Creating Podcast Markers from Final Cut Pro Chapter Markers
When you send a Final Cut Pro sequence to a Soundtrack Pro multitrack project, you can create a podcast chapter marker for every Final Cut Pro chapter marker.
To create podcast markers from Final Cut Pro chapter markers:
1 Confirm that the source Final Cut Pro sequence has chapter markers applied to it.
See the Final Cut Pro User Manual for information on Final Cut Pro chapter markers.
2 Send the Final Cut Pro sequence to a Soundtrack Pro multitrack project.
For information on sending Final Cut Pro sequences to a Soundtrack Pro multitrack project, see "Creating Soundtrack Pro Multitrack Projects from Final Cut Pro Clips or Sequences" on page 428.
The Final Cut Pro sequence loads into the Soundtrack Pro Timeline, with its markers arrayed along the top of the Time ruler.
![At the Counter Try a Sample Tastes Aweful 01:5 1:00:00 01:01:20:00 01:01:40:00 53.1 41.1 49.1 [Image] [Image] [Image]](/content/2026/05/894656/images/61a877b418dc5be7c159c99ee79d85838e9f0ae91b20c721793753d92a4fc981.jpg)
3 In Soundtrack Pro, reveal the podcast track by choosing Show > Podcast Track from the Show pop-up menu in the upper-right corner of the Timeline.
The podcast track appears just below the video track.
4 Choose Mark > Create Podcast Markers from FCP Chapters.
The chapter markers from the Final Cut Pro sequence are inserted in the podcast track as podcast chapter markers. The markers have the same names they did in Final Cut Pro. By default, this operation sets the Image Source pop-up menu to Video at Start of Section. For more information about the Image Source pop-up menu, see "Using the Image Source Pop-Up Menu" on page 386.

Adding Images to a Podcast
Your podcasts can display still images on iTunes and iPod. Using the podcast track together with the Details tab, you can add a single image for an entire podcast or create a slideshow of images that plays in sync with the audio portion of your podcast. If your project has a video track, you can use frames of the video as still images in your podcast. You can also add other still images to your podcast.
Setting an Episode Image for an Entire Podcast
A common podcasting practice is to insert a single, representative image for an audio podcast so that it displays (in iTunes and on iPod) during the entire episode.
To set an episode image for a podcast:
1 In the Project tab, scroll down to the Metadata > Episode Image section.
2 Do one of the following:
- Drag a still image from the Finder or from iPhoto to the Episode Image image well or copy an image in an image editing application and paste it into the image well.
- Click Choose and, in the dialog that appears, navigate to the image file you want to add and click Open.
Note: You can add any of the following image types using the Image Source pop-up menu: PDF, EPS, TIFF, JPG, GIF, PNG, PICT, BMP, ICO, and ICNS.
3 To display the podcast track, choose Show > Podcast Track from the Show pop-up menu in the upper-right corner of the Timeline.
4 Confirm that the podcast track contains the single, default chapter marker region that spans the entire length of the project.

5 Click the podcast track to select it.
6 In the Image Source pop-up menu in the Details tab, select Episode Image.
The image is applied to the entire podcast. If there are no subsequent markers with images, this initial image will be shown for the duration of the podcast.
Note: Once you set the episode image in the Project tab, you can apply the episode image to any podcast marker region using the Image Source pop-up menu.
For more information on the Image Source pop-up menu, see "Using the Image Source Pop-Up Menu" on page 386.
Creating a Slideshow in a Podcast
By adding multiple markers to a podcast and adding an image to each marker, you can create a slideshow that plays in sync with the audio portion of your podcast.
To add a series of images to a podcast:
1 To display the podcast track, choose Show > Podcast Track from the Show pop-up menu in the upper-right corner of the Timeline.
2 Using the Blade tool, click the podcast track at each point where you want to add an image.
For more information about adding markers, see "Using Podcast and Chapter Markers" on page 381.
3 Select a marker region and use the Image Source pop-up menu to apply an image.
For more information on the Image Source pop-up menu, see "Using the Image Source Pop-Up Menu," next.
4 Repeat step 3 for each marker in your slideshow.
Using the Image Source Pop-Up Menu
You can apply images to your podcast in a variety of ways with the Image Source pop-up menu.
To apply an image to a marker region:
1 Select the marker region in the podcast track.
2 Click the Image Source pop-up menu in the Details tab.

3 Use the Image Source pop-up menu in the Details tab to choose one of the following methods for adding a still image:
- Episode Image: Drag a still image from the Finder or from iPhoto to the image well or copy an image in an image editing application and paste it into the image well. Choose Episode Image again to clear the current marker image.
- Video at Start of Section: If the multitrack project has a video in it, choose this option to have Soundtrack Pro insert the corresponding video frame from the same Timeline location.
• Video at: Use the value slider to manually choose a video frame from the video track. - Other: Click Choose and, in the dialog that appears, navigate to the image file you want to add and click Open.
Note: You can add any of the following image types using the Image Source pop-up menu: PDF, EPS, TIFF, JPG, GIF, PNG, PICT, BMP, ICO, and ICNS.
To remove an image from a podcast:
1 Select the marker region in the podcast track.
2 Choose Episode Image from the Image Source pop-up menu.
The image is removed and no image is displayed for that marker region.

Note: Enhanced podcasts (using still images) and video podcasts are mutually exclusive. Information for enhanced and video podcasts can co-exist in your multitrack project, but you must choose one or the other when you export. See "Exporting Podcasts," next, for more information.
Exporting Podcasts
After you have completed editing and mixing your project, including adding any podcast-specific enhancements such as images, chapter markers, or web links, you are ready to export your podcast.
Compression is an important step in exporting any audio or video podcast file. While it is technically possible to distribute a podcast using standard (uncompressed) file formats, it is not very practical nor very common. That's because podcast files inevitably encounter bandwidth bottlenecks as they travel to the far reaches of the Internet. So, when it comes to podcasting, small is beautiful.
Exporting Audio Podcasts
Almost all audio-only podcasts use one of two compressed formats: AAC or MP3. In fact, a podcast must use either the AAC or the MP3 format to be included in the iTunes Store. AAC (also known as Advanced Audio Coding codec or MPEG-4/AAC) is a newer, more efficient format. It provides more clarity than MP3 audio at the same bit rate with smaller file sizes or files of the same size at higher quality.
For additional general information about exporting audio files see "Exporting a Master Mix to a Compressed Audio File" on page 399.
Exporting Audio Podcasts as AAC Files
You can export AAC audio files directly from Soundtrack Pro by choosing File > Export and selecting AAC/Podcast File from the File Type menu. For complete information on exporting to the AAC format, see "Exporting to AAC/Podcast Files" on page 401. In step 6 of those export instructions, you are presented with the following options:
- No Video: Choose this option to export an audio-only (AAC) file. The resulting podcast file will have the.m4a extension.
- Enhanced (images): Choose this option to export an enhanced podcast containing audio and images. The resulting podcast file will have the .m4a extension and will include chapters and web links if you specified them in Soundtrack Pro.
Note: "Enhanced (images)" is the only option that allows for still images to appear in the resulting podcast.
- Video Track: This option is discussed in "Exporting Video Podcasts Directly from Soundtrack Pro," below.
Exporting Audio Podcasts as MP3 Files
You can export MP3 audio files directly from Soundtrack Pro. For complete information on exporting to the MP3 format, see "Exporting to MP3 Files" on page 399.
Exporting Video Podcasts
While iTunes can play a wide variety of video formats, iPod only plays videos that are created to exact specifications. The specifications include AAC for the audio portion and one of two related formats (H.264 or MPEG-4) for the video portion. You want to make sure that your video podcast is encoded correctly so that it will sync to iPod without issue. Through links to its associated application, Compressor, Soundtrack Pro includes encoding presets to make video podcasts that can play on iTunes, on a video iPod, or with Apple TV.
Exporting Video Podcasts Directly from Soundtrack Pro
To export a podcast including both video and audio, follow the instructions in "Exporting to AAC/Podcast Files" on page 401. In step 6 of those export instructions, choose the third option: Video Track.
This option results in an MPEG-4 (.m4v) file containing both video and audio. The properties of the exported podcast file are equivalent to the H.264 for iPod Video 640x480 setting that is included in the Compressor application. The resulting podcast file includes chapters and web links if you specified them in Soundtrack Pro.
Using this method for exporting video podcasts offers the speed and convenience of exporting directly from Soundtrack Pro. A tradeoff of this method is you don't have as much control over the various details of the transcoding process. For complete control over all aspects of the transcode, including the various video parameters, use Compressor (instead of this Export dialog). See "Exporting Video Podcasts Using Compressor," next.
Exporting Video Podcasts Using Compressor
Compressor is the high-speed video and audio encoding tool for Final Cut Studio. You can use it to convert content so that it can be experienced on many different platforms and devices (including iTunes, Apple TV, and an iPod, among others).
The Export dialog in Soundtrack Pro offers a direct link to the Compressor application. When you export using Compressor, you can use the presets included with Compressor for your exported file or use custom presets that you create in Compressor.
To export a video podcast using Compressor:
(For detailed information, see "Exporting a Master Mix Using Compressor" on page 410.)
1 Choose File > Export (or press Command-E).
2 Choose Master Mix from the Exported Items pop-up menu.
3 Choose Using Compressor from the File Type pop-up menu.
4 Select Encode Video.
5 In the associated pop-up menu, choose H.264 for Video Podcasting.
6 Click Export.
Optionally, you could export your podcast project using the Preserve Video option (retaining the video's original format and exporting the audio as a standard, uncompressed, AIFF file) and then import those files into Compressor for final transcoding. This method gives you the most options in terms of transcoding decisions. For more information about the Preserve Video option, see "Exporting a Master Mix Using Compressor" on page 410. Once you create customized versions of the Compressor iPod presets, they are available in the Soundtrack Pro export via Compressor options.
For more information on working with Compressor presets, see the Compressor User Manual. The manual is available from the Compressor Help menu and is included in the Documentation folder installed with Soundtrack Pro.
Using Post-Export Actions for Podcast Production
The Soundtrack Pro Export dialog includes post-export actions that can automate parts of your podcasting workflow and save you time and effort. You can use the feature to automatically trigger your own AppleScript documents as a part of any export operation.
You can link your Soundtrack Pro podcast export to custom AppleScript documents that would execute at the end of an export. For example, at the end of an overnight video podcast transcode, Soundtrack Pro could automatically trigger a custom AppleScript document that would transfer the exported podcast to a web server via scriptable FTP software and send you (or a client) an email notification.
For more information about using post export-actions see "Using Post-Export Actions" on page 416.
Using Control Surfaces with Soundtrack Pro
You can connect and use control surfaces to automate recording, mixing, and other tasks in Soundtrack Pro.
Control surfaces provide a set of hardware controls that let you mix and edit your projects with greater flexibility and precision than using a mouse to move onscreen controls. You can also change multiple parameters at once using a control surface.
There are a variety of control surfaces available for use with video and audio production applications. Most control surfaces include faders, knobs, and buttons similar to those found on a hardware mixing console, including channel strip controls for volume, pan, mute, solo, and track selection, and a set of transport controls. Control surfaces also typically provide buttons for selecting parameters to edit and for selecting different tracks or banks of tracks, a jog wheel for moving the playhead precisely, and other controls. When you use a control surface with Soundtrack Pro, some controls are premapped to common functions. You can map other controls to Soundtrack Pro commands and functions in the Control Surfaces Preferences pane.
To use a control surface, you connect it to your computer, add it to Soundtrack Pro, map the controls you want to use to Soundtrack Pro commands, then record control surface automation data in your project. Recorded control surface automation data appears in the corresponding envelope in the Timeline.
Connecting Control Surfaces
Soundtrack Pro supports control surfaces that use the Mackie Control and Logic Control protocols to communicate with your computer. In order to use a control surface, you must first connect the control surface to a MIDI interface, and connect the MIDI interface to your computer, unless the control surface allows direct connection to the computer. Before connecting a MIDI interface, be sure your computer supports the MIDI interface you plan to use. Read the installation instructions included with the MIDI interface, and install the latest version of any appropriate firmware or driver software if needed. For more information, refer to the documentation that came with the control surface and with the MIDI interface.
Adding and Deleting Control Surfaces
When you have connected the MIDI interface to your computer, and connected the control surface to the MIDI interface, you add the control surface in Soundtrack Pro Control Surface Preferences.
To add a connected control surface:
1 Choose Soundtrack Pro > Preferences, then click the Control Surfaces button.
2 Click the Add (+) button to add the control surface.
The visual representation of the control surface appears in the panel in the upper part of the window.

3 Choose the type of control surface you are adding from the Control Surface Type pop-up menu.
4 Choose the MIDI input port to use for the control surface from the Input Connection pop-up menu.
5 Choose the MIDI output port to use for the control surface from the Output Connection pop-up menu.
6 Click the Close button to dismiss the Preferences window.
You can delete a control surface, if you decide you don't want to use it any longer.
To delete a control surface:
1 Choose Soundtrack Pro > Preferences, then click the Control Surfaces button.
2 Select the control surface in the Control Surfaces display area.
3 Click the Delete (−) button.
Premapped Controls
When you connect a control surface, many controls are premapped to work with specific Soundtrack Pro buttons and commands. Premapped controls include the following:
Control Soundtrack Pro button or command
| Master fader Master volume (physical output channels 1-2) | |
| Channel strip volume faders Track volume slider | |
| Channel strip rotary knobs Track pan slider | |
| Channel strip record-ready buttons | Track Arm for Recording button |
| Channel strip select buttons Select the track. | |
| Channel strip mute buttons Track mute button | |
| Channel strip solo buttons Track solo button | |
| Transport controls Transport controls (Move back, Move forward, Play, Stop, Record) | |
| Jog wheel Moves playhead back or forward. | |
Mapping Commands to Control Surface Buttons
Many buttons on control surfaces are not directly assigned to a specific command in Soundtrack Pro. Some buttons, such as the bank and channel buttons, are premapped but can also be mapped to other commands. You can map these buttons in the Control Surface Buttons window and save the mappings or modify them later.
To map a command to a control surface button:
1 Choose Soundtrack Pro > Preferences, then click the Control Surfaces button.
2 Click the Control Surface Buttons button to show the Control Surface Buttons window.

3 In the Control Surface Buttons window, drag an action from the Available Commands list (on the right) to a button in the Control Surface Buttons list (on the left) to map the command to the button.
4 Optionally, you can search for commands and control surface buttons by typing text in the Search field, located at the upper-right corner of the window.
Recording Control Surface Automation
Once you have connected a control surface and mapped the controls you plan to use, you can use the control surface to control volume, pan, and other functions in your Soundtrack Pro projects. Using the automation modes described in "Automation Modes" on page 365, you can record control surface movements while a project plays.
To record control surface movements, follow the procedures described in "Recording Automation Data" on page 365.
You can thin automation data recorded from a control surface. For information on thinning automation data, see "Thinning Envelope Points in Recorded Automation Data" on page 366.
Exporting Multitrack Projects
Once you have created a final mix of a multitrack project, you can choose from several different ways to deliver it. You can export the project mix or export individual tracks, busses, or submixes to a wide variety of formats.
You can export a project to a mono, stereo, or multichannel audio file. You can export all, or selected, tracks, busses, or submixes to either stereo or multichannel audio files, or to groups of mono files. And you can create as many mixes of your project as you like by selecting or muting tracks, busses, and submixes; adjusting controls, effects, and envelopes; and then exporting each version as a separate mix.
Export file formats include the following standard audio file types: AIFF, WAVE, NeXT, Sound Designer II, MP3, AAC/Podcast, and Dolby Digital Professional (AC-3). You can also export a project to a variety of formats using Compressor, the Final Cut Studio transcoding application.
Note: Dolby Digital Professional encoding is available only on computers that have Final Cut Studio installed.
The Soundtrack Pro Export dialog includes a variety of post-export actions that can automatically open the exported files in a Final Cut Pro sequence or in File Editor project view, place exported files on new tracks, or export a mix to Motion, Logic, or Waveburner. You can also add your own custom Applescript actions using the Export dialog.
To streamline your workflow, you can create custom export presets with any combination of exported items, file types, bit depths, sample rates, and post-export actions.
You can also export your project using AAF, an industry-standard project interchange format. And you can save a multitrack project with all of the media files it uses together in the same folder.
About the Export Dialog
The Export dialog in Soundtrack Pro is a flexible tool that provides numerous alternatives for your workflow and distribution needs.
To open the Export dialog for a multitrack project:
- Choose File > Export.
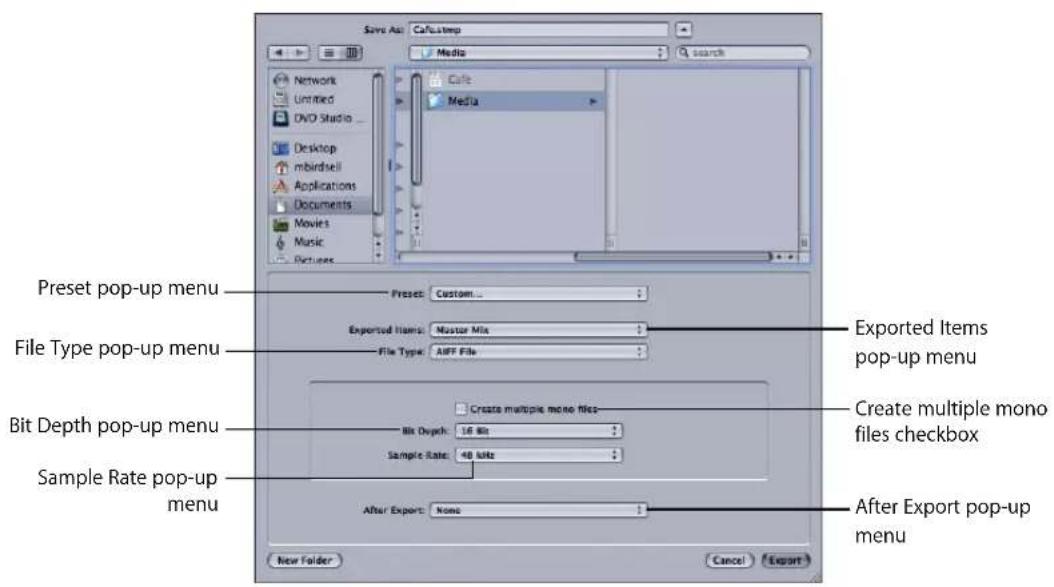
- Preset pop-up menu: Create custom export presets with any combination of exported items, file types, bit depths, sample rates, and post-export actions. For more information, see "Using Export Presets" on page 418.
- Exported Items pop-up menu: Choose to export a master mix or export the component parts of your multitrack project as individual files or as groups of files. For more information about exporting a master mix, see "Exporting a Master Mix" on page 397. For more information about exporting the component parts of your multitrack project, see "Exporting Tracks, Busses, and Submixes Separately" on page 414.
- File Type pop-up menu: Choose the file type for the exported audio file or files. For more information, see "Exporting a Master Mix to a Standard Audio File" on page 398 and "Exporting a Master Mix to a Compressed Audio File" on page 399.
- Create multiple mono files checkbox: Select this checkbox to export a separate audio file for each output channel in your multitrack project. For more information, see "Exporting Multiple Mono Files" on page 415.
- Bit Depth pop-up menu: Choose a bit depth for the exported file.
- Sample Rate pop-up menu: Choose a sample rate for the exported file.
- After Export pop-up menu: Choose a post-export action. For more information about post-export actions, see "Using Post-Export Actions" on page 416.
Exporting and the Cycle Region
You can export just a portion of your multitrack project by selecting it with the cycle region.
To select a portion of a multitrack project with the cycle region, do one of the following:
- Drag in the bottom half of the Time ruler from the beginning of where you want the cycle region to the end.
- Position the playhead and press I to set the cycle region In point. Position the playhead and press O to set the cycle region Out point.
- Press X to set the cycle region In and Out points at the boundaries of the clip that currently intersects the playhead. The clip on the uppermost selected track is used.
If you want to export the entire multitrack project, be sure to first remove the cycle region.
To remove the cycle region, do one of the following:
- Choose Edit > Cycle Region > Remove Cycle Region (or press Option-X).
■ Control-click the cycle region, then choose Cycle Region from the shortcut menu and Remove Cycle Region from the submenu.
For more information about using the cycle region, see "Working with the Cycle Region" on page 134.
Exporting a Master Mix
A master mix (or project mixdown) is a single audio file that contains all of the elements and settings in your multitrack project. When you export a master mix, all unmuted tracks, busses, and submixes that are routed to hardware output jacks are included in the exported file. You can exclude any tracks, busses, and submixes from the exported mix by muting them. For more information about routing to hardware output jacks, see "Setting Hardware Outputs" on page 265 and "Setting the Submix Outputs to Surround" on page 296.
Exporting a Master Mix to a Standard Audio File
You can export a mixdown of your project to any of the following standard (uncompressed) audio formats: AIFF, WAVE, NeXT, and SoundDesigner II.
To export a master mix as a standard audio file:
1 Choose File > Export (or press Command-E).
The Export dialog appears.

2 Choose Master Mix from the Exported Items pop-up menu.
Note: You can also use an export preset to export a master mix. For more information about using export presets and the Preset pop-up menu, see "Using Export Presets" on page 418.
3 Use the File Type pop-up menu to choose a file type for the exported audio file.
If you choose any of the last four menu items (MP3 File, AAC/Podcast File, Dolby Digital Professional (AC-3) File, or Using Compressor), the bottom portion of the Export dialog displays the options for the selected menu item. For information about these menu items, see "Exporting a Master Mix to a Compressed Audio File" on page 399.
4 You can optionally select the "Create multiple mono files" checkbox to export a separate mono audio file for each output channel in your multitrack project. For more information, see "Exporting Multiple Mono Files" on page 415.
5 Choose a bit depth for the exported file from the Bit Depth pop-up menu.
6 Choose a sample rate for the exported file from the Sample Rate pop-up menu.
The sample rate is the number of times an analog signal is measured—or sampled—per second. The higher the sample rate, the higher the quality and the larger the file size, but don't choose a sample rate higher than the rate used in your multitrack project or you'll waste space.
7 You can optionally use the After Export pop-up menu to choose a post-export action. For information about post-export actions, see "Using Post-Export Actions" on page 416.
8 Type a name for the exported file, and browse to the location where you want to save the file.
9 Click Export.
Note: When you bounce or export a project with an effect tail (sound that extends past the end of the audio file, usually caused by reverb or another effect), the length of the tail is limited to a maximum of 30 seconds. If the tail extends beyond this amount of time, it is cut off after 30 seconds in the bounced or exported file.
Exporting a Master Mix to a Compressed Audio File
You can export a mixdown of your project to any of the following compressed audio formats: MP3, AAC/Podcast, and Dolby Digital Professional (AC-3). These compressed formats provide reduced file sizes and data rate reduction.
Exporting to MP3 Files
MP3 is a specific type of MPEG encoding known formally as MPEG audio layer 3. MP3 uses perceptual audio coding and psychoacoustic compression to remove all superfluous information (specifically the redundant and irrelevant parts of a sound signal that the human ear doesn't hear anyway). The result is that MP3 encoding shrinks the original sound data from a CD (with a data rate of 1411.2 kilobits per one second of stereo music) by a factor of 12 (down to 112–128kbps) without sacrificing very much sound quality. Proponents of MP3 claim there is no sacrifice in sound quality, but audio professionals can usually hear the difference on good equipment.
To export a master mix as an MP3 file:
1 Choose File > Export (or press Command-E).
The Export dialog appears.
2 Choose Master Mix from the Exported Items pop-up menu.
Note: You can also use an export preset to export a master mix. For more information about using export presets and the Preset pop-up menu, see "Using Export Presets" on page 418.
3 Choose MP3 File from the File Type pop-up menu.
The bottom portion of the Export dialog displays the MP3 export options. Since Soundtrack Pro can tap the power of Compressor as a background process, these export options are identical to the corresponding options in the Compressor application.

4 Choose from the following MP3 export options:
- Stereo Bit Rate pop-up menu: The higher the mono or stereo kilobits per second (Kbps), the higher the audio quality and the larger the file size. The most common bit rate for stereo MP3 files is between 128 Kbps and 192 Kbps. Lower bit rates are more appropriate for sound files containing voice recordings (as opposed to music).
Some example settings and uses include:
• 32 kbps: AM radio quality, suitable for medium-quality speech
- 96 kbps: FM radio quality, suitable for high-quality speech or medium-quality music
• 128 kbps: Suitable for good-quality music
• 256 kbps and 320 kbps: Suitable for music that is near audio CD quality
- Use Variable Bit Rate Encoding (VBR): This setting varies the number of bits used to store the music depending on the complexity of the music. This can help keep file size to a minimum.
- Sample Rate pop-up menu: The sample rate is the number of times an analog signal is measured—or sampled—per second. The higher the sample rate, the higher the quality and the larger the file size, but don't choose a sample rate higher than the rate used in your multitrack project or you'll waste space.
- Channels pop-up menu: If your project is monaural or if the target playback device is mono, choose Mono. (Mono files are about half the size of stereo files.) If your project output is in stereo and the target playback device is stereo, choose Stereo.
- Joint Stereo: When deselected, your MP3 files contain one track for the right stereo channel and one track for the left. In many cases, the two channels contain related information. When the Joint Stereo checkbox is selected, one channel carries the information that's identical on both channels, and the other channel carries the unique information. At bit rates of 160 Kbps and below, this can improve the sound quality of your converted audio.
- Smart Encoding Adjustments: Select this to have Compressor analyze your encoding settings and music source, and then adjust settings to maximize quality.
- Filter Frequencies Below 10 Hz: Filtering inaudible frequencies results in smaller, more efficient files without perceptible loss of quality.
5 You can optionally use the After Export pop-up menu to choose a post-export action. For information about post-export actions, see "Using Post-Export Actions" on page 416.
6 Type a name for the exported file, and browse to the location where you want to save the file.
7 Click Export.
Exporting to AAC/Podcast Files
AAC (Advanced Audio Coding) provides audio encoding that compresses much more efficiently than older formats, such as MP3, yet delivers higher-quality results with smaller file sizes. AAC is the default audio format for theiPod and iTunes, as well as the default audio codec for the .m4v format used in all video files sold on iTunes.
To export a master mix as an AAC/Podcast file:
1 Choose File > Export (or press Command-E).
The Export dialog appears.
2 Choose Master Mix from the Exported Items pop-up menu.
Note: You can also use an export preset to export a master mix. For more information about using export presets and the Preset pop-up menu, see "Using Export Presets" on page 418.
3 Choose AAC/Podcast File from the File Type pop-up menu.
The bottom portion of the Export dialog displays the AAC/Podcast export options. Since Soundtrack Pro can tap the power of Compressor as a background process, these export options are identical to the corresponding options in the Compressor application.
The AAC/Podcast export options are divided into three separate panes: Audio, Streaming, and Podcast.

4 Choose from the following export options in the Audio pane:
- Channels pop-up menu: Choose either mono or stereo for the exported media file.
- Sample Rate pop-up menu: Choose from one of the following sample rates: 8, 11.025, 12, 16, 22.050, 24, 32, 44.1, or 48 kHz. You can also choose Recommended to have Soundtrack Pro automatically choose a sample rate that is suitable for the Channels and Bit Rate settings.
• Quality pop-up menu: Choose one of the following for the audio quality of your output media file:
- Low: This allows for fast transcoding, but at the expense of output file quality.
• Medium: The audio quality is better than Low, but this takes longer to transcode.
- High: This is the best audio quality setting available. Use this setting when the audio quality is important for the output media file and you don't mind how long it takes to transcode.
- Bit Rate slider and field: Move the slider to set the overall audio bit rate for an exported media file between the range of 16 Kbps (2 KB/sec.) to 256 Kbps (32 KB/sec.), or enter a specific number in the accompanying field.
5 Choose from the following export options in the Streaming pane:

- Streaming hints enabled checkbox: Make sure that this box is selected if you want the MPEG-4 Part 2 output format streaming settings to be applied.
- QuickTime Streaming Server Compatibility (pre v4.1) checkbox: Select this checkbox if you want your exported file to work with an older QuickTime Streaming Server (version 4.1 or earlier). You don't need to select this box if you are using a newer version of QuickTime, because any streaming compatibility issues are automatically resolved.
- Maximum Packet Size field: Enter a number to specify the largest file size allowable (in bytes) for a streaming packet in your output media file. The packet size you choose should be no larger than the largest packet used on any network between the streaming server and the viewer.
• Maximum Packet Duration field: Enter a number to specify the longest duration allowable (in milliseconds) for a streaming packet in your output media file. The duration affects MPEG-4 Part 2 audio only. It limits the maximum amount of audio (in milliseconds) in any packet, which limits the audio dropout created by the loss of a packet.
6 Select one of the following buttons in the Podcast pane:
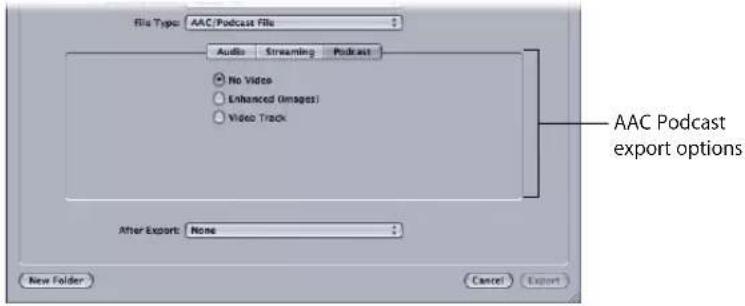
- No Video: Choose this option to export an audio-only (AAC) file.
- Enhanced (images): Choose this option to export an enhanced podcast containing audio and chapter marker images. For more information, see Chapter 14, "Creating Podcasts in Soundtrack Pro," on page 377.
- Video Track: Choose this option to export an MPEG-4 (.m4v) file containing both audio and video. For complete control over the various video parameters, use Compressor (instead of this Export dialog). For more information, see "Exporting a Master Mix Using Compressor" on page 410.
7 You can optionally use the After Export pop-up menu to choose a post-export action. For information about post-export actions, see "Using Post-Export Actions" on page 416.
8 Type a name for the exported file, and browse to the location where you want to save the file.
9 Click Export.
Exporting to Dolby Digital Professional (AC-3) Files
Dolby Digital Professional format (also known as AC-3) is a very common compressed audio format for DVD-Video discs. AC-3 programs can deliver 5.1-channel surround as well as a variety of other surround configurations. This format is frequently used to encode stereo files to greatly reduce their file size.
Note: Dolby Digital Professional (AC-3) encoding is available only on computers that also have Final Cut Studio installed.
To export a master mix as a Dolby Digital Professional (AC-3) file:
1 Choose File > Export (or press Command-E).
The Export dialog appears.
2 Choose Master Mix from the Exported Items pop-up menu.
Note: You can also use an export preset to export a master mix. For more information about using export presets and the Preset pop-up menu, see "Using Export Presets" on page 418.
3 Choose Dolby Digital Professional (AC-3) File from the File Type pop-up menu.
The bottom portion of the Export dialog displays the Dolby Digital Professional (AC-3) File export options. Since Soundtrack Pro can tap the power of Compressor as a background process, these export options are identical to the corresponding options in the Compressor application.
The AC-3 File export options are divided into three separate panes: Audio, Bitstream, and Preprocessing.

4 Choose from the following export options in the Audio pane:
- Target System pop-up menu: Available settings are limited to those appropriate for the selected target system. If you're encoding for use with DVD Studio Pro, choose DVD Video. Choose DVD Audio only if you are encoding for use in a DVD Audio authoring application. Choose Generic AC-3 to remove the setting limits.
- Audio Coding Mode pop-up menu: Specifies the audio channels of the encoded stream. This setting also has an Automatic button.

Choose the audio channel grouping for the encoded stream from the Audio Coding Mode pop-up menu.
For example, "3/2 (L, C, R, Ls, Rs)" means three front channels (left, center, right) and two rear (surround) channels. "2/0 (L, R)" is essentially a standard stereo file. The audio coding mode affects settings such as the available bandwidth and surround channel preprocessing. If you click the Automatic button (next to the Audio Coding Mode pop-up menu), Compressor makes its best guess at the intended audio coding mode, based on available source audio files.


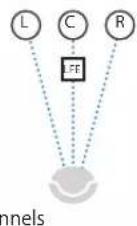
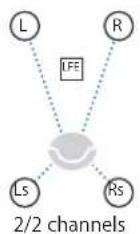


flowchart
graph TD
    A["L"] --> B["FE"]
    C["2/0 channels (LFE option not available)"] --> B
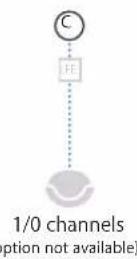
Note: In the Audio Coding Mode pop-up menu, "S" stands for a single rear "Surround" channel.
- Enable Low Frequency Effects checkbox: Select this option to include the LFE channel in the encoded stream. (Not available for 1/0 mono or 2/0 stereo.)
- Sample Rate pop-up menu: Specifies the sample rate. All files intended for video and audio DVD authoring must have a 48 kHz sample rate as per the DVD specification. The 32 kHz and 44.1 kHz sample rates are only available when Generic AC-3 is the target system.
- Data Rate pop-up menu: The choices depend on the coding mode and target system. The higher the rate, the better the quality. Dolby Digital Professional (AC-3) streams have a constant data rate. At 448 kbps, which is the default for 5.1 encoding, one minute of AC-3 audio takes about 3.3 MB of storage space. For stereo encoding, rates of 192 kbps and 224 kbps are typical and will produce good results.
- Bit Stream Mode pop-up menu: Defines the purpose of the encoded audio material. The information is included in the finished stream and can be read by some decoding systems.
- Dialog Normalization field: Specifies the average volume of the dialogue, using decibels of full scale (dBFS), in your sound files relative to full modulation. The playback device uses this information to maintain similar volume among different AC-3 streams. The goal is to make all AC-3 encoded audio files have the same listening level, regardless of the source file.
It is especially important to properly use the Dialog Normalization feature if you have different audio files (with different volume levels) going on to a DVD. If you know the average level for each of them, enter that number in the Dialog Normalization field for each file. For example, if the dialogue in your project averages around -12 dB on the level meter, enter -12 in the Dialog Normalization field.
Note: This normalization is between the audio streams on the DVD, not within an individual audio stream itself.
You can enter values from -1 dBFS to -31 dBFS. The difference between the value you enter and 31 dBFS (which represents the normal dialogue listening level) is the amount that the source audio is attenuated.
- If you enter -31 dBFS, the attenuation is 0 dB (31 dBFS–31 dBFS), and the source audio levels are not affected at all.
- If you enter -27 dBFS, the attenuation is 4 dB (31 dBFS–27 dBFS).
- If you enter -12 dBFS, the attenuation is 19 dB (31 dBFS–12 dBFS).
The louder the source file, the smaller the value you enter, and the more the audio in the encoded file is attenuated during playback.
Important: It is critical that you have set the Dialog Normalization setting correctly if you intend to use any of the Compression Preset settings. The Compression Preset settings assume that the audio, after the dialogue has been normalized, is at the normal listening level of 31 dBFS. Levels that are consistently louder than that result in distorted sound and erratic levels.
If you want to ensure that the AC-3 encoder does not affect your sound levels, enter -31 for the Dialog Normalization and choose None from the Compression Preset pop-up menu (located in the Preprocessing pane).
5 Choose from the export options in the Bitstream pane.
These settings are stored in the finished stream for use by the playback device. Leave them at their default values unless you have a specific technical reason for changing them.

- Center Downmix and Surround Downmix pop-up menus: If your encoded audio has these channels, but the player does not, the channels are mixed into the stereo output at the specified level.
- Dolby Surround Mode pop-up menu: When encoding in 2/0 (stereo) mode, specifies whether the signal uses Dolby Surround (Pro Logic).
• Copyright Exists checkbox: Select this option to specify that a copyright exists for this audio.
- Content is Original checkbox: Select this option to specify that this audio is from the original source and not a copy.
- Include Audio Production Information: Select this checkbox and fill in the fields below to specify how the encoded audio content was mixed. Playback devices may use this information to adjust output settings.
- Peak Mixing Level field: Specifies peak sound pressure level (SPL) (between 80 dB and 111 dB) in the production environment when this mix was mastered.
• Room Type field: Specifies information about the mixing studio.
6 Choose from the export options in the Preprocessing pane.
Preprocessing options are applied to the audio data before encoding. With the exception of the Compression Preset setting, leave these settings at their default values unless you have a specific technical reason for changing them.

- Compression Preset pop-up menu: Specifies one of the dynamic range processing modes built in to the Dolby Digital Professional (AC-3) format. The default of Film Standard Compression should only be used when you are encoding an original mix intended for cinema. In almost all cases, you should choose None.
Important: It is critical that you have set the Audio tab's Dialog Normalization setting correctly if you intend to use any of these Compression Preset settings. The Compression Preset settings assume that the audio, after the dialogue has been normalized, is at the normal listening level of 31 dBFS. Levels that are consistently louder than that result in distorted sound and erratic levels.
Note: If you are building a Dolby Digital Professional 5.1 channel surround sound DVD, you will use Film Standard Compression.

- General
- Apply Digital Deemphasis checkbox: Specifies whether input audio data is pre-emphasized and needs to be de-emphasized before encoding.
• LFE Channel
- Low-Pass Filter checkbox: Select this option to apply a 120 Hz low-pass filter to the Low Frequency Effects (LFE) channel. Turn off this filter if the digital signal fed to the LFE's input does not contain information above 120 Hz.
• Full Bandwidth Channels
- Low-Pass Filter checkbox: Select this option to turn on a low-pass filter with a cutoff near the available audio bandwidth that is applied to the main input channels. If the digital signal fed to the main input channels does not contain information above the available audio bandwidth, you can turn off this filter. Compressor automatically determines the available bandwidth.
- DC Filter checkbox: Select this option to turn on a DC high-pass filter for all input channels as a simple way to remove DC offsets. Most mixed audio material is already free of DC offsets.
- Surround Channels
- 90° Phase-Shift checkbox: Select this option to generate multichannel AC-3 streams that can be downmixed in an external 2-channel decoder to create true Dolby Surround-compatible output.
- 3 dB Attenuation checkbox: Select this option to apply a 3 dB cut to the surround channels of a multichannel film soundtrack being transferred to a consumer home theater format. Cinema surround channels are mixed 3 dB "hot" (higher) relative to the front channels to account for cinema amplifier gains.
7 You can optionally use the After Export pop-up menu to choose a post-export action. For information about post-export actions, see "Using Post-Export Actions" on page 416.
8 Type a name for the exported file, and browse to the location where you want to save the file.
9 Click Export.
Exporting a Master Mix Using Compressor
The Export dialog in Soundtrack Pro offers a direct link to the Compressor application. Compressor is the high-speed video and audio encoding tool for Final Cut Studio. It provides an efficient way to transcode between professional formats, or to convert content so that it can be experienced on many different platforms and devices (including websites, Apple TV, an iPod, CD-ROM discs, DVDs, cell phones, and so on).
When you export using Compressor, you can use custom presets that you create in Compressor or the presets included with Compressor.
To export a master mix using Compressor from within Soundtrack Pro:
1 Choose File > Export (or press Command-E).
The Export dialog appears.
2 Choose Master Mix from the Exported Items pop-up menu.
Note: You can also use an export preset to export a master mix. For more information about using Soundtrack Pro export presets and the Preset pop-up menu, see "Using Export Presets" on page 418.
3 Choose Using Compressor from the File Type pop-up menu.
The bottom portion of the Export dialog displays the Compressor export options. Since Soundtrack Pro can tap the power of Compressor as a background process, many of these export options are identical to the corresponding options in the Compressor application.

4 Do one of the following:
- To export the video in its original format, select Preserve Video, then choose an export preset from the adjacent preset pop-up menu. In this option, the video is copied unchanged to the exported file.
- To export the video in a different format, select Encode Video, then choose an export preset from the adjacent preset pop-up menu. Encoding the video transcodes it to the new export format. Transcoding the video can take longer than copying and can result in a loss of quality. In most cases, when the video format of the exported file is the same as the source video, you should preserve the video when exporting. If the video format of the exported file is different than the source video, you should encode the video when exporting.
For information about using Compressor export presets, see "Using Compressor Export Presets," next.
5 Optionally, for multichannel projects, click the Edit Channel Layout button to change the channel layout for the exported file. For information on exporting multichannel projects, see "Exporting Multichannel Projects with Compressor" on page 413.
6 Click Export.
Using Compressor Export Presets
Compressor includes a large number of export presets for a variety of target formats and playback devices.
Using Existing Presets
When you export a Soundtrack Pro project using Compressor, you can select an export preset in the Compressor Export Options dialog. Export presets appear in the pop-up menus to the right of the Preserve Video and Encode Video buttons.

Editing or Creating Presets
Click the Edit Presets button to open the Compressor application so that you can modify existing Compressor presets or create new ones.
For more information on working with Compressor presets, see the Compressor User Manual. The manual is available from the Compressor Help menu and is included in the Documentation folder installed with Soundtrack Pro.
Exporting Multichannel Projects with Compressor
When you export a multichannel project using Compressor, you can edit the channel layout. By default, Soundtrack Pro uses the SMPTE/ITU standard for routing surround output channels.
Audio Interface Output Speaker
| 1 Left |
| 2 Right |
| 3 Center |
| 4 LFE |
| 5 Left Surround (Ls) |
| 6 Right Surround (Rs) |
If you are exporting to a file format that uses a different standard for routing output channels, use the Channel Layout interface to re-assign the channels and outputs.
To edit the channel layout:
1 In the Compressor Export Options dialog, click the Edit Channel Layout button.

The Channel Layout dialog appears. The Channel Layout dialog includes pop-up menus for Left, Right, Center, LFE, Left Surround, Right Surround, and Center Surround outputs. You can choose the physical output channel (labeled "Channel 1," "Channel 2," and so forth) for each submix.
2 Choose the physical output channel for each channel in the exported project.
Exporting Tracks, Busses, and Submixes Separately
As an alternative to exporting a master mix, you can export the component parts of your multitrack project as individual files or as groups of files. These options are available for AIFF, WAVE, NeXT, and SoundDesigner II export files.
Note: Muted tracks, busses, and submixes are excluded from all of the following export combinations.
To export component parts of a multitrack project:
- Follow the steps described in "Exporting a Master Mix to a Standard Audio File" on page 398, except in step 2, instead of choosing Master Mix, choose any of the following from the Exported Items pop-up menu:
- Selected Tracks, Busses, and Submixes: Exports selected tracks, busses, and submixes only. If nothing is selected, each unmuted track, bus, and submix is exported as a separate file.
- All Tracks, Busses, and Submixes: Exports each unmuted track, bus, and submix as a separate file.
- All Tracks: Exports each unmuted track as a separate file.
- All Busses: Exports each unmuted bus as a separate file.
- All Submixes: Exports each unmuted submix as a separate file.
Output File Names
Output files are given the same names as the tracks, busses, or submixes being exported. For example, "Track 1" results in "Track 1.aif." If you select the "Create multiple mono files" checkbox, the Mixer object name (for example, "Track 1") serves as the base name to which channel codes are appended (for example, "Track 1.R.aif" and "Track 1.L.aif"). For more information, see "Exporting Multiple Mono Files," below.
Effect Tails
When you export a project, track, bus, or submix that includes an effect (for example, a reverb or delay) that produces a tail that extends past the end of the project, the exported file lengthens to include the tail.
You can also select part of an audio file and add an effect to a selection. When you add an effect that produces a tail to a selection, the tail is blended with the audio following the selection until the effect level falls below -96 dB. The project lengthens to include the tail if necessary.
Exporting Multiple Mono Files
Select the "Export multiple mono files" checkbox to export a separate mono audio file for each output channel in your multitrack project.
Selecting this checkbox results in a separate audio file for each hardware output (jack). For example, by default, all tracks are routed to Submix 1, and Submix 1 is routed to the Stereo 1, 2 outputs. With this setup, selecting the "Export multiple mono files" checkbox exports two mono files. The letter L is appended to the filename of the left mono file, and the letter R is appended to the right mono file.

If the Output pop-up menu is set to Surround >1-6, six mono files are exported, each with the corresponding code appended to its filename: L, R, C, LFE, Ls, and Rs.
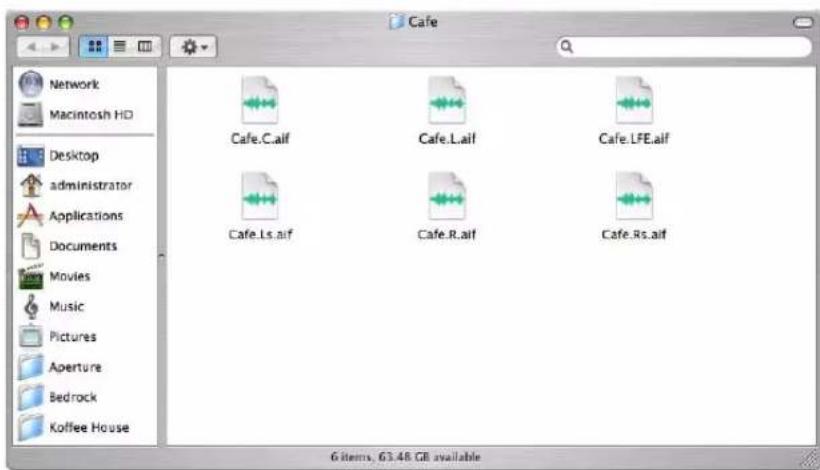
For more information about routing to hardware output jacks, see "Connecting Physical Outputs" on page 297 and "Setting the Submix Outputs to Surround" on page 296.
Using Post-Export Actions
The Soundtrack Pro Export dialog includes post-export actions that can automate parts of your workflow and save you time and effort. The post-export actions range from opening the exported files in a Final Cut Pro sequence to bouncing mixes to new tracks. You can also use the feature to automatically trigger your own AppleScript documents as a part of any export operation.
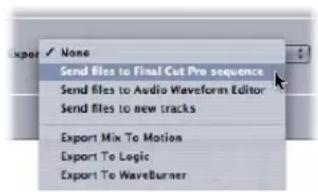
Default Actions
Soundtrack Pro includes the following list of default actions that can be chosen once the export is complete:
- Send files to Final Cut Pro sequence: Opens Final Cut Pro and allows you to quickly create a new sequence, and insert the exported file in the sequence. If you originally sent the project from Final Cut Pro to Soundtrack Pro, the new sequence looks just like the original sequence but has additional audio tracks that contain your mixdown.
- Send files to Audio Waveform Editor: Opens the exported file in the File Editor project view.
- Send files to new tracks: Inserts the exported file into a new track in the Timeline.
- Export Mix to Motion: Opens the exported file in Motion.
- Export Mix to Logic: Opens the exported file in Logic.
- Export Mix to Waveburner: Opens the exported file in Waveburner.
To add a post-export action:
1 Follow any of the export steps described earlier in this chapter.
2 Choose a post-export action from the After Export pop-up menu.
3 Click Export.
The file or files are exported and the post-export action is executed.
Custom Actions
You can save a series of actions in the File Editor as an AppleScript droplet. Those droplets will appear as actions in the After Export pop-up menu (provided you save them to the default location: /Users/username/Library/Scripts/Soundtrack Pro Scripts/).
For more information about creating your own AppleScript droplets in Soundtrack Pro, see "Scripting Actions in the File Editor Project View" on page 248.
You can also add your own AppleScript scripts (that you create outside of Soundtrack Pro) to this default location, and they will appear in the After Export pop-up menu. Such custom actions could include an AppleScript script to send an email notification or to automatically transfer the exported file to a web server.

To add your own AppleScript scripts to the After Export pop-up menu:
1 Confirm that your AppleScript script uses the following syntax (to ensure that it works in the in the After Export pop-up menu):
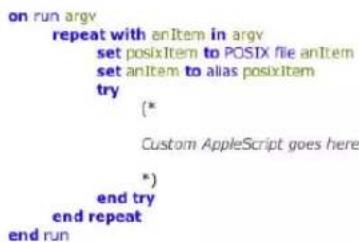
2 Save your AppleScript script to the default Soundtrack Pro AppleScript location: /Users/ username/Library/Scripts/Soundtrack Pro Scripts/.
For more information about writing AppleScript scripts, go to the following websites:
• Apple Developers: http://developer.apple.com/applescript
• General Apple Customers: http://macscripter.net
Using Export Presets
You can streamline your workflow by saving all export settings (any combination of export objects, formats, and actions) into a collection of presets for future use.
Custom export presets can include any combination of exported items, file type, bit depth, sample rates, and post-export actions.
To create a new export preset:
1 Choose File > Export (or press Command-E).
The Export dialog appears.
2 Configure the Export dialog to reflect the export options you want to use for the exported file or files.
- For standard audio file types (AIFF, WAVE, NeXT, and SoundDesigner II), the options include Exported Items, File Type, the "Create multiple mono files" checkbox, Bit Depth, Sample Rate, and post-export actions.
- For compressed audio file types (MP3, AAC/Podcast, Dolby Digital Professional/AC-3), the options include the detailed settings for each of those formats, the choice of Compressor presets, and post-export actions.
3 Choose Save Preset from the Preset pop-up menu.
4 Type a name for the new preset and click OK.
To apply a saved export preset:
1 Choose File > Export (or press Command-E).
The Export dialog appears.
2 Choose an export preset from the Preset pop-up menu.
The Export dialog displays the corresponding export options.
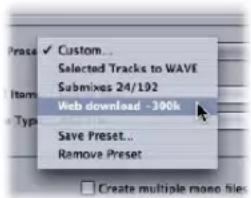
3 Type a name for the exported file, and browse to the location where you want to save the file.
4 Click Export.
Exporting to AAF
Advanced Authoring Format (AAF) is an industry-standard project interchange format for sharing projects and editing decisions between different video and audio editing applications.
To export a project to an AAF file:
1 Choose File > Export AAF.
The Save dialog appears.
2 In the Save dialog, type a name for the file and browse to the location where you want to save it.
For more information on using OMF and AAF files, see "Exchanging OMF and AAF Files with Other Applications" on page 435.
Saving Multitrack Projects
For information on saving multitrack projects, see "Saving Multitrack Projects" on page 111.
Distributing a Multitrack Project and Its Media Files Together
You can save a multitrack project with all of the media files it uses together in the same folder. Saving the project and its media files together is useful when you want to move the project from one computer to another to continue working on it or to archive the project and media for later use.
To save a project and its audio files together:
1 Choose File > Save As.
2 In the dialog that appears, select the Collect Audio Files checkbox.
This option saves the project file and a copy of every audio file the project uses to the selected location.
Note: When you check this box, the setting is retained for any subsequent saves. In other words, the File > Save menu option changes to File > Save (Collected), and any new media you add to the project will be collected the next time you save the project.

3 Enter a name for the saved project, navigate to the folder in which you want to save the project and its audio files, and click Save.
The project file and a copy of every audio file the project uses are saved in the selected location.
4 You can optionally create a new folder for the collected project. To create a new folder for the project, click the triangle next to the Save As field to expand the Save dialog, then click New Folder. It's a good idea to save each collected project in its own folder.
5 You can optionally select the Collect Unused Audio Files checkbox to include media files you have deleted from the project. If you do not want to include these media files, deselect this checkbox.
6 If the project includes a video, you can optionally select the Collect Video File checkbox to save the video in the selected folder.
If the folder already contains any of the media files, an alert appears, asking if you want to replace the existing files.
Note: Because video files are typically very large files, saving a copy of the video file may take several minutes and may require a large amount of disk space.
7 If the project includes edited audio files, you can optionally select the Save Edited Media Locally checkbox to save the project's edited audio files in the same folder as the project. If this box is not selected, edited media is saved to the Edited Media Location defined in Soundtrack Pro preferences.
To remove deleted audio files from a project, do one of the following:
In the Bin, select one of the audio files you want to remove, then choose Remove Unused from the Media pop-up menu.
- In the Bin, Control-click one of the audio files you want to remove, then choose Remove Unused from the shortcut menu.
Using Soundtrack Pro with Other Applications
You can work with media files and projects from Final Cut Pro, Motion, DVD Studio Pro, and other applications in Soundtrack Pro projects.
Soundtrack Pro gives you several ways to work with files from Final Cut Pro, Motion, and DVD Studio Pro, as well as third-party applications.
Using Soundtrack Pro with Final Cut Pro
You can use Soundtrack Pro for every aspect of creating audio for a project, from multitrack recording to advanced audio processing and mixing. For example, you can send a clip's media file directly from Final Cut Pro to Soundtrack Pro, modify it, and then immediately see the changes to your clip back in Final Cut Pro. You can also batch process audio files using Applescript documents created in Soundtrack Pro. However, one of the most powerful advantages of using Soundtrack Pro is the ability to send entire sequences to Soundtrack Pro and automatically conform them each time you make editorial changes to a sequence in Final Cut Pro. For information about using Conform, see Chapter 18, "Using Conform with Final Cut Pro," on page 439.
About Soundtrack Pro Audio File Projects
A Soundtrack Pro audio file project allows you to edit and process an audio media file nondestructively, which means you can always alter or remove all of the actions you applied and even get back to the original state of the audio. A Soundtrack Pro audio file project is stored in a special Mac OS X format called a package (or bundle). A Mac OS X package appears to be a single file in the Finder but actually contains a collection of files, such as the original audio file, render files, and the list of actions applied to your audio file. To take advantage of nondestructive editing, you can create a Soundtrack Pro audio file project by either saving one from Soundtrack Pro or sending a clip or clips from Final Cut Pro to a Soundtrack Pro audio file project.
Methods for Sending Audio from Final Cut Pro to Soundtrack Pro
You can take several approaches to working with your Final Cut Pro project's audio in Soundtrack Pro. The method you choose depends on your situation:
- Do you need to make specific changes to audio clips in your project? Final Cut Pro allows you to open one or more clips in the Soundtrack Pro File Editor, where you can analyze and process the audio using a variety of powerful tools.
- Do you need to batch process multiple audio files? Using customizable Soundtrack Pro scripts, you can automate repetitive audio processing tasks such as removing clicks, adding fades, or normalizing levels.
- Do you need a complete audio post-production solution for your movie, including sound editing, sweetening, and mixing? You can send multiple Final Cut Pro clips—or even an entire sequence—to a Soundtrack Pro multitrack project, where you can complete your final mix by adding additional tracks of sound effects, voiceover, and music. Both stereo and surround sound mixing are supported.
Sending Individual Audio Clips from Final Cut Pro to Soundtrack Pro
There are three methods you can use to open a clip in the Soundtrack Pro File Editor:
- Send a clip item or items to Soundtrack Pro as a Soundtrack Pro audio file project: A Soundtrack Pro audio file project is created for each item. This allows you to nondestructively make changes to the audio in the Soundtrack Pro File Editor. The original clips in Final Cut Pro are automatically reconnected to the new Soundtrack Pro audio file projects. You have the option to copy the entire media file for each clip item, or you can create trimmed versions with handles.
- Process a clip with a Soundtrack Pro script: The clip opens in the File Editor, the actions in the script are performed automatically, the clip is saved with the changes, and the File Editor moves to the background so you can continue working in Final Cut Pro. If your clip's media file is a standard audio or video file, you have the option to create a new Soundtrack Pro audio file project, so as to process the file nondestructively. If you don't take advantage of this option, the script processes the source media destructively (permanently). If your clip's media file is already a Soundtrack Pro audio file project, the changes are nondestructive.
- Open a clip's media file destructively in the Soundtrack Pro File Editor: If you do not use a Soundtrack Pro audio file project for editing and you save the changes to the file in its native format, or in any flat audio file format (such as AIFF, WAVE, and so on), any changes you make to the audio file are destructive (permanent).
Sending Clips from Final Cut Pro to the Soundtrack Pro File Editor
When you send an audio clip from Final Cut Pro to the Soundtrack Pro File Editor, a Soundtrack Pro audio file project is created with the file extension ".stap." This file can be edited nondestructively. The Final Cut Pro clip is reconnected to the new Soundtrack Pro audio file project, so the original media file is not affected by what you do in the File Editor.
You can send single clips or multiple clips to Soundtrack Pro audio file projects.
To send a single Final Cut Pro clip to the Soundtrack Pro File Editor:
1 Do one of the following:
- Select the clip in either the Final Cut Pro Browser or Timeline, then choose File > Send To > Soundtrack Pro Audio File Project.
- Control-click the clip in either the Final Cut Pro Browser or Timeline, then choose Send To > Soundtrack Pro Audio File Project from the shortcut menu.
The Save dialog appears.

2 In the Save dialog, do the following:
a Enter a name for the Soundtrack Pro audio file project.
b Choose a location to save the Soundtrack Pro audio file project.
c Select "Send only referenced media" to copy only the used section of the media (between the In and Out points) to the new Soundtrack Pro audio file project. This is recommended unless you intend to edit the entire source file.
d To add media handles when the "Send only referenced media" option is selected, enter handle durations in the In Handle and Out Handle fields.
3 Click Save.
A Soundtrack Pro audio file project is created and opened in the Soundtrack Pro File Editor. The Final Cut Pro clip is reconnected to the new Soundtrack Pro audio file project instead of its original media file.
4 Modify the audio as needed.
5 Choose File > Save to save the project with the changes.
A dialog appears allowing you to choose whether the Soundtrack Pro audio file project should include a copy of the original audio media file or simply refer to it.

6 Choose one of the following, then click OK.
- Include Source Audio: This option copies the original audio media file into the Soundtrack Pro audio file project package. Because the audio file project has its own copy of the original media, it is self-contained and doesn't rely on any external audio files. This option simplifies media management and makes it easier to transfer the audio file project to other computers. However, this increases the project file size and therefore requires more disk space. - Reference Source Audio: This option creates a link to the original source audio file, resulting in a smaller project file. However, to use this project file, you always need to keep track of the original source audio file. If you accidentally delete the original media file, the Soundtrack Pro audio file project can no longer play back. Choose the Reference Source Audio option only if the media is in a shared location accessible from any computer you might use to access the Soundtrack Pro audio file project.
When you return to Final Cut Pro, the clip now connects to the new Soundtrack Pro audio file project.
To send multiple Final Cut Pro clips to Soundtrack Pro:
1 Select multiple clips in the Browser or Timeline.
2 Do one of the following:
- Choose File > Send To > Soundtrack Pro Audio File Project.
- Control-click the selection, then choose Send To > Soundtrack Pro Audio File Project from the shortcut menu.
3 In the Save dialog, choose a location to save the new Soundtrack Pro audio file projects.
4 To create a new folder, press Command-Shift-N, enter a name for the folder, then click Create.
5 Click OK.
6 A Soundtrack Pro audio file project is created for each clip selected in Final Cut Pro. Each Soundtrack Pro audio file project is then opened in a File Editor tab in Soundtrack Pro.
Processing a Clip's Media File with a Soundtrack Pro Script
When you send a Final Cut Pro clip's media to a Soundtrack Pro script, the following steps occur for each unique file:
- With your consent, Final Cut Pro generates a Soundtrack Pro audio file project and replaces the clip's media file with it.
- The audio file project or the clip's media file opens in the Soundtrack Pro File Editor.
- The script actions are applied to the audio file project or the media file.
- The audio file project or the clip's media file is saved with the changes.
If your clip's media file is a standard audio or video file, you have the option to create a new Soundtrack Pro audio file project, so as to process the file nondestructively. If you don't take advantage of this option, the script processes the source media destructively (permanently). If your clip's media file is already a Soundtrack Pro audio file project, the changes are nondestructive.
About Soundtrack Pro Scripts
Soundtrack Pro scripts are AppleScript droplets containing Soundtrack Pro File Editor actions. Scripts can be created in Soundtrack Pro or a script editing application such as Script Editor, the AppleScript application included with Mac OS X.
To modify one or more clips' media files using a Soundtrack Pro script:
1 Select the clips in the Final Cut Pro Browser or Timeline.
2 Do one of the following:
- Choose File > Send To > Soundtrack Pro Script.
- Control-click the selection, then choose Send To > Soundtrack Pro Script from the shortcut menu.
3 Choose the script you want to use from the submenu.
Note: If you have not created custom Soundtrack Pro scripts and saved them to the default Soundtrack Pro script location, no scripts appear in the submenu.
By default, a dialog appears offering to convert each clip's media file to a Soundtrack Pro audio file project, which allows for nondestructive editing.
4 Choose one of the following options:
- Yes: Creates a Soundtrack Pro audio file project for each clip and then prompts you for a location to save these project files. You can create a new folder by pressing Command-Shift-N.
- No: This option edits the files destructively, making permanent changes to the original media files.
- Cancel: Cancels the script operation.
Soundtrack Pro opens and each clip is automatically opened, edited, saved, and closed in the File Editor.
You can also repeat the last script you used to edit a clip, making it easy to edit several clips with the same set of actions.
To edit a clip with the last script used:
- Control-click the clip in the Final Cut Pro Browser or Timeline, then choose Send To > Last Soundtrack Pro Script from the shortcut menu.
To disable the dialog that appears when you use the Send To Soundtrack Pro Script command:
1 Choose Final Cut Pro > User Preferences, then click the Editing tab.
2 Deselect the Warn on "Send to Soundtrack Pro Script" option, then click OK.
Opening a Final Cut Pro Clip's Media File Directly in Soundtrack Pro
You can open a Final Cut Pro clip's media file directly in the Soundtrack Pro File Editor by choosing the Open in Editor command, or by opening the file from the Finder.
Important: In either of these cases, if you make changes in the Soundtrack Pro File Editor and save those changes to the original file, your changes will be destructive and permanent. To edit nondestructively, you can save the file as a Soundtrack Pro audio file project and import that file into Final Cut Pro.
About the Open in Editor Command
To open Final Cut Pro audio clips in Soundtrack Pro using the Open in Editor command, choose Final Cut Pro > System Settings, then click the External Editors tab. Make sure that Soundtrack Pro is the application set to open audio files. This ensures that Final Cut Pro automatically opens Soundtrack Pro when you choose Open in Editor and that, when you return to Final Cut Pro, the clip is automatically reconnected to the updated media file. You can also choose Soundtrack Pro for editing video files if you work with a lot of linked video and audio clip items. For more information, see the Final Cut Pro User Manual.
To open a Final Cut Pro audio clip's media file directly in the Soundtrack Pro File Editor:
1 Control-click the audio clip in either the Final Cut Pro Browser or Timeline, then choose Open in Editor from the shortcut menu.
The audio clip's media file opens in the Soundtrack Pro File Editor.
2 In Soundtrack Pro, modify the audio as needed.
3 Choose File > Save to save the file with the changes.
The Save dialog appears. By default, the File Type pop-up menu is set to Audio File Project, which saves the changes nondestructively. If you wish to permanently modify the original file, choose the original file type and filename. Soundtrack Pro will ask if you're sure you want to overwrite the file. Choose OK only if you're sure that you no longer need your unedited media.
4 Click Save.
5 If you saved the file with a different filename or different file type, you must manually add the new file to your Final Cut Pro sequence.
Important: Unless you save a Soundtrack Pro audio file project, this is a destructive process that permanently modifies the original file.
About Soundtrack Pro Multitrack Projects
Multitrack projects are similar to Final Cut Pro projects: they contain multiple audio tracks in a timeline that you can use to arrange clips in sequence. Like Final Cut Pro sequences, clips in a multitrack project refer to media files stored elsewhere, so the project file size stays small. Multitrack projects also contain a single video track for synchronizing your audio to picture.
Multitrack projects have track controls for volume, pan, mute, solo, effects, and effect parameters. You can create additional audio busses and submixes for grouping signals from audio tracks together or for effect sends. Tracks, busses, and submixes can be exported to individual audio files or to a stereo or multichannel mixdown. These Soundtrack Pro features are particularly useful for creating stem mixes that you can send back to Final Cut Pro.
Creating Soundtrack Pro Multitrack Projects from Final Cut Pro Clips or Sequences
You can create a Soundtrack Pro multitrack project from a selection of Final Cut Pro clips or an entire sequence. The multitrack project opens automatically in the Soundtrack Pro Timeline, and clips appear just as they did in your Final Cut Pro sequence, complete with level and pan settings and crossfades. In Soundtrack Pro, you can arrange your clips, add effects, and create a finished mix. The final mix can be exported from Soundtrack Pro and automatically imported into Final Cut Pro in sync with your original sequence.
Note: Some information from Final Cut Pro is not included in the multitrack project, such as pan settings for stereo pairs, generators, and effects applied to clips.
Sending a Final Cut Pro Sequence or Clip Selection to a Soundtrack Pro Multitrack Project
Creating a Soundtrack Pro multitrack project from within Final Cut Pro is a simple process.
To create a multitrack project from a sequence or a group of clips:
1 Select a sequence in the Final Cut Pro Browser, or select multiple clips in the Timeline.
2 Do one of the following:
- Choose File > Send To > Soundtrack Pro Multitrack Project.
- Control-click the selection, then choose Send To > Soundtrack Pro Multitrack Project.
The Save dialog appears.

3 In the dialog that appears, select from the following options:
- Open in Soundtrack Pro Multitrack Editor: Select this option to open the multitrack project in Soundtrack Pro after it is created.
- Include Background Video: Select this option to render the video in your Final Cut Pro sequence. The Soundtrack Pro multitrack project will refer to this file in its video track so you can see your video while you edit. Select what kind of background video you want to export:
- Fully Rendered Video (slow): Your entire sequence is rendered at full quality to a QuickTime movie file. This option is recommended if the project is to be moved to another computer.
- Base Layer Video (fast): Any sequence segment that requires rendering in Safe RT mode (in other words, any segment with a red render bar) is exported without effects. These files are not portable to a different computer. For more information, see the Final Cut Pro User Manual.
- Save project with latest clip metadata (recommended): Select this option to ensure an accurate change history by having Final Cut Pro automatically save the project after the send process.
4 Enter a project name or keep the default name, then click Save.
A Soundtrack Pro multitrack project file is created with the file extension ".stmp."
Note: This is a small file that refers to the media files used by your Final Cut Pro sequence clips. Make sure those media files are available when the Soundtrack Pro multitrack project opens.
If you selected Open in Soundtrack Pro Multitrack Editor, the multitrack project opens in the Soundtrack Pro Timeline.
5 Modify the multitrack project as needed.
6 When you finish working on the project in Soundtrack Pro, choose File > Save.
When you have followed the steps described above, you can send a mixdown back to Final Cut Pro.
Sending a Mixdown Back to Final Cut Pro Automatically
When you create a Soundtrack Pro multitrack project from within Final Cut Pro, all of the sequence clip information is stored in the multitrack project. When you export a mixdown of the multitrack project in Soundtrack Pro, you can also choose to open a new copy of the Final Cut Pro sequence that looks just like the original sequence but has additional audio tracks that contain your mixdown.
Clip information is sent from Soundtrack Pro to Final Cut Pro using the Final Cut Pro XML Interchange Format.
To export a mixdown and open a new copy of a Final Cut Pro sequence containing the mixdown:
1 In Soundtrack Pro, open the multitrack project you want to mix down.
2 Choose File > Export.
3 If you wish, you may choose options from the following pop-up menus:
- Exported Items: Choose an entire mix, or individual tracks, busses, or submixes, or some combination thereof.
- File Type: The default (AIFF File) is appropriate for Final Cut Pro use.
- Bit Depth: Choose the setting appropriate for your Final Cut Pro project.
- Sample Rate: Choose the setting appropriate for your Final Cut Pro project.
- Preset: Optionally, you can save a preset combining all of the above settings, for future exports.
4 Choose "Send files to Final Cut Pro sequence" from the After Export pop-up menu.

5 Enter a name for the exported file and click Export.
Soundtrack Pro exports mixdown files from the multitrack project and adds them to a Final Cut Pro XML file containing the original sequence. For your convenience, the audio tracks from the original sequence are moved to other tracks and are muted.
In Final Cut Pro, the Import XML dialog appears.

6 Use the Destination pop-up menu to choose your original project, then click OK.
A copy of your original sequence (with the name you specified in step 5) appears in the Browser.
7 Double-click the new sequence in the Browser to open it in the Timeline.
The sequence opens with the mixdown audio correctly synchronized to your clips in the Timeline and the original audio tracks muted.
When you want to work on the project in Soundtrack Pro again, you can reopen it from the Final Cut Pro Timeline.
To open a Soundtrack Pro multitrack project from a mixdown clip in Final Cut Pro:
1 In your Final Cut Pro sequence, Control-click the mixdown clip, then choose Open in Editor from the shortcut menu.
Make sure that the Open in Editor command is set to open audio files in Soundtrack Pro. For details, see "About the Open in Editor Command" on page 427.A dialog appears with the following options:
- Open Audio File: Opens the mixdown audio file in the Soundtrack Pro File Editor.
- Open Project: Opens the Soundtrack Pro multitrack project linked to the mixdown audio file.
2 Click Open Project.
The Soundtrack Pro multitrack project linked to the mixdown audio file opens in Soundtrack Pro.
To update a mixdown clip in your Final Cut Pro sequence:
1 Follow the steps above for opening a Soundtrack Pro multitrack project file from a mixdown clip in Final Cut Pro.
2 Once the multitrack project opens in Soundtrack Pro, make changes to the multitrack project, then choose File > Save to save the project.
3 Choose File > Export.
4 Save the mixdown file with the same name, in the same file format, and in the same location as the previous mixdown file.
5 Switch to Final Cut Pro and open the sequence containing your mixdown.
The mixdown clip remains in the same location, but the media file it refers to has been replaced by your new mixdown file, so the mixdown is now updated in Final Cut Pro.
Note: For information about using the Soundtrack Pro Conform feature to merge a picture edit and the sound edit of the same Final Cut Pro sequence, see Chapter 17, "Using Soundtrack Pro with Other Applications," on page 421.
Using Soundtrack Pro with DVD Studio Pro
Soundtrack Pro and DVD Studio Pro offer two possible workflows for editing DVD Studio Pro audio clips.
- You can import two-channel Soundtrack Pro audio file projects into DVD Studio Pro projects, which allows you to take advantage of the powerful features of the Soundtrack Pro File Editor to nondestructively modify the original audio source file. You can import and use Soundtrack Pro audio file projects in your DVD Studio Pro projects like any other audio files. When you need to make a change to an audio file project, it opens in Soundtrack Pro. Once you save the project in Soundtrack Pro, it automatically updates in DVD Studio Pro.
- You can edit a DVD Studio Pro clip destructively by opening it in the Soundtrack Pro File Editor. Once you have edited and saved the file in Soundtrack Pro, it updates in DVD Studio Pro. You hear the changes in DVD Studio Pro without having to reimport the clip.
To make a change to a Soundtrack Pro audio file project from a DVD Studio Pro project:
1 Import a Soundtrack Pro audio file project into DVD Studio Pro.
Note: If you import a Soundtrack Pro audio file project that includes more than two channels, DVD Studio Pro only uses the first two channels.
2 Do one of the following to open the audio file project in Soundtrack Pro:
- Select the file in the Assets tab, then choose File > Asset > Open In Editor.
- Control-click the file in the Assets tab, then choose Open In Editor from the shortcut menu.
Soundtrack Pro opens with this audio file project in its File Editor.
3 Make the needed changes to the audio file project in Soundtrack Pro and save the project.
4 Switch back to DVD Studio Pro.
The Asset Refresh dialog appears, letting you know that the audio file project has changed. Play the file to hear the changes in DVD Studio Pro. You can click Show Log in the dialog to see a list of elements that use this file.
To edit an audio clip destructively in the File Editor:
1 In DVD Studio Pro, Control-click the clip, then choose Open With from the shortcut menu.
2 In the dialog that appears, select Soundtrack Pro and click choose.
Soundtrack Pro opens and the clip appears in the File Editor.
3 Edit the clip in the File Editor.
You can edit the audio file project in the File Editor using the commands and functions described in Chapter 6, "Editing Audio Files," on page 191. You can apply actions or analyze the file and fix analyzed problems.
4 When you are finished editing the clip, choose File > Save.
5 Click Save.
You can also save the clip by choosing File > Save As. If you save the clip using the Save As command, be sure the name, location, and file type in the Save As dialog are the same as for the clip's source file.
Note: You can also save the clip in Soundtrack Pro as an audio file project, which lets you use the workflow described in "Using Soundtrack Pro with DVD Studio Pro" on page 432.
Using Soundtrack Pro with Motion
You can edit a Motion audio track nondestructively by sending it to the File Editor as an audio file project. Sending an audio track to the File Editor as an audio file project lets you exchange audio media and projects between Motion and Soundtrack Pro. When you save your changes in the File Editor, the clip is updated in Motion without having to be reimported.
To edit a Motion audio track nondestructively in the File Editor, you send the clip to the File Editor as a new audio file project, edit the clip in the File Editor, then save the audio file project. After following these steps, you can make roundtrips between Motion and Soundtrack Pro so you can keep working in both applications.
When you send an audio track from Motion to the File Editor, a new audio file project (with the file type .stap) is created for the track.
To send an audio track from Motion to the File Editor:
1 In the Motion Audio tab or Timeline Layer list, do one of the following.
- Select the audio track, then choose Edit > Send Audio to Soundtrack Pro.
- Control-click the audio track, then choose Send to Soundtrack Pro from the shortcut menu.
A new audio file project is created for the audio track, and a Save As dialog appears.
2 In the Save As dialog, type a name for the new project, and browse to a location to save the project.
A new audio file project containing the audio track opens in the Soundtrack Pro File Editor.
3 Edit the audio file project in the File Editor.
You can use the commands and functions described in Chapter 6, "Editing Audio Files," on page 191. You can graphically edit the file, apply actions, analyze the file, and fix analyzed problems.
When you are finished editing the audio file project of the audio track, you save the project in Soundtrack Pro.
4 In Soundtrack Pro, choose File > Save.
When you have followed the steps described above, the clip is updated in Motion. You hear the clip with the changes you made in the File Editor, without having to reimport the clip. You can make roundtrips between Motion and Soundtrack Pro by opening the saved audio file project, making changes, then saving the project. Each time you save the project, the clip is updated in Motion.
Using Soundtrack Pro with Third-Party Applications
You can use Soundtrack Pro to exchange media and project files with third-party applications.
Exchanging OMF and AAF Files with Other Applications
When you "send" a Final Cut Pro sequence to a Soundtrack Pro multitrack project, you are using the Final Cut Pro XML Interchange Format to transfer the data between the two applications. Open Media Framework (OMF) and Advanced Authoring Format (AAF) are two industry-standard project interchange formats that Soundtrack Pro can use to share projects and import the editing decisions from other (third-party) video and audio editing applications. You can also export a multitrack project from Soundtrack Pro as an AAF file.
For more information on sending Final Cut Pro sequences to Soundtrack Pro multitrack projects, see "Using Soundtrack Pro with Final Cut Pro" on page 421.
Importing OMF and AAF Files
Follow these steps to import OMF and AAF Files into Soundtrack Pro.
To import an OMF file:
1 Choose File > Import OMF.
The Import OMF dialog appears.
2 Use the dialog to select the file and click Import OMF.
A progress bar shows that the file is being translated and the project opens in Soundtrack Pro.
To import an AAF file:
1 Choose File > Import AAF.
The Import AAF dialog appears.
2 Use the dialog to select the file and click Import AAF.
A progress bar shows that the file is being translated and the project opens in Soundtrack Pro.
The multitrack projects created from importing OMF and AAF files include any available pan and volume information.
Using OMF and AAF Files
The OMF and AAF formats provide a way to consolidate all of the audio files and audio edits from a third-party video or audio editing application into one portable package. The picture editor can choose to include handles (extra footage beyond the In and Out points of a clip that provides a safety margin in case you need it during the sound edit and mix). Here are some things to keep in mind when using OMF and AAF files:
- OMF and AAF exports generally omit unused media to keep the overall file size low. If you want to "steal" a performance from another take, you might be out of luck with an OMF or AAF export.
- OMF or AAF exported files are usually truncated. If a music piece was edited into many small clips during the picture edit, the OMF and AAF export process applies those edits permanently on the file level. Sound editors usually prefer to have one original piece of music with (nondestructive) edits referring to it.
- It is always a good idea to have single-frame "sync pops" at the top and tail of the video and every single audio track to verify synchronization.
- OMF and AAF files do not include video, so usually, a video file needs to be exported separately.
- To exchange OMF and AAF files with ProTools, you will need DigiTranslator, the Digidesign interchange application, which is sold separately.
• Volume automation and panning automation is not always included in OMF and AAF files. - OMF and AAF exports often include audio files with very long and complicated filenames.
- OMF and AAF exports support a single sample rate. All the audio files in a single export must have the same sample rate.
- OMF packages (that contain media) are limited to a 2 GB maximum file size.
Exporting to AAF
You can export Soundtrack Pro multitrack projects as AAF files.
To export a project to an AAF file:
1 Choose File > Export AAF.
The Save dialog appears.
2 In the Save dialog, type a name for the file and browse to the location where you want to save it, then click Save.
Exporting Audio Files
You can open an audio file exported from Soundtrack Pro (a project mix; an exported track, bus, or submix; or an audio file project) in any application that supports audio files.
If you save an audio file project as an AIFF file or a QuickTime movie, a link is included in the AIFF file or movie, letting you reopen the project in Soundtrack Pro and make changes to action settings and other edits.
If you export a saved multitrack project using File > Export, a link is included in the exported file, letting you reopen the multitrack project in Soundtrack Pro and make changes. The project must have been previously saved at least once before you export the project mix.
When you reopen the exported file, a dialog appears, asking if you want to open the audio file or the original project. In the dialog, click Open Project.
The multitrack project opens in the Soundtrack Pro Timeline so you can continue working. When you are finished working in Soundtrack Pro, be sure to save the multitrack project before exporting a project mix so your changes are retained.
Using Conform with Final Cut Pro
18
The picture editor and sound editor can work in parallel and then use Conform to easily merge the results of their work.
One of the biggest hurdles faced by sound editors is dealing with picture changes. When a picture editor moves clips or changes edit durations, the sound editor receives the new edit and then must manually conform the sound mix to the new picture edit. This process is time-consuming and it's easy to make mistakes. Worse, manually conforming a mix distracts a sound editor from the most important job at hand: completing the mix.
About Conforming Manually
When manually conforming a sound mix to a new picture cut, a sound editor imports the picture editor's new audio clips into an existing multitrack project on new tracks. Next, the sound editor has to walk through the new edits one by one, comparing the old placement of clips to the new ones. Clips in the old mix must be adjusted so that they line up with new cuts in the video. Clips may also need to be deleted or added because a shot was cut or added.
Using Soundtrack Pro Conform
Soundtrack Pro Conform makes conforming multitrack projects much more efficient. The picture editor and sound editor can work in parallel and then use Conform to easily merge the results of their work.
Here is how a picture editor and a sound editor might work together using Conform:
- A Final Cut Pro sequence is sent to a Soundtrack Pro multitrack project.
- Changes and edits are made in parallel to both the Final Cut Pro sequence and the Soundtrack Pro multitrack project. The Soundtrack Pro project that the sound editor uses is referred to as the "original" audio mix.
- An "updated" send is performed to provide Soundtrack Pro with a new version of the project containing the edits performed in Final Cut Pro. This creates a second Soundtrack Pro multitrack project, referred to as the "updated project."
- When you initiate Conform, Soundtrack Pro analyzes both the "original" audio mix and the "updated" send from Final Cut Pro, including all possible clip moves and media changes.
- Soundtrack Pro then generates a third project, referred to as the "Result" project, that has every change made with the highest confidence. You can then use the Conform interface to review/modify/approve all the changes needed to best perform the process of editing the audio mix to match the new project.
To conform a Soundtrack Pro multitrack project to changes made to the source sequence in Final Cut Pro:
1 Select a sequence in the Final Cut Pro Browser.
2 Do one of the following:
- Choose File > Send To > Soundtrack Pro Multitrack Project.
- Control-click the selection, then choose Send To from the shortcut menu and Soundtrack Pro Multitrack Project from the submenu.
The Save dialog appears.

3 In the dialog that appears, confirm that the "Save project with latest clip metadata (recommended)" checkbox is selected.
This ensures an accurate change history by having Final Cut Pro automatically save the project after the sequence is sent to Soundtrack Pro. If you are planning to use Conform frequently, the "Save project with latest clip metadata (recommended)" checkbox should always be selected.
4 Click Save.
For more information on sending sequences to Soundtrack Pro, see "Creating Soundtrack Pro Multitrack Projects from Final Cut Pro Clips or Sequences" on page 428.
5 At this point, changes and edits are made in parallel to both the Final Cut Pro sequence and the Soundtrack Pro multitrack project:
- Sound editor: Makes changes to the Soundtrack Pro multitrack project. This project is referred to as the "original" audio mix project.
• Picture editor: Makes changes to the Final Cut Pro sequence.
6 In Final Cut Pro, do one of the following:
- Choose File > Send To > Soundtrack Pro Multitrack Project.
- Control-click the selection, then choose Send To from the shortcut menu and Soundtrack Pro Multitrack Project from the submenu.
The Save dialog appears.

7 In the dialog that appears, confirm that the "Save project with latest clip metadata (recommended)" checkbox is selected, then enter a new name for the multitrack project and click Save.
This creates a new Soundtrack Pro project that will be referred to as the "updated" project.
8 Make sure that both the "original" audio mix project and the "updated" project are open in Soundtrack Pro.
9 Do one of the following:
- Choose File > Conform To Project.
- Open the Conform tab, then click the Conform Projects button.
This initiates the conform process.

10 In the dialog that appears, select the "original" audio mix project (the "sound editor version") in the left list. Select the "updated" project (the more recent send from Final Cut Pro—the "picture editor version") in the right list.
Note: Only projects that have embedded Final Cut Pro clip metadata (projects sent from Final Cut Pro or opened via XML documents) appear in this dialog.
11Click Continue.
Soundtrack Pro analyzes the clip positions in your "original" audio mix and the clip positions in the "updated" picture edit from Final Cut Pro, and determines the best position/duration and media to use for each clip. Soundtrack Pro will attempt to conform the audio mix from the "original" project to match the video from the "updated" project.
The multitrack Timeline displays the new, untitled "result" project (the results of the conform process).

The Conform tab displays the Conform worklist: a list of clips that may have moved or changed.
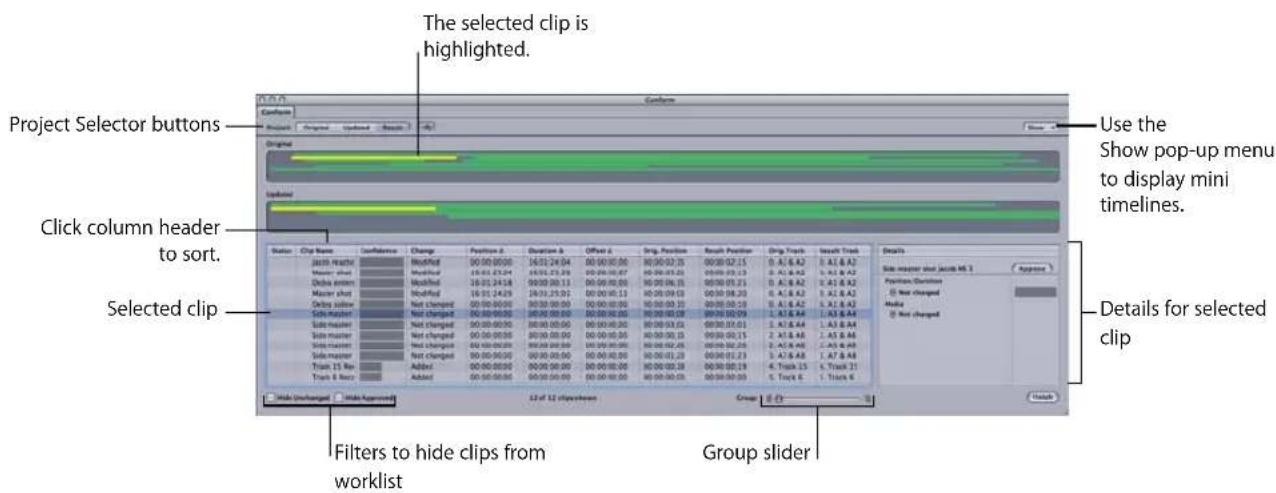
Reviewing and Approving the Changes in the Conform Result Project
Once you have a Conform worklist, you can inspect the changes, reviewing the playback in the original, updated or result projects, and can change and accept choices for each clip individually or multiple clips or groups of clips all at once. The goal is to walk through the changes made to generate the result project and verify that all the clips have been moved into the correct positions, and that the correct choices have been made to satisfy the artistic goals for the audio mix. At any time, you are free to accept all the changes made by Soundtrack Pro and finish the conform process.
Filtering Out Unchanged Clips
For many clips, the Position/Duration and Media may be unchanged (the clips were the same in both versions of the project). These show up as "Not Changed" in the Conform worklist. It can be useful to filter out all the Unchanged clips, so that you can concentrate on reviewing the clips that actually moved or had media changes.
To filter out unchanged clips from the Conform worklist:
■ Select the Hide Unchanged checkbox.
Unchanged clips are removed from the worklist. Only clips that have changed remain in the worklist.
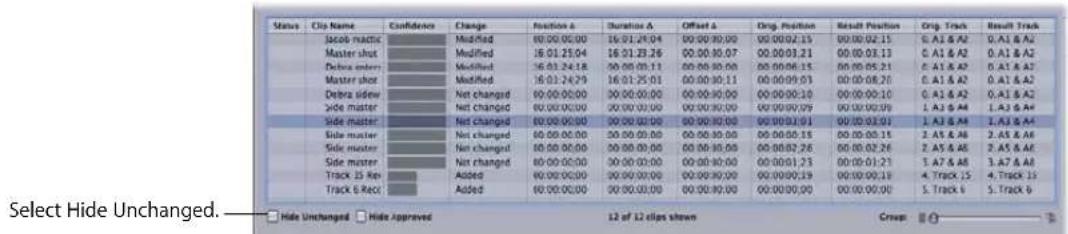
Using the Project Selector Buttons
Use the Project Selector buttons to select one of three projects to appear in the main multitrack Timeline. This is helpful if you want to go back to your sound edit (the "original" project) to quickly see where a clip or group of clips was, then go to the result project and preview those same clips to verify that they correctly match the picture. By default, once the Conform process starts, the multitrack Timeline will show the untitled result project, ready for you to review each clip or group of clips in the worklist.
To use the Project Selector buttons to display a project:
- Click the Original, Updated, or Result button.
The corresponding project appears in the multitrack Timeline.
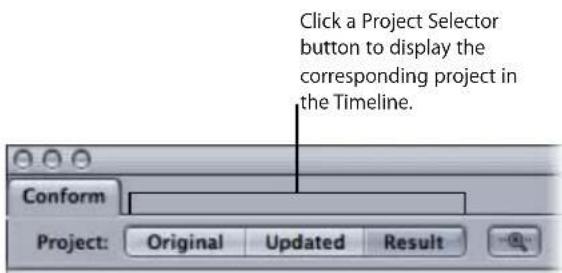
Grouping Clips in the Conform Work List
It can be useful to group clips together in the Conform work list. You can use the Group slider to control how clips are grouped together. When you click clips or groups, the selected clips (or clips in the selected group) are highlighted in the mini timelines.
Groups in the Conform work list

To automatically form groups in the work list:
- Drag the Group slider to the right.
To reduce or remove groups from the work list:
- Drag the Group slider to the left.
If you drag the slider all the way to the left, you will remove all groups and you can work with individual clips.
Dragging the slider all the way to the right will remove all groups, and you can work with individual clips. Sliding the group slider to the right will automatically form groups of clips.
Showing Selected Clips in the Timeline
If the Show Selected Clip in the Timeline button (the magnifying glass zoom button to the right of the project selector) is selected, then as clips or groups are selected in the work list, the main Timeline will scroll and zoom to show the selected group and/or clips.

Approving Changes and Clips
The objective of this part of the conform process is to work through all of the clips on the work list and verify that the clips are in the correct position.
It can be useful to start with the clips that have the lowest confidence value. To do this, you can click the header of the Confidence column and sort in ascending order. This way, you'll get the clips with the lowest confidence at the top.
You can then click a clip and see the different options for position/duration and media.
To audition and approve changes and clips in the result project:
1 Enable the "Show selected clip in the Timeline" button.
For details, see "Showing Selected Clips in the Timeline," above.
2 Click Result in the Project Selector buttons to display the result project in the main multitrack Timeline.
3 Click a clip in the work list and audition the clip in the main Timeline of the result project to verify the correct position.
4 In the Details section, select an option for the clip.
When you select a clip with more than one position, duration, or media option, the clip will immediately move to that selected location so that you can audition that choice in the main Timeline.
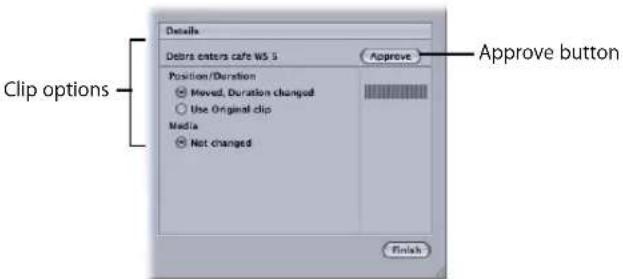
Note: When the clip moves, any automation that might exist on the track will move with the clip.
5 Once you are satisfied with your choice, click the Approve button.
The clip is marked with a green checkmark, indicating that it has been reviewed and approved in the result project.
Note: The process of reviewing and approving changes is simply a tool to help you go through the work list of clips.
6 Optionally, you can select multiple clips or select a group and then click Approve to approve all selected clips.
Filtering Out Approved Clips
Once you have a number of clips or groups that you have approved, you may find it useful to enable the Hide Approved filter. With this filter enabled, clips will pop off the work list as you approve them, helping you focus attention on the clips that need to be reviewed and approved.
To filter out approved clips from the Conform work list:
■ Select the Hide Approved checkbox.
Approved clips are removed from the work list. Only clips that are not approved remain in the work list.

Finishing the Conform Process
Once you are satisfied that all the clips in the Result project are in the correct place, you can click the Finish button to end the Conform process. You are not required to approve every single clip. In fact, the approvals do not change the outcome of the Conform process: the updated project will have all the clips set to their currently selected position/duration/media regardless of whether the selection is approved or not. The approval process is really more of a tool to help you manage your progress through the worklist.
To finish the Conform process:
- Click Finish.
The result is an Untitled project containing the conform results. This project can be saved and edited just like any other project. Typically, you will use this result project for subsequent audio edits in Soundtrack Pro. If more changes are made in Final Cut Pro, the result project from your first conform (plus any edits you've made in Soundtrack Pro) can be used as the "Original" project in a subsequent conform process. It will be conformed to an even more recent send from Final Cut Pro.
Soundtrack Pro Keyboard Shortcuts
General and File
| Keyboard shortcut Function | |
| Creates a new, blank multitrack project. | |
| Creates a new audio file project. | |
| Opens the Open dialog. | |
| Saves the current project. | |
| Opens the Save As dialog to save the project with a new name. | |
| Opens the Save As dialog to save a copy of the project with a different name. | |
| Adds the selected audio file (in a media tab) to the Bin of the current multitrack project. | |
| • If the Project pane contains a single tab, closes the Soundtrack Pro window.• If the Project pane contains multiple tabs, closes the active tab.• If a particular tab is active, closes the tab. | |
| Minimizes Soundtrack Pro. | |
| Hides Soundtrack Pro. | |
| Hides all other windows. | |
| Closes all projects and quits Soundtrack Pro. | |
Keyboard shortcut Function
Shows the Soundtrack Pro Preferences window.

Opens the Soundtrack Pro User Manual.
Layouts, Tabs, and HUDs
Keyboard shortcut Function
 | Switches the project layout to the Standard layout. |
| [2K5D] | Switches the project layout to the Separate Mixer and Video layout. |
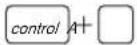 | Activates or deactivates the left pane. |
 | Activates or deactivates the lower pane. |
| [TZST] | Activates or deactivates the right pane. |
| [02AX] | Activates or deactivates the Video tab. |
 | Activates the Mixer for the current multitrack project. |
 | Activates the Project pane. |
| [7S4T] | Activates the Browser tab. |
| [027Z] | Activates the Details tab. |
| [246T] | Activates the Effects tab. |
 | Activates the Sound Palette. |
| [DB4H] | Moves to the previous (left) tab. |
 | Moves to the next (right) tab. |
| [4655] | Activates the Multipoint Video HUD. |
 | Activates or deactivates the video output device or Digital Cinema Desktop. |
Navigating the Timeline
| Keyboard shortcut Function | |
| return | Moves the playhead to the beginning of the project, or to the beginning of the cycle region if it is active. |
| option M+ | Moves the playhead to the position of the preceding marker. |
| shift M+ | Moves the playhead to the position of the next marker. |
| option +← | Moves the playhead to the position of the previous frame in the video clip. |
| option +→ | Moves the playhead to the position of the next frame in the video clip. |
Project Playback
| Keyboard shortcut Function | |
 | Starts playing the project. |
 | If the project is playing, stops project playback. |
 | Starts playback from the beginning of the project. |
 | Moves the playhead to the beginning of the cycle region, then to the beginning of the project. |
 | Moves the playhead to the beginning of the cycle region (if present). |
 | Moves the playhead to the beginning of the project. |
 | Moves the playhead to the end of the cycle region (if present). |
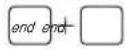 | Moves the playhead to the end of the project. |
 | Plays in reverse. |
 | Plays in reverse faster (press J repeatedly). |
 | Stops playback. |
 | Plays forward. |
| L | Fast-forwards (press L repeatedly). |
| K+L | Plays in slow motion. |
| J+K | Plays in reverse slow motion. |
| option+space | Starts or stops preview playback. |
Cycle Region
| Keyboard shortcut Function | |
| C | Activates the cycle region, or deactivates it if it is active. |
| X | Creates a cycle region around the selected audio clip under the playhead or the uppermost audio clip under the playhead. |
| option X+□ | Removes the cycle region. |
| shift + A | Creates a cycle region from the current selection. |
| I | Sets the cycle region In point. |
| O | Sets the cycle region Out point. |
| option I + □ | Removes the cycle region In point. |
| option O + □ | Removes the cycle region Out point. |
| shift + I | Moves the cycle region playhead to the In point. |
| shift + O | Moves the cycle region playhead to the Out point. |
General Editing
| Keyboard shortcut Function | |
| Undoes the last command. | |
| Redoes the last undone command. | |
| Cuts the selected item. | |
| Ripple cuts the selected item. | |
| Copies the selected item. | |
| Pastes the cut or copied item. | |
| Ripple deletes the selected item. | |
| Duplicates the selected item. | |
| Selects all items in the window. | |
| Deselects all items in the window. | |
| Ripple cuts to the next edit. | |
| Ripple deletes to the next edit. | |
Editing Audio Clips in the Timeline
| Keyboard shortcut Function | |
| Opens the Paste Repeat dialog so that you can paste multiple copies of the cut or copied audio clip. | |
| Turns snapping on or off. | |
| Splits selected audio clips under the playhead, or splits clips on selected tracks under the playhead. | |
| Joins the selected clips. | |
| Crossfades the selected clips across the Timeslice selection. | |
| option + D | Fades in to the playhead on selected clips or tracks. |
| option + G | Fades out from the playhead on selected clips or tracks. |
| + + Zoption | Trims the clip to the Timeslice selection. |
| + option + drag | Slips (offsets) a clip. |
| + \ | Spots the selected clip or File Editor selection to the playhead. |
| + shift + \ | Opens the Spot to Timeline dialog for spotting the selected clip or File Editor selection. |
| + shift X + \ | Performs a ripple cut. |
| + shift + delete | Performs a ripple delete. |
| E | Shows or hides envelope(s) for the selected track(s). |
| option E + \ | Switches envelope selection mode (between the Select Only Clips mode and the Select Envelope Points With Clips mode). |
Moving Audio Clips and Envelope Points
| Keyboard shortcut Function | |
| Moves the clip or envelope point to the previous gridline. | |
| Moves the clip or envelope point to the next gridline. | |
| Moves the clip or envelope point to the previous video frame. | |
| Moves the clip or envelope point to the next video frame. | |
| Locks or unlocks the selected clip(s). | |
| Disables or enables the selected clip(s). | |
| Moves the clip to the previous edit. | |
| Moves the clip to the next edit. | |
Keyboard shortcut Function
| Moves the clip up one track. | |
| Moves the clip down one track. | |
| Moves the selected envelope point up by a coarse value. | |
| Moves the selected envelope point down by a coarse value. | |
| Moves the selected envelope point up by a fine value. | |
| Moves the selected envelope point down by a fine value. | |
| Adds envelope points at the edges of selected clips. |
Viewing the Timeline
| Keyboard shortcut Function | |
| Zooms out horizontally to the next zoom level. | |
| Zooms in horizontally to the next zoom level. | |
| Increases the track height to the next level. | |
| Decreases the track height to a lower level. | |
| Zooms in on the current selection. | |
| Returns to the default zoom level. | |
| Fits the project in the display size. | |
| Sets the track height to Mini. | |
| Sets the track height to Small. | |
| Sets the track height to Medium. | |
| Sets the track height to Large. | |
Timeline Tools
| Keyboard shortcut Function | |
| A | Selects the Selection (arrow) tool. |
| B | Selects the Blade (razor) tool. |
| B + B | Selects the Blade All tool. |
| W | Selects the Timeslice tool. |
| U + U | Selects the (Sound Palette) Lift tool. |
| U | Selects the (Sound Palette) Stamp tool. |
| H | Selects the Scrub tool. |
File Editor Project View Tools and Commands
| Keyboard shortcut Function | |
| A | Selects the Selection (arrow) tool. |
| W | Selects the Frequency Selection tool. |
| P | Selects the Sample Edit (pencil) tool. |
| T | Selects the Audio Stretching tool. |
| Z | Selects the Zoom tool. |
| H | Selects the Scrub tool. |
| control + Z | Zooms in to the sample level. |
| option + Z | Zooms in on the current selection. |
| shift Z + □ | Fits the waveform in the display size. |
| + control + Y | Sets the ambient noise print. |
| + Y | Adds ambient noise. |
| + shift + Y | Replaces with ambient noise. |
| + shift I + □ | Adjusts selection inward to zero crossing. |
| + shift O + □ | Adjusts selection outward to zero crossing. |
| I | Adjusts In point left to zero crossing. |
| J | Adjusts In point right to zero crossing. |
| shift + [ | Adjusts Out point left to zero crossing. |
| + jshift | Adjusts Out point right to zero crossing. |
Processing and Editing Audio Files
| Keyboard shortcut Function | |
 | Creates a new file from the current selection. |
 | Creates a new file from the contents of the Clipboard. |
 | Opens the Normalize dialog for the audio file or selection. |
 | Opens the Adjust Amplitude dialog for the audio file or selection. |
 | Opens the Paste Mix dialog so that you can paste audio and mix it with the existing audio.Replaces the audio file or selection with silence. |
| Flattens audible actions, as indicated by the position of the Action Insert bar. | |
| Flattens all actions. | |
| A/B last actions. | |
| Sets the ambient noise print. | |
| Adds ambient noise. | |
| Replaces with ambient noise. | |
Tracks, Busses, and Submixes
| Keyboard shortcut Function | |
| Adds a new track to the Timeline. | |
| Adds a new bus to the Timeline. | |
| Adds a new submix to the Timeline. | |
| Removes the selected track, bus, or submix from the Timeline. | |
| Selects the track above the currently selected track. | |
| Selects the track below the currently selected track. | |
| Adds the track above to the current selection. | |
| Adds the track below to the current selection. | |
| Locks the selected track. | |
| Shows or hides envelopes for the selected items. | |
Keyboard shortcut Function
| +G |

Groups the selected tracks.
Enables groups.
Markers
Keyboard shortcut Function
| M | Inserts a time marker at the current playhead position. |
| Adds a region marker for the duration of the selection. | |
| Adds time markers at the beginning and end of the selection. | |
| Inserts a beat marker at the current playhead position. | |
| Displays the Details tab for the selected marker. |
Selecting Audio Clips in the Timeline
Keyboard shortcut Function
| shift + end | Selects all clips between the playhead and the end of the project, on selected tracks only. If no tracks are selected, selects clips across all tracks. |
| shift option + □ + end | Selects all clips on all tracks between the playhead and the end of the project. |
| shift + home | Selects all the clips between the playhead and the beginning of the project, on selected tracks only. If no tracks are selected, selects clips across all tracks. |
| shift option + □ + home | Selects all clips on all tracks between the playhead and the beginning of the project. |
| shift T + □ | Selects all clips on selected tracks. |
| shift option T+ □ + □ | Selects all clips on all tracks. |
| option A + □ | Creates a timeslice from the selection on selected tracks. |
| shift + ↑ | Moves the playhead to the previous edit, and reverses the select state of any clip starting at that edit. |
| Keyboard shortcut Function | |
| shift+↓ | Moves the playhead to the next edit, and reverses the select state of any clip ending at that edit. |
| shift option+□+↑ | Moves the playhead to the previous edit, and reverses the select state of any clip starting at that edit, on selected track(s) only. |
| shift option+□+↓ | Moves the playhead to the next edit, and reverses the select state of any clip ending at that edit, on selected track(s) only. |
Video Out
| Keyboard shortcut Function | |
| control + V | Plays using the external video output device or Digital Cinema Desktop (set in Soundtrack Pro > Preferences). |
Recording
| Keyboard shortcut Function | |
| control + 1 | Makes Take 1 the active take for the selected clip. |
| control + 2 | Makes Take 2 the active take for the selected clip. |
| control + 3 | Makes Take 3 the active take for the selected clip. |
| control + 4 | Makes Take 4 the active take for the selected clip. |
| control + 5 | Makes Take 5 the active take for the selected clip. |
| control + 6 | Makes Take 6 the active take for the selected clip. |
| control + 7 | Makes Take 7 the active take for the selected clip. |
| control + 8 | Makes Take 8 the active take for the selected clip. |
| control + 9 | Makes Take 9 the active take for the selected clip. |
Using Arrow Keys to Move the Playhead
| Keyboard shortcut Function | |
| Moves the playhead to the previous edit. | |
| Moves the playhead to the next edit. | |
| Moves the playhead to the previous edit on the selected track. | |
| Moves the playhead to the next edit on the selected track. | |
| Moves the playhead one video frame to the left. | |
| Moves the playhead one video frame to the right. | |
| Moves the playhead one gridline to the left. | |
| Moves the playhead one gridline to the right. | |
Working with Timeslices
| Keyboard shortcut Function | |
 | Moves the Timeslice location up one row. |
 | Moves the Timeslice location down one row. |
| [SDSC] | Extends the Timeslice location up one row. |
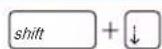 | Extends the Timeslice location down one row. |
| [YYSX] | Moves the Timeslice location left one gridline. |
 | Moves the Timeslice location right one gridline. |
 | Extends the left edge one gridline. |
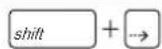 | Extends the right edge one gridline. |
 | Extends the left edge to the next edit. |
Keyboard shortcut Function
| shift + ↓ | Extends the right edge to the next edit. |
| Moves the Timeslice location to the previous edit. | |
| Moves the Timeslice location to the next edit. | |
| Moves the Timeslice location up a track. | |
| Moves the Timeslice location down a track. | |
| Moves the Timeslice location to the previous gridline. | |
| Moves the Timeslice location to the next gridline. | |
| Moves the Timeslice location to the previous frame. | |
| Moves the Timeslice location to the next frame. | |
| shift + ↑ | Extends the Timeslice to the previous edit. |
| shift + ↓ | Extends the Timeslice to the next edit. |
| shift + ← | Extends the Timeslice to the previous gridline. |
| shift + → | Extends the Timeslice to the next gridline. |
| shift option + □ + ← | Extends the Timeslice to the previous frame. |
| shift option + □ + → | Extends the Timeslice to the next frame. |
What Is Sound?
All sounds are vibrations traveling through the air as sound waves. Sound waves are caused by the vibrations of objects and radiate outward from their source in all directions. A vibrating object compresses the surrounding air molecules (squeezing them closer together) and then rarefies them (pulling them farther apart). Although the fluctuations in air pressure travel outward from the object, the air molecules themselves stay in the same average position. As sound travels, it reflects off objects in its path, creating further disturbances in the surrounding air. When these changes in air pressure vibrate your eardrum, nerve signals are sent to your brain and are interpreted as sound.
Fundamentals of a Sound Wave
The simplest kind of sound wave is a sine wave. Pure sine waves rarely exist in the natural world, but they are a useful place to start because all other sounds can be broken down into combinations of sine waves. A sine wave clearly demonstrates the three fundamental characteristics of a sound wave: frequency, amplitude, and phase.

line
| Time (ms) | Amplitude | | --------- | --------- | | 0 | 0 | | 1 | -1 | | 2 | 0 | | 3 | 1 | | 4 | -1 | | 5 | 0 |Frequency
Frequency is the rate, or number of times per second, that a sound wave cycles from positive to negative to positive again. Frequency is measured in cycles per second or hertz (Hz). Humans have a range of hearing from 20 Hz (low) to 20,000 Hz (high). Frequencies beyond this range exist, but they are inaudible to humans.
Amplitude
Amplitude (or intensity) refers to the strength of a sound wave, which the human ear interprets as volume or loudness. People can detect a very wide range of volumes, from the sound of a pin dropping in a quiet room to a loud rock concert. Because the range of human hearing is so large, audio meters use a logarithmic scale (decibels) to make the units of measurement more manageable.
Phase
Phase compares the timing between two similar sound waves. If two periodic sound waves of the same frequency begin at the same time, the two waves are said to be in phase. Phase is measured in degrees from 0 to 360, where 0 degrees means both sounds are exactly in sync (in phase) and 180 degrees means both sounds are exactly opposite (out of phase). When two sounds that are in phase are added together, the combination makes an even stronger result. When two sounds that are out of phase are added together, the opposing air pressures cancel each other out, resulting in little or no sound. This is known as phase cancelation.
Phase cancelation can be a problem when mixing similar audio signals together, or when original and reflected sound waves interact in a reflective room. For example, when the left and right channels of a stereo mix are combined to create a mono mix, the signals may suffer from phase cancelation.
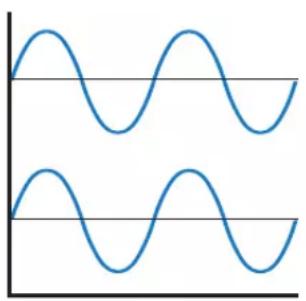
natural_image
Two identical blue sinusoidal waveforms on a Cartesian coordinate system (no labels or text)Separate signals

natural_image
Two identical blue sinusoidal waves oscillating between horizontal lines (no text or symbols)
natural_image
Simple horizontal line with no text, numbers, or symbols
natural_image
Simple blue sine wave pattern on a Cartesian coordinate system (no labels or text)In phase
Out of phase
Mixed signals
Frequency Spectrum of Sounds
With the exception of pure sine waves, sounds are made up of many different frequency components vibrating at the same time. The particular characteristics of a sound are the result of the unique combination of frequencies it contains.
Sounds contain energy in different frequency ranges, or bands. If a sound has a lot of low-frequency energy, it has a lot of bass. The 250–4000 Hz frequency band, where humans hear best, is described as midrange. High-frequency energy beyond the midrange is called treble, and this adds crispness or brilliance to a sound. The graph below shows how the sounds of different musical instruments fall within particular frequency bands.
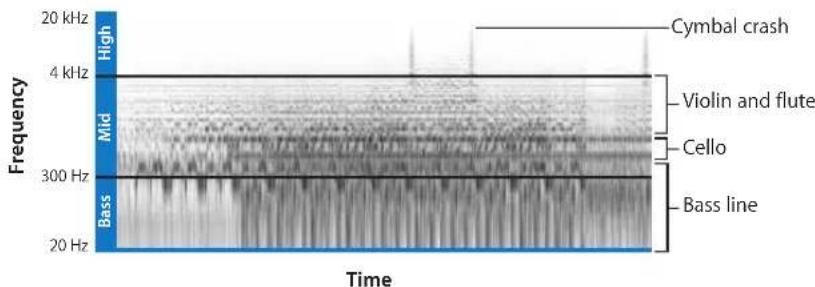
line
| Frequency | Time Label | | --------- | ---------------- | | 20 kHz | High | | 4 kHz | Mid | | 300 Hz | Bass | | 20 Hz | Bass line |Note: Different manufacturers and mixing engineers define the ranges of these frequency bands differently, so the numbers described above are approximate.
Tip: The human voice produces sounds that are mostly in the 250–4000 Hz range, which likely explains why people's ears are also the most sensitive to this range. If the dialogue in your movie is harder to hear when you add music and sound effects, try reducing the midrange frequencies of the nondialogue tracks using an equalizer filter. Reducing the midrange creates a "sonic space" in which the dialogue can be heard more easily.
Musical sounds typically have a regular frequency, which the human ear hears as the sound's pitch. Pitch is expressed using musical notes, such as C, E flat, and F sharp. The pitch is usually only the lowest, strongest part of the sound wave, called the fundamental frequency. Every musical sound also has higher, softer parts called overtones or harmonics, which occur at regular multiples of the fundamental frequency. The human ear doesn't hear the harmonics as distinct pitches, but rather as the tone color (also called the timbre) of the sound, which allows the ear to distinguish one instrument or voice from another, even when both are playing the same pitch.
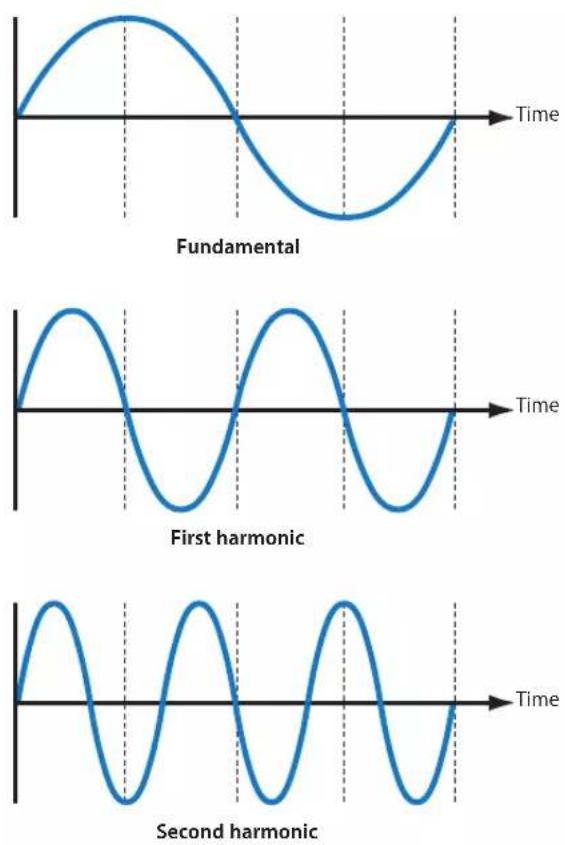
Musical sounds also typically have a volume envelope. Every note played on a musical instrument has a distinct curve of rising and falling volume over time. Sounds produced by some instruments, particularly drums and other percussion instruments, start at a high volume level but quickly decrease to a much lower level and die away to silence. Sounds produced by other instruments, for example, a violin or a trumpet, can be sustained at the same volume level and can be raised or lowered in volume while being sustained. This volume curve is called the sound's envelope and acts like a signature to help the ear recognize what instrument is producing the sound.

line
| Time | Amplitude | |------|---------| | 0 | 0 | | 1 | 0.5 | | 2 | 0.3 | | 3 | 0.7 | | 4 | 0.2 | | 5 | 0.8 | | 6 | 0.1 | | 7 | 0.9 | | 8 | 0.05 | | 9 | 0.95 | | 10 | 0.02 | | 11 | 0.92 | | 12 | 0.01 | | 13 | 0.91 | | 14 | 0.005 | | 15 | 0.90 | | 16 | 0.002 | | 17 | 0.89 | | 18 | 0.001 | | 19 | 0.88 | | 20 | 0.0005 | | 21 | 0.87 | | 22 | 0.0002 | | 23 | 0.86 | | 24 | 0.0001 | | 25 | 0.85 | | 26 | 0.00005 | | 27 | 0.84 | | 28 | 0.00002 | | 29 | 0.83 | | 30 | 0.00001 | | 31 | 0.82 | | 32 | 0.000005| | 33 | 0.81 | | 34 | 0.000002| | 35 | 0.80 | | 36 | 0.000001| | 37 | 0.79 | | 38 | 0.0000005| | 39 | 0.78 | | 40 | 0.0000002| | 41 | 0.77 | | 42 | 0.0000001| | 43 | 0.76 | | 44 | 0.00000005| | 45 | 0.75 | | 46 | 0.00000002| | 47 | 0.74 | | 48 | 0.00000001| | 49 | 0.73 | | 50 | 0.000000005| | 51 | 0.72 | | 52 | 0.000000002| | 53 | 0.71 | | 54 | 0.000000001| | 55 | 0.70 | | 56 | 0.0000000005| | 57 | 0.69 | | 58 | 0.68 | | 59 | 0.67 | | 60 | 0.66 | | 61 | 0.65 | | 62 | 0.64 | | 63 | 0.63 | | 64 | 0.62 | | 65 | 0.61 | | 66 | 0.60 | | 67 | 0.59 | | 68 | 0.58 | | 69 | 0.57 | | 70 | 0.56 | | 71 | 0.55 | | 72 | 0.54 | | 73 | 0.53 | | 74 | 0.52 | | 75 | 0.51 | | 76 | 0.50 | | 77 | 0.49 | | 78 | 0.48 | | 79 | 0.47 | | 80 | 0.46 | | 81 | 0.45 | | 82 | 0.44 | | 83 | 0.43 | | 84 | 0.42 | | 85 | 0.41 | | 86 | 0.40 | | 87 | 0.39 | | 88 | 0.38 | | 89 | 0.37 | | 90 | 0.36 | | 91 | 0.35 | | 92 | 0.34 | | 93 | 0.33 | | 94 | 0.32 | | 95 | 0.31 | | 96 | 0.30 | | 97 | 0.29 | | 98 | 0.28 | | 99 | 0.27 | | Note: The actual values may vary due to the random nature of the data generation process shown in the code.
natural_image
Abstract waveform pattern with no text or symbolsPercussive volume envelope Sustained volume envelope
Measuring Sound Intensity
Human ears are remarkably sensitive to vibrations in the air. The threshold of human hearing is around 20 microPascals ( µ P), which is an extremely small amount of atmospheric pressure. At the other extreme, the loudest sound a person can withstand without pain or ear damage is about 200,000,000 µ P: for example, a loud rock concert or a nearby jet airplane taking off.
Because the human ear can handle such a large range of intensities, measuring sound pressure levels on a linear scale is inconvenient. For example, if the range of human hearing were measured on a ruler, the scale would go from 1 foot (quietest) to over 3000 miles (loudest)! To make this huge range of numbers easier to work with, a logarithmic unit—the decibel—is used. Logarithms map exponential values to a linear scale. For example, by taking the base-ten logarithm of 10 (10) and 1,000,000,000 (10), this large range of numbers can be written as 1–9, which is a much more convenient scale.
Because the ear responds to sound pressure logarithmically, using a logarithmic scale corresponds to the way humans perceive loudness. Audio meters and sound measurement equipment are specifically designed to show audio levels in decibels. Small changes at the bottom of an audio meter may represent large changes in signal level, while small changes toward the top may represent small changes in signal level. This makes audio meters very different from linear measuring devices like rulers, thermometers, and speedometers. Each unit on an audio meter represents an exponential increase in sound pressure, but a perceived linear increase in loudness.
Important: When you mix audio, you don't need to worry about the mathematics behind logarithms and decibels. Just be aware that to hear incremental increases in sound volume, exponentially more sound pressure is required.
What Is a Decibel?
The decibel measures sound pressure or electrical pressure (voltage) levels. It is a logarithmic unit that describes a ratio of two intensities, such as two different sound pressures, two different voltages, and so on. A bel (named after Alexander Graham Bell) is a base-ten logarithm of the ratio between two signals. This means that for every additional bel on the scale, the signal represented is ten times stronger. For example, the sound pressure level of a loud sound can be billions of times stronger than a quiet sound. Written logarithmically, one billion (1,000,000,000 or 10) is simply 9. Decibels make the numbers much easier to work with.
In practice, a bel is a bit too large to use for measuring sound, so a one-tenth unit called the decibel is used instead. The reason for using decibels instead of bels is no different from the reason for measuring shoe size in, say, centimeters instead of meters; it is a more practical unit.
Number of decibels Relative increase in power
| 0 | 1 | |
| 1 | 1 | . 2 |
| 3 | 2 | |
| 10 10 | ||
| 20 100 | ||
| 30 1000 | ||
| 50 100,000 | ||
| 100 10,000,000,000 |
Decibel Units
Audio meters are labeled with decibels. Several reference levels have been used in audio meters over the years, starting with the invention of the telephone and evolving to present day systems. Some of these units are only applicable to older equipment. Today, most professional equipment uses dBu, and most consumer equipment uses dBV. Digital meters use dBFS.
- dBm: The m stands for milliwatt (mW), which is a unit for measuring electrical power. (Power is different from electrical voltage and current, though it is related to both.) This was the standard used in the early days of telephone technology and remained the professional audio standard for years.
- dBu: This reference level measures voltage instead of power, using a reference level of 0.775 volts. dBu has mostly replaced dBm on professional audio equipment. The u stands for unloaded, because the electrical load in an audio circuit is no longer as relevant as it was in the early days of audio equipment.
- dBV: This also uses a reference voltage like dBu, but in this case the reference level is 1 volt, which is more convenient than 0.775 volts in dBu. dBV is often used on consumer and semiprofessional devices.
- dBFS: This scale is very different from the others because it is used for measuring digital audio levels. FS stands for full-scale, which is used because, unlike analog audio signals that have an optimum signal voltage, the entire range of digital values is equally acceptable when using digital audio. 0 dBFS is the highest-possible digital audio signal you can record without distortion. Unlike analog audio scales like dBV and dBu, there is no headroom past 0 dBFS.
Signal-to-Noise Ratio
Every electrical system produces a certain amount of low-level electrical activity called noise. The noise floor is the level of noise inherent in a system. It is nearly impossible to eliminate all the noise in an electrical system, but you don't have to worry about the noise if you record your signals significantly higher than the noise floor. If you record audio too low, you raise the volume to hear it, which also raises the volume of the noise floor, causing a noticeable hiss.
The more a signal is amplified, the louder the noise becomes. Therefore, it is important to record most audio around the nominal (ideal) level of the device, which is labeled 0 dB on an analog audio meter.
The signal-to-noise ratio, typically measured in dB, is the difference between the nominal recording level and the noise floor of the device. For example, the signal-to-noise ratio of an analog tape deck may be 60 dB, which means the inherent noise in the system is 60 dB lower than the ideal recording level.
Headroom and Distortion
If an audio signal is too strong, it will overdrive the audio circuit, causing the shape of the signal to distort. In analog equipment, distortion increases gradually the more the audio signal overdrives the circuit. For some audio recordings, this kind of distortion can add a unique "warmth" to the recording that is difficult to achieve with digital equipment. However, for audio post-production, the goal is to keep the signal clean and undistorted.
0 dB on an analog meter refers to the ideal recording level, but there is some allowance for stronger signals before distortion occurs. This safety margin is known as headroom, meaning that the signal can occasionally go higher than the ideal recording level without distorting. Having headroom is critical when recording, especially when the audio level is very dynamic and unpredictable. Even though you can adjust the recording level while you record, you can't always anticipate quick, loud sounds. The extra headroom above 0 dB on the meter is there in case the audio abruptly becomes loud.
Dynamic Range and Compression
Dynamic range is the difference between the quietest and loudest sound in your mix. A mix that contains quiet whispers and loud screams has a large dynamic range. A recording of a constant drone such as an air conditioner or steady freeway traffic has very little amplitude variation, so it has a small dynamic range.
You can actually see the dynamic range of an audio clip by looking at its waveform. For example, two waveforms are shown below. The top one is a section from a well-known piece of classical music. The bottom one is from a piece of electronic music. From the widely varied shape of the waveform, you can tell that the classical piece has the greater dynamic range.
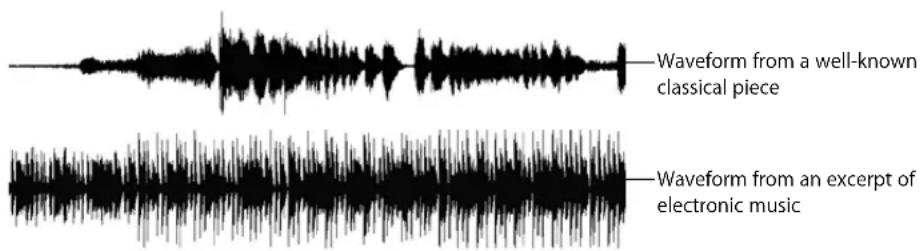
Notice that the loud and soft parts of the classical piece vary more frequently, as compared to the fairly consistent levels of the electronic music. The long, drawn-out part of the waveform at the left end of the top piece is not silence—it's actually a long, low section of the music.
Dynamic sound has drastic volume changes. Sound can be made less dynamic by reducing, or compressing, the loudest parts of the signal to be closer to the quiet parts. Compression is a useful technique because it makes the sounds in your mix more equal. For example, a train pulling into the station, a man talking, and the quiet sounds of a cricket-filled evening are, in absolute terms, very different volumes. Because televisions and film theaters must compete with ambient noise in the real world, it is important that the quiet sounds are not lost.
The goal is to make the quiet sounds (in this case, the crickets) louder so they can compete with the ambient noise in the listening environment. One approach to making the crickets louder is to simply raise the level of the entire soundtrack, but when you increase the level of the quiet sounds, the loud sounds (such as the train) get too loud and distort. Instead of raising the entire volume of your mix, you can compress the loud sounds so they are closer to the quiet sounds. Once the loud sounds are quieter (and the quiet sounds remain the same level), you can raise the overall level of the mix, bringing up the quiet sounds without distorting the loud sounds.
When used sparingly, compression can help you bring up the overall level of your mix to compete with noise in the listening environment. However, if you compress a signal too far, it sounds very unnatural. For example, reducing the sound of an airplane jet engine to the sound of a quiet forest at night and then raising the volume to maximum would cause the noise in the forest to be amplified immensely.
Different media and genres use different levels of compression. Radio and television commercials use compression to achieve a consistent wall of sound. If the radio or television becomes too quiet, the audience may change the channel—a risk advertisers and broadcasters don’t want to take. Films in theaters have a slightly wider dynamic range because the ambient noise level of the theater is lower, so quiet sounds can remain quiet.
Stereo Audio
The human ear hears sounds in stereo, and the brain uses the subtle differences in sounds entering the left and right ears to locate sounds in the environment. To recreate this sonic experience, stereo recordings require two audio channels throughout the recording and playback process. The microphones must be properly positioned to accurately capture a stereo image, and speakers must also be spaced properly to recreate a stereo image accurately.
If any part of the audio reproduction pathway eliminates one of the audio channels, the stereo image will most likely be compromised. For example, if your playback system has a CD player (two audio channels) connected to only one speaker, you will not hear the intended stereo image.
Important: All stereo recordings require two channels, but two-channel recordings are not necessarily stereo. For example, if you use a single-capsule microphone to record the same signal on two tracks, you are not making a stereo recording.
Identifying Two-Channel Mono Recordings
When you are working with two-channel audio, it is important to be able to distinguish between true stereo recordings and two tracks used to record two independent mono channels. These are called dual mono recordings.
Examples of dual mono recordings include:
- Two independent microphones used to record two independent sounds, such as two different actors speaking. These microphones independently follow each actor's voice and are never positioned in a stereo left-right configuration. In this case, the intent is not a stereo recording but two discrete mono channels of synchronized sound.
- Two channels with exactly the same signal. This is no different than a mono recording, because both channels contain exactly the same information. Production audio is sometimes recorded this way, with slightly different gain settings on each channel. This way, if one channel distorts, you have a safety channel recorded at a lower level.
- Two completely unrelated sounds, such as dialogue on track 1 and a timecode audio signal on track 2, or music on channel 1 and sound effects on channel 2. Conceptually, this is not much different than recording two discrete dialogue tracks in the example above.
The important point to remember is that if you have a two-track recording system, each track can be used to record anything you want. If you use the two tracks to record properly positioned left and right microphones, you can make a stereo recording. Otherwise, you are simply making a two-channel mono recording.
Identifying Stereo Recordings
When you are trying to decide how to work with an audio clip, you need to know whether a two-channel recording was intended to be stereo or not. Usually, the person recording production sound will have labeled the tapes or audio files to indicate whether they were recorded as stereo recordings or dual-channel mono recordings. However, things don't always go as planned, and tapes aren't always labeled as thoroughly as they should be. As an editor, it's important to learn how to differentiate between the two.
Here are some tips for distinguishing stereo from dual mono recordings:
- Stereo recordings must have two independent tracks. If you have a tape with only one track of audio, or a one-channel audio file, your audio is mono, not stereo.
Note: It is possible that a one-channel audio file is one half of a stereo pair. These are known as split stereo files, because the left and right channels are contained in independent files. Usually, these files are labeled accordingly: AudioFile.L and AudioFile.R are two audio files that make up the left and right channels of a stereo sound. - Almost all music, especially commercially available music, is mixed in stereo.
- Listen to a clip using two (stereo) speakers. If each side sounds subtly different, it is probably stereo. If each side sounds absolutely the same, it may be a mono recording. If each side is completely unrelated, it is a dual mono recording.
Interleaved Versus Split Stereo Audio Files
Digital audio can send a stereo signal within a single stream by interleaving the digital samples during transmission and deinterleaving them on playback. The way the signal is stored is unimportant as long as the samples are properly split to left and right channels during playback. With analog technology, the signal is not nearly as flexible.
Split stereo files are two independent audio files that work together, one for the left channel (AudioFile.L) and one for the right channel (AudioFile.R). This mirrors the traditional analog method of one track per channel (or in this case, one file per channel).
Digital Audio
Digital audio recording works by recording, or sampling, an electronic audio signal at regular intervals (of time). An analog-to-digital (A/D) converter measures and stores each sample as a numerical value that represents the audio amplitude at that particular moment. Converting the amplitude of each sample to a binary number is called quantization. The number of bits used for quantization is referred to as bit depth. Sample rate and bit depth are two of the most important factors when determining the quality of a digital audio system.
Sample Rate
The sample rate is the number of times an analog signal is measured—or sampled—per second. You can also think of the sample rate as the number of electronic snapshots made of the sound wave per second. Higher sample rates result in higher sound quality because the analog waveform is more closely approximated by the discrete samples. Which sample rate you choose to work with depends on the source material you're working with, the capabilities of your audio interface, and the final destination of your audio.
For years, the digital audio sample rate standards have been 44,100 Hz (44.1 kHz) and 48 kHz. However, as technology improves, 96 kHz and even 192 kHz sample rates are becoming common.
Audio sample rates When used
| 8 kHz–22.225 kHz These lower sample rates are used strictly for multimedia files. |
| 32 kHz 32 kHz is generally used with 12-bit audio on DV. |
| 44.1 kHz This sample rate is used for music CDs and some DAT recorders. |
| 48 kHz Almost all digital video formats use this sample rate. |
| 88.2 kHz A multiple of 44.1 kHz. This is useful for high-resolution audio that needs to be compatible with 44.1 kHz. For example, if you eventually plan to burn an audio CD, this sample rate is a good choice. |
| 96 kHz A multiple of 48 kHz. This is becoming the professional standard for audio post-production and music recording. |
| 192 kHz A multiple of 48 and 96 kHz, this is a very high-resolution sample rate used mostly for professional music recording and mastering. |
Bit Depth
Unlike analog signals, which have an infinite range of volume levels, digital audio samples use binary numbers (bits) to represent the strength of each audio sample. The accuracy of each sample is determined by its bit depth. Higher bit depths mean your audio signal is more accurately represented when it is sampled. Most digital audio systems use a minimum of 16 bits per sample, which can represent 65,536 possible levels (24-bit samples can represent over 16 million possible levels).
To better understand bit depth, think of each digital audio sample as a ladder with equally spaced rungs that climb from silence to full volume. Each rung on the ladder is a possible volume that a sample can represent, while the spaces between rungs are in-between volumes that a sample cannot represent.
When a sample is made, the audio level of the analog signal often falls in the spaces between rungs. In this case, the sample must be rounded to the nearest rung. The bit depth of a digital audio sample determines how closely the rungs are spaced. The more rungs available (or, the less space between rungs), the more precisely the original signal can be represented.
Quantization errors occur when a digital audio sample does not exactly match the analog signal strength it is supposed to represent (in other words, the digital audio sample is slightly higher or lower than the analog signal). Quantization errors are also called rounding errors because imprecise numbers represent the original analog audio. For example, suppose an audio signal is exactly 1.15 volts, but the analog-to-digital converter rounds this to 1 volt because this is the closest bit value available. This rounding error causes noise in your digital audio signal. While quantization noise may be imperceptible, it can potentially be exacerbated by further digital processing. Always try to use the highest bit depth possible to avoid quantization errors.
The diagram on the far right shows the highest bit depth, and therefore the audio samples more accurately reflect the shape of the original analog audio signal.

For example, a 1-bit system (a ladder with only two rungs) can represent either silence or full volume, and nothing in between. Any audio sample that falls between these rungs must be rounded to full volume or silence. Such a system would have absolutely no subtlety, rounding smooth analog signals to a square-shaped waveform.
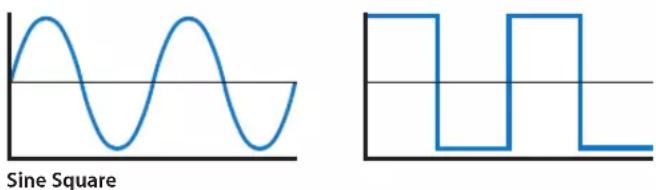
line
| Waveform | Value | |----------|-------| | Sine | 0 | | Square | 0 |When the number of bits per sample is increased, each sample can more accurately represent the audio signal.

natural_image
Pure electrical circuit lines without any symbols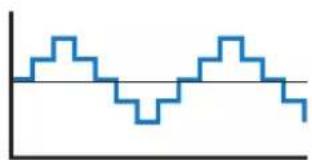
natural_image
Abstract blue line pattern on white background (no text or symbols)2-bit1-bit

natural_image
Simple blue waveform diagram on a Cartesian coordinate system (no labels or text)
16-bit4-bit
To avoid rounding errors, you should always use the highest bit depth your equipment supports. Most digital video devices use 16- or 20-bit audio, so you may be limited to one of these bit depths. However, professional audio recording devices usually support 24-bit audio, which has become the industry standard.
Bit depth When used
| 32-bit floating point This allows audio calculations, such as fader levels and effects processing, to be performed at very high resolution with a minimum of error, which preserves the quality of your digital audio. |
| 24-bit This has become the audio industry standard for most audio recording formats. Most professional audio interfaces and computer audio editing systems can record with 24-bit precision. |
| 20-bit Used in some video formats such as Digital Betacam and audio formats such as ADAT Type II. |
| 16-bit DAT recorders, Tascam DA-88 and ADAT Type I multitracks, and audio CDs all use16-bit samples. Many digital video formats, such as DV, use 16-bit audio! |
| 8-bit In the past, 8-bit audio was often used for CD-ROM and web video.Today, 16-bit audio is usually preferred, but available bandwidth and compatibility with your target user's system are your chief considerations when outputting audio for multimedia use. |
Many consumer DV camcorders allow you to record four audio channels using 12-bit mode, but this is not recommended for professional work.
Working with Professional Video and Audio Equipment
About Video Interfaces, Signals, and Connectors
This section describes common types of video interfaces, signal formats, and connectors.
Video Interfaces
Final Cut Studio allows you to use a wide variety of video interfaces for capture and output. The following section shows examples of the most common types of video interfaces available.
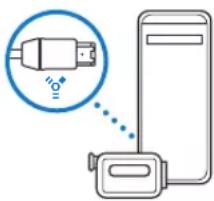
natural_image
Diagram showing a device connected to a mobile phone, with a magnified inset highlighting the connector (no text or symbols present)FireWire for DV
You can use the built-in FireWire port on your computer to capture and output to almost any DV device, including DV, DVCAM, DVCPRO, DVCPRO 50, and DVCPRO HD devices.
In this configuration, you only need your computer and a supported DV device.
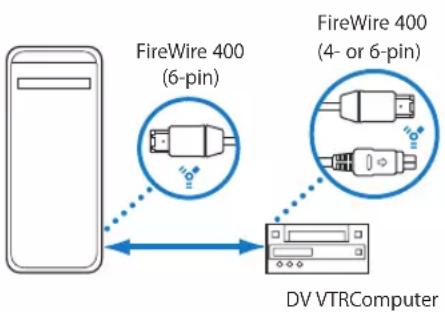
flowchart
graph TD
    A["FireWire 400 (6-pin)"] --> B["DV VTRComputer"]
    C["FireWire 400 (4- or 6-pin)"] --> B

natural_image
Diagram showing a device with an icon of a plug and a connected port, no text or symbols presentFireWire for Uncompressed Digital Video
Interfaces such as the AJA Io connect to your computer via FireWire. However, instead of transferring compressed DV signals, the AJA Io transfers an uncompressed component 4:2:2 signal via FireWire. The AJA Io has a wide range of digital and analog connectors, as well as RS-422 device control.
Important: Although this type of video interface uses FireWire, it is not used to connect DV devices. If you want to capture or output DV video, you can connect your DV device directly to the FireWire port on your computer.

flowchart
graph LR
    A["FireWire 400 (6-pin)"] -->|dotted arrow| B["AJA Io"]
    C["BNC connector"] -->|dotted arrow| D["Analog or digital VTR Computer"]
    B <--> D

PCI Video Interface Card
If you are using professional analog or digital formats (either standard definition or high definition) without native FireWire connectivity, you need to purchase and install a PCI video interface card to connect your video deck or camcorder to your computer. Many PCI interface cards come with a breakout box where video, audio, and perhaps even 9-pin remote connectors are located (rather than on the PCI card itself). Interface cards are also referred to as video cards or capture cards. This is not the same as the video graphics card used to send signals to your main computer display.
Note: Some broadcast-quality video output devices receive both the video and audio from a project. When you use a video output device that supports both video and audio output, Soundtrack Pro automatically routes your audio output to this device to provide the best possible synchronization of the audio and video.
PCI Video Interface Card with Built-in Connectors
PCI cards allow you to capture and output video with high data rates, such as uncompressed standard definition (SD) and high definition (HD) video. PCI cards are necessary for high-end applications such as compositing, online editing, and uncompressed video editing. Many PCI cards have BNC or RCA connectors mounted directly on the back of the card. In this configuration, you connect your video equipment directly to the PCI card connectors on the back of your computer.
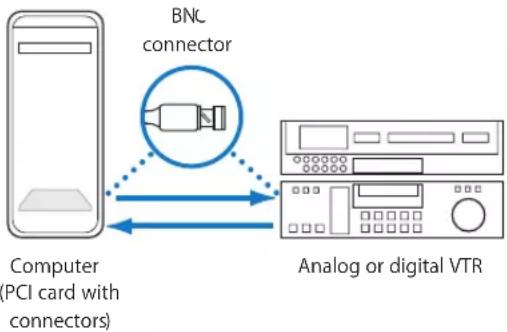
flowchart
graph LR
    A["Computer (PCI card with connectors)"] -->|BNC connector| B["Analog or digital VTR"]
PCI Video Interface Card with Breakout Box
Many PCI cards aren't big enough to fit all of the necessary video and audio connectors. In these situations, a breakout box is connected to the PCI card via a multipin connector on a long cable, and the connectors are accessible on the breakout box instead of the back of the PCI card. A breakout box is also useful because it allows you to place the connectors somewhere more convenient than the back of your computer, such as on an equipment rack or a desktop.

flowchart
graph LR
    A["Computer (with PCI card)"] <--> B["Breakout box"]
    B <--> C["BNC connector"]
    C --> D["Analog or digital VTR"]
USB Video Interface
USB video interfaces cannot support the high data rates required for professional video use, so they are not commonly used. USB video interfaces are usually used for converting analog video sources to a digital signal for capture.

flowchart
graph LR
    A["User"] --> B["USB"]
    B --> C["USB interface"]
    C --> D["Analog VTRComputer"]
    E["RCA connector"] --> C
    C --> D
Video Signals and Connectors
When you capture and output, the type of video signal you use to connect your equipment is a critical factor that goes into determining the quality of your video. Video camcorders, decks, and monitors can use different types of signals, depending on the environment they are intended for. Consumer equipment usually has limited video signal choices; professional equipment gives you the greatest range of options.
Here are the most common video signals used on today's video devices:
- Composite
• S-Video (Y/C) - Component YUV (Y'C R C R )
- Component RGB
• FireWire (IEEE 1394 or i.LINK)
• SDI
• HD-SDI
• HDMI
• SCART
Composite
Composite is the lowest common denominator of video signals. A composite signal runs all color and brightness information on a single cable, resulting in lower-quality video compared to the quality of other formats. Nearly all video devices have a composite input and output. This format uses a single RCA or BNC connector.
In professional editing environments, composite video signals are most commonly used for troubleshooting, for menu outputs, and for low-quality preview monitoring. For consumer and home use, composite signals are often used to connect VCRs or DVD players to televisions.


RCA connector


BNC connector
S-Video
S-Video, also known as Y/C, is a higher-quality video signal used by high-end consumer video equipment. The image looks sharper and has better color than a composite video image because S-Video keeps the color and brightness information separate on two cables. Most low-cost analog-to-digital video interfaces have S-Video as their highest-quality video connector. Use care when working with S-video connectors; the four delicate pins can be bent easily.


S-Video connector
Component YUV and Component RGB
Professional video equipment, such as Betacam SP decks, has component YUV (Y'C_B C_R) video inputs and outputs. Component YUV separates color and brightness information into three signals, which keeps the color quality more accurate than that of other systems. Component YUV is as good as analog video gets. High-end consumer devices, such as DVD players and televisions, have increasingly begun to support component YUV.
Note: Another form of component video, component RGB, is not as widespread on professional equipment as component YUV.
Both component YUV and RGB signals use from three to five connectors. You can use three BNC connectors, plus a fourth (typically labeled "genlock" or "house sync") to send a timing signal. Sync can also be embedded in the Y or G part of the signal (using three connectors), a separate composite signal on a fourth connector, or separate H and V drive signals (using five connectors). See your equipment's documentation for more information.
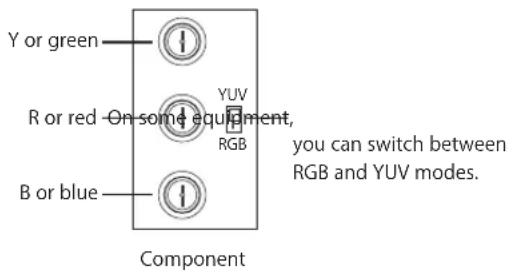
FireWire 400
FireWire 400, also called IEEE 1394a or i.LINK, is the consumer and professional standard for formats such as DV, DVCAM, DVCPRO, DVCPRO 50, DVCPRO HD, and HDV. FireWire is an inexpensive and easy way to capture and output high-quality digital video using a variety of camcorders and decks and is capable of data rates as high as 400 Mbps. Standard FireWire cables can be up to 4.5 meters long.
There are two kinds of FireWire connectors: a 4-pin connector (typically found on video equipment such as camcorders or decks) and a 6-pin connector (used for computer equipment). However, some newer video equipment uses the 6-pin connector, and some video interfaces use the 4-pin connector. See your equipment's documentation for more information.
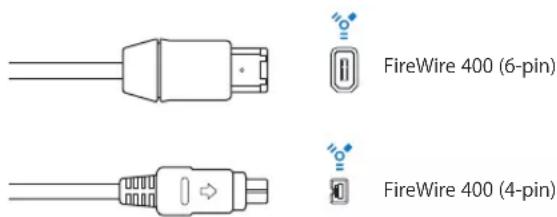
FireWire 800
FireWire 800, also called IEEE 1394b, is the next generation of FireWire after IEEE 1394a, a higher-bandwidth version capable of data transfer speeds of up to 800 Mbps. FireWire 800 is also capable of supporting cable distances of up to 100 meters.
In addition to the standard 9-pin-to-9-pin FireWire 800 cables, 9-pin-to-4-pin and 9-pin-to-6-pin FireWire 400 to FireWire 800 cables are also available to connect older devices to a FireWire 800 interface.

Note: FireWire 800 is commonly used to connect hard disks and other data peripherals to your computer, but this connector is rarely used to connect video devices.
SDI
Serial Digital Interface (SDI) is the standard for high-end, uncompressed digital video formats such as D1, D5, and Digital Betacam. If you want to capture digital video from these formats at the highest possible quality, you need a video interface with an SDI input and output, as well as a high-performance disk array (a set of disk drives grouped together to read and write in parallel), to accommodate the high data rates you'll work with. Many devices can send both video and audio data through a single SDI connection.

HD-SDI
High Definition Serial Digital Interface (HD-SDI) is a higher-bandwidth version of SDI designed for the extremely high data rates required by uncompressed HD video. Like SDI, HD-SDI is capable of sending both video and audio through a single connection. The following decks have HD-SDI interfaces: DVCPRO HD, D-5 HD, and HDCAM decks.
Some devices provide even higher data rates by pairing two HD-SDI channels together (known as dual-link HD-SDI). Uncompressed HD RGB video and other digital cinema formats can be transmitted using dual-link HD-SDI.
SDTI
Serial Digital Transport Interface (SDTI) is based on SDI, allowing native video formats to be sent in real time within an SDI video stream. SDTI does not define a specific video signal format but instead uses the structure of SDI to carry any kind of data. This allows video facilities to use their existing SDI patchbays and routers to transfer other native video formats, or transfer any kind of data. For example, some DV decks can transfer DV via SDTI, which means native DV can be transferred long distances over existing coaxial cable instead of the usual FireWire connection. Other formats, such as HDCAM and MPEG, can also be transferred via packets within an SDTI transport stream.
HDMI
High-Definition Multimedia Interface (HDMI) supports both digital television and computer signals and can also include multiple digital audio channels. HDMI devices are compatible with single-link digital DVD signals via an adapter, although no audio or additional metadata can be included. Many HD display devices and digital television set-top boxes include HDMI connectors.


HDMI connector
SCART
Consumer PAL equipment sometimes has a special connector called a SCART connector. A SCART connector has multiple pins that run composite, component RGB, and stereo audio in one bundle. SCART input or output can be broken up into individual connections using special adapters available from video and home electronics stores.

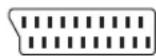
SCART connector
About Audio Interfaces, Signals, and Connectors
This section describes common types of audio interfaces, signal formats, and connectors.
Setting Up an Audio Interface
By default, Soundtrack Pro uses one of the built-in audio interfaces included with your Macintosh computer, such as a stereo headphone jack or a stereo speaker output. If you need to capture audio from a professional device, you may need a separate third-party interface. You can connect a third-party audio interface to your computer, and then connect microphones and musical instruments to the audio interface for recording. You can also connect output devices, such as monitors or speakers, a mixer, or an amplifier to the third-party audio interface.
Built-in Audio Interfaces
The following audio interfaces are included with your Macintosh computer (though some computer models may not include all interfaces).
Built-in Analog Audio
You can capture and output audio using the built-in audio ports on your computer. The built-in audio interface on your computer usually uses a stereo miniplug connector. If necessary, you can buy an adapter to connect the miniplug connector to two stereo RCA or 1/4" tip-ring-sleeve (TRS) connectors, which can then be connected to your video or audio device.
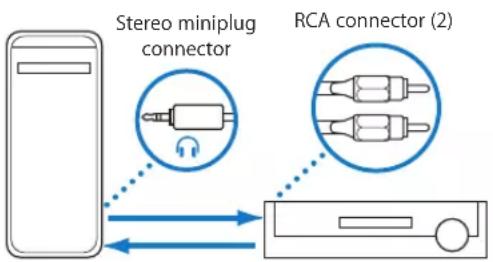
Computer Analog Audio or video device
For basic mixing, you can connect the built-in audio output on your computer to a pair of external speakers. This gives you two output channels, which can be configured for dual mono or stereo playback.
Built-in S/PDIF Digital Audio
Some computers have built-in S/PDIF optical digital ports (sometimes called TOSLINK) that you can connect to some CD players, DAT recorders, and other digital audio devices.
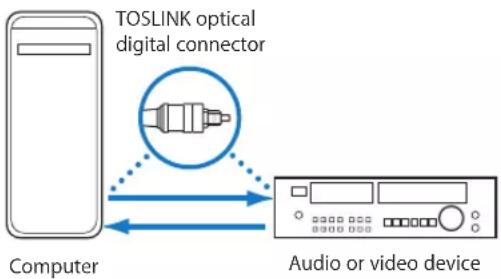
flowchart
graph LR
    A["Computer"] -->|TOSLINK optical digital connector| B["Audio or video device"]
    B -->|Data flow arrow| A
DV FireWire
If your post-production project uses a DV codec, you can output audio via the FireWire port on your computer. This allows you to use a DV deck, DV camcorder, or DV-to-analog converter as an audio interface. In this case, you connect your FireWire cable to your DV device and then connect the audio outputs of the DV device to external speakers or a television monitor.
Choosing a Third-Party Audio Interface
Before you purchase a separate audio interface, consider that most third-party video interfaces may have enough audio connectors to meet your requirements. You should consider a separate audio interface when:
- You are trying to capture or output more audio channels than your built-in audio interface or third-party video interface supports.
- You need to capture or output in a format not supported by your existing interfaces (for example, if you need to capture audio at a sample rate of 96 kHz but your video interface only supports a sample rate of 48 kHz).
Benefits of a Third-Party Audio Interface
Third-party audio interfaces can provide many more features than your computer's built-in interfaces, such as:
- More than two audio channels—eight channels is common, but some interfaces have 24 or more input and output channels
• Professional connectors such as XLR or 1/4" TRS - High-quality analog-to-digital and digital-to-analog converters supporting sample rates as high as 192 kHz and 24 bits per sample
- Support for analog and digital audio formats
- Stable, "jitter-free" digital audio clocks
Tips for Selecting a Third-Party Audio Interface
When you select an audio interface, make sure it has the following:
- Connectors that match your audio equipment, such as XLR, 1/4" TRS, RCA, or TOSLINK
- Support for audio signal formats that your audio equipment uses, such as AES/EBU, S/PDIF, or ADAT Lightpipe
- Enough audio inputs and outputs to connect your equipment
- Sample rate and bit depth at least as high as your audio equipment. For example, if you have an audio device with a sample rate of 96 kHz and 24 bits, your audio interface should at least match this.
Note: Soundtrack Pro supports input from digital audio interfaces up to a maximum sample rate of 96 kHz and a maximum bit depth of 24 bits. If you connect an interface that uses sample rates or bit depths outside the range supported by Soundtrack Pro, an alert message appears, telling you that data from the audio interface is not compatible with the application.
- Mac OS X compatibility. When choosing an audio interface, check the manufacturer's specifications to make sure the interface is compatible with Mac OS X.
- Up-to-date driver software, if needed. If the device requires a driver, make sure an up-to-date driver is included with the device, or is available from the manufacturer.
Important: If you are considering purchasing an interface, make sure it supports Mac OS X Core Audio. Soundtrack Pro supports any audio interface that is compatible with Mac OS X Core Audio.
All digital audio interfaces can be susceptible to latency, a noticeable delay between the time the audio signal is produced and the time you hear it. When connecting an audio interface, you should connect the interface directly to the computer, rather than connecting it through a hub or daisy-chaining it through another device. Connecting an audio interface through a hub or an intermediary device can cause an unacceptable amount of latency, particularly with slower protocols such as USB.
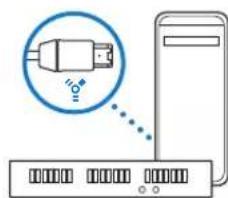
natural_image
Diagram showing a computer connected to a server with an icon of a plug and signal waves (no text or symbols present)FireWire for Digital Audio
FireWire is a professional and consumer standard for both audio and video equipment. The combination of fast data-transfer rates, high storage capacities, and plug-and-play connection makes FireWire an attractive choice for working with digital audio files. FireWire is included on all current Macintosh computers, and a number of FireWire audio interfaces are available. These third-party interfaces are not DV devices, but merely devices that use FireWire as a means of transferring digital audio data. FireWire interfaces are more convenient to switch between computers than PCI cards, and they can be used with both desktop and portable computers. A FireWire interface typically supports ten or more inputs, and at least eight outputs.

flowchart
graph LR
    A["FireWire 400 (6-pin)"] --> B["Breakout box"]
    C["XLR connector (2)"] --> B
    B --> D["Analog or digital VTR"]
    style A fill:#f9f,stroke:#333
    style C fill:#f9f,stroke:#333
    style B fill:#ccf,stroke:#333
    style D fill:#cfc,stroke:#333
Important: Although a FireWire bus supports a very high data rate, connecting too many devices, such as a DV video device, a FireWire hard disk, and a FireWire audio interface, could potentially exceed the bus speed, resulting in audio with missing samples.

natural_image
Diagram showing a USB port connected to a desktop computer via a dotted line, with no visible text or symbols.USB Audio Interfaces
There are a wide variety of USB audio interfaces available. USB supports plug-and-play operation and the ability to connect several devices in sequence (daisy-chaining). USB is included on all current Macintosh computers.
Most USB audio interfaces support two or four audio channels at one time. USB audio interfaces vary in quality considerably, so take some time to research them before you purchase one. The connectors on USB interfaces vary; some interfaces have RCA connectors and others have both XLR and 1/4" TRS connectors. Very inexpensive USB audio interfaces may only have a stereo miniplug.
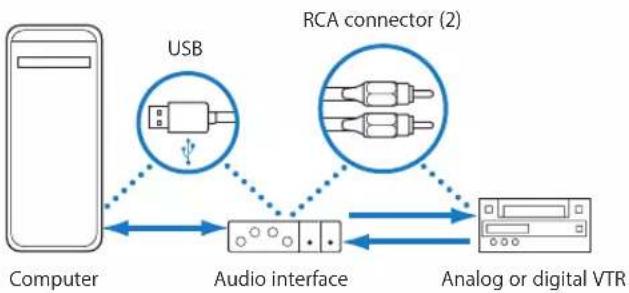
flowchart
graph LR
    A["Computer"] --> B["USB"]
    B --> C["Audio interface"]
    C --> D["Analog or digital VTR"]
    E["RCA connector (2)"] --> C
    C --> D
Make sure you don't exceed the total bandwidth of the USB bus. USB 1.1 has a fairly low data rate, so be careful not to add too many USB items to the bus. Ideally, USB audio interfaces are always directly connected to your computer, not connected via a hub or to the computer's display, keyboard, or another peripheral. If you are having audio problems with a USB interface connected to a hub, try removing USB devices and eliminating the hub from the connection.
USB 2.0 audio interfaces are also available. Because USB 2.0 devices can handle high data rates (similar to FireWire 400), you can treat them similarly to FireWire audio interfaces (see "FireWire for Digital Audio" on page 488).

PCI Audio Interface Cards
Peripheral Connect Interface (PCI) interfaces, unlike FireWire and USB interfaces, require that you install a dedicated sound card in your computer. Of all the audio interfaces, PCI audio interfaces provide the maximum transfer speed and can support many channels with high sample rates. Many PCI audio interface cards come with a separate breakout box where the audio input and output connectors are located.
PCI Audio Interface Card with Built-in Connectors
Some PCI audio interface cards have audio connectors attached directly to the card. Because there is limited space on a PCI card to mount audio connectors, RCA connectors are typically used.

flowchart
graph LR
    A["Computer PCI card with connectors"] --> B["Audio or video device"]
    C["RCA connector (2)"] --> B
PCI Audio Interface Card with Breakout Box
The majority of PCI audio interface cards have a breakout box with a large number of XLR or 1/4" TRS connectors. The breakout box is attached to the PCI card via a long cable with a multipin connector. The long cable allows you to place the breakout box in a convenient location, so you can easily connect and disconnect your video and audio devices without going behind your computer.

flowchart
graph LR
    A["Computer with PCI card"] <--> B["Breakout box"]
    B <--> C["XLR connector (2)"]
    B --> D["Analog or digital VTR"]
Audio Connectors, Cables, and Signal Formats
Different audio connectors and cables are suited for different purposes. They are available for professional and consumer audio equipment, at a range of prices and levels of quality. Audio connectors are often indicative of the kind of signal they transmit. However, there are enough exceptions that it's important to know what kind of audio signal you are connecting, in addition to the connector type. An important distinction is whether an audio connector carries a balanced or an unbalanced signal. When connecting microphones and musical instruments to an audio interface or a mixer, make sure the interface has the proper input jacks for the type of connectors and cables you plan to use.
Analog Audio Connectors, Cables, and Signal Formats
The following is a cross-section of available industry-standard analog audio connectors, cables, and signal formats.
1/8" Mini Connectors
These are very small, unbalanced audio connectors. Many computers have 1/8" mini inputs and outputs at -10 dBV line level, and many portable audio devices such as CD players, iPod digital music players, and MP3 players use these connectors for headphone outputs. Portable MiniDisc and DAT recorders often use 1/8" mini connectors for connecting microphones.


Note: Some Macintosh computers and portable audio recorders also use a connector that combines both a stereo miniplug and a 1/8" optical digital connection (see "S/PDIF" on page 492) in a single jack.
RCA Connectors
Most consumer equipment uses RCA connectors, which are unbalanced connectors that usually handle -10 dbV (consumer) line levels. RCA connectors are used on consumer audio equipment such as home stereo systems and videocassette recorders.


RCA connector
1/4" Audio Connectors
1/4" connectors (sometimes called phone plugs) are used on a wide variety of professional and consumer musical equipment, including musical instruments and amplifiers, speakers, and external effects devices.
1/4" Tip-Sleeve Connectors
1/4" tip-sleeve (TS) connectors with a tip and a sleeve are unbalanced connectors often used for musical instruments like electric guitars, keyboards, amplifiers, and so on.


1/4" tip-sleeve (TS) connector
1/4" Tip-Ring-Sleeve Connectors
Professional equipment often uses 1/4" tip-ring-sleeve (TRS) audio connectors with +4 dBu line level. 1/4" TRS connectors connect to three wires in an audio cable—hot, neutral, and ground—and usually carry a balanced audio signal. In some situations, the three wires may be used to send left and right (stereo) signals, making the signals unbalanced.
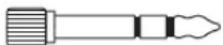

1/4" tip-ring-sleeve (TRS) connector
Note: Tip-sleeve and tip-ring-sleeve connectors look almost identical. Some audio devices (especially mixers) accept a TS connector in a TRS jack, but you should always check the equipment documentation to be sure. Remember that most 1/4" TS connectors connect to -10 dBV line level equipment, whereas 1/4" TRS connectors usually expect a +4 dBu line level.
XLR Connectors
These are the most common professional audio connectors. They almost always carry a balanced signal. Many cables use an XLR connector on one end and a 1/4" TRS connector on the other. The signal may be microphone level (when using a microphone) or +4 dBu/dBm (professional) line level.


XLR connector
Digital Audio Connectors, Cables, and Signal Formats
Although digital audio signals are completely different from analog signals, the same connectors are often used for convenience. For example, an XLR connector can be used to carry an analog audio signal or an AES/EBU digital audio signal. The following is a cross-section of available industry-standard digital audio connectors, cables, and signal formats.
S/PDIF
Sony/Philips Digital Interface Format (S/PDIF) is a consumer-level variation of the AES/EBU digital audio protocol. S/PDIF audio data can be transmitted several ways, including:
- Via coaxial cables with an RCA connector
- Via optical TOSLINK
Connectors for S/PDIF signals are found on most consumer digital equipment, such as DAT recorders, CD players, DVD players, MiniDisc equipment, and some audio interfaces.


S/PIDF optical digital connector
TOSLINK Optical and ADAT Lightpipe
TOSLINK is a connector for optical digital signals. TOSLINK is used for several digital signal formats, although most devices support only one of these formats:
• S/PDIF (stereo digital)
• AC-3 and DTS (5.1-channel surround)
• ADAT Lightpipe (an 8-channel digital signal)
Some Macintosh computers have a single interface that combines a TOSLINK connector with an analog stereo miniplug.


TOSLINK connector
ADAT Lightpipe is an eight-channel digital audio format developed by Alesis. This signal format uses TOSLINK optical connectors. Eight channels are supported at sample rates of 44.1 and 48kHz using 24 bits per sample. Higher sample rates are available by pairing channels (this format is sometimes called sample multiplexing, or S/MUX). For example, a sample rate of 192kHz is possible, but the number of channels is reduced to two. However, not all equipment supports channel pairing and increased sample rates.
AES/EBU
The AES/EBU (Audio Engineering Society/European Broadcasting Union) standard for transferring digital audio typically uses XLR connectors in professional studio environments. The data protocol is essentially identical to S/PDIF.


XLR connector
TDIF Connectors
Tascam Digital Interface (TDIF) is a signal format for transferring digital audio between Tascam digital multitrack recorders or digital mixers. Connections are made via a 25-pin D-subminiature connector and data is carried on shielded cable. Eight channels are supported at sample rates of 44.1 and 48 kHz using 24 bits per sample. Higher sample rates are available by pairing channels. The TDIF standard is currently one of two major formats (the other being ADAT optical) widely used in professional products for digital transfer of more than two tracks of audio simultaneously using only one cable.

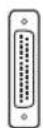
TDIF connector
About Microphone, Instrument, and Line Level
Audio equipment can output line level at -10 dBV (consumer level), +4 dBm/dBu (professional level), or microphone level, which is around 50 or 60 dB less than line level. When you use a microphone, the level is very low, requiring a preamplifier to raise the signal to line level before it can be recorded or processed. Most audio mixers, cameras, and professional portable recording devices have built-in preamplifiers.
Instrument level is between microphone and line level, around -20 dBV or so. Guitars and keyboards usually output at instrument level.
Signal Differences Between Pro and Consumer Equipment
Professional audio equipment typically uses higher voltage levels than consumer equipment, and it also measures audio on a different scale.
- Professional analog devices measure audio using dBu (or dBm in older equipment). 0 dB on the audio meter is usually set to +4 dBu, which means optimal levels are 4 dB greater than 0 dBu (.775 V), or 1.23 V.
- Consumer audio equipment measures audio using dBV. The optimal recording level on a consumer device is -10 dBV, which means the levels are 10dB less than 0dBV (1 V), or 0.316V .
Therefore, the difference between an optimal professional level (+4 dBu) and consumer level (-10 dBV) is not 14 dB, because they are referencing different signals. This is not necessarily a problem, but you need to be aware of these level differences when connecting consumer and professional audio equipment together.
About Balanced Audio Signals
Audio cables can be either balanced or unbalanced, depending on their intended use. For long cable runs, especially when using relatively low microphone levels, a three-wire balanced audio circuit reduces noise. Balanced audio cables use the principle of phase cancellation to eliminate noise while maintaining the original audio signal.
A balanced audio cable sends the same audio signal on two wires, but inverts the phase of one signal by 180 degrees.
natural_image
Simple blue sine wave pattern on a Cartesian coordinate system (no labels or text)Original signal
natural_image
Simple sine wave line diagram with no text or labelsInverted signal (reverse phase)
When noise is introduced into the cable, it is introduced equally to both the original and the inverted signal.
line
| x | y | | --- | --- | | 0 | 0 | | 1 | 1 | | 2 | -1 | | 3 | 2 | | 4 | -2 | | 5 | 3 | | 6 | -3 | | 7 | 4 | | 8 | -4 | | 9 | 5 | | 10 | -5 | | 11 | 6 | | 12 | -6 | | 13 | 7 | | 14 | -7 | | 15 | 8 | | 16 | -8 | | 17 | 9 | | 18 | -9 | | 19 | 10 | | 20 | -10 | | 21 | 11 | | 22 | -11 | | 23 | 12 | | 24 | -12 | | 25 | 13 | | 26 | -13 | | 27 | 14 | | 28 | -14 | | 29 | 15 | | 30 | -15 | | 31 | 16 | | 32 | -16 | | 33 | 17 | | 34 | -17 | | 35 | 18 | | 36 | -18 | | 37 | 19 | | 38 | -19 | | 39 | 20 | | 40 | -20 | | 41 | 21 | | 42 | -21 | | 43 | 22 | | 44 | -22 | | 45 | 23 | | 46 | -23 | | 47 | 24 | | 48 | -24 | | 49 | 25 | | 50 | -25 | | 51 | 26 | | 52 | -26 | | 53 | 27 | | 54 | -27 | | 55 | 28 | | 56 | -28 | | 57 | 29 | | 58 | -29 | | 59 | 30 | | 60 | -30 | | 61 | 31 | | 62 | -31 | | 63 | 32 | | 64 | -32 | | 65 | 33 | | 66 | -33 | | 67 | 34 | | 68 | -34 | | 69 | 35 | | 70 | -35 | | 71 | 36 | | 72 | -36 | | 73 | 37 | | 74 | -37 | | 75 | 38 | | 76 | -38 | | 77 | 39 | | 78 | -39 | | 79 | 40 | | 80 | -40 | | 81 | 41 | | 82 | -41 | | 83 | 42 | | 84 | -42 | | 85 | 43 | | 86 | -43 | | 87 | 44 | | 88 | -44 | | 89 | 45 | | 90 | -45 | | 91 | 46 | | 92 | -46 | | 93 | 47 | | 94 | -47 | | 95 | 48 | | 96 | -48 | | 97 | 49 | | 98 | -49 | | 99 | 50 | | 100 | -50 |
natural_image
Simple line drawing of a waveform with no text or symbolsNoise on line
(affects both signals)
When the signal arrives at its destination, the inverted signal is put back in phase and both signals are combined. This puts the original and inverted signals back in phase, but it causes the noise signals on each line to be out of phase.
natural_image
Simple line drawing of a waveform with no text or symbols
natural_image
Simple line drawing of a waveform with no text or symbolsInverted signal
(inverted again)
Now, both audio signals are in phase, but the noise is inverted, causing the noise to be canceled. At the same time, the original signal gets a little stronger because it is sent on two wires and combined. This helps compensate for the reduction in signal strength that occurs naturally on a long cable run.

natural_image
Simple blue sine wave pattern on a Cartesian coordinate system (no labels or text)Combined signals (noise eliminated)
Any noise introduced into the cable across its long run is almost completely eliminated by this process.
Note: Unbalanced cables have no way of eliminating noise and are therefore not as robust for long-distance cable runs, microphone signals, and other professional applications.
Tips for Choosing Speakers and an Amplifier
Professional audio engineers have to be able to trust the sound coming from their speakers. When you mix your audio, you need audio monitors that can handle the full range of audio intensities and frequencies. Ideally, your monitors will have a flat frequency response from 20 Hz to 20,000 Hz (or 20 kHz). This means that they neither attenuate nor amplify any frequencies. Flat frequency response is important for critical listening because the speakers themselves are not “coloring” the sound.
In addition to the speaker quality itself, additional factors affect your audio monitoring environment:
- Size and materials of the room
- Placement of the speakers within the room, such as distance from walls and angle of speakers
- Listener position between speakers
Frequency Response and Dynamic Range
Speaker quality varies greatly depending on their purpose as well as their price. For example, speakers in a portable stereo or television are designed to play audio that has already been mastered by a mixing engineer. Mastered audio such as audio CD, radio, television, and movie sound has a compressed dynamic range (meaning levels are fairly consistent and loud).
Speakers and amplifiers that are designed for mastered audio often intentionally emphasize certain frequencies, as is done with the bass enhancement feature found on many systems. This may make an audio CD sound better, but it is not recommended for mixing production sound because you get a false impression of the audio signal. For example, if your speakers overemphasize frequencies around 2 kHz, you may compensate during mixing by reducing the intensity of audio around 2 kHz. If you then play your mix on a different set of speakers with a flat frequency response, the frequencies around 2 kHz will sound too muffled.

line
| Frequency | Value | | --------- | ----- | | 20 Hz | + dB | | 200 Hz | + dB | | 1 kHz | + dB | | 5 kHz | + dB | | 20 kHz | + dB | | 20 Hz | + dB | | 200 Hz | + dB |Flat
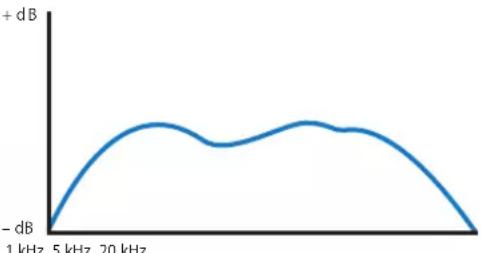
line
| Frequency | Value (dB) | | --------- | ---------- | | 1 kHz | -dB | | 5 kHz | +dB | | 20 kHz | +dB |Not
Self-Powered Versus Passive Speakers
Speakers powered by an external amplifier are called passive speakers. When you use separate amplifiers and passive speakers, a number of factors affect the overall frequency response and quality of your audio. Instead of using a separate amplifier and speakers, a simpler option is to use self-powered speakers (speakers with built-in amplifiers). These have become increasingly popular, especially for studio monitoring and video editing.
Self-powered speakers deliver more consistent performance because both components are designed to work together and are housed in a single enclosure. For video editing systems, self-powered speakers are a good, easy-to-use solution. Self-powered speakers accept line level inputs, so it's fairly easy to connect them to your audio interface.
Amplifiers and Signal Levels for Unpowered Speakers
Unpowered speakers require signals with higher voltage than consumer and professional equipment can provide directly. These levels are known as speaker level audio signals, while audio devices such as tape recorders and audio mixers usually provide line level signals. An audio amplifier boosts line level signals to speaker levels to properly drive speakers. Wide-gauge speaker cables that can handle the higher electrical strength of speaker levels are used to connect the amplifier to speakers.
Connecting Professional Video Devices
Regardless of what format or video interface you use, the same basic steps apply when you connect a VTR or camcorder to your computer.
Connecting Professional SD Video Devices
If you're using a format other than DV, such as Betacam SP or Digital Betacam, you need to install a third-party video interface that supports the proper signal for the format you're using. Some video interfaces can digitize analog video input and output (for analog formats like Betacam SP), while others capture video only if it is already digital. In either case, the video interface encodes the video information using a codec, which may or may not apply compression to the video data to make it smaller while stored on disk. Compression settings used by video interfaces are typically controlled by software and use a variation of the M-JPEG codec (although the name of the codec itself may not reflect this).
Unlike DV video devices (which use a single FireWire cable), third-party interfaces send and receive video, audio, and device control data on separate cables. For remote device control connections on professional equipment, 9-pin (DB9) connectors are used.
A Recommended System Using a Third-Party Video Interface
To set up a system using a third-party video interface, you need the following equipment:
- Your computer and display
• A non-DV format video device (a camcorder or deck)
• Audio and video cables for your system
- A third-party capture interface installed in or connected to your computer
Note: Some third-party video interfaces have a breakout box connected to the card with a special cable, which is included.
- A USB-to-serial adapter or internal modem serial port adapter
• An RS-422 video deck control cable
- A blackburst generator, with the appropriate cables to connect it to both your third-party video interface and your video and audio devices
The following illustration shows a typical SD setup:

flowchart
graph LR
    A["PCI card"] -->|USB| B["USB-to-serial adapter"]
    B -->|RS-422 serial| C["Analog or digital VTR"]
    C -->|Audio| D["Amplified speakers"]
    C -->|Video| E["Standard definition monitor"]
    A --> F["Breakout box"]
    F -->|Audio| C
    F -->|Video| C
    F --> G["Reference video"]
    G --> H["Blackburst generator"]
    H -->|Reference video| F
Following are basic instructions for connecting a video device to a third-party video interface in your computer, as well as connecting remote device control.
To connect video and audio outputs from your VTR to your third-party video interface:
1 Install a supported third-party PCI video interface in your computer or connect a FireWire or USB video interface.
For detailed information, see the documentation that came with your video interface and your computer.
2 If you are using a PCI card video interface that came with a breakout box, connect the breakout box to the PCI card using the cables provided.
3 Connect the video output of your VTR or camcorder to the video input of your video interface.
4 Connect the audio outputs of your VTR or camcorder to the audio inputs of your video or audio interface.
5 Connect the 9-pin remote device control cable to your deck, and to your breakout box or serial port adapter.
6 To genlock your video interface with your camcorder or deck:
a Connect one of the blackburst generator's outputs (there should be several) to the genlock or external sync input on your deck (usually you use a cable with a BNC connector).
b Connect another of the blackburst generator's outputs to the genlock or external sync connector on your video interface.
7 Plug in and turn on your blackburst generator.
8 Turn on your deck.
9 If you're using Soundtrack Pro or Final Cut Pro to control your camcorder or deck, make sure that the device control switch on your VTR is set to Remote.
For more information about VTR settings, see the documentation that came with your VTR and your video interface.
For information about synchronizing Soundtrack Pro to an external video deck or audio recorder, see "Synchronizing Soundtrack Pro to External Timecode" on page 506.
Note: Some broadcast-quality video output devices receive both the video and audio from a project. When you use a video output device that supports both video and audio output, Soundtrack Pro automatically routes your audio output to this device to provide the best possible synchronization of the audio and video.
Connecting Professional Component Analog Video Devices
The most prevalent component analog video format still in use today is Betacam SP. It is an SD video format, but because it is analog, your video interface must have analog-to-digital converters to digitize the analog signal before encoding it and writing a digital media file to the computer hard disk. Unlike digital capture interfaces, analog-to-digital interfaces often allow you to adjust luma and chroma levels (using controls in the Final Cut Pro Log and Capture window) when you digitize.
The steps for connecting an analog VTR to a video interface are essentially the same as for digital SD and HD devices. The main difference is that you need to make three physical connections, one for each of the three analog video components: Y, R-Y, and B-Y (also called YUV or YCBCR , depending on the country and the specifics of the format). For more information, see the Final Cut Pro User Manual. To connect equipment, see "Connecting Professional SD Video Devices" on page 498.
Connecting Consumer Analog Video Devices
If you want to digitize video from an analog consumer format, such as VHS or 8 mm video, you need a video interface that has an analog composite video input. Also, older consumer decks rarely support remote device control, which means you can't remotely control the deck or capture timecode from these formats. If you need the ability to recapture the video accurately using timecode, it's often easiest to dub (copy) the video to a digital format like DV, or a professional format you are using for your project.
There are fairly inexpensive capture interfaces that can accept an analog composite input and convert it to a DV video signal transferred via FireWire. Some more expensive interfaces may also accept an analog component input.
Connecting Non-DV Devices to a DV Converter
You can use a DV converter to convert a device in a non-DV format, such as Betacam SP or Digital Betacam, to DV. This allows you to capture footage using the built-in FireWire port on your computer. However, unlike a complete DV FireWire setup, this kind of deck still requires serial (RS-422 or RS-232) remote device control.
This kind of setup is used mainly for low-resolution capture and offline editing. Because Final Cut Pro can edit DV video natively, you can capture your video as if it were DV footage, edit at DV resolution, and then recapture only the necessary media files for your finished movie at full resolution using one of the third-party video interface solutions described earlier.
Important: If you plan to recapture footage later, make sure timecode is captured accurately.
A Recommended Non-DV-to-DV System Using Serial Device Control
You need the following equipment:
- Your computer and display
- A non-DV format playback device, such as a Betacam SP or Digital Betacam deck
- An analog-to-DV or digital SDI-to-DV converter
Note: Some DV camcorders and VTRs can also act as an analog-to-DV converter.
- A 4-to-6-pin FireWire cable, available at an electronics store or an Apple Authorized Reseller
- A USB-to-serial adapter or internal modem serial port adapter
• An RS-422 video deck control cable
The following illustration shows a typical non-DV-to-DV setup:

flowchart
graph LR
    A["Server"] -->|USB| B["USB-to-serial adapter"]
    B -->|RS-422 serial| C["Analog or digital VTR Computer"]
    C -->|Audio| D["Amplified speakers"]
    C -->|Video| E["Standard definition monitor"]
    C -->|Audio| F["DV converter"]
    F -->|FireWire| A
To connect video and audio outputs from your VTR to your analog-to-DV or digital-to-DV converter:
1 With your DV converter turned off, connect the 6-pin connector on the FireWire cable to the FireWire port on your computer.
2 Connect the 4-pin connector on the FireWire cable to the DV converter.
3 Connect the video output of your VTR to the video input of the DV converter.
4 Connect the audio output of your VTR to the audio input of the DV converter.
Note: The DV converter mentioned above could possibly be a DV VTR that can convert analog video and audio input to DV FireWire. Some decks need to be in record mode to allow this conversion. Other decks may not support this.
5 Connect the remote device control.
Connecting Professional Audio Devices
The steps for connecting audio playback and recording devices are similar to the steps for connecting professional video devices. (For information on connecting professional video devices, see "Connecting Professional Video Devices" on page 498.) Many professional audio-only devices such as DAT recorders and Tascam DA-88/DA-98 multitracks also support remote device control and audio insert editing.
If you plan to capture footage using separate video and audio interfaces, you may need to set up additional synchronization between your audio device and audio interface. For more information, see "Synchronizing Equipment with a Blackburst Generator" on page 504 as well as the documentation that came with your audio interface.
Connecting Professional Digital Audio Devices
Professional digital audio devices often use balanced XLR connectors. Each XLR carries two AES/EBU digital audio channels. Connect the digital audio outputs of your video or audio device to your audio interface (or its breakout box). If your video interface has the appropriate connectors, you can also connect the audio outputs of your device to the audio inputs on the video interface.
Note: Professional analog audio devices also use XLR connectors, but the signal is incompatible with AES/EBU digital audio.
Connecting Consumer Digital Audio Devices
Consumer devices such as CD players, MiniDisc recorders, and some DAT recorders use either an optical or RCA (coax) connector for S/PDIF digital audio. S/PDIF carries two channels of digital audio, usually at a sample rate of 44.1 or 48 kHz and a bit depth of 16 bits. Connect the S/PDIF output of your audio device to the S/PDIF input on your audio or video interface, if available.
Connecting Professional Analog Audio
Professional analog audio devices use balanced XLR or 1/4" TRS connectors for each audio channel. Most audio interfaces that support multiple audio channels come with a breakout box that contains all the connectors.
To connect multiple analog audio channels from a VTR or audio device to a multichannel audio interface:
■ Connect each audio output channel on the VTR or audio device to each audio input channel on the audio interface or corresponding breakout box, if included.
A Recommended Audio System Using a Third-Party Audio Interface
To set up a system using a third-party audio interface, you need the following equipment:
- Your computer and display
- A device-controllable audio deck, such as a DAT or multitrack deck
- Appropriate analog cables for your system
- An audio interface
Note: Some third-party PCI interface cards have a breakout box connected to the card with a special cable.
- A USB-to-serial adapter or internal modem serial port adapter
- A blackburst generator, with the appropriate cables to connect it to both your third-party audio interface and your audio deck. (For more information, see "Synchronizing Equipment with a Blackburst Generator," next.)
- An RS-422 video deck control cable
Synchronizing Equipment with a Blackburst Generator
With most professional editing systems, you capture video, audio, and timecode via separate cables. It's important that when you capture, the VTR and the video and audio interfaces are synchronized via a common video timing signal. If digital audio samples and video lines and frames are not precisely synchronized, they eventually drift apart because they are captured at slightly different rates.
Using a common sync source is especially important when you are independently capturing long segments of video and audio to synchronize together later. If your audio deck and capture interface are not both receiving the same timing information, the sync between the audio and video portions of clips might drift over time.
A blackburst generator provides a common timing signal (or clock) to lock together the timing clocks of all devices in a system. This is sometimes referred to as external sync or house sync because every device in an entire facility can be timed to this common reference.
Professional VTRs, camcorders, audio devices, and interfaces often have the ability to accept sync signals from an external device. These connectors are labeled "genlock" (short for generator lock), "external sync," "reference input", or "reference video". On some equipment, the normal composite video input of a device can be used to lock to external sync.
Important: To synchronize your video or audio devices and interfaces, they must all accept an external clock source (such as a blackburst generator).
When you genlock a deck and a video or audio capture interface, one output of the blackburst generator should be connected to the external sync input of the video or audio deck, and another output should be connected to the external sync input of your audio interface.
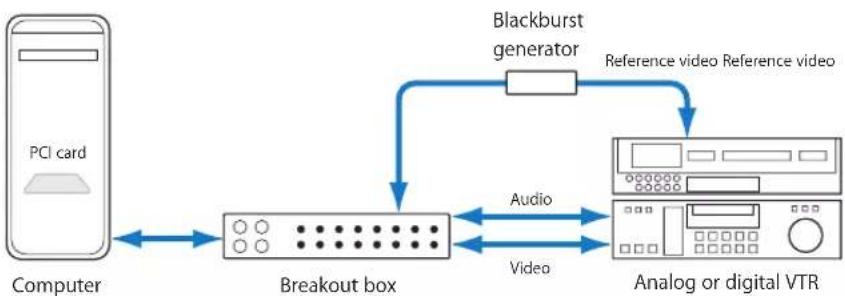
flowchart
graph LR
    A["PCI card"] --> B["Breakout box"]
    B --> C["Blackburst generator"]
    C --> D["Reference video"]
    C --> E["Reference video"]
    B <--> F["Audio"]
    B <--> G["Video"]
    B --> H["Analog or digital VTR"]
To connect your audio deck outputs to a third-party audio interface for synchronized, genlocked audio capture:
1 Install a supported audio interface card in your computer, or connect a supported audio interface.
For more information, see the documentation that came with the audio interface and your computer.
2 If you are using a PCI card audio interface that came with a breakout box, connect the breakout box to the PCI card using the included cable.
3 Connect the audio outputs of your audio device to the audio inputs of your audio interface.
4 Connect the remote device control cable.
5 To genlock your audio deck to your audio or video interface:
a Connect one of the blackburst generator's outputs (there should be several) to the genlock or external sync input on your audio deck.
b Connect another of the blackburst generator's outputs to the genlock or external sync connector on your video or audio capture interface (depending on which one you are using to capture audio).
For more information, see "Synchronizing Equipment with a Blackburst Generator" on page 504.
6 Plug in and turn on your blackburst generator.
7 If you are using a blackburst generator, choose Final Cut Pro > User Preferences, and in the General tab of the User Preferences window, make sure that "Sync audio capture to video source if present" is selected.
8 If you're using Final Cut Pro to control your audio deck, make sure that the device control switch on the equipment is set to Remote.
9 Once your deck and video capture interface are genlocked together, you still need to calibrate the timecode capture offset (found in the Device Control Presets tab in the Audio/Video Settings window) prior to capture.
For more information about calibrating timecode for capture, see the Final Cut Pro User Manual.
Synchronizing Soundtrack Pro to External Timecode
There may be times when you will wish to synchronize Soundtrack Pro to an external video deck or audio recorder. Soundtrack Pro can "chase" (synchronize to) timecode sent by an external video deck or other LTC sources.
Note: This is not the same thing as device control, which allows you to remotely control a video or audio device for capturing and output. See the Final Cut Pro User Manual for information on device control.
There are two types of signal involved in this process. LTC (Linear Time Code) is an audio signal sent by a video deck or audio recorder. This signal can't be read directly by the computer; it must be converted to MIDI Time Code (MTC) first. MTC can send via USB to the computer, and via MIDI cables for distribution to other connected MIDI compatible devices.
You will need the following equipment to synchronize Soundtrack Pro to external timecode:
- A video deck or audio recorder capable of sending LTC time code
- A device capable of converting LTC to MTC, such as the MotU MIDI Timepiece AV or Emagic Unitor 8 MKII
- An RCA-to-1/4-inch audio cable, or a 1/4-inch-to-1/4-inch audio cable
• A USB connection to the MIDI device - Possibly, a BNC-to-RCA female adapter
Setting Up the LTC Source Device
The LTC generator should be set up as the master sync device. All timecode settings should be set to "internal." If available, Jog should be turned off. See the documentation for your particular video deck or audio recorder for specific instructions.
Setting Up the MTC Generator
Set the MTC generator to receive LTC signals:
- In the case of the MIDI Timepiece, use the "Clockworks" control panel.
- In the case of the Unitor 8 MkII, use the "Unitor Control" application.
Setting Up Soundtrack Pro to Sync to External Timecode
You can set up Soundtrack Pro to sync to external timecode.
To sync Soundtrack Pro to external timecode, do the following:
1 Choose Soundtrack Pro > Preferences, then click the Synchronization button at the top of the Preferences window.

2 In the Input section, select the Sync to MIDI Time Code checkbox.
3 In the Output section, choose the frame rate for your project from the Frame Rate pop-up menu.
4 In the Time Code Offset section, enter your tape's offset in the Bar 1 At field. This is typically 01:00:00:00.
5 Close the Preferences window.
6 Depending on your timecode source, choose either View > Time Ruler Units > Drop Frame or View > Time Ruler Units > Non-Drop Frame.
7 Choose View > Time Ruler Units > Set Starting Timecode.
8 In the dialog that appears, enter the SMPTE position where you would like the sequence to start.
This often is the same as the tape offset. If your timecode source is drop frame, be sure to select the Drop Frame checkbox.

9 Click the MIDI Sync button in the transport controls.

Soundtrack Pro will now "chase" (synchronize to) timecode sent by the tape deck or other LTC sources.
Working with Apogee Hardware in Soundtrack Pro
Soundtrack Pro offers a dedicated control panel that allows you to configure selected Apogee hardware. Currently, this control panel supports the Apogee Ensemble only. Refer to the Apogee website for details on supported hardware models.
To open the Apogee control panel:
1 Confirm that your Apogee unit is connected and turned on.
2 Choose Soundtrack Pro > Open Apogee Control Panel.

The Apogee control panel offers two parameter types: Global and Unit.
- Global parameters are relevant only if more than one Apogee device is connected to your system; they define how several devices work together.
- Unit parameters configure individual hardware units.
Global Parameters
The Global parameters at the top of the Apogee hardware control panel define how multiple Apogee hardware devices work together.

Unit Selection
The Unit Select pop-up menu defines the hardware device (when multiple units are connected). The parameters of the selected device are displayed in the Unit tabs below.
Selecting the Identify Unit checkbox next to the Unit Select pop-up menu illuminates all LEDs on the corresponding hardware interface.
Loop Sync
Loop Sync facilitates the proper clocking of multiple units. It allows simple reconfiguration of clock signals, accommodating nonsynchronous digital inputs on all connected units.
The Loop Sync Master pop-up menu determines the hardware unit that you want to use as the clock master. Once a device is designated as master, all other units are automatically locked to its word clock.
Selecting the Disable Loop Sync checkbox allows you to manually adjust synchronization settings.
Note: Multiple Apogee device configuration (and the way Apogee devices interact) is determined by the Apogee driver version. Refer to the information included with the Apogee driver or device for details.
Units Parameters
The Units parameters configure the individual hardware units in your system. They are spread over three tabs: General, Inputs, and Outputs.
General Tab
The settings in this tab control a variety of features, such as the clock source, UV22HR dithering algorithm, and level meter behavior.
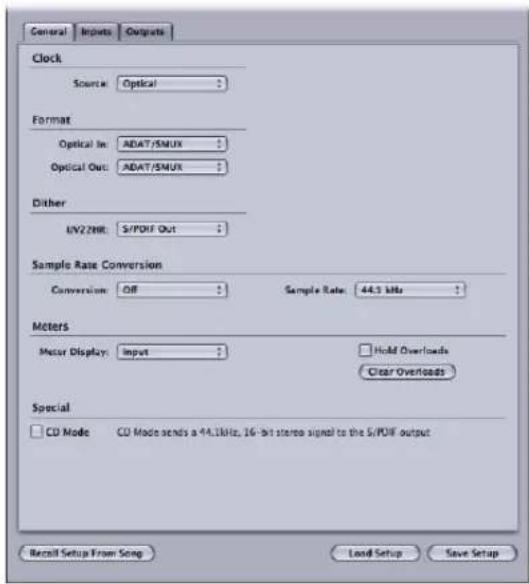
- Clock Source pop-up menu: Sets the clock source for the chosen unit. Options are Internal, Optical, Coax, and Word Clock.
- Format section: These settings determine the format of the optical input and output channels. Options are ADAT/SMUX and S/PDIF.
- UV22HR pop-up menu: This specifies the target signal path for the UV22HR dithering algorithm. Options are Off, Analog In 1–2, Analog In 3–4, Analog In 5–6, Analog In 7–8, Optical In 1–2, Optical In 3–4, Optical In 5–6, Optical In 7–8, S/PDIF In, and S/PDIF Out.
-
Sample Rate Conversion section: The Conversion pop-up menu allows you to enable sample rate conversion for the S/PDIF Input or Output signal path. If you decide to engage sample rate conversion on the S/PDIF Out channel, you can set the destination sample rate in the Sample Rate pop-up menu (next to the Conversion pop-up menu). Sample rate options are 44.1, 48, 88.2, and 96 kHz.
-
Meter Display pop-up menu: This pop-up menu determines the type of metering displayed by your units. Options are input level, output level, or no signal at all. If you select the Hold Overloads checkbox, your hardware displays overloads permanently. Clicking the Clear Overloads button (alongside the Meter Display pop-up menu) resets the overload LEDs of your meters.
- CD Mode checkbox: Selecting this checkbox turns on CD mode, which sends a 44.1 kHz, 16-bit stereo signal to the S/PDIF output, regardless of the input. In effect, selecting this checkbox automatically switches the Conversion pop-up menu to S PDIF Out, the Sample Rate pop-up menu to 44.1 kHz, and the UV22HR pop-up menu to S/PDIF Out. If any of these automatically set parameters are then changed manually, the CD Mode checkbox is automatically disabled.
Inputs Tab
This tab is used to configure the inputs of your Apogee hardware. The tab contains four identical parameter sets for microphone inputs 1 to 4 and a parameter section for line inputs 5 to 8.

Inputs 1 to 4
Inputs 1 to 4 feature built-in pre-amps. These can be configured individually via the four identical sets of Pre-Amp parameters.
- Level pop-up menu: This pop-up menu allows you to switch the respective channel between microphone and line inputs. If you choose the Line option, the +4 dBu and -10 dBV options shown in the pop-up menu below are used to set the reference level of the line input. All microphone-related settings (Gain, Group, 48V Phantom Power, and Phase Invert) will be dimmed.
- Gain slider: Sets the gain level of the chosen input (only available for microphone channels).
- Group pop-up menu: The gain controls of the microphone inputs can be assigned to a group. Groups allow you to link the Gain sliders of the microphone inputs. Changing the Gain slider of any microphone input assigned to a group also changes the Gain sliders of all microphone inputs in this group. Individual gain relationships (relative levels between microphone inputs)—at the time the Gain sliders were assigned to the group—are retained. Options are Group 1, Group 2, and None. The Group pop-up menu is only available to channels used as microphone inputs.
- Soft Limit checkbox: Select to apply Apogee's soft limiting to the inputs.
- Phase Invert checkbox: Select this checkbox to reverse the phase of the input signal (available only if the channel is used as microphone input).
- 48V Phantom Power checkbox: Select to activate a 48-volt phantom power supply for inputs 1 to 4. This checkbox is available only if the channel is used as a microphone input.
Line Inputs 5 to 8
The Analog Line Inputs section offers the following parameters for line inputs 5 to 8:
- Level pop-up menu: Sets the input level of line inputs 5 to 8. Options are +4 dBu and -10 dBV.
- Soft Limit checkbox: Select to apply Apogee's soft limiting to the analog line inputs.
Outputs Tab
This tab is used to configure the outputs of your Apogee hardware.

Headphone Parameters
These options configure the output signal for the headphone outputs.
- Source pop-up menu: Determines which output pair is sent to the headphone outputs. Options are Analog Out 1–2, Analog Out 3–4, Analog Out 5–6, Analog Out 7–8, Optical Out 1–2, Optical Out 3–4, Optical Out 5–6, Optical Out 7–8, and S/PDIF Out.
- Level slider: Sets the level of the headphone outputs.
Main Parameters
The Format pop-up menu allows you to choose the output channels that you wish to control with the Main Level slider. Values are Stereo, 5.1 Surround, and 7.1 Surround.
Analog Line Output Level Settings
Choose either the +4 dBu or -10 dBV option from the respective Channel pop-up menu to determine the reference level for each of your eight analog line outputs.
Setup Buttons
The bottom of the Apogee hardware control panel offers three buttons that allow you to load and save your configuration settings.
- Recall Setup From Song: Loads the configuration saved with the song.
- Load Setup: Opens a file selector box, allowing you to load a stored configuration.
- Save Setup: Opens a file selector box, allowing you to save the current configuration.
Solutions to Common Problems and Customer Support
E
Appendix
If you run into problems while working with Soundtrack Pro, there are several resources you can use to find a solution.
- This appendix: This appendix includes information about some of the most frequent issues users encounter.
- Release Notes: A late-breaking news page in the Soundtrack Pro Help menu provides last-minute information that didn't make it into the manual. Be sure to consult this help page as soon as you install or upgrade Soundtrack Pro.
- AppleCare Knowledge Base: AppleCare Support maintains a database of common support issues that is updated and expanded to include new issues as they arise. This is an excellent, free resource for Soundtrack Pro users. To access the AppleCare Knowledge Base, go to the AppleCare support page at http://www.apple.com/support.
- AppleCare Support: There are a variety of support options available to Soundtrack Pro customers. For more information, see the Apple Professional Software Service & Support Guide that comes with your Soundtrack Pro documentation.
Solutions to Common Problems
The following tips address some common issues.
Audio Files and Audio Interfaces
There are several factors that can affect performance when working with digital audio files. Observing the following guidelines will help you maintain the highest possible performance when working with Soundtrack Pro projects:
- Because digital audio files require intensive processing by the computer's processor, do not perform other processor-intensive tasks while working in Soundtrack Pro.
- External audio interfaces connected to your computer can be susceptible to latency, a noticeable delay between the time the audio signal is produced and the time it reaches the computer. Some hardware and software manufacturers offer guidelines for reducing the amount of latency for their equipment. Be sure to read the documentation that came with your audio interface.
- If you are using a USB audio interface, make sure the audio interface is directly connected to your computer. Do not connect a USB audio interface through a USB hub, or chain it through another USB device.
- If you experience unwanted noise or hiss, check the connections between your computer and any external audio devices. Refer to the documentation that came with each device for any additional instructions on dealing with noise.
Eliminating Recording Latency
You can use the Latency Compensation setting in the Preferences Recording pane to eliminate any latency inherent in your recording device. You calculate the latency by playing a loop and recording it at the same time, as described below:
1 Use an appropriate cable to connect the audio output port you are using to the input port for the device from which you plan to record.
2 Choose a loop with a large number of transients, such as a drum loop.
3 Set the tempo to 60 bpm (to simplify the latency calculation).
4 Click the Arm for Recording button in the header of the track to which you want to record.
5 In the Recording tab, set the Input device to the recording device.
6 Set Monitor to None and ensure that hardware monitoring on your recording device is turned off. You may also need to reduce input or output volumes of your devices in order to avoid feedback.
7 Click the Record button and let the loop play for a few seconds. Then click Stop.
8 Visually compare the original track and the newly recorded track. Zoom in to identify a place where the tracks have identical waveforms but are not lined up. Set the playhead at the corresponding identical points on the two waveforms and subtract the two Beats field values. This is the latency in milliseconds. If the recorded audio is late (to the right), you enter a positive value; if it's early (to the left), you enter a negative value. For example, if the location in beats of the selected point in the source loop is 1.2.002 and the location in beats of the corresponding point in the recording is 1.2.008, the latency is 6 milliseconds.
9 Enter the latency value in the Recording Preferences pane.
10 Mute the recorded track and test record the loop again to make sure the latency is eliminated.
Calling AppleCare Support
Included in your Soundtrack Pro package is documentation about the support options available from Apple. Several levels of support are available, depending on your needs.
Whatever your issue, it's a good idea to have the following information immediately available. The more of this information you have ready to give to the support agents, the faster they will be able to address your issue.
- The registration number that came with Soundtrack Pro. This number is different from the software serial number that is used to activate your copy of Soundtrack Pro
- Which version of Mac OS X you have installed. This information is available by choosing About This Mac from the Apple menu.
- The version of Soundtrack Pro you have installed, including updates if applicable. The version number can be viewed by choosing Soundtrack Pro > About Soundtrack Pro.
• The model of computer you are using - How much RAM is installed in your computer, and how much is available to Soundtrack Pro. You can find out how much RAM is installed by choosing About This Mac from the Apple menu in the Finder.
- What other third-party hardware is connected to or installed in the computer, and who are the manufacturers. Include hard disks, video cards, and so on.
- Any third-party plug-ins or other software installed along with Soundtrack Pro
AppleCare Support can be reached online at:
http://www.apple.com/support/soundtrackpro
Using Apple Loops Utility
F
Appendix
Some audio files you use in Soundtrack Pro can include metadata called tags. Tags provide information about the audio recorded in a file. Soundtrack Pro uses tags in one of two ways:
• To help locate files using the Search feature in Soundtrack Pro
- To provide information that Soundtrack Pro uses when matching the file's tempo and key to the project tempo and key, for the best possible playback quality
Both AIFF and WAV file formats can include tags. Libraries of audio files created for use with loop-based music software are usually tagged, and Soundtrack Pro recognizes the tags used in most popular file formats.
What Is Apple Loops Utility?
Apple Loops Utility is a companion application to Soundtrack Pro that you can use to view and manage tags in audio files. You can add and change tags using Apple Loops Utility; you can also tag multiple files, a process known as batch tagging.
Apple Loops Utility can read both AIFF and WAV file formats. When you save changes you make to either type of file, the file is saved as an AIFF file, the default file format for Soundtrack Pro. The set of tags you can work with using Apple Loops Utility includes all of the tags in WAV files tagged for use with Sony's ACID music application, as well as additional tags.
Tagged audio files can also contain information about transients. Transients indicate where beats occur in the file, and Soundtrack Pro uses transients to play back audio files at the highest level of quality. Apple Loops Utility can detect transients present in an audio file, and you can use Apple Loops Utility to add markers for additional transients and move them to new locations.
The Apple Loops Utility Interface
The interface consists of a window with two tabs: the Tags tab and the Transients tab. The bottom of the window includes a set of playback controls and file management buttons. Apple Loops Utility also includes an Assets drawer, located to the right of the main window, where you manage open files.

Tags Tab
The Tags tab includes areas for different types of tags, and also includes a set of playback controls you can use to listen to a file open in Apple Loops Utility. Listening to a file can help you decide which tags are appropriate for the file.

Property Tags
• Number of Beats field: Displays the number of beats in the file.
- File Type buttons: Set the file type, which can be Non-looping or Looping.
• Key pop-up menu: Sets the key of the file.
- Scale Type pop-up menu: Sets the file's scale type. The choices are Major, Minor, Good for Both, and Neither.
- Time Signature pop-up menu: Sets the file's time signature. The choices are 4/4, 3/4, 5/4, 6/8, and 7/8.
- Author field: Displays the name of the file's author. You can enter a new name by typing in the field.
- Copyright field: Displays the file's copyright data, if it exists. You can enter new data by typing in the field.
- Comment field: Displays any comments about the file. You can enter comments by typing in the field.
Search Tags
These tags are used by the Search feature in Soundtrack Pro when you search for files matching specific criteria.
- Collection: Displays the name of the collection the file is affiliated with, if one exists. You can enter new data by typing in the field.
- Theme: Displays the name of the theme the file is affiliated with, if one exists. You can enter new data by typing in the field.
- Genre pop-up menu: Displays choices for the musical genre of the file.
- Instrumentation list: Displays choices for the musical instrument or instrument category recorded in the file. Selecting an instrument category in the left column displays the list of instruments in that category in the right column.
File Info
This area of the Tags tab includes rows with Kind, Length, Date Modified, Sample Rate, Channels, Tempo, and File Location information. This information is for viewing only, and cannot be edited in the Tags tab.
Descriptors
Descriptors are complementary pairs of keywords describing the mood or character of the music recorded in the file. Each pair of keywords has a row of buttons, allowing you to choose either one keyword from the pair, or neither keyword.
Transients Tab
The Transients tab contains a large waveform display, with a Beat ruler and a horizontal scroll bar. Markers indicate the position of transients in the file. Typically, transients correspond to the peaks or most pronounced amplitude changes in a sound's waveform. The Transients tab includes controls for the beat division and sensitivity with which Apple Loops Utility detects transients in the file. You can also listen to the file using the playback controls to help determine where transients occur.

The Transients tab includes the following controls:
- Transient Division pop-up menu: Sets the beat value at which Apple Loops Utility detects transients.
- Sensitivity slider: Sets the degree of sensitivity at which Apple Loops Utility detects transients.
Assets Drawer
The Assets drawer lists the files open in Apple Loops Utility. The drawer, which is open when you open Apple Loops Utility, contains a Name column with the name of each open file, and a Changes column, which indicates any files to which you have applied changes.

Playback and File Management Controls
The bottom of the Apple Loops Utility window contains a set of playback controls so that you can listen to the file in Apple Loops Utility. The playback controls do not affect the file's tags, only the playback of the selected file.

- Go to Beginning button: Starts playback from the beginning of the selected file.
- Play button: Plays back the selected file.
- Stop button: Stops playback of the selected file.
• Key pop-up menu: Transposes the selected file to a new key for playback. - Tempo slider: Sets the playback tempo of the selected file. You can also enter a value in the field.
• Volume slider: Sets the playback volume of the selected file. You can also enter a value in the field.
When multiple files are selected, the playback controls are not available. You cannot play more than one file at a time.
There are two additional buttons at the bottom of the window, the Assets button and the Save button.
- Assets button: Shows and hides the Assets drawer.
- Save button: Saves your changes to the currently selected files in the Assets drawer.
Opening Files in Apple Loops Utility
You can open audio files from within Apple Loops Utility, or directly from a Soundtrack Pro project. You can have up to 2000 files open at the same time. When you open files in Apple Loops Utility, the files are displayed in the File list of the Assets drawer.
To open an audio file in Apple Loops Utility, do one of the following:
- Choose File > Open, then select the file in the Open dialog.
- Choose File > Open Recent, then choose a file from the submenu.
- Click the Add File button in the Assets drawer.
- Drag files from the Finder to the Assets drawer.
To open an audio file from Soundtrack Pro into Apple Loops Utility:
■ Control-click the file in Soundtrack Pro, then choose Open in Apple Loops Utility from the shortcut menu.
To open multiple files in Apple Loops Utility, do one of the following:
- Choose File > Open, then Shift-click the files in the Open dialog.
- Drag the volume or folder containing the files from the Finder to the Assets drawer.
You can have multiple Apple Loops Utility windows open at the same time so that you can compare different files. Each time you open an Apple Loops Utility window, an Open dialog appears, letting you choose the file or files to open in that window. You can change the open window behavior in the Apple Loops Utility Preferences window. See "Apple Loops Utility Preferences" on page 531 for more information.
Tagging Files in Apple Loops Utility
To tag files, you select the files in the Assets drawer, and then make changes to the selected files' tags in the Tags tab. When you change the settings in the Tags tab, the changes are applied only to the currently selected files.
When you make changes to a file's tags, a dot appears in the Changes column next to the filename to indicate that the file has been changed. You can select a file or group of files and make one or several changes, and then select another file or group of files and make different changes. Apple Loops Utility remembers all the changes you make as you work with different files. When you finish making changes, you can save changes to only the currently selected files, or save changes to all files marked in the Changes column of the Assets drawer.
Note: Changing a file's tags has no effect on the actual audio data recorded in the file. Changing the tag for the number of beats, for example, only changes the information used when Soundtrack Pro searches for files, not the actual number of beats recorded in the audio file. Similarly, changing the tag for key has no effect on the actual musical key of the audio file.
To tag a single audio file:
1 Select the file in the Assets drawer. (If the drawer is closed, click the Assets button to open it.)
Note: When a single file is selected, you can use the Up and Down Arrow keys to move up and down the files in the Assets drawer. You can listen to the file using the playback controls.
2 Make the changes you want to the file's tags in the Tags tab.
See "Tags Tab" on page 521 for information about the options in the Tags tab.
3 Click Save to save changes to the selected file, or click Save All to save all changes.
Tagging Multiple Files
When multiple files are selected, only the tags that apply to all the selected files can be changed. Items in the Tags tab that do not apply to all the currently selected files are dimmed and unavailable.
Each tag has a checkbox. Select the checkbox next to the tags for which you want to save changes.
To tag multiple files:
1 Select the files in one of the following ways:
- Shift-click to select adjacent files in the Assets drawer.
- Command-click to select nonadjacent files in the Assets drawer.
- Press Command-Shift-A to select all files in the Assets drawer.
2 Make the changes you want to the available tags for the selected files in the Tags tab.
See "Tags Tab" on page 521 for information about the options in the Tags tab.
3 Select the checkboxes next to the tags for which you want to save changes.
4 Click Save to save changes to the selected files, or click Save All to save all changes.
There are many keyboard shortcuts to simplify the task of tagging files. For a complete list of keyboard shortcuts, see "Apple Loops Utility Keyboard Shortcuts" on page 532.
Working With Transients
Transients are the points in an audio file where beats occur. Typically, transients occur at the widest areas of a waveform in the waveform display. During playback, Soundtrack Pro adjusts looping files using a technique called stretching to achieve the best audio quality, based on the loop's transients. Non-looping files are not affected by stretching.
When you open a file in Apple Loops Utility, it looks for transients at every 16th note position, based on the file's tags for tempo and the number of beats. You can change the beat value at which Apple Loops Utility detects transients using the Transient Division pop-up menu.
To display a file in the Transients tab:
■ Select the file in the Assets drawer, then click the Transients tab.
The Transients window can display only one file. If multiple files are selected, no waveform is displayed in the window. The waveform display in the Transients tab displays both the transients detected by Apple Loops Utility and transients you add to the file. You can add transients and move existing transients in the Transients tab.
To add a new transient:
- Click in the darker area above the Beat ruler in the waveform display.
To move a transient marker:
- Drag the marker by its handle in the area above the Beat ruler.
To change the beat value of detected transients:
- Choose a beat value from the Transient Division pop-up menu.
Choosing a larger beat value results in fewer transients being detected. Choosing a smaller beat value results in more transients being detected, if they are present in the audio recorded in the file.
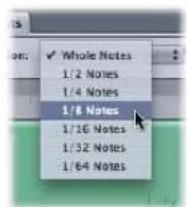
Sometimes transients occur at points in the audio file other than on a beat value. You can have Apple Loops Utility detect additional transients in the file using the Sensitivity slider. When you increase the sensitivity of transient detection, Apple Loops Utility considers points of higher amplitude in the waveform as transients, regardless of whether or not they occur at a beat value.
To change the sensitivity of transient detection:
- Drag the Sensitivity slider to the left to decrease the sensitivity, or to the right to increase the sensitivity of transient detection.

To remove a transient, do one of the following:
- Click the transient's handle in the area above the Beat ruler, then press the Delete key.
- Drag the transient out of the area above the Beat ruler.
Saving Changes to Files
When you save changes in Apple Loops Utility, you can save changes to only the currently selected files, or to all files marked in the Changes column of the Assets drawer. Any other file tags are unchanged. This is especially useful when working with a large group of files.
When saving multiple files, the checkbox next to the tag must be selected if changes to that tag are to be saved. For information about tagging multiple files, see "Tagging Files in Apple Loops Utility" on page 527.
To save changes to the currently selected files:
- Click the Save button.
Saving changes to a large number of files may take several minutes.
To save all changes:
- Click the Save All button in the Assets drawer.
To save multiple files to the same directory:
1 Choose File > Save As.
2 Navigate to the directory where you want to save the files, then click Save.
When you save multiple files using the Save As dialog, the files are saved to the selected directory, and their names are unchanged.
When you save changes to files in the WAV format, by default they are converted to the AIFF format and saved in the same location as the original WAV files. The new AIFF files have the same name as the WAV files, but with the .aiff file suffix. You can change this default behavior in the Apple Loops Utility Preferences window. See the following section, "Apple Loops Utility Preferences," for more information.
Removing Files From the Assets Drawer
You can remove files from the Assets drawer.
To remove files:
- Select the file or files in the Assets drawer, then click the Remove File button at the top of the drawer (or press the Delete key).
If you remove files to which you have applied changes, a dialog appears letting you choose whether to save or discard your changes.
Apple Loops Utility Preferences
You can set preferences for the startup behavior and default file saving behavior in the Apple Loops Utility Preferences window.

Startup
- Show Open Panel On Launch: When selected, an Open dialog appears each time you open Apple Loops Utility.
Saving
- When Converting a WAV to AIFF:
• Show Conversion Alert: Shows the conversion alert dialog when you try to save a WAV file.
- Close WAV and Edit AIFF: Automatically converts the WAV to an AIFF, closes the WAV file, and opens the AIFF for editing.
- Keep Working in WAV: Leaves the WAV file open.
Apple Loops Utility Keyboard Shortcuts
General and File
| Key command Function | |
 | Creates a new, blank Apple Loops Utility window and opens the Open dialog. |
 | Opens the Open dialog, from which you open files in Apple Loops Utility. |
 | Closes the current window. |
 | Closes the selected files. |
 | Saves changes to the currently selected files. If any of the files are WAV files, a dialog appears asking if you want to continue editing the files as WAV files or save them as AIFF files. |
 | Opens the Save As dialog to save the currently selected file with a new name. |
 | Saves all open files. |
 | Selects the file above the current file in the Assets drawer. |
| [7402] | Selects the file below the current file in the Assets drawer. |
| [XZTA] | Selects all files in the Assets drawer. |
Navigation
| Key command Function | |
| F1 | Makes the Tags tab active. |
| F2 | Makes the Transients tab active. |
| F3 | Makes the Assets drawer active. |
Key and Scale Type Tagging
| Key command Function | |
| Turns on keyboard tagging. | |
| Sets the key to A. | |
| Sets the key to A# (A-sharp). | |
| Sets the key to B. | |
| Sets the key to C. | |
| Sets the key to C# (C-sharp). | |
| Sets the key to D. | |
| Sets the key to D# (D-sharp). | |
| Sets the key to E. | |
| Sets the key to F. | |
| Sets the key to F# (F-sharp). | |
| Sets the key to G. | |
| Sets the key to G# (G-sharp). | |
| Sets the scale type to Major. | |
| Sets the scale type to Minor. | |
| Sets the scale type to Both. | |
| Sets the scale type to Neither. | |
Descriptor Tagging
For the following descriptor keyboard shortcuts, pressing the key once selects the first (left) item, pressing the key again selects the second (right) item, and pressing the key a third time selects Neither (the center button).
| Key command Function | |
| 1 | Single/Ensemble |
| 2 | Part/Fill |
| 3 | Acoustic/Electric |
| 4 | Dry/Processed |
| 5 | Clean/Distorted |
| 6 | Cheerful/Dark |
| 7 | Relaxed/Intense |
| 8 | Grooving/Arrhythmic |
| 9 | Melodic/Dissonant |
| F5 | Sets Batch Tagging to All. |
| F6 | Sets Batch Tagging to None. |
Transients
| Key command Function | |
 | Increases sensitivity. |
 | Decreases sensitivity. |
| [X025] | Increases sensitivity five times. |
 | Decreases sensitivity five times. |
| [K45W] | Nudges the selected marker by one pixel to the left. |
 | Nudges the selected marker by one pixel to the right. |
| [XXBT] | Selects the previous marker. |
 | Selects the next marker. |
Index
1/4" phone plug connectors 491
1/4" tip-ring-sleeve connectors 491
1/4" tip-sleeve connectors 491
3rd-party applications 435–436
3rd-party effects 23
3rd-party interfaces
audio interfaces 486, 504
uses for 25
video interfaces 498
5.1 surround sound. See surround sound
48V phantom power supply 513
90° phase-shift options 410
1394a connectors 482
1394b connectors 483
A
A/B Last Two Actions command 234
AAC files 67, 79, 193, 387, 388, 404
AAC/Podcast files 398, 399, 401–404
AAF files
exporting 313
using in other applications 435–436
AC# output 311
AC-3 files 312, 398, 399, 407
ACID music application 519
Action Insert bar 62, 232
actions
Action Insert bar 232
Actions tab 62
adjusting selections for 231
applying 180,230
comparing 234
deleting 235
described 43,230
displaying 44
droplets 248, 417
editing 231
file length and 235
flattening 233
limitations of 235
podcasts 390
post-export actions 378, 390, 416–417
processing effects as 328
rendering effects as 229, 329
rendering realtime effects 243–244
reordering 232
replacing 180
resampling and 229
scripting in File Editor 248
settings 231
turning on/off 231
working with in File Editor 230-235
Actions list 62, 230, 232–233
Actions pop-up menu 62
Actions tab 44,62
adapters 498
See also specific adapter names
audio equipment 490-493
video equipment 477-484
ADAT Lightpipe connectors 493
Add Ambient Noise command 227
Add Effect button 60
Add Send button 60
Add Submix command 264
Add Take command 256
adding effects
to busses 144–145
to submixes 144–145
to channel strips 284
to tracks 144–145
Adjust Amplitude command 221
ADR (automatic dialogue replacement) 252
Advanced Audio Coding. See AAC files
AES/EBU connectors 493
AES/EBU digital audio channels 503
After Export pop-up menu 396, 416, 417
AIFF files 66, 79, 192, 212, 246, 312, 389, 398, 519–535
AJA lo 478
alert preferences 98
aligning clips with markers 186
ambient noise, adding 227
amplifiers 26, 485, 496, 497
amplitude
adjusting 221
described 464
measuring 467
zero crossings 205
analog audio
capturing 485
connecting equipment 503
output 514
analog video
composite 481
connecting equipment 498–500, 501
consumer devices 501
analog-to-digital capture cards 481
analog-to-digital converters 501
analog-to-DV converters 502
analog-to-DV systems 498–500
Analysis Results list 63, 236
Analysis tab 63
analysis tools 236–240
Analysis tab 63
fixing analyzed problems 240
parameters 238
results 238
windows 216, 217
zooming in on problems 239
Analysis Type list 63, 236
analysis types 236–237
clicks/pops 236
clipped signal 237
DC offset 237
listing 63
phase issues 237
power line hum 236
silence 237
Analyze button 63
annotation metadata 90
Apogee hardware 509–514
Apple Cinema Display 319
Apple Core Audio Format 66, 79, 192, 246
Apple Loops files
searching 81
tagged information 90
tails on 230
Apple Loops Utility 80, 519–535
Apple Store 20
Apple TV 389
Apple websites 19–20
AppleCare Knowledge Base 515
AppleCare Support 515-517
AppleScript 390
AppleScript droplets 248, 417
AppleScript Script Editor 248
AppleScript websites 417
applications, using Soundtrack Pro with 435–437
Apply button 220
Apply Digital Deemphasis option 410
Apply Equalization command 228
approving Conform changes 444, 446
Arm for Recording button 41, 45, 280, 368, 374
Arrow tool 461
artifacts 481
ASIO plug-in 23
Asset Refresh dialog 433
Assets drawer 520, 524–528, 530
attack 333
attenuating sound 302
audio
amplitude 467
analysis 63, 236–240
balanced signals 494
bit depth 474
channels 406
cleaning up 342
clicks 236
clipping 237, 288, 289–290, 333
compressed formats 193
copying in File Editor 206
cutting in File Editor 206
DC offset 237
decibels 468
digital audio overview 473–476
distortion 470
Dolby Digital AC-3 format 404
dynamic range 470
editing sound 294
effects. See effects
fading in/out 220
frequencies 465
gain 221,341
headroom 470
inserting noise in 222
inserting waveforms in 223
mixing sound. See mixing audio
monitoring environment 26
multitake 46
normalizing 221
overloaded signal 237
pasting in File Editor 206
phase issues 237
pops 236
postproduction 334
power line hum 236
professional vs. consumer equipment 476
pullup/pulldown conversion controls 56
recording preferences 100
recording. See recording audio
reducing noise in 225–226
sample rates 399, 401, 474
signal formats 487, 490–496
signal-to-noise ratio 469
silence in 221–222
silence threshold 237
sound, described 463
sound waves 463
stereo 471-473
summing 263
synced 46
synchronization preferences 101
temporary mono mix 290–291
in video clips 321
volume. See volume
audio channels
multiple channel capture 503
separating 122
audio clips
aligning with markers 186
in Bin hierarchy 88
changing offset of 157
channel selections 120
colors 116
combining into multichannel clips 123
conforming 432, 439
copying 151
crossfades between 158–160
cutting 151
dates 115
described 113
deselecting 148
duration of 156–157
editing 162–182
editing Final Cut Pro audio 423
editing in place 166, 195
editing source media files and 166, 195
enabling or disabling 115, 118
Final Cut Pro and 422
grouping 445
information in Bin 88
joining 173
keyboard shortcuts 453–455
locking or unlocking 115, 118
metadata 58, 115
moving 154–155
moving envelope points with 359
multiple instances of 167, 197
multitake clips 252
muting 118
name of 116
overlapping 108, 162
pasting 151–152
playback mode 188
properties 58, 114–116
redoing changes 93
removing 151, 152
replacing source audio in 189–190
resizing 156–157
selecting 147–148
snapping 94–95, 156
soloing 120
splitting 164, 170–173
spotting in Timeline 153
transposing 188
truncating 162
unchanged clips 444
undoing changes 93
zooming in/out 129–130
Audio Coding Mode pop-up menu 406
audio effects. See effects
audio equipment
amplifiers 26
Apogee hardware 509–514
cables 490
connecting 23–26, 503
connectors 490–492
input and output devices 24
microphone levels 494
microphones 26
mixers 26
monitors 25, 26, 496
professional vs. consumer 494
recording equipment 367
recording quality 476
selecting 487
signals and cables 490–496
speakers 27,496
stereo mixing systems 32
surround sound 298
synchronizing 504
audio file projects
about 66,421
automating effects in 243
closing 242
creating 241
editing in File Editor 198–211
exporting. See exporting items
file extensions 65
importing video into 315, 316
opening 198
opening in File Editor project view 240–241
overview 11
playing 71–78, 199
processing in File Editor 219–244
recording. See recording audio
saving 244–247
soloing 199
source file editing and 196
waveform editing 193
audio files
adding to multitrack projects 113–114
adding to Timeline 113–114
ambient noise in 227
amplitude 221
analyzing in File Editor 236–240
collecting and saving 111,419
common problems 516
creating 214
Cycle Region and 200
displaying information 92–93
editing in File Editor 198–211
exporting projects to 398–413
finding 52, 78–87
formats for 79, 192
Frequency Spectrum view 214
gain of 221
graphically editing 164–165, 208–211
information in Bin 88
inserting noise in 222
length of 235
looping 79, 188
matching equalization 228
missing files 96
moving between selections 205
multichannel files 212–214
non-looping 79, 188
normalization 221
opening in Apple Loops Utility 526
opening in File Editor 198
opening in File Editor project view 240-241
opening in native format 241
phase of 221
playing in File Editor 199
podcasts 377
previewing 91–92
processing in File Editor 219–244
reconnecting 96
reducing noise in 225–226
referenced files 245
resampling 229
sample rates 107
saving 246–247
saving with projects 111, 419–420
scratch locations 112
scrubbing 200
selecting in File Editor 202–205
selecting parts of 202–204, 208
silence in 221–222
size of 22,367
soloing 92, 199
Sound Designer files 79
source 113, 148, 189–190
storing in Bin 87–90
tagged 81
tagging with Apple Loops Utility 519–535
time stretching 210, 224
unused 420
WAV 79
audio interfaces 485
advantages 25
FireWire 29
as output devices 100, 280
third party 486
types of 485–490
USB 28
audio levels
measuring 468
audio meters
decibels 468, 469
Audio MIDI Setup utility 23
audio mixing
compression 471
Audio pane 405
Audio Pulldown pop-up menu 99
Audio Stretching tool 210
audio tracks
colors 116
locking or unlocking 119
selecting all clips on 149
selecting items forward or backward on 150
stereo recordings 473
in Timeline 39
Audio Units plug-ins 23, 327
audio-only AAC files 404
audio-only podcasts 387
See also podcasts
author metadata 90
Auto Gain parameter 341
Automatic dialogue replacement (ADR) 252
automation 355-366
control surface movements 394
described 355
envelopes 355–364
modes for 365
podcasting and 390
post-export actions 416–417
processing effects 354
realtime effects 243, 351
recording automation data 365–366
recording in Mixer 291
recording sensitivity 98, 366
surround sound pan settings 303
Automation Mode pop-up menu 39, 43, 44
automation modes 106
Latch 365
Read 365
Touch 365
auxiliary busses 124, 270
B
Back button 51, 54
background noise 227
background video 429
balanced audio signals 494
balanced XLR connectors 503
band-pass filters 306, 335
bands
frequency ranges 465
bandwidth 335,489
base layer video 429
bass frequencies 226, 334, 335, 465
bass management 311
batch processing 422
batch tagging 519
Beat display 73
beats
beat divisions 56, 109
beat markers 59, 183–185
displaying time 56, 109, 133
items in Bin 90
Beats-based format
entering units 74
metronome 146
multitrack projects 56
playhead and 73
project format 109
scoring markers 186
snapping to notes 95
Time ruler and 133
Beats-based ruler 56
Beginning value slider 59
bels. See decibel
Betacam SP 498, 501
Bin tab
adding audio files from 114
deleting files 420
described 48
shortcut menus 89
storing files in 87–90
bit depth 67, 79, 99, 193
audio interfaces 487
consumer audio 503
digital audio 474
saving 246
Soundtrack Pro and 487
Bit Depth pop-up menu 396
Bit Rate slider 402
bit rates 400, 402
Bit Stream Mode pop-up menu 407
Bitstream pane 408
blackburst generators 499, 504–506
Blade and Blade All tools 164, 170, 171, 253
blue noise 341
BMP files 384
BNC connectors 479, 481, 482
boosting signals 26, 334–335
bouncing projects. See effect tails, exporting items
breakout boxes 31, 478, 479, 490
brightness (sound) 26
Broadcast Wave files 79, 212, 316
Browser tab 51,80
built-in analog audio 485
built-in digital audio 486
bundles 66, 421
busses
adding 135
adjusting pan position 142
adjusting volume 142
auxiliary busses 270
changing icon for 141
channel strip controls 274
channel strips 44, 140
controls 124, 142–144
copying 141
described 124, 127
effects 144–145
envelopes for 145, 356
exporting 414
grouping 136–139
icons 40
including in submixes 263
Master bus 126
in mixing process 270–272
moving 141
muting 143
numbered 141
removing 147
renaming 141
routing signals to physical outputs 263
routing tracks to 125
selecting 136
sends routed to 350
setting height of 132
setting submixes for 264
soloing 143–144
in submixes 125
in Timeline 39
working with 135–147
Button view 52, 81, 83–85
Button View button 52, 81
buttons
control surface 393–394
mapping commands to 393–394
Toolbar 70
BWF files 316
Bypass button 220
Bypass Effects button 40
bypassing
effects 349, 351
sends 351
C
cables 490–496
CAF files 66, 79, 192, 246
camcorder audio quality 476
camcorders
connecting 24
video capture 24
Can't Find File dialog 96
Cancel button 220
capture cards. See video cards
Category list 60
Category pop-up menu 52
CD mode 512
CD players 503
center
phantom 304
stereo plus center 309
Center Bias slider 302
center channel 310
Center Downmix pop-up menu 408
center frequency 335
chaining effects 347–348
channel layout, editing 413
Channel Strip pop-up menu 44
channel strips 44–45
adding to Mixer 275
changing icon for 281
copying 276
described 273
effects 284–286
enabling for recording 280
muting 280
pan position 278–279
removing 283
renaming 281
reordering 276
selecting 276
sends 286–287
setting outputs for 279–280
soloing 280
stereo level meters 282
Tracks tab 61, 138, 140
volume levels 277
working with 273–283
channels
AAC/Podcast files 402
center 310
Compressor settings 412, 413
dialogue 268
Dolby Digital 406
editing multichannel files 212–214
enabling or disabling 213
export settings 401
full-bandwidth 410
input 369
items in Bin 90
LFE 306, 311, 410
mono audio 121
multichannel audio capture 503
in new files 214
numbers of 67
preferences 97, 100
recording sound for 306
reordering 229
selecting 120, 202–203, 213
stereo mixdowns 267
surround 297, 306, 310, 410
swapping 229
using in Dolby Digital programs 404
valence 256
voiceover and dialogue 309
Channels pop-up menu 401
Channels submenu 41
chapter markers 381–384
chapters in podcasts 380
chasing timecode 506
chorus effects 336
Clear Fixed button 63
clicks 236
Clicks and Pops Threshold slider 237
Clip Speed pop-up menu 58, 115
clipping 236, 237, 288, 289–290, 333
clipping indicators 289
clips. See audio clips; video clips
Clock Source menu 511
closing
audio file projects 242
multitrack projects 106
window panes 34
windows 67
Collapse slider 302
collecting
audio files 111,419
unused files 420
video files 111,420
Color pop-up menu 57, 115, 217
color space 481–482
colors
audio clip colors 116
track colors 116
track labels 40, 45
video clips 116
Column view 52, 81, 82–83
Column View button 52, 81
Columns pop-up menu 48
combining clips into multichannel audio 123
comments for markers 59
common sync sources 504
comp tracks 253
compacting projects 111
comparing
action results in files 234
most recent actions 234
Component analog video 501
Component RGB 481-482
Component video 481–482
Component YUV 481-482
composite tracks 253
composite video
capture interfaces 501
inputs 504
signals 481
compression
audio formats 193, 399
audio mixing 471
compressors 332
podcasts 387
results of 332
settings 409
sound waves and 463
Compression Preset pop-up menu 409
Compressor 410-413
export presets 412
exporting files and 398
exporting master mixes 410–413
exporting podcasts with 389
multichannel projects in 413
compressors 332–333
Computer button 51
Configure Device button 50
Conform To Project command 442
Conform tool 47, 439–448
Conform worklist 443, 445
connecting
control surfaces 391
professional audio devices 503–504
surround sound physical outputs 297
connectors 490–492
1/4" phone plug 491
1/4" tip-sleeve 491
1/8" mini 490
ADAT Lightpipe 493
AES/EBU 493,503
BNC 479, 481, 482
digital audio 492–493
FireWire 482
Genlock 482
HD-SDI 483
PCI cards 479, 489
RCA 479, 481, 485, 491
S-Video 481
SCART 484
SDI 483
TDIF 493
TOSLINK 492
TRS 485,491
TS 491
USB-to-serial adapters 498
video equipment 477–484, 498–502
XLR 488, 490, 492, 503
consumer equipment
audio devices 503
audio quality 476
compared to professional 494
connecting 501
Content is Original setting 408
contextual menus 71, 89
control surfaces 391–394
adding 392
automation modes 394
connecting 391
deleting 392
described 391
FireWire audio interface 29
mapping commands to 393–394
preferences 102
premapped controls 393
recording movements 394
support of 26
types of 391
using 391
Control Surfaces preferences 102
controls 393
Convert to Looping or Non-Looping commands 188
Convert to Mono command 228
Copy from Next Point button 59
Copy from Previous Point button 59
copying items
audio clips 151
audio files for editing 167, 197
audio in File Editor 206
busses 141
channel strips 276
envelope points 361, 362
Lift and Stamp tools 179
properties 165
submixes 141
Timeslices 177
tracks 141
Copyright Exists setting 408
copyright metadata 90
Core Audio Format 66, 79, 192, 246, 487
Correlation meter 339
creation dates 58, 115
crossfade mode 108, 160
crossfades
adjusting 158, 159, 160, 255
creating 108, 160
defined 160
moving 160
types of 161
customer support 515–517
Customize dialog 70
customizing keywords 85
cut edits 453
cutoff frequency 335
cutting frequencies 334
cutting items
audio clips 151
audio files 206
envelope points 362
frequencies 335
peak levels 332
Timeslices 177
Cycle button 38, 78, 372
Cycle Region 72
dragging 325
exporting items and 397
keyboard shortcuts 452
linking to selections 200
cycling playback 134–135
D
daisy-chaining 487
DAT devices 24, 503
Data Rate pop-up menu 407
data rates 407
dates 58, 115
dB. See decibel
dBFS units 469
dBm units 469
dBu units 469
dBv units 469
DC Filter option 410
DC filters 410
DC offset 237
"dead" rooms 26
decay time 339
decibel units 469
decibels 464, 467, 468
decoders, stereo playback and 311
decompressing audio files 193
Default Fade Type pop-up menu 99
delay effects 331, 337
delay rate 337
delay time 337
deleting items
actions 235
audio clips 151, 152
beat markers 185
busses 147
channel strips 283
control surfaces 392
Cycle Region 135, 397
directories from Search paths 87
effects 286
effects presets 330
envelope points 362–363
envelopes 364
files 420
groups or group items 140
images 387
layouts 69
markers 185
podcast and chapter markers 381
presets 182
realtime effects 352
scoring markers and 185
submixes 147
takes 256
time markers 185
Timeslices 177
tracks 147
transition points 255
video clips from projects 325
Denoiser effect 341
depth 337
descriptors 522, 534
destructive editing 422, 427, 433
detaching tabs 68
Details tab 57–59, 320, 360, 379
device control
compared to synchronizing 506
consumer devices 501
non-DV devices 501
presets 506
diagnostic effects 331, 339–341
Dialog Normalization setting 407, 409
dialogue
creating submixes 266
foreign language channels 268
in mixing process 262
normalization 407, 409
sending to busses 272
surround sound mixes 309
diffusion 339
digital audio
See also audio
connecting equipment 503
connectors 492–493
hard disk space 22
overview 473–476
digital audio interfaces 487
digital audio tape recorders. See DAT devices
Digital Betacam format 498, 501
Digital Cinema Desktop 319
digital video 107
See also video
digital-to-DV converters 502
DigiTranslator 436
directories 86–87
disabling
actions 231
audio clips 118
channels 213
effects 285
groups 139
properties 181
sends 287
speakers 303
disk space 367
displaying
audio file information 92–93
effects presets 330
envelope point details 360
envelopes 146, 243
file information 88
Frequency Spectrum view 214
markers 184
Mixer in separate window 274
Mixer options 281–282
podcast tracks 379
video frames 323
Video tab in separate window 274
window elements 36
distortion 333
distortion effects 331
distortion, audio 470
distributing projects 419–420
dithering 246, 511
Dock, minimizing windows to 67
docked tabs, detaching 68
docking window tabs 36
document file management controls 56
Dolby Digital Professional format 311, 312, 399,
404-410
Dolby Laboratories website 311
Dolby Surround Mode pop-up menu 408
downmixes
bitstream settings 408
LFE signals in 311
stereo playback 312
downsampling 107
drop frames 109, 321
droplets 248, 417
dry signals 337, 339
dual mono channels
identifying 472
dual-link HD-SDI connectors 483
duration
changing 156
items in Bin 90
markers 185
Timeslice selections 178
Duration value slider 57, 59, 115
DV codec 486
DV formats 477
DV-to-analog converter box 502
DVCAM format 477
DVCPRO 50 format 477
DVCPRO format 477
DVCPRO HD format 477
DVD Studio Pro
Dolby encoding options 405
editing clips from 432
using Soundtrack Pro with 432–433
DVDs, video for 107
DVD-Video format 405
dynamic range
audio 470,497
DC offset and 237
dynamics effects and 332
external speakers 25
Spectrum Analyzer and 340
dynamics effects 331, 332–333
E
early reflections 32, 339
echo chambers 338
editing items
actions 231
applying actions 230
audio clips 162–182
audio clips without editing sources 167, 197
audio files in File Editor 198–211
channel layout 413
clip properties 114–116
Conform worklist 443
destructive editing 427, 432, 433
DVD Studio Pro clips 432–433
envelope points 360, 360–361
Final Cut Pro audio 423
in Frequency Spectrum view 218–219
graphically 208–211
in place editing 162, 166, 194, 195
keyboard shortcuts 453–454, 457
Motion audio tracks in File Editor 434
multichannel files 212–213
multitake clips 373
in Multitake Editor 254–255, 257–259
in multitrack projects 166, 193–197
in Multitrack Timeline and File Editor 168–169
nondestructive editing 193, 423, 434
numerically 209
podcast and chapter markers 382
reviewing and approving changes 446
samples 209
scripts and 425
source media files 113, 166, 195
time stretching 210
Timeline editing tools HUD 165
waveform editing 11, 193
waveform tools 208–211
zero crossings and 205
education users 20
Effect list 60, 145, 343, 344
effect parameters 60
Effect Parameters area 60, 145
effect tails 345, 399
effects 327–354
adding 144, 284
adding with sends and busses 270–271
applying 219, 229, 242
automating 243, 363
busses 144–145
channel strips 284–286
chorus 336
delay 331, 337
deleting 286
Denoiser effect 341
described 327
diagnostic 331, 339–341
distortion 331, 333
dynamics 331, 332–333
effects chains 344
envelopes and 356, 363
EQ 331, 334–336
filter 331, 334–336
included with Soundtrack Pro 331-342
meters 331, 339–341
miscellaneous 331, 341–342
Mixer 284–286
modulation 331, 336–337
music and effects submixes 268–269
parameters 60, 343
plug-ins 23, 311
presets 330
processing. See processing effects
realtime. See realtime effects
rendering to actions 229, 243
reordering 285
replacing 286
reverb 331, 338–339
settings 284–285
spotting 170
Stereo Spread plug-in 342
submixes 144–145
surround sound 306, 311
tails 110, 230, 244, 345, 414
third-party 23
time-based 337–339
tracks 144–145
turning off 285
turning on 285, 287
types of 331–342
effects chains 329, 344, 347–348
effects slots 45
Effects submenu 219–220, 328
Effects tab
adding effects to channel strips 284–285
adding effects to Timeline items 144–145, 344
adjusting parameters 347
overview 60
realtime effects 242, 343
embedded timecode 153
Enable Low Frequency Effects setting 406
Enabled checkbox 58
enabling tracks for recording 280, 368
encoding
analysis 401
Compressor settings 410–413
video 411
End value slider 59
end-of-project marker 110
enhanced podcasts 377, 387, 388, 404
envelope points 357–363
adding 357
changing position of 360, 361
changing values of 361
copying 361, 362
cutting 362
deleting 362–363
displaying details 360
editing 360, 360–361
information about 59
moving 108, 324, 355, 358
nudging 362
pasting 362
preferences 99
reducing number of 366
scoring markers and 186
selecting 108, 357–358
Envelope selection mode 108
envelopes 355–366
about 355–364
adding 363
automating parameters 363
automating processing effects 354
automating realtime effects 351
busses 145, 356
described 467
displaying 146, 243, 356
displaying details 360
editing points 360
effects and 356, 363
envelope selection mode 359
hiding 146
master 42,364
moving points with clips 359
overview 355–356
percussive 467
removing 364
reverb 339
sends and 363
submixes 145, 356
surround sound position 303
sustained 467
Timeslice tool and 359
track 145,356
track pan 356
volume 356
envelopes disclosure triangle 41
episodes 377, 384, 386
EPS files 384
EQ (equalization)
frequency ranges used with 334–335
graphic 336
Lift and Stamp tools 181
matching 228
overview 334–336
parametric 336
prints 228
EQ effects 331, 334–336
equipment
See also audio equipment, video equipment
connecting audio equipment 23–26
connecting video devices 498–502
consumer devices 501
example hardware setups 27–29
non-DV devices 501
professional audio equipment 503
setting up. See system setup
synchronizing 504
exclusive solo 144
exponential fades 159
Export Bit Depth pop-up menu 99
Export dialog 396
Exported Items pop-up menu 396
exporting items
AAC files 401-404
audio file projects 313
busses 414
components of multitrack projects 414
compressed formats 399
Compressor and 389, 410–413
Cycle Region and 397
effect tails and 414
Export dialog 396
file formats 395
file names 414
mixdowns for Final Cut Pro 430
mono audio files 415
multitrack projects 395–420
multitrack projects to Final Cut Pro 430
muted tracks and 414
podcasts 387–389
post-export actions 416–417
presets for 396, 412, 418
project mixes 397–413
submixes 414
surround sound 312, 405–410
tracks 414
updating mixdowns 432
video podcasts 388
external audio speakers 25
external monitors 27
external sync 500, 504, 505
external timecode 506
external video output devices 319
F
Factory Presets pop-up menu 330
Fade In command 220
Fade Out command 220
Fade Selector 255
fade-ins and fade-outs 158, 220
Favorites list 54, 81
Favorites tab 54, 81
feedback 337
File Editor 191
analyzing audio files in 236–240
applying effects in project view 242
automating realtime effects 243
closing projects 242
copying audio in 206
creating projects 241
cutting/pasting in 206–207
Cycle Region 200
editing audio files in 198–211
editing DVD Studio Pro clips in 432
editing items with Multitrack Timeline 168–169
editing Motion audio tracks in 434
filling screen with 35
Frequency Spectrum view 214–219
Global Waveform view 249
keyboard shortcuts 457
markers in 183, 249
moving between selections 205
opening Final Cut Pro audio in 422, 423, 427
opening projects in 198, 240–241
overview 43
playing audio file projects in 199
processing audio files in 219–244
project view 43, 240–242, 246, 247, 248
realtime effects in 345
recording in 367, 375
Sample units 212
saving files in project view 246
saving projects 244–247
scripting actions in 248
scrubbing audio in 77, 200
selecting channels in 202–204
selecting parts of audio files 202–204, 208
selection details 59
soloing audio files in 199
source media files and 196
spotting sound effects 170
supported audio formats 192
tab view 43
Time Ruler units 242
Timeline controls and 247
working with actions 230–235
zooming in/out 207–208
file extensions 65
file formats. See formats
File Info area 522
File list 51
file management
controls 56
preferences 98
file size 90, 115, 245
File Type pop-up menu 53, 396
files
See also audio files, video files
audio file projects 421
bundles or packages of 66
keyboard shortcuts 449
looping 79, 173, 188
metadata 58
missing files 96
mono 228
multitrack projects 428
non-looping 79, 188
output file names 414
preferences 98
previewing 91–92
properties 58
recorded audio 112
scratch locations 112
sizes 58
source 148, 189–190
stereo 228
supported formats 79
tagged 81, 519–535
temporary render files 112
Film Standard Compression setting 409
filter effects 331, 334–336
Filter Frequencies setting 401
filtering
approved clips 447
Clipboard contents 219
unchanged clips 444
Final Cut Pro
creating multitrack projects from 106, 428–432
exporting multitrack projects to 430
importing video from 315
opening audio in File Editor 241, 427
podcast markers in 383
post-export actions 416
processing audio with scripts 425
saving droplets to clips in 248
scoring markers 185–187
sending mixdowns to 430
using Conform with 439–448
using Soundtrack Pro with 421–432
Final Cut Pro XML Interchange Format 430, 435
Final Cut Studio
Compressor 410-413
Soundtrack Pro integration 13
workflow features 16
Finder, adding audio files from 114
finding items
Bin information categories 88
with Browser tab 80
directories in Search database 86–87
with Favorites tab 81
files 78–87
keywords 52–53
missing media files 96
refining searches 83, 84
with Search tab 52–53, 81–87
Finish button 448
finishing systems 25
FireWire
audio interfaces 29, 488
audio outputs 486
connectors for 482
described 482
digital audio devices 488
FireWire 400 482
FireWire 800 483
video interfaces 477
website 19
Fix All button 63
Fix button 63, 240
fixing audio problems 240
flangers 337
flat frequency response 496
flattening
actions 233
audio files 229
floating window tabs 36
folders. See directories
Foley recordings 306
foreign language channels 268
formats
Apogee settings 511
audio 79, 192
compression and 399
export formats 395
image files 384
opening files in native format 241
saved files 246
time 109, 321, 322
uncompressed 398
video 79,315
Forward button 51, 54
Frame Rate pop-up menu 101
frame rates 322
frames for podcast markers 380
frequencies
average frequency spectrum 228
delay rates 337
EQ and 334
filtering 401
range controls 216
reverb 339
waveforms 223
frequency bands 340, 341, 342
frequency ranges 334–335
described 463,465
editing 218–219
effects 334
narrow 219
paste edits 219
selecting 218
frequency response 497
Frequency Scale setting 216
Frequency Selection tool 208, 219
Frequency smoothing slider 342
frequency spectrum 214–219, 228
Frequency Spectrum view 43, 191, 214–219
editing in 218–219
shortcut menu 217
Spectrum View HUD 216
switching to 215
Frequency Spectrum View button 43
Full Bandwidth Channels settings 410
fully rendered video 429
fundamental 466
G
gain 221, 333, 335, 341
Gain slider 513
General preferences 97–98
General settings, Preprocessing tab 409
genlocking devices 482
audio devices 505
genlock connectors 504
professional equipment 504
video interfaces 500
genres 90
GIF files 384
glass-noise effect 342
Global parameters 510
Global Timeline view 40, 133
Global Waveform view 43, 249
Go buttons 290
Go to Beginning button 38, 77
Go to End button 38,78
Goniometer 340
graphic EQs 336
graphics cards 478
grid lines 110, 127
Group menu 513
Group slider 445
grouping
applying changes to groups 137
busses 136
clips in Conform workflow 445
creating groups 61
deleting groups or group items 140
Groups outline 139
renaming groups 140
submixes 136
tracks 136
Groups outline 61, 138, 139
H
H.264 format 388
handle length 98
handles on markers 183
hard disks 22
hardware
See also audio equipment, equipment
outputs 265
requirements 21
sample rates 107
harmonics 334, 465, 466
HD format 79, 315
HD-SDI connectors 483
HDMI connectors 484
HDMI interface 484
headers 40–41
headphones 514
headroom 470
heads-up displays. See HUDs
Height control 42
help
keyboard shortcuts 450
onscreen 18
hiding
approved clips 447
envelopes 146
Mixer sections 281
window elements 36
High Definition Serial Digital Interface
connectors 483
high frequency ranges 334
High-Definition Multimedia Interface
connectors 484
high-frequency ranges 334
high-frequency reverb 339
high-pass filters 335, 410
hinting 82, 90, 403
hiss 516
Home button 51
house sync 482, 504
hubs 487
HUDs 64
keyboard shortcuts 450
Multipoint Video HUD 322
Spectrum View HUD 216
Surround Panner HUD 300, 304
Timeline editing tools HUD 165
hum 236
hyperlink URLs 380
|
i.LINK 482
ICNS files 384
ICO files 384
icons
busses 40, 141
channel strips 45, 281
headers 40
outputs 40
showing in Toolbar 70
submixes 141
tracks 40, 141
IEEE 1394a 482
See also FireWire
IEEE 1394b connectors 483
Image Source pop-up menu 380, 386
images
changes to 47
deleting 387
podcast markers 380
in podcasts 384–387
slideshows 385
Import XML dialog 431
importing items
audio formats supported 79
OMF and AAF files 435
QuickTime movies 79, 315
video formats supported 79
video from Final Cut Pro 315
video into projects 315, 316
Include Audio Production Information setting 408
Include Source Audio setting 424
increments in value sliders 75
indexed directories 86–87
Initial Timecode value slider 56
Input Channel pop-up menu 50, 369
input channels 369
Input Device pop-up menu 41, 50, 369
input devices 24
Input pop-up menu 100
input ports 487
Input Routing buttons 41, 50
input signal 372
Input synchronization settings 101
Insert command 222-224
inserting
actions 232
noise 222
silence 222
submixes 264
waveforms 223
instrument levels 494
instruments 90, 334
intensity
amplitude 464
depth 337
measuring 467
interchange formats 435
interface cards. See video cards
interfaces. See audio interfaces, video interfaces
interlaced video 27
interleaved stereo files 473
Invert command 221
iPhoto 384
iPods 377, 389
Items pop-up menu 48
iTunes 377, 389
J
joining audio clips 173
Joint Stereo setting 401
JPG files 384
K
key
items in Bin 90
transposing clips 188
key (musical) 519, 521, 525, 533
Key pop-up menu 100
keyboard shortcuts
Apple Loops Utility 532-535
Arrow tool 461
Cycle Region 452
editing 453, 457
File Editor 457
HUDs 450
layouts 450
listed 449–462
markers 458
moving clips 155
navigation 451,455
nudging items 454
playback 78, 317, 451
playhead 131
puck position 303
recording audio 460
scrubbing audio 201
selecting items 459
shuttling through clips 130, 317
tabs 450
Timeline 451, 455
Timeslice tool 178, 461
tracks 458
video out 460
window panes 36
keyword buttons 52, 53, 84–85
keywords 52–53, 82–85
adding 85
multiple 83, 85
Keywords list 52, 53, 82
knee parameter 333
L
labels 45
Latch automation mode 106, 291, 365
latency
described 487
eliminating 516
increased 30
Latency Compensation slider 100
layouts
choosing 69
deleting 69
described 68
keyboard shortcuts 450
saving 68
length of files 235
Level menu 513
level meters
channel strips 282, 288
effects 340
Meters tab 49
Mixer 45
peak indicators 283
recording audio and 370
Recording tab 50
surround sound 304
Level smoothing slider 342
levels
audio 468
instrument levels 494
line levels 494
reverb 339
LFE (low frequency effects)
balancing 302
channels 306, 311, 410
enabling 406
interference and 311
limitations 311
multichannel sound and 306
surround sound and 293
LFE Balance slider 302
LFO (low-frequency oscillator) 336–337
Lift tool 165, 179
limiters 333
line levels 494
linear fades 159
linear scale 217
Linear Time Code (LTC) 506
linking items 200
locating recorded files 374
Locked checkbox 58
locking
audio clips 118
tracks 119
logarithmic fades 159
logarithmic scale 217
Logic Control protocol 26, 391
Logic post-export actions 416
Loop Sync Master menu 510
looping
converting non-looping files to 188
file indicator 90
joining looping files 173
looping files 79
playback 134–135
resizing looping clips 156
low frequency effects. See LFE
low-frequency oscillator (LFO) 336–337
low-frequency reverb 339
Low-Pass Filter option 410
low-pass filters 335, 410
LTC (Linear Time Code) 506
M
M & E submixes 268–269
M-JPEG format 498
.m2v files 79, 315
.m4p files 404
.m4v files 388
Mac OS X Core Audio 487
Mac OS, version of 517
Mackie Control protocol 26, 391
Magnify button 63, 239
mapping commands to control surfaces 393
marker titles, viewing 184
markers
aligning audio clips to Timeline with 186
beat 183–185
chapter markers 381–384
deleting 185, 381
duration 185
editing 382
Final Cut Pro 185–187
images for 380, 386
information about 59
inserting 183
keyboard shortcuts 458
moving 184, 382
naming 184, 382
podcast markers 379, 380, 381–384
region markers 185
scoring 185–187
time 183–185, 186
types of 183
URLs 380
uses for 183
using in File Editor 249
using with video 185–187
video frames and 325
working with 183–187
MAS plug-in 23
Master bus
about 290
defined 126
envelopes in 364
routing signals to physical outputs 263
in Timeline 39
master envelopes 42, 364
Master Envelopes button 42, 247
master mixes 397–412
master Timeslice 176
mastering process 292
Match EQ effect 181
Matches list 52, 53, 82, 83
matching equalization 181, 228
Maximum Packet Duration field 403
Maximum Packet Size field 403
Measure in pop-up menu 57, 59, 115, 380
measures 56, 109, 133
media files
missing files 96
multiple instances of clips based on 167, 197
reconnecting 96
saving with projects 111, 419–420
storing 22
Media pop-up menu 48, 51, 53, 54, 89, 92
memory 21
metadata
adding 57
audio clips 115
clips 58
files 58
items in Bin 90
in Project tab 55
saving for Conform projects 441
saving projects with 429
searching for files by 81
working with tagged clips 188
Meter Display menu 512
meters
diagnostic 331
effects 339–341
level meters 288–289
preferences 97
recording audio and 370
surround sound controls 304–305
Meters tab 49, 288–289, 304
microphones 26, 485, 494
MIDI Clock pop-up menu 101
MIDI Clock signal 38, 78, 101
MIDI Clock Virtual MIDI Device checkbox 101
MIDI input port 392
MIDI interface 29, 391
MIDI output port 392
MIDI Setup utility 23
MIDI Sync button 38,78
MIDI Time Code (MTC) 38, 78, 101, 506
MIDI Time Code pop-up menu 101
MIDI Time Code Virtual MIDI Device checkbox 101
midrange frequencies 334, 335
midrange frequencies (sound) 465
MiniDisc recorders 503
minimizing windows 67
miscellaneous effects 341–342
mix (ratio) 337, 339
mixdowns
conforming 432, 439
exporting 397–413
sending to Final Cut Pro 430
surround sound output 312
surround-to-stereo 297
updating 432, 440
Mixer 261–292
channel strips in 273–283
described 261
effects in 284–286
hiding 281–282
level meters 305
mixing multitrack projects in 12
overview 44–46
peak indicators 289
realtime effects in 345
recording audio in 291, 374
recording automation in 291
resizing and rearranging windows 274
sends in 286
showing 281–282
volume levels 288
working in 261–292
Mixer Objects outline 61, 138
Mixer pop-up menu 44
mixers 26,485
mixing audio
bitstream settings 408
busses and 270–272
converting stereo to surround sound 307
creating submixes 266
custom window layouts for 274
described 261
example 266–272
exporting mixes 397–413
final mixes 292
guidelines for 292
Master bus 290
mastering process 292
multiple mixes 292
sends and 270–272
setting output 265
signal routing in 263
Soundtrack Pro features 17
surround sound 299–306
temporary mono mixes 290–291
workflow 262
modification dates 58, 115
modulation effects 331, 336–337
Monitor Device pop-up menu 50,370
Monitor pop-up menu 100
Monitor Volume slider 37,44
monitors
amplifiers and 26
audio 26,496
external video monitors 27
quality 496
setting up 485
mono audio
channels 121,402
converting stereo to 228
exporting 312, 396, 401, 415
multiple mono files 396, 415
setting output 265
temporary mono mixes 290
Mono Mix button 37,44,291
Motion
opening audio in Soundtrack Pro 241
post-export actions 416
using Soundtrack Pro with 434
mouse devices 98
.mov extension 79, 315
movies. See Quicktime movies
moving items
audio clips 154–156
busses 141
Conform worklist 443
Cycle Region 134
envelope points 324, 355, 358, 361
keyboard shortcuts 155,454
markers 184
nudging clips 324
podcast and chapter markers 382
puck in surround sound 303
snapping operations 94
submixes 141
Timeslice selections 176
Toolbar buttons 70
tracks 141
video clips 324
windows 67
MP3 files 67, 79, 193, 387, 398, 399–401
MPEG-2 files 79, 315
MPEG-2 playback 79, 315
MPEG-4 files 388, 404
MPEG-4/AAC format 387
MTC (MIDI Time Code) 38, 78, 101, 506
MTC signals 101
multichannel audio
channel selections 120
creating 214
creating from separate clips 123
editing 212–214
exporting 312
exporting with Compressor 413
guidelines 306
reordering channels 229
separating channels 122
MultiMeter 340-341
multiple solo 144
multiple soloing 144
multiple-take audio 46, 251, 372, 373
Multipoint Video HUD 64, 322
multitake audio 46, 251, 372, 373
Multitake Editor 251–259
about 46
adding or deleting takes 256
editing in 254–255
example workflow 257–259
illustrated 253
renaming takes 256
reordering takes 257
selecting parts of audio files 253
slipping take regions 255
multitrack audio recorders 24
multitrack projects 65
about 12,428
adding audio files to 113–114
audio clip properties 114–116
busses in 124
closing 106
creating 105
creating from Final Cut Pro 428–432
distributing 419–420
editing 294
editing files in 193–197
editing source media files 166, 196
envelope selection mode 108
exporting. See exporting items
file extensions 111
importing video into 315, 316
length of 110
missing files 96
multitake audio 251–259
opening 105
overlap mode 108
playing 71–78
properties 106–108
reconnecting media files 96
recording. See recording audio
saving 111,246
saving with media files 111, 419–420
scrubbing 77
sending mixdowns to Final Cut Pro 430
soloing files in 199
Soundtrack Pro features 16
spotting sound effects 170
submixes and 125
time format 56, 109–110
tracks in 124
Tracks tab and 138
types of 65
Multitrack Timeline
editing in 168–169
moving video in 324
music
displaying information about 58
displaying properties 115
instruments 485
key 90, 100
music and effects submixes 268–269
properties 57
reverb 270–271
scale 90
in surround sound mixes 310
music and effects submixes 268–269
musical intervals 188
musical sounds 466, 467
Mute button 41, 46, 143
Mute Project checkbox 50
muting
audio clips 118
busses 143
channel strips 280
export settings and 414
submixes 143
tracks 143, 199
N
Name field 40, 45, 59, 380
names
items in Bin 90
output files 414
podcast and chapter markers 382
truncating 98
narration 309
narrow frequency ranges 219
navigation
Global Timeline view 133
keyboard shortcuts 130, 451, 455
playhead 451
scroll bars 128
Timeline 128–135
transport controls 38
Zoom control 129–130
Nearby Keys button 53
nearfield monitors 32
NeXT files 66, 79, 192, 246, 312, 398
Next frame button 78
Next Selection button 39, 43, 205
noise
ambient 227
Denoiser effect 341
eliminating 341,516
glass-noise effect 342
inserting in audio 222
noise gates 333
noise prints 225, 227
pink 222
reducing 225–226, 341
white 222
zero crossing and 205
noise floor 469
Noise Generator dialog 222
nominal levels of sound 469
nondestructive editing 166, 193, 196, 423
non-drop frames 109, 321
non-DV format devices 499, 501
non-looping files 79, 188
normalization 221, 407, 409
Normalize command 221
notch frequencies 336
NTSC format 79, 315
nudging
clips 324
envelope points 362
keyboard shortcuts 454
numbering in Timeline 141
0
offset
audio clips 157
slip offset 90
slipping take regions 255
Offset value slider 57, 115
OMF files 435–436
onscreen help 18
Open In Editor command 427
opening
audio files in native format 241
files in File Editor 198
Final Cut Pro audio 422
multitrack projects 105
project view 241
reopening projects 97
Soundtrack Pro mixes in Final Cut Pro 431
Original button 445
out-of-phase material 339
out-of-phase sounds 464
outline views 61
output devices
about 24
video 318–319
Output pop-up menu 41, 46, 265, 279
output ports 487
Output synchronization settings 101
outputs. See physical outputs, submixes
Overlap mode 108, 162
Overlap Mode pop-up menu 99
overlapping audio clips 162
overloaded signals 237
overtones 465, 466
P
packages 66, 421
PAL format 79, 315, 484
pan envelopes 145
pan position 142, 278–279
pan slider 142
panning controls
automating surround sound 303
channel strips 278–279
in headers 41
level meters and 304
Surround Panner HUD 300
surround sound and 45, 142, 278, 295
parallel editing 440
Parameter list 63, 236
parametric EQs 336
passive speakers 497
paste edits 219
Paste Mix command 206
Paste Repeat command 207
pasting items
audio clips 151–152
audio in File Editor 206
envelope points 362
filtered results in frequency ranges 219
frequency ranges and 219
Timeslices 177
Path pop-up menu 51, 54
paths to items in Bin 90
PCI audio interface cards 489, 490
PCI video interface cards 31, 478, 479
PCM format 67, 193
PDF files 384
peak indicators 45, 50, 283, 289–290
peak information 340
peak limiters 333
Peak Mixing Level setting 408
peaks 207–208, 221, 236, 332, 523
Peaks Value and Location display 49, 289
performance 516
Peripheral Connect Interface. See PCI
phantom centers 304, 310
phantom power supply 513
phase
balanced audio signals and 495
correlation meter display 339
inverting 221,513
phase cancellation 494
phase issues 236, 237
phase shifters 336
phase, sound waves and 464
phase cancellation 464
phone plug connectors 491
physical output channels 41, 125, 279, 296
physical outputs
connecting 297
in mixing process 263
multitrack projects 125
surround sound 296
PICT files 384
pink noise 222, 341
pitch 465, 466
Play button 71, 77, 92, 220, 371, 372, 373
Play From Beginning button 38,77
Play/Pause button 38
playback 71–78
audio files in File Editor 198, 199
changing mode 188
controlling 38, 55, 71–74, 134–135
cycling 134–135
keyboard shortcuts 78, 130, 317, 451
looping 134–135, 188
MPEG-2 79,315
non-looping 188
playback modes 188
playback region 134–135
playing files without actions 234
position 77,451
soloing audio files 199
starting 71
stereo 312
transport controls 77–78
video 317–319
playhead
described 44
during recording 374
keyboard shortcuts 131,451
location value slider 74
moving to peaks 289
moving to specific times 73
positioning with Time ruler 133
preferences 98
scoring markers to 186–187
scrubbing audio 201
setting 72–74
splitting audio clips with 164, 171, 172, 173
spotting clips to 113, 153
synchronization 166, 195
Playhead Position value slider 37, 38, 44, 74
playing projects 71–78
plug-ins
Audio Units 23, 327
effects 21, 23
included with Soundtrack Pro 23
Stereo Spread 342
surround sound 311
unsupported 23
PNG files 384
podcast markers 379, 380, 381–384
Podcast pane 404
Podcast track 39, 379
podcasts 377–390
automating 390
chapter markers 381
chapters in 380
compression 387
Compressor and 389
enhanced 388
episodes 377, 384
exporting 387–389, 404
images in 384–387
importing markers from Final Cut Pro 383
post-export actions 390
slideshows in 385
uploading 378
workflow 378
pointing devices 98
pops 236
position controls 300
Position value slider 57, 59, 115, 380
positions of items in Bin 90
post-export actions 416
post-fader sends 271, 287
post-production 334, 422
power line hum 236
preamplifiers 494, 513
predelay time 339
Preemphasis slider 216
pre-fader sends 271
preferences
Apple Loops Utility 531
Recording 367
Soundtrack Pro 97–103
Preferences window 97
premapped controls 393
Preprocessing pane 409–410
Preserve Video option 389, 411
Preset pop-up menu 396
presets
Compressor settings 412
deleting 182,330
effects 330, 330–331
export presets 396,418
noise reduction 226
saving 181
Sound Palette 179, 180
thumbnails of 182
Presets drawer 220, 330
preview controls 48, 51, 53, 54, 91–92
Preview on selection button 92
previewing items 91–92
files 91–93
noise reduction changes 226
preview file information 91–93
Previous frame button 77
Previous Selection button 39, 43, 205
problems. See analyzing audio
Process menu 219, 230, 328
processing audio
batch processing 422
files 219–229
scripts 425
processing effects
See also effects
advanced settings 353
applying 353
automation 354
overview 328
presets 330–331
working with 353
processor speed 21
professional equipment
analog audio 503
audio equipment 494, 503
synchronizing 504
video equipment 498
project controls 40
project files 88
project mixdowns. See mixdowns
Project pane 37
Project preferences 99–100
project properties 106–110
envelope selection mode 108
length 110
overlap mode 108
sample rate 107
time format 56, 109–110
Project tab 55–57
project view 240–248
projects
controlling playback of 134–135
distributing 419–420
exporting mixes 397–413
importing QuickTime movies into 79, 315
importing video into 315, 316
information about 56
miniature view of 133
overall volume of 288–290
playing 71–78
preferences 99–100
properties 56
removing video clips from 325
saving as audio file projects 244–245
saving with media files 419–420
scrolling through 128
scrubbing 77
undoing and redoing changes 93
properties
audio clips 114–116
busses 124
copying 165, 179
enabling or disabling 181
multitrack projects 106–110
property tags 521
puck 300, 303
Pullup/Pulldown pop-up menus 56
punching in and out 371
Q
Q (bandwidth) 335
quality of equipment 494
Quality pop-up menu 402
quantization 473
quarter-size frames 103, 319
QuickTime movies
audio files 79
file size and 245
as multichannel files 212
opening in File Editor 192
opening in Soundtrack Pro 66, 79
opening video 315
saving 246
saving video with audio 245
supported formats 315
website 19
QuickTime MPEG-2 Playback Component 79, 315
QuickTime Streaming Server Compatibility 403
R
RAM 21
rarification, sound waves and 463
ratio parameter in Compressor 332
RCA connectors 479, 481, 485, 491
Read Before You Install document 21
Read mode 365
realtime effects 343–352
See also effects
adding 344–345
adjusting parameters 345
advanced settings 345–346
applying 229
applying in project view 242
automation
bypassing 349
chaining 347–348
overview 329
parameters 351
removing 352
rendering 243–244, 329
reordering 348
resetting to defaults 352
sends and 349–351
showing 229
working with 343
recently-opened projects 105
reconnecting media files 96
Record button 38, 77, 371, 372, 373
recording audio 367–375
adjusting settings 369
Audio MIDI Setup utility 23
disk space and 367
eliminating latency 516
enabling channel strips for 280
enabling tracks for recording 368
in File Editor 375
file location 112
keyboard shortcuts 460
locations of files 374
in Mixer 291, 374
multiple takes 372–373
multitrack projects 371
multitrack recordings 371
preferences 100
preparing for 367
save location 100
sessions location 100
single takes 371
surround sound workflow 294
in Timeline 368–373
recording automation data 365, 366, 394
recording control surface automation 394
Recording pane 367
recording sessions, save location 100
Recording tab 50, 368, 372
Redo command 93
Reduce Noise command 225–226
reference input connectors 504
Reference Source Audio setting 424
referenced files 245, 246, 423
refining searches 83, 84
regeneration 337
region markers
duration 185
multiple 166, 195
release parameter 333
Remove Effect button 60
Remove Unused command 420
removing. See deleting items
renaming
channel strips 281
groups 140
items in Timeline 141
presets 182
takes 256
Render to Action command 229, 244
rendering
effects to actions 229, 243
flattening actions 233
realtime effects 329
render file location 112
saving in project view and 246
video as QuickTime movies 429
Reorder Channels command 229
reordering
actions 232
Actions list 233
channel strips in Mixer 276
channels 213, 229
effects 285, 348
sends 287,351
takes 257
Replace With Ambient Noise command 227
replacing
dialogue 252
effects 286
sound with noise 227
source audio for clips 189
Resample command 229
Reset button 49, 217, 220, 289
Reset Effect button 60
resizing
audio clips 156
Cycle Region 135
Timeslice selections 175
video clips 324
Video tab 318
windows 67
Result button 445
Results list 238
results projects 440, 443
reverb effects 270–271, 331, 338–339
reverb envelopes 339
reverb time, 339
reverberation 26, 338
Reverse command 221
reviewing changes 444, 446
RGB color space 481–482
ripple cuts 453
ripple deletes 453
RMS Slow and Fast modes 340
roll-off filters 335
room shape, audio and 26
room types 339, 408
Root Mean Square 340
Rotation slider 301
roundtrips 315, 430, 434
routing signals 263
RTAS plug-in 23
ruler units 109, 212, 242
Ruler Units pop-up menu 56
rulers
grid lines and 110
units 109, 212, 242
S
s-curve fades 159
S-Video connectors 481
S-Video signals 481
S/MUX (sample multiplexing) 493
S/PDIF connectors 492
S/PDIF digital audio 486, 503
Safe RT mode 429
Sample Edit tool 209
sample multiplexing 493
Sample Rate pop-up menu 99, 107, 229, 396, 401,
402, 406
sample rates
Apogee hardware conversion 511
audio files 107
audio interfaces 487
choosing 229
consumer audio 503
described 107
digital audio 399, 401, 474
digital video 107
DVD format 406
hardware 107
importing audio files 79, 193
items in Bin 90
in multichannel files 214
multitrack projects 107
OMF and AAF files 436
saving 246
Soundtrack Pro and 67,487
Waveform Editor 229
Sample ruler 217
sample units 212
samples
editing 209
problems in 239
reversing 221
saving items
actions as AppleScript droplets 248
audio file projects 244–247
audio file projects with video 245
audio files 246–247
default locations 112
file formats supported 246
layouts 68
multitrack projects 111
multitrack projects and files 419–420
preferences 98
rendering files 246
scratch locations 112
Sound Palette presets 181
scale type 533
Scale Type pop-up menu 53
scale, musical 90
SCART connector 484
scoring markers 185, 185–187
scratch locations 98, 112
Script Editor 248
scripts
actions 248
after export scripts 417
custom actions 417
processing Final Cut Pro audio 422, 425
scroll bars 40, 128
scrollwheels 98
Scrub tool 165, 200, 253
scrubbing
described 200
keyboard shortcuts 201
projects 77
SD Video devices 498
SDI format 483
SDTI (Serial Digital Transport Interface) 484
Search database 86–87
Search field 88
Search Results list 53
Search tab 52–53, 81–87
search tags 522
Search Text field 53,82
searches, keyword 52–53
searching. See finding items
segments 170–173
selecting items
action selections 231
all clips on tracks 149
amplifiers 496
audio clips 147–148
audio equipment 487
audio files in File Editor 202–205
busses 136
channel strips 276
channels 213
Cycle Region 397
Cycle Region links 200
displaying selections in Timeline 446
envelope points 357
envelope selection mode 359
forward or backward in tracks 150
frequency ranges 218
keyboard shortcuts 459
moving between selections 205
objects in Tracks tab 138
parts of audio files 164
portions of clips 174
speakers 496
submixes 136
takes in Multitake Editor 254
Timeslice tool and 149, 151, 164, 174, 359
tracks 136
video 323
while scrubbing 201
zero crossings and 205
Selection Length value slider 37, 39
Selection tool 147, 164, 208, 253
self-powered speakers 497
semitones 188
sending files (post-export actions) 416
sends
adding to tracks 349
automating 363
busses and 124, 350
bypassing 351
channel strips 286–287
envelopes and 363
pan position 351
post-fader sends 271, 287
pre-fader sends 271
realtime effects and 349–351
reordering 287, 351
settings 287
turning on/off 287
volume level 350
working with 270–272
Separate Mixer and Video command 275
separating channels 122
separators in Toolbar 70
serial device control 502
Serial Digital Interface (SDI) 483
Serial Digital Transport Interface (SDTI) 484
Set Ambient Noise Print command 227
Set Equalization Print command 228
Set Noise Print command 225
setting up system. See system setup
Setup button 53
shelf filters 335
shortcut menus 71,89
Show pop-up menu 40, 379, 381, 383
Show/Hide Presets button 220
shuttling through clips 130
signal routing 263
signal-to-noise ratio 469
silence 222, 237
Silence command 221
Silence Threshold slider 237
sine waves 463
Single Folder Multi-mono audio files 79, 212
size of files 58, 115
slideshows in podcasts 385
slipping take regions 255
Smart Encoding Adjustments setting 401
SMPTE (Society of Motion Picture and Television
Engineers) 101
Snap button 247
Snap option 94–95
Snap To button 247
Snap To pop-up menu 253
Snap To Value pop-up menu 42
Snap To values 42, 94–95
snapping
clips to adjacent clips 156
envelope points 358
Multitake Editor 253
preferences 99
Snapping button 42, 253
Society of Motion Picture and Television Engineers
(SMPTE) 101
soft knee 333
soft limiting 513
Solo button 41, 46, 143–144, 253
soloing
audio files 92
busses 143
channel strips 280
stereo channels 120
submixes 143
tracks 143–144
types of 144
Sony/Philips Digital Interface Format (S/PDIF) 492
sound
See also audio
musical sounds 466, 467
recording. See recording audio
sound waves 463
volume. See volume
sound design 11, 327, 331, 342
Sound Designer files 66, 79, 192, 246, 312, 398
Sound Palette 179, 180
Sound Palette HUD 64
sound stage 32
sound. See audio
Soundtrack Pro
Conform 439-448
customer support 515–517
education users and 20
features 15–17
Final Cut Studio integration 13
interface 34
keyboard shortcuts 449–462
learning about 18, 20
onscreen help 18
plug-ins 23
preferences 97–103
resources 18
scripts 248, 417
setting up. See system setup
software installation 21
system considerations 21–23
using with Apogee hardware 509–514
using with DVD Studio Pro 432-433
using with Final Cut Pro 421–432
using with Motion 434
using with other applications 437
using with third-party applications 435–437
website for 19
Soundtrack Pro User Manual 18
source media files
editing 166, 196
Final Cut Pro files 424
including while saving 246
replacing 189–190
selecting 148
spaces in Toolbar 70
speakers 25, 27, 485
disabling 303
dynamic range 497
frequency response 497
passive 497
placement 32
quality 496
self-powered 497
surround sound 298
Spectrum Analyzer 340, 340
Spectrum View HUD 216–217
Spectrum view. See Frequency Spectrum view
speed (delay rate) 337
Split menu item 170, 172, 173
split stereo files 473
Split tool. See Blade tool
splitting
audio clips 164, 170–173
podcast tracks 381
takes 253, 254
spotting clips 113, 322
Stamp tool 165, 179
standing waves 26
.stap file extension 65, 244
starting timecode 99
startup preferences 97
stem mixes. See submixes
stereo audio 471–473
channel selections 120
channels 402
converting to mono 228
converting to surround sound 307
creating stereo mixes 267
data rate 407
delays 337
enhancing 342
envelopes 356
equipment setup 32
music in surround sound mixes 310
separating channels 122
setting output 265
soloing channels 120
spread 342
stereo image 32
stereo mixdowns 267
stereo playback 312
stereo plus center 309
surround-to-stereo mixdown 297
swapping channels 229
switching to surround sound 295
Stereo Bit Rate pop-up menu 400
stereo delays 337
stereo images 32
stereo mixdowns 267
stereo plus center 309
Stereo Spread plug-in 342
still images 380, 384–387
.stmp extension 65, 105, 111
storage space 22
streaming hints 403
streaming packets 403
Streaming pane 403
Stretch tool. See Audio Stretching tool, time
stretching
stretching technique 528
sub bass 335
Submix pop-up menu 41, 46
submixes
adding 136, 264
adjusting volume 142
changing icon for 141
channel strips 44, 140, 274, 279–280
controls 125, 142–146
copying 141
creating 266
defined 263
described 127
effects 144–145
envelopes 145, 356
exporting 414
grouping 136, 139
icons 40
independence of 265
intermediate submixes 272
moving 141
music and effects submixes 268–269
muting 143
numbered 141
output 279–280
output file names 414
overview 125–126
properties 125
removing 147
renaming 141
routing signals to physical outputs 263
selecting outputs 136
setting for tracks and busses 264
setting height of 132
soloing 143–144
stem mixes 428
stereo mixes 267
surround sound projects 296
in Timeline 39
workflow for 263
working with 135–147
subwoofers 293
summing audio 263
surround channels 306, 310, 410
Surround Downmix pop-up menu 408
Surround Panner HUD 300
surround panners 295
surround sound
about 293
automating 303
center channel 310
connecting physical outputs 297
converting stereo to 307
data rates 407
dialogue and voiceovers 309
effect plug-ins 311
envelopes 356
exporting 312, 404–410
level meters 282
LFE channel 311
metering 304–305
mixdowns 312
Mixer meters 305
mixing projects 299–303, 306
music and effects mixes 269
panning controls 278
project workflow 294
puck shortcuts 303
setting output 265
speakers 298
stereo music in 310
stereo playback 312
submix outputs 296
surround channels 310
Surround Panner HUD 300
surround panners 295
surround-to-stereo mixdown 297
system setup 294
surround-to-stereo mixdown 297
Swap Channels command 229
switching
between looping and non-looping mode 188
between surround and stereo audio 296
between Waveform view and Frequency
Spectrum view 215
Sync To MIDI Clock settings 101
Sync To MIDI Time Code settings 101
synchronization
automatic dialogue replacement 252
blackburst generators and 504
external timecode and 506
markers and 186
OMF and AAF files 436
podcast images 384
preferences 101
slide shows 385
synced audio in Multitake Editor 46
Synchronization preferences 101
system requirements 21
system setup 21–29
Apogee hardware 514
connecting audio equipment 23–26
control interface 29
example hardware setups 27–29
FireWire audio interface 29
overview 21
powered speakers 27
software installation 21
surround sound projects 294
system considerations 21–23
USB audio interface 28
video output devices 30
T
tabs
described 37
detaching/reattaching 68
keyboard shortcuts 450
reordering 68
tagged audio clips 188
tagged audio files 81, 519–535
tags 519, 521, 522
Taqs tab 520, 521–522
tags. See metadata
tails, effect 110, 230, 244, 345, 399, 414
takes 253
See also recording audio
adding 256
deleting 256
items in Bin 90
multitake clips 373
in Multitake Editor 253
multitake recordings 372
recording 371
renaming 256
reordering 257
selecting 254
slipping regions 255
splitting 254
Tap tempo delays 337
Target System pop-up menu 405
TDIF connectors 493
templates, temporary 179
tempo 90, 186–187, 519
Tempo envelope 364
Tempo value slider 100
temporary files 112
temporary mono mix 290–291
temporary templates 179
text
searching for 82, 84
showing in Toolbar 71
thinning envelope points 366
third-party applications 435–437
third-party effects 23
third-party interfaces
audio interfaces 486, 504
uses for 25
video interfaces 498
threshold 226, 332
thumbnails 182
TIFF files 384
timbre 466
Time Code Offset synchronization settings 101
Time display 40, 43, 73–74, 321
time format
described 321
projects 133
setting 56, 109–110
tracks 146
time markers 59, 183–185, 186
Time ruler 40, 133, 321
Time Ruler units 242, 315
Time Signature pop-up menu 53
time signatures 53, 90, 100
Time smoothing slider 342
Time Stretch command 224
Time Stretch sheet 224
time stretching
audio files 210, 224
video and 324
Time-based effects 337–339
Time-based format
aligning clips in 109
entering units 73, 133
project format 109
snapping options 94
tracks and 146
Time-based ruler 56
timecode
aligning audio clips to 133, 186
embedded 153
external 506
format 321
items in Bin 90
MIDI Timecode 38
moving clips to specific 155
spotting clips to 153
starting timecode 99
synchronizing to 506
time markers and 185
Time ruler units and 109, 315, 321
Time-based format 73
Timecode HUD 64
value sliders 76
Timecode HUD 64
timecode value sliders 76
Timeline
adding audio files to 113–114
Conform projects in 445
controls 40, 42, 247
cutting, copying, and pasting items in 151
Cycle Region 134
deselecting items in 148
displaying selected clips in 446
displaying with Mixer 275
editing audio clips in 12, 162–166
editing in place 166, 195
editing tools 39, 164–165
editing tools HUD 165
fades and crossfades in 158–161
filling screen with 35
Global view 133
headers 40–41
keyboard shortcuts 130, 451, 453, 454, 455
lifting and stamping properties 179
markers 183–187
moving audio clips in 154–155
Multitrack Timeline 162–166, 168–169
navigating in 128–135
offsets in 157
outline view 61
overview 39–40
preferences 98
in Project pane 37
recording audio in 368–373
resizing clips in 156
scrubbing projects in 77
selecting clips in 147–151
setting track height in 132
snapping clips in 156
spotting clips in 153
Timeslice tool 174
track controls 40–41
Tracks tab and 138–140
video display in 323
working in 127–132
zooming in/out 129–130
Timescale pop-up menu 99
Timeslice tool
about 164, 174–178
changing selection area 177–178
cutting, copying, or pasting selections 177
Cycle Region and 200
deleting contents of selection 177
envelope selection and 359
extending selections 149
keyboard shortcuts 178,461
master Timeslices 176
selecting to right or left 151
tip-ring-sleeve connectors 485, 491
tip-sleeve connectors 491
tone 226,333
tone color 466
Tone Control slider 226
Toolbar 37, 38, 69–71
TOSLINK connectors 486, 492
Touch automation mode 106, 291, 365
Track area 40
track envelopes 356
Track Height control 132, 247
Track Height pop-up menu 99
track pan envelopes 356
Track pop-up menu 50
tracks
adding 135
adding sends to 349
channel strip controls 274
channel strips 44, 140
color labels 40, 45
colors 116
combining with sends and busses 272
comp tracks 253
controls 40–41, 124, 142–144
copying 141
described 127
effects 144–145
enabling for recording 280, 368
envelopes 145, 356
exporting 414
grouping 136–137
height 99, 132, 247, 253
icons 40, 141
keyboard shortcuts 458
LFE tracks 311
Motion 434
moving 141
moving audio clips between 154
multitrack projects 428
muting 143, 199
names 90
numbered 141
overview 124
pan envelopes 356
pan positions 142–143, 278
podcast tracks 379
preferences 99
removing 147
renaming 141
routing signals to physical outputs 263
routing to busses 125
selecting 136
selecting all clips on 149
selecting items forward or backward 150
setting submixes for 264
soloing 143–144
splitting 381
splitting takes 254
in submixes 125, 263
time format 146
in Timeline 39
video tracks 316
volume 142
working with 135–147
Tracks tab 61, 138–140
transcoding options 389
transients 519, 523, 528–529, 535
Transients tab 520, 523, 528
transition points 255
transport controls 37, 38, 44, 55, 77–78, 317
Transpose envelope 364
Transpose pop-up menu 58, 115
transposing keys 188
treble 226,334
troubleshooting 240, 515–517
TRS connectors 485, 491
truncate mode 108, 162
truncating OMF or AAF files 436
TS connectors 491
two-channel audio 472
Type buttons 59
U
unbalanced audio cables 496
unbalanced signals 494
uncompressed audio formats 398
uncompressed digital video 478
Undo command 93
Unit Select menu 510
Units parameters 511
Universal Serial Bus. See USB
unlocking
audio clips 118
tracks 119
unused files 111, 420, 436
Updated button 445
updating
mixdowns 432,440
multitrack documents 246
uploading podcasts 378
upsampling 107
URLs for markers 380
USB audio interface 28, 487, 488, 516
USB devices 516
USB hubs 498, 516
USB video interface 480
USB-to-serial adapters 498
User Manual 18
User Preset list 330
UV22HR dithering algorithm 511
V
Value display 290
value sliders 75
Value value slider 59
VBR (Variable Bit Rate encoding) 400
video 315-325
background video 429
base layer 429
clips.See video clips
Conform tool and 47
displaying start and end frames 323
for DVDs 107
encoding 411
equipment.See video equipment
files.See video files
frame rates 99, 322
fully rendered 429
importing into projects 315, 316
inserting in podcasts 386
interfaces.See video interfaces
keyboard shortcuts 317
markers 185–187
moving clips 324
moving markers 325
Multipoint Video HUD 322
output devices 318–319
playback of 317–319
pullup/pulldown conversion controls 56
quality of 481
removing from projects 325
resizing clips 324
saving as reference movies 245
scrubbing 77,322
signals 480–484
spotting 322
supported formats 79, 315
Time display and 321
time format 321
Time ruler and 321
time stretching and 324
timecode format 109,321
transport controls 317
viewing area 55
working with 315–325
working with audio in 321
video cards
analog-to-digital 481
connecting 478
connecting analog equipment to 498–500
video interface cards 478
video clips
in Bin hierarchy 88
colors 116
deselecting 148
importing into projects 316
information in Bin 88
removing from projects 325
timecode position 185, 186
viewing details of 320
video connectors 480–484
video decks 501
video equipment
analog 501
breakout boxes 31
connecting devices 498–502
consumer devices 501
described 24
external video output 30
input and output devices 24
monitors 27
PCI cards 31
professional equipment 498
synchronizing 504
video signals 480–484
video files
in Bin hierarchy 88
collecting 111,420
podcasts 377
reconnecting 96
size of 420
viewing details about 320
Video Frames per Second pop-up menu 99
video interfaces
advantages 25
choosing 477–480
PCI cards 31,478
video monitors 27
video out
external video devices 30
keyboard shortcuts 460
preferences 103
video out devices 319
Video Out preferences 103
video output devices 30, 318–319
video podcasts 387, 388, 389, 404
Video Pulldown pop-up menu 99
Video Scale pop-up menu 55
Video tab 55, 274, 316, 318
video tape recorders. See VTRs
video tracks
displaying imported video 316
selecting all clips on 149
in Timeline 39
videotape recorders. See VTRs
viewing area 55
virtual MIDI devices 101
voiceovers 309
voices 323,465
volume
busses 142
channel strips 277
level meters 282
master project volume 290
noise levels 223
normalizing 407
overall 288–290
sends 350
submixes 142
tracks 142
volume envelopes 145, 356
volume fader 45
volume slider 41, 92, 142, 220
VST plug-in 23
VTRs (video tape recorders)
analog 501
connecting 24,500
multiple analog channels 503
non-DV devices 502
W
WAV files 66, 79, 192, 212, 246, 312, 398
Wave Generator dialog 223
Waveburner 416
Waveform Editor. See File Editor
Waveform view 191, 215
Waveform view button 43
waveforms
clip offset and 157
displaying 43
dynamic range 470
editing 11, 66, 193
editing tools 43, 208–211
frequency of 223
inserting in audio 223
length of 224
sample units 212
Time Ruler units 242
types of 223
zooming in/out 207, 211
websites
Apple homepage 19
Apple Service and Support 19
Apple Store 20
Apple websites 20
AppleCare Support 517
Dolby Laboratories 311
FireWire 19
podcast markers and 380
QuickTime 19
Soundtrack Pro 19
wet signals 337, 339
white noise 222, 341
width (depth) 337
Width slider 301
windows
analysis windows 216, 217
closing 67
custom mixing layouts 274
floating or docking tabs 36
keyboard shortcuts 36,450
minimizing to Dock 67
moving 67
rearranging tabs 36
resizing 67
toggling elements in 34
Video tab as 318
workflows
custom window layouts 274
DVD Studio Pro and 432–433
Final Cut Studio features 16
mixing process 262
Multitake Editor 257–259
podcasts 378
Soundtrack Pro Conform 439–448
surround sound projects 294
workspace, setting up 67–71
X
XLR connectors 488, 490, 492, 503
XML files 430
XML Interchange Format 430, 435
Y
Y/C connectors 481
Y'CbCr color space (YUV) 481–482
Z
zero crossings 205
Zoom control 42, 129–130, 207
Zoom slider 253
Zoom tool 211
zooming in/out
File Editor 207-208
on analyzed problems 239
with scroll wheel 129–130, 207
waveform display 211
with Zoom control 129–130
- Contents
- Preface 11 An Introduction to Soundtrack Pro
- Chapter 1 21 Setting Up Your System
- Chapter 2 33 The Soundtrack Pro Interface
- Chapter 3 65 Setting Up Soundtrack Pro
- Chapter 4 105 Working with Multitrack Projects
- Chapter 5 127 Working in the Timeline
- Chapter 6 191 Editing Audio Files
- Chapter 7 251 Using the Multitake Editor
- Chapter 8 261 Basic Mixing in Soundtrack Pro
- Chapter 9 293 Mixing Surround Sound
- Chapter 10 315 Working with Video in Soundtrack Pro
- Chapter 11 327 Working with Audio Effects
- Chapter 12 355 Working with Automation
- Chapter 13 367 Recording Audio in Soundtrack Pro
- Chapter 14 377 Creating Podcasts in Soundtrack Pro
- Chapter 15 391 Using Control Surfaces with Soundtrack Pro
- Chapter 16 395 Exporting Multitrack Projects
- Chapter 17 421 Using Soundtrack Pro with Other Applications
- Chapter 18 439 Using Conform with Final Cut Pro
- Appendix A 449 Soundtrack Pro Keyboard Shortcuts
- Appendix B 463 Audio Fundamentals
- Appendix C 477 Working with Professional Video and Audio Equipment
- Appendix D 509 Working with Apogee Hardware in Soundtrack Pro
- Appendix E 515 Solutions to Common Problems and Customer Support
- Appendix F 519 Using Apple Loops Utility
- An Introduction to Soundtrack Pro
- Soundtrack Pro gives you the tools you need to create high-quality soundtracks for your film and video productions.
- Overview of Soundtrack Pro
- Using Soundtrack Pro in Your Post-Production Workflow
- Notable Features in Soundtrack Pro
- Audio editing features:
- Multitrack project features:
- Final Cut Studio workflow features:
- Mixing features:
- Other features:
- Resources for Learning About Soundtrack Pro
- About This Soundtrack Pro Onscreen User Manual
- Apple Websites
- Soundtrack Pro Website
- Apple Service and Support Website
- Other Apple Websites
- Setting Up Your System
- The way you set up your system depends on the audio equipment you plan to use.
- System Considerations
- Processor Speed and RAM
- Hard Disks
- Dedicated Hard Disk
- Setting the Audio Input and Output
- To select a default output device:
- To select a default input device:
- Audio MIDI Setup
- For more information, go to:
- Adding Audio Units Plug-ins to Your Computer
- Connecting Equipment
- Video and Audio Input and Output Devices
- Video Device
- Audio Device
- Video and Audio Interfaces
- External Audio and Video Monitoring
- External Audio Speakers and Monitors
- Setting Up a Proper Audio Monitoring Environment
- Amplifiers
- Mixers
- Control Surfaces
- External Video Monitors
- Example Hardware Setups
- Setting Up a System Using Powered Speakers
- Setting Up a System Using a FireWire Interface and a Control Surface
- Setting Up a System Using a Video Output Device
- Setting Up a System Using a PCI Video Interface Card with Breakout Box
- Setting Up a System for Stereo Mixing
- Stereo Speaker Placement and Listening Position
- Setting Up a System for Surround Mixing
- The Soundtrack Pro Interface
- 2
- Soundtrack Pro Window Organization
- Showing and Hiding the Panes
- Rearranging Tabs
- Project Pane
- Toolbar
- Transport Controls
- Timeline
- Headers
- Timeline Controls
- File Editor
- Mixer
- Multitake Editor
- Conform
- Bin
- Meters Tab
- Recording Tab
- Browser
- Search Tab
- Favorites Tab
- Video Tab
- Project Tab
- Details Tab
- File and Clip Details
- Marker Details
- Envelope Point Details
- File Editor Selection Details
- Effects Tab
- Tracks Tab
- Actions Tab
- Analysis Tab
- HUDs
- Timecode HUD
- Sound Palette
- Multipoint Video HUD
- Setting Up Soundtrack Pro
- 3
- Two Kinds of Projects
- Project File extension Description
- Multitrack Projects
- Audio File Projects
- Setting Up Your Workspace
- Basic Window Controls
- To move a window:
- To resize the Soundtrack Pro window:
- To minimize the Soundtrack Pro window to the Dock:
- To close the Soundtrack Pro window:
- Using Tabs
- To reorder tabs:
- To detach a tab:
- To attach (dock) a tab:
- Using Project Layouts
- To save a project layout:
- To switch to a saved project layout:
- To delete a saved layout:
- To transfer a saved project layout file to another computer:
- Customizing the Toolbar
- To add a button to the Toolbar:
- To move a button in the Toolbar:
- To add space or a separator to the Toolbar:
- To return the Toolbar to the default set of buttons:
- To show only icons in the Toolbar, do one of the following:
- Using the Shortcut Menu
- Playing Projects
- To play the project:
- Setting the Playhead Quickly
- To set the playhead, do one of the following:
- Setting the Playhead Using the Time Display
- To set the playhead using the Time display:
- Entering Time-Based Units
- For example:
- Entering Beats-Based Units
- Setting the Playhead Using the Playhead Location Value Slider
- About Changing Values and Timecode Entries
- Using Value Sliders
- To change values in coarse increments, do one of the following:
- Using Timecode Value Sliders
- Scrubbing Audio
- Scrubbing Video
- Controlling Playback with the Transport Controls
- Controlling Playback Using Keyboard Shortcuts
- Locating and Adding Audio Files
- Supported Audio File Formats
- Sample Rates
- Bit Depths
- Supported Video File Formats
- Looping and Non-Looping Files
- Using the Browser to Locate Files
- To locate audio files using the Browser:
- Using Favorites to Locate Files
- Using Search to Locate Files
- Searching for Files in Column View
- To search for files in Column view:
- To search using the Search Text field:
- Refining a Search in Column View
- To refine your search using the Matches column:
- To refine your search by selecting multiple keywords:
- Searching for Files in Button View
- To search for files in Button view:
- To search by file path or filename:
- Refining a Search in Button View
- Adding Custom Keywords
- To add a custom keyword:
- Adding a Directory to the Search Database
- To add a directory to the Search database:
- Removing a Directory from the Search Database
- Using the Bin
- The Bin Hierarchy
- To add a file to the Bin, do one of the following:
- Viewing and Editing Projects in the Bin
- To control the display of information categories in the Bin:
- Searching Bin Information
- To search information categories in the Bin:
- Using the Shortcut Menu and the Media Pop-Up Menu in the Bin
- To use the shortcut menu or the Media pop-up menu to affect an entire project:
- To use the shortcut menu or the Media pop-up menu to affect an individual item in the Bin:
- Bin Column Information
- Previewing Audio Files
- To preview an audio file:
- Using the Preview Controls
- To preview an audio file with a project:
- To preview a file without the project (solo):
- Viewing File and Clip Information
- Using Undo and Redo
- To undo the last change:
- To redo the last change:
- Using Snapping
- To turn snapping on:
- To set the Snap To value:
- To temporarily reverse the snapping state:
- Reconnecting Media Files
- To reconnect an audio file:
- To reconnect a video file:
- Setting Soundtrack Pro Preferences
- General Preferences
- Startup
- Alerts and File Management
- Project Preferences
- Recording Preferences
- To select an audio interface as the output device:
- Synchronization Preferences
- Input
- Output
- Time Code Offset
- Control Surfaces Preferences
- Video Out Preferences
- Working with Multitrack Projects
- 4
- Creating and Opening Multitrack Projects
- To create a new multitrack project:
- To open an existing project:
- Creating a Multitrack Project from Final Cut Pro Clips or Sequences
- Closing Multitrack Projects
- To close a project:
- Setting Project Properties
- Automation Mode
- To set the automation mode:
- Sample Rate
- To set the sample rate:
- Overlap Mode
- To set the project overlap mode:
- Envelope Selection Mode
- To select and move clips and envelope points together:
- To select and move clips and envelope points independently of each other:
- Project Time Format
- Setting the Project Ruler Units
- To choose the ruler units for a project:
- To specify the details of the units shown in the Time display and Time ruler:
- Time Ruler Units and Grid Lines
- Setting the Project Length
- To set the project length:
- To delete the end-of-project marker:
- Saving Multitrack Projects
- To save your project:
- Setting Default Locations for Saving Media Files
- Edited Media Location
- To change the edited media location, do one of the following:
- Scratch Location
- To change the scratch location:
- Recordings Location
- To change the recordings location:
- Collecting Media for a Project
- Adding Files to a Multitrack Project
- To add an audio file from the Finder:
- To add an audio file from the Bin tab:
- Viewing and Editing Clip and Track Properties
- Clip Properties
- Setting Clip and Track Colors
- To set the color of a clip, do one of the following:
- To set a track color, do one of the following:
- Enabling and Disabling Clips
- To enable a clip in the Timeline, do one of the following:
- Locking and Unlocking Clips and Tracks
- Locking Clips
- Locking Tracks
- To lock a track, do one of the following:
- To unlock a track, do one of the following:
- Making Clip Channel Selections
- Using the Shortcut Menu to Make a Channel Selection
- Separating Channels by Option-Dragging
- Combining Separate Clips to Create Multichannel Clips
- To create a single multichannel clip from separate clips:
- Tracks, Busses, Submixes, and the Master Bus
- Tracks
- Busses
- Submixes
- The Master Bus
- Working in the Timeline
- 5
- Moving Around in the Timeline
- Using the Scroll Bars
- Using the Zoom Control
- To zoom in, do one of the following:
- To zoom out, do one of the following:
- To fit the project in the visible area of the Timeline:
- Using the J, K, and L Keys for Shuttling
- Setting Track Height
- Using the Global Timeline View
- Using the Time Ruler
- Working with the Cycle Region
- To set the cycle region, do one of the following:
- To activate or deactivate the cycle region, do one of the following:
- To resize the cycle region:
- To remove the cycle region, do one of the following:
- Working with Tracks, Busses, and Submixes in the Timeline
- Adding Tracks, Busses, and Submixes
- To add a track, do one of the following:
- To add a bus, do one of the following:
- To add a submix, do one of the following:
- Selecting Tracks, Busses, and Submixes
- To select a track, bus, or submix, do one of the following:
- To select adjacent tracks, busses, or submixes, do one of the following:
- To select nonadjacent tracks, busses, or submixes:
- Grouping Tracks, Busses, and Submixes
- To group tracks, busses, or submixes:
- Applying Changes to Groups of Selected Tracks, Busses, and Submixes
- Changes in the track header or the shortcut menu:
- Changes in the Timeline:
- Managing Track Selections with the Tracks Tab
- Mixer Objects Outline
- Groups Outline
- To rename a group in the Groups outline:
- To delete a group or remove an item from a group:
- Channel Strip
- Moving and Copying Tracks, Busses, and Submixes
- To move a track, bus, or submix:
- To copy a track, bus, or submix:
- Renaming Tracks, Busses, and Submixes
- To rename a track, bus, or submix:
- Changing a Track, Bus, or Submix Icon
- To change the icon for a track, bus, or submix, do one of the following:
- Using the Track Controls
- Adjusting Volume
- Adjusting Pan Position
- Muting and Soloing Tracks, Busses, and Submixes
- To mute a track, bus, or submix:
- To solo a track, bus, or submix (multiple solo):
- To exclusively solo a track, bus, or submix:
- Adding Effects to a Track, Bus, or Submix
- To add effects to a track, bus, or submix:
- Showing and Hiding Track, Bus, and Submix Envelopes
- Changing Track Time Format
- To change a track's time format:
- Removing Tracks, Busses, and Submixes
- Selecting Audio Clips in the Timeline
- To select an individual clip:
- To select multiple audio clips in the same track:
- Selecting the Entire Contents of a Track
- To select all the clips on selected tracks:
- Selecting Partial Contents of One or More Tracks
- Cutting, Copying, and Pasting Audio Clips
- To cut an audio clip:
- To copy an audio clip, do one of the following:
- To paste an audio clip:
- To paste multiple copies of a clip:
- Removing Audio Clips
- To remove an audio clip:
- Spotting Clips to the Timeline
- To spot a clip to the playhead:
- To spot a clip to the Timeline using timecode:
- Moving Clips
- Moving Audio Clips
- To move an audio clip to a new time position:
- To move an audio clip to a new track:
- To lock the time position of a clip as you move it between tracks:
- Moving Clips Numerically
- To move an item by entering a timecode value:
- Moving Clips with Keyboard Shortcuts
- To move a selected clip up one track:
- Snapping Clips to Clips on Adjacent Tracks
- Resizing Audio Clips
- To resize an audio clip:
- Changing the Offset of an Audio Clip
- To slip (change the offset of) a clip:
- Creating Fades and Crossfades in the Timeline
- Creating Fade-Ins and Fade-Outs in the Timeline
- To create a fade-in or fade-out on a clip in the Timeline:
- To adjust the fade type:
- Creating Crossfades Between Audio Clips
- To set the project to crossfade mode:
- To create a crossfade:
- To adjust crossfade boundaries:
- To move the crossfade without changing its length:
- To adjust the crossfade type:
- Truncating Overlapping Audio Clips
- To set the project to truncate mode:
- To truncate an audio clip:
- Editing Audio Clips in the Multitrack Timeline
- Using the Timeline Editing Tools
- Selection Tool
- Timeslice Tool
- Blade and Blade All Tools
- Lift and Stamp Tools
- Scrub Tool
- Timeline Editing Tools HUD
- To use the Timeline Editing Tools HUD:
- Editing in Place
- How Clips Are Affected by Media File Editing
- How Source Audio File Editing Works in a Soundtrack Pro Multitrack Project
- Modifying a Clip Without Affecting Its Source Media
- Using the Multitrack Timeline and the File Editor Together
- Making Changes in the File Editor and Hearing Them in the Timeline
- To make changes in the File Editor and hear the results in the Timeline:
- Spotting Sound Effects from the File Editor to the Timeline
- To add small sections of a longer audio file to a multitrack project:
- Splitting and Joining Audio Clips
- Splitting Clips with the Blade Tool
- To split audio clips with the Blade tool:
- Splitting Clips Across All Tracks with the Blade All Tool
- Splitting Clips with the Playhead
- To split selected audio clips with the playhead:
- To split audio clips on selected tracks:
- To split audio clips while playing a project:
- Joining Audio Clips
- To join audio clips:
- Editing with the Timeslice Tool
- To make a selection with the Timeslice tool:
- To select a portion of a clip with the Timeslice tool:
- Cutting, Copying, and Pasting Timeslices
- To cut a Timeslice:
- To copy a Timeslice:
- To paste a Timeslice:
- Deleting the Contents of Timeslices
- To delete the contents of a Timeslice selection:
- Changing the Timeslice Selection Area
- To extend the Timeslice selection area graphically:
- Using the Timeslice Tool with Keyboard Shortcuts
- Using the Lift and Stamp Tools
- To lift properties from a clip in the Timeline:
- To stamp properties on one or more clips in the Timeline:
- To name or rename a Sound Palette preset:
- To attach a thumbnail image to a Sound Palette preset:
- To delete a Sound Palette preset:
- Working with Markers
- Types of Markers
- Inserting Markers
- To insert a time marker:
- To insert a beat marker:
- Naming Markers
- To name a time marker or beat marker:
- To view marker titles in the Timeline:
- Moving Markers
- Adjusting a Marker's Duration
- Deleting Markers
- To delete a marker:
- Using Markers with Video
- Using Final Cut Pro Scoring Markers
- Using Markers to Align Audio Clips to Timecode
- To add a time marker at a specific timecode position in a video clip, do one of the following:
- To align an audio clip with a marker:
- Scoring a Marker to the Playhead
- To score a marker to the playhead:
- Working with Tagged and Looping Clips
- Transposing Tagged Audio Clips
- To transpose a tagged audio clip, do one of the following:
- Changing a Clip's Playback Mode
- To convert the playback mode to looping, do one of the following:
- To convert the playback mode to non-looping, do one of the following:
- Replacing the Source Audio in a Clip
- To replace the source audio file for a clip:
- To replace the source audio file in all clips using the same source file:
- Editing Audio Files
- Editing Audio Files Directly in a Multitrack Project
- How Media File Editing Works in a Multitrack Project
- How Source Audio File Editing Works in an Audio File Project
- Editing Audio Files in the File Editor
- Opening Audio Files in the File Editor Tab
- Playing Audio Files in the File Editor
- To play an audio file:
- Soloing an Audio File in the File Editor
- To solo an audio file in the File Editor tab:
- Linking the File Editor Selection and the Cycle Region
- To link the Cycle Region to File Editor and Timeslice selections:
- Scrubbing Audio Files
- To scrub an audio file with the Scrub tool:
- To scrub an audio file with the playhead:
- To make a selection while scrubbing with the playhead:
- To scrub using keyboard shortcuts:
- Selecting Part of an Audio File
- To select part of an audio file:
- To select the entire audio file:
- To select the left channel of an audio file:
- To select the right channel of an audio file:
- To select the area between two markers in the File Editor project view:
- To select the entire contents of one or more channels:
- To select the partial contents of one or more channels:
- Adjusting Selections to a Zero Crossing
- To adjust a selection to the zero crossing:
- Moving Between Selections
- To move to the previous selection:
- To move to the next selection:
- Cutting, Copying, and Pasting in the File Editor
- To cut part of an audio file in the File Editor:
- To copy audio in the File Editor:
- To paste audio in the File Editor:
- To paste mix audio in the File Editor:
- To paste repeat in the File Editor:
- Zooming In and Out in the File Editor
- To zoom in or out, do one of the following:
- To zoom in or out using a scrollwheel:
- To zoom in on a selection:
- To zoom in to see individual samples:
- To zoom out to see the entire waveform:
- To return to the original zoom level:
- Editing Audio Files Graphically with Waveform Editing Tools
- Frequency Selection Tool
- Sample Edit Tool
- Audio Stretching Tool
- To graphically time stretch an audio file:
- Zoom Tool
- To zoom in using the Zoom tool:
- Choosing the Sample Units in the File Editor
- Editing Multichannel Files
- Selecting and Editing Channels in Multichannel Files
- Creating a New Multichannel Audio File
- To open a new multichannel audio file:
- Using Frequency Spectrum View
- Viewing an Audio File in Frequency Spectrum View
- Using the Spectrum View HUD
- To open the Spectrum View HUD:
- Adjusting the Frequency Spectrum View with the Shortcut Menu
- To show the frequency spectrum on a logarithmic scale:
- To show the frequency spectrum on a linear scale:
- To choose an analysis window for Frequency Spectrum view:
- Editing in Frequency Spectrum View
- To select a frequency range:
- Frequency Selection Tool Guidelines
- Processing Audio Files
- Choosing Processing Effects
- Fade In
- Fade Out
- Normalize
- To set the normalization level:
- To preview the file at the normalization level:
- Adjust Amplitude
- To set the amplitude level:
- Silence
- Invert
- Reverse
- Insert
- Inserting Silence
- To set the length of the inserted silence:
- Click OK.
- Inserting Noise
- To choose the type of noise to insert:
- To set the length of the inserted noise:
- To set the volume level of the inserted noise:
- Inserting a Waveform
- To choose the type of waveform to insert:
- To set the frequency of the inserted waveform:
- To set the length of the inserted waveform:
- Time Stretch
- To time stretch an audio file:
- Click OK.
- Noise Reduction
- Set Noise Print
- To set part of an audio file as a noise print:
- Reduce Noise
- To reduce noise using the noise print:
- To set the threshold of the noise reduction:
- To set the amount of noise reduction:
- To change the tone of the noise reduction:
- To preview the file with noise reduction:
- To set the preview volume level:
- To compare the file with and without noise reduction:
- To hear only the noise to be removed:
- To use a noise reduction preset:
- Adding Ambient Noise
- Set Ambient Noise Print
- Add Ambient Noise
- To add ambient noise to an audio file:
- Replace With Ambient Noise
- To replace existing audio with ambient noise:
- Equalization Matching
- Set Equalization Print
- To set an equalization print:
- Apply Equalization
- To match equalization using the equalization print:
- Convert to Mono
- To select how a stereo file is converted to mono:
- Resample
- To choose the new sample rate:
- Swap Channels
- Reorder Channels
- To reorder channels in an audio file:
- Render to Action
- Applying Realtime Effects to Individual Audio Files
- Working with Actions
- Applying Actions
- To apply an action:
- Editing Actions
- To show an action's settings, do one of the following:
- Adjusting and Applying Action Selections
- To adjust an action's selection, do one of the following:
- To set the File Editor's current selection to the action's selection, do one of the following:
- Turning Actions On and Off
- To turn an action off:
- To turn an action on:
- Reordering Actions
- To reorder actions:
- Using the Action Insert Bar
- To set the position of the next applied action:
- Reversing the Order of the Actions List
- To reverse the order of the Actions list:
- Flattening Actions
- To flatten all audible actions:
- To flatten all actions, do one of the following:
- Comparing the Project With and Without Actions
- To hear the file without actions:
- To hear the file with all actions:
- To hear the file with only selected actions:
- Comparing the Last Two Actions
- To compare the last two actions:
- Deleting Actions
- To delete an action:
- Limitations of Actions That Change the File's Length
- Analyzing an Audio File
- To show the analysis lists and tools:
- To analyze an audio file:
- Types of Audio Analysis
- Clicks and Pops
- (Power Line) Hum
- DC Offset
- Phase Issues
- Clipped Signal
- To select the types of analysis to perform:
- Setting Analysis Parameters
- To set analysis parameters:
- Reading Analysis Results
- Zooming In on Analyzed Problems
- To zoom in on an item in the Results list:
- To zoom in and stay at the new zoom level:
- Fixing Analyzed Problems
- To fix an item:
- To fix all items in one operation:
- To clear fixed items from the Results list:
- Using the File Editor Project View
- Opening the File Editor Project View
- To create a new, blank audio file project:
- To open an audio file project in the File Editor project view, do one of the following:
- To open an audio file in its native format in the File Editor project view, do one of the following:
- Setting the Time Ruler Units in the File Editor Project View
- To set the Time Ruler units in the File Editor project view:
- Closing Audio File Projects
- Applying Realtime Effects in the File Editor Project View
- To add a realtime effect to an audio file project in the File Editor project view:
- Automating Realtime Effects in the File Editor Project View
- To automate a realtime effect parameter:
- Rendering Realtime Effects to Actions
- To render realtime effects and envelopes to an action:
- Saving Audio File Projects from the File Editor Project View
- To save a project as an audio file project:
- Saving Audio File Projects Containing Video
- About Saving QuickTime Movies and File Size
- Saving Audio Files from the File Editor Project View
- To save a project as an audio file:
- Click Save.
- Using the Timeline Controls in the File Editor Project View
- Scripting Actions in the File Editor Project View
- To save a series of actions as a droplet:
- Applying a Saved Droplet to a Clip in Final Cut Pro
- To apply a saved droplet to a clip in Final Cut Pro:
- Using the Global Waveform View
- Using Markers in the File Editor Project View
- Using the Multitake Editor
- 7
- About the Multitake Editor
- What Is ADR?
- Multitake Clips
- Creating Multitake Clips
- Recording Multitake Clips
- Converting Standard Clips to Multitake Clips
- To convert a standard clip to a multitake clip:
- Overview of the Multitake Editor
- Editing in the Multitake Editor
- To split a take using the Blade tool:
- To select an active take for a region:
- To delete a transition point:
- Slipping Take Regions
- To slip a take region:
- Adding and Deleting Takes
- To remove a take:
- Renaming Takes
- To rename a take in a multitake clip:
- Reordering Takes
- To rearrange the order of takes in a multitake clip:
- Example: A Multitake Editing Workflow
- To edit multiple takes of a line of dialogue using the Multitake Editor:
- Basic Mixing in Soundtrack Pro
- 8
- Soundtrack Pro gives you the tools to create sophisticated audio mixes for your projects.
- Steps in Mixing
- Step 1: Mix main dialogue tracks
- Step 2: Mix other dialogue and middle ground tracks
- Step 3: Mix background tracks
- Step 4: Make changes to the overall mix
- Structuring an Audio Post-Production Project
- What Is a Submix and How Do You Use It?
- Basic Signal Routing in Soundtrack Pro
- Setting the Submixes for Tracks and Busses
- To set the submix for a track or bus:
- Setting Hardware Outputs
- Example: Mixing a Project with Dialogue, Music, and Effects Submixes
- Creating Submixes
- Creating a Stereo Mix
- Creating a Separate Music and Effects Mix
- Signal Routing for a Separate Music and Effects Mix in Surround
- Using Sends and Busses
- Example: Adding Effects with Sends and Busses
- To make a send a post-fader send:
- Example: Combining Track Signals with Sends and Busses
- Using the Mixer
- Working with Channel Strips in the Mixer
- Using Custom Layouts for Mixing
- Adding Channel Strips to the Mixer
- Selecting Channel Strips
- Reordering Channel Strips
- To reorder a channel strip:
- Copying Channel Strips
- Setting Channel Strip Volume Levels
- To set the volume level of a channel strip, do one of the following:
- To return the volume fader to the default level:
- Setting Channel Strip Pan Position
- Setting Channel Strip Output
- To set the output for a submix in the Mixer:
- Muting and Soloing Channel Strips
- To mute a channel strip:
- To solo a channel strip:
- To exclusively solo a channel strip:
- Enabling Track Channel Strips for Recording
- To enable a track channel strip for recording:
- Renaming Channel Strips
- To rename a channel strip:
- Changing a Channel Strip Icon
- To change a channel strip icon:
- Showing and Hiding Sections of the Mixer
- To hide a section of the Mixer:
- To hide sections of channel strips:
- Using the Channel Strip Level Meters
- To reset a peak indicator:
- Removing Channel Strips
- Working with Effects in the Mixer
- Adding Effects to a Channel Strip
- To add an effect to a channel strip:
- Showing Channel Strip Effects Settings
- To show an effect's settings in the Effects tab:
- Reordering Effects in the Mixer
- To reorder an effect in the Mixer:
- Turning Effects Off and On
- Replacing an Effect
- To replace an effect in a channel strip:
- Deleting Effects from a Channel Strip
- To delete an effect from a channel strip, do one of the following:
- To delete all effects from a channel strip:
- Working with Sends and Busses in the Mixer
- Adding Sends to a Channel Strip
- To add a send to a channel strip:
- Reordering Sends in the Mixer
- Showing Send Settings
- Turning Sends Off and On
- Setting the Overall Project Volume Level
- To change the channel order in the meter display:
- Using the Peak Indicators in the Mixer Channel Strips
- To reset all peak indicators:
- Using the Peaks Value and Location Display in the Meters Tab
- To move the playhead to the highest (peak) value played in a channel:
- To reset the Peaks Value and Location display values:
- Using the Master Bus
- Master Bus Details
- Adjusting the Master Volume
- Listening to a Temporary Mono Mix
- To listen to a temporary mono mix:
- To latch the Mono Mix button:
- Recording Audio in the Mixer
- Recording Automation in the Mixer
- Creating Multiple Mixes
- Things to Keep in Mind While Mixing
- Mixing Surround Sound
- 9
- Soundtrack Pro gives you the tools to create sophisticated surround mixes for your projects.
- What Is 5.1 Surround?
- Creating a Surround Project
- Step 1: Acquiring the sound
- Step 2: Editing and arranging a multitrack project
- Step 3: Mixing surround
- Step 4: Exporting and delivering surround projects
- Setting Up for Surround
- Setting Up Soundtrack Pro for Surround
- Using the Surround Panners
- Setting the Submix Outputs to Surround
- To switch the hardware output setting from stereo to surround:
- Connecting Physical Outputs
- To connect physical outputs for monitoring surround sound:
- Stereo Mixdown
- Surround Speaker Placement
- Using Surround Panners to Create a Surround Mix
- The Mini Surround Panner
- The Surround Panner HUD
- Surround Panner Automation
- Modifier Keys for Moving the Puck
- Surround Metering
- Surround Panner HUD Meters
- Mixer Meters
- Surround Mixing Strategies
- Mixing Surround Files
- Converting a Stereo Mix to 5.1 Surround
- Placing Dialogue and Voiceover in a Surround Mix
- To place dialogue and narration in the center channel:
- Placing Stereo Music in a Surround Mix
- Using the Center Channel
- Using Surround Channels
- Using Surround Effect Plug-ins
- Limitations of the LFE Channel
- Accommodating Stereo Playback
- Exporting and Delivering 5.1 Surround Projects
- Mixdowns
- Project Files
- Working with Video in Soundtrack Pro
- Adding a Video to a Project
- Playing the Video
- Controlling Video Playback Using Keyboard Shortcuts
- Resizing the Video Tab
- To resize the Video tab:
- Using Video Output Devices
- To configure Soundtrack Pro for a video output device:
- To switch off output to an external video output device:
- To switch on output to an external video output device:
- Viewing Video Details
- To view details of a video file:
- Working with a Video's Audio
- Using the Time Display and Time Ruler with Video
- Scrubbing and Spotting with the Multipoint Video HUD
- Opening and Closing the Multipoint Video HUD
- To open the Multipoint Video HUD:
- Working with the Multipoint Video HUD
- Making a Selection in the Timeline or in the File Editor
- Dragging a Clip into the Multitrack Timeline
- Dragging a Clip Around the Multitrack Timeline
- Resizing a Clip in the Multitrack Timeline
- Nudging a Clip in the Multitrack Timeline
- Horizontally Moving an Envelope Point in the Timeline and File Editor Project View
- Time Stretching in the File Editor
- Dragging the Cycle Region
- Dragging Markers
- Removing a Video from a Project
- Working with Audio Effects
- Processing Effects and Realtime Effects
- Applying Processing Effects
- To apply a processing effect to a clip in the Timeline:
- Applying Realtime Effects
- Working with Effect Presets
- To add a preset:
- To apply an effect preset:
- To adjust effect preset parameters:
- To delete a preset:
- To hide the Presets drawer:
- To apply a preset to an effect from the Effects tab:
- Audio Effects Included with Soundtrack Pro
- Dynamics Effects
- Compressors
- Limiters
- Noise Gates
- Distortion Effects
- EQ and Filter Effects
- Frequency Ranges Used with EQ
- Roll-Off Filters
- Graphic EQs
- Parametric EQs
- Modulation Effects
- Chorus
- Phase Shifters
- Flangers
- Reverb and Delay Effects
- Delay
- Reverb
- Meters and Diagnostic Effects
- Correlation Meter
- MultiMeter
- Spectrum Analyzer
- Goniometer
- Miscellaneous Effects
- Denoiser
- Stereo Spread
- Working with Realtime Effects
- Working in the Effects Tab
- Adding Realtime Effects
- Adjusting Realtime Effect Parameters
- To adjust realtime effect parameters in the advanced settings window:
- Chaining and Reordering Realtime Effects
- To reorder effects in an effects chain:
- Bypassing Realtime Effects
- To bypass an effect:
- Adding Sends to Tracks
- To add a send to a track, do one of the following:
- Choosing the Bus to Which a Send Is Routed
- Adjusting Send Volume
- To adjust send volume:
- Adjusting Send Pan Position
- To adjust send pan position:
- Reordering Sends
- To reorder a send:
- Bypassing Sends
- Automating Realtime Effect Parameters
- Resetting Realtime Effects to Their Default Settings
- To reset a realtime effect to its default settings:
- Removing Realtime Effects
- To remove an effect:
- Working with Processing Effects
- Advanced Settings for Processing Effects
- To show the advanced settings window for a processing effect:
- Automating Processing Effect Parameters
- Working with Automation
- 12
- Using automation, you can create changes over time to volume, pan, effects, and other controls.
- Working with Envelopes
- Track, Bus, and Submix Envelopes
- To show the envelopes for a track, bus, or submix:
- Default Stereo Envelopes
- Default Surround Envelopes
- Adding Envelope Points
- To add an envelope point to an envelope:
- Selecting Envelope Points
- To select multiple envelope points, do one of the following:
- To deselect a selected envelope point, do one of the following:
- Moving Envelope Points
- To move an envelope point:
- Selecting and Moving Envelope Points with Clips
- The Timeslice Tool and the Envelope Selection Mode
- Viewing and Editing Envelope Point Details
- To view envelope point details:
- To change the value of an envelope point in the Details tab:
- To change the position of an envelope point in the Details tab:
- Nudging Envelope Points
- Cutting, Copying, and Pasting Envelope Points
- To cut envelope points:
- To copy envelope points:
- To paste envelope points:
- Deleting Envelope Points
- To delete envelope points:
- Automating Effect and Send Parameters
- To add an envelope for an effect or send parameter:
- To remove an envelope for an effect parameter:
- Master Bus
- To show or hide the Master bus envelopes, do one of the following:
- To show the Transpose or Tempo envelopes:
- Recording Automation Data
- Automation Modes
- To record automation data for movements to controls:
- Thinning Envelope Points in Recorded Automation Data
- To set the amount of thinning:
- Recording Audio in Soundtrack Pro
- Getting Ready to Record
- Recording Audio in the Timeline
- Enabling Tracks for Recording
- To enable a track for recording:
- Adjusting Recording Settings
- To adjust recording settings:
- Recording a Single Take
- To record a single take:
- Multitrack Recording
- To record to multiple tracks simultaneously:
- Recording Multiple Takes
- To record multiple takes:
- Editing Multitake Clips
- Recording Audio in the File Editor Project View
- To record audio in the File Editor project view:
- Creating Podcasts in Soundtrack Pro
- 14
- Soundtrack Pro gives you the tools to create professional podcasts of your projects.
- Podcasting Media Production
- Step 1: Record the sound (and video)
- Step 2: Edit and mix the sound, video, and images
- Step 3: Podcast-specific editing and authoring
- Step 4: Compress the audio (and video) files
- Step 5: Upload the compressed files
- Using the Podcast Track and Podcast Markers
- Displaying the Podcast Track and the Details Tab
- To display the podcast track:
- To make the Details tab active, do one of the following:
- To view or enter information for a podcast marker:
- Podcast Marker Information in the Details Tab
- Adding Markers to a Podcast
- Using Podcast and Chapter Markers
- To add a marker:
- Deleting Podcast and Chapter Markers
- Moving Podcast and Chapter Markers
- To move a podcast marker with the pointer:
- To move a podcast marker or a chapter marker using the Details tab:
- Editing Podcast and Chapter Markers
- To name a chapter or podcast marker:
- Creating Podcast Markers from Final Cut Pro Chapter Markers
- Adding Images to a Podcast
- Setting an Episode Image for an Entire Podcast
- To set an episode image for a podcast:
- Creating a Slideshow in a Podcast
- To add a series of images to a podcast:
- Using the Image Source Pop-Up Menu
- To apply an image to a marker region:
- To remove an image from a podcast:
- Exporting Podcasts
- Exporting Audio Podcasts
- Exporting Audio Podcasts as AAC Files
- Exporting Audio Podcasts as MP3 Files
- Exporting Video Podcasts
- Exporting Video Podcasts Directly from Soundtrack Pro
- Exporting Video Podcasts Using Compressor
- To export a video podcast using Compressor:
- Using Post-Export Actions for Podcast Production
- Using Control Surfaces with Soundtrack Pro
- You can connect and use control surfaces to automate recording, mixing, and other tasks in Soundtrack Pro.
- Connecting Control Surfaces
- Adding and Deleting Control Surfaces
- To add a connected control surface:
- To delete a control surface:
- Premapped Controls
- Mapping Commands to Control Surface Buttons
- To map a command to a control surface button:
- Recording Control Surface Automation
- Exporting Multitrack Projects
- About the Export Dialog
- Exporting and the Cycle Region
- Exporting a Master Mix
- Exporting a Master Mix to a Standard Audio File
- To export a master mix as a standard audio file:
- Exporting a Master Mix to a Compressed Audio File
- Exporting to MP3 Files
- To export a master mix as an MP3 file:
- Exporting to AAC/Podcast Files
- To export a master mix as an AAC/Podcast file:
- Exporting to Dolby Digital Professional (AC-3) Files
- Exporting a Master Mix Using Compressor
- Using Compressor Export Presets
- Using Existing Presets
- Editing or Creating Presets
- Exporting Multichannel Projects with Compressor
- To edit the channel layout:
- Exporting Tracks, Busses, and Submixes Separately
- To export component parts of a multitrack project:
- Output File Names
- Effect Tails
- Exporting Multiple Mono Files
- Using Post-Export Actions
- Default Actions
- To add a post-export action:
- Custom Actions
- To add your own AppleScript scripts to the After Export pop-up menu:
- Using Export Presets
- To create a new export preset:
- To apply a saved export preset:
- Exporting to AAF
- To export a project to an AAF file:
- Distributing a Multitrack Project and Its Media Files Together
- To save a project and its audio files together:
- Using Soundtrack Pro with Other Applications
- Using Soundtrack Pro with Final Cut Pro
- About Soundtrack Pro Audio File Projects
- Methods for Sending Audio from Final Cut Pro to Soundtrack Pro
- Sending Individual Audio Clips from Final Cut Pro to Soundtrack Pro
- Sending Clips from Final Cut Pro to the Soundtrack Pro File Editor
- To send a single Final Cut Pro clip to the Soundtrack Pro File Editor:
- Do one of the following:
- In the Save dialog, do the following:
- To send multiple Final Cut Pro clips to Soundtrack Pro:
- Processing a Clip's Media File with a Soundtrack Pro Script
- About Soundtrack Pro Scripts
- To modify one or more clips' media files using a Soundtrack Pro script:
- To edit a clip with the last script used:
- To disable the dialog that appears when you use the Send To Soundtrack Pro Script command:
- Opening a Final Cut Pro Clip's Media File Directly in Soundtrack Pro
- About the Open in Editor Command
- To open a Final Cut Pro audio clip's media file directly in the Soundtrack Pro File Editor:
- About Soundtrack Pro Multitrack Projects
- Creating Soundtrack Pro Multitrack Projects from Final Cut Pro Clips or Sequences
- Sending a Final Cut Pro Sequence or Clip Selection to a Soundtrack Pro Multitrack Project
- Sending a Mixdown Back to Final Cut Pro Automatically
- To export a mixdown and open a new copy of a Final Cut Pro sequence containing the mixdown:
- To update a mixdown clip in your Final Cut Pro sequence:
- Using Soundtrack Pro with DVD Studio Pro
- To make a change to a Soundtrack Pro audio file project from a DVD Studio Pro project:
- To edit an audio clip destructively in the File Editor:
- Using Soundtrack Pro with Motion
- To send an audio track from Motion to the File Editor:
- Using Soundtrack Pro with Third-Party Applications
- Exchanging OMF and AAF Files with Other Applications
- Importing OMF and AAF Files
- To import an OMF file:
- To import an AAF file:
- Using OMF and AAF Files
- Exporting Audio Files
- Using Conform with Final Cut Pro
- 18
- The picture editor and sound editor can work in parallel and then use Conform to easily merge the results of their work.
- About Conforming Manually
- Using Soundtrack Pro Conform
- Reviewing and Approving the Changes in the Conform Result Project
- Filtering Out Unchanged Clips
- Using the Project Selector Buttons
- Grouping Clips in the Conform Work List
- Showing Selected Clips in the Timeline
- Approving Changes and Clips
- To audition and approve changes and clips in the result project:
- Filtering Out Approved Clips
- Finishing the Conform Process
- To finish the Conform process:
- Soundtrack Pro Keyboard Shortcuts
- Processing and Editing Audio Files
- Video Out
- Recording
- What Is Sound?
- Fundamentals of a Sound Wave
- Frequency
- Amplitude
- Phase
- Frequency Spectrum of Sounds
- Measuring Sound Intensity
- What Is a Decibel?
- Decibel Units
- Signal-to-Noise Ratio
- Headroom and Distortion
- Dynamic Range and Compression
- Stereo Audio
- Identifying Two-Channel Mono Recordings
- Identifying Stereo Recordings
- Interleaved Versus Split Stereo Audio Files
- Digital Audio
- Bit Depth
- Working with Professional Video and Audio Equipment
- About Video Interfaces, Signals, and Connectors
- Video Interfaces
- FireWire for DV
- FireWire for Uncompressed Digital Video
- PCI Video Interface Card
- PCI Video Interface Card with Built-in Connectors
- PCI Video Interface Card with Breakout Box
- USB Video Interface
- Video Signals and Connectors
- Composite
- S-Video
- Component YUV and Component RGB
- FireWire 400
- FireWire 800
- SDI
- HD-SDI
- SDTI
- HDMI
- SCART
- About Audio Interfaces, Signals, and Connectors
- Setting Up an Audio Interface
- Built-in Audio Interfaces
- Built-in Analog Audio
- Built-in S/PDIF Digital Audio
- DV FireWire
- Choosing a Third-Party Audio Interface
- Benefits of a Third-Party Audio Interface
- Tips for Selecting a Third-Party Audio Interface
- FireWire for Digital Audio
- USB Audio Interfaces
- PCI Audio Interface Cards
- PCI Audio Interface Card with Built-in Connectors
- PCI Audio Interface Card with Breakout Box
- Audio Connectors, Cables, and Signal Formats
- Analog Audio Connectors, Cables, and Signal Formats
- 1/8" Mini Connectors
- RCA Connectors
- 1/4" Audio Connectors
- 1/4" Tip-Sleeve Connectors
- 1/4" Tip-Ring-Sleeve Connectors
- XLR Connectors
- Digital Audio Connectors, Cables, and Signal Formats
- S/PDIF
- TOSLINK Optical and ADAT Lightpipe
- AES/EBU
- TDIF Connectors
- About Microphone, Instrument, and Line Level
- Signal Differences Between Pro and Consumer Equipment
- About Balanced Audio Signals
- Tips for Choosing Speakers and an Amplifier
- Frequency Response and Dynamic Range
- Self-Powered Versus Passive Speakers
- Amplifiers and Signal Levels for Unpowered Speakers
- Connecting Professional Video Devices
- Connecting Professional SD Video Devices
- A Recommended System Using a Third-Party Video Interface
- To connect video and audio outputs from your VTR to your third-party video interface:
- Connecting Professional Component Analog Video Devices
- Connecting Consumer Analog Video Devices
- Connecting Non-DV Devices to a DV Converter
- A Recommended Non-DV-to-DV System Using Serial Device Control
- To connect video and audio outputs from your VTR to your analog-to-DV or digital-to-DV converter:
- Connecting Professional Audio Devices
- Connecting Professional Digital Audio Devices
- Connecting Consumer Digital Audio Devices
- Connecting Professional Analog Audio
- To connect multiple analog audio channels from a VTR or audio device to a multichannel audio interface:
- A Recommended Audio System Using a Third-Party Audio Interface
- Synchronizing Equipment with a Blackburst Generator
- To connect your audio deck outputs to a third-party audio interface for synchronized, genlocked audio capture:
- Synchronizing Soundtrack Pro to External Timecode
- Setting Up the LTC Source Device
- Setting Up the MTC Generator
- Setting Up Soundtrack Pro to Sync to External Timecode
- To sync Soundtrack Pro to external timecode, do the following:
- Working with Apogee Hardware in Soundtrack Pro
- To open the Apogee control panel:
- Global Parameters
- Unit Selection
- Loop Sync
- Units Parameters
- General Tab
- Inputs Tab
- Inputs 1 to 4
- Line Inputs 5 to 8
- Outputs Tab
- Headphone Parameters
- Main Parameters
- Analog Line Output Level Settings
- Setup Buttons
- Solutions to Common Problems and Customer Support
- Solutions to Common Problems
- Audio Files and Audio Interfaces
- Eliminating Recording Latency
- Calling AppleCare Support
- Using Apple Loops Utility
- F
- What Is Apple Loops Utility?
- The Apple Loops Utility Interface
- Tags Tab
- Property Tags
- Search Tags
- File Info
- Descriptors
- Transients Tab
- Assets Drawer
- Playback and File Management Controls
- Opening Files in Apple Loops Utility
- Tagging Files in Apple Loops Utility
- To tag a single audio file:
- Tagging Multiple Files
- To tag multiple files:
- Working With Transients
- To display a file in the Transients tab:
- To add a new transient:
- To move a transient marker:
- To change the beat value of detected transients:
- To change the sensitivity of transient detection:
- To remove a transient, do one of the following:
- Saving Changes to Files
- To save changes to the currently selected files:
- To save all changes:
- To save multiple files to the same directory:
- Removing Files From the Assets Drawer
- To remove files:
- Apple Loops Utility Preferences
- Saving
- Apple Loops Utility Keyboard Shortcuts
- General and File
- Navigation
- Descriptor Tagging
- Index
- A
- B
- C
- D
- E
- G
- H
- |
- J
- K
- L
- M
- N
- 0
- P
- Q
- R
- S
- T
- U
- V
- W
- X
- Y
- Z
Brand : APPLE
Model : Soundtrack Pro 2
Category : Software