
PJ WUL6670 - Projector RICOH - Free user manual and instructions
Find the device manual for free PJ WUL6670 RICOH in PDF.


| Product Type | Video Projector |
| Brand | Ricoh |
| Model | PJ WUL6670 |
| Display Technology | 3x0.64" LCD |
| Native Resolution | WUXGA (1920 x 1200) |
| Light Source | Laser (Class 1) |
| Light Source Life | Normal: 20,000 h; ECO: 30,000 h |
| Brightness | Not specified in manual (estimated ~5000 lumens) |
| Throw Ratio | 1.2:1 - 2.0:1 |
| Zoom | Manual, 1.6x |
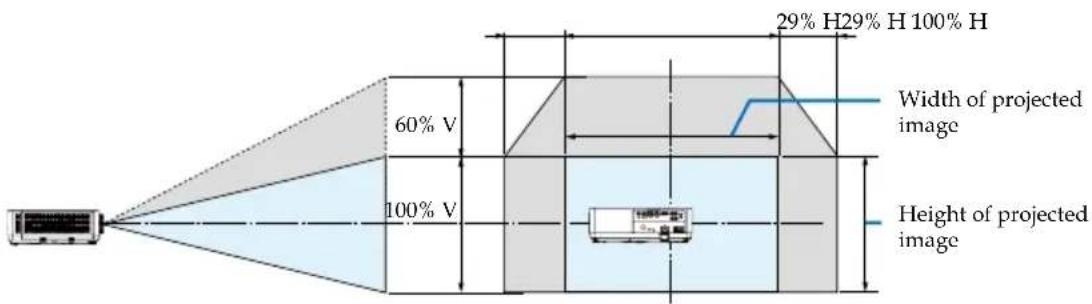
| Lens Shift | Horizontal: ±29%; Vertical: +60% to -0% |
| Keystone Correction | Horizontal ±30°, Vertical ±30° |
| Projection Size | 30" to 300" diagonal |
| Speaker | 16W (monaural) |
| Inputs | HDMI 1, HDMI 2, Computer In, HDBaseT, USB-A, USB-B, LAN, PC Control |
| Outputs | Monitor Out, Audio Out |
| Dimensions (W x D x H) | 405 mm x 358 mm x 137 mm (without feet) |
| Weight | Approx. 7.9 kg (net) |
| Power Consumption | Normal: 315W; ECO1: 207W; ECO2: 182W; Standby: ≤0.5W |
| Noise Level | Normal: Typ 37 dB(A); ECO: Typ 27 dB(A) |
| Operating Temperature | 5°C to 40°C (0-1400 m altitude); 5°C to 30°C (1400-3000 m) |
| Filter Maintenance | Cleanable and replaceable; reminder up to 1000 h |
| Accessories Included | Remote control with batteries, power cord (1.8m), HDMI cable (1.5m), quick start guide |
| Safety | Laser class 1, IEC 60825-1:2014, RG2 |
Frequently Asked Questions - PJ WUL6670 RICOH
User questions about PJ WUL6670 RICOH
0 question about this device. Answer the ones you know or ask your own.
Ask a new question about this device
Download the instructions for your Projector in PDF format for free! Find your manual PJ WUL6670 - RICOH and take your electronic device back in hand. On this page are published all the documents necessary for the use of your device. PJ WUL6670 by RICOH.
USER MANUAL PJ WUL6670 RICOH
natural_image
Abstract composition of five colored circles (orange, blue, pink, green, cyan) arranged in a scattered pattern on white background (no text or symbols)- Usage Notice
- Introduction
- Basic Operations
- User Settings
- LAN Control
- Troubleshooting
- Replacing the filter
Appendices8.
Read this manual carefully before you use this machine and keep it handy for future reference. For safe and correct use, be sure to read the Precautions in this manual before using the machine.

natural_image
Gradient background transitioning from dark blue to white (no text or symbols)Table of Contents
Table of Contents....1
Usage Notice....3
Precautions ....3
Remote Control Battery....10
Laser safety caution ....12
Laser Notice 12
Light Module 13
Safety Labels of This Machine ....13
Regulation & Safety Notices....16
Air ventilation 21
Place your projector correctly ....21
Power Switch Symbols 22
Other Information....23
Copyrights 23
Introduction....24
Package Overview....24
Product Overview....25
Connection Ports 27
Control Panel and Indicators....28
Remote Control....29
Installation of Remote Control Batteries 31
Remote Control Operating Range 32
Angle sensor 33
Installing the Projector....34
Connecting a Computer (Connect to Computer/Notebook) 35
Basic Operations....35
Connecting a Audio Device (Audio) 36
Connecting a USB Device 37
Powering On/Off the Projector ....38
Powering on the Projector....38
Power off the projector....40
Input Source Signal Selection 41
Adjust the Projector Zoom function....42
Adjust the Projector Focus function....42
Adjust the Projector Lens shift function ....43
Adjust the projected image 45
Adjust the position of the projected image ....45
Table of Contents
Adjust the screen size....46
User Settings......47
On Screen Display (OSD)....47
How to operate the OSD 47
Image adjustment ....48
Display Setting....51
Default settings....57
Audio....62
Options....63
USB Memory....67
Viewing via USB Memory....69
LAN Control 71
Controlling this Device with Web Browser....71
Connecting to the device....71
Access from the Web Browser....72
Login....72
System Status....72
General Setup 73
Picture Setup....73
Image Setup....74
Network Setup....75
Control the Projector via the Projector Management Utility 76
Installing Projector Management Utility....77
Control the projector with the projector Management Utility....79
Troubleshooting....80
Cleaning the case & lens....85
Before Maintenance 85
Clean casing of your projector 85
Clean the projection window 85
Filter Cleaning and Replacement 86
Cleaning the filter....86
Replacing the filter 87
Appendices 88
List of Compatible Signals....88
Configurations of Terminals....91
Specifications 93
External Dimensions....95
Trademarks 96
Precautions
Follow all warnings, precautions and maintenance as recommended in this user's guide to maximize the life of your unit.
■ Warning- Indicates a potentially hazardous situation which, if instructions are not followed, could result in death or serious injury.
■ Caution- Indicates a potentially hazardous situation which, if instructions are not followed, may result in minor or moderate injury or damage to property.
■Warning- Do not place vases, plant pots, cups, toiletries, medicines, small metal objects, or containers holding water or any other liquids, on or close to this machine. Fire or electric shock could result from spillage or if such objects or substances fall inside this machine.
■Warning- Do not use flammable sprays or solvents in the vicinity of this machine. Also, avoid placing these items in the vicinity of this machine. Doing so could result in fire or electric shock.
■Warning- Keep the machine and attachments out of the reach of children. If the machine is near children, it may cause injury.
■Warning- Plastic bags can be dangerous, please do not leave near babies and young children. To avoid the threat of suffocation, please keep away from their nose and mouth.
■ Warning- Do not use any power sources other than those that match the specifications shown in this manual. Doing so could result in fire or electric shock.
■ Warning- Do not damage, break, or modify the power cord. Also, do not place heavy objects on the power cord, or pull the cord or bend it severely. Doing so could result in fire or electric shock.
- Warning- Touching the prongs of the power cable's plug with anything metallic constitutes a fire and electric shock hazard.
■ Warning- The supplied power cord is for use with this machine only. Do not use it with other appliances. Also, do
Usage Notice
not use power cord other than the one supplied with this machine. Doing so could result in fire or electric shock.
■ Warning- It is dangerous to handle the power cord plug with wet hands. Doing so could result in electric shock.
■ Warning- Be sure to disconnect the plug from the wall outlet at least once a year and check for the following:
■ There are burn marks on the plug.
■ The prongs on the plug are deformed.
If any of the above conditions exist, do not use the plug and consult your dealer or service representative. Use of the plug could result in fire or electric shock.
■ Warning- Be sure to disconnect the power cord from the wall outlet at least once a year and check for the following:
The power cord's inner wires are exposed, broken, etc.
The power cord's coating has a crack or dent.
■ When bending the power cord, the power turns off and on.
■ Part of the power cord becomes hot.
■The power cord is damaged.
If any of the above conditions exist, do not use the power cord and consult your dealer or service representative. Use of the power cord could result in fire or electric shock.
■ Warning- Do not use the connection cable if it is deformed, cracked, or damaged. Doing so could result in fire or electric shock. If the connection cable is deformed, cracked, or damaged, contact your service representative to request a replacement cable.
■ Warning- When using an extension cord or power strip, only connect equipment whose total power consumption is within the power rating for the extension cord or power strip. If the power rating is exceeded, it may cause heat buildup and result in fire.
■ Warning- If the machine emits smoke or odours, or if it behaves unusually, you must turn off its power immediately. After turning off the power, be sure to disconnect the power cord plug from the wall outlet. Then contact your service representative and report the problem. Do not use the machine. Doing so could result in fire or electric shock.
Usage Notice
■ Warning- If metal objects, or water or other fluids fall inside this machine, you must turn off its power immediately. After turning off the power, be sure to disconnect the power cord plug from the wall outlet. Then contact your service representative and report the problem. Do not use the machine. Doing so could result in fire or electric shock.
■ Warning- Never operate this unit on AC power during a thunderstorm. If you see lightning or hear thunder, never touch the unit, cables and/or peripherals. An electric surge caused by the storm, may result in an electrical shock or damage to the unit.
■ Warning- If the machine topples, or if a cover or other part gets broken, you must turn off its power immediately. After turning off the power, be sure to disconnect the power cord plug from the wall outlet. Then contact your service representative and report the problem. Do not use the machine. Doing so could result in fire or electric shock.
■ Warning- Never push objects of any kind into this product through openings as they may touch dangerous voltage points or short-out parts that could result in a fire or electric shock. Never spill liquid of any kind on the product.
■ Warning- Do not remove any covers or screws that are not mentioned in this manual. There are high voltage components inside the machine that may cause electric shock. Contact your service representative if any of the machine's internal components require maintenance, adjustment, or repair.
■ Warning- Do not disassemble or modify the machine. Doing so may cause injury or malfunction.
■ Warning- Installing the Projector on a Wall or Ceiling:
a) Do not attempt to clean or replace parts for a machine that is installed in a high location on a wall or ceiling. Doing so may cause it to fall down, resulting in an injury.
b) Contact your sales or service representative to clean or replace parts for a machine that is installed on a wall or ceiling.
c) If a machine is incorrectly installed on a wall or ceiling, it may fall down and cause an injury. Contact your sales or service representative if you want to install a machine on a wall or ceiling.
Usage Notice
d) Do not obstruct the machine's vents. Doing so risks fire caused by overheated internal components.
e) For users, do not install the projector by yourself. Contact your sales or service representative if you want to install the projector on a wall or ceiling.
f) For sales or service representatives:
- Use brackets that are strong enough to support the projector. Projector's weight including lens is approx. 8.1kg.
- The projector must be installed in a location that is sturdy enough to support the full weight of the projector and brackets.
- Use only the M4 screws for fixing to the brackets.
Use all four of the projector's screw holes to the brackets, and make sure the screws are tightened.
g) Do not use the projector in oil-mist or smoke environment. Doing so may cause the projector case to crack and fall from its ceiling mount. This may cause serious injury.
■ Caution- Use the drop proof chain to prevent projector dropping:
a) Connect the safety bolt of the projector to the solid part of the building with a drop proof chain by using common tools.
b) Make sure to use a drop chain that can support the weight of the projector and the drop tool.
■ Caution- Keep the machine away from humidity and dust.
Otherwise a fire or an electric shock might occur.
■ Caution- Do not place any objects on the machine. Doing so may cause the machine to topple over, possibly resulting in injury.
■ Caution- Do not place the machine on an unstable or tilted surface. If it topples over, an injury might occur.
■ Caution- Do not place the machine or use it in an environment where it might get wet such as from snow, rain, or being near water. Doing so could result in fire or electric shock.
■ Caution- Do not put your face or hand near the exhaust vents. Doing so could result in burns or an accident due to hot air coming from the exhaust vents.
■ Caution- Do not use the machine on soft material such as paper or cloth that might get sucked into the intake vents. Doing so may cause heat buildup inside the machine,
Usage Notice
resulting in malfunction, burns, or fire.
■ Caution- Do not place the machine in a location where air flow is poor. Doing so may cause fire due to internal components becoming overheated.
■ Caution- Do not place or store the machine in a location where direct sunlight or heat generation might occur. The heat may deform or wear out the exterior parts or negatively affect internal parts. Doing so could result in fire.
■ Caution- Do not place low heat resistant material near the exhaust vents. Hot air may come from the exhaust vents, resulting in damage to the machine or an accident.
- Caution- Do not obstruct the machine's vents. Doing so risks fire caused by overheated internal components.
■ Caution- Push the power plug all the way into the power outlet. Do not use a power outlet with a loose connection. Doing so may result in heat buildup. Plug the power cord in the correct direction into the base. If they are not plugged in correctly, it could result in smoke, fire, or electric shock.
■ Caution- If this machine is not going to be used for several days or longer at a time, disconnect its power cord from the wall outlet.
■ Caution- When disconnecting the power cord from the wall outlet, always pull the plug, not the cord. Pulling the cord can damage the power cord. Use of damaged power cords could result in fire or electric shock.
■ Caution- Be sure to disconnect the plug from the wall outlet and clean the prongs and the area around the prongs at least once a year. Allowing dust to build up on the plug constitutes a fire hazard.
■ Caution- When performing maintenance on the machine, always disconnect the power cord from the wall outlet.
■ Caution- Do not place the power cord and connection cable in a way that might cause someone to trip and fall. The machine might fall over and cause an injury.
■ Caution- The machine may be very hot after it is turned off, especially the vents.
■ Caution- Do not place the machine on other equipment or vice versa. Doing so may cause heat buildup inside the machine or cause the other equipment to malfunction.
Usage Notice
■ Caution- Do not increase the volume unless you are listening while increasing the volume. Also, lower the volume before turning off the power, because a loud sound may be emitted when the power is turned on and cause hearing damage.
- Caution- If the machine's interior is not cleaned regularly, dust will accumulate. Fire and breakdown can result from heavy accumulation of dust inside this machine. Contact your sales or service representative for details about and charges for cleaning the machine's interior.
■ Caution- Unplug the power cord from the wall outlet before you move the machine. While moving the machine, take care that the power cord is not damaged under the machine. Failing to take these precautions could result in fire or electric shock.
■ Caution- Do not use attachments not recommended by RICOH. Use of an incompatible attachments could cause hazards or damage to the product.
■ Caution- Unplug this product from the wall outlet and take the product to qualified service personnel if you encounter any of the following conditions: a) The power supply cord or plug is damaged. b) Liquid has been spilled, or objects have fallen into the product. c) The product has been exposed to rain or water. d) The product does not operate normally when following the operating instructions. Adjust only those controls that are covered by the operating instructions. e) The product has been dropped or damaged in any way. (If the cabinet should break, please handle with care to avoid injury.)
■ Caution- This product incorporates glass components, including a lens. If this should break, please handle with care to avoid injury and contact your sales representative for repair service. Avoid any broken pieces of glass since they may cause injury.
■ Caution- Do not place anything in front of the lens while the projector is operating. Things placed in front of the lens may overheat and burn or start a fire.
■ Caution- Unauthorized substitutions may result in fire, electric shock, or other hazards. Upon completion of any service or repairs to this product, ask the service technician to perform safety
Usage Notice
checks to verify that the product is in proper operating condition.
■ Caution- Do not use the product in a closed installation location. Do not place the product in a box or in any other closed installation location. Otherwise it may overheat, which could result in a risk of fire.
■ Warning- Do not look into the lens or vent when the product is on. The bright light may damage your eyes. Be especially careful in an environment with children.
■ Caution- Do not block the projection light when it is on. If you do so, the part that is blocking the projection light may get quite hot and deform, deteriorate or cause a burn or fire. The reflected light may make the lens hot and cause a product failure. To temporarily suspend projection, select the mute function. To suspend longer, turn off the product.
■ Caution- Be sure to reserve proper space at the top, sides, and rear of the shell for ventilation and projector cooling. The following figure shows minimum distances to be reserved. If the projector is placed in a cabinet or an enclosed environment, the requirements for minimum distances must be satisfied.
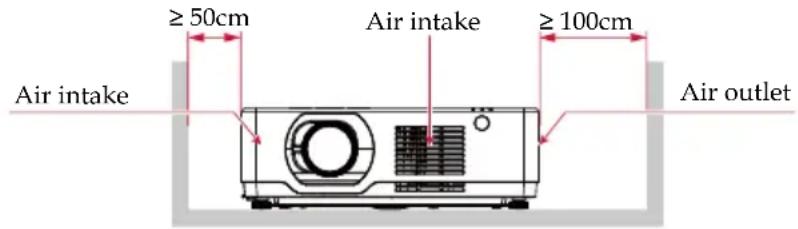
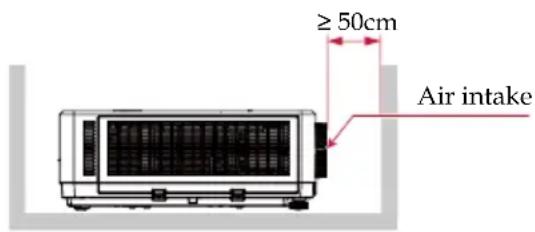
■ Caution- Do not block the ventilation holes to prevent overheating.
Usage Notice
Remote Control Battery
Warning
- Do not touch the battery directly with bare hands if it leaks. If the liquid gets into your eyes, do not rub them. It may cause blindness. Immediately wash with clean water and consult a doctor.
• Never throw batteries into a fire.
Using the batteries improperly may cause them to explode or leak and may result in serious injury. If battery-leaking fluid contacts skin, wash the fluid off immediately with clean water and consult a doctor. If the fluid spills on an instrument, avoid contact and wipe it off using tissue paper. Then dispose of the used tissue paper as flammable garbage after moistening the tissue with water.
- Keep new and used batteries away from children.
If the battery compartment does not close securely, stop using the product and keep it away from children. If you think batteries might have been swallowed or placed inside any part of the body, seek immediate medical attention.
- Do not mix new batteries with used batteries, old batteries, or
Usage Notice
batteries of different types. Otherwise, fluid leakage may occur.
- Risk of an explosion if battery is replaced by an incorrect type.
- Remove the batteries from the remote control when they are used up. Otherwise, fluid leakage may occur.
Notes
- Be sure to use AAA/R03 size batteries.
- Dispose of batteries in a designated disposal area.
- Attention should be drawn to the environmental aspects of battery disposal.
- If the remote control does not operate correctly, or if the operating range becomes reduced, replace the batteries.
- Avoid contact with water or liquid.
- Do not expose the remote control to moisture or heat.
- Do not drop the remote control.
- If the batteries have leaked in the remote control, carefully wipe the case clean and install new batteries.
- Dispose of used batteries according to the instructions.
- The remote control may fail to operate if the infrared remote sensor is exposed to bright sunlight or fluorescent lighting.
Important:
Contents of this manual are subject to change without prior notice. In no event will the company be liable for direct, special, incidental, or consequential damage as a result of handing or operating this product.
Laser safety caution

WARNING
- The laser module is equipped in this product. Use of controls or adjustments of procedures other than those specified herein may result in hazardous radiation exposure.
- This product is classified as Class 1 of IEC 60825-1 Third edition (2014) and RG2 of IEC/EN62471-5 First edition. Obey the laws and regulations of your country in relation to the installation and management of the device.
- Regarding the installation and management of the equipment, please comply with the relevant laws and regulations of your country.
- Outline of laser emitted from the built-in light module: Wavelength: 455 nm Maximum power: 105W
- Radiation pattern from the protective housing: Wavelength: 455 nm Maximum laser output: : 333mW
- The laser module is equipped in this product. Use of controls or adjustments of procedures other than those specified herein may result in hazardous radiation exposure.
Laser Notice
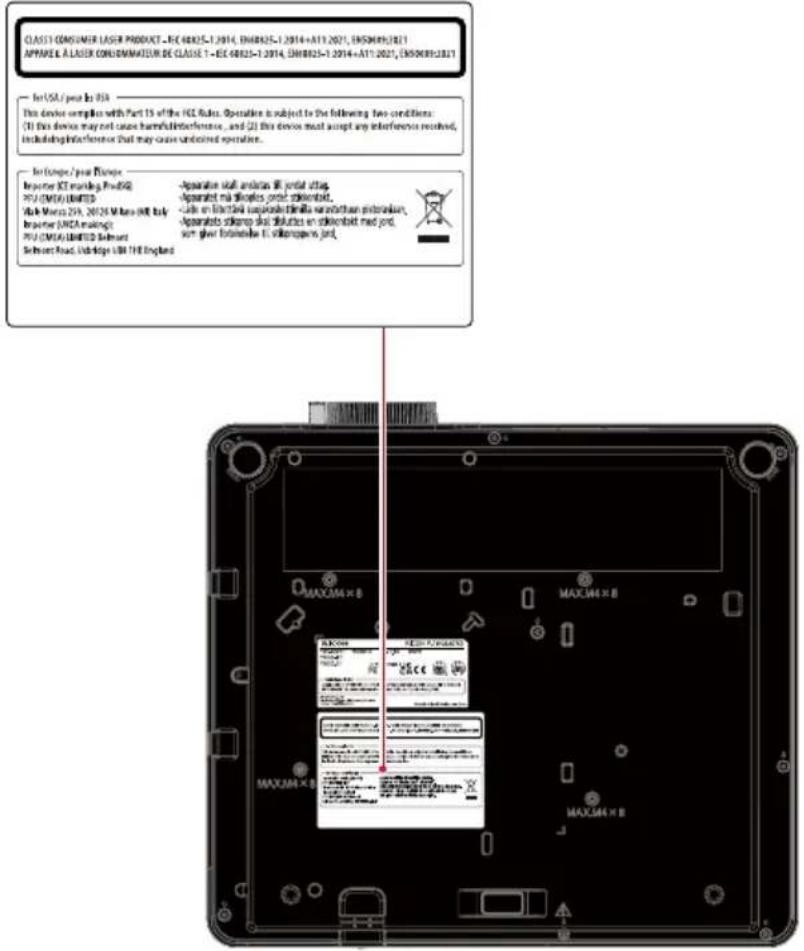
IEC 60825-1:2014, EN 60825-1:2014+A11:2021: CLASS 1 LASER PRODUCT - RISK GROUP 2.
The product's intended use as a consumer laser product and compliant with EN 50689:2021.
CLASS 1 CONSUMER LASER PRODUCT
EN 50689:2021
Light Module
- A light module containing multiple laser diodes is equipped in the product as the light source.
- these laser diodes are sealed in the light module. No maintenance or service is required for the performance of the light module.
• End user is not allowed to replace the light module. - Contact qualified distributor for light module replacement and further information.
Safety Labels of This Machine
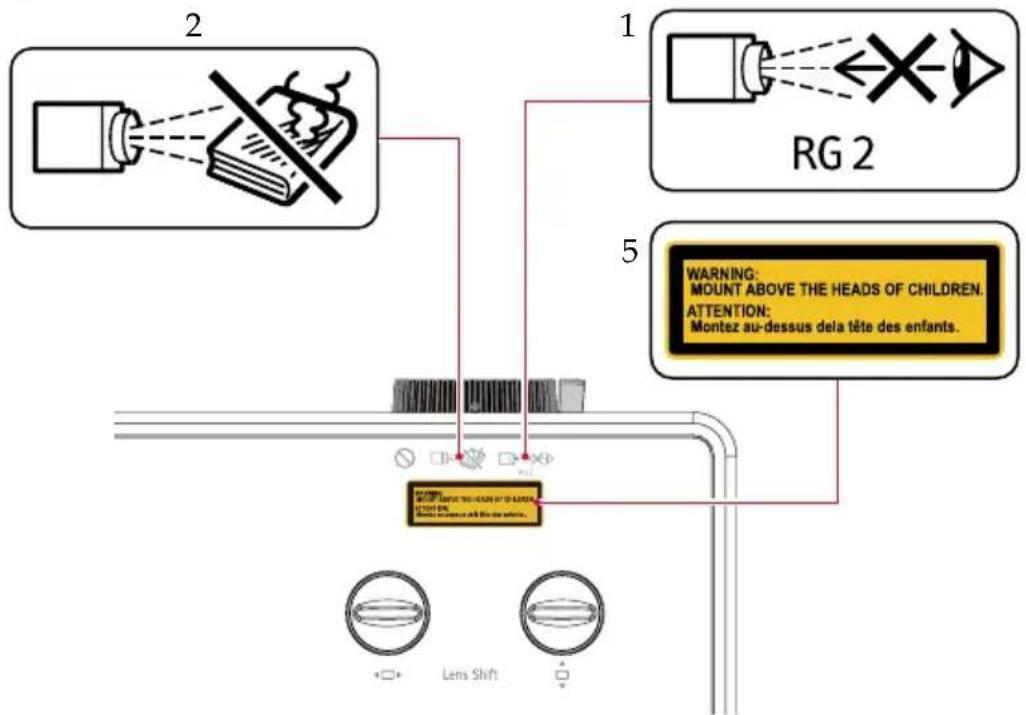
- Do not look into the lens while the light source is on. The strong light from the light source may cause damage to your eyesight.
-
Do not place anything in front of the lens while the projector is operating. Things placed in front of the lens may overheat and burn or start a fire. If you want to temporarily stop the projected image, use the AV mute on the remote control.
-
Laser aperture warning:
• CLASS 1 LASER PRODUCT - RISK GROUP 2 IEC62471-5:2015
- Do not stare into the beam, maybe harmful to the eyes.
- Do not look into the light source light using optical instruments (such as magnifying glasses and mirrors). Visual impairment could result.
- When turning on the projector, make sure no one within projection range is looking at the lens.
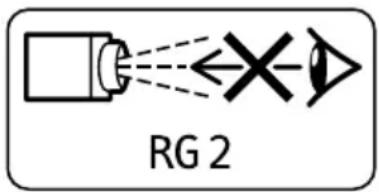
- Keep any items (magnifying glass etc.) out of the light path of the projector. The light path being projected from the lens is extensive, therefore any kind of abnormal objects that can redirect light coming out of the lens, can cause an unpredictable outcome such as a fire or injury to the eyes.
-
Do not remove any screws. Do not block or cover the vents.
-
Do not remove any screws. Do not block or cover the vents.
-
WARNING: MOUNT ABOVE THE HEADS OF CHILDREN. (For USA and Canada only)
The use of a ceiling mount is recommended with this product to place it above the eyes of children.
Usage Notice
flowchart
graph TD
    A["Lighting Gun"] --> B["No Noise"]
    C["RG 2"] --> D["Warning: Mount Above the Heads of Children. Attention: Montez au-dessus dela tête des enfants."]
    E["Lens Shift"] --> F["Warning: Mount above the Heads of Children. Attention: Montez au-dessus dela tête des enfants."]
    G["1"] --> H["Warning: Mount above the Heads of Children. Attention: Montez au-dessus dela tête des enfants."]
    I["2"] --> J["Warning: Mount above the Heads of Children. Attention: Montez au-dessus dela tête des enfants."]
    K["5"] --> L["Warning: Mount above the Heads of Children. Attention: Montez au-dessus dela tête des enfants."]
3
Usage Notice
4

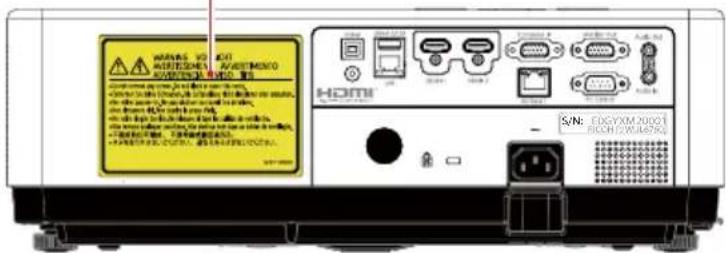
WARNING VORSICHT AVERTISSEMENT AVVERTIMENTO ADVERTENCIA AVISO 警告
- Do not remove any screws. Do not block or cover the vents.
- Entfernen Sie keine Schrauben. Die Luftauslässe nicht blockieren oder abdecken.
- Ne retirer aucune vis. Ne pas obstruer ou couvrir les abrations,
• Non rimuovere viti. Non coprire le prese d'aria. - No retire ningún tornillo. No bloquee ni tape las salidas de ventilación.
- Não remova quaisquer parafusos. Não obstrua nem tape as saídas de ventilação,
- 不要拆除任何螺丝。不要堵塞或覆盖通风孔
・ネジを取り外さないでください。通気孔をふさがないでください。
520110300
Regulation & Safety Notices
This appendix lists the general notices of your Projector.
Notice: Users in the United States of America FCC notice
MODEL NAME: RICOH PJ WUL6760
TRADE NAME: PROJECTOR MODEL NAME: RICOH PJ WUL6760 Tested To Comply with FCC Standards FOR HOME OR OFFICE USE
This device complies with Part 15 of the FCC Rules. Operation is subject to the following two conditions:
- This device may not cause harmful interference and
- This device must accept any interference received, including interference that may cause undesired operation.
NOTE: This equipment has been tested and found to comply with the limits for a Class A digital device, pursuant to Part 15 of the FCC Rules. These limits are designed to provide reasonable protection against harmful interference when the equipment is operated in a commercial environment. This equipment generates, uses, and can radiate radio frequency energy and, if not installed and used in accordance with the instruction manual, may cause harmful interference to radio communications. Operation of this equipment in a residential area is likely to cause harmful interference in which case the user will be required to correct the interference at his own expense.
■ Caution- Changes or modifications not expressly approved by the party responsible for compliance could void the user's authority to operate the equipment.
RESPONSIBLE PARTY: PFU America, Inc. 3900 Freedom Circle, Suit 240, Santa Clara, CA 95054 Telephone number: (408)992-2900
Notice: Shielded cables
All connections to other computing devices must be made using shielded cables to maintain compliance with FCC regulations.
Caution
Changes or modifications not expressly approved by the manufacturer could void the user's authority, which is granted by the Federal Communications Commission, to operate this projector.
Notes to Users in the State of California
Perchlorate Material - special handling may apply, See www.dtsc.ca.gov/hazardouswaste/perchlorate.
Notes to Users in Canada
The Class A digital apparatus meets all requirements of the Canadian Interference-Causing Equipment Regulation. Interference-Causing Equipment Regulation.
Declaration of Conformity for EU countries
■ EMC Directive 2014/30/EU (including amendments)
■ Low Voltage Directive 2014/35/EU
Notice: Users in EU countries CE Marking Traceability Information (For EU Countries Only)
Manufacturer:
Ricoh Co., Ltd.
3-6 Nakamagome 1-chome, Ohta-ku, Tokyo. 143-8555, Japan
Importer:
PFU (EMEA) LIMITED Viale Monza 259, 20126 Milano (MI) Italy
Notice: Users in UK UKCA Marking Traceability Information (For UK Only)
Manufacturer:
Ricoh Co., Ltd.
3-6 Nakamagome 1-chome, Ohta-ku, Tokyo. 143-8555, Japan
Importer:
PFU (EMEA) LIMITED Belmont, Belmont Road, UxbridgeUB8
1HE England
User Information on Electrical and Electronic Equipment
Users in the countries where this symbol shown in this section has been specified in national law on collection and treatment of E-waste.
Our Products contain high quality components and are designed to facilitate recycling.
Our products or product packaging are marked with the symbol below.
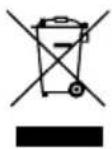
This product contains substances which are harmful to humans and the environment.
The symbol indicates that the product must not be treated as municipal waste. It must be disposed of separately via the appropriate return and collection systems available. By following these instructions you ensure that this product is treated correctly and help to reduce potential impacts on the environment and human health, which could otherwise result from inappropriate handling. Recycling of products helps to conserve natural resources and protect the environment.
For more detailed information on collection and recycling systems for this product, please contact the shop where you purchased it, your local dealer or sales/service representatives.
Notice: Users in Turkey
If you wish to discard this product, please contact your local authorities, the shop where you bought this product, your local dealer or sales/service representatives.
Laser Notice
IEC 60825-1:2014, EN 60825-1:2014+A11:2021: CLASS 1 LASER PRODUCT - RISK GROUP 2.
The product's intended use as a consumer laser product and compliant with EN 50689:2021.
CLASS 1 CONSUMER LASER PRODUCT
EN 50689:2021
Warning
This equipment is compliant with Class A of CISPR 32. In a residential environment this equipment may cause radio interference.
Properly shielded and grounded cables and connectors must be used for connections to a host computer (and/or peripheral) in order to meet emission limits.
Notice: Users in the EU and the UK Note for the Battery and/or Accumulator Symbol
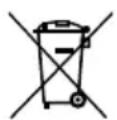
In accordance with the Battery Directive 2006/66/EC Article 20 Information for end-users Annex II, the above symbol is printed on batteries and accumulators. This symbol means that in the European Union, used batteries and accumulators should be disposed of separately from your household waste.
In the EU, there are separate collection systems for not only used electrical and electronic products but also batteries and accumulators. Please dispose of them correctly at your local community waste collection/recycling centre.
COMMISION REGULATION (EU) 2019/2020
The light source of this product is not intended for applications other than image projection.
Air ventilation
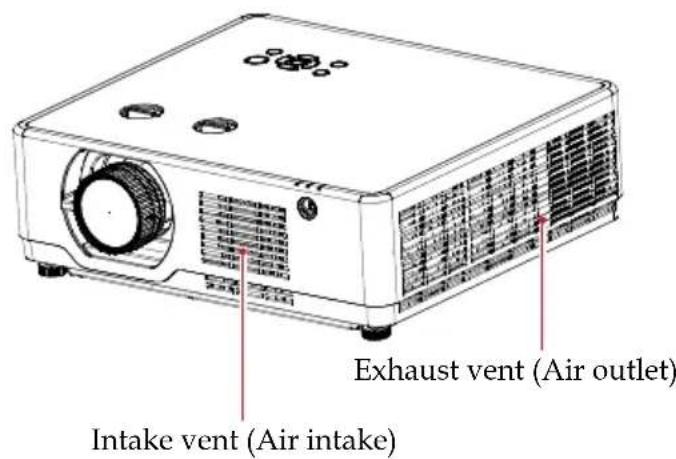
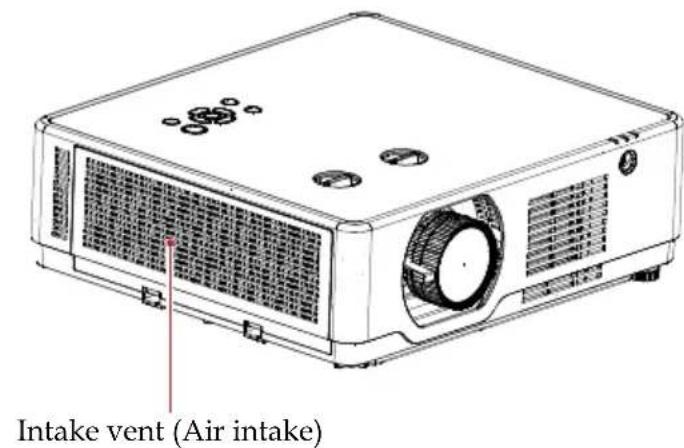
Openings in the casing are designed for ventilation and overheating prevention. DO NOT block or cover these openings to keep your projector in normal operation and from overheating.

Note:
Heat exhaust at the air outlet Keep the following in mind when using or installing your projector:
• DO NOT place flammable materials or sprayers near your projector.
- Keep the air outlet one meter away from other objects.
- DO NOT touch the area close to the air outlet especially the metal components, e.g. screws. This area and parts will get very hot once your projector starts operating.
- DO NOT place any object atop your projector. They may not only be damaged but also lead to fire after being overheated.
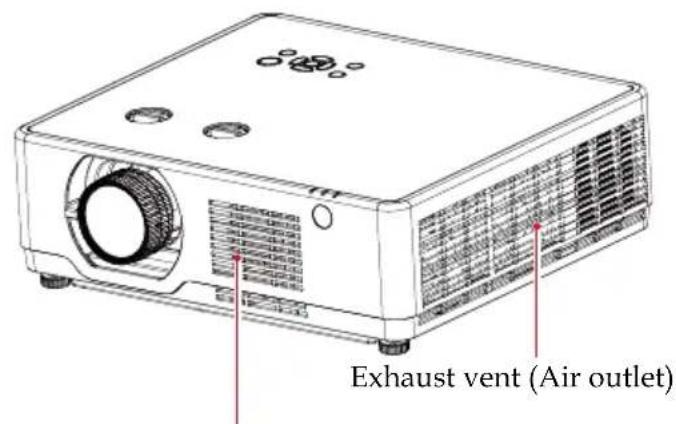
Intake vent (Air intake)
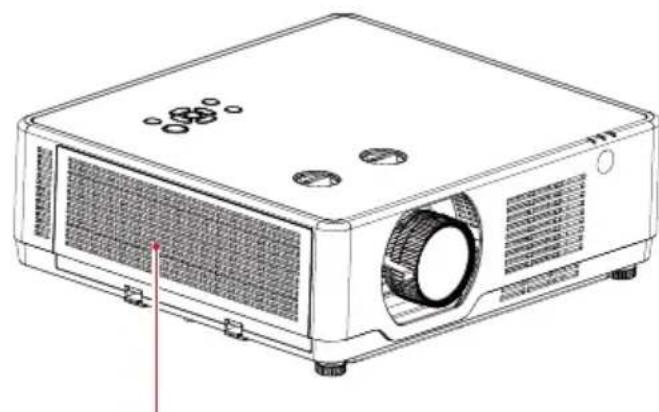
natural_image
Line drawing of a projector with ventilation grilles and a circular vent (no text or symbols)Intake vent (Air intake)
Place your projector correctly
Use your projector at specified location in correct way. Invalid projector location may shorten light source 's life-cycle or even lead to severe incidents or fire.
Usage Notice
Power Switch Symbols
The meaning of the symbols for the switches on this machine as follows:

: On/Standby(Off)
Other Information
Copyrights to Images
When projecting images using the projector, be careful not to infringe the copyright of protected materials.
The following are examples that may infringe the copyright of protected materials.
- Broadcasting images or movies for commercial purposes
- Modifying images or movies using functions such as freeze, magnify, or zoom to broadcast images for commercial purposes or public viewing
- Varying the aspect ratio of images or movies using a function that changes the screen size to broadcast images for commercial purposes or public viewing
Copyrights
This projector uses open source and/or third party software. To check the information about software copyrights, see ‘Options’ - ‘Information’ - ‘License’ in the MENU.
You can also view and download the source code from: http://www.support-download.com/bb/html/dr_ut_e/oss/index.htm
CAUTION:
- When connecting to a LAN, be sure to read and understand the security risks described in the manual and use the unit as safe as possible.
Introduction
Package Overview
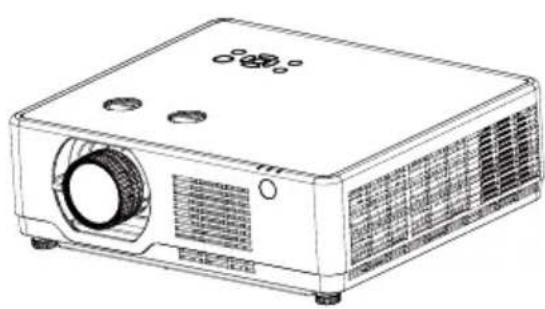
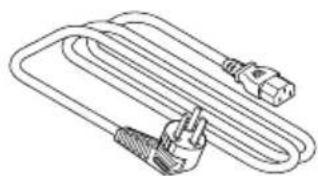
The projector is provided with the following accessories. Make sure that everything is included in the package. If anything is missing, contact your dealer immediately.
natural_image
Line drawing of a projector with ventilation grilles and fan (no text or symbols)Projector
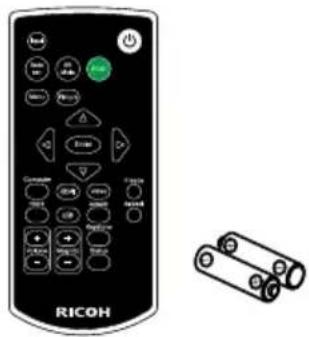
Remote control & AAA/R03 battery x2
natural_image
Line drawing of a coiled electrical plug with two connectors (no text or symbols)Power Cord (1.8m)
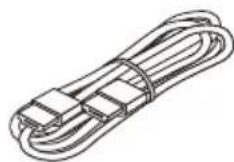
HDMI cable (1.5m)
* Models for Europe are packed with two different codes, one for EU and one for UK.
Documents:
□ Quick start guide
Product Overview
Front/Top/Side
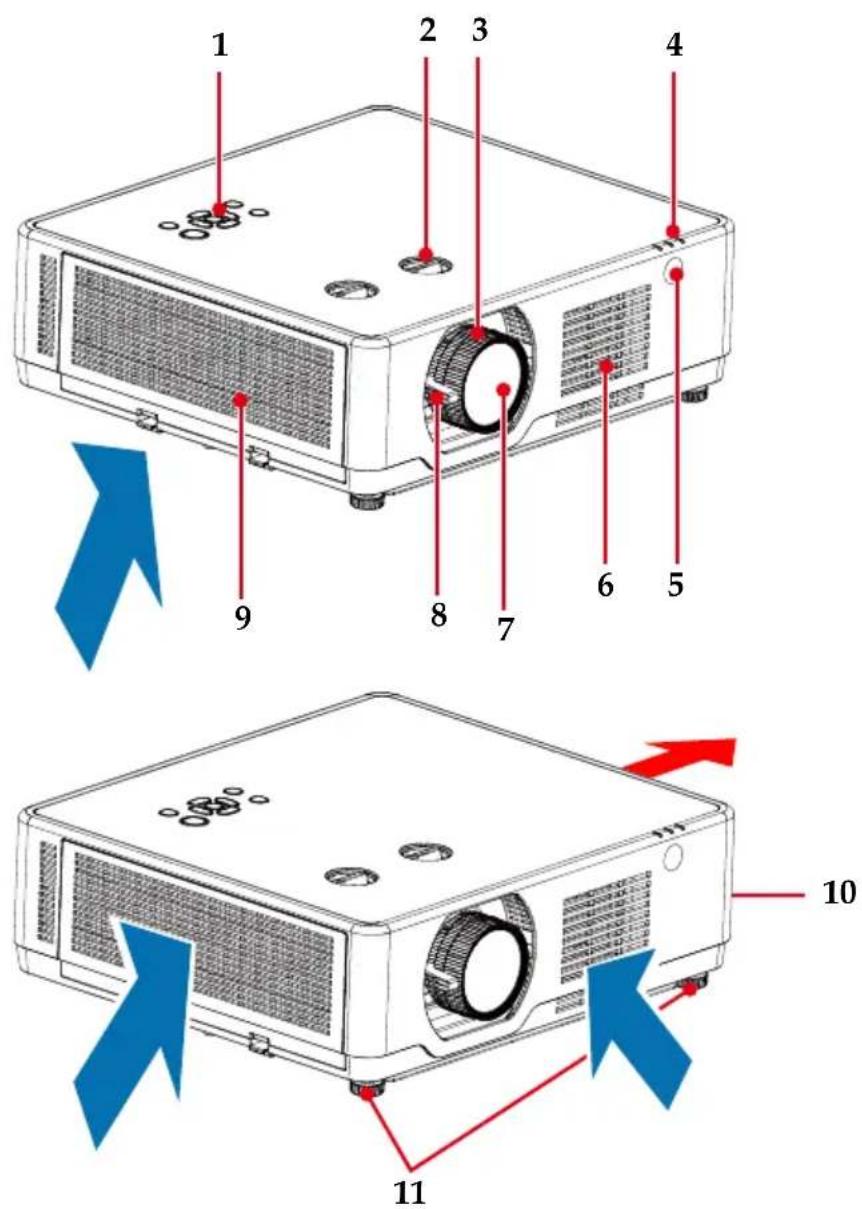
- Control panel
- Lens shift dial
- Focus ring
- Indicator
- Front Remote Sensor
-
Air intake
-
Projection window
- Zoom lever
- Filter (Air intake)
- Air intake
- Adjustment feet
Introduction
Rear
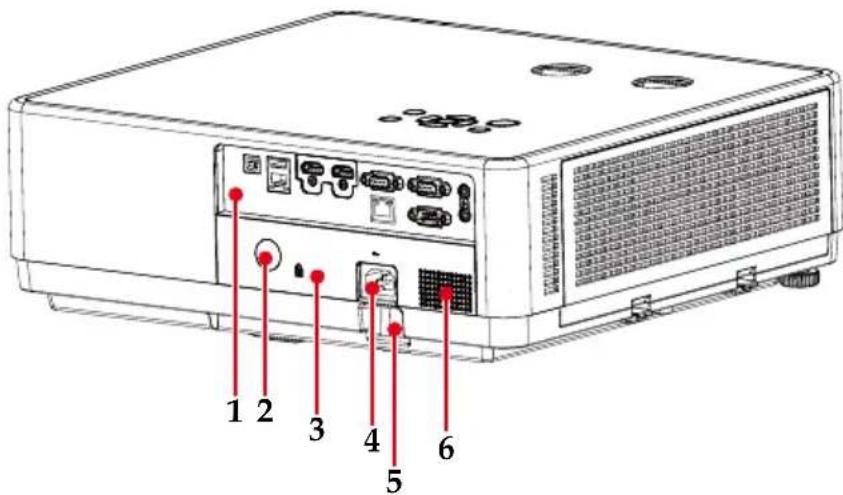
-
Connection ports
-
Safety bar (for fixing with wire)
-
Rear Remote Sensor
-
Speaker (16W*1)
-
Built-in Security Slot(
-
Indicator
Connection Ports
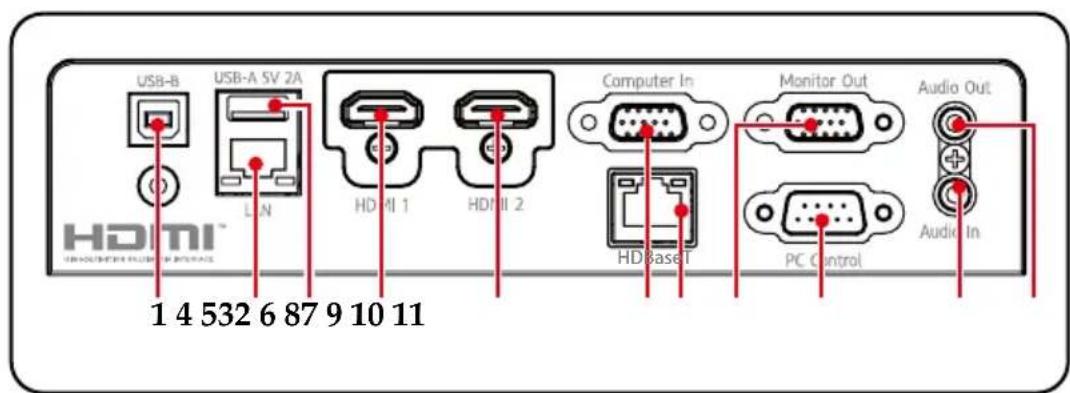
- USB-B terminal 7.HDBaseTterminal (*)
- LAN terminal 8.MonitorOutterminal
- USB-A terminal (5V/2A) 9.PC-Controlterminal
- HDMI1 In terminal 10. Audio In terminal
- HDMI2 In terminal 11. Audio Out terminal
- Computer In terminal
Control Panel and Indicators
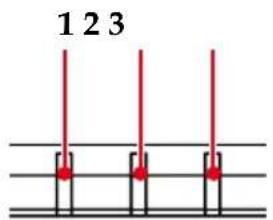
Power Status Light
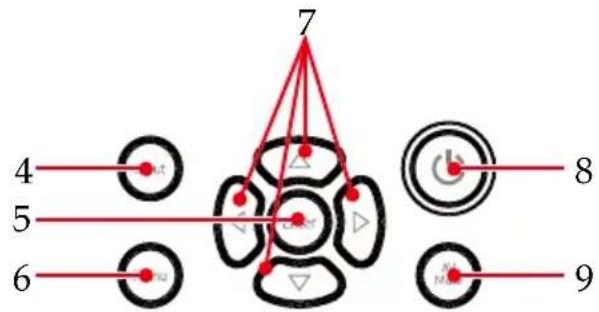
Note For detail indicator, please see page 82.
| 1 Power indicator | This indicator informs the power status of the projector. |
| 2 Status indicator | This indicator lights/blinks when a button is pressed while the key lock function is utilized, or while performing the specific operations. |
| 3 Light indicator | This indicator informs the state of light source, used time of the light source. |
| 4 Input Select the input source. | |
| 5 Enter button Select or confirm settings. | |
| 6 Menu | Press “Menu” to launch the on screen display (OSD), or go back to the previous menu. (See page 47) |
| 7 Four directional key | Use ▲▼ or◀to ●lect items or make adjustments to your selection. |
| 8 Power ⏻ | Refer to the “Power On/Off the Projector” section. (See page 38~40) |
| 9 AV Mute Pause the audio and video | |
Remote Control
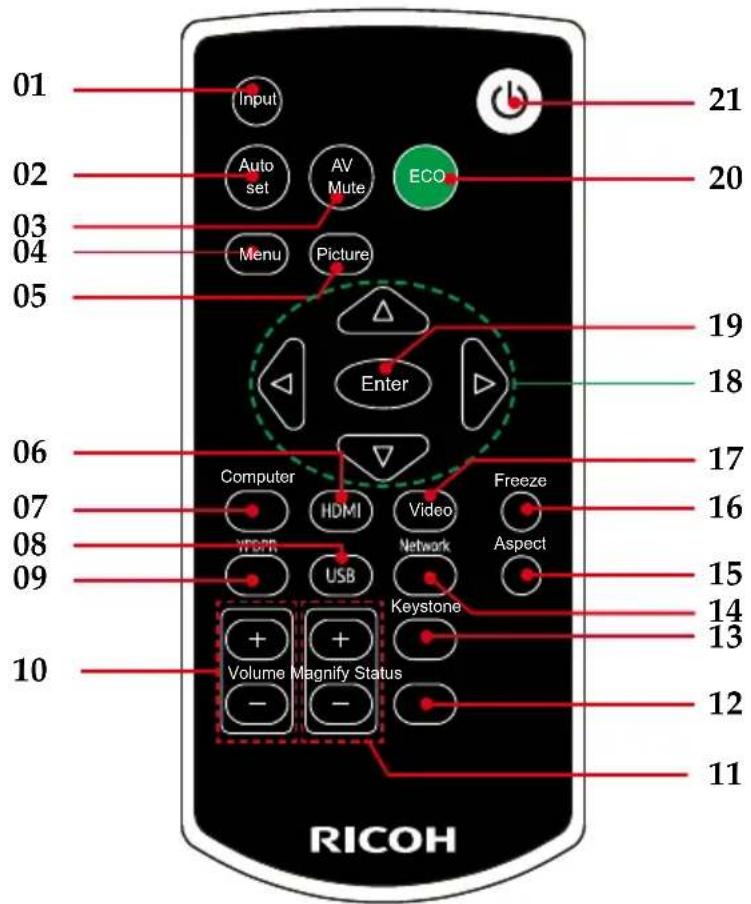
| 1 Input | Press “Input” to choose your desired input source. |
| 2 Auto set | Automatically synchronize the projector to the input source. |
| 3 AV Mute | Momentarily turn off/on the audio and video. |
| 4 Menu | Press “Menu” to launch the On Screen Display (OSD), back to the top level of OSD for the OSD main menu operation. (See page 47) |
| 5 Picture | Select the preset picture mode. |
| 6 HDMI | Press “HDMI” to choose HDMI1 and HDMI2 source. |
Introduction
| 7 Computer | Press “Computer” to choose Computer In terminal. |
| 8 USB | Press “USB” to choose Memory Viewer as input source. |
| 9 YPBPR | This button is not supported with this machine. |
| 10 Volume +/- | Increase or decrease speaker volume. |
| 11 Magnify +/- | - Zoom in or out the projector display image.- Magnified area can be moved by four directional keys. |
| 12 Status | Display the projector status. |
| 13 Keystone | Adjust the image to compensate for distortion caused by tilting the projector. |
| 14 Network | This button is not supported with this machine. |
| 15 Aspect | Use this function to choose your desired aspect ratio. |
| 16 Freeze | Pause the screen image. Press again to resume the screen image. |
| 17 Video | This button is not supported with this machine. |
| Four Directional Select Keys | Use ▲, ▼or▲to▲select items or make adjustments to your selection. |
| 19 Enter | Confirm your section of items in sub menu operation. |
| 20 ECO | Use this function to choose your desired Light Source Power Mode. (See page 53) |
| 21 Power | Refer to the “Power On/Off the Projector” section. (See page 38~40) |
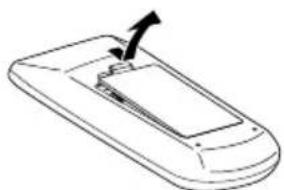
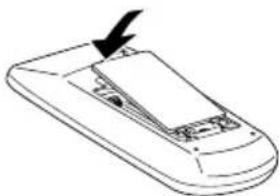
Installation of Remote Control Batteries
1 Push the clip to release the battery cover.
2 Install new batteries (AAA/R03 or LR03). Ensure that you have the batteries' polarity (+/-) aligned correctly.
natural_image
Line drawing of a handheld device with an arrow pointing to the screen (no text or symbols)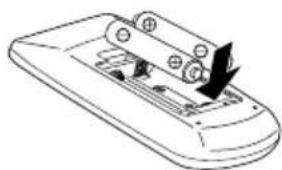
natural_image
Line drawing of a remote control device with a black arrow indicating the cable or switch (no text or symbols present)3 Close the battery cover and press it down until it clicks into place. Do not mix different types of batteries or new and old batteries.
natural_image
Line drawing of a device with a black arrow pointing to a component (no text or symbols)
For safe operation, note the following precautions:
■ Use two AAA/R03 or LR03 batteries.
- Keep the remote control away from water or other liquid.
■ Do not place the remote control in an overly hot or humid place.
■ Do not drop the remote control.
■ Do not use a new battery and a used one at the same time.
■ Using a different battery than specified in this manual may cause an explosion.
■ Handle used batteries according to instructions on the battery or local regulations or guide.
■ Remove the batteries when the remote control will not be used for a long time.
■ An infrared remote control may not work if it is exposed to strong light or fluorescent light.
■ If battery liquid leaks in the remote control, carefully clean the battery holder before installing new batteries.
- Keep batteries out of the reach of children. (Children may swallow or choke on the batteries. If this happens, contact a doctor immediately.)
Remote Control Operating Range
Point the remote control at the remote control sensing windows (front and rear) on the projector.
When the remote control is pointed at the signal receiver on the projector, the effective range of the remote control is an area of radius 7 meters or about 8 meters in straight line from the receiver.
The remote control is effective within vertical and horizontal ±15^ to the receiving direction of the remote control signal receiver. When the angle exceeds this range, the effective control distance will be reduced.
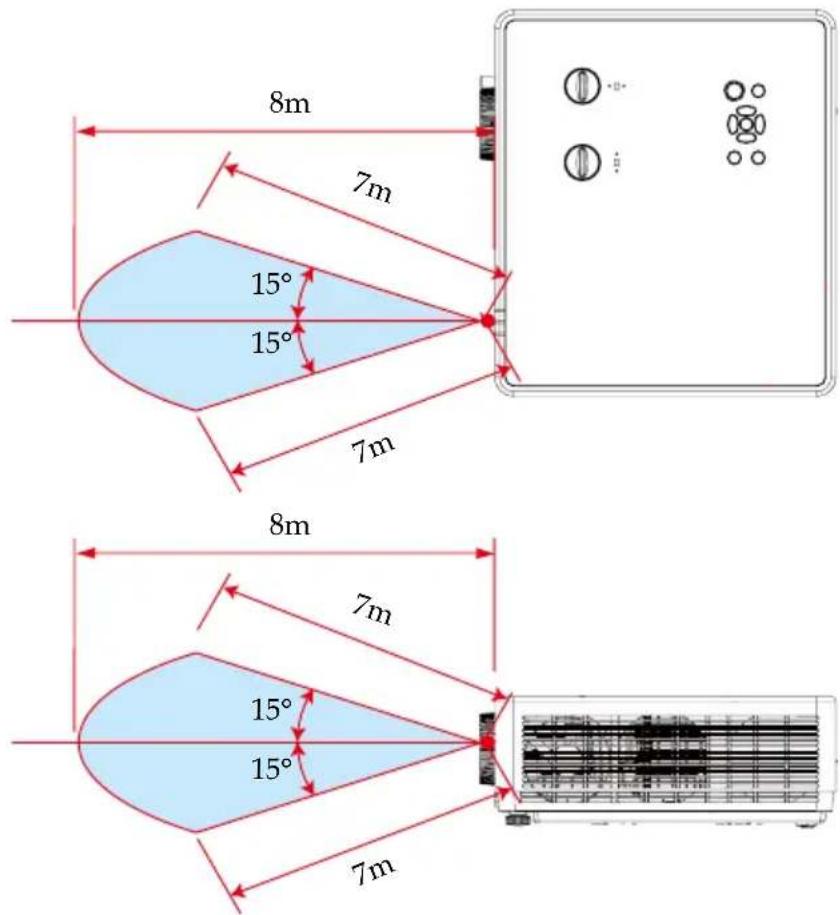
Angle sensor
The installation angle range that the built-in angle sensor of the projector can detect is shown in the figure below.
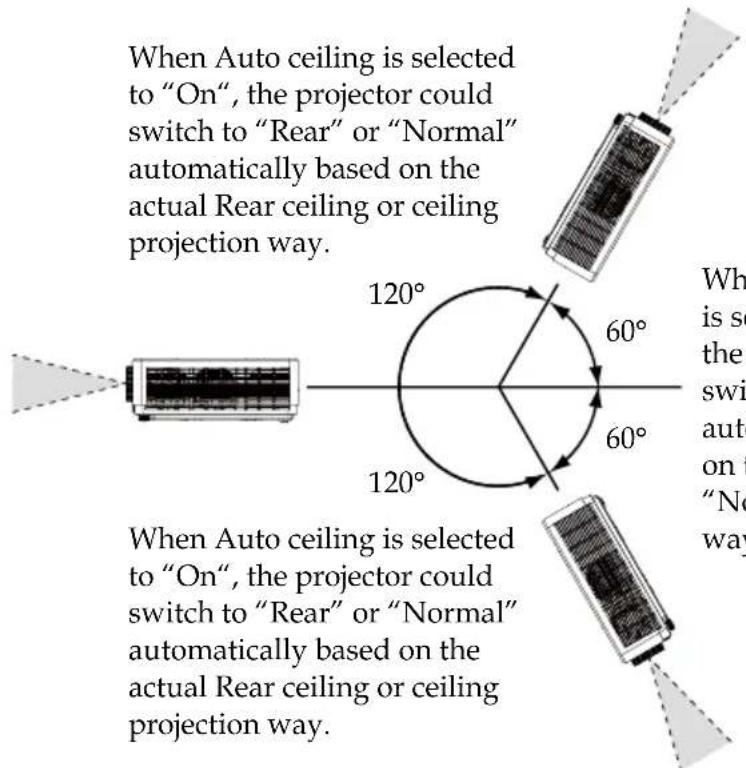
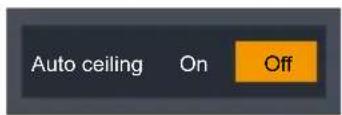
When Auto ceiling is selected to "On", the projector could switch to "Ceiling" automatically based on the actual "Rear" or "Normal" projection way.
Installing the Projector
When you select a position for the projector, consider the size and shape of your screen, the location of your power outlets, and the distance between the projector and the rest of your equipment. Follow these general guidelines:

When using a LAN, use the network separated by a firewall to prevent unauthorized access from the Internet.
Pay careful attention to the installation location, management of the devices, and the network device to which the device is connected, in order to prevent malicious third parties from viewing the communication data.
Pay careful attention to the installation location and management of the devices, in order to prevent unauthorized tampering by a malicious third party who can operate the devices.
Position the projector on a flat surface at a right angle to the screen. The projector (with the standard lens) must be at least 4.3 feet (1.3 m) from the projection screen.
Position the projector to the desired distance from the screen. The distance from the lens of the projector to the screen, the zoom setting, and the video format determine the size of the projected image.
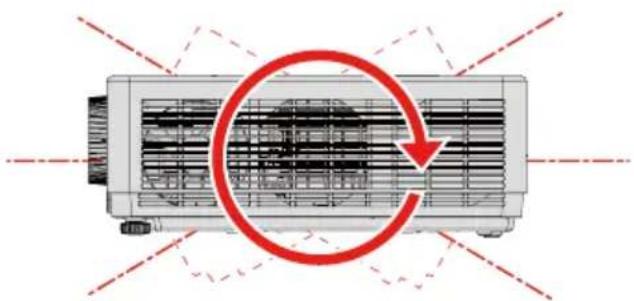
natural_image
Diagram of a car air conditioner unit with airflow arrows indicating circulation (no text or symbols)Vertical 360^
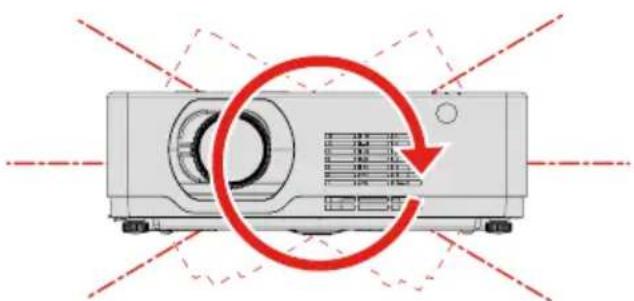
natural_image
Diagram of a projector with red circular arrow indicating rotation (no text or symbols)Horizontal 360^
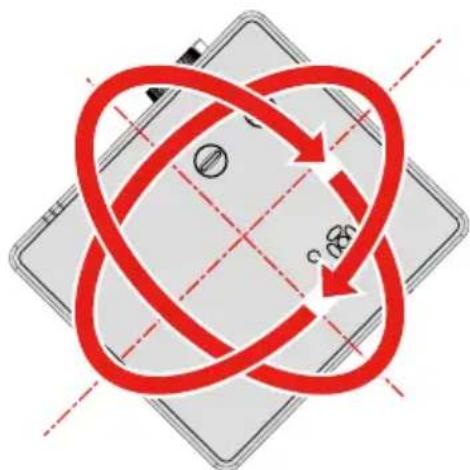
natural_image
Abstract diagram with overlapping red arrows and geometric shapes, no text or symbols presentVertical & Horizontal 360°
Basic Operations
Connecting a Computer (Connect to Computer/Notebook)
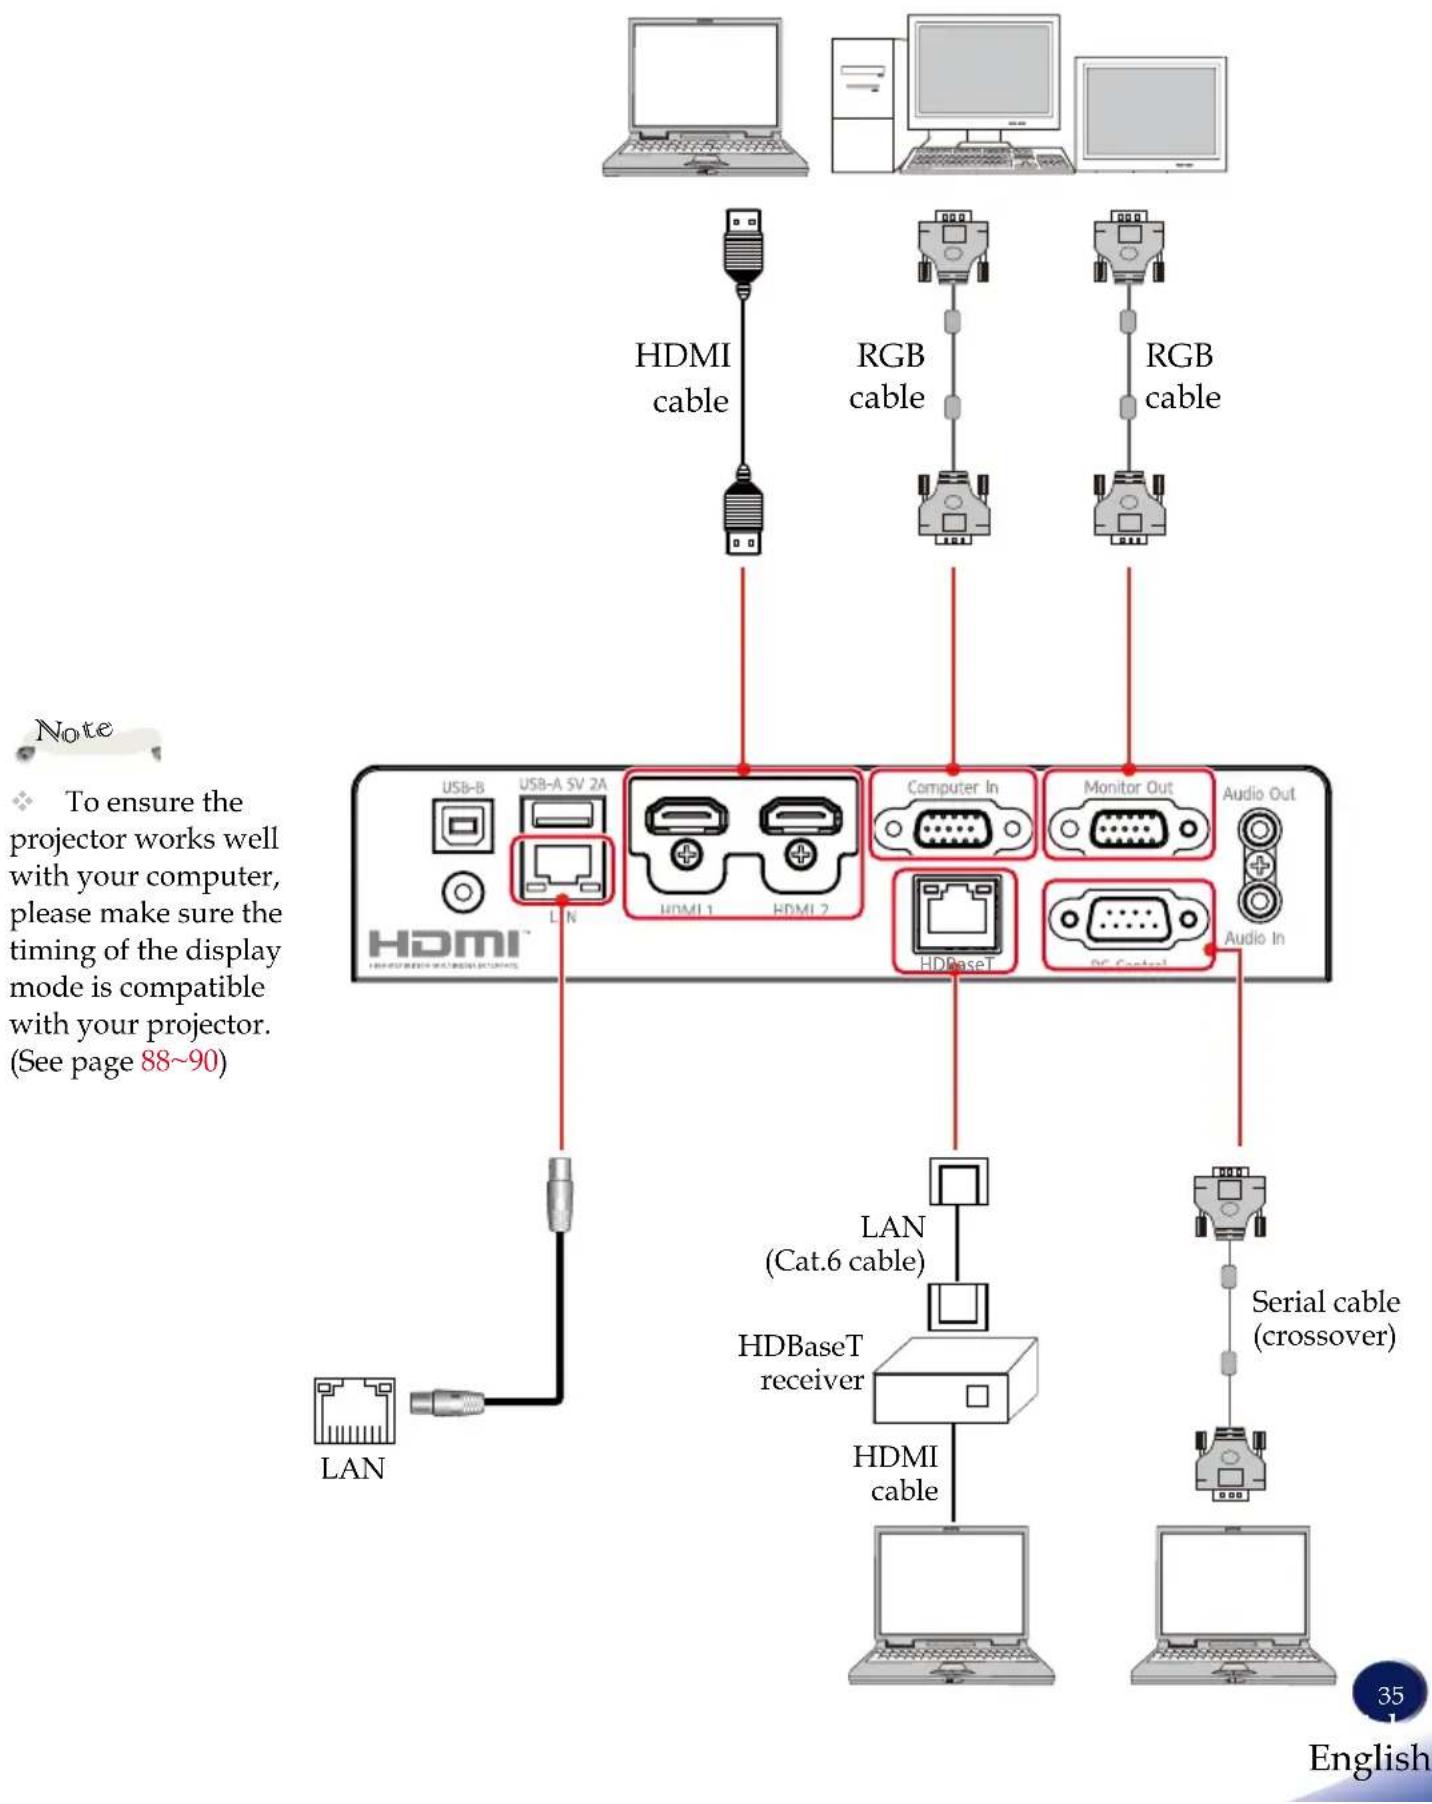
flowchart
graph TD
    A["PC"] --> B["HDMI cable"]
    C["PC"] --> D["RGB cable"]
    E["PC"] --> F["RGB cable"]
    G["USB-B"] --> H["USB-A SV 2A"]
    H --> I["LDN"]
    J["HDMI"] --> K["HDMI1"]
    J --> L["HDMI2"]
    M["Computer In"] --> N["HDBaseT"]
    O["Monitor Out"] --> P["HDBaseT"]
    Q["Audio Out"] --> R["Audio In"]
    S["LAN"] --> T["LAN (Cat.6 cable)"]
    U["HDBaseT receiver"] --> V["HDMI cable"]
    W["Serial cable (crossover)"] --> X["Laptop"]
    Y["English"] --> Z["35"]
Basic Operations
Connecting a Audio Device (Audio)
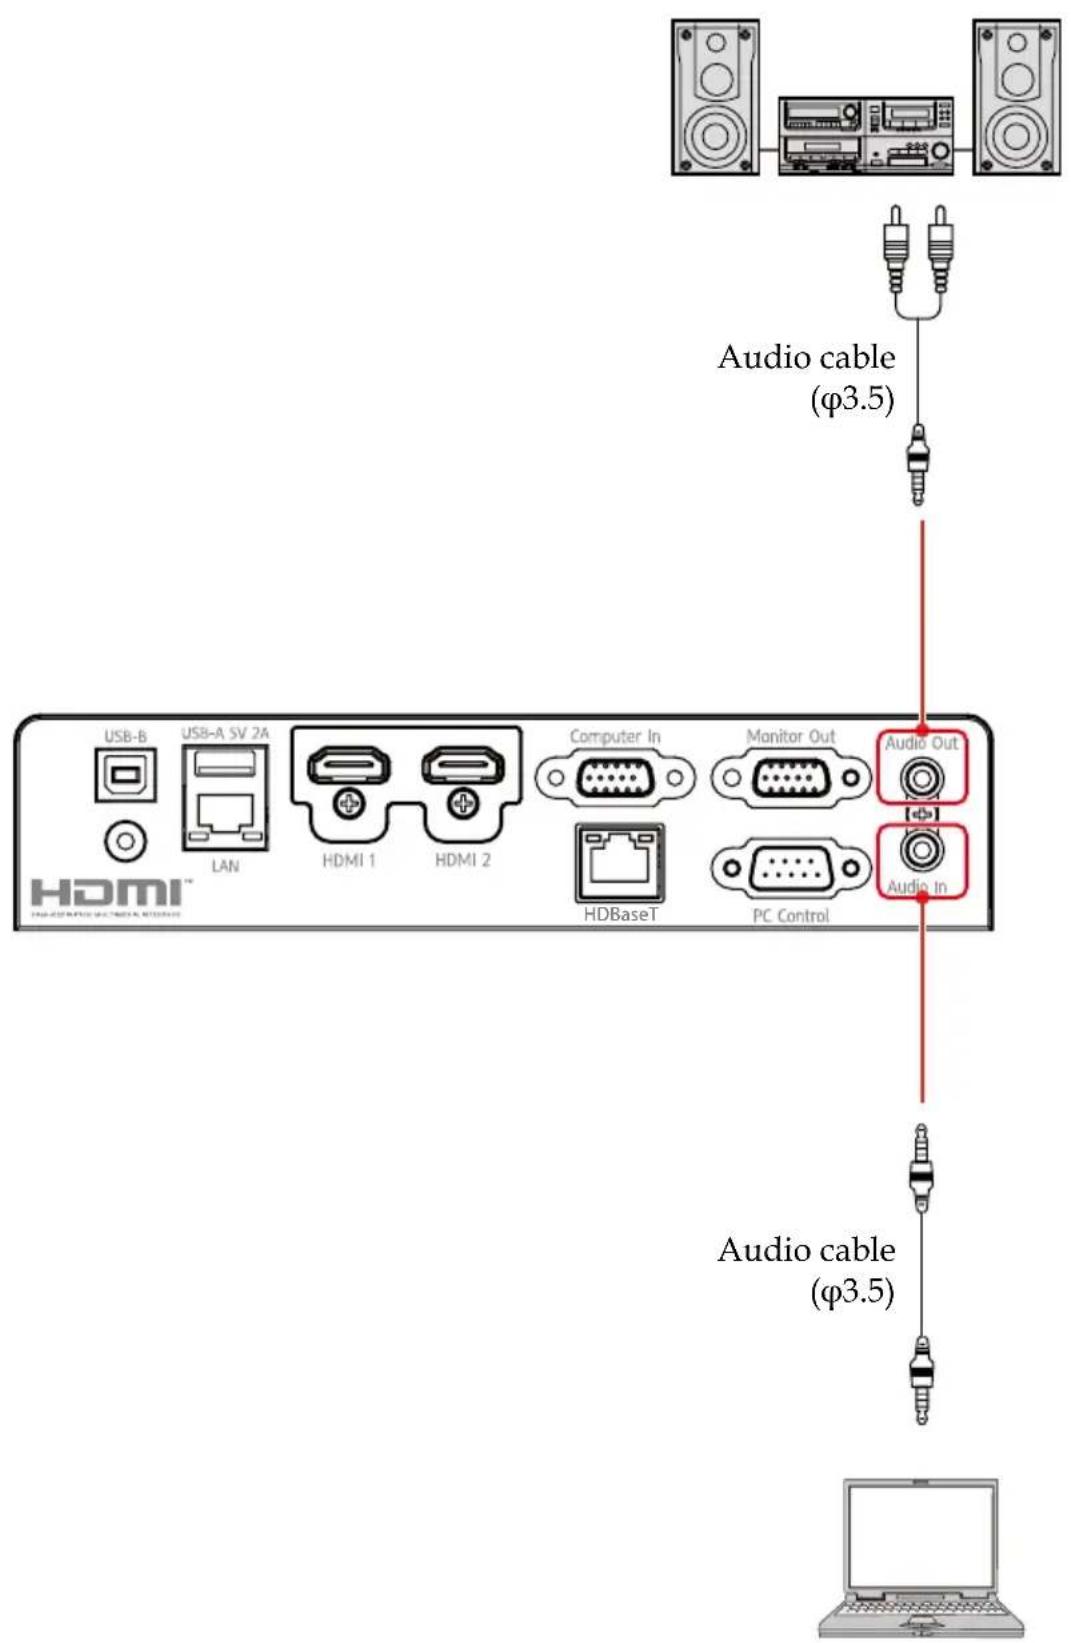
Basic Operations
Connecting a USB Device
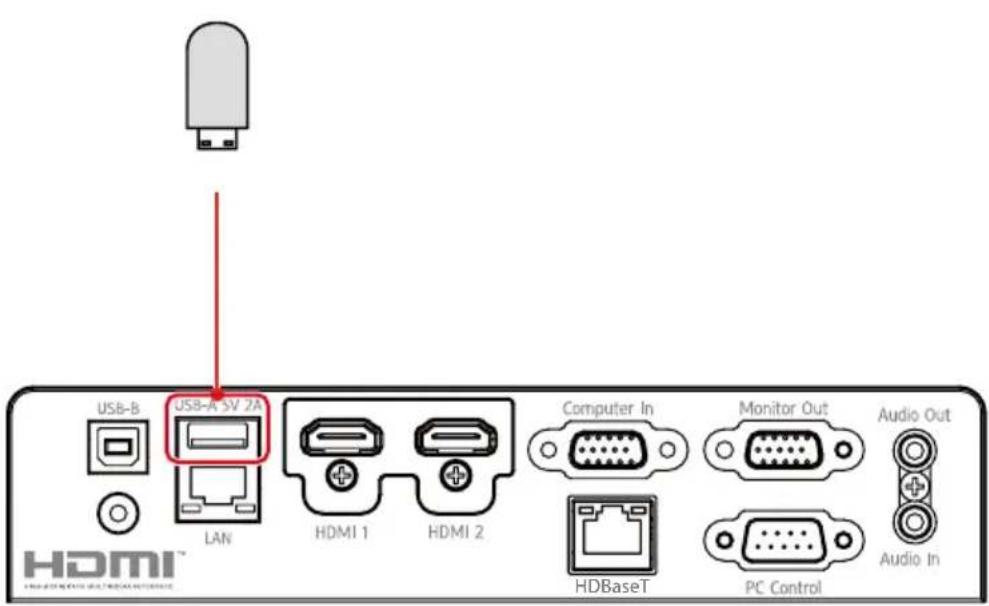
Basic Operations
Powering On/Off the Projector
Powering on the Projector
Note
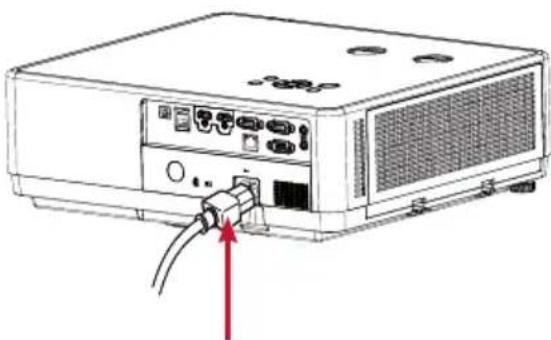
Make sure that the power plug is fully inserted into both the projector AC inlet and the wall outlet.
The AC outlet must be near this equipment and must be easily accessible.
Note
If you connect multiple sources at the same time, press "Input" to switch inputs.
Note
Turn on the projector first and then the signal sources.
- Ensure that the power cord and signal cable are securely connected. The Power indicator will flash orange.
natural_image
Line drawing of a portable electronic device with ports and connectors, connected to a cable (no text or symbols visible)Connect the AC power cord to the projector.
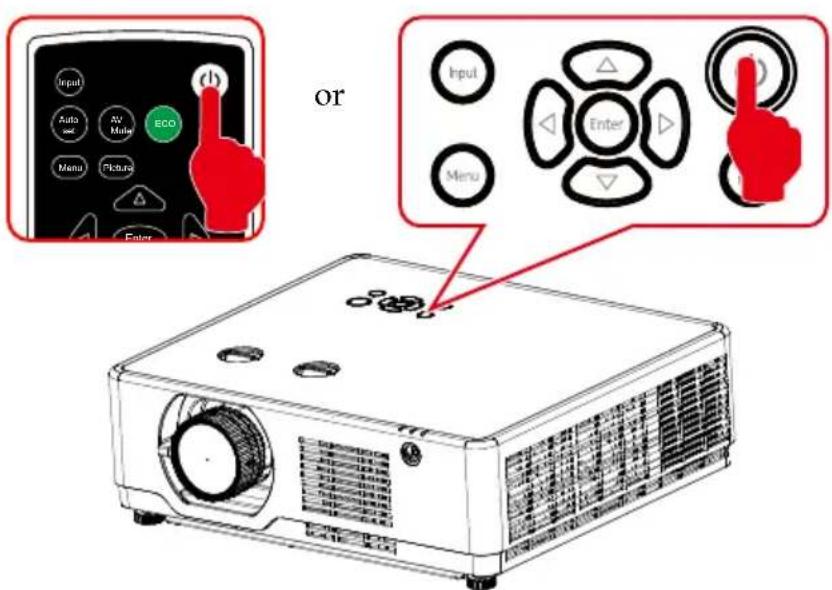
- Turn on the projector by pressing the “⏻” button on the control panel or the “⏻” button remote control. The Power indicator will flash orange when standby power is set to “ECO”.
The startup screen will display and the Power indicator will turn blue and the Light indicator will turn or blink green.
- The first time you use the projector, you will be asked to select the preferred language. Turn on your source (computer, notebook, video player, etc.) The projector will detect your source automatically.
Make sure that the "Auto Source" has been set to "On".
Basic Operations
CAUTION:
- Do not look into the lens while the light source is on. The strong light from the lens may cause damage to your eyesight.
- Do not block the air intake or exhaust. Doing so could cause a fire due to internal overheating.
- Do not place your hands, face, or other objects near the air exhaust. Doing so could result in injury and/or damage the object.
Basic Operations
Power off the projector

When the Power indicator flashes green, the light source is cooling down, and the projector cannot be turned on at this moment. When the Power indicator glows red steadily, the projector can be turned on again.
- Press the “ ⏻” button on the control panel or the “ ⏻ ” button on the remote control. The following dialog box will pop up.
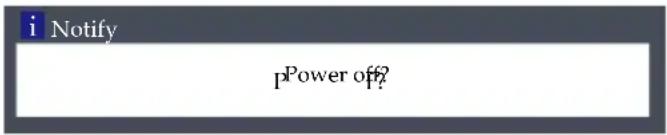
- Press the " 🔊" or " 🔊 "button again. The projector will shut down.
- The Power indicator will blink orange when the projector goes to standby mode.
- Unplug the power cord out of the socket and projector connector.
Basic Operations
Input Source Signal Selection
Basic Operations
Press the Input button on the remote control or the control panel and choose Computer, HDMI1, HDMI2 or Memory Viewer as the input source.

You can also change the input source by direct keys on the remote control.
Menu operation
1) Press the Input button on the remote control to enter the input source menu.
2) Press ▲▼ buttons to choose Computer, HDMI1, HDMI2 or Memory Viewer and press Enter to select the input source.
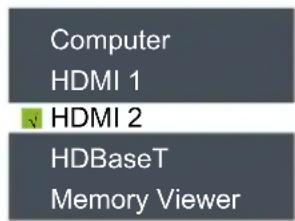
Computer
If the input source is a computer that connects to Computer In port with a RGB cable, choose "Computer".
HDMI1
If the input source is a device that connects to the HDMI 1 In terminal with an HDMI cable, choose "HDMI 1".
Note
Automatic search does not support "Memory Viewer".
HDMI 2
If the input source is a device that connects to the HDMI 2 In terminal with an HDMI cable, choose "HDMI 2".
When the signal source is "Memory Viewer", Still, Scale, Auto setting and Image functions are unavailable.
Memory Viewer
If the input source is a device that connects to the USB terminal, choose Memory Viewer.
To use Memory Viewer, see page 69 for instruction.
HDBaseT
Select input HDBaseT if a device is connected to the HDBaseT terminal
Basic Operations
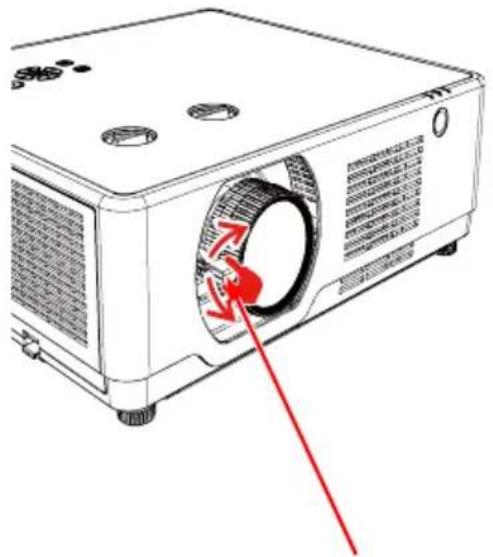
Adjust the Projector Zoom function
Use the Zoom lever to adjust the image size on the screen.
natural_image
Line drawing of a projector with a red arrow pointing to the interior panel (no text or symbols)Zoom Lever
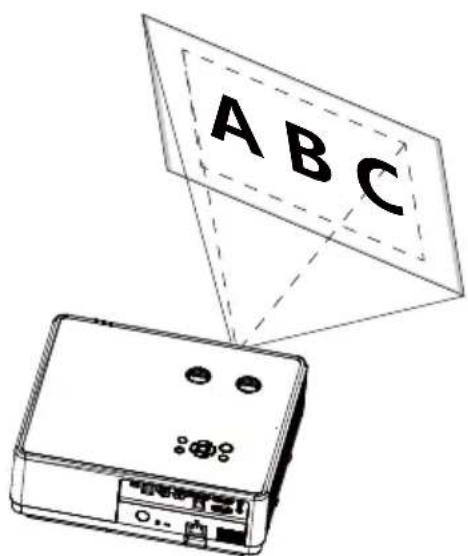
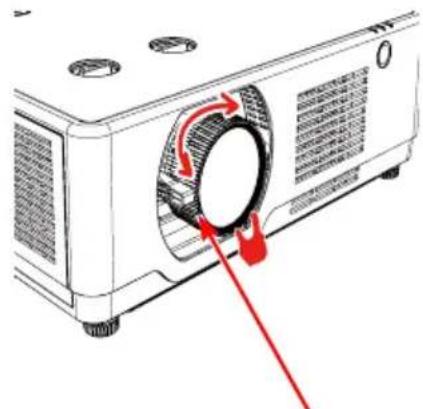
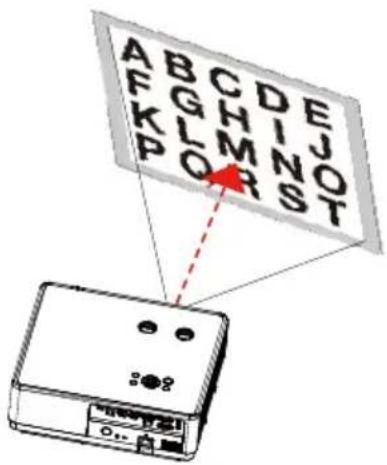
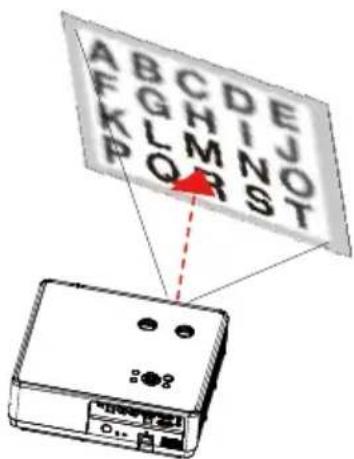
Adjust the Projector Focus function
Use the Focus ring to obtain the best focus.
Note
The image is not stable immediately after the projector is turned on. Adjust the image at least 30 minutes after the projector is turned on.
The projected image becomes unsharp when Keystone correction is enabled. This is a limitation of digital correction.
natural_image
Diagram of a portable air conditioner unit with red arrows indicating airflow direction (no text or symbols)Focus ring
Basic Operations
Adjust the Projector Lens shift function
Use the Zoom lever to adjust the image size on the screen.
Note
After turning the lens shift dial to align the projection position, turn the lens shift dial slightly to the opposite side to loosen it.
If the lens shift dial is stopped at the aligned position, the lens shift position may drift due to vibrations or environmental temperature.
Keep hands away from the lens mounting portion while performing a lens shift. Failure to do so could result in fingers being pinched by the moving lens.
The image is not stable immediately after the projector is turned on. Adjust the image at least 30 minutes after the projector is turned on.
The projected image becomes unsharp when Keystone correction is enabled. This is a limitation of digital correction.
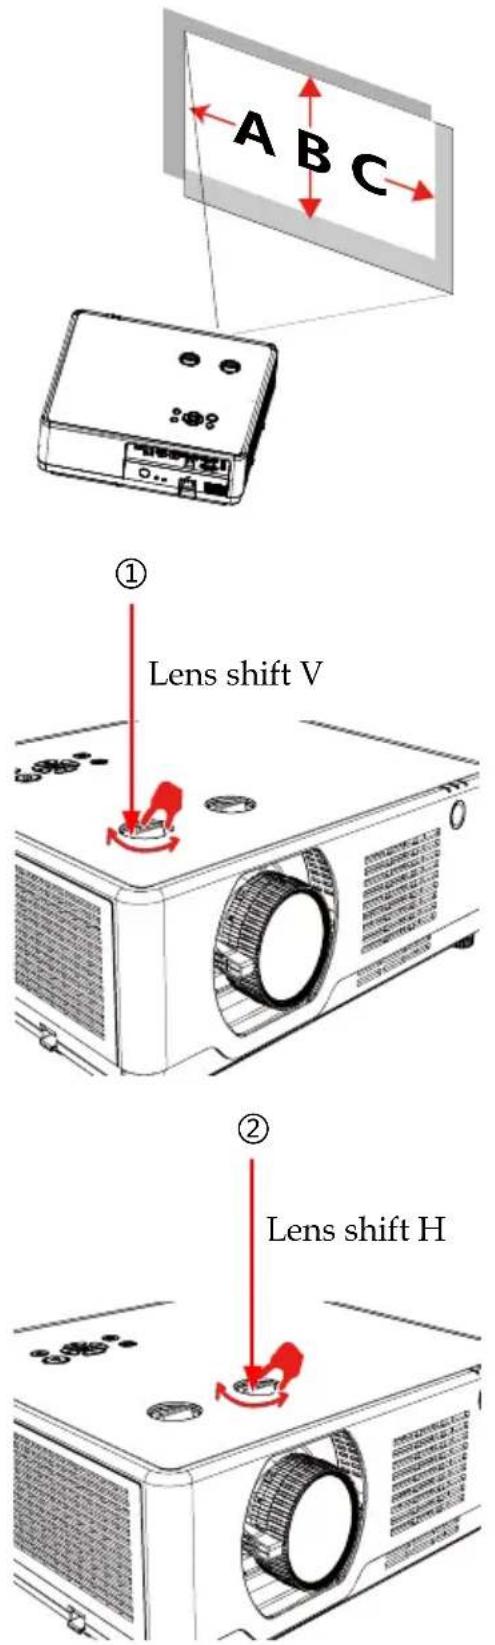
Rotate the ① and ② dial to make Lens shift adjustment manually.
Rotate ① dial, then you can move upward and downward the image with a distance up to 60% between the upper and lower range of the image.
Rotate ② dial, then you can move rightward and leftward the image with a distance up to -29% \~ +29% of the width of the image.
Basic Operations
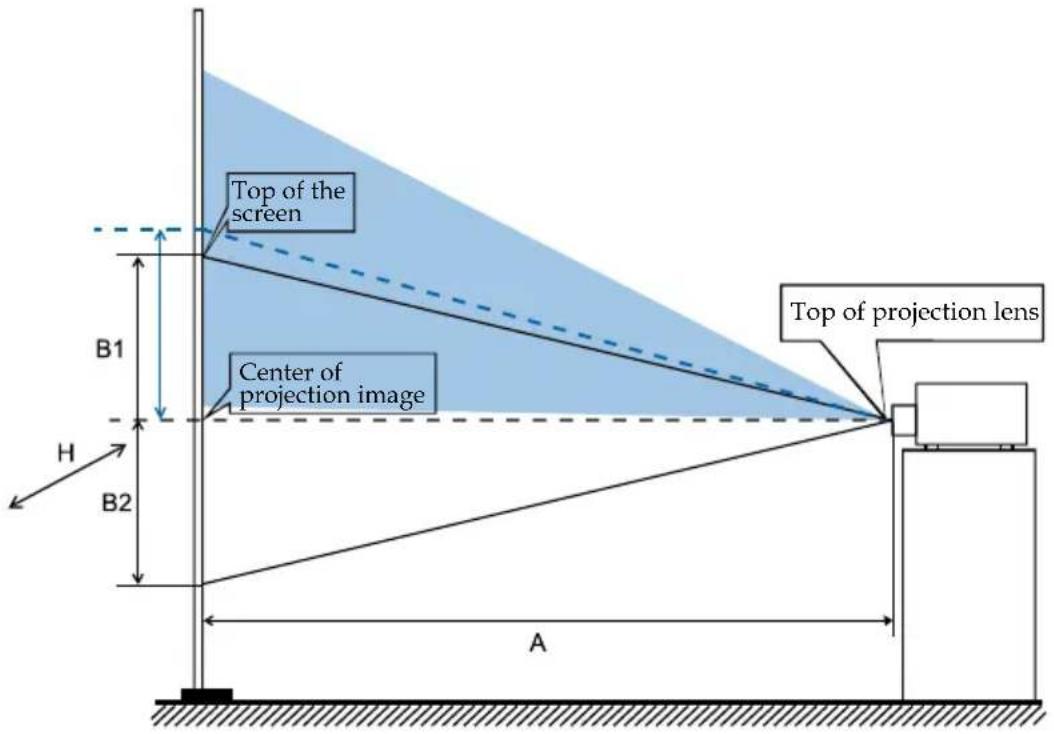
The diagram below shows the lens shift adjustment range ([ORIENTATION]: [DESKTOP FRONT]).
Basic Operations
Adjust the projected image
Adjust the position of the projected image
- Place the projector so that it is perpendicular to the screen.
- Rotate the adjustable feet and tilt the projector to an appropriate height, the max height will up to 20mm, just as follow Image ①.
- To raise the projector, rotate the two feet clockwise. To lower the projector or retract the adjustable feet, rotate the two feet counterclockwise, just as follow Image ②.
- Using the adjustable feet, you can adjust the projection angle up to 3.5 degrees, just as follow Image ③.
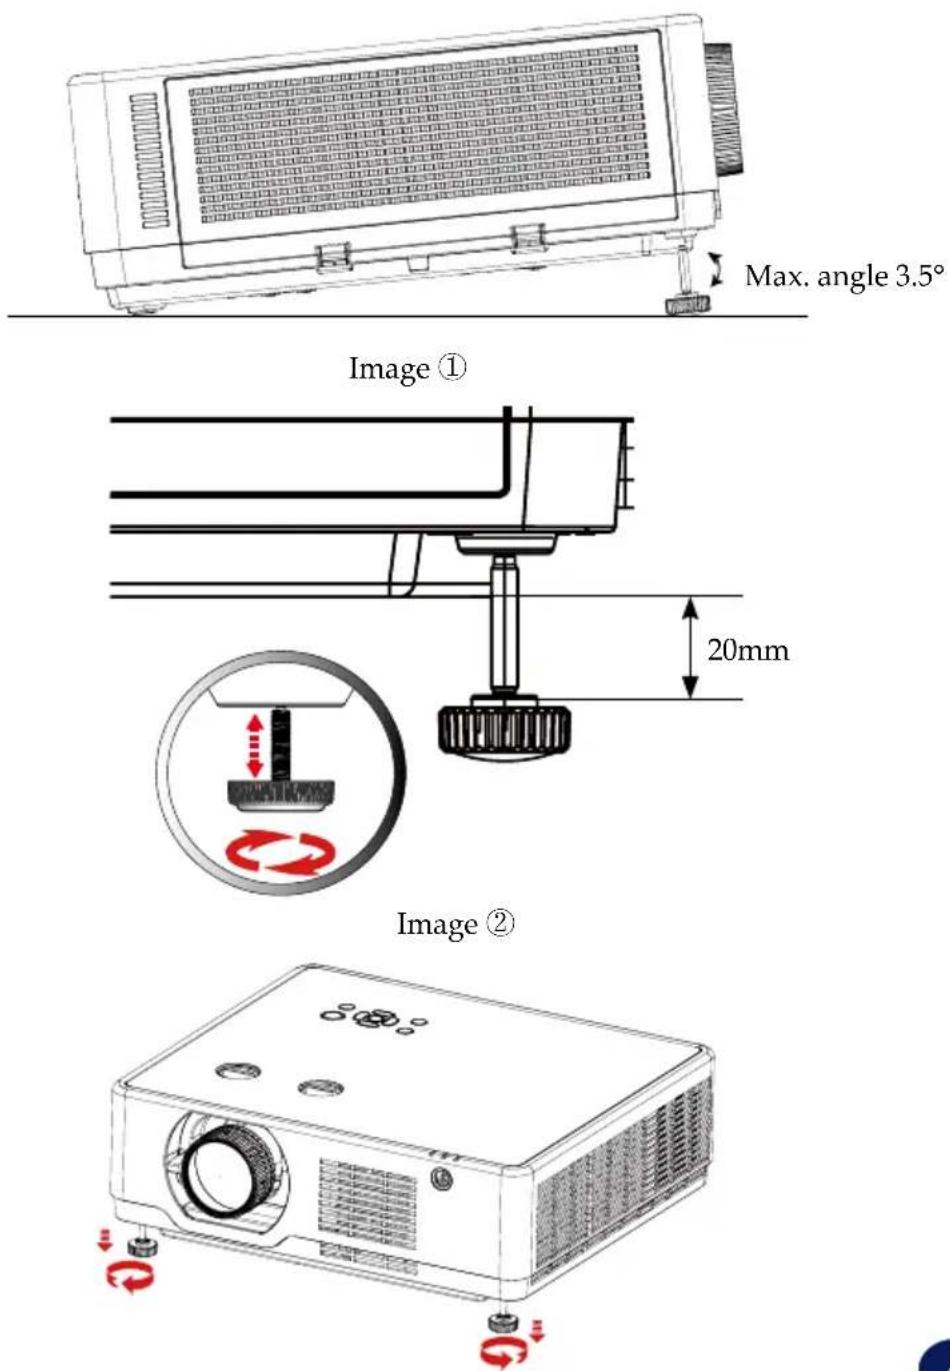
Image ③
Basic Operations
Adjust the screen size
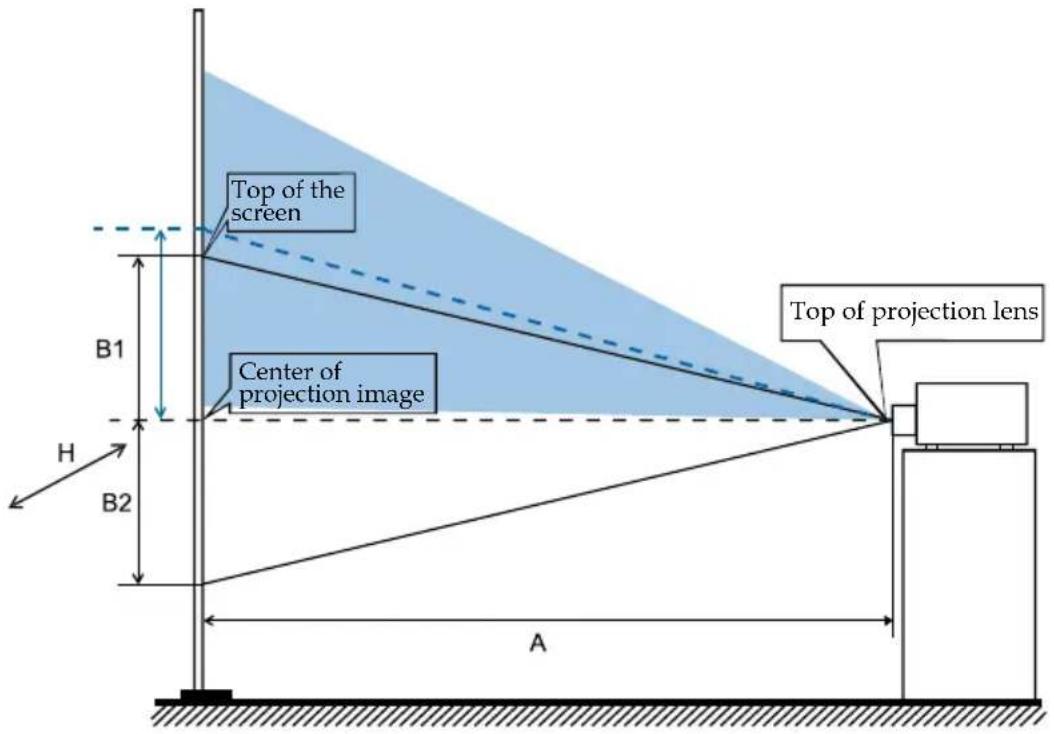
Projection size (diagonal): - RICOH PJ WUL6760 series : 30" to 300"
| Screen size Throw Distance | ||||||
| Diagonal Size (inch) | Width H (mm) | Height B1+B2 (mm) | B2 Max | B2 Min | Wide A (mm) | Tele A (mm) |
| 30 646 | 404 202 | -40 765 1 | 258 | |||
| 40 862 | 538 269 | -54 1031 | 1689 | |||
| 60 129 | 2 808 404 | -81 1564 | 2550 | |||
| 80 172 | 3 1077 53 | 8 -108 20 | 98 3411 | |||
| 90 193 | 9 1212 60 | 6 -121 23 | 64 3842 | |||
| 100 215 | 4 1346 6 | 73 -135 2 | 631 4273 | |||
| 120 258 | 5 1615 8 | 08 -162 3 | 64 5134 | |||
| 150 323 | 1 2019 1 | 010 -202 | 3964 6426 | |||
| 180 387 | 7 2423 1 | 212 -242 | 4764 7718 | |||
| 200 430 | 8 2692 1 | 346 -269 | 5297 8579 | |||
| 240 516 | 9 3231 1 | 615 -323 | 6364 10301 | |||
| 270 581 | 16 3635 1 | 817 -363 | 7164 11593 | |||
| 300 646 | 2 4039 2 | 019 -404 | 7964 12885 | |||
On Screen Display (OSD)
The Projector has a multilingual On Screen Display that allows you to make image adjustments and change a variety of settings
How to operate the OSD
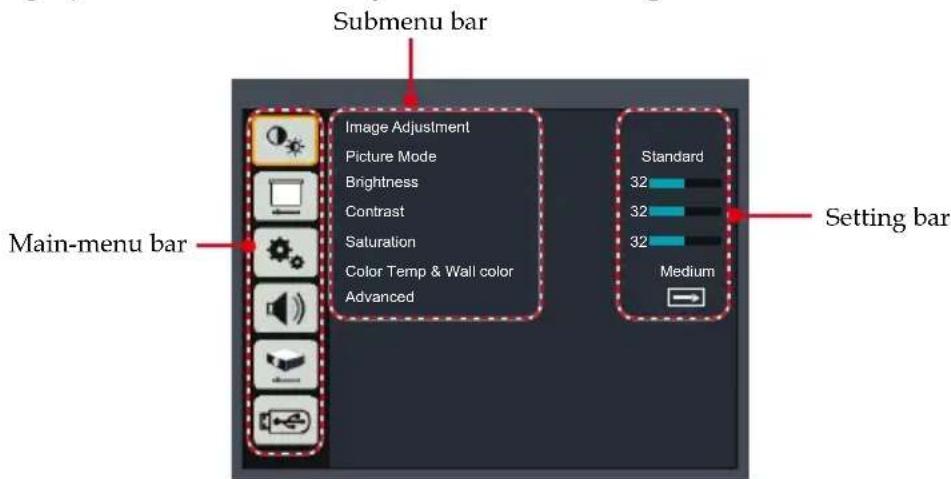
- To open the OSD, press "Menu" on the Control Panel or Remote Control.
- When OSD is displayed, use ▲▼ keys to select any item in the main menu. While making a selection on a particular page, press ▶ or “Enter” key to enter sub menu.
- Use ▲▼ keys to select the desired item in the sub menu and press ▶ or "Enter" key to view further settings. Adjust the settings by using ◀key or ▲key.
-
Select the next item to be adjusted in the sub menu and adjust as described above.
-
When there is no next menu in the submenu, press the ◀▶ buttons to set related options.
-
When there is a next menu in the submenu, the screen will display the icon. Press the buttons to set related options. If the next submenu contains option settings, press the "ENTER" button to proceed with the next submenu option setting (as above).
-
Press the "MENU" button to return to the previous menu setting.
- Press the ◀▶ buttons to change or adjust the setting and press "ENTER" button to confirm the change.
- After exiting, press the "MENU" button again, the OSD will close, and the projector will automatically save the new settings.
User Settings
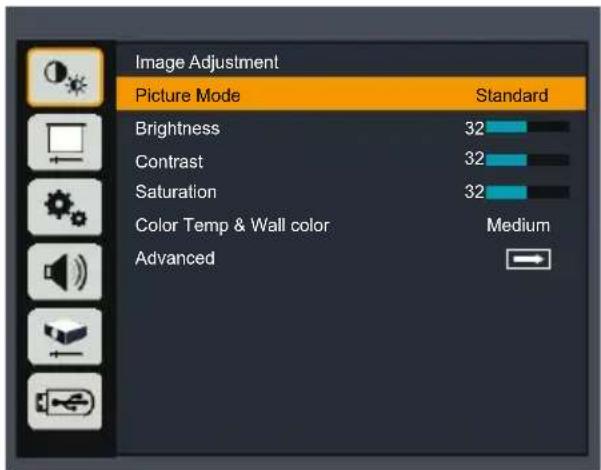
Image adjustment
Picture Mode
There are factory presets optimized for various types of images. The available options:

Bright: Mode for emphasizing brightness.
Standard: Mode for optimizing the balance between brightness and color reproduction.
Natural: Images suitable for natural portraits.
DICOM SIM.: This mode is suitable for projecting a monochrome medical image such as an X ray radiography, MRI, etc.
Brightness
Adjust the brightness of the image.

Press the ◀ key to darken image.
Press the key to lighten the image.
Contrast
The contrast controls the degree of difference between the lightest and darkest parts of the picture. Adjusting the contrast changes the amount of black and white in the image.
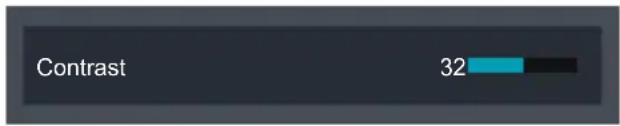
Press the ◀ key to decrease the contrast.
Press the ▶key to increase the contrast.
Saturation
Adjust the color saturation of the image.
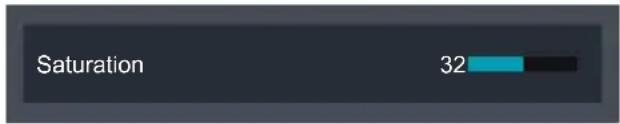
Press the ◀ key to decrease the amount of color in the image.
Press the ▶key to increase the amount of color in the image.
Color temp & wall color
Use this function to set the color temperature of the image or to obtain an optimized screen image according to the wall color. The available options: low/medium/high/dark green/light yellow/light blue.

Advanced
Adjust the white balance of the image.
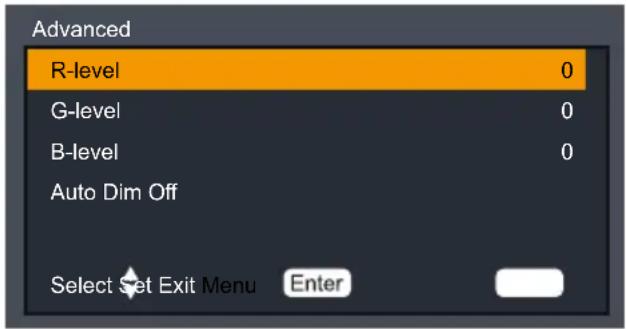
User Settings
R-level: press the button to decrease the red level. Press the button to increase the red level.

G-level: press the ◀ button to decrease the green level. Press the ▶ button to increase the green level.

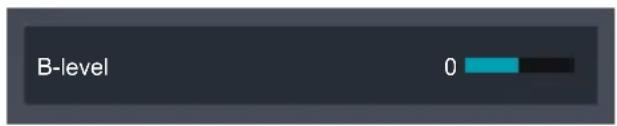
B-level: press the button to decrease the blue level. Press the button to increase the blue level.
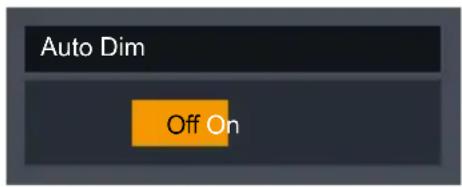
Auto Dim: Set the option to "On" to optimize contrast. Set the option to "Off" to off contrast function. Auto Dim is only valid for the following settings. 1) picture mode = Bright. 2) Laser mode = Normal. 3) White field of external signal
Display Setting
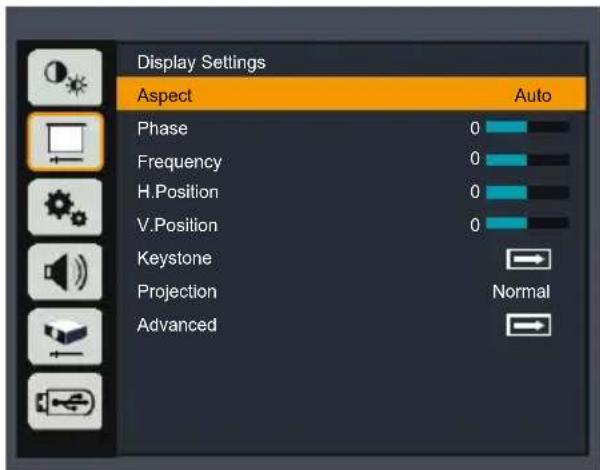
Aspect
Use this function to choose your desired aspect ratio.

Auto: Automatically selects the appropriate display format.
4:3: Displays 4:3 aspect ratio.
16:9: Displays 16:9 aspect ratio.
16:10: Displays 16:10 aspect ratio.

“Phase” and “Frequency” functions are only supported under Computer Signal source.
Phase
Eliminate flicker from the image displayed. Use the ◀ or ▶ key to adjust the value.

Frequency
This function is used to adjust or diminish the disruption from patterns formed by projected vertical stripes.

User Settings
H. Position (Horizontal Position)
Shift the projected image position horizontally.

- “H. Position” and “V. Position” functions are only supported under Signal source.
Press the ◀key to move the image left.
Press the ▶key to move the image right.
V. Position (Vertical Position)
Shift the projected image position vertically.
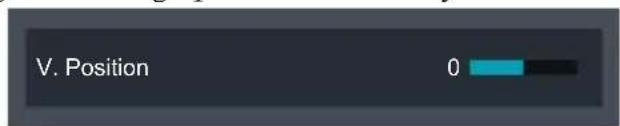
Press the ◀ key to move the image down.
Press the ▶key to move the image up.
Keystone
Adjust image distortion caused by tilting the projector.
White arrow means no correction.
Red arrow indicates the corrected direction and will disappear when the maximum value is reached.
H/V keystone function may not adjust correctly. Please use Four Corners correction instead.
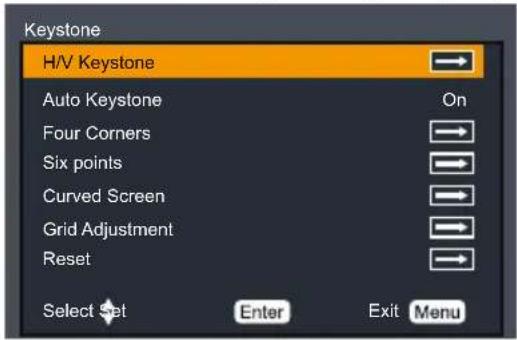
H/V keystone: Adjust the keystone of projected images in horizontal and vertical directions.

Horizontal keystone correction
- Press the ◀ key to adjust the left.
- Press the key to adjust the right.
Vertical keystone correction
- Press the ▲key to adjust the top.
- Press the ▼ key to adjust the bottom.
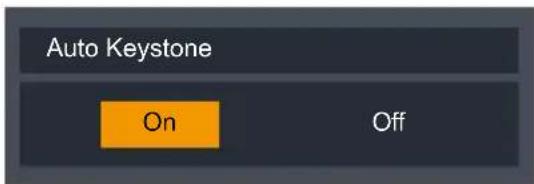
Auto keystone: Press the ◀ or ▶ key to turn on or turn off the auto keystone function.
User Settings
Note
White arrow means no correction.
Red arrow indicates the corrected direction and will disappear when the maximum value is reached.
Four Corner: Compensate for image distortion by adjusting one corner at a time.
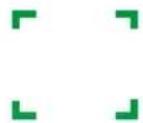
Press the Enter key to select the corner and press the ▲ ▼ ◀ ▶ key for adjustment.
Six points: Compensate for image distortion by adjusting one corner at a time.

Press the Enter key to select the corner and press the▲▼◀▶ keys for adjustment.
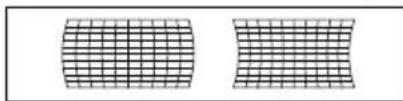
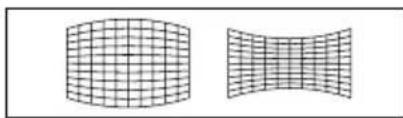
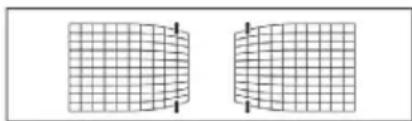
▶ Curved Screen: For uneven linearity or bending deformation of projected images in vertical/horizontal directions.
X/Y Gain

Press▲▼ key to enter the "Curved Screen" option and press the ▲▼◀▶ keys for adjustment.
--- X/Y gain
- Press the key: stretch the vertical line leftward/rightward.
- Press the key: indent the vertical line leftward/rightward.
natural_image
Two abstract geometric patterns with grid lines, no text or symbols present- Press the key: stretch the horizontal line upward/downward.
- Press the key: indent the horizontal line upward/downward.
natural_image
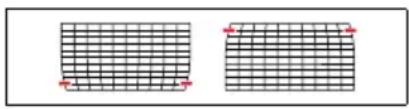
Two 3D grid diagrams with curved surfaces, no text or symbols present--- X offset
- Press the key: correct the vertical line on the right, and leave the center area unchanged while expanding the top and bottom.
- Press the key: correct the vertical line on the left, and leave the center area unchanged while expanding the top and bottom.
User Settings
- Press the key: correct the vertical line on both sides, and leave the center area above unchanged while expanding the lower corners.
- Press the key: correct the vertical line on both sides, and leave the center area above unchanged while expanding the upper corners.
natural_image
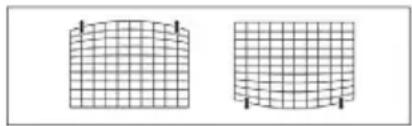
Two identical grid diagrams with red markers, no text or symbols present--- Y offset
- Press the key: correct the horizontal line on the right, and keep the center area unchanged while expanding the top and bottom.
- Press the key: correct the horizontal line on the left, and leave the center area unchanged while expanding the top and bottom.
natural_image
Two grid diagrams showing curved and straight lines, no text or symbols present- Press the ▲ey: correct the horizontal lines on both sides, and keep the center area and area above unchanged while expanding the lower corners.
- Press the ▼key: correct the horizontal lines on both sides, and keep the center area and area below unchanged while expanding the upper corners.
natural_image
Two identical grid-patterned panels with corner markers, no text or symbols presentGrid adjustment: Select this function to adjust the local points of the projected image.

natural_image
Grid of gray squares with dashed border (no text or symbols)Press▲Key to enter the "Grid adjustment" option and press the ▲▼◀▶ keys for adjustment.
Reset: Restore all modified parameters to the factory settings.
Projection
Use this function to select the projector mode, depending upon how the projector is mounted.
User Settings

Note
When auto ceiling is "On", ceiling and rear ceiling are disabled.
Normal: This is the default selection. The image is projected directly onto the screen.
Ceiling: When selected, the image will appear upside down.
▶ Rear: When selected, the image will appear reversed.
Rear Ceiling: When selected, the image will appear reversed in upside down position.
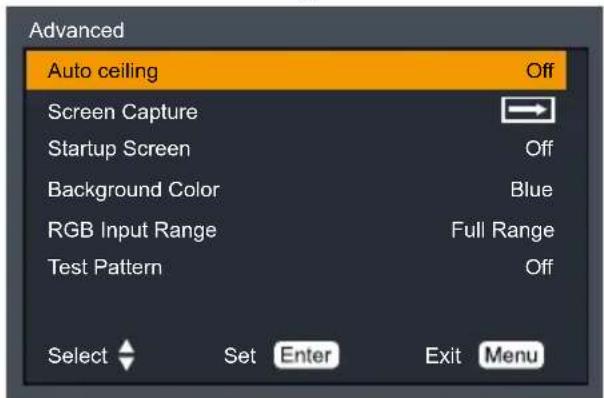
Advanced
Preset advanced screen setting.
Note
When the input source is "Memory Viewer", "User" function is invalid.
Auto ceiling: Press the ◀ or ▶ key to turn on/of the ceiling function.
Screen Capture: This function is used to capture the projected image and set it as the startup screen picture.
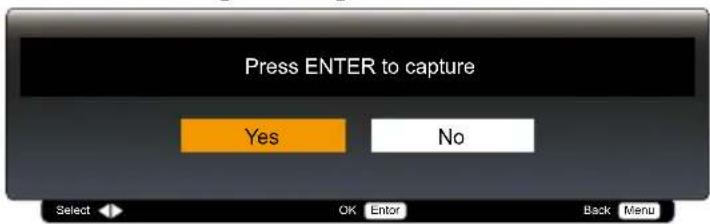
Startup Screen: Use this function to choose your desired startup screen.
Startup Screen
Logo Off
- Logo: Display logo on the start-up screen.
- Off: Display an empty start-up screen.
Background Color: Use this function to choose your desired background color between Logo, User logo, Blue, and Black.
Background Color
Logo
User logo Blue Black
RGB input range: Adjust the RGB aberration range in the HDMI input source.
RGB Input Range
Auto

Full Range
- Auto: Automatically detect RGB range.
- Full Range: Select this mode when computer signal or full range signal from AV equipment is input.
- Limited Range: Process the input image with a limited RGB range.
Test pattern: Display the test patterns built in the projector. Position, size and other element settings are not reflected in the patterns. Make sure that the input signal has been displayed before all types of adjustments are done. Select the mode of the needed patterns: off, grid, color bar, white and black. Select "Off" to cancel this function.

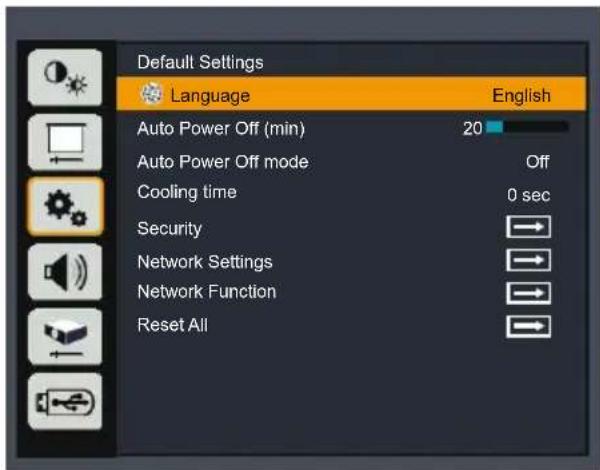
Default settings
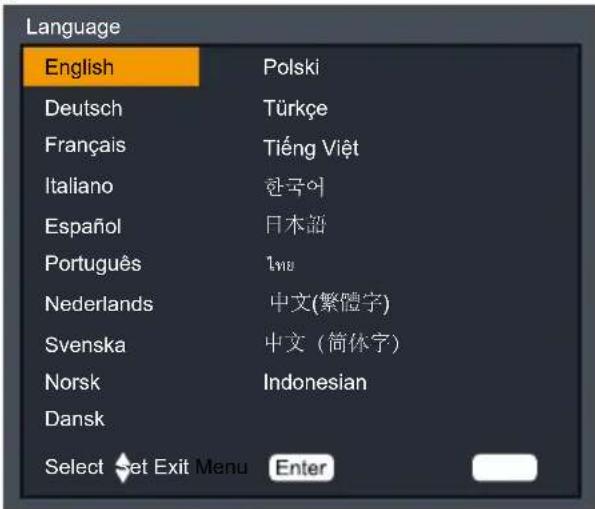
Language
This function is used for multi-language switch. Enter "Default settings" OSD > "Language", press "ENTER" to enter the submenu, and press the ▲ or ▼▼ to select the language. Press "ENTER" again for confirmation.
Auto Power Off (min)
Set the time interval of screen countdown. The projector will enter the state of countdown when there is no signal input. Auto Power Off is activated when the set time interval is due. The light source will turn off to cool down, and enter the standby mode. The adjustable range is 0-120 min.

Default value of "Auto Power Off (min)" is 20 min.
Auto Power Off mode
This function is to set power off method of the auto power off function.
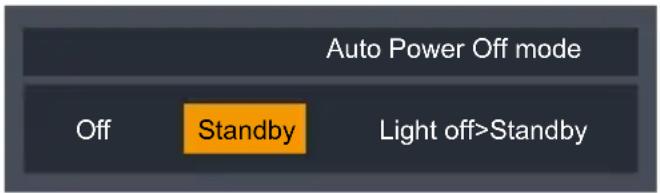
Off: Disable the auto power-off function.
Standby: Enter standby mode when input become no signal and set time has elapsed.
Light off > Standby: Enter Light Off mode for one hour when input become no signal and set time has elapsed. In this mode, the power indicator light become twinkling green and the Light turn On again when input signal is detected or Any key (except power key).
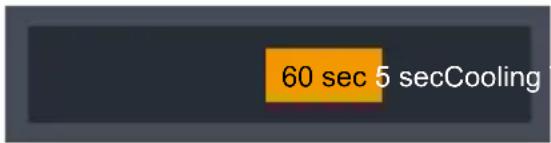
Cooling Time
After your projector is powered off, select cooling fan speed to shorten the cooling time.
60 sec: Running in normal way.
5 sec: Projector runs faster than in 60 sec mode with shorter time but with a louder sound.
Security
Configure the security settings.

The default security code is "111".
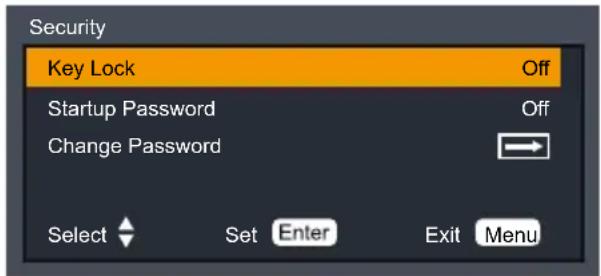
Key Lock: This function disables keys on the control panel or remote control to avoid undesired operation.
- Off: The key on the control panel or remote control is operable
• Key: The key on the control panel is not operable.
User Settings
- Remote control: the key on the remote control is not operable.
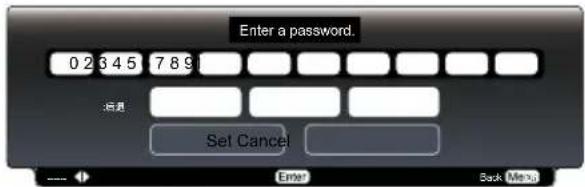
Startup Password: Select "On" to use the security verification when the turning on the projector. Select "Off" to be able to switch on the projector without security verification.
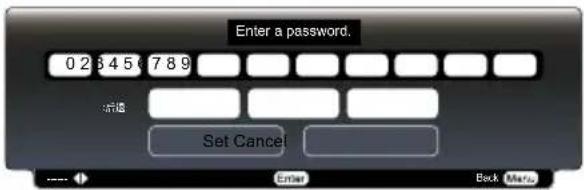
Change password
You may change the password into 3 digits as needed, press the indicator ◀key, and select "Password change". After the password prompt box displays, press the indicator ◀key and enter the correct password. "New password" prompt box disappears. Set new password.
Network Settings
Configure the network settings.
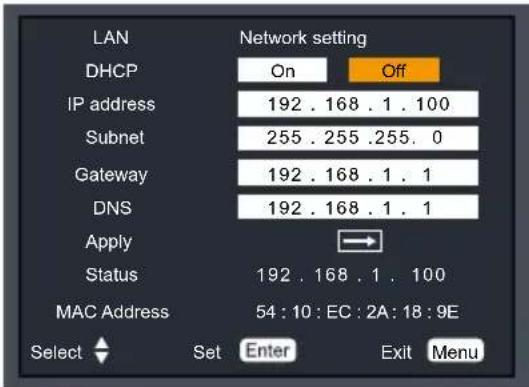
DHCP: Select "On" to allow the projector to obtain an IP address automatically from your network. Select "Off" to manually assign IP, Subnet Mask and Gateway configuration.
IP Address: Set an IP address.
Subnet mask: Set subnet mask.
Default gateway: Set default gateway.
User Settings
DNS: Set DNS address.
Apply: Execute all settings.
Status: Display the current IP address.
MAC address Display the projector's MAC address.
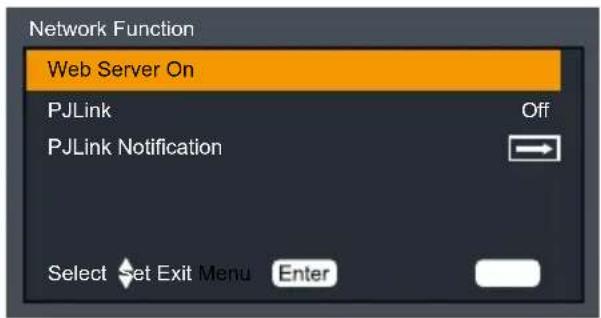
Network Function
Configure some network functions.
Note
To prevent unauthorized access, it is recommended to disable features that are not used.
If the LAN Projection settings have been changed, the new settings will take effect when the power is turned on after turned off.
Web Server: Set the option to "On" to enable web server function.
Set the option to "Off" to disable web server function
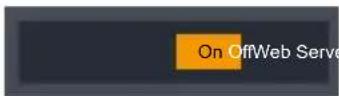
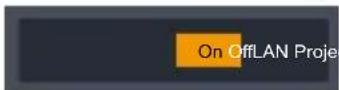
▶ LANProjection:Set the option to "On" to enable LAN projection function..
Set the option to "Off" to disable LAN projection function.
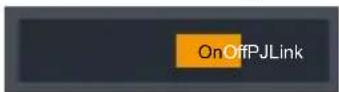
PJLink: Set the option to "On" to enable PJ Link function. Set the option to "Off" to disable PJ Link function.
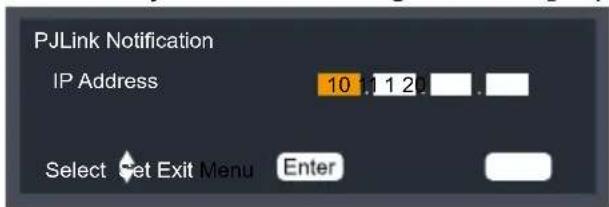
PJLink Notification: You can manually set the IP address of the computer currently communicating with the projector.
User Settings
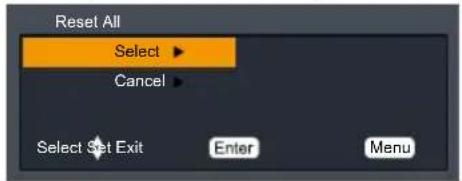
Reset all
Return the adjustments and settings to the factory default values. (not including the language and Security setting) Choose "Select" to return the display parameters on all menus except Language to the factory default settings.
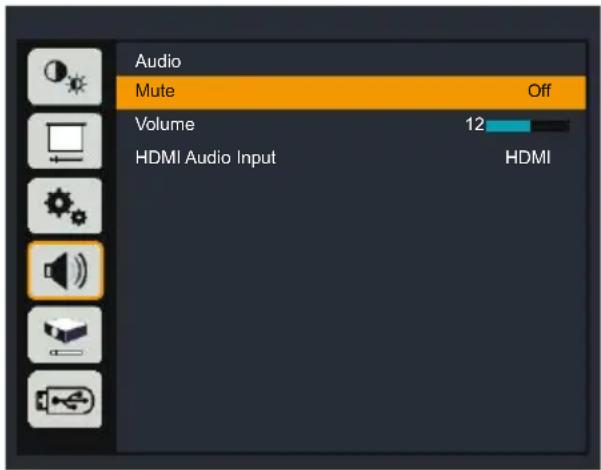
Audio
Mute
Disable audio temporarily.

“Mute” function affects both internal and external speaker volume.
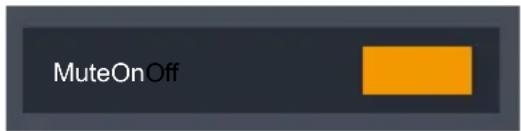
Select "Off" to output audio.
Select "On" to disable audio.
Volume
Adjust the volume

Press the ◀ button to turn down the volume.
Press the button to turn up the volume.
HDMI Audio Input
You can connect an external device to the
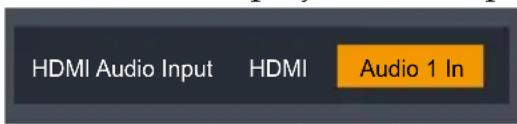
When HDMI is selected, audio from the "HDMI 1 In" and "HDMI 2 In" terminal will be output.
When Audio 1 In is selected, audio input into the “Audio In” terminal will be output.
Options
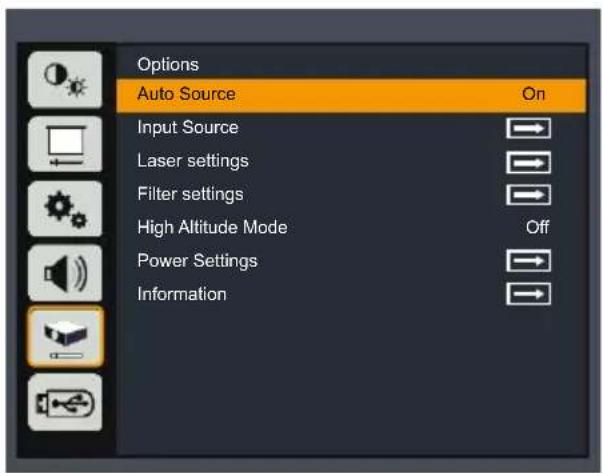
Note
Auto Source does not support "Memory Viewer".
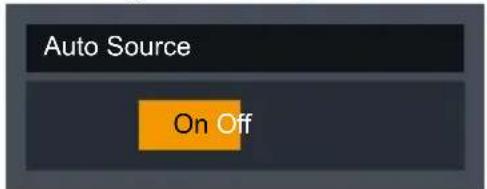
Auto Source
When this function is turned "On", the projector will search for other signals if the current input signal is lost. When this function is turned "Off", it will only search a specified connection terminal.
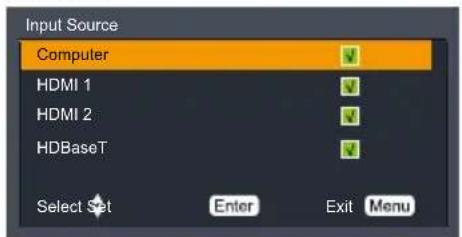
Input Source
Use this option to enable/disable input sources. Press the ▶ key to enter the sub menu and select which sources you require. Press "Enter" to finalize the selection. The projector will only search for inputs that are enabled.
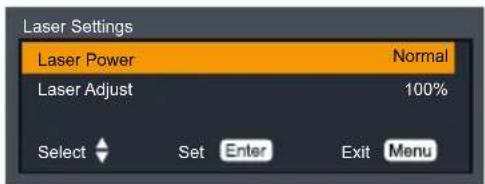
Laser settings
This function is used to set the laser mode.
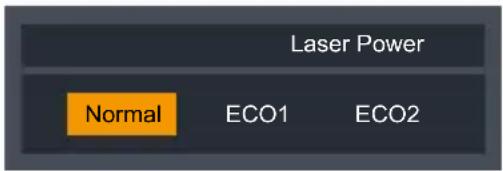
Laser Power: Select "Normal" mode and the machine displays normal
User Settings
brightness. Select "ECO 1/ECO 2" mode, the machine display low brightness, reduce the electric power consumption of the light source, thus extending the service life of the light source.
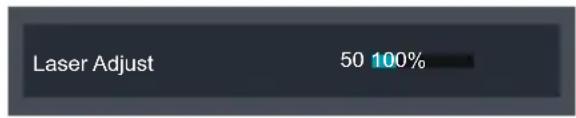
Laser Adjust: Laser adjustment: When this function is turned on, if the service life of the bulb is exceeded, the alarm menu will automatically pop up.
Filter Settings
Use this option to view the filter status and configure the filter settings. Press the ▶ key to enter the sub menu and configure the desired settings.
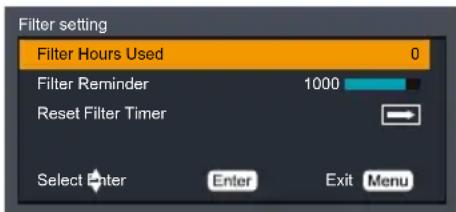
Filter Hours Used: Displays the use duration of the filter.
Filter Reminder: You can specify the maximum use duration of the filter (that is, specify the cleaning cycle for the filter).

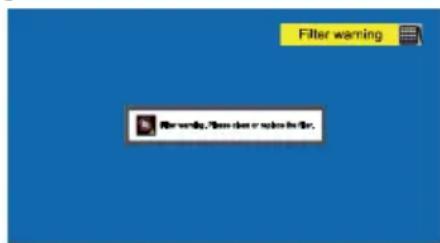
If the [Filter Reminder] is specified and the use duration exceeded the specified maximum value, the screen displays an alert and a message, until any key is pressed.
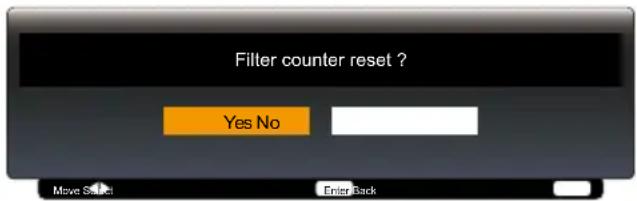
Reset Filter Timer: Resets the count of filter hours used.
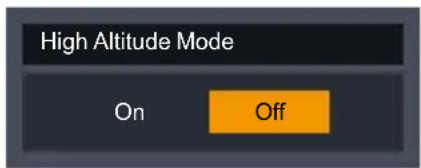
High Altitude Mode
If the projector is used at altitudes below 1400m, select [Off]. If the projector is used at altitudes from 1400m to 3000m, select [On].
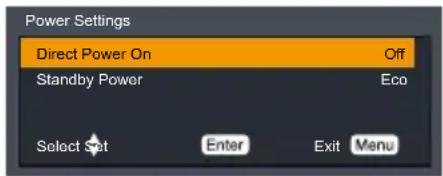
Power Settings
Use this option to configure the power settings. Press the ▶ key to enter the sub menu and configure the desired settings. If changes are made, they will take effect the next time the projector is powered on.
Direct Power On: When it is set to [On], the projector is automatically powered on when an AC power supply is connected. Wait at least 30 seconds before connecting the power code again, after disconnecting the power cord.
Standby Power: Specify the standby mode.
---Eco: In the Eco mode, network functions and RS-232C serial communication (except powering-on instructions) functions are unavailable.
---Normal: In the Normal mode, serial communication functions and network functions are not limited.
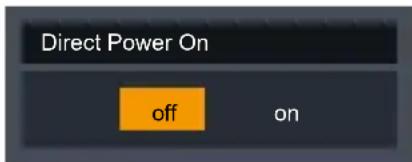
Direct Power On
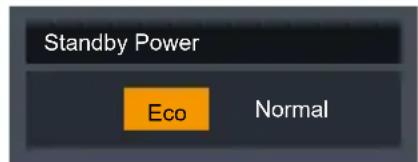
Standby Power
Information
Displays information related to the projector. Detects projected image signals and operating status of the projector.
User Settings
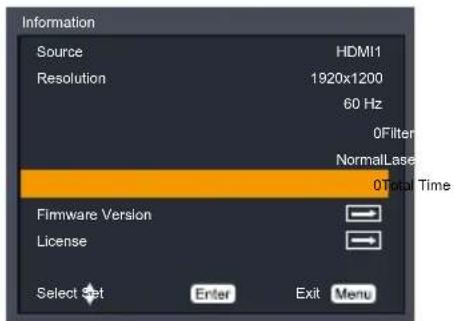
Source: Displays selected input source.
Resolution: Displays the resolution of input signals in the unit of Hz. And displays [----] when no input signal is detected.
Filter Hours Used: Display the used hours of the filter.
Laser Power: Displays the mode of the laser light source.
Total Time: Displays the number of hours the light source has been used.
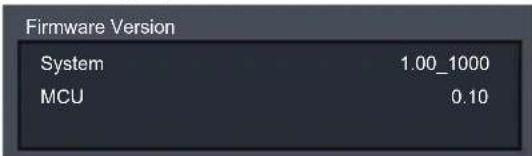
Firmware Version: Displays the firmware versions of the system and MCU.
License: Displays open source software license.
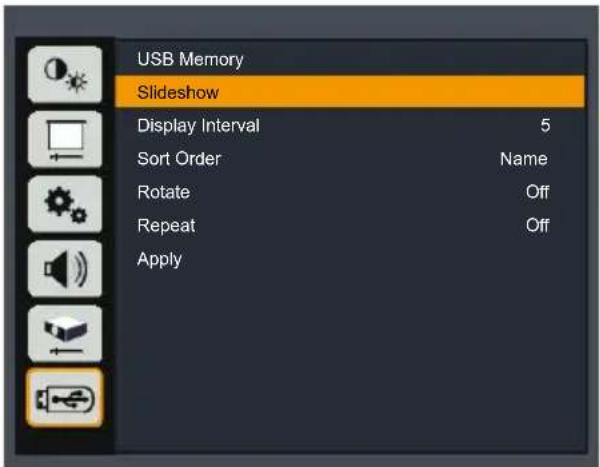
USB Memory
Note
- "USB memory" function is available when [Memory Viewer] input is selected.
Slide show
If you want to project a slide show of images, the display effects for switching slides can be customized.
Display Interval
If you want to project a slide show of images, you can specify the slide switching interval.

Sort Order
If you want to project a slide show of images, the display effects for switching slides can be customized.
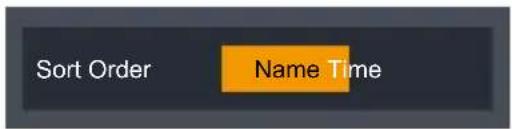
Name: Displays by file name and folder name.
Time: Displays by file time and folder time.
Rotate
You can specify the rotation mode for images.

User Settings
▶ Off: Invalid option.
90 Degree: Rotates the image 90 Degree to the right.
180 Degree: Rotates the image 180 Degree.
270 Degree: Rotates the image 270 Degree to the right.
Repeat
You can specify whether to repeat display slides.
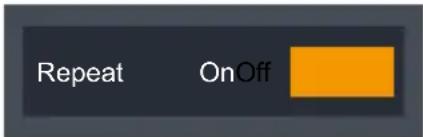
Off: Returns to the thumbnail display after the last file is displayed.
On: Displays the first file again after the last file is displayed.
Apply
Apply the settings in [USB Memory].
Viewing via USB Memory
When a USB memory device is inserted into the projector, the Memory Viewer function enables the projector to project images stored in the USB memory device.
Content Supported by Memory Viewer
| Image | Extension Format Description | ||
| JPG/JPEG | Baseline encoded, 24-bit Non-interlaced RGB, 24-bit | Maximum image resolution: 10000x10000 pixelsMaximum display resolution: WUXGA | |

USB HDD is not supported.
Connecting with USB hub is not supported.
For USB memory requirement
- Format and Memory size
| Format Memory Size File Size | |
| FAT 4GB 2GB | |
| FAT32 32GB 4GB | |
- Supported USB Version : USB 2.0
- Maximum number of folders/files that can be displayed is 500.
- Cannot play digital rights management (DRM) protected files.
Displaying the Memory Viewer Screen
- Press the [Input] button on the remote control or the [Input] button on the rear control panel, and select [Memory Viewer] from [Input Source].
- Directly insert a USB memory device into the
terminal.
- The projector displays the standby screen "please press RC EN TER
please press RC ENTER

-
Press the
button. -
The root directory of the USB memory device is displayed in thumbnail mode.
-
Press the ◀▶ buttons to select a file.
-
Press the
button.
- Images are displayed in full-screen mode.
User Settings
-
Press the ▶ button to switch to next image, and press the ◀ button to return to the previous image.
-
Press the
button.
- The screen returns to the thumbnail display.
Memory Viewer setting
OSD menu operation
Here are some option settings for Memory Viewer on OSD menu.
Unplug the USB memory
-
Press the ◀▶ buttons on the remote control to select the thumbnail on the top left.
-
Press the
button .
- The projector displays the standby screen [please press RC Enter
- The USB memory can be removed from the projector.
Controlling this Device with Web Browser
You can control this device from a PC by using a web browser.
Note
To control with web browser, set to "ON" of Network Function>Web Server in the menu of this device.
If you click the "Download" button on the left, you will see a file, but this file is cannot be used on this machine.
Connecting to the device
1. Confirmation of the IP address of the device
Select the “Default Settings” → “Network” in the menu of this device, and verify the IP address. (See pages 59).
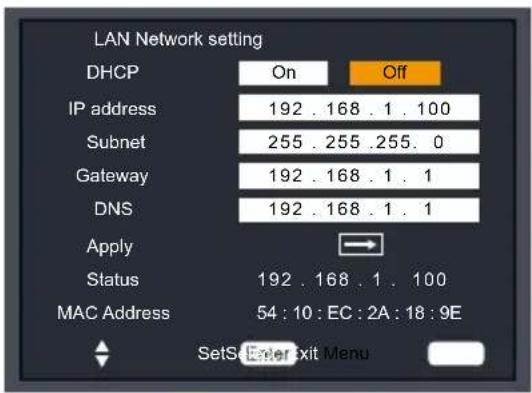
2. Connection
Enter the IP address that was verified by opening the web browser.
For example, enter http://192.168.1.100/ if the IP address is displayed as shown above.
LAN Control
Access from the Web Browser
Communication with the web server is not encrypted. Avoid using the same password as other information devices.
Login
Open the network control page.
Enter the password in [New Password] and [Confirm Password] field, and click [OK].
* The password setting screen will be displayed when you start up for the first time. Please set a password to use the web page.
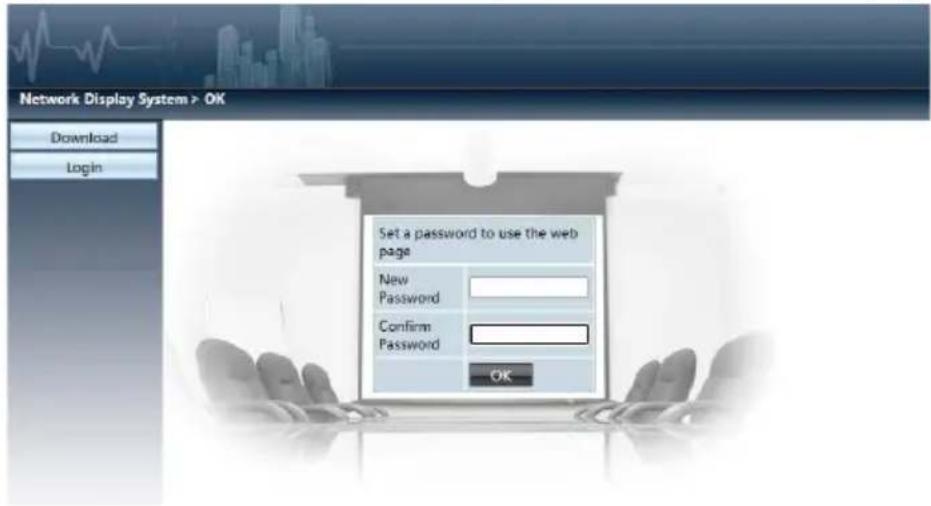
Enter the passwdprd in [Passwor] field, and click [Login]
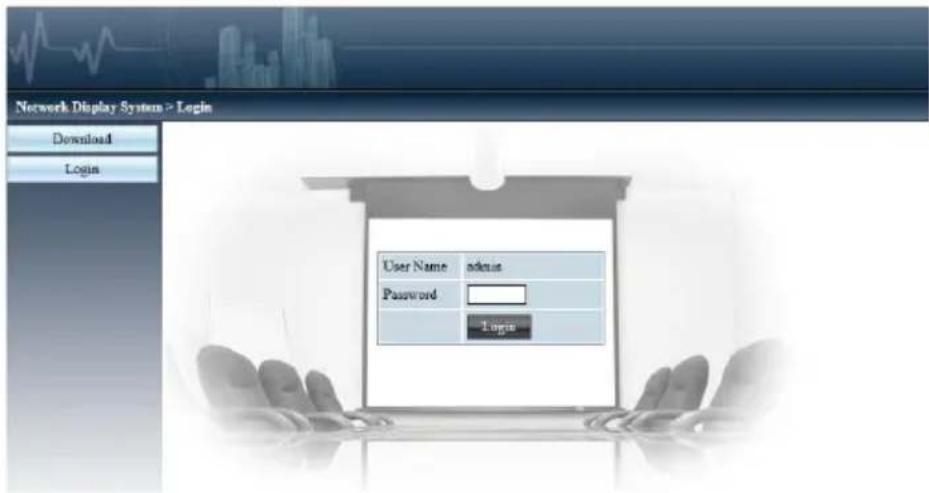
When you log in, a navigation bar for setting the projector will be displayed on the left side of the home screen.
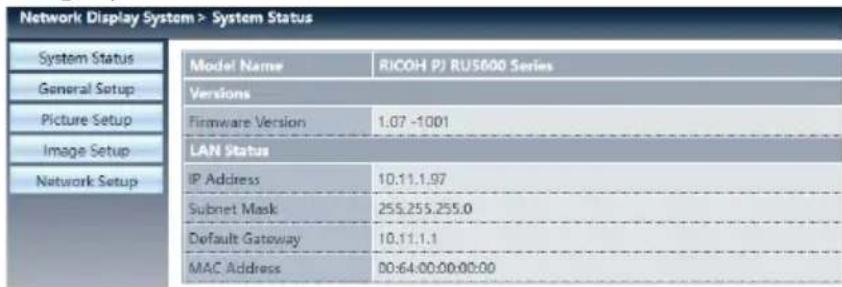
System Status
The current status of the projector is displayed.
You can check information such as firmware version number of
the projector and IP address.
General Setup
You can change the password for the projector.
And you can control the Power and Input Source of the projector.
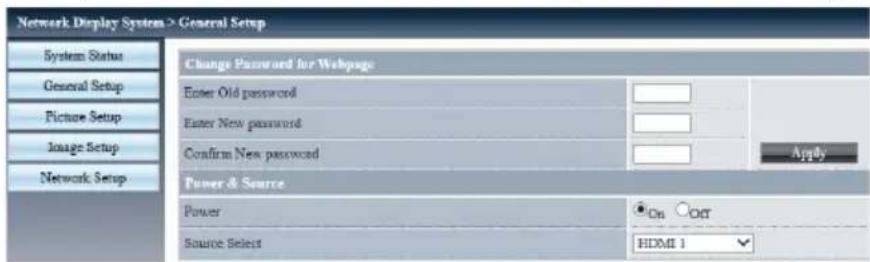
Enter Old password: Enter the existing password.
Enter New password: Enter a new password.
Confirm New password: Enter the new password again for confirmation.
Apply: Updates the settings.
Power: Switches the power of the projector between On and Off.
Source Select: Switches the input source of the projector.
Picture Setup
You can change the values to adjust the projected image.
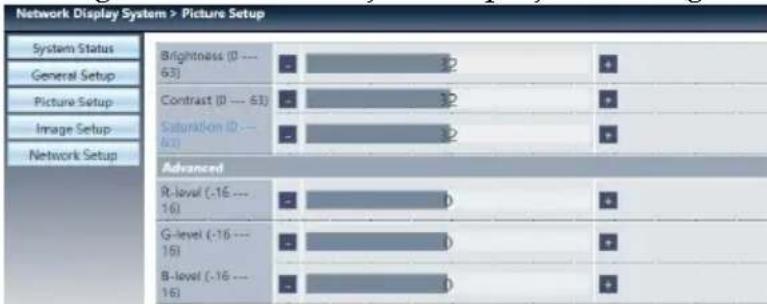
LAN Control
Brightness: Adjust the brightness of the projected image.
Contrast: Adjust the contrast of the projected image.
Saturation: Adjust the saturation of the projected image.
Advanced: Adjust the white balance of the image.
R-level: Adjust the red level.
G-level: Adjust the green level.
B-level: Adjust the blue level.
Image Setup
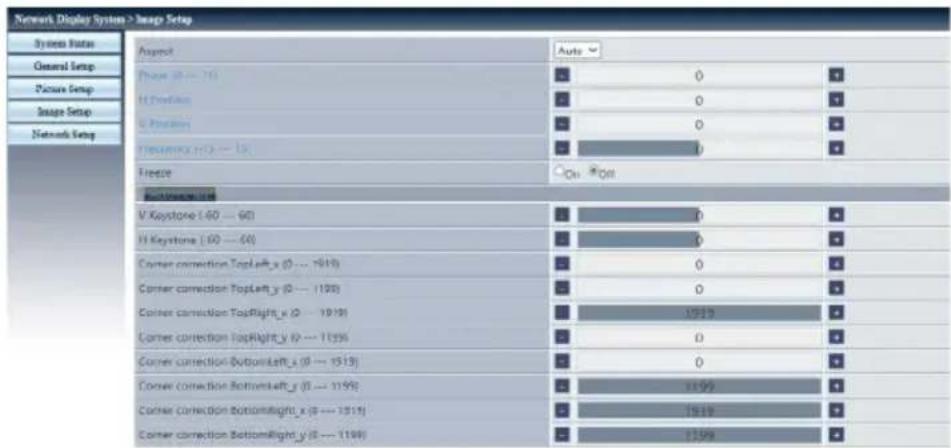
Aspect: Switche the aspect ratio of the projected image.
Phase: Adjust the phase of the projected image.
H Position: Adjust the horizontal position of the projected image.
V Position: Adjust the vertical position of the projected image.
Frequency: Adjust the frequency of the projected image.
Freeze: Switches the image freezing function between on and off.
Auto PC Adj.: Implements automatic adjustment by the PC.
V Keystone: Adjust the vertical keystone distortion.
H Keystone: Adjust the horizontal keystone distortion.
Corner correction: Adjust the screen when the linearity is uneven or the vertical or horizontal curves of the projected image are deformed.
Network Setup
- IPV6 cannot be used in this device.
After [Reset] is implemented, [LAN Settings] will be restored to factory defaults
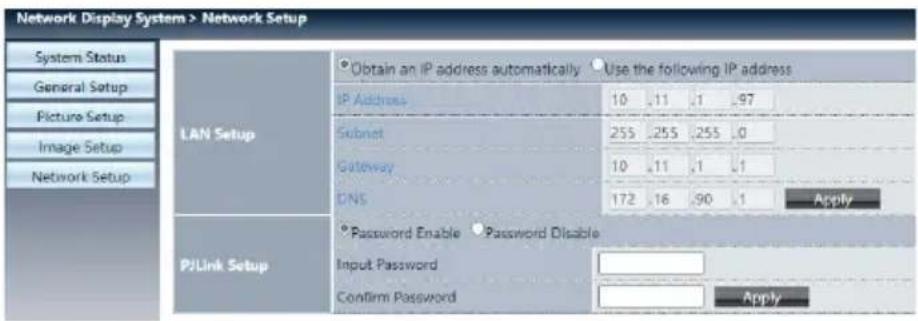
LAN Setup:
If you want to enable the DHCP, select [Obtain the IP address automatically].
IP address: If no DHCP is used, enter the IP address.
Subnet: If no DHCP is used, enter the subnet.
Gateway: If no DHCP is used, enter the gateway IP address.
DNS: If no DHCP is used, enter the DNS server IP address. Supported characters: Digits (0-9).
PJLink Setup:
If you want to setup the Password, select [Password Enable].
Input password: Input the PJLink password.
Confirm password: Input the PJLink password once again and confirm.
Apply
Updates the settings.
Control the Projector via the Projector Management Utility
Projector Management Utility conforms to the PJLink class 1 standards, and is compatible with all class 1 commands.
A maximum of 100 projectors connected to the network can be managed using one computer.
Projector Management Utility operating environment is described below.
Note
This software is to control and monitor projectors manufactured by our company. The software may not work properly when used to control other projectors.
The projector management utility function is available only "PJLink" in "Network Function" is On.
• Supported operating system
- Windows 10 (32-bit/64-bit version), Windows 11
- Memory size
Recommended memory size for the operating system of the computer you are using
- Display resolution 800 × 600 pixels or more
Installing Projector Management Utility
Register projectors
- Registers the projectors with Auto search
-Click [Register Projector] button.
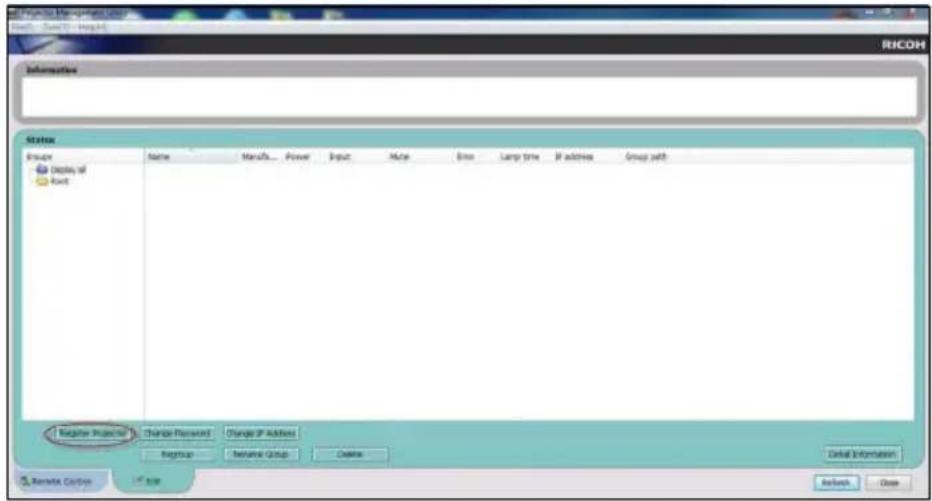
-Click [Auto Search] button.
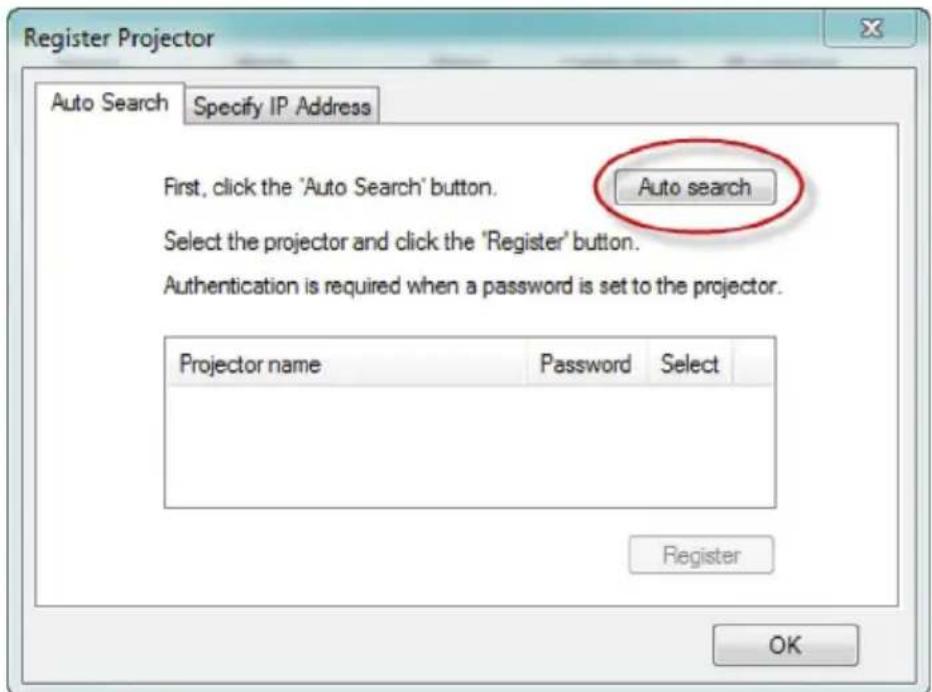
-List of projectors which support PJLink are displayed in the window. Projector name is displayed as “*******” until authorization if password is enable.
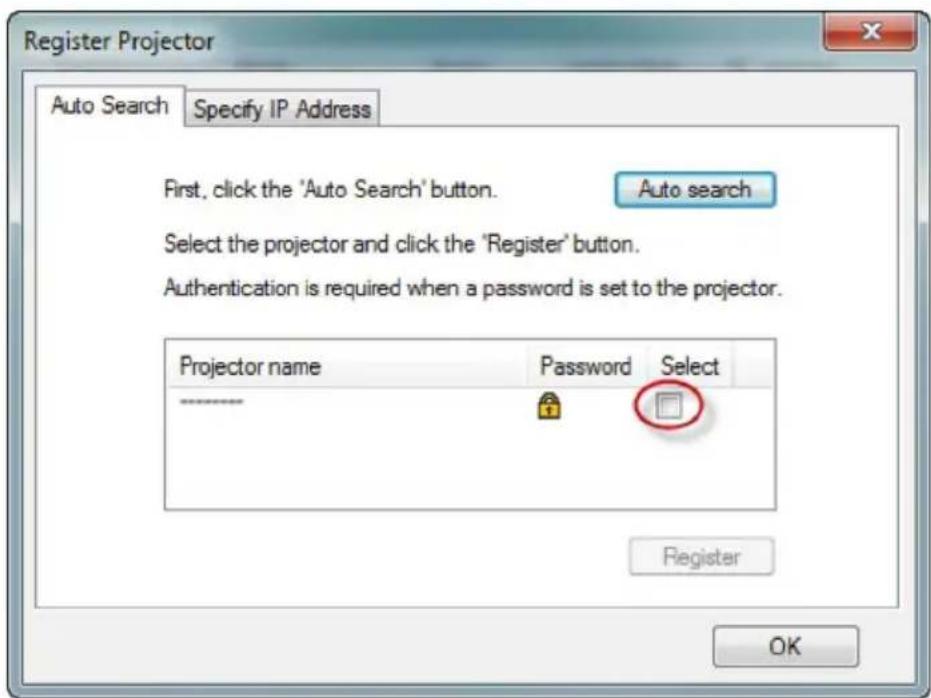
-Select the desired projector and click [Register] button.
Password authorization is required if password of the projector is set to enable.
-Click [OK] button to return to the original screen.
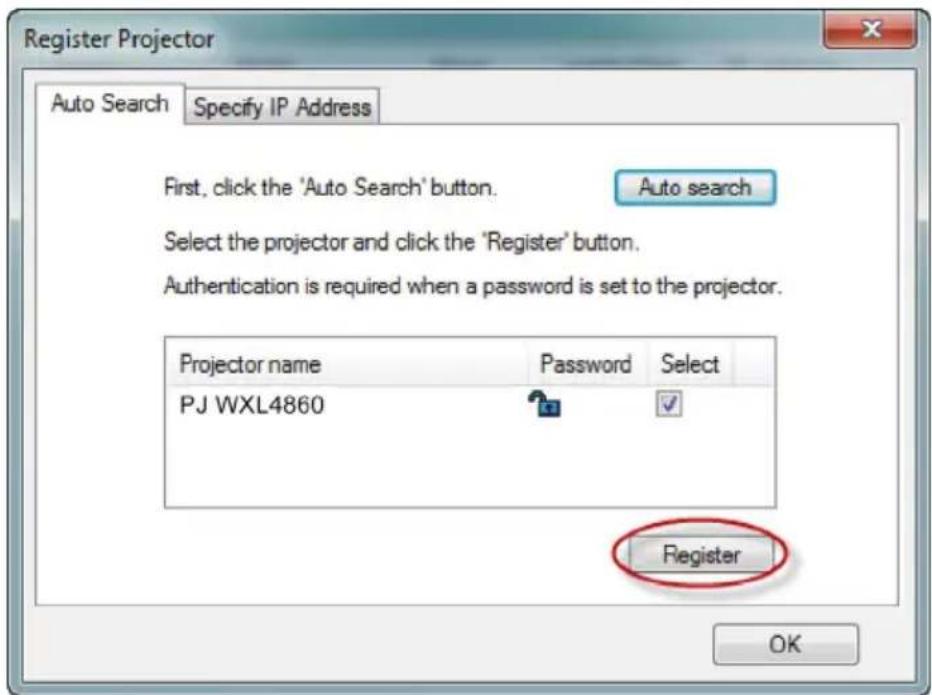
- Directly specifies the IP address and registers the projector.
-Enter IP address of the desired projector and click [Confirm] button then the projector name will be displayed. After confirming the projector name, click [Register] button.
Control the projector with the projector Management Utility
Click [Remote Control] tab and select the desired projector in the list. You can control the selected projector by clicking control buttons in the bottom of the window.
[Power] button
Turn "On/Off" the power of the projectors or groups selected from the Projector (/Group) List.
[Input] button
Switches the input source of the projectors or groups selected from the Projector (/Group) List.
Input source will not be changed if the projector doesn't support the selected input source.

A Table of input source name in the projector and the projector management utility.
| The projector The projector Management Utility |
| Computer RGB 1 |
| HDMI1 DIGITAL 1 |
| HDMI2 DIGITAL 2 |
| Memory Viewer STORAGE 1 |
| HDBaseT NETWORK 3 |
Detail Information] button
Show detail information of the selected projector.
Troubleshooting
If you experience trouble with the projector, refer to the following information. If the problem persists, please contact your local dealer or service center.
- Ensure that the projector is correctly connected to the peripheral device.
- Ensure that all devices are connected to an AC power socket and the power supply is connected.
- If the projector fails to project an image from the computer connected to it, restart the computer.
Problem: Image cannot be displayed
Check whether the projector is correctly connected to the computer or the video device and the power supply is normally connected.
Check whether the computer input signal is correct. When the projector is connected with some portable computers, the display output settings usually need to be changed. For details on the settings, see the user manual for the computer.
Images can be displayed only 10s after the projector is turned on.
Check the input signal, color system, video system, or computer system modes.
Check whether the temperature exceeds the specified operating temperature.
Images cannot be displayed when the [Mute] button is enabled. You need to press the [Mute] button or other related buttons on the remote control.
Problem: Image is displayed partially, incorrectly, or in rolling mode
Press [Auto Set] on the remote control.
Adjust the display settings of the computer. Ensure that the resolution is set to less than or equal to 1600x1200 pixels. View the operating system help file.
Problem: Image is blurred
Adjust the focus of the projector.
Adjust the projection distance appropriately.
▶ Check whether the projection window is free from dust.
Troubleshooting
Ensure that there is no condensation in the projection window. For example, if the projector is moved from a cool environment to a warmer environment, there might be condensation on the projection lens or projection window. If this happens, wait until the condensation disappears before turning on the projector.
Problem: Image is not bright enough
▶ Check whether the contrast or brightness is appropriate.
▶ Check whether an appropriate image mode is specified.
Check whether the image source power is appropriate.
▶ Ensure that the projection screen is within the required projection range.
Problem: Image is deformed or disappears
Press the [Aspect] button on the remote control, or on the OSD menu, choose [Image Adjustment] > [Image Mode], and specify an appropriate display aspect ratio.
Problem: Projected image is too small or too big
Check if the projector is placed perpendicular to the screen.
Adjust the distance between the projector and the projection screen.
Press the [Aspect] button on the remote control, or on the OSD menu, choose [Display Settings] > [Aspect], and specify an appropriate display aspect ratio.
Problem: Projected image rotated upside down.
Press the [Menu] button on the control or on the remote control, then choose [Display Settings] > [Projection].
Troubleshooting
Problem: Indicators lights up or blinks
 The time marked in the preceding table is an Indicators blinking interval.Blink*1 Repetition to light on for 1.5 seconds / off for 1.5 seconds.Blink*2 Repetition to light on for 1.5 seconds / off for 7.5 seconds.Blink*3 Repetition to light on for 2.5 seconds / off for 0.5 seconds.Blink*4 Repetition to light on for 0.5 seconds / off for 0.5 seconds. The time marked in the preceding table is an Indicators blinking interval.Blink*1 Repetition to light on for 1.5 seconds / off for 1.5 seconds.Blink*2 Repetition to light on for 1.5 seconds / off for 7.5 seconds.Blink*3 Repetition to light on for 2.5 seconds / off for 0.5 seconds.Blink*4 Repetition to light on for 0.5 seconds / off for 0.5 seconds. | Projector status | NO. | Details | Indicators | Content (condition, sequence, check item, etc.) | ||
| POWER | STATUS 1 | STATUS 2 | |||||
| Normal | 1 | OFF | AC is not connected to the projector state | ||||
| 2 | Standby (ECO) | Normal Standy | |||||
| 3 | Standy(Sleep) | Sleep Standby | |||||
| 4 | Laser ON (ECO ON) | Laser ON (Laser power ECO1/ECO2) | |||||
| 5 | Laser ON (ECO OFF) | Laser ON(Laser power Normal) | |||||
| 6 | Warm Up | Warm Up | |||||
| 7 | Keylock | A button has been pressed while the KEY LOCK is activated. | |||||
| Warning | 8 | Laser Timer Waring | Laser replacement grace period. | ||||
| Abnormal | 9 | Laser Timer Error | Laser replacement time exceeded. | ||||
| 10 | Laser Retry | Preparing to relight laser after lighting has failed. | |||||
| 11 | Laser Low Current error | When LD-Driver current value is too low | |||||
| 12 | LD Driver SPI Comm error | When LD-Driver SPI communication error | |||||
Troubleshooting
| Abnormal | 13 | LD Driver status error | [5A2B] (B [2340] *4) (B [2340] *4) | [2XAA][KARK][23D5] | [TD05][DSH7](B [W604] | When LD driver is in standby state |
| 14 | LD Driver voltage error |  [SD4C](B [ASZT] *4) [SD4C](B [ASZT] *4) |  [BH23](A03K) [BH23](A03K) | [SC50] | When LD-Driver 13V or 55V error | |
| 15 | LD Driver current output error |   (Blink*4) (Blink*4) |   (HDY3) (HDY3) | [H62] (DYCX) (DYCX) | When LD-Driver output current is abnormal | |
| 16 | LD-status ready error |  [SDCK](B [0740] *4) [SDCK](B [0740] *4) |   (3075) (3075) | [SD2C][XST4](57AB) | When LD driver is not ready | |
| 17 | Laser Error (other) | [DC08][2420](B  *4) *4) |  [KHO3](2HY5) [KHO3](2HY5) |  [SKKW](57HK) [SKKW](57HK) | when LD Driver error | |
| 18 | Temp Error | [27WY] (B [Y46C] *4) (B [Y46C] *4) |   |   | When Temperature status is error | |
| 19 | Fan1 Error Red | [SCK4][4205](Light) | [20D8][K00C](D6ZC) |  | When Fan-1 status is error | |
| 20 | Fan2 Error Red | [W350](Light)[CD85] |   (OYW0) (OYW0) |  | When Fan-2 status is error | |
| 21 | Fan3 Error Red |  [264K](Light)[720K] [264K](Light)[720K] |  [ZST8] [ZST8] | [272T] (84G3) (84G3) | When Fan-3 status is error | |
| 22 | Fan4 Error Red |  (I (I  t) t) |  [206A](HCHX)(DSCW) [206A](HCHX)(DSCW) | [68BX] | When Fan-4 status is error | |
| 23 | Fan5 Error Red | [804Z](I [IGHK] t) | [227S][227S] |   (H4KZ) (H4KZ) | When Fan-5 status is error | |
| 24 | Fan6 Error Red | [00ZX](I  t) t) |   (A73S) (A73S) |  | When Fan-6 status is error | |
| 25 | Power Error Red | [YST4] (Light) (Light) |   (THK2) (THK2) | [3KSS] | When power status is error | |
| Normal | 26 | Cooling | [C502][K682](B [5Y4B] *4) | [H6W6] | [DTWO] | The PJ enter cooling status |
Troubleshooting
| Normal | 27 | Light Off mode Green (Light) | [7864] | [0019] | [0003] | Power Save Standy |
| Abnormal | 28 | Color wheel Error | Red (Blink*4) | Red (Blink*4) |  | When phosphor wheel status is error |
| Warning | 29 | Filter Waring Red | [I 00178] | [8K77] | [0075] | Filter over time Waring |
Replacing the filter
Before Maintenance
Before maintaining or replacing a component, ensure that the power is turned off. For details, see the section of "Turn off the projector".
Clean casing of your projector
Gently wipe the casing with clean and soft cloth dampened with small amount of neutral detergent to remove heavy dirt. Do not over apply cleaner to the casing. Abrasive cleaner, solution, or other rough chemical may scratch the casing surface.
Place your projector in proper container after use to protect it from dirt and dust and being scratched.
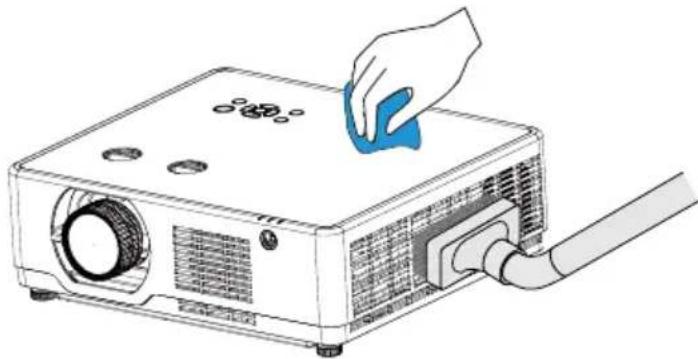
natural_image
Line drawing of a projector with a hand cleaning the top panel (no text or symbols)Clean the projection window
Wipe the lens with clean cloth dampened with non-abrasive camera lens cleaner or clean it with lens cleaning paper or air blower.
Do not over apply cleaner to the lens. Abrasive cleaner, solution, or other rough chemical may scratch the lens.
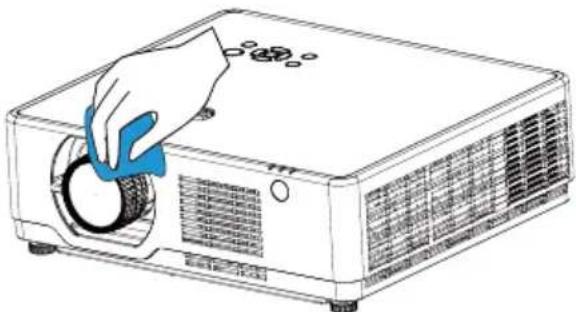
natural_image
Line drawing of a projector with a hand cleaning the screen (no text or symbols)Replacing the filter
Filter Cleaning and Replacement
Note
When installing the filter, Install the rib on the filter is upward and outside of the projector.
In the following cases, maintain the filter and reset the number of hours the filter is used:
- When the filter hours used reaches the filter timer value;
- When the indicator shows filter warning (See page 64) or filter warning message is displayed at power on (See page 84).
Cleaning the filter
- Turn off the projector and unplug the AC power supply from the power socket.
- Push button to release the filter cover and pull it out.
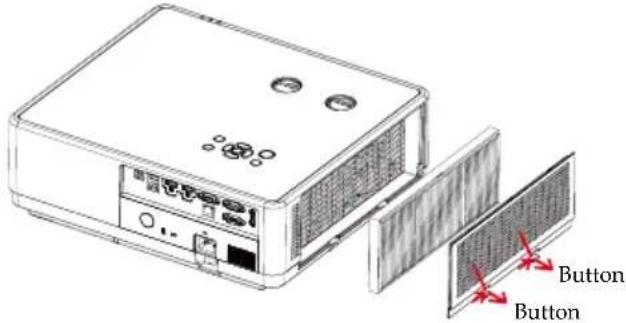
Note
Whenever you dust the filter, use the soft brush attachment to dust. This is to avoid damage to the filter.
Do not wash the filter with water. Doing so can result in filter clogging.
- Remove the filter.
- Remove the filter from the filter cover.
- Remove dust from the filter and the filter cover.
- Clean both outside and inside.
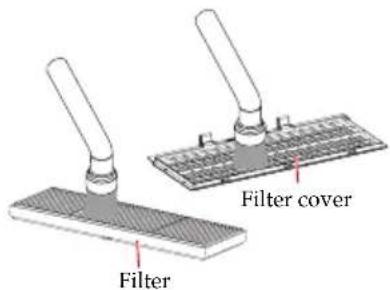
Replacing the filter
Replacing the filter
- Attach the filter to the projector.

When installing the filter, please make sure that the catch of the filter is facing outwards, otherwise the installation is reversed.
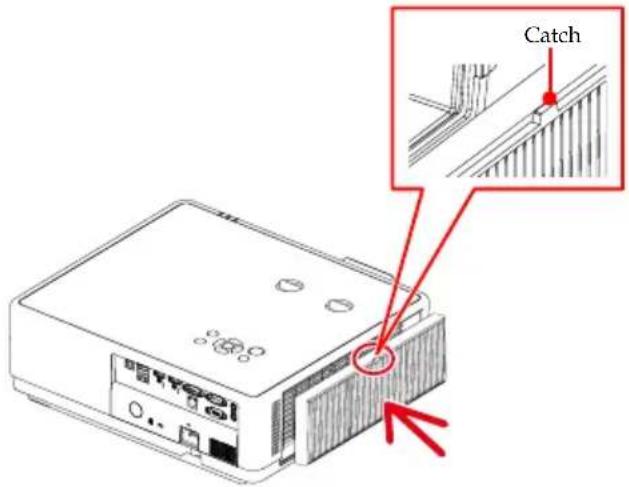
- Put the filter cover back to the projector cabinet.
Insert the three catches of the tip of the filter cover into the groove of the cabinet, and then push the A button to close the filter cover.
- Push the filter cover until it clicks into place.
After installing the filter cover to the cabinet, please press the left and right ends (B) of the filter cover manually to ensure that it is fully installed.
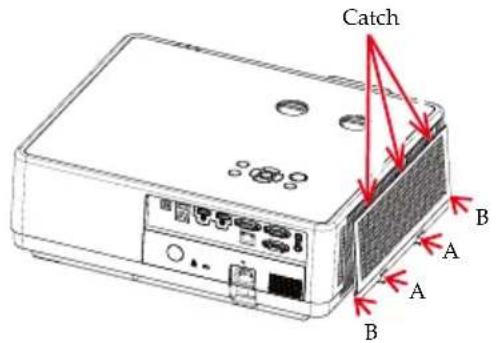
Reset the Filter timer
Plug the power cord into the wall outlet, and then turn on the projector.
From the menu, select [Options] → [Filter Settings] → [Reset Filter Timer]. (→ page 64)
The interval time to clean the filter is set to [1000H] at time of shipment. When using the projector as it is, you do not clear the filter usage.
List of Compatible Signals
| A. RGB Signal | |||||
| (1) Computer Input | |||||
| Mode Resolution | V frequency (Hz) | H frequency (kHz) | Clock (MHz) | Note | |
| VGA | 640x480 60 31.5 | 25.2 | |||
| 640x480 67 35 | 26.8 | ||||
| 640x480 72 37.9 | 31.5 | ||||
| 640x480 75 37.5 | 31.5 | ||||
| 640x480 85 43.3 36 | |||||
| SVGA | 800x600 56 35.1 | 36 | |||
| 800x600 60 37.9 | 40 | ||||
| 800x600 72 48.1 | 50 | ||||
| 800x600 75 46.9 | 49.5 | ||||
| 800x600 85 53.7 | 56.3 | ||||
| Mac | 832x624 | 75 49.1 57.3 | |||
| XGA | 1024x768 | 60 48.4 | 65 | ||
| 1024x768 | 70 56.5 | 75 | |||
| 1024x768 | 75 60 | 78.8 | |||
| 1024x768 | 85 68.7 94.5 | ||||
| MAC | 1152x864 75 67.5 108 | ||||
| SXGA | 1280x1024 60 64 108 | ||||
| 1280x1024 72 77 133 | |||||
| 1280x1024 75 80 135 | |||||
| QVGA | 1280x960 60 60 101.3 | ||||
| SXGA+ | 1400x1050 60 65.3 121.8 | ||||
| UXGA | 1600x1200 60 75 162 | ||||
| 1920x1080 60 67.5 148.5 | |||||
| WUXGA | 1920x1200 60 74 154 | ||||
| (2) Extended Wide Timing | |||||
| WXGA | 1280x720 60 44.8 | 74.2 | |||
| 1280x800 60 49.6 | 83.5 | ||||
| 1366x768 60 47.7 | 84.8 | ||||
| 1440x900 60 59.9 | 106.5 | ||||
| WSXGA+ | 1680x1050 60 65.3 | 146.3 | |||
| B. HDMI Input | |||||
| (1) Computer input signal | |||||
| Mode Resolution | V frequency (Hz) | H frequency (kHz) | Clock (MHz) | Note | |
| VGA | 640 x 480 60 | 31.5 | 25.2 | ||
| 640 x 480 67 | 35 | 26.8 | |||
| 640 x 480 72 | 37.9 | 31.5 | |||
| 640 x 480 75 | 37.5 | 31.5 | |||
| 640 x 480 | 85 43.3 36 | ||||
| SVGA | 800 x 600 56 | 35.1 | 36 | ||
| 800 x 600 60 | 37.9 | 40 | |||
| 800 x 600 72 | 48.1 | 50 | |||
| 800 x 600 75 | 46.9 | 49.5 | |||
| 800 x 600 85 | 53.7 | 56.3 | |||
| MAC | 832 x 624 | 75 49.1 57.3 | |||
| XGA | 1024 x 768 60 | 48.4 | 65 | ||
| 1024 x 768 70 | 56.5 | 75 | |||
| 1024 x 768 75 | 60 | 78.8 | |||
| 1024 x 768 85 | 68.7 94.5 | ||||
| MAC | 1152 x 864 | 75 67.5 108 | |||
| SXGA | 1280 x 1024 60 | 64 | 108 | ||
| 1280 x 1024 72 | 77 | 133 | |||
| 1280 x 1024 75 | 80 | 135 | |||
| QVGA 1280 x 960 60 60 101.3 | |||||
| SXGA+ 1400 x 1050 60 65.3 | 121.8 | ||||
| UXGA | 1600 x 1200 60 | 75 162 | |||
| 1920 x 1080 60 | 67.5 148.5 | ||||
| WUXGA | 1920x1200 (RB) | 60 74 154 | |||
| 4K | 3840x2160 30 | 67.5 297 | |||
| (2) Extended Wide Timing | |||||
| WXGA | 1280x720 | 60 44.8 74.2 | |||
| 1280x800 | 60 49.6 83.5 | ||||
| 1366x768 | 60 47.7 84.8 | ||||
| 1440x900 | 60 59.9 106.5 | ||||
| WSXGA+ 1680x1050 | 60 65.3 146.3 | ||||
Appendices
| (3) Component Signal | |||||
| 480i 1440x480 | 59.94 15.7 | 13.5 | |||
| 576i 1440x576 | 50 15.6 | 13.5 | |||
| 480p 720x480 | 59.94 31.5 | 27 | |||
| 576p 720x576 | 50 31.3 | 27 | |||
| 720p | 1280x720 | 60 45 74 | 25 | ||
| 1280x720 | 50 37.5 | 74.25 | |||
| 1080i | 1920x1080 | 60 33.8 | 74.25 | ||
| 1920x1080 | 50 28.1 | 74.25 | |||
| 1080p | 1920x1080 | 23.98/24 27 | 74.25 | ||
| 1920x1080 | 60 67.5 | 148.5 | |||
| 1920x1080 | 50 56.3 | 148.5 | |||
| C. Memory Viewer | |||||
| Description | |||||
| Display Resolution | 1920X1200 | ||||
| Format jpeg | |||||
| Maximum Image Size | pixel 10000 x 10000 | ||||
| MB 2048MB | |||||
Configurations of Terminals
| MONITOR OUT terminal RGB (D-sub 15) | ||||
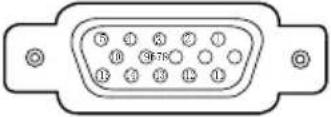 | 1 | Red (Output) | 9 | ---- |
| 2 | Green (Output) | 10 | Grounding (field synchronizing) | |
| 3 | Blue ((Output) | 11 | Grounding | |
| 4 | ---- | 12 | DDC data | |
| 5 | Grounding (line synchronizing) | 13 | Horizontal synchronizing(compound sync.) output | |
| 6 | Grounding (red) | 14 | Vertical synchronizing output | |
| 7 | Grounding (green) | 15 | DDC Clock | |
| 8 | Grounding (blue) | |||
| PC Control Terminal (D-SUB-9) | ||||
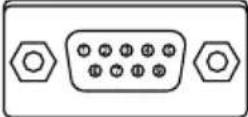 | 1 | ---- | 6 | ---- |
| 2 | RXD | 7 | ---- | |
| 3 | TXD | 8 | ---- | |
| 4 | ---- | 9 | ---- | |
| 5 | GND | |||
| LAN terminal | ||||
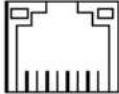 87654321 87654321 | 1 | TX + | 5 | ---- |
| 2 | TX - | 6 | RX - | |
| 3 | RX + | 7 | ---- | |
| 4 | ---- | 8 | ---- | |
| HDMI terminal (HDMI Type A 19) | ||||
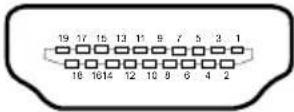 | 1 | TMDS Data2+ 11 TMDS Clock Shield | ||
| 2 | TMDS Date2 Shield 12 TMDS Clock- | |||
| 3 | TMDS Date2- 13 CEC | |||
| 4 | TMDS Date1+ | 14 | Reserved(N.C. on device) | |
| 5 | TMDS Datel Shield 15 SCL | |||
| 6 | TMDS Datel- 16 SDA | |||
| 7 | TMDS Date0+ 17 DDC/CEC Ground | |||
| 8 | TMDS Date0 Shield 18 +5V Power | |||
| 9 | TMDS Date0- 19 Hot Plug Detect | |||
| 10 | TMDS Clock+ | |||
Appendices
| Computer In terminal | ||||
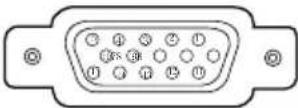 | 1 | Red/S-C input 9 | VCC | |
| 2 | Green input 10 Grounding(field synchronizing) | ronizing) | ||
| 3 | B input 11 Grounding | |||
| 4 | ---- | 12 | DDC data | |
| 5 | Grounding(line synchronizing) 13 | Horizontal synchronizing(compound sync.)input | ||
| 6 | Grounding(red) 14 Vertical synchronizing | input | ||
| 7 | Grounding(green) 15 DDC clock | |||
| 8 | Grounding(blue) | |||
| USB-A terminal | ||||
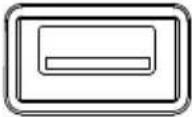 | 1 VBUS 5 ---- | |||
| 2 D+ | 6 ---- | |||
| 3 D+ | 7 ---- | |||
| 4 GND 8 ---- | ||||
| USB-B terminal | ||||
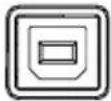 | 1 VBUS | 6 | ---- | |
| 2 | D- | 7 | ---- | |
| 3 D+ | 8 | ---- | ||
| 4 | ID | 9 | ---- | |
| 5 GND | 10 | ---- | ||
Specifications
■ List of general Specifications
| Item RICOH IJJ WUL6760 series | |
| Optical | |
| LCD system 3x0.64" | |
| Display Resolution | 1920x1200 |
| Light source life Norma: 20,000h, ECO1/ECO2: 30,000h | |
| Projection lens | RICOH Lens |
| F | 1.5~2.08 |
| f | 17.2~27.7mm |
| Throw Ratio | 1.2 (wide)-2.0 (tele) |
| Zoom Ratio 1.6 | |
| Zoom | Manual |
| Focus | Manual |
| Lens shift | H: ±29%V: +60%~-0% |
| Throw Distance(m) | 0.765m~7.964m (Wide)1.258m~12.885m (Tele) |
| Image Size(inch) 30"~300" | |
| Electrical | |
| Terminal Interface | Computer InMonitor OutAudio OutAudio InLANPC ControlHDMI 1 InHDMI 2 InUSB-BUSB-AHDBaseT(*) |
| Speaker | 1×16 W (monaural) |
| Power consumption | Normal: 315W(100V)/312W(110V)/305W(220V)/305W(240V)ECO1: 207W(100V)/206W(110V)/202W(220V)/202W(240V)ECO2: 182W(100V)/181W(110V)/178W(220V)/178W(240V)Maximum: ≤360WStandby: ≤0.5WNetwork Standby: ≤2W |
| Rating Current(A) 3.6A-1.6A (100-240V~ 50/60Hz) | |
| Noise | Normal: Typ 37dB(A)ECO 1/ECO 2: Typ 27dB(A) |
| Mechanical | |
Appendices
| Keystone | H: ±30°V: ±30° |
| Adjust feet | Max 3.5° |
| Dimensions(WxDxH) | 405 mm (W)×358mm (D)×137 mm(H) (Not including feet) |
| Net. Weight (KG) | Approx. 7.9kg |
| Gross. Weight (KG) | Approx. 10.4kg |
| Environment | Operating temperature: 5°C~40°C (0-1400m Altitude)/ 5°C~30°C (1400-3000m Altitude)Operating Humidity: 20~80%RH (non-condensing)Storage temperature: -10°C~50°CStorage Humidity: 10~85%RH (non-condensing) |
Note
- This model complies with the above specifications.
- Designs and specifications are subject to change without notice.
- This model may not be compatible with features and/or specifications that may be added in the future.
■ Separately sold product
Replacement Air Filter Type 15.
External Dimensions
Tapped holes used for ceiling installation.
Screw: M4
Depth: 8mm
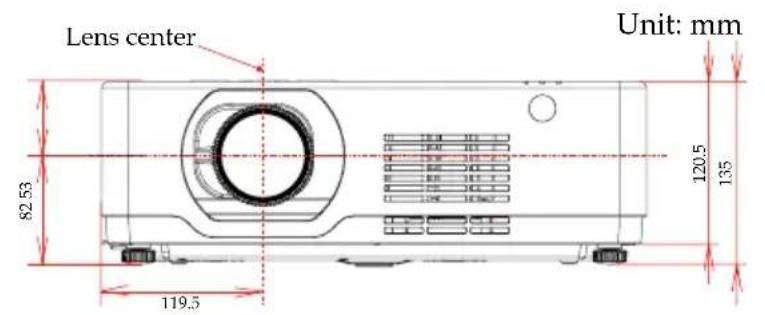
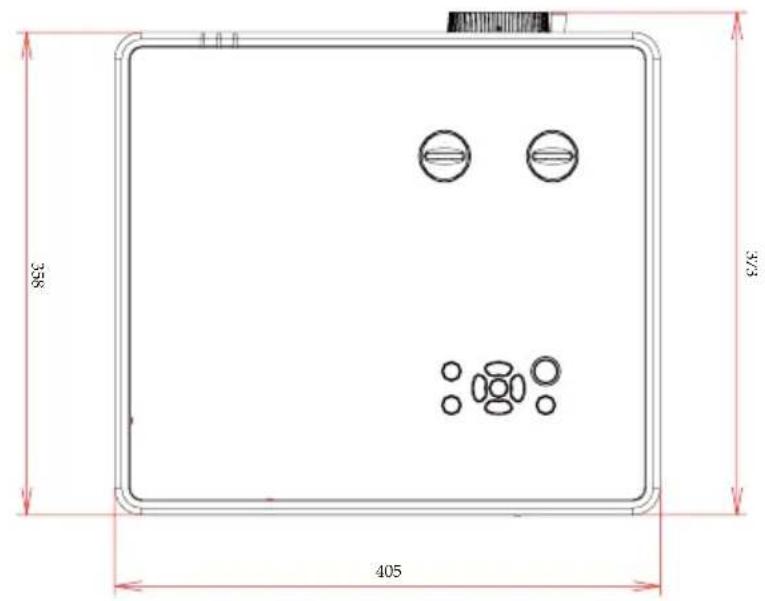
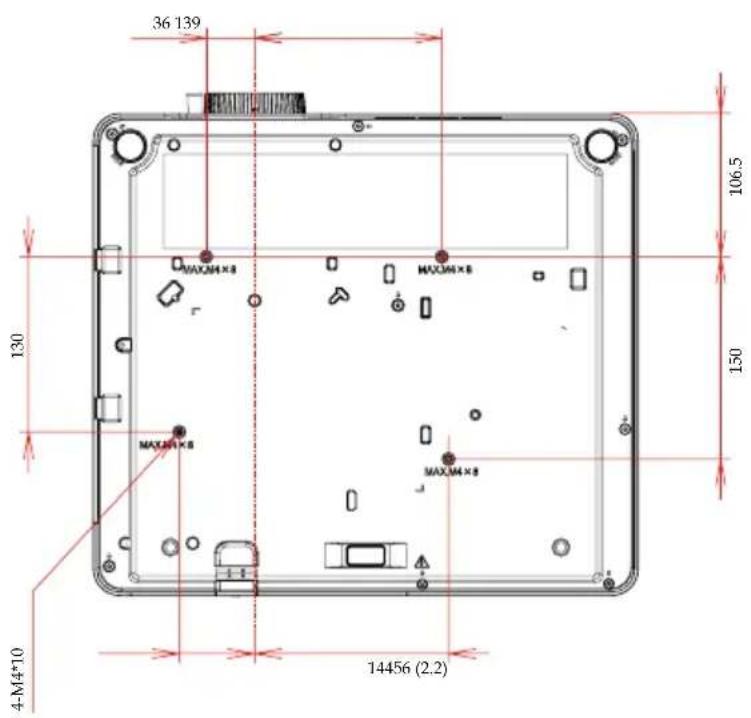
Trademarks
- Microsoft, Windows, Windows Vista, Internet Explorer and PowerPoint are either a registered trademark or trademark of Microsoft Corporation in the United States and/or other countries.
- HDMI, the HDMI Logo and High-Definition Multimedia Interface are trademarks or registered trademarks of HDMI Licensing Administrator, Inc.
- Kensington is a trademark or registered trademark of ACCO Brands.
- Blu-ray is a trademark of Blu-ray Association.
- Other product and company names mentioned in this user's manual may be the trademarks or registered trademarks of their respective holders.
- Trademark PJLink is a trademark applied for trademark rights in Japan, the United States of America and other countries and areas.


- Table of Contents
- Table of Contents....1
- Usage Notice....3
- Introduction....24
- Basic Operations....35
- User Settings......47
- LAN Control 71
- Troubleshooting....80
- Cleaning the case & lens....85
- Appendices 88
- Precautions
- Usage Notice
- Remote Control Battery
- Warning
- Notes
- Important:
- Laser safety caution
- Laser Notice
- Light Module
- Safety Labels of This Machine
- WARNING VORSICHT AVERTISSEMENT AVVERTIMENTO ADVERTENCIA AVISO 警告
- Regulation & Safety Notices
- Notice: Users in the United States of America FCC notice
- Notice: Shielded cables
- Caution
- Notes to Users in the State of California
- Notes to Users in Canada
- Declaration of Conformity for EU countries
- Notice: Users in EU countries CE Marking Traceability Information (For EU Countries Only)
- Notice: Users in UK UKCA Marking Traceability Information (For UK Only)
- User Information on Electrical and Electronic Equipment
- Notice: Users in Turkey
- Notice: Users in the EU and the UK Note for the Battery and/or Accumulator Symbol
- COMMISION REGULATION (EU) 2019/2020
- Air ventilation
- Place your projector correctly
- Power Switch Symbols
- Other Information
- Copyrights to Images
- Copyrights
- CAUTION:
- Introduction
- Package Overview
- Product Overview
- Connection Ports
- Control Panel and Indicators
- Remote Control
- Installation of Remote Control Batteries
- For safe operation, note the following precautions:
- Remote Control Operating Range
- Angle sensor
- Installing the Projector
- Basic Operations
- Connecting a USB Device
- Powering On/Off the Projector
- Powering on the Projector
- Note
- Power off the projector
- Input Source Signal Selection
- Computer
- HDMI1
- HDMI 2
- Memory Viewer
- HDBaseT
- Adjust the Projector Zoom function
- Adjust the Projector Focus function
- Adjust the Projector Lens shift function
- Adjust the projected image
- Adjust the position of the projected image
- Adjust the screen size
- On Screen Display (OSD)
- How to operate the OSD
- User Settings
- Image adjustment
- Picture Mode
- Brightness
- Contrast
- Saturation
- Color temp & wall color
- Advanced
- Display Setting
- Aspect
- Phase
- Frequency
- Position (Horizontal Position)
- Position (Vertical Position)
- Keystone
- --- Y offset
- Projection
- Default settings
- Language
- Auto Power Off (min)
- Auto Power Off mode
- Cooling Time
- Security
- Network Settings
- Network Function
- Reset all
- Audio
- Mute
- Volume
- HDMI Audio Input
- Options
- Auto Source
- Input Source
- Laser settings
- Filter Settings
- High Altitude Mode
- Power Settings
- Information
- USB Memory
- Slide show
- Display Interval
- Sort Order
- Rotate
- Repeat
- Apply
- Viewing via USB Memory
- Displaying the Memory Viewer Screen
- please press RC ENTER
- Memory Viewer setting
- OSD menu operation
- Unplug the USB memory
- Controlling this Device with Web Browser
- Connecting to the device
- Confirmation of the IP address of the device
- Connection
- LAN Control
- Access from the Web Browser
- Login
- System Status
- General Setup
- Picture Setup
- Image Setup
- Network Setup
- Control the Projector via the Projector Management Utility
- Installing Projector Management Utility
- Control the projector with the projector Management Utility
- [Power] button
- [Input] button
- Detail Information] button
- Troubleshooting
- Problem: Image cannot be displayed
- Problem: Image is displayed partially, incorrectly, or in rolling mode
- Problem: Image is blurred
- Problem: Image is not bright enough
- Problem: Image is deformed or disappears
- Problem: Projected image is too small or too big
- Problem: Projected image rotated upside down.
- Replacing the filter
- Before Maintenance
- Clean casing of your projector
- Clean the projection window
- Filter Cleaning and Replacement
- Cleaning the filter
- Reset the Filter timer
- Appendices
- Specifications
- ■ Separately sold product
- External Dimensions
- Trademarks
Brand : RICOH
Model : PJ WUL6670
Category : Projector