
TelePAD 10A3 4G - Tablet XORO - Free user manual and instructions
Find the device manual for free TelePAD 10A3 4G XORO in PDF.


| Product Type | Tablet |
| Brand | Xoro |
| Model | TelePAD 10A3 4G |
| Display Size | 10.1 inches |
| Display Resolution | 1280 x 800 pixels |
| Processor | Quad-core 1.3 GHz |
| RAM | 2 GB |
| Internal Storage | 16 GB |
| Expandable Storage | microSD, up to 32 GB |
| Operating System | Android 10 |
| Connectivity | Wi-Fi 802.11 b/g/n, Bluetooth 4.2, 4G LTE |
| SIM Card | Nano-SIM |
| Rear Camera | 5 MP |
| Front Camera | 2 MP |
| Battery Capacity | 4000 mAh |
| Dimensions (W x H x D) | 240 x 160 x 9 mm |
| Weight | 500 g |
| Power Supply | AC adapter 5V/1A |
| Main Functions | Multimedia playback, internet browsing, app installation, GPS |
| Cleaning | Wipe with a soft, dry cloth |
| Safety Precautions | Keep away from water and heat; do not attempt to disassemble |
| Spare Parts | Contact authorized service center |
| Repairability | Repairs should be performed by qualified personnel |
| General Information | User manual included in package |
Frequently Asked Questions - TelePAD 10A3 4G XORO
User questions about TelePAD 10A3 4G XORO
0 question about this device. Answer the ones you know or ask your own.
Ask a new question about this device
Download the instructions for your Tablet in PDF format for free! Find your manual TelePAD 10A3 4G - XORO and take your electronic device back in hand. On this page are published all the documents necessary for the use of your device. TelePAD 10A3 4G by XORO.
USER MANUAL TelePAD 10A3 4G XORO
FREE TO CHOOSE INNOVATIONS
XORO®
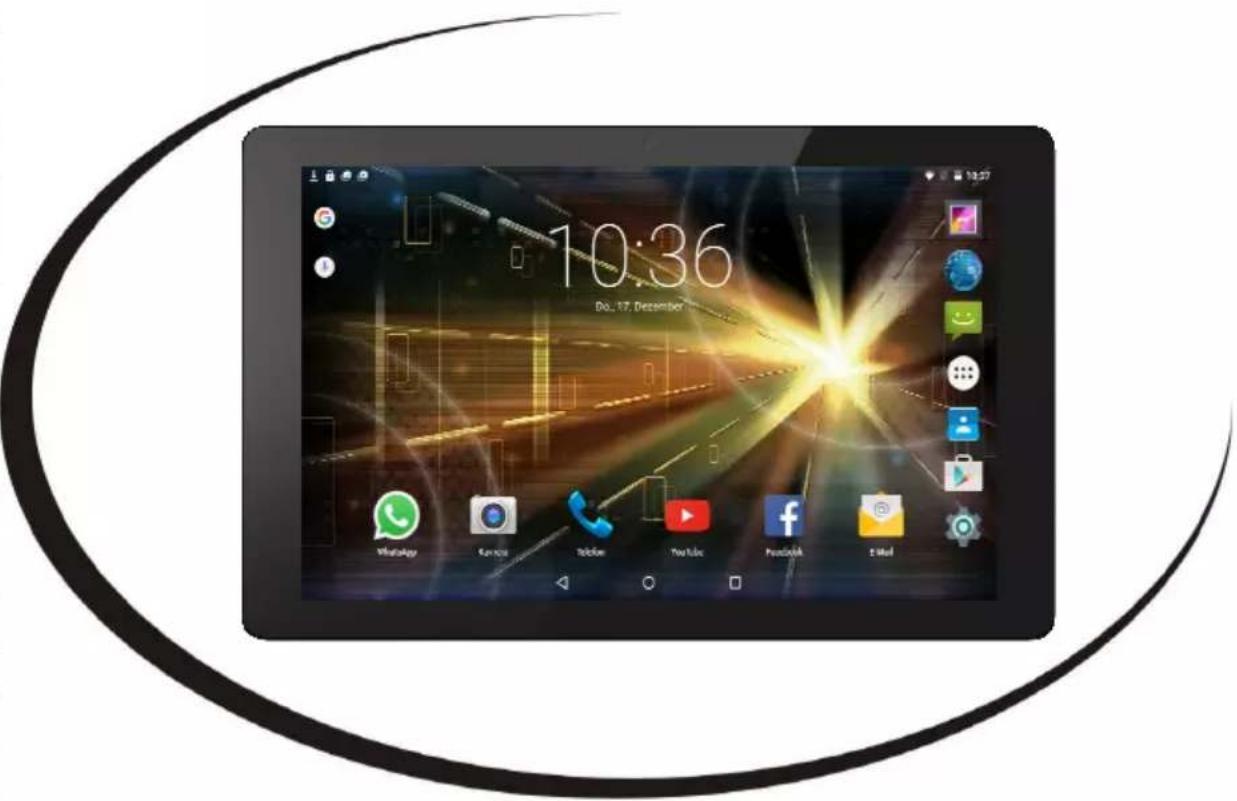
TelePAD 10A3 4G
Speicher, Akku, Apps....20
natural_image
Close-up of a computer monitor with two ports and two icons below (no readable text or symbols)
Hinweise:
Auto-start management
Allow or deny app auto-start during system bootup
App permissions
Manage app permissions for security and privacy protection

Data Protection
Protect your data from unwanted access
natural_image
Outdoor view of a curved stone bridge over a canal with people walking nearby (no visible text or symbols)natural_image
Stylized line drawing of a ram's head with horns and beard (no text or symbols)Source Code
FREE TO CHOOSE INNOVATIONS
XORO®
TelePAD 10A3 4G

Electronic Security, Usage 4
First Steps
Package contents, Power on / off / standby 5
Device....6
Power supply, USB, Memory Cards 7
Definition, SIM Cards 8
Desktop....9
Virtual Keyboard, Toolbar / Statusbar 10
Toolbar / Statusbar, Manage contacts 11
Send & Receive Calls 12
Send & Receive Short Messages 13
Connect with computer, Lockscreen 14
Camera 15
System Settings
SIM Management, Wireless LAN.... 16
Bluetooth, Data Usage 17
Audio Profiles, Display 18
Storage, Apps 19
Location access, Security, Language & Keyboard 20
Backup & Factory Reset, Date & Time 21
Accessibility, Developer Options 22
Applications
GooglePlay Store, installation / uninstallation applications 23
Music Playback, Picture Playback 24
Movie Playback, installed applications.... 25
File Manager, Navigation, Voice commands.... 26
Troubleshooting.... 27
Warranty & Recycling Information....28
Licenses & Disclaimer 29
Electronic Security

The lightning flash with an arrowhead symbol within an equilateral triangle is intended to alert the user of the presence of un-insulated "dangerous voltage" within the product's enclosure that may be of sufficient magnitude to constitute a risk of electric shock to persons.
The exclamation point within an equilateral triangle is intended to alert the user of the presence of important operating and maintenance (servicing) instructions in the literature accompanying the appliance. This device complies with Part 15 of the FCC Rules. The FCC Rules are developed to avoid or reduce the interference of electrical devices at home. This device may cause radio wave. If it is not installed as instructed, it may cause. interference to radio or TV, especially at the moment of switching on and off.
User's Manual
- All the safety precautions and the operating instructions should be followed
- The safety and operating instructions should be retained for future reference.
Power supply
- Never touch the device with wet hands.
- This device works only with the storm voltage marked on the rear panel.
- Keep the appliance away from rain and moisture.
• If you want to pull the plug out of the plug socket, always pull directly on the plug. Never pull on the cable as it could tear. - Make sure that the power cable is not bent, caught or run over and that it does not come into contact with heat sources.
- Make sure that the power cable is not wound around the device while in operation.
- Never place the machine on the power cable while it is being operated.
- Only use extension cables that are designed for the power consumption level of the machine.
- Only operate the machine if the electrical voltage stated on the type plate beneath the machine agrees with the voltage on your plug socket. The wrong voltage can destroy the machine.
- Do not open the appliance.
- Pull out the mains plug if the appliance is not to be used over a longer period of time.
• Take care that nobody can trip over the power supply cable.
Position
- Do not connect accessories on the box which are not defined by the manufacturer.
- Do not place this product on an unstable cart, stand, tripod, bracket, or table. The product may fall, causing serious injury to a child or adult, and serious damage to the product. Use only with a cart, stand, tripod, bracket, or table recommended by the manufacturer, or sold with the product. Any mounting of the product should follow the manufacturer's instructions, and should use a mounting accessory recommended by the manufacturer.
- A product and cart combination should be moved with care. Quick stops, excessive force, and uneven surfaces may cause the product and cart combination to overturn.
Safety Information
- The device is able to show a still image on the TV screen or monitor over an unlimited period of time. This can cause damage to the screen. It is therefore advisable to activate the screen saver. Or switch the player off, if the device is not in use.
- Do not uses the device permanent in the 4:3 mode. This can cause damage to the TV screen.
- Do not increase the volume when the box is just playing very quiet sections. This cold damage the speaker if very loud passages starts all of a sudden after the quiet section.
- Switch the box off by the Off/On switch if it is not going to used for a longer period of time. Please unplug the power cable from the wall outlet.
- Disconnect the main plug during thunderstorms.
- Slots and openings in the cabinet are provided for ventilation and to ensure reliable operation of the product and to protect it from overheating, and these openings must not be blocked or covered.
- The openings should never be blocked by placing the product on a bed, sofa, rug, or other similar surface.
- This product should not be placed in a built-in installation such as a bookcase or rack unless proper ventilation is provided or the manufacturer's instructions have been adhered to.
- Protect the device against weather influences, moistures and high temperature.
- Never spill liquid of any kind on the product.
- Do not expose the device and the remote control to direct sunlight.
Usage
- Playback of supported video, picture and music files
• Installing and running the supported applications - Connecting to a network via WLAN, Bluetooth, 3G/4G
- Connection from compatible storage devices and USB HID devices
- Use phone features
Use GPS applications
- The unit is designed exclusively for use in private households
MicroUSB
- The USB ports on this device are not used to charge devices with an integrated battery (mobile phones, tablet computers, MP3 players, etc.)
- Notice., The specifications on the type plate with respect to the maximum power output of the USB ports
MicroSD Cardreader
• SD cards are supported up to a size of 2 GB
• SDHC cards are supported up to a size of 32 GB
Notes:
Unfortunately, there are a variety of different SD card on the market, so that a compatibility of all the storage media can not always be guaranteed.
Package Contents
The following components are supplied with the Xoro TelePAD:
• Xoro TelePAD 10A3 4G
- Charger
• USB 2.0 Cable, OTG Cable
- User manual
- Protective bag, Earphone
If any of these items are missing, please contact your dealer as soon as possible. Keep the original packaging in the event that the unit needs to be returned to the dealer.
Turn on / off, StandBy
In device turned off, press and hold the power button (1) for a few seconds. The system is started as soon as the Xoro logo or Android operating system logo appears on the display.
In operation, press the power button briefly to turn the unit into the standby mode or the operating mode to enable.
In operation, press and hold the power button for a few seconds until the window to shut down appears. Confirm the operation by pressing the OK button on the screen. Also it is possible to put the device in airplane mode, Silent or Vibrate mode.
Device of TelePAD 10A3 4G

1 Power button
2 Volume + button
3 Volume - button
4 Rear Camera
5
6 USB/OTG/Charing
7 MicroSD & SIM card cover
8 Earphone jack
9
10
11 Speaker
Power supply / charging the device
The device can also charge the battery from a USB 2.0 port of a connected computer. Alternatively use the supplied power adapter to charge your Xoro TelePAD 10A3 4G. Please read the information on the nameplate of the power supply.
Notes:
• The charger delivers a stabilized DC voltage of 5V. Operation with non-stabilized voltage can damage the instrument. Only use the supplied power supply, safe operation and compliance with all regulations and standards is ensured.
- Charge the device if possible, prior to when the device prompts you to load the built-in battery. With regular charging cycles, you conserve the built-in battery and prolong its service life.
USB ports & Memory Cards
The device has a microUSB 2.0 port. This connector USB devices such as mass storage devices (USB sticks, hard drives, etc.) or USB input devices (mouse, keyboard, etc.) can be connected. The device also has a MicroSD memory card slot. The device supports memory cards with a capacity of up to 32GB FAT / FAT32 format.
Notes:
- It supports only the file systems FAT/FAT32. If a medium is formatted with a different file system, then this may not be recognized by the device.
- The USB ports on this device are not suitable for charging other devices with integrated battery (mobile phones, tablet computers, MP3 players, etc.). Notice the specifications on the type plate with respect to the maximum power output of the USB ports
- Unfortunately, there are a variety of different SD cards and USB 2.0 storage devices on the market, so that a fundamental compatibility of all storage media can not always be guaranteed.
Headphone
The device has on the top a headphone jack. For the use of a commercially available headphones with 3.5 mm jack is required.
Note:
The built-in speaker on the back is automatically turned off when using headphones.
Screen
The Xoro TelePAD 10A3 4G are equipped with position sensors. This recognizes the position in which the device is located and rotates the on-screen content in the correct position. In order to prevent the rotation of the screen contents, you can use this function in the system settings off. The built-in display is touch-sensitive (touch screen) and with the fingers (input via virtual keyboard (page 11), symbols or gesture control) or a suitable pen served.
Definition
The Xoro TelePAD is equipped with the Android operating system. The name derives from the Greek word "androide", which means as much as "human-like" and is increasingly being used as an operating system for mobile devices such as smartphones, netbooks and tablet pcs. Android was a Linux-based open source operating system developed by the Open Handset Alliance, which is composed of a variety of large companies, software developers and handset manufacturers and their main member is the company Google.
Android itself does not have its own support. In order to get support you log into the different Google Groups, use the internal support forum and the online documentation. However, there are many websites, forums and communities that deal specifically with the extensive functions of Android and the developer problems.
Because the operating system is very complex, only the basic features and key programs are explained in this manual.
That Xoro TelePAD 10A3 4G had a setup wizard that guides you quickly and safely after the first run through the most important system settings and the equipment set up to your liking.
Inserting the SIM card
To use your new XORO Telepad optimally, you should use the correct SIM card size. Here Micro- is between the minimum, distinguished. The SIM card is obtained when buying a new tariff in the desired size mostly for free.
For your XORO Telepad you need a mirco-SIM card.
To install your SIM card, proceed as follows:
Installation of your Mirco SIM card(s):

natural_image
Close-up of two electronic components with no visible text or symbolsSwitch off your Xoro Telepad completely before installing the SIM card.
Directly under the panel, the two SIM card slots. Follow the SIM card (s), as shown, until it stops, into the hole.
Desktop

The desktop consists of five freely configurable surfaces on which single program shortcuts or mini-applications (widgets) can be stored. By Swipe left or right to reach the next surface. Return to the default desktop you always by clicking on the icon

An overview of all programs stored on the system they can reach by clicking the icon 🙏 at the center bottom of the screen Each displayed in the program overview icons can be linked to the desktop by holding the desired icon down for long. The link is then placed on the desktop and can be located where desired. Alternatively, offer many programs to its own desktop application (widget). You can find the widget in the upper part of the program overview. By clicking on the desired widgets it is placed on the desktop.

To delete an icon or a widget from the desktop must be pressed the corresponding icon or widget long and drawn on appearing at the top of the image X. In the process, only the link is deleted, the associated application.

Virtual Keyboard
The Xoro TelePAD has a touch-sensitive display (touchscreen) and will operate with your fingers. For any text input virtual keyboard will therefore automatically appear.
Tap to write on the letter you want. Enter capital letters by first tapping the button ↑ , numbers and special characters by tapping the ?123 Icon. Corrections can be made by tapping on the icon ✗ .
If speech inputs are possible, you can simply announce text by tapping on the icon 🙏. The device then automatically recognizes the text and converts the spoken word into text characters.

Notes:
- Settings for the keyboard layout, language, spelling you will find in the system settings (page 21).
- To use the voice input a working Internet connection is required.
Toolbar / Statusbar

The TelePAD has in operation two fixed toolbars, a top and a bottom toolbar. The top toolbar displays in the normal state to the right of the battery status, signal strength of the wireless connection and, if necessary, when using the WiFi signal strength or the Bluetooth icon. On the left side icons of applications Messenger, USB connections ect.) appears.
The top toolbar can be enlarged to the desktop points to the left or right side by wiping from the top of the screen. In the menu that appears, thus one finds various shortcut icons. By tapping on the icons, for example, the wireless receiver, GPS receiver, or Bluetooth can receive de / activate.
On the left side it displays the current date and time and it can in notifications displayed (Received short messages, missed calls, ect.) be changed directly in the application.
Below the icons in the bottom toolbar and the Android operating system are explained:
Home Button

Turn back to Homescreen
Back Button

Moves back Operation
Menu Button

u of a application
Overview
Displays a list of all installed applications and widgets
Last Applications

Lists the applications previously used to
Manage contacts

TelePAD 10A3 4G
In the Contacts application, you can manage all your contacts on your phone, social network or messenger services and contact. You can reach the contacts application by pressing the Icon on the desktop or in the program summary.
You can search by pressing the icon in the top bar for contacts, create new contacts or edit existing contacts.
If you want to make a call, press the desired name and right on the telephone number displayed. To start a text message can be sent by pressing the icon ☐.
Press the icon ☐ to enter the setup menu of the application. Here you can import or export contacts to share contact information, edit or delete.
Note:
It is also possible to manage from the Contacts application, out calls or text messages from your third-party programs or call. Please use as a guide the documentation provided by the manufacturer of the application. Contacts which are placed on the SIM card adapt limited. In order to be able for example to add a contact photo, the contact must be copied to the device.
Send & receive calls
Press the icon 📞 to start the phone application. Now enter the main screen gives you an overview of frequently used contacts. By pressing the icon 📌 to display the dialpad. The icon KONTAK displays your entire contact list.
| 1SAT | 2ARS | 3DAY |
| 4SAT | 5JUL | 6MAY |
| 7RPMI | 8TUN | 9WED |
| 天 | 0 | 2 |
Advanced settings can be adjusted by pressing the icon ☐. Here you can create new contacts, as well as call forwarding, call barring ect. define in the call settings and configure.
A search for a contact, you start with the symbol 🔒 at the top of the phone main menu.

To start a call, enter the desired phone number using the numeric keys, type or select the desired contact from the phone book and press the icon 📞.
The call is now established. During the call, the following functions are available:
- w / hide numeric keypad - dsfree function - tophone disable / enable - d / continue conversation - lings (recording function, ect.)
For incoming calls to ring or vibrate, depending on the setting, the device and shows you, if sent with the calling telephone number or, if a contact is linked to the name of the caller.
To accept the call, press the icon 📞.
The call is terminated by pressing the red handset icon or automatically if the caller terminates the call on his part.
Notes:
- If the device is in airplane mode calls can not be sent or received.
• Video calls require internet connection and only work if the other person has a capable for this function terminal. - Not in any mobile network all the listed features of the device are available. Please inform yourself to the effect on your wireless service provider.
Send & receive Short Messages
The TelePAD10A3 4G 4G can SMS & MMS Send SMS messages. You can start the application by pressing the icon on the desktop or from the program summary. It is also possible directly from the contacts application to send out a text message (page 12). This has the advantage that it does not have to manually insert receiver.

If they have to start the application manually define the recipients. If you want to reply to a previously saved message, press the corresponding message or the contact. You can then directly continue the already saved conversation.

To select a new recipient, click on the icon. Now enter the name of the intended recipient in the upper field. Alternatively, you can use the icon for a selection from the contact list.
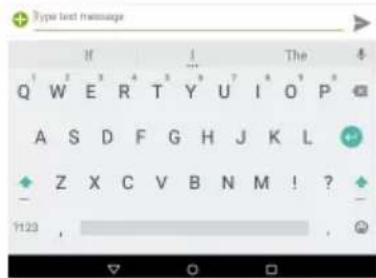
If the recipients selected, tap now at the bottom of the text box "Tape text message" so that the keyboard is displayed.
You can now write the text! By pressing the icon +, you can attach a variety of media to your message.
When your message is complete, press the icon ▶ to send.
Settings for conversation history or the text message application can be made in each window by pressing the icon .
Notes:
- The unit shall itself determine in which format (SMS, MMS) the text message must be sent. Normally, the device applies the required settings automatically from your mobile phone provider and it must be made no adjustments. In the settings of the short message application, the parameters can, if necessary, adjust manually.
- For the delivery of images, videos or smileys reception of MMS text messages must be configured on the device and an Internet connection to be set up!
- Please note that text messages are limited to 160 characters in length. The device can split longer messages automatically when shipping and assemble when receiving long text messages. There are when sending to the actual fees!
Connect to computer
You can Xoro TelePADconnect to a computer to transfer data between the device and the PC. The device is detected on your computer as a USB mass storage device. The device must be switched on for it!
- Connect the device via the USB connection cable to your computer Now the following window appears on the display of Xoro TelePAD:

- Tap "Turn on USB storage" button. Your computer will recognize the Xoro TelePAD10A3 4G 4G as a USB mass storage device and you can exchange data between the devices.
• To stop the data exchange with the device, tap the "Turn off USB storage" and / or unplug the USB cable.
Note:
While the access to the computer to the internal memory of the device may not have all system functions. In order to use the device properly disable the PC connection!
Lock Screen
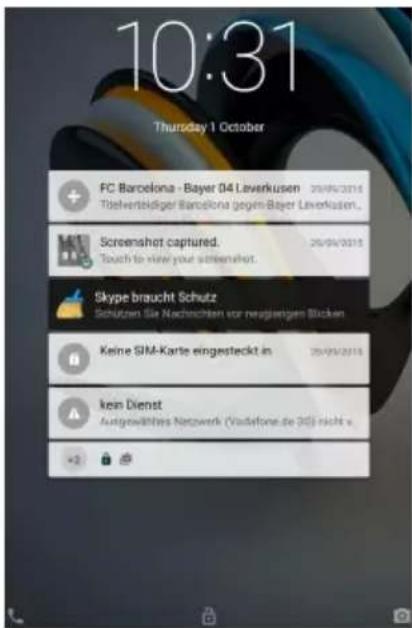
Depending on the system settings it may happen that your TelePAD a lock screen on the screen shows, for example, if the device has not been used for a while in operation and is turned on from sleep mode.
You can release the lock by touching or right-drag the circle.
If the device is secured with a password or a pattern against unauthorized access (page 21), you need at this point to pick up the device to unlock the fuse.
Note:
Use as an access password, gesture or pattern only variations that you can also sure to remember. The lock of the device serves as protection against theft and can not be bypassed and remain prevents your data so that access if necessary!
Camera
The Xoro TelePAD10A3 4G 4G features on the front and on the back each have a camera, the front camera is mainly used for video calling and the back camera for Picture & Video recordings.
To start the camera press the icon in the program overview. With video telephony applications, the front camera will start automatically.

The following settings can be made in the camera application:
-
In the Camera Settings You can adjust various camera parameters in general and the photo and video recording, for example. The white balance, exposure, or a color effect to add.
-
video recordings
-
taking photos
-
Smart Filter function (eg panel, Mono, Sepia, etc)
-
Switch to panorama mode
-
Facial Beautification mode
-
Live-photo mode
-
Switch to camera mode
-
Detection by gesture: Automatic detection in recognition of the gesture:
-
Do not move unit while HDR capture
-
Flashes
-
Switch between the front / rear-side camera
When you have made all the settings for your recording, you can record your shot by tapping the trigger (3).
To exit the Camera application, tap the icon in the bottom toolbar.
All photos and videos will be available immediately in the gallery application are available (page 24) and can be edited, forwarded or deleted from there.
Notes:
- By divergence or contraction of two fingers the image can be digitally zoom.
The best shots you can achieve by holding the TelePAD with both hands to the recording from being blurred. - The camera focuses and exposes the image in most shooting situations automatically. For this purpose, the device requires possibly a little moment, before you press the shutter button.
System Settings
In the following chapter of this manual the various system settings are explained. You can reach the settings menu by clicking the Settings icon 📄 on the desktop or in the program overview.

Einstellungen
Settings / Wireless & Networks / SIM management In this menu you can configure the inserted SIM card.

To disable / enable the respective SIM card, tap on the slider
The menu allows you to enable, for data connections, or make roaming settings.


HITRON-0860 Verbunden

WLAN-8A8971

Vodafone Hotspot

Toni 1000_EXT

DOR

WLAN-454070
Settings / Wireless & Networks / Wi-Fi
To set up the wireless internet connection, proceed as follows:
- Tap the menu item "Wi-Fi" on the slider to This "ON" switch. Now the device will automatically search for all available wireless radio networks in the vicinity of the device.
- Tap on the name of the network to which you want to connect your device.
- If the network requires a password, now opens a window for entering a password.
- Enter the password and tap the wireless network on "Connect".
The password is stored in the device and the network automatically establishes the connection when it is in range.
By clicking the icon ☐ at the right top of the screen, you can configure advanced connection settings.
To set up the Bluetooth connection, proceed as follows :
- Tap the menu item "Bluetooth" on the slider at the top right to this to "ON" switch.
• Now, the unit automatically searches for all available Bluetooth devices in the area.
• Tap the name of the device with which you want to connect.
• In the next window you a key for the connection is displayed. Now click on "Pair" icon to connect. - On the device with which you want to connect, a message should appear to confirm the connection. You may need to enter the previously generated key for this connection!
- Other settings for the connection you can make by clicking on the icon behind the name of the connected device. You can also use the connection manually disable (unpair).
By clicking the icon ☐ at the right top of the screen, advanced connection settings can be made.
The visibility of the device you can click the icon change.

to
Settings / Wireless & Networks / Data usage
In this menu item you can display statistical analysis on the data volume used. This is for example useful if you do not have Internet flatrate and your Internet is charged by data volume.
By clicking the icon ☐, you can make advanced settings.
Settings / Wireless & Networks / More ...
If you activate the "airplane mode" option, all radio connections are disconnected at once turned off. Calls, text messages or Internet access is not possible!
In the menu item "VPN" they can set up a virtual private network (VPN). The VPN client works for the production of simple PPTP and L2TP - based VPNs and can moreover be extended optionally with other third-party clients.
In the menu item "Tethering & portable hotspot" you can configure the device as a wireless hotspot if you want, for example, share a set on the machine UMTS internet connection with other WiFi - enabled devices via Bluetooth or USB connection.
System Settings
To do this, activate the desired function and set up the appropriate menu point out the connection settings. The device will act as a mobile router.
In the menu item " Mobile networks " you can configure the built-in 3G module , for example, if a data connection can be established and which access points to use the device.
Settings / Device / Audio profiles
This menu allows to select various predefined sound profiles. The profile "General" can be described as follows to configure to your liking:
Tap the Settings icon 🧑 to open the Audio Profile Editor. You can now configure the device to your liking, for example, configure the ringtone for calls and messages or disable various system sounds on / off. Also , the volume of notifications can be set and / or vibration alarm de / activate .
Settings / Device / Display
In this menu next to brightness and font size used can be set, the backgrounds and colors of the operating system, as follows, to configure.
Lock screen notifications Show Notifications of calls or text messages
Scenes You can choose from several predefined graphic themes. To activate it, tap "Set Scene"
Theme Select from different color themes. To exchange clauses of the color theme, tap the desired color.
Wallpaper You can set the background images used on the desktop and / or the lock screen.
Sleep Allows you to define when the device with disconnected will be automatically switched to standby or hibernate mode. Use of Hibernate can significantly reduce the battery consumption.
The Xoro TelePAD is compatible with devices that support Wi-Fi Certified Miracast ^TM protocol for wireless transmission. To activate the function for wireless transmission tap the "Cast screen" menu and make a connection to a compliant device. If the connection is active, you can transfer the screen and so video and audio stream content wirelessly on a variety of screens and other devices with Miracast. Example, you can assign the device the screen on a TV with a certified Miracast adapter.
Note:
To use this function, an active Wi-Fi connection is required. Take in setting up the connection, the manual of the display device to help and follow the steps listed there.

bar
| Category | Value (GB) | |---|---| | Spotify | 4.39 | | WhatsApp | 1.49 | | Apps (Appdaten & Medieninhalte) | 1.74 | | Bilder, Videos | 30.53 | | Audio (Musik, Töne usw.) | 116 KB | | Daten im Cache | 13.48 MB | | Sonstiges | 2.05 MB |Settings / Device / Storage
In this section you can find out how much space is available on the attached storage devices. You can use this menu item also delete memory cards and storage devices safely remove ("Remove card", "Unmount").
"Internal Memory"
In this section apps are installed by default. It is not possible for user files (MP3, JPEG) stored in this area.
"SD card" or "USB Memory"
In this area you can store user files. Some apps can "Settings / Apps" are moved from internal memory to the virtual, internal SD card in the area.
Note:
A portion of the memory of the device is used by the hardware (GPU, Wi-Fi) and is not for the operating system or apps. Therefore, a smaller value for the memory is displayed in the view Apps / ACTIVE / RAM than is actually installed.
Settings / Device / Battery
In this menu item you can retrieve information about the installed battery. Tabular is listed which system services the battery status all influence the most.
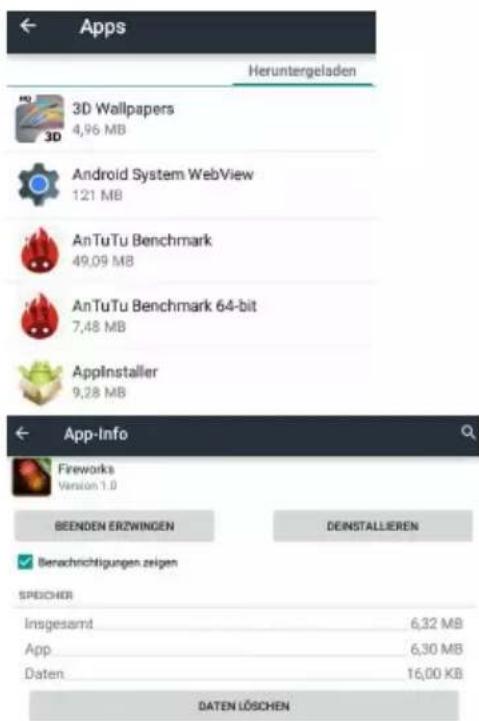
Settings / Device / Apps
In this section you can manage apps as follows :
- Uninstall
- force stop
- delete data
- Move to internal SD card or internal memory
- Clear cache
Select an application from the "Downloads", "On SD Card", "Active" or "All". You can then select one of the management functions. System services and apps may not be capable to uninstall or stop.

Settings / Personal / Location Access
In this menu you can determine whether the device is allowed to use your current location. Your location is determined here by an active Internet connection when the internal GPS antenna has been disabled.

By tapping on the slider you can use the GPS module of the device de / activate.

Settings / Personal / Security
In this menu, you can configure various security settings, including :
Screen lock In this menu, you can protect the device against unauthorized access with a password nem or even defined pattern.
Encrypt Tablet With this function it is possible the contents of your device to decrypt.
Set up SIM card lock In this menu, you can query the PIN code of your SIM card de / activate or edit the pre existing code
Unknown sources Is this setting enabled, you can also applications install that do not originate from the Google Play Goals
Verify Apps If this function is activated, who examined the all of Google's applications for malicious code
← Sprache & Eingabe
Sprache
In this menu, you can configure various settings for language and keyboard functions, including:
Language sets the language for the Android opera ting system and apps.
Spell checker Enables and configures the spell check of the operating System.
Personal dictionary displays your personal dictionary InputMethods Allows you to set and config the default input method
Pointer Speed Allows you to set the total speed of the mouse pointer.
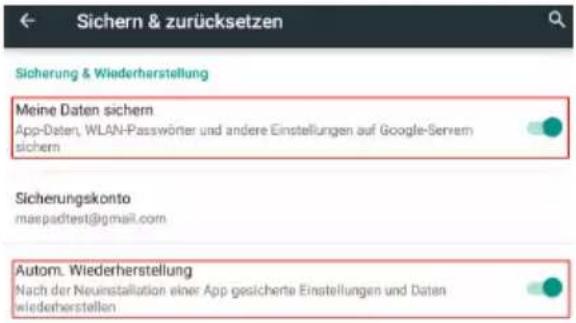
By resetting the Android operating mode, all data will be deleted from the internal memory. All settings must be made again and then all apps will be reinstalled.
Reset the device before you distribute them to other people or if problems occur that can not change settings or uninstall apps can eliminate.
Settings / Accounts
Allows you to add and manage e-mail, Google and Exchange accounts or accounts of social networks (Facebook, Twitter, ect.)

Automatic date & time Enable this setting if the unit relate the current time from the Internet (recommended). When the "Auto Date / Time" is turned off, you can adjust at this point time and date manually.
Use 24-hour format If you turn this function off, the time is not displayed in 24-hour format.
Choose date format Determines in what format the date display is
Settings / System / Sheduled power on & off
In this menu you can specify times when the device should automatically turn on or off.
System Settings
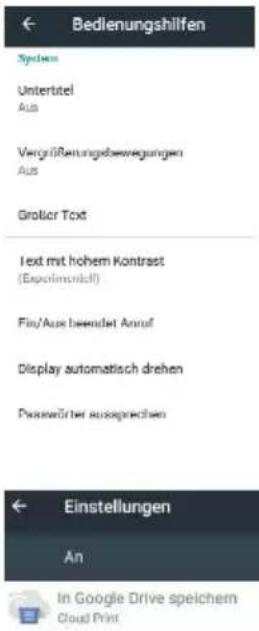
In this menu, various functions enable the operation of the appliance simplistic to, for example, the display for the menu text larger global or the rotation of the screen contents can be prevented.
Also various third-party applications designed to improve usability of the device can be configured in this menu item.
Settings / System / Printing
Google Cloud Print is a new technology that connects your printers to the web. With Google Cloud Print, you can make your printers available to yourself and others. The applications are the same ones you use every day. Google Cloud Print works on your phone, tablet, Chromebook, PC, or any other web-enabled device with which you want to print.
After you enable the feature, you can make settings by pressing the icon .
Note:
To use a Google Cloud Print account is necessary that they invest in the settings of the application, or when it already exists, enter.
Settings / System / About tablet
At this point, information about the software installed on the Xoro Telepad firmware are displayed. If you want to contact the Xoro Customer Service, please write down next to serial number and the software version.
Note:
You can enable the Android developer options in the system settings by repeatedly tapping on the menu item "Build Number". The settings in this menu should be changed only by expert users and in consultation with the Xoro Customer Service.
A check in the "USB debugging" for example activates the debug mode of the device. This feature is primarily of interest to developers, as share and exchange among other system files, and can be read. Furthermore, users can with profound technical knowledge to send commands to the phone or control the device with programs such as "Android Debug Bridge" via PC and communicate with the smartphone.
GooglePlay Store

With the icon 📋 takes you from the program overview out in the Google Play Store. Please follow the on-screen instructions to register there once or login with an existing account. Signing up is free!
In Google Play Store, you can arbitrarily by free and fee-based programs (apps), games, movies, music or books for and install instantly on your device. Purchased products are usually available on other Android devices and must not be bought again.
Install applications manually

You can install applications on the device manually of course, as will be explained below.
- First you need under the menu item "Security" a hook behind the "Unknown sources" (page 21) if necessary.
- Embark to the settings menu by tapping the icon "Settings" on the desktop or in the program overview.
- Copy the installation file in APK format to an SD card or USB disk
- Install the application as described from a file manager on your device.
Note:
Be critical when you install apps from unknown sources. Prior to installation, is displayed on the data and functions accessed by an application.
Uninstall Application
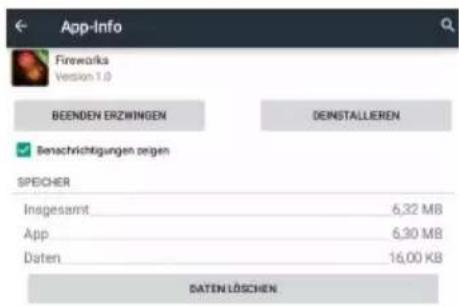
Set out as described above, in the "Settings" menu and tap under the menu item "Device" "Apps" option. Now you will see a list of downloaded applications and can view more information by clicking on the application. Now select to remove "Uninstall" to delete the program from your device.
Music Playback

To play music, connect a media (USB storage device or memory card), are stored in the music files. Now press the Icon to start the playback program.

The application lists existing directories and files supported on. Select the file you want to play.
More options for music playback can be accessed via the application menu
Available buttons and functions of the remote control:
VOL+/- change Volume Back to directory / file list Select next / previous file Pause/Continue Playback
Supported file formats: MP3,WMA,WAV
Picture Playback
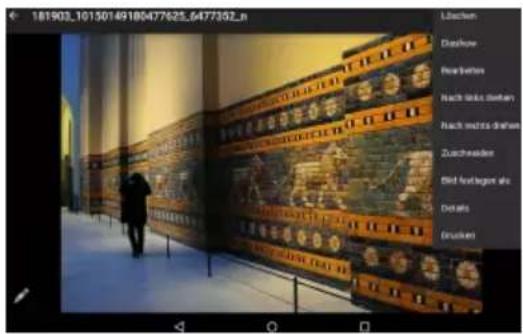
To see the photos you connect a media (USB storage device or memory card), on the images are stored. Now press the icon to start the playback program.

The application lists existing directories and files supported on. With your finger on the screen left or right to slide to show previous or next image. The button ← returns to directory / file list.
If you play music in the background, the music can be used when watching in the background! Available buttons and functions of the remote control in this application, see above.
More options for image reproduction can be found in the application menu
Supported file formats: JPEG, BMP, PNG, GIF
Movie Playback

To play videos, connect a media (USB storage device or memory card) that stores the video files. Now press the Icon to start the playback program.

The application lists existing directories and files supported on. Select the file you want to play.
More options for music playback can be accessed via the application menu
Available buttons and functions of the remote control:
VOL+/- Change Volume Back to directory / file list Select next / previous file Pause/Continue Playback
Supported media: MKV, MPEG, VOB, TS, MOV, AVI u.a. Video Decoder: MPEG-1/2/4, H.264 (bis 1080p)
Notes:
If several programs installed to play media files, you are asked which program you want to use one times or every time. Make your selection and confirm with "OK"
Installed Applications
The Xoro TelePAD Android operating mode is already equipped with the main application, which are explained in the following. For more information on the individual applications use the appropriate documentation by the manufacturer of the software on the Internet.
Browser
With the pre-installed browser, you can browse web pages, save your favorite pages as "bookmark" and open multiple web pages simultaneously in multiple "tabs".
With pre-installed e-mail client, you can check your emails from POP3, IMAP and Exchange servers. When you start the e-mail app for the first time, all the necessary information is requested to do so. Apply to get your e-mail provider about the correct server settings. Go to Manage to "Settings / Accounts & sync" to existing e-mail, Google or Exchange accounts or add more.
Applications
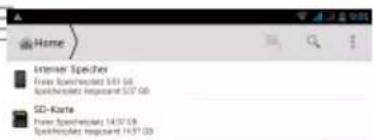
Filemanager
The device has a preinstalled file manager. With this application you can edit, move, or delete files in the operating system
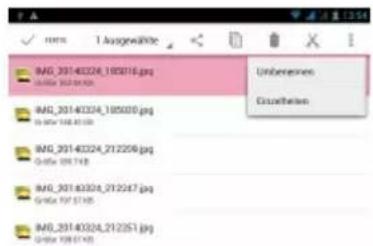
The File Manager allows you to start with this symbol program overview.

in the
After starting all available disks are displayed. Once you tap the desired storage medium, a listing of all the files on this disk will be displayed. Select a file and hold the file until the edit menu at the top of the screen. You can edit the file, move, send, or delete now by pressing the respective symbols!

Google Maps / Navigation
The Xoro TelePAD has a built in GPS receiver and thus can determine your location using GPS satellites in orbit and navigate with it to any desired location.
To start the navigation, tap one of the icons program overview.

Your current location is now determined and displayed on a map. You can now enter and search a desired location in the search box. The terrain can be divided into different layers represent so-called (satellite photo, traffic, ect.). If you would like to navigate to the place entered, tap the car icon. Navigation starts!
Notes:
- For the device to find your location in the terrain, the GPS receiver in the device must be activated (page 21).
- A working Internet connection is possibly necessary for the use of mobile navigation services.

Google Voice Control
Wherever you see this symbol 📋 on the Android operating system, you can control the device using voice commands, for example, can make text input via voice recognition or looking web pages in the browser. Tap the microphone icon, for example, and ask about the weather! The device will let you pick out the right answer from the internet and let you know.
To use the voice control with a working Internet connection is required.
Please read the following information to find out the possible cause of a problem before contacting service
| Problem Solution | |
| No Mobile Connection | Check if the SIM card has been correctly inserted into the device (page 6)Check whether the respective SIM card is enabled in the System Setup menu (page 17)Provide sufficient wireless coverage. Avoid tunnel or basement spaces where experience has shown that the mobile radio reception may be disturbed. |
| No Sound | Check to see if mute is activated in the volume control (mute)Turn up the volume until you hear the sound again |
| No Internet Connection | Check if the wireless router is working properly.Check whether the parameters on Xoro TelePAD are set correctly.Take, for example, on the setting DHCP.Run the automatic search for networks again.Enter the correct password (This is set in the router configuration).Do not choose a foreign networks.The Internet server may intermittently become unavailable or overloaded.Check whether the device is in airplane mode. |
| Time and date are false | Check the settings for the time zone and insert it again. |
Perform repairs never even through, please let this always qualified personnel. Contact the service technician if the following faults:
- If the power supply or power cable is defective.
• If objects have fallen into the unit.
• If the device has come into contact with water. - If the unit does not work use.
- If the unit has been dropped and if the product has power fluctuations.
Use original spare parts and accessories. Unauthorized substitutions may result in short circuits or fires and other mishaps.
Warranty & Recycling Information
In case the products delivered are not free from defects in material or workmanship, MAS Electronic AG has the right to either repair or replace the defective product at its choice. MAS Electronic AG manufactures and repairs goods using components which are new or equivalent to new in accordance with industry standards and practice. The warranty for wearing parts (e.g. rechargeable batteries) is limited to 6 months. In case the device is equipped with internal data storage (e.g. hard disc drive, Flash drive), the customer is responsible to backup his data before sending the device. MAS Elektronik AG is not liable for any data loss on returned devices. MAS Electronic AG reserves the right to reset returned devices to factory defaults. Please note your personal settings for this reason.
MAS Electronic AG is not liable for any accessories not belonging to original package content such as DVDs, hard disc drives, Flash storage devices, batteries, etc. This limited warranty covers the warranty requirements set by authorities in your country.
This limited warranty only is valid in the coThis limited warranty does not cover finishes, accessories or batteries, nor does it cover damage resulting from accident, misuse, abuse, dirt, water, battery leakage, tampering, servicing performed or attempted by unauthorized service agencies. This limited warranty does not cover damages resulting from firmware upgrades. Only in case of firmware upgrades needed to add functions promised at time of purchase, such damages are covered by this limited warranty. For a correct and frictionless completion of warranty or repairs you need a RMA No. You may obtain a RMA on the internet at www.mas.de/FAQ or by telephone.
Please send the device in its original packing material, all standard accessories and a copy of the invoice, a description of defect and the RMA No. to following address. Please note the RMA number clear and in large numbers on the outer package.
Recycling Information
Recycling of electronic devices
This product is designed and manufactured with high quality materials and components which can be recycled and reused. This symbol means that electrical and electronic equipment, at their end-of-life, should be disposed of separately from your household waste. Please, dispose of this equipment at your local community waste collection/recycling centre. In the European Union there are separate collection systems for used electrical and electronic product. Please, help us to conserve the environment we live in!

Recycling of paper and carton
The material recycling symbol on the carton and user manual denotes that they are recyclable. Dispose them not with the normal household waste.

Recycling of plastic parts
The material recycling symbol on the plastic parts denotes that they are recyclable. Do not dispose them in household waste.

Green Dot
The “Grüne Punkt” denotes that the MAS Elektronik AG pays a duty to the “Society for Waste Prevention and Secondary Resource Generation”.
We would like to point out that the firmware of the Xoro TelePAD contains open source software, which is licensed under the GNU General Public License (GPL) and Lesser General Public License (LGPL). To ensure a GPL / LGPL compliant use of the programs, please refer to the license terms of the GPL / LGPL.
Under the Agreement of the GPL and LGPL, we provide the source code of these programs are available. The corresponding code can be at the e-mail address: Apply for beta@ersservice.de. You get the source code then on CD by mail! You can modify and distribute the source code under the terms of the GPL / LGPL license. However, we assume no technical support for changes to the source code!
License text
The license text of the GNU General Public License is available in the download area of the product on our website, as well as on http://www.gnu.org!
Sourcecode
The source codes used are when they are not available in the download area of the product, starting from purchase to purchase up to 3 years on request by e-mail!
Trademarks
The Android logo, Google Search ^TM , Google Maps ^TM , Gmail ^TM , YouTube ^TM , Google PlayStore ^TM and Google Talk ^TM are trademarks of Google Inc.
All other trademarks and copyrights are the property of their respective owners!

natural_image
Black and white line drawing of a ram's head with horns (no text or symbols)
Disclaimer
Some content and services accessible through this device belong to third parties and by copyright, patent, trademark and / or other laws are protected for the protection of intellectual property. Such content and services are provided solely for your personal, non-commercial use. Xoro is not liable for damage to software or hardware or damage to property arising from the use of the services and of the device, unless these are due to gross negligence or intent, his agents, or his legal representatives.
For direct or indirect damage - in particular damage to other software, damage to hardware, damage for loss of use and damage caused by functional failure of the device, the company can not be held liable. Only the User shall be liable for the consequences of use of the software used on the device and the hardware.
The device and the software used was developed with great care, however errors can never be ruled out. It can therefore not be held responsible for the security of your data!
EC Declaration
With the CE mark explains Xoro, a registered trademark of the MAS Elektronik AG that this product meets the essential requirements and guidelines of the European regulations.
The following wireless features are delivered with this device: Wireless LAN (WLAN) MAS Elektronik AG hereby declares that this device conforms to the fundamental requirements and the remaining relevant regulations of the 1999/5/EC RTTE directive.

FREE TO CHOOSE INNOVATIONS

XORO by MAS Elektronik AG
Weidegrund 3
21614 Buxtehude
Deutschland
Tel: 04161 800 24 24
www.xoro.de

natural_image
Recycling symbol with four arrows forming a triangle (no text or labels)


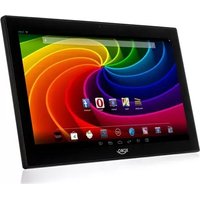
- XORO®
- TelePAD 10A3 4G
- Hinweise:
- App permissions
- Source Code
- First Steps
- System Settings
- Applications
- Electronic Security
- User's Manual
- Power supply
- Position
- Safety Information
- Usage
- MicroUSB
- MicroSD Cardreader
- Notes:
- Package Contents
- Turn on / off, StandBy
- Device of TelePAD 10A3 4G
- Power supply / charging the device
- USB ports & Memory Cards
- Headphone
- Note:
- Screen
- Definition
- Inserting the SIM card
- Installation of your Mirco SIM card(s):
- Desktop
- Virtual Keyboard
- Toolbar / Statusbar
- Home Button
- Back Button
- Menu Button
- Overview
- Last Applications
- Manage contacts
- Send & receive calls
- Send & receive Short Messages
- Connect to computer
- Lock Screen
- Camera
- Einstellungen
- Settings / Wireless & Networks / Wi-Fi
- Settings / Wireless & Networks / Data usage
- Settings / Wireless & Networks / More ...
- Settings / Device / Audio profiles
- Settings / Device / Display
- Settings / Device / Storage
- "Internal Memory"
- "SD card" or "USB Memory"
- Settings / Device / Battery
- Settings / Device / Apps
- Settings / Personal / Location Access
- Settings / Personal / Security
- ← Sprache & Eingabe
- Sprache
- Settings / Accounts
- Settings / System / Sheduled power on & off
- Settings / System / Printing
- Settings / System / About tablet
- GooglePlay Store
- Install applications manually
- Uninstall Application
- Music Playback
- Picture Playback
- Movie Playback
- Installed Applications
- Browser
- Filemanager
- Google Maps / Navigation
- Google Voice Control
- Warranty & Recycling Information
- Recycling Information
- Recycling of electronic devices
- Recycling of paper and carton
- Recycling of plastic parts
- Green Dot
- License text
- Sourcecode
- Trademarks
- Disclaimer
- EC Declaration
- XORO by MAS Elektronik AG
Brand : XORO
Model : TelePAD 10A3 4G
Category : Tablet