EBM4545-2BL - Oven Exquisit - Free user manual and instructions
Find the device manual for free EBM4545-2BL Exquisit in PDF.


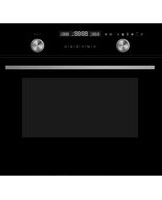
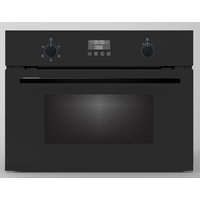
| Product Type | Built-in Microwave Oven with Grill |
| Brand | Exquisit |
| Model | EBM4545-2BL |
| Mains Voltage | 220-240 V ~ 50 Hz |
| Oven Power (Total) | 2850 W |
| Microwave Output Power | 900 W |
| Microwave Frequency | 2450 MHz |
| Functions | Microwave, Grill, Microwave+Grill, Microwave+Convection, Convection, Defrost |
| Temperature Range | 50 - 250 °C |
| Control Type | Touch control with electronic programmer |
| Display | LED |
| Child Lock | Yes |
| Timer | Yes (up to 10 h for oven, 90 min for microwave) |
| Auto Shut-off | Yes (based on temperature) |
| Interior Light | Yes (LED, can be turned off) |
| Turntable | Yes (removable) |
| Door Removal | Yes (for cleaning) |
| Cleaning Method | Non-abrasive cleaners; removable door and internal glass panel |
| Installation Type | Built-in (under worktop or in wall unit) |
| Warranty | See manufacturer's website (exquisitbenelux.nl) |
Frequently Asked Questions - EBM4545-2BL Exquisit
User questions about EBM4545-2BL Exquisit
0 question about this device. Answer the ones you know or ask your own.
Ask a new question about this device
Download the instructions for your Oven in PDF format for free! Find your manual EBM4545-2BL - Exquisit and take your electronic device back in hand. On this page are published all the documents necessary for the use of your device. EBM4545-2BL by Exquisit.
USER MANUAL EBM4545-2BL Exquisit
domestic and professional appliances
EBM4545BL

natural_image
Line drawing of a standard oven with ventilation slots and control panel (no text or symbols)GEBRUIKSAANWIJZING
BEDIENEN

Deur demonteren
natural_image
Line drawing of a mechanical device with a circular component attached (no text or symbols)
natural_image
Technical line drawing of a mechanical assembly with a circular component overlay (no text or symbols)natural_image
Technical line drawing of a mechanical component with internal structure and directional arrows (no text or symbols)Deur eraf lichten
REINIGEN EN ONDERHOUD TECHNISCHE SPECIFICATIES
Reinigen
https://www.exquisitbenelux.nl
domestic and professional appliances

DOMEST
domestic and professional appliances

MULTIBRAND SALES & SERVICES
exquisit

domestic and professional appliances
EBM4545BL
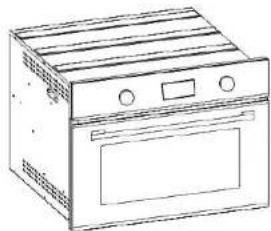
natural_image
Line drawing of a standard oven with ventilation slots and control panel (no text or symbols)GEBRUIKSAANWIJZING
domestic and professional appliances
EBM4545BL
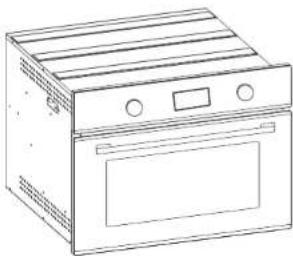
natural_image
Line drawing of a standard oven with lid and front panel (no text or symbols)INSTRUCTION MANUAL
Compact Microwave Oven
Do not use the oven until you have read this Instruction manual
DEAR CUSTOMER
Congratulations on your purchase. We aim to make our products exceptionally easy to use and extremely efficient. After reading the instruction manual, we hope operating the oven will be easy.
Before being packaged and leaving the manufacturer, the cooker was thoroughly checked with regard to safety and functionality.
These instructions have been compiled in order to help you learn how to handle the appliance. So please read them carefully before you use the appliance for the first time in order to avoid possible accidents.
Please keep the instruction manual and store it in a safe place so that it can be consulted at any time.
It is necessary to follow the instructions in the manual carefully in order to avoid possible accidents.
This appliance must only be used for the purpose for which it is intended, i.e. domestic cooking, defrosting and reheating foods. Any other use could be dangerous and may lead to premature failure of the appliance.
User information:
. Ovens become hot during and immediately after use. Ensure you do not touch the heating elements located inside the appliance.
. The oven door can become very hot during operation.
. After use, please ensure that the appliance is switched off.
. Keep children away from the appliance when in use, and immediately after use.
. Keep the oven door closed when in use.
TABLE OF CONTENTS
Safety instructions.... 3
How to save energy....4
Unpacking.... 4
Installation....5
Description of the appliance....7
Prior first use....8
Electronic programmer 8
Operation....9
Cleaning and maintenance....14
Technical information.... 16
Warranty 17
SAFETY INSTRUCTIONS
- Read the user instructions carefully before using the oven for the first time.
● Follow the instructions for first use of the oven.
● Clean the oven regularly. - Remove spills as soon as they occur.
● Always use oven gloves when removing shelves and trays from the oven. - Do not allow children near the oven when in use.
- Do not allow fat or oils to build up on the oven shelves, grill pan or oven base.
- Do not place any cooking utensils or plates directly on the oven base.
● Always grill with the oven door closed. - Do not grill food containing fat without using the grill pan grid.
- Do not cover the grill pan grid or the oven walls with aluminium foil.
- Do not perform maintenance or cleaning of the oven without first switching off the electricity supply. If the oven has recently been used, allow it to cool.
- Do not use abrasive cleaners or powders that will scratch the surface of the appliance.
- Do ensure that the door is completely closed during cooking to ensure the seal works properly.
- Do not attempt to repair the internal workings of your oven.
- Steam will escape when the door is opened. Step back from the appliance and wait until the steam has dissipated.
- When opening the appliance, take great care that hot water which may have collected in the drip tray does not overflow, as this may cause injury.
- Do not come into contact with hot steam and do not touch the hot oven sides.
● During use the appliance becomes hot, Care should be taken to avoid touching heating elements inside the oven.
● WARNEAppliance and its accessible parts become hot during use. Care should be taken to avoid touching heating elements.
● Children less than 8 years of age shall be kept away unless continuously supervised. - This appliance can be used by children aged from 8 years and above and persons with reduced physical, sensory or mental capabilities or lack of experience and knowledge if they have been given supervision or instruction concerning use of the appliance in a safe way and understand the hazards involved. Children shall not play with the appliance. Cleaning and user maintenance shall not be made by children without supervision.
● WARNING: Ensure that the appliance is switched off before replacing the lamp to avoid the possibility of electric shock.
● WARNING: Turntable is only applicable to microwave mode, other than microwave mode (such as oven model) please remove the turntable;
HOW TO SAVE ENERGY

Using energy in a responsible way not only saves money but also helps the environment.
So let's save energy! And this is how you can do it:
● Make sure the door is properly closed. Heat can leak through spillages on the door seals. Clean up any spillages immediately.
UNPACKING
During transportation, protective packaging was used to protect the appliance against any damage.
After unpacking, please dispose of all elements of packaging in a way that will not cause damage to the environment. All materials used for packaging the appliance are environmentally friendly; they are 100% recyclable and are marked with the appropriate symbol.
Caution!
During unpacking, the packaging materials (polythene bags, polystyrene pieces, etc.) should be kept out of reach of children.
DISPOSAL OF THE APPLIANCE

Old appliances should not simply be disposed of with normal household waste, but should be delivered to a collection and recycling centre for electric and electronic equipment.
A symbol shown on the product, the instruction manual or the packaging shows that it is suitable for recycling.
Materials used inside the appliance are recyclable and are labeled with information concerning this. By recycling materials or other parts from used devices you are making a significant contribution to the protection of our environment.
Information on appropriate disposal centers for used devices can be provided by your local authority.
INSTALLATION

Installing the oven
The appliance can be installed under a worktop or in a wall unit (open or closed) with the appropriate dimensions for recessed installation. Centre the oven in the unit so as to ensure a minimum distance of 10mm between the appliance and the surrounding unit. The material of the unit supporting the appliance must be heat resistant (or covered with a heat resistant material). For greater stability, attach the oven to the unit with two screws through the holes provided on the side panels.
If the appliance is to be installed under a worktop, ensure the top rail has been removed to provide free airflow around the product. Do not use your appliance immediately after moving it from a cold location, as condensation may cause a malfunction. Wait approximately 1-2 hours before use.

INSTALLATION


Installation Instructions
Warning!
All electrical work must be carried out by a suitably qualified and authorized electrician. No alterations or willful changes in the electricity supply should be carried out.
● Mains lead should be minimum 1.5m long.
- Do not connect your Built in Oven to the mains electricity supply using an extension lead.
- This appliance must be earthed.
- If you are unsure of how to install the oven Use an authorised agent to install the appliance to your electricity source.
- Before setting up you're built in oven, check for any external visible damage. Do not install or use your oven if it is damaged.
● This appliance must be installed on a flat surface.
- Don't install built in oven in an area that may be damp.
DESCRIPTION OF THE APPLIANCE


natural_image
Pure graphical toolbar icons without any text or symbolsDESCRIPTION OF THE APPLIANCE
Before First Use
Cleaning
Before using the oven for the first time we recommend that you clean it with soapy water, rinse carefully and then heat on the grill setting at maximum temperature for 30 minutes, with no accessories in the oven.
A slightly unpleasant smell may be produced, caused by grease remaining on the oven elements from the production process.
On first electrical connection
Electronic programmer


Children lock Oven light

[Non-Text]

Cooking time

Time

Timer

End of the cooking time
OPERATION
| Icon | Function | Power | Preset temperature (°C) | Microwave power (W) | Preset Time (min) | Adjustable temperature range | Adjustable Microwave power range |
| Microwave | 1654W/ | 800 | 1 | / | 900-100W | ||
| Microwave and grill | 1654W/ 1750W | 180 10 | 400 | 110-180°C | 200-600W | ||
| Microwave + rear heater + fan | 1654W/ 1100W | 180 10400 | 110-200°C | 200-600W | |||
| Defrost | 1654W/ | 10 | 400 | / | / | ||
| Top grill | 1750W | 80 | / | Default | 50-250°C | / | |
| Rear heater + fan | 2850W | 180 | /50-250° | Default | / | ||
| Top grill+ fan | 1750W | 180 | /50-250° | Default | / | ||
| Top grill+ rear heater + fan | 2850W | 180 | /50-250° | Default | / |
Operate the oven
- Touch the button " ⏻ " 2s turn on the oven.
- Touch button " √" or " ⏱" to select function.
3.A suggested temperature will appear on the temperature display. - Touch button " 🔒 " to confirm.
- Touch ON/OFF " Ⓞ" button to switch off the oven.
Function selection / Temperature regulation
- Touch and hold the ON/OFF button " ⏻ " to switch on the oven.
- Touch button" ☑ "or " 🔊 " to select function.
3.A suggested temperature will appear on display and blinking when function selected. - Touch button “💡” enter the temperature mode, Touch button “💡” or “ 🔗” to set the temperature.
- Touch " Ⓤ" to confirm the selected temperature.
6.Oven start working.
OPERATION
Setting the time
The clock can be set when the ON/OFF button " ⏻" in OFF position.
- At first power on, you see "0:00" on display.
- Touch clock button " Ⓤ" time displays "0:00" and " ▼ "keeps flashing.
- Touch " √" or " ∧" to set time.
- Touch button " ☑" to confirm or will auto confirm after 5 seconds.
Timer
- At power on, you see "0:00" displayed.
- Touch clock button " Ⓞ" TWICE, time display "0:00" and " △" keeps flashing.
- Touch " √ " or " ⬇ " to set time.
- Touch button " ⏻" to confirm.
Caution!
The timer will not be activated without pressing “ ⚙ ” and will return to time state. The function of alarm can be canceled by setting the time to “0:00”, when the time is ran out, signal is given and the icon ⚙ is flashing to remind the user. Alarm can be stopped by pressing“ ⚙” and “ ⚙”, or it will stop automatically after 30 seconds.
Semi-automatic operation
This mode to set the oven cooking time, when time runs out, oven stops working and alarm sounds to remind the customer.
Set the cooking time when ON/OFF button " ⏻ " is on and the oven is working:
- Touch button " Ⓞ " twice, cooking time " |→| " flashing, display shows "0:00".
- Touch " √ " or " ∧ " to set the cooking time.
- Touch " Ⓧ" to confirm, the cooking time "|→|" lights up, time set saved.
- Set cooking time runs out, oven stops heating, alarm sounds, the cooking time icon "|→|" and temperature icon both flashing.
- Touch buttons“💡” and “💡”, the alarm signal will go off, or it will be turned off automatically after 30 seconds.
OPERATION
Automatic operation
Touch button " Ⓞ " to set end time, but only after setting cooking time.
Set end time when the ON/OFF button " ☺ "is on, oven is working and cooking time already set:
-
Touch button " Ⓞ" for 3 times, the end of cooking time icon "→l" flashing.
-
Touch " √" or " ∧" to set the end of cooking time.
-
Touch " ⚙️ " to confirm, the end of cooking time “→” light up, setting is saved.
4.Oven stops heating when the set end time is reached, alarm sounds,the cooking"|→" time and temperature icon both flashing.
- Touch button " Ⓞ" or " Ⓞ", the alarm signal will go off or alarm signal will be turned off automatically after period of time.
For example
The current time is 2:00, set the cooking time to 1 hour and set the end of cooking time at "3:00", if not adjust end of cooking time by "⊗" but touch "⊕" to save, then the oven will stop heating at "3:00".
If you touch button “ ⏻ ” to adjust the end of cooking time to “3:30” and touch button “ ⏻ ” to save then the oven starts working at “2:30” and stops at “3:30”.
Caution!
The cooking time and end of cooking time range:
Cooking time range:0<t<10hours
End of cooking time range: current time < end of cooking time < current time + 24 hours
End of cooking time = current time + cooking time
End of the work time priority display than the current time
We suggest that you supervise the first few cooks to make time and temperature are right.
Microwave time range:0<t ≤90min
Child Safety Device
To avoid operation while the oven is working, the child lock function has been added to this oven series.
Operate the oven when time displays or normal heating function as below:
- Touch " 🔒" button and hold for 5 seconds.
Time display area shows key icon " 🔒", the appliance is locked.
-
All the buttons are disabled after the child lock is active and the key icon", keeps blinking, to show that machine is locked.
-
Touch and hold " 🔒" button for 5 seconds to unlock.
Caution
Child Safety Device can be used when the ON/OFF button in any position.
OPERATION
Lighting function
- Press “ Ⓧ ” to turn on/off the light when power on.
● Light will be automatically turn on while heating, touch “ Ⓧ ” key to turn off and re-turn on the light.
Caution
When select 20°C defrost function, the oven light used as a heating element and can not turn off.
Lighting function can not be turned off while child safety device on.
Automatic shut-off feature
Each mode has a maximum working time, auto shut off function noted in the following criteria:
| Temperature | Working Hours |
| 50-120 °C | 24 h |
| 121-200 °C | 6 h |
| 201-250 °C | 4 h |
When you select cooking time for the oven, this will take precedence over the auto shut off function. (assume that set shut off temperature to 201°C-250°C, set cook time to 5 hour, so oven will not auto shut off when working for 4 hours, and keep working when reach 5 hours).
When functions conflict:
- Use ON/OFF switch “ ⭕ ” turn off the oven, the cooking time (“→”) and the end of cooking time(“ →”) will be cancelled.
- Change the temperature setting during working, time count down stops, press “ 📋 ” and it will continue.
- Press several keys at the same time, functions will not operate.
- Change the function during working, time count down will stop.
Caution!
When using touch control, to get the best result, remove you finger swift and soft after touch unless the manual states other directions. Tips: Make sure your finger and buttons both dry and cool.
OPERATION
Oven lights
The light bulb will turn on after opening of oven door, and it can be used when the Power key " ⏻ " is on or off.
The light bulb will go on when the Power key “💡” is on , touch “💡” to turn on/off the light bulb of oven. The light icon “💡” will light up on display when the light bulb is turned on.
Door-checking switch
When the Power key "◎" is on, the icon "door" will flash if the door is open, dimmed constantly if door is closed.
Turntable Operation
The turntable (A) rotates to allow food to be cooked evenly without needing to stop the programme and turn the food by hand. It rotates in either direction. The turntable can also be used as a cooking dish. To remove it after use, lift it using the access areas provided in the base of the cavity.
If the turntable does not turn, first check that it has not been turned off (touch - only on microwave and combination programmes), then ensure all parts of the turntable and mechanism are correctly in position. Never try to rotate the turntable by hand. This can damage the drive mechanism (B) and may invalidate your warranty.
You should also check there is nothing obstructing the guide wheels (C).

CLEANING AND MAINTENANCE
Door removal
In order to obtain easier access to the oven chamber for cleaning, it is possible to remove the door.
To do this, tilt the safety catch part of the hinge upwards. Close the door lightly, lift and pull it out towards you. In order to fit the door back on to the cooker, do the reverse. When fitting, ensure that the notch of the hinge is correctly placed on the protrusion of the hinge holder. After the door is fitted to the oven, the safety catch should be carefully lowered down again. If the safety catch is not set it may cause damage to the hinge when closing the door.
Removal of the internal glass panel
Unscrew and unfasten the screw that is at the bottom of the door. Next take Next take out the glass After cleaning, insert the glass and screw

natural_image
Technical line drawing of a mechanical assembly with a magnified inset showing a hand holding a component (no text or symbols)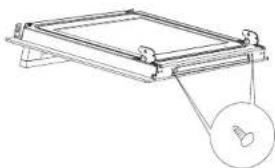
natural_image
Line drawing of a mechanical device with a circular component attached (no text or symbols)Tilting the hinge safety catches

natural_image
Technical line drawing of a mechanical component with internal structure and directional arrows (no text or symbols)Door removal
CLEANING AND MAINTENANCE
Cleaning
You should only use non-abrasive cleaners. Any abrasive cleaners (including Cif) will scratch the surface and could erase the control panel markings. You should not use cleaning products with a chlorine or acidic base.
Any spillages should be cleaned off immediately, especially any alkaline or acidic substances (lemon juice, vinegar etc.)
Stainless steel
Stainless steel can be effectively cleaned by simply using a dilute solution of water and mild detergent and drying to a shine with a clean cloth. Proprietary stainless steel cleaners are available.
Inside the oven
It is recommended that the interior of the oven be cleaned after every use using suitable products, especially if any spillage has occurred. The shelves can be removed and washed by hand or in the dishwasher.
Grill
When used regularly, the grill element does not need cleaning as the intense heat will burn off any splashes. The interior ceiling may need regular cleaning, which should be done with warm water, detergent and a sponge. If the grill is not used regularly, it should be run for 10 minutes every month to burn off any splashes, in order to reduce the risk of fire.
PLEASE NOTE: Steam cleaners must not be used to clean this appliance. Do not store flammable material in the oven.
Do not allow grease or food particles to build up around the door.
IMPORTANT:
When correctly installed, your product meets all safety requirements laid down for this type of product. However, special care should be taken around the rear or the underneath of the appliance as these areas are not designed or intended to be touched and may contain sharp or rough edges that could cause injury
TECHNICAL INFORMATION
Mains electrical voltage: 220-240Vac, 50Hz
Oven: 2850W
Microwave output: 900W, 2450MHz
WARRANTY
exquisit
Warranty conditions
Dear user,
For our warranty conditions, please scan the QR code below or use the link underneath. At the bottom in the footer you will find our warranty conditions.

https://www.exquisitbenelux.nl
For questions regarding sales you can email to: verkoop@domest.nl
For questions regarding service you can email to: service@domest.nl
For other questions you can email to: info@domest.nl
We can also be reached by phone : +31(0)314 362244


DOMEST
domestic and professional appliances

MULTIBRAND
SALES & SERVICES


- BEDIENEN
- Deur demonteren
- REINIGEN EN ONDERHOUD TECHNISCHE SPECIFICATIES
- Reinigen
- INSTRUCTION MANUAL
- DEAR CUSTOMER
- TABLE OF CONTENTS
- SAFETY INSTRUCTIONS
- HOW TO SAVE ENERGY
- UNPACKING
- DISPOSAL OF THE APPLIANCE
- INSTALLATION
- Installing the oven
- Installation Instructions
- Warning!
- DESCRIPTION OF THE APPLIANCE
- Before First Use
- Cleaning
- OPERATION
- Operate the oven
- Setting the time
- Timer
- Caution!
- Semi-automatic operation
- Oven lights
- Door-checking switch
- Turntable Operation
- CLEANING AND MAINTENANCE
- Door removal
- Removal of the internal glass panel
- Stainless steel
- Inside the oven
- Grill
- IMPORTANT:
- TECHNICAL INFORMATION
- Warranty conditions
Brand : Exquisit
Model : EBM4545-2BL
Category : Oven