
TS4400D - Server BUFFALO - Free user manual and instructions
Find the device manual for free TS4400D BUFFALO in PDF.

| Product Type | Network Attached Storage (NAS) Server |
| Brand | Buffalo |
| Model | TS4400D (TeraStation 4000 Series) |
| Hard Drive Support | Supports up to 4 un-partitioned HDDs (3.5" SATA) |
| RAID Levels | RAID 0, 1, 5, 6, 10 (depending on number of disks) |
| File System | XFS |
| Management Software | NAS Navigator 2 (Windows/Mac), Web-based admin interface |
| Network Interface | Gigabit Ethernet (RJ-45), IP address shown on display |
| Boot Options | USB boot for initial setup, then switch to HDD boot |
| Display | Front panel LCD display with status messages |
| LED Indicators | Power, status, hard drive activity |
| Power Supply | Internal power supply (AC 100-240V) |
| Cooling | Internal fan |
| Setup Requirement | Requires at least one HDD; use new or wiped drives |
| Dimensions (Approx.) | Standard 4-bay tower form factor |
| Weight (Approx.) | Depends on installed drives; ~5-8 kg empty |
| Operating Temperature | 5°C to 35°C |
| Warranty | Standard manufacturer warranty |
Frequently Asked Questions - TS4400D BUFFALO
User questions about TS4400D BUFFALO
0 question about this device. Answer the ones you know or ask your own.
Ask a new question about this device
Download the instructions for your Server in PDF format for free! Find your manual TS4400D - BUFFALO and take your electronic device back in hand. On this page are published all the documents necessary for the use of your device. TS4400D by BUFFALO.
USER MANUAL TS4400D BUFFALO
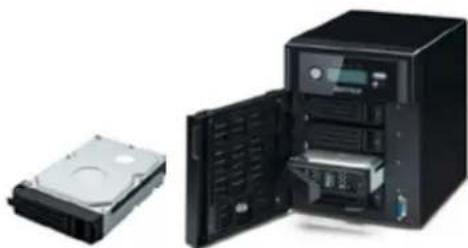
The TS4000 series will not work without disks. Please prepare 1 or more un-partitioned HDDs for the setup process. Use either new HDD(s) or delete all partitions (and therefore all data) with a partition editor before you start with existing HDD(s).
Step by step
- Mount one or more HDDs to a frame and insert it in the TeraStation™
natural_image
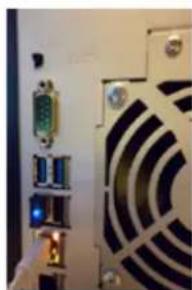
Two black hard drives shown: one open with a drive unit, the other closed (no visible text or labels)- Prepare the MicroSD and the USB adapter and insert the USB adapter into a USB 2.0 port, connect power and network.
natural_image
Close-up of a computer interface panel with buttons and a speaker grille (no visible text or symbols)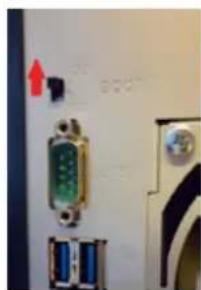
natural_image
Close-up of a computer interface showing a green LED indicator and black ports (no readable text or symbols)-
Move the boot switch to USB position.
-
Boot the TeraStation™.
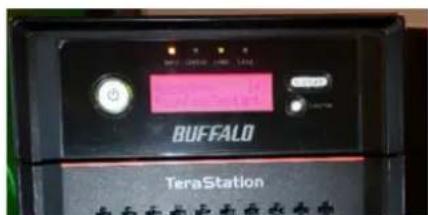
Now the unit gives after some minutes a tone, the display goes red and it says "push function button to start".
- Push the function button until beep sounds.
The display status color will be blue and sequence through these messages:
■ Recovery Preparing
■ System Recovering
■ FW/Updating
■ Recovery Finished, "Change Boot SW"
TeraStation™ 4000
Setup Guide
- The TeraStation ^TM will shut down and the Power button will no longer be lit green. The display and Info light stay on.
- Remove the USB adapter, move the switch on the back to HDD, press the power button
natural_image
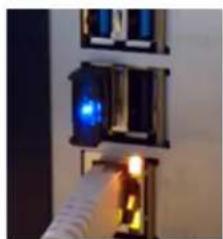
Close-up of a hand inserting a blue LED into a wall-mounted electrical socket (no text or symbols visible)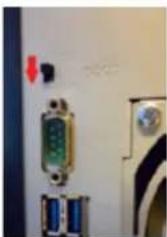
natural_image
Close-up of a computer interface panel with a green LED indicator and two blue ports, no visible text or symbols.If you use just one drive you will have a brief warning for missing HDDs and afterwards the TeraStation™ will operate normally.
If you use more than one drive: The first HDD is mounted and will work normally and the other HDDs are mounted but not yet formatted. The display will therefore turn red and the status LEDs of all unformatted drives will show red as well.
The warning, red display, and red LEDs will remain until you finish formatting all HDDs.
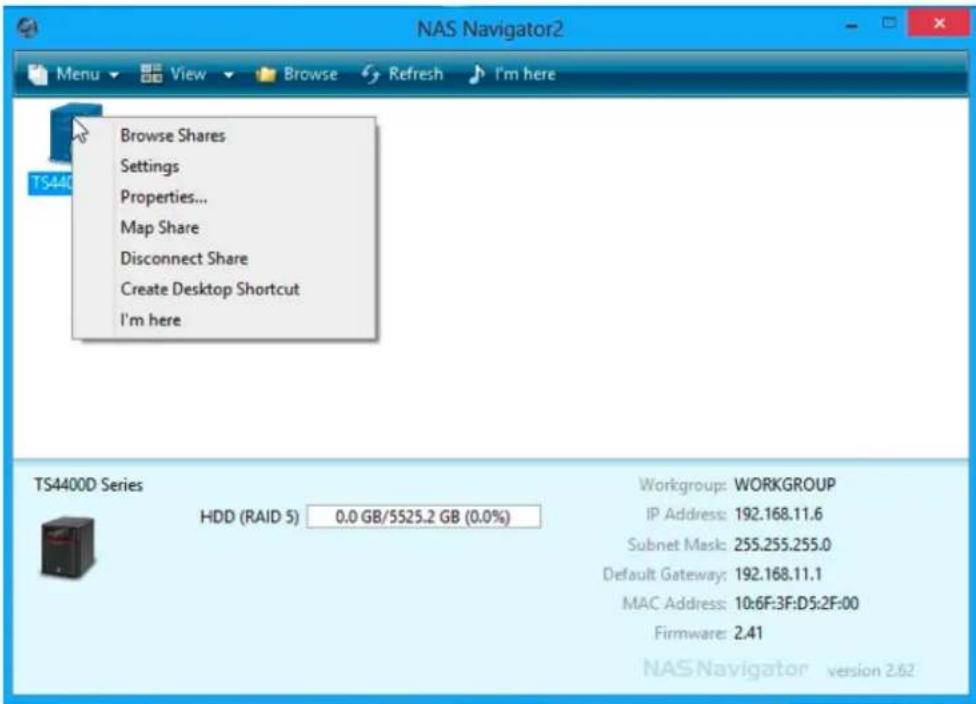
- Now please install the NAS Navigator on your computer and click 'Refresh' to reveal your new TeraStation™ 4000. Right click on it and select 'Settings'. A browser window will launch the admin interface. It's also possible to access the admin interface by entering the TS4000 series IP address (shown on the TS's display) directly into a browser window.
TeraStation™ 4000
Setup Guide
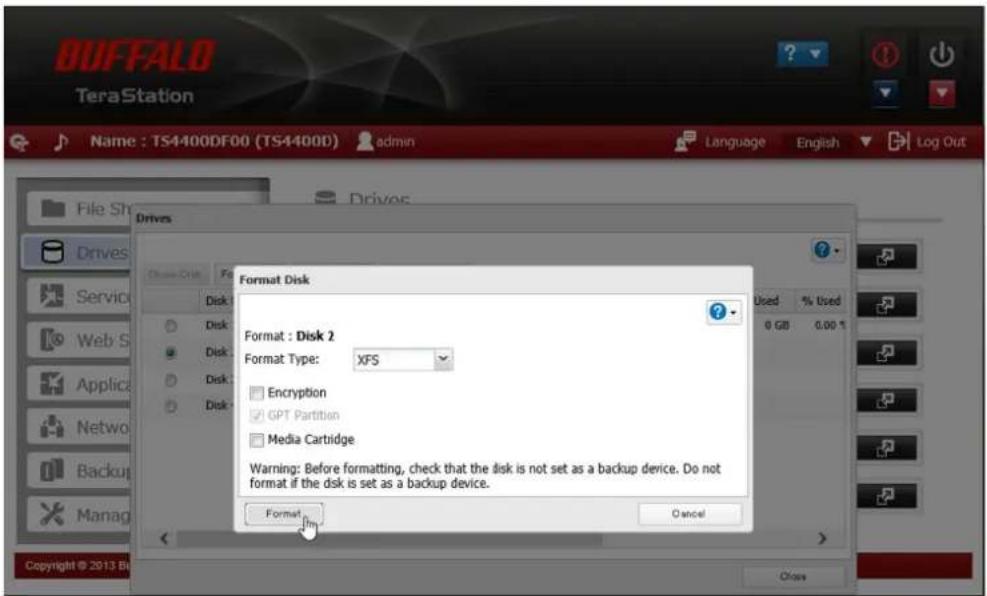
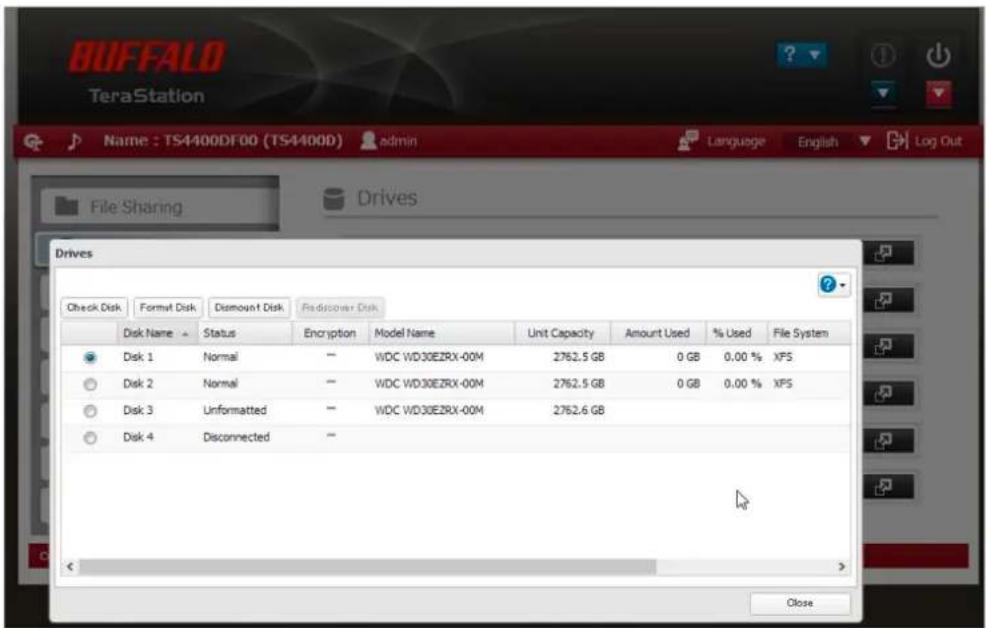
- Format all unformatted HDDs via the admin interface. Once formatting is completed the status in the admin page will change to 'Formatted' please wait to see this before continuing, depending on HDD capacity this could take approximately 8 minutes per drive.
Setup Guide
- After formatting, the Raid option is available. Please note: the setup process will not automatically create Raid. Once all your drives are formatted, please create the Raid or Raid Array that best suit your needs.

10a. After creating Raid 1, 5, 6, 10 (availability depending on number of disks installed) the TeraStation™ will automatically begin a Raid check.
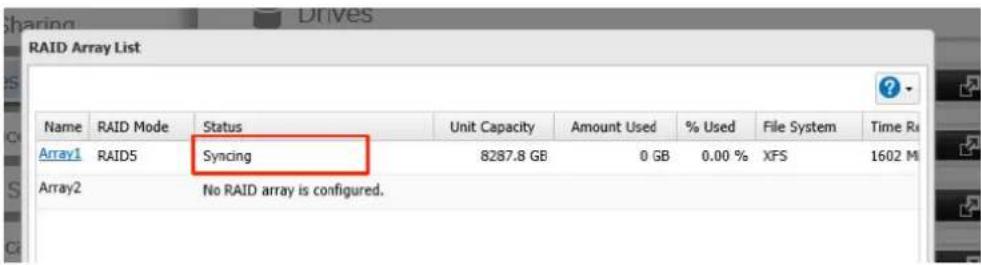
10b. The status shows 'Syncing' during the Raid check while the consistency of the file system is confirmed. This process can take up to 24 hours. However, please note, TeraStation™ is fully operable during this time as the Raid check is performed in the background.
- Once your Raid is created, next create folders according to your needs.
Notes:
If you boot the TeraStation™ without an HDD installed it will stop with a warning and red display with the message that booting from HDD failed. In this case, please switch off the unit with a long power button press and start from step 1 of this set up guide.
If instead of booting from the USB you boot from HDD (skipping step 3) the unit shows status as "boot from HDD1". In this case, please switch off with a long power button press and continue with step 2.
Brand : BUFFALO
Model : TS4400D
Category : Server