
Max Power Relief PM500 - Massage device OMRON - Free user manual and instructions
Find the device manual for free Max Power Relief PM500 OMRON in PDF.


| Product Type | TENS Massage Device (Transcutaneous Electrical Nerve Stimulation) |
| Model | PM500 (REF HV-F023-Z) |
| Dimensions | Approx. 2" (W) × 4.4" (H) × 1" (D) (52 mm × 112 mm × 25 mm) |
| Weight | Approx. 3.5 oz (100 g) including batteries |
| Power Source | DC 3 V (2 AAA alkaline or manganese batteries) |
| Battery Life | Approx. 4 months (15 min daily use, Lower Back mode, max intensity) |
| Preset Modes | 9 modes: Arm, Lower Back, Leg, Foot, Shoulder, Joint, Tap, Knead, Rub |
| Intensity Levels | 15 levels (1 low to 15 high) |
| Session Duration | Automatic 15-minute shut-off; recommended max 30 min per session, up to 3 times/day |
| Pads | 2 Long Life Pads™, self-adhesive, reusable up to 150 uses, washable |
| Electrode Cords | Included, replaceable |
| Output Frequency | Approx. 1 to 238 Hz |
| Pulse Duration | 150 μsec |
| Maximum Output Voltage | 70 V (during 500 Ω load) |
| IP Classification | IP22 (protected against fingers and oblique water drops) |
| Service Life | Device: 5 years; Pad: 150 uses |
| Operating Temperature | +50°F to +104°F (+10°C to +40°C), 30-80% RH |
| Storage Temperature | -4°F to +140°F (-20°C to +60°C), 10-95% RH |
| Cleaning Pads | Wash with fingertips under cold water; air-dry; no detergents |
| Cleaning Unit | Wipe with lightly moistened cloth; no chemicals |
| Safety Precautions | Do not use with pacemakers, implanted devices; avoid head, neck, chest, genitals; not for pregnant women or children |
| Warranty | Unit: 1 year; Pads: 30 days |
| Included Accessories | 2 Long Life Pads, 2 electrode cords, pad holder, belt clip, soft pouch, 2 AAA batteries, manual, quick start guide |
| Optional Accessories | PMLLPAD-L (3"x4.5") and PMLLPAD (2.5"x4") replacement pads |
Frequently Asked Questions - Max Power Relief PM500 OMRON
User questions about Max Power Relief PM500 OMRON
0 question about this device. Answer the ones you know or ask your own.
Ask a new question about this device
Download the instructions for your Massage device in PDF format for free! Find your manual Max Power Relief PM500 - OMRON and take your electronic device back in hand. On this page are published all the documents necessary for the use of your device. Max Power Relief PM500 by OMRON.
USER MANUAL Max Power Relief PM500 OMRON
Pads are for Single Patient Use Only
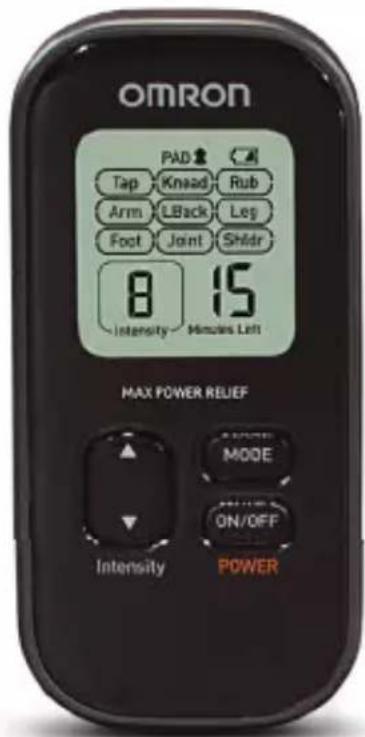
9 Modes
15 Power Levels
All for Healthcare
TABLE OF CONTENTS
- INTRODUCTION 3
- INTENDED USE 4
- SAVE THESE INSTRUCTIONS 5
- IMPORTANT SAFETY PRECAUTIONS AND WARNINGS....6
- HOW MAX POWER RELIEF WORKS.... 13
- KNOW YOUR UNIT....14
- ASSEMBLY STEPS....16
- GET STARTED WITH YOUR THERAPY 19
- HOW TO CONTROL AND REDUCE YOUR PAIN 26
- CLEANING AND STORAGE 28
- TROUBLESHOOTING 30
- LIMITED WARRANTY 32
- SPECIFICATIONS.... 34
- FCC STATEMENT 36
- GUIDANCE AND MANUFACTURER'S DECLARATION 37
1. INTRODUCTION
Thank you for purchasing the OMRON Max Power Relief.
The Max Power Relief is a portable TENS (Transcutaneous Electrical Nerve Stimulation) device that provides relief of chronic, acute* and arthritic pain. It is designed to reduce and relieve muscle and joint pain, stiffness and numbness in the back, arms, legs, shoulder and foot by applying electrical nerve stimulation to the surface of the skin near the site of the pain. The Max Power Relief uses comfortable, self-adhesive Long Life Pads™ that can be used up to 150 times.
TENS is a safe and drug-free pain relief solution that has been used for over 40 years by medical professionals such as physical therapists and chiropractors.
* Acute pain refers to sore or achy muscles due to strain from exercise or normal household and work activities.
- Register your product online at www.register-omron.com.
- Keep your purchase receipt as proof of purchase for warranty coverage.
2. INTENDED USE
This device is intended for the relief of pain associated with sore or aching muscles of the lower back, arms, legs, shoulder, or foot due to strain from exercise or normal household and work activities. When used for the symptomatic relief and management of chronic, intractable pain and relief of pain associated with arthritis, use the Shoulder mode of stimulation.
Environments of Use: Clinics, hospital and home environments
Patient Population: Adult
3. SAVE THESE INSTRUCTIONS
Symbols Glossary:
For symbol information, visit: OmronHealthcare.com/symbols-glossary
Contraindication
Do not use this device if you have a cardiac pacemaker, implanted defibrillator or other implanted metallic or electronic device. Such use could cause electric shock, burns, electrical interference or death.
4. IMPORTANT SAFETY PRECAUTIONS AND WARNINGS

WARNING
Indicates a potentially hazardous situation which, if not avoided, could result in death or serious injury.
DO NOT USE THIS UNIT WITH THESE OTHER DEVICES:
- Do not use this device while using another TENS device.
- With a life-supporting medical electronic device such as an artificial heart or lung or respirator.
- For Hospitals and Clinics: In the presence of electronic monitoring equipment such as cardiac monitors and ECG alarms because the equipment may not operate properly when the electrical stimulation device is in use.
- For Hospitals and Clinics: Simultaneous connection of a patient to high frequency surgical ME equipment may result in burns at the site of the stimulator electrodes and possible damage to the stimulator.
- For Hospitals and Clinics: Operation in close proximity (e.g. 1 m) to a shortwave or microwave therapy ME equipment may produce instability to the stimulator output.
DO NOT USE THIS UNIT UNDER THESE CONDITIONS
- Consult with your physician before using this unit.
The unit may cause lethal rhythm disturbances in certain susceptible individuals. If you have had a recent surgical procedure, the stimulation may disrupt the healing process.
Before using your unit, ensure that:
- The cord is not broken.
- The gel pad is not damaged.
- The electrode cord connection is not broken.
- The unit is intact and working.
- There is no battery leakage.
4. IMPORTANT SAFETY PRECAUTIONS AND WARNINGS
DO NOT USE ON THESE INDIVIDUALS
- Pregnant women.
- Do not use on children or infants because this device has not been evaluated for pediatric use.
- Keep out of the reach of young children because the electrode cord could cause strangulation.
- Persons incapable of expressing their thoughts or intentions.
- Persons incapable of operating the unit by themselves.
- Use caution if you have a tendency to bleed internally, such as following an injury or fracture.
- If you have suspected or diagnosed heart disease, you should follow precautions recommended by your physician.
- If you have suspected or diagnosed epilepsy, you should follow precautions recommended by your physician.
- Use caution if stimulation is applied over the menstruating uterus.
• DO NOT APPLY THE PADS TO THESE BODY AREAS:
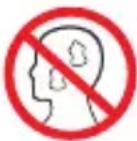 | The head, the mouth, or any area of the face. |
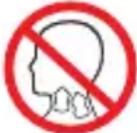 | The neck or any area of the throat because this could cause severe muscle spasms resulting in closure of the airway, difficulty in breathing, or adverse effects on heart rhythm or blood pressure. |
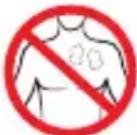 | Near the heart, or on genital area. |
4. IMPORTANT SAFETY PRECAUTIONS AND WARNINGS
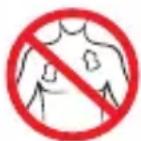 | Both sides of thechest cavitysimultaneously (lateral or front and back), oracross your chestbecause the introduction of electrical current may cause rhythm disturbances which could be lethal. |
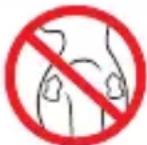 | |
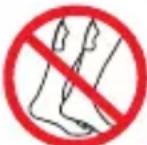 | On thecalves of both legsat the same time because this may cause cardiac disturbance. |
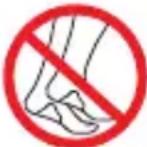 | On thebottom of both feetat the same time because this may cause cardiac disturbance. |
Open wounds or rashes or over swollen, red, infected or inflamed areas or skin eruptions (such as varicose veins, phlebitis, thrombophlebitis and thrombosis), or on top of or close to cancerous lesions, or over ares of skin that lack normal sensation.
DO NOT USE THIS UNIT DURING THESE ACTIVITIES
- When in the bath or shower;
- While sleeping;
- While driving, operating machinery, or during any activity in which electrical stimulation can put you at risk of injury.
PAIN MANAGEMENT WARNINGS
- If you have had medical or physical treatment for your pain, consult with your physician before using this unit.
- If your pain does not improve, becomes seriously chronic or severe, or continues for more than five days, stop using the unit and consult with your physician.
- The mere existence of pain functions as a very important warning telling us that something is wrong. Therefore, if you suffer from any serious illness, consult your physician in order to confirm that it is advisable for you to use this unit.
4. IMPORTANT SAFETY PRECAUTIONS AND WARNINGS
DO NOT ALTER THE UNIT
- Do not plug this cord into anything other than this unit.
- No modification of this unit is allowed.
- Use this unit only with the leads, electrodes, pads and accessories recommended by the manufacturer to avoid damage to the unit.
natural_image
Line drawing of a rectangular electronic device with buttons and display (no text or symbols)WARNINGS REGARDING THE PADS
- Apply pads to normal, healthy, dry, clean skin (of adult patients).
- If you experience any skin irritation or redness after a session, do not continue stimulation in that area of the skin.
Possible Adverse Reactions
- You should stop using the unit and consult with your physician if you experience adverse reactions from the unit.
- You may experience skin irritation and burns beneath the stimulation electrodes applied to your skin.
- You may experience headache and other painful sensations during or following the application of electrical stimulation near your eyes and to your head and face.

CAUTION
Indicates a potentially hazardous situation which, if not avoided, may result in minor or moderate injury to the user or patient, or cause damage to the equipment or other property.
PRECAUTIONS REGARDING THE PADS
- Do not move the pads to another location while the unit is on.
- Therapy won’t work with just one pad. You MUST USE TWO PADS at the same time.
- Make sure the components are connected well and the pads are fixed on the part of the body you wish to treat or the therapy may not be effective.
- Pad should not touch any metal object, such as a belt buckle, necklace, or other metal worn under clothing.
- Do not overlap pads or put pads on top of each other.
Gel pads may also stick together and cause gel to be removed when separating. - Do not share pads with another person. This may cause a skin irritation or infection. Pads are intended for use by one person.
- Do not leave pads attached to the skin after treatment.
4. IMPORTANT SAFETY PRECAUTIONS AND WARNINGS
- Do not bend or fold the pads because the gel may get damaged and it won't stick or function properly.
- To avoid damage to the adhesive surface of the pads, put the pads only on the skin or on the plastic pad holder provided.
- Always place clean pads in accordance with illustrations provided (Refer to pages 19-22, Pad Placement).
- Do not apply ointment or any solvent to the pads or to your skin because it will disrupt the pads from functioning properly. The self-adhesive pads will adhere to your skin.
- Do not add spray, lotions or creams to skin or pads.
- Place pads on each side of the pain, not directly on the pain.
- Place pads at least 1 inch (3 cm) apart for optimal results.
CAUTION WHILE USING UNIT
MAIN UNIT
- If the unit is not functioning properly or you feel discomfort, immediately stop using it.
- Do not use for any other purpose except for what it is intended.
- Do not place in a room with high humidity, such as a bathroom. This will damage the unit. Ideal temperature for using 50 °F - 104 °F (10 °C - 40 °C), 30 - 80 % relative humidity.
- Do not use the unit without proper lighting. You may not be able to operate unit successfully.
- While using this device, make sure that no mobile phone or any other electrical devices that emit electromagnetic fields is within 12 inches (30 cm). This may result in poor performance of the device.
- Do NOT turn unit on until pads are on your skin.
CORD
- Do not insert the electrode plug into any place other than the jack on the unit.
- Do not pull on the electrode cord during treatment.
- Do not bend or pull the end of the cord.
- When pulling out the cord from the unit, hold the plug and pull.
- Replace the cord when broken or damaged.
4. IMPORTANT SAFETY PRECAUTIONS AND WARNINGS
BATTERY
- Do not throw the batteries into a fire. The batteries may explode.
- Dispose of the unit, batteries, and components according to applicable legal regulations. Unlawful disposal may cause environmental pollution.
- Do not mix alkaline and manganese batteries as this will shorten the battery life.
- During therapy, do not remove the battery cover and do not touch the battery terminals.
- Do not use batteries after their expiration date.
PADS
- The size, shape and type of pads may affect the safety and effectiveness of electrical stimulation.
- The electrical performance characteristics of pads may affect the safety and effectiveness of electrical stimulation.
- Using pads that are too small or incorrectly applied, could result in discomfort or skin burns.
- Detach the pads before replacing the batteries.
General Precautions
- The long-term effects of electrical stimulation are unknown.
- Apply stimulation to only normal, intact, clean, dry and healthy skin.
- TENS is not effective in treating the original source or cause of the pain, including headache.
- TENS is not a substitute for pain medications and other pain management therapies.
• TENS devices do not cure disease or injuries. - TENS is a symptomatic treatment and, as such, suppresses the sensation of pain that would otherwise serve as a protective mechanism.
- Effectiveness is highly dependent upon patient selection by a practitioner qualified in the management of pain patients.
- You may experience skin irritation or hypersensitivity due to the electrical stimulation or electrical conductive medium (gel).
- Keep unit away from young children. The unit contains small pieces that may be swallowed. Immediately contact your physician.
- Ensure that this device has acclimated to room temperature before using. Using this device after an extreme temperature change could lead to an improper operation. OMRON recommends waiting for approximately 2 hours for the device to warm up or cool down when the device is used in an environment within the temperature specified as operating conditions after it is stored either at the maximum or at the minimum storage temperature. For operating, storage and transport conditions, refer to page 34.
- The clip may fall off if attached to soft or thin clothing.
4. IMPORTANT SAFETY PRECAUTIONS AND WARNINGS
Possible Adverse Reactions
- Do not use to treat one region for extended periods of time (more than 30 minutes a session, up to three times/day) or muscles in that region may become exhausted and sore.
5. HOW MAX POWER RELIEF WORKS
How does it work?
The OMRON Max Power Relief is a powerful TENS device that provides relief of chronic, acute* and arthritic pain.
Scientific theory suggests that TENS therapy may work in several ways:
- Gentle electrical pulses move through the skin to nearby nerves to block or shut out the pain message from ever reaching the brain from the source of the pain.
- Gentle electrical pulses increase the production of the body's natural pain killers, such as endorphins.
- Blood circulation improves as muscles contract and relax with the flow of the electrical stimulation.
* Acute pain refers to sore or achy muscles due to strain from exercise or normal household and work activities.
6. KNOW YOUR UNIT
PACKAGE CONTENTS
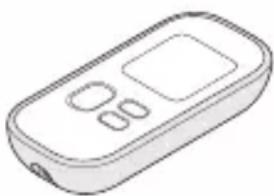
Main Unit Electrode Cords
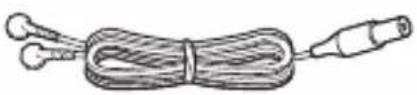
natural_image
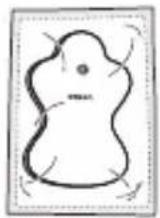
Illustration of a coiled cable with two connectors (no text or symbols)Pad Holder (1 standard)
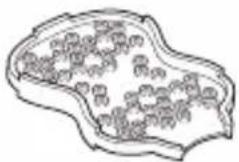
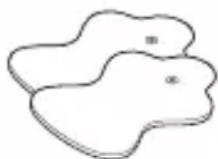
2 LONG LIFE PADS™ (1 standard pair)
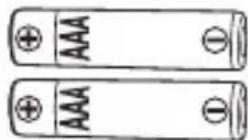
Batteries
(2 AAA size (LR03) batteries)
Belt Clip
Soft Pouch
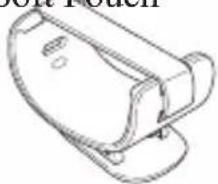
natural_image
Line drawing of a mechanical component with no visible text or symbols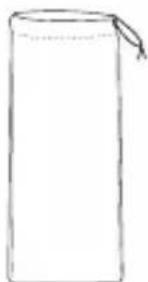
natural_image
Simple line drawing of a cylindrical object with a loop on top (no text or symbols)Instruction Manual
Quick Start Guide/Pad Placement Guide
6. KNOW YOUR UNIT
FEATURES
- Nine preset modes (Arm, Lower Back, Leg, Foot, Shoulder, Joint, Tap, Knead, Rub).
- Fifteen intensity levels (1 low to 15 high).
- Pair of pads (durable, reusable, washable, up to 150 uses).
(Only use OMRON manufactured pads and cords with this unit).
-
Automatic15-minute shut off.
-
Big screen lets you clearly control your therapy with mode, intensity level and minutes left displayed.
- Low battery icon displays to remind you when to replace the batteries.
- Pad icon displays if pad falls off.
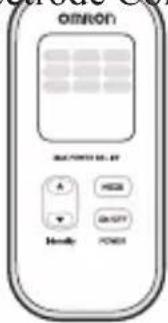
BUTTONS AND THEIR FUNCTIONS
Pad Icon
If the pad dislodges, the pad icon will be displayed.
Intensity Level
Intensity Button
Set according to your needs.
Press ▲ for higher intensity.
Press ▼ for lower intensity.
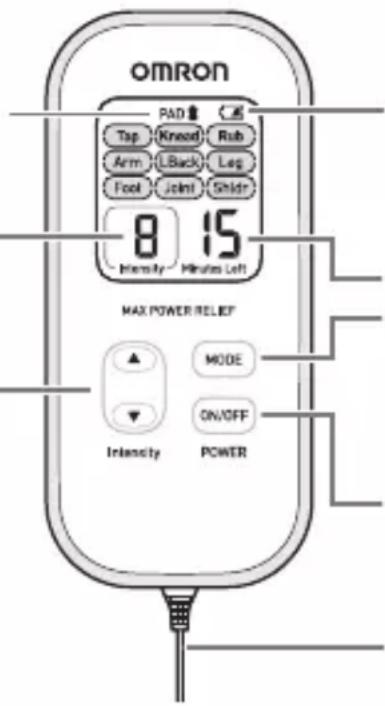
Battery Icon
If the battery is low, the battery icon will display.
: Battery is close to low.
☐ : Battery is low.
Minutes Remaining
Mode Button
Select one of the nine preset modes to treat your pain. Mode type will show on screen.
Power Button
Push once for “ON” and again for “OFF”.
Cord
7. ASSEMBLY STEPS
Before using your unit, ensure that:
- The cord is not broken.
- The gel pad is not damaged.
- The electrode cord connection is not broken.
- The unit is intact and working.
- There is no battery leakage.
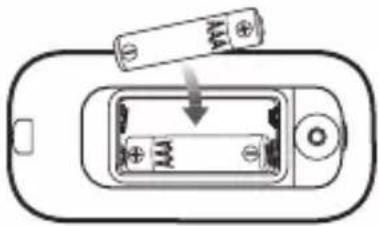
STEP 1 - INSERT BATTERIES
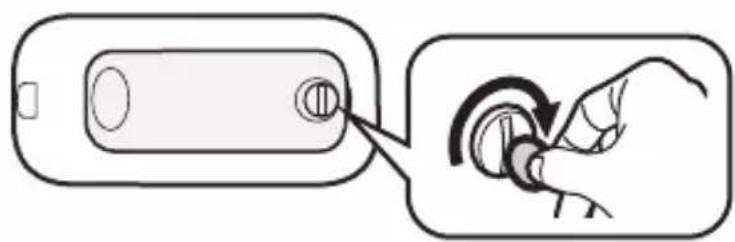
1 Remove the battery cover on the back using a coin.
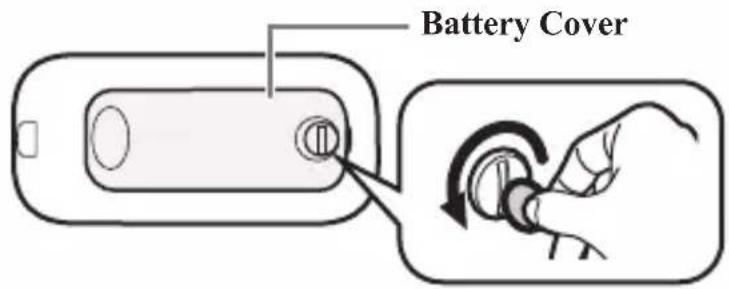
2 Insert batteries. Make sure the + signs correspond when inserting batteries.
natural_image
Diagram of a battery holder with an external resistor and battery, showing internal components (no text or symbols)3 Reinstall the battery cover. Tighten with a coin.
natural_image
Diagram showing a hand pressing a button on a device, with no text or symbols present.7. ASSEMBLY STEPS
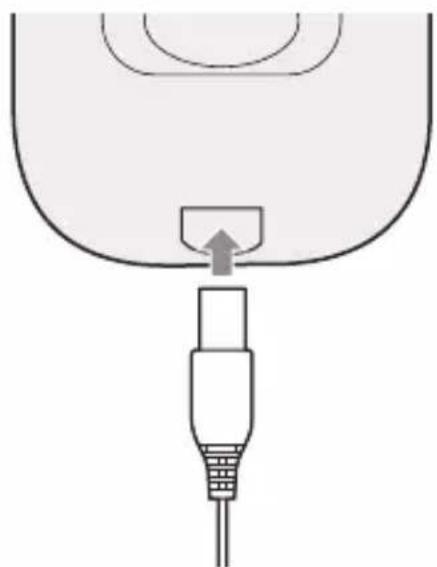
STEP 2 – ATTACH ELECTRODE CORD TO THE MAIN UNIT
Attach the electrode cord plug to the bottom of the main unit.
natural_image
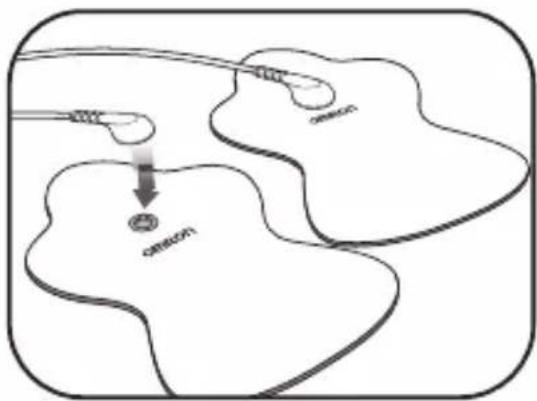
Simple line drawing of a medical device with a connector and arrow indicating insertion (no text or symbols)STEP 3 – SNAP EITHER ELECTRODE CORD TO EACH OF THE PADS
For the first time, take the pads out of the sealed package.

CAUTION
- Do NOT turn unit on until pads are on your skin.
- Therapy won't work with just one pad. You MUST USE TWO PADS at the same time.
NOTE:
Pads will not stick if the skin has too much hair. We recommend shaving the area for effective treatment.
7. ASSEMBLY STEPS
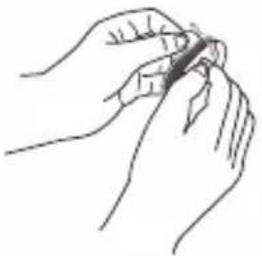
STEP 4 – REMOVE AND DISCARD PLASTIC FILM FROM PADS
Remove the clear plastic film from the back of the pad.
Discard the plastic film backing as well as the clear packaging.
natural_image
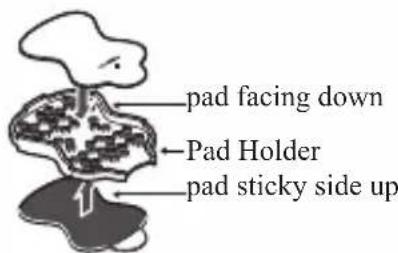
Line drawing of two hands holding a small object, possibly a tool or device (no text or symbols present)STORING PADS ON PAD HOLDER
Remove plastic film and put sticky side of pads on either side of the pad holder.
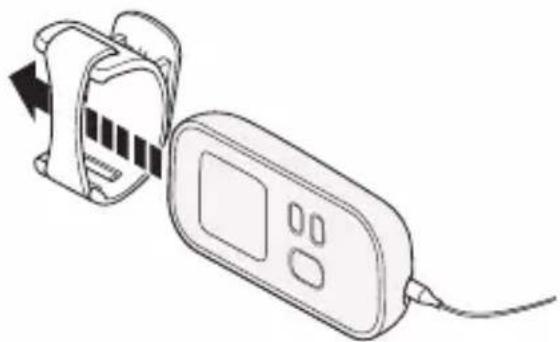
STEP 5 – ATTACH THE UNIT TO THE BELT CLIP
natural_image
Line drawing of a device with a clip and control panel, showing a left-hand rule with an arrow indicating rotation (no text or symbols present)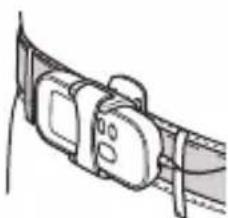
natural_image
Simple line drawing of a device with a strap and buttons (no text or symbols)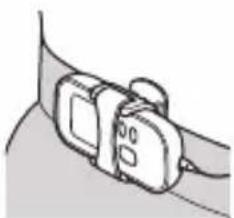
natural_image
Simple line drawing of a device with a strap and connector (no text or symbols)
CAUTION
- The clip may fall off if attached to soft or thin clothing.
8. GET STARTED WITH YOUR THERAPY
(USE FOR A MAXIMUM OF 30 MINUTES PER SESSION)
STEP 1 – PAD PLACEMENT

CAUTION
For optimal therapy:
- Place pads on each side of the pain, not directly on the pain.
- Place pads at least 1 inch (3 cm) apart for optimal results.
- Therapy won't work with just one pad. You MUST USE TWO PADS at the same time.
- Do not overlap pads or put pads on top of each other.
- Do not add spray, lotions or creams to skin or pads.
- Do not share pads with another person.
Before starting your therapy, rate your pain from 1 low to 10 high. This mental check gives you a basis you can compare to once the session is complete.
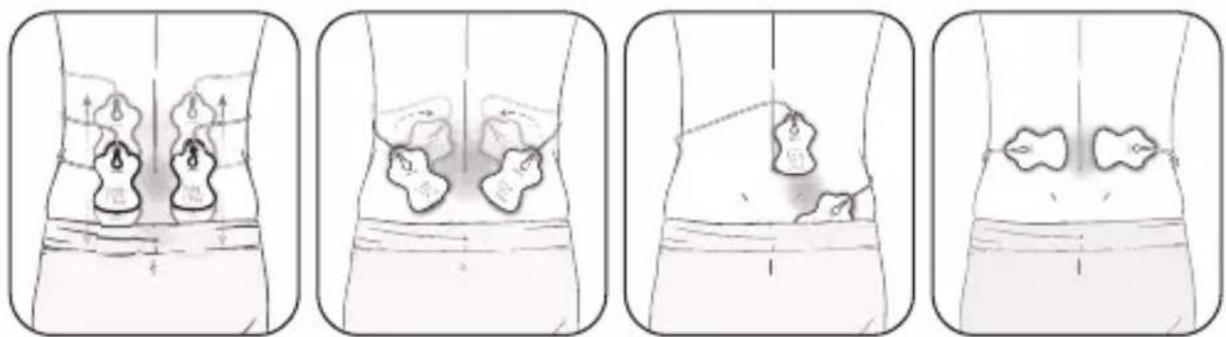
LOWER BACK
Attach both pads on the lower back according to your pain.
Place pads on muscle of back, not on spine.
8. GET STARTED WITH YOUR THERAPY
STEP 1 – PAD PLACEMENT (continued)
natural_image
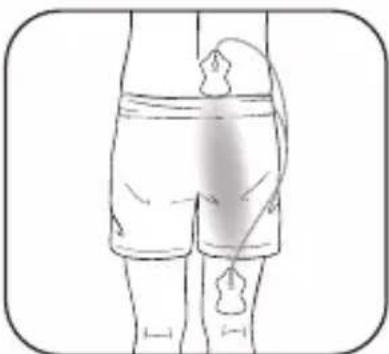
Line drawing of a person's lower body with bandages and a medical device attached (no text or symbols)LOWER BACK
Attach one pad below and above the region in pain, both on same side.
natural_image
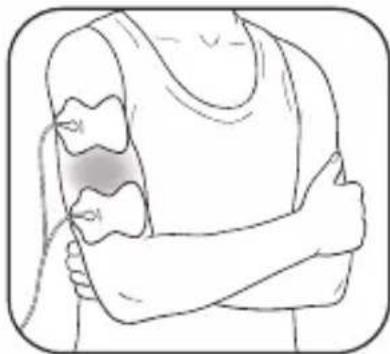
Line drawing of a person holding an arm with two shaded areas, no text or symbols presentARM
Attach pads on each side of the region where you feel pain.
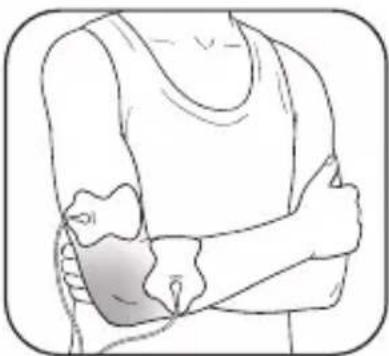
natural_image
Illustration of a person's arm with shaded area indicating muscle or joint area (no text or symbols)JOINT
(ELBOW)
Attach pads on each side of the joint with the pain.
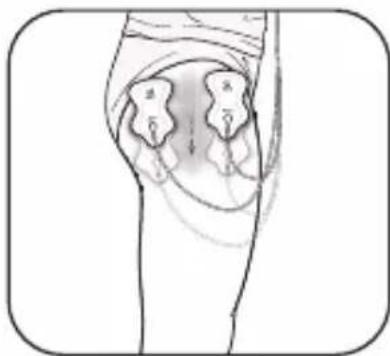
natural_image
Anatomical illustration of pelvic bones with labeled regions (no text or symbols present)LEG
(HIP & THIGH)
Attach pads on each side of the area with pain.
8. GET STARTED WITH YOUR THERAPY
STEP 1 – PAD PLACEMENT (continued)
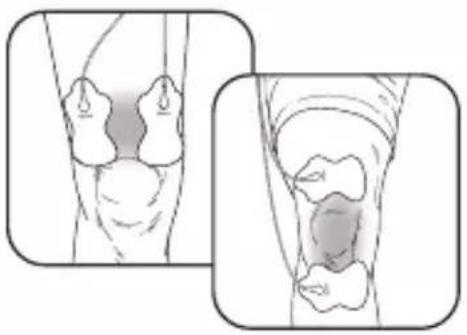
natural_image
Medical illustration showing two views of a knee joint with shaded areas indicating different regions (no text or labels present)JOINT
(KNEE)
Attach both pads above the knee or above and below the joint with pain.
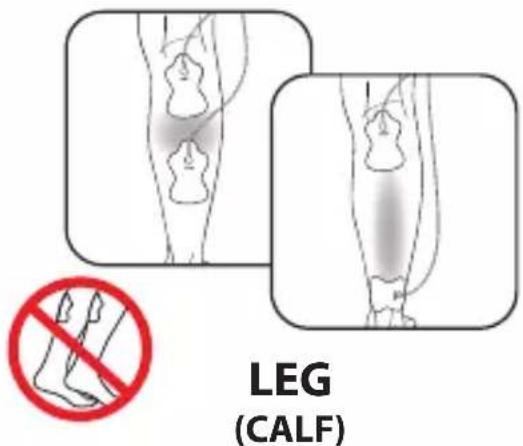
Attach both pads on the calf where you feel pain.

WARNING
- Do not apply the pads on the calves of both legs at the same time.
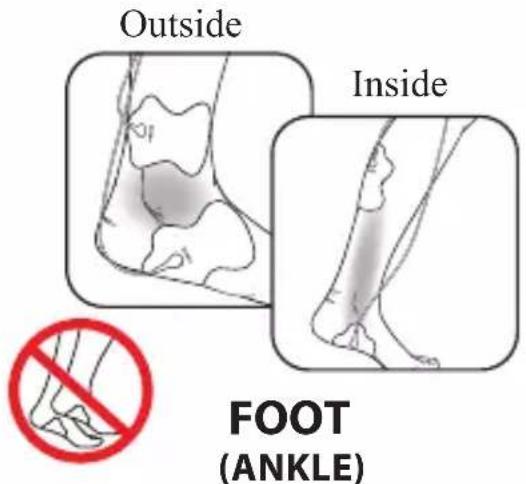
Attach pads on the left for pain on the outside of your ankle/foot. Attach the pads on the right for pain on the inside of your ankle/foot.

WARNING
- Do not apply the pads on the bottom of both feet at the same time.
8. GET STARTED WITH YOUR THERAPY
STEP 1 – PAD PLACEMENT (continued)
natural_image
Anatomical illustration of human back with two heart-shaped lesions (no text or labels)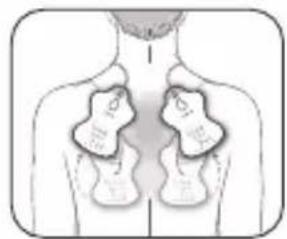
natural_image
Anatomical illustration of human upper back with two labeled medical device patches (no text or symbols present)SHOULDER
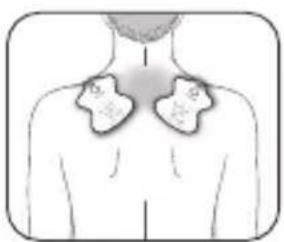
Attach both pads on the shoulders according to your pain.
natural_image
Illustration of a human shoulder with a highlighted area (no text or symbols)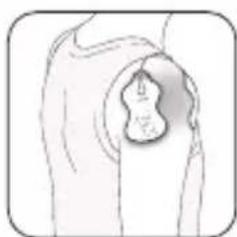
natural_image
Line drawing of a human shoulder with a circular anatomical symbol on the chest (no text or labels)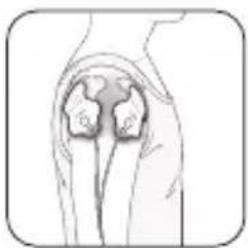
natural_image
Anatomical illustration of a human hip joint (no text or labels)SHOULDER
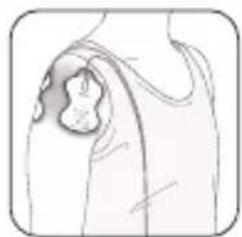
Attach one pad on the front and on the back of your shoulder.
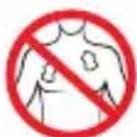
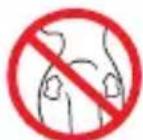
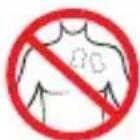

WARNING
- Do not apply the pads on both sides of the chest cavity simultaneously (lateral or front and back), or across your chest because the introduction of electrical current may cause rhythm disturbances which could be lethal.
- Do not apply the pads near the heart.
8. GET STARTED WITH YOUR THERAPY
STEP 2 – SELECT 1 OF 9 MODES
- Push "ON/OFF".
- Choose 1 of the 9 modes. Modes cannot be combined.
Choose a massage-like mode
- Tap
- Knead
- Rub
Or choose a pain mode:
- Arm
- Lower Back
- Leg
- Foot
- Joint (Knee/elbow/wrist)
- Shoulder
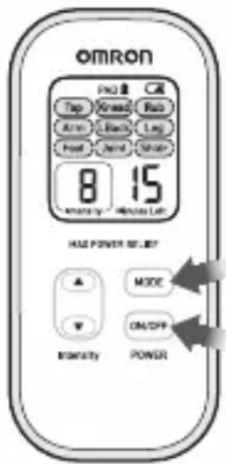
Push "MODE"
Push "ON"
How to switch modes
The unit automatically defaults to the last mode selected. Each time you push the mode button, it switches to the next mode at the lowest intensity. You can only use ONE MODE at a time.
How to select the right mode
Any of the modes can be used on body parts or pains described in this manual or Quick Start Guide/Pad Placement Guide.
Select the mode that feels right for your unique pain.
8. GET STARTED WITH YOUR THERAPY
STEP 2 – SELECT 1 OF 9 MODES (continued)
Arm Lower Back Leg Foot
| Tap | Knead | Rub |
| Arm | LBack | Leg |
| Foot | Joint | Shldr |
| Tap | Knead | Rub |
| Arm | LBack | Leg |
| Foot | Joint | Shldr |
| Tap | Knead | Rub |
| Arm | LBack | Leg |
| Foot | Joint | Shldr |
| Tap | Knead | Rub |
| Arm | LBack | Leg |
| Foot | Joint | Shldr |
| Therapies designed for | Arm Lower Back Leg Foot | |||
| What does the therapy deliver? | Series of low to medium rate tapping, tingling and pulsing sensations. | Series of high rate to low tingling sensations, followed by tapping. With higher intensity, you may feel kneading or massage-like sensations. | Series of low to medium tapping and rubbing sensations. | Series of low rate tapping, pulsing sensations. |
Joint Shoulder
| Tap | Knead | Rub |
| Arm | LBack | Leg |
| Foot | Joint | Shldr |
Tap Knead
| Tap | Knead | Rub |
| Arm | LBack | Leg |
| Foot | Joint | Shldr |
| Tap | Knead | Rub |
| Arm | LBack | Leg |
| Foot | Joint | Shldr |
| Tap | Knead | Rub |
| Arm | LBack | Leg |
| Foot | Joint | Shldr |
Rub
| Tap | Knead | Rub |
| Arm | LBack | Leg |
| Foot | Joint | Shldr |
| Therapies designed for | Joint | Shoulder | Tap | Knead | Rub |
| What does the therapy deliver? | Series of medium to high rate tapping, pulsing sensations. | Series of low to high rate tapping, pulsing, kneading and massage-like sensations. | Series of low rate tapping sensations. | Series of medium rate pulsing sensations to mimic massage. | Series of high rate pulsing sensations to mimic hands rubbing. |
8. GET STARTED WITH YOUR THERAPY
STEP 3 – SELECT THE CORRECT INTENSITY LEVEL (1 LOW – 15 HIGH)
Start at the lowest intensity level and slowly increase it by pushing the “▲(Up)” arrow button. You should feel a gentle pulsing sensation.
How do I pick the right intensity level for my pain?
Each time you push the “▲(Up)” or “▼(Down)” arrow, it moves to another level. If the stimulation sensation becomes weaker or disappears, increase the intensity until it is restored. But, if the sensation is at all uncomfortable, press the down arrow to decrease the intensity.
- Press ▲ for higher intensity.
- Press ▼ for lower intensity.
How long is the therapy?
The unit will continue automatically for 15 minutes before it shuts off. We recommend a total of two 15-minutes therapy in one sitting, up to three times/day.
The screen shows you how many minutes are remaining.
Intensity level out of 15 levels
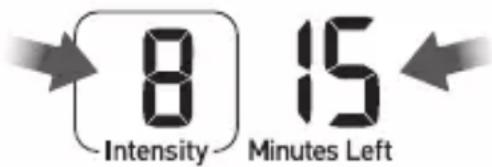
Minutes left out of 15 minutes
9. HOW TO CONTROL AND REDUCE YOUR PAIN
When should I start therapy?
Use as soon as your pain begins. Start with one session (unit automatically turns off at 15 minutes).
Get to your pain early
If you get to your pain early, it may prevent the pain from becoming worse, or even chronic. It's better for you to get it under control sooner so that it does not reach a high pain threshold where it limits your daily activities.
How long should you use it?
Start with one 15-minute session. Rate your pain to check your progress, 1 low to 10 high. Stop therapy session if pain has reduced or stopped. Press the “On” button to continue therapy for another 15-minute session.
1 session Max minutes/session Max times/day 15-minute 30 minutes 3 times per day automatic shut-off

CAUTION
Possible Adverse Reactions
Do not use to treat one region for extended periods of time (more than 30 minutes a session, up to 3 times/day) or muscles in that region may become exhausted and sore.
When to stop using the unit?
- If you experience an adverse reaction (skin irritation/redness/burns, headache or other painful sensation, or if you feel any unusual discomfort).
- If your pain does not improve, becomes seriously chronic and severe, or continues for more than five days.
9. HOW TO CONTROL AND REDUCE YOUR PAIN
What type of pain is it best for?
This therapy works best on acute pain because it is localized. Acute pain is pain in one area for less than 3 months. If you have chronic pain, you may have pain in more than one area and for longer than 6 months. Chronic pain may be compounded by other issues that this unit cannot address.
Remember, this unit does not cure your pain or the original cause of the pain. It provides temporary relief or reduction of pain so that you can control your life and activities better.
10. CLEANING AND STORAGE
The unit is designed for repeated use over time. The pads will last up to 150 uses, or 5 months (based on use one time per day). Here are important cleaning and storage instructions:
Cleaning the pads
- Turn the power off and remove the electrode cord from the pads.
- Wash the pads when the adhesive surface becomes dirty and/or the pads are difficult to adhere.
- Wash the pad softly with your fingertips under slow running cold water for several seconds (do not use a sponge/cloth/sharp object like a nail on adhesive side, do not use detergents, chemicals or soap).
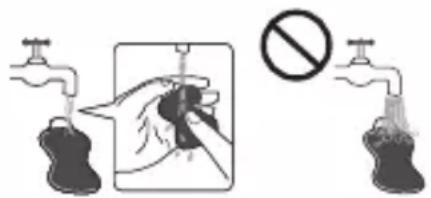
- Pads can be washed after 15 uses, approximately ten times for up to 150 uses. Do not wash the pads too long or too frequently.
- Dry the non-sticky surface of the pads and let the adhesive surface air-dry completely. Do not wipe with a tissue paper or cloth.
- Pads are replaceable and can be purchased when needed by calling 1-800-634-4350 or going to OmronHealthcare.com
The life of the pads may vary by how often the pads are washed, the skin condition, and how the pads are stored.
When should you replace your pads?
Replace the pads when they no longer stick to your skin or if more than 25% of the pad's surface is not in contact with your skin.
Cleaning the unit
- Turn unit off and disconnect the electrode cords from the pads.
-
Clean with a lightly moistened cloth (or a cloth soaked in a neutral cleaning solution) and wipe gently.
-
Do not use chemicals (like thinner, benzene).
- Do not let water get into the internal area.
10. CLEANING AND STORAGE
Storing the pads
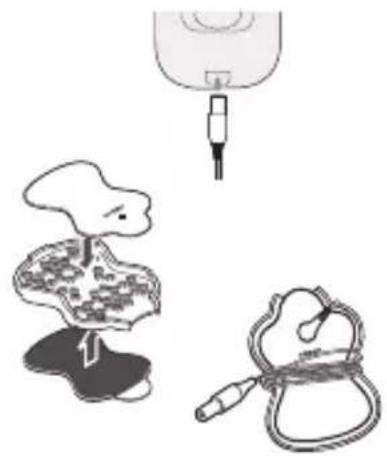
- Turn the unit off and remove the cord from the bottom of the unit.
- Remove the pads from your body.
- Leave the electrode cords connected to the pads.
Place the pads on the pad holder, one pad on each side with the sticky side of each pad on the pad holder.
- Wrap the electrode cords around the pad holder.
Storing the unit and pads
- Store the unit with the belt clip on.
Store the pads with the electrode cords on the pad holder, and put into the pouch. - Do not keep in areas subject to direct sunlight, high or low temperatures, humid areas, near a fire, vibration, or shock.
Operating and storage temperature, +50^ to +104^ (+10^ to +40^) , 30 to 80% relative humidity.
- Do not keep in places that can be easily reached by children.
- When not in use for a long period, remove the batteries before storage to avoid liquid discharge from batteries.
- Do not wrap the electrode cords around the unit because it may damage the cord.
natural_image
Illustration of a medical procedure with a catheter and two separate illustrations (no text or symbols)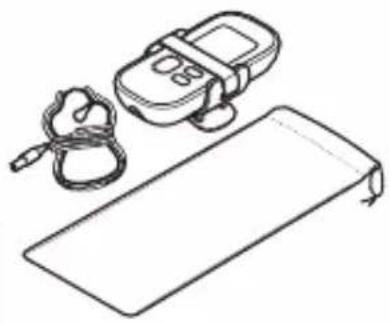
natural_image
Line drawing of a medical device with a bandage and a handheld device (no text or symbols)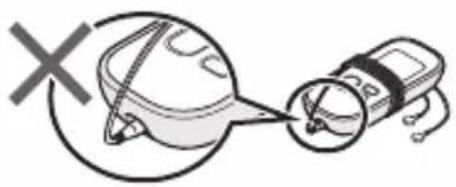
natural_image
Diagram showing a device connected to a globe with a cross mark, no text or symbols present11. TROUBLESHOOTING
If any of the below problems occur, check to make sure that no other electrical device is within 12 inches (30 cm). If the problem persists, refer to the table below.
| If this happens... Possible causes... Try this solution... | ||
| The intensity is not felt. Very weak intensity level. | Are you using only one pad? Put the other pad on your skin. You must use BOTH PADS for therapy to work. | |
| Have you removed the transparent film from the pad? | Peel off film on the adhesive surface of pads. | |
| Are the pads stacked together or do pads overlap? | Check placement of pads. Refer to Pad Placement Guide. | |
| Is the cord properly connected to the unit? | Connect cord plug correctly into the jack at bottom of this unit. | |
| Is the intensity setting getting weak? Press the ▲ up button. | ||
| Is the gel damaged? Replace pad. | ||
| Are the batteries weak? Replace both AA batteries. | ||
| Is the intensity “1”? Press the ▲ up button. | ||
| The skin turns red or the skin feels irritated. | Is the adhesive surface of pads dirty or dry? | Wash adhesive surface of pads softly with your fingertips for about 3 seconds under slow running water. |
| Is therapy time too long? Use less than 15 minutes. | ||
| Are the two pads attached properly to the body? | Refer to the Pad Placement Guide and attach correctly. | |
| Is the pad surface worn out? Replace both pads at the same time. | ||
| No power source. Are the polarities of battery (+ and -) aligned in the wrong direction? Are the batteries depleted? | Check batteries for correct alignment. Replace batteries. | |
| Power cut off during use. | Are the batteries weak? Replace both batteries at the same time. | |
| Is the cord broken? Replace cord. | ||
- TROUBLESHOOTING
| If this happens... Possible causes... Try this solution... | ||
| Battery icon is empty. Are the batteries weak? Replace both batteries at the same time. | ||
| Gel pad does not stick to skin. | Have you removed the transparent film from the pad? | Peel off film from the adhesive surface of pads. |
| Is the pad wet? Is your skin too wet? Dry the pad. Dry the skin. | ||
| The gel pad may be damaged. Replace the pad. | ||
| Is there too much hair on your skin? Shave the immediate area for proper pad adhesion. | ||
| Are you using pad while perspiring? Dry the pad placement area. | ||
| Have the pads been washed too long and/or too frequently? | Leave the pad in freezer for overnight. | |
| Were the pads stored under high temperature, high humidity, or direct sunshine? | Replace both pads. | |
| Pad icon is displayed.PAD | Only one pad is attached, or both pads are not attached. | Reattach detached pad(s) onto the skin firmly. |
| Have you removed the transparent film from the pad? | Peel off film from the adhesive surface of pads. | |
| Is the cord properly connected to the main unit? | Connect cord plug correctly into the jack at the bottom of the main unit. | |
| Is the adhesive surface of pads dirty or dry? | Wash adhesive surface of pads softly with your fingertips for about 3 seconds under slow running water. | |
| If the above measures are not effective, contact us at 1-800-634-4350. | ||
12. LIMITED WARRANTY
Your OMRON Max Power Relief unit, excluding the batteries and pads, is warranted to be free from defects in materials and workmanship appearing within 1 year from the date of purchase, when used in accordance with the instructions provided with the device. The above warranty extends only to the original retail purchaser.
The pads are warranted to be free from defects in materials and workmanship appearing within 30 days from the date of purchase when the device is used in accordance with the instructions provided with the device. The above warranty extends only to the original retail purchaser.
We will, at our option, replace without charge any unit covered by the above warranty. Replacement is our only responsibility and your only remedy under the above warranty.
To obtain warranty service, contact Customer Service by calling 1-800-634-4350 for the address of the inspection center and the return shipping and handling fee that may apply. Enclose the proof of purchase. Include a letter, with your name, address, phone number, and description of the specific problem. Pack the product carefully to prevent damage in transit. Because of possible loss in transit, we recommend insuring the product with return receipt requested.
THE FOREGOING IS THE SOLE WARRANTY PROVIDED BY OMRON IN CONNECTION WITH THIS PRODUCT, AND OMRON HEREBY DISCLAIMS ANY OTHER WARRANTIES, EXPRESS OR IMPLIED, INCLUDING IMPLIED WARRANTIES OF MERCHANTABILITY AND FITNESS FOR A PARTICULAR PURPOSE. IMPLIED WARRANTIES AND OTHER TERMS THAT MAY BE IMPOSED BY LAW, IF ANY, ARE LIMITED IN DURATION TO THE PERIOD OF THE ABOVE EXPRESS WARRANTY.
SOME STATES DO NOT ALLOW LIMITATIONS ON HOW LONG AN IMPLIED WARRANTY LASTS, SO THE ABOVE LIMITATION MAY NOT APPLY TO YOU.
OMRON SHALL NOT BE LIABLE FOR LOSS OF USE OR ANY OTHER SPECIAL, INCIDENTAL, CONSEQUENTIAL OR INDIRECT COSTS, EXPENSES OR DAMAGES.
SOME STATES DO NOT ALLOW THE EXCLUSION OR LIMITATION OF INCIDENTAL OR CONSEQUENTIAL DAMAGES, SO THE ABOVE LIMITATION OR EXCLUSION MAY NOT APPLY TO YOU.
12. LIMITED WARRANTY
This warranty provides you with specific legal rights, and you may have other rights that vary by jurisdiction.
FOR CUSTOMER SERVICE
Visit our web site at: OmronHealthcare.com
Call toll free: 1-800-634-4350
13. SPECIFICATIONS
| Product Name OMRON Max Power Relief | |
| Model # | PM500 REF HV-F023-Z |
| Power Source DC 3 V | (2 AAA alkaline batteries or 2 AAA manganese batteries) |
| Battery Life | New batteries (2 AAA alkaline batteries) will last for approx. 4 months (when used for 15 minutes a day, Lower Back Mode, max. intensity). |
| Frequency Approx. 1 to 238 Hz | |
| PULSE Duration 150 μsec | |
| Maximum Output Voltage 70 V | (during 500 Ω load) |
| Power Control 15 intensity levels | |
| Operating and Storage Conditions (When using product) | +50 °F to +104 °F (+10 °C to +40 °C),30 to 80 % RH (non-condensing), 700 to 1060 hPa |
| Transportation Conditions -4 °F | to +140 °F (-20 °C to +60 °C),10 to 95 % RH, 700 to 1060 hPa |
| Weight | Approx. 3.5 oz (100 g) (incl. batteries) |
| Outer Dimension Approx. 2” (W) × 4.4” (H) × 1” (D)(52 mm × 112 mm × 25 mm) | |
| Classification of ME equipment | Internally powered |
| IP classification IP 22 | |
| Operation Mode Continuous operation | |
| Applied Part Type BF (Pads) | |
| Durable period (Service Life) D | device: 5 yearsPad: 150 uses |
NOTE: These specifications are subject to change without notice.
This OMRON product is produced under the strict quality system of OMRON HEALTHCARE Co. Ltd., Japan.
Designed for a minimum of 5 years life expectancy.
IP classification is degrees of protection provided by enclosures in accordance with IEC 60529. This device is protected against solid foreign objects of diameter 12.5 mm such as a finger and greater, and against oblique falling water drops which gives trouble to normal operation.
13. SPECIFICATIONS
Optional Accessories
- PMLLPAD-L (3"x4.5" (75 mm × 114 mm))
- PMLLPAD (2.5"x4" (63 mm × 102 mm))
To order : OmronHealthcare.com
14. FCC STATEMENT
FCC CAUTION
Changes or modifications not expressly approved by the party responsible for compliance could void the user's authority to operate the equipment.
Note:
This equipment has been tested and found to comply with the limits for a Class B digital device, pursuant to part 15 of the FCC Rules. These limits are designed to provide reasonable protection against harmful interference in a residential installation. This equipment generates, uses and can radiate radio frequency energy and, if not installed and used in accordance with the instructions, may cause harmful interference to radio communications. However, there is no guarantee that interference will not occur in a particular installation. If this equipment does cause harmful interference to radio or television reception, which can be determined by turning the equipment off and on, the user is encouraged to try to correct the interference by one or more of the following measures:
• Reorient or relocate the receiving antenna.
- Increase the separation between the equipment and receiver.
- Connect the equipment into an outlet on a circuit different from that to which the receiver is connected.
- Consult the dealer or an experienced radio/TV technician for help.
15. GUIDANCE AND MANUFACTURER'S DECLARATION
OMRON Max Power Relief
Information for Accompanying Documents in the Scope of IEC60601-1-2:2014
Important information regarding Electromagnetic Compatibility (EMC)
PM500 conforms to IEC60601-1-2:2014 Electromagnetic Compatibility (EMC) standard. Further documentation in accordance with this EMC standard is available at OmronHealthcare.com/emc. Refer to the EMC information for PM500 on the website.

OMRON HEALTHCARE Co., Ltd.
53, Kunotsubo, Terado-cho, Muko, Kyoto 617-0002 JAPAN
Distributed by:
OMRON HEALTHCARE, INC.
1925 West Field Court, Lake Forest, IL 60045 U.S.A.
OmronHealthcare.com
© 2019 OMRON HEALTHCARE, INC.
Made in China
OMRON®
Omron Healthcare helps you make positive lifestyle changes with innovative medical solutions that you can use safely and accurately at home. OmronHealthcare.com
For questions: 1-800-634-4350
Get general pain info:
OmronPainRelief.com/blog


- Pads are for Single Patient Use Only
- TABLE OF CONTENTS
- INTRODUCTION
- INTENDED USE
- SAVE THESE INSTRUCTIONS
- Symbols Glossary:
- Contraindication
- IMPORTANT SAFETY PRECAUTIONS AND WARNINGS
- WARNING
- DO NOT USE THIS UNIT WITH THESE OTHER DEVICES:
- DO NOT USE THIS UNIT UNDER THESE CONDITIONS
- Before using your unit, ensure that:
- DO NOT USE ON THESE INDIVIDUALS
- • DO NOT APPLY THE PADS TO THESE BODY AREAS:
- DO NOT USE THIS UNIT DURING THESE ACTIVITIES
- PAIN MANAGEMENT WARNINGS
- DO NOT ALTER THE UNIT
- WARNINGS REGARDING THE PADS
- Possible Adverse Reactions
- CAUTION
- PRECAUTIONS REGARDING THE PADS
- CAUTION WHILE USING UNIT
- MAIN UNIT
- CORD
- BATTERY
- PADS
- General Precautions
- HOW MAX POWER RELIEF WORKS
- How does it work?
- KNOW YOUR UNIT
- PACKAGE CONTENTS
- FEATURES
- BUTTONS AND THEIR FUNCTIONS
- Pad Icon
- Intensity Level
- Intensity Button
- Battery Icon
- Minutes Remaining
- Mode Button
- Power Button
- ASSEMBLY STEPS
- STEP 1 - INSERT BATTERIES
- STEP 2 – ATTACH ELECTRODE CORD TO THE MAIN UNIT
- STEP 3 – SNAP EITHER ELECTRODE CORD TO EACH OF THE PADS
- NOTE:
- STEP 4 – REMOVE AND DISCARD PLASTIC FILM FROM PADS
- STORING PADS ON PAD HOLDER
- STEP 5 – ATTACH THE UNIT TO THE BELT CLIP
- GET STARTED WITH YOUR THERAPY
- (USE FOR A MAXIMUM OF 30 MINUTES PER SESSION)
- STEP 1 – PAD PLACEMENT
- For optimal therapy:
- LOWER BACK
- STEP 1 – PAD PLACEMENT (continued)
- SHOULDER
- STEP 2 – SELECT 1 OF 9 MODES
- Choose a massage-like mode
- Or choose a pain mode:
- How to switch modes
- How to select the right mode
- STEP 2 – SELECT 1 OF 9 MODES (continued)
- STEP 3 – SELECT THE CORRECT INTENSITY LEVEL (1 LOW – 15 HIGH)
- How do I pick the right intensity level for my pain?
- How long is the therapy?
- HOW TO CONTROL AND REDUCE YOUR PAIN
- When should I start therapy?
- Get to your pain early
- How long should you use it?
- When to stop using the unit?
- What type of pain is it best for?
- CLEANING AND STORAGE
- Cleaning the pads
- When should you replace your pads?
- Cleaning the unit
- Storing the pads
- Storing the unit and pads
- TROUBLESHOOTING
- LIMITED WARRANTY
- SPECIFICATIONS
- Optional Accessories
- FCC STATEMENT
- FCC CAUTION
- GUIDANCE AND MANUFACTURER'S DECLARATION
- Important information regarding Electromagnetic Compatibility (EMC)
- OMRON HEALTHCARE Co., Ltd.
- OMRON HEALTHCARE, INC.
- OMRON®
Brand : OMRON
Model : Max Power Relief PM500
Category : Massage device