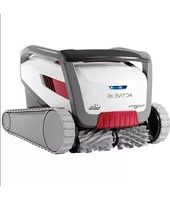
Dolphin Active X6 - Pool Robot MAYTRONICS - Free user manual and instructions
Find the device manual for free Dolphin Active X6 MAYTRONICS in PDF.


| Product Type | Robotic Pool Cleaner |
| Brand | Maytronics |
| Model | Dolphin Active X6 |
| Motor Protection | IP68 |
| Minimum Operating Depth | 0.80 m (2.64 ft) |
| Maximum Operating Depth | 5 m (16.4 ft) |
| Power Supply Input | 100-240V / 50-60Hz 2A |
| Power Supply Output | <30 VDC |
| Power Supply Protection | IP54 |
| Water Temperature Range | 6-34°C (43-93°F) |
| Maximum Chlorine Level | 4 ppm |
| pH Range | 7.0-7.8 |
| Maximum Salt Level (NaCl) | 5000 ppm |
| Wi-Fi Frequency | 2.4 GHz |
| Connectivity | Bluetooth, Wi-Fi (via MyDolphin Plus app) |
| Filtration System | Dual filter basket with net and ultra-fine filter panels |
| Control Options | Manual power button or smartphone app |
| Cleaning Cycle | Automatic until completion |
| Safety Features | GFCI required; power supply must be placed 3.5m from pool edge and 11cm above ground |
| Recommended Maintenance | Clean filter after each use; monthly filter panel cleaning; weekly general maintenance; clean impeller as needed |
| Storage Temperature | 5-45°C (41-113°F) |
| Included Components | Robotic pool cleaner, power supply, floating cable, caddy kit, dual filter basket |
Frequently Asked Questions - Dolphin Active X6 MAYTRONICS
User questions about Dolphin Active X6 MAYTRONICS
0 question about this device. Answer the ones you know or ask your own.
Ask a new question about this device
Download the instructions for your Pool Robot in PDF format for free! Find your manual Dolphin Active X6 - MAYTRONICS and take your electronic device back in hand. On this page are published all the documents necessary for the use of your device. Dolphin Active X6 by MAYTRONICS.
USER MANUAL Dolphin Active X6 MAYTRONICS
Maytronics Dolphin robotic pool cleaner
EN
User Instructions

EN
M600 / ZENIT 60 / ACTIVE X6 / ACTIVE ULTIMATE Robotic Pool Cleaner
User Instructions
Contents
- INTRODUCTION 2
- SPECIFICATIONS....2
- WARNINGS AND CAUTIONS 2
3.1 Water conditions .... 3
3.2 Important: Setting up the Wi-Fi ® ....3
- ROBOTIC POOL CLEANER PARTS 4
- USING THE ROBOTIC POOL CLEANER....5
5.1 Setup ....5
5.2 Placing the Robotic Pool Cleaner into the pool....6
5.3 Connecting the Robotic Pool Cleaner to your smart device (Phone or tablet) 6
5.4 Operating the Robotic Pool Cleaner without using your smart device....7
5.5 Using the power supply....7
5.6 Robotic Pool Cleaner indicator lights ....7
5.7 Removing the Robotic Pool Cleaner from the pool 8
- CARE AND MAINTENANCE....9
6.1 Cleaning after use - Removing and cleaning the dual filter basket ....9
6.2 Periodic filter cleaning - Recommended at least once a month....10
6.3 Cleaning the impeller ....11
6.4 Periodic general maintenance - Recommended at least once a week....12
-
OFF-SEASON STORAGE....12
-
TROUBLESHOOTING....13
1. INTRODUCTION
Thank you for purchasing a Maytronics Robotic Pool Cleaner.
We are sure that your Maytronics Robotic Pool Cleaner will provide you with reliable, convenient, and cost-effective pool cleaning, to enhance your pool's hygiene.
Robotic Pool Cleaners by Maytronics deliver advanced cleaning technologies, exceptional ease of use, long-lasting performance, and simple maintenance. You and your family will be free to enjoy your swim with full confidence that your pool is completely clean.
2. SPECIFICATIONS
Motor protection: IP 68
Minimum depth: 0.80m/2.64ft
Maximum depth: 5m/16.4ft
Digital Power supply
Input: 100-240V / 50-60Hz 2A
Output: <30 VDC
IP54
3. WARNINGS AND CAUTIONS
IMPORTANT SAFETY INSTRUCTIONS
READ AND FOLLOW ALL INSTRUCTIONS
Please adhere strictly to the following WARNINGS:
| WARNING | Take the Robot Pool Cleaner out of the pool before allowing people to enter the pool. |
| WARNING | When examining the Robot Pool Cleaner, disconnect the main power supply. |
| WARNING | Ensure that children do not attempt to access Robot Pool Cleaner while it is operating. |
| WARNING | Keep the Robot Pool Cleaner out of the reach of children or persons with reduced physical, sensory or mental capabilities, or lack of experience and knowledge, unless they have been given supervision or instruction. |
| WARNING | Only an original power cable must be used, at all times. Replaced by a Robot Pool Cleaner certified technician, in case of need to avoid hazard. |
| WARNING | The unit must be connected only to a supply circuit that is protected by a ground-fault circuit interrupter (GFCI). This GFCI should be tested on a routine basis. To test the GFCI, push the test button. The GFCI should interrupt power. Push the reset button. Power should be restored. If the GFCI fails to operate in this manner, the GFCI is defective. If the GFCI interrupts power to the power unit without the test button being pushed, a ground current may be flowing, indicating the possibility of an electric shock. Do not use the power unit. Disconnect the power unit and contact the manufacturer for assistance. |

To reduce the risk of electric shock replace damaged cord immediately. Do not use extension cord to connect unit to electric supply; provide a properly located outlet.
Please ensure that the following PRECAUTIONS are implemented:
 | Operator should keep hands away from driving belt mechanism. |
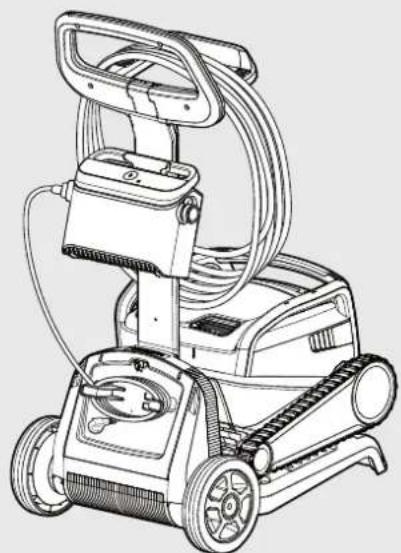
 | Position the Caddy and power supply at least 3.5m/12ft from pool's edge – during operation. |
 | For continued protection against possible electric shock, the power supply unit should be placed at least 11cm/4in above ground. |
 | When lifting the Robot Pool Cleaner, take care to prevent back injury. |
 | Do not bury cord – locate cord to minimize abuse from lawn mowers, hedge trimmers and other equipment. |
 | This Robot is for use with permanently installed pools. Do not use with storable pools.A permanently installed pool is constructed in or on the ground or in building such that it cannot be readily disassembled for storage and reassembled to its original integrity. |
3.1 Water Conditions
Use the Robotic Pool Cleaner in the following water conditions:
| Chlorine Maximum 4 | ppm |
| pH 7.0 -7.8 | |
| Temperature 6-34°C | /43-93°F |
| NaCl Maximum 5000 | ppm |
3.2 Important: Setting up the Wi-Fi®
To assist you with tips, product updates, and communication with the Dolphin support team, you have to be connected to the Wi-Fi®.
Please make sure that you have the following:
- Your home Wi-Fi® network covers the pool area.
- Your Wi-Fi ® router has a sufficient signal strength near the location of the power supply.
- Ensure that your smart device (phone or tablet) have a Wi-Fi® connectivity.
In case you have a weak signal strength, please use a Wi-Fi® extender.
Note: The robot's power supply supports 2.4GHz Wi-Fi® frequency only.
4. ROBOTIC POOL CLEANER PARTS
▶ Robotic Pool Cleaner
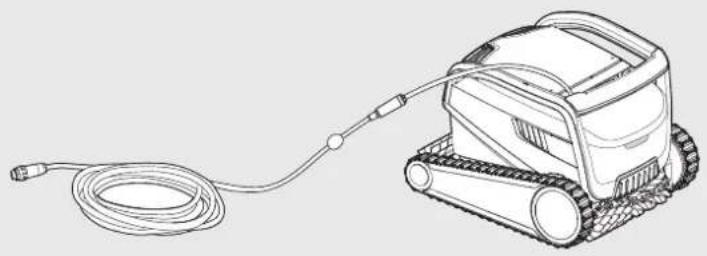
Power supply

▶ Filtration
Start the season with the net filters for large debris then use ultra-fine filters for daily use.

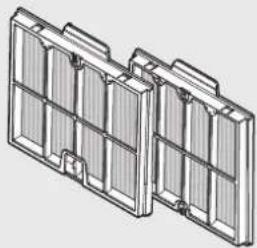
* The net filters are assembled in the filter basket.
▶ Caddy kit
5. USING THE ROBOTIC POOL CLEANER
5.1 Setup
Before using the Robotic Pool Cleaner for the first time, perform the following steps:

Position the power supply at approximately the middle of the long side of the pool, at least at a distance of 3.5m/12ft.

5.1.25 Unwind the cable and stretch it out completely so that it has no kinks.

5.1.3 Attach the floating cable to the power supply: Insert the cable with the notch on the connector (1), lined up with the groove in the socket on the power supply, and turn clockwise (2).

5.1.4 Plug in the power supply and leave it in the OFF position.
5.2 Placing the Robotic Pool Cleaner into the pool
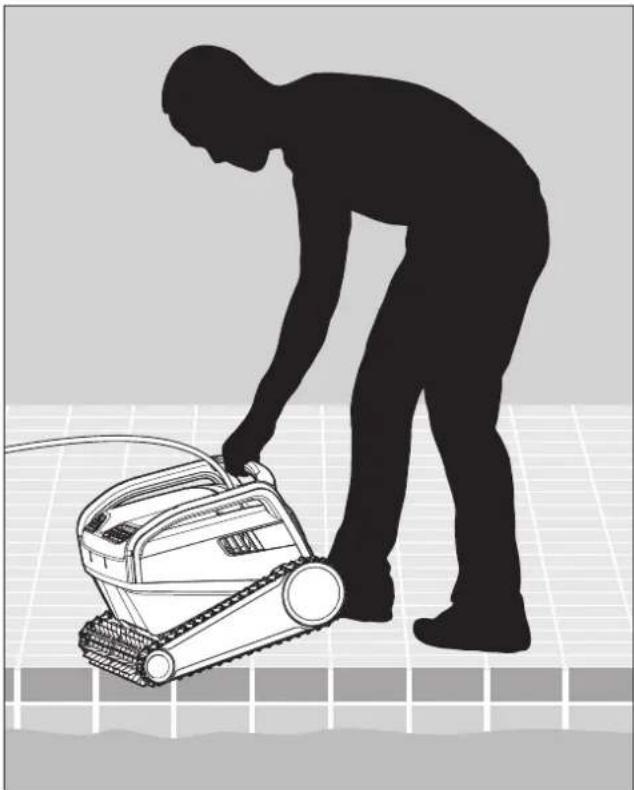
5.2.1 Place the Robotic Pool Cleaner in the pool.
Release it and let it sink to the floor of the pool.
Make sure that the floating cable is free of any obstacles.
5.3 Connecting the robot to your smart device (Phone or tablet)
Please follow these simple steps:
- Download the MyDolphin™ Plus App to your smart device (phone or tablet) from
Google Play

or the App Store

- Activate Bluetooth® and Wi-Fi® on your smart device (phone or tablet).
- During the initial connection to the robot, the smart device must be connected to your home Wi-Fi® network (Please see section 3.2).
- Activate the MyDolphin™ Plus App on your smart device.
- Scan the QR code on the side of the power supply, and follow the instructions.
After completing the set-up, you will have access to advanced features, troubleshooting tips, and additional programing options.
5.4 Operating the Robotic Pool Cleaner without using your smart device
Press the power button to turn the robot ON.
The Robotic Pool Cleaner will now operate until it has reached the end of the cleaning cycle.

5.5 Using the power supply
Your power supply is designed to provide you with the most advanced features to improve your experience.
• A single on/off button for an easy operation.
• LED indicators for the advanced features.
LED indications table:
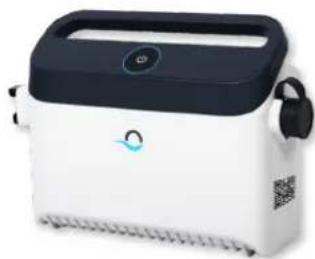
| Lights display Meaning | |
| Blue circle Blinks 4 times Occur after connecting the power-supply to the power outlet. | |
| Blue connectivity light is consistent Bluetooth® connected | |
| Green and Blue connectivity lights blink alternately | Pairing process is ongoing |
| Green connectivity light is on Wi-Fi® connected to home network | |
5.6 Robotic Pool Cleaner indicator lights
| Light Indication | |
| Blue blinking | Normal operation of the Robotic Pool Cleaner |
| Green blinking | Remote-Control or Smartphone communicate with the Robotic Pool Cleaner |
| Red constant | Robot error. Check the Troubleshooting section for solutions.If none of the solutions solve the issue, contact your dealer to check the Robotic Pool Cleaner. |

5.6.1 Indicator lights.
5.7 Removing the Robotic Pool Cleaner from the pool
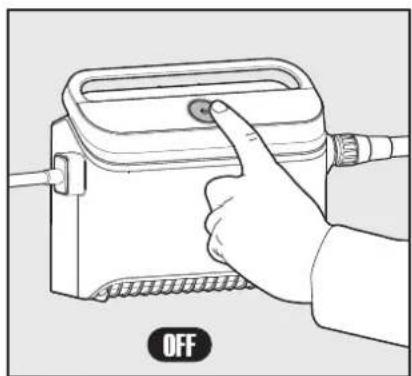
Turn OFF and unplug the power supply.
5.7.1
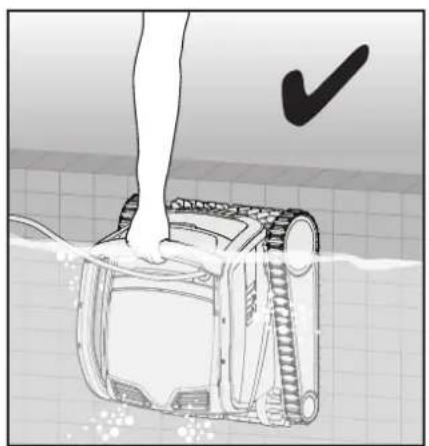
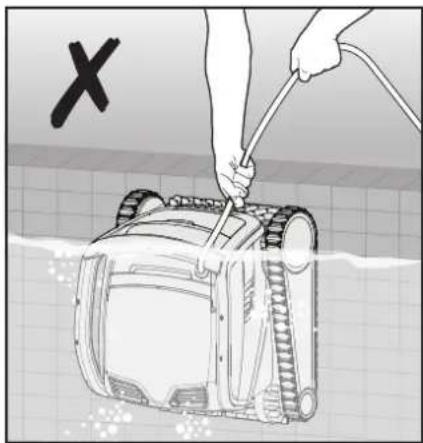
5.7.2 Use the floating cable to pull the Robotic Pool Cleaner to the side of the pool. Use the handle to remove the robot from the pool.

DO NOT PULL THE POOL CLEANER FROM THE POOL USING THE CABLE.

5.7.3 Place the Robotic Pool Cleaner on the side of the pool and let the water drain out.
6. CARE AND MAINTENANCE

Make sure the power supply is switched off and unplugged.
We highly recommend cleaning the filter basket after each cleaning cycle.
Note: Do not let the filter panels dry out before cleaning.
6.1 Cleaning after use - Removing and cleaning the dual filter basket
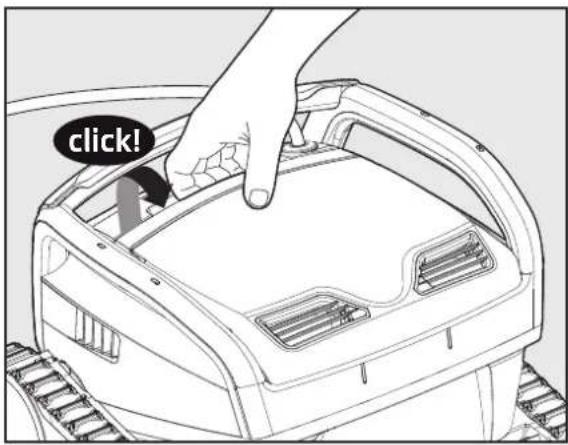
6.1.1
Open the filter cover.
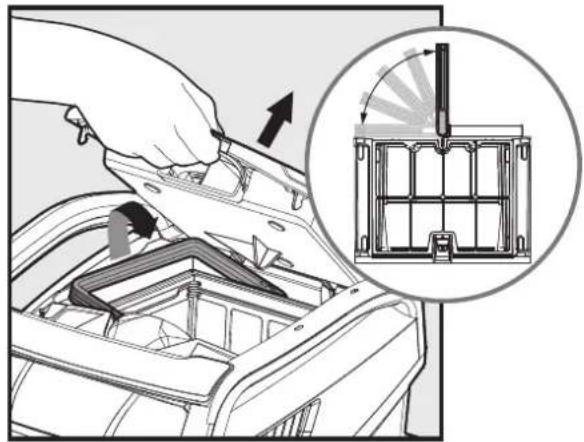
6.1.2
Upon opening the filter cover,
the handle will lift independently.

6.1.3 6
Lift the basket.
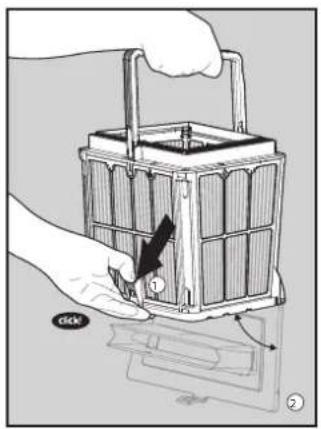

release the bottom lid.


Clean the filter basket with a hose.Open t
6.2 Periodic filter cleaning - Recommended at least once a month
Dismantle the 4 ultra-fine filter panels of the outer basket, according to the following steps:

6.2.1 Hold down the handle to remove the inner net basket.

6.2.2 Dismantle the panels; start by pressing on panel 1, using your thumbs.

6.2.3 Continue to dismantle the panels in order: 2 → 3 → 4 .

6.2.4 Clean the filter panels with a hose.

6.2.5 Assemble the filter panels according to the following order: Panel 4 → 3 → 2 → 1.

6.2.6 Insert the clean filter basket and close the filter cover.
6.3 Cleaning the impeller
If you notice debris trapped in the impeller:

Make sure the power supply is switched off and unplugged.
Clean the debris trapped in the impeller opening, according to the following steps:
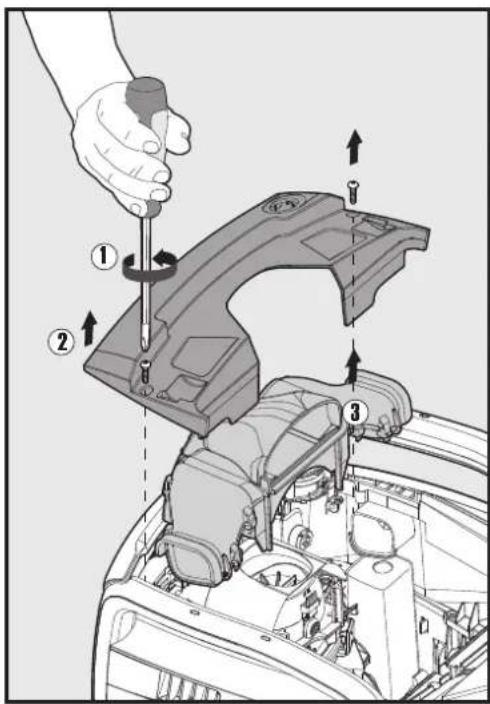
6.3.1

6.3.2

6.3.3


Assemble the impeller compartment according to the next steps:

6.3.5

6.3.6
6.4 Periodic general maintenance - Recommended at least once a week
- When the cable is wet, spread it flat and straight in the yard, and allow it to dry for at least five hours to avoid twisting of the cable.
- Wash the Robotic Pool Cleaner with fresh water, to reduce damage caused by the chemicals in the pool water.
If the Robotic Pool Cleaner will not be in use for an extended period of time, perform the following storage steps:
• Make sure that no water is left in the Robotic Pool Cleaner.
• Thoroughly clean the filter basket and panels and insert them back in place.
• Roll up the cable so that it has no kinks.
- Store the Robotic Pool Cleaner in a protected area out of direct sun/rain/frost, at a temperature of between 5°-45°C/41°-113°F.

8. TROUBLESHOOTING
If the suggested solutions do not solve the problem, please contact your dealer or Service Center.
| Symptom Possible reason Corrective action | ||
| The power supply or its switch LED are not working. | No voltage in the power socket in the wall.The power supply is not switched ON.The power cable is not properly connected to the power supply inlet.The Ground Fault Interrupter is switched OFF (closed). | Check that there is voltage in the power socket in the wall.Check that the power supply is plugged in and turned ON.Check that the power cable is securely connected all the way into the power supply.Turn the power supply OFF. Wait 30 seconds, then turn it back on. |
| The Robotic Pool Cleaner does NOT move. | The floating cable is not properly connected to the power supply outlet.An obstacle is blocking the impeller, tracks, or wheels. | Check that the floating cable is securely connected to the power supply.Unplug the power supply. Open the impeller cover and check that nothing is trapped in the impeller.Verify that nothing blocks the tracks or wheels. |
| The Robotic Pool Cleaner is moving in circles. | Clogged filter basket.Debris stuck in the impeller house or impeller cover.Power supply incorrectly positioned.Algae buildup or pool water does not meet specifications. | Clean the filter basket.Remove debris stuck in the impeller house or impeller cover (see illustrations 6.3.1 to 6.3.4).Place power supply in a position that enables the Robotic Pool Cleaner to freely reach the entire pool area.Correct pool and water conditions. |
| The Robotic Pool Cleaner does not turn or moves in one direction only. | Debris stuck in the impeller house or impeller cover. | Remove debris stuck in the impeller house or impeller cover (see illustrations 6.3.1 to 6.3.4). |
| The Robotic Pool Cleaner moves but does not clean the pool. | Clogged filter basket.Debris stuck in the impeller house or impeller cover. | Clean the filter basket.Remove debris stuck in the impeller house or impeller cover (see illustrations 6.3.1 to 6.3.4). |
| The Robotic Pool Cleaner cleans only part of the pool. | Power supply incorrectly positioned.Not enough floating cable is released for the correct operation of the Robotic Pool Cleaner. | Place the power supply in a position that enables the Robotic Pool Cleaner to freely reach the entire pool area, while verifying a minimal distance from the pool of 3.5m / 12ft and minimal height above the ground of 11cm / 4in.Check that there is enough slack in the floating cable for the Robotic Pool Cleaner to reach the entire pool.Clean the filter basket. |
| The floating cable has kinks. | Clogged filter basket.Debris stuck in the impeller house or impeller cover. | Clean the filter basket.Remove debris stuck in the impeller house or impeller cover. (see illustrations 6.3.1 to 6.3.4).To remove the kinks, stretch the floating cable out completely and let it sit for at least a day in the sun. |
| The Robotic Pool Cleaner doesn't climb the walls. | Clogged filter basket.Algae on walls.Unsuitable pH level.Debris stuck in the impeller house or impeller cover. | Clean the filter basket.Check the level of chemicals in the water. Improper levels may allow the growth of algae, making the walls slippery.If so, adjust the levels and scrub the walls.Remove debris stuck in the impeller house or impeller cover (see illustrations 6.3.1 to 6.3.4). |
| Symptom Possible reason Corrective action | |
| Can not connect to your Wi-Fi®, and the communication Led is blinking Green. | The power supply is too far from the router (weak signal) or your router is not working properly. Please reset the power supply (disconnect the power cord), and wait 1 min.Please check that your smartphone has a strong Wi-Fi® connectivity near the power supply (try to play any online video streaming application).Please check the home router if it's working properly.Please locate the power supply to be as closer as possible to the home router.Please install a Wi-Fi® extender (2.4Ghz) to ensure that you have a with sufficient signal strength.Note: In case the communication LED is still blinking Green, you have the option to connect via Bluetooth®. |
| Can not connect to your robot via Bluetooth®, and the communication Led is blinking Blue. | The power supply is too far from the smart device, or your Bluetooth® is disabled, or not working properly. Try to turn Off and then On the Bluetooth® in your smartphone For IOS – Go to settings → Bluetooth®. For Android – Go to slider and turn Off/On the Bluetooth® icon.Get closer to the IoT power supply.Ensure that you don't have any interference/obstacles.Please turn the power supply Off and then ON.If none of the above troubleshooting help, then please contact the dealer for further help. |



- MAYTRONICS DOLPHIN ROBOTIC POOL CLEANER
- EN
- M600 / ZENIT 60 / ACTIVE X6 / ACTIVE ULTIMATE ROBOTIC POOL CLEANER
- CONTENTS
- INTRODUCTION
- SPECIFICATIONS
- WARNINGS AND CAUTIONS
- IMPORTANT SAFETY INSTRUCTIONS
- READ AND FOLLOW ALL INSTRUCTIONS
- 3.1 WATER CONDITIONS
- 3.2 IMPORTANT: SETTING UP THE WI-FI®
- ROBOTIC POOL CLEANER PARTS
- ROBOTIC POOL CLEANER
- POWER SUPPLY
- FILTRATION
- CADDY KIT
- USING THE ROBOTIC POOL CLEANER
- 5.1 SETUP
- 5.2 PLACING THE ROBOTIC POOL CLEANER INTO THE POOL
- 5.3 CONNECTING THE ROBOT TO YOUR SMART DEVICE (PHONE OR TABLET)
- 5.4 OPERATING THE ROBOTIC POOL CLEANER WITHOUT USING YOUR SMART DEVICE
- 5.5 USING THE POWER SUPPLY
- 5.6 ROBOTIC POOL CLEANER INDICATOR LIGHTS
- 5.7 REMOVING THE ROBOTIC POOL CLEANER FROM THE POOL
- CARE AND MAINTENANCE
- 6.1 CLEANING AFTER USE - REMOVING AND CLEANING THE DUAL FILTER BASKET
- 6.2 PERIODIC FILTER CLEANING - RECOMMENDED AT LEAST ONCE A MONTH
- 6.3 CLEANING THE IMPELLER
- 6.4 PERIODIC GENERAL MAINTENANCE - RECOMMENDED AT LEAST ONCE A WEEK
- TROUBLESHOOTING
Brand : MAYTRONICS
Model : Dolphin Active X6
Category : Pool Robot