
SW8 AM2Q X 2 - Refrigerator WHIRLPOOL - Free user manual and instructions
Find the device manual for free SW8 AM2Q X 2 WHIRLPOOL in PDF.
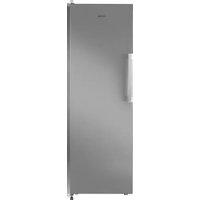


| Product Type | Refrigerator with No-Frost technology |
| Brand | Whirlpool |
| Model | SW8 AM2Q X 2 |
| Energy Class | Not specified in manual; estimated A+ to A++ |
| Dimensions (H x W x D) | Approx. 185 x 70 x 75 cm |
| Net Weight | Approx. 75 kg |
| Power Supply | 220-240 V, 50 Hz |
| Cooling System | No-Frost automatic defrost |
| Key Functions | 6th Sense Fresh Control / ProFresh, Fast Cooling, Fan, Door Open Alarm, ON/Stand-by |
| Temperature Control | Electronic with LED display |
| Interior Lighting | LED light, switches off after 8 min door open |
| Door Reversibility | Yes, door swing can be reversed |
| Installation | Single or side-by-side with freezer; 50 mm rear clearance required |
| Maintenance | Clean condenser annually; defrost drain tool provided; use neutral detergent |
| Safety | Disconnect power before cleaning; no flammable fluids; no steam cleaners |
| Spare Parts / Repairability | LED light service replacement; antibacterial filter available; condenser cleaning required |
| Warranty | Door reversal not covered if done by service |
| Manual Languages | Multiple languages including EN, DE, FR, IT, etc. |
Frequently Asked Questions - SW8 AM2Q X 2 WHIRLPOOL
User questions about SW8 AM2Q X 2 WHIRLPOOL
0 question about this device. Answer the ones you know or ask your own.
Ask a new question about this device
Download the instructions for your Refrigerator in PDF format for free! Find your manual SW8 AM2Q X 2 - WHIRLPOOL and take your electronic device back in hand. On this page are published all the documents necessary for the use of your device. SW8 AM2Q X 2 by WHIRLPOOL.
USER MANUAL SW8 AM2Q X 2 WHIRLPOOL
User Manual Directives d'utilisation Gebrauchsanweisung Οδηγίες χρήσης IHasználati útmutató


/ 6th Sense Fresh Control
.Green Intelligence ProFresh
Note
"ProFresh" function / "6th Sense Fresh Control"
Working / 6th Sense Fresh Control

7. Maintenance and cleaning

8. TROUBLESHOOTING
8.1. BEFORE CONTACTING THE AFTER-SALES SERVICE...
8. TROUBLESHOOTING
8.1. BEFORE CONTACTING THE SERVICE CENTER...
1.2. INSTALLATION OF TWO APPLIANCES
EXAMPLE OF OPTIMAL LOADING

8. TROUBLESHOOTING CHART
8.1. BEFORE CONTACTING THE SERVICE DEPARTMENT
EXAMPLE OF FOOD ARRANGEMENT
BRRR sound of the compressor running..

6. RECOMMENDATIONS WHEN THE APPLIANCE IS NOT IN USE
6.1. ABSENCE/VACATION
8. TROUBLESHOOTING GUIDE
8.1. BEFORE CONTACTING CONSUMER SERVICE
Chapter 2: FUNCTIONS 45
2.1. POWER/STANDBY MODE 45 2.2. 6TH SENSE FRESH CONTROL / GREEN INTELLIGENCE PROFRESH 45 2.3. DOOR OPEN ALARM 45 2.4. QUICK COOLING 45 2.5. FAN 45 2.6. TEMPERATURE SETTING 45 2.7. NO-FROST FROST-FREE REFRIGERATOR COMPARTMENT 45 2.8. REFRIGERATOR INTERIOR LIGHT.... 45
Chapter 3: USE 46
3.1. NOTES 46
Chapter 4: TIPS FOR FOOD STORAGE ....46
4.1. AIR CIRCULATION 46 4.2. STORAGE INSTRUCTIONS FOR FRESH FOOD AND DRINKS 46 4.3. STORAGE LOCATIONS FOR FRESH FOOD AND DRINKS 46
Chapter 5: OPERATING NOISES....47
Chapter 6: RECOMMENDED ACTIONS IF THE APPLIANCE IS NOT USED ....48
6.1. LONG ABSENCE / HOLIDAY PERIOD 48 6.2. MOVING 48 6.3. POWER OUTAGE....48
Chapter 7: MAINTENANCE AND CLEANING OF THE DEVICE....48
Chapter 8: TROUBLESHOOTING GUIDE....49
8.1. BEFORE CONTACTING SERVICE.... 49 8.2. FAULTS 49
Chapter 9: SERVICE....50
Other:
CHANGING THE DOOR HANDING 179
NOTE:

8. TROUBLESHOOTING GUIDE
8.1. BEFORE CONTACTING SERVICE...

8. TROUBLESHOOTING GUIDE
8.1. BEFORE CONTACTING AFTER-SALES SERVICE...
2. FUNCTIONS
2.1. ON/STAND BY
6. RECOMMENDATIONS FOR WHEN YOU DO NOT USE THE APPLIANCE
6.1. ABSENCE/VACATION


8. TROUBLESHOOTING GUIDE
8.1. BEFORE CONTACTING THE SERVICE DEPARTMENT:

A strange sound when the water valve or fan starts to work.


8. TROUBLESHOOTING LIST
8.1. BEFORE CONTACTING THE SERVICE DEPARTMENT...
8. TROUBLESHOOTING INSTRUCTIONS
8.1. BEFORE CONTACTING THE TECHNICAL SERVICE...
2. FUNCTIONS
2.1. ON/STANDBY

8. TROUBLESHOOTING GUIDE
8.1. BEFORE CONTACTING THE TECHNICAL SUPPORT SERVICE...

8. TROUBLESHOOTING MANUAL
8.1. BEFORE CONTACTING AFTER-SALES SERVICE...
TABLE OF CONTENTS
Chapter 1: INSTALLATION....156
1.1. INSTALLING THE APPLIANCE 156 1.2. INSTALLING TWO APPLIANCES 156 1.3. ADJUSTING THE DOORS (IF APPLICABLE) 156
Chapter 2: FUNCTIONS....157
2.1. ON/STANDBY 157 2.2. 6TH SENSE FRESH CONTROL / GREEN INTELLIGENCE PROFRESH 157 2.3. DOOR ALARM 157 2.4. FAST COOLING 157 2.5. FAN 157 2.6. TEMPERATURE SETTING 157 2.7. REFRIGERATOR COMPARTMENT WITH AUTOMATIC DEFROSTING 157 2.8. REFRIGERATOR LIGHT 157
Chapter 3: USE....158
8. TROUBLESHOOTING
8.1. BEFORE CONTACTING THE SERVICE ORGANIZATION...

Chapter 1: INSTALLATION....172
1.1. INSTALLING SINGLE APPLIANCE 172 1.2. INSTALLING TWO APPLIANCES 172 1.3. ADJUST DOORS (IF AVAILABLE) 172
Chapter 2: FUNCTIONS....173
2.1. ON/STANDBY.... 173 2.2. 6TH SENSE FRESH CONTROL / GREEN INTELLIGENCE PROFRESH 173 2.3. DOOR OPEN ALARM 173 2.4. FAST COOLING 173 2.5. FAN....173 2.6. TEMPERATURE SETTING 173 2.7. NO-FROST REFRIGERATOR COMPARTMENT 173 2.8. REFRIGERATOR LIGHT.... 173
Chapter 3: USE....174
3.1. NOTES 174
Chapter 4: FOOD-STORAGE TIPS ....174
4.1. AIR VENTILATION 174 4.2. HOW TO STORE FRESH FOOD AND BEVERAGE 174 4.3. WHERE TO STORE FRESH FOOD AND BEVERAGE 174
Chapter 5: FUNCTIONAL SOUNDS....175
Chapter 6: RECOMMENDATION IN CASE OF NO USE OF THE APPLIANCE....176
6.1. ABSENCE / VACATION 176 6.2. MOVING 176 6.3. POWER FAILURE 176
Chapter 7: MAINTENANCE AND CLEANING....176
Chapter 8: TROUBLESHOOTING GUIDE ......177
8.1. BEFORE CONTACTING AFTER-SALES SERVICE.... 177 8.2. FAILURES 177
Chapter 9: AFTER-SALES SERVICE ....178
Others:
REVERSE DOOR SWING....179
NOTE:
The instructions apply to several models, so there may be differences. Sections which only apply to certain appliances are indicated with an asterisk (*).
Functions which are dedicated specially for your already bought model of product you will find in QUICK START GUIDE.
1. INSTALLATION
1.1. INSTALLING SINGLE APPLIANCE
To guarantee adequate ventilation, leave a space on both sides and above the appliance.
The distance between the rear of the appliance and the wall behind the appliance should be at least 50mm.
A reduction of this space will increase the energy consumption of the product.
1.2. INSTALLING TWO APPLIANCES
When installing the freezer ① and the fridge ② together, ensure that the freezer is located on the left and the fridge on the right (as shown in the drawing). The left side of the refrigerator is equipped with a special device to avoid condensation problems between appliances.
We recommend installing two appliances together using the linking kit ③ (as shown in the drawing). You can purchase it from the Service department.
1.3. ADJUST DOORS (If available)
To level the doors using the adjustable lower hinge (select models)
If the refrigerator door is lower than the freezer door, raise the refrigerator door by turning the adjustment screw counterclockwise using an M10 wrench.
If the freezer door is lower than the refrigerator door, raise the freezer door by turning the adjustment screw counterclockwise using an M10 wrench.

2. FUNCTIONS
2.1. ON/STAND BY

This function turns the refrigerator On or puts it in Stand-by. To put the product in Stand-by, press and hold the On/Stand-by button ⏻ for 3 seconds. All icons turn off except the On/Stand-by icon ⏻ backlight to indicate that the appliance is in Stand-by. When the appliance is in Stand-by, the light inside the refrigerator compartment does not work. Remember that this operation does not disconnect the appliance from the power supply. To switch the appliance On again, simply press the On/Stand-By button ⏻.
2.2. 6TH SENSE FRESH CONTROL
PROFRESH
This function allows optimum storage conditions (regarding temperature and humidity) to be quickly reached inside the appliance. The fan must also be switched on for it to work properly. The "6th Sense Fresh Control" / "ProFresh" is activated by default. To activate or deactivate this function – see the enclosed Quick Start Guide.
2.3. DOOR OPEN ALARM
The Door Open Alarm is activated when the door is left open for more than 5 minutes. Indication of the alarm is shown by the blinking of the LED Door Light. If the door is left open more than 8 minutes, the LED Door Light switches off.
2.4. FAST COOLING
The use of this function is recommended when placing a very high quantity of food in the refrigerator compartment.
Using the Fast Cooling function, it is possible to increase the cooling capacity in the refrigerator compartment. To maximize the cooling capacity, please keep the fan switch on.
2.5. FAN
The Fan improves temperature distribution inside the product, allowing better preservation of stored food. By default, the fan is switched on. It is advisable to keep the fan switched on, so that the 6th Sense Fresh Control / Green Intelligence ProFresh function can work properly and also when the ambient air temperature is above 27-28°C or if you notice drops of water on the glass shelves or in severe humidity conditions. Please note that when the fan is switched on, it will not continuously work. The fan will start/stop working depending on the temperature and/or humidity level inside the product. It is therefore absolutely normal if the fan does not move even if the fan is switched on. To activate or deactivate this function – see enclosed Quick Start Guide.
Attention: Switching off the Fan deactivates the 6th Sense Fresh Control / Green Intelligence ProFresh function.
Note:
Do not obstruct the air intake area with food items.
To guarantee the right performance at lower ambient temperature (colder than 18°C) and to minimize energy consumption, turn off the fan.
If the appliance has the Fan, it can be equipped with the antibacterial filter.
Remove it from the box placed in the crisper drawer and insert it into the cover of the fan.
The replacement procedure is included in the filter box.
2.6. TEMPERATURE SETTING
The appliance is normally factory-set for operation at the recommended medium temperature.
For details of setting temperature - see enclosed Quick Start Guide.
Note: Displayed set points correspond to the average temperature throughout the whole refrigerator.
2.7. NO-FROST REFRIGERATOR COMPARTMENT
Refrigerator compartment defrosting is completely automatic.
Droplets of water on the rear wall inside the refrigerator compartment indicate that the automatic defrost phase is in progress. The defrost water is automatically run into a drain hole and collected in a container, where it evaporates.
2.8. REFRIGERATOR LIGHT
The light system inside the fridge compartment uses LEDs light, allowing a better lightning as well as very low energy consumption.
If the LED light system does not work, please contact the Service to replace it.
Important:
The refrigerator compartment light switches on when the refrigerator door is opened. If the door is kept open for more than 8 minutes the light will be automatically switched off.
3. USE
3.1. NOTES
- Do not block the air outlet area (on the back wall inside the product) with food products.
- All shelves, flaps and pull-out baskets are removable.
- The internal temperatures of the appliance may be affected by the ambient temperature, frequency of door opening, as well as location of the appliance. Temperature setting should take into consideration these factors.
- Unless otherwise specified the appliance accessories are not dishwasher safe.
4. FOOD-STORAGE TIPS
The refrigerator is the ideal storage location for ready meals, fresh and preserved food, dairy products, fruit and vegetables and beverage.
4.1. AIR VENTILATION
- The natural circulation of air in the refrigerator compartment results in zones with different temperatures. It is coldest directly above the fruits and vegetables crisper and at the rear wall. It is warmest at the top front of the compartment.
- Insufficient ventilation results in an increase in energy consumption and reduction of the refrigerating performance.
4.2. HOW TO STORE FRESH FOOD AND BEVERAGE
- Use recyclable plastic, metal, aluminum and glass containers and cling film to wrap foods.
- Always use closed containers for liquids and for food that may give off or be tainted by odor or flavor transfer or cover them.
- Foods which give off a large amount ethylene gas and those that are sensitive to this gas, such as fruit, vegetables and salad, should always be separated or wrapped so as not to reduce the storage life; for example do not store tomatoes together with kiwi fruits or cabbage.
- Do not store food too close together to enable sufficient air circulation.
- To avoid bottles falling over, you can use the bottle holder (available on selected models).
- If you have a little quantity of food to store in the refrigerator, we recommend to use the shelves above the crisper for fruits and vegetables since this is the coolest area of the compartment.
4.3. WHERE TO STORE FRESH FOOD AND BEVERAGE
- On the fridge shelves: ready meals, tropical fruits, cheeses, deli.
- In the coldest area – Zero Degrees drawer* (the one above Cooler Compartment*): meat, fish, cold cuts, cakes.
- In the fruits and vegetables crisper: fruits, salad, vegetables.
- In the door: butter, jams, sauces, pickles, cans, bottles, beverage cartons, eggs.
EXAMPLE OF FOOD ARRANGEMENT
5. FUNCTIONAL SOUNDS
Sounds coming from your appliances are normal since it has a number of fans and engines to regulate performances that switch on and off automatically.
Some of the functional sounds can be reduced through
- Leveling the appliance and installing it on an even surface.
- Separating and avoiding contact between the appliance and furniture.
- Checking if the internal components are correctly placed.
- Checking if bottles and containers are not in contact with each other.
Some of the functional sounds you might hear:
| A hissing sound when switching on the appliance for the first time or after a long pause. | A gurgling sound when refrigerant fluid enters into the pipes. | BRRR sound is from the compressor running. |
 |  |  |
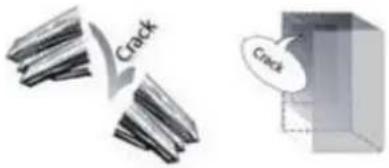
| Buzzing sound when water valve or fan start working. | A cracking sound when compressor starts or when ready ice drops into ice box abrupt clicks when compressor switches on and off. | The CLICK is from the thermostat which adjusts how often the compressor is running. |
 |  |  |
6. RECOMMENDATION IN CASE OF NO USE OF THE APPLIANCE
6.1. ABSENCE / VACATION
In case of vacation, it is recommended to use up food and to disconnect the appliance to save energy.
6.2. MOVING
- Take out all internal parts.
- Wrap them well, and fix them together with adhesive tape so that they do not bang together or get lost.
- Screw the adjustable feet so that they do not touch the support surface.
- Close and fix the door with adhesive tape and, again using adhesive tape, fix the power cable to the appliance.
6.3. POWER FAILURE
In the event of a power failure, call the local office of your electricity supply company and ask how long it is going to last.
Note: Bear in mind that a full appliance will stay cold longer than a partially filled one.
If food is found to be in a poor condition, it is best to throw it away.
For power failures lasting up to 24 hours.
- Keep the door of the appliance closed. This will allow the stored food to stay cold as long as possible.
For power failures lasting more than 24 hours.
- Try to use up the food, which is more easily perishable.
7. MAINTENANCE AND CLEANING
Before any cleaning or maintenance operation, unplug the appliance from the mains or disconnect the electrical power supply.
Periodically clean the appliance with a cloth and a solution of lukewarm water and neutral detergent specifically for refrigerator interiors. Never use abrasives. Never clean refrigerator parts with flammable fluids. The fumes can create a fire hazard or explosion. Clean the outside of the appliance and the door seal with a damp cloth and dry with a soft cloth. Do not use steam cleaners.
Condenser placed in the rear of the appliance should be cleaned regularly using a vacuum cleaner.
Condenser placed in the rear of the appliance should be cleaned regularly using a vacuum cleaner.
Important:
- The buttons and control panel display must not be cleaned with alcohol or alcohol-derived substances, but with a dry cloth.
- The refrigeration system pipes are located near the defrost pan and can become hot. Periodically clean them with a vacuum cleaner.
To ensure continuous and correct flow of defrost water, regularly clean the inside of the draining hole on the back of the refrigerator near the fruit and vegetable drawer, using the tool provided.


8. TROUBLESHOOTING GUIDE
8.1. BEFORE CONTACTING AFTER-SALES SERVICE...
Performance problems often result from little things you can find and fix yourself without tools of any kind.
| PROBLEM SOLUTION | |
| The appliance is not working: • Is the power cable plugged into a live socket with the proper voltage?Have you checked the protection devices and fuses of the electrical system in your home? | |
| If there is water in the defrost pan: | • This is normal in hot, damp weather. The pan can even be half full. Make sure the appliance is level so that the water does not overflow. |
| If the edges of the appliance cabinet, which come in contact with the door seal, are warm to the touch: | • This is normal in hot weather and when the compressor is running. |
| If the light does not work: • Have you checked the protection devices and fuses of the electrical system in your home?Is the power cable plugged into a live socket with the proper voltage?In case the LEDs are broken the user must call the Service for exchange of the same type available only at our After-sales Service Centers or authorized dealers. | |
| If the motor seems to run too much: | • Motor running time depends on different things: number of door openings, amount of food stored, temperature of the room, setting of the temperature controls.Is the condenser (back the appliance) free of dust and fluff?Are the door properly closed?Are the door seals properly fitted?On hot days or if the room is warm, the motor naturally runs longer.If the appliance door has been left open for a while or if large amounts of food have been stored, the motor will run longer in order to cool down the interior of the appliance. |
| If the appliance temperature is too high: | • Are the appliance controls correctly set?Has a large amount of food been added to the appliance?Check that the door is not opened too often.Check that the door close properly. |
| If the doors do not open and close properly: | • Check that food packages are not blocking the door.Check that the internal parts or automatic ice maker are not out of position.Check that the door seals are not dirty or sticky.Ensure the appliance is level. |
8.2. FAILURES
When any failure appears any LEDs indicator start blinking, it is necessary to call service. The appliance will work preserving the food stored.
Note: In case of power failure, appliance goes back to normal operation and previously chosen temperature setpoint is restored.
9. AFTER-SALES SERVICE
Before contacting After-Sales Service:
Switch the appliance on again to see if the problem has been solved. If it has not, disconnect the appliance from the power supply and wait for about an hour before switching on again.
If, after performing the checks described in the Troubleshooting Guide and switching the appliance on again, your appliance still does not work properly, contact the After-sales Service, explain the problem.
Specify:
- the model and appliance serial number (stated on the rating plate), • the nature of the problem,
SERVICE
0000 000 00000

- the Service number (the number after the word SERVICE on the data plate on the inside of the appliance),
- your full address,
- your telephone number and area code.
Note:
The direction of door opening can be changed. If this operation is performed by After-sales Service it is not covered by the warranty.


EAC
400010844157
195138714.00
- MAINTENANCE AND CLEANING
- TROUBLESHOOTING
- BEFORE CONTACTING THE AFTER-SALES SERVICE
- BEFORE CONTACTING THE SERVICE CENTER
- INSTALLATION OF TWO APPLIANCES
- TROUBLESHOOTING CHART
- BEFORE CONTACTING THE SERVICE DEPARTMENT
- RECOMMENDATIONS WHEN THE APPLIANCE IS NOT IN USE
- ABSENCE/VACATION
- TROUBLESHOOTING GUIDE
- BEFORE CONTACTING CONSUMER SERVICE
- CHAPTER 2: FUNCTIONS
- CHAPTER 3: USE
- CHAPTER 4: TIPS FOR FOOD STORAGE
- CHAPTER 5: OPERATING NOISES
- CHAPTER 6: RECOMMENDED ACTIONS IF THE APPLIANCE IS NOT USED
- CHAPTER 7: MAINTENANCE AND CLEANING OF THE DEVICE
- CHAPTER 8: TROUBLESHOOTING GUIDE
- CHAPTER 9: SERVICE
- CHANGING THE DOOR HANDING
- BEFORE CONTACTING SERVICE
- BEFORE CONTACTING AFTER-SALES SERVICE
- FUNCTIONS
- ON/STAND BY
- RECOMMENDATIONS FOR WHEN YOU DO NOT USE THE APPLIANCE
- TROUBLESHOOTING LIST
- TROUBLESHOOTING INSTRUCTIONS
- BEFORE CONTACTING THE TECHNICAL SERVICE
- ON/STANDBY
- BEFORE CONTACTING THE TECHNICAL SUPPORT SERVICE
- TROUBLESHOOTING MANUAL
- TABLE OF CONTENTS
- CHAPTER 1: INSTALLATION
- BEFORE CONTACTING THE SERVICE ORGANIZATION
- CHAPTER 4: FOOD-STORAGE TIPS
- CHAPTER 5: FUNCTIONAL SOUNDS
- CHAPTER 6: RECOMMENDATION IN CASE OF NO USE OF THE APPLIANCE
- CHAPTER 7: MAINTENANCE AND CLEANING
- CHAPTER 9: AFTER-SALES SERVICE
- REVERSE DOOR SWING
- NOTE
- INSTALLATION
- INSTALLING SINGLE APPLIANCE
- INSTALLING TWO APPLIANCES
- ADJUST DOORS (IF AVAILABLE)
- TH SENSE FRESH CONTROL
- PROFRESH
- DOOR OPEN ALARM
- FAST COOLING
- THE USE OF THIS FUNCTION IS RECOMMENDED WHEN PLACING A VERY HIGH QUANTITY OF FOOD IN THE REFRIGERATOR COMPARTMENT
- FAN
- DO NOT OBSTRUCT THE AIR INTAKE AREA WITH FOOD ITEMS
- TEMPERATURE SETTING
- NO-FROST REFRIGERATOR COMPARTMENT
- REFRIGERATOR LIGHT
- IMPORTANT
- USE
- NOTES
- FOOD-STORAGE TIPS
- AIR VENTILATION
- HOW TO STORE FRESH FOOD AND BEVERAGE
- WHERE TO STORE FRESH FOOD AND BEVERAGE
- FUNCTIONAL SOUNDS
- SOME OF THE FUNCTIONAL SOUNDS CAN BE REDUCED THROUGH
- RECOMMENDATION IN CASE OF NO USE OF THE APPLIANCE
- ABSENCE / VACATION
- MOVING
- POWER FAILURE
- FOR POWER FAILURES LASTING UP TO 24 HOURS
- FOR POWER FAILURES LASTING MORE THAN 24 HOURS
- FAILURES
- AFTER-SALES SERVICE
- SPECIFY
- SERVICE
Brand : WHIRLPOOL
Model : SW8 AM2Q X 2
Category : Refrigerator