ShutterBoss III - Remote control Vello - Free user manual and instructions
Find the device manual for free ShutterBoss III Vello in PDF.


| Product Type | Wireless Remote Control |
| Brand | Vello |
| Model | ShutterBoss III |
| Dimensions (approx.) | 4.1 x 1.6 x 0.8 inches (104 x 40 x 20 mm) |
| Weight (approx.) | 2.5 oz (70 g) |
| Power Source | 2 x CR2032 3V lithium batteries |
| Battery Life (approx.) | Up to 100 hours of standby |
| Wireless Frequency | 2.4 GHz |
| Range | Up to 100 feet (30 meters) |
| Shutter Release Modes | Single, Continuous, Bulb, Timer |
| Intervalometer Function | Yes, programmable time-lapse intervals |
| Shutter Speed Range | 1 second to 99 hours (bulb mode) |
| Number of Shots per Sequence | 1 to 399 |
| Display | LCD screen with backlight |
| Compatibility | Most DSLR and mirrorless cameras with shutter release port |
| Connection Type | 2.5mm or 3.5mm stereo jack (cable included) |
| Included Accessories | Remote unit, shutter release cable, CR2032 batteries, manual |
| Care Instructions | Clean with a soft, dry cloth; avoid liquids |
| Safety Warnings | Do not disassemble; keep away from children; remove batteries if not used for long periods |
| Spare Parts Available | Replacement batteries, cables (sold separately) |
| Repair Policy | Contact Vello support; no user-serviceable parts inside |
| Environmental Information | RoHS compliant; dispose of electronics and batteries properly |
Frequently Asked Questions - ShutterBoss III Vello
User questions about ShutterBoss III Vello
0 question about this device. Answer the ones you know or ask your own.
Ask a new question about this device
Download the instructions for your Remote control in PDF format for free! Find your manual ShutterBoss III - Vello and take your electronic device back in hand. On this page are published all the documents necessary for the use of your device. ShutterBoss III by Vello.
USER MANUAL ShutterBoss III Vello
THANK YOU FOR CHOOSING VELLO
The Vello Wireless ShutterBoss has a range of up to 250 feet on 99 channels over the reliable FSK modulated 2.4 GHz frequency. But this device is more than just a wireless shutter release. It features many timer functions: self-timer, interval timer, and long-exposure timer, as well as controls for the number of continuous shutter trips. The transmitter is powered by two AAA batteries that can provide the low amount of power this device uses for up to four years.
You can set the timer delays, exposure times, and intervals up to 99 hours, 59 minutes, 59 seconds in one-second increments. You can select anywhere from 1 to 999 continuous shots, or set the device to take an unlimited number of photos.
The LCD screen also has a backlit function for low-light conditions.
The Vello Wireless ShutterBoss is great for time-lapse recording of blooming flowers, astrophotography, etc.
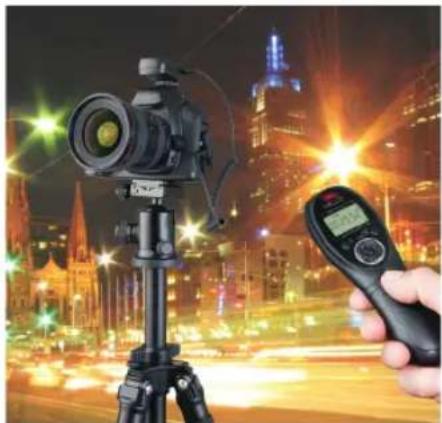
natural_image
Nighttime cityscape with a digital camera on a tripod and a hand holding a handheld remote, no visible text or symbols.PRECAUTIONS
- There are no user-serviceable parts inside the devices. Do not attempt to disassemble or perform any unauthorized modification.
- Do not operate the devices in the presence of flammable gas or vapors.
- Do not handle with wet hands or immerse in or expose to water or rain. Failure to observe this precaution could result in fire or electric shock.
-
Keep out of the reach of children. This device contains small parts which may pose a choking hazard.
-
Observe caution when handling batteries. Batteries may leak or explode if improperly handled. Use only the batteries listed in this manual. Make certain to align batteries with correct polarity.
-
Batteries are prone to leakage when fully discharged. To avoid damage to the product, be sure to remove the batteries when leaving the product unattended for prolonged periods or when no charge remains.
-
Do not use or leave the devices in conditions of extreme heat, severe cold, or high humidity.
- Turn off the camera's power before inserting or removing the remote cord.
- Dispose of used batteries, packaging, and old devices in accordance with appropriate local environmental regulations.
- All images are for illustrative purposes only.
FEATURE DIAGRAMS
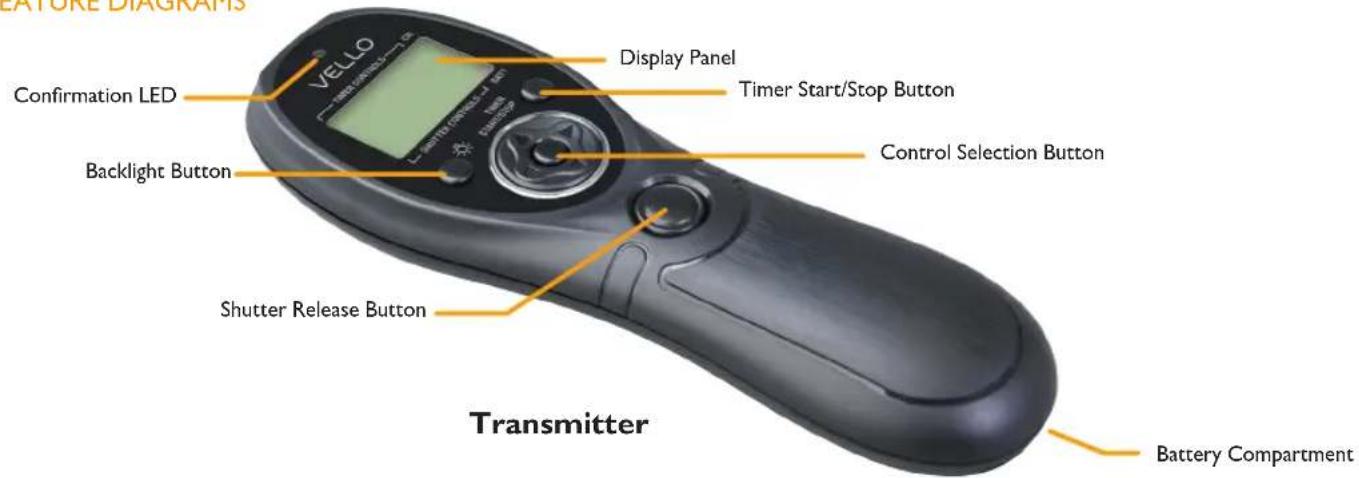
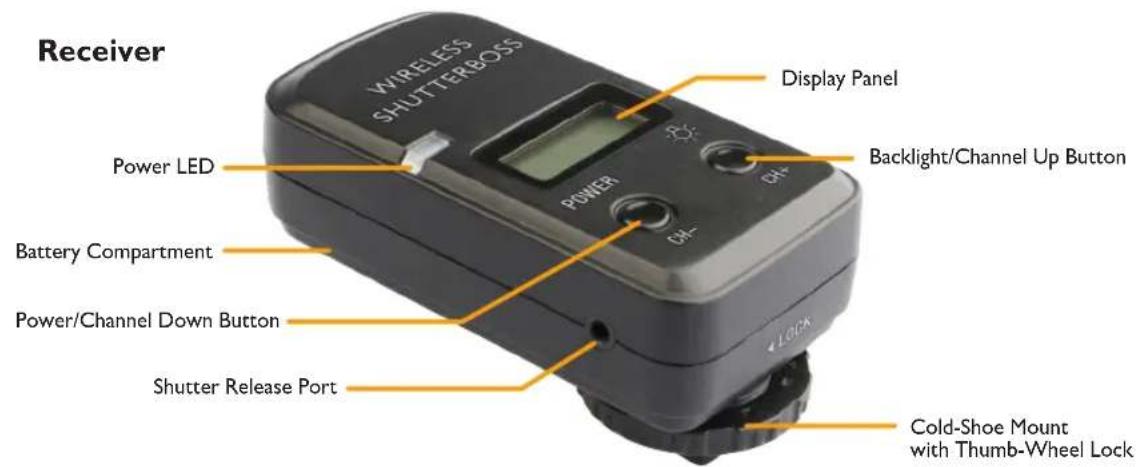
TRANSMITTER DISPLAY PANEL
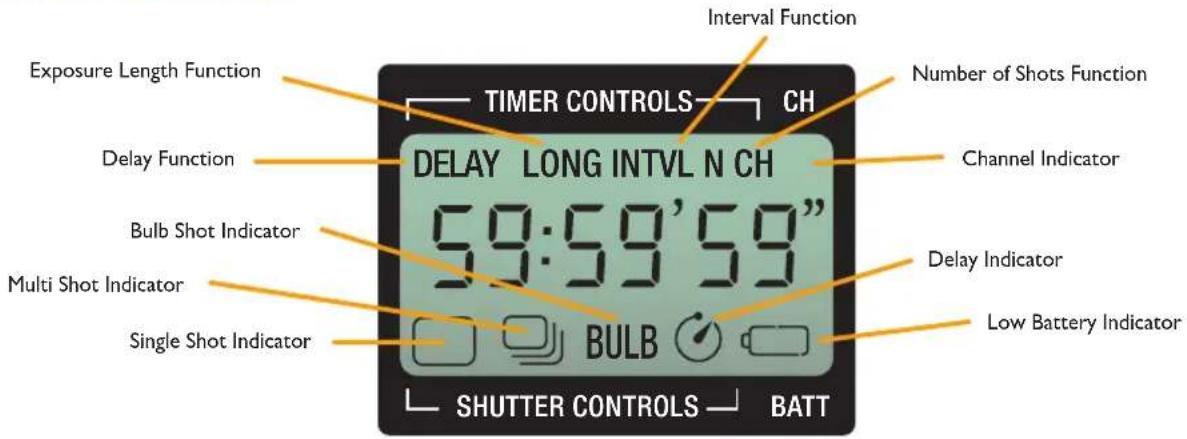
KEY FEATURES
Channel Selector: 99 possible radio channels, plus one universal channel, over the reliable FSK 2.4 GHz frequency. No DIP switches to set. One transmitter can trigger multiple receivers.
Extended Range: Approx. 250 feet (80 m).
Multifunction: Trigger your camera wirelessly or wired.
Versatile: One receiver works with dozens of camera models. Just swap out the camera release cable.
Dual-Function Release: Press halfway to focus; press fully to the trigger shutter.
Delayed Release: Delay function gives you extra time to get into position.
Multi-Exposure: Take multiple shots with one press of the trigger.
Interval Control: Control the amount of time between multiple shots.
Long Exposure: Control the length of the exposure remotely.
LED Indicators: Confirm pre-focus and exposure.
Ultra-low Power: AAA transmitter batteries can last up to four years on standby.
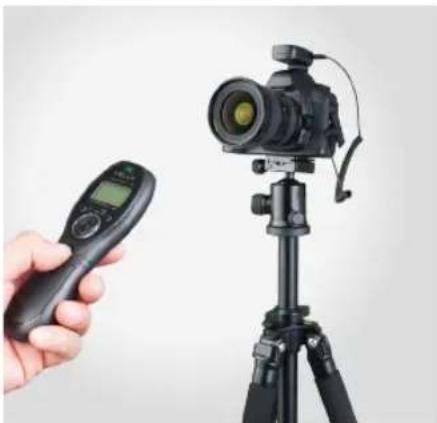
natural_image
Hand holding a remote control with a DSLR camera on a tripod (no text or symbols visible)POWERING UP
Turning ON the Transmitter: The
Wireless ShutterBoss is optimized for ultra-low power usage. Pressing any key will wake the device. If no operation is performed, the transmitter will revert to standby status in one minute, and the display will turn off. The device will stay active during timing operations and bulb exposures longer than one minute.
Turning ON the Receiver: Press and hold the power button for two seconds. The display will show the channel in use. The receiver turns off the same way. Press and hold the power button until the display goes off.
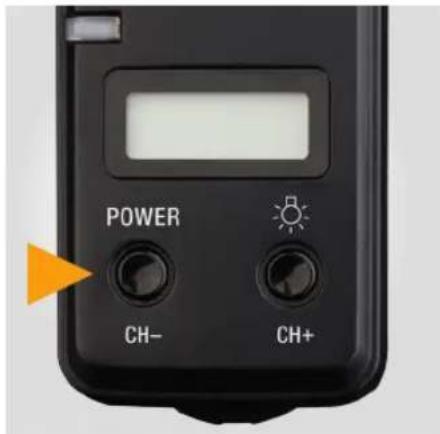
Press and hold the power button for two seconds to power up the receiver. The LED will blink green while the device is on.
The transmitter uses ultra low power, and can last up to four years on standby.
SETTING THE CHANNEL
Setting the Channel on the
Transmitter: The transmitter and receiver must be set to the same channel for proper communication.
1: Use the arrow button to select the channel
setting. Press the left and right arrows until CH is displayed in the upper right corner of the screen.
2: Press the center button on the arrow button to change the setting.
3: Press the up and down arrows to adjust the channel up or down.
4: Press the center button to lock the setting.

Setting the Channel on the Receiver:
1: With the device on, press the CH- and CH+ at the same time. The CH in the display will blink, indicating that you can now change the setting.
2: Press the CH- or CH+ buttons to adjust the channel.
3: Press both CH- and CH+ buttons a second time to save your setting. If no action is taken in ten seconds, the device will save the setting displayed.
The channels you select for the transmitter and receiver will become the default settings for the next time you power up the device.
When you select [—] as the channel for the transmitter and receiver, this effectively sets the devices to communicate on all channels. A receiver set to [—] will respond to any transmission it receives on the 2.4 GHz frequency. This is useful in setups with multiple devices all needing to respond to a single trigger.
WIRED SETUP
You can use your transmitter as a wired remote. With your camera and transmitter OFF, connect the shutter release cable's sub-mini plug end to the jack at the front of the transmitter, and the other end to your camera's shutter release jack. Power up your camera.
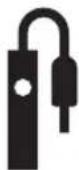
Look for this symbol.
Many camera manufacturers use it to indicate the jack for connecting remote devices.
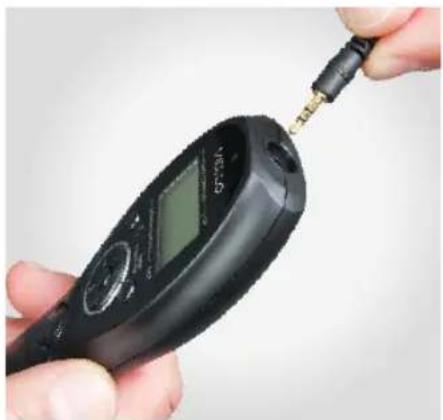
natural_image
Close-up of hands holding a black handheld electronic device with a small metallic connector inserted (no visible text or symbols)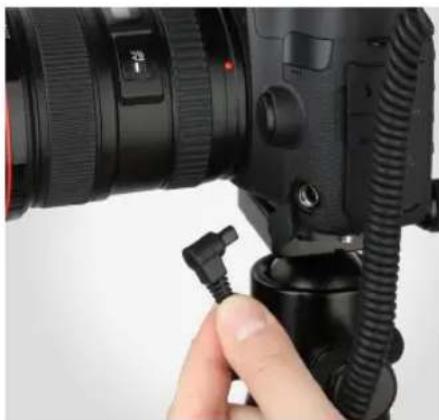
natural_image
Close-up of a black DSLR camera with attached cable and connector, no visible text or symbolsWIRELESS SETUP
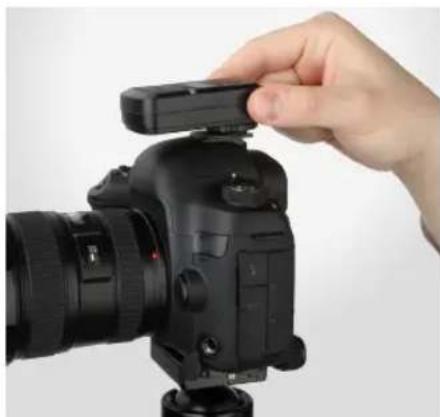
Mount the receiver onto your camera's hot shoe, facing forwards or backwards. If your camera's hot shoe is in use, you can mount the receiver to an accessory bracket or a tripod using either an accessory shoe or the receiver's 1/4"-20 threaded socket.
With your camera and receiver OFF, connect the shutter release cable's sub-mini plug end to the receiver and the other end to your camera's shutter release jack. Power up the receiver and then the camera.
Be sure to also read your camera's manual for guidance on use of remotes.
natural_image
Hand holding a camera module with a small clip, no visible text or symbols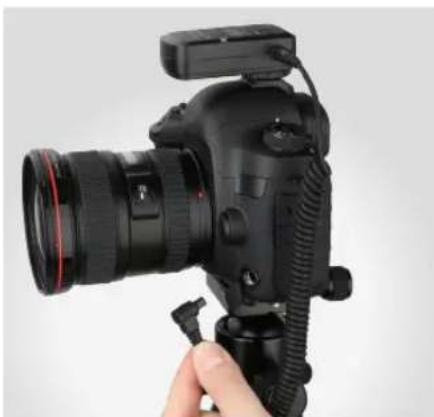
natural_image
Close-up of a black DSLR camera with adjustable lens and strap, held by a hand (no visible text or symbols)SHUTTER CONTROL: SINGLE SHOT
- Turn on the receiver by pressing and holding the Power button until the display comes on.
- Set your camera to single shot mode.
- Use the arrow button on the transmitter to select single shot mode. Press the left and right arrows until the single shot icon is displayed in the bottom left of the screen.
to select single shot mode. Press the left and right arrows until the single shot icon is displayed in the bottom left of the screen.

- Press the transmitter's shutter release button halfway to wake or focus your camera (if set to Auto Focus). The LEDs on the transmitter and receiver will turn green.
- Fully depress the shutter release button on the transmitter. The LEDs will turn red, and the shutter will be triggered.
- Press the transmitter's shutter release button halfway to wake or focus your camera (if set to Auto Focus). The LEDs on the transmitter and receiver will turn green.
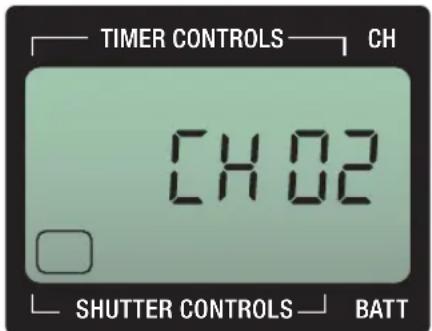
In single shot mode, only the single shot icon and the channel in use will display.
SHUTTER CONTROL: CONTINUOUS SHOOTING
Continuous shooting under the Shutter Control settings will trigger the camera shutter once every second. For exposures longer than one second, use the Timer Control settings described later in this manual.
- Turn on the receiver by pressing and holding the Power button.
- Set your camera to single shot mode.
- Use the arrow button on the transmitter to select continuous shooting mode.

Press the left and right arrows until the continuous shooting icon is displayed at the bottom.
- Press the transmitter's shutter release button halfway to wake or focus your camera (if set to Auto Focus). The LEDs on the transmitter and receiver will turn green.
- Fully depress and hold the shutter release button on the transmitter. The LEDs will turn red, and the shutter will be triggered. The LEDs will blink green and red as shots are focused and triggered.
- Release the shutter release button to stop continuous shooting.
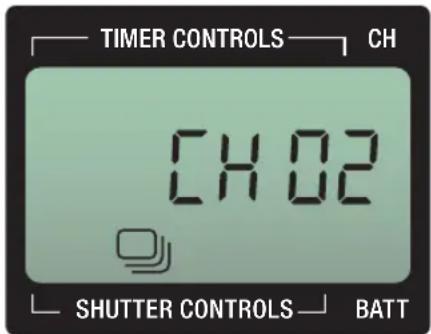
In continuous shooting mode, only the multiple shot icon and the channel in use will display.
SHUTTER CONTROL: BULB SHOT
Bulb exposures under the Shutter Control settings give you manual control over a long exposure. To preset long exposure times, use the Timer Control settings described later in this manual.
- Turn on the receiver by pressing and holding the Power button until the display comes on.
- Set your camera to bulb exposure.
-
Use the arrow button on the transmitter to select bulb mode. Press the left and right arrows until BULB is displayed at the bottom of the LCD.
-
Press the transmitter's shutter release button halfway to wake or focus your camera (if set to Auto Focus). The LEDs on the transmitter and receiver will turn green.
- Fully depress the shutter release button on the transmitter. The LEDs will turn red and the shutter will be triggered. The LEDs will continue to blink red, and the screen will display the seconds of exposure.
- Press the shutter release button again to end the bulb exposure.
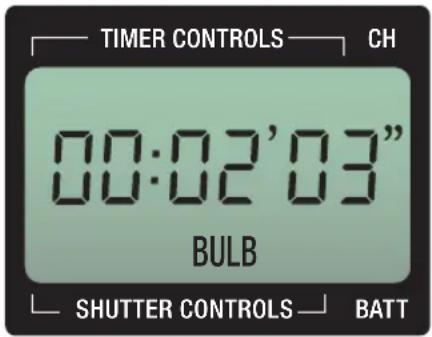
In bulb mode, the screen will display the seconds of your exposure.
SHUTTER CONTROL: DELAY
The Delay feature in the Shutter Controls gives you simple control over delay and number of shots. To combine delay with other exposure settings, use the Timer Control settings described later in this manual.
- Turn on the receiver by pressing and holding the Power button.
- Set your camera to single shot mode.
-
Use the arrow button on the transmitter to select delay shooting mode. Press the left and right arrows until the delay icon is displayed at the bottom of the LCD.
-
Press the set button in the middle of the arrow button to change the settings.
- Press the up and down arrows to set the number of exposures (from 1 to 999 shots, or set the device to take an unlimited number of Photos when set to “--”).
- Press the right arrow to move to delay time, and use the up and down arrows to set the value (from 1 to 59 seconds).
- Press the set button in the middle of the arrow button to lock your settings.
- Press the transmitter's shutter release button halfway to wake or focus the camera. Fully depress the shutter release
button. The delay countdown will begin, and one shot will be taken per second.
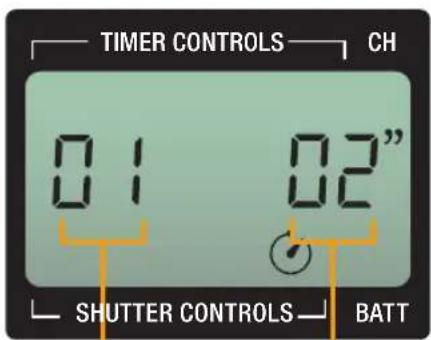
number of shots seconds of delay
TIMER CONTROLS
The Timer Controls at the top of the LCD screen give you more control over delay, exposure length, and number of shots and the intervals between them than the Shutter Controls or even the controls on your camera.
You can choose only one function, such as delay time or exposure length, or set up a series of controls that begins with a delay countdown up to 99 hours 59 minutes 59 seconds and then triggers a series of long exposures with intervals between each shot.
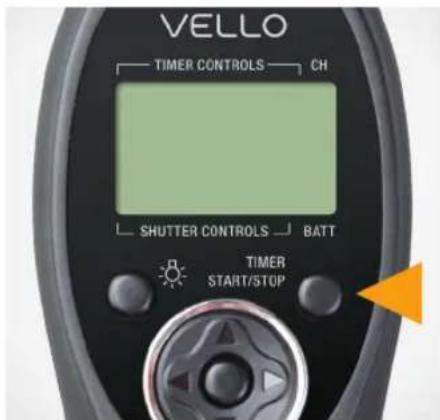
Once you've set up your Timer Controls, press the Timer Start/Stop button to begin the countdowns and exposures.
TIMER CONTROLS: DELAY
Under Timer Controls, the Wireless ShutterBoss allows you to set a delay of up to 99 hours 59 minutes 59 seconds.
- Turn on the receiver by pressing and holding the Power button until the display comes on.
- Make certain your camera is NOT also set for a delay.
- Use the arrow button on the transmitter to select DELAY under the Timer

Controls. Press the left and right arrows until DELAY is displayed at the top of the LCD.
- Press the set button in the middle of the arrow button to change the Delay setting. Use the left and right arrows to move between hours, minutes, and seconds. Use the up and down arrows to change the time values.
- Press the set button again to accept your selection.
- Continue on to other Timer Control settings, or press Timer Start/Stop to begin the delay timer.
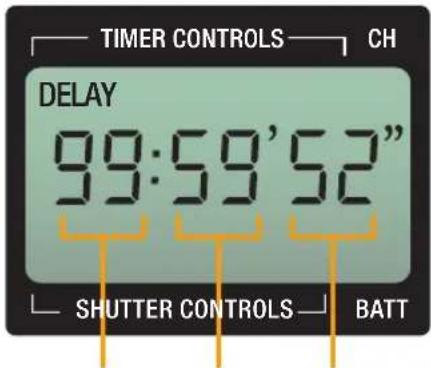
hours minutes seconds
TIMER CONTROLS: EXPOSURE LENGTH
Under Timer Controls, the Wireless ShutterBoss can control shutter speeds that are much longer than what your camera offers, and you don't have to manually end the exposure as you do with the Shutter Controls.
- Turn on the receiver by pressing the Power button until the display comes on.
- Set your camera to bulb exposure.
-
Use the arrow button on the transmitter to select LONG under the Timer Controls. Press the left and right arrows until LONG is displayed at the top of the LCD.
-
Press the set button in the middle of the arrow button to change the Long Exposure setting. Use the left and right arrows to move between hours, minutes, and seconds. Use the up and down arrows to change the time values.
- Press the set button again to accept your selection.
- Continue on to other Timer Control settings, or press Timer Start/Stop to begin the exposure process.
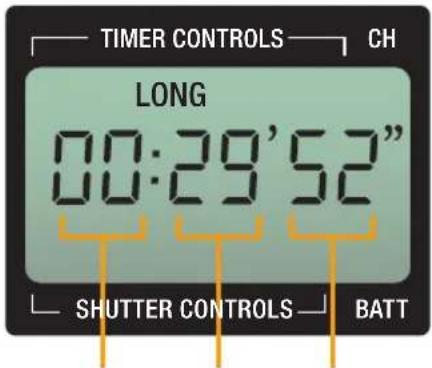
hours minutes seconds
TIMER CONTROLS: INTERVALS
The Wireless ShutterBoss allows you to control the amount of time between a series of shots. Choose an interval that is longer than your exposure time. If using a flash, be sure to set an interval that is longer than your flash recycle time.
- Turn on the receiver by pressing the Power button until the display comes on.
- Set your camera exposure.
-
Use the arrow button on the transmitter to select INTVL under the Timer Controls. Press the left and right arrows until INTVL is displayed.
-
Press the set button in the middle of the arrow button to change the exposure Interval setting. Use the left and right arrows to move between hours, minutes, and seconds. Use the up and down arrows to change the time values.
- Press the set button again to accept your selection.
- Continue on to other Timer Control settings or press Timer Start/Stop to begin the exposure process.
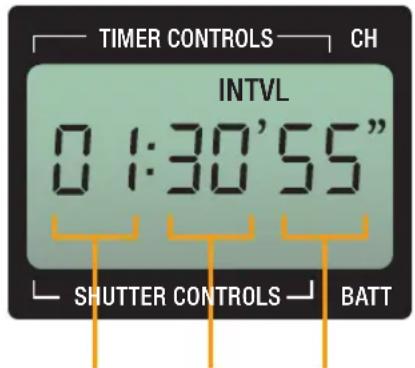
hours minutes seconds
TIMER CONTROLS: NUMBER OF SHOTS
Once you've set the Interval time under the Timer Controls, you must tell the Wireless ShutterBoss how many shots to trigger.
- Turn on the receiver by pressing the Power button until the display comes on.
- Set your camera exposure.
- Use the arrow button on the transmitter

to select N under the Timer Controls. Press the left and right arrows until N is displayed.
- Press the set button in the middle of the arrow button to change the setting for number of exposures. Use the up and down arrows to change the number of shots. To set the number of exposures to infinity, set the tens and hundreds columns to zero. The screen will display three dashes.
- Press the set button again to accept your selection.
- If this is the last of your Timer Control settings, press Timer Start/Stop to begin the exposure process.
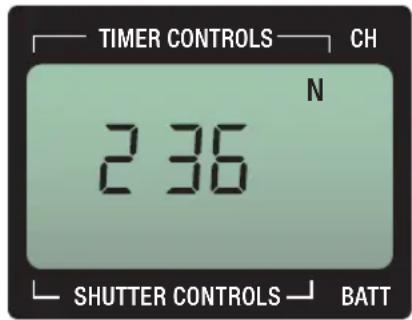
- While the intervalometer is running, press and hold the Set button to display the current exposure as it counts downward.
BACKLIGHT BUTTON
Both the transmitter and receiver feature a backlight for low-light shooting conditions. Press and hold the backlight button for three seconds to activate the backlight on the display. The backlight will remain lit for about six seconds on the transmitter and four seconds on the receiver.
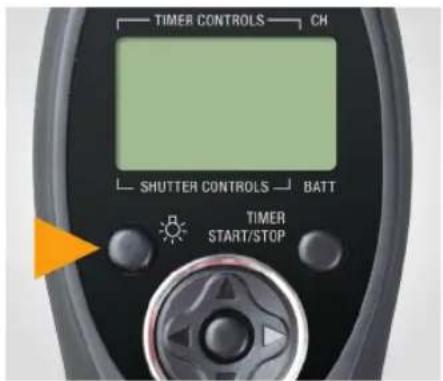
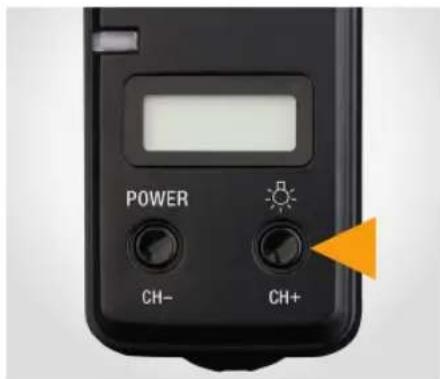
Transmitter backlight button Receiver backlight button
CHANGING THE BATTERIES
Both the transmitter and receiver of the Wireless ShutterBoss will display a blinking battery icon when battery power is low.
The receiver uses two AAA batteries, which provide more than 400 hours of standby time. To replace the batteries, slide open the battery door on the end of the unit.
The transmitter uses two AAA batteries, which offer four years of standby time. To replace the batteries, slide open the battery cover on the back of the unit.
Make sure to install batteries in the correct orientation.
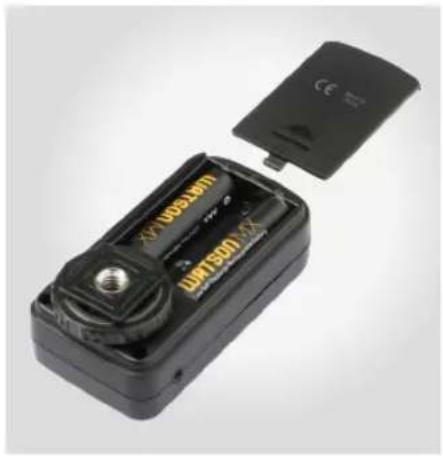
natural_image
Black battery pack with internal components and a partially open top panel (no visible text or symbols)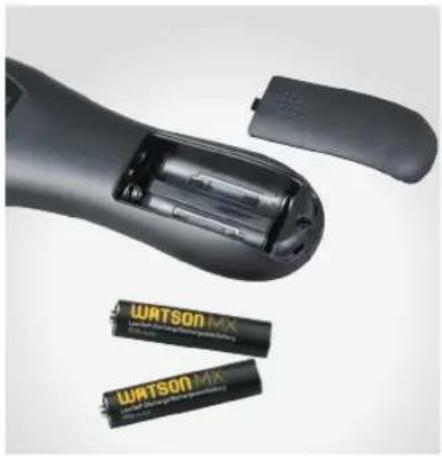
natural_image
Close-up of a black remote control device with two batteries labeled 'WATSON MX' (no additional text or symbols visible)CARE OF THE WIRELESS SHUTTERBOSS
Protect the Wireless ShutterBoss
Do not drop the devices. The units may malfunction if subjected to a strong shock or vibration.
Keep Dry
The devices are not waterproof. Avoid getting the devices wet. Do not expose them to high humidity.
Avoid Sudden Temperature Changes
Sudden changes in temperature, such as entering or leaving a warm building on a cold day, can cause damaging condensation inside the devices. Protect the transmitter and
receiver by placing them inside a carrying case or a sealed plastic bag and allowing them to adjust to temperature changes gradually.
Avoid Magnetic Fields
Strong static charges or electromagnetic fields generated by equipment such as radio transmitters can interfere with the system. A strong external static charge can cause unusual characters to display on the screen or may cause the device to malfunction. In such a situation, turn off the camera, disconnect all devices, remove the batteries, and then replace them a few seconds after the display goes out.
Liquid Crystal Displays
The display panel is a liquid crystal display. At very low temperatures, the display response may become slower. And at temperatures higher than 140^ F ( 60^ C), the display may darken. In either case, the display will return to normal at room temperature.
SPECIFICATIONS
| Supported Cameras | closed insert) |
| Frequency | nels over FSK 2.4 GHz |
| Range | |
| Timer Control | Delay: 0 sec. to 99 hr. 59 min. 59 sec. in one-sec. incrementsExposure Range: 0 sec. to 99 hr. 59 min. 59 sec. in one-sec. incrementsInterval: 1 sec. to 99 hr. 59 min. 59 sec. in one-sec. incrementsNumber of Shots: 1 to 999 or |
| Operating Temperature | ^1F to 122^ ( -20^ to 50^ ) |
| Dimensions | Transmitter: 5.9 × 2 × 1 in. ( 149 × 50 × 24 mm)Receiver: 2.9 × 1.5 × 1.2 in. ( 74 × 38 × 31 mm) |
FCC COMPLIANCE
This device complies with Part 15 of the FCC Rules. Operation is subject to the following two conditions:
- This device may not cause harmful interference.
- This device must accept any interference received, including interference that may cause undesired operation.
ONE-YEAR LIMITED WARRANTY
This VELLO product is warranted to the original purchaser to be free from defects in materials and workmanship under normal consumer use for a period of one (1) year from the original purchase date or thirty (30) days after replacement, whichever occurs later. The warranty provider's responsibility with respect to this limited warranty shall be limited solely to repair or replacement, at the provider's discretion, of any product that fails during normal use of this product in its intended manner and in its intended environment. Inoperability of the product or part(s) shall be determined by the warranty provider. If the product has been discontinued, the warranty provider reserves the right to replace it with a model of equivalent quality and function.
This warranty does not cover damage or defect caused by misuse, neglect, accident, alteration, abuse, improper installation or maintenance. EXCEPT AS PROVIDED HEREIN, THE WARRANTY PROVIDER MAKES NEITHER ANY EXPRESS WARRANTIES NOR ANY IMPLIED WARRANTIES, INCLUDING BUT NOT LIMITED TO ANY IMPLIED WARRANTY OF MERCHANTABILITY OR FITNESS FOR A PARTICULAR PURPOSE. This warranty provides you with specific legal rights, and you may also have additional rights that vary from state to state.
To obtain warranty coverage, contact the Vello Customer Service Department to obtain a return merchandise authorization ("RMA") number, and return the defective product to Vello along with the RMA number and proof of purchase. Shipment of the defective product is at the purchaser's own risk and expense.
For more information or to arrange service, visit www.vellogear.com or call Customer Service at 212-594-2353.
Product warranty provided by the Gradus Group.
www.gradusgroup.com
VELLO is a registered trademark of the Gradus Group. © 2016 Gradus Group LLC. All Rights Reserved.
www.vellogear.com

VELLO
A Gradus Group Brand
GG1
- THANK YOU FOR CHOOSING VELLO
- PRECAUTIONS
- KEY FEATURES
- POWERING UP
- Turning ON the Transmitter: The
- SETTING THE CHANNEL
- Setting the Channel on the
- Setting the Channel on the Receiver:
- WIRED SETUP
- WIRELESS SETUP
- SHUTTER CONTROL: SINGLE SHOT
- SHUTTER CONTROL: CONTINUOUS SHOOTING
- SHUTTER CONTROL: BULB SHOT
- SHUTTER CONTROL: DELAY
- TIMER CONTROLS
- TIMER CONTROLS: DELAY
- TIMER CONTROLS: EXPOSURE LENGTH
- TIMER CONTROLS: INTERVALS
- TIMER CONTROLS: NUMBER OF SHOTS
- BACKLIGHT BUTTON
- CHANGING THE BATTERIES
- CARE OF THE WIRELESS SHUTTERBOSS
- Protect the Wireless ShutterBoss
- Keep Dry
- Avoid Sudden Temperature Changes
- Avoid Magnetic Fields
- Liquid Crystal Displays
- FCC COMPLIANCE
- ONE-YEAR LIMITED WARRANTY
Brand : Vello
Model : ShutterBoss III
Category : Remote control