
SL2 - Camera LEICA - Free user manual and instructions
Find the device manual for free SL2 LEICA in PDF.


| Product Type | Mirrorless full-frame system camera |
| Model | Leica SL2 |
| Sensor | 47.3 MP full-frame CMOS (8368 x 5584 pixels) |
| Image Stabilization | 5-axis, up to 5.5 stops |
| Viewfinder | 5.76M-dot OLED EVF, 0.78x magnification, 120 fps |
| LCD Screen | 3.2" touchscreen, 2.1M dots, anti-fingerprint coating |
| Video Resolution | Up to 5K (MOV) at 30 fps, 4K at 60 fps |
| ISO Range | 50 - 50000 (manual), Auto: 100 - 50000 |
| Shutter Speed | 30 min to 1/8000 s (mechanical), 1 s to 1/40000 s (electronic) |
| Continuous Shooting | Up to 20 fps (electronic shutter, without AFc) |
| Storage | Dual SD/SDHC/SDXC slots (UHS-II) |
| Connectivity | USB 3.1 Type-C, HDMI 2.0b Type A, 3.5mm audio in/out |
| Wireless | Wi-Fi 802.11ac (2.4/5 GHz), Bluetooth 4.2 |
| Battery | Leica BP-SCL4 (Li-ion, 7.2V, 1860 mAh), approx. 370 shots per charge |
| Dimensions (W x H x D) | 146 × 107 × 42 mm |
| Weight | Approx. 835 g (body only, without battery) |
| Material | Full-metal aluminum/magnesium housing with leatherette cover |
| Protection | Splash-water and dust resistant (IP54) |
| Lens Mount | Leica L bayonet (compatible with L-Mount lenses, M/R via adapter) |
| Included Accessories | Battery (BP-SCL4), charger (BC-SCL4), bayonet cover, carry strap, quick start guide |
| Maintenance | Clean sensor gently with dry cloth; avoid strong magnetic fields; store in dry place |
| Safety | Do not disassemble; use only Leica accessories; keep battery away from heat; dispose of batteries properly |
| Spare Parts / Repairability | Only authorized Leica service centers; accessories available from Leica |
| General Information | Firmware updates via SD card; Leica FOTOS app for remote control and image transfer |
Frequently Asked Questions - SL2 LEICA
User questions about SL2 LEICA
0 question about this device. Answer the ones you know or ask your own.
Ask a new question about this device
Download the instructions for your Camera in PDF format for free! Find your manual SL2 - LEICA and take your electronic device back in hand. On this page are published all the documents necessary for the use of your device. SL2 by LEICA.
USER MANUAL SL2 LEICA
Download the full scope instruction manual here:
https://en.leica-camera.com/Service-Support/Support/Downloads
Please register via the following link if you would like to receive a printed copy of the full scope instruction manual:
www.order-instructions.leica-camera.com
PART DESIGNATIONS
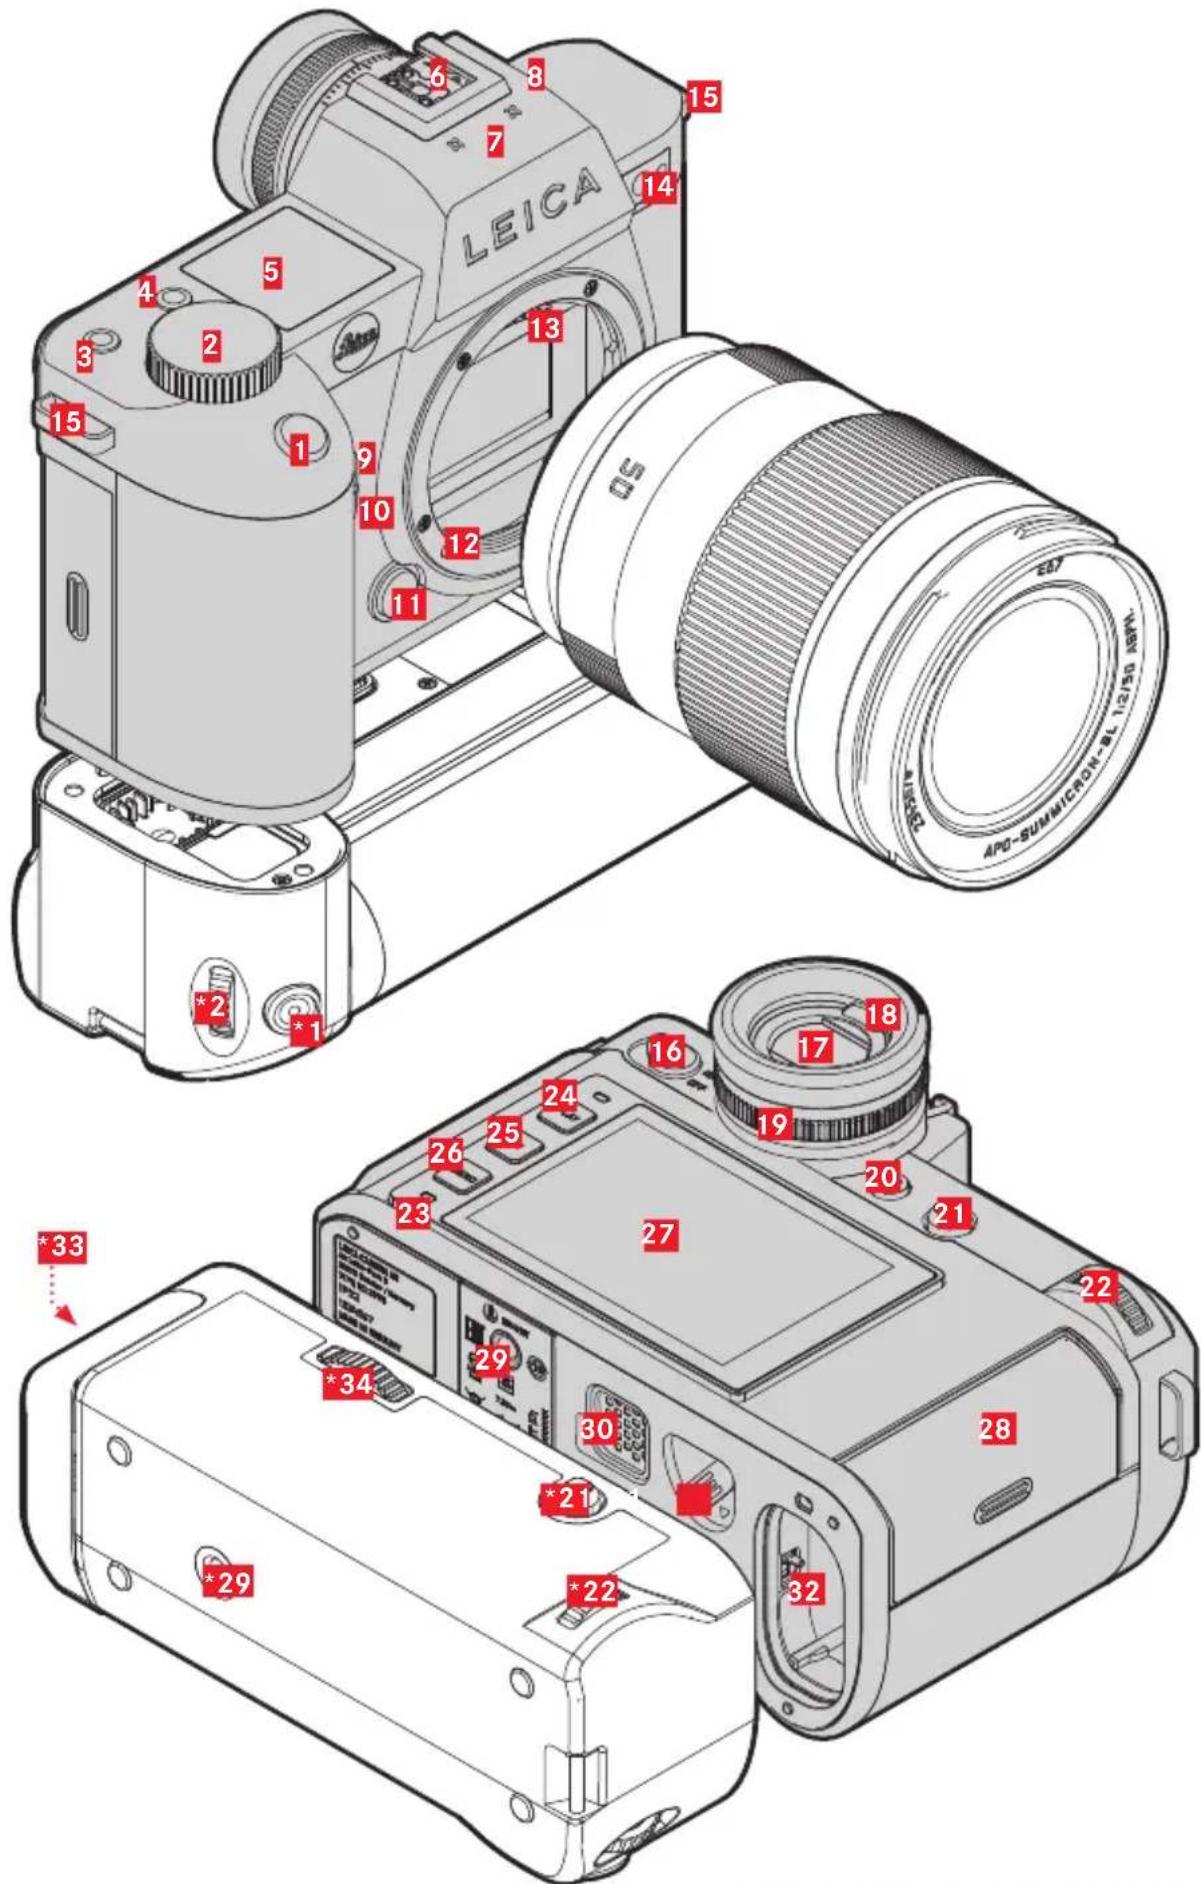
* optional accessory: Multifunction hand grip SL
1 Shutter button
Tap:
- Autofocusing - Activating exposure metering and exposure control
Press down fully:
- Shutter release - Video recording Start/Stop in standby mode: - The camera is reactivated
2 Front setting wheel
in the menu:
- Scrolling through the menu screens in recording mode: - depending on exposure mode, configurable (see table under "Wheel assignment") in review mode: - Zooming in/out of the frame
3 FN button\*\*
in recording mode:
- Photo: SO - Video: SO (Cine: Exposure Index)
4 FN button\*\*
in recording mode:
- Mode change photo/video in review mode: - Marking/rating a recording
5 Top display
- Set operating mode - Recording data - Camera information
6 Accessory shoe
Recommended flash units: Leica SF 40, SF 64 and SF 58
7 Microphone
Sound is recorded in stereo
8 Speaker
FN button\*\*
in recording mode: - Photo: Magnification - Video: Microphone Gain
10 FN button\*\*
in recording mode: - Setting the AF metering method
11 Lens release button
12 Leica L bayonet
13 Contact strip
14 Self-timer LED / AF Assist Lamp / Sensor for exposure metering
15 Strap lugs
natural_image
Technical line drawing showing two views of a mechanical component with labeled parts (no text or symbols present)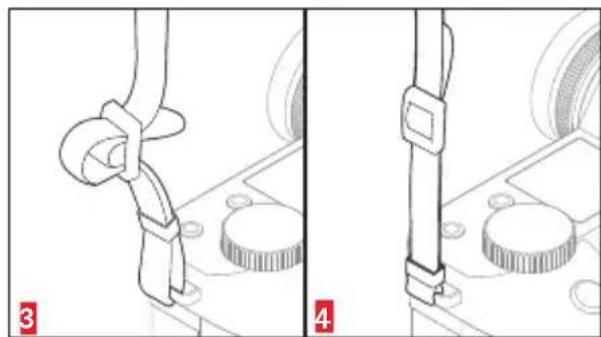
natural_image
Technical line drawing of a mechanical component with two views (labeled 3 and 4), showing no text or symbols.16 Main switch
Switching the camera ON/OFF
17 Viewfinder eyepiece
18 Eye sensor
Available settings: LCD panel only/EVF only/automatic switchover
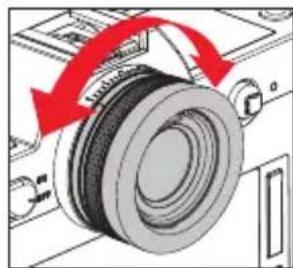
19 Diopter setting ring
Setting range: -4/+2 diopter
natural_image
Diagram of a mechanical device with a rotating wheel and red arrows indicating motion (no text or symbols)20 FN button\*\*
EVF/LCD panel switchover
21 Joystick
in the menu:
- Menu control
in recording mode:
- Shifting the AF metering fi eld
- Exposure lock (press and hold)
in review mode:
- Scrolling
- Video playback control
22 Thumbwheel
in the menu:
- Menu control
in recording mode:
- depending on exposure mode, confi gurable (see table under "Wheel assignment")
in review mode:
- Scrolling
- Video playback control
23 Status LED
- Memory card access
- Using the WLAN function
- Charging via USB
24 PLAY button
- Switchover between picture and playback/review mode
- Return to full-screen display
25 FN button\*\*
in Playback/Review mode:
- Toggling info displays
26 MENU button
in the menu:
- Scrolling through the menu screens in recording mode:
- Accessing the menu
in review mode:
- Accessing the Playback/Review menu
27 LCD panel
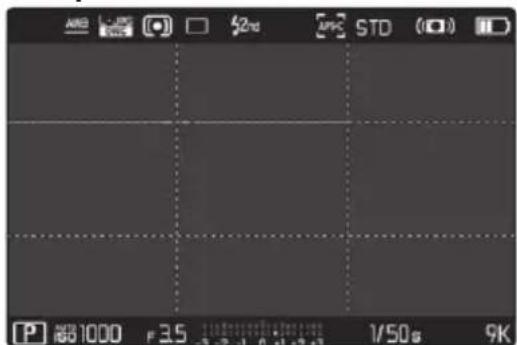
3.2" TFT LCD, 1080 x 720 pixels,
2,332,800 dots, touch panel
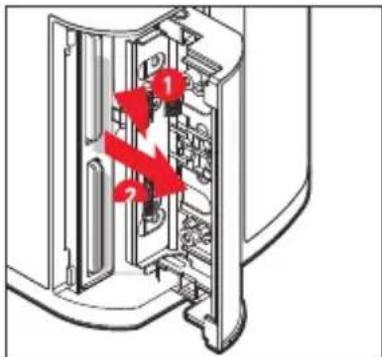
28 Memory card slot
UHS-II, UHS-I, SD/SDHC/SDXC
29 Tripod thread
A 1/4 DIN 4503 (1/4") with stainless steel in the base
30 Contact for multifunction hand grip
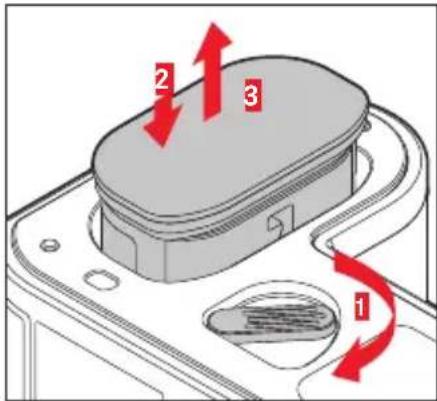
31 Battery release lever
32 Battery compartment
\*33 Hand grip-integrated battery compartment
\*34 Hand grip lock
CHARGING THE BATTERY
| Display Charge status | Charge time* | |
| CHARGE fl ashes green | battery is charging | |
| 80% lights up orange | 80% approx. 2 h | |
| CHARGE continuous green light | 100% approx. 312 h |
*for a completely discharged battery
ATTACHING THE MULTIFUNCTION LOAD USB/DATA TRANSFER HAND GRIP\*
STATUS DISPLAY PHOTO
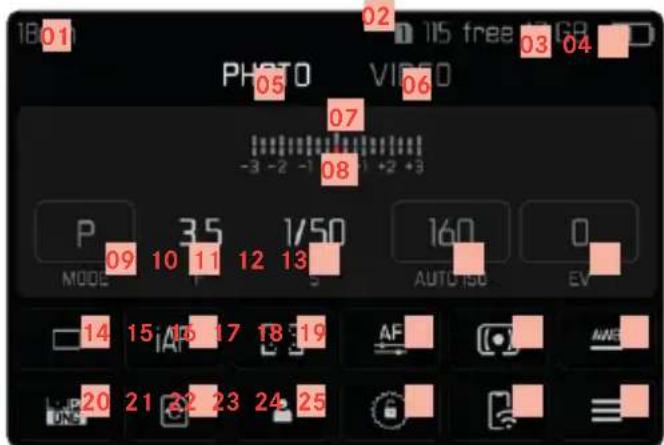
01 Focal length
02 Memory card used
03 Remaining memory capacity
04 Battery capacity
05 Menu section PHOTO
06 Menu sections VIDEO
07 Light balance
08 Exposure compensation scale
09 Exposure mode
10 Exposure value
11 Shutter speed
12 ISO Sensitivity
13 Exposure compensation VALUE
14 Picture mode (Picture sequence)
15 Autofocus mode
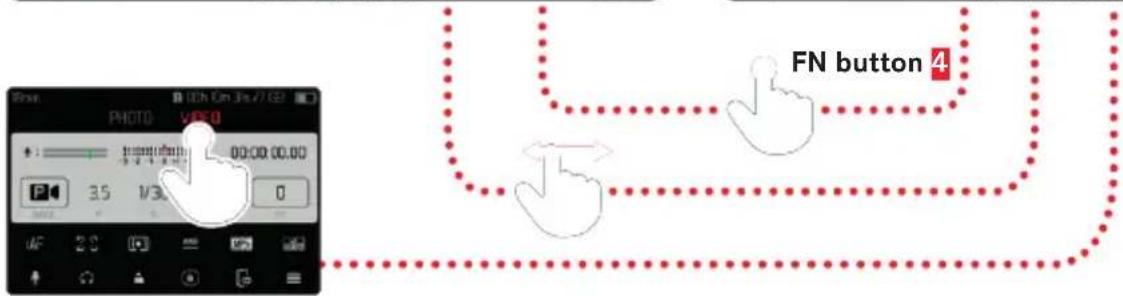
STATUS DISPLAY VIDEO
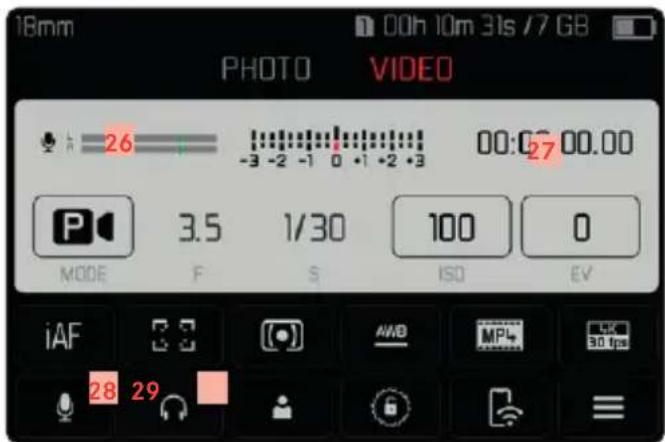
16 Autofocus metering method
17 Autofocus settings
18 Exposure metering method
19 White balance mode
20 File format/compression level/resolution
21 Formatting a memory card
22 User profile
23 Locking/unlocking the setting wheels
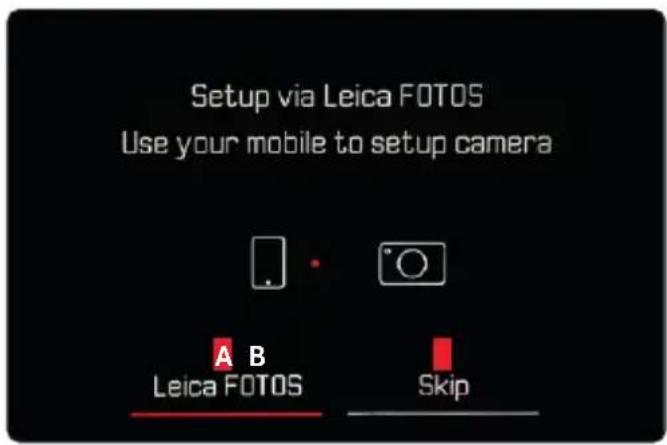
24 Leica FOTOS
25 Main menu
26 Microphone recording level
27 Recording time
28 Recording level
29 Headphone volume
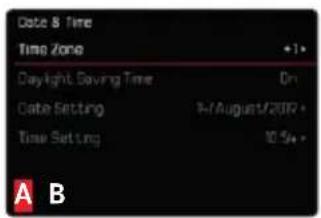
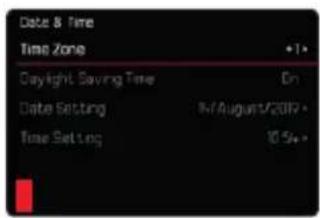
INITIAL START/APP CONNECTION
GESTURE CONTROL

natural_image
Hand cursor icon with red finger pressing a button (no text or symbols)Tap briefly

natural_image
Hand cursor icon with finger pressing a button (no text or symbols)Tap Touch and hold, horizont twice drag and drop swipe pinch spread
natural_image
Hand icon with a pointing finger and circular button, no text or symbols present
natural_image
Hand icon with red arrows pointing up and down, no text or symbols presenthorizontal/vertical
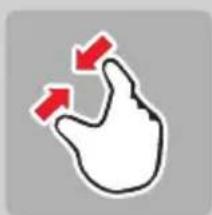
natural_image
Hand icon with two red arrows pointing upward (no text or symbols)Two-finger
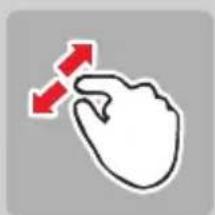
natural_image
Hand icon with two red arrows pointing at the index finger (no text or symbols)Two-finger
WHEELASSIGNMENT(factory settings)
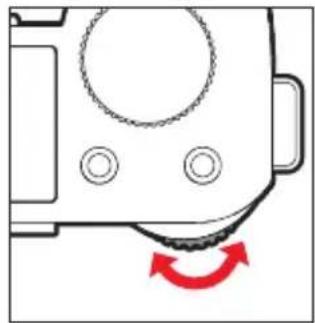
natural_image
Diagram of a mechanical component with circular features and a red curved arrow indicating rotational motion (no text or symbols)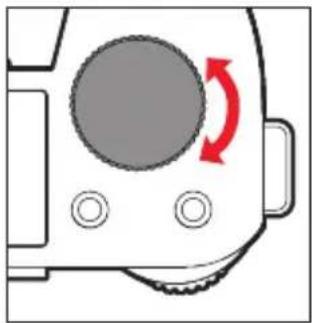
natural_image
Diagram of a device with a circular button and directional arrow, no text or symbols presentThumbwheel Front setting wheel
| Function assignment optionally for thumbwheel or front setting wheel | |||
| AF lens | P | Program shift Exposure Compensation | |
| Exposure Compensation Microphone Gain | |||
| S/S | Exposure Compensation Shutter speed | ||
| A/A | Aperture | Exposure Compensation | |
| M/M | Shutter speed | ||
| MF lens | A | Magnification Exposure Compensation | |
| Magnification Exposure Compensation | |||
| M/M | Magnification Shutter speed | ||
The function assignment can be switched between the two wheels.
▶ Select Direct Access Settings in the main menu
▶ Select Wheel Assignment [AF Lenses] / Wheel Assignment [MF Lenses] in the submenu
▶ Select the desired setting
LEICA FOTOS APP
Experience the new Leica FOTOS app. The Leica FOTOS app is a digital tool with plenty of exciting options and allows the photographer to get more out of his Leica camera than ever before. You can now link all your WLAN-capable Leica cameras via a single app to transfer images easily and instantly, capture the essence of unforgettable moments, manage, optimize and share your photos – anytime, anywhere.

Download on the App Store

GET IT ON
Google Play
TECHNICAL DATA
CAMERA
Designation
Leica SL2
Camera type
Mirrorless full-frame system camera
Type no.
2998
Order No.
10 854 EU/JP/US (black), 10 856 ROW (black)
Buffer memory
4 GB
DNG™: 78 recordings
JPG: > 100 recordings
Storage medium
UHS-II (recommended), UHS-I, SD/SDHC/SDXC memory card
Material
Full-metal housing made of aluminum and magnesium, leatherette cover, splash-water protected in compliance with IEC standard 60529 (protection type IP54).
Lens mount
Leica L bayonet with contact strip for communication between lens and camera
Operating conditions
-10 to +40°C
Dimensions (WxHxD)
146 × 107 × 42 mm
Weight
approx. 835 g (without battery)
SENSOR
Sensor size
CMOS sensor, pixel pitch: 4.3 m
Fullframe (47.3 MP): 8368 x 5584 pixels
APS-C (20.2 MP): 5504 x 3664 pixels
Picture resolution
DNG™: 8368 x 5584 pixels (46.7 MP)
JPG: 8368 x 5584 pixels (46.7 MP), 6000 x 4000
pixels (24 MP), 4272 x 2848 pixels (12 MP)
VIEWFINDER/LCD PANEL
Viewfinder (EVF)
Resolution: 5,760,000 pixels (dots), 120 fps, magnification: 0.78x, aspect ratio: 4:3, frame coverage: 100%, exit pupil position: 21 mm, setting range +2/-4 diopters, with eye sensor for automatic switchover between viewfinder and LCD panel, time delay 0.005 s
LCD panel
3.2" (backlight LED) with anti-fingerprint and anti-scratch coating, 2,100,000 pixels (dots), format 3:2, touch control available
EQUIPMENT
WLAN
The Leica FOTOS app is required to use the WLAN function. The Leica app is available from the Apple App Store™ or the Google Play Store™. Complies with Wi-Fi IEEE802.11b/g/n, 2.4 GHz, channel 1-11 (2412-2462 MHz) and Wi-Fi IEEE802.11ac, 2.4 GHz & 5 GHz, channel 39-48 (5180-5240 MHz), channel 52-64 (5260-5320 MHz), channel 100-140 (5500-5700 MHz) (standard WLAN protocol), encryption method: WLAN-compatible WPA™/WPA2™
Bluetooth
Bluetooth v4.2 (Bluetooth Low Energy (BLE)), 2402 to 2480 MHz
Menu languages
English, German, French, Italian, Spanish, Russian, Japanese, Simplified Chinese, Traditional Chinese, Korean
POWER SUPPLY
Rechargeable battery (Leica BP-SCL4)
Lithium-ion rechargeable battery, rated voltage: 7.2 V (DC); capacity: 1860 mAh (min.), approx. 370 recordings (based on CIPA standard, without EVF); charging time: approx. 140 min (after deep discharge); manufacturer: Panasonic Energy (Wuxi) Co. Ltd., Made in China
Charger (Leica BC-SCL4)
Input: AC 100–240 V, 50/60 Hz, 0.25 A, automatic switchover; Output: DC 8.4 V 0.85 A; Manufacturer: Salom Electric (Xiamen) Co., Ltd., Made in China
SAFETY REMARKS
GENERAL INFORMATION
- Do not use your camera in the immediate vicinity of devices with powerful magnetic, electrostatic or electromagnetic fields (e.g. induction ovens, microwave ovens, television sets or computer monitors, video game consoles, cell phones, broadcasting equipment). Their electromagnetic fields can interfere with recordings.
• Strong magnetic fields, e.g. from speakers or large electric motors can damage the stored picture data or disrupt recording. - Switch off the camera, remove the battery and switch the camera back on in case of a camera malfunction due to the effects of electromagnetic fields.
- Do not use the camera in the immediate vicinity of radio transmitters or high-voltage power lines. Their electromagnetic fields may interfere with recordings.
• Always store small parts e.g. the accessory shoe cover as follows:
- out of the reach of children
– in a safe location, where they will not get lost or stolen
- State-of-the-art electronic components are sensitive to static discharge. Since people can easily pick up charges of several 10,000 volts by walking on synthetic carpets, a discharge can occur when you touch the camera, and especially it is placed on a conductive surface. A static discharge on the camera housing poses no risk for the electronics. Despite built-in safety circuits, you should avoid direct contact with external camera contacts like those in the flash shoe.
- Take care not to soil or scratch the sensor for lens detection (6-bit encoding) in the bayonet. You must similarly prevent direct contact of the bayonet with grains of sand or similar particles, as these could cause irreparable damage. This component must only be cleaned with a dry cloth (in system cameras).
- Use a cotton or linen cloth instead of a microfiber cloth from an optician's (synthetic) when cleaning the contacts. Make sure to discharge any electrostatic charge by deliberately touching a heating or water pipe (conductive, grounded material). Dirt deposits and oxidation on the contacts can be avoided by storing your camera in a dry location with the lens cap and the flash shoe/viewfinder cap (in system cameras) attached.
- Only use accessories specified for this model to prevent faults, short circuits or electric shock.
- Do not attempt to remove parts of the housing (covers) yourself. Repairs must be done at authorized service centers only.
- Protect the camera against contact with insect sprays and other aggressive chemicals. Petroleum spirit, thinner and alcohol must not be used for cleaning. Some chemicals and liquids can damage the camera housing or the surface finish.
- Rubber and plastics are known to expel aggressive chemicals and should therefore not be kept in contact with the camera for extended periods of time.
- Prevent any sand or dust or water penetration into the camera, e.g. during snowfall or rain or on the beach. Be extra careful when changing the lens (in system cameras) and when inserting or removing the memory card and rechargeable battery. Sand and dust can damage the camera, the lens, the memory card and the battery. Moisture can cause malfunctions and irreparable damage to the camera and memory card.
LENS
- A camera lens can have the effect of a magnifying glass when exposed to direct frontal sunlight. The camera must therefore be protected against extended exposure to direct sunlight.
- Attaching the lens cap and keeping the camera in the shade or ideally in its camera case, will help prevent damage to the interior of the camera.
RECHARGEABLE BATTERY
- Improper use of the batteries or the use of unapproved battery types may result in an explosion!
- Do not expose the rechargeable battery to sunlight, heat, humidity or moisture for prolonged periods of time. Likewise, the batteries must not be placed in a microwave oven or a high-pressure container as this would pose a fire or explosion hazard.
- Do not under any circumstances charge or insert a damp or wet battery into the camera!
- A safety valve in the battery ensures that any excess pressure caused by improper handling is discharged safely. It is nevertheless important to dispose of a bloated battery immediately. It may pose an explosion hazard!
- Keep the battery contacts clean and easily accessible. Although lithium-ion batteries are secured against short circuits, they should still be protected against contact with metal objects like paper clips or jewelry. A short-circuited battery can get very hot and cause severe burns.
- When a battery is accidentally dropped, make sure to check the housing and the contacts immediately for any damage. A damaged battery can damage the camera.
- The battery must be removed from the camera or charger and must be replaced immediately in case of a strange smell, discoloration, deformation, overheating or leakage. Continued use of the battery may result in overheating, which can cause fire and/or explosion!
- Never throw batteries into a fire as they might explode!
-
Keep the battery away from sources of heat in case of a leak or a smell of burning. Leaked fluid can catch fire!
-
The use of other chargers not approved by Leica Camera AG can cause damage to the batteries – and in extreme cases – cause serious or life-threatening injuries.
- Make sure that the power socket is freely accessible at all times.
- The in-car charging cable must never be connected while the charger is connected to mains electricity.
- Do not attempt to open the battery or the charger. Repairs must only be carried out by authorized service centers.
- Keep batteries out of the reach of children. Batteries can cause suffocation when swallowed.
CHARGER
- Using the charger in the vicinity of broadcasting receivers may interfere with reception. Ensure a distance of at least 1 m (3 ft) between the charger and the receiver.
- When the charger is in use, it may emit a buzzing sound – this is normal and not a malfunction.
- Disconnect the charger from the mains when it is not in use, because it consumes some a very small amount electricity, even when no battery is inserted.
• Always keep the charger contacts clean, and never short circuit them.
MEMORY CARD
- Never remove the memory card during a datasave or card reading process. The camera must not be switched off or be subjected to impact or vibrations while working.
- Do not open the compartment or remove the memory card or battery while the status LED is flashing to indicate camera memory access. Data on the card may otherwise be destroyed and camera malfunctions may occur.
- Do not drop or bend memory cards as this will cause damage and result in the loss of stored data.
- Do not touch the connections on the reverse of the memory card and keep them clean and dry.
- Keep memory cards out of the reach of children. Swallowing a memory card may cause suffocation.
SENSOR
Cosmic radiation (e.g. during flights) may cause pixel defects.
CARRY STRAP
- Once you have attached the carry strap, please make sure that the clips are mounted correctly to prevent the camera from falling.
- Carry straps are usually made of very robust material. You should therefore keep it out of the reach of children. A carry strap is not a toy and poses a strangulation risk.
- Use the carry strap only for its intended purpose on a camera or on binoculars. Any other use poses the risk of injury and may possibly result in damage to the carry strap and is therefore not permitted.
- Carry straps should also not be used for cameras/binoculars during sports activities with a high risk of getting entangled in the carry strap (e.g. mountain climbing and similar outdoor activities).
TRIPOD
- When using a tripod, make sure it is standing securely and turn the camera only by turning the tripod, not the actual camera.
- Ensure that the tripod screw is hand-tightened only.
- Avoid transporting the camera while the tripod is attached. You might injure yourself or others and the camera could get damaged.
FLASH
The use of incompatible flash units with your Leica SL2 may result in irreparable damage to the camera and/or the flash unit.
REGULATORY INFORMATION
Specific regional approvals for this device can be found in the camera menu.
▶ Select Camera Information in the main menu
▶ Select Regulatory Information from the submenu

This device contains electric and/or electronic components which must not be disposed of in general household waste. Instead, it should be disposed of at a recycling collection point provided by your local authority. This service is free of charge. Any standard or rechargeable batteries used in this device must be removed and disposed of separately in accordance with local regulations. Please contact your local authorities, waste disposal collection point or the retailer, from whom you purchased the device for more information on correct waste disposal.
English
Declaration of Conformity (DoC)
Hereby, “Leica Camera AG” declares that this product is in compliance with the essential requirements and other relevant provisions of Directive 2014/53/EU.
Customers can download a copy of the original DoC to our RE products from our DoC server:
www.cert.leica-camera.com
In case of further questions, please contact:
Leica Camera AG, Am Leitz-Park 5, 35578 Wetzlar, Germany
Product dependent (see technical data)
| Type | Frequency band (central frequency) | Maximum power (dBm e.i.r.p.) |
| WLAN | 2412-2462/5180-5240 MHz/5260-5320/5500-5700 MHz | 20 |
| Bluetooth®Wireless Technology | 2402-2480 MHz 20 |
The CE mark on our products documents compliance with the fundamental requirements of applicable EU guidelines.
WLAN: 5150 to 5350 Mhz for indoor use only
WARRANTY
In addition to your statutory warranty rights regarding your dealer, you will receive an additional Leica Camera AG product warranty valid from the date of purchase at an authorized Leica retailer.
Previously, the product warranty was included with the product in the packaging. From now on, the product warranty will only be available online as a new service. You will be able to review the warranty conditions for your product at any time, without having to search fr the document. Please note that this new policy applies only for products that are no longer delivered with a hardcopy product warranty included in the packaging. Any products still delivered with the warranty document in the packaging remain governed exclusively by that document. For more information regarding the warranty scope, services and limitations, please visit: warranty.leica-camera.com
FOR US ONLY:
FCC Note:
This equipment has been tested and found to comply with the limits for a Class B digital device, pursuant to Part 15 of the FCC Rules. These limits are designed to provide reasonable protection against harmful interference in a residential installation. This equipment generates, uses, and can radiate radio frequency energy and, if not installed and used in accordance with the instructions, may cause harmful interference to radio communications. However, there is no guarantee that interference will not occur in a particular installation. If this equipment does cause harmful interference to radio or television reception, which can be determined by turning the equipment off and on, the user is encouraged to try to correct the interference by one or more of the following measures:
- Reorient or relocate the receiving antenna.
- Increase the separation between the equipment and receiver.
- Connect the equipment into an outlet on a circuit different from that to which the receiver is connected.
- Consult the dealer or an experienced radio/TV technician for help.
FCC Caution:
To assure continued compliance, follow the attached installation instructions and use only shielded interface cables with ferrite core when connecting to computer or peripheral devices. Any changes or modifications not expressly approved by the party responsible for compliance could void the user's authority to operate this equipment.
| Trade Name: LEICA | |
| Type No. 2998 | |
| Responsible party/Support contact: | Leica Camera Inc.1 Pearl Count, Unit A, Allendale, New Jersey 07401Tel.: +1 201 995 0051/ Fax: +1 201 995 1684technicalinfo@leicacamerausa.com |
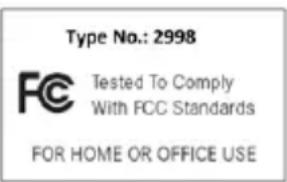
Contains FCC ID: VPYLB1JS955
This transmitter must not be co-located or operated in conjunction with any other antenna or transmitter. This equipment complies with FCC radiation exposure limits set forth for an uncontrolled environment and meets the FCC radio frequency (RF) Exposure Guidelines. This equipment has very low levels of RF energy that are deemed to comply without testing of specific absorption ratio (SAR).
FOR CANADA ONLY:
CAN ICES-3 (B)/NMB-3(B)
HMN: 2998
Contains IC: 772C-LB1JS955

A recyclable lithium ion/polymer battery powers this camera. Please call 1-800-8-BATTERY for information on how to recycle this battery.
This device complies with Industry Canada licence-exempt RSS standard(s). Operation is subject to the following two conditions:
(1) this device may not cause interference, and
(2) this device must accept any interference, including interference that may cause undesired operation of the device.
The available scientific evidence does not show that any health problems are associated with using low power wireless devices. There is no proof, however, that these low power wireless devices are absolutely safe. Low power Wireless devices emit low levelsof radio frequency energy (RF) in the microwave range while being used. Whereas high levels of RF can produce health effects(by heating tissue), exposure of low-level RF that does not produce heating effects causes no known adverse health effects. Many studies of low-level RF exposures have not found any biological effects. Some studies have suggested that some biologicaleffects might occur, but such findings have not been confirmed by additional research. Model 4889 has beentested and found to comply with IC radiation exposure limits set forth for an uncontrolled environment and meets RSS-102 of theIC radio frequency (RF) Exposure rules.
FOR SINGAPORE ONLY FOR UNITED ARAB EMIRATES ONLY:
Complies with IMDA Standards DA106734
TRA
REGISTERED No:
ER73893/19
DEALER No: DA0112968/13

LEICA SL2
Instruction manual
SL2/EN/2022/05/4.0/1
FOREWORD
Dear Customer,
We wish you a great deal of fun and success taking photographs with your new Leica SL2. Please read this manual thoroughly to familiarize yourself with the full scope of functions your camera has to offer. You can find all information about the Leica SL2 whenever you need it at https://SL2.leica-camera.com.
Your Leica Camera AG
SCOPE OF DELIVERY
Before using your camera for the first time, please check that the accessories supplied are complete.
- Leica SL2
- Lithium-ion rechargeable battery Leica BP-SCL4
- Charger Leica BC-SCL4, incl. mains cable (US, EU)
- Camera bayonet cover
- Carry strap
- Quick Start Guide
- CE flyer
- Creative Cloud flyer
- Test certificate
Subject to changes in design and model type.
REPLACEMENT PARTS / ACCESSORIES
Please contact Leica Customer Care or visit the Leica Camera AG website for information on the extensive range of Leica replacement parts/accessories:
https://leica-camera.com/en-US/photography/accessories
Only the accessories specified and described in this manual or by Leica Camera AG must be used with the camera (battery, charger, mains plug, mains cable, etc.). These accessories must only be used with this product. Third-party accessories may result in malfunctions or damage to the product.
Please read the chapters “Legal information”, “Safety remarks”, and “General information” before using your camera for the first time. Knowledge of the content will prevent inadvertent damage to the product, possible injuries and other risks.
LEGAL INFORMATION
COPYRIGHT NOTICE
- Compliance with copyright laws is mandatory. The recording and publication of pre-recorded media like tapes, CDs or other published or broadcast material may breach copyright laws. The same applies for all software supplied in the scope of delivery.
- The following applies for all video material created with this camera: This product is governed by the AVC Patent Portfolio license and is meant for private use by a consumer only. The device may furthermore be used for purposes for which the consumer receives no remuneration, e.g. (i) encoding in accordance with the AVC Standard ("AVC Video") and/or (ii) decoding of AVC Video that was encoded by a consumer in accordance with the AVC Standard within the scope of personal use and/or which the consumer has received from the provider, who is in possession of a license to offer AVC Video. No license is granted or implied for any other use. Any other use, specifically the provision of AVC video in exchange for remuneration, may require a separate license agreement with MPEG LA, L.L.C. Please visit the MPEG LA, L.L.C. website at: www.mpegla.com for more information.
- The designations SD, SDHC, SDXC, microSDHC and their associated logos are registered trademarks of SD-3C, LLC.
LEGAL INFORMATION ABOUT THIS MANUAL
COPYRIGHT
All rights reserved.
All text, images and graphics are subject to copyright and other laws to protect intellectual property. They must not be copied, modified or used for any purpose including trade purposes.
TECHNICAL DATA
Product changes with regards to the product or services may have occurred after the editorial deadline. The manufacturer reserves the right to effect structural or shape changes, color deviations and changes to the scope of delivery or service, where these changes or deviations are reasonably acceptable for the customer, while taking into consideration the interests of Leica Camera AG. In that respect, Leica Camera AG reserves the right to changes and errors. The images in this manual may depict accessory, special features or other items that are not part of the standard scope of delivery or service. Some pages may contain model types and services, which are not offered in specific countries.
BRANDS AND LOGOS
The brand names and logos used in this documented are protected trademarks. These brands or logos must not be used without prior approval by Leica Camera AG.
LICENSE RIGHTS
Leica Camera AG intends to provide you with innovative and informative documentation. Due to the amount of creativity that has gone into its design, we ask for your understanding that Leica Camera AG must protect its intellectual property, including patents, trademarks and copyrights, and that possession of the documentation does not infer any licensing rights of the intellectual property of Leica Camera AG.
REGULATORY INFORMATION
You will find the manufacturing date of your camera on the stickers in the Warranty Card and/or on the packaging.
The date format is year/month/day.
COUNTRY-SPECIFIC LICENSES
Specific regional approvals for this device can be found in the camera menu.
▶ Select Camera Information in the main menu
▶ Select Regulatory Information
LICENSE INFORMATION
The device-specific license information can be found in the camera menu.
▶ Select Camera Information in the main menu
▶ Select License Information
CE MARK
The CE mark on our products documents compliance with the fundamental requirements of applicable EU guidelines.
English
Declaration of Conformity (DoC)
Hereby, "Leica Camera AG" declares that this product is in compliance with the essential requirements and other relevant provisions of Directive 2014/53/EU.
Customers can download a copy of the original DoC to our Radio Equipment products from our DoC server:
www.cert.leica-camera.com
Please contact Leica Camera AG, Am Leitz Park 5, 35578 Wetzlar, Germany in case of any further questions
Depending on product (see technical data)
| Type | Frequency band (lower frequency) | Maximum output(dBm E.I.R.P.) |
| WLAN | 2412-2462/5160-5240 MHz/5260-5320/5300-5700 MHz | 20 |
| Bluetooth *Wireless Technology | 2402-2480 MHz 20 |
DISPOSAL OF ELECTRICAL AND ELECTRONIC EQUIPMENT
(Applies within the EU and for other European countries with active waste separation policies.)
This device contains electric and/or electronic components which must not be disposed of in general household waste. Instead, it should be disposed of at a recycling collection point provided by your local authority.
This service is free of charge. Any standard or rechargeable batteries used in this device must be removed and disposed of separately in accordance with local regulations.
Please contact your local authorities, waste disposal collection point or the retailer, from whom you purchased the device for more information on correct waste disposal.
IMPORTANT NOTES REGARDING THE USE OF WLAN/BLUETOOTH®
- Appropriate measures must be taken to ensure security and protect against disruptions to the systems in place where devices or computer systems are in use that require more stringent security than WLAN devices.
- Leica Camera AG shall not accept liability for damages arising from the use of the camera for purposes other than as a WLAN device.
- It is assumed that the WLAN function will be used in countries where this camera is sold. There may be a risk of breaching statutory wireless communication regulations when using the camera in other countries. Leica Camera AG shall not accept liability for such breaches.
- Please note that there is a risk of unauthorized third party interception of wirelessly communicated data. We highly recommend that you activate encryption in the wireless access point settings to ensure data safety.
-
Avoid using the camera in areas where it can be exposed to magnetic fields, static electricity or other interferences, e.g. near a microwave oven. RF transmissions may otherwise not reach the camera.
-
Using the camera near devices like microwave ovens or wireless phones that use the 2.4 GHz RF band may negatively affect the performance of both devices.
- Do not attempt to connect to wireless networks you are not authorized to use.
- The device will automatically search for wireless networks, once the WLAN function is enabled. A list, including networks you are not authorized to access, will be displayed (SSID: Network identifier for a WLAN network). Do not attempt to connect to third party network, as this could be construed as unauthorized access.
- We recommend disabling the WLAN function while on an aircraft.
- The use of the WLAN-RF band between 5150 MHz and 5350 MHz is permitted only in enclosed spaces.
- Please read the important notes on specific functions of Leica FOTOS on p. 264.
SAFETY REMARKS
GENERAL INFORMATION
- Do not use your camera in the immediate vicinity of devices that generate powerful magnetic, electrostatic or electromagnetic fields (e.g. induction ovens, microwave ovens, television sets or computer screens, video game consoles, cell phones, broadcasting equipment). Their electromagnetic fields can interfere with image recordings.
- Strong magnetic fields, e.g. from speakers or large electric motors can damage the stored data or disrupt shooting.
- Switch off the camera, remove the battery briefly, replace it and switch the camera back on in case of a camera malfunction due to the effects of electromagnetic fields.
- Do not use the camera in the immediate vicinity of radio transmitters or high-voltage power lines. Their electromagnetic fields may also interfere with image recordings.
• Always store small parts e.g. the accessory shoe cover as follows: - out of the reach of children
- in a safe location, where they will not get lost or stolen
- State-of-the-art electronic components are sensitive to static discharge. You can easily pick up charges of several 10,000 volts by simply walking on synthetic floor coverings. A static discharge can occur when you touch the camera and especially if it is placed on a conductive surface. A static discharge on the camera housing poses no risk for the electronics. Despite built-in safety circuits, you should avoid direct contact with external camera contacts like those in the flash shoe.
- Take care not to soil or scratch the sensor for lens detection in the bayonet. You must similarly prevent direct contact of the bayonet with grains of sand or similar particles, as these could cause irrep-
arable damage. This component must only be cleaned with a dry cloth (in system cameras).
- Use a cotton or linen cloth instead of a microfiber cloth from an optician's (synthetic) when cleaning the contacts. Make sure to discharge any electrostatic charge by deliberately touching a heating or water pipe (conductive, grounded material). Dirt deposits and oxidation on the contacts can be avoided by storing your camera in a dry location with the lens cap and the flash shoe/viewfinder cap (in system cameras) attached.
- Only use accessories specified for this model to prevent faults, short circuits or electric shock.
- Do not attempt to remove parts of the housing (covers) yourself. Repairs must be done at authorized service centers only.
- Protect the camera against contact with insect sprays and other aggressive chemicals. Petroleum spirit, thinner and alcohol must not be used for cleaning. Some chemicals and liquids can damage the camera housing or the surface finish.
- Rubber and plastics are known to expel aggressive chemicals and should therefore not be kept in contact with the camera for extended periods of time.
- Prevent any sand or dust or water penetration into the camera, e.g. during snowfall or rain or on the beach. Be extra careful when changing the lens (in system cameras) and when inserting or removing the memory card and rechargeable battery. Sand and dust can damage the camera, the lens, the memory card and the battery. Moisture can cause malfunctions and irreparable damage to the camera and memory card.
LENS
- A camera lens can have the effect of a magnifying glass when exposed to direct frontal sunlight. The camera must therefore be protected against extended exposure to direct sunlight.
- Attaching the lens cap and keeping the camera in the shade or ideally in its camera case, will help prevent damage to the interior of the camera.
RECHARGEABLE BATTERY
- Improper use of the batteries or the use of unapproved battery types may result in an explosion!
- Do not expose the rechargeable battery to sunlight, heat, humidity or moisture for prolonged periods of time. Likewise, the batteries must not be placed in a microwave oven or a high-pressure container as this would pose a fire or explosion hazard!
- Do not under any circumstances charge or insert a damp or wet battery into the camera!
- A safety valve in the battery ensures that any excess pressure caused by improper handling is discharged safely. It is nevertheless important to dispose of a bloated battery immediately. It may pose an explosion hazard!
- Keep the battery contacts clean and easily accessible. Although lithium-ion batteries are secured against short circuits, they should still be protected against contact with metal objects like paper clips or jewelry. A short-circuited battery can get very hot and cause severe burns.
- When a battery is accidentally dropped, make sure to check the housing and the contacts immediately for any damage. A damaged battery can damage the camera.
- The battery must be removed from the camera or charger and must be replaced immediately in case of a strange smell, discoloration, deformation, overheating or leakage. Continued use of the battery may result in overheating, which can cause fire and/or explosion!
-
Never throw batteries into a fire as they may explode.
-
Keep the battery away from sources of heat in case of leakage or if you smell burning. Leaked fluid can catch fire!
- The use of other chargers not approved by Leica Camera AG can cause damage to the batteries – and in extreme cases – cause serious or life-threatening injuries.
- Make sure that the power socket is freely accessible at all times.
- Do not attempt to open the battery or the charger. Repairs must only be carried out by authorized service centers.
- Keep batteries out of the reach of children. Batteries can cause suffocation when swallowed.
FIRST AID
- Battery fluid may cause blindness if it comes into contact with the eyes. Rinse the eyes thoroughly with clean water immediately. Avoid rubbing. Seek medical attention immediately.
- Leaked battery fluid poses an injury hazard when it comes in contact with clothing or skin. Rinse the affected areas thor oughly with clean water.
CHARGER
- Using the charger in the vicinity of broadcasting receivers may interfere with reception. Ensure a distance of at least 1 m between the charger and the receiver.
- When the charger is in use, it may emit a buzzing sound – that is normal and not a malfunction.
- Disconnect the charger from the mains when it is not in use, as it consumes electricity (a very small amount), even if no battery is inserted.
- Always keep the charger contacts clean, and never short-circuit them.
MEMORY CARD
- Never remove the memory card during a data save or card reading process. The camera must not be switched off or be subjected to impact or vibrations while working.
- Do not open the cover/remove the memory card or the battery from the camera while the status LED is lit, which indicates memory access. Data on the card may otherwise be destroyed and camera malfunctions may occur.
- Do not drop or bend memory cards as this will cause damage and result in the loss of stored data.
- Do not touch the connections on the reverse of the memory card and keep them clean and dry.
- Keep memory cards out of the reach of children. Swallowing a memory card may cause suffocation.
SENSOR
- Cosmic radiation (e.g. during flights) may cause pixel defects.
CARRY STRAP
- Carry straps are usually made of very robust material. You should therefore keep it out of the reach of children. A carry strap is not a toy and poses a strangulation risk.
- Use the carry strap only for its intended purpose on a camera or on binoculars. Any other use poses the risk of injury and may possibly result in damage to the carry strap and is therefore not permitted.
- Carry straps should also not be used for cameras/binoculars during sports activities that pose a risk of entanglement (e.g. when mountain climbing and similar outdoor activities).
TRIPOD
- When using a tripod, make sure it is standing securely and turn the camera only by turning the tripod, not the actual camera. Ensure that the tripod screw is hand-tightened only. Avoid transporting the camera while the tripod is attached. You might injure yourself or others and the camera could get damaged.
FLASH
- The use of incompatible flash units with your Leica SL2 may result in irreparable damage to the camera and/or the flash unit.
GENERAL INFORMATION
Please read the section about "Care/Storage" for more information about what to do in case of problems.
CAMERA/LENS
(For system cameras)
- Make a note of the serial numbers of your camera (engraved in the base of the camera housing) and lenses, as this information will be extremely important in case of loss.
- Make sure to always have a lens or the camera bayonet cover attached to prevent dust or other foreign bodies penetrating the camera.
- That is why you should always replace lenses quickly and in a dust-free environment.
- Never store the camera bayonet cover or the lens back cover in a pants pocket, as they will attract lint and dust, which could then be accidentally introduced into the camera.
LCD PANEL
- Condensation may form on the LCD panel if the camera is exposed to great temperature fluctuations. Wipe the screen carefully with a soft, dry cloth.
- The screen image will initially be slightly darker than normal if the camera is very cold when it is switched on. The normal level of brightness will be reached as soon as the LCD panel warms up.
RECHARGEABLE BATTERY
- The rechargeable battery must only be charged within a specific temperature range. See chapter "Technical Data" (p. 292) for details about operating conditions.
- Lithium-ion batteries can be charged at any time, regardless of their current charge level. A partially charged battery will charge to full capacity faster than a fully discharged one.
- The rechargeable batteries come only partly charged ex works and should therefore be charged fully before their first use.
- A new battery only reaches its full capacity after it has been fully charged and – by using it in the camera – depleted 2 to 3 times. This depletion process should be repeated roughly every 25 cycles.
- Battery and charger heat up during the charging process. That is normal and not a malfunction.
- Rapid flashing of the two LEDs (>2 Hz) when charging commences indicates a charging error (e.g. maximum charging time exceeded, voltages or temperatures outside permitted ranges or a short circuit). Disconnect the charger from the mains and remove the battery. Ensure that the above temperature conditions are met and then restart the charging process. Please contact your dealer, the Leica representative in your region or Leica Camera AG if the problem persists.
- Rechargeable lithium-ion batteries generate power by way of internal chemical reactions. These reactions are influenced by ambient temperature and humidity. Do not expose the battery to extreme temperatures (high or low) for extended periods of time (e.g. in a parked car in the summer or winter) to ensure a maximum service life.
- However, every battery has its limits – even in optimal conditions! After several hundred charging cycles, the operating times will get significantly shorter.
- The replaceable battery supplies power to a backup battery, which is permanently installed in the camera. This backup battery retains the date and time for some weeks. Once the backup battery is depleted, it must be replenished by inserting a charged
main battery. The time and date will have to be set again after a full depletion of both batteries.
- As the battery capacity deteriorates or if using an older battery, warning messages may appear and some functions may be restricted or blocked entirely.
- Always remove the battery if the camera will not be used for an extended period of time. Make sure to switch the camera off via the main switch before removing the battery. Leaving the battery in the camera will result in a deep discharge after a few weeks. Voltage levels will decrease significantly, as the camera uses a low idle current to maintain settings.
- Dispose of damaged batteries in accordance with the relevant regulations at an approved collection point for proper recycling.
- The date of manufacture can be found on the battery. The date format is week/year.
MEMORY CARD
- The range of available SD/SDHC/SDXC cards on the market is too extensive for Leica Camera AG to test for compatibility and quality. Generally, any type of memory card may be used without any damage to the camera or memory card. As some “no name” cards may not fully comply with the SD/SDHC/SDXC standards, Leica Camera AG cannot provide any guarantee of function.
- We recommend formatting memory cards from time to time, as fragmented residual data from deleted files may block some of the storage capacity.
-
Generally, it is not necessary to format (initialize) memory cards that have been previously used. Formatting will, however, be necessary if you insert an unformatted memory card or a card that was formatted in another device (e.g. a computer) for the first time.
-
We recommend backing up your data on a PC, because electromagnetic fields, static electricity and any damage to the memory card or camera defects may result in irretrievable damage or loss of your data.
- SD, SDHC, and SDXC memory cards come with a write protection slider to prevent accidental overwriting. This slider is located on the non-beveled side of the card. All data on the card is protected when the slider is set to its lower position, marked LOCK.
- All data stored on the memory card will be lost during formatting. Formatting will not be prevented by a deletion protection set for individual pictures.
SENSOR
- Any dust or dirt particles stuck to the glass cover of the sensor may result in noticeable dark stains or specks on the pictures (in system cameras). Alternatively, send your camera to the Leica Customer Care department for sensor cleaning (see p. 298). This service is not part of the warranty offering and will therefore incur charges.
DATA
- All data, including personal information, may be changed or deleted due to incorrect or accidental operation, static discharge, accidents, malfunctions, repairs and other measures.
- Please note that Leica Camera AG does NOT accept liability for direct or consequential damage due to the manipulation or destruction of data and personal information.
FIRMWARE UPDATE
Leica is continuously working on the further improvement and optimization of Leica SL2. As digital cameras have many functions that are controlled electronically, improvements and enhancements to the functions can be installed on the camera retroactively. Leica releases so-called firmware updates at irregular intervals. Cameras are always supplied ex works with the latest firmware installed or you can download the latest version from our website yourself and transfer it to your camera.
You will receive a newsletter informing you of the availability of a new firmware update if you register your camera on the Leica Camera homepage.
Visit the download section or the “Customer Area” for information about how to register or how to get firmware updates for your Leica SL2. Additionally, you can find information about changes or additions to the manual at: https://club.leica-camera.com
Leica releases firmware updates for lenses at irregular intervals. You can download any new firmware version from our homepage and transfer it to your lens. Please see p. 259 for more information.
Select the menu item Camera Information (see p. 259) to check whether your camera and lenses are running the latest firmware version.
WARRANTY
In addition to your statutory warranty rights regarding your dealer, you will receive an additional Leica Camera AG product warranty valid from the date of purchase at an authorized Leica retailer. Previously, the product warranty was included with the product in the packaging. From now on, the product warranty will only be available online as a new service. You will be able to review the warranty conditions for your product at any time, without having to search for the document. Please note that this new policy applies only for products that are no longer delivered with a hardcopy product warranty included in the packaging. Any products still delivered with the warranty document in the packaging remain governed exclusively by that document. For more information regarding the warranty scope, warranty services and limitations, please visit: https://warranty.leica-camera.com
Leica SL2 comes with splash water and dust protection.
The camera was tested under controlled laboratory conditions and is classes as IP54 in accordance with DIN EN 60529. Please note: The splash water and dust protection coating is not permanent and will diminish over time. Please read the section on "Care/Storage" for detailed instructions on how to clean and dry the camera. The warranty does not cover liquid damage. Any attempt to open the camera casing by an unauthorized retailer or service partner will cause an immediate expiration of the splash water and dust warranty.
i
TABLE OF CONTENTS
FOREWORD....2
SCOPE OF DELIVERY 2
REPLACEMENT PARTS / ACCESSORIES 3
LEGAL INFORMATION......4
SAFETY REMARKS 8
GENERAL INFORMATION....12
WARRANTY 15
TABLE OF CONTENTS 16
PART DESIGNATIONS 24
DISPLAYS 28
PHOTO....28
VIDEO/CINE 30
DISPLAYS IN THE TOP DISPLAY 32
PREPARATION 34
ATTACHING THE CARRY STRAP....34
PREPARING THE CHARGER....34
CHARGING THE BATTERY 35
CHARGING VIA USB 36
INSERTING/REMOVING THE BATTERY 36
INSERTING/REMOVING THE MEMORY CARD 37
LENS 39
COMPATIBLE LENSES....39
CHANGING THE LENS 41
DIOPTER SETTINGS....44
MULTIFUNCTION HANDGRIP SL 45
CAMERA OPERATION ....50
CONTROL ELEMENTS 50
MAIN SWITCH 50
SHUTTER BUTTON....51
FRONT DIAL....52
THUMBWHEEL 52
JOYSTICK....53
PLAY BUTTON/MENU BUTTON....53
FUNCTION BUTTONS ....54
LCD PANEL (TOUCH SCREEN) 55
TOP DISPLAY....56
MENU CONTROL....56
CONTROL ELEMENTS....56
MENU SECTIONS....57
SETTINGS IN PHOTO AND VIDEO MODE 58
SWITCHING MENU SECTIONS 59
STATUS SCREEN 60
MAIN MENU 62
MENU NAVIGATION....63
SUBMENU 65
KEYBOARD/NUMBER PAD....65
MENU BAR....66
SCALE MENU 66
DATE/TIME MENU....67
COMBI MENU (AF PROFILES)....67
COMBI MENU (IMAGE PROPERTIES)....68
USER-DEFINED OPERATION 70
FAVORITES MENU....70
MANAGING THE FAVORITES MENU....70
DIRECT ACCESS TO MENU FUNCTIONS....71
CHANGING AN ASSIGNMENT....71
ACCESSING THE ASSIGNED MENU FUNCTION....71
SETTING WHEEL ASSIGNMENTS ....72
WHEN USING AF LENSES....73
WHEN USING MF LENSES....74
ROTATION DIRECTION OF THE SETTING WHEELS....75
JOYSTICK FUNCTIONS ....75
LOCKING THE OPERATING ELEMENTS....76
USER PROFILES 76
CAMERA BASIC SETTINGS....80
MENU LANGUAGE....80
DATE/TIME 80
RECEIVING THE SETTINGS FROM A MOBILE DEVICE....80
MANUAL SETTINGS....80
DISTANCE UNIT 81
POWER SAVE MODE (STANDBY MODE).... 82
LCD PANEL/VIEWFINDER SETTINGS 82
LCD PANEL/EVF USE 83
EYE SENSOR SENSITIVITY....83
BRIGHTNESS....84
LCD PANEL 84
EVF 84
COLOR RENDERING....84
LCD PANEL 84
EVF 84
AUTOMATIC LCD PANEL AND EVF SHUTDOWN....85
IMAGE PROPERTIES....91
COLOR PROFILE....92
MONOCHROME PROFILE....92
CUSTOMIZING PHOTO PROFILES....92
AUTOMATIC OPTIMIZATION....93
NOISE REDUCTION....93
NOISE REDUCTION FUNCTION FOR LONG-TERM EXPOSURE 93
NOISE REDUCTION IN JPG SHOTS....93
IMAGE STABILIZATION....94
SETTING THE STABILIZATION DIRECTION....94
DARK AREA OPTIMIZATION (IDR)....95
DYNAMIC RANGE....95
iDR FUNCTION 95
DATA MANAGEMENT....96
STORAGE OPTIONS....96
FORMATTING A MEMORY CARD 96
DATA STRUCTURE....97
EDIT FILE NAMES....98
CREATING A NEW FOLDER 99
ADDING COPYRIGHT INFORMATION....99
LOGGING THE SHOOTING LOCATION....99
DATA TRANSFER 100
i
PRACTICAL DEFAULT SETTINGS....102
TOUCH AF 102
INFO PROFILES....104
CHANGING THE INFO PROFILES....105
DEACTIVATING INDIVIDUAL INFO PROFILES....105
CUSTOMIZING THE INFO PROFILES....105
SHOW AVAILABLE 106
INFO BARS 106
GRID 106
CLIPPING....106
FOCUS PEAKING....107
LEVEL GAUGE 108
HISTOGRAM....109
TEMPORARY ACTIVATION/DEACTIVATION OF INDIVIDUAL FUNCTIONS....109
ENHANCED LIVE VIEW 110
MF ASSIST FUNCTIONS....110
AF ASSIST LAMP....110
ACOUSTIC AF CONFIRMATION....111
PHOTOGRAPHY 112
DRIVE MODE 112
FOCUSING....113
AF PHOTOGRAPHY....113
AUTOFOCUS MODES.... 113
INTELLIGENT AF....113
AFs (single) 113
AFc (continuous)....113
AUTOFOCUS METERING METHODS....114
MULTI-FIELD METERING....114
SPOT/FIELD METERING....114
ZONE 115
TRACKING 115
PERSON DETECTION (FACE DETECTION)....116
AF SETTINGS....117
AF PROFILES....117
PRE FOCUS 119
FOCUS LIMIT....119
AF QUICK SETTING....120
ACCESSING AF QUICK SETTING....120
ADJUSTING THE METERING FIELD SIZE.... 120
CHANGING THE AF METERING METHOD 120
MF ASSIST FUNCTIONS....121
ENLARGEMENT IN AF MODE 121
AF ASSIST LAMP 122
ACOUSTIC AF CONFIRMATION....122
SHIFTING THE AF METERING FIELD 122
MANUAL FOCUSING (MF)....123
MF ASSIST FUNCTIONS 123
FOCUS PEAKING....123
ENLARGEMENT IN MF MODE....124
DISTANCE DISPLAY....126
USING AUTOFOCUS IN MF MODE 126
ISO SENSITIVITY.... 127
FIXED ISO VALUES....127
AUTOMATIC SETTING....127
LIMITING SETTING RANGES 127
DYNAMIC ISO SETTING....128
FLOATING ISO 129
WHITE BALANCE 129
AUTOMATIC CONTROL/FIXED SETTINGS.... 130
MANUAL SETTING VIA METERING.... 130
GRAY CARD 131
GRAY CARD LIVE VIEW....131
DIRECT SETTING OF THE COLOR TEMPERATURE....132
EXPOSURE.... 132
SHUTTER TYPE.... 133
EXPOSURE MODES.... 136
SELECTING A MODE....136
FULLY AUTOMATIC EXPOSURE SETTING - P....137
AUTOMATIC PROGRAM - P.... 137
CHANGING THE PRESET SHUTTER SPEED AND APERTURE COMBINATIONS (SHIFT)137
SEMI-AUTOMATIC EXPOSURE SETTING - A/S.... 138
APERTURE PRIORITY - A....138
SHUTTER SPEED PRIORITY - S 138
MANUAL EXPOSURE SETTING - M....139
LONG-TERM EXPOSURE.... 140
FIXED SHUTTER SPEEDS 140
B FUNCTION....140
EXPOSURE CONTROL....141
EXPOSURE PREVIEW....141
EXPOSURE LOCK 141
EXPOSURE COMPENSATION 144
DEPTH OF FIELD CHECK....145
SHOOTING MODES.... 146
CONTINUOUS SHOOTING MODE....146
INTERVAL SHOOTING....147
EXPOSURE BRACKETING....149
MULTISHOT 150
SETTING THE DELAY TIME....151
MOTION ARTEFACTS CORRECTION....151
SELF-TIMER 152
SPECIAL SHOOTING MODES.... 153
IMAGE OVERLAY 153
FLASH PHOTOGRAPHY.... 155
COMPATIBLE FLASH UNITS.... 155
FLASH EXPOSURE METERING (TTL METERING).... 156
SETTINGS ON THE FLASH UNIT....157
FLASH CONTROL....157
SYNC POINT 157
FLASH RANGE.... 158
FLASH EXPOSURE COMPENSATION ....159
REVIEW MODE....162
CONTROL ELEMENTS IN REVIEW MODE 162
INITIATE/EXIT REVIEW MODE.... 164
SELECTING/SCROLLING THROUGH IMAGES.... 165
INFO DISPLAYS IN REVIEW MODE.... 166
CROPPED SECTION ZOOM 167
DISPLAYING MULTIPLE IMAGES AT ONCE 168
TAGGING/RATING OF PHOTOS.... 170
DELETING IMAGES 170
DELETING INDIVIDUAL IMAGES....171
DELETING MULTIPLE IMAGES....171
DELETING ALL IMAGES....172
DELETING UNRATED IMAGES....173
PREVIEW OF LATEST IMAGE.... 173
SLIDE SHOW 174
<< >> 175
REC FRAME 204
WAVEFORM MONITOR (WFM) 205
ADJUSTING VISUALIZATION 206
ASPECT RATIO DISPLAY.... 207
SAFETY AREA....208
RECORDING VIDEO....210
VIDEO MODE AND CINE MODE.... 210
START/EXIT VIDEO MODE....211
START/END VIDEO RECORDING.... 212
DUSPLAY AND OPERATION VIA USB-PTP USING EXTERNAL ACCESSORY (LIKE
GIMBALS) 212
FOCUSING 213
AUTOFOCUS MODES....213
CONTROLLING THE AUTOFOCUS 214
TOUCH AF 214
SUPPRESSING CONTINUOUS FOCUSING....214
AUTOFOCUS METERING METHODS....214
TRACKING 216
PERSON DETECTION (FACE DETECTION).... 216
AF SETTINGS....217
FOCUS LIMIT....218
AF QUICK SETTING....218
MF ASSIST FUNCTIONS ....219
SHIFTING THE AF METERING FIELD 220
MANUAL FOCUSING (MF)......221
MF ASSIST FUNCTIONS 221
FOLLOW FOCUS....223
FUNCTION BEHAVIOR....224
FOLLOW FOCUS MENU....224
PREPARATION.... 225
CONFIGURING A FOCUS POSITION.... 225
CHANGING THE FOCUS POSITION....226
APPLICATION 227
ACCESS AS NEEDED....227
AUTOMATIC SEQUENCE 228
OTHER SETTINGS 229
SPEED....229
SUBSEQUENT FOCUS MODE....229
ISO SENSITIVITY....229
FIXED ISO VALUES.... 229
AUTOMATIC SETTING.... 230
DYNAMIC ISO SETTING....231
FLOATING ISO 231
ASA SENSITIVITY....232
WHITE BALANCE 232
AUTOMATIC CONTROL/FIXED SETTINGS 233
MANUAL SETTING VIA METERING.... 233
DIRECT SETTING OF THE COLOR TEMPERATURE.... 235
EXPOSURE....235
EXPOSURE MODES....238
FULLY AUTOMATIC EXPOSURE SETTING - P.... 239
SEMI-AUTOMATIC EXPOSURE SETTING - A/S 240
MANUAL EXPOSURE SETTING - M 240
EXPOSURE COMPENSATION....241
PLAYBACK MODE....242
CONTROL ELEMENTS IN PLAYBACK MODE....242
INITIATE/EXIT PLAYBACK MODE 244
SELECTING/SCROLLING THROUGH IMAGES....245
INFO DISPLAYS IN PLAYBACK MODE 246
DISPLAYING MULTIPLE SHOTS AT ONCE....247
TAGGING/RATING OF RECORDINGS.... 248
DELETING RECORDINGS 249
DELETING INDIVIDUAL RECORDINGS.... 249
DELETING MULTIPLE RECORDINGS 250
DELETING ALL RECORDINGS 251
DELETING UNRATED RECORDINGS....251
SLIDE SHOW 252
VIDEO PLAYBACK....253
VIDEO EDITING 256
< < < > > > 257
OTHER FUNCTIONS....258
RESETTING THE CAMERA TO FACTORY SETTINGS.... 258
FIRMWARE UPDATES....259
EXECUTING A FIRMWARE UPDATE 260
LEICA FOTOS 264
CONNECTING....264
DISABLING WI-FI 266
DISABLING WLAN AUTOMATICALLY.... 266
DISABLING WLAN MANUALLY 266
REMOTE CAMERA CONTROL 267
CARE/STORAGE 268
PIXEL MAPPING 269
FAQ 270
MENU OVERVIEW 278
INDEX 284
TECHNICAL DATA....292
LEICA CUSTOMER CARE....298
LEICA ACADEMY 299
Definition of the various categories of information found in this manual
Note
Additional information
Important
Failure to comply with instructions may result in damage to the camera, the accessories or the recordings
Attention
Non-compliance may result in personal injury
i
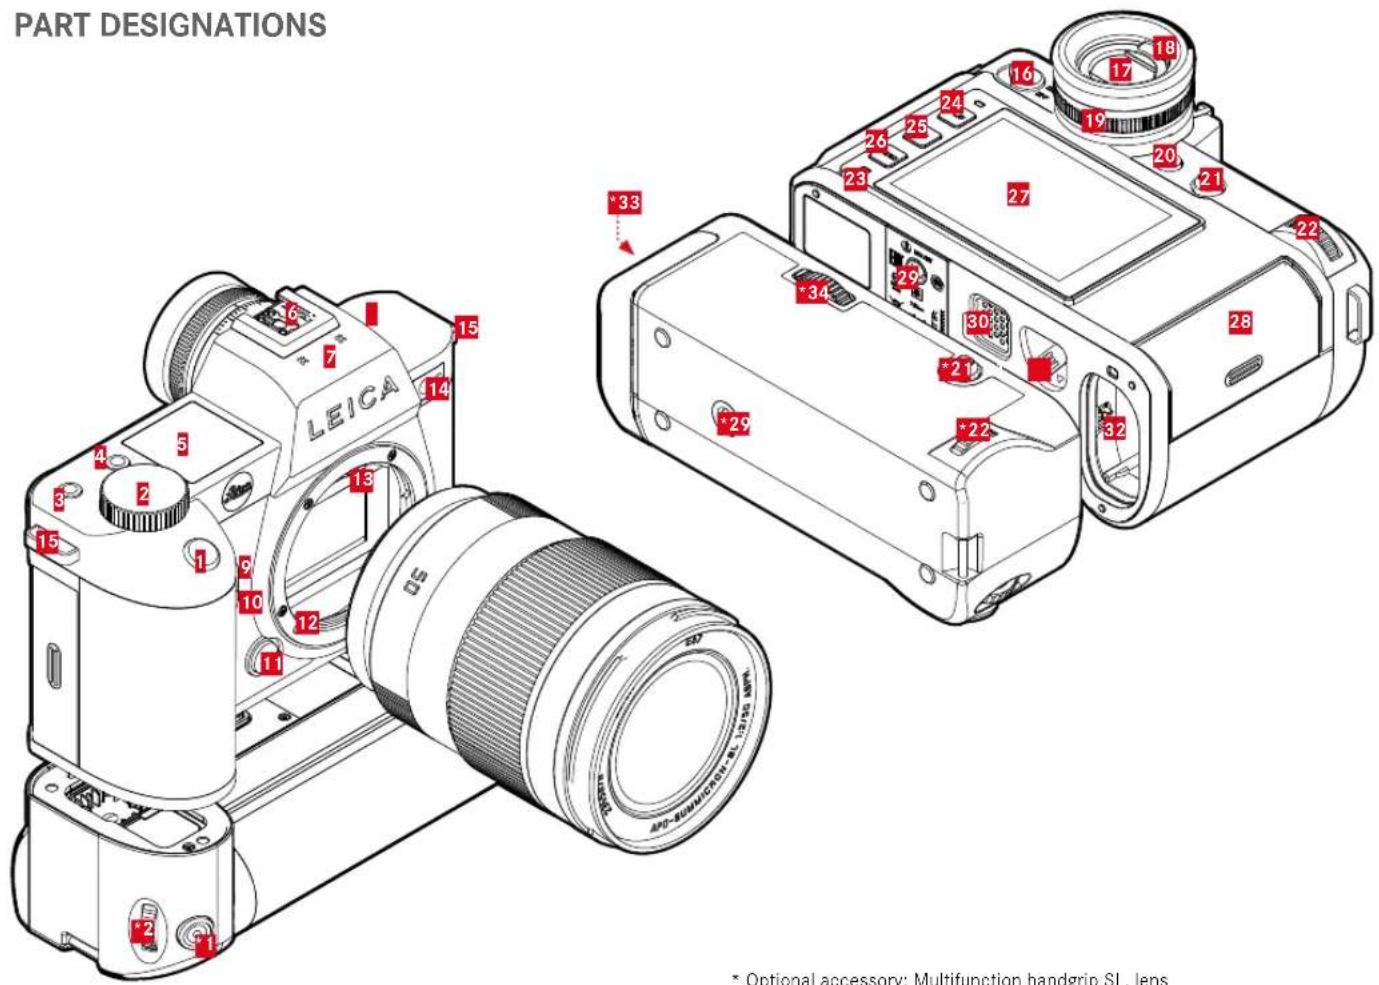
LEICA SL2
1 Shutter button
2 Front dial
3 Function button
4 Function button
5 Top display
6 Accessory shoe
7 Microphone
8 Speaker
9 Function button
10 Function button
11 Lens release button
12 Leica L bayonet
13 Contact strip
14 Self-timer LED / AF assist lamp / exposure metering sensor
15 Strap lugs
16 Main switch
17 Viewfinder eyepiece
18 Eye sensor
19 Diopter setting wheel
20 Function button
21 Joystick
22 Thumbwheel
23 Status LED
24 PLAY button
25 FN button
26 MENU button
27 LCD panel
28 Memory card slot
29 Tripod thread
30 Contact for multifunction handgrip
31 Battery release lever
32 Battery compartment
MULTIFUNCTION HANDGRIP SL
*1 Shutter button
*2 Front dial
*21 Joystick
*22 Thumbwheel
*29 Tripod thread
*33 Handgrip-integrated battery compartment
*34 Handgrip lock
i
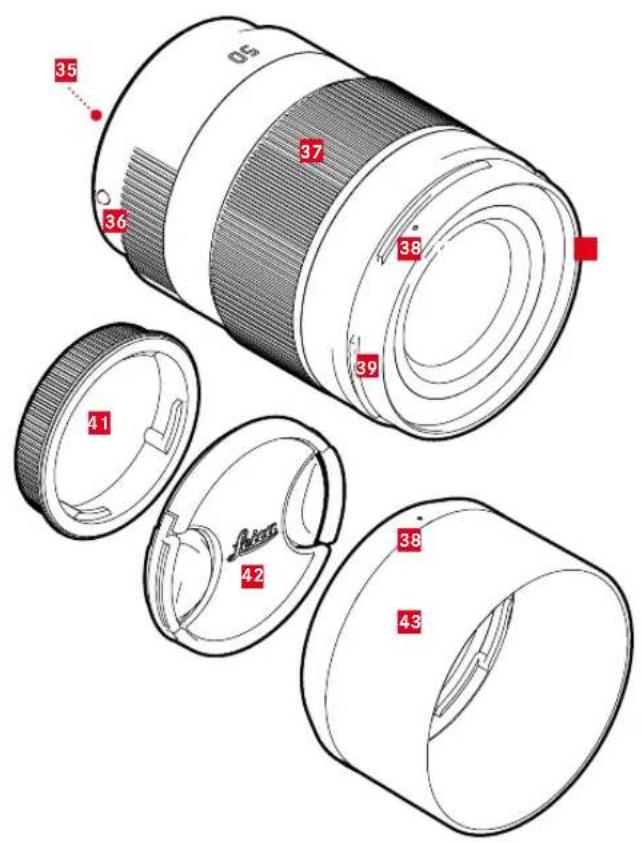
LENS\*
35 Contact strip
36 Alignment points for lens replacement
37 Focus ring poss. zoom ring
38 Alignment point for lens hood mounting
39 Male bayonet for lens hood
40 Internal thread for filters
41 Bayonet cover
42 Lens cap
43 Lens hood
i
DISPLAYS
The images displayed on the LCD panel and in the viewfinder are identical.
PHOTO
STATUS SCREEN
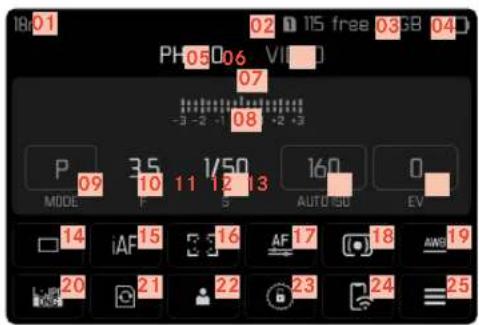
WHEN TAKING A PICTURE
All displays/values refer to the actual settings.
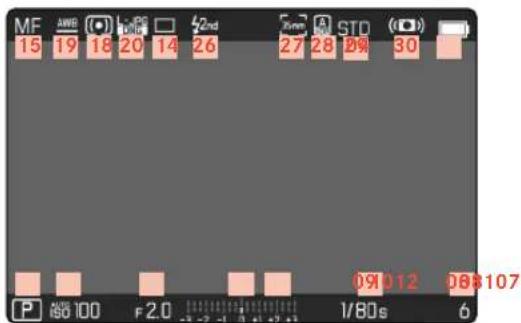
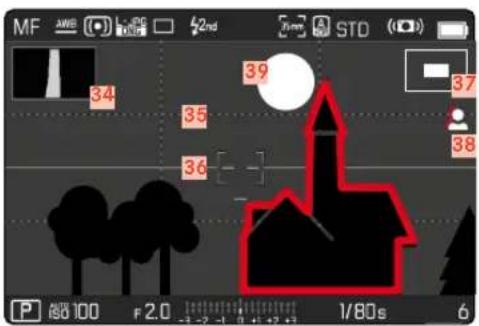
IN REVIEW MODE
All displays/values refer to the displayed image.
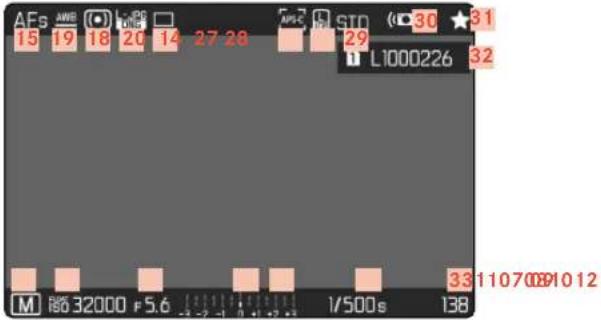
ACTIVATED Capture Assistants
01 Focal length
02 Memory card used
03 Remaining storage capacity
04 Battery capacity
05 Menu section PHOTO
06 Menu sections VIDEO
07 Light balance
08 Exposure compensation scale
09 Exposure mode
10 Aperture value
11 Shutter speed
12 ISO Sensitivity
13 Exposure compensation value
14 Shooting mode (Drive Mode)
15 Focus mode
16 Autofocus metering method
17 Autofocus settings
18 Exposure metering method
19 White balance mode
20 File format/compression level/resolution
21 Formatting a memory card
22 User profile
23 Locking/unlocking the setting wheels
24 Leica FOTOS
25 Main menu
26 Flash sync point
27 Aspect ratio (sensor)
28 Dark area optimization (iDR) enabled
29 Color rendering (Film Style)
30 Stabilization activated
31 Icon for marked picture
32 File name
33 File number of the image shown
34 Histogram
35 Grid lines
36 Level gauge
37 ■ Display of cropped section size and position (only visible for enlarged sections)
38 Focus peaking
(identification of in sharp edges in the object)
39 Clipping / Zebra
VIDEO/CINE
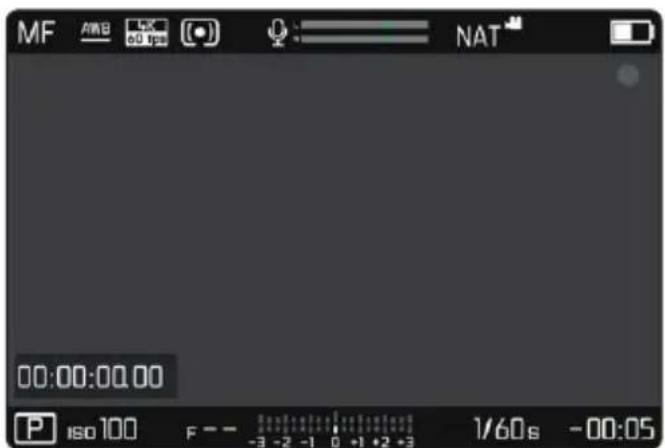
STATUS SCREEN
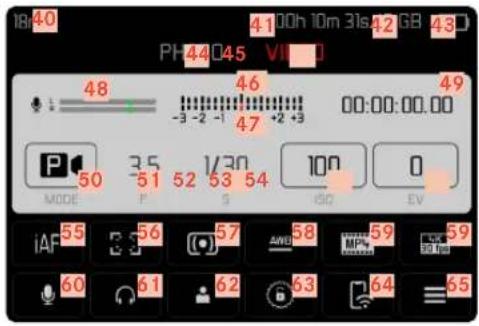
WHEN TAKING A PICTURE
All displays/values refer to the actual settings.
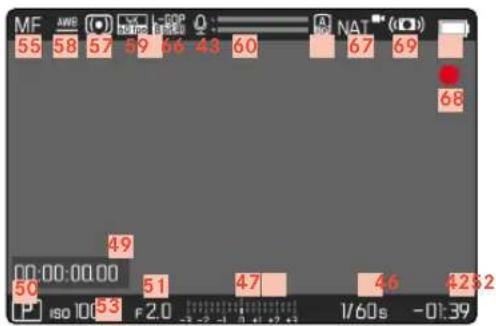
IN REVIEW MODE
All displays/values refer to the displayed image.
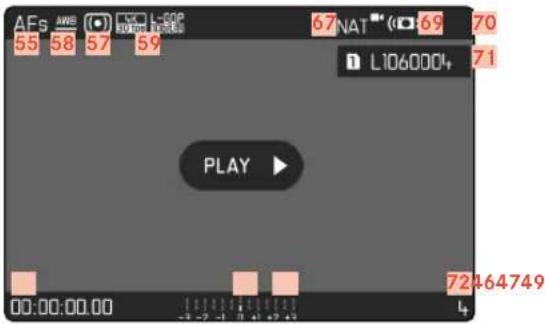
40 Focal length
41 Memory card used
42 Remaining storage capacity
43 Battery capacity
44 Menu section PHOTO
45 Menu sections VIDEO
46 Light balance
47 Exposure compensation scale
48 Microphone recording level
49 Recording time (timecode)
50 Exposure mode
51 Aperture value
52 Shutter speed
(Cine: shutter angle)
53 ISO Sensitivity
(Cine: ASA indication)
54 Exposure compensation value
55 Focus mode
56 Autofocus metering method
57 Exposure metering method
58 White balance mode
59 File format/compression level/resolution
60 Recording level
61 Headphone volume
62 User profile
63 Locking/unlocking the setting wheels
64 Leica FOTOS
65 Main menu
66 Dark area optimization (IDR) enabled
67 Color rendering (Video Style)
68 Indicates recording in progress
69 Stabilization activated
70 Icon for marked picture
71 File name
72 File number of the image shown
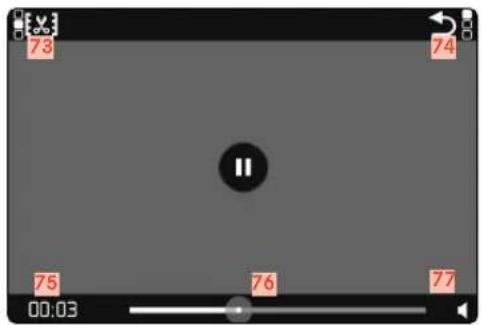
73 Video editing function
74 Exiting video playback
75 Current time of the playback
76 Playback status bar
77 Playback volume
DISPLAYS IN THE TOP DISPLAY
Home screen
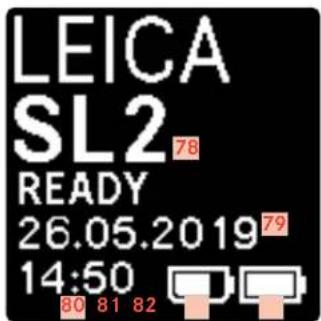
DEFAULT VIEW
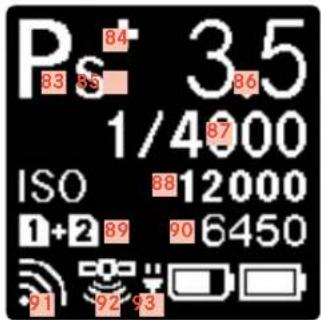
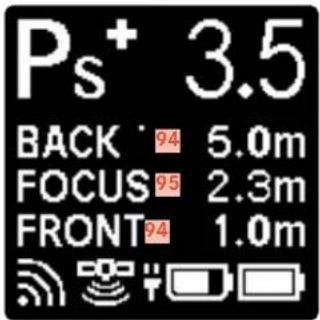
MODE CHANGE




78 Camera name
79 Date
80 Time
81 Handgrip battery capacity
82 Camera battery capacity
83 Exposure mode
84 Set flash exposure compensation
85 Program shift
86 Aperture value
87 Shutter speed (Cine: shutter angle)
88 ISO Sensitivity (Cine: ASA indication)
89 Memory card used
90 Remaining storage capacity
91 Leica FOTOS
92 GPS
93 USB charging function
94 Depth of field threshold values
95 Sharp distance focus
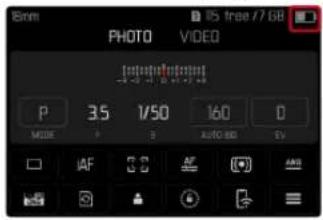
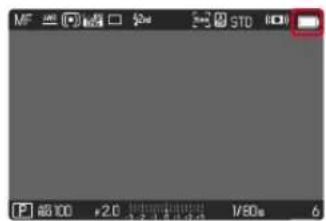
CHARGE STATUS INDICATOR ON THE LCD PANEL
The battery charge status is displayed in the status screen and in the header line at the top right.
natural_image
Camera LCD screen interface showing settings and battery status (no readable text or symbols)| Display Charge status | |
| Approx. 75 - 100% | |
| Approx. 50 - 75% | |
| Approx. 25 - 50% | |
| Approx. 0 - 25% | |
| Approx. 0%The battery needs charging or replacing | |

PREPARATION
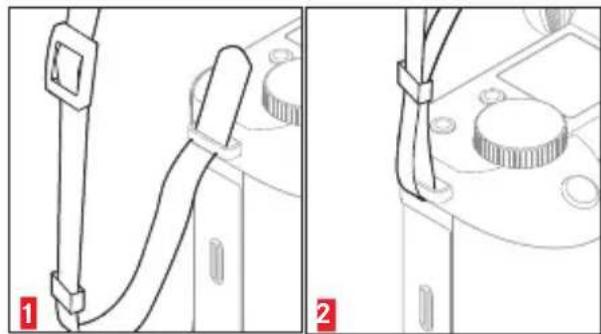
ATTACHING THE CARRY STRAP
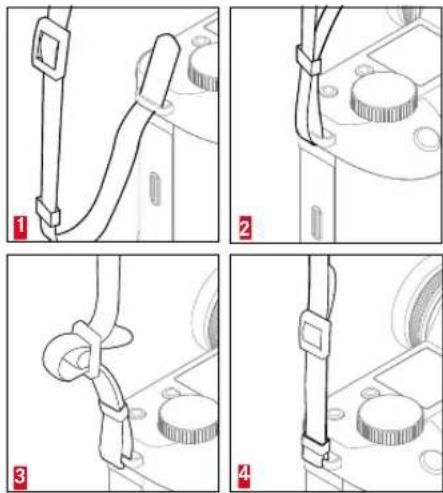
Attention
- Once you have attached the carry strap, please make sure that the clips are mounted correctly to prevent the camera from falling.
PREPARING THE CHARGER
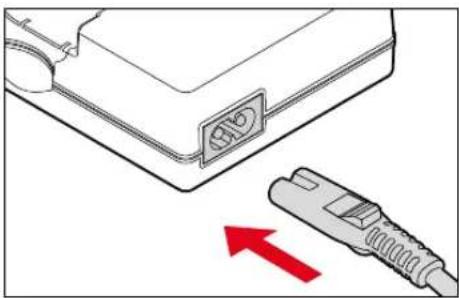
Use the mains cable with the matching regional plug to connect the charger to mains electricity.
natural_image
Diagram showing a device with a connector and a cable inserted, with a red arrow indicating direction (no text or symbols present)Note
- The charger will automatically adapt to local mains voltage.
CHARGING THE BATTERY
The camera is powered by a lithium-ion battery.
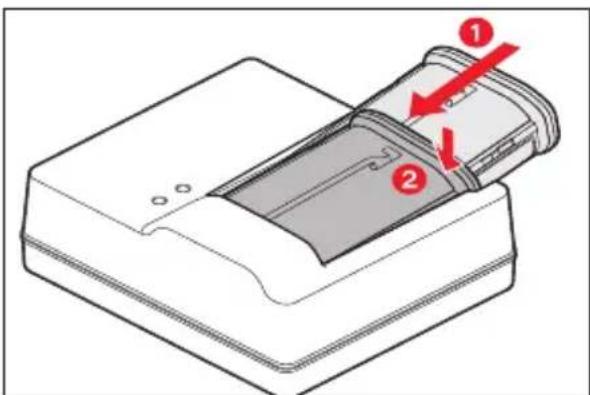
INSERTING THE BATTERY IN THE CHARGER
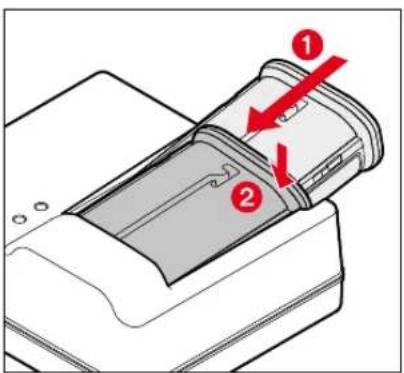
▶ Slide the battery into the charger with the groove facing up until the contacts meet
▶ Press down on the battery until you can hear and feel it clicking into place
▶ Ensure that the battery is fully inserted into the charger
REMOVING THE BATTERY FROM THE CHARGER
▶ Tilt the battery up and lift it out at an angle
CHARGE STATUS INDICATORS ON THE CHARGER
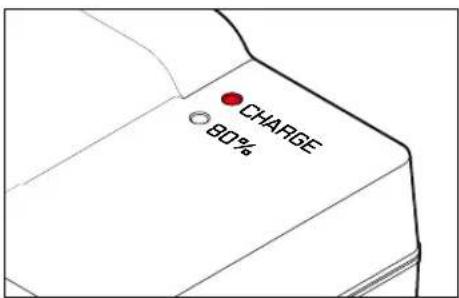
The status LED indicates a correct charging process.
| Display Charge status | Charge time* | |
| CHARGE flashes green | Battery is charging | |
| 80% lights up orange | 80% Approx. 2h | |
| CHARGE continuous green light | 100% Approx. 3.5h |
Disconnect the charger from mains electricity when the charging process is complete. There is no risk of overcharging.
* for a completely discharged battery


CHARGING VIA USB
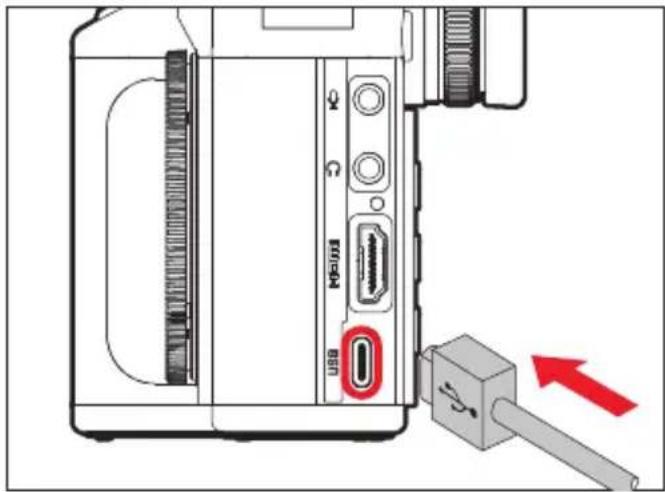
The rechargeable battery in the camera can be automatically charged when the camera is connected to a computer or another suitable power source via USB cable.
Factory setting: On
▶ Select Camera Settings in the main menu
Select USB Charging
▶ Select On/Off
Notes
- The camera will only charge while it is switched off. The charging process will be interrupted as soon as the camera is switched on. The camera will be displayed as a USB storage medium if an SD card is inserted (see p. 100).
• The charging will start automatically.
INSERTING/REMOVING THE BATTERY
▶ Ensure that the camera is switched OFF (see p. 50)
INSERTION
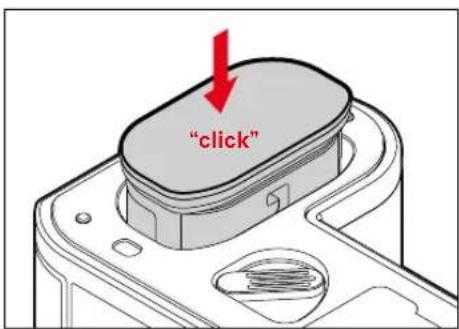
▶ Insert the battery into the slot with the groove pointing towards the LCD panel and gently push until you hear and feel it clicking into place
REMOVAL
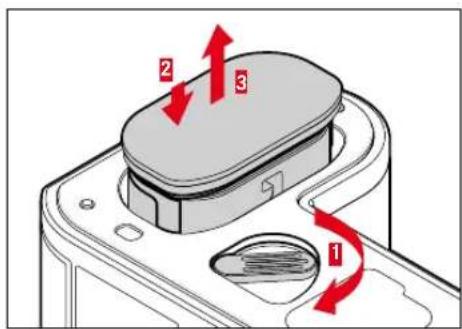
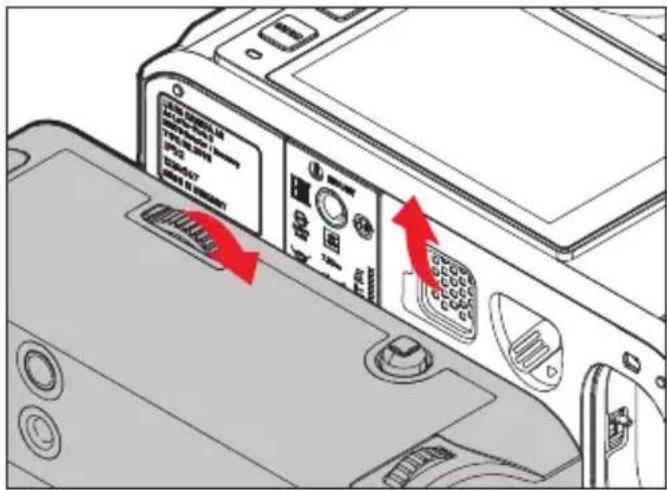
▶ Turn the battery release lever
- Battery is pushing out slightly.
▶ Press down on the battery lightly
• The battery unlocks and pushes out fully.
Removing the battery
Important
- Removing the battery while the camera is switched on may result in the loss of custom settings or damage to the memory card.
INSERTING/REMOVING THE MEMORY CARD
Leica SL2 offers slots for two memory cards. There are various options for use, see p. 96.
The camera will save exposures to an SD (Secure Digital), SDHC (High Capacity) or SDXC (eXtended Capacity) memory card.
Notes
- SD/SDHC/SDXC memory cards are available from various suppliers in a range of sizes and with differing read/write speeds. Memory cards with high storage capacities and high read/write speeds offer quick storage and rendering.
- The memory card may not be supported (capacity) or will have to be formed in the camera before first use (see p. 96). The camera will in that case display a relevant message. Please see the section "Technical Data" for information about supported cards.
- Check the memory card for correct alignment if you are having difficulties inserting it into the camera.
• See p.10 and p.13 for additional information.
• Video shootings require a high write speed.

▶ Ensure that the camera is switched OFF (see p. 50)
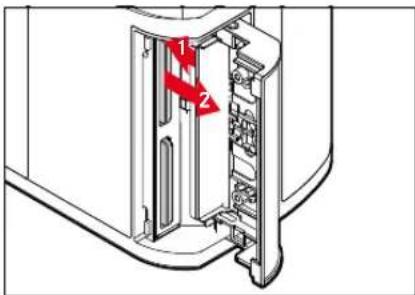
OPENING THE COVER OVER THE MEMORY CARD SLOT
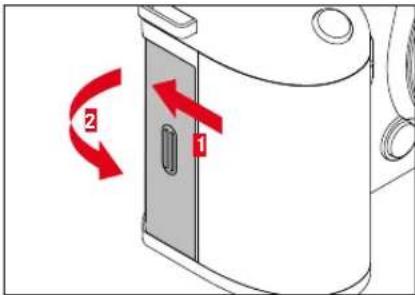
▶ Slide the cover as shown in the illustration until you hear a click
• The cover lifts automatically.
CLOSING THE COVER OVER THE MEMORY CARD SLOT
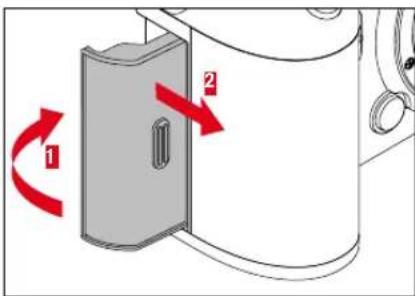
▶ Close and hold down the cover
▶ Slide the cover as shown in the illustration until it audibly clicks into place
INSERTION
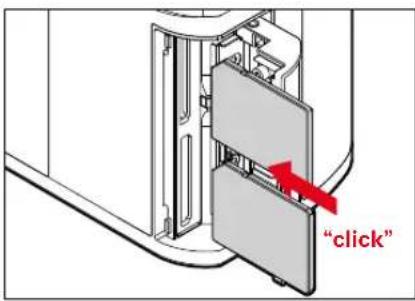
▶ Push the memory card into the slot until you hear and feel it clicking into place
• The beveled corner of the card must be at the top left.
REMOVAL
▶ Push down on the card until you hear a click
• The card pushes out slightly.
Remove the memory card
LENS
COMPATIBLE LENSES
Sophisticated optical systems guarantee the excellent imaging performance of the SL lenses. In the design phase for the optics, a homogeneous performance across all focal lengths, aperture and focus settings is a high priority. That is how SL lenses can be used for optimally creative results in any situation.
Leica M and R lenses can also be used in conjunction with Leica M/R L adapters.
L-MOUNT LENSES
In addition to Leica SL lenses, the Leica SL2 can also accommodate Leica TL lenses with full functionality via the L bayonet. The camera will automatically switch to the APS-C format when a TL lens is attached. A variety of compatible lenses from manufacturers of the L-Mount Alliance are also available.
EXPOSURE METERING AND EXPOSURE CONTROL USING VARIO LENSES
Some Leica TL and SL Vario lenses have a variable speed, which means that the effective aperture opening depends on the configured focal length. Make sure to set the desired focal length before storing the meter value or changing the shutter speed/aperture combination to prevent incorrect exposure. Please read the sections on "Exposure" starting on page 132 for more information. Make sure that the aperture setting on the flash unit matches the camera aperture if you are using a non-system compatible flash unit.

LEICA M AND R LENSES
Leica M and R lenses can be attached via Leica M or R L adapters. There are lens profiles stored in the camera, which allow the following functions:
- The flash exposure and flash reflector controls utilize the stored lens data (see "Compatible flash units").
- The lens data is furthermore written to the Exif data of the recordings, provided the lens is relevantly encoded. The focal length of the lens is additionally displayed when rendering the extended image data.
The camera will automatically select the appropriate lens type settings if the Leica M lens used comes with 6-bit encoding, or the Leica R lens has an ROM contact strip. You will have to enter the lens type manually if the lenses do not have that feature.
Using automatic detection
▶ Select Camera Settings in the main menu
▶ Select Lens Profiles
▶ Activate automatic lens detection (Auto) or deactivate the feature (Off)
Setting the lens type manually
▶ Select Camera Settings in the main menu
▶ Select Lens Profiles
▶ Select M Lenses or R Lenses
Sorting the lens type lists
▶ Select Camera Settings in the main menu
▶ Select Lens Profiles
▶ Select M Lenses or R Lenses
▶ Select Edit List of M Lenses or Edit List of R Lenses
▶ Activate (On) or deactivate (Off) the lens types you will be using
CHANGING THE LENS
Important
- Make sure to always have a lens or the camera bayonet cover attached to prevent dust or other foreign bodies penetrating the camera.
- That is why you should always replace lenses quickly and in a dust-free environment.
L-MOUNT LENSES
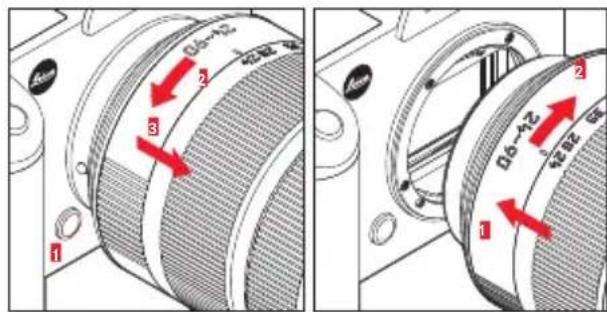
ATTACHING THE LENS
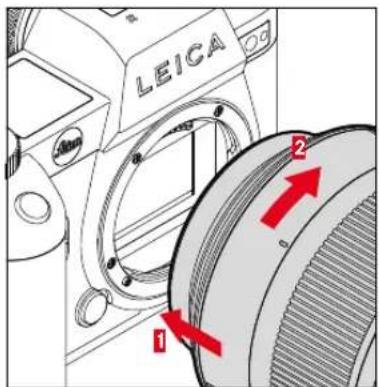
▶ Ensure that the camera is switched OFF (see p. 50)
▶ Hold the lens by the fixed ring
▶ Position the alignment points on the lens opposite the release button on the camera housing
▶ Attach the lens in this position
▶ Turn the lens clockwise until you hear and feel it click into place
DETACHING THE LENS
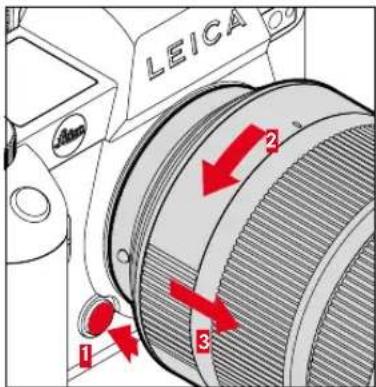
▶ Ensure that the camera is switched OFF
▶ Hold the lens by the fixed ring
▶ Press and hold the release button on the camera housing
▶ Turn the lens counter-clockwise until the alignment point is opposite the release button
Remove the lens

OTHER LENSES
(e.g. Leica M lenses)
Other lenses can be used by inserting an adapter for L bayonets (e.g. Leica-M adapter L).
ATTACHING THE ADAPTER
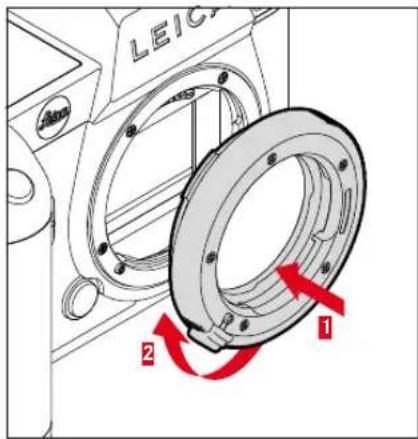
▶ Ensure that the camera is switched OFF (see p. 50)
▶ Position the alignment point on the adapter opposite the alignment point on the camera housing
▶ Attach the lens in this position
▶ Turn the adapter clockwise until you hear and feel it click into place
▶ Attach the lens immediately
DETACHING THE ADAPTER
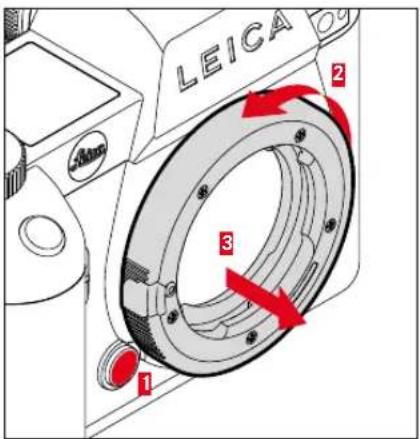
▶ Ensure that the camera is switched OFF
Detaching the lens
▶ Press and hold the release button on the camera housing
▶ Turn the adapter counter-clockwise until the alignment point is opposite the release button
Remove the adapter
ATTACHING THE LENS TO THE ADAPTER
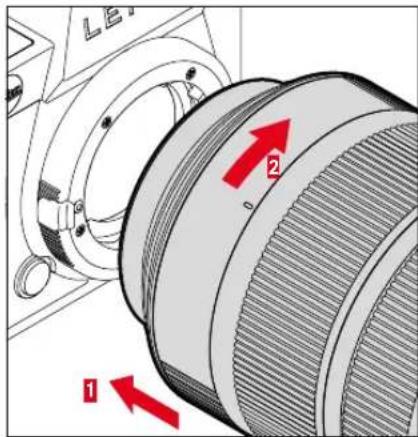
▶ Ensure that the camera is switched OFF (see p. 50)
▶ Hold the lens by the fixed ring
▶ Position the alignment point on the lens opposite the alignment point on the adapter
▶ Attach the lens in this position
▶ Turn the lens clockwise until you hear and feel it click into place
DETACHING THE LENS FROM THE ADAPTER
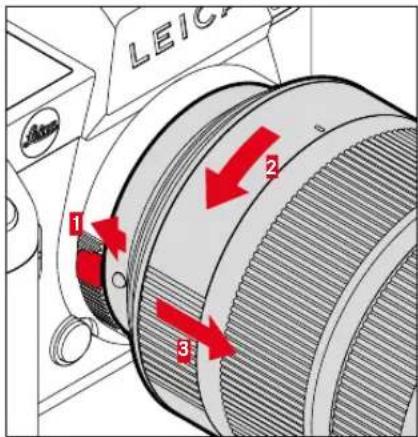
▶ Ensure that the camera is switched OFF
▶ Hold the lens by the fixed ring
▶ Press and hold the release button on the adapter
▶ Turn the lens counter-clockwise until its alignment point is opposite the release button
Remove the lens


DIOPTER SETTINGS
The viewfinder has a diopter setting function with a range between -4 and +2 diopter to allow glasses wearers the use of the camera without eyeglasses (diopter compensation).
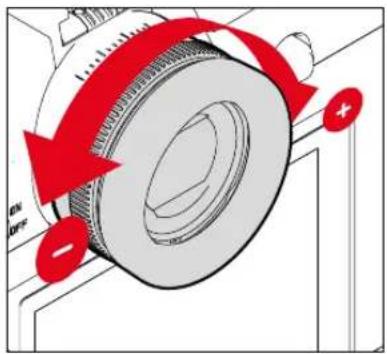
▶ Look through the viewfinder
▶ Aiming at and focusing on an object
▶ Turn the diopter setting wheel until you see the image in the viewfinder and the displays in perfect focus
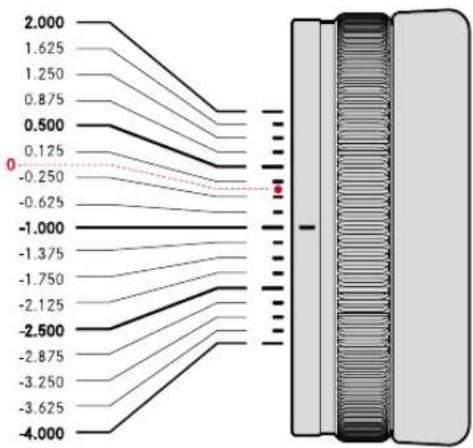
line
| Value | | ------ | | 2.000 | | 1.625 | | 1.250 | | 0.875 | | 0.500 | | 0.125 | | -0.250 | | -0.625 | | -1.000 | | -1.375 | | -1.750 | | -2.125 | | -2.500 | | -2.875 | | -3.250 | | -3.625 | | -4.000 |MULTIFUNCTION HANDGRIP SL (optional accessory)
The Multifunction Handgrip SL is an optional accessory and comes with additional operating elements (shutter button, joystick, thumbwheel and front dial) positioned specifically for easy portrait photography. The handgrip is therefore particularly useful for one-handed photography. It also offers space for a second rechargeable battery.
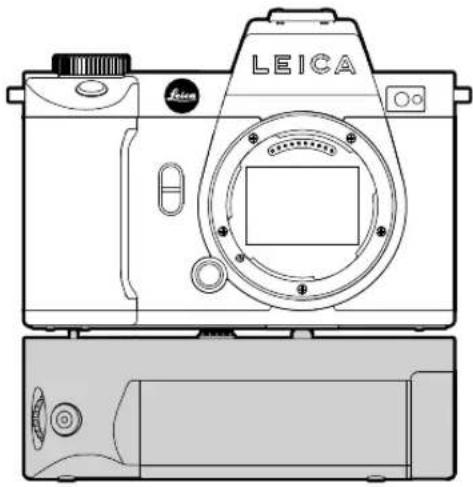
natural_image
Line drawing of a LEICA camera with front and back views (no text or symbols)PHOTOGRAPHY WITH THE HANDGRIP
The operating elements of the handgrip are positioned in such a way as to be in easy reach when using the camera for portrait photography.
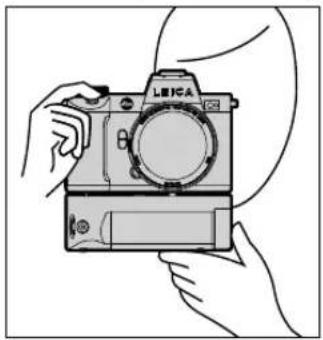
natural_image
Line drawing of hands holding a LEFCA camera and a battery (no text or symbols)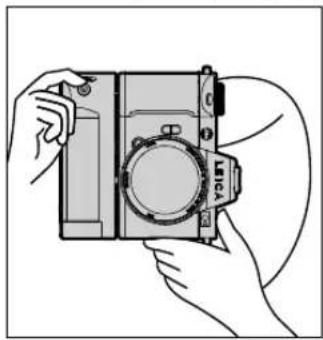
natural_image
Line drawing of hands holding a camera with no visible text or symbols

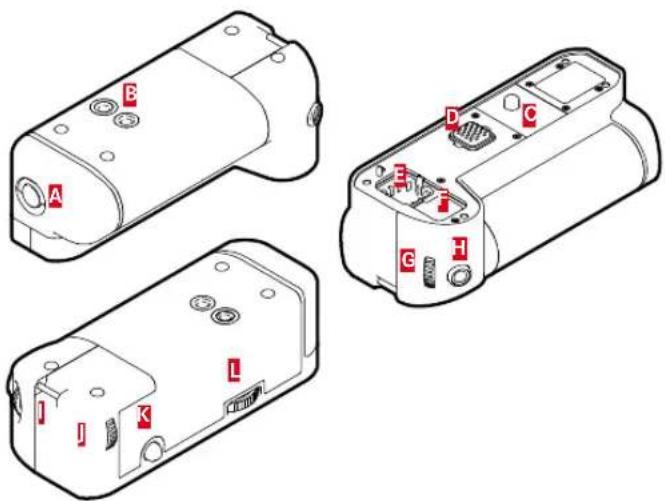
A Locking toggle
B Tripod thread
Attachment screw
D Interface with the camera
E Storage compartment for the contact cover of the handgrip
F Storage compartment for the contact cover of the camera
G Front dial
Shutter button
1 Strap lug
Thumbwheel
K Joystick
Handgrip lock
ATTACHING THE HANDGRIP
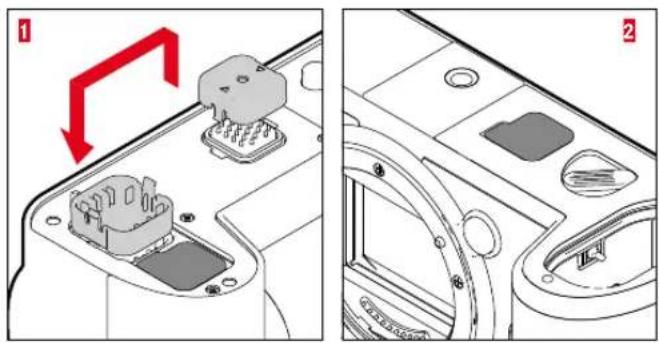
natural_image
Two technical diagrams showing a device's internal components, one with a red arrow indicating rotation and the other with a numbered label (no text or symbols present)▶ Squeeze the contact cover of the handgrip on the two sides marked with triangles and lift it off
- Store the contact cover in its designated compartment in the handgrip
▶ Remove the contact cover in the base of the camera housing
- Store the contact cover in its designated compartment in the handgrip
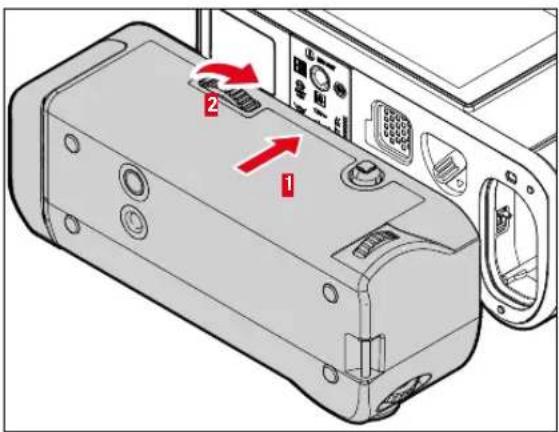
▶ Align the handgrip with the base of the camera
• Make sure not to damage the contacts.
▶ Turn the handgrip lock to the right and hand tighten
Important
- Make sure to check regularly whether the connection is still tight when using the camera with the handgrip attached and re-tighten it as needed.
DETACHING THE HANDGRIP
▶ Turn the handgrip lock to the left to unlock the connection
- Make sure to hold the camera and the handgrip securely while doing so.
▶ Replace both cover caps over the connections
Important
- Make sure that the contact covers are securely in place on the camera and on the handgrip whenever the handgrip is not attached to the camera. The highly sensitive contacts could otherwise easily be damaged.

MOUNTING THE WRIST LOOP/CARRY STRAP ON THE MULTIFUNCTION HANDGRIP
The high quality wrist loop is available as an optional ergonomic accessory for the handgrip to ensure more stability for the camera. The hand loop is recommended in particular for landscape photography.
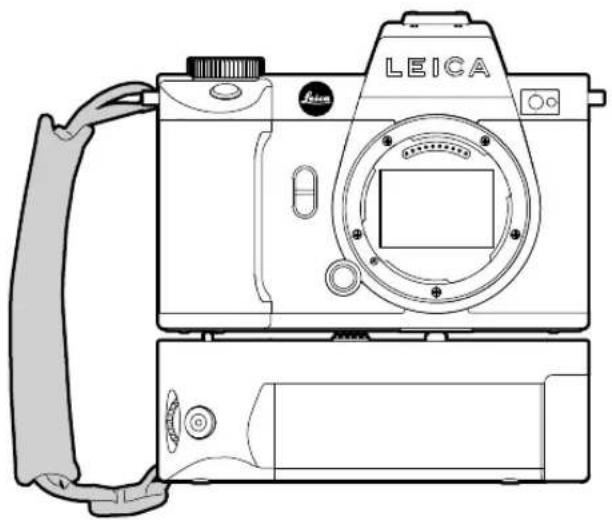
natural_image
Line drawing of a LEICA digital camera with attached cable (no text or symbols)When using the handgrip for portrait photography for extended periods of time, we recommend attaching the carry strap on the strap lug of the camera on the right-hand side and on the strap lug of the handgrip. This will always maintain the camera in the correct position. See p. 34 for instructions on how to attach the carry strap.
CHANGING THE BATTERY
The multifunction handgrip offers space for a second rechargeable battery. This will significantly increase operating time.
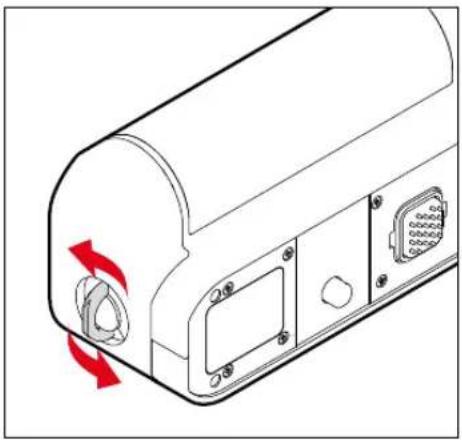
natural_image
Technical line drawing of a mechanical component with red directional arrows indicating rotation or movement (no text or symbols)▶ Click up the locking toggle
▶ Turn the locking toggle in anti-clockwise direction
• The battery cover lifts automatically.
REMOVING THE BATTERY
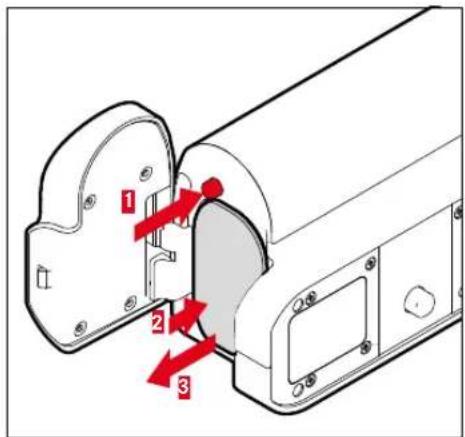
▶ Push down the ejector pin
- Battery is pushing out slightly.
▶ Press down on the battery lightly
• The battery unlocks and pushes out fully.
Removing the battery
INSERTING THE BATTERY
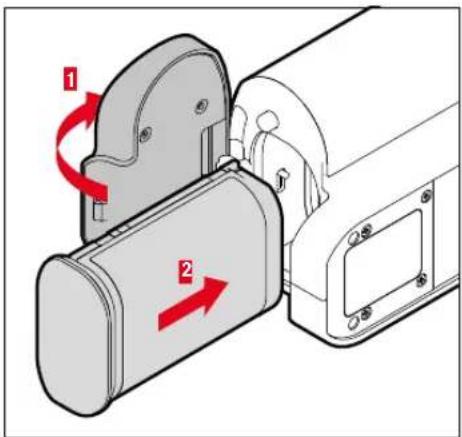
Insert the battery into the slot with the groove pointing towards until you hear and feel it clicking into place
CLOSE THE BATTERY COMPARTMENT
▶ Close the cover over the battery compartment
- It will click to signify it is locked.
▶ Click down the locking toggle
Note
- The camera must have a battery with at least minimal charge inserted to utilize a rechargeable battery in the handgrip.


CAMERA OPERATION
CONTROL ELEMENTS
MAIN SWITCH
The main switch switches the camera on and off.
SWITCHING THE CAMERA ON
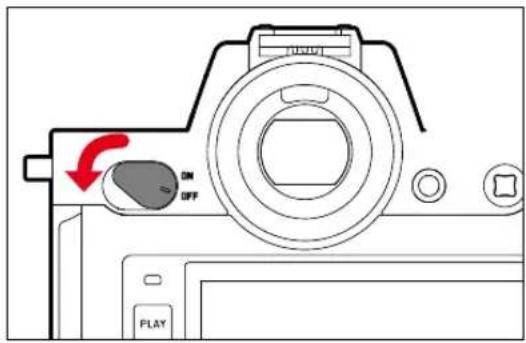
Notes
- Once switched on, the camera will be ready to use after approx. 1 s.
- The LED lights up briefly and the displays in the viewfinder appear.
SWITCHING THE CAMERA OFF
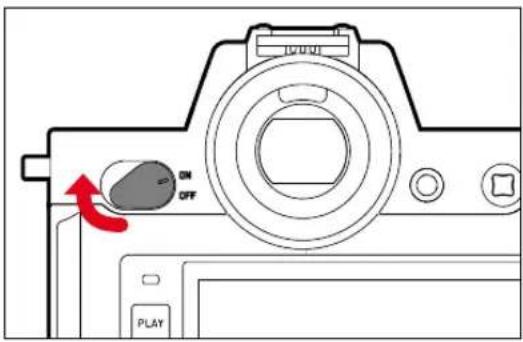
Note
- The function Auto Power Off (see p. 82) deactivates the camera automatically if no operation occurs within a preset time. Use the main switch to deactivate the camera if this function is Off to prevent inadvertent exposures and battery discharge when the camera is not in use.
SHUTTER BUTTON
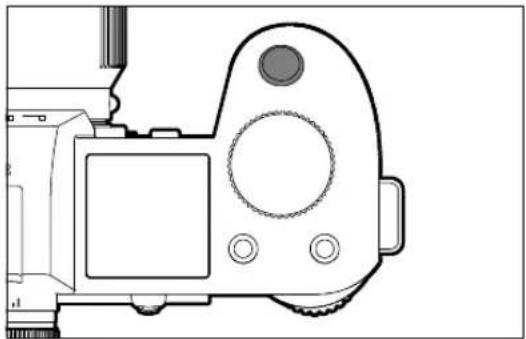
natural_image
Technical line drawing of a DSLR camera with front panel and control buttons (no text or symbols)The shutter button works in two stages.
Tapping (= Pressing the shutter button to the 1st pressure point)
- Activating the camera electronics and displays
- Exposure lock (metering & saving):
- AF mode: range measurement (AF-L)
- (semi) automatic exposure mode: exposure metering (AE-L)
- Canceling a running self-timer delay time
- Return to shooting mode
- from review mode
- from menu control
- from standby mode
Press down fully
- Shutter release
• The data is then transferred to the memory card.
- Starting a video shooting
- Starting a preselected self-timer delay time
- Starting a continuous shooting or interval shooting
Notes
- Press down the shutter button in a smooth motion until you hear the click of the shutter to prevent camera shake.
-
The shutter button remains locked:
-
if the memory card inserted and/or the internal buffer memory are (temporarily) full
- if the battery has exceeded its performance limits (capacity, temperature, age)
- if the memory card is write-protected or damaged
- if the sensor is too hot

FRONT DIAL
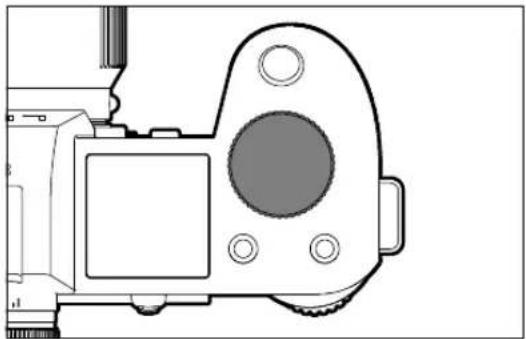
natural_image
Technical line drawing of a mechanical device with no visible text or symbols- Menu navigation
- Setting the shutter speeds
- Exposure compensation value selection
- Enlarging/reducing viewed pictures
THUMBWHEEL
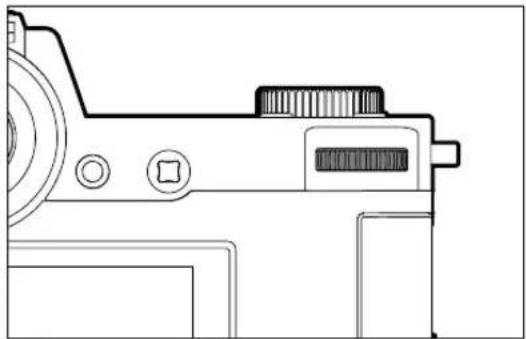
natural_image
Technical line drawing of a mechanical device with no visible text or symbols- Menu navigation
- Accessing the submenu
- Applying menu settings
- Setting selected menu items/functions
- Setting the aperture value
- Exposure compensation value selection
- Setting the program shift
- Scroll through the gallery
- Playback of video recordings
- Confirming the prompts
JOYSTICK
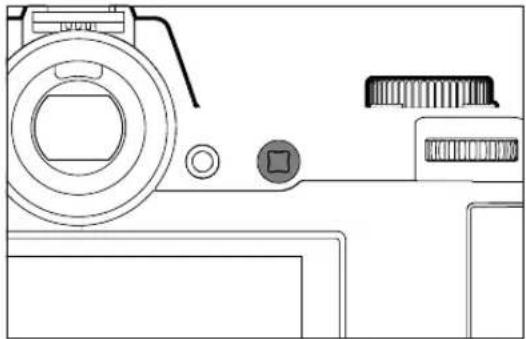
natural_image
Line drawing of a camera with lens, buttons, and screen (no text or symbols)- Menu navigation
- Accessing the submenu
- Applying menu settings
- Setting selected menu items/functions
- Scroll through the gallery
- Shifting the metering field
- Exposure lock
- Playback of video recordings
- Confirming the prompts
PLAY BUTTON/MENU BUTTON
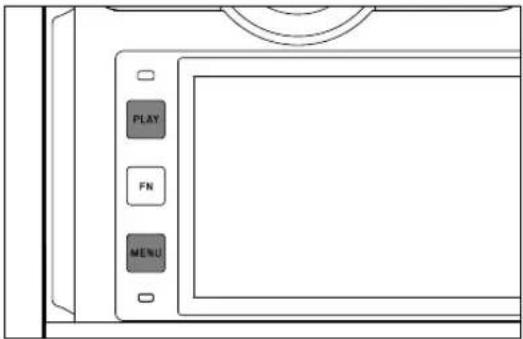
PLAY BUTTON
- Activation and deactivation of the (continuous) review mode
- Return to full-screen display
MENU BUTTON
- Accessing the menu (incl. status screen)
- Accessing the play menu
- Exiting the currently displayed (sub) menu


FUNCTION BUTTONS
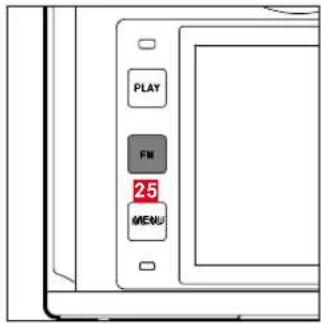
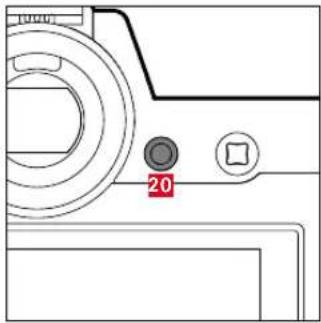
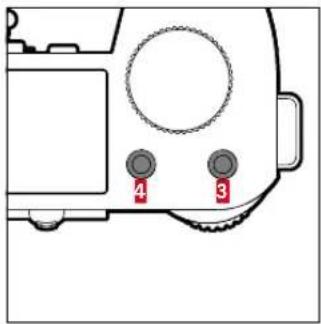
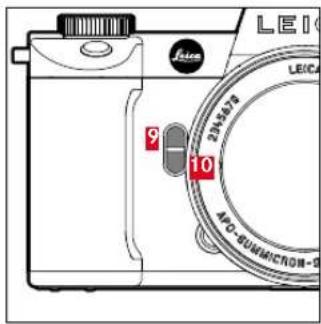
Direct access to various menus and functions. All function buttons can be custom configured (see p. 71).
| FACTORY SETTINGS | |
| In shooting mode In review mode | |
| FN button25 | |
| Toggle info profiles | |
| Function button20 | |
| LCD panel/EVF switchover | |
| Function button4 | |
| Mode change (photo/video) Marking/rating a shot | |
| Function button3 | |
| - Photo:SO- Video:SO- (Cine:Exposure Index) | |
| Function button9 | |
| - Photo: Magnification- Video: Microphone Gain | |
| Function button10 | |
| Autofocus metering method | |
LCD PANEL (TOUCH SCREEN)
| TOUCH CONTROL* In shooting mode In review mode | |||
 | “tap” Shifting the AF metering field and focusing (while Touch AF is activated) | Selecting shots | |
 | “double tap” Resetting the AF metering field (while Touch AF is activated) | Enlarging/reducing viewed pictures | |
 | “swipe” Scroll through the gallery | Shifts the enlarged image section | |
 | “horizontal swipe” (full length) | Mode change (photo/video) Scroll through the gallery | |
 | “vertical swipe” (full length) | Switch to review mode Switch to shooting mode | |
 | “tap and hold” Accessing the AF Quick Setting | ||
 | “two-finger pinch” “two-finger spread” | Changing the size of the AF metering field (using the AF modes Field and Eye/Face/Body Detection) | Enlarging/reducing viewed pictures |
 | “swipe and hold” “hold and swipe” | Continuous scrolling | |
* A light touch is enough, don't apply pressure.

TOP DISPLAY
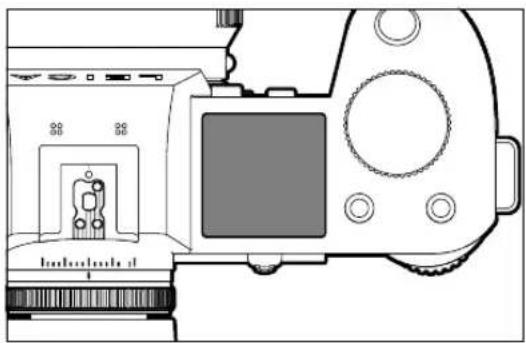
natural_image
Technical line drawing of a DSLR camera with front panel and display screen (no text or symbols)- Display of the active mode
- Display of image data
- Display of camera information
MENU CONTROL
CONTROL ELEMENTS
The following elements are used for menu control.
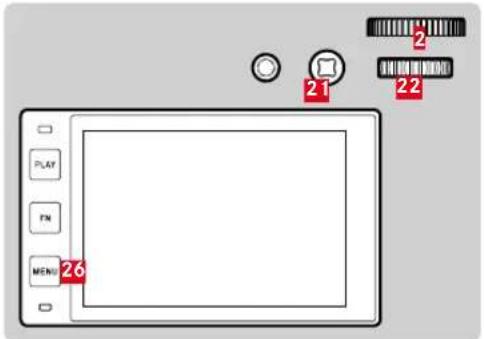

Joystick
Front dial


MENU button

Thumbwheel
MENU SECTIONS
The following menu sections are available: Status Screen, and Favorites.
lain Menu
Status screen:
- quick access to the most important settings
Favorites:
- your custom list (see p. 70 for details on how to manage this list)
- The favorites menu can only be displayed if it has at least one menu item assigned.
Main Menu:
- offers access to all menu items
- contains various submenus
The currently active operating mode (Photo or Video) is highlighted in color in all menu areas.
| Section PHOTO VIDEO | ||
| Status screen Dark | background Bright background | |
| Favorites | Dark header line Bright header line | |
| Main menu(top level) | ||
| Main menu(Submenus) | ||
STATUS SCREEN
Photo Video
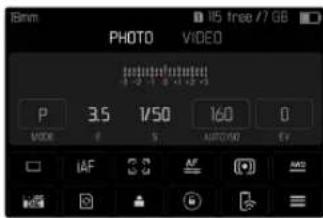
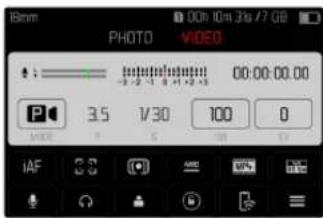

FAVORITES
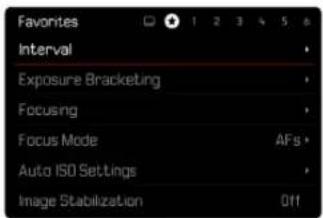
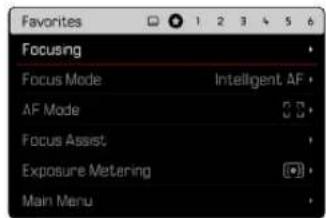
MAIN MENU
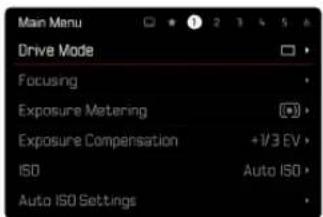
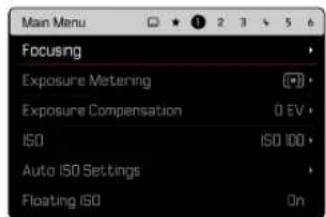

SETTINGS IN PHOTO AND VIDEO MODE
The available settings depend on the operating mode (Photo or Video) currently in use.
- All menu items and their sub items available in the main menu before User Profile are mode-specific. That means that any changes made here, will only apply for the operating mode currently in use. Any menu items of the same name in the other operating mode will be unaffected. That includes settings for focusing, exposure metering or white balance.
- All settings and functions after that in the main menu (including User Profile) are available in both operating modes and have global effect. A setting selected in one of the modes will also apply to the other.
Settings and functions with global effect are:
- User Profile
- Dial Lock
- Joystick Lock
- Display Settings
- Leica FOTOS
- Image Stabilization
- Panning Mode
- Format Card
- Camera Settings
- Camera Information
- Language
- Reset Camera
SWITCHING MENU SECTIONS
The status screen will always be displayed as the first menu section. The top level of the menu is organized into "pages", which are displayed in the header line: Status screen, poss. Favorites menu (up to 2 pages), and several sections of the Main menu. You can switch between menu sections by scrolling through the pages. Alternatively, the status screen and the favorites menu offer access to the main menu as their respectively last menu item.
Scrolling forward
▶ Press the MENU button
or
▶ Turn the front dial in clockwise direction
- The status screen will appear again after the last page of the main menu.
Scrolling backward
▶ Turn the front dial in anti-clockwise direction
- The last page of the main menu will appear again after the status screen.
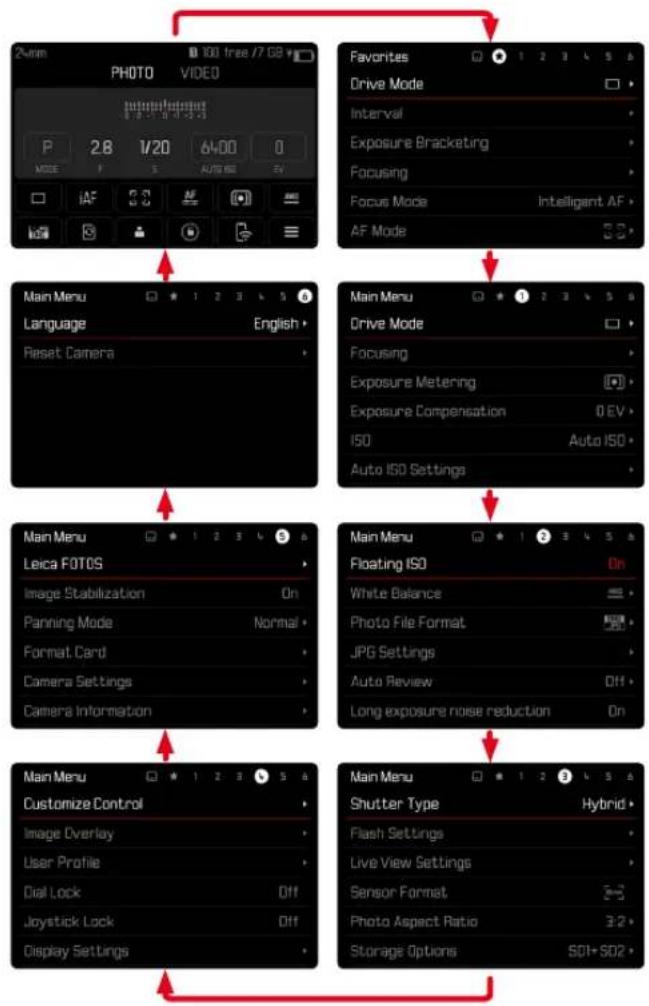
flowchart
graph TD
    A["PHOTO"] --> B["Main Menu"]
    B --> C["Leica FOTOS"]
    C --> D["Customize Control"]
    D --> E["Main Menu"]
    E --> F["Shutter Type"]
    F --> G["Hybrid"]

    subgraph Section 1
        H["P"] --> I["2.8"]
        J["1/20"] --> K["6400"]
        L["AV"] --> M["0"]
        N["iAF"] --> O["3"]
        P["AV"] --> Q["5"]
        R["AV"] --> S["5"]
        T["AV"] --> U["5"]
        V["AV"] --> W["5"]
    end

    subgraph Section 2
        X["Favorites"] --> Y["Drive Mode"]
        Y --> Z["Interval"]
        Z --> AA["Exposure Bracketing"]
        AA --> AB["Focusing"]
        AB --> AC["Focus Mode"]
        AC --> AD["Intelligent AF"]
        AD --> AE["AF Mode"]
        AE --> AF["5"]
    end

    subgraph Section 3
        AG["Main Menu"] --> AH["Language"]
        AH --> AI["Reset Camera"]
        AI --> AJ["English"]
    end

    subgraph Section 4
        AK["Main Menu"] --> AL["Focusing"]
        AL --> AM["Exposure Metering"]
        AM --> AN["Exposure Compensation"]
        AN --> AO["0 EV"]
        AO --> AP["ISO"]
        AP --> AQ["Auto ISO"]
        AQ --> AR["Auto ISO Settings"]
    end

    subgraph Section 5
        AS["Main Menu"] --> AT["Floating ISO"]
        AT --> AU["White Balance"]
        AU --> AV["Photo File Format"]
        AV --> AW["JPG Settings"]
        AW --> AX["Auto Review"]
        AX --> AY["Off"]
        AY --> AZ["Long exposure noise reduction"]
        AZ --> BA["On"]
    end

STATUS SCREEN
The status screen offers an overview of the most important information regarding the current camera status and active settings. It furthermore allows direct access to important settings. The status screen is optimized for touch control.
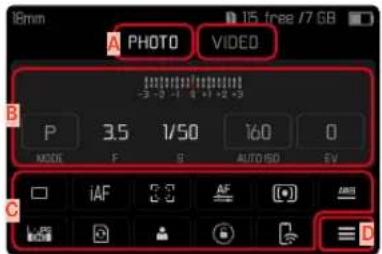
A Mode: photo/video (see p. 211)
B Exposure settings (see p. 132 and p. 235)
C Menu items
D Access to the main menu
Notes
- Where touch control is not possible or not desirable (e.g. in EVF mode), the status screen can alternatively be controlled via the joystick and/or the thumbwheel.
- The settings become effective immediately.
- The framed control panels can be selected. Unframed values are added in automatically (depending on the active exposure mode).
- The available menu items in photo and video mode differ (see p. 28 and p. 30).
SELECTING SETTINGS
Settings can be selected in various ways from within the status screen. The setting types vary from menu to menu.
Tap the desired control panel
• The relevant menu appears.
DIRECT SETTINGS
A version of the menu bar appears in the lower area of the status screen (see p. 66).
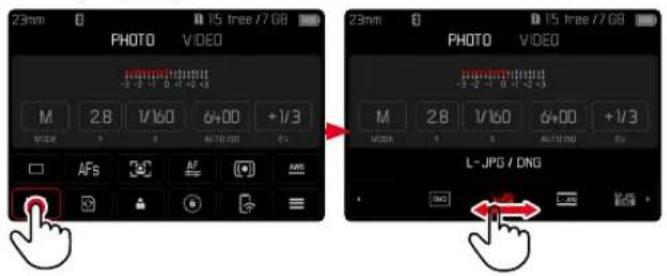
▶ Select the desired function directly or swipe
ACCESSING A STANDARD SUBMENU
These menus behave as if they were accessed from within the main menu (see p. 63). Touch control is therefore unavailable. From there, you return to the status screen and not to the next higher menu item.
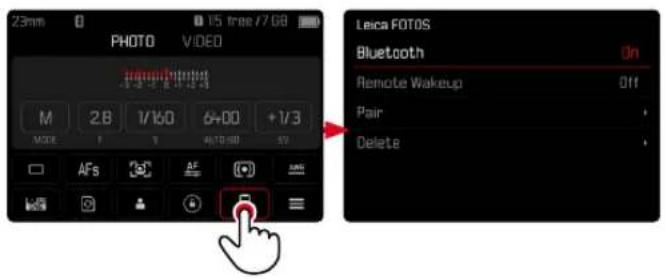
▶ Select the desired setting

FAVORITES MENU SUBMENU
The favorites menu offers quick access to the most frequently used menu items. It can contain up to 11 menu items. These can be assigned individually (see p. 70).
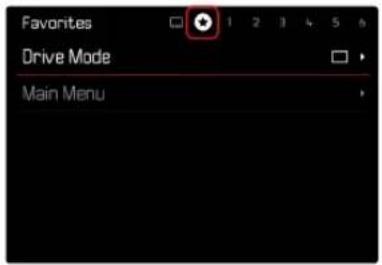
MAIN MENU
The main menu offers access to all settings. Most of these are organized in submenus.
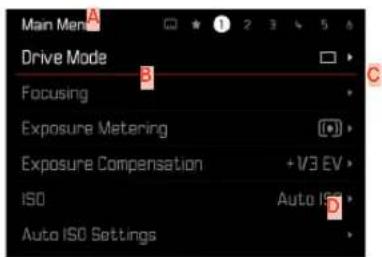
A Menu sections: Main Menu and Favorites
B Menu item name
C Menu item setting
D Submenu reference
There are various types of submenus available. The following pages describe their operation.
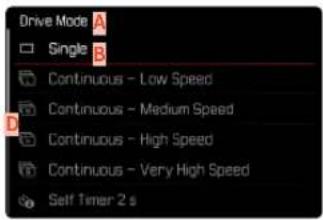
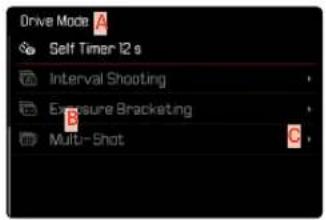
A Current menu item
B Submenu item
c References to other submenus
D Scrollbar
MENU NAVIGATION
▶ Press the MENU button (repeatedly if needed)
or
▶ Turn the front dial in clockwise direction
- The status screen will appear again after the last page of the main menu.
Scrolling backward
▶ Turn the front dial in anti-clockwise direction
- The last page of the main menu will appear again after the status screen.
LINE BY LINE NAVIGATION
(Function/function option selection)
▶ Press the joystick up/down
or
▶ Turn the thumbwheel (to the right = down, to the left = up)
- Once the last menu item has been reached scrolling up or down, the display will automatically jump to the previous or next screen. The currently active menu section (Favorites, Main Menu) is not exited.
Note
- Some menu items can only be accessed under specific circumstances. The text in the relevant line is displayed in gray to signify the existence of a submenu.


SHOW SUBMENU
▶ Press the joystick/thumbwheel
or
▶ Press the joystick to the right
CONFIRM SELECTION
▶ Press the joystick/thumbwheel
- The screen image changes back to the active menu item. The set function variant is shown on the right in the relevant menu line.
Note
- No confirmation is needed for the selection of On or Off. An automatic save is done.
GO BACK ONE STEP
(Return to the superordinate menu item)
▶ Press the joystick to the left
- This option is only available for list-type submenus.
▶ Press the MENU button 1x
- The top level of the currently selected menu section is displayed.
EXITING THE MENU
You can exit the menus and submenus at any time – with/without applying the settings selected there.
Go to shooting mode
▶ Tap the shutter button
Go to review mode
▶ Press the PLAY button
SUBMENU
KEYBOARD/NUMBER PAD
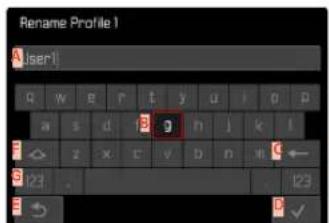
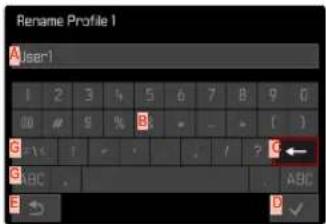
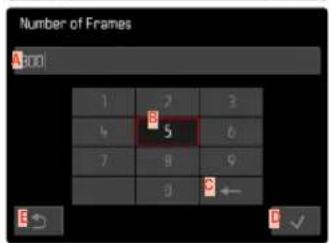
A Entry line
B Keyboard/Number pad
c "Delete" button (deletes the last character entered)
D "Confirm" button
(to apply individual values and existing settings)
E Return to previous menu level
Shift key (toggles between upper and lower case letters)
G Changing the character type
SELECTING A BUTTON (ICON/FUNCTION BUTTON)
Using button control
▶ Press the joystick in the relevant direction
• The currently active button will be highlighted.
▶ Press the joystick/thumbwheel
or
▶ Turn the thumbwheel
- The currently active button will be highlighted.
- There will be an automatic jump to the next/previous line when the end/beginning of the line is reached.
▶ Press the joystick/thumbwheel
Using touch control
▶ Press the button of your choice
SAVE
▶ Select button D
CANCEL
▶ Select button E


MENU BAR
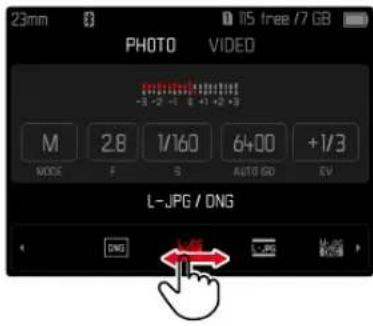
Using button control
▶ Press the joystick left/right
or
▶ Turn the thumbwheel
Using touch control
▶ Select the desired function directly or swipe
Notes
- The currently active setting displayed in the center is highlighted in red.
- The set value is displayed above the scale/below the menu bar.
- The following applies for direct access: The selected function requires no additional confirmation and will be active immediately.
SCALE MENU
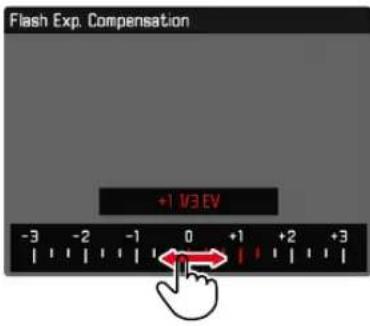
Using button control
▶ Press the joystick left/right
or
▶ Turn the thumbwheel
Using touch control
▶ Select the desired setting directly or swipe
Notes
- The currently active setting displayed in the center is highlighted in red.
- The set value is displayed above the scale/below the menu bar.
DATE/TIME MENU
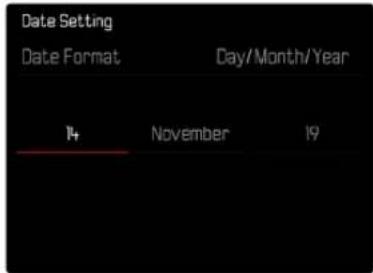
Moving to the next settings field
▶ Press the joystick left/right or
▶ Turn the thumbwheel
Setting values
▶ Press the joystick up/down
Saving and returning to superordinate menu item
▶ Press the joystick/thumbwheel
COMBI MENU (AF PROFILES)
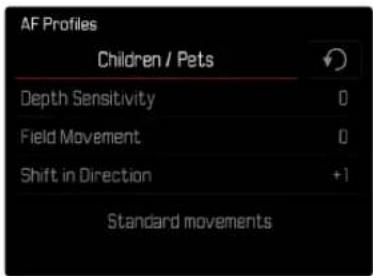
The setting of the individual menu items is done via a setting bar in the lower display area.
Accessing individual menu items
- Press the joystick in the relevant direction or - Turn the thumbwheel
Setting individual items
▶ Press the joystick/thumbwheel
- The set value displayed next to the menu item is highlighted.
▶ Press the joystick left/right or
▶ Turn the thumbwheel
Applying the setting
▶ Press the joystick/thumbwheel
Returning to the superordinate menu item
▶ Press the joystick to the left

COMBI MENU (IMAGE PROPERTIES)
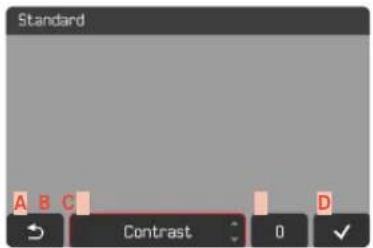
A "Back" button
(Exit without saving)
B "Parameter" button
c "Setting" button
D "Confirm" button
(Save and exit)
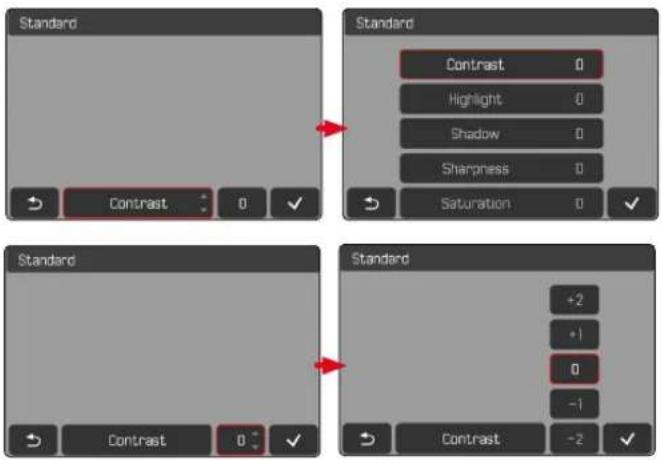
The operation is slightly different, depending on whether the settings are done via key control or touch control.
The screen image will remains visible continuously while settings are being adjusted. The result of the setting can be observed directly.
Using button control
Navigating between buttons
▶ Press the joystick left/right
- An active button is indicated by a red frame.
Applying setting
▶ Press the joystick up/down
- The button toggles directly between each of the options.
or
▶ Press the joystick
- All selectable options are displayed.
- The "Parameter" button displays the currently set value for each of the parameter options.
▶ Press the joystick up/down
- An active button is indicated by a red frame.
▶ Press the joystick
- The options are no longer displayed.
Using touch control
Tap the desired button
- All available options are displayed for the buttons "Parameter" and "Setting".
- The "Parameter" button displays the currently set value for each of the parameter options.
▶ Tap the desired alternative
SAVE
▶ Select the "Confirm" button
CANCEL
▶ Select the "Back" button

USER-DEFINED OPERATION
FAVORITES MENU
Assign your most frequently used menu items to a favorites menu (up to 11 items) for quick and easy access. The available functions are shown in the list on p. 278.
As there are separate menu sections for photo and video mode, the associated favorite menus can also be assigned individually. The favorites menu in video mode applies for both video modes (Video and Cine). The menu item ISO in Cine mode accesses the associated Exposure Index function.
The favorites menu will be represented by an asterisk in the header line, provided it contains at least one menu item.
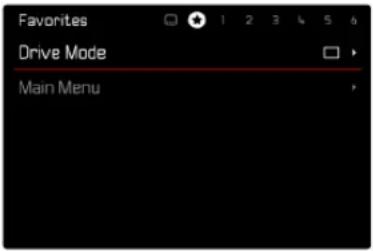
MANAGING THE FAVORITES MENU
▶ Switch to the desired mode (photo or video)
▶ Select Customize Control in the main menu
▶ Select Edit Favorites
▶ Select the desired menu item
| Edit Favorites | |
| Drive Mode | Off |
| Interval Shooting | Off |
| Exposure Bracketing | Off |
| Focusing | Off |
| Focus Mode | Off |
| AF Mode | Off |
▶ Select On/Off
- A warning message appears when the favorites menu has reached the maximum of 11 menu items and no further items can be added.
Note
- The favorites menu will be deleted completely if all menu items are set to Off.
DIRECT ACCESS TO MENU FUNCTIONS
You can assign specific menu functions to the function buttons for extra quick direct access to menu items in shooting mode. The assignments in photo and video mode are completely independent of each other. The available functions are shown in the list on p. 278. For factory settings see p. 54.
CHANGING AN ASSIGNMENT
All function buttons permit a quick and easy reassignment of functions in addition to access to their currently assigned menu function.
▶ Switch to the desired mode (photo or video)
▶ Press and hold the desired function button
- The direct access appears on the LCD panel.
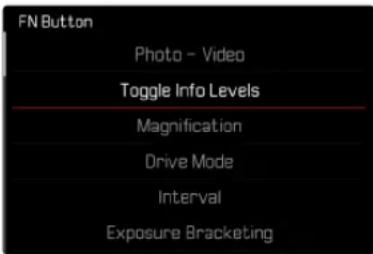
▶ Select the desired menu item
ACCESSING THE ASSIGNED MENU FUNCTION
▶ Briefly press and release the desired function button
- The assigned function is accessed, or a submenu appears on screen.
Notes
- The submenus accessed via direct access may look differently than when they are accessed via the main menu. Specifically, they often appear as menu bars to allow quick settings.
- The settings can be done via key control or using touch control on the LCD panel. The operating mode depends on the type of submenu.


SETTING WHEEL ASSIGNMENTS (IN SHOOTING MODE)
The function of the two setting wheels depends on the active exposure mode. Wheel assignments can be specified independently for photo and video mode and for every exposure mode. The two control elements can furthermore have functions assigned independently.
FUNCTION ASSIGNMENT
▶ Switch to the desired mode (photo or video)
▶ Select Customize Control in the main menu
▶ Select Wheel Assignment (AF Lenses) / Wheel Assignment (MF Lenses)
| Wheel Assignment (AF-lens) | ||
| Thumbwheel | Front Wheel | |
| P | Programm Shift | Exp Comp. |
| A | Aperture | Exp Comp. |
| S | Exp. Comp. | Shutter Speed |
| M | Aperture | Shutter Speed |
Selecting the desired exposure mode
▶ Press the joystick up/down
- Currently available assignment options are highlighted in red.
Assigning a function to the thumbwheel
▶ Turn the thumbwheel
- The available thumbwheel assignment options cycle through.
Assigning a function to the front dial
▶ Turn the front dial
- The assignment for the front dial cycles through the available functions.
Saving the assignment and exiting the menu
▶ Press the joystick to the left
or
▶ Tap the shutter button
or
▶ Press the MENU button
WHEN USING AF LENSES
The available functions are listed in the tables below (the factory setting is highlighted in bold).
Photo mode
| Thumbwheel Front dial | ||
| P | Program shiftExposure compensationISO | Program shiftExposure CompensationISO |
| S | Exposure CompensationShutter speedISO | Exposure compensationShutter speedISO |
| A | ApertureExposure compensationISO | ApertureExposure CompensationISO |
| M | ApertureShutter speedISO | ApertureShutter speedISO |
Video mode
| Thumbwheel Front dial | ||
| P | Microphone GainExposure compensationISO | Microphone GainExposure CompensationISO |
| S | Exposure CompensationShutter speedISO | Exposure compensationShutter speedISO |
| A | ApertureExposure compensationISO | ApertureExposure compensationISO |
| M | ApertureShutter speedISO | ApertureShutter speedISO |
CUSTOMIZING THE SETTING WHEELS
The two setting wheels can have function assignments independent of each other. Available functions depend on the selected exposure mode.
▶ Switch to the desired mode (photo or video)
▶ Select Customize Control in the main menu
▶ Select Wheel Assignment (AF lens)
▶ Implementing the desired assignment

WHEN USING MF LENSES
The available functions are listed in the tables below (the factory setting is highlighted in bold).
Photo mode
| Thumbwheel Front dial | ||
| A | MagnificationExposure compensationISO | MagnificationExposure CompensationISO |
| M | MagnificationShutter speedISO | MagnificationShutter speedISO |
Video mode
| Thumbwheel Front dial | ||
| A | MagnificationExposure compensationISO | MagnificationExposure compensationISO |
| M | MagnificationShutter speedISO | MagnificationShutter speedISO |
CUSTOMIZING THE SETTING WHEELS
The two setting wheels can have function assignments independent of each other. Available functions depend on the selected exposure mode.
▶ Switch to the desired mode (photo or video)
▶ Select Customize Control in the main menu
▶ Select Wheel Assignment (MF lens)
▶ Implementing the desired assignment
ROTATION DIRECTION OF THE SETTING WHEELS
You can specify any rotation direction for exposure settings via the setting wheels. You specify the rotation direction, which will result in an exposure reduction (shorter shutter speeds/smaller aperture). The assignments for the two setting wheels are done separately independent of each other in photo and video mode.
THUMBWHEEL
Factory setting: Stop Down→
▶ Switch to the desired mode (photo or video)
▶ Select Customize Control in the main menu
▶ Select Thumbwheel Direction
▶ Select Stop Down → or ← Stop Down
FRONT DIAL
Factory setting: -Stop Down
▶ Switch to the desired mode (photo or video)
▶ Select Customize Control in the main menu
▶ Select Front Wheel Direction
▶ Select Stop Down → or ← Stop Down
JOYSTICK FUNCTIONS (IN SHOOTING MODE)
You can assign various functions to the joystick in photo mode. The settings for AF and MF mode are done separately. See p.110, p. 126 and p. 141 for the various functions.
AF MODE
▶ Select Customize Control in the main menu
▶ Select Joystick
▶ Select AF Mode
▶ Select the desired setting (AF L, AE L, AF L + AE L)
MF MODE
▶ Select Customize Control in the main menu
▶ Select Joystick
▶ Select MF Mode
▶ Select the desired setting
(AFs, AFs + AE L, AFc, AFc + AE L, AE L, Zoom)

Various operating elements can optionally be locked in shooting mode.
Note
- 📁 Appears on screen when a operating element is used while the lock is active.
LOCKING THE SETTING WHEELS
▶ Select Dial Lock in the main menu
▶ Select On/Off
▶ Select Joystick Lock in the main menu
▶ Select On/Off
USER PROFILES
This camera allows the permanent storage of any menu settings, to e.g. access them quickly and easily for recurring conditions/image objects. Six memory slots are provided to store custom settings, plus the factory setting, which is always available and cannot be modified (Default Profile). You can assign names for the saved profiles yourself.
Any profiles configured for the camera can be saved to a memory card for use on another camera. Similarly, profiles saved on a memory card can be transferred to the camera.
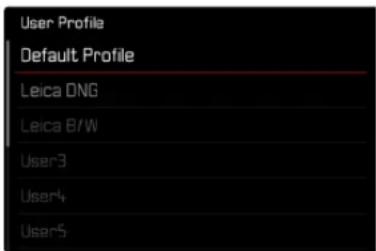
CREATING PROFILES
Saving settings/creating a profile.
▶ Create custom settings for the desired functions via menu control
▶ Select User Profile in the main menu
▶ Select Manage Profiles
▶ Select Save as Profile
▶ Select a memory slot
| Save as Profile | |
| Leica DNG | Used > |
| Leica B/W | Used > |
| User3 | Unused > |
| User4 | Unused > |
| User5 | Unused > |
| User6 | Unused > |
▶ Confirm the selection
Notes
- Existing profiles are overwritten with the latest settings.
- A memory slot can only be deleted via the function Reset Camera described in the section "Resetting the camera to factory settings" (see p. 258).
RENAMING PROFILES
| Rename Profiles | |
| User 1 | Leica DNG » |
| User 2 | Leica B/W » |
| User 3 | User3 » |
| User 4 | User4 » |
| User 5 | User5 » |
| User 6 | User6 » |
▶ Select User Profile in the main menu
▶ Select Manage Profiles
▶ Select Rename Profiles
▶ Select a profile
▶ Enter a name for the profile via the associated submenu keyboard and confirm your input (see p. 65)
• Profile names must be between 3 and 10 characters in length.

APPLY/ACTIVATE PROFILES
Factory setting: Default Profile
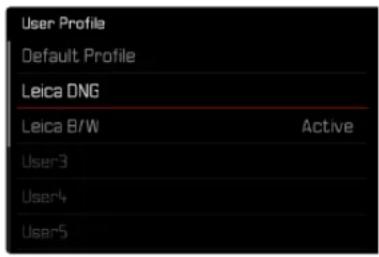
▶ Select User Profile in the main menu
- A list of profile names is displayed.
▶ Select a profile
- The selected profile is marked as Active.
• Free memory slots appear in gray.
EXPORTING/IMPORTING PROFILES TO/FROM THE MEMORY CARD
▶ Select User Profile in the main menu
▶ Select Manage Profiles
▶ Select Export Profiles or Import Profiles
▶ Confirm the selection
Notes
- When importing and exporting, all profile slots are transferred to the card, i.e. including any empty slots. Any existing profiles stored in the camera will be overwritten, during the profile import. Individual profiles cannot be imported or exported.
- Any existing set of profiles will be replaced on the memory card during an export without an acknowledgment prompt.


CAMERA BASIC SETTINGS
The two menu items Language and Date & Time appear automatically when switching the camera on for the first time, after a reset to factory settings (see p. 258), or after a firmware update.
MENU LANGUAGE
Factory setting: English
Available menu languages: German, French, Italian, Spanish, Russian, Japanese, Korean, Traditional or Simplified Chinese
▶ Select Language in the main menu
▶ Select your language
- Aside from a few exceptions, the language will be changed for all information.
DATE/TIME
RECEIVING THE SETTINGS FROM A MOBILE DEVICE
The date and time settings can be automatically received from the mobile device.
Factory setting: On
▶ Select Camera Settings in the main menu
▶ Select Date & Time
▶ Select via Smartphone
- The settings will be re-synched each time the device is paired again. The pairing process is described in the chapter “Leica FOTOS” (see p. 264).
MANUAL SETTINGS
DATE
You can choose one of 3 options for the display sequence.
▶ Select Camera Settings in the main menu
▶ Select Date & Time
▶ Select Date Setting
▶ Select the desired date format
(Day/Month/Year, Month/Day/Year, Year/Month/Day)
▶ Set the date
TIME
▶ Select Camera Settings in the main menu
▶ Select Date & Time
▶ Select Time Setting
▶ Select the desired brightness (12 Hours, 24 Hours)
▶ Set the time
(Select am or pm for the 12-hour format)
TIME ZONE
▶ Select Camera Settings in the main menu
▶ Select Date & Time
▶ Select Time Zone
▶ Select your time zone/current location
- The Greenwich Mean Time offset is shown on the left of the line
- Major cities in the relevant time zones are shown on the right
▶ Select Camera Settings in the main menu
▶ Select Date & Time
▶ Select Daylight Saving Time
▶ Select On/Off
DISTANCE UNIT
The distance can be displayed in meters or in feet (see p. 126). Factory setting: Meter (m)
▶ Select Camera Settings in the main menu
▶ Select Distance Unit
▶ Select the desired setting (Meter (m), Feet (ft))

POWER SAVE MODE (STANDBY MODE)
The camera will switch to the power-saving standby mode after a preset time to extend battery life if this function is activated.
The device has two power save levels.
- Activates device standby mode in 3s/5s/10s/2min/5min/10min
- Automatic LCD panel shutdown (see p. 85)
Factory setting: 2 min
▶ Select Camera Settings in the main menu
▶ Select Power Saving
▶ Select Auto Power Off
▶ Select the desired setting
(Off, 3 s, 5 s, 10 s, 2 min, 5 min, 10 min)
Note
- The camera can be woken from standby mode at any time by pressing the shutter button or by switching the main switch off and on again.
LCD PANEL/VIEWFINDER SETTINGS
The camera comes equipped with a 3.2" liquid crystal color panel, which is protected by a glass cover made of extremely hard and scratch-resistant Gorilla® glass.
The following functions can be configured and used individually:
- Use of the LCD panel and EVF (electronic viewfinder)
- Eye sensor sensitivity
- Brightness
- Color rendering
- EVF Frame Rate
- Automatic LCD panel and EVF shutdown
LCD PANEL/EVF USE
You can preset the situations in which EVF and LCD panel should be used. The displays appearing on screen and in the viewfinder are identical.
Factory setting: Auto
| EVF LCD panel | ||
| Auto | The eye sensor in the viewfinder automatically toggles the camera between LCD panel and EVF. • Shooting • Review • Menu control | |
| LCD | • Shooting • Review • Menu control | |
| EVF | • Shooting • Review • Menu control | |
| EVF extended | Only EVF is used for shooting mode. The eye sensor in the viewfinder automatically toggles the camera between LCD panel and EVF for review and menu control. • Shooting • Review • Menu control | |
▶ Select Display Settings in the main menu
▶ Select EVF LCD
▶ Select the desired setting
Note
- Select EVF if you want to keep the LCD panel switched off (e.g. on dark environments).
EYE SENSOR SENSITIVITY
You can adjust the eye sensor sensitivity to ensure that the change-over functions reliably if you wear eyeglasses.
Factory setting: High
▶ Select Display Settings in the main menu
▶ Select Eye Sensor Sensitivity
▶ Select the desired setting


BRIGHTNESS
You can adjust brightness for best visibility in various lighting conditions. Brightness is set individually for the LCD panel and the viewfinder. Selection occurs via key control or touch control.
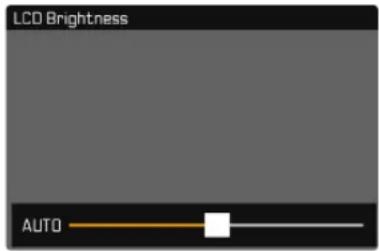
LCD PANEL
▶ Select Display Settings in the main menu
▶ Select LCD Brightness
▶ Select the desired brightness or Auto
▶ Confirm selection
EVF
▶ Select Display Settings in the main menu
▶ Select EVF Brightness
▶ Look through the viewfinder
▶ Select the desired brightness
▶ Confirm selection
Note
- The setting Auto is not available here.
COLOR RENDERING
Color rendering can also be adjusted. Brightness is set individually for the LCD panel and the viewfinder. Selection occurs via key control or touch control.
natural_image
Simple 2D coordinate system with colored axes (no labels or data points)LCD PANEL
▶ Select Display Settings in the main menu
▶ Select LCD Color Adjustment
▶ Select the desired color setting
▶ Confirm selection
EVF
▶ Select Display Settings in the main menu
▶ Select EVF Color Adjustment
▶ Look through the viewfinder
▶ Select the desired color setting
▶ Confirm selection
AUTOMATIC LCD PANEL AND EVF SHUTDOWN
The LCD panel and EVF deactivate automatically to save power. The time until power off can be set.
This setting also affects autofocus; the AF system will be deactivated at the time of automatic shutdown as well. We therefore recommend the off setting if autofocus is to be used in HDMI recordings.
Factory setting: 1 min
▶ Select Camera Settings in the main menu
▶ Select Power Saving
▶ Select All Displays Auto Off
▶ Select the desired setting (Off, 30 s, 1 min, 5 min)
Note
- The top display is not affected by the automatic shutdown.
EVF FRAME RATE
The image frequency of the EVF can be set.
Factory setting: 60 fps
▶ Select Display Settings in the main menu
▶ Select EVF Frame Rate
▶ Select the desired setting (60 fps, 120 fps)
ACOUSTIC SIGNALS
Some functions can be acknowledged with acoustic signals. The following special functions can be configured separately:
- Electronic shutter sound
- AF confirmation
VOLUME
The volume of active signals can be set.
Factory setting: Low
▶ Select Camera Settings in the main menu
▶ Select Acoustic Signal
Select Volume
Select Low/High
ACOUSTIC SIGNALS
This setting specifies, whether the camera shout output general notification signals, e.g. during the delay time of the self-timer or as a warning signal, when the memory card is full.
Factory setting: Off
▶ Select Camera Settings in the main menu
Select Acoustic Signal
▶ Select Acoustic Signals
Select Or

ELECTRONIC SHUTTER SOUND
Factory setting: Off
▶ Select Camera Settings in the main menu
▶ Select Acoustic Signal
▶ Select Electronic Shutter Sound
▶ Select On
AUTOFOCUS CONFIRMATION
A signal sound can be selected for successful AF settings.
Factory setting: Off
▶ Select Camera Settings in the main menu
▶ Select Acoustic Signal
▶ Select AF Confirmation
▶ Select On
SILENT PHOTOGRAPHY
When pictures should be taken as quietly as possible.
▶ Select Camera Settings in the main menu
▶ Select Acoustic Signal
▶ Select Electronic Shutter Sound/AF Confirmation/Acoustic Signals
▶ Select Off for each of these menu items


PHOTO SETTINGS
SENSOR FORMAT
The image data of the entire 35 mm sensor can be used or only a cropped section, which corresponds to the APS-C format. This can be helpful, e.g. when only limited storage capacity remains or a lens developed specifically for APS-C is used.
The max. available resolution is dependent on the setting of the sensor format.
| Sensor format DNG Resolution | |
| 35 mm 8368 x 5584 pixels (46.7 MP) | |
| APS-C 5504 x 3664 pixels (20.2 MP) |
Note
- The setting switches automatically to APS-C when an APS-C-specific lens is mounted.
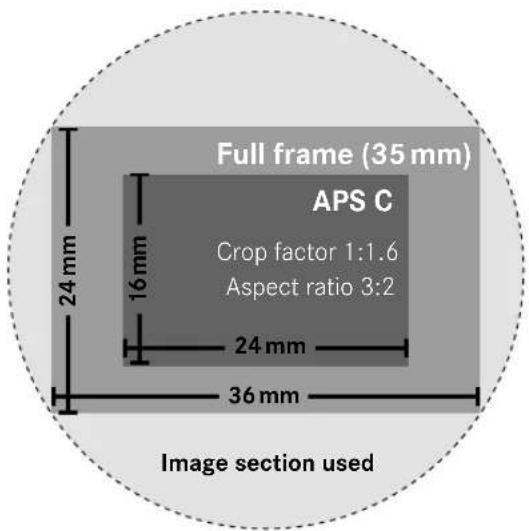
Factory setting: 35 mm
▶ Select Sensor Format in the main menu
▶ Select the desired setting (35 mm, APS C)
- The set sensor format is shown in the header line.
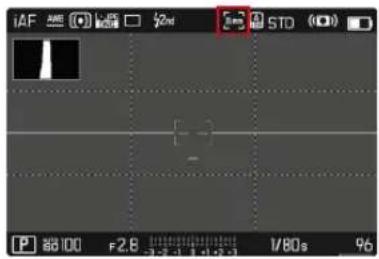
natural_image
Camera LCD screen interface showing settings for AF, shutter speed, and time (no readable text or symbols on the screen)FILE FORMAT
Choose the JPG format JPG or the standardized raw data format DNG (= digital negative). Both can be used individually or simultaneously. When creating JPGs, an initial processing occurs in the camera. Various parameters, including contrast, saturation, black level, or edge sharpness are set automatically. The result is then compressed and stored. The immediate result is an image that is optimized for various uses and a quick preview. For post-processing, on the other hand, DNG images are recommended.
DNG files contain all raw data as recorded by the camera sensor at the time the picture is taken. Special software (e.g. Adobe ^ Photoshop ^ Lightroom ^ or Capture One Pro ^ ) will be needed to display DNG format files or to work with this format. Post-processing will allow exact adjustments of many parameters to your own expectations.
Factory setting: DNG + JPG
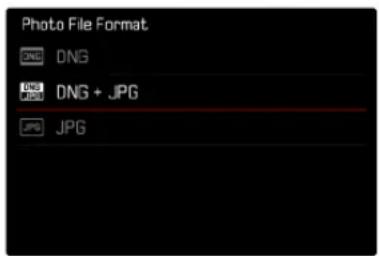
▶ Select Photo File Format in the main menu
▶ Select a format
(DNG, DNG + JPG, JPG)
Notes
- The standardized DNG format is used for the storage of raw image data.
- Where picture data is stored in DNG and JPG format simultaneously, the specified setting for the JPG resolution will be applied to the JPG file.
- The DNG format always uses the highest resolution, no matter what JPG setting is selected.
- The remaining number of frames shown in the LCD panel will not necessarily change after every shooting. That very much depends on the object; very fine image structures result in higher data quantities, while homogeneous surfaces mean less data.


RESOLUTION
The JPG format setting offers 3 image resolution (number of pixels) options. The following file formats are available: L-JPG, M JPG and S JPG. This choice allows an alignment with the intended use and available memory card capacity.
Factory setting: L-JPG
| JPG Settings | |
| JPG Resolution | L-JPG |
| Noise Reduction | Low |
| Film Style | STD |
| iDR | Auto |
▶ Select JPG Settings in the main menu
▶ Select JPG Resolution
▶ Select the desired resolution
The resolution also depends on the selected sensor format. The set sensor format is shown in the header line.
| RESOLUTION Sensor format | ||
| L-JPG | 46.7 MP 20.2 MP | |
| M JPG | 24 MP 10.3 MP | |
| S JPG | 12.2 MP 5 MP | |
ASPECT RATIO
You have a choice of aspect ratios to select in addition to the basic 3:2 (e.g. 1:1). The relevant cropped section will be displayed. Images made in JPG format are saved with the relevant aspect ratio. DNG images will always have the natural sensor format (3:2), the set aspect ratio is only in aid of the image composition. In review mode, DNG images will be displayed with horizontal or vertical auxiliary lines showing the cropped section seen when shooting.
Factory setting: 3:2
▶ Select Photo Aspect Ratio in the main menu
▶ Select the desired setting

FILM STYLE
IMAGE PROPERTIES
One of the many advantages of digital photography is that it is very easy to change essential image properties. The image properties of JPG pictures can be changes slightly using several parameters. These are summarized in pre-configured Film Style profiles.
CONTRAST
The contrast setting, i.e. the difference between light and dark image sections, determines whether an image comes across as “flat” or “brilliant”. Increasing or decreasing this difference impacts on contrast, meaning that some image sections are rendered brighter or darker.
SHARPNESS
The impression of sharpness in a picture is largely determined by edge sharpness, i.e. by how slight the transition area between light and dark is at edges in the picture. Expanding or reducing these areas will therefore change the impression of sharpness.
COLOR SATURATION
The saturation factor in color shots determines, whether colors in the picture appear “pale” and pastel-like or “vivid” and bright. While lighting conditions and weather (e.g. foggy/clear) are a given in terms of shooting conditions, their rendering can be influenced.
HIGHLIGHT/SHADOW
Depending on the exposure selected and the dynamic scope of the object, some details in brighter or darker areas may no longer be clearly visible. The parameters Highlight and Shadow allow differentiated control over very brightly or less brightly lit areas. Where, for example, part of the object is in shadow, a higher setting for Shadow can help brighten these areas to make details more visible. Conversely, existing shadows or particularly bright areas might be additionally emphasized for reasons of image composition. Positive values will brighten the targeted areas, while negative values will darken them.


COLOR PROFILE
3 pre-configured color profiles are available:
Factory setting: Standard
- STD Standard
- VIV Vivid
- NAT Natural
▶ Select JPG Settings in the main menu
▶ Select Film Style
▶ Select a profile
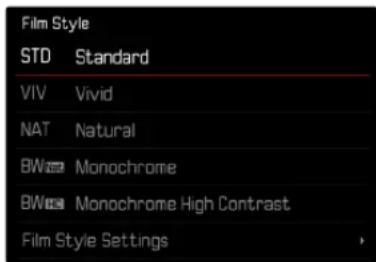
MONOCHROME PROFILE
Two pre-configured monochrome profiles are available:
- BW Monochrome
- Chrome High Contrast
▶ Select JPG Settings in the main menu
▶ Select Film Style
▶ Select a profile
CUSTOMIZING PHOTO PROFILES
These parameters can be adjusted for all available profiles (Saturation only for color profiles). See p. 68 for details on menu operation.
▶ Select JPG Settings in the main menu
▶ Select Film Style
▶ Select Film Style Settings
▶ Select a profile
▶ Select Contrast/Highlight/Shadow/Sharpness/Saturation
▶ Select the desired level
(-2, -1, 0, +1, +2)
▶ Confirm
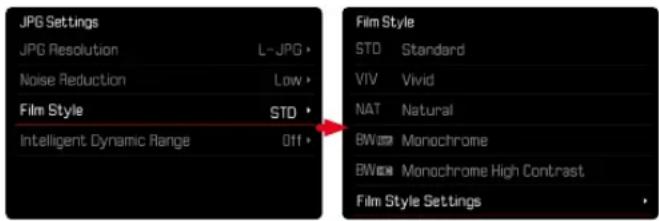
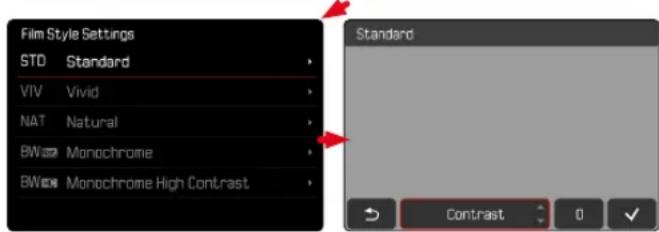
AUTOMATIC OPTIMIZATION
NOISE REDUCTION
NOISE REDUCTION FUNCTION FOR LONG-TERM EXPOSURE
In digital photography, the appearance of flawed pixels that can be white, red, blue or green is referred to as "noise". Image noise becomes more apparent when using higher sensitivities, particularly on uniform dark areas. Long exposure times may cause severe image noise. In order to reduce this annoying phenomenon, the camera will take a second "black picture" (taken with the shutter closed) automatically after a shooting with slow shutter speed and high ISO value. The noise metered in this parallel image is then digitally "subtracted" from the data for the actual image. In such cases the message Noise reduction in progress... will appear with a relevant time value. The doubling of the "exposure" time must be taken into account for long-term exposure times. The camera must not be switched off during that time.
Factory setting: On
▶ Select Long exposure noise reduction in the main menu
▶ Select On/Off
NOISE REDUCTION IN JPG SHOTS
Except when high sensitivities are used, noise is luckily negligible. Nevertheless, noise reduction is a component of data processing when JPG files are generated. On the other hand, since it also has an effect on the focus review, you can optionally weaken or strengthen this noise reduction in comparison to the standard setting.
Factory setting: Low
▶ Select JPG Settings in the main menu
▶ Select Noise Reduction
▶ Select the desired setting (Low, Medium, High)
Note
• This setting will only affect shots in JPG format.


IMAGE STABILIZATION
The less favorable the lighting conditions during shooting, the slower will be the required shutter speeds for correct exposure. Visual image stabilization is a great tool for preventing out-of-focus images due to blurring.
Factory setting: On
▶ Select Image Stabilization in the main menu
Select On/Off
SETTING THE STABILIZATION DIRECTION
For camera pans it can be useful to only correct camera shake in specific directions.
Factory setting: Normal
| Normal | Camera shake in all directions (horizontal, vertical, rotational) will be corrected automatically. |
| Automatic | The camera recognizes the panning direction automatically and corrects orthogonal camera shake autonomously. |
| Vertical Panning | Only horizontal camera shake will be corrected. |
| Horizontal Panning | Only vertical camera shake will be corrected. |
▶ Select Panning Mode in the main menu
▶ Select the desired setting
(Normal, Auto Panning, Vertical Panning, Horizontal Panning)
Note
- Some lenses may not support all settings offered in the camera. Please contact Leica Customer Care if you have any questions (see p. 298).
DARK AREA OPTIMIZATION (IDR)
DYNAMIC RANGE
The contrast range of an object comprises all levels of brightness from the brightest to the darkest point in the image. All levels of brightness can be captured by the sensor, provided the contrast range of the object is lower than the dynamic range of the camera. In case of significant differences of brightness in the object (e.g. shootings of interior spaces with bright windows in the background, shootings with subject elements in shadow or directly lit by the sun, landscapes with dark areas and a very bright sky), the camera with its limited dynamic range will not be able to map the entire contrast range of the object. Information in 'edge areas' will be lost (under and overexposure).
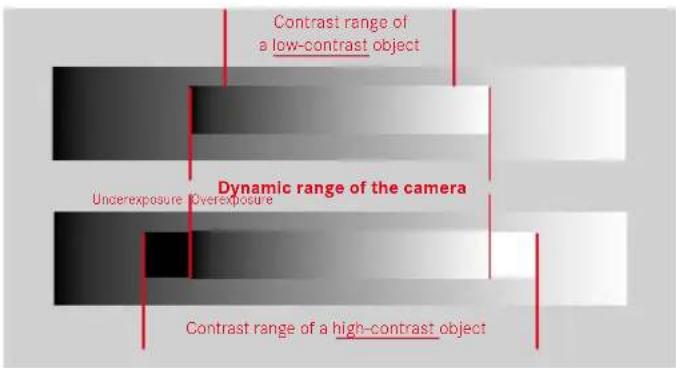
iDR FUNCTION
The IDR (Intelligent Dynamic Range) function allows an optimization of the darker areas. Object details become much clearer. This function will only affect shots in JPG format.
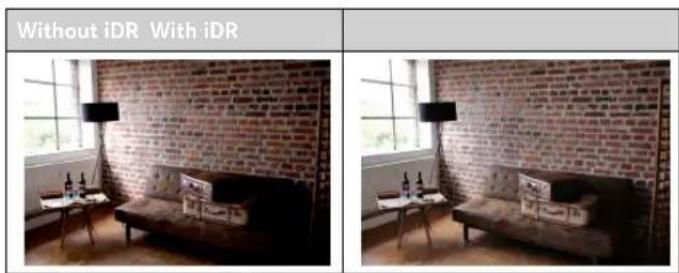
natural_image
Two side-by-side photos showing a room with brick walls, a coffee table, and a wall-mounted monitor; no text or symbols visible.You can specify beforehand if and to what extent you want to optimize darker areas (High, Standard, Low, Off). In the Auto setting, the camera will automatically select the right setting depending on the contrast range of the object. In addition to that setting, the effect also depends on the exposure settings. The function will have the strongest effect in combination with low ISO values and fast shutter speeds. The effect is less pronounced with higher ISO values and/or slower shutter speeds.
Factory setting: Auto
▶ Select JPG Settings in the main menu
Select iDR
▶ Select the desired setting
(Auto, High, Standard, Low, Off)
Note
- The optimization of darker areas will slightly reduce differentiation in very bright areas.


DATA MANAGEMENT
STORAGE OPTIONS
There are a number of options for saving data when two memory cards are inserted.
DNG + JPG on SD1 = SD2 (Backup)
- DNG + JPG on SD1 + SD2 (Standard)
- DNG on SD1 / JPG on SD2 (Split)
| SD1 = SD2(Backup) | All files are saved to SD1 and SD2. One of the cards therefore serves as backup. |
| SD1 + SD2(Standard) | Files are saved to SD1 first, until its capacity is reached. Subsequent files will then be saved to SD2. |
| SD1 / SD2(Split) | Files are saved separately depending on their format: JPG files are saved to SD1 and DNG files to SD2. |
An icon in the status screen denotes the selected setting.
Factory setting: DNG + JPG on SD1 + SD2 (Standard)
▶ Select Storage Options in the main menu
▶ Select the desired setting
(SD1 SD2, SD1+SD2, SD1/SD2)
FORMATTING A MEMORY CARD
Memory cards that have already been in use with this camera will usually not require formatting. An unformatted memory card that is inserted into the camera for the first time must be formatted. We recommend formatting memory cards from time to time, because residual data traces (data pertaining to individual pictures) may reduce the card's memory capacity. The two memory cards will be formatted separately.
▶ Select Format Card in the main menu
▶ Select Format SD Card 1 or Format SD Card 2
▶ Confirm the selection
- The lower status LED will flash during that process.
Notes
- Never switch off the camera while data transfer is in progress.
- All data stored on the memory card will be lost during formatting. Formatting will not be prevented by a deletion protection set for individual pictures.
- All images should therefore be regularly transferred to a safe mass storage medium, e.g. the hard disk of a computer.
- A simple formatting process will initially not irretrievably destroy existing data on the card. Only the directory will be deleted, which means the data will no longer be directly accessible. Data access can be restored with appropriate software. Only data that is overwritten when new data is saved will actually be irretrievable.
- A memory card should be formatted again in the camera if it was formatted in another device, e.g. a computer.
- Contact your retailer or Leica Customer Care for assistance if the memory card cannot be formatted/overwritten (see p. 298).
DATA STRUCTURE
FOLDER STRUCTURE
The files (= pictures) on the memory cards are saved in automatically generated folders. The first three characters signify the folder number (numerals), the last five the folder name (letters). The first folder is assigned the name "100LEICA", the second "101LEICA". A folder will always be created with the next available number; you can have max. 999 folders.
FILE STRUCTURE
The file names in these folders consist of eleven characters. In the factory settings, the first file is named "L1000001.XXX", the second "L1000002.XXX", etc. The first letter can be selected, the "L" from the factory settings denotes the camera brand. The first three characters signify the folder number (numerals). The next four digits denote the sequential file number. Once file number 1000 is reached, then a new folder will be automatically created, in which the file numbering begins at 0001 again. The last three places after the dot denote the file format (DNG or JPG).


Notes
- When using memory cards that were not formatted with this camera, the file numbering will begin with 0001 again. Should the memory card already contain a file with a higher number, then numbering will be continued from that number.
- A relevant message will be displayed on the LCD panel once folder number 999 and file number 1000 are reached, and all numbering must be reset.
- Format the memory card and reset the picture number right after to reset the folder number to 100.
EDIT FILE NAMES
▶ Select Camera Settings in the main menu
▶ Select Edit File Name
- A keyboard submenu is displayed.
- The input line contains the factory setting "L" as the first letter of the file name. Only this letter can be changed.
▶ Enter a letter of your choice (see p. 65)
▶ Confirm
Notes
- The change to a file name applies to all subsequent shots or until a new change is made. The sequential number will not be affected; but it will be reset when a new folder is created.
- During a reset to factory settings, the first letter will always be reset to "L".
- Lower case letters are unavailable.
CREATING A NEW FOLDER
▶ Select Camera Settings in the main menu
▶ Select Reset Image Numbering
• A relevant prompt is displayed.
▶ Confirm the creation of a new folder (Yes) or cancel the new folder (No)
Note
- The name part (first letter) of a new folder created this way remains unchanged. The file numbers in that folder will start again at 0001.
ADDING COPYRIGHT INFORMATION
This camera allows you to enter letters and other characters as a copyright mark for your picture files.
You can enter up to 20 characters of information under 2 headings per shot.
▶ Select Camera Information in the main menu
▶ Select Copyright Information in the submenu
▶ Activate the Copyright function (On)
▶ Select Information/Artist in the submenu
- A keyboard submenu is displayed.
▶ Enter the desired information (see p. 65)
▶ Confirm
LOGGING THE SHOOTING LOCATION (ONLY IN CONNECTION WITH THE LEICA FOTOS APP)
Location information can be sourced from a mobile device in connection with the Leica FOTOS app. Current location information will then be written to the Exif data of the recordings (geotagging).
▶ Activating GPS functions on a mobile device
▶ Activate Leica FOTOS and connect to the camera (see chapter "Leica FOTOS")
▶ Activate geotagging for this camera in Leica FOTOS
Notes
- The use of GPS and associated technologies may be restricted in some countries or regions. Violations will be prosecuted by local authorities. You should therefore contact your travel agent or the embassy of your destination country for relevant information beforehand.
- It will take a few seconds for the Bluetooth connection to establish. The configured shutdown time should be considered when choosing a delay time if shutdown is enabled in the camera.
- All recordings with location information are marked with the geotagging icon in playback mode.


GEOTAGGING STATUS
The status of existing location information is displayed on screen, provided the info bars are displayed and geotagging is enabled. The status screen will always show the current geotagging status. The geotagging status will also be shown in the top display.
| The location information is current(most recent geolocation max. 15 mins prior). | |
| The location information is not necessarily current anymore (most recent geolocation max. 12 h prior). | |
| The available location information is outdated(most recent geolocation more than 12 h in the past).No location data will be written to Exif data. | |
| No icon | Geotagging is deactivated. |
Location information will be continuously updated as long as the camera is connected to Leica FOTOS. The Bluetooth function of the camera and the mobile device must therefore remain enabled to ensure latest information. It is, however, not necessary for the app to be running in the foreground.
DATA TRANSFER
Data can be conveniently transferred to mobile devices via Leica FOTOS. Alternatively, a card reader or USB cable can be used for the transfer.
ABOUT LEICA FOTOS
▶ See chapter "Leica FOTOS" (p. 264)
VIA USB CABLE
The camera supports multiple data transfer options (PTP and mass storage mode). A transfer mode can be permanently selected or chosen every time a connection is established.
Factory setting: PTP
▶ Select Camera Settings in the main menu
▶ Select USB Mode
▶ Select the desired setting
(Mass Storage, PTP, Select on connection)
Notes
- We recommend using a card reader for the transfer of large files.
- The USB connection must not be interrupted while data is being transferred, as the computer or the camera could otherwise “crash” and irreparable damage could occur on the memory card.
- The camera must not be turned off or automatically shut itself down due to a lack of battery power while data is being transferred, as this can cause the computer to crash. For the same reason, the battery must never be removed from the camera while the connection is active.


PRACTICAL DEFAULT SETTINGS
TOUCH AF
Touch AF allows a direct placement of the AF metering field.
Factory setting: On
▶ Select Camera Settings in the main menu
▶ Select Touch AF
▶ Select On/Off
Positioning the AF Metering Field
▶ Tap the LCD panel in the desired position
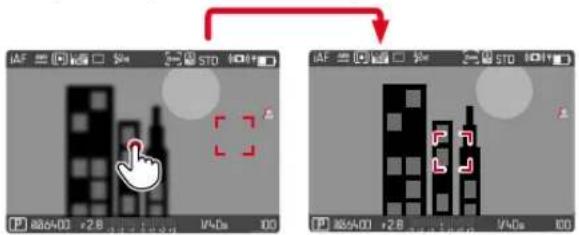
Moving the metering field back to the center of the screen
▶ Double-tap the LCD panel
Notes
- This function is available in conjunction with the following AF metering methods: Spot, Field, Zone, Tracking and Eye/Face/Body Detection.
- With Spot, Field, Zone or Eye/Face/Body Detection metering selected, the camera will immediately focus again automatically. If the metering method tracking is selected, the metering field will remain at the selected position and autofocus commences when the shutter button is tapped.
- The settings described in this chapter apply for both photo and video mode.
TOUCH AF IN EVF MODE
Touch AF is deactivated by default when EVF is in use to prevent any inadvertent altering of the AF metering field. Touch AF can, however, also be used in EVF mode.
Factory setting: Off
▶ Select Camera Settings in the main menu
▶ Select Touch AF in EVF
Select On/Off
Note
- The settings described in this chapter apply for both photo and video mode.
PERSONALIZED LENS SETTINGS EV INCREMENT
The total angle of rotation of the lens used for focusing can be individually adjusted. The setting selected indicates the angle of rotation required to change the focus setting from infinity to the nearest possible distance. Example: for a setting to 90^ , the entire focus range will be run through when the focus ring is turned by one quarter. A full turn of the focus ring will be needed for a setting to 360^ . Smaller values facilitate a faster, larger values a more precise adjustment. A setting to Maximum offers the highest precision.
Unlike the permanent settings, a setting to Standard MF will result in a non-linear dependency of rotation angle and focus setting. The extent of the change depends dynamically on the speed of rotation. With slow rotation, the same angle of rotation (e.g. 45°) causes a smaller change than with fast rotation.
Factory setting: Standard MF
▶ Select Focusing in the main menu
Select MF Setup
▶ Select the desired setting
(Standard MF, 90°, 120°, 150°, 180°, 210°, 240°, 270°, 300°, 330°, 360°, Maximum)
Notes
- The settings Standard MF and Maximum are highly lens-dependent. Maximum may, for example, mean a rotation angle of 360^ or 720^ .
You can choose between 1/2 EV or 1/3 EV graduations. This will allow you to choose between stronger or more subtle effects for your relevant settings.
This setting doesn't just apply for exposure compensation settings. It also specifies the sensitivity of the setting wheels in standard shooting mode, i.e. the increment width with which the shutter speeds and the aperture will be set. A setting to 1/2 will change the shutter speeds and aperture values that much faster each time the setting wheel is moved one click further and the correct setting is achieved quicker. A setting to 1/3 facilitates a more precise setting.
Factory setting: 1/3
▶ Select Camera Settings in the main menu
Select EV Increment
▶ Select the desired setting (1/2, 1/3)


AUXILIARY DISPLAYS
The Leica SL2 has 4 independent info profiles, which contain differing combinations of the available auxiliary displays. The following functions are available:
- Info Bars (see p. 106)
- Grid (only shooting mode, see p. 106)
- Focus Peaking (see p. 107)
- Clipping (see p. 106)
- Level Gauge (only shooting mode, see p. 108)
- Histogram (see p. 109)
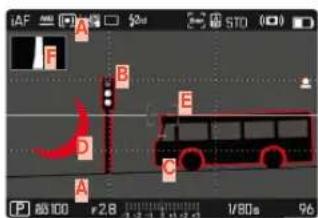
A Info Bars (= header and footer line)
B Grid
c Focus peaking
D Clipping
E Level gauge
F Histogram
INFO PROFILES
Up to 4 independent profiles can be used. The desired function can be selected and adjusted individually for each profile. During operation, the switch between info profiles is done via direct access (see p. 71). In factory settings, that will be the FN button. It allows quick switches between various views.
The following profiles are predefined in the factory settings:
| Profile | Factory settings |
| 1 | Only info bars (header and footer lines) |
| 2 | Full screen view (all auxiliary displays off) |
| 3 | Info Bars, Clipping / Zebra, Focus Peaking, Histogram |
| 4 | Info Bars, Clipping / Zebra, Grid, Level Gauge |
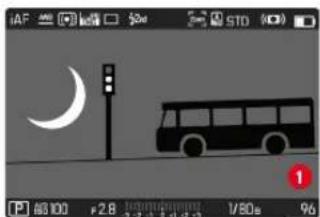
natural_image
Black-and-white photo of a bus parked near a street lamp with a crescent moon in the background (no readable text or symbols)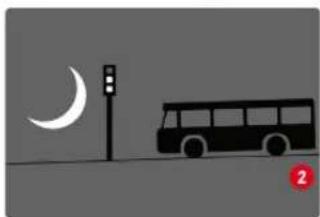
natural_image
Simple illustration of a bus at night with a crescent moon and street lamp (no text or symbols)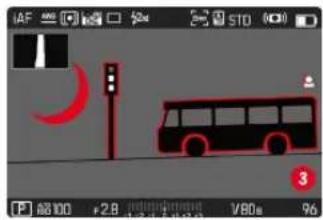
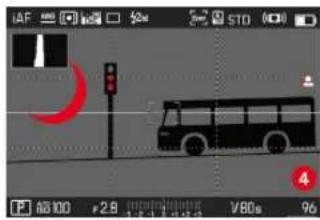
CHANGING THE INFO PROFILES
▶ Press the function button with the Toggle Info Levels assignment
- In factory settings, that will be the FN button.
Note
- The same info profiles are available in review mode as in shooting mode. The actual info profile currently in use, however, is saved separately.
DEACTIVATING INDIVIDUAL INFO PROFILES
You can limit the number of info profiles by activating/deactivating individual profiles. At least one profile must always be active, but that can be an "empty" profile.
▶ Select Camera Settings in the main menu
▶ Select Capture Assistants
▶ Select a profile
Select On/Off
CUSTOMIZING THE INFO PROFILES
▶ Select Camera Settings in the main menu
Select Capture Assistants
Select Setting
▶ Select a profile
▶ Select the desired function
▶ Select the desired setting
| Function Available settings | |
| Info Bars On, Off | |
| Grid | 3 x 3, 6 x 4, Off |
| Clipping / Zebra | Off, Upper limit (value between 200 and 255) |
| Focus Peaking On, Off | Color (Red, Blue, Green, White) & sensitivity (settings apply to all info profiles) |
| Level Gauge On, Off | |
| Histogram On, Off | |
Note
- It is advisable to reserve one info profile as "empty", in which all functions are set to Off. It allows you to temporarily hide all displays. In effect, you get an unobstructed view of the full screen image.


SHOW AVAILABLE
INFO BARS
The header and footer lines show the currently active settings and exposure values. See chapter "Displays" for a full list of the various displays (see p. 28).
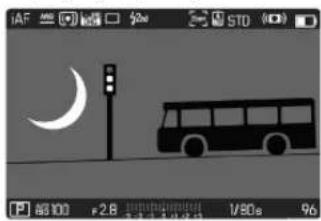
natural_image
Silhouette of a bus at night with a crescent moon and street lamp (no text or symbols)GRID
The grids divide the image frame into multiple fields. They facilitate picture composition and an exact camera orientation. The grid line distribution can be adjusted to fit the object.
natural_image
Pure grid pattern with no text, numbers, or symbols
You can choose one of two grid displays. They divide the image field into 3x3 or 6x4 fields.
CLIPPING
The Clipping display marks very bright image areas. This function is a very easy and exact tool for checking the correct exposure setting. Overexposed areas flash black.
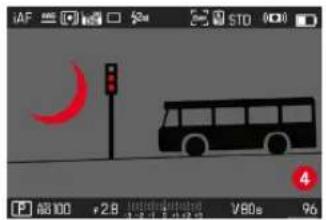
SETTING THE LIMIT VALUE
You can set a threshold value for these displays, i.e. define a value at what degree of overexposure they will appear, so that you can adjust these displays to specific conditions or in line with your own composition ideas.
▶ Select Camera Settings in the main menu
▶ Select Capture Assistants
Select Setting
▶ Select a profile
▶ Select Clipping / Zebra
▶ Select Upper limit
▶ Select the desired value (200 to 255)
FOCUS PEAKING
This assist function highlights the edges of in focus subject elements in color.
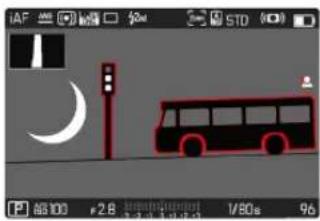
natural_image
Illustration of a bus with a crescent moon and street lamp, no text or symbols presentWhen Focus Peaking is activated, will appear to the right of the frame with a display of the color used.
HIGHLIGHT COLOR
The color can be user-specified. This setting will apply for all info profiles.
Factory setting: Red
▶ Select Focusing in the main menu
▶ Select Focus Aid
▶ Select Focus Peaking
▶ Select the desired setting (Red, Green, Blue, White)
SENSITIVITY
The sensitivity can be additionally adjusted. This setting will apply for all info profiles.
Factory setting: High
▶ Select Focusing in the main menu
▶ Select Focus Aid
▶ Select Peaking Sensitivity
▶ Select the desired setting (Low, High)
Note
- Focus peaking is based on subject contrast, i.e. differences between light and dark. As a result, high contrast subject elements could be marked, even if they are not completely in focus.


LEVEL GAUGE
The integrated sensors of the camera show its orientation. These indicators ensure exact camera orientation along the longitudinal and transverse axes of critical objects, e.g. architecture.
Deviations in relation to the longitudinal axis (i.e. when the camera is tilted up or down in the direction of view) are indicated by a short line in the center of the image (1). Deviations in relation to the transverse axis (when the camera is tilted to the left or right) are indicated by two long lines to the left and right of the image center (2).
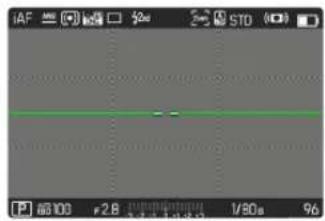
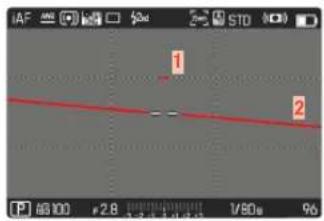
Note
- The camera will switch the aspect of the level gauge autonomously for shoots in vertical format.
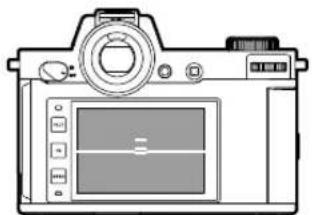
natural_image
Line drawing of a DSLR camera with front panel and control buttons (no text or symbols)Correct alignment
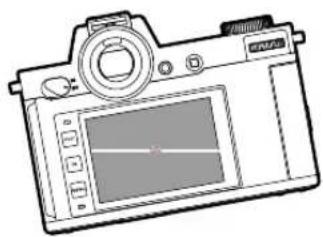
natural_image
Line drawing of a digital camera with screen and lens (no text or symbols)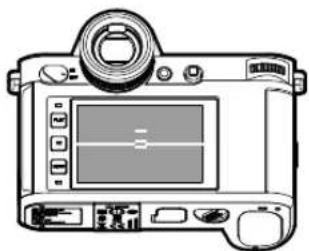
natural_image
Line drawing of a digital camera with screen and lens (no text or symbols)Tilted laterally to the left Tilted downward in the direction of view
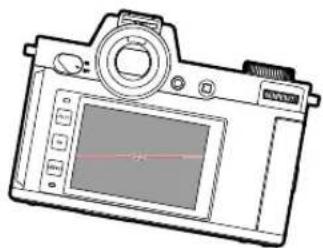
natural_image
Line drawing of a DSLR camera with control panel and display screen (no text or symbols)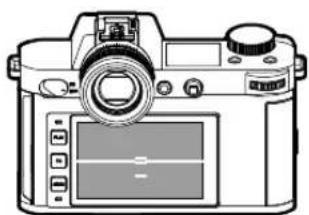
natural_image
Line drawing of a DSLR camera with control panel and display screen (no text or symbols)Tilted laterally to the right Tilted upward in the direction of view
HISTOGRAM
Histogram represents the brightness distribution in the image. The horizontal axis shows the graduated values from black (left) through gray to white (right). The vertical axis corresponds to the number of pixels at each brightness level.
This type of rendering allows an additional quick and easy assessment of the exposure setting.
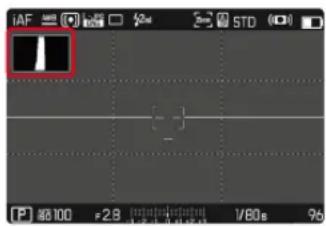
Notes
- The histogram is always based on the brightness displayed; depending on the settings used, it may not represent the final exposure.
- In shooting mode, the histogram should be regarded as a "trend indicator".
- The histogram during rendering may differ slightly from the one during exposure.
- The Histogram always refers to the currently displayed cropped section of the image.
TEMPORARY ACTIVATION/DEACTIVATION OF INDIVIDUAL FUNCTIONS
The following assist functions can be activated/deactivated temporarily:
- Focus peaking
- Clipping
- Assigning the desired assist function to a function (see p. 71)
▶ Press the corresponding function button
- The status of the assist function toggles On/Off.
- A relevant indicator appears in the screen image.
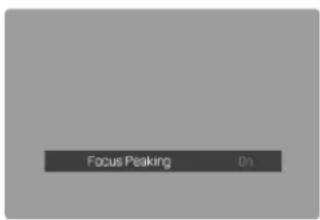
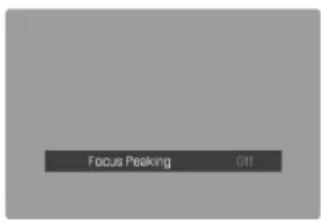
The temporary setting is reset when the user switches to another info profile or the camera is switched off.


ENHANCED LIVE VIEW
Image composition is often difficult in very dark environments (e.g. at night), as the objects are barely visible. The function enhanced Live View will assist the image composition in such situations. The image is enhanced in Live View based on a significant increase in the ISO value and a reduced refresh rate. Picture quality will not be impacted. Due to technical issues, there will, however, be image noise and severe tracer effects in Live View mode. This function will only be active in very low ambient light.
Depending on the selected exposure mode and other settings, Live View will display an exposure preview when the shutter release button is tapped and held (see section "Exposure control" beginning on page 141).
▶ Select Live View Settings in the main menu
▶ Select Enhanced Live View
Select On/Off
Notes
- The function will be inactive even if enhanced Live View is set to On if there is sufficient ambient light.
- In AF mode, the function Enhanced Live View will be intermittently inactive during range metering.
- Focus Peaking will be unavailable when Enhanced Live View is set to On.
MF ASSIST FUNCTIONS
AF ASSIST LAMP
The integrated AF assist lamp allows operation of the AF system in unfavorable lighting conditions. This lamp comes on while metering is performed, provided the function is activated.
Factory setting: On
▶ Select Camera Settings in the main menu
Select AF Assist Lamp
▶ Select On/Off
Notes
• The AF assist lamp illuminates an area of up to approx. 5 m.
- The AF assist lamp switches off automatically, once focusing was successful (AF metering field is green) or has failed (AF metering field is red).
ACOUSTIC AF CONFIRMATION
You can set an acoustic confirmation signal for successful focus metering in AF mode.
Factory setting: Off
▶ Select Camera Settings in the main menu
▶ Select Acoustic Signal
▶ Select AF Confirmation
▶ Select On
▶ Select Volume
▶ Select Low/High


PHOTOGRAPHY
The settings described in this chapter only apply for photo mode. They are therefore part of the photo menu and must always be accessed and configured from within photo mode (see chapter "Camera operation" in the section "Menu Control"). Any menu items of the same name in the video menu are entirely independent of these.
Image data is shown in the top display and on the LCD panel (EVF). For display settings see p. 104. See chapter "Displays" for details about the various displays.
DRIVE MODE
The functions and settings described in the following generally refer to the exposure of individual pictures. In addition to single frame shooting, the Leica SL2 offers a number of other exposure modes. Please read the relevant sections for information about functionalities and setting options.
▶ Select Drive Mode in the main menu
▶ Select the desired function options
| Mode Setting options | / Variants |
| Single frame shooting | Single |
| Continuous shooting(see p. 146) | Speed:- Continuous - Low Speed- Continuous Medium Speed- Continuous - High Speed- Continuous - Very High Speed |
| Interval shooting(see p. 147) | Number of FramesInterval between the shootings (Interval)Delay time (Countdown) |
| Exposure bracketing(see p. 149) | Number of Frames (3 or 5)EV StepsExposure Compensation |
| Multishot(see p. 150) | Delay time (Self Timer)Motion artefacts correction |
| Self-timer(see p. 152) | Delay time:- Self timer 2 s- Self timer 12 s |
FOCUSING
Your Leica SL2 allows automatic as well as manual focusing. There are 3 operating modes and 4 metering methods available for AF photography. Only manual setting options are available for MF lenses.
AF PHOTOGRAPHY
▶ Select the desired AF mode
▶ Position the AF metering field as needed
▶ Tap and hold the shutter button
- Focusing occurs one time (AFs) or continuously (AFc).
- Metering was successful: The AF metering field lights up green.
- Metering was unsuccessful: The AF metering field lights up red.
- Alternatively, focusing and/or exposure settings can be done and saved via the joystick (see "Metering memory lock" on p. 141).
▶ Shutter release
MF PHOTOGRAPHY
▶ Select as focus mode MF (see p. 123)
▶ Use the focus ring to manually focus on the object
▶ Shutter release
Please read the following chapters for more information.
AUTOFOCUS MODES
The following AF modes are available: AFs, AFc and Intelligent AF. The currently selected AF mode is shown in the header line.
Factory setting: Intelligent AF
▶ Select Focusing in the main menu
▶ Select Focus Mode
▶ Select the desired setting (Intelligent AF, AFs, AFc)
INTELLIGENT AF
Suitable for all objects. The camera automatically selects between AFs and AFc.
AFs (single)
Suitable for objects with little or no movement. Focusing is done only once and the setting remains as long as the shutter button is held at the pressure point. That also applies if the AF metering field is pointed at another object.
AFc (continuous)
Suitable for objects in motion. As long as the shutter button is held at the 1st pressure point, focusing is continuously adjusted to the object in the AF metering field.


AUTOFOCUS METERING METHODS
The AF mode offers various metering methods for focusing. A successful focus setting is identified by a green metering field, an unsuccessful one is shown in red.
Factory setting: Multi Field
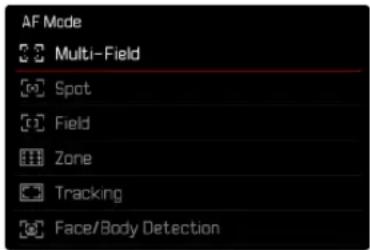
▶ Select Focusing in the main menu
▶ Select AF Mode
▶ Select the desired setting (Multi Field, Spot, Field, Zone, Tracking, Eye/Face/Body Detection)
Notes
• AF focusing can be unsuccessful:
- if the distance to the object is too great (macro mode) or too small - if the object is not sufficiently illuminated
- Touch AF allows a direct placement of the AF metering field. See p. 102 for more information.
MULTI-FIELD METERING
Several metering fields are detected automatically. This function is particularly useful for snapshots.
SPOT/FIELD METERING
Both methods detect only those parts of the object that are within the relevant AF metering fields. The metering fields are indicated by a small frame (field metering) or a cross (spot metering). The very small measuring range for spot metering allows focusing on tiny details of the subject.
The slightly larger measuring range in field metering is less critical for focusing, but still permits selective metering.
These metering methods can also be used for serial exposures in which the part of the object you want to focus on will always be at the same off-center position in the image.
Simply move the AF metering field to another position (see p. 122).
ZONE
With this metering method, subject sections are recorded with a coherent group comprising 5 x 5 fields. This function combines some security for snapshots with the option of aiming at larger objects reliably.
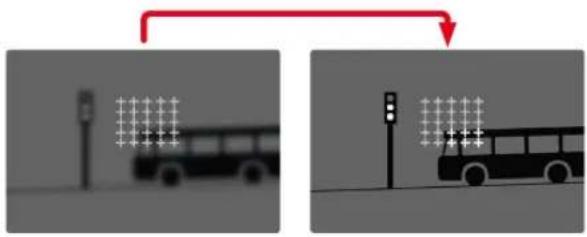
Once the setting has been made, the metering fields are displayed where object sections are displayed in focus.
TRACKING
This field metering variant helps in the capture of moving objects. The focus on the object in the metering field is continuously adjusted, once it is detected.
▶ Aim the metering field at the desired object (by panning the camera shifting the metering field)
▶ Tap and hold the shutter button
or
▶ Press and hold the joystick (provided it was assigned the function AF L or AF L + AE L, see p. 141)
• The camera focuses on the object.
▶ Pan the camera to the desired cropped section
- The metering field "tracks" the saved object and focus is continuously adjusted.
Note
- This metering method focuses continuously, even if the AF mode AFs was set.


START POSITION FOR TRACKING
Factory setting: Center
You can specify the starting point for tracking.
| Center | Center of the screen |
| Last Position | Ending position of the most recent trackingExample:A car drives thought he picture from left to right.The picture is taken on the right edge of the frame. The subsequent measurement is taken at the right edge of the frame. |
| Recall | Starting position of the most recent trackingExample:A car drives thought he picture from left to right.The picture is taken on the right edge of the frame. The subsequent measurement is taken at the left edge of the frame. |
▶ Select Focusing in the main menu
Select AF Setup
▶ Select AF Tracking Start Position
▶ Select the desired setting
(Last Position, Recall, Center)
PERSON DETECTION (FACE DETECTION)
Person detection is an expansion of the face detection feature. In addition to biometric patterns of faces, the camera also detects body patterns and uses them for focusing. Tracking will therefore continue, once a person is detected and measured, even if the face may not be in view at some point. This feature prevents inadvertent "jumps" to other faces if several persons are in the frame.
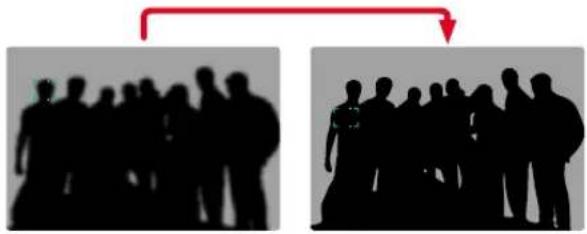
natural_image
Silhouettes of a group of people in front and right, with a red arrow pointing from the left to the right (no text or symbols)When face detection detects an eye, the focus will be on that eye. Should more than one eye be detected, then the user can choose the eye to focus on. The currently selected eye will be highlighted. Additionally, the desired face can be easily selected if there are several faces in the frame.
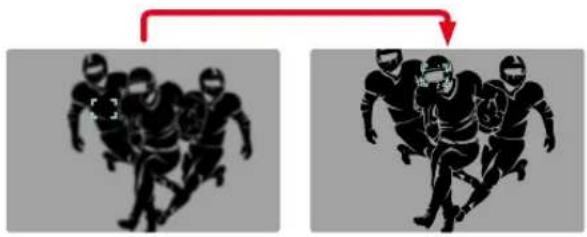
natural_image
Two identical black-and-white illustrations of a running football team, one with a red arrow pointing to the other (no text or symbols)Switching between faces
▶ Press the joystick in the relevant direction
Switching the focused eye
▶ Press the joystick
AF SETTINGS
AF PROFILES
Factory setting: Children / Pets
AF profiles allow optimal adjustments to the autofocus behavior depending on the type of object. You specify the sensitivity of the autofocus response to changes in the object.
There are 4 pre-defined AF profiles:
| AF Profile Typical situation | |
| Children / Pets | Standard movements |
| Team sports | Fast and unexpected change in direction |
| Runner | Constant movements |
| Wildlife | Sudden appearance, change in direction |


Each of these profiles contains three parameters: Depth Sensitivity, Field Movement and Shift in Direction.
| Higher values: Lower values: | |
| Depth Sensitivity | |
| Changes in the distance to the object are tracked immediately | The adjustment is delayed slightly to prevent unwanted focus jumps, should e.g. a person or object pass in front of the subject |
| Field Movement | |
| In case of movement from within the active focus field, the camera will switch to the next focus field as quickly as possible | Gradual switchover to adjacent focus fields to prevent errors due to slight movements |
| Shift in Direction | |
| The focus will immediately track sudden changes to the movement of the object | More robust focusing during steady movements |
ACCESSING THE ACTIVE PROFILE
▶ Select Focusing in the main menu
▶ Select AF Setup
▶ Select AF Profiles
CHANGING THE ACTIVE PROFILE
▶ Accessing the active profile
▶ Press the joystick/thumbwheel
- The currently selected profile is marked as changeable by red lettering and two small white triangles on either side.
▶ Press the joystick left/right
or
▶ Turn the thumbwheel
ADJUSTING THE ACTIVE PROFILE
▶ Accessing the active profile
▶ Select desired parameter
▶ Press the joystick/thumbwheel
▶ Setting the desired value
RESETING THE ACTIVE PROFILE
▶ Accessing the active profile
▶ Press the joystick to the right
▶ Press the joystick/thumbwheel
PRE FOCUS
When the function is active, the camera carries out a continuous depth mapping in realtime before the actual focusing. That allows a pre-identification of possible focus points in a scene. It speeds up the autofocus function significantly.
The pre-focus function is compatible with all AF modes and AF metering methods.
Factory setting: On
▶ Select Focusing in the main menu
▶ Select AF Setup
▶ Select Pre Focus
Select On/Off
FOCUS LIMIT
The focus area can be limited to the macro range. This will speed up automatic focusing considerably.
Factory setting: Off
▶ Select Camera Settings in the main menu
▶ Select Focus Limit (Macro)
Select Or/Off
Notes
- The focusing range differs depending on the lens used (see relevant instructions).
• This function is not available for specific lenses: - lenses mounted via an adapter (e.g. Leica M lenses with L adapter M)
- specific Leica SL lenses


AF QUICK SETTING
AF Quick Setting offers the following functions:
- Quick switches of the AF metering methods
- Changing the metering field size (only Field and Eye/Face/Body Detection)
Which of the two functions will appear first when accessing AF Quick Setting depends on the currently active AF mode.
The screen image will remains visible continuously while settings are being adjusted.
ACCESSING AF QUICK SETTING
▶ Tap and hold the LCD panel
- All auxiliary displays are hidden.
- Red triangles appear at two corners of the metering field if the metering method Field/Eye/Face/Body Detection is set.
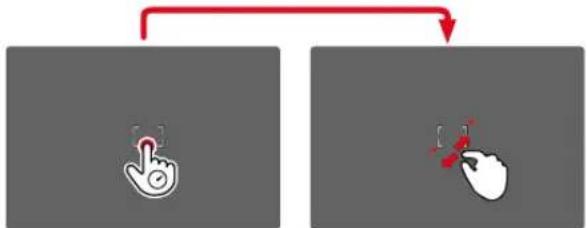
flowchart
graph TD
    A["Hand Press Icon"] --> B["Click Action Icon"]
    C["Hand Click Icon"] --> D["Click Action Icon"]
- In all other AF modes, the AF Mode menu bar will be displayed directly.
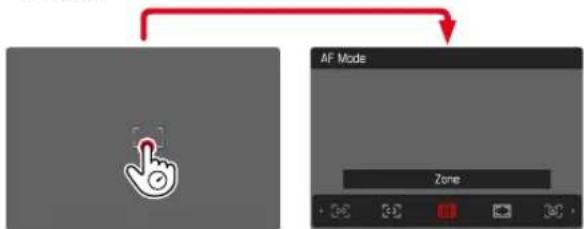
flowchart
graph TD
    A["AF Mode"] --> B["Zone"]
    B --> C["Control buttons: Red, Blue, Green, etc."]
ADJUSTING THE METERING FIELD SIZE
(only Field and Eye/Face/Body Detection)
▶ Turn the thumbwheel
or
▶ Two-finger pinch/spread
- The size of the AF-metering field is adjustable in 3 increments.
CHANGING THE AF METERING METHOD
Should the active AF mode be Field or Eye/Face/Body Detection, then the user will have to access the AF Mode menu bar first:
▶ Turn the front dial
• The AF Mode menu bar appears.
▶ Select the desired metering method
• Alternatively, you can use the front dial for the setting.
- The setting is applied automatically after 3 seconds, the menu bar disappears.
Note
- AF Quick Setting can only be accessed if the function Touch AF is active (see p. 102).
MF ASSIST FUNCTIONS
ENLARGEMENT IN AF MODE
You can access the enlargement function independent of focusing for a better assessment of the settings.
The Magnification function must be assigned to one of the function buttons to use this feature (see p. 71).
Assigning a function to a function button
▶ See p. 71
Accessing the enlargement function
▶ Press the function button
- An enlarged image section appears. The position of the enlargement depends on the position of the AF metering field.
- The rectangle within the frame at the top right represents the current magnification, as well as its position in the displayed cropped section.
- The enlargement starts at the 1st of 3 enlargement increments.
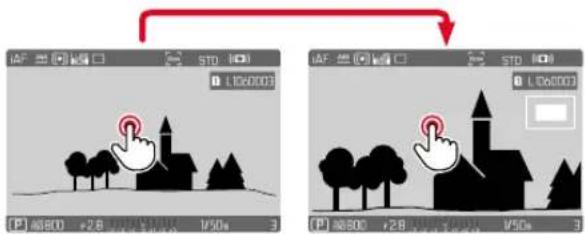
Adjusting the enlargement function
▶ Turn the thumbwheel/front dial
• The image section toggles between magnification factors.
Changing the position of the enlarged section
▶ Swiping will allow you to move the position of an enlarged cropped section
or
▶ Press the joystick in the relevant direction
Exiting the enlargement function
Tap the shutter button
Notes
• The enlargement function remains active until it is exited.
- The most recently magnification function will still be active the next time the feature is accessed.


AF ASSIST LAMP
The integrated AF assist lamp allows operation of the AF system in unfavorable lighting conditions. This lamp comes on while metering is performed, provided the function is activated.
See p. 110 for settings.
ACOUSTIC AF CONFIRMATION
You can set an acoustic confirmation signal for successful focus metering in AF mode (see p. 85).
SHIFTING THE AF METERING FIELD
All AF metering methods permit shifting the AF metering field before focusing.
▶ Press the joystick in the relevant direction
or
▶ Tap the LCD panel in the desired position (while Touch AF is activated)
Notes
- The metering field will remain at the most recently used position for this AF metering method even if the user changes the AF metering method or the camera is switched off.
- The metering fields are joined together when the exposure metering method Spot is combined with the AF metering methods Spot, Field and Zone. Exposure metering will then occur at the point specified by the AF metering field, even if it is moved.
QUICK AF METERING POSITION CHANGES
The function Toggle Focus Point allows seamless changes between two metering positions in photo mode.
The position of the AF metering field is reset to the center of the image when the function is initially accessed. Whenever the function is accessed after that, the AF metering field will jump back and forth between the center of the image and the most recently used focus position.
The function Toggle Focus Point must be assigned to one of the function buttons (see p. 71).
Note
- This function is available in the AF modes Spot, Field, Zone and Tracking.
MANUAL FOCUSING (MF)
Focusing manually may in some situations be a better choice than autofocus.
– the same setting is used for several shoots
- it would take longer to use the metering memory lock function
- the setting is to be kept at infinity for landscape pictures
- poor, i.e. very dark lighting conditions prevent AF operation or would slow it down
▶ Select Focusing in the main menu
▶ Select Focus Mode
▶ Select MF
▶ Turn the focus ring until the desired part of the object is in clear focus
MF ASSIST FUNCTIONS
The following assist functions are available in MF mode.
FOCUS PEAKING
This assist function highlights the edges of in focus subject elements in color.
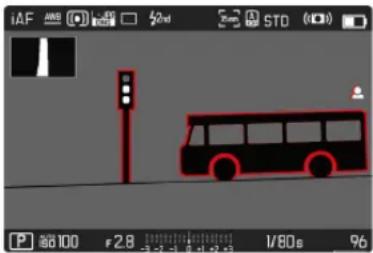
When Focus Peaking is activated, will appear to the right of the frame with a display of the color used. The color can be user-specified. The sensitivity can be additionally adjusted. The activation of this function is controlled via the info profiles (see p.104).
▶ Activate the function
▶ Turn the focus ring to mark the desired subject elements
Note
- Focus peaking is based on subject contrast, i.e. differences between light and dark. As a result, high contrast subject elements could be marked, even if they are not completely in focus.


ENLARGEMENT IN MF MODE
The larger the details of the subject are shown, the better you can assess their sharpness and the more accurately you can focus. This function can be automatically activated during manual focusing or can be accessed independently.
ACCESS VIA THE FOCUS RING
Turning the focus ring will automatically enlarge a image section.
▶ Select Focusing in the main menu
▶ Select Focus Aid
▶ Select Auto Magnification
▶ Select On
▶ Turn the focus ring
- An enlarged image section appears. The position of the enlargement depends on the position of the AF metering field.
- The rectangle within the frame at the top right represents the current magnification, as well as its position in the displayed cropped section.
- The enlargement starts at the 1st of 3 enlargement increments.
Adjusting the enlargement function
▶ Turn the thumbwheel/front dial
Changing the position of the enlarged section
▶ Swiping will allow you to move the position of an enlarged cropped section
or
▶ Press the joystick in the relevant direction
Exiting the enlargement function
Tap the shutter button
or
▶ Decrease the enlargement, until the full image is visible again
Note
- The enlargement will automatically return to normal viewing size about 5 s after the last movement of the focus ring.
FUNCTION BUTTON/JOYSTICK ACCESS
This function can be assigned to a function button or the joystick.
Assigning a function to a function button
▶ See p. 71
Assigning the function to the joystick
▶ Select Customize Control in the main menu
▶ Select Joystick
▶ Select Magnification
Accessing the enlargement function
▶ Press the function button/Joystick
- An enlarged image section appears. The position of the enlargement depends on the position of the AF metering field.
- The rectangle within the frame at the top right represents the current magnification, as well as its position in the displayed cropped section.
- The enlargement starts at the 1st of 3 enlargement increments.
Adjusting the enlargement function
▶ Turn the thumbwheel/front dial
Changing the position of the enlarged section
▶ Swiping will allow you to move the position of an enlarged cropped section
or
▶ Press the joystick in the relevant direction
Exiting the enlargement function
Tap the shutter button
Note
- The enlargement function remains active until it is exited.


DISTANCE DISPLAY
Distance information is shown in the top display during manual focusing.
- Focus Mode MF: when the shutter button is pressed to the first pressure point
- Focus Mode AF: when the shutter button is pressed and held at the first pressure point, followed by a turning of the focus ring
The unit of measure (m or ft) can be selected, see p. 81.
Note
- The focus distance is estimated based on the focus position transmitted by the lens.
USING AUTOFOCUS IN MF MODE
The joystick can be used as needed for automatic focusing. The AF modes AFs and AFc are available.
You can also concurrently carry out exposure metering and save the resulting value (see p. 141).
▶ Select Customize Control in the main menu
▶ Select Joystick
▶ Select MF Mode
▶ Select the desired setting
(AFs, AFs + AE L, AFc, AFc + AE L)
The metering functions are distributed as follows while the joystick is pressed and held:
| Menu settings Joystick Shutter button | ||
| AFs + AE L | Exposure and focus - | |
| AFc + AE L | ||
| AFs | Sharpness Exposure | |
| AFc | ||
▶ Aim at the object
▶ Press and hold the joystick
• The measurement is taken and saved.
- Store more measurements via the shutter button as needed
▶ Select the final image section
▶ Shutter release
ISO SENSITIVITY
The ISO setting covers a range between ISO 50 and ISO 50 000, allowing you to adapt to the relevant situation as required.
There is more leeway for the use of preferred shutter-speed/aperture combinations when setting the exposure manually. You can set priorities within the scope of the automatic setting, e.g. for reasons of picture composition.
Factory setting: Auto ISO
FIXED ISO VALUES
Values between ISO 50 and ISO 50 000 can be selected in 11 increments. The manual ISO setting occurs in full EV increments.
▶ Select ISO in the main menu
▶ Select the desired value
Note
- When high ISO values are used or the image is edited later, image noise, as well as vertical and horizontal stripes may become visible, particularly in larger, evenly lit areas of the object.
AUTOMATIC SETTING
The camera automatically adjusts the sensitivity to ambient brightness and/or to the configured shutter-speed/aperture combination. In conjunction with aperture priority mode, this function extends the range for automatic exposure control. The automatic setting of ISO sensitivity occurs in increments of 1/2EV or 1/3 EV, depending on the selected EV Increment setting.
▶ Select ISO in the main menu
▶ Select Auto ISO
LIMITING SETTING RANGES
A max. ISO value can be set, which will then limit the automatic setting range (Maximum ISO). A max. exposure time can also optionally be configured. There are automatic settings and fixed max. shutter speeds 1/2 s and 1/2000 s available for that purpose.
Separate settings are available for flash photography.
LIMITING ISO VALUES
All values from ISO 100 are available.
Factory setting: 6400
▶ Select Auto ISO Settings in the main menu
▶ Select Maximum ISO
▶ Select the desired value


LIMITING SHUTTER SPEED RANGES
Factory setting: Auto
▶ Select Auto ISO Settings in the main menu
▶ Select Shutter Speed Limit
▶ Select the desired value
(Auto, 1/2000, 1/1000, 1/500, 1/250, 1/125, 1/60, 1/30, 1/15, 1/8, 1/4, 1/2)
LIMITING ISO VALUES (FLASH)
All values from ISO 100 are available.
Factory setting: 6400
▶ Select Auto ISO Settings in the main menu
▶ Select Maximum ISO with Flash
▶ Select the desired value
LIMITING SHUTTER SPEED RANGES (FLASH)
Factory setting: 1/15
▶ Select Auto ISO Settings in the main menu
▶ Select Shutter Speed Limit (Flash)
▶ Select the desired value
(Auto, 1/250, 1/125, 1/60, 1/30, 1/15, 1/8, 1/4, 1/2)
DYNAMIC ISO SETTING
The thumbwheel and front dial can be configured to allow manual ISO settings in real time. Turning the dial will cycle through all setting values available in the ISO menu (including Auto ISO).
FLOATING ISO
This function complements Auto ISO. Light strength changes with many zoom lenses when the focal length is changed. Floating ISO will in this situation adjust the sensitivity in fine graduations and will simultaneously ensure that the selected settings of aperture value and shutter speed remain constant in (semi) automatic exposure modes. This will specifically in video shootings prevent visible jumps in brightness.
Factory setting: On
▶ Select Floating ISO in the main menu
Select On
Note
- Floating ISO can work only if the original ISO setting allows scope for change, i.e. the highest/lowest ISO setting is not already being used. The Floating ISO warning icon will be displayed in that case.
WHITE BALANCE
In digital photography, White Balance ensures neutral color rendering in any light. White Balance relies on the setting made in the camera, which light color is to be rendered as 'white'.
Four methods are available:
- automatic control
- fixed presets
- manual setting via metering
- direct setting of the color temperature
Factory setting: Auto
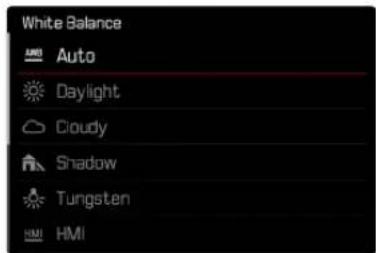


AUTOMATIC CONTROL/FIXED SETTINGS
- Auto: for automatic control, which delivers neutral results in most situations
- Various fixed presets for most frequently encountered light sources:
| Daylight | For outdoor shootings in sunlight |
| Cloudy | For outdoor shootings in cloudy conditions |
| Shadow | For outdoor shootings with the main subject in shadow |
| Tungsten | For indoor shootings with (predominantly) incandescent lamp light |
| HMI | For indoor shootings with (predominantly) light from metal halide lamps |
| Fluorescent (warm) | For indoor shootings with (prevailing) light from fluorescent tubes with warm light color |
| Fluorescent (cool) | For indoor shootings with (prevailing) light from fluorescent tubes with cool light color |
| Flash | For flash photography |
▶ Select White Balance in the main menu
▶ Select the desired setting
MANUAL SETTING VIA METERING
Gray card / Lw Gray card Live View
The variant Gray card is suited best for subjects in which you can clearly identify a neutral gray or pure white area. If not, or should you base your metering on an off-center detail, then Maycard Live View will be a better choice.
Note
- A value configured using this method will remain unchanged (i.e. it will be used for all subsequent photographs) until new measurements are taken or one of the other white balance settings is selected.
GRAY CARD
This metering variant captures all color hues in the metering field and uses these to calculate a mean gray value.
▶ Select White Balance in the main menu
▶ Select ↗ Gray card
• The following appears on the LCD panel:
- the image based on automatic white balance
- a frame in the center of the image
![Gray Card Press [SET] to abort](/content/2026/05/882799/images/bdc64d6e98e5c0a9af1465bcc5a1c11d55fdc5edbc1cdcd5a8e4117756a50670.jpg)
▶ Aim the metering field at a white or neutral gray area
- The screen image changes dynamically in line with the reference area in the frame.
Performing measurement
▶ Shutter release
or
▶ Press the joystick/thumbwheel
• The measurement is taken.
Cancelling measurements
▶ Press the FN button
GRAY CARD LIVE VIEW
This metering variant captures only the color hue metered within the metering field and calculates the mean gray value from it.
▶ Select White Balance in the main menu
▶ Select LV Graycard Live View
• The following appears on the LCD panel:
- the image based on automatic white balance
- a cross in the middle of the image
natural_image
Pure graphical element with no text, numbers, or symbols visibleRepositioning the metering field
▶ Aim the metering field at a white or neutral gray area
▶ Press the joystick in the relevant direction
Performing measurement
▶ Shutter release
or
▶ Press the joystick/thumbwheel
• The measurement is taken.
Cancelling measurements
▶ Press the FN button


DIRECT SETTING OF THE COLOR TEMPERATURE
Values between 2000 and 11500K (Kelvin) can be set directly. That gives you a very wide range, which covers virtually all color temperatures occurring in real life and within which you can adapt color rendering to any light color and your personal preferences with incredible detail.
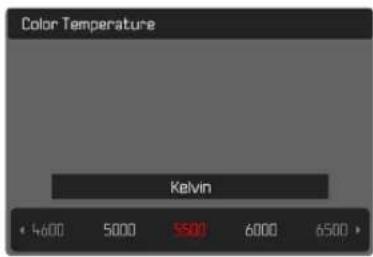
▶ Select White Balance in the main menu
▶ Select Color Temperature
▶ Select the desired value
EXPOSURE
The exposure setting is done dynamically via the two setting wheels. As a rule, the thumbwheel controls the aperture and the front dial the shutter speed. The "free" dial is used for quick access to exposure compensation during semi automatic exposure setting. Function assignments can be modified, see p. 72.
Exposure settings can be done quickly and easily via the status screen.
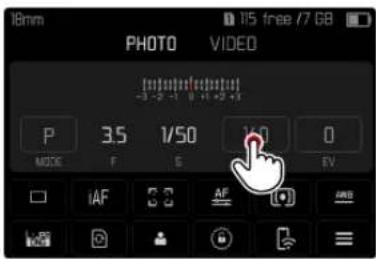
▶ Tap the desired control panel
• The active control panel is highlighted in red.
- A setting band appears instead of the light balance. A dot marks the current setting. The current setting value is displayed above the dot.
Tap the setting band briefly in the desired position, or drag the dot to the desired position
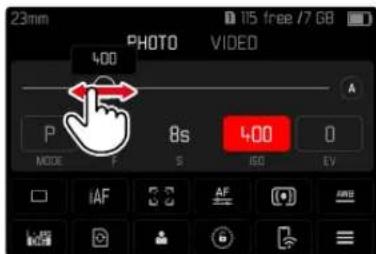
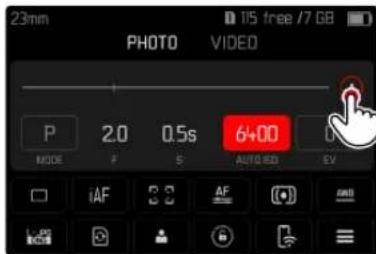
SHUTTER TYPE
The Leica SL2 comes equipped with a mechanical shutter and a purely electronic shutter function. The electronic shutter expands the available shutter area and functions completely noiseless, which may be important in some work environments.
Factory setting: Hybrid
▶ Select Shutter Type in the main menu
▶ Select the desired setting
(Mechanical, Electronic, Hybrid)
| Mechanical | Only the mechanical shutter is used.Working range: 30 min to 1/8000 s. |
| Electronic | Only the electronic shutter function is used.Working range: 60s to 1/40000 s. |
| Hybrid | You can add the electronic shutter function if you need faster shutter speeds than can be achieved with the mechanical shutter.Working range: 30 min to 1/8000 s + 1/8000 s to 1/40000s. |


APPLICATION
The classic shutter sound of the mechanical shutter conveys an auditive feedback. It is well suited for long-term exposures, as well as for shots of moving objects.
The electronic shutter function allows photography with an open aperture in very bright due to very fast shutter speeds. The distinctive “rolling shutter” effect makes it less suitable for moving objects.
Notes
- The electronic shutter function does not allow flash photography.
- The electronic shutter function in combination with fast shutter speeds can result in stripe effects on the images when used with LED or fluorescent tube lighting.
EXPOSURE METERING METHODS
The following exposure metering methods are selectable.
Factory setting: Multi Field

Spot

Center-weighted

Highlight-Weighted

Multi-field
▶ Select Exposure Metering in the main menu
▶ Select the desired metering method
(Spot, Center Weighted, Highlight Weighted, Multi Field)
- The selected metering method is displayed in the header line of the screen image.
Spot metering allows a shifting of the metering field:
▶ Press the joystick in the relevant direction
Notes
- The exposure information (ISO value, aperture, shutter speed and light balance with exposure compensation scale) will help to determine the settings required for correct exposure.
- The most important displays (ISO value, aperture and shutter speed) will also appear in the top display.
SPOT
This metering method is concentrated exclusively on a small area in the center of the image. The metering fields are joined together when the exposure metering method Spot is combined with the AF metering methods Spot, Field and Zone. Exposure metering will then occur at the point specified by the AF metering field, even if it is moved.
CENTER-WEIGHTED
This method considers the entire image field. The subject elements captured in the center will, however, impact on the calculation of the exposure value more so than areas around the edges.
MULTI-FIELD
This metering method is based on the detection of multiple values. These values are used in an algorithm to calculate an exposure value appropriate for a good rendering of the assumed main subject.
HIGHLIGHT-WEIGHTED
This method considers the entire image field. The exposure value will, however, be adjusted to very bright subject elements. That prevents the overexposure of bright subject elements without having to measure them individually. This metering method is particularly useful for objects that are significantly more brightly lit than the rest of the picture frame (e.g. people in a spotlight), or that reflect the light significantly (e.g. white clothing).
| Multi field Highlight weighted | |
 |  |
 |  |
 |  |


EXPOSURE MODES
There are four exposure modes available to adjust the rendering of the object or to create the desired pictorial composition:
- Automatic program (P)
- Aperture priority mode (A)
- Shutter speed priority mode (S)
- Manual setting (M)
SELECTING A MODE
Via the thumbwheel
▶ Press the thumbwheel
- The currently selected mode is shown in the top display. The currently selected mode is marked in red on screen.
▶ Turn the thumbwheel to select the desired mode
- The mode display changes in the top display and on screen. All modes can be reached by turning the wheel in either direction.
- The selected mode will be applied automatically approx. 2 s after the thumbwheel is moved the last time.
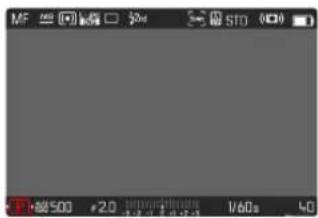

Applying the selected mode immediately
▶ Press the joystick/thumbwheel or
Tap the shutter button
Via the status screen
Tap the control panel
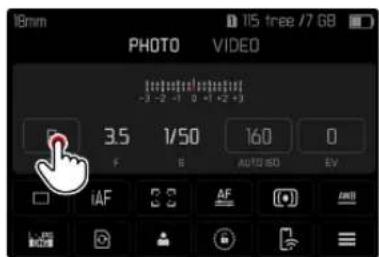
Tap the desired exposure mode
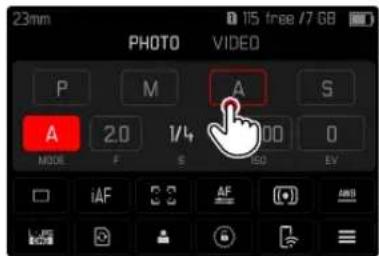
Note
- When using a lens with an aperture ring (e.g. Leica M lenses), only the exposure modes A (aperture priority) and M (manual setting) will be available. Where that is the case, 0.0 is displayed as the aperture value.
FULLY AUTOMATIC EXPOSURE SETTING - P
AUTOMATIC PROGRAM - P
The automatic program mode facilitates fast and fully automatic photography. The exposure is controlled by an automatic shutter speed and aperture setting.
▶ Select the operating mode P (see p. 136)
▶ Tap and hold the shutter button
- Exposure information is displayed at the bottom of the screen. This contains the automatically set value pair of aperture setting and shutter speed.
- All other visible displays of the info bars will be hidden.
▶ Shutter release
or
▶ Adjusting the automatically set value pair (Program shift)
CHANGING THE PRESET SHUTTER SPEED AND APERTURE COMBINATIONS (SHIFT)
Changing the preset values using the Shift function combines the reliability and speed of fully automatic exposure control with the opportunity to vary the speed/aperture combination selected by the camera at any time to fit in with your own ideas and intentions. The overall exposure, i.e. the brightness of the image, remains unchanged. Faster shutter speeds are a good choice for e.g. sports pictures, while longer speeds will offer more depth of field for e.g. landscape pictures.
▶ Turn the thumbwheel to the left/right (right = greater depth of field with slower shutter speeds, left = faster shutter speeds with lesser depth of field)
- Shifted value pairs are marked with an asterisk next to the F. The icon in the top display changes from P to Ps.
Note
- The adjustment range is limited to guarantee correct exposure.


SEMI-AUTOMATIC EXPOSURE SETTING - A/S
APERTURE PRIORITY - A
Aperture priority mode sets the exposure automatically according to the manually selected aperture. This mode is suitable for pictures in which the depth of field is a critical compositional element.
By selecting an appropriately low aperture value, you can reduce the depth of field range, for example to make a face “stand out” in sharp focus against an unimportant or distracting background for a portrait. Conversely, you can use a higher aperture value to increase the depth of field range, so that everything from the foreground to the background will be in full focus in a landscape shot.
▶ Select the operating mode A (see p. 136)
▶ Set the desired aperture value
▶ Tap and hold the shutter button
- Exposure information is displayed at the bottom of the screen. This contains the automatically set value pair of aperture setting and shutter speed.
- All other visible displays of the info bars will be hidden.
▶ Shutter release
Note
- The remaining exposure time after shutter release is counted down in seconds on the display for shutter speeds greater than 2 s.
SHUTTER SPEED PRIORITY - S
Shutter speed priority mode will set exposure automatically according to the manually selected shutter speed. It is therefore particularly suitable for pictures of moving objects, where the sharpness of the movement depicted is a critical picture composition element.
An appropriately fast shutter speed can help to avoid e.g. unwanted motion blurring and will "freeze" the object. Conversely, an appropriately longer shutter speed can help create a better feeling of motion in the image with targeted "tracer effects".
▶ Select the operating mode S (see p. 136)
▶ Select the desired shutter speed
▶ Tap and hold the shutter button
- Exposure information is displayed at the bottom of the screen. This contains the automatically set value pair of aperture setting and shutter speed.
- All other visible displays of the info bars will be hidden.
▶ Shutter release
MANUAL EXPOSURE SETTING - M
The following manual settings for shutter speed and aperture are a good choice:
- to create a special image mood that can only be achieved with a very specific type of exposure
- to ensure a perfectly identical exposure for multiple images with different cropped sections
▶ Select the operating mode M (see p. 136)
▶ Select desired exposure
- The exposure compensation is done using the scale of the light balance.
▶ Tap and hold the shutter button
- Exposure information is displayed at the bottom of the screen.
- All other visible displays of the info bars will be hidden.
▶ Shutter release
Displays on the light balance:
| Correct exposure | |
| under/overexposure by the displayed value | |
| under or overexposure by more than 3 EV | |
Note
- The screen image will show an exposure preview if P-A-S M is selected in the menu item Exposure Preview (after exposure metering, see p. 141).


LONG-TERM EXPOSURE
FIXED SHUTTER SPEEDS
In the modes S and M, the Leica SL2 allows shutter speeds up to 30 minutes. The remaining exposure time after shutter release is counted down in seconds on the display for shutter speeds greater than 1 s.
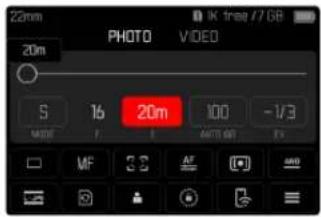
B FUNCTION
Using the Bulb setting in M mode will leave the shutter open as long as the shutter button remains pressed (max. 30 min; depending on ISO setting).
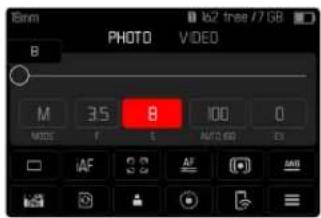
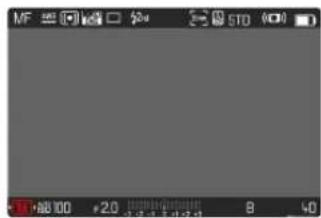
▶ Select the operating mode M (see p. 136)
▶ Turn the front dial in clockwise direction until B is displayed as the shutter speed
Notes
- Image noise becomes more apparent when using higher sensitivities, particularly on uniform dark areas. Long exposure times may cause severe image noise. In order to reduce this annoying phenomenon, the camera will take a second "black picture" (taken with the shutter closed) automatically after a shooting with slow shutter speed and high ISO value. The noise metered in this parallel image is then digitally "subtracted" from the data for the actual image. In such cases the message Noise reduction in progress... will appear with a relevant time value. The doubling of the "exposure" time must be taken into account for long-term exposure times. The camera must not be switched off during that time.
- The maximum selectable shutter speed depends, among other things, on the setting of the menu item Shutter Type, see p. 133.
EXPOSURE CONTROL
EXPOSURE PREVIEW
The brightness of the screen image mirrors the effects of the selected exposure settings when pressing and holding the shutter button on the first pressure point. You can now assess and control the effect of the relevant exposure setting on the image before taking the picture. This will apply as long as the subject brightness and the set exposure don't result in excessively low or high brightness values.
This function can be disabled for the manual exposure setting (M).
Factory setting: P-A-S M
▶ Select Live View Settings in the main menu
▶ Select Exposure Preview
▶ Select P-A-S (only in automatic, aperture priority and shutter speed priority mode) or P-A-S M (also for manual setting)
Notes
- Depending on ambient lighting conditions, the brightness of the screen image may differ from that of the actual pictures, despite the settings described above. The screen image will appear considerably darker than the - correctly exposed - picture. That is particularly the case in long-term exposures.
- The exposure preview will also be displayed if exposure metering is done via another control element (e.g. using the joystick, provided is was assigned the AE L function).
EXPOSURE LOCK
We often want to arrange important subject elements outside the center of the picture for reasons of picture composition and these elements may sometimes be very bright or very dark. Center-weighted metering and spot metering, however, mainly capture an area in the center of the image and are calibrated to an average gray scale value.
In that case, the exposure lock initially allows a metering of the main subject, as well as storing of the relevant settings until the final image section is set. The same applies for focusing (AF-L) in any autofocus mode.
Usually both lock functions (focusing and exposure) are done at the same time with the shutter button. You can, however, divide the lock functions between the shutter button and the joystick or assign both to the joystick. The functions include settings and storage.


AE-L (AUTO EXPOSURE LOCK)
The camera stores the exposure value. The focus can therefore be set on another object, no matter which exposure value is selected.
AF-L (AUTO FOCUS LOCK)
The camera stores the focus setting. That makes it easier to change the image section when focusing is fixed.
AE-L/AF-L
This option allows the camera to store the exposure value and the focus setting when the joystick is pressed and held.
Notes
- An exposure lock doesn't make much sense in conjunction with multi-field metering, because a targeted capture of an individual object element will not be possible.
- A change in the aperture setting after the exposure lock is set will not result in an adjustment of the shutter speed, i.e. the end result would be an incorrect exposure.
EXPOSURE LOCK IN AF MODE
The metering functions are distributed as follows while the joystick is pressed and held:
| Menu settings Joystick Shutter button | ||
| AF L + AE L | Exposure and focus | No function |
| AF L | Sharpness Exposure | |
| AE L | Exposure Sharpness | |
The shutter button will store both measured values if the joystick is not pressed.
Via the shutter button
▶ Aim at the key part of the object or at a similar detail
▶ Tap and hold the shutter button
• The measurement is taken and saved.
▶ Pan the camera to capture the final image section while keeping the shutter button pressed
▶ Shutter release
Via the Joystick
▶ Select Customize Control in the main menu
▶ Select Joystick
▶ Select AF Mode
▶ Select the desired setting
▶ Press and hold the joystick
- The measurement is taken and saved.
▶ Store more measurements via the shutter button as needed
▶ Select the final image section
▶ Shutter release
EXPOSURE LOCK IN MF MODE
In MF mode, only the exposure can be locked via the shutter button. This function can also be assigned to the joystick.
The exposure value is saved via the shutter button independent of the setting if the joystick is not pressed.
Via the shutter button
▶ Aim at the key part of the object or at a similar detail
▶ Tap and hold the shutter button
• The measurement is taken and saved.
▶ Select the final image section
▶ Shutter release
Via the Joystick
▶ Select Customize Control in the main menu
▶ Select Joystick
▶ Select MF Mode
▶ Select AE L
▶ Press and hold the joystick
• The measurement is taken and saved.
▶ Select the final image section
▶ Shutter release


EXPOSURE COMPENSATION
Exposure meters are calibrated for a medium gray scale value, which matches a standard, i.e. average image object. Should the measured image detail not fulfill that requirement, then the a relevant exposure compensation can be effected.
Specifically where several shots are taken in sequence, for example if for a series a slightly lesser or greater exposure is desired for a particular reason, then exposure compensation can be a very useful function: Unlike with exposure lock, the setting remains active until it is reset.
Exposure compensation values can be set in the range ±3 EV. The available values depend on the global setting EV Increment (see p. 103).
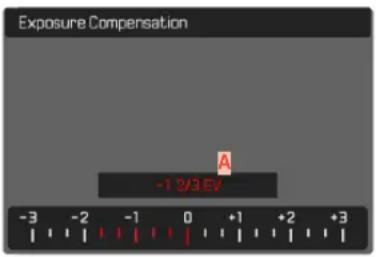
A Set compensation value (marks at 0 = Off)
Using thumbwheel control
This function is assigned to one of the setting wheels in the three (semi) automatic exposure modes and therefore quickly accessible (see p. 72).
Using menu control
▶ Select Exposure Compensation in the main menu
- A scale appears as a submenu item on the LCD panel.
▶ Set the value on the scale
- The set value is displayed above the scale.
- While setting the value, you can see the effect on the screen image, which becomes darker or lighter.
Notes
- The following applies for set compensation values, no matter how they were initially set: They remain effective until they are manually reset to 0, even if the camera is switched off and on again in the meantime.
- The set exposure compensation is indicated by a mark on the exposure compensation scale in the footer line.
- Changes to the EV Increment setting (see p. 103) lead to the cancellation of a compensation that has been set, i.e. in such cases it is automatically reset to D.
DEPTH OF FIELD CHECK
This function simulates the effects of the current aperture and shutter speed settings. It allows the user to assess the exposure and depth of field of the image before shooting. The function is similar to that of the depth-of-field preview button.
- Assigning the function Exposure/DOF Simulation to a function button
▶ Press the function button
- The display cycles through the display options.
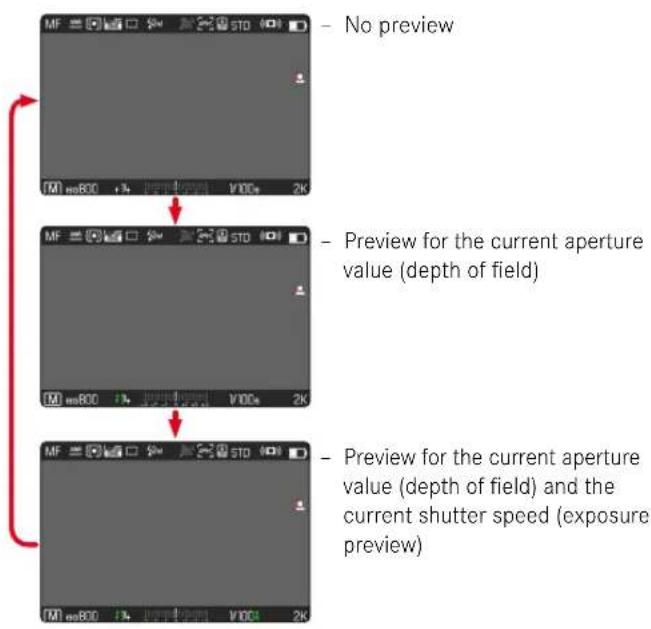
When the exposure information is visible, a green eye symbol next to the values for aperture and shutter speed will display the active depth of field/exposure preview. The relevant unit of measure icon will additionally appear in green.


SHOOTING MODES
CONTINUOUS SHOOTING MODE
The camera is set to single shots by default (Single). Series of shots can also be created to e.g. capture motion sequences at various stages.
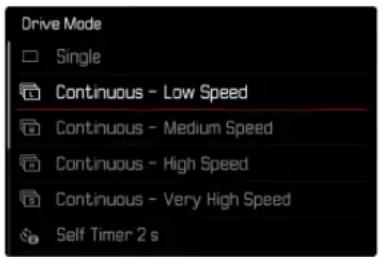
▶ Select Drive Mode in the main menu
▶ Select the desired setting
(Continuous - Low Speed, Continuous Medium Speed, Continuous - High Speed, Continuous - Very High Speed)
Once you have finalized your settings, the camera will do continuous shootings as long as you keep the shutter button pressed down fully (and you have sufficient space on your memory card).
Notes
- We recommend deactivating the preview mode (Auto Review) when using this function.
-
The specified picture sequence stated in the technical information refers to a default setting (ISO 200, JPG format L-JPG). The picture sequence may differ in conjunction with other settings or depending on the picture content, White Balance setting and the memory card used.
-
Regardless of how many frames were taken in a series, the last picture in the series or the last image in the series or the last image saved on the memory card while the saving process is ongoing will be displayed first in both review modes.
- Continuous shooting is not possible if a flash is used. Only a single picture will be taken if the flash function is activated.
- Continuous shooting mode is not available in combination with the self-timer function.
- The buffer memory of the camera only allows a limited number of frames in series and in the selected exposure frequency. The exposure frequency is reduced, once the capacity limit of the camera's buffer memory is reached. This slow-down is due to the time required to transfer the data from the buffer memory to the card. The remaining number of exposures is displayed at the bottom right.
- Continuous - Low Speed/Continuous Medium Speed: For the modes AFs, AFc and MF, the exposure and white balance settings are done individually for every shooting. Focusing is done additionally in the modes AFs and AFc.
- Continuous - High Speed/Continuous Very High Speed: In the modes AFs, AFc and MF the exposure, focus and white balance settings specified for the first shoot will be applied to all subsequent shoots.
INTERVAL SHOOTING
This camera allows you to automatically capture motion sequences over extended periods of time using the interval shooting function. You specify the number of frames, the intervals between shots, and the start time of the series.
When applying exposure and focus settings, keep in mind that conditions may change during the course of the operation.
SPECIFYING THE NUMBER OF FRAMES
▶ Select Drive Mode in the main menu
▶ Select Interval Shooting
▶ Select Number of Frames
▶ Enter the desired value
SPECIFYING THE INTERVALS BETWEEN SHOTS
▶ Select Drive Mode in the main menu
▶ Select Interval Shooting
▶ Select Interval
▶ Enter the desired value
SETTING THE DELAY TIME
▶ Select Drive Mode in the main menu
▶ Select Interval Shooting
▶ Select Countdown
▶ Enter the desired value
Getting started
▶ Press the shutter button
- The remaining time until the next shoot and its number is displayed at the top right.
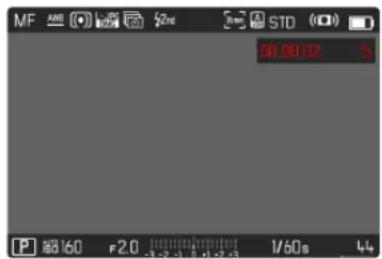
- The camera will switch off automatically between shoots. Tapping the shutter button reactivates the camera.
Cancelling a running series of shots
▶ Press the joystick
- A small menu appears.
▶ Select End
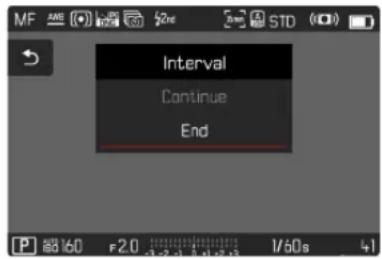


Notes
- The use of autofocus in interval shooting may result in not all exposures having their focus on the same object.
- Interval shooting over an extended period of time in a cold location or in a place with high temperature and humidity may result in malfunctions.
- Interval shooting will be interrupted or canceled in the following situations:
- if the battery is depleted
- if the camera is switched off
Make sure to check the battery for sufficient charge. - Interrupted or canceled interval shooting can be resumed by switching the camera off, replacing the battery or memory card as needed and then switching the camera back on. A prompt will be displayed on screen if the camera is switched off and on again while the Interval Shooting shooting function is active.
- The interval function remains active after a picture series is completed, and also after the camera is switched off and on again, until another shooting mode (Drive Mode) is set.
- Availability of the interval function does not mean that the camera is suitable for use as a monitoring device.
- Regardless of how many pictures were taken in a series, the last picture in the series or the last picture in the series or the last picture saved on the memory card while the saving process is ongoing will be displayed first in both review modes.
- The pictures of an interval shooting are marked with 📋 in review mode.
- The camera may under some circumstances be unable to take good pictures. That may happen if, for example, focusing was unsuccessful. In that case, the camera will not take a picture and the series will continue with the next interval. The message Some Frames are dropped appears on screen.
EXPOSURE BRACKETING
Many attractive objects are rich in contrast, which means they have very bright and very dark areas. The image effect can be dramatically different, depending on which of these areas you choose to align your exposure with. The automatic bracketing function in aperture priority mode allows you to produce several alternatives with graduated exposure values and varying shutter speeds. You can then select the picture you like best or use relevant picture editing software to calculate an image with a particularly broad contrast spectrum (HDR).
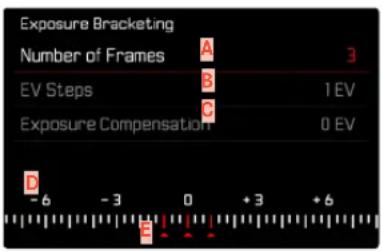
A Number of frames
B Exposure difference between shots
c Exposure compensation
D Light value scale
Exposure values of the images marked in red (The scale will be offset by the relevant value if exposure compensation is set concurrently.)
You can select the desired number of frames (3 or 5). The exposure difference, which can be set via EV Steps, can be up to 3 EV. The available values depend on the global setting EV Increment (see p. 103).
▶ Select Drive Mode in the main menu
▶ Select Exposure Bracketing
▶ Select the desired number of frames under Number of Frames in the submenu
▶ Select the desired exposure offset under EV Steps in the submenu
▶ Select the desired Exposure Compensation value in the submenu
- The marked exposure values change positions according to the settings selected. In the case of exposure compensation, the scale also shifts.
- The selected exposure compensation value will be applied to the entire series of shots.
▶ Shutter release


Notes
- 📄 appears on the LCD panel if the bracketing function is activated. You can watch the effect of the function on screen while the pictures are taken (brighter or darker).
-
Depending on the exposure mode, the exposure gradations are produced by changing the shutter speed and/or aperture value:
-
Shutter speed (A/M)
- Aperture (S)
-
Shutter speed and aperture value (P)
-
The picture sequence: underexposure/correct exposure/overexposure.
- The working range for automatic bracketing may be limited depending on the available shutter-speed/aperture combination.
- With automatic ISO sensitivity control enabled, the sensitivity calculated by the camera automatically for the raw picture will also be applied to all other shots in the series, i.e. the ISO value will not change during bracketing. This may mean that the slowest shutter speed specified under Shutter Speed Limit is exceeded.
- The focus range for automatic bracketing may be limited (depending on the originally set shutter speed). The specified numbers of frames will be taken regardless. Several shots in a series may consequently have the same exposure values.
- The function remains active until another function is selected from the Drive Mode submenu. If no other function is selected, another bracketing is taken each time the shutter button is pressed.
MULTISHOT
In multishot mode, up to 8 individual images are taken with a very small offset. To do so, the sensor is moved minimally between the individual shooting (by less than a pixel width). The individual images are then merged into a single shot with extremely high resolution (187 MP) and a standard size DNG image is additionally saved.
Multishot images are highly sensitive to camera shake. It is therefore recommended to place the camera on a tripod.
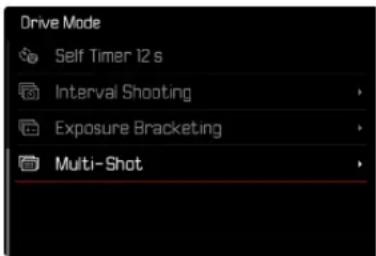
▶ Select Drive Mode in the main menu
▶ Select Multi Shot
SETTING THE DELAY TIME
Factory setting: 2 s
▶ Select Drive Mode in the main menu
▶ Select Multi Shot
▶ Select Self Timer
▶ Select the desired setting (Off, 2 s, 12 s)
MOTION ARTEFACTS CORRECTION
As multiple shots are taken in series, any movement in the frame can result in ghost images. These artefacts are automatically corrected in factory settings. This function can also be deactivated to increase camera performance.
Factory setting: On
▶ Select Drive Mode in the main menu
Select Multi Shot
▶ Select Motion artefacts correction
▶ Select On/Off
Notes
- A multishot images will not be created if motion artefacts correction fails. The "standard" DNG image will, however, remain intact.
- A deactivation of the motion artefacts correction can further improve image sharpness for completely immobile objects.
- This function is not available in conjunction with APS-C lenses and in some cases with some lenses attached via adapter.
- The following limitations apply when using Multi Shot: Exposure time ≤ 1 s, aperture value ≤ F16, ISO value ≤ 3200.
- The electronic shutter function is always used for multishot shootings. The multishot function remains deactivated when the Shutter Type is set to Mechanical.
- Multishot shootings are not possible if a flash is used.
- The multishot function creates very large image files. Sufficient storage space on the memory card is essential.
- The message Vibration detected. Ensure a robust, level surface. appears in the display if the camera-internal sensors detect movement.


SELF-TIMER
The self-timer function allows taking pictures with a preset time delay. We recommend that the camera is placed on a tripod.
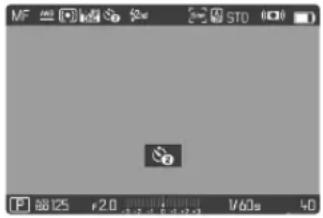
▶ Select Drive Mode in the main menu
▶ Select Self timer 2 s/Self timer 12 s
▶ Shutter release
- The remaining time until exposure is counted down on screen. The self-timer LED at the front of the camera counts down the delay time. It flashes slowly during the first 10 s, then fast for the last 2 s.
- The self-timer delay time can be canceled at any time by taping the shutter button; the relevant settings remain intact.
Notes
- Exposure metering is done first; in autofocus mode, focusing is first. Only then will the delay time commence.
- The self-timer function is only available for single frame shootings.
- The function remains active until another function is selected from the Drive Mode submenu.
Leica SL2 allows a transparent overlay over previous shots as an image composition tool. That way, objects can be recorded from the exact same position at different times, or various objects can be aligned exactly against the same background in multiple shooting sessions. The transparent overlay image will not be visible in the finished image.
One usage scenario would be the creation of an image series in front of a tree across an entire year. The precise alignment of the image would also allow the creation of a time lapse shooting.
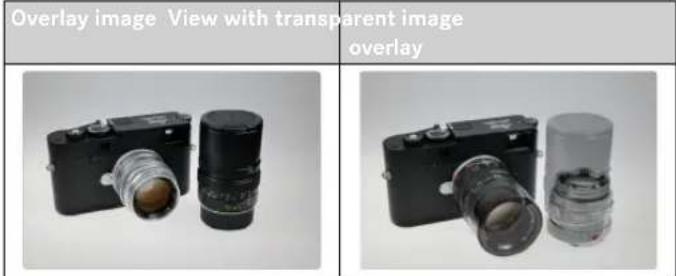
TRANSPARENCY
The transparency of the overlay image can be adjusted in line with e.g. lighting conditions.
▶ Select Image Overlay in the main menu
Select Transparency
Select High/Low
IMAGE SELECTION
Any image from the memory card can be selected for the image overlay.
▶ Select Image Overlay in the main menu
▶ Select Choose Overlay Image
• The Image Selection display appears.
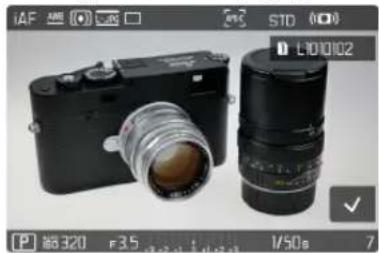
natural_image
Black and silver photo of a camera with lens, shown in a editing interface (no readable text or symbols on the camera body)- In Image Selection view, all recorded images appear in full screen mode. An overview of all images in thumbnail size is not available. The info displays can be accessed as before.
Note
- It may not be possible to render files with this camera that were not recorded with this device. The same applies to the Overlay function.


Browsing through the images
▶ Press the joystick left/right
or
▶ Turn the thumbwheel
or
▶ Swipe to the left or right
Selecting a recorded image
▶ Press the joystick/thumbwheel
or
▶ Directly select the control element "Confirm"
Resetting the function when switching off the camera
The function settings can optionally be reset when switching off the camera.
▶ Select Image Overlay in the main menu
▶ Select Reset on Turn Off
▶ Select On/Off
- The image selection and the setting for Use Overlay Image will remain intact after the camera is switched off if Off is selected.
ACTIVATING THE FUNCTION
▶ Select Image Overlay in the main menu
▶ Select Use Overlay Image
▶ Select Or/Off
FLASH PHOTOGRAPHY
The camera determines the necessary flash intensity by firing one or more pre-flashes before taking the actual picture. The main flash fires immediately after, i.e. during exposure. All factors influencing exposure (e.g. filters, aperture settings, distance to the main subject, reflective ceilings, etc.) are automatically considered.
COMPATIBLE FLASH UNITS
The entire scope of functions described in this instruction manual, incl. TTL flash metering, is available only for Leica system flash units like the SF 40. Other flash units, which only have a positive center contact, can be safely fired via the Leica SL2, but cannot be controlled via the camera. Correct function cannot be guaranteed when using any other flash unit.
Note
- When using flash units that are not specifically designed for the camera and can therefore not automatically switch over the white balance of the camera should be used in the flash setting.
Important
- The use of incompatible flash units with your Leica SL2 may result in irreparable damage to the camera and/or the flash unit.
Notes
- A flash unit that is not ready to flash may cause incorrect exposures or error messages.
- Studio flash systems may have a very long flash firing duration. It may therefore be advantageous to select a slower shutter speed than 1/180 s when using such a system. The same applies for RF-controlled flash firing for so-called “off-camera” flashes, as the transmission time may cause a delay.
- Continuous shooting and automatic bracketing with flash are not available.
- Multishot shootings are not possible if a flash is used.
- Use a tripod to prevent blurring at slow shutter speeds. Alternatively, you can select a higher sensitivity.
- Depending on the setting selected in the menu, the camera may not support slower shutter speeds, because an increase in ISO sensitivity takes priority.

ATTACHING THE FLASH UNIT
▶ Switch off the camera and flash unit
▶ Slide the foot of the flash unit all the way into the accessory shoe and use the clamping nut (where available) to secure it against accidental movement
- Movement inside the accessory shoe can interrupt required contacts and therefore cause malfunctions.
DETACHING THE FLASH UNIT
▶ Switch off the camera and flash unit
▶ Detaching the flash unit
FLASH EXPOSURE METERING (TTL METERING)
The camera offers a fully automated, camera-controlled flash mode in conjunction with system-compatible flash units (see p. 155) and for the auto modes aperture priority and manual setting.
In aperture priority mode and with manual setting, the camera furthermore allows the use of other interesting flash techniques like flash synchronization and firing with slower shutter speeds than the max. sync time.
The camera additionally communicates the sensitivity setting to the flash unit. The flash unit can use this information to automatically adjust its range data, provided the device comes with these displays and the aperture setting selected on the lens is also entered manually on the flash unit. The ISO sensitivity setting cannot be altered via the flash unit on system-compatible units, because the information is received from the camera.
SETTINGS ON THE FLASH UNIT
| Operating mode | |
| TTL | Automatic control by the camera |
| A | SF 40, SF 60:Automatic camera control, no flash exposure compensationSF 58, SF 64:Control via the flash unit using a built-in exposure sensor |
| M | The flash exposure must be set to an output level to match the aperture and shutter speed settings determined by the camera. |
Notes
- Set the flash unit to TTL mode to allow automatic control of the unit by the camera.
- When set to A, objects with above or below average brightness may not be exposed correctly.
- Please read the relevant manual provided with third party flash units regarding their various operating modes.
FLASH CONTROL
The settings and functions described in the following sections only apply to settings and functions available in this camera and in system-compatible flash units.
SYNC POINT
Flash exposures are lit by two light sources:
- existing light from the environment
- the additional flash
Any subject elements lit primarily by the flash will almost always be rendered in perfect focus by the short burst of light, provided the focus is set correctly. All other subject elements in the same frame lit by ambient light or lit from within will be rendered with varying degrees of sharpness. Whether or not these object elements will be rendered in sharp focus or blurred, as well as the degree of “blurri-ness” depends on two interdependent factors:
- the shutter speeds
- the speed of movement of the subject elements or camera during shooting
The longer the shutter speed and the faster the motion, the greater the difference between the two superimposed partial images.


A flash is usually fired at the start of exposure (Start of Exp.). This may result in apparent contradictions, e.g. the picture of a vehicle being overtaken by its own light trail. This camera allows you to synchronize the flash firing with the end of exposure (End of Exp.). The sharp image will in this case be a rendering of the end of the captured motion. This flash technique creates a more natural impression of movement and dynamics in the image.
This function is available with all camera and flash unit settings.
Factory setting: End of Exp.
▶ Select Flash Settings in the main menu
▶ Select Flash Sync
▶ Select the desired setting (Start of Exp., End of Exp.)
- The set sync point is shown in the header line.
Notes
- Do not use sync cables that are longer than 3 m.
- When using the flash with faster shutter speeds, a difference between the two flash firing points will be barely discernible or only noticeable for very fast movements.
FLASH RANGE
The usable flash range depends on the aperture and sensitivity values set manually or calculated by the camera. It is important to ensure that the subject is within the relevant flash range for sufficient illumination. A permanent setting to the shortest available shutter speed for flash mode (sync time) may often result in unnecessary underexposure of those subject elements that are not lit sufficiently by the flash.
This camera allows the fine tuning of the shutter speed used in flash mode in combination with aperture priority depending on the conditions of the object or your own pictorial composition ideas.
Factory setting: 1/15
▶ Select Auto ISO Settings in the main menu
▶ Select Shutter Speed Limit (Flash)
▶ Select the desired value
(Auto, 1/250, 1/125, 1/60, 1/30, 1/15, 1/8, 1/4, 1/2)
FLASH EXPOSURE COMPENSATION
This function can be used to selectively reduce or enhance flash exposure regardless of ambient light, e.g. to brighten the face of a person in the foreground when taking a picture outdoors in the evening while retaining the same general lighting mood.
Factory setting: EV
▶ Select Flash Settings in the main menu
▶ Select Flash Exp. Compensation
- The submenu displays a scale with a red setting mark. The function is deactivated if the value is set to .
▶ Set the value on the scale
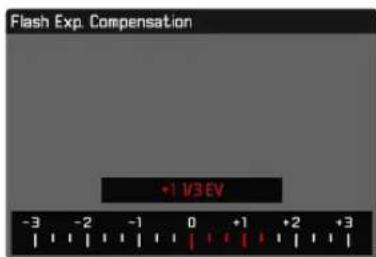
- The set value is displayed above the scale.
- The available values depend on the global setting EV Increment (see p. 103).
Notes
- The following applies for set compensation values, no matter how they were initially set: They remain effective until they are manually reset to ☐, even if the camera is switched off and on again in the meantime.
- Changes to the EV Increment setting (see p. 103) lead to the cancellation of a compensation that has been set, i.e. in such cases it is automatically reset to D.
- A compensation value configured on the camera will be overruled when a relevantly equipped flash unit is attached, e.g. a Leica SF 60 and a compensation value is entered on that flash unit.
- The menu item Flash Exp. Compensation can only be used in conjunction with flash units on which the compensation value cannot be set manually (e.g. Leica SF 26).
- A brighter flash illumination with Plus compensation will require a greater flash intensity. Flash exposure compensation will therefore impact on the flash range: A Plus correction will decrease it, a Minus correction will increase it.
- An exposure compensation set on the camera will only affect the measurement of ambient light. If a simultaneous TTL flash exposure metering compensation is desired in flash mode, then it must be additionally set on the flash unit. (Exception: On the Leica SF 26, the compensation value must be set on the camera via menu control.)


FLASH PHOTOGRAPHY
▶ Switch on the flash unit
▶ Set the desired guide number control mode (e.g. TTL or GNC = Guide Number Control) on the flash unit
▶ Switch the camera on
▶ Set the desired exposure mode, shutter speed and/or aperture setting
- It is imperative to take note of the shortest flash sync speed, as it determines whether a "normal" flash or an HSS flash is fired.
- Tap the shutter button before each flash exposure to activate exposure metering
- The flash unit may not fire if this step is missed by pressing the shutter button down completely and skipping these settings.


REVIEW MODE
There are two completely independent review functions available:
- short-term rendering directly after shooting (Auto Review)
- normal review mode, in which the stored mages can be viewed and managed for any length of time
The switchover between shooting and review mode, as well as most other actions can be completed using gesture or key control. Please see p.55 for more information about the available gestures.
Notes
- Recorded pictures are not automatically rotated in review mode to utilize the full screen area.
- It may not be possible to render files with this camera that were not recorded with this device.
- In some cases, the screen image may not have the expected quality, or the LCD panel will remain blank and only display the file name.
- You can toggle back from review mode to shooting mode at any time by tapping the shutter button.
CONTROL ELEMENTS IN REVIEW MODE
CONTROL ELEMENTS ON THE CAMERA
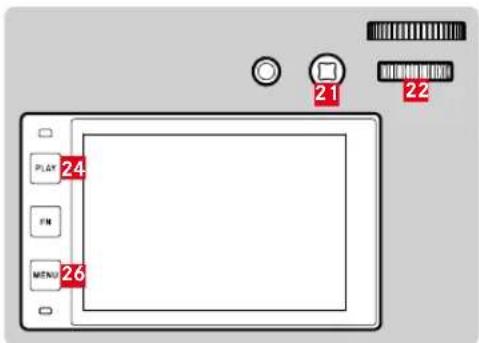
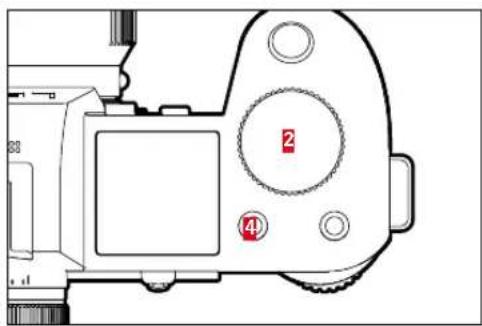
| 2 | Front dial Thumbwheel | ||
| 4 | Function button | 24 | PLAY button |
| 20 | Function button | 25 | FN button |
| 21 | Joystick | 26 | MENU button |
FUNCTION BUTTONS IN REVIEW MODE
In review mode, the function buttons either have permanently assigned functions or are without function.
The following function buttons have assigned functions:
| Button Function | |
| FN button 25 | Toggle Info Levels |
| Function button 20 | EVF LCD |
| Function button 4 | Mark shots (Rate / Unrate) |
CONTROL ELEMENTS ON THE LCD PANEL
On-screen control elements generally function by intuitively by touch. Many can also be selected by pressing one of the three buttons to the left of the LCD panel. A control element in the header is accompanied by an icon denoting the relevant button. A control element on the edge of the screen will be positioned directly next to the relevant button.
Example: The "Go back" icon ➤ can be selected in one of two ways:
- tap on the "Go Back" icon directly
- Press the relevant button (top button = PLAY button)
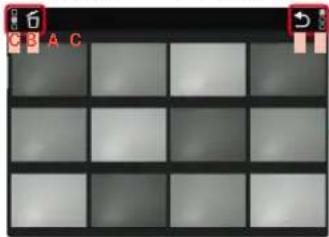
natural_image
Grid of grayscale squares with no text or symbols, likely a UI or design canvas (no readable content)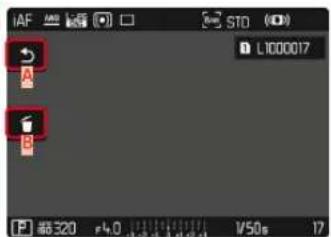
A Control element "Go back"
B Control element "Delete"
c Display of the relevant button


INITIATE/EXIT REVIEW MODE
Using touch control
Swipe up or down
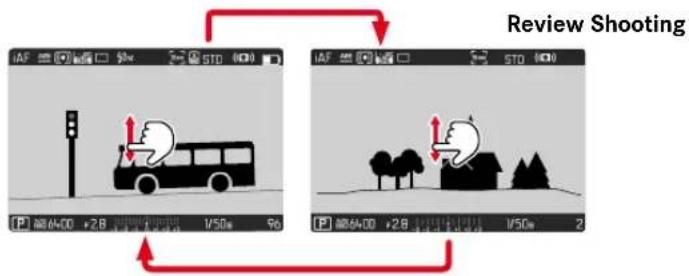
Using button control
▶ Press the PLAY button
• The last picture taken appears on the screen.
- The following message appears if the inserted memory card does not contain any image data: No valid picture to play.
- The PLAY button function differs, depending on the current camera setting:
| Initial situation | After pressing the PLAY button |
| Full screen display of an image Shooting mode | |
| Display of an enlarged cropped section/or several thumbnails image | Full screen display of the image |
SELECTING/SCROLLING THROUGH IMAGES
The shots are visually arranged in a horizontal reel. When the end of an image series is reached, the display automatically jumps back to the first image in the series. All shots can therefore be reached by scrolling either right or left.
SINGLE
Using touch control
▶ Swipe to the left or right
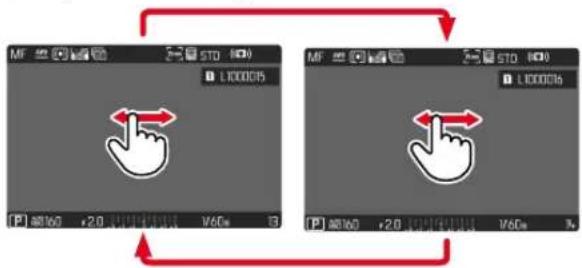
Using button control
▶ Press the joystick left/right
or
▶ Turn the thumbwheel
CONTINUOUS
▶ Swipe to the left or right and hold the finger on the edge of the screen
• The subsequent shots will move past continuously.
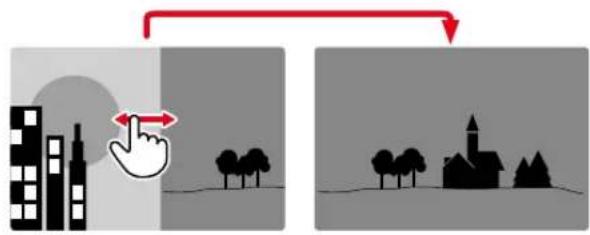


INFO DISPLAYS IN REVIEW MODE
The same info profiles are available in review mode as in shooting mode. The actual info profile currently in use, however, is saved separately. It is therefore possible to use an empty info profile completely without assist function icons in review mode, without having to set them again when switching to shooting mode. See p. 104 for setting options and additional information. The assist functions Grid and Level Gauge are not available in review mode.
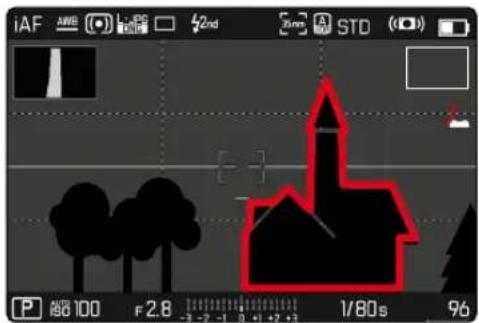
DISPLAYING ASSIST FUNCTIONS
Switching between info profiles
▶ Press the FN button
natural_image
Silhouette of a bus parked near a traffic light (no text or symbols)Empty info profile Image data only
natural_image
Silhouette of a bus at a traffic intersection with a traffic light (no text or symbols visible)(Info Bars)
natural_image
Black-and-white illustration of a bus at a traffic light with a red signal marker (no text or symbols)Clipping / Zebra + Info Bars
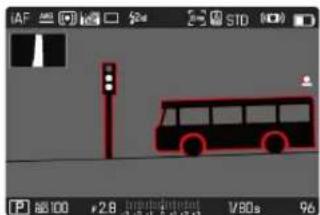
Info Bars, Focus Peaking, Histogram
CROPPED SECTION ZOOM
You can zoom in to any section of an image for closer inspection. Zooming via the front dial is done in four increments; zooming is stepless via touch control.
Using touch control
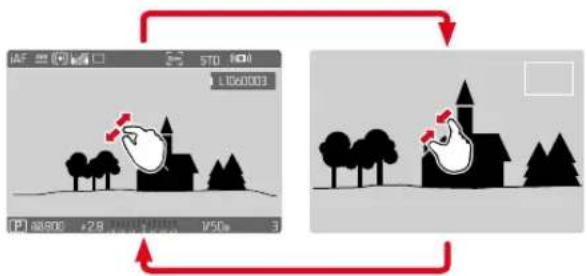
natural_image
Two-panel image showing a cartoon chicken on a hill and a black-and-white house with trees, both connected by red arrows indicating rotation or transformation (no text or symbols)▶ Two-finger pinch/spread
- The image will be zoomed in/zoomed out at the desired point.
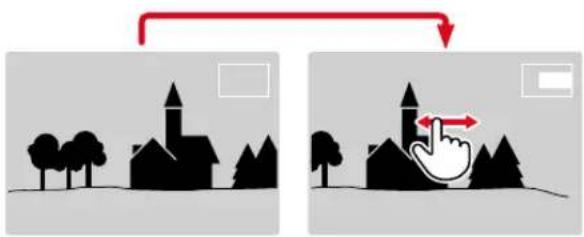

▶ Swiping will allow you to move the position of an enlarged cropped section
- The rectangle within the frame at the top right represents the current magnification, as well as its position in the displayed cropped section.
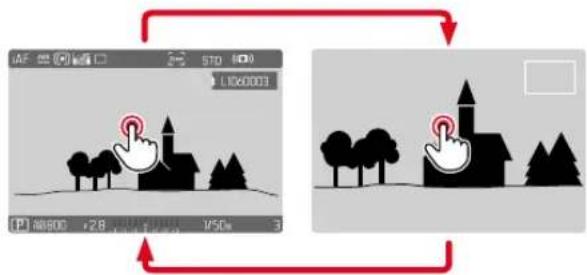
▶ Double tap
- Toggles between the third zoom increment at the tap position and standard full screen view.

Using button control
▶ Turn the front dial (in clockwise direction: increase magnification, anti-clockwise: decrease magnification)
or
▶ Press the joystick/thumbwheel
- Toggles between the third zoom increment at the tap position and standard full screen view.
▶ Use the joystick to move the position of the cropped section while the image is magnified
- The rectangle within the frame at the top right represents the current magnification, as well as its position in the displayed cropped section.
You can move directly from one picture to the next in magnification mode, which will then also be displayed with the same magnification.
▶ Turn the thumbwheel to the left/right
Notes
- It may not be possible to enlarge pictures taken with other camera types.
• Video recordings cannot be enlarged.
DISPLAYING MULTIPLE IMAGES AT ONCE
The camera offers an overview function in which several thumbnail images can be viewed on one screen, which makes it easier to find a specific image. You can choose 12 or 30 images per overview.
OVERVIEW
Using touch control
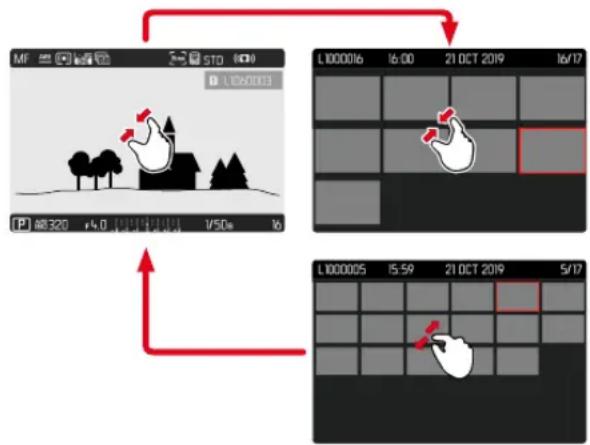
flowchart
graph TD
    A["Hand gestures"] --> B["L100006 16:00 21 OCT 2019 16/17"]
    B --> C["L100005 15:59 21 OCT 2019 5/17"]
    C --> D["Timecode: 16:320, r=0, 1/50s, 16"]
▶ Two-finger pinch
- The display toggles from 12 to 30 thumbnails.
Viewing other images
▶ Swipe up or down
Using button control
▶ Turn the front dial in anti-clockwise direction
- 12 thumbnails are shown at the same time. Another turn on the thumbwheel increases the number of displayed thumbnails to 30.
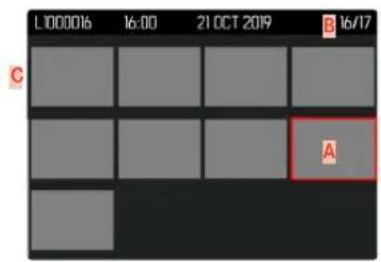
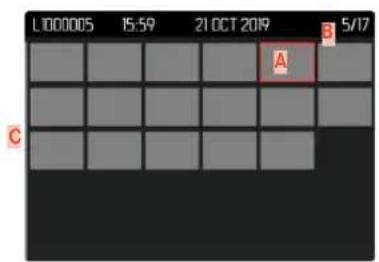
A Currently selected image
B Number of the currently selected images
C Scrollbar
The currently viewed image is framed in red and can be selected for a closer look.
Navigating between images
▶ Press the joystick in the relevant direction or
▶ Turn the thumbwheel
Displaying the image in full size Using touch control
▶ Two-finger spread
or
Tap the desired image
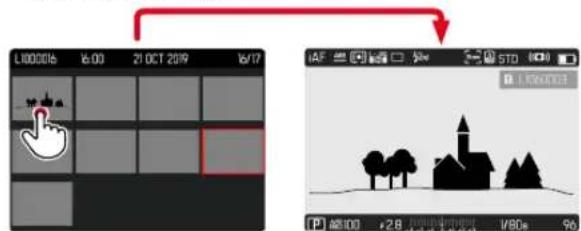
Using button control
▶ Turn the front dial in clockwise direction or
▶ Press joystick, thumbwheel or PLAY button


TAGGING/RATING OF PHOTOS
Images can be marked as favorites to find them quicker or to simplify the later deletion of multiple images. Tagging can be done in regular view mode or in the overviews.
Tagging a photos
▶ Press the function button 4
or
▶ Press the joystick up
- The recording is marked with ★. The icon will appear in the header line on the far right when viewing images in full size, and in the top left corner of the thumbnail in overview mode.
Removing a tag
▶ Press the function button 4
or
▶ Press the joystick down
• The ★ marking disappears.
Note
- In the overview, recordings can only be tagged via the function button.
DELETING IMAGES
There are several methods available to delete images:
- deleting individual images
- deleting multiple images
- deleting all images without a icon/ranking
- deleting all images
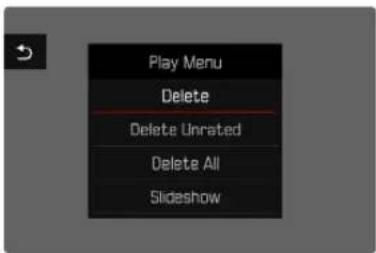
Important
- Once deleted, shots are no longer retrievable.
DELETING INDIVIDUAL IMAGES
▶ Press the MENU button
▶ Select Delete in the play menu
• The Delete screen appears.
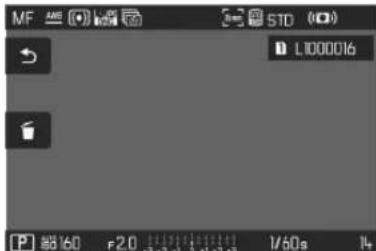
▶ Select the Delete icon 6
(tap the icon directly or press the FN button)
- The LED will flash during the delete process. The process may take a few seconds.
- The next image will be displayed once deletion is complete. The following message appears if no other images are saved on the card: No valid picture to play.
Cancelling a deletion and returning to normal review mode
▶ Select the "Go back" icon
(tap the icon directly or press the PLAY button)
Notes
- The Delete screen can not be called up when in overview mode, because the menu function Delete of the play menu is not available in this context.
- The "Scroll" and "Magnify" functions continue to be available when the "Delete" screen is active.
DELETING MULTIPLE IMAGES
Several images can be marked in a Delete overview with twelve thumbnails and can then be deleted all at once. This overview can be reached in two ways.
▶ Turn the front dial in anti-clockwise direction
• The overview screen appears.
▶ Press the MENU button
▶ Select Delete Multi in the play menu
• The Delete overview appears.
or
▶ Press the MENU button
▶ Select Delete in the play menu
• The Delete screen appears.
▶ Turn the front dial in anti-clockwise direction
• The Delete overview appears.
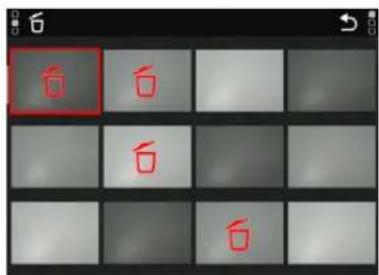


Any number of images can be selected in this view.
Selecting images for deletion
▶ Select a image
▶ Press the joystick/thumbwheel
or
Tap the desired image
- The images selected for deletion are marked with a red Delete icon 6.
Deleting the selected images
▶ Select the Delete icon 6
(tap the icon directly or press the FN button)
- The prompt Do you want to delete all marked files? appears.
▶ Select Yes
Cancelling a deletion and returning to normal review mode
▶ Select the "Go back" icon
(tap the icon directly or press the PLAY button)
DELETING ALL IMAGES
▶ Press the MENU button
▶ Select Delete All in the play menu
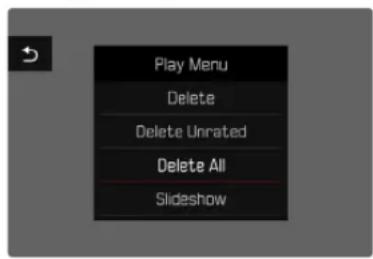
- The prompt Do you want to delete all files? appears.
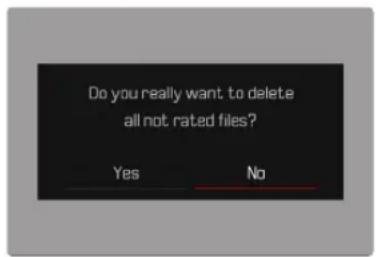
▶ Select Yes
Note
- The message No valid picture to play, appears after successful deletion. The same picture is displayed again if deletion was unsuccessful. When deleting several or all images, a notification screen may appear for the time needed to process the data.
DELETING UNRATED IMAGES
▶ Press the MENU button
▶ Select Delete Unrated in the play menu
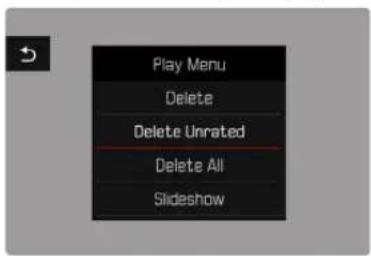
- The prompt Do you really want to delete all not rated files? appears.
▶ Select Yes - The LED will flash during the deletion process. The process may take a few seconds. The next marked image appears once deletion is complete. The message No valid picture to play appears if no other recordings are saved on the card.
PREVIEW OF LATEST IMAGE
Photo shootings can be displayed automatically directly after they are taken to e.g. check the success of the shots quickly and easily. A duration for the automatic display can be configured.
▶ Select Auto Review in the main menu
▶ Select the desired function or duration in the submenu (Off, 1 s, 3 s, 5 s, Permanent, Shutter button pressed)
Permanent: The most recent frame is displayed until automatic review is ended by pressing the PLAY button or by tapping the shutter button.
Shutter button pressed: The most recent frame is displayed for as long as the shutter button is pressed down.
Notes
- Various control elements change back to regular review mode to execute their normal functions while automatic review is selected. The camera will remain in review mode until it is exited.
- Marking and deleting can only be done in regular review mode and not during automatic review.
- When pictures were taken with the functions continuous shooting or interval shooting, then the last image in the series will be displayed or – if the save process is still incomplete – the last image in the series saved to the memory card.
- Where display times were configured (1 s, 3 s, 5 s) automatic review can be ended immediately by pressing the PLAY button or tapping the shutter button.


SLIDE SHOW
A slide show function is available in Review mode, in which the saved images are shown automatically in series. Choose to see all images (Play All), only photos (Pictures Only) or only videos (Videos Only) should be displayed. For photos, select how long each image should be displayed (Duration).
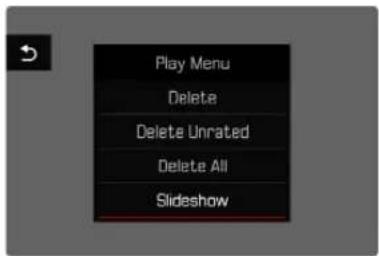
SETTING THE DURATION
▶ Press the MENU button
▶ Select Slideshow in the play menu
▶ Select Duration
▶ Select the desired duration (1 s, 2 s, 3 s, 5 s)
▶ Press the MENU button
▶ Select Slideshow in the play menu
▶ Select the desired setting
(Play All, Pictures only, Videos only)
- The slide show will start automatically with the selected images and runs in an endless loop until it is exited.
ENDING THE SLIDE SHOW
▶ Press the PLAY button
or
Tap the shutter button
• The camera switches to the relevant mode.
Notes
- An intermediate screen may appear while the data is prepared for review.
- The settings in Duration remain intact even after the camera is switched off and on again.


VIDEO SETTINGS
SENSOR FORMAT
The image data of the entire 35 mm sensor can be used or only a cropped section, which corresponds to the APS-C format. This can be helpful, e.g. when only limited storage capacity remains or a lens developed specifically for APS-C is used.
Factory setting: 35 mm
▶ Select Sensor Format in the main menu
▶ Select the desired setting
(35 mm, APS C)
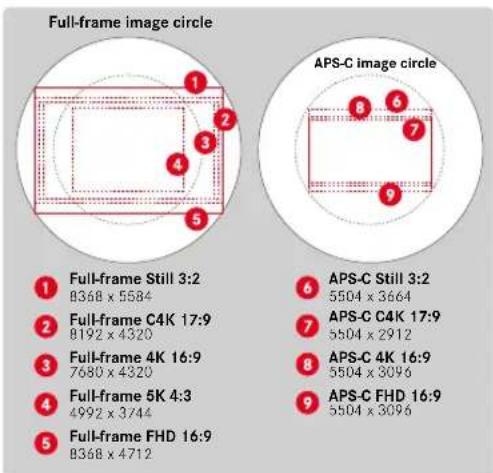
Note
- The setting switches automatically to APS-C when an APS-C-specific lens is mounted.
FILE FORMAT
Video can be recorded in the file formats MOV or MP4. Various combinations of resolution and frame rate can be configured depending on the file format chosen. The settings are done separately. You could therefore select the combination C4k/29.97 fps for the MOV format or FHD/59.94 fps for MP4. The preset video format settings are then accessed automatically, when one of the two file formats is selected.
Note
- You can toggle between video file formats via the status screen without having to (re)configure the settings.
VIDEO FORMAT
The following combinations of resolution and frame rate are available:
| Frame rate Resolution (file format) | ||||
| 23.98fps | 5K C4K 4K FHD | |||
| MOV MOV MOV + MP4 MOV + MP4 | ||||
| 24fps MOV MOV | ||||
| 25fps MOV MOV | MP4 MOV + MP4 | |||
| 29,97fps | MOV | MOV | MOV + MP4 | |
| 47,95fps | MOV MOV | |||
| 48 fps | MOV MOV | |||
| 50 fps | MOV MOV + MP4 MOV + MP4 | |||
| 59,94fps | MOV | MOV + MP4 | ||
| 100fps | MOV | |||
| 119,88fps | MOV | |||
| Slow Motion | 100 fps | MOV + MP4 | ||
| 120fps | MOV + MP4 | |||
| 150fps | MOV + MP4 | |||
| 180fps | MOV + MP4 | |||
AVAILABLE RESOLUTIONS
You can choose resolutions with the associated aspect ratios (depending on the file format of the recording).
| Sensor format | File Format Available resolutions | ||
| 35 mm | MOV | 5K | 4992 x 3744 |
| C4K | 4096 x 2160 | ||
| MOV + MP4 | 4K | 3840 x 2160 | |
| APS-C | FHD | 2790 x 1572 | |
| MOV | C4K | 5504 x 2912 | |
| MOV + MP4 | 4K | 5504 x 3096 | |
| FHD | 2752 x 1548 | ||
AVAILABLE FRAME RATES
Up to 11 different frame rates between 23.98 fps and 180 fps are available depending on the selected resolution. The frame rates 100 fps to 180 fps allow slow motion shots in varying speeds.


SETTING THE VIDEO FORMAT
Factory setting: file format MOV, resolution 4K, frame rate 29.97 fps
MOV
▶ Select Video Format / Resolution in the main menu
▶ Select MOV
▶ Select the desired resolution (5K, C4K, 4K, FHD, FHD Slow Motion)
▶ Select the desired frame rate
MP4
▶ Select Video Format / Resolution in the main menu
▶ Select MP4
▶ Select the desired resolution (4K, FHD, FHD Slow Motion)
▶ Select the desired frame rate
Note
- The list of available resolutions for this camera also contains additional information, e.g. on video compression.
VIDEO STYLE
IMAGE PROPERTIES
The image properties of video recordings can be changes slightly using several parameters. These are summarized in pre-configured Video Style profiles.
CONTRAST
The contrast setting, i.e. the difference between light and dark image sections, determines whether an image comes across as "flat" or "brilliant". Increasing or decreasing this difference impacts on contrast, meaning that some image sections are rendered brighter or darker.
SHARPNESS
The impression of sharpness in a picture is largely determined by edge sharpness, i.e. by how slight the transition area between light and dark is at edges in the shot. Expanding or reducing these areas will therefore change the impression of sharpness.
COLOR SATURATION
The saturation factor in color images determines, whether colors in the shots appear "pale" and pastel-like or "bright" and colorful. While lighting conditions and weather (e.g. foggy/clear) are a given in terms of shooting conditions, their rendering can be influenced.
HIGHLIGHT/SHADOW
Depending on the exposure selected and the dynamic scope of the object, some details in brighter or darker areas may no longer be clearly visible. The parameters Highlight and Shadow allow differentiated control over very brightly or less brightly lit areas. Where, for example, part of the object is in shadow, a higher setting for Shadow can help brighten these areas to make details more visible. Conversely, existing shadows or particularly bright areas might be additionally emphasized for reasons of image composition. Positive values will brighten the targeted areas, while negative values will darken them.
VIDEO PROFILES
COLOR PROFILE
3 pre-configured color profiles are available:
- STD Standard
- viv Vivie
- NAT ^™ Natura
▶ Select Video Style in the main menu
▶ Select a profile
MONOCHROME PROFILE
There are two additional profiles available for monochrome video recordings:
- BW Monochrome
- SW# chrome High Contrast
▶ Select Video Style in the main menu
▶ Select a profile
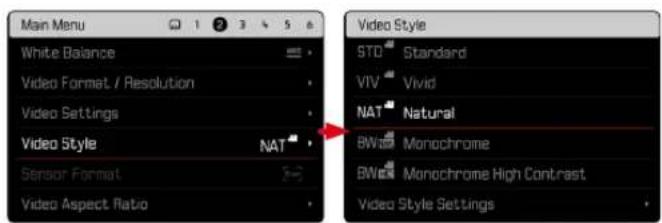
Note
- The Video Style function is unavailable if any other setting but Off is selected for Video Gamma.


CUSTOMIZING VIDEO PROFILES
These parameters can be adjusted for all available profiles (Saturation only for color profiles). See p. 68 for details on menu operation.
▶ Select Video Style in the main menu
▶ Select Video Style Settings
▶ Select a profile
▶ Select Contrast/Highlight/Shadow/Sharpness/Saturation
▶ Select the desired level (-2, -1, 0, +1, +2)
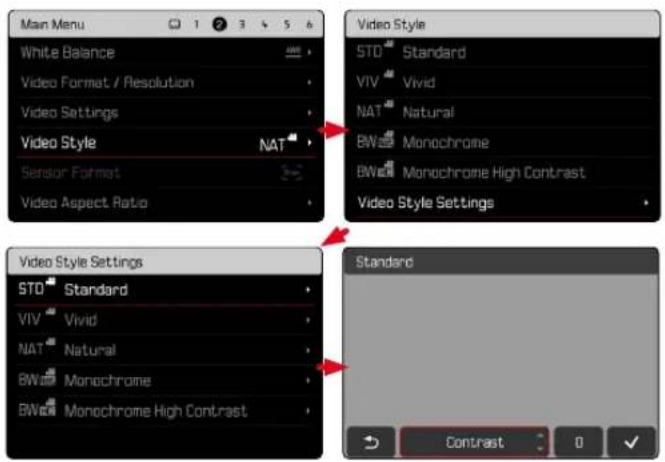
AUDIO SETTINGS
MICROPHONE
The sensitivity of the integrated microphone can be set.
Factory setting: 0 dB
▶ Select Video Settings in the main menu
▶ Select Microphone Gain
▶ Select the desired level
(Off, +6 dB, +5 dB, +4 dB, +3 dB, +2 dB, +1 dB, 0 dB, -1 dB, 2 dB, 3 dB, 4 dB, 5 dB, 6 dB, -7 dB, 8 dB, 9 dB, -10 dB, 11 dB, -12 dB)
Notes
- The Autofocus function and manual focusing adjustments generate noise that may be picked up in the recording.
- There will be no audio recorded if this setting is Off. As notification, the icon for the recording level changes as shown here
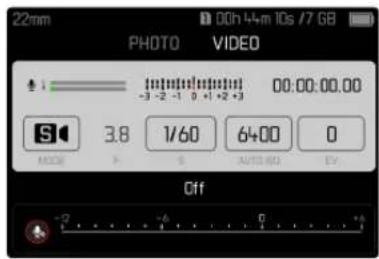
WIND NOISE REDUCTION
Wind noise reduction can be adjusted individually for the internal and the external microphone.
INTERNAL MICROPHONE
Factory setting: _ow
▶ Select Video Settings in the main menu
▶ Select Wind Noise Reduction
▶ Select Internal Microphone
▶ Select the desired setting (High, Low, Off)
EXTERNAL MICROPHONE
Factory setting: Off
▶ Select Video Settings in the main menu
▶ Select Wind Noise Reduction
▶ Select External Microphone
▶ Select the desired setting (High, Low, Off)
TIMECODE
The timecode is a data record that is generated and recorded alongside the image and audio data. It ensures the correct time assignment of frame and audio signals after cutting or after later separate processing. Timecode mode and start time can be selected.
TIMECODE MODE
Time information is written to the recorded video file if the timecode setting is activated.
Factory setting: Off
| Off | Timekeeping begins at 00:00:00.00 for every recording. |
| Free Run | The timer continues running regardless of whether the camera is currently recording video. |
| Rec Run | The timer only runs while a video is being recorded. The timer will stop when recording ends and will continue when the next recording starts. |
▶ Select Video Settings in the main menu
Select Timecode
▶ Select Mode
▶ Select the desired setting (Off, Free Run, Rec Run)


START TIME
The start time can be reset manually or can be set to a specific value if multiple cameras are used for recording. Alternatively, the current time set in the camera can be specified as the timecode.
▶ Select Video Settings in the main menu
▶ Select Timecode
Select Start Time
▶ Select the desired setting
(Reset Timecode, Manual, Camera Time)
The desired start time can be set in the format hour:minute:second:-frame if Manual is selected.
VIDEO GAMMA
Video gamma can be set to HLG and L-Log or can be deactivated altogether.
| Off | Optimization for playback compatible with all screen/TV devices in compliance with the BT.709 standard. |
| HLG | Optimization for HDR-capable UHD-TV devices. |
| L-Log | Optimization for professional reworking, e.g. color grading. |
Factory setting: Off
▶ Select Video Settings in the main menu
Select Video Gamma
▶ Select the desired setting (Off, HLG, L-Log)
Notes
• Video Gamma is not available under the following conditions:
- Recordings in MP4 format
- Recordings in 8 bit
- Recordings in slow motion
- The following functions are unavailable when Video Gamma is used:
- IDR
- Video Style
HLG SETTINGS
Sharpness and saturation can be set. The factory setting is a median value 0 in both cases.
▶ Select Video Settings in the main menu
▶ Select Video Gamma
▶ Select Settings
▶ Select HLG
▶ Select Sharpness or Saturation
▶ Select the desired setting
(-2, -1, 0, +1, +2)
L-LOG SETTINGS
The sharpness for L-Log can be adjusted. Additionally, various LUT profiles can be applied as preview when using L-Log. Saved recordings remain unaffected.
SHARPNESS
Factory setting: -2
▶ Select Video Settings in the main menu
▶ Select Video Gamma
▶ Select Settings
▶ Select L-Log
▶ Select Sharpness
▶ Select the desired setting
(-2, -1, 0, +1, +2)
SETUP/MANAGEMENT OF LUT PROFILES
You can import custom LUT profiles to the camera to optimally meet your LUT preview expectations.
▶ Select Video Settings in the main menu
▶ Select Video Gamma
▶ Select Settings
▶ Select L-Log
▶ Select Custom LUT
- A list of six memory slots is displayed. Three are reserved for use with HDMI output, and three for internal camera use (LCD panel/EVF).
- Filled memory slots will show the name of the saved LUT profile. Free memory slots display the word Unused.


EXAMPLE
In the following, the assignment shown below will be used for all subsequent figures. Two profile slots for internal camera display (LCD panel/EVF) are taken, all others are unused.
| Custom LUT | |
| LUT 1 (EVF-LCD) | Sepia 12 |
| LUT 1 (HDMI) | Unused |
| LUT 2 (EVF-LCD) | Steel |
| LUT 2 (HDMI) | Unused |
| LUT 3 (EVF-LCD) | Unused |
| LUT 3 (HDMI) | Unused |
Importing a custom LUT profile
▶ Download or export an LUT profile as a CUBE file
▶ Give the file a meaningful name (file name max. 8 characters, file ending “.cub”)
- This file name (without the ending) will appear as a profile name in the camera after import. A later file name change on the camera will not be possible.
▶ Save the download to the memory card
- Store the file in the main directory of the memory card (not in a sub-directory).
▶ Insert the memory card into the camera
▶ Select an unused memory slot
- You will have to delete an existing profile first if there is no unused memory slot available.
- The "Import" dialog appears. It displays the files found on the memory card.
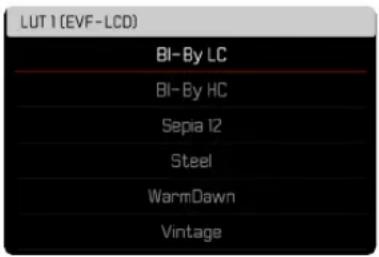
- The message import failed will appear if the camera does not find a compatible file.
▶ Select the profile to import
▶ Select Yes
Notes
- You can only import LUT profiles with the file ending ".cub".
- Files with the ending ".cube" will not be recognized. These can, however, simply be renamed before saving them to the SD card.
- File names must be max. 8 characters (incl. spaces) long.
- Incompatible files will not be recognized.
- A maximum of six profiles saved to the memory card will be displayed. The profiles found on the card will be displayed chronologically in ascending order: the most recently saved profile will appear at the top.
- In rare cases, a particular combination of memory card and computer may result in a search returning only three profile files.
- Where two memory cards are in use, and both contain compatible files, only the files on SD1 will be considered.
Freeing a memory slot
▶ Select a profile
- The "Delete" dialog appears.
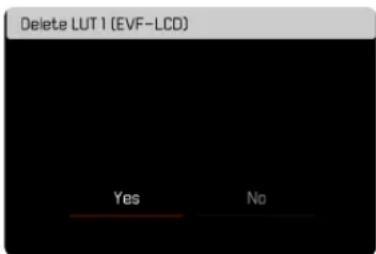
▶ Select Yes
Notes
- The pre-configured profiles Natural and Classic cannot be deleted.
- A profile that is currently in use cannot be deleted.


USING LUT PROFILES
CHANGING THE OUTPUT CHANNEL
The user can choose to apply the LUT profile for output via HDMI or in the camera (LCD panel/EVF).
▶ Select Video Settings in the main menu
▶ Select Video Gamma
▶ Select Settings
▶ Select L-Log
Select Output
▶ Select the desired setting (EVF LCD, HDMI)
Note
- The menu item Output is unavailable if the setting Off is selected for LUT Profile.
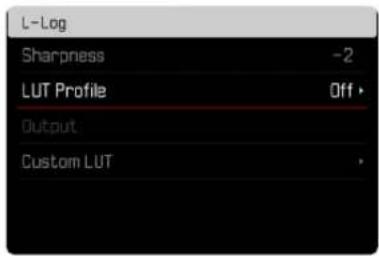
When toggling between the two output channels, the setting for the selected memory slot will remain unchanged. Since it is possible that different profiles are saved on the same slot depending on the output channel, it is possible that a different profile or an unused memory slot is selected. The name of the active profile will change accordingly next to the menu item LUT Profile. This does not apply for the pre-configured profiles, which exist on the same memory slot for both output channels.
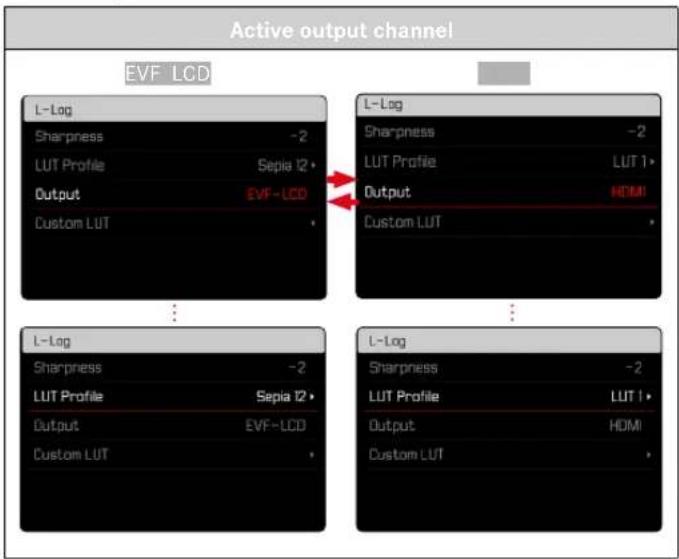
SELECTING THE LUT PROFILE
In addition to the two pre-configured LUT profiles, three more memory slots are available for custom LUT profiles.
▶ Select Video Settings in the main menu
▶ Select Video Gamma
Select Settings
Select L-Log
Select LUT Profile
- The list of profiles available for the active output channel appears.
▶ Select the desired setting
(Off, Natural, Classic, LUT 1, LUT 2, LUT 3)
Note
- Unused memory slots appear in the list as LUT 1, LUT 2, and LUT 3. A memory slot filled with a custom LUT profile will display its name instead.
The list of selectable LUT profiles depends on the currently selected output channel (camera/HDMI). The channel is displayed next to the menu item Output. When the channel is set to HDMI, the selection list will display the profiles available for HDMI output. The setting EVF LCD will therefore show the profiles available for camera display.
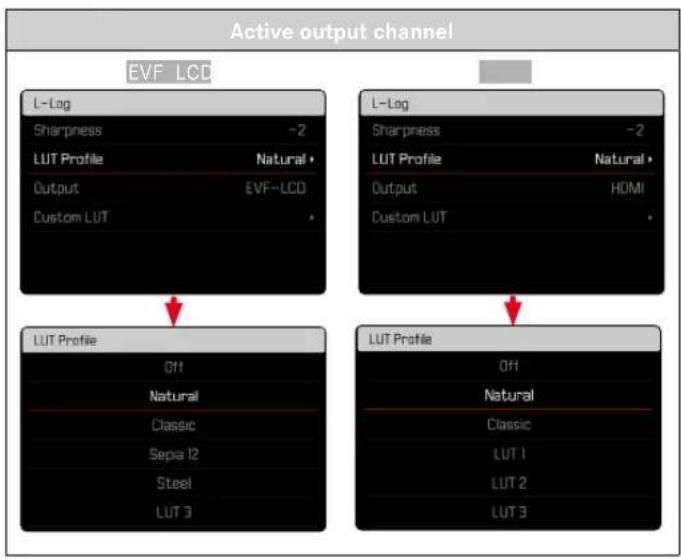


AUTOMATIC OPTIMIZATION
VIDEO STABILIZATION
With video recording - in addition to optical stabilization by means of appropriately equipped lenses - a independent digital stabilization function is available that can be used with any lens. This function is particularly useful in conjunction with lenses that do not feature an OIS function.
Factory setting: On
▶ Select Image Stabilization in the main menu
▶ Select On/Off
Note
- The function Panning Mode is permanently set to Normal in video mode. Camera shake in all directions (horizontal, vertical, rotational) will be corrected automatically.
DARK AREA OPTIMIZATION (IDR)
DYNAMIC RANGE
The contrast range of an object comprises all levels of brightness from the brightest to the darkest point in the image. All levels of brightness can be captured by the sensor, provided the contrast range of the object is lower than the dynamic range of the camera. In case of significant differences of brightness in the object (e.g. shootings of interior spaces with bright windows in the background, shootings with subject elements in shadow or directly lit by the sun, landscapes with dark areas and a very bright sky), the camera with its limited dynamic range will not be able to map the entire contrast range of the object. Information in 'edge areas' will be lost (under and overexposure).
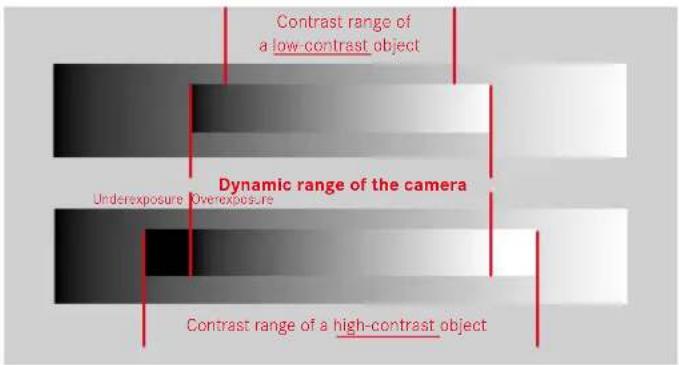
iDR FUNCTION
The iDR (Intelligent Dynamic Range) function allows an optimization of the darker areas. Object details become much clearer.
Without iDR With iDR
natural_image
Interior view of a minimalist room with brick wall and wooden furniture (no visible text or symbols)
natural_image
Interior view of a modern living room with brick wall art, coffee table, and large window (no visible text or symbols)You can specify beforehand if and to what extent you want to optimize darker areas (High, Standard, Low, Off). In the Auto setting, the camera will automatically select the right setting depending on the contrast range of the object.
In addition to that setting, the effect also depends on the exposure settings. The function will have the strongest effect in combination with low ISO values and fast shutter speeds. The effect is less pronounced with higher ISO values and/or slower shutter speeds.
Factory setting: Auto
▶ Select iDR in the main menu
▶ Select the desired setting
(Auto, High, Standard, Low, Off)
Note
- The optimization of darker areas will slightly reduce differentiation in very bright areas.
DATA MANAGEMENT
SEGMENTED RECORDING
Videos recorded in MOV format can be automatically segmented into individual one-minute files and saved. This method protects recordings against technical errors during the write process, in case the recording is interrupted. All previously saved one-minute segments will remain intact.
Factory setting: Off
▶ Select Video Settings in the main menu
▶ Select Segmented Video
▶ Select Or/Off
Notes
- This function is not available for the MP4 video format setting.
- The individual recordings will not be played back automatically in sequence.
- Essential for segmentation is the playback time of the finished recording. Slow motion recordings will be segmented in a way that the finished recordings will have a playback time of about one minute.


FORMATTING A MEMORY CARD
Memory cards that have already been in use with this camera will usually not require formatting. An unformatted memory card that is inserted into the camera for the first time must be formatted. We recommend formatting memory cards from time to time, because residual data traces (data pertaining to individual shots) may reduce the card's storage capacity. The two memory cards will be formed separately.
▶ Select Format Card in the main menu
▶ Select Format SD Card 1 or Format SD Card 2
▶ Confirm the selection
- The lower status LED will flash during that process.
Notes
- Never switch off the camera while data transfer is in progress.
- All data stored on the memory card will be lost during formatting. Formatting will not be prevented by the deletion protection set for individual shots.
- All images should therefore be regularly transferred to a safe mass storage medium, e.g. the hard disk of a computer.
- A simple formatting process will initially not irretrievably destroy existing data on the card. Only the directory will be deleted, which means the data will no longer be directly accessible. Data access can be restored with appropriate software. Only data that is overwritten when new data is saved will actually be irretrievable.
- A memory card should be formatted again in the camera if it was formatted in another device, e.g. a computer.
- Contact your retailer or Leica Customer Care for assistance if the memory card cannot be formatted/overwritten (see p. 298).
DATA STRUCTURE
FOLDER STRUCTURE
The files (= shots) on the memory cards are saved in automatically generated folders. The first three characters signify the folder number (numerals), the last five the folder name (letters). The first folder is assigned the name "100LEICA", the second "101LEICA". A folder will always be created with the next available number; you can have max. 999 folders.
FILE STRUCTURE
The file names in these folders consist of eleven characters. In the factory settings, the first file is named "L1000001.XXX", the second "L1000002.XXX", etc. The first letter can be selected, the "L" from the factory settings denotes the camera brand. The first three characters signify the folder number (numerals). The next four digits denote the sequential file number. Once file number 1000 is reached, then a new folder will be automatically created, in which the file numbering begins at 0001 again. The last three places after the dot denote the file format (MOV or MP4).
Notes
- When using memory cards that were not formatted with this camera, the file numbering will begin with 0001 again. Should the memory card already contain a file with a higher number, then numbering will be continued from that number.
- A relevant message will be displayed on the LCD panel once folder number 999 and file number 1000 are reached, and all numbering must be reset.
- Format the memory card and reset the frame number right after to reset the folder number to 100.


EDIT FILE NAMES
▶ Select Camera Settings in the main menu
▶ Select Edit File Name
- A keyboard submenu is displayed.
- The input line contains the factory setting "L" as the first letter of the file name. Only this letter can be changed.
▶ Enter a letter of your choice (see p. 65)
▶ Confirm
Notes
- The change to a file name applies to all subsequent shots or until a new change is made. The sequential number will not be affected; but it will be reset when a new folder is created.
- During a reset to factory settings, the first letter will always be reset to "L".
- Lower case letters are unavailable.
CREATING A NEW FOLDER
▶ Select Camera Settings in the main menu
▶ Select Reset Image Numbering
- A relevant prompt is displayed.
▶ Confirm the creation of a new folder (Yes) or cancel the new folder (No)
Note
- The name part (first letter) of a new folder created this way remains unchanged. The file numbers in that folder will start again at 0001.
ADDING COPYRIGHT INFORMATION
This camera allows you to enter letters and other characters as a copyright mark for your video files.
You can enter up to 20 characters of information under 2 headings per shot.
▶ Select Camera Information in the main menu
▶ Select Copyright Information in the submenu
▶ Activate the Copyright function (On)
▶ Select Information/Artist in the submenu
- A keyboard submenu is displayed.
▶ Enter the desired information (see p. 65)
▶ Confirm
DATA TRANSFER
Data can be conveniently transferred to mobile devices via Leica FOTOS. Alternatively, a card reader or USB cable can be used for the transfer.
ABOUT LEICA FOTOS
▶ See chapter "Leica FOTOS" (p. 264)
VIA USB CABLE
The camera supports multiple data transfer options (PTP and mass storage mode). A transfer mode can be permanently selected or chosen every time a connection is established.
Factory setting: PTP
▶ Select Camera Settings in the main menu
▶ Select USB Mode
▶ Select the desired setting
(Mass Storage, PTP, Select on connection)
Notes
- We recommend using a card reader for the transfer of large files.
- The USB connection must not be interrupted while data is being transferred, as the computer or the camera could otherwise “crash” and irreparable damage could occur on the memory card.
- The camera must not be turned off or automatically shut itself down due to a lack of battery power while data is being transferred, as this can cause the computer to crash. For the same reason, the battery must never be removed from the camera while the connection is active.


PRACTICAL DEFAULT SETTINGS
TOUCH AF
Touch AF allows a direct placement of the AF metering field.
Factory setting: On
▶ Select Camera Settings in the main menu
▶ Select Touch AF
▶ Select On/Off
Positioning the AF Metering Field
▶ Tap the LCD panel in the desired position
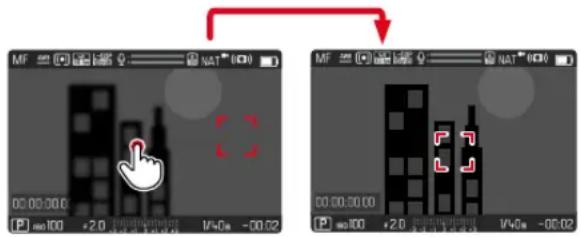
Moving the metering field back to the center of the screen
▶ Double-tap the LCD panel
Notes
- This function is available in conjunction with the following AF metering methods: Spot, Field, Zone, Tracking and Eye//Face/Body Detection.
- With Spot, Field, Zone or Eye//Face/Body Detection metering selected, the camera will immediately focus again automatically. If the metering method tracking is selected, the metering field will remain at the selected position and autofocus commences when the shutter button is tapped.
TOUCH AF IN EVF MODE
Touch AF is deactivated by default when EVF is in use to prevent any inadvertent altering of the AF metering field. Touch AF can, however, also be used in EVF mode.
Factory setting: Off
▶ Select Camera Settings in the main menu
▶ Select Touch AF in EVF
▶ Select On/Off
PERSONALIZED LENS SETTINGS
The total angle of rotation of the lens used for focusing can be individually adjusted. The setting selected indicates the angle of rotation required to change the focus setting from infinity to the nearest possible distance. Example: for a setting to 90^ , the entire focus range will be run through when the focus ring is turned by one quarter. A full turn of the focus ring will be needed for a setting to 360^ . Smaller values facilitate a faster, larger values a more precise adjustment. A setting to Maximum offers the highest precision.
Unlike the permanent settings, a setting to Standard MF will result in a non-linear dependency of rotation angle and focus setting. The extent of the change depends dynamically on the speed of rotation. With slow rotation, the same angle of rotation (e.g. 45^ ) causes a smaller change than with fast rotation.
Factory setting: Standard MF
▶ Select Focusing in the main menu
Select MF Setup
▶ Select the desired setting
(Standard MF, 90°, 120, 150, 180, 210, 240, 270, 300°, 330°, 360°, Maximum)
Note
- The settings Standard MF and Maximum are highly lens-dependent. Maximum may, for example, mean a rotation angle of 360^ or 720^ .
EV INCREMENT
You can choose between 1/2EV or 1/3EV graduations. This will allow you to choose between stronger or more subtle effects for your relevant settings.
This setting doesn't just apply for exposure compensation settings. It also specifies the sensitivity of the setting wheels in standard shooting mode, i.e. the increment width with which the shutter speeds and the aperture will be set. A setting to 1/2 will change the shutter speeds and aperture values that much faster each time the setting wheel is moved one click further and the correct setting is achieved quicker. A setting to 1/3 facilitates a more precise setting. Factory setting: 1/3
▶ Select Camera Settings in the main menu
Select EV Increment
▶ Select the desired setting (1/2, 1/3)


AUDIO OUTPUT
SETTING THE OUTPUT LEVEL
The volume level can be set for connected headphones.
- Accessing the status screen
▶ Select the headphone icon
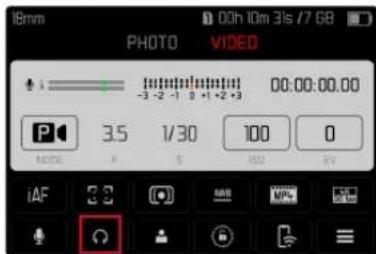
▶ Select the desired setting
• There will be no audio output if the setting is
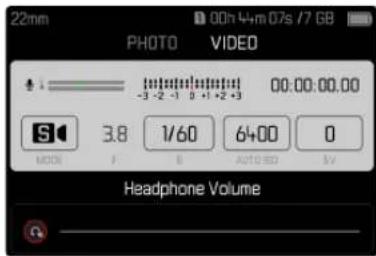
HDMI OUTPUT WITH/WITHOUT SOUND
HDMI output is available with or without audio.
Factory setting: With Audio
▶ Select HDMI Output in the main menu
▶ Select the desired setting (With Audio, Without Audio)
Note
- An output with audio may result in some negligible delays. We recommend the setting Without Audio to avoid this effect (if, for example HDMI Live View is required for a recording with an external recorder).
AUXILIARY DISPLAYS
The Leica SL2 has 4 independent info profiles, which contain differing combinations of the available auxiliary displays. The following functions are available:
- Info Bars (see p. 199)
- Grid (only shooting mode, see p. 199)
- Focus Peaking (see p. 200)
- Zebra (see p. 199)
- Level Gauge (only shooting mode, see p.201)
- Histogram (see p. 202)
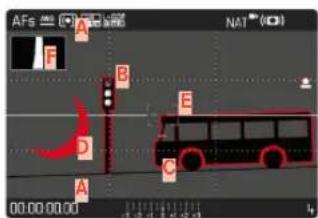
A Info Bars (= header and footer line)
B Grid
c Focus peaking
D Zebra
E Level gauge
F Histogram
INFO PROFILES
Up to 4 independent profiles can be used. The desired function can be selected and adjusted individually for each profile. During operation, the switch between info profiles is done via direct access (see p. 71). In factory settings, that will be the FN button. It allows quick switches between various views.
The following profiles are predefined in the factory settings:
| Profile | Factory settings |
| 1 | Only info bars (header and footer lines) |
| 2 | Full screen view (all auxiliary displays Off) |
| 3 | Info Bars, Clipping / Zebra, Focus Peaking, Histogram |
| 4 | Info Bars, Clipping / Zebra, Grid, Level Gauge |
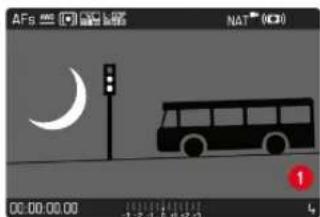
natural_image
Illustration of a bus at night with a crescent moon and street lamp (no text or symbols)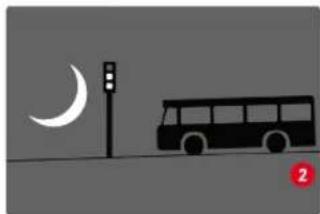
natural_image
Simple illustration of a bus parked near a street lamp with a crescent moon in the background (no text or symbols)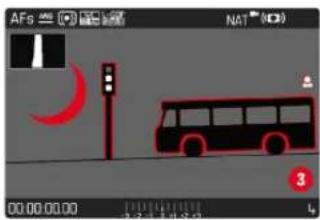
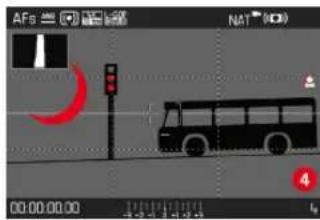


CHANGING THE INFO PROFILES
▶ Press the function button with the Toggle Info Levels assignment
- In factory settings, that will be the FN button.
Note
- The same info profiles are available in playback mode as in shooting mode. The actual info profile currently in use, however, is saved separately.
DEACTIVATING INDIVIDUAL INFO PROFILES
You can limit the number of info profiles by activating/deactivating individual profiles. At least one profile must always be active, but that can be an "empty" profile.
▶ Select Camera Settings in the main menu
▶ Select Capture Assistants
▶ Select a profile
Select On/Off
CUSTOMIZING THE INFO PROFILES
▶ Select Camera Settings in the main menu
Select Capture Assistants
Select Setting
▶ Select a profile
▶ Select the desired function
▶ Select the desired setting
| Function Available settings | |
| Info Bars On, Off | |
| Grid | 3 x 3, 6 x 4, Off |
| Clipping / Zebra | Off, Upper limit (value between 200 and 255) |
| Focus Peaking On, Off | Color (Red, Blue, Green, White) & sensitivity (settings apply to all info profiles) |
| Level Gauge On, Off | |
| Histogram On, Off | |
Note
- It is advisable to reserve one info profile as "empty", in which all functions are set to Off. It allows you to temporarily hide all displays. In effect, you get an unobstructed view of the full screen image.
SHOW AVAILABLE
INFO BARS
The header and footer lines show the currently active settings and exposure values. See chapter "Displays" for a full list of the various displays (see p.28).
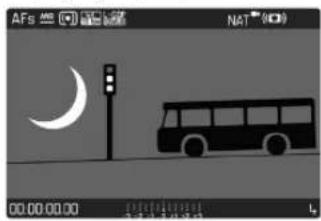
natural_image
Silhouette of a bus at night with a crescent moon and street lamp (no text or symbols)GRID
The grids divide the image frame into multiple fields. They facilitate pictorial composition and an exact camera orientation. The grid line distribution can be adjusted to fit the object.
natural_image
Pure grid pattern with no text, numbers, or symbols
You can choose one of two grid displays. They divide the image field into 3x3 or 6x4 fields.
ZEBRA
The Zebra display marks very bright image areas. This function is a very easy and exact tool for checking the correct exposure setting. Overexposed areas will appear white with moving black stripes.
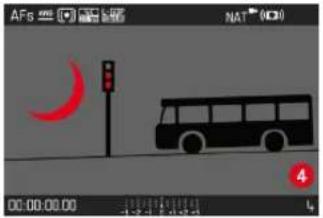
SETTING THE LIMIT VALUE
You can set a threshold value for these displays, i.e. define a value at what degree of overexposure they will appear, so that you can adjust these displays to specific conditions or in line with your own composition ideas.
▶ Select Camera Settings in the main menu
▶ Select Capture Assistants
Select Setting
▶ Select a profile
Select Clipping / Zebra
Select Upper limit
▶ Select the desired value (200 to 255)


FOCUS PEAKING
This assist function highlights the edges of in focus subject elements in color.
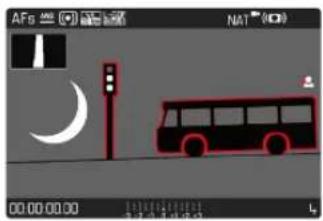
natural_image
Illustration of a bus at a station with a crescent moon and night light, no text or symbols present.When Focus Peaking is activated, Will appear to the right of the frame with a display of the color used.
HIGHLIGHT COLOR
The color can be user-specified. This setting will apply for all info profiles.
Factory setting: Red
▶ Select Focusing in the main menu
Select Focus Aid
▶ Select Focus Peaking
▶ Select the desired setting (Red, Green, Blue, White)
SENSITIVITY
The sensitivity can be additionally adjusted. This setting will apply for all info profiles.
Factory setting: High
▶ Select Focusing in the main menu
Select Focus Aid
▶ Select Peaking Sensitivity
▶ Select the desired setting (Low, High)
Note
- Focus peaking is based on subject contrast, i.e. differences between light and dark. As a result, high contrast subject elements could be marked, even if they are not completely in focus.
LEVEL GAUGE
The integrated sensors of the camera show its orientation. These indicators ensure exact camera orientation along the longitudinal and transverse axes of critical objects, e.g. architecture.
Deviations in relation to the longitudinal axis (i.e. when the camera is tilted up or down in the direction of view) are indicated by a short line in the center of the image (1). Deviations in relation to the transverse axis (when the camera is tilted to the left or right) are indicated by two long lines to the left and right of the image center (2).
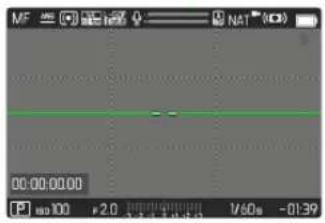
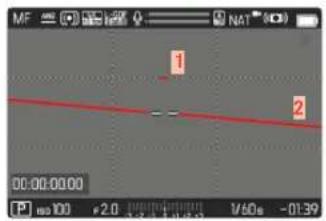
Note
- In vertical format recordings, the camera will switch the aspect of the level gauge autonomously.
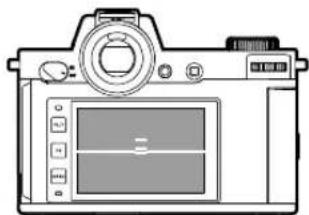
natural_image
Line drawing of a DSLR camera with control panel and display screen (no text or symbols)Correct alignment

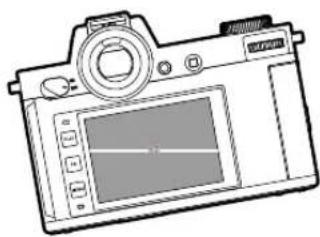
natural_image
Line drawing of a digital camera with screen and control panel (no text or symbols)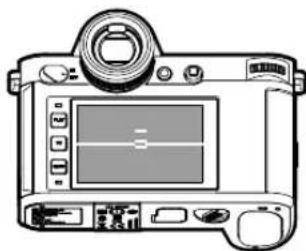
natural_image
Line drawing of a DSLR camera with front panel and control buttons (no text or symbols)Tilted laterally to the left Tilted downward in the direction of view
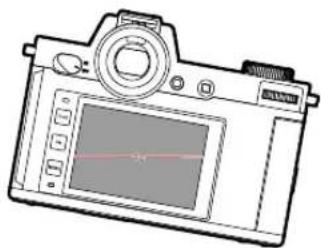
natural_image
Line drawing of a digital camera with screen and control panel (no text or symbols)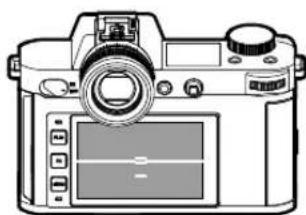
natural_image
Line drawing of a DSLR camera with control panel and display screen (no text or symbols)Tilted laterally to the right Tilted upward in the direction of view

HISTOGRAM
Histogram represents the brightness distribution in the image. The horizontal axis shows the graduated values from black (left) through gray to white (right). The vertical axis corresponds to the number of pixels at each brightness level.
This type of rendering allows an additional quick and easy assessment of the exposure setting.
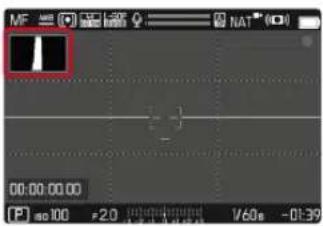
Notes
- The histogram is always based on the brightness displayed; depending on the settings used, it may not represent the final exposure.
- In shooting mode, the histogram should be regarded as a "trend indicator".
- The histogram during rendering may differ slightly from the one during exposure.
- The Histogram always refers to the currently displayed cropped section of the image.
VIDEO ASSIST FUNCTIONS
REFERENCE VALUES
A color bar can be displayed and also recorded for calibration purposes. A test sound with a frequency of 1 kHz will (optionally, three volume settings) be emitted.
COLOR BAR
A choice of three color bars (SMPTE, EBU, ARIB) is available.
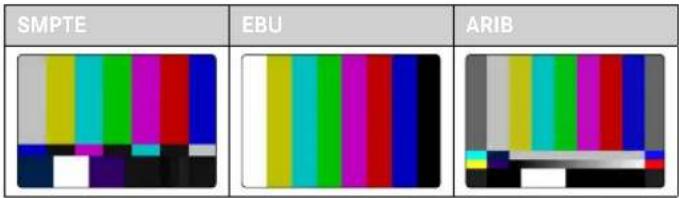
▶ Select Video Settings in the main menu
Select Color Bar
▶ Select the desired setting (Off, SMPTE, EBU, ARIB)
Regardless of the current setting of Info Profile, the test image always appears completely free at first. An operating hint is displayed in the top right corner. The info displays can be accessed at any time.
With operating hint With auxiliary displays
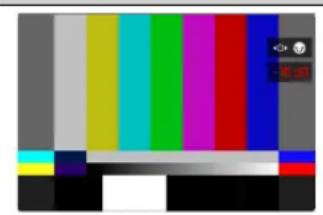
natural_image
Color test bar with multiple solid color blocks (no text or symbols)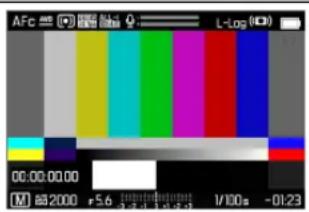
Displaying information and auxiliary displays
▶ Press the function button with the Toggle Info Levels assignment
- In factory settings, that will be the FN button.
- The operating hint is hidden and the most recently active Info Profile is displayed.
- The following auxiliary displays will not be displayed while the color bar is visible: Focus Peaking, Histogram, Level Gauge, Clipping/Zebra.
Ending the display of the color bar
▶ Press the joystick/thumbwheel
• The color bar and test sound end.
TEST SOUND
A test sound with a frequency of 1 kHz will be emitted whenever the color bar is accessed. Der operating hint at the top right of the image shows the current volume. Available setting options: OFF, 20 dB, -18 dB, -12 dB. The selected setting will remain for all subsequent accesses.
Factory setting: -18 dB
Setting the volume
▶ Press the joystick left/right
or
▶ Turn the thumbwheel to the left/right
Notes
- The operating hint will be hidden after ten seconds have elapsed without any change to the volume setting and will reappear, when the next change is made.
- During HDMI output, the test sound will only be output on the connected device and not on the camera.
- During HDMI output, the test sound will be output on the connected device even if the menu item HDMI Output is set to Without Audio.
- During HDMI output, the operating hint will only be displayed in Live View mode of the camera, and not on the external device.


APPLICATION
For HDMI output, the reference values are used for the configuration of the external device. The reference values can be irrespectively recorded at the start of a video for later use in post-production.
▶ Select the desired color bar
▶ Set the volume or mute the test sound
▶ Display Info Displays as needed
▶ Press the shutter button
- Start the recording. The test sound is no longer output via the speakers, but will still be recorded.
▶ Press the joystick/thumbwheel
• The color bar and test sound end.
- Recording continues.
REC FRAME
A flashing red dot signifies a running video recording. The option REC Frame offers an even better visualization of the process. With the option set to On, the entire screen content will be framed. This frame appears in bright red during a running recording and will otherwise be gray.
Factory setting: On
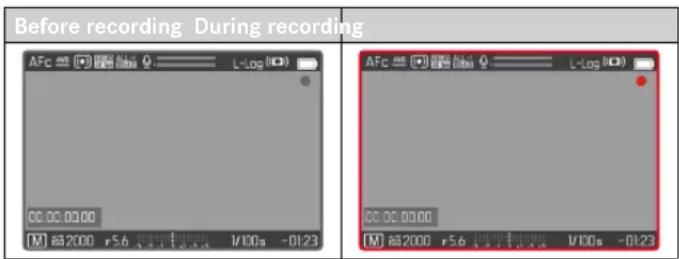
▶ Select Video Settings in the main menu
▶ Select REC Frame
▶ Select On/Off
Quick option for hiding/displaying the REC Frame
The red dot is part of the info bars and is displayed or hidden alongside them (via the Info profiles). The recording status will still be displayed via the REC frame, without impeding the view of the image content. The REC frame can also be displayed or hidden while recording.
With Info bars REC frame only
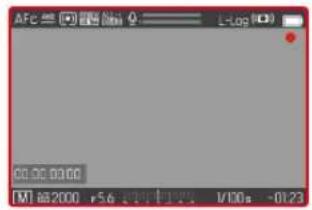
natural_image
Solid gray rectangle with a thin red border (no text or symbols)▶ Assigning the REC Frame setting to an function button
▶ Press the function button
- Displays/hides the REC Frame.
WAVEFORM MONITOR (WFM)
The Waveform Monitor (WFM) allows a quick and safe assessment of the luminance and color distribution within the current scene. Image faults become more easily apparent, which might otherwise be missed while recording with a smaller screen.
Factory setting: Off
▶ Select Waveform Monitor in the main menu
Select On/Off
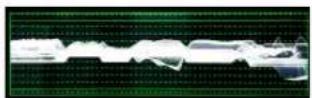
The Waveform Monitor displays the luminance distribution for the entire visible image as a percentage (IRE). A value of 0% corresponds to a luminance value of 16 (in 8-bit encoding), while a value of 100% corresponds to a luminance value of 235 (in 8-bit encoding).
The visualization displays solid lines at 0%, 50%, and 100%. The dotted lines below them represent the values 109% and -4%.
natural_image
Pure horizontal dotted lines without any text, numbers, or symbols

Notes
- Waveform Monitor and Histogram cannot be displayed at the same time.
- The Waveform Monitor will not be displayed on the external device during HDMI output.
- Der Waveform Monitor is available only in shooting mode, not in playback mode.
- The exposure compensation and ISO values (ISO only when accessed directly) can be adjusted using a menu bar. The screen image remains visible and shows the immediate effect of the selected setting. Should the Waveform Monitor be active, then it will remain visible in these cases, and will also display the effects of the latest setting.
ADJUSTING VISUALIZATION
The size and position of the Waveform Monitor can be adjusted to current requirements.
Starting the adjustment
▶ Touch and hold the LCD panel on the Waveform Monitor
- Red triangles will appear at two corners of the Waveform Monitor. All other displays disappear.
Adjusting the size
The size is adjustable in four increments.
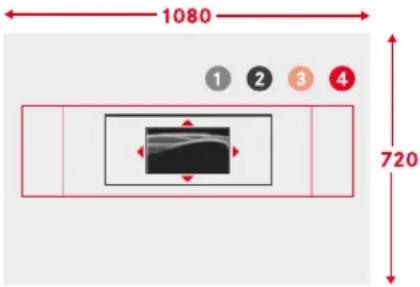
▶ Turn the thumbwheel
(to the right: larger, to the left: smaller)
or
▶ Two-finger pinch/spread
Note
- The Waveform Monitor will appear smaller in the EVF than on the LCD panel.
Adjusting the position
You can choose any position.
▶ Press the joystick in the relevant direction or
Tap the LCD panel in the desired position
Completing the adjustment
▶ Press the joystick/thumbwheel
or
Tap the shutter button
ASPECT RATIO DISPLAY
The actually recorded aspect ratio depends on the set resolution (see p. 177). It is possible, however, to have colored auxiliary lines displayed to show other aspect ratios (e.g. 4:3). Multiple auxiliary lines can be displayed at the same time. No auxiliary lines are displayed in factory settings.
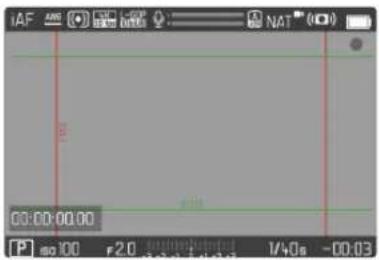
▶ Select Video Aspect Ratio in the main menu
▶ Select the desired setting
(1.33:1 (4:3), 1.66:1 (5:3), 1.78:1 (16:9), 1.85:1 (37:20), 2.35:1, 2.40:1)
▶ Select On/Off
Notes
- The format limits of a wider aspect ratio (than that of the recorded video) are indicated by horizontal green lines, those of a narrower one by vertical red lines.
• The auxiliary lines are labeled with the relevant aspect ratio.


SAFETY AREA
Depending on the playback device used, a small area of the image borders may be invisible. It is therefore possible to display a "safety area" in a configurable width. The image is displayed with a relevantly proportioned frame around the desired image section. Multiple safety area frames can be displayed at the same time. No safety area frames are displayed in factory settings.
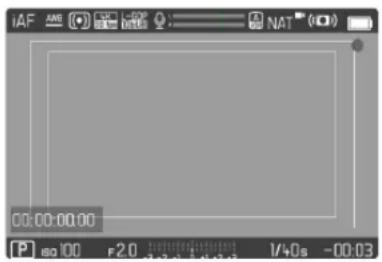
▶ Select Video Safety Area in the main menu
▶ Select the desired setting (80%, 90%, 92.5%, 95%)
▶ Select On/Off
AF ASSIST LAMP
The AF assist lamp could be a visible disturbance in video recordings and is therefore always without function in video mode, no matter the setting for AF Assist Lamp.
ACOUSTIC AF CONFIRMATION
You can set an acoustic confirmation signal for successful focus metering in AF mode.
▶ Select Camera Settings in the main menu
▶ Select Acoustic Signal
▶ Select AF Confirmation
▶ Select On
▶ Select Volume
▶ Select Low/High
Note
- The signal only appears during the focusing for a recording, not during recording.


RECORDING VIDEO
The settings described in this chapter only apply for video operations. They are therefore part of the video menu and must always be accessed and configured from within video mode (see chapter "Camera operation" in the section "Menu Control"). Any menu items of the same name in the photo menu are not affected.
Notes
- As only part of the sensor area is used in video recordings, the relevantly effective focal length is increased, which slightly reduces the size of the image sections.
- The max. file size for uninterrupted video recording is 96 GB. Once a recording exceeds this file size, the overrun will be automatically stored in a new file.
- Some menu items are unavailable in Video mode. The text in the relevant line is displayed in gray to signify the existence of a submenu.
- Unlike in photo mode, the joystick is used exclusively for focusing (metering and saving) in video mode. A coupling of exposure metering and focusing is not done, no matter which metering method is selected.
- The automatic LCD panel and EVF shutdown will also deactivate the AF system (see p. 85). We therefore recommend the Off setting if autofocus is to be used in HDMI recordings.
VIDEO MODE AND CINE MODE
Cine mode is optimized for use by cinematography professionals. The mode is reduced to the most important points and the use of terminology from cinematography ensure a seamless user experience.
(Semi) automatic exposure programs (P, A, S) and the automatic control of light sensitivity (Auto ISO, Floating ISO) remain disabled. Light sensitivity is stated as an SA value.
Unlike other video modes, the shutter speeds are not set as absolutes, but as shutter angles, relative to the selected frame rate. In conjunction with suitable lenses, the Cine mode allows the Leica SL2 the use of T-stops to ensure exact same exposure scenarios independent of camera settings.
Factory setting: Video
▶ Select Recording Mode in the main menu
▶ Select the desired setting (Video, Cine)
Note
- The settings for light sensitivity (ISO/ASA), aperture and shutter speeds are saved separately for Video and Cine mode.
START/EXIT VIDEO MODE
The camera will always be in Photo mode at initial activation or after a reset to factory settings. There are two methods for toggling between Photo and Video mode:
Using touch control
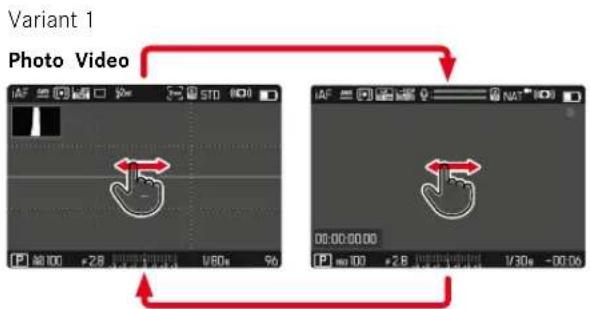
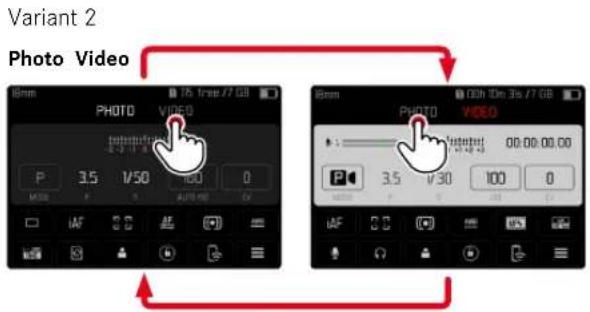
- The color of the status screen changes accordingly.
Using button control
▶ Press the function button with the function assignment Photo Video
- In factory settings, that will be the FN button.
Note
- The camera switches to the most recently set photo or video mode.


▶ Press the shutter button
• Video recording begins.
• The dot flashes red.
• Recording time is running.
• The Status LED flashes.
▶ Press the shutter button again
• Video recording ends.
• The dot lights in gray.
Notes
- The current shooting is shown in the top display with a dot below the mode.
- Basic shooting settings (see p. 176) must be configured before shooting.
- No direct access to menu functions is possible during video recording.
DUSPLAY AND OPERATION VIA USB-PTP USING EXTERNAL ACCESSORY (LIKE GIMBALS)
Leica SL2 allows connecting an optional Gimbal like DJI Ronin RS2 via USB-PTP. The Gimbal supports blur-free recordings.
▶ Select JSB Mode in the main menu
▶ Select PTP or Select on connection
- Connecting the Gimbal to the camera (see Gimbal operating instructions)
Once the PTP connection is established, the camera can also be triggered via the shutter button on the Gimbal.
Many Gimbal models allow controlling the focus function of the camera, provided it is in MF mode.
Note
- The camera screen will switch off for technical reasons if external devices connected to the USB or HDMI output are operated simultaneously.
FOCUSING
Your Leica SL2 allows automatic as well as manual focusing. There are 3 operating modes and 4 metering methods available for automatic focusing. Only manual setting options are available for MF lenses.
TAKING VIDEOS WITH AF
Focusing is done as needed when AFs is in use. The area in the AF metering field will be focused continuously if AFc and Intelligent AF are in use. Continuous focusing can be suppressed by using a metering memory lock.
TAKING VIDEOS WITH MF
Focusing is done manually via the focus ring. The joystick can be used as needed to do an AF metering (in AFs mode).
Note
- Autofocus can be overridden manually at any time by turning the focus ring, while pressing and holding the shutter button at the first pressure point. The set focus will remain unchanged until the shutter button is released.
AUTOFOCUS MODES
The following AF modes are available: AFs, AFc and Intelligent AF. The currently selected AF mode is shown in the header line.
Factory setting: Intelligent AF
▶ Select Focusing in the main menu
▶ Select Focus Mode
▶ Select the desired setting (Intelligent AF, AFs, AFc)
INTELLIGENT AF
Suitable for all objects. The camera automatically selects between AFs and AFc.
AFs (single)
A meaningful option if the focus setting should remain constant for an extended period of time. Allows greater control over focusing and helps to avoid incorrect focusing.
AFc (continuous)
Suitable for objects in motion. Focusing is continuously adjusted to the object in the AF metering field.
Facilitates an intuitive focus control, specifically in conjunction with Touch AF.


CONTROLLING THE AUTOFOCUS
TOUCH AF
During video recordings, Touch AF facilitates a more intuitive focus control, even if the main object moves outside the center of the frame. See p. 194 for more information.
▶ Tap the LCD panel in the desired position
- Focusing is done after the touch.
SUPPRESSING CONTINUOUS FOCUSING
Continuous focus adjustments can be suppressed by initiating a metering memory lock.
Use the following control elements depending on the currently selected mode:
| Intelligent AF Shutter button (tap and hold) |
| Joystick (press and hold) |
| AFc Joystick (press and hold) |
The camera stores the focus setting. That makes it easier to change the image section when focusing is fixed. The focus remains constant as long as the control element is held. Automatic focusing will only resume after the control element is released.
AUTOFOCUS METERING METHODS
The AF mode offers various metering methods for focusing. A successful focus setting is identified by a green metering field, an unsuccessful one is shown in red.
Factory setting: Multi Field
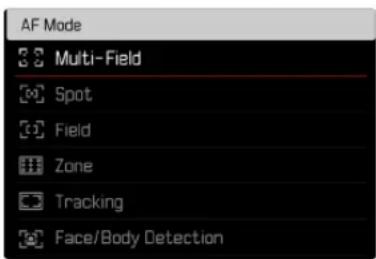
▶ Select Focusing in the main menu
▶ Select AF Mode
▶ Select the desired setting
(Multi Field, Spot, Field, Zone, Tracking, Eye // Face / Body Detection)
Note
• AF focusing can be unsuccessful:
- if the distance to the object is too great (macro mode) or too small
- if the object is not sufficiently illuminated
MULTI-FIELD ZONE
Several metering fields are detected automatically. With this metering method, subject sections are recorded with a
coherent group comprising 5 x 5 fields.

SPOT/FIELD
Both methods detect only those parts of the object that are within the relevant AF metering fields. The metering fields are indicated by a small frame (field metering) or a cross (spot metering). The very small measuring range for spot metering allows focusing on tiny details of the subject. Simply move the AF metering field to another position.
The slightly larger measuring range in field metering is less critical for focusing, but still permits selective metering.
▶ Press the joystick in the relevant direction
or
▶ Tap the LCD panel in the desired position (while Touch AF is activated)
Notes
- In both cases, the metering fields remain at their last positions set, even if the metering method is changed or the camera is switched off.
- The metering fields are joined together when the exposure metering method Spot is combined with the AF metering methods Spot, Field and Zone. Exposure metering will then occur at the point specified by the AF metering field, even if it is moved.
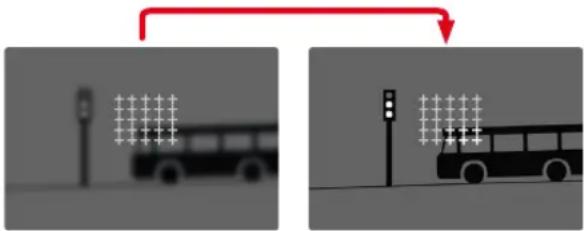
Once the setting has been made, the metering fields are displayed where object sections are displayed in focus.

TRACKING
This field metering variant helps in the capture of moving objects. The focus on the object in the metering field is continuously adjusted, once it is detected.
▶ Aim the metering field at the desired object (by panning the camera shifting the metering field)
▶ Tap and hold the shutter button
or
▶ Press and hold the joystick
• The camera focuses on the object.
- The metering field “tracks” the saved object and focus is continuously adjusted.
Note
- This metering method focuses continuously, even if the AF mode AFs was set.
START POSITION FOR TRACKING
Factory setting: Center
You can specify the starting point for tracking.
| Center | Center of the screen |
| Last Position | Ending position of the most recent tracking |
| Recall | Starting position of the most recent tracking |
▶ Select Focusing in the main menu
▶ Select AF Setup
▶ Select AF Tracking Start Position
▶ Select the desired setting
(Last Position, Recall, Center)
PERSON DETECTION (FACE DETECTION)
Person detection is an expansion of the face detection feature. In addition to biometric patterns of faces, the camera also detects body patterns and uses them for focusing. Tracking will therefore continue, once a person is detected and measured, even if the face may not be in view at some point. This feature prevents inadvertent “jumps” to other faces if several persons are in the frame.
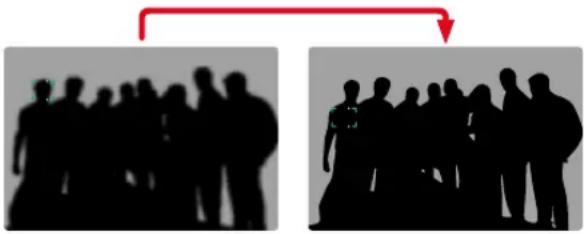
natural_image
Silhouettes of two groups with a red arrow pointing from the group center (no text or symbols)When face detection detects an eye, the focus will be on that eye. Should more than one eye be detected, then the user can choose the eye to focus on. The currently selected eye will be highlighted. Additionally, the desired face can be easily selected if there are several faces in the frame.
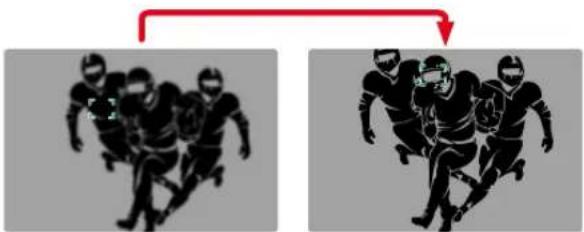
natural_image
Two identical black-and-white illustrations of a group of American football players, one running and the other running, with no text or symbols present.Switching between faces
▶ Press the joystick in the relevant direction
Switching the focused eye
▶ Press the joystick
AF SETTINGS
SENSITIVITY
Specifies the sensitivity of contrast metering.
Factory setting: 0
▶ Select Focusing in the main menu
Select AF Setup
Select AF Sensitivity
▶ Select the desired setting
(-3, -2, -1, 0, +1, +2, +3)
SPEED
Where objects are not as fast-moving, it is advisable to set AF Speed to a slightly lower value. This will prevent overly abrupt focus changes. For very fast-moving objects, a high setting will guarantee a correct focus.
Factory setting:
▶ Select Focusing in the main menu
Select AF Setup
Select AF Speed
▶ Select the desired setting
(-5, -4, -3, -2, -1, 0, +1, +2, +3, +4, +5)


FOCUS LIMIT
The focus area can be limited to the macro range. This will speed up automatic focusing considerably.
Factory setting: Off
▶ Select Camera Settings in the main menu
▶ Select Focus Limit (Macro)
▶ Select On/Off
Notes
-
The focusing range differs depending on the lens used (see relevant instructions).
• This function is not available for specific lenses: -
lenses mounted via an adapter (e.g. Leica M lenses with L adapter M)
- specific Leica SL lenses
AF QUICK SETTING
AF Quick Setting offers the following functions:
- Quick switches of the AF metering methods
- Changing the metering field size (Field and Eye/Face/Body Detection only)
The viewfinder image remains visible continuously during setting adjustments.
ACCESSING AF QUICK SETTING
▶ Tap and hold the LCD panel
- All auxiliary displays are hidden.
- Red triangles appear at two corners of the metering field if the metering method Field/Eye/Face/Body Detection is set.
natural_image
Simple icon of a hand cursor clicking a button, no text or symbols present
natural_image
Pixelated white mouse cursor with red motion lines on gray background (no text or symbols)- In all other AF modes, the AF Mode menu bar will be displayed directly.
natural_image
Simple icon of a hand cursor clicking a button, no text or symbols present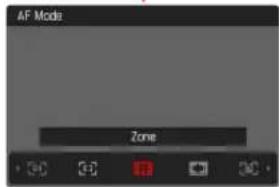
ADJUSTING THE METERING FIELD SIZE
(Field and Eye/Face/Body Detection only)
▶ Turn the thumbwheel
or
▶ Two-finger pinch/spread
- The size of the AF-metering field is adjustable in 3 increments.
CHANGING THE AF METERING METHOD
The user needs to access the AF Mode menu bar first if the active AF mode is Field or Eye/Face/Body Detection:
▶ Turn the front dial
• The AF Mode menu bar appears.
▶ Select the desired metering method
- Alternatively, you can use the front dial for the setting.
- The setting is applied automatically after 3 seconds, the menu bar disappears.
Notes
- This function is unavailable while recording.
- AF Quick Setting can only be accessed if the function Touch AF is active (see p. 194).
MF ASSIST FUNCTIONS
ENLARGEMENT IN AF MODE
You can access the enlargement function independent of focusing for a better assessment of the settings.
The function Magnification must be assigned to one of the function buttons to use this feature (see p. 71).
Assigning a function to one of the function buttons
▶ See p. 71
Accessing the enlargement function
▶ Press the function button
- An enlarged image section appears. The position of the enlargement depends on the position of the AF metering field.
- The rectangle within the frame at the top right represents the current magnification, as well as its position in the displayed cropped section.
- The enlargement starts at the 1st of 3 enlargement increments.
Adjusting the enlargement function
▶ Turn the thumbwheel/front dial
Changing the position of the enlarged section
▶ Swiping will allow you to move the position of an enlarged cropped section
or
▶ Press the joystick in the relevant direction
Exiting the enlargement function
Tap the shutter button


Notes
- The enlargement function remains active until it is exited.
- The most recently magnification function will still be active the next time the feature is accessed.
• This function is unavailable while recording.
AF ASSIST LAMP
The AF assist lamp is not active in video mode.
ACOUSTIC AF CONFIRMATION
You can set an acoustic confirmation signal for successful focus metering in AF mode (see p.85).
Note
• This function is unavailable while recording.
SHIFTING THE AF METERING FIELD
All AF metering methods permit shifting the AF metering field before focusing.
▶ Press the joystick in the relevant direction or
▶ Tap the LCD panel in the desired position (while Touch AF is activated)
Notes
- The metering field will remain at the most recently used position for this AF metering method even if the user changes the AF metering method or the camera is switched off.
- The metering fields are joined together when the exposure metering method Spot is combined with the AF metering methods Spot, Field and Zone. Exposure metering will then occur at the point specified by the AF metering field, even if it is moved.
MANUAL FOCUSING (MF)
Manual focusing offers more control and is less prone to incorrect settings than the AF modes.
▶ Select Focusing in the main menu
▶ Select Focus Mode
Select MF
▶ Start video recording
▶ Turn the focus ring to select the desired focusing
MF ASSIST FUNCTIONS
The following assist functions are available in MF mode.
FOCUS PEAKING
This assist function highlights the edges of in focus subject elements in color.
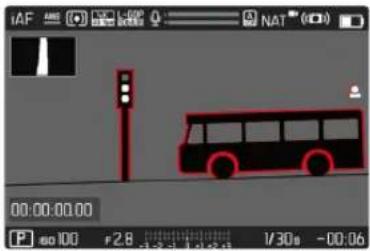
When Focus Peaking is activated, will appear to the right of the frame with a display of the color used. The color can be user-specified. The sensitivity can be additionally adjusted. The activation of this function is controlled via the info profiles (see p. 197).
▶ Activate the function
▶ Turn the focus ring to mark the desired subject elements
Note
- Focus peaking is based on subject contrast, i.e. differences between light and dark. As a result, high contrast subject elements could be marked, even if they are not completely in focus.


ENLARGEMENT IN MF MODE
The larger the details of the subject are shown, the better you can assess their sharpness and the more accurately you can focus. This function can be automatically activated during manual focusing or can be accessed independently.
ACCESS VIA THE FOCUS RING
Turning the focus ring will automatically enlarge a image section.
▶ Select Focusing in the main menu
▶ Select Focus Aid
▶ Select Auto Magnification
▶ Select On
▶ Turn the focus ring
- An enlarged image section appears. The position of the enlargement depends on the position of the AF metering field.
- The rectangle within the frame at the top right represents the current magnification, as well as its position in the displayed cropped section.
- The enlargement starts at the 1st of 3 enlargement increments.
Adjusting the enlargement function
▶ Turn the thumbwheel/front dial
Changing the position of the enlarged section
▶ Swiping will allow you to move the position of an enlarged cropped section
or
▶ Press the joystick in the relevant direction
Exiting the enlargement function
Tap the shutter button
or
▶ Decrease the enlargement, until the full image is visible again
Notes
- The magnification will automatically return to normal viewing size about 5 s after the last movement of the focus ring.
• This function is unavailable while recording.
ACCESS VIA THE FUNCTION BUTTON
This function can be assigned to an function button.
Assigning a function to one of the function buttons
▶ See p. 71
Accessing the enlargement function
▶ Press the function button
- An enlarged image section appears. The position of the enlargement depends on the position of the AF metering field.
- The rectangle within the frame at the top right represents the current magnification, as well as its position in the displayed cropped section.
- The enlargement starts at the 1st of 3 enlargement increments.
Adjusting the enlargement function
▶ Turn the thumbwheel/front dial
Changing the position of the enlarged section
▶ Swiping will allow you to move the position of an enlarged cropped section
or
▶ Press the joystick in the relevant direction
Exiting the enlargement function
Tap the shutter button
Note
- The enlargement function remains active until it is exited.
DISTANCE DISPLAY
Distance information is shown in the top display during manual focusing.
- Focus Mode MF: when the shutter button is pressed to the first pressure point
- Focus Mode AF: when the shutter button is pressed and held at the first pressure point, followed by a turning of the focus ring
The unit of measure (m or ft) can be selected, see p. 81.
Note
- The focus distance is estimated based on the focus position transmitted by the lens.
FOLLOW FOCUS
This function facilitates automatic transitions to specified focus settings (focus positions). Up to threes such focus positions can be pre-configured and optionally be set up with a delay time. When a focus position is accessed, the camera will automatically focus on the set distance. The transition will then be achieved smoothly and with a configurable speed. That way, soft, almost unnoticeable transitions are created. Prerequisite is that the relevant distances are known beforehand.
The specified focus positions can be accessed individually or in an automated sequence.
▶ Select Focusing in the main menu
▶ Select Focus Mode
▶ Select Follow Focus
▶ Select Focus Position
- “Follow Focus” is activated. The Follow Focus menu appears.
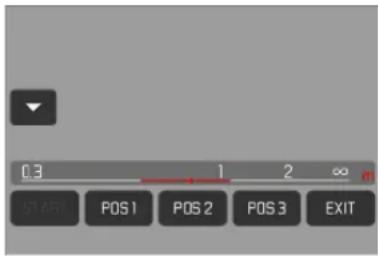
- The Follow Focus menu remains visible until the function is exited.


FUNCTION BEHAVIOR
The function continues to run regardless of whether the camera is currently recording. All operating procedures described in the following can therefore also occur while actively recording. It is also possible to start and stop a recording during an active focus sequence, or to exit the Follow Focus menu while recording.
Notes
- The following limitations apply while the function is active:
- Depending on their assignments, some function buttons may be unavailable.
- EVF is unavailable.
- Follow Focus is not available under the following conditions:
- Recordings in slow motion
- When using a lens adapter
- When using MF lenses
- When using lenses with AF/MF switch if the MF setting is selected
FOLLOW FOCUS MENU
All operation is done via touch control only.
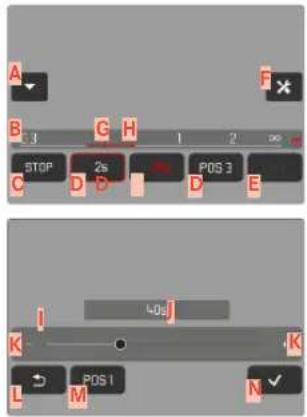
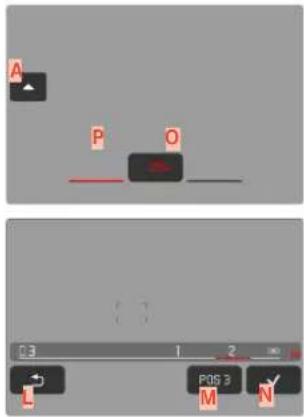
A Button for expanding/reducing the Follow Focus menu
B Focus position settings bar (Sharp focus in m or ft)
C "START" button (initiates the automatic focus sequence)
D Focus positions
“EXIT” button (exits the Follow Focus menu)
F "Edit" button (only for pre-configured focus positions)
G Display of the set distance
H Display of the distance range in clear focus
(Depth of field range, depending on the in-focus distance and the exposure value)
Delay time settings bar
Set delay time
K Buttons "Plus" and "Minus"
L "Back" button
M Currently selected focus position
N "Confirm" button
Running delay time
P Currently set focus position
The Follow Focus menu can be reduced to essential elements for better visibility.
Tap button A
- The Follow Focus menu toggles between full and reduced view.
Note
- Focus positions cannot be selected directly in reduced view.
PREPARATION
CONFIGURING A FOCUS POSITION
▶ Tap the desired focus position
- The delay time settings menu appears.
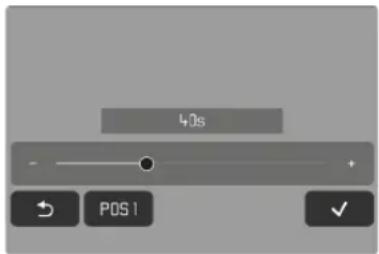
Setting a delay time
Delay times up to 120s can be set (default setting is 0 s).
Tap the buttons "Plus" and "Minus"
or
▶ Tap the desired setting directly via the settings bar
- The selected time is displayed above the settings bar.
Tap the "Confirm" button
- The distance settings menu appears.


Setting the distance
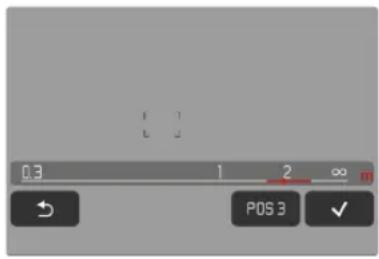
▶ Select the desired distance
- Focusing can be done manually or via AFs (joystick/Touch AF). The shutter button remains locked.
- The settings bar displays the set distance.
Tap the "Confirm" button
- The display returns to the top level of the Follow Focus menu.
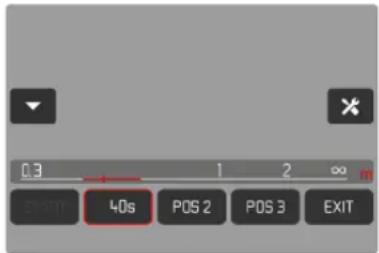
- The currently set focus position is indicated by a red frame. The settings bar displays the set distance.
- The set delay time is displayed instead of POS 1, POS 2 or POS 3.
Canceling the setting
Tap the "Back" button
- The display reverts to the previous menu level.
CHANGING THE FOCUS POSITION
Tap the desired button
- The "Edit" button appears.
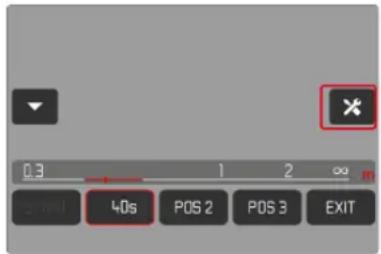
Tap the "Edit" button
- Any running delay time or focus setting is canceled.
- The delay time settings menu appears.
▶ Define a new focus position
APPLICATION
The Follow Focus function can be utilized in two ways.
- The pre-configured focus positions are accessed individually as needed.
- All configured focus positions are selected automatically in sequence.
Both methods can also be combined.
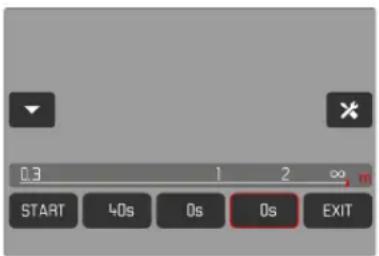
ACCESS AS NEEDED
The configured focus positions can be accessed any number of times.
With delay time:
- The active delay time is displayed in red and counts down.
- After that, the transition to the next desired focus position begins.
Without delay time:
- The transition to the next desired focus position is immediate.
▶ Tap the desired focus position
- The camera focuses with the set speed on the configured distance (once the delay time has elapsed – if set).
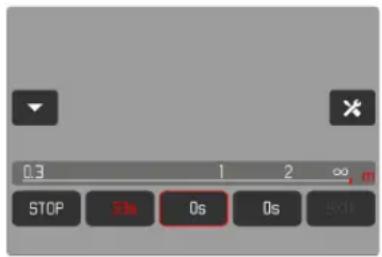
Note
- The transition to a focus position can be canceled via the "STOP" button, as long as it is not yet completed.


AUTOMATIC SEQUENCE
An automatic sequence of focus positions can be initiated if at least two positions have been configured.
START
▶ Configure at least two focus positions
Tap the "START" button
- The "START" button becomes "STOP" for the duration of the sequence.
- All configured focus positions will be accessed in sequence (once the set delay time has elapsed - if any).
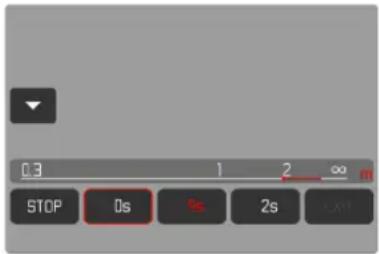
All other buttons are deactivated while the focus sequence runs.
Note
- The automatic focus sequence can be run any number of times. The focus sequence will automatically revert to the first position when it is restarted.
CANCEL
Tap the "STOP" button
- The running focus sequence is canceled.
Initiating the automatic focus sequence directly at the beginning of the recording
The automatic focus sequence can be initiated directly at the beginning of the recording.
▶ Select Focusing in the main menu
▶ Select Focus Mode
▶ Select Follow Focus
▶ Select Start FF with Recording
▶ Select On/Off
Exiting the function
▶ Canceling a running sequence
Tap the "EXIT" button
- The "EXIT" button is unavailable while a focus sequence is running.
OTHER SETTINGS
SPEED
The speed at which one focus position transitions to the next can be configured. This setting will then apply for all transitions.
▶ Select Focusing in the main menu
▶ Select Focus Mode
▶ Select Follow Focus
Select Speed
▶ Select the desired setting
(Very Low, Low, Medium, High, Very High)
SUBSEQUENT FOCUS MODE
After exiting, you can switch automatically to a pre-configured focus mode (e.g. MF) or to the most recently used focus mode.
▶ Select Focusing in the main menu
Select Focus Mode
▶ Select Follow Focus
▶ Select Return to
▶ Select the desired setting
(Intelligent AF, AFs, AFc, MF, Previous setting)
ISO SENSITIVITY
(Video mode)
The ISO setting covers a range between ISO 50 and ISO 50000, allowing you to adapt to the current situation.
There is more leeway for the use of preferred shutter-speed/aperture combinations when setting the exposure manually. You can set priorities within the scope of the automatic setting.
Factory setting: ISO 100
FIXED ISO VALUES
ISO values between 50 and 50,000 can be selected. Manual ISO setting occurs in increments of 1/2 EV or 1/3 EV, depending on the selected EV Increment setting. The number of available ISO values depends on the selected EV Increment.
▶ Select ISO in the main menu
▶ Select the desired setting
Note
- When high ISO values are used or the image is edited later, image noise, as well as vertical and horizontal stripes may become visible, particularly in larger, evenly lit areas of the object.


AUTOMATIC SETTING
The camera automatically adjusts the sensitivity to ambient brightness and/or to the configured shutter-speed/aperture combination. In conjunction with aperture priority mode, this function extends the range for automatic exposure control. The automatic setting of ISO sensitivity occurs in increments of 1/2 EV or 1/3 EV, depending on the selected EV Increment setting.
▶ Select ISO in the main menu
▶ Select Auto ISO
Note
- This function is not available in Cine mode.
LIMITING SETTING RANGES
A max. ISO value can be set, which will then limit the automatic setting range (Maximum ISO). A max. exposure time can also optionally be configured. There are automatic settings and fixed max. shutter speeds 1/30 s and 1/2000 s available for that purpose.
LIMITING ISO VALUES
All values from ISO 100 are available.
Factory setting: 6400
▶ Select Auto ISO Settings in the main menu
▶ Select Maximum ISO
▶ Select the desired value
LIMITING SHUTTER SPEED RANGES
Factory setting: Auto
▶ Select Auto ISO Settings in the main menu
▶ Select Shutter Speed Limit
▶ Select the desired value
(Auto, 1/2000, 1/1000, 1/500, 1/250, 1/125, 1/60, 1/30)
DYNAMIC ISO SETTING
The thumbwheel and front dial can be configured to allow manual ISO settings in real time. That is the factory setting in the operating modes S, A and M. Turning the dial will cycle through all setting values available in the ISO menu. That means that Auto ISO can also be selected.
FLOATING ISO
This function complements Auto ISO. Light strength changes with many zoom lenses when the focal length is changed. Floating ISO will in this situation adjust the sensitivity in fine graduations and will simultaneously ensure that the selected settings of aperture value and shutter speed remain constant in (semi) automatic exposure modes. This will specifically in video shootings prevent visible jumps in brightness.
Factory setting: On
▶ Select Floating ISO in the main menu
▶ Select On
Notes
- Floating ISO can work only if the original ISO setting allows scope for change, i.e. the highest/lowest ISO setting is not already being used. The Floating ISO warning icon will be displayed in that case.
- This function is not available in Cine mode.


ASA SENSITIVITY (Cine-Mode)
The sensitivity setting in Cine mode is always done manually. The menu item Exposure Index replaces the menu item ISO. The value is stated in ASA units. Automatic settings (Auto ISO/Floating ISO) are unavailable.
Factory setting: 400 ASA
▶ Select ISO in the main menu
▶ Select the desired setting
(50 ASA, 100 ASA, 200 ASA, 400 ASA, 800 ASA, 1600 ASA, 3200 ASA, 6400 ASA, 12500 ASA, 25000 ASA, 50000 ASA)
WHITE BALANCE
In white balance ensures neutral color rendering in any light. White Balance relies on the setting made in the camera, which light color is to be rendered as 'white'.
Four methods are available:
- automatic control
- fixed presets
- manual setting via metering
- direct setting of the color temperature
Factory setting: Auto
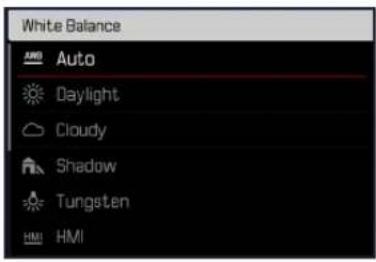
AUTOMATIC CONTROL/FIXED SETTINGS
- Auto: for automatic control, which delivers neutral results in most situations
- Various fixed presets for most frequently encountered light sources:
| Daylight | For outdoor shootings in sunlight |
| Cloudy | For outdoor shootings in cloudy conditions |
| Shadow | For outdoor shootings with the main subject in shadow |
| Tungsten | For indoor shootings with (predominantly) incandescent lamp light |
| HMI | For indoor shootings with (predominantly) light from metal halide lamps |
| Fluorescent (warm) | For indoor shootings with (prevailing) light from fluorescent tubes with warm light color |
| Fluorescent (cool) | For indoor shootings with (prevailing) light from fluorescent tubes with cool light color |
| Flash | For shooting with flash |
▶ Select White Balance in the main menu
▶ Select the desired setting
MANUAL SETTING VIA METERING
(Graycard/uv Graycard Live View)
The variant 📄 Gray card is suited best for subjects in which you can clearly identify a neutral gray or pure white area. If not, or should you base your metering on an off-center detail, then 📄 wycard Live View will be a better choice.
Note
- A value configured using this method will remain unchanged (i.e. it will be used for all subsequent photographs) until new measurements are taken or one of the other white balance settings is selected.


GRAY CARD
This metering variant captures all color hues in the metering field and uses these to calculate a mean gray value.
▶ Select White Balance in the main menu
▶ Select ↗ Gray card
• The following appears on the LCD panel:
- the image based on automatic white balance
- a frame in the center of the image
![Gray Card Press [SET] to abort](/content/2026/05/882799/images/bf918b4732f81fa16c75862f36a3f5bfc4064f4f7215fe5d2517b283036abb72.jpg)
▶ Aim the metering field at a white or neutral gray area
- The screen image changes dynamically in line with the reference area in the frame.
Performing measurement
▶ Shutter release
or
▶ Press the joystick/thumbwheel
• The measurement is taken.
Cancelling measurements
▶ Press the FN button
GRAY CARD LIVE VIEW
This metering variant captures only the color hue metered within the metering field and calculates the mean gray value from it.
▶ Select White Balance in the main menu
▶ Select LV Graycard Live View
• The following appears on the LCD panel:
- the image based on automatic white balance
- a cross in the middle of the image
natural_image
Pure graphical element with no text, numbers, or symbols visible▶ Aim the metering field at a white or neutral gray area
Repositioning the metering field
▶ Press the joystick in the relevant direction
Performing measurement
▶ Shutter release
or
▶ Press the joystick/thumbwheel
• The measurement is taken.
Cancelling measurements
▶ Press the FN button
DIRECT SETTING OF THE COLOR TEMPERATURE
Values between 2000 and 11,500K (Kelvin) can be set directly. That gives you a very wide range, which covers virtually all color temperatures occurring in real life and within which you can adapt color rendering to any light color and your personal preferences with incredible detail.
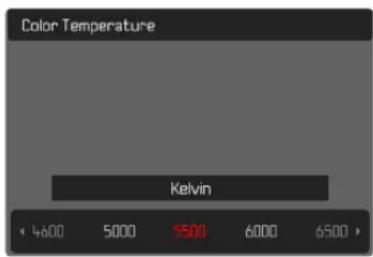
▶ Select White Balance in the main menu
▶ Select Color Temperature
▶ Select the desired value
EXPOSURE
The exposure setting is done dynamically via the two setting wheels. Generally, the thumbwheel controls the aperture, and the front dial controls ISO sensitivity. Function assignments can be modified, see p. 72.
Exposure settings can be done quickly and easily via the status screen.
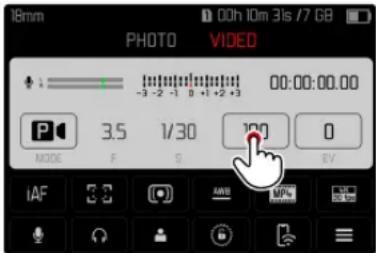
▶ Tap the desired control panel
- The active control panel is highlighted in red.
- A setting band appears instead of the light balance. A dot marks the current setting. The current setting value is displayed above the dot.


Tap the setting band briefly in the desired position, or drag the dot to the desired position
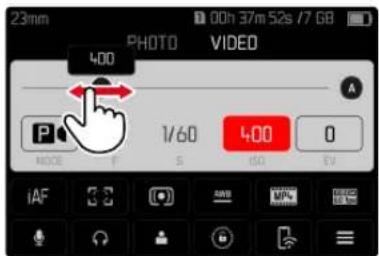
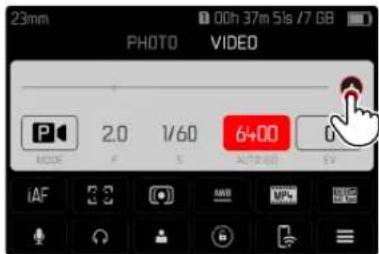
EXPOSURE METERING METHODS
The following exposure metering methods are selectable.
Factory setting: Multi Field

Spot

Center-weighted

Highlight-Weighted

Multi-field
▶ Select Exposure Metering in the main menu
▶ Select the desired metering method
(Spot, Center Weighted, Highlight Weighted, Multi Field)
- The selected metering method is displayed in the header line of the screen image.
Spot metering allows a shifting of the metering field:
▶ Press the joystick in the relevant direction
Notes
- The exposure information (ISO value, aperture, shutter speed and light balance with exposure compensation scale) will help to determine the settings required for correct exposure.
- The most important displays (ISO value, aperture and shutter speed) will also appear in the top display.
SPOT
This metering method is concentrated exclusively on a small area in the center of the image. The metering fields are joined together when the exposure metering method Spot is combined with the AF metering methods Spot, Field and Zone. Exposure metering will then occur at the point specified by the AF metering field, even if it is moved.
CENTER-WEIGHTED
This method considers the entire image field. The subject elements captured in the center will, however, impact on the calculation of the exposure value more so than areas around the edges.
MULTI-FIELD
This metering method is based on the detection of multiple values. These values are used in an algorithm to calculate an exposure value appropriate for a good rendering of the assumed main subject.
HIGHLIGHT-WEIGHTED
This method considers the entire image field. The exposure value will, however, be adjusted to very bright subject elements. That prevents the overexposure of bright subject elements without having to measure them individually. This metering method is particularly useful for objects that are significantly more brightly lit than the rest of the frame (e.g. people in a spotlight), or that reflect the light significantly (e.g. white clothing).
| Multi field Highlight weighted | |
 |  |
 |  |
 |  |


EXPOSURE MODES
You can choose one of four video shooting modes:
- Automatic program (P)
- Aperture priority mode (A)
- Shutter speed priority mode (S)
- Manual setting (M)
Cine mode also offers another, fully manual mode.
Notes
- When using a lens with an aperture ring (e.g. Leica M lenses), only the exposure modes A (aperture priority) and M (manual setting) will be available. Where that is the case, F0.0 is displayed as the aperture value.
- The following applies for all exposure modes: the available shutter speeds for custom settings or those available for automatic settings depend on the selected frame rate (Video Resolution, see p.177).
- When Auto ISO is active, the camera uses the dynamic adjustment function for the ISO value for the exposure setting. Depending on the exposure mode selected, the automatic ISO setting interacts with automatically controlled aperture and/or shutter speed settings.
SELECTING A MODE
Via the thumbwheel
▶ Press the thumbwheel
- The currently selected mode is shown in the top display. The currently selected mode is marked in red on screen.
▶ Turn the thumbwheel to select the desired mode
- The mode display changes in the top display and on screen. All modes can be reached by turning the wheel in either direction.
- The selected mode will be applied automatically approx. 2 s after the thumbwheel is moved the last time.
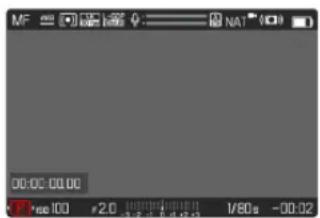

Applying the selected mode immediately
▶ Press the joystick/thumbwheel
or
▶ Tap the shutter button
Via the status screen
Tap the control panel
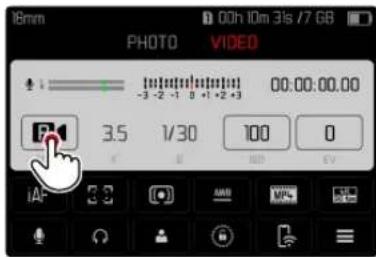
Tap the desired exposure mode
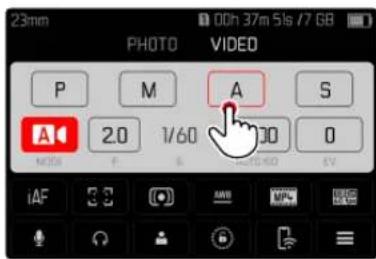
FULLY AUTOMATIC EXPOSURE SETTING - P

AUTOMATIC PROGRAM - P
The exposure is controlled by an automatic shutter speed and aperture setting.
The exposure compensation and recording level are controlled directly via the setting wheels.
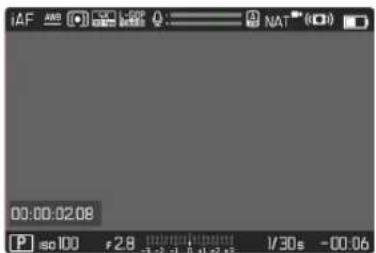
▶ Select the operating mode P (see p. 238)
▶ Set exposure compensation as needed
▶ Start video recording
Note
- Automatic exposure control takes into account any fluctuations in brightness. Set the shutter speed manually if this is undesirable, e.g. for landscape recordings or panning.

SEMI-AUTOMATIC EXPOSURE SETTING - A/S
APERTURE PRIORITY - A
Aperture priority mode sets the exposure automatically according to the manually selected aperture. It is therefore specifically suitable for video recordings in which the depth of field is a critical compositional element.
The range of the depth of field can be diminished with an accordingly small exposure value. This will set off the focused area against the unfocused background. Conversely, a greater exposure value will increase the range of the depth of field. Such a setting is advisable if the foreground and background should be rendered in sharp focus. The selected aperture setting will be maintained for the duration of the recording.
▶ Select the operating mode A (see p. 238)
▶ Set the desired exposure value
▶ Start video recording
SHUTTER SPEED PRIORITY - S
Shutter speed priority mode will set exposure automatically according to the manually selected shutter speed. The selected shutter speed will be maintained for the duration of the recording.
▶ Select the operating mode S (see p. 238)
▶ Select the desired shutter speed
▶ Start video recording
MANUAL EXPOSURE SETTING - M
The following manual settings for shutter speed and aperture are a good choice:
- to maintain constant exposure settings between multiple recordings
- to maintain constant exposure settings while recording, specifically in conjunction with fixed ISO settings
▶ Select the operating mode M (see p. 238)
▶ Select desired exposure
- The exposure compensation is done using the scale of the light balance.
▶ Start video recording
Displays on the light balance:
| Correct exposure | |
| under/overexposure by the displayed value | |
| under or overexposure by more than 3 EV |
EXPOSURE COMPENSATION
Exposure compensation values can be set in the range ±3EV. The available values depend on the global setting EV Increment (see p.195).
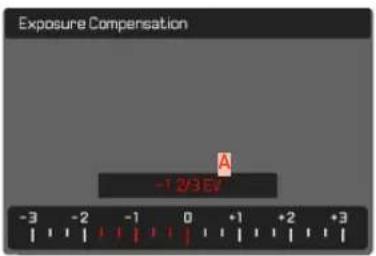
A Set compensation value (marks at 0 = Off)
▶ Select Exposure Compensation in the main menu
- A scale appears as a submenu item on the LCD panel.
▶ Set the value on the scale
- The set value is displayed above the scale.
- While setting the value, you can see the effect on the screen image, which becomes darker or lighter.
Notes
- This function is assigned to one of the setting wheels in the three (semi) automatic exposure modes and therefore quickly accessible (see p. 72).
- The set exposure compensation is indicated by a mark on the exposure compensation scale in the footer line (see p. 30).
- The following applies for set compensation values, no matter how they were initially set: They remain effective until they are manually reset to 9, even if the camera is switched off and on again in the meantime.
- Changes to the EV Increment setting (see p. 195) lead to the cancellation of a compensation that has been set, i.e. in such cases it is automatically reset to 0.


PLAYBACK MODE
Playback mode is used to display and manage the stored recordings. The switchover between shooting and playback mode, as well as most other actions can be completed using gesture or key control. Please see p. 55 for more information about the available gestures.
Notes
- Recorded videos are not automatically rotated in playback mode to utilize the full screen area.
- It may not be possible to render files with this camera that were not recorded with this device.
- In some cases, the screen image may not have the expected quality, or the LCD panel will remain blank and only display the file name.
- You can toggle back from playback mode to shooting mode at any time by tapping the shutter button.
CONTROL ELEMENTS IN PLAYBACK MODE
CONTROL ELEMENTS ON THE CAMERA
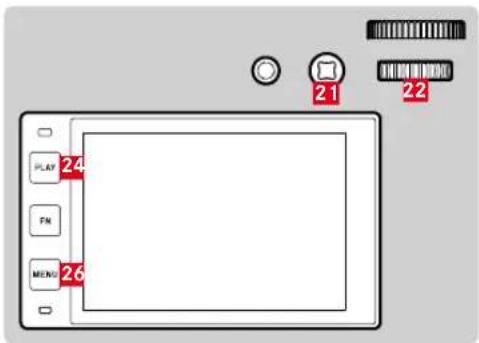
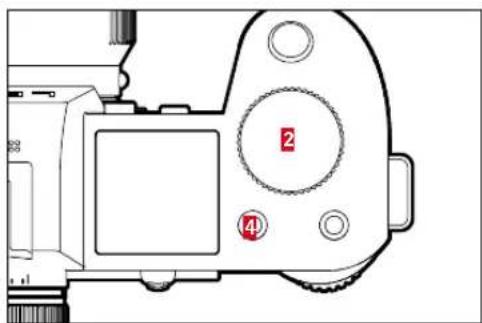
2 Front dial
4 Function button
20 Function button
21 Joystick
22 Thumbwheel
24 PLAY button
25 FN button
26 MENU button
FUNCTION BUTTONS IN REVIEW MODE
In playback mode, the function buttons either have permanently assigned functions or are without function.
The following function buttons have assigned functions:
| Button Function | |
| FN button 25 | Toggle Info Levels |
| Function button 20 | EVF LCD |
| Function button 4 | Mark shots (Rate / Unrate) |
CONTROL ELEMENTS ON THE LCD PANEL
On-screen control elements generally function by intuitively by touch. Many can also be selected by pressing one of the three buttons to the left of the LCD panel. A control element in the header is accompanied by an icon denoting the relevant button. A control element on the edge of the screen will be positioned directly next to the relevant button.
Example: The "Go back" icon ➕ can be selected in one of two ways:
- tap on the "Go Back" icon directly
- press the relevant button
(top button = PLAY button)
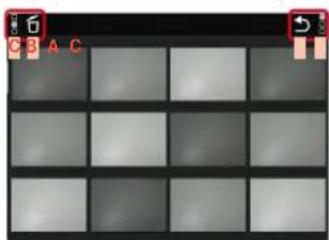
natural_image
Grid of grayscale squares with selection handles, no text or symbols present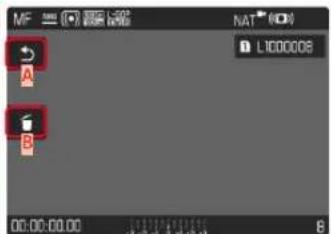
A Control element "Go back"
B Control element "Delete"
c Display of the relevant button


INITIATE/EXIT PLAYBACK MODE
Using touch control
Swipe up or down
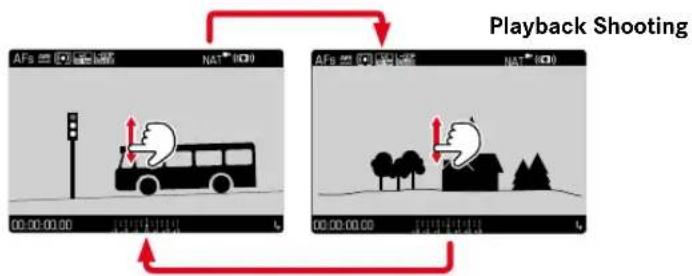
flowchart
graph TD
    A["AFs"] --> B["Car with Down Arrow"]
    B --> C["Left Frame"]
    D["AFs"] --> E["Tree with Up Arrow"]
    E --> F["Right Frame"]
    style A fill:#f9f,stroke:#333
    style D fill:#f9f,stroke:#333
    style B fill:#ccf,stroke:#333
    style E fill:#ccf,stroke:#333
    style C fill:#fff,stroke:#333
    style F fill:#fff,stroke:#333
Using button control
▶ Press the PLAY button
• The last shot taken appears on the screen.
- The following message appears if the inserted memory card does not contain any (image) files: No valid picture to play.
- The PLAY button function differs, depending on the current camera setting:
| Initial situation | After pressing the PLAY button |
| Full screen display of a recording Recording mode | |
| Display of multiple small recordings | Full screen display of the recording |
SELECTING/SCROLLING THROUGH IMAGES
The shots are visually arranged in a horizontal reel. When the end of an image series is reached, the display automatically jumps back to the first image in the series. All shots can therefore be reached by scrolling either right or left.
SINGLE
Using touch control
▶ Swipe to the left or right
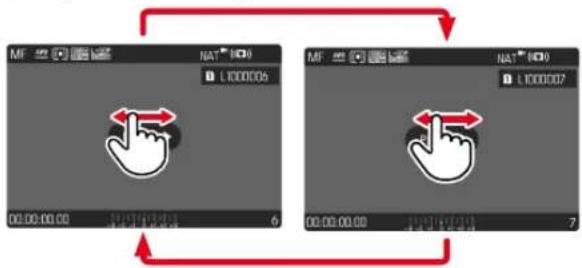
Using button control
▶ Press the joystick left/right
or
▶ Turn the thumbwheel
CONTINUOUS
▶ Swipe to the left or right and hold the finger on the edge of the screen
• The subsequent shots will move past continuously.
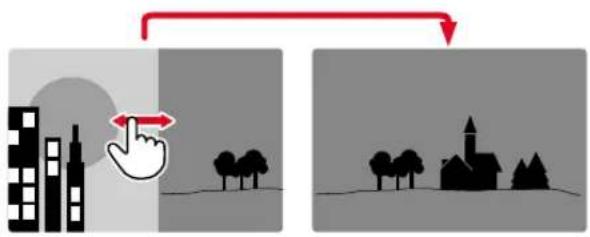


INFO DISPLAYS IN PLAYBACK MODE
The same info profiles are available in playback mode as in shooting mode. The actual info profile currently in use, however, is saved separately. It is therefore possible to use an empty info profile completely without assist function icons in playback mode, without having to set them again when switching to shooting mode. See p. 104 for setting options and additional information. The assist functions Grid and Level Gauge are not available in playback mode.
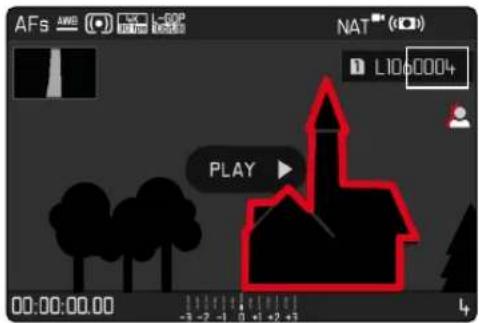
DISPLAYING ASSIST FUNCTIONS
Switching between info profiles
▶ Press the FN button
natural_image
Silhouette of a bus parked near a traffic light (no text or symbols)Empty info profile Image data only
natural_image
Silhouette of a bus parked near a traffic light (no text or symbols visible)(Info Bars)
natural_image
Illustration of a bus at a traffic light with a red signal marker (no text or symbols)Clipping / Zebra + Info Bars
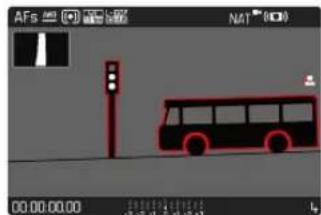
natural_image
Illustration of a bus at a traffic intersection with a red light beam (no text or symbols)Info Bars, Focus Peaking, Histogram
DISPLAYING MULTIPLE SHOTS AT ONCE
The camera offers an overview function in which several thumbnail images can be viewed on one screen, which makes it easier to find a specific image. You can choose 12 or 30 images per overview.
OVERVIEW
Using touch control
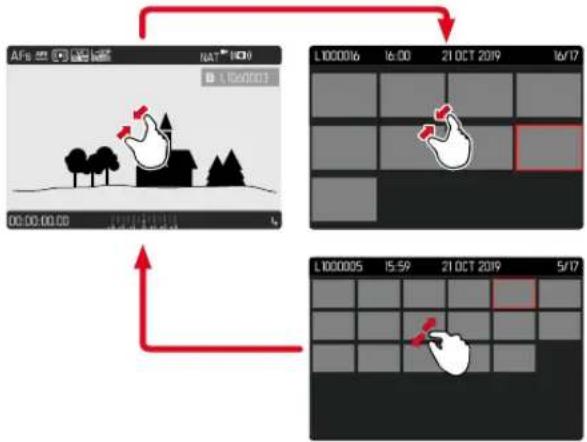
flowchart
graph TD
    A["AFs"] --> B["L100006 16:00 21 OCT 2019 16/17"]
    B --> C["L100005 15:59 21 OCT 2019 5/17"]
    C --> D["Time: L100003, L100004, L100005"]
    D --> E["Time: L100003, L100004, L100005"]
▶ Two-finger pinch
• The display toggles from 12 to 30 thumbnails.
Viewing other images
▶ Swipe up or down
Using button control
▶ Turn the front dial in anti-clockwise direction
- 12 thumbnails are shown at the same time. Another turn on the thumbwheel increases the number of displayed thumbnails to 30.
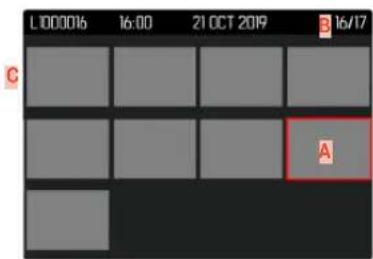
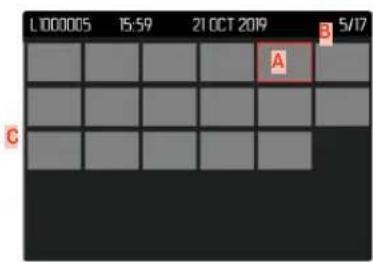
A Currently selected image
B Number of the currently selected images
C Scrollbar
The currently viewed image is framed in red and can be selected for a closer look.


Navigating between images
▶ Press the joystick in the relevant direction or
▶ Turn the thumbwheel
Displaying the image in full size Using touch control
▶ Two-finger spread
or
▶ On the desired recording
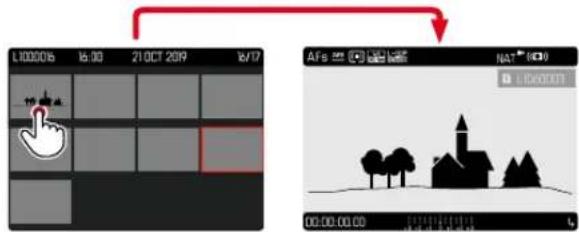
Using button control
▶ Turn the front dial in clockwise direction or
▶ Press joystick, thumbwheel or PLAY button
TAGGING/RATING OF RECORDINGS
Images can be marked as favorites to find them quicker or to simplify the later deletion of multiple images. Tagging can be done in regular view mode or in the overviews.
Tagging a recording
▶ Press the function button 4
or
▶ Press the joystick up
- The recording is marked with ★. The icon will appear in the header line on the far right when viewing images in full size, and in the top left corner of the thumbnail in overview mode.
Removing a tag
▶ Press the function button 4
or
▶ Press the joystick down
• The ★ marking disappears.
Note
- In the overview, recordings can only be tagged via the function button.
DELETING RECORDINGS
There are several methods available to delete recordings:
– deleting individual recordings
– deleting multiple recordings
– deleting all recordings without a icon/ranking
- deleting all recordings
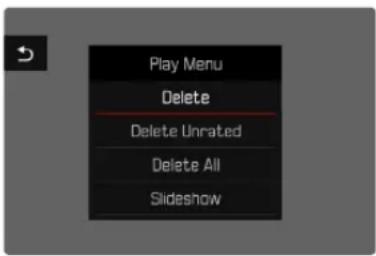
Important
- Once deleted, shots are no longer retrievable.
DELETING INDIVIDUAL RECORDINGS
▶ Press the MENU button
▶ Select Delete in the play menu
• The Delete screen appears.
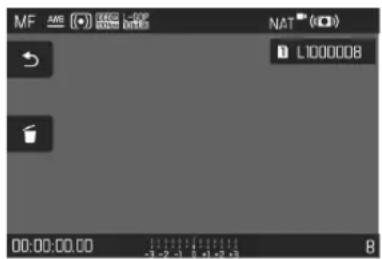
▶ Select the Delete icon 6
(tap the icon directly or press the FN button)
- The LED will flash during the delete process. The process may take a few seconds.
- The next image will be displayed once deletion is complete. The following message appears if no other recordings are saved on the card: No valid picture to play.
Canceling a deletion and return to the normal playback mode
▶ Select the "Go back" icon
(tap the icon directly or press the PLAY button)
Notes
- The Delete screen can not be called up when in overview mode, because the menu function Delete of the play menu is not available in this context.
- With the Delete screen active, you can still browse between stored recordings.


DELETING MULTIPLE RECORDINGS
Several recordings can be marked in a Delete overview with twelve thumbnails and can then be deleted all at once. This overview can be reached in two ways.
▶ Turn the front dial in anti-clockwise direction
• The overview screen appears.
▶ Press the MENU button
▶ Select Delete Multi in the play menu
• The Delete overview appears.
or
▶ Press the MENU button
▶ Select Delete in the play menu
• The Delete screen appears.
▶ Turn the front dial in anti-clockwise direction
• The Delete overview appears.
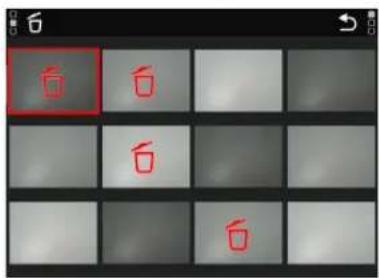
Any number of recordings can be selected in this view.
Selecting recordings for deletion
▶ Select a image
▶ Press the joystick/thumbwheel
or
Tap the desired image
- The recordings selected for deletion are marked with a red Delete icon 6.
Deleting the selected recordings
▶ Select the Delete icon 6
(tap the icon directly or press the FN button)
• The prompt Do you want to delete all marked files? appears.
Select Yes
Canceling a deletion and return to the normal playback mode
▶ Select the "Go back" icon
(tap the icon directly or press the PLAY button)
DELETING ALL RECORDINGS
▶ Press the MENU button
▶ Select Delete All in the play menu
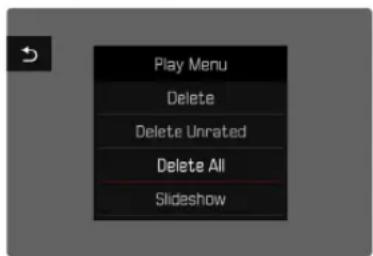
- The prompt Do you want to delete all files? appears.
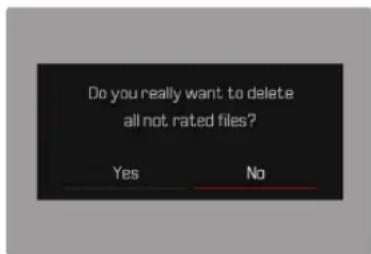
▶ Select Yes
Note
- The message No valid picture to play, appears after successful deletion. The same shot is displayed again if deletion was unsuccessful. When deleting several or all recordings, a notification screen may appear for the time needed to process the data.
DELETING UNRATED RECORDINGS
▶ Press the MENU button
▶ Select Delete Unrated in the play menu
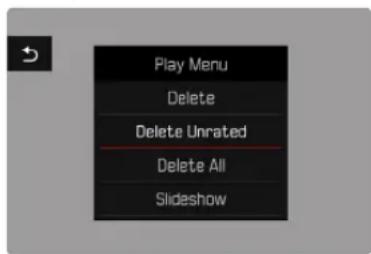
- The prompt Do you really want to delete all not rated files? appears.
▶ Select Yes - The LED will flash during the deletion process. The process may take a few seconds. The next marked image appears once deletion is complete. The message No valid picture to play, appears if no other recordings are saved on the card.


SLIDE SHOW
A slide show function is available in playback mode, in which the saved images are shown automatically in series. Choose to see all images (Play All), only photos (Pictures Only) or only videos (Videos Only) should be displayed. For photos, select how long each image should be displayed (Duration).
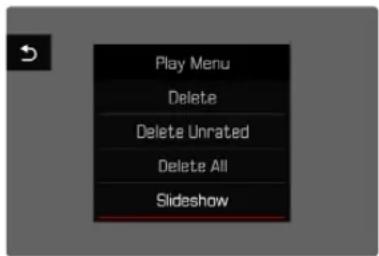
SETTING THE DURATION
▶ Press the MENU button
▶ Select Slideshow in the play menu
▶ Select Duration
▶ Select the desired duration (1 s, 2 s, 3 s, 5 s)
▶ Press the MENU button
▶ Select Slideshow in the play menu
▶ Select the desired setting
(Play All, Pictures only, Videos only)
- The slide show will start automatically with the selected images and runs in an endless loop until it is exited.
ENDING THE SLIDE SHOW
▶ Press the PLAY button
or
▶ Tap the shutter button
- The camera switches to the relevant mode.
Notes
- An intermediate screen may appear while the data is prepared for playback.
- The settings in Duration remain intact even after the camera is switched off and on again.
VIDEO PLAYBACK
PLAY ▶ appears on screen if you have selected a video file in play-back mode.
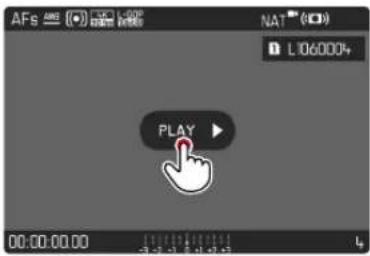
START PLAYBACK
▶ Press the joystick/thumbwheel
or
Tap PLAY
ACCESSING THE CONTROL ELEMENTS
The control elements are displayed when playback is stopped.
Using touch control
Tap anywhere on the LCD panel
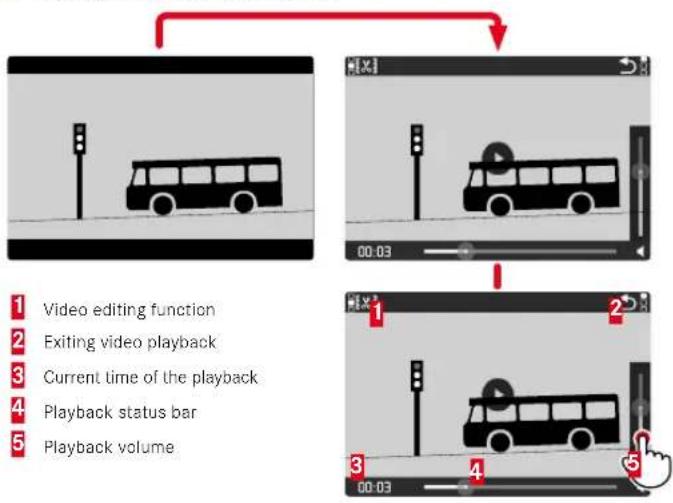
flowchart
graph TD
    A["1: Video editing function"] --> B["2: Exiting video playback"]
    B --> C["3: Current time of the playback"]
    C --> D["4: Playback status bar"]
    D --> E["5: Playback volume"]
Using button control
▶ Press the joystick/thumbwheel
Note
- The control elements disappear after about 3 s. Tapping the LCD panel again or pressing a button will make them reappear.


PAUSE PLAYBACK
Tap anywhere on the LCD panel
or
▶ Press the joystick/thumbwheel
RESUMING PLAYBACK
Using touch control
While the control elements are visible:
Tap anywhere on the LCD panel
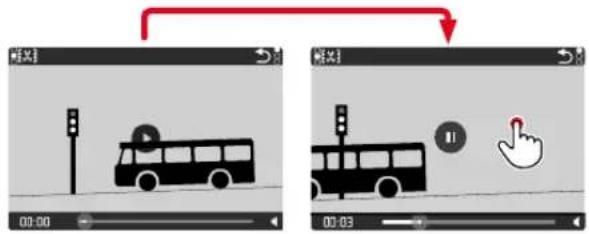
Using button control
While the control elements are visible:
▶ Press the joystick/thumbwheel
NAVIGATE TO ANY POINT IN THE FILE
QUICK JUMP
Using touch control
While the control elements are visible:
Tap the Playback status bar at the desired position
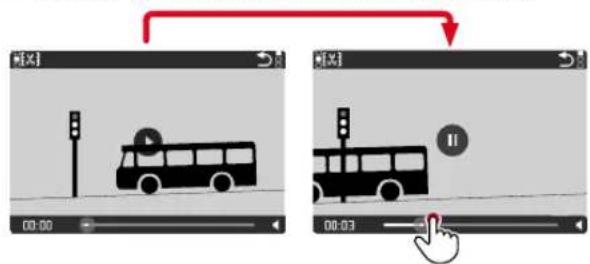
Using button control
▶ Press and hold the joystick left/right
PRECISE SELECTION
▶ Turn the thumbwheel
END PLAYBACK
Using touch control
While the control elements are visible:
Tap the "Go back" icon
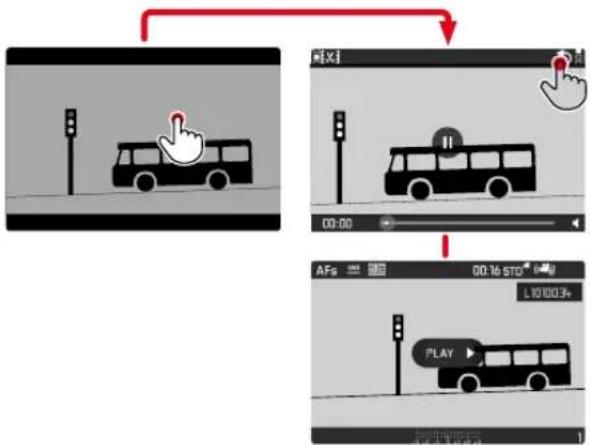
flowchart
graph TD
    A["Start"] --> B["Action: Clicked Bus"]
    B --> C["Play Button"]
    C --> D["Action: Clicked Bus"]
    D --> E["Action: Play Button"]
Using button control
▶ Press the PLAY button
SETTING THE VOLUME
Using touch control
While the control elements are visible:
Tap the volume icon
Tap the volume bar at the desired position
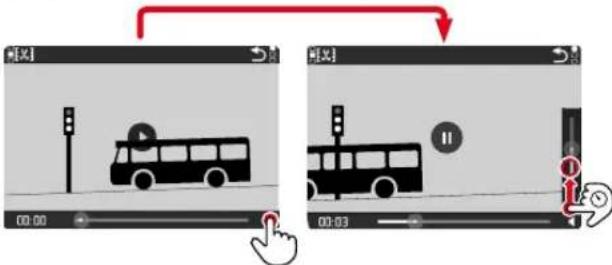
Using button control
▶ Press the joystick up/down
• The volume status bar appears.
▶ Press the joystick up (louder) or down (quieter)
Note
- Sound is switched off at the lowest part of the bar and the volume icon changes to 🔒.


VIDEO EDITING
Using touch control
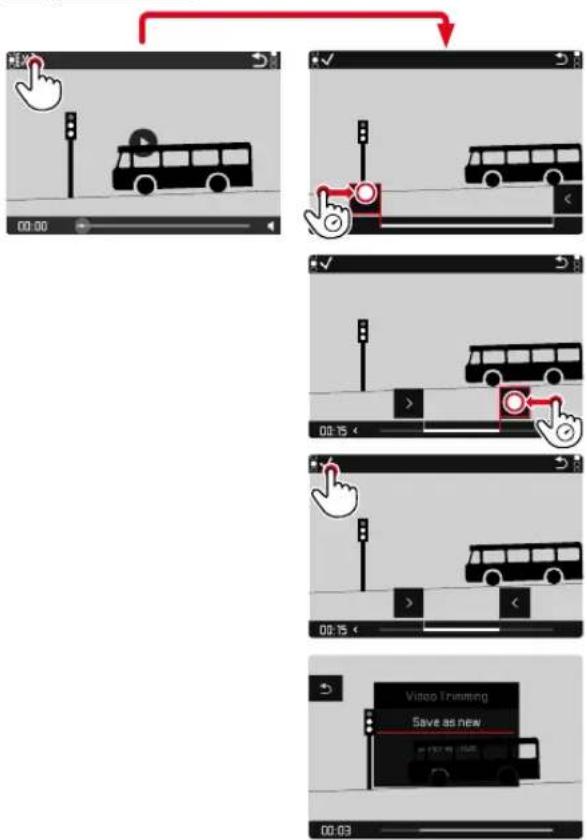
flowchart
graph TD
    A["Start"] --> B["Click at bus, Traffic Light"]
    B --> C["Move to bus at 00:15"]
    C --> D["Move to bus at 00:03"]
    D --> E["Save as new video from 00:15"]
    E --> F["Move to bus at 00:15"]
    F --> G["Move to bus at 00:03"]
    G --> H["Video Trimming"]
Using button control
ACCESSING THE VIDEO EDITING FUNCTION
▶ Press the FN button
- The video editing screen appears, the left cutting mark is highlighted in red (= active).
CHANGING THE CURRENT CUTTING POINT
▶ Press the joystick left/right
- The selected cutting point is highlighted in red (= active).
MOVING THE ACTIVE CUTTING POINT
▶ Turn the thumbwheel
- The currently selected time of the relevant cutting point is displayed at the bottom left of the footer line. A still of the video sequence at that point is displayed in the background.
CUTTING
▶ Press the FN button to confirm the cuts
• The Video Trimming menu appears.
▶ Select a function from the Video Trimming menu (Save as new, Overwrite, Preview)
| Save as new | The new video is additionally saved, the original video remains unchanged. |
| Overwrite | The newly cut video is saved and the original one is deleted. |
| Preview | The new video is played. The newly cut video is not saved and the original remains unchanged. |
CANCELLING THE VIDEO EDITING FUNCTION
The editing function can be canceled at any time, provided no selection was made in the Video Trimming menu.
▶ Press the PLAY button
• The video playback screen reappears.
Notes
- In all three cases, a notification screen appears while the data is being processed. Then the new video is played back.
- The numbering of existing recordings will not be changed when Save as new is selected. The newly created video will be added to the end of the series of videos.


OTHER FUNCTIONS
The settings described in this chapter apply for photo and video mode alike. They are therefore available in the picture and video menu (see chapter "Camera Operation" under "Menu Control"). A setting selected in one of the modes will also apply to the other.
RESETTING THE CAMERA TO FACTORY SETTINGS
This function allows you to reset all your custom menu settings back to the factory settings. You can optionally exclude the user profiles, Wi-Fi and Bluetooth settings, as well as the image numbering from the reset individually.
▶ Select Reset Camera in the main menu
- The prompt Reset Camera Settings? appears.
▶ Confirm or reject the reset to factory settings (Yes) / (No)
- Selecting No will cancel the reset and the display will return to the main menu. Selecting Yes will trigger additional prompts regarding the settings you can opt to keep.
▶ Confirm or reject the reset of the user profiles (Yes) / (No)
▶ Confirm or reject the reset of the Wi-Fi and Bluetooth settings (Yes) / (No)
▶ Confirm or reject the reset of the image numbering (Yes)/(No)
▶ Confirm or reject the reset of the LUT profiles (Yes)/(No)
• The message Please Restart the Camera appears.
▶ Switch the camera off and on again
Notes
- Date & time, as well as the preferred language will have to be set up again after a reset. Relevant prompts will appear on screen.
- You reset the image file numbering separately via the menu item Reset Image Numbering (see p. 258).
FIRMWARE UPDATES
Leica is continuously working on the further improvement and optimization of your camera. Since many camera functions are entirely controlled by software, some of these improvements and additions to the functional scope can be installed in retrospect. Leica offers firmware updates at irregular intervals, which you can download from our website.
Leica will notify you of any new updates, once you have registered your camera. Users of Leica FOTOS will also be automatically notified about firmware updates for their Leica cameras.
Finding the currently installed firmware version
▶ Select Camera Information in the main menu
- The current firmware versions are displayed.
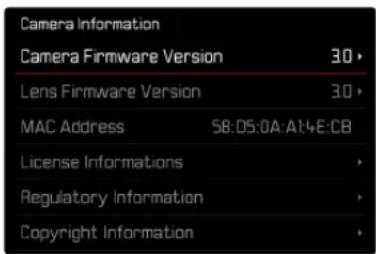
More information about registering, firmware updates and how to download them to your camera, as well as any amendments and additions to this manual can be found in the customer area of our website at:
https://club.leica-camera.com


EXECUTING A FIRMWARE UPDATE
Any interruption of a running firmware update may cause serious and irreparable damage to your equipment! You will therefore have to take particular note of the following, when carrying out a firmware update:
- Do not switch off the camera!
- Do not remove the memory card!
- Do not remove the rechargeable battery!
- Do not remove the lens!
Notes
- A warning message will appear if the battery is insufficiently charged. Recharge the battery and then repeat the process described above.
- You will find additional device and country-specific registration marks and numbers in the Camera Information submenu.
PREPARATION
▶ Fully charge and insert the rechargeable battery
The second SD memory card (where applicable) must be removed from the camera
▶ Any stored firmware files on the memory card must be removed
- We recommend saving any images on the memory card and reformatting it before the update.
(Caution: Loss of data! All data stored on the memory card will be lost during formatting.)
▶ Download the latest firmware version
▶ Save the download to the memory card
- The firmware file must be stored in the main directory of the memory card (not in a sub-directory).
▶ Insert the memory card into the camera
▶ Switch the camera on
UPDATING THE CAMERA FIRMWARE
▶ Preparation
▶ Select Camera Information in the main menu
▶ Select Camera Firmware Version
▶ Select Start Update
- A prompt with information about the camera is displayed.
▶ Check the version information
Select Yes
• The prompt Save profiles on SD Card? appears.
Select Yes/No
• The update will start automatically.
- The lower status LED will flash during this process.
- Once the process has completed successfully, a relevant on-screen message and prompt to restart the device will appear on screen.
▶ Switch the camera off and on again
Note
- Date & time, as well as the preferred language will have to be set up again after the restart. Relevant prompts will appear on screen.
UPDATING THE LENS FIRMWARE
Where available, you can optionally carry out firmware updates for lenses. The instructions provided for camera firmware updates apply.
▶ Preparation
▶ Select Camera Information in the main menu
▶ Select Lens Firmware Version
Select Start Update
- A prompt with information about the camera is displayed.
▶ Check the version information
▶ Select Yes
• The update will start automatically.
- The lower status LED will flash during this process.
- Once the process has completed successfully, a relevant on-screen message and prompt to restart the device will appear on screen.
▶ Switch the camera off and on again

UPDATING THE ADAPTER FIRMWARE
Where available, you can optionally carry out firmware updates for adapters. The instructions provided for camera firmware updates apply.
▶ Preparation
▶ Select Camera Information in the main menu
▶ Select Lens Firmware Version
▶ Select Start Update
- A prompt with information about the camera is displayed.
▶ Check the version information
▶ Select Yes
- The update will start automatically.
- The lower status LED will flash during this process.
- Once the process has completed successfully, a relevant on-screen message and prompt to restart the device will appear on screen.
▶ Switch the camera off and on again
Note
- The relevant menu item will only be visible if an adapter is mopunted and activ.


LEICA FOTOS
The camera can be controlled remotely using a smartphone/tablet PC. This will require an installation of the Leica FOTOS app on the mobile device. Leica FOTOS furthermore offers a variety of other useful functions:
- Geotagging for images
- File transfer
▶ Scan the following QR code with the mobile device
or
The app is available from Apple App Store™/Google Play Store™
CONNECTING
FIRST-TIME CONNECTION TO A MOBILE DEVICE
The connection is established via Bluetooth. A pairing of the camera and the mobile device is required for a first-time connection to a mobile device.
CONNECTION WIZARD
The connection wizard appears at initial startup of the camera or after a camera reset. These settings are also available via the menu item Leica FOTOS.
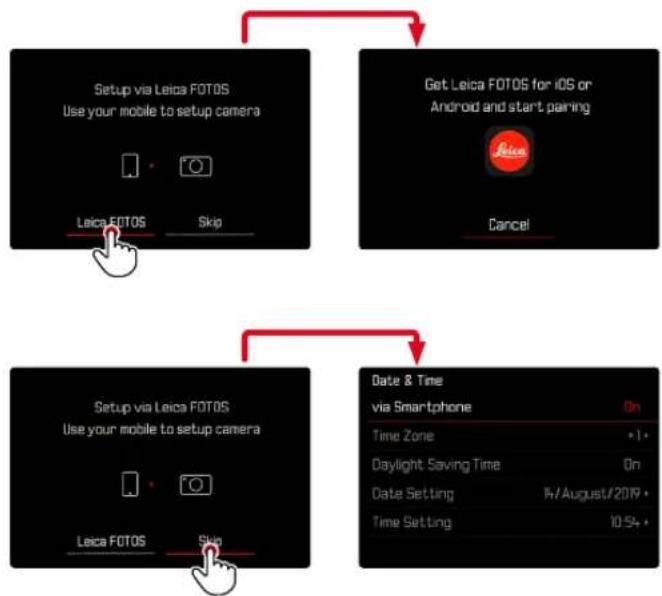
flowchart
graph TD
    A["Setup via Leica FOTOS\nUse your mobile to setup camera"] --> B["Get Leica FOTOS for iOS or\nAndroid and start pairing\nLeica"]
    B --> C["Cancel"]
    D["Setup via Leica FOTOS\nUse your mobile to setup camera"] --> E["Date & Time\nvia Smartphone\nOn"]
    E --> F["Time Zone +1·"]
    E --> G["Daylight Saving Time On"]
    E --> H["Date Setting 14/August/2019·"]
    E --> I["Time Setting 10.54·"]
USING THE MENU TO
ON THE MOBILE DEVICE
▶ Activate Bluetooth
▶ Launch the Leica FOTOS app
▶ Select the camera model
IN THE CAMERA
▶ Select Leica FOTOS in the main menu
Select Bluetooth
- Bluetooth is activated.
▶ Follow the Leica FOTOS instructions
- The icons "Bluetooth" and "GPS" appear on the LCD panel once a connection is established.
Notes
- The pairing process may take a few minutes to complete.
• Each mobile device only needs to be paired with the camera once. The process adds the device to the list of known devices. - GPS data will be automatically determined and written to the Exif data when pictures are taken while the camera is connected to the Leica FOTOS app.
CONNECTING WITH PAIRED DEVICES
▶ Select Leica FOTOS in the main menu
Select Bluetooth
Select On
- Activate the Bluetooth function.
- The camera connects to the mobile device automatically.
Notes
- Should there be more than one known device in the vicinity of the camera, then it will automatically connect to the first device responding. A favorite mobile device cannot be specified.
- Disconnect and reconnect if the wrong device was connected.

DISABLING WI-FI
DISABLING WLAN AUTOMATICALLY (Sleep mode)
The factory settings provide that the Wi-Fi via the camera is disabled after a short period of inactivity to save power. The timing of the automatic disconnect can be adjusted manually. Camera access will then be available at any time during the selected time span.
Factory setting: After 5 min
▶ Select Leica FOTOS in the main menu
▶ Select Wi Fi Sleep Mode
▶ Select the desired setting
- After 5 min: Shut-down after 5 mins of inactivity
- Tomorrow: no auto power saving today
- Never: Wi-Fi remains active permanently
DISABLING WLAN MANUALLY
It is recommended to disable WLAN on the camera, once a connection to a mobile device is no longer needed.
▶ Select Leica FOTOS in the main menu
▶ Select Bluetooth
▶ Select Off
REMOVING PAIRED DEVICES FROM THE LIST
We recommend removing rarely used devices from the list of known devices to prevent unwanted connections.
▶ Select Leica FOTOS in the main menu
▶ Select Delete
▶ Select the relevant device
- A security prompt appears on the LCD panel.
▶ Select Yes
Note
- The pairing process will have to be repeated to reconnect a deleted device to the camera.
FIND THE MAC ADDRESS
You can find the MAC address of the Leica SL2 in the camera menu.
▶ Select Camera Information in the main menu
REMOTE CAMERA CONTROL
You can take pictures and record video remotely via the mobile device, and can also change image settings or transfer data to the mobile device. A list of available functions and instructions for their use can be found in the Leica FOTOS app.
REMOTE CAMERA ACTIVATION
The camera can be activated remotely from off or standby if this function is activated in the camera. The Bluetooth function must be active.
▶ Select Leica FOTOS in the main menu
Select Remote Wakeup
Select On
- The camera will scan for known devices and automatically establishes a connection.
Important information
- Remote activation will activate the camera even if it was switched off via the main switch.
- Accidental remote camera activation may result in unwanted pictures taken and excessive power consumption.
- A third-party device can – provided is has been paired with the camera – access the camera remotely if your own mobile device is not currently connected or its Bluetooth function is deactivated. This poses a danger of unauthorized access to your data or camera functions.
Solution
- Only activate this function just before you want to use it.
- Disable the function as soon as it is no longer needed.
CARE/STORAGE
We recommend the following if the camera will not be used for an extended period of time:
- Switch off the camera
- Remove the memory card
- Remove the battery (after approx. 2 months the set date and time will be lost)
CAMERA HOUSING
- Keep your equipment meticulously clean, as any kind of dirt residue presents a breeding ground for micro organisms.
- Only clean the camera with a soft, dry cloth. Stubborn dirt should first be moistened with a watered-down detergent and can then be wiped away with a dry cloth.
- Wet a soft cloth with tap water, wring it out thoroughly and use it to wipe down the camera. Then wipe it down thoroughly with a dry cloth.
- Wipe the camera with a clean, lint-free cloth to remove stains and fingerprints. Tougher dirt in hard to reach corners of the camera housing can be removed with a small brush. Take care not to touch the shutter blades.
- Store the camera in a closed and padded container to prevent friction damage and protect it against dust accumulation.
- Keep the camera in a dry, sufficiently ventilated place, where it will not be subjected to high temperatures and humidity. Make sure to remove all moisture from the camera if it was used in humid conditions.
-
Do not store the camera in a leather case for extended periods of time to prevent fungal contamination.
-
Empty you camera bag completely if it ever gets wet during use. Your equipment might otherwise be subjected to moisture and tanning residue released by the moist leather.
- All mechanical bearings and sliding surfaces on your camera are lubricated. Remember to press the shutter button several times every three months to prevent the lubrication points hardening if the camera will not be used for an extended period of time. We also recommend repeated adjustment and use of all the other operating elements.
- When using your camera in tropical climates, make sure to expose the equipment to sunlight and fresh air as much as possible to prevent fungal growth. Storage in airtight containers or cases is recommended only in conjunction with a desiccant like silica gel.
LENS
- A soft-bristle brush will usually suffice to remove dust from the outer lenses. Remove more severe soiling with a clean, soft cloth that is completely free of foreign matter. Wipe the lens in a circular motion from the center outward. We recommend using microfiber cloths that come in a protective container and are available from photography shops and other optical retailers. These cloths are machine-washable at 40°C. Do not use fabric softener and do not iron them. Never use spectacle lens cleaning cloths, as these are soaked in chemicals, which could damage the glass of the camera lenses.
- Attach a transparent UVA filter for optimal front lens protection in unfavorable conditions (e.g. sand, salt water spray). Please remember that the filter may create unwanted light reflections in some backlight situations and in case of high contrasts.
- Lens caps also protect the lens against accidental fingerprint smudges and rain.
- All mechanical bearings and sliding surfaces on your lens are lubricated. Make sure to periodically move the focus ring and the aperture ring to prevent seizing if the lens will not be used for an extended period of time.
VIEWFINDER/LCD PANEL
- Switch off your camera and leave it to stand at room temperature for around 1 hour if condensation has formed on or in the camera. The condensation will disappear, once the camera temperature has reached room temperature.
RECHARGEABLE BATTERY
- Lithium-ion rechargeable batteries should only be stored partially charged, i.e. not fully depleted or fully charged. The camera LCD panel will show the current charge level of the battery. Charge the battery twice a year for around 15 minutes to avoid deep discharge in case of very long storage periods.
MEMORY CARDS
- Make sure to store memory cards in their anti-static container when not in use.
- Do not store memory cards where they will be exposed to high temperatures, direct sunlight, magnetic fields or static electricity. Always remove the memory card if the camera will not be used for an extended period of time.
- We recommend formatting the memory card from time to time, because fragmented residual data from deleted files may block some of its storage capacity.
SENSOR
PIXEL MAPPING
Defective pixels may appear on the image sensor of digital cameras over time. The camera compensates for these defective pixels automatically by calculating the data captured by other pixels surrounding defective ones. This feature requires a process known as “pixel mapping” to recognize and register defective pixels. The camera does this automatically every two weeks. The function can also be accessed manually if needed.
▶ Select Camera Settings in the main menu
▶ Select Pixel Mapping
▶ Select Yes
- Pixel mapping is executed. The process may take a few seconds.
- The message Please Restart the Camera appears.
▶ Switch the camera off and on again
FAQ
| Problem | Possible cause to be verified | Troubleshooting suggestions |
| Battery issues | ||
| Battery is depleted too quickly Battery too cold | Warm the battery (e.g. in pants pocket) and only insert | directly before use |
| Battery too hot Allow battery to cool down | ||
| LCD panel or EVF set too bright Reduce brightness | ||
| Power save mode deactivated | Activate Auto Power Off | |
| AF mode permanently activated Select other mode | ||
| Permanent WLAN connection Deactivate WLAN when not in use | ||
| Continuous use of LCD panel (e.g. in Live View mode) Deactivate the function | ||
| Battery has been recharged too many times The battery has reached the end of its operating time Replace battery | ||
| Third-party lens with high power consumption connected | Change battery, use handgrip, use external power supply via USB | |
| Tracking AF with AFc activated Use AFs or MF | ||
| Preview of the recorded images (Auto Review) activated | Deactivate the function | |
| Charging process not starting | Incorrect battery polarization or faulty charger connection | Check polarization and connection |
| Charging takes too long | Battery too hot or too cold | Charge the battery at room temperature |
| Charging pilot light is on, but battery isn't charging | The battery contacts are dirty | Clean the contacts with a soft, dry cloth |
| Battery has been recharged too many times The battery has reached the end of its operating time Replace battery | ||
| Battery not charging via USB | The battery can only be charged via USB when the camera is off | Switch off the camera |
| Camera problems | ||
| The camera suddenly switches itself off | Battery is depleted | Charge or replace the battery |
| The camera won't switch on | Battery is depleted | Charge or replace the battery |
| Battery too cold Warming the battery (e.g. in pants pocket) | ||
| The camera switches off again immediately after it is switched on | Battery is depleted | Charge or replace the battery |
| Camera is heating up | Heat development due to high-res video shooting (4K) or continuous shooting with DNG | Not a fault; allow camera to cool down if it gets too hot |
| Camera does not recognize the memory card | The memory card is not compatible or defective | Replace the memory card |
| Memory card is incorrectly formatted. Format the memory card in the camera (Caution: Loss of data!) | ||
| Menus and displays | ||
| Electronic viewfinder is dark | EVF brightness is set too low | Set the EVF brightness |
| Display language is not English | - | Select English in the Language menu |
| Electronic viewfinder is dark | Switchover between EVF and LCD incorrectly set | Select a suitable setting |
| Viewfinder is out of focus | Check the diopter setting and adjust as needed | |
| The LCD panel is to dark or too bright/not clear | The brightness setting is incorrect | Adjust the display brightness |
| Viewing angle is too small | View the LCD panel at a perpendicular angle | |
| Brightness sensor is blocked | Make sure that the brightness sensor is not blocked | |
| Favorites menu does not appear | The favorites menu is empty | Add at least one function |
| Live View stops suddenly or doesn't start | The camera is hot due to high ambient temperature, extended Live View operation, extended video shooting or continuous shooting | Allow camera to cool down |
| The brightness in Live View mode is not the same as in the pictures | The brightness settings for the LCD panel have no influence over the exposures | Adjust the brightness settings as needed |
| Exposure preview is deactivated | Activate the function | |
| The number of remaining shots does not count down after a picture is taken | The image requires only very little memory space | This is not a fault; the number of remaining shots is calculated as approximations |
| Shooting | ||
| Image noise appears on the LCD panel/in the viewfinder when the shutter button is pressed to the first pressure point | The gain is increased to aid image composition if the object is insufficiently lit with reduced aperture opening | Not a fault - picture quality will not be impacted |
| LCD panel/viewfinder deactivates after a very short time | Power Save settings are activated | Change the settings as needed |
| The display switches off after the picture is taken/the LCD panel goes dark after the picture is taken | Flash loads after picture is taken, LCD panel deactivates during load time | Wait until the flash is loaded |
| Flash won't fire | The flash cannot be used with the current settings | Refer to the list of flash function-compatible settings |
| Battery is depleted | Charge or replace the battery | |
| Pressing the shutter button while flash is still loading | Wait until the flash is loaded | |
| Electronic shutter function is selected | Change the setting | |
| Automatic bracketing or continuous shooting is activated | Change the setting | |
| The flash does not fully illuminate the object | Object is outside the flash range | Move object into flash range |
| Flash is covered | Make sure the flash unit is not covered by your finger or some object | |
| The camera won't take a picture/shutter button is deactivated | Memory card is full | Replace the memory card |
| The memory card is not formed | Reformat the memory card (Caution: Loss of data!) | |
| The memory card is write protected | Deactivate the write protection on the memory card (small lever on the side of the memory card) | |
| Dirt on the memory card contacts | Clean the contacts with a soft cotton or linen cloth | |
| The memory card is damaged | Replace the memory card | |
| The sensor is overheating | Allow camera to cool down | |
| The camera has switched off automatically (Auto Power Off) | Switch the camera on again deactivate auto shutdown as needed | |
| Image data is being written to the memory card and the cache is full | Wait | |
| Noise reduction function is working (e.g. after night photography with long exposure times) | Wait or deactivate noise reduction | |
| Battery is depleted | Charge or replace the battery | |
| Camera is processing a picture | Wait | |
| Image numbering has reached its limit | See section “Data Management” | |
| Image does not sharpen automatically | AF is deactivated | Activate AF |
| No face detection/faces are not recognized | Face is covered (sunglasses, hat, long hair, etc.) | Remove distracting objects |
| Face takes up to little space in the picture composition | Change image composition | |
| Face is tilted or horizontal | Keep face straight | |
| Camera not held straight | Hold camera straight | |
| Face is insufficiently lit | Use flash, improve illumination | |
| Camera selects incorrect object | The incorrectly selected object is closer to the image center that the main object | Change the image section or take picture using the focus lock |
| The incorrectly selected object is a face | Deactivate face detection | |
| No continuous shooting available | The camera is overheated and the function was temporarily disabled to protect the camera | Allow camera to cool down |
| The image on the LCD panel displays lots of noise | Light enhancement function of the LCD panel in dark surroundings | Not a fault - picture quality will not be impacted |
| Image storage takes a long time | Noise Suppression is activated for long-term exposures | Deactivate the function |
| The memory card inserted is slow Use a suitable memory card | ||
| Manual white balance is unavailable The image object is too bright or too dark | ||
| Camera does not focus Desired object part is too close to the camera Select Macro mode | ||
| AF metering field is framed in red with activated AF; images out of focus | Focusing was unsuccessful Try to focus again | |
| No AF metering field selectable | Focus ring not in AF position | Turn the focus ring to the AF position |
| Automatic Metering Field Control or Face Detection in AF Mode is selected | Select other control mode | |
| Image Review is activated Deactivate Image Review | ||
| Camera is in Standby mode Press the shutter button to the first pressure point | ||
| AF assist lamp does not light up | Camera is in video shooting mode | Change the mode |
| Function is deactivated | Activate AF | |
| MF Setup is grayed out | The mounted lens does not support this setting | Use another lens |
| Focus Limit (Macro) is grayed out in the camera settings | The mounted lens does not support this setting | Use another lens |
| Lens Profiles is grayed out in the camera settings | No M-adapter L or R-adapter L attached | This menu is available only for Leica M and Leica R lenses |
| Multi Shot is grayed out | Use an APS-C lens | Use another lens |
| is set to | Set the to or | |
| No video is recorded | The camera is overheated and the function was temporarily disabled to protect the camera | Allow camera to cool down |
| Video shooting stops | Maximum length of individual video sequence was reached | |
| The memory card's write speed is too low for the selected video resolution/compression | Insert another memory card or change the storage method | |
| L Log is not se lectable in video mode | A 10 bit format was not selected as the video format | Switch to 10 bit format for the video format |
| In video mode, I see ASA instead of ISO, angle instead shutter speed and T-aperture values instead of F-values | Cine was selected as shooting mode | Switch from Cine to Video mode |
| There are visible exposure jumps during zooming | The camera is set to Auto ISO | Switch to |
Review and photo management
| Selected images cannot be deleted | Some of the selected images are write protected | Remove write protection (using the device with which the file was originally set to write protected) |
| File numbering does not start at 1 | The memory card contains previously stored images | See section “Data Management” |
| The time and date settings are incorrect or are not displayed | The camera has not been in use for an extended period of time (the battery was removed) | Insert a charged battery and configure the correct settings |
| The time and date stamp on images are incorrect | Time settings are incorrect | Set the time correctlyCaution: Time settings will be lost if the camera is not used/remains in storage with a depleted battery over an extended period of time |
| The time and date stamp on images are unwanted | Setting was ignored | Cannot be removed in retrospectDeactivate the function as needed |
| Pictures/recordings are damaged or missing | The memory card was removed while the readiness indicator was flashing | Never remove the memory card while the readiness indicator is flashing. Charge the battery. |
| The memory card formatting is faulty or the card is damaged | Reformat the memory card(Caution: Loss of data!) | |
| The most recent image is not displayed on the LCD panel | Preview is deactivated | Activate Preview |
| Parts of my video scenes are not fully in the picture | Difference of aspect ratios between camera and playback medium | Set the correct aspect ratio on the camera |
| Picture quality | ||
| The picture is too bright | Light sensor was covered while picture was taken | Make sure that the light sensor is not obstructed |
| Image noise | Long exposure times (>1 s) | Activate the noise suppression function for long exposure times |
| ISO sensitivity set too high | Decrease ISO sensitivity | |
| Unnatural colors | White balance not or incorrectly set | Adjust white balance to light source or adjust manually |
| Round white stains, similar to soap bubbles | Taking flash photography shots in a very dark environment: reflections of dust particles | Deactivate the flash |
| Images are out of focus | Lens is dirty | Clean the lens |
| Lens is obstructed | Make sure that lens is unobstructed | |
| Camera moved during shooting | Use flash | |
| Mount the camera on a tripod | ||
| Use faster shutter speeds | ||
| Macro Function | Select the appropriate mode | |
| Images are overexposed | Flash is activated in bright surroundings | Change the flash mode |
| Strong light source in the image Avoid strong light sources | in the image | |
| (Half) backlight falling into the lens (also from light sources outside the image range) | Use the lens hood or change to another object | |
| Selected exposure time is too long Select a shorter exposure | time | |
| Out of focus/picture stabilizer not functioning | Shooting at a dark location without flash | Use a tripod |
| The image is grainy or there is image noise | ISO sensitivity set too high | Decrease ISO sensitivity |
| Horizontal stripes Picture was taken with electronic shutter under a light source like a fluorescent lamp | Ionic shutter under a light source like a fluorescent lamp | Try shorter shutter speeds |
| Unnatural colors and brightness | Picture taken in artificial light or extreme brightness | Set white balance or select correct lighting presets |
| No images are displayed No memory card inserted | Insert a memory card | |
| The images were taken with another camera | Transfer the shots to another device to view them | |
| Images cannot be displayed | File name of the image was changed on a PC | Use appropriate software for image transfers from a PC to the camera |
| Video quality | ||
| Video recordings show flickering/stripes | Light source interference in artificial lighting | Select a different frame rate (suitable for the local Alternating current (AC) grid frequency) under Video Resolution |
| Camera noise in video recording | The setting wheels were used | Avoid using the setting wheels during video shootings |
| No sound on video recording | Playback volume is set too low | Increase playback volume |
| Microphone was covered during shooting | Make sure the microphone is not obstructed while shooting video | |
| Speakers are covered | Make sure that speakers are unobstructed during playback | |
| Microphone was deactivated while recording | Activate the microphone | |
| Flickering or horizontal stripes in the video recording | CMOS sensors will display this phenomenon when light sources like LED lamps or fluorescent tubes are used | Quality may be improved by selecting a manual shutter speed (e.g. 1/100s) |
| Smartphones/WLAN | ||
| WLAN connection gets interrupted | Camera deactivates when it overheats (safety feature) | Allow camera to cool down |
| Cannot pair with a mobile device | The camera was already paired with the mobile device | Delete the camera registration from the Bluetooth settings in the mobile device and repeat pairing process |
| Mobile device connection/image transfer not working | The mobile device is too far away | Bring the devices closer to each other |
| Interference from other devices in the vicinity, e.g. other smartphones or a microwave oven | Increase distance to interfering devices | |
| Interference from multiple mobile devices in the vicinity | Re-establish the connection/disconnect other mobile devices | |
| Mobile device is currently connected to another device Check connection | ||
| Camera does not appear on the WLAN configuration screen of the mobile device | Mobile device does not recognize camera | Switch the WLAN function of the mobile device off and on again |
MENU OVERVIEW
DIRECT ACCESS
| Function PHOTO VIDEO/CINE Page | |||||||||
| Status screen | Favorites | Function buttons | Status | screen | Favorites | Function buttons | |||
| Photo Video | ◆ | ● ● | 4 | ◆ | ● ● | 4 | 210 | ||
| Toggle Info Levels | ● ● | 25 | ● ● | 25 | 104, 197 | ||||
| Magnification | ● ● | 9 | ● | 121, 124, 219 | |||||
| Toggle Focus Point | ● | 122 | |||||||
| Exposure/DOF Simulation | ● | 145 | |||||||
| Focus Peaking | ● | 107, 123, 200, 221 | |||||||
| Clipping / Zebra | ● | 106, 199 | |||||||
| Toggle Video Gamma | ● | 183 | |||||||
| Toggle AF/MF | ● | ● | |||||||
| Audio Levels(Microphone Gain + headphone volume) | ◆ | ● ● | 9 | 54, 72, 181 | |||||
| Drive Mode | ◆ ★ | ● | 112 | ||||||
| Interval Shooting | ★ | ● | 147 | ||||||
| Exposure Bracketing | ★ | ● | 149 | ||||||


| Function PHOTO VIDEO/CINE Page | ||||||||
| Status screen | Favorites | Function buttons | Status screen | Favorites | Function buttons | |||
| Self timer | ● | 152 | ||||||
| Multi Shot | ● | 150 | ||||||
| Focusing | ★ | ● | ★ | ● | ||||
| Focus Mode | ◆ | ★ | ● | ◆ | ★ | ● | ||
| AF Mode | ◆ | ★ | ● | (10) | ◆ | ★ | ● | 75, 114, 120, 214, 219 |
| AF Profiles | ◆ | 117 | ||||||
| Focus Aid | ★ | ● | ★ | ● | ||||
| AF Setup | ● | ● | ||||||
| MF Setup | ● | ● | ||||||
| Exposure Metering | ◆ | ★ | ● | ◆ | ★ | ● | ||
| Exposure Compensation | ◆ | ★ | ● | ◆ | ★ | ● | ||
| ISO (Photo & Video)* | ◆ | ★ | ● | (3) | ◆ | ★ | ● | 72, 127, 129, 229, 232 |
| Exposure Index (Cine)* | (3) | |||||||
| Auto ISO Settings | ★ | ● | ★ | ● (in video mode only) | ||||
| Function PHOTO VIDEO/CINE Page | |||||||||
| Status screen | Favorites | Function buttons | Status screen | Favorites | Function buttons | ||||
| White Balance | ◆ ★ | ● | ◆ ★ | ● | 129 132, 232 235 | ||||
| Gray card | ★ ★ | ● | ● | 131, 234 | |||||
| Photo File Format | ◆ ★ | ● | 89 | ||||||
| JPG Settings | 90 93, 95 | ||||||||
| JPG Resolution | ◆ ★ | ● | 90 | ||||||
| Film Style | ★ | ● | 91 | ||||||
| iDR | ★ | ● | 95 | ||||||
| Auto Review | ● | 173 | |||||||
| Long exposure noise reduction | ● | 93 | |||||||
| Shutter Type | ★ | ● | 133 | ||||||
| Flash Settings | ★ | ● | 155 159 | ||||||
| Flash Exp. Compensation | ★ | ● | 159 | ||||||
| Live View Settings | 110 | ||||||||
| Exposure Preview | ● | 141 | |||||||
| Enhanced Live View | ● | 110 | |||||||
| Sensor Format | ● | ● | 88, 90, 176 | ||||||
| Photo Aspect Ratio | ● | 90 | |||||||
| Storage Options | ● | 96 | |||||||
| Status screen | Favorites | Function buttons | Status | screen | Favorites | Function buttons | |||
| Image Overlay | ● | 153 | |||||||
| Video Format / Resolution | ● | ◆ ★ | ● | 177, 178 | |||||
| Video Settings | |||||||||
| LUT Profile | ● | 183 188 | |||||||
| Video Gamma | ● | 183 188 | |||||||
| Timecode | ● | 182 | |||||||
| Segmented Video | ★ | ● | 190 | ||||||
| Color Bar | ● | 202 | |||||||
| REC Frame | ● | 204 | |||||||
| iDR | ★ | ● | 189 | ||||||
| Video Style | ★ | ● | 179 | ||||||
| Video Aspect Ratio | ● | 207 | |||||||
| Waveform Monitor | ● | 205 | |||||||
| User Profile | ◆ | ★ | ● | ◆ | ★ | ● | 76 78 | ||
| Dial Lock | ◆ | ★ | ● | ◆ | ★ | ● | 76 | ||
| Joystick Lock | ★★ | ● | ● | 76 | |||||
| Display Settings | 83 | ||||||||
| EVF LCD | ★★ | ● ● | (20) | ● ● | (20) | 83 | |||
| Leica FOTOS | ◆ | ◆ | 264 267 | ||||||
| Image Stabilization | ★★ | ● | ● | 94, 188 | |||||
| Camera Settings | 36, 40,80 82,98 100,102 105,110, 119,192 195,197 199,208, 218,269 | ||||||||
| Touch AF | ● | ● | 102 | ||||||
| Touch AF in EVF | ● | ● | 102 | ||||||
| Focus Limit (Macro) | ● | ● | 119, 218 | ||||||
| AF Assist Lamp | ● | 110 | |||||||
| USB Charging | ● | ● | 36 | ||||||
| Acoustic Signal | ● | ● | 85 | ||||||
| Lens Profiles | ★★ | ● | ● | 40 | |||||
| EV Increment | ● | 103, 195 | |||||||
| Format Card | ◆ | ★ | ● | ★ | ● | 96, 190 | |||
* Some function are available only via direct access. These are listed at the top of the table.
i
INDEX
4K....177
5K....177
A
A (Aperture priority) 138, 240
Accessories....3
Acoustic signals 85
Adapter 42, 262
AE-L 141, 142
AF assist lamp....110, 122
AFc....113,213
AF confirmation....86, 111
AF-L 142
AF/MF, toggling....113
AF mode....113, 213
AF Mode....114, 214
AF Quick Setting....120
AFs....113,213
Akademie, Leica....299
Aperture.... 136, 238
Aperture priority 138,240
App 264
ASA....232
Aspect ratio (video)....177, 207, 208
Assist function 104, 197, 202
Assist functions, AF....110, 121, 219
Assist functions, MF....123, 221
Autofocus....113, 117, 213
Auto ISO....127,230
Automatic playback....252
Automatic program 137,239
Automatic review 173, 174
Auxiliary displays....104, 197
B
Basic image settings (photo) 88
Basic recording settings (video) 176
Basic settings, camera....80
Basic settings, recording (photo)...... 88
Basic settings, recording (video) 176
Brightness, EVF 84
Brightness, LCD panel....84
Bulb....140
Button assignment....71
C
C4K....177
Calibration 202
Camera information 259
Camera, reset 258
Care 268
Carry strap.... 10,34
Center-weighted metering....135, 237
Charger....9,34
Charge status, charger.... 35
Charge status, LCD panel.... 33
Charging the battery 35
Cine 210
Clipping....106, 166, 199, 246
Color bar....202
Color Bar 202
Color profile 92
Color rendering, EVF 84
Color rendering, LCD panel....84
Color saturation, image properties (photo).... 91
Color saturation, image properties (video) 179
Color settings, EVF 84
Color settings, LCD panel....84
Color temperature....132, 235
Connection, mobile devices 264
Contact. Leica....298
Continuous shooting 146
Contrast, image properties (photo) 91
Contrast, image properties (video)....179
Copyright 99,193
Customer service 298
Custom LUT profiles.... 184
D
Dark area optimization....95, 189
Data management....96, 190
Data structure....97, 191
Data transfer....100, 193
Date 67,80
Deactivation, LCD panel....85
Deletion, recordings (photo)....170
Deletion, recordings (video) 249
Deletion, user profiles....77
Depth of field 145
Depth-of-field preview button 145
Dial, front 52, 72
Diopter compensation....44
Direct access....71,278
Displays 28, 30, 32, 104, 197
Display, settings....82
Display, standby 85
Disposal 6
Distance display....126, 223
Distance unit....81
DNG 89
DOF (Depth of Field) 145
Drive Mode 112, 146, 147
Dynamic ISO setting....128, 231
Dynamic Range 95,189
E
Editing, video....256
Electronic shutter 86,133
Electronic shutter sound 86
Enhanced Live View 110
EVF 85
EV Increment 103, 195
Exposure....132, 235
Exposure, automatic 137, 239
Exposure bracketing....149
Exposure compensation....144, 241
i
Exposure compensation, flash 159
Exposure lock 141
Exposure, long-term....93, 140
Exposure, manual....139, 240
Exposure metering, flash....156
Exposure, metering methods 134, 236
Exposure, modes 136, 238
Exposure preview....141
Exposure simulation....141
Exposure time, max.... 140
Eye sensor....83
F
Face detection 116, 216
Factory settings 258
FAQ 270
Favorites, menu....62, 70, 278
Favorites, recordings (photo)....170
Favorites, recordings (video) 248
FHD....177
Field metering....114,215
File format....89, 176
File name 98,192
Film Style 92
Firing point, flash....157
Firmware 14,259
Fixed ISO value 127,229
Flash 155
Flash, control 157
Flash, exposure compensation....159
Flash, exposure metering....156
Flash, firing point....157
Flash, range....158
Flash, setting....157
Flash, synchronization....157
Flash units, compatible....155
Floating ISO....129, 231
FN button....54,278
Focus assist....123, 221
Focusing 113, 213
Focusing, automatic.... 113, 213
Focusing, manual....123, 221
Focusing, metering methods.... 114, 214
Focus limit....119,218
Focus mode 113, 213
Focus peaking....107, 123, 200, 221
Folder, creating new....99, 193
Folders....97,191
Folder structure 97, 191
Follow Focus 223
Format 89,176
Formatting, memory card 96, 190
Frame rate 177
Front dial....52,72
Full HD 177
G
General information....12
Geotagging....99
Gimbal....212
Gray Card....130,233
Grid....106, 199
H
Handgrip 45
HDMI....196
HDR 149
Highlight, image properties (photo) 91
Highlight, image properties (video)....179
Highlight-Weighted, exposure....135, 237
Histogram 109,202
Horizon 108,201
|
iDR....95,189
Image numbering 97, 191
Image numbering, reset 99, 193
Image Overlay 153
Image properties....91
Image stabilization, picture 94
Image stabilization, video.... 188
Increment, EV 103, 195
Individual button assignment 71
Info Bars....106, 199
Info profiles....104, 197
Information displays....104, 197
Information, regulatory....5
Inserting/removing the battery 36
Intelligent AF 113,213
Intelligent Dynamic Range....95, 189
Interval shooting 147
ISO Sensitivity....127, 229
ISO setting, dynamic....128, 231
ISO value, greatest....127, 230
J
Joystick 53,75
JPG 89
K
Keyboard....65
Keylock 76
L
Language 80
LCD panel 82
Legal information 4
Leica Academy....299
Leica Customer Care....298
Leica FOTOS....7,264
Lens 8,39,261,268
Level gauge.... 108,201
Location information....99
Lock....76
Long-term exposure 93,140
LUT 184
M
Magnification, MF assist function....124
Magnification, recording mode (video) 219, 222
i
Magnification, review mode (photo) 167
Magnification, shooting mode (photo).... 121, 124
Magnifying glass 124
Main menu....62
Main switch....50
Manual exposure setting....139, 240
Manual focusing....123, 221
Maximum exposure time.... 140
Memory card....10, 13, 37, 96, 190, 269
Menu bar....66
Menu control....56
Menu language....80
Menu navigation....59, 63
Menu screen 57
Metering method, AF.... 114, 214
Metering method, exposure 134, 236
MF....123, 221
Microphone....181
M (Manual exposure setting)....139, 240
Mode, switching....211
Monochrome (picture)....92
Monochrome recording (photo)....92
Monochrome recording, video 180
Monochrome (video) 180
MOV....176
MP4 176
Multi-field metering, exposure 135, 237
Multi-field metering, focusing.... 114, 215
Multishot....150
N
Name, file....97, 98, 191, 192
Name, folder 97, 191
Navigation, menu 59, 63
Noiseless 86
Noise reduction....93, 138, 140
Notes, legal 4
Number pad 65
0
One-Minute videos....190
Operating mode, exposure.... 136, 238
Operation, customized 70
Optical image stabilization 94
Overlay.... 153
Overview, parts 24
P
Part Designations.... 24
P (automatic program).... 137, 239
Person detection.... 116, 216
Photo Aspect Ratio....90
Picture, interval....147
Picture series....146, 147, 149
Power off, automatic 82, 85
Power save....82
Power save mode 82
Pre Focus....119
Preview 173
Preview, Depth of Field.... 145
Problems.... 270
Profile, user....76
a
Quick access....70, 71
R
Rating, photos....170
Rating, recordings....248
Raw data 89
REC Frame 204
Rechargeable battery, capacity.... 33
Rechargeable battery, notes 9, 12, 269
Recording, delete (photo)....170
Recording, deleting (video).... 249
Recording, rating (photo)....170
Recording, rating (video) 248
Recordings, tagging (video) 248
Recording, tagging (photo)....170
Regulatory information....5
Remote control 267
Repair....298
Replacement parts.... 3
Reset, camera 258
Reset, image numbering....99, 193
Resolution (picture) 90
Resolution (video)....177
Restriction, focus area 119, 218
Review, automatic (photo)....173, 174
Review mode....162
s
Safety remarks....8
Saturation, image properties (photo).... 91
Saturation, image (video)....179
Saving, energy 82
Scale 66
Scope of delivery 2
SD card....10, 13, 37, 96, 190, 269
Segmented video....190
Self-timer 152
Sensitivity, ASA 232
Sensitivity, eye sensor....83
Sensitivity, ISO 127, 229
Sensor....10, 13
Sensor format 88, 176
Service....298
Setting, LCD panel 82
Settings, store....76
Shadow, image properties (photo).... 91
Shadow, image properties (video) 179
Sharpness, image properties (photo) 91
Sharpness, image properties (video)....179
Shift 137
Shooting, continuous 146
i
Shooting Mode....112
Shooting mode (Video)....210
Short cut....70, 71
Shutter button....51
Shutter, electronic 86, 133
Shutter release....51
Shutter speed 136
Shutter-speed/aperture combination 136, 238
Shutter speed priority mode 138, 240
Signals, acoustic 85
Silent....86
Silent operation....86
Slide show....174, 252
Smartphone 264
Sound....85,255
Spot metering, exposure....135, 237
Spot metering, focusing.... 114, 215
S (Shutter speed priority mode) 138, 240
Standby mode....82
Status screen....28, 30, 60
Storage 268
Submenu....62
Switching, mode....164, 211, 244
Switching off, camera....50
Switching on, camera....50
Sync point....157
T
Tagging, recordings (photo)....170
Tagging, recordings (video) 248
Tally 204
Technical Data 292
Test image....202
Thumbwheel....52,72
Time 67,81
Timecode 182
Time lapse....147
Time zone....81
Tones 85
Touch AF 102, 194
Touch control 55, 102, 194
Tracking 115,216
Transfer, data 100, 193
Troubleshooting....270
TTL metering....155, 156
U
Update, firmware....14, 259
USB....36
User-defined operation 70
User profiles....76
V
Video....210, 253
Video format....177
Video Gamma 183
Video mode....210
Video stabilization....188
Video Style....179
Volume, acoustic signals....85
Volume, video....255
W
Warning signal....85
Warranty 15
Waveform Monitor 205
White balance 129,232
Wi-Fi/WLAN....7
Wind noise reduction 181
Z
Zebra....106, 199
Zone, focusing....115, 215
i
TECHNICAL DATA
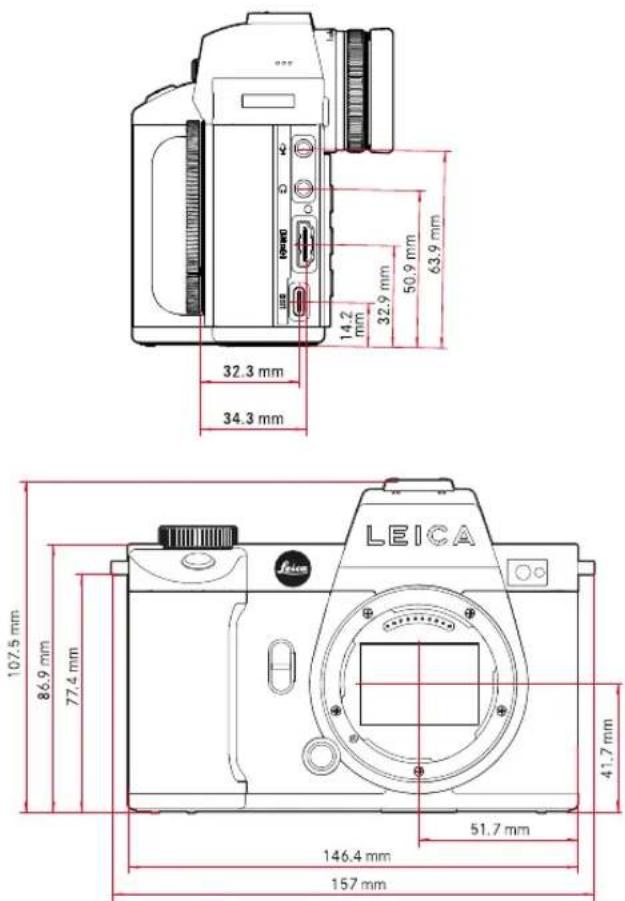
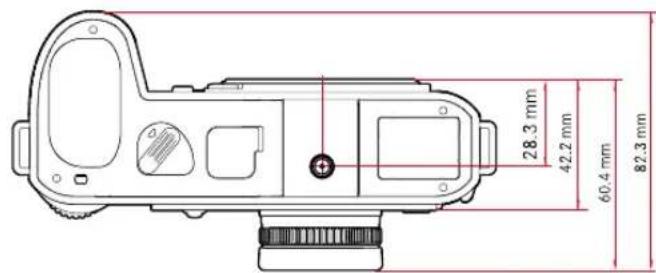
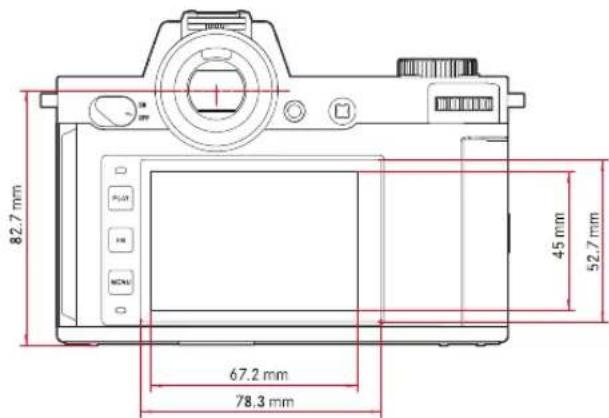
CAMERA
Designation
Leica SL2
Camera type
Mirrorless full-frame system camera
Type no.
9584
Order No.
10854 (EU/JP/US), 10856 (ROW)
Buffer memory
4GB
DNG™: 78 shots
JPG: > 100 shots
Storage medium
UHS-II (recommended), UHS-I, SD/SDHC/SDXC memory card
Material
Full-metal housing made of aluminum and magnesium, leatherette cover, splash-water protected in compliance with IEC standard 60529 (protection type IP54)
Lens mount
Leica L bayonet with contact strip for communication between lens and camera
Operating conditions
-10 to +40°C
Interfaces
ISO accessory shoe with additional control contacts, HDMI jack 2.0b Type A, USB 3.1 Gen1 Type C, Audio-Out 3.5mm /Audio-In 3.5mm , communication interface in the bottom cover for multifunction handgrip
Tripod thread
A 1/4 DIN 4503 (1/4") with stainless steel in the base
Weight
approx. 840 g (without battery), approx. 920 g (with battery)
SENSOR
Sensor size
CMOS sensor, pixel pitch: 4.3μm
35 mm: 8368×5584 pixels (47.3 MP)
APS-C: 5504×3664 pixels (20.2 MP)
Processor
Leica Maestro series (Maestro III)
Image stabilization
5-Axis image stabilization up to 5.5 aperture levels
Filter
RGB color filter, UV/IR filter, no low-pass filter
File formats
Photo: DNG™ (raw data), DNG + JPG, JPG (DCF, Exif 2.31)
Video: MP4: H.265/MPEG-4 AVC (Audio format: 2ch 48 kHz/16 bit, AAC), MOV: H.264/MPEG-4 AVC (MP4Audio format: 2ch 48 kHz/16 bit, AC-3)
Image resolution
| 35 mm | DNGTM | 8368 x 5584 pixels (46.7 MP) |
| JPG | 8368 x 5584 pixels (46.7 MP)6000 x 4000 pixels (24 MP)4272 x 2848 pixels (12.2 MP) | |
| APS-C | DNGTM | 5504 x 3664 pixels (20.2 MP) |
| JPG | 5504 x 3664 pixels (20.2 MP)3936 x 2624 pixels (10.3 MP)2736 x 1824 pixels (5 MP) |
File size
DNG™: approx. 84.4 MB
JPG: depending on resolution and image content
Video: max. length: unlimited, max. file size: 96 GB
Color depth
DNG™: 14 bit
JPG: 8 bit
Color space
Photo: sRGB
Video: Rec. 709/Rec. 2020 (HLG/L-Log)
Shooting Mode Video
Video mode: P - A - S - M
Cine mode: M
Video Resolution
| Sensor format | RESOLUTION | Sensor area |
| 35 mm - 5K (4:3) 4992 x 3744 | ||
| 35 mm - C4K (17:9) | 4096 x 2160 | 8192 x 4320 |
| 35 mm - 4K (16:9) | 3840 x 2160 | 7680 x 4320 |
| 35 mm - Full HD (16:9) | 2790 x 1572 | 8368 x 4712 |
| APS-C - C4K (17:9) | 5504 x 2912 | |
| APS-C - 4K (16:9) | 5504 x 3096 | |
| APS-C - Full HD (16:9) | 2752 x 1548 | 2752 x 1548 |
Video frame rate / bit rate
| MOV 5K | ||||||
| 29.97 fps | 4:2:0 / 10 bit (SD & HDMI) | 35 mm | H.265 | Long GOP | 200 Mbps | |
| 25 fps | 4:2:0 / 10 bit (SD & HDMI) | 35 mm | H.265 | Long GOP | 200 Mbps | |
| 23.98 fps | 4:2:0 / 10 bit (SD & HDMI) | 35 mm | H.265 | Long GOP | 200 Mbps | |
| MOV CAK | ||||||
| 59.94 fps | 4:2:0 / 10 bit (SD) | 4:2:2 / 10 bit (HDMI) | 35 mm & APS-C | II.265 | Long GOP | 200 Mbps |
| 59.94 fps | 4:2:0 / 8 bit (SD) | 4:2:2 / 10 bit (HDMI) | 35 mm & APS-C | II.264 | Long GOP | 150 Mbps |
| 50 fps | 4:2:0 / 10 bit (SD) | 4:2:2 / 10 bit (HDMI) | 35 mm & APS C | H.265 | Long GOP | 200 Mbps |
| 50 fps | 4:2:0 / 8 bit (SD) | 4:2:2 / 10 bit (HDMI) | 35 mm & APS-C | II.264 | Long GOP | 150 Mbps |
| 48 fps | 4:2:0 / 10 bit (SD) | 35 mm & APS-C | H.265 | Long GOP | 200 Mbps | |
| 24 fps | 4:2:2 / 10 bit (HDMI) | |||||
| 47.95 fps | 4:2:0 / 10 bit (SD) | 35 mm & APS-C | II.265 | Long GOP | 200 Mbps | |
| 23.98 fps | 4:2:2 / 10 bit (HDMI) | |||||
| 29.97 fps | 4:2:2 / 10 bit (SD & HDMI) | 35 mm & APS-C | H.264 | ALL-I | 400 Mbps | |
| 29.97 fps | 4:2:2 / 10 bit (SD & HDMI) | 35 mm & APS-C | H.264 | Long GOP | 150 Mbps | |
| 25 fps | 4:2:2 / 10 bit (SD & HDMI) | 35 mm & APS-C | H.264 | ALL I | 400 Mbps | |
| 25 fps | 4:2:2 / 10 bit (SD & HDMI) | 35 mm & APS-C | II.264 | Long GOP | 150 Mbps | |
| 24 fps | 4:2:2 / 10 bit (SD & HDMI) | 35 mm & APS-C | H.264 | ALL-I | 400 Mbps | |
| 24fps | 4:2:2 / 10bit (SD & HDMI) | 35 mm & APS-C | H.264 | Long GOP | 150 Mbps | |
| 23.98fps | 4:2:2 / 10bit (SD & HDMI) | 35 mm & APS-C | H.264 | Long GOP | 150 Mbps | |
| MOV 1K | ||||||
| 59.94fps | 4:2:0 / 10bit (SD) | 4:2:2 / 10bit (HDMI) | 35 mm & APS-C | H.264 | Long GOP | 200 Mbps |
| 59.94fps | 4:2:0 / 8bit (SD) | 4:2:2 / 10bit (HDMI) | 35 mm & APS-C | H.264 | Long GOP | 150 Mbps |
| 50fps | 4:2:0 / 10bit (SD) | 4:2:2 / 10bit (HDMI) | 35 mm & APS-C | H.265 | Long GOP | 200 Mbps |
| 50fps | 4:2:0 / 8bit (SD) | 4:2:2 / 10bit (HDMI) | 35 mm & APS-C | H.264 | Long GOP | 150 Mbps |
| 48fps | 4:2:0 / 10bit (SD) | 4:2:2 / 10bit (HDMI) | 35 mm & APS-C | H.265 | Long GOP | 200 Mbps |
| 24fps | ||||||
| 47.95fps | 4:2:0 / 10bit (SD) | 35 mm & APS-C | H.265 | Long GOP | 200 Mbps | |
| 23.98fps | 4:2:2 / 10bit (HDMI) | |||||
| 29.97fps | 4:2:2 / 10bit (SD & HDMI) | 35 mm & APS-C | H.264 | ALL-I | 400 Mbps | |
| 29.97fps | 4:2:2 / 10bit (SD & HDMI) | 35 mm & APS-C | H.264 | Long GOP | 150 Mbps | |
| 25fps | 4:2:2 / 10bit (SD & HDMI) | 35 mm & APS-C | H.264 | ALL-I | 400 Mbps | |
| 25fps | 4:2:2 / 10bit (SD & HDMI) | 35 mm & APS-C | H.264 | Long GOP | 150 Mbps | |
| 24fps | 4:2:2 / 10bit (SD & HDMI) | 35 mm & APS-C | H.264 | Long GOP | 150 Mbps | |
| 23.98fps | 4:2:2 / 10bit (SD & HDMI) | 35 mm & APS-C | H.264 | ALL I | 400 Mbps | |
| 23.98fps | 4:2:2 / 10bit (SD & HDMI) | 35 mm & APS-C | H.264 | Long GOP | 150 Mbps | |
| MOV FHD | ||||||
| 119,88fps | 4:2:0 / 10bit (SD) | 4:2:2 / 10bit (HDMI) | 35 mm & APS-C | H.265 | Long GOP | 150 Mbps |
| 100fps | 4:2:0 / 10bit (SD) | 4:2:2 / 10bit (HDMI) | 35 mm & APS-C | H.265 | Long GOP | 150 Mbps |
| 59.94fps | 4:2:2 / 10bit (SD & HDMI) | 35 mm & APS-C | H.264 | ALL-I | 200 Mbps | |
| 50fps | 4:2:2 / 10bit (SD & HDMI) | 35 mm & APS-C | H.264 | ALL-I | 200 Mbps | |
| 29.97fps | 4:2:2 / 10bit (SD & HDMI) | 35 mm & APS-C | H.264 | ALL-I | 200 Mbps | |
| 25fps | 4:2:2 / 10bit (SD & HDMI) | 35 mm & APS-C | H.264 | ALL-I | 200 Mbps | |
| 23.98fps | 4:2:2 / 10bit (SD & HDMI) | 35 mm & APS-C | H.264 | ALL-I | 200 Mbps | |
| MOV FHD Slow Motion | ||||||
| 180fps | 4:2:0 / 8bit (SD & HDMI) | APS-C | H.264 | Long GOP | 20 Mbps | |
| 150fps | 4:2:0 / 8bit (SD & HDMI) | APS-C | H.264 | Long GOP | 20 Mbps | |
| 120fps | 4:2:0 / 8bit (SD & HDMI) | 35 mm & APS-C | H.264 | Long GOP | 20 Mbps | |
| 100fps | 4:2:0 / 8bit (SD & HDMI) | 35 mm & APS-C | H.264 | Long GOP | 20 Mbps | |
| MP4 4K | ||||||
| 59.94fps | 4:2:0 / 8bit (SD & HDMI) | 35 mm & APS-C | H.264 | Long GOP | 150 Mbps | |
| 59.94fps | 4:2:0 / 10bit (SD & HDMI) | 35 mm & APS-C | H.265 | Long GOP | 100 Mbps | |
| 50fps | 4:2:0 / 8bit (SD & HDMI) | 35 mm & APS-C | H.264 | Long GOP | 150 Mbps | |
| 50fps | 4:2:0 / 10bit (SD & HDMI) | 35 mm & APS-C | H.265 | Long GOP | 100 Mbps | |
| 29.97fps | 4:2:0 / 8bit (SD & HDMI) | 35 mm & APS-C | H.264 | Long GOP | 100 Mbps | |
| 25fps | 4:2:0 / 8bit (SD & HDMI) | 35 mm & APS-C | H.264 | Long GOP | 100 Mbps | |
| 23.98fps | 4:2:0 / 8bit (SD & HDMI) | 35 mm & APS-C | H.264 | Long GOP | 100 Mbps | |
| MP4 FHD | ||||||
| 59.94fps | 4:2:0 / 8bit (SD & HDMI) | 35 mm & APS-C | H.264 | Long GOP | 28 Mbps | |
| 50fps | 4:2:0 / 8bit (SD & HDMI) | 35 mm & APS-C | H.264 | Long GOP | 28 Mbps | |
| 29.97fps | 4:2:0 / 8bit (SD & HDMI) | 35 mm & APS-C | H.264 | Long GOP | 20 Mbps | |
| 25fps | 4:2:0 / 8bit (SD & HDMI) | 35 mm & APS-C | H.264 | Long GOP | 20 Mbps | |
| 23.98fps | 4:2:0 / 8bit (SD & HDMI) | 35 mm & APS-C | H.264 | Long GOP | 24 Mbps | |
| MP4 FHD Slow Motion | |||||
| 180fps | 4:2:0 / 8 bit (SD & HDMI) | APS-C | H.264 | Long GOP | 20 Mbps |
| 150fps | 4:2:0 / 8 bit (SD & HDMI) | APS-C | H.264 | Long GOP | 20 Mbps |
| 120fps | 4:2:0 / 8 bit (SD & HDMI) | 35mm & APS-C | H.264 | Long GOP | 20 Mbps |
| 100fps | 4:2:0 / 8 bit (SD & HDMI) | 35mm & APS-C | H.264 | Long GOP | 20 Mbps |
Video Gamma
Rec. 709, L-Log Rec. 2020, HLG Rec. 2020
VIEWFINDER/LCD PANEL
Viewfinder (EVF)
Resolution: 5,760,000 dots, 120 fps, magnification: 0.78x, aspect ratio: 4:3, frame coverage: 100%, exit pupil position: 21 mm, setting range +2/-4dpt, with eye sensor for automatic switchover between viewfinder and LCD panel, time delay 0.005 s
LCD panel
3.2" (backlight LED) with anti-fingerprint and anti-scratch coating, 2,100,000 dots, format 3:2, touch control available
Top display
1.28" highly reflective trans-reflective monochrome LCD, 128 x 128 pixels, viewing angle 120°; anti-fingerprint coating
SHUTTER
Shutter type
Electronically controlled focal plane shutter/electronic shutter
Shutter speeds
Mech. shutter: Bulb, 30 min to 1/8000 s Electro. shutter function: 60 s to 1/40000 s Flash Synch: up to 1/250 s
Shutter button
Two-stage
(1st stage: Activation of the camera electronics including autofocus and exposure metering, 2nd stage: Taking the picture)
Self-timer
Delay time: 2s or 12s
Drive Mode
| Single | |
| Continuous - Low Speed | 3 fps |
| Continuous Medium Speed | 6 fps |
| Continuous - High Speed | 10 fps without AFc/AE/WB |
| Continuous - Very High Speed | 20 fps with electro. shutter function without AFc/AE/WB |
| Interval Shooting | |
| Exposure Bracketing | |
| Multi Shot | Generates 2 DNGs: 1x 47MP, 1x 187MP8 frames are combined into one high-res image |
FOCUSING
Working range
30 cm to ∞
With macro setting: from 17cm
Focus Mode
Automatic or manual
With manual setting: optional magnifying glass function (Auto Magnification) and edge marking (Focus Peaking) available as focus aids
Autofocus system
Based on contrast metering and depth mapping
Autofocus modes
Intelligent AF (autonomously selects AFs and AFc), AFs, AFc, AF setting can be saved, optional Touch AF
Autofocus metering methods
Spot (can be shifted), Field (can be shifted and scaled), Multi Field, Zone (can be shifted), Eye/Face/Body Detection, Tracking Video mode only: Follow Focus
Autofocus Metering Fields
225
EXPOSURE
Exposure metering
TTL (exposure metering through the lens)
Exposure Metering Methods
Spot, Center Weighted, Highlight Weighted, Multi Field
Exposure modes
Automatic program (P)
Aperture priority (A): manual aperture setting
Shutter priority mode (S): manual shutter speed setting
Manual (M): Manual setting for shutter speed and aperture
Exposure compensation
±3 EV in 1/3 EV increments or 1/2 EV increments
Automatic bracketing
3 or 5 frames, graduations between shoots up to 3 EV, in 1/3 EV increments or 1/2 EV increments
additional optional exposure compensation: up to ±3EV
ISO sensitivity range
| Photo Video | ||
| Auto ISO | ISO 100 to ISO 50000 | ISO 100 to ISO 50000 |
| Manual | ISO 50 to ISO 50000 | ISO 50 to ISO 50000 |
White balance
Automatic (Auto), Default (Daylight - 5200 K, Cloudy - 6000 K, Shadow - 7000 K, Tungsten - 3200 K, HMI - 5600 K, Fluorescent (warm) - 4000 K, Fluorescent (cool) - 4500 K, Flash - 5400 K), manual metering (Gray card, Graycard Live View), manual color temperature setting (Color Temperature, 2000 K to 11,500 K)
FLASH EXPOSURE CONTROL
Flash unit connector
Via the accessory shoe
Flash sync time
←: 1/250s, slower shutter speeds available, automatic changeover to TTL linear flash mode with HSS-compatible Leica flash units if sync time is undercut
Flash exposure metering
Using center-weighted TTL pre-flash metering with Leica flash units (SF26, SF40, SF58, SF60, SF64) or with system-compatible flash units, remote controlled flash SFC1
Flash exposure compensation
SF 40: ±2 EV in 1/2 EV increments SF 60: ±2 EV in 1/3 EV increments
EQUIPMENT
Microphone
Stereo internal + microphone input 3.5 mm stereo jack
Speaker
Mono internal + headphones output 3.5 mm stereo jack
WLAN
WLAN function for connecting to the Leica FOTOS app. The Leica app is available from the Apple App Store™ or the Google Play Store™. Complies with Wi-Fi IEEE802.11b/g/n, 2.4 GHz, channel 1-11 (2412-2462 MHz) and Wi-Fi IEEE802.11ac, 2.4 GHz & 5 GHz, channel 39-48 (5180-5240 MHz), channel 52-64 (5260-5320 MHz), channel 100-140 (5500-5700 MHz) (standard WLAN protocol), encryption method: WLAN-compatible WPA™/WPA2™
GPS
Not available everywhere due to country-specific legislation; can be added via the Leica FOTOS app. Data is written to Exif header of the picture files.
Bluetooth
Bluetooth v4.2 (Bluetooth Low Energy (BLE)), 2402 to 2480 MHz
Menu languages
English, German, French, Italian, Spanish, Russian, Japanese, Simplified Chinese, Traditional Chinese, Korean
POWER SUPPLY
Rechargeable battery (Leica BP-SCL4)
Lithium-ion rechargeable battery, rated voltage: 7.2 V (DC); capacity: 1860 mAh; charging time: approx. 140 min (after deep discharge); manufacturer: Panasonic Energy (Wuxi) Co. Ltd., Made in China Approx. 450 shots (according to CIPA standard, with Auto Power Off 10 s), approx. 1400 shots (according to CIPA standard, adapted shooting cycle*, with Auto Power Off 5 s)
USB Power Supply
USB charger function in standby mode or when switched off USB power supply when switched on
Charger (Leica BC-SCL4)
Input: AC 100-240 V, 50/60 Hz, 0.25 A, automatic switchover; output: DC 8.4 V 0.85 A; manufacturer: Salom Electric (Xiamen) Co., Ltd., Made in China
* Alternating: Switch on, one shoot every 3s, shutdown after 10 shoots, 5 min wait time; switch on, one shoot every 3s, shutdown after 50 shoots, 5 min wait time

QuickTime
LEICA CUSTOMER CARE
Please contact the Customer Care department of Leica Camera AG for the maintenance of your Leica equipment and for help and advice regarding Leica products and how to order them. You can also contact the Customer Care department or the repair service provided by your regional Leica subsidiary for repairs or warranty claims.
LEICA GERMANY
Leica Camera AG
Leica Customer Care
Am Leitz-Park 5
35578 Wetzlar
Germany
Phone: +49 (0)6441 2080-189
Fax: +49 (0)6441 2080-339
Email: customer.care@leica-camera.com
https://leica-camera.com
YOUR NATIONAL REPRESENTATIVE
You will find the Customer Care department responsible for your locality on our homepage:
https://leica-camera.com/en-US/contact
LEICA ACADEMY
Have a look at our full seminar program with many interesting workshops on the topic of photography at: https://leica-camera.com/pl-PL/leica-akademie

LEICA SL2 LEICA SL2-S
FIRMWARE UPDATE 6.2.0
EXTENDED FUNCTIONALITY
- The requirements of Lot6/Lot26, Regulation (EU) 2023/826 on ecode-sign are supported.
FIRMWARE UPDATES
Leica is continuously working on the further improvement and optimization of your camera. Since many camera functions are entirely controlled by software, some of these improvements and additions to the functional scope can be installed in retrospect. Leica offers firmware updates at irregular intervals, which you can download from our website.
Leica will notify you of any new updates, once you have registered your camera. Users of Leica FOTOS will also be automatically notified about firmware updates for their Leica cameras.
There are two options for installing firmware updates.
- conveniently via the Leica FOTOS app
– directly via the camera menu
Finding the currently installed firmware version
→ Select Camera Information in the main menu
• The current firmware versions are displayed.
More information about registering, firmware updates and how to download them to your camera, as well as any amendments and additions to this manual can be found in the customer area of our website at:
https://club.leica-camera.com
EXECUTING A FIRMWARE UPDATE
Any interruption of a running firmware update may cause serious and irreparable damage to your equipment!
You will therefore have to take particular note of the following, when carrying out a firmware update:
- Do not switch off the camera!
- Do not remove the memory card!
- Do not remove the rechargeable battery!
- Do not detach the lens!
Notes
- A warning message will appear if the battery is insufficiently charged. Recharge the battery and then repeat the process described above.
- You will find additional device and country-specific registration marks and numbers in the Camera Information submenu.
PREPARATION
→ Fully charge and insert the rechargeable battery
→The second SD memory card (where applicable) must be removed from the camera
→Any stored firmware files on the memory card must be removed
- We recommend saving any images on the memory card and reformatting it before the update.
(Caution: Loss of data! All data stored on the memory card will be lost during formatting.)
→Download the latest firmware version
→ Save the download to the memory card
- The firmware file must be stored in the main directory of the memory card (not in a sub-directory).
→Insert the memory card into the camera
→Switch the camera on
UPDATING THE CAMERA FIRMWARE
→Preparation
→ Select Camera Information in the main menu
→Select Camera Firmware Versi
→Select Start Update
- A prompt with information about the camera is displayed.
→Check the version information
→Select
• The prompt Save profiles on SD Card? appears.
→ Select Yes/No
• The update will start automatically.
- The lower status LED will flash during this process.
- Once the process has completed successfully, a relevant on-screen message and prompt to restart the device will appear on screen.
→Switch the camera off and on again
Note
- Date & time, as well as the preferred language will have to be set up again after the restart. Relevant prompts will appear on screen.
UPDATING THE LENS FIRMWARE
Where available, firmware updates can be performed for Leica SL lenses and for all other lens types by L-Mount Alliance.
Firmware updates for Leica SL lenses are generally uploaded alongside the latest version of the camera firmware and will not have to be implemented manually. Provided an SL lens is attached during the camera update, it will automatically receive the latest firmware version. Where that is not the case, a relevant prompt will appear when a lens is attached to a camera with updated firmware for the first time.
The instructions provided for camera firmware updates apply.
→Preparation
→ Select Camera Information in the main menu
→Select Lens Firmware Versi
→Select Start Update
- A prompt with information about the camera is displayed.
→Check the version information
→Select
• The update will start automatically.
- The lower status LED will flash during this process.
- Once the process has completed successfully, a relevant on-screen message and prompt to restart the device will appear on screen.
→Switch the camera off and on again

LEICA SL2 LEICA SL2-S
FIRMWARE UPDATE 6.1.0
EXTENDED FUNCTIONALITY
- Supported lenses
IMPROVEMENT
- Profoto Connect Pro:
Fixed an error when connecting to "Profoto Connect Pro".
- Eye detection in AF mode:
Eye detection during refocusing in video mode (AF mode, L-Log) has been improved.
- Magnification via joystick:
In MF mode, magnification via joystick is possible again.

FIRMWARE UPDATES
Leica is continuously working on the further improvement and optimization of your camera. Since many camera functions are entirely controlled by software, some of these improvements and additions to the functional scope can be installed in retrospect. Leica offers firmware updates at irregular intervals, which you can download from our website.
Leica will notify you of any new updates, once you have registered your camera. Users of Leica FOTOS will also be automatically notified about firmware updates for their Leica cameras.
There are two options for installing firmware updates.
- conveniently via the Leica FOTOS app
– directly via the camera menu
Finding the currently installed firmware version
→Select Camera Information in the main menu
• The current firmware versions are displayed.
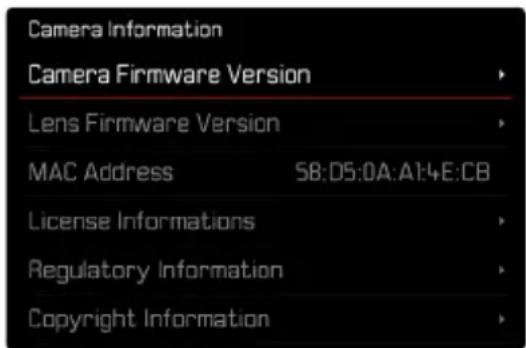
More information about registering, firmware updates and how to download them to your camera, as well as any amendments and additions to this manual can be found in the customer area of our website at:
https://club.leica-camera.com
EXECUTING A FIRMWARE UPDATE
Any interruption of a running firmware update may cause serious and irreparable damage to your equipment!
You will therefore have to take particular note of the following, when carrying out a firmware update:
- Do not switch off the camera!
- Do not remove the memory card!
- Do not remove the rechargeable battery!
- Do not detach the lens!
Notes
- A warning message will appear if the battery is insufficiently charged. Recharge the battery and then repeat the process described above.
- You will find additional device and country-specific registration marks and numbers in the Camera Information submenu.
PREPARATION
→ Fully charge and insert the rechargeable battery
→The second SD memory card (where applicable) must be removed from the camera
→Any stored firmware files on the memory card must be removed
- We recommend saving any images on the memory card and reformatting it before the update.
(Caution: Loss of data! All data stored on the memory card will be lost during formatting.)
→Download the latest firmware version
→Save the download to the memory card
- The firmware file must be stored in the main directory of the memory card (not in a sub-directory).
→Insert the memory card into the camera
→Switch the camera on
UPDATING THE CAMERA FIRMWARE
→Preparation
→Select Camera Information in the main menu
→Select Camera Firmware Version
→Select Start Update
- A prompt with information about the camera is displayed.
→Check the version information
→Select Yes
- The prompt save profiles on SD Card? appears.
→Select Yes/No
• The update will start automatically.
- The lower status LED will flash during this process.
- Once the process has completed successfully, a relevant on-screen message and prompt to restart the device will appear on screen.
→Switch the camera off and on again
Note
- Date & time, as well as the preferred language will have to be set up again after the restart. Relevant prompts will appear on screen.
UPDATING THE LENS FIRMWARE
Where available, firmware updates can be performed for Leica SL lenses and for all other lens types by L-Mount Alliance.
Firmware updates for Leica SL lenses are generally uploaded alongside the latest version of the camera firmware and will not have to be implemented manually. Provided an SL lens is attached during the camera update, it will automatically receive the latest firmware version. Where that is not the case, a relevant prompt will appear when a lens is attached to a camera with updated firmware for the first time.
The instructions provided for camera firmware updates apply.
→Preparation
→Select Camera Information in the main menu
→Select Lens Firmware Version
→Select Start Update
- A prompt with information about the camera is displayed.
→Check the version information
→Select Yes
• The update will start automatically.
- The lower status LED will flash during this process.
- Once the process has completed successfully, a relevant on-screen message and prompt to restart the device will appear on screen.
→Switch the camera off and on again

LEICA SL2/SL2-S
Firmware update
FIRMWARE
| Camera model Firmware version | |
| Leica SL2 6.0.0 | |
| Leica SL2-S 6.0.0 | |
NEW
• Continuous shooting with activated Perspective Control
SL2: for 2 fps and 6 fps, SL2-S: for 2 fps and 5 fps
- Added lock function for white balance settings Auto ISO and Auto
This function ensures a constant ISO value and automatic white balance during video recording until recording is stopped, or settings are changed via menu settings.
EXTENDED FUNCTIONALITY
- New submenu item Flash Mode under Flash Settings
- The menu item AF Quick Setting only was added to the menu Touch AF in EVF
In Touch AF mode, this will prevent accidental movement of the AF frame, but still allows the Touch AF functions to be used.
- Newly added menu items for the Favorites menu
- Thumbwheel: New functionality as function button
- Joystick: More assignment options
IMPROVEMENT
• GPS accuracy of the shooting location was significantly improved
- Revised Play menu: The option Delete All was replaced by Delete Unrated
- The Continuous Shooting settings in the menu item Drive Mode were renamed
- The menu item Self Timer is now a main menu item, and can be combined with other shooting modes
- Bugfixes in the firmware
Download the full scope instruction manual here:
https://en.leica-camera.com/Service-Support/Support/Downloads
Please register via the following link if you would like to receive a printed copy of the full scope instruction manual: www.order-instructions.leica-camera.com
FIRMWARE UPDATES
Leica is continuously working on the further improvement and optimization of your camera. Since many camera functions are entirely controlled by software, some of these improvements and additions to the functional scope can be installed in retrospect. Leica offers firmware updates at irregular intervals, which you can download from our website.
Leica will notify you of any new updates, once you have registered your camera. Users of Leica FOTOS will also be automatically notified about firmware updates for their Leica cameras.
There are two options for installing firmware updates.
- conveniently via the Leica FOTOS app
- directly via the camera menu
Finding the currently installed firmware version
▶ Select Camera Information in the main menu
- The current firmware versions are displayed.
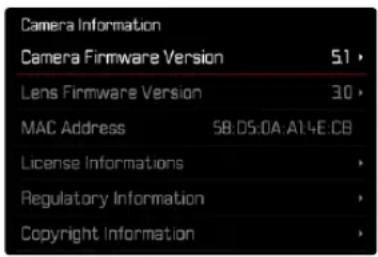
More information about registering, firmware updates and how to download them to your camera, as well as any amendments and additions to this manual can be found in the customer area of our website at:
https://club.leica-camera.com
EXECUTING A FIRMWARE UPDATE
Any interruption of a running firmware update may cause serious and irreparable damage to your equipment!
You will therefore have to take particular note of the following, when carrying out a firmware update:
- Do not switch off the camera!
- Do not remove the memory card!
- Do not remove the rechargeable battery!
- Do not detach the lens!
Notes
- A warning message will appear if the battery is insufficiently charged. Recharge the battery and then repeat the process described above.
- You will find additional device and country-specific registration marks and numbers in the Camera Information submenu.
PREPARATION
▶ Fully charge and insert the rechargeable battery
The second SD memory card (where applicable) must be removed from the camera
▶ Any stored firmware files on the memory card must be removed
- We recommend saving any images on the memory card and reformatting it before the update.
(Caution: Loss of data! All data stored on the memory card will be lost during formatting.)
▶ Download the latest firmware version
▶ Save the download to the memory card
- The firmware file must be stored in the main directory of the memory card (not in a sub-directory).
▶ Insert the memory card into the camera
▶ Switch the camera on
UPDATING THE CAMERA FIRMWARE
▶ Preparation
▶ Select Camera Information in the main menu
▶ Select Camera Firmware Version
▶ Select Start Update
- A prompt with information about the camera is displayed.
▶ Check the version information
▶ Select Yes
- The prompt Save profiles on SD Card? appears.
▶ Select Yes/No
• The update will start automatically.
- The lower status LED will flash during this process.
- Once the process has completed successfully, a relevant on-screen message and prompt to restart the device will appear on screen.
▶ Switch the camera off and on again
Note
- Date & time, as well as the preferred language will have to be set up again after the restart. Relevant prompts will appear on screen.
UPDATING THE LENS FIRMWARE
Where available, firmware updates can be performed for Leica SL lenses and for all other lens types by L-Mount Alliance.
Firmware updates for Leica SL lenses are generally uploaded alongside the latest version of the camera firmware and will not have to be implemented manually. Provided an SL lens is attached during the camera update, it will automatically receive the latest firmware version. Where that is not the case, a relevant prompt will appear when a lens is attached to a camera with updated firmware for the first time.
The instructions provided for camera firmware updates apply.
▶ Preparation
▶ Select Camera Information in the main menu
▶ Select Lens Firmware Version
▶ Select Start Update
- A prompt with information about the camera is displayed.
▶ Check the version information
▶ Select Yes
- The update will start automatically.
- The lower status LED will flash during this process.
- Once the process has completed successfully, a relevant on-screen message and prompt to restart the device will appear on screen.
▶ Switch the camera off and on again
FLASH MODES
Select one of the three available operating modes.
- Automatic
- Manual
- Long-term exposure
A AUTOMATIC FLASH ACTIVATION
That is the default flash mode. The flash unit will fire automatically if poor lighting conditions would mean slower shutter speeds, which could result in blurred images.
MANUAL FLASH ACTIVATION
This mode is suitable for backlit pictures in which the main subject does not fill the entire frame and is in shadow, or in situations where a fill-in flash will moderate sharp contrasts (e.g. in direct sunlight). The flash will fire each time a picture is taken, regardless of prevailing lighting conditions. The flash intensity depends on the metered ambient brightness: in poor light it is the same output as in automatic mode, with output decreasing with increasing brightness. The flash will then work as a fill-in light, e.g. to light up dark shadows in the foreground or backlit objects, and to create more balanced overall lighting.
AUTOMATIC FLASH ACTIVATION AT SLOWER SHUTTER SPEEDS (LONG-TERM SYNCHRONIZATION)
This mode ensures appropriately exposed, brighter dark backgrounds and bright foreground.
The shutter speed is not extended beyond 1/30 s in the other flash modes to minimize the risk of blurring. This may mean, however, that pictures with flash exposure can end up with objects in the background not illuminated by the flash and therefore being underexposed. In this mode, slower shutter speeds (up to 30 s) are permitted to avoid this effect.
▶ Select Flash Settings in the main menu
▶ Select Flash Mode
▶ Select the desired setting
- The currently active mode is displayed on screen.
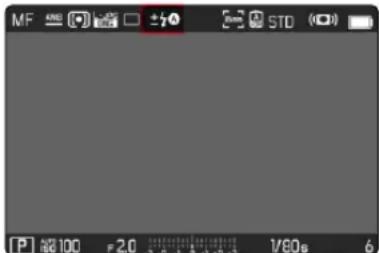
PLAY MENU
DELETING IMAGES
DELETING UNRATED IMAGES
▶ Press the MENU button
▶ Select Delete Unrated in the play menu
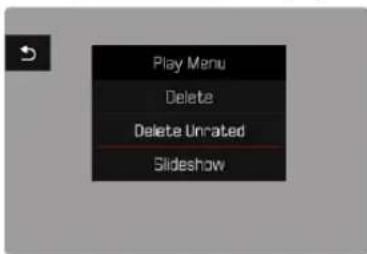
- The prompt Do you really want to delete all not rated files? appears.
▶ Select Yes
- The LED will flash during the deletion process. The process may take a few seconds. The next marked image appears once deletion is complete. The message to valid picture to play appears if no other images are saved on the card.
Note
- The message No valid picture to play, appears after successful deletion. The same image is displayed again if deletion was unsuccessful. When deleting several or unrated images, a notification screen may appear for the time needed to process the data.
ISO SENSITIVITY (IM VIDEO MODE)
AUTOMATIC SETTING
The camera automatically adjusts the sensitivity to ambient brightness and/or to the configured shutter-speed/aperture combination. In conjunction with aperture-priority mode, this function extends the range for automatic exposure control. The automatic setting of ISO sensitivity occurs in increments of 1/2 EV or 1/3 EV, depending on the selected EV Increment setting.
▶ Select ISO in the main menu
▶ Select Auto ISO
Note
- This function is not available in Cine mode.
LIMITING SETTING RANGES
A max. ISO value can be set, which will then limit the automatic setting range (Max. ISO value). A max. exposure time can also optionally be configured. There are automatic settings and fixed max. shutter speeds 1/30s and 1/2000s available for that purpose.
LIMITING ISO VALUES
All values from ISO 100 are available.
Factory setting: 6400
▶ Select Auto ISO Settings in the main menu
▶ Select Maximum ISO
▶ Select the desired value
LIMITING SHUTTER SPEED RANGES
Factory setting: Auto
▶ Select Auto ISO Settings in the main menu
▶ Select Shutter Speed Limit
▶ Select the desired value (Auto, 1/2000, 1/1000, 1/500, 1/250, 1/125, 1/60, 1/30)
ISO VALUE LOCK
Factory setting: Off
▶ Select ISO in the main menu
▶ Select Auto ISO - Lock
Notes
- During video capture, the ISO value can be modified via the FN button or the thumbwheel.
- You can toggle between Auto ISO and Auto ISO - Lock, or switch to another fixed ISO value. However, you cannot switch from a fixed ISO value to Auto ISO - Lock during video capture. In that case, the Auto ISO - Lock will be grayed out.
DYNAMIC ISO SETTING
The thumbwheel and front dial can be configured to allow manual ISO settings in real time. The factory settings include that function for the modes S, A, and M. Turning the dial will cycle through all setting values available in the ISO menu. That means that Auto ISO can also be selected.
FLOATING ISO
This function complements Auto ISO. Light strength changes with many zoom lenses when the focal length is changed. Floating ISO will in this situation adjust the sensitivity in fine graduations and will simultaneously ensure that the selected settings of aperture value and shutter speed remain constant in (semi) automatic exposure modes. This will specifically in video shootings prevent visible jumps in brightness.
Factory setting: On
▶ Select Floating ISO in the main menu
▶ Select On
Notes
- Floating ISO can work only if the original ISO setting allows scope for change, i.e. the highest/lowest ISO setting is not already being used. The Floating ISO warning icon will be displayed in that case.
- This function is not available in Cine mode.
- Floating ISO will be deactivated during shooting if Auto ISO - Lock is enabled. The ISO value will locked in during shooting.
PERSPECTIVE CONTROL
This assist function displays a frame showing the expected cropped section of the image after a correction of the perspective of vertical falling lines. Perspective Control helps to achieve a generally straighter vertical line and straight horizon, which ensures a natural image effect, specifically in architectural images.
The function “Perspective Control” calculates the image section and the required distortion correction based on the actual panning angles of the camera and the lens used. In effect, the camera orientation during shooting (determined by internal camera sensors) is the decisive factor and not the lines visible in the image object. The function is therefore unlike automatic perspective control features used for post-editing, which are generally based on the image content.
The functionality depends on the image file format used (JPG or DNG). For JPG format images, the correction occurs directly in the camera and the corrected image is stored. For DNG format images, the relevant information is written to the meta data of the original image. Image correction is done later on using a program like Adobe Photoshop Lightroom® or Adobe Photoshop®.
Factory setting: Off
Notes
- In case of large panning angles, the distortion correction needed for a complete perspective control would be too extreme. That is why this function is automatically skipped or only partially used where angles are too large. In that case, we recommend creating DNG format images and effecting the desired corrections in a post-editing step.
- While Perspective Control is active, the auxiliary displays for Level Gauge, Histogram and Grid, as well as the function Auto Review will be temporarily disabled.
• Multi Shot is unavailable in Perspective Control. - Continuous Shooting options: with SL2 for 2 fps and 6 fps, SL2-S for 2 fps and 5 fps.
- All data edits will be written to the meta data of DNG images, even if the function is deactivated. A special tag will be added if the function is enabled, which will recommend corrections for supported image editing software.
▶ Select Perspective Control in the main menu
▶ Select On
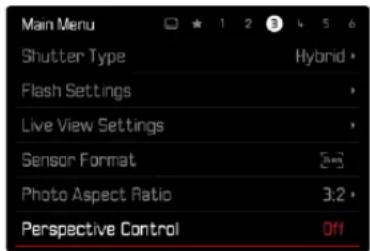
WHITE BALANCE
(IM VIDEO MODE)
In white balance ensures neutral color rendering in any light. White Balance relies on the setting made in the camera, which light color is to be rendered as 'white'.
Five methods are available:
- automatic control
- automatic control with lock function
- fixed presets
- manual setting via metering
– direct setting of the color temperature
Factory setting: Auto
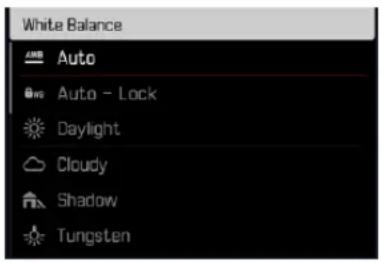
Notes
- During video capture, the white balance can be modified via the FN button or the thumbwheel.
- You can toggle between Auto and Auto - Lock, or switch to another fixed color temperature. However, you cannot switch from a fixed value to Auto during video capture. In that case, the Auto - Lock function will be grayed out.
Notes on white balance during HDMI output
- Automatic white balance cannot be applied to HDMI RAW outputs. White balance will automatically be set to Daylight if HDMI RAW output is activated, while automatic white balance is enabled.
TOUCH AF
(IN EVF MODE)
Touch AF is deactivated by default when EVF is in use to prevent accidental repositioning of the focus frame. Touch AF can, however, also be used in EVF mode.
Factory setting: Off
▶ Select Camera Settings in the main menu
▶ Select Touch AF in EVF
▶ Select On/AF Quick Setting only/Off
| Touch AF in EVF | Function |
| On | Long press:3 size increments for the focus frame are available.Double tap:Moves the focus frame back to the center. |
| AF Quick Setting only | Long press:3 size increments for the focus frame are available. |
| Off | Double tap:Moves the focus frame back to the center. |
Note
- The settings described in this chapter apply for both photo and video mode.
JOYSTICK FUNCTIONS
(IN SHOOTING MODE)
You can assign various functions to the joystick in photo mode. The settings for AF and MF mode are done separately.
AF MODE
▶ Select Customize Control in the main menu
▶ Select Joystick
▶ Select AF Mode
▶ Select the desired setting (AF L, AE L, AF L + AE L)
MF MODE
▶ Select Customize Control in the main menu
▶ Select Joystick
▶ Select MF Mode
▶ Select the desired setting

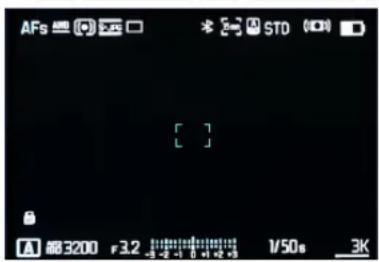
BUTTON LOCK
▶ Select Customize Control in the main menu
▶ Select Joystick
▶ Select Button Lock
▶ Select the desired setting
- Double press
- Depending on settings, the first tap on the joystick activates AF L, AE L, or AF L + AE L. Successful AF metering is indicated by a green focus frame. If AE L is selected, the icon appears in the footer line.
- This metered value remains saved until the second joystick tap.
- Press and hold
- Depending on the setting, AF L, AE L, or AF L + AE L will be locked as long as the joystick is pressed and held.
- When the joystick is released, the relevant metering type will be unlocked.
Technical Data.
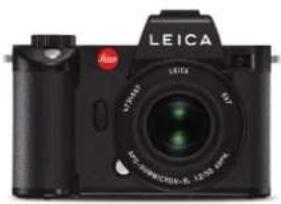
natural_image
Black LEICA digital camera with lens and control panel (no visible text or symbols)Camera Leica SL2
| Camera type | Mirrorless full-frame system camera |
| Type no. | 2998 |
| Order no. | 10 854 EU/JP/US (black), 10 856 ROW (black) |
| Buffer memory | 4 GB: DNGTM: 78 recordings / JPG: >100 recordings |
| Storage medium | UHS-II (recommended), UHS-I, SD/SDHC/SDXC memory card |
| Material | Full-metal housing made of aluminum and magnesium, leatherette, cover, splash-water protected in compliance with IEC standard 60529 (protection type IP54). |
| Lens mount Leica L bayonet with contact strip for communication between lens and camera | |
| Operating conditions | -10 to +40°C |
| Interfaces | ISO accessory shoe with additional control contacts, HDMI jack 2.0b Type A, USB 3.1 Gen1 Type C, Audio-Out 3.5 mm/Audio-In 3.5 mm, communication interface in the base cover for multifunction hand grip |
| Tripod thread | A 1/4 DIN 4503 (1/4") with stainless steel in the base |
| Dimensions (WxHxD) | 146 x 107 x 42 mm |
| Weight | approx. 835 g (without battery) |
| Sensor | |
| Sensor size | CMOS sensor, pixel pitch: 4.3 μm / Fullframe (47.3 MP): 8368 x 5584 pixels / APS-C (20.2 MP): 5504 x 3664 pixels |
| Image Stabilization | 5 axis Body Image Stabilization. Camera stabilizes up to 5.5 stops. |
| Filter | RGB color filter, UV/IR filter, no low-pass filter |
| Processor | Leica Maestro series (Maestro III) |
| File formats | Photo: DNGTM (raw data), DNG + JPG, JPG (DCF, Exif 2.31) Video: MP4: H.264/MPEG-4 AVC (Audio Format: 2ch 48 kHz/16 bit, AAC), MOV: H.264/MPEG-4 AVC (Audio Format: 2ch 48 kHz/16 bit, AC-3) |
| Picture resolution | DNGTM: 8368 x 5584 pixels (46.7 MP) JPG: 8368 x 5584 pixels (46.7 MP), 6000 x 4000 pixels (24 MP), 4272 x 2848 pixels (12 MP) |
| Color depth | DNGTM: 14 bit, JPG: 8 bit |
| Color space | Picture: sRGB, ECI-RGB v2.0, Adobe RGB Video: Rec. 709/Rec. 2020 (HLG)/L-Log |
| File size | DNGTM: 84.4 MB JPG: depending on resolution and image content Video: max. length: 29 min, max. file size: 96 GB |
| Recording Mode Video | Video mode: P - A - S - M / Cine mode: M |
| Video resolution/frame rate | MOV 5K: 29.97 fps, 25 fps, 23.98 fps / MOV C4K: 59.94 fps, 50 fps, 29.97 fps, 25 fps, 24 fps / MOV 4K: 59.94 fps, 50 fps, 29.97 fps, 25 fps, 23.98 fps / MOV FHD: 180 fps, 150 fps, 120 fps, 100 fps, 59.94 fps, 50 fps, 29.97 fps, 25 fps, 23.98 fps / MP4 4 K: 59.94 fps, 50 fps, 29.97 fps, 25 fps, 23.98 fps / MP4 FHD: 180 fps, 150 fps, 120 fps, 100 fps, 59.94 fps, 50 fps, 29.97 fps, 25 fps, 23.98 fps |
| Bit Rate | 8/10 bit for recordings on SD card, 10 bit via HDMI output |
| Video Gamma | Rec. 709, L-Log Rec. 2020, HLG Rec. 2020 |
| Viewfinder (EVF) | Resolution: 5,760,000 dots, 120 fps, magnification: 0.78x, aspect ratio: 4:3, frame coverage: 100%, exit pupil position: 21 mm, setting range +2/-4 diopters, with eye sensor for automatic switchover between viewfinder and LCD panel, time delay 0.005 s |
| LCD panel | 3.2" (backlight LED) with anti-fingerprint and anti-scratch coating, 2,100,000 pixels (dots), format 3:2, touch control available |
| Top display | 1.28" highly reflective trans-reflective monochrome LCD, 128 x 128 pixels, viewing angle 120°; anti-fingerprint coating |
| Shutter | |
| Shutter type | Electronically controlled focal plane shutter/electronic shutter |
| Shutter speeds | Mech. shutter: 30 min to 1/8000 s / Electr. shutter function: 1 s to 1/40000 s / Flash Synch: up to 1/250 s |
| Shutter button | Two-stage (1st stage: Activation of the camera electronics including autofocus and exposure metering, 2nd stage: Taking the picture) |
| Self-timer | Delay time: 2 s or 12 s |
| Picture Series | Single Continuous Low Speed (3 fps), Continuous Medium Speed (6 fps), Continuous High Speed (10 fps without AFc/AE/WB), Continuous Super Speed (20 fps with electr. shutter function without AFc/AE/WB), Interval Shooting, Exposure Bracketting, Multishot |
| Multishot | Generates 2 DNGs: 1x 47 MP, 1x 187 MP (8 pictures are combined into one high-res image) |
| Focusing | |
| Focus Mode | Automatic (Autofocus in modes iAF/AFs/AFc/Touch AF) or manual. With manual setting: Auto Magnification and Focus Peaking optionally available as focus aids |
| Autofocus system | Based on contrast metering and depth mapping |
| Autofocus modes | Smart AF (autonomously selects AFs and AFc), AFs (picture taken only after successful focusing), AFc (picture can be taken at any time), AF setting can be saved |
| Autofocus Metering Methods | Spot (can be shifted), Field (can be shifted), Multi-Field, Zone, Face detection, object Tracking, optional Touch AF |
| Autofocus Metering Fields | 225 |
| Exposure | |
| Exposure metering | TTL (Through The Lens' exposure metering) |
| Exposure Metering Methods | Spot, Center-Weighted, Multi-Field |
| Exposure modes | Automatic program (P), Aperture priority (A): manual aperture setting, Shutter priority mode (S): manual shutter speed setting Manual (M): manual setting for shutter speed and aperture |
| Exposure Compensation | ±3 EV in 1/3 EV increments or 1/2 EV increments |
| Automatic bracketing | 3 or 5 exposures, up to ±3 EV, in 1/3 EV increments Shift function: up to ±3 EV |
| ISO sensitivity range | Auto ISO: ISO 100 to ISO 50000, Manual: ISO 50 to ISO 50000 |
| White balance | Automatic (Auto), Daylight 5200 K, Cloudy 6000 K, Shadow 7000 K, Tungsten 3200 K, HMI 5600 K, Fluorescent Warm 4000 K, Fluorescent Cold 4500 K, Flash 5400 K, Gray Card Live View, Gray Card, Color Temperature 2000 K to 11500 K |
| Flash | |
| Flash unit connector | About the accessory shoe |
| Flash sync time | ←: 1/250 s, slower shutter speeds available, automatic changeover to TTL linear flash mode with HSS-compatible Leica flash units if sync time is undercut |
| Flash exposure metering | Using center-weighted TTL pre-flash metering with Leica flash units (SF 26, 40, 58, 60, 64) or with system-compatible flash units, flash remote control SF C1 |
| Flash exposure compensation | SF 40: ±2 EV in 1/2 EV increments, SF 60: ±2 EV in 1/3 EV increments |
| Equipment | |
| Microphone | Stereo internal + microphone input 3.5 mm stereo jack |
| Speaker | Mono internal + headphones output 3.5 mm stereo jack |
| WLAN | The Leica FOTOS app is required to use the WLAN function. The Leica app is available from the Apple App StoreTM or the Google Play StoreTM. Compliant with Wi-Fi IEEE802.11b/g/n, 2.4 GHz, channel 1-11 (2412-2462 MHz) and Wi-Fi IEEE802.11ac, 2.4 GHz & 5 GHz, channel 39-48 (5180-5240 MHz), channel 52-64 (5260-5320 MHz), channel 100-140 (5500-5700 MHz) (standard WLAN protocol), encryption method: WLAN-compatible WPATM/WPA2TM |
| Bluetooth | Bluetooth v4.2 (Bluetooth Low Energy (BLE)), 2402 to 2480 MHz |
| GPS | Via Leica FOTOS app |
| Menu languages | English, German, French, Italian, Spanish, Russian, Japanese, Simplified Chinese, Traditional Chinese, Korean |
| Power supply | |
| Rechargeable battery(Leica BP-SCL4) | Lithium-ion rechargeable battery, rated voltage: 7.2 V (DC); capacity: 1860 mAh (min.), approx. 370 recordings (based on CIPA standard, without EVF); charging time: approx. 140 min (after deep discharge); manufacturer: Panasonic Energy (Wuxi) Co. Ltd., Made in China |
| USB Power Supply USB charger function in standby mode or when switched off, USB power supply when switched on | |
| Charger (Leica BC-SCL4) | Input: AC 100–240 V, 50/60 Hz, 0.25 A, automatic switchover; Output: DC 8.4 V 0.85 A; Manufacturer: Salom Electric (Xiamen) Co., Ltd., Made in China |
- Shutter button
- Front setting wheel
- FN button\*\*
- FN button\*\*
- Top display
- Accessory shoe
- Microphone
- Speaker
- FN button\*\*
- FN button\*\*
- Lens release button
- Leica L bayonet
- Contact strip
- Self-timer LED / AF Assist Lamp / Sensor for exposure metering
- Strap lugs
- Main switch
- Viewfinder eyepiece
- Eye sensor
- Diopter setting ring
- FN button\*\*
- Joystick
- Thumbwheel
- Status LED
- PLAY button
- FN button\*\*
- MENU button
- LCD panel
- Memory card slot
- Tripod thread
- Contact for multifunction hand grip
- Battery release lever
- Battery compartment
- \*33 Hand grip-integrated battery compartment
- \*34 Hand grip lock
- CHARGING THE BATTERY
- ATTACHING THE MULTIFUNCTION LOAD USB/DATA TRANSFER HAND GRIP\*
- STATUS DISPLAY PHOTO
- STATUS DISPLAY VIDEO
- WHEELASSIGNMENT(factory settings)
- LEICA FOTOS APP
- TECHNICAL DATA
- VIEWFINDER/LCD PANEL
- EQUIPMENT
- POWER SUPPLY
- SAFETY REMARKS
- GENERAL INFORMATION
- LENS
- RECHARGEABLE BATTERY
- CHARGER
- MEMORY CARD
- SENSOR
- CARRY STRAP
- TRIPOD
- FLASH
- REGULATORY INFORMATION
- English
- Declaration of Conformity (DoC)
- WARRANTY
- FOR US ONLY:
- FCC Note:
- FCC Caution:
- Contains FCC ID: VPYLB1JS955
- FOR CANADA ONLY:
- FOR SINGAPORE ONLY FOR UNITED ARAB EMIRATES ONLY:
- LEICA SL2
- FOREWORD
- SCOPE OF DELIVERY
- REPLACEMENT PARTS / ACCESSORIES
- LEGAL INFORMATION
- COPYRIGHT NOTICE
- LEGAL INFORMATION ABOUT THIS MANUAL
- COPYRIGHT
- BRANDS AND LOGOS
- LICENSE RIGHTS
- COUNTRY-SPECIFIC LICENSES
- LICENSE INFORMATION
- CE MARK
- DISPOSAL OF ELECTRICAL AND ELECTRONIC EQUIPMENT
- IMPORTANT NOTES REGARDING THE USE OF WLAN/BLUETOOTH®
- FIRST AID
- CAMERA/LENS
- (For system cameras)
- LCD PANEL
- DATA
- FIRMWARE UPDATE
- Leica SL2 comes with splash water and dust protection.
- i
- TABLE OF CONTENTS
- PRACTICAL DEFAULT SETTINGS....102
- EXPOSURE.... 132
- SHOOTING MODES.... 146
- SPECIAL SHOOTING MODES.... 153
- FLASH PHOTOGRAPHY.... 155
- REVIEW MODE....162
- << >> 175
- Note
- Important
- Attention
- MULTIFUNCTION HANDGRIP SL
- LENS\*
- DISPLAYS
- PHOTO
- WHEN TAKING A PICTURE
- IN REVIEW MODE
- VIDEO/CINE
- STATUS SCREEN
- DISPLAYS IN THE TOP DISPLAY
- CHARGE STATUS INDICATOR ON THE LCD PANEL
- PREPARATION
- PREPARING THE CHARGER
- REMOVING THE BATTERY FROM THE CHARGER
- CHARGING VIA USB
- Notes
- INSERTING/REMOVING THE BATTERY
- REMOVAL
- INSERTING/REMOVING THE MEMORY CARD
- OPENING THE COVER OVER THE MEMORY CARD SLOT
- CLOSING THE COVER OVER THE MEMORY CARD SLOT
- INSERTION
- COMPATIBLE LENSES
- L-MOUNT LENSES
- EXPOSURE METERING AND EXPOSURE CONTROL USING VARIO LENSES
- LEICA M AND R LENSES
- Using automatic detection
- Setting the lens type manually
- Sorting the lens type lists
- CHANGING THE LENS
- OTHER LENSES
- (e.g. Leica M lenses)
- DIOPTER SETTINGS
- MULTIFUNCTION HANDGRIP SL (optional accessory)
- PHOTOGRAPHY WITH THE HANDGRIP
- DETACHING THE HANDGRIP
- MOUNTING THE WRIST LOOP/CARRY STRAP ON THE MULTIFUNCTION HANDGRIP
- CHANGING THE BATTERY
- CLOSE THE BATTERY COMPARTMENT
- CAMERA OPERATION
- CONTROL ELEMENTS
- MAIN SWITCH
- SHUTTER BUTTON
- Press down fully
- PLAY BUTTON
- MENU BUTTON
- MENU CONTROL
- MENU SECTIONS
- Favorites:
- Main Menu:
- SETTINGS IN PHOTO AND VIDEO MODE
- SWITCHING MENU SECTIONS
- Scrolling forward
- Scrolling backward
- SELECTING SETTINGS
- DIRECT SETTINGS
- ACCESSING A STANDARD SUBMENU
- FAVORITES MENU SUBMENU
- MAIN MENU
- MENU NAVIGATION
- LINE BY LINE NAVIGATION
- SHOW SUBMENU
- CONFIRM SELECTION
- GO BACK ONE STEP
- (Return to the superordinate menu item)
- EXITING THE MENU
- SUBMENU
- SELECTING A BUTTON (ICON/FUNCTION BUTTON)
- Using button control
- Using touch control
- SAVE
- CANCEL
- DATE/TIME MENU
- COMBI MENU (AF PROFILES)
- Navigating between buttons
- Applying setting
- USER-DEFINED OPERATION
- FAVORITES MENU
- MANAGING THE FAVORITES MENU
- ▶ Select On/Off
- DIRECT ACCESS TO MENU FUNCTIONS
- CHANGING AN ASSIGNMENT
- ACCESSING THE ASSIGNED MENU FUNCTION
- SETTING WHEEL ASSIGNMENTS (IN SHOOTING MODE)
- FUNCTION ASSIGNMENT
- Selecting the desired exposure mode
- Assigning a function to the thumbwheel
- Assigning a function to the front dial
- Saving the assignment and exiting the menu
- WHEN USING AF LENSES
- CUSTOMIZING THE SETTING WHEELS
- WHEN USING MF LENSES
- ROTATION DIRECTION OF THE SETTING WHEELS
- THUMBWHEEL
- FRONT DIAL
- JOYSTICK FUNCTIONS (IN SHOOTING MODE)
- AF MODE
- MF MODE
- LOCKING THE SETTING WHEELS
- USER PROFILES
- CREATING PROFILES
- RENAMING PROFILES
- APPLY/ACTIVATE PROFILES
- EXPORTING/IMPORTING PROFILES TO/FROM THE MEMORY CARD
- CAMERA BASIC SETTINGS
- MENU LANGUAGE
- DATE/TIME
- RECEIVING THE SETTINGS FROM A MOBILE DEVICE
- MANUAL SETTINGS
- DATE
- TIME
- TIME ZONE
- DISTANCE UNIT
- POWER SAVE MODE (STANDBY MODE)
- LCD PANEL/VIEWFINDER SETTINGS
- LCD PANEL/EVF USE
- EYE SENSOR SENSITIVITY
- BRIGHTNESS
- EVF
- COLOR RENDERING
- AUTOMATIC LCD PANEL AND EVF SHUTDOWN
- EVF FRAME RATE
- ACOUSTIC SIGNALS
- VOLUME
- ELECTRONIC SHUTTER SOUND
- AUTOFOCUS CONFIRMATION
- SILENT PHOTOGRAPHY
- PHOTO SETTINGS
- SENSOR FORMAT
- FILE FORMAT
- RESOLUTION
- ASPECT RATIO
- FILM STYLE
- IMAGE PROPERTIES
- CONTRAST
- SHARPNESS
- COLOR SATURATION
- HIGHLIGHT/SHADOW
- COLOR PROFILE
- MONOCHROME PROFILE
- CUSTOMIZING PHOTO PROFILES
- AUTOMATIC OPTIMIZATION
- NOISE REDUCTION
- NOISE REDUCTION FUNCTION FOR LONG-TERM EXPOSURE
- NOISE REDUCTION IN JPG SHOTS
- IMAGE STABILIZATION
- SETTING THE STABILIZATION DIRECTION
- DARK AREA OPTIMIZATION (IDR)
- DYNAMIC RANGE
- iDR FUNCTION
- DATA MANAGEMENT
- STORAGE OPTIONS
- FORMATTING A MEMORY CARD
- DATA STRUCTURE
- FOLDER STRUCTURE
- FILE STRUCTURE
- EDIT FILE NAMES
- CREATING A NEW FOLDER
- ADDING COPYRIGHT INFORMATION
- LOGGING THE SHOOTING LOCATION (ONLY IN CONNECTION WITH THE LEICA FOTOS APP)
- GEOTAGGING STATUS
- DATA TRANSFER
- ABOUT LEICA FOTOS
- VIA USB CABLE
- PRACTICAL DEFAULT SETTINGS
- TOUCH AF
- TOUCH AF IN EVF MODE
- PERSONALIZED LENS SETTINGS EV INCREMENT
- Factory setting: Standard MF
- Factory setting: 1/3
- AUXILIARY DISPLAYS
- INFO PROFILES
- CHANGING THE INFO PROFILES
- DEACTIVATING INDIVIDUAL INFO PROFILES
- CUSTOMIZING THE INFO PROFILES
- SHOW AVAILABLE
- INFO BARS
- GRID
- CLIPPING
- SETTING THE LIMIT VALUE
- FOCUS PEAKING
- HIGHLIGHT COLOR
- SENSITIVITY
- LEVEL GAUGE
- HISTOGRAM
- TEMPORARY ACTIVATION/DEACTIVATION OF INDIVIDUAL FUNCTIONS
- ENHANCED LIVE VIEW
- MF ASSIST FUNCTIONS
- AF ASSIST LAMP
- ACOUSTIC AF CONFIRMATION
- PHOTOGRAPHY
- DRIVE MODE
- FOCUSING
- AF PHOTOGRAPHY
- MF PHOTOGRAPHY
- AUTOFOCUS MODES
- INTELLIGENT AF
- AFs (single)
- AFc (continuous)
- AUTOFOCUS METERING METHODS
- MULTI-FIELD METERING
- SPOT/FIELD METERING
- ZONE
- TRACKING
- START POSITION FOR TRACKING
- PERSON DETECTION (FACE DETECTION)
- Switching between faces
- AF SETTINGS
- AF PROFILES
- ACCESSING THE ACTIVE PROFILE
- CHANGING THE ACTIVE PROFILE
- ADJUSTING THE ACTIVE PROFILE
- RESETING THE ACTIVE PROFILE
- PRE FOCUS
- FOCUS LIMIT
- AF QUICK SETTING
- ACCESSING AF QUICK SETTING
- ADJUSTING THE METERING FIELD SIZE
- CHANGING THE AF METERING METHOD
- ENLARGEMENT IN AF MODE
- SHIFTING THE AF METERING FIELD
- QUICK AF METERING POSITION CHANGES
- MANUAL FOCUSING (MF)
- ENLARGEMENT IN MF MODE
- ACCESS VIA THE FOCUS RING
- FUNCTION BUTTON/JOYSTICK ACCESS
- DISTANCE DISPLAY
- USING AUTOFOCUS IN MF MODE
- ISO SENSITIVITY
- FIXED ISO VALUES
- AUTOMATIC SETTING
- LIMITING SETTING RANGES
- LIMITING ISO VALUES
- LIMITING SHUTTER SPEED RANGES
- LIMITING ISO VALUES (FLASH)
- LIMITING SHUTTER SPEED RANGES (FLASH)
- DYNAMIC ISO SETTING
- FLOATING ISO
- WHITE BALANCE
- AUTOMATIC CONTROL/FIXED SETTINGS
- MANUAL SETTING VIA METERING
- GRAY CARD
- Performing measurement
- Cancelling measurements
- GRAY CARD LIVE VIEW
- Repositioning the metering field
- DIRECT SETTING OF THE COLOR TEMPERATURE
- EXPOSURE
- SHUTTER TYPE
- APPLICATION
- EXPOSURE METERING METHODS
- SPOT
- CENTER-WEIGHTED
- MULTI-FIELD
- HIGHLIGHT-WEIGHTED
- EXPOSURE MODES
- SELECTING A MODE
- Via the thumbwheel
- Applying the selected mode immediately
- Via the status screen
- FULLY AUTOMATIC EXPOSURE SETTING - P
- AUTOMATIC PROGRAM - P
- CHANGING THE PRESET SHUTTER SPEED AND APERTURE COMBINATIONS (SHIFT)
- SEMI-AUTOMATIC EXPOSURE SETTING - A/S
- APERTURE PRIORITY - A
- SHUTTER SPEED PRIORITY - S
- MANUAL EXPOSURE SETTING - M
- LONG-TERM EXPOSURE
- FIXED SHUTTER SPEEDS
- B FUNCTION
- EXPOSURE CONTROL
- EXPOSURE PREVIEW
- EXPOSURE LOCK
- AE-L (AUTO EXPOSURE LOCK)
- AF-L (AUTO FOCUS LOCK)
- AE-L/AF-L
- EXPOSURE LOCK IN AF MODE
- Via the shutter button
- Via the Joystick
- EXPOSURE LOCK IN MF MODE
- EXPOSURE COMPENSATION
- Using thumbwheel control
- Using menu control
- DEPTH OF FIELD CHECK
- SHOOTING MODES
- CONTINUOUS SHOOTING MODE
- INTERVAL SHOOTING
- SPECIFYING THE NUMBER OF FRAMES
- SPECIFYING THE INTERVALS BETWEEN SHOTS
- SETTING THE DELAY TIME
- Getting started
- Cancelling a running series of shots
- EXPOSURE BRACKETING
- MULTISHOT
- MOTION ARTEFACTS CORRECTION
- SELF-TIMER
- TRANSPARENCY
- IMAGE SELECTION
- Browsing through the images
- Selecting a recorded image
- Resetting the function when switching off the camera
- ACTIVATING THE FUNCTION
- FLASH PHOTOGRAPHY
- COMPATIBLE FLASH UNITS
- ATTACHING THE FLASH UNIT
- DETACHING THE FLASH UNIT
- FLASH EXPOSURE METERING (TTL METERING)
- FLASH CONTROL
- SYNC POINT
- FLASH RANGE
- FLASH EXPOSURE COMPENSATION
- REVIEW MODE
- CONTROL ELEMENTS IN REVIEW MODE
- FUNCTION BUTTONS IN REVIEW MODE
- CONTROL ELEMENTS ON THE LCD PANEL
- INITIATE/EXIT REVIEW MODE
- SELECTING/SCROLLING THROUGH IMAGES
- SINGLE
- CONTINUOUS
- INFO DISPLAYS IN REVIEW MODE
- DISPLAYING ASSIST FUNCTIONS
- CROPPED SECTION ZOOM
- DISPLAYING MULTIPLE IMAGES AT ONCE
- OVERVIEW
- Navigating between images
- Displaying the image in full size Using touch control
- TAGGING/RATING OF PHOTOS
- Tagging a photos
- Removing a tag
- DELETING IMAGES
- DELETING INDIVIDUAL IMAGES
- DELETING MULTIPLE IMAGES
- DELETING ALL IMAGES
- DELETING UNRATED IMAGES
- PREVIEW OF LATEST IMAGE
- SLIDE SHOW
- SETTING THE DURATION
- ENDING THE SLIDE SHOW
- VIDEO SETTINGS
- VIDEO FORMAT
- AVAILABLE RESOLUTIONS
- AVAILABLE FRAME RATES
- SETTING THE VIDEO FORMAT
- MOV
- MP4
- VIDEO STYLE
- VIDEO PROFILES
- CUSTOMIZING VIDEO PROFILES
- AUDIO SETTINGS
- MICROPHONE
- WIND NOISE REDUCTION
- INTERNAL MICROPHONE
- EXTERNAL MICROPHONE
- TIMECODE
- TIMECODE MODE
- START TIME
- VIDEO GAMMA
- HLG SETTINGS
- L-LOG SETTINGS
- SETUP/MANAGEMENT OF LUT PROFILES
- EXAMPLE
- Importing a custom LUT profile
- Freeing a memory slot
- USING LUT PROFILES
- CHANGING THE OUTPUT CHANNEL
- SELECTING THE LUT PROFILE
- VIDEO STABILIZATION
- SEGMENTED RECORDING
- PERSONALIZED LENS SETTINGS
- EV INCREMENT
- AUDIO OUTPUT
- SETTING THE OUTPUT LEVEL
- HDMI OUTPUT WITH/WITHOUT SOUND
- ZEBRA
- VIDEO ASSIST FUNCTIONS
- REFERENCE VALUES
- COLOR BAR
- Displaying information and auxiliary displays
- TEST SOUND
- Setting the volume
- REC FRAME
- Quick option for hiding/displaying the REC Frame
- WAVEFORM MONITOR (WFM)
- ADJUSTING VISUALIZATION
- Starting the adjustment
- Adjusting the size
- Adjusting the position
- Completing the adjustment
- ASPECT RATIO DISPLAY
- SAFETY AREA
- RECORDING VIDEO
- VIDEO MODE AND CINE MODE
- START/EXIT VIDEO MODE
- DUSPLAY AND OPERATION VIA USB-PTP USING EXTERNAL ACCESSORY (LIKE GIMBALS)
- TAKING VIDEOS WITH AF
- TAKING VIDEOS WITH MF
- CONTROLLING THE AUTOFOCUS
- SUPPRESSING CONTINUOUS FOCUSING
- MULTI-FIELD ZONE
- SPOT/FIELD
- SPEED
- Exiting the enlargement function
- ACCESS VIA THE FUNCTION BUTTON
- Assigning a function to one of the function buttons
- Accessing the enlargement function
- Adjusting the enlargement function
- Changing the position of the enlarged section
- FOLLOW FOCUS
- FUNCTION BEHAVIOR
- FOLLOW FOCUS MENU
- CONFIGURING A FOCUS POSITION
- Setting a delay time
- Canceling the setting
- CHANGING THE FOCUS POSITION
- ACCESS AS NEEDED
- AUTOMATIC SEQUENCE
- START
- Exiting the function
- OTHER SETTINGS
- SUBSEQUENT FOCUS MODE
- (Video mode)
- ASA SENSITIVITY (Cine-Mode)
- PLAYBACK MODE
- CONTROL ELEMENTS IN PLAYBACK MODE
- INITIATE/EXIT PLAYBACK MODE
- INFO DISPLAYS IN PLAYBACK MODE
- DISPLAYING MULTIPLE SHOTS AT ONCE
- TAGGING/RATING OF RECORDINGS
- Tagging a recording
- DELETING RECORDINGS
- DELETING INDIVIDUAL RECORDINGS
- DELETING MULTIPLE RECORDINGS
- Selecting recordings for deletion
- Deleting the selected recordings
- Canceling a deletion and return to the normal playback mode
- DELETING ALL RECORDINGS
- DELETING UNRATED RECORDINGS
- VIDEO PLAYBACK
- START PLAYBACK
- ACCESSING THE CONTROL ELEMENTS
- PAUSE PLAYBACK
- RESUMING PLAYBACK
- NAVIGATE TO ANY POINT IN THE FILE
- QUICK JUMP
- PRECISE SELECTION
- END PLAYBACK
- VIDEO EDITING
- ACCESSING THE VIDEO EDITING FUNCTION
- CHANGING THE CURRENT CUTTING POINT
- MOVING THE ACTIVE CUTTING POINT
- CUTTING
- CANCELLING THE VIDEO EDITING FUNCTION
- OTHER FUNCTIONS
- RESETTING THE CAMERA TO FACTORY SETTINGS
- FIRMWARE UPDATES
- Finding the currently installed firmware version
- EXECUTING A FIRMWARE UPDATE
- UPDATING THE CAMERA FIRMWARE
- UPDATING THE LENS FIRMWARE
- UPDATING THE ADAPTER FIRMWARE
- LEICA FOTOS
- CONNECTING
- FIRST-TIME CONNECTION TO A MOBILE DEVICE
- CONNECTION WIZARD
- USING THE MENU TO
- ON THE MOBILE DEVICE
- IN THE CAMERA
- CONNECTING WITH PAIRED DEVICES
- DISABLING WI-FI
- DISABLING WLAN AUTOMATICALLY (Sleep mode)
- DISABLING WLAN MANUALLY
- REMOVING PAIRED DEVICES FROM THE LIST
- FIND THE MAC ADDRESS
- REMOTE CAMERA CONTROL
- REMOTE CAMERA ACTIVATION
- Important information
- Solution
- CARE/STORAGE
- CAMERA HOUSING
- MEMORY CARDS
- PIXEL MAPPING
- MENU OVERVIEW
- INDEX
- A
- B
- C
- D
- E
- F
- G
- H
- |
- J
- K
- L
- M
- N
- 0
- P
- R
- s
- T
- U
- V
- W
- Z
- CAMERA
- Designation
- Camera type
- Type no.
- Order No.
- Buffer memory
- Storage medium
- Material
- Lens mount
- Operating conditions
- Interfaces
- Tripod thread
- Weight
- Sensor size
- Processor
- Filter
- File formats
- File size
- Color depth
- Color space
- Shooting Mode Video
- Viewfinder (EVF)
- Top display
- SHUTTER
- Shutter speeds
- Working range
- Focus Mode
- Autofocus system
- Autofocus Metering Fields
- Exposure metering
- Automatic bracketing
- FLASH EXPOSURE CONTROL
- Flash unit connector
- Flash sync time
- Flash exposure metering
- Speaker
- WLAN
- GPS
- Bluetooth
- Menu languages
- Rechargeable battery (Leica BP-SCL4)
- USB Power Supply
- Charger (Leica BC-SCL4)
- LEICA CUSTOMER CARE
- LEICA GERMANY
- Leica Camera AG
- YOUR NATIONAL REPRESENTATIVE
- LEICA ACADEMY
- LEICA SL2 LEICA SL2-S
- EXTENDED FUNCTIONALITY
- IMPROVEMENT
- FIRMWARE
- NEW
- FLASH MODES
- A AUTOMATIC FLASH ACTIVATION
- MANUAL FLASH ACTIVATION
- AUTOMATIC FLASH ACTIVATION AT SLOWER SHUTTER SPEEDS (LONG-TERM SYNCHRONIZATION)
- PLAY MENU
- ISO SENSITIVITY (IM VIDEO MODE)
- ISO VALUE LOCK
- PERSPECTIVE CONTROL
- (IM VIDEO MODE)
- Notes on white balance during HDMI output
- (IN EVF MODE)
- JOYSTICK FUNCTIONS
- (IN SHOOTING MODE)
- BUTTON LOCK
Brand : LEICA
Model : SL2
Category : Camera