
Maker Select pro Ultimate - 3D Printer MONOPRICE - Free user manual and instructions
Find the device manual for free Maker Select pro Ultimate MONOPRICE in PDF.


| Product Type | 3D Printer - FDM |
| Brand | Monoprice |
| Model | Maker Select Pro Ultimate |
| Technology | Fused Deposition Modeling (FDM) |
| Build Volume | 200 x 200 x 180 mm (7.9 x 7.9 x 7.1 in) |
| Filament Diameter | 1.75 mm |
| Supported Materials | PLA, ABS, PETG, TPU, Nylon, Polycarbonate |
| Print Bed | Heated borosilicate glass bed, max temp 130°C |
| Extruder | Single direct drive, all-metal hotend (up to 260°C) |
| Resolution | 0.1 - 0.4 mm layer height |
| Connectivity | USB, SD card, no Wi-Fi |
| Display | Full-color touchscreen LCD |
| Power Supply | 24V DC, 240W power adapter |
| Dimensions | 400 x 400 x 500 mm (15.7 x 15.7 x 19.7 in) |
| Weight | 12 kg (26.5 lbs) |
| Noise Level | ~50 dB during printing |
| Maintenance | Clean glass bed with isopropyl alcohol, lubricate linear rods with PTFE grease monthly |
| Safety Features | Thermal runaway protection, filament runout sensor, sturdy metal frame |
| Spare Parts Available | Yes, including hotend assemblies, fans, build plate, belts |
| Repairability | Modular design, easy disassembly; firmware open-source |
| Warranty | 1 year limited parts and labor |
Frequently Asked Questions - Maker Select pro Ultimate MONOPRICE
User questions about Maker Select pro Ultimate MONOPRICE
0 question about this device. Answer the ones you know or ask your own.
Ask a new question about this device
Download the instructions for your 3D Printer in PDF format for free! Find your manual Maker Select pro Ultimate - MONOPRICE and take your electronic device back in hand. On this page are published all the documents necessary for the use of your device. Maker Select pro Ultimate by MONOPRICE.
USER MANUAL Maker Select pro Ultimate MONOPRICE
natural_image
Interior view of a black 3D printer with visible internal structure and mounting base (no text or symbols)P/N 15710, 21873, 24167
User's Manual
CONTENTS
SAFETY WARNINGS AND GUIDELINES....3
INTRODUCTION....4
FEATURES....4
CUSTOMER SERVICE....4
PACKAGE CONTENTS 5
PRODUCT OVERVIEW....6
UNPACKING AND SETUP....7
MANUAL CURA SETUP 20
CREATING A GCODE FILE....21
MAINTENANCE....24
Feed Mechanism 24
Lubricating the Z Axis....24
Lubricating the X and Y Axes....24
Notice for Industry Canada....28
SAFETY WARNINGS AND GUIDELINES
- The printer is very sensitive to static electricity. Always contact a grounded object before working with this device. It is recommended to wear an anti-static wrist strap when working with this device.
- Power off and unplug the printer from the power source prior to making repairs or alterations.
- The printer operates at high temperatures. Always allow the nozzle, the extruded material, and print bed to cool before touching.
- Some types of filament can emit a strong odor when heated. Always use this printer in a well-ventilated area.
- Do not leave the printer unattended when in operation.
- Do not expose this printer to excessive vibration.
- Do not expose this printer to water or moisture of any kind. Do not place drinks or other containers with moisture on or near the printer. If moisture does get in or on the printer, immediately unplug it from the power outlet and allow it to fully dry before reapplying power.
- Do not place the printer near a heat source, such as a fireplace, heating vent, radiator, etc. Do not leave it in direct sunlight.
- The power supply for this monitor uses a NEMA 5-15 three prong, grounded plug. Do not use a "cheater" plug or otherwise bypass the grounding pin.
- Do not allow the power cord to be crimped, pinched, stepped on, etc. Ensure that the power cord does not present a tripping hazard.
- Never unplug the unit by pulling on the power cord. Always grasp the connector head.
- This device should only be operated by qualified adults.
- In the event of serious operating problem, stop using the unit immediately.
- Always take care when using the scraper. Never direct scraper action towards your fingers.
INTRODUCTION
Thank you for purchasing this Maker Select 3D printer! This printer has a heated build plate and can therefore print PLA, ABS, wood, copper fill, steel fill, bronze fill, and other materials. It can print gcode files from a computer using a USB connection or from an SD™ card. It is compatible with computers running Microsoft Windows®, Macs® running OS X®, and Ubuntu Linux.
FEATURES
• Ultra high 20 micron layer resolution
- Can print from USB connection or SD™ card
- Up to 300 mm/sec print speed
- Extruder nozzle temperatures from 180 \~ 260°C
• Build plate temperatures from 50\~100°C
• 200 x 200 x 175 mm build volume
- Compatible with Windows®, Mac® OS X®, and Ubuntu Linux
CUSTOMER SERVICE
The Monoprice Customer Service department is dedicated to ensuring that your ordering, purchasing, and delivery experience is second to none. If you have any problem with your order, please give us an opportunity to make it right. You can contact a Monoprice Customer Service representative through the Live Chat link on our website www.monoprice.com during normal business hours (Mon-Fri: 5am-7pm PT, Sat-Sun: 9am-6pm PT) or via email at support@monoprice.com
PACKAGE CONTENTS
Please take an inventory of the package contents to ensure you have all the items listed below. If anything is missing or damaged, please contact Monoprice Customer Service for a replacement.
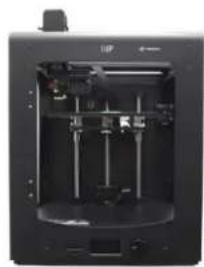
1x 3D printer
1x Spool holder
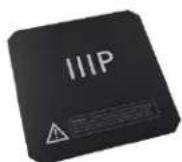
2x Print bed mats
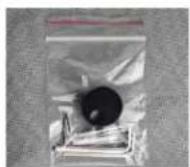
1x Package of hex wrenches
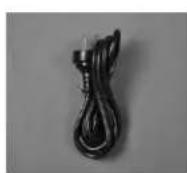
1x AC power cord
1x USB cable
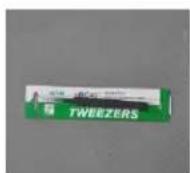
1x Tweezers
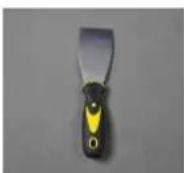
1x Scraper
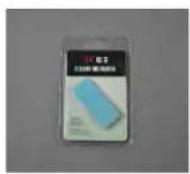
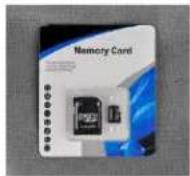
1x Card reader
1 SD ^TM card
natural_image
Interior view of a black electronic device with internal components and a small screen (no visible text or symbols)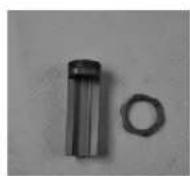
PRODUCT OVERVIEW
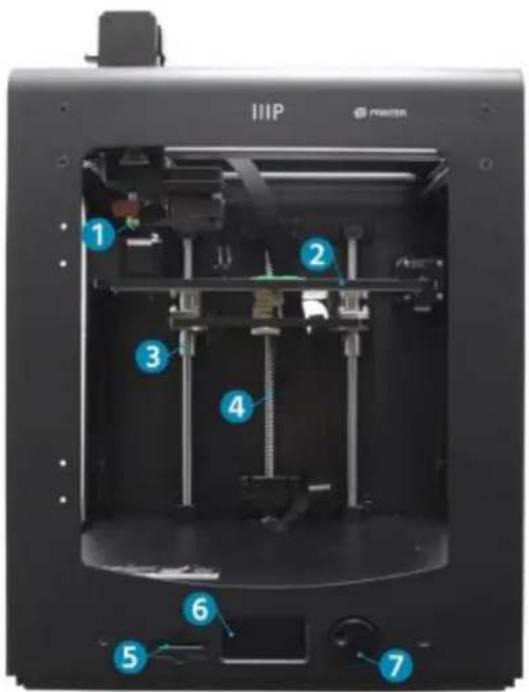
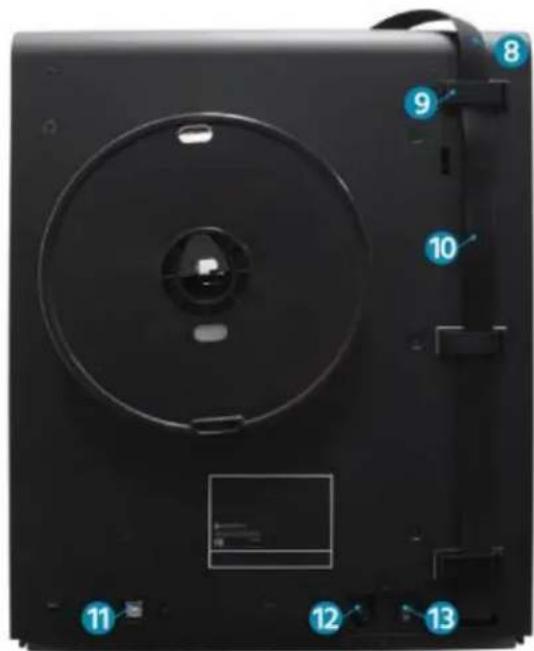
- Mk11 extruder
- Double locking Z-axis screw
- Printing mat
- Guide rod
- SD card slot
- LCD display
-
Navigation dial
-
Cable quick coupler
- Cable lock
- Extruder cable
- USB port
- Power switch
- AC power socket
UNPACKING AND SETUP
Take care when unpacking the printer. Do not use excessive force at any stage of the unpacking process.
- Place the box on a flat stable surface.
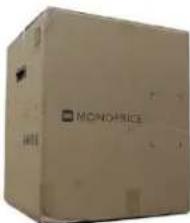
natural_image
Exterior view of a beige box labeled 'MONOPRICE' (no other text or symbols visible)- Open the box and remove the User's Manual.
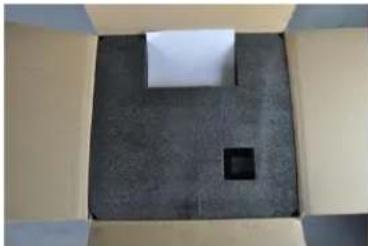
natural_image
Open cardboard box containing a dark textured cushion with a small square cutout on top (no text or symbols visible)- Remove the black foam protector.
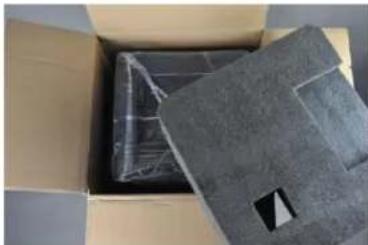
natural_image
Open cardboard box with a partially cut-out black plastic cover (no text or symbols visible)- Grasp the printer with two hands under the top frame and gently lift it out of the box. A second person may be needed to hold the box in place.
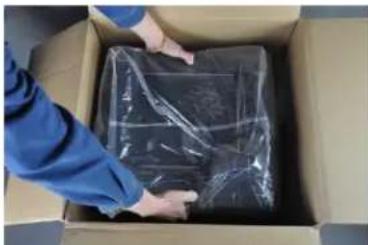
natural_image
Person in blue jacket handling a large black plastic bag inside a cardboard box (no text or symbols visible)-
Place the printer on a sturdy table.
-
Remove the plastic bag from the top of the printer.
-
Cut the two black bindings from the side of the printer.
-
Carefully remove the print mats.
-
Gently remove the accessories box from under the print bed.
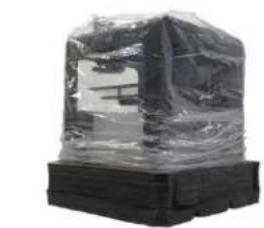
natural_image
Exterior view of a transparent cube covered in plastic film, mounted on a black base (no text or symbols visible)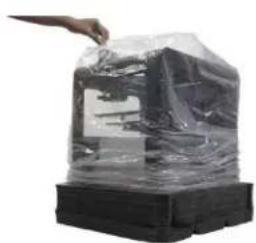
natural_image
Hand holding a transparent plastic cover over a mechanical component (no visible text or symbols)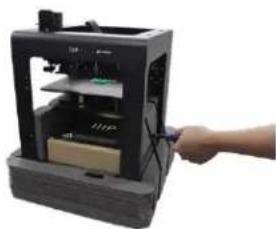
natural_image
Hand operating a 3D printer with a small electronic device on top (no visible text or symbols)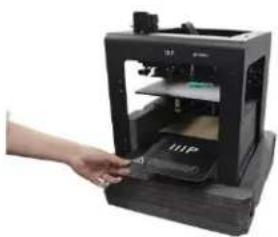
natural_image
Hand inserting a 3D printer into a device (no visible text or symbols)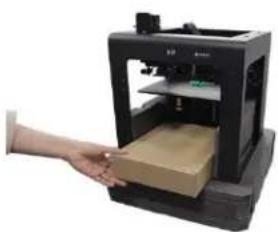
natural_image
Hand inserting a cardboard printer into a box (no visible text or symbols)- Fold the protecting foam and carefully pull it out from under the print bed.
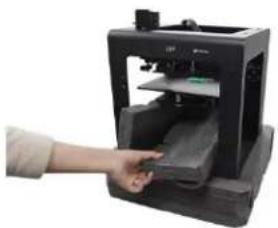
natural_image
Hand inserting a 3D printer into a device (no visible text or symbols)- Carefully cut the bindings that hold the X-axis and Y-axis rails in place.
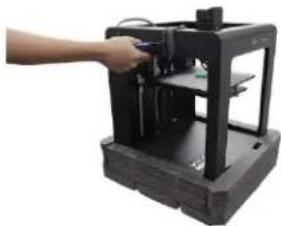
natural_image
Hand operating a 3D printer with a green base and black frame (no visible text or symbols)- Carefully lift the printer out of the foam cradle and set the foam aside.
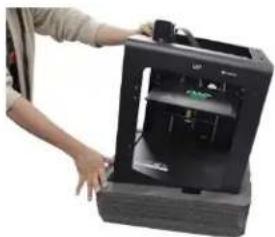
natural_image
Person handling a 3D printer with visible internal components (no text or symbols)- Open the accessories box and locate the bag with the hex wrenches and control knob. Remove the control knob from the bag.
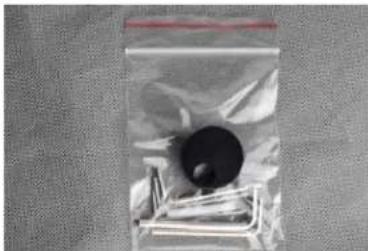
natural_image
Close-up of a plastic bag containing a black circular object and metal pins (no text or symbols visible)- Using the 1.5mm hex wrench, loosen the locking screw.
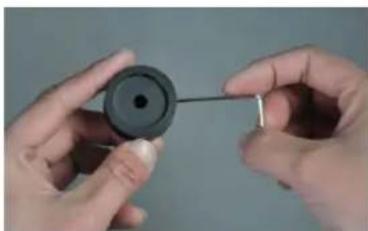
natural_image
Close-up of hands holding a small metallic tool with a circular component (no text or symbols visible)- Turn the control post by hand until the flat side is facing up.
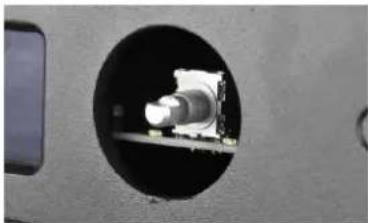
natural_image
Close-up of a mechanical component inside a circular opening, with no visible text or symbols.- Position the control knob with the locking screw facing up, then slide it onto the control post.
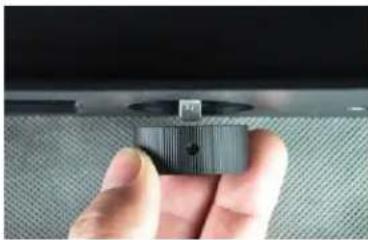
natural_image
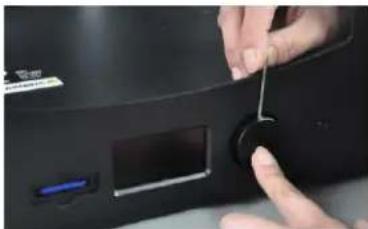
Close-up of a hand holding a small mechanical knob on a textured surface (no visible text or symbols)- Using the 1.5mm hex wrench, tighten the locking screw to secure the control knob in place. Ensure that there is a small amount of clearance between the knob and the printer frame so the knob can be freely moved.
natural_image
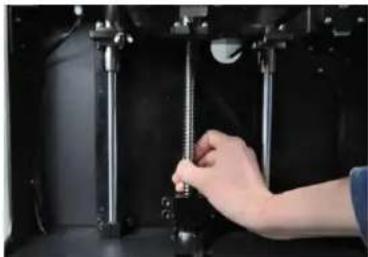
Close-up of hands using a tool to press or adjust a device on a black surface, with no visible text or symbols.- Manually turn the Z-axis screw clockwise to raise the print bed.
natural_image
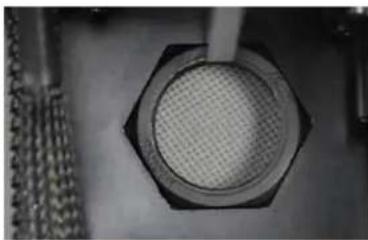
Close-up of a hand adjusting a mechanical component with metal rods (no visible text or symbols)- Insert the plastic spool holder nut into the hex shaped indent inside the printer. Position the wrench mark on the nut toward the 2 o'clock position.
natural_image
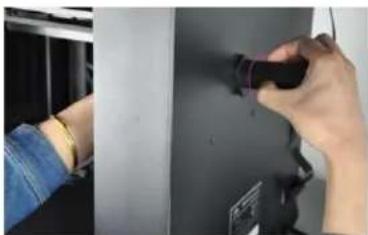
Close-up of a perforated circular object with a hexagonal base, placed on a surface with mechanical components nearby (no visible text or symbols)- With one hand hold the nut in place. With the other hand insert the spool holder into the large hole on the back, then turn clockwise and thread it into the nut. Tighten, but do not over tighten.
natural_image
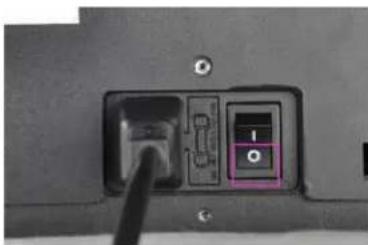
Close-up of hands installing or adjusting a black plastic component on a wall (no visible text or symbols)- Ensure that the printer is powered off (O side of the power switch is depressed).
natural_image
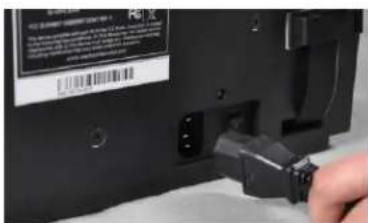
Close-up of a computer interface showing a port with an orange square button labeled 'I' and a black cable inserted (no readable text or symbols)- Insert the C13 end of the included AC power cord into the C14 panel connector
MENU OPERATION
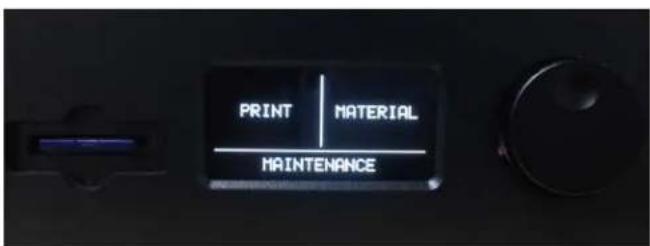
- The LCD menu system operates with the control knob to the right of the display.
- Rotate the control knob to move the highlight on the menu or to change a selected value.
- Press the control knob to select the highlighted entry or to confirm an action.
LEVELING THE BUILD PLATE
Although the build plate was leveled at the factory, it may have shifted somewhat during shipping. Before you begin using the printer, you will need to check the build plate level and adjust it as necessary.
Build plate leveling is crucial to getting a good print. A build plate that is not level will have areas where the nozzle is either too far or too close to the build plate. If the nozzle is too far from the plate, the extruded material will be unable to stick to it. On the other hand, if it is too close to the plate, it could prevent material from extruding and could damage the nozzle and/or build plate.
Perform the following steps to level the build plate.
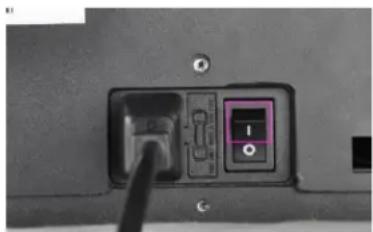
- Depress the I side of the power switch to power the printer on.
natural_image
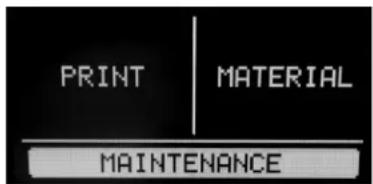
Close-up of a computer interface button with a black hole and a highlighted square (no text or symbols visible)- Once startup is complete, the built-in menu system is displayed. Use the navigation wheel to move the highlight to the MAINTENANCE entry, then press the wheel to select it.
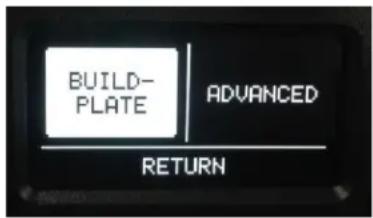
- Select the BUILD-PLATE entry. The system will start the 7-step leveling process.
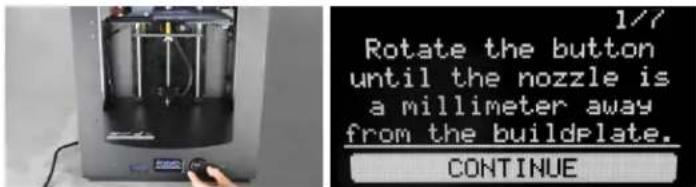
- For step 1/7, use the control knob to raise the build plate, as directed. Press the control knob to select the CONTINUE option when complete.
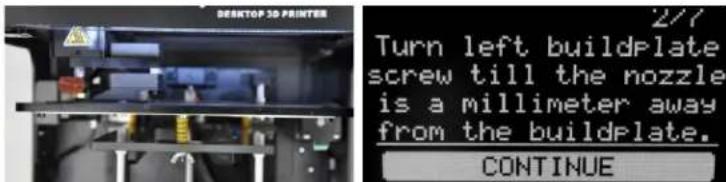
- For step 2/7, adjust the screw under the left-rear corner of the build plate until the plate is 1mm from the nozzle. Turn the screw clockwise to lower the build plate and counterclockwise to raise it. Select the CONTINUE option to proceed.
- For step 3/7, adjust the screw under the right-rear corner of the build plate until the plate is 1mm from the nozzle. Turn the screw clockwise to lower the build plate and counterclockwise to raise it. Select the CONTINUE option to proceed.
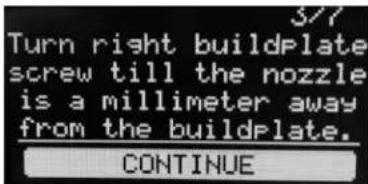
- Insert a sheet of ordinary printer paper between the nozzle and the build plate, then readjust the screw under the right-rear corner of the build plate until there is a 1mm gap. Select the CONTINUE option to proceed.
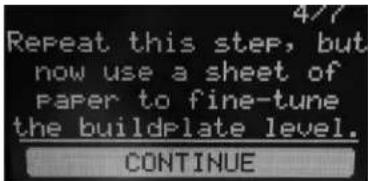
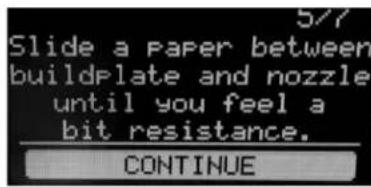
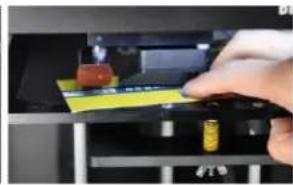
- The extruder will move to the center front of the build plate. Adjust the screw under the center-front until you can move the paper with a slight bit of resistance. Select the CONTINUE option to proceed.
natural_image
Close-up of a hand inserting a yellow and black card into a black electronic device (no visible text or symbols)- The extruder will move to the left-rear of the build plate. Adjust the screw under the left-rear corner until you can move the paper with a slight bit of resistance. Select the CONTINUE option to proceed.
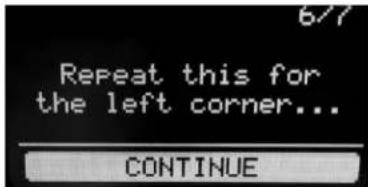
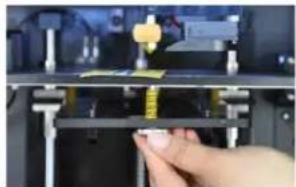
natural_image
Close-up of a hand holding a small object in a mechanical assembly (no visible text or symbols)- The extruder will move to the right-rear of the build plate. Adjust the screw under the right-rear corner until you can move the paper with a slight bit of resistance. Select the DONE option to finish the process.
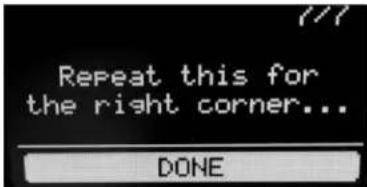
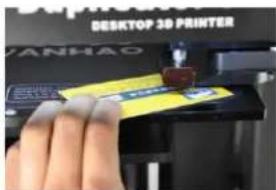
INSERTING FILAMENT
Before you can print any objects, you will need to insert filament. Perform the following steps to insert filament. Note that these instructions will assume the use of PLA filament.
- Ensure that the printer is powered on.
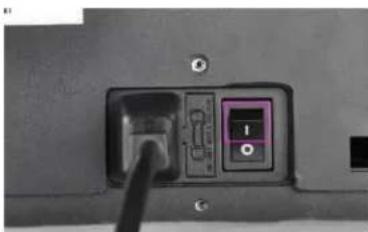
natural_image
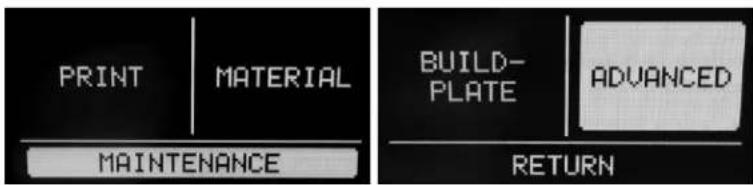
Close-up of a computer interface button with a black cable inserted, showing no visible text or symbols.- Select the MAINTENANCE option, then select ADVANCED.
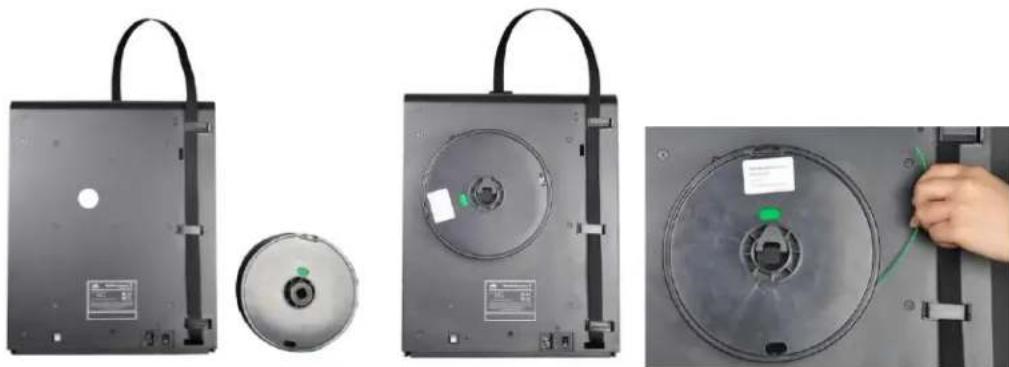
- Place a spool of filament on the filament holder, oriented to that the spool turns counterclockwise when the filament is pulled.
natural_image
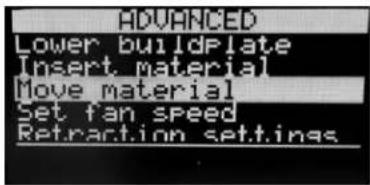
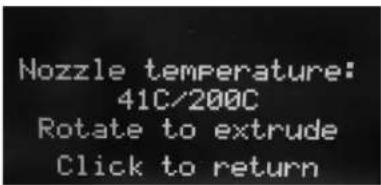
Three views of a black electronic device showing internal components and a hand inserting a cable into a terminal block (no text or symbols visible)- Select the Move material option. Wait for the nozzle temperature to reach the target value (200°C).
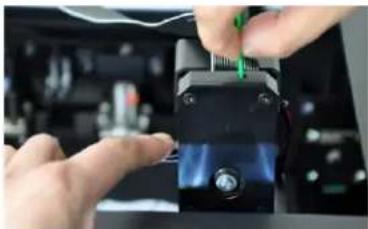
- With one hand, depress the lever on the feed mechanism and with the other insert the filament into the hole on top, as shown. Keep pushing in the filament until there is significant resistance. Release the lever.
natural_image
Close-up of hands operating a mechanical device with a green tool inserted, no visible text or symbols- Turn the control knob clockwise until your filament starts to extrude out of the nozzle. Note that the initial material coming out of the nozzle may not be the same color as your filament. This is because factory testing of this printer may have left some
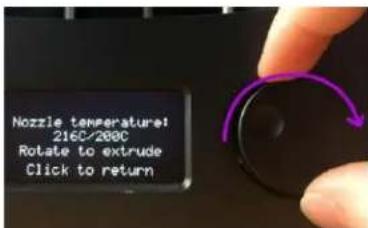
residual filament in the nozzle. Keep turning the control knob until the correct color material starts to extrude. Press the control knob to continue.
INSTALLING CURA
While this printer is compatible with many popular 3D printing software packages, the preferred software is Cura. A special version of Cura, with information about this printer already setup, is available for download from our website. To download the software, use your browser to go to www.monoprice.com, type 15710 into the search bar, then scroll down to the Support Files section and click the Cura download link.
After downloading the software, extract it from the .zip file and run the installer. Follow the installation instructions to install the software and any necessary drivers. After installing and launching Cura, the software will ask which 3D printer you are using. Select the Maker Select option.
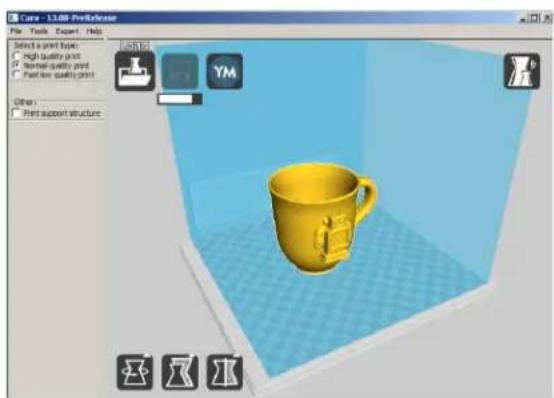
When Cura starts, you will see the following screen with the following elements.
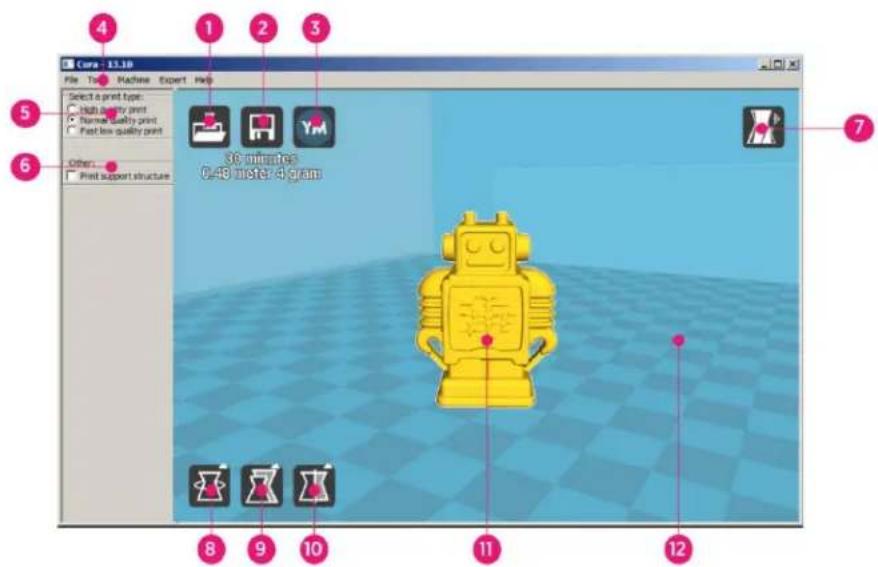
- Load File Button: Click this button to open the file browser, which allows you to select and load a compatible 3D print model.
- Save Toolpath Button: Click this button to save the prepared toolpath to a file on the local hard drive or SD card.
- Share Button: Click this button to share your 3D print file on YouMagine.com
-
Menu Bar: The menu bar allows you to select the various options and functions.
-
Print Profiles: Use the radio buttons to select one of the print profiles, which determine the print quality.
- Print With Support Structure: When printing models with overhanging elements, it might be a good idea to add support structures.
- View Modes Button: Use this button to select different views of the loaded model.
- Rotate Model Button: Use this button to rotate the model in three dimensions.
- Scale Model Button: Use this button to change the scale/size of the model.
- Mirror Model Button: Use this button to flip/mirror the model in three dimensions.
- Loaded 3D Model: This is the 3D model object.
- 3D Print Area: The background area represents the build area and build volume of this printer.
The buttons and wheel of your mouse perform the following functions:
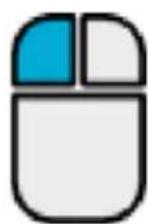
Left Mouse Button: Click an object to select it. Click and hold the button, then move the mouse to drag the 3D object around the print area.
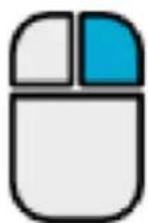
Right Mouse Button. Click and hold the button, then move the mouse to move the camera around the model.
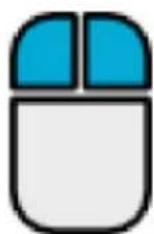
Left and Right Mouse Buttons: Click and hold both buttons, then move the mouse to zoom the camera in or out.
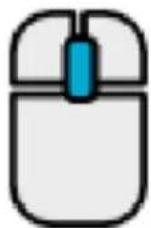
Scroll Wheel: Use the scroll wheel to zoom the camera in or out.
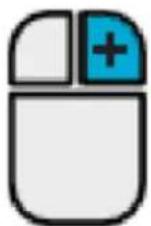
Right Mouse Button + Shift Key: Hold down one of the shift keys, then click and hold the right mouse button and move the mouse to pan the 3D view.
MANUAL CURA SETUP
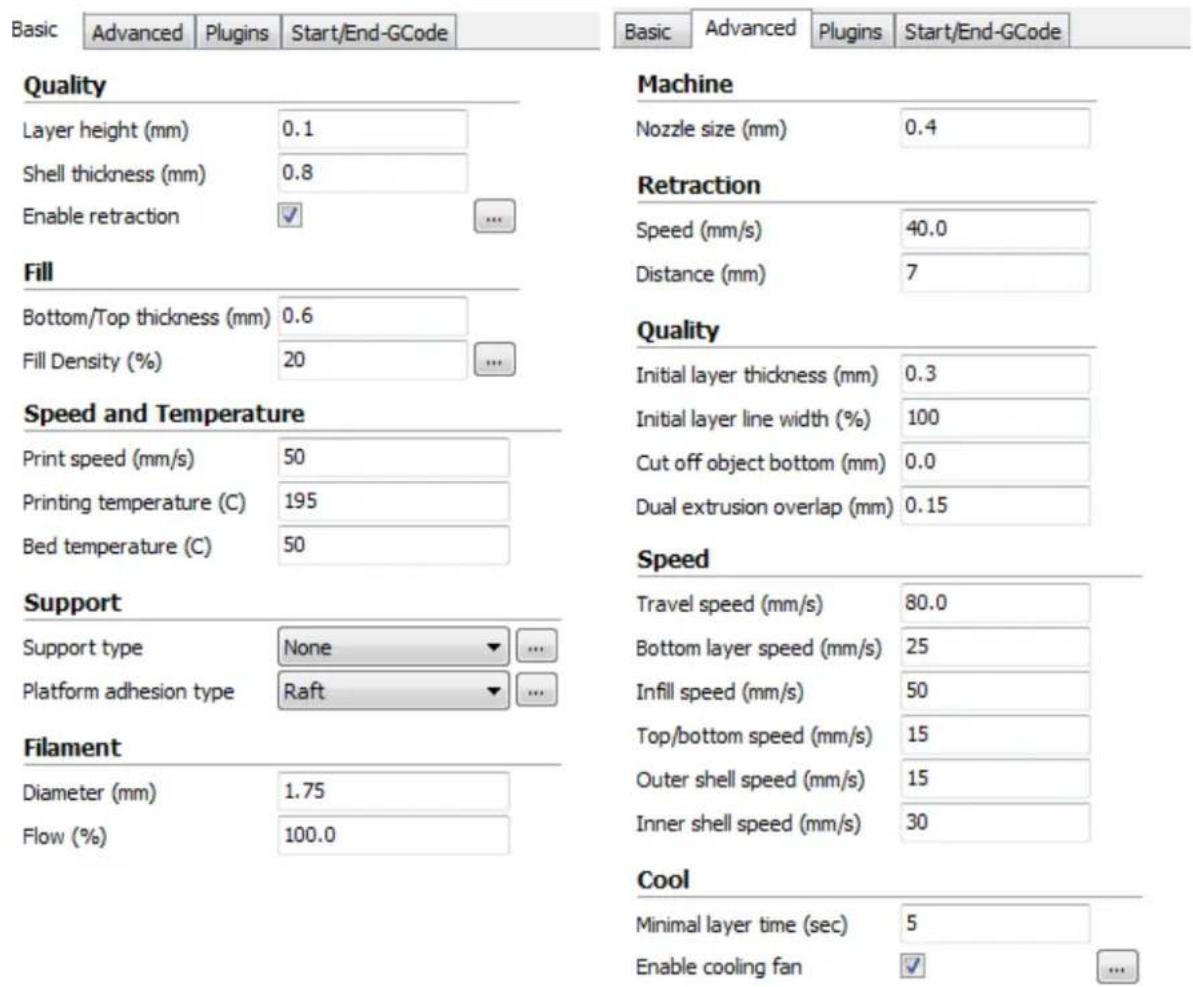
If you have a different version of Cura installed or if you want to set the printer information manually for Cura or another software package, use the settings contained in the following images to configure your software to work with the Maker Select printer.
CREATING A GCODE FILE
Before making a print, you need a gcode file, which contains all the model information as well as machine specific information about your printer. You can create the proper file using a basic model file in STL format.
YouMagine.com is an online community website dedicated to allowing users to share and download various basic model files, which can be used to create the gcode file. You can freely download and use designs created by other people and can upload your own designs for others to enjoy! Perform the steps in this section to download a model and create the gcode file in Cura.
-
Open your internet browser and navigate to www.youmagine.com
-
You can browse the site to find models of interest. For this example, we will select the Ultimaker Coffee Cup mode. Click in the search field next to the magnifying glass at the top of the page and type Coffee Cup, then press enter.
-
Locate the Ultimaker Coffee Cup model and click the link to go to the details and download page. Click the Download button and save the file to your system.
-
Launch Cura, click the load button, then locate and select the STL file you downloaded.

natural_image
3D rendered yellow mug inside a blue room with tool icons, no visible text or symbols on the mug or environment.- Once Cura has finished loading the file, it will automatically begin preparing the
model for printing on your selected printer model (Maker Select). A progress bar will appear under the Save Toolpath icon. While Cura is working, you can set the print type (quality) and can instruct it to print support structures. This model will require a support structure, so check the support structure box.
- Once Cura has finished preparing the model, the Save Toolpath icon will activate. Beneath the Save Toolpath icon is an estimate of the amount of time it will take to print the model, as well as the length and weight of filament that will be required.
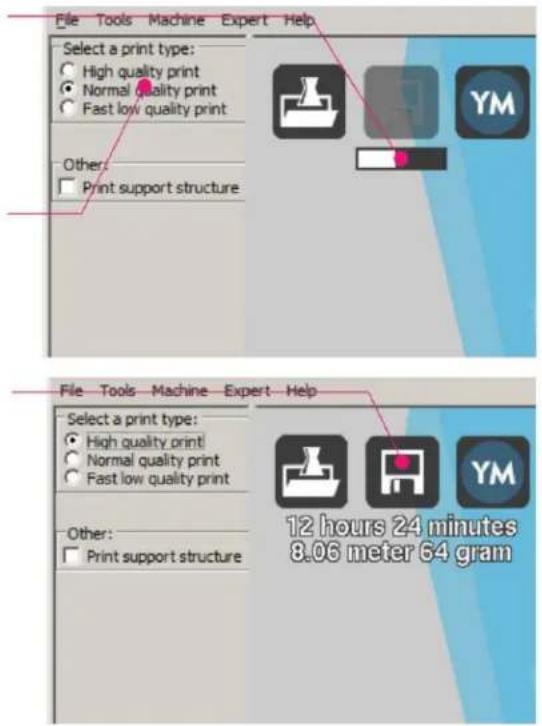
- If you have an SD™ card mounted on your computer, the Save Toolpath icon will change to the Save Toolpath to SD button. For best results, we recommend that you print from an SD card, rather than using the USB connection and printing from your

flowchart
graph LR
    A["Computer icon"] --> B["Standard file icon"]
computer. Click the Save Toolpath or Save Toolpath to SD button to save the model.
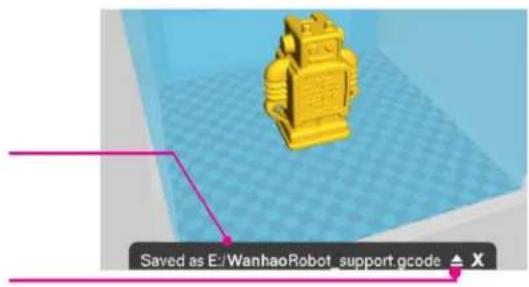
- When the file save is complete, a message will be displayed on screen indicating the full path and filename of your model file. If you printed to SD card, click the Eject button to safely remove the SD card from your computer. If you did not save the file to an SD card, you should copy it to an SD card before proceeding.
- Ensure that the printer is powered off, then insert the SD card with your saved file into the SD card slot to the left of the display on the front of the printer. Power the printer on.
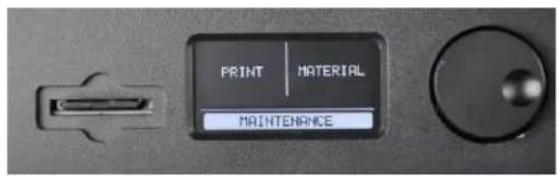
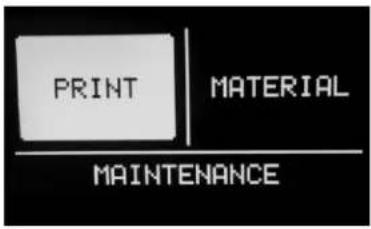
- Use the control knob to highlight and select the PRINT option.
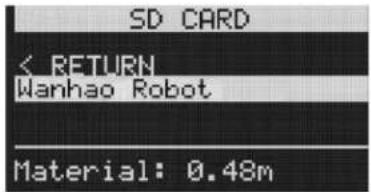
- Locate and select your file on the SD card. In the accompanying images, the file is the Wanhao Robot, but instead select the file you created in step 8 above.
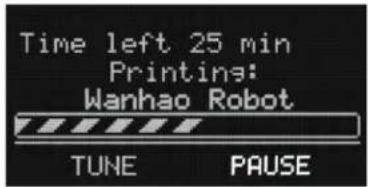
- While it is printing the model, the printer will display a progress bar, as well as a TUNE and a PAUSE option. Selecting TUNE will allow you to make adjustments to some of the settings or to abort the print operation.
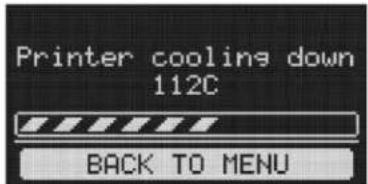
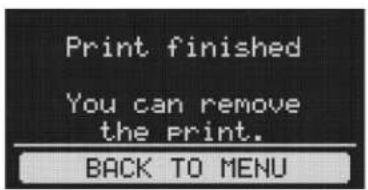
- When the print operation is completed, the printer will start to cool down. A progress bar will help you predict the amount of time needed for cool down.
- Once the cool down process has finished, you can remove the print from the build plate. The best way to do so is with the included scraper.
MAINTENANCE
Feed Mechanism
After a lot of printing, the gear in the feed mechanism can accumulate small plastic particles. Clean the feed mechanism by blowing compressed air into the gear on the front or by using a brush.
Lubricating the Z Axis
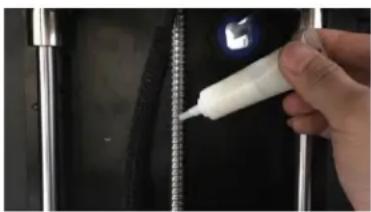
The Z-axis threaded rod should be lubricated every six months using a Teflon ^® grease, such as Magnalube-G. Place 10 drops of grease evenly along the length of the threaded rod, then raise and lower the platform to spread the lubrication.
natural_image
Close-up of a hand holding a white plastic tool near a black textured surface, with no visible text or symbols.Lubricating the X and Y Axes
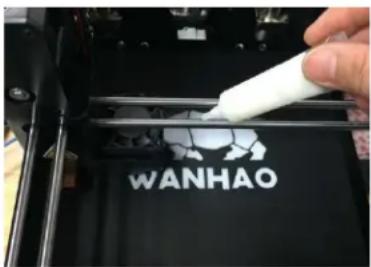
If you notice small wavers in the outside surfaces of your prints, you should lubricate the X-axis and Y-axis guide rods, using sewing machine oil. Add a single drop of sewing machine oil to each guide rod, then move the extruder through the full motion in the X and Y axes. Remove any excess oil to prevent dust accumulation.
TECHNICAL SUPPORT
Monoprice is pleased to provide free, live, online technical support to assist you with any questions you may have about installation, setup, troubleshooting, or product recommendations. If you ever need assistance with your new product, please come online to talk to one of our friendly and knowledgeable Tech Support Associates. Technical support is available through the online chat button on our website www.monoprice.com during regular business hours, 7 days a week. You can also get assistance through email by sending a message to tech@monoprice.com
TROUBLESHOOTING
Q1: The print will not stick to the build plate.
A1: This is caused by an improperly leveled build plate. Perform the steps in the LEVELING THE BUILD PLATE section.
Q2: The material feed mechanism ticks while loading new material.
A2: As long as material is being extruded at a normal rate, this is normal. The feed mechanism is designed to tick backwards, rather than grinding the material.
Q3: Insufficient material is extruded out of the nozzle.
A3: This could be due to a partial blockage due to burned material. Attempt to clear the blockage by raising the nozzle temperature to 260^ C and try printing. If the blockage is removed, continue printing at 260^ C for at least 10 minutes.
Q4: Printing at 260^ C does not clear the partial blockage or filament material will not extrude at all.
A4: A foreign object larger than 0.4mm may be blocking the nozzle. Clean or replace the nozzle.
Q5: Filament material will not extrude or extrudes too slowly during printing, but flows normally when the extruder is not close to the build plate.
A5: The build plate is too close to the nozzle. Perform the steps in the LEVELING THE BUILD PLATE section.
SPECIFICATIONS
| Print Technology | Fused filament fabrication (FFF) |
| Build Volume | 200 x 200 x 175 mm |
| Layer Resolution | Ultra high: 20 micronHigh: 60 micronMedium: 100 micronLow: 200 micron |
| Position Precision | X: 12.5 micronY: 12.5 micronZ: 5 micron |
| Filament Diameter | 1.75mm |
| Supported Filament Types | ABS, PLA, wood, copper fill, steel fill, bronze fill, and other materials |
| Nozzle Diameter | 0.4 mm |
| Print Speed | 1 - 150 mm/s |
| Travel Speed | 1 - 350 mm/s |
| Software Package | Cura |
| File Types | STL, OBJ, DAE, AMF |
| Operating System Support | Windows® (XP and later 32/64-bit)Mac® OS X® (10.6+ 64-bit)Ubuntu Linux (12.04+) |
| SD Card Requirements | SDTM only (not SDHCTM), FAT16 or FAT32 formatting, 8 GB maximum capacity. |
| Input Power | 100 ~ 240 VAC, 50/60 Hz, 4A |
| Power Consumption | 221 watts |
| Connectivity | Stand-alone printing from SD cardUSB (firmware) |
| Average Operational Noise | 49 dBA. |
| Ambient Operating Temperature | +59 ~ +89°F (+15 ~ +32°C) |
| Storage Temperature | +32 ~ 89 lbs. (0 ~ +32°C) |
| Nozzle Temperature | +356 ~ +500°F (+180 ~ +260°C) |
| Build Plate Temperature | +122 ~ +212°F (+50 ~ +100°C) |
| Frame Dimensions | 13.7" x 10.4" x 16.9" (348 x 264 x 430 mm) |
| Assembled Dimensions | 14.2" x 17.3" x 18.9" (360 x 440 x 480 mm) |
| Weight | 30.6 lbs. (13.9 kg) |
REGULATORY COMPLIANCE
Notice for FCC

This device complies with Part 15 of the FCC rules. Operation is subject to the following two conditions: (1) this device may not cause harmful interference, and (2) this device must accept any interference received, including interference that may cause undesired operation.
Modifying the equipment without Monoprice's authorization may result in the equipment no longer complying with FCC requirements for Class B digital devices. In that event, your right to use the equipment may be limited by FCC regulations, and you may be required to correct any interference to radio or television communications at your own expense.
This equipment has been tested and found to comply with the limits for a Class B digital device, pursuant to Part 15 of the FCC Rules. These limits are designed to provide reasonable protection against harmful interference in a residential installation. This
equipment generates, uses and can radiate radio frequency energy and, if not installed and used in accordance with the instructions, may cause harmful interference to radio communications. However, there is no guarantee that interference will not occur in a particular installation. If this equipment does cause harmful interference to radio or television reception, which can be determined by turning the equipment off and on, the user is encouraged to try to correct the interference by one or more of the following measures:
- Reorient or relocate the receiving antenna.
- Increase the separation between the equipment and receiver.
- Connect the equipment into an outlet on a circuit different from that to which the receiver is connected.
- Consult the dealer or an experienced radio/TV technician for help.
Notice for Industry Canada

This Class B digital apparatus complies with Canadian ICES-003.
SD ^™ is a trademark of SD-3C, LLC in the United States, other countries, or both.
Microsoft ^® and Windows ^® are registered trademarks of Microsoft Corporation in the United States and/or other countries.
Apple ^® , Mac ^® , and OS X ^® are trademarks of Apple Inc., registered in the U.S. and other countries.
DuPont ^™ and Teflon ^® are trademarks or registered trademarks of E. I. du Pont de Nemours and Company or its affiliates.

- CONTENTS
- SAFETY WARNINGS AND GUIDELINES
- INTRODUCTION
- FEATURES
- CUSTOMER SERVICE
- PACKAGE CONTENTS
- PRODUCT OVERVIEW
- UNPACKING AND SETUP
- MENU OPERATION
- LEVELING THE BUILD PLATE
- INSERTING FILAMENT
- INSTALLING CURA
- MANUAL CURA SETUP
- CREATING A GCODE FILE
- MAINTENANCE
- Feed Mechanism
- Lubricating the Z Axis
- Lubricating the X and Y Axes
- TECHNICAL SUPPORT
- TROUBLESHOOTING
- REGULATORY COMPLIANCE
- Notice for Industry Canada
Brand : MONOPRICE
Model : Maker Select pro Ultimate
Category : 3D Printer