
ArmorLock - External hard drive G-TECHNOLOGY - Free user manual and instructions
Find the device manual for free ArmorLock G-TECHNOLOGY in PDF.


| Product Type | Encrypted NVMe SSD with mobile and desktop apps |
| Capacity | Up to 2TB (example: 2.05TB) |
| Interface | USB-C (SuperSpeed USB 10Gbps), compatible with USB-A |
| Transfer Speed | Up to 1000MB/s read and write (sustained) |
| Encryption | 256-bit AES-XTS hardware encryption, always on |
| Unlock Method | Biometric (fingerprint/face) via smartphone app, password-less |
| Drop Protection | Up to 3 meters on carpeted concrete |
| Crush Resistance | Up to 1,000 lb |
| Water/Dust Resistance | IP67 |
| Compatibility (Host OS) | Windows 10+, macOS 10.12+ |
| Compatibility (App) | iOS, Android (mobile); macOS, Windows (desktop) |
| Bluetooth | Bluetooth Low Energy (BLE) 4.2+ |
| App Features | Unlock, manage users, location tracking, secure erase, format, firmware updates |
| User Management | Multi-user, cross-device, remote authorization via email/messaging |
| Cooling | Heat-dispersing cool aluminum core |
| LED Indicators | 3 LEDs: Locked, Unlocked, Activity |
| Cables Included | USB-C to USB-C, USB-C to USB-A |
| Power Source | Bus-powered via USB |
| Warranty | 1, 2, 3, or 5 years depending on purchase (check product support) |
Frequently Asked Questions - ArmorLock G-TECHNOLOGY
User questions about ArmorLock G-TECHNOLOGY
0 question about this device. Answer the ones you know or ask your own.
Ask a new question about this device
Download the instructions for your External hard drive in PDF format for free! Find your manual ArmorLock - G-TECHNOLOGY and take your electronic device back in hand. On this page are published all the documents necessary for the use of your device. ArmorLock by G-TECHNOLOGY.
USER MANUAL ArmorLock G-TECHNOLOGY
Encrypted NVMe™ SSD with Mobile and Desktop Apps User Manual
natural_image
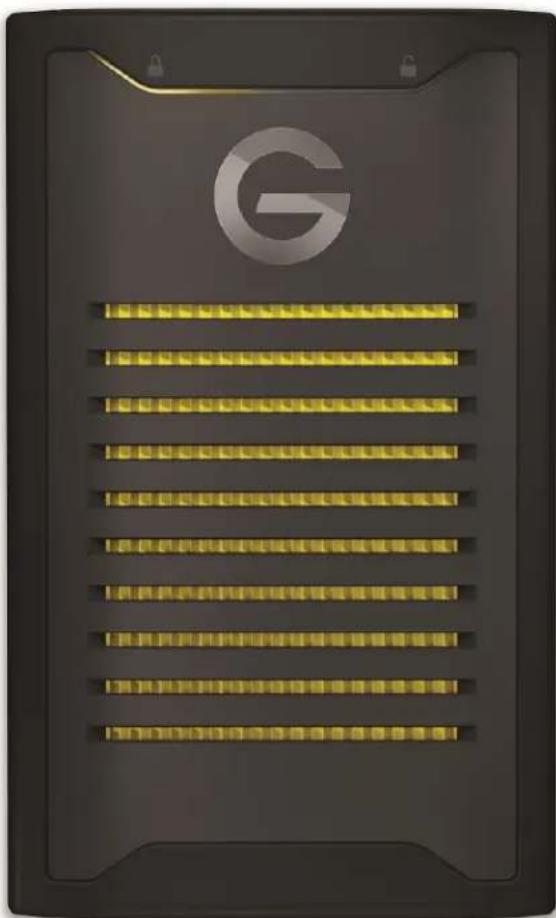
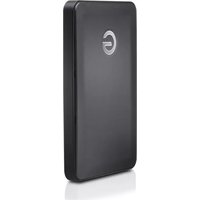
Front view of a black electronic device with a white 'G' logo and horizontal gold bars (no text or symbols on the device itself)Accessing Online Support
Visit our product support website at https://support.g-technology.com and choose from these topics:
■ Downloads — Download software and updates for your G-Technology product
■ Warranty & Returns — Check warranty, get product replacement (RMA)
■ Ask a Question — Submit a query about a product or open a support case
■ G-Technology Community — Share your thoughts and connect with other G-Technology users at our community
Table of Contents
Accessing Online Support......ii
1 Welcome to ArmorLock....1
Key Features....1
ArmorLock App....2
Your key to revolutionary security, speed and convenience.... 2
What's in the Box....2
Tech Notes....2
Drive Compatibility....2
App Compatibility....2
USB Host and OS Compatibility....3
Bluetooth™ Compatibility....3
A Look at the ArmorLock Drive....3
2 Getting Started....5
Get the Mobile App....5
Download and Setup the App....5
ArmorLock Mobile App Overview....5
Add a New Drive with the Mobile App....6
Setup and Use the Drive....6
Get the Desktop App....7
Download and Setup the App....8
ArmorLock Desktop App Overview....8
Add a New Drive with the Desktop App....9
Setup and Use the Drive....9
3 Main Activities.... 11
Unlock and Lock the Drive....11
Remove a Drive.... 11
Mobile App....11
Desktop App....11
Authorize Local Users....12
User Requesting Access to a Drive.... 12
Manager Authorizing Access....12
Authorize Remote Users Before You Ship the Drive.... 12
User Requesting Access to a Drive....13
Manager Authorizing Access....13
User Receives and Adds the Drive.... 13
4 More About Your ArmorLock App and Drive....14
Drive Indicators....14
App Version....14
User Authentication....14
Location Tracking....14
Drive Information....15
How to Use Recovery....15
5 Manager Settings.... 16
Adding and Removing Users....16
Adding a User....16
Removing a User....16
User Name....16
New Recovery Key....17
Read-Only Mode....17
Reset to Factory Settings....17
6 Keeping ArmorLock Up to Date.... 18
Firmware Updates: Using iOS Mobile App....18
Firmware Updates: Using macOS Desktop App....18
7 Compliance and Warranty Information....19
Regulatory Compliance....19
Safety Compliance....19
FCC Class B Information....19
Industry Canada Statement....19
ICES-3(B)/NMB-3(B) Compliance Statement.... 20
CE Compliance For Europe....20
Warranty Information....20
Obtaining Service....20
Limited Warranty for Consumer Products....21
Australia/New Zealand 22
How to Handle an ArmorLock Drive....23
8 Glossary....24
Authorized User....24
File System....24
Manager....24
QR Code....24
USB....24
User....24
User ID....25
User Key....25
User Name 25
Welcome to ArmorLock
We built the ArmorLock™ encrypted NVMe™ SSD and app to deliver revolutionary data protection that's amazingly simple to use. It's next-generation security, with new-generation simplicity. Encryption is just the beginning.
Key Features
PASSWORDS ARE A THING OF THE PAST
Remembering passwords, entering codes and downloading software slows down access to critical content. We've removed access barriers without sacrificing content security. With ArmorLock™ technology, your phone is your key, leveraging your phone's biometric authentication to simply and quickly access your content with the tap of a button.
THE NEW AUTHORITY ON AUTHORIZATION
Collaboration is critical to your workflow. Multiple users and drives create security risks. The ArmorLock™ app provides easy, multi-user authorization and management features. Before you ship your precious content to your partner, authorize them to unlock the ArmorLock™ drive using your favorite email or messaging service.
ROBUST DRIVE MANAGEMENT
With the app, you can format your drive to one of the compatible file systems and when your content is no longer needed, use the secure erase feature to confidently erase the drive with the tap of a button. Can't remember where you last used your drive? The app will show you on a map.
HIGH-GRADE DATA SECURITY
Built with always on, high-grade 256-bit AES-XTS hardware encryption for powerful data protection without compromising on speed. The ArmorLock encrypted NVMe™ SSD comes completely locked out of the box, shutting out access from the start. When a drive is unlocked you have fast access to stored content. Ejecting the drive automatically locks it - rendering all content inaccessible.
ADRENALINE FOR YOUR CONTENT
Transfer time is down time. With the ArmorLock encrypted NVMe™ SSD's heat-dispersing cool aluminum core, you get sustained pro-grade transfer speeds up to 1000MB/s read and 1000MB/s write.**
BUILT FOR RIGOR
Production trucks, DIT carts, Pelican cases, and backpacks. The ArmorLock encrypted NVMe™ SSD gives you pro-grade durability you can rely on. Hand it off and trust it's safe with our durable, easy-to-hold enclosure, up to 3-meter drop protection*** ,1,000-pound crush resistance, and IP67 dust and water resistance.
ArmorLock App
Your key to revolutionary security, speed and convenience
We designed the ArmorLock mobile and desktop apps to make unlocking and managing your ArmorLock drive really simple. Instead of remembering passwords or using fingerprints, your phone or computer becomes the key to unlock your drive. The app is packed with features such as multi-drive and multi-user management, secure erase and self-formatting, and tracking your drive's last known location. We've made this technology so easy to use that if you can use your phone, you can use ArmorLock.
What's in the Box
■ ArmorLock encrypted NVMe SSD
■ USB-C™ to USB-C cable (supports SuperSpeed USB 10Gbps)
■ USB-C to USB-A cable (supports SuperSpeed USB 10Gbps)
■ Quick Start Guide
■ Technical Support and Limited Warranty Guide
Tech Notes
Note: The ArmorLock NVMe SSD drive is a direct attached storage unit that uses USB for storage access. This product is not a wireless Internet-enabled drive.
Drive Compatibility
The drive works with USB-C and USB-A 3.0 hosts, and is compatible with the following operating systems.
Table 1.1
| Windows® | macOS |
| Windows 10+ macOS 10.12+ |
App Compatibility
The ArmorLock app is compatible with the following operating systems. The app is required to unlock and manage the drive.
Table 1.2
When ArmorLock drives are accessed from a personal computer system via the desktop app, a 64-bit operating system is required. Compatibility can vary, depending on hardware configuration and operating system. For the newest features and compatibility options, always install the latest app updates.
USB Host and OS Compatibility
The following table lists the USB host and operating system combinations that can be used with ArmorLock.
Table 1.3
| When plugged into USB host... macOS Windows | ||
| You can use the macOS app to... Pair & Unlock --- | ||
| You can use the iPhone app to... Pair & Unlock Pair & Unlock |
Bluetooth™ Compatibility
Your smartphone and ArmorLock SSD communicate via Bluetooth. The ArmorLock SSD is compatible with the Bluetooth Low Energy (BLE) wireless personal area network technology that is part of the Bluetooth 4.2 and later wireless technology standards. All of the operating systems included in the preceding list are compatible with Bluetooth Low Energy.
A Look at the ArmorLock Drive
The ArmorLock encrypted NVMe SSD contains a number of prominent features:
■ A USB-C interface port
■ Three (3) LEDs: locked, unlocked, and power/activity
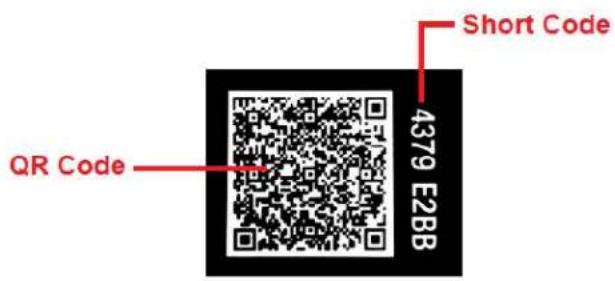
- QR code and Short Code unique to each individual drive (located on the back of the drive). QR Code is to be used with a phone camera and the Short Code is to be used with computers for app-to-drive pairing.
The image below illustrates the location, color, and status of the LEDs, and the location of the USB-C port.

2
Getting Started
This chapter provides instructions for downloading the ArmorLock app, connecting to and setting up the ArmorLock encrypted NVMe SSD.
Get the Mobile App
Download and Setup the App
- Download the ArmorLock app in one of the following ways:
a. Use your phone's camera to scan the QR code located on the back of your drive
b. Go to GetArmorLock.com/Apps
c. Search for ArmorLock on the App Store
-
Launch the ArmorLock app. The End User License Agreement (EULA) window will open.
-
Scroll down to read the full agreement, then select Accept.
- Swipe (or select Next) through the ArmorLock intro pages, then select Done.
- Enter your User Name for the phone, then select Save.
- The app will then request permission to send notifications, select Allow. Select Allow again to proceed.
a. Note: Notifications are important and will help guide you when new actions are required, such as authorizing new requests to access your drive.
- ArmorLock is now ready to add a drive.
ArmorLock Mobile App Overview

- Main Menu: The "three-dot" main menu allows you to:
a. Share User ID: A new User requesting access to a drive can 1) send their phone's User ID to a Manager with the drive in a different location, or 2) display their phone's User ID QR Code to be scanned by a Manager in the same location.
b. Scan User ID: A drive Manager can scan another phone's User ID to add them into their User List. This is a good way to gather User IDs from your team to give them access to a drive.
c. Share ArmorLock App: Share the ArmorLock app with other Users. This is especially important when you are authorizing remote users before you ship them a drive.
d. Select Add Drive or Remove Drives.
e. View Introduction.
f. Open About screen.
- Toggle icon: The toggle icon lets you switch between Card view and List view modes (Show screen shots of cards and multiple drives in the list).
- Drive Card: Once you've added a drive your screen shows the "Drive Card" for that drive. Swipe left to add a new drive, and when you have multiple drives added, you can swipe left or right to toggle between drives.
- Drive Card Gear Icon: The gear icon is specific to each drive and allows you update and manage drive settings.
Add a New Drive with the Mobile App
This section takes you through the steps to add a new drive for the first time. You can also use these steps to add additional drives to manage with your ArmorLock app.
Setup and Use the Drive
- Turn on your computer and log-in.
- Connect the drive to your computer.
a. Note: Connecting the ArmorLock drive to a USB hub is not recommended. If such a connection is used, a powered USB hub is recommended in order to supply the appropriate power to the drive.
- The ArmorLock drive will power on and the LED light under the Lock Symbol will turn on.
- Open the ArmorLock app and add a new drive.
a. Card View (default view) – select the Add Drive icon.
b. List View – select the + Add Drive button.
- A "Bluetooth Required" permission will popup, select Allow. Select OK to proceed.
a. Note: ArmorLock uses Bluetooth to connect to drives and must be enabled.
- If Bluetooth is off, a popup will tell you to turn Bluetooth on.
a. Go to your phone's settings and turn on Bluetooth.
b. Reopen ArmorLock and select Add Drive.
- A "Camera Access Required" permission will popup, select Allow. Select OK to proceed.
a. Note: Camera access must be allowed to scan QR codes with your phone.
- Locate the QR code on the back of the drive and scan it with your phone. Three options will appear:
a. Request Access – Allows you to request access to a drive already managed by another device.
b. Use Recovery Key – Lets you enter your saved Recovery Key to restore access to your drive when all other methods are unavailable. Note: This will also remove all other users/managers from the drive.
c. Erase and Setup as New – Takes you through the initial setup for a new drive (drive name, color, format, etc.).
- From the menu, select Erase and Setup as New. Then complete the Setup options for the drive.
a. Enter the name for the drive (required).
b. Choose a color identifier.
c. Select the drive format.
- macOS (HFS+) - Time Machine compatible.
- Windows (NTFS) – Standard Windows filing format.
- Windows and macOS (exFAT) – For flexibility between both operating systems.
d. Select drive's last known location (optional).
- Location tracking is off by default. Turn on to view the last known location where the drive was used and add a map location to each entry.
- When turned on, a location permission popup will appear, select Allow.
Additional location setting must be selected: Allow while using the app, allow once, or don't allow.
e. Advanced Settings.
- User Authentication – Off by default. Enables biometrics (fingerprint, face ID, or passcode) for an additional layer of security to verify that the person using the app is the correct, authorized user.
- Auto Firmware Updates – On by default. We recommend leaving this on for future updates.
f. Select Format Drive.
- A final warning says that any existing drive content will be permanently erased.
g. Select Erase.
- The drive will begin formatting. Do not disconnect the drive or leave the app.
- Save the Recovery Key. The Recovery Key restores access to the drive when all other methods are unavailable, and all Authorized Users will be removed. Several options are available for saving.
a. Photos – Requires giving ArmorLock access to the photos app.
b. Files – Saves in your phone's file system as a PDF.
c. Print – We strongly recommend printing and storing in a safe location.
- G-Technology cannot restore your access if you lose your Recovery Key.
- After saving, select continue. Then you will be asked to confirm that the Recovery Key is saved, select Confirm. You should see Successful Setup. Your phone is now the drive Manager and is ready to use.
Get the Desktop App
The ArmorLock desktop app allows you to unlock and manage your drive using your computer. One main difference with using the ArmorLock app on a computer is the use of unique alphanumeric Short Codes instead of scanning QR codes like you do with
your phone. Adding a drive requires entering its unique Short Code located next to the QR code.
Download and Setup the App
- Download the ArmorLock app in one of the following ways:
a. Go to GetArmorLock.com/Apps
b. Search for ArmorLock on the App Store
-
Launch the ArmorLock app. The End User License Agreement (EULA) window will open.
-
Scroll down to read the full agreement, then click Accept.
- Click through the ArmorLock intro pages, then click Done.
- Enter your User Name for the computer, then click Save.
- The app will then request permission to send notifications, click Allow. Click Allow again to proceed.
a. Note: Notifications are important and will help guide you when new actions are required, such as authorizing new requests to access your drive.
- ArmorLock is now ready to add a drive.
ArmorLock Desktop App Overview

- List View: When ArmorLock is open, the List View is where added drives are located.
a. At the bottom left corner, the + and - buttons are for adding or removing drives.
b. Multiple drives will also appear as a list in this pane.
c. When you click on a drive, drive information will be located in the card view. Click the lock icon to unlock or lock the drive.
- Drive Card view: When you click on a drive, a lock icon and drive information will appear in the Drive Card view.
a. Lock icon – click to unlock the drive.
b. Unlock icon – click to lock and eject the drive.
c. i icon – click to display (default view) the drive name, model, serial number, capacity, firmware, and open source licenses.
d. Gear icon – click to edit the drive settings.
e. Map pin – click to show the last recorded location of the drive.
f. Erase icon – click to securely erase and reformat the drive.
g. (Manager role only) ID icon – click to view the list of authorized devices and edit each role.
h. (Manager role only) Key icon – click to generate a new recovery key and replace the existing one.
- Main Menu: The main menu can be accessed at the top of the app window. The following are the three main submenus and their primary selections (not exhaustive).
a. ArmorLock
- About ArmorLock – View the ArmorLock version and license agreement.
- Preferences – Set the ArmorLock Username and select to automatically start ArmorLock at Login.
- Services – Services Preferences for your operating system.
b. Drive
- Add Drive – Add an ArmorLock drive to the app.
- Remove Drive – Remove an ArmorLock drive from the app.
c. Share
- Share User ID – Send your User ID to request access to another ArmorLock drive.
Add a New Drive with the Desktop App
This section takes you through the steps to add a new drive for the first time. You can also use these steps to add additional drives to manage with your ArmorLock app.
Setup and Use the Drive
- Turn on your computer and log-in.
- Connect the drive to your computer.
a. Note: Connecting the ArmorLock drive to a USB hub is not recommended. If such a connection is used, a powered USB hub is recommended in order to supply the appropriate power to the drive.
-
The ArmorLock drive will power on and the LED light under the Lock Symbol will turn on.
-
Inside the app, there are three ways to add a new drive.
a. List View - click the + Add Drive button.
b. Bottom left corner – click + or – to add or remove drives.
c. Drive Menu – click Drive and select Add or Remove Drive.
-
Click Add Drive.
-
A Short Code window will popup. Enter the drive's Short Code.
a. The Short Code is an 8-digit code on the back of the drive, next to the QR code.
b. After the last digit is entered, the app will automatically locate the drive.
- Three options will popup.
a. Request Access – Your User ID can be scanned by the drive Manager for access.
b. Use Recovery Key – Restores access to the drive when all other methods are unavailable. This will also remove all other users/managers from the drive.
c. Erase and Setup as New – The initial setup (name, color, format, etc.) for a new drive.
- Click Erase and Setup as New. Then select the Setup options for the drive.
a. Enter the name for the drive.
b. Select the drive format.
- macOS (HFS+) - Time Machine compatible.
- Windows (NTFS) – Standard Windows filing format.
- Windows and macOS (exFAT) – For flexibility between both operating systems.
c. Choose a color identifier.
d. Select optional settings.
- Location tracking - Off by default. Turn on to find the last known location where the drive was used and add a map location to each entry.
- User Authentication – Off by default. Enables biometrics (fingerprint, face ID, or passcode) for an additional layer of authentication.
- Auto Firmware Updates – On by default. We recommend leaving this on for future updates.
e. Click Format Drive.
- The drive will begin formatting. Do not disconnect the drive or close the app.
- Save the Recovery Key. A couple options are available for saving.
a. Print – We strongly recommend printing and storing in a safe location. G-Technology cannot restore your access if you lose your Recovery Key.
b. - Save as PDF - Saves in your computer's file system as a PDF.
-
After saving, click Done. Then you will be asked to confirm that the Recovery Key is saved, click Confirm.
-
Your computer is now the drive Manager and ready to use.
3
Main Activities
Unlock and Lock the Drive
To lock the ArmorLock drive, you must eject it from your computer. Any ejected ArmorLock drive is securely locked and can only be unlocked with the ArmorLock app using an Authorized phone or computer. The following steps describe how to unlock and lock the drive.
- Connect the ArmorLock drive to a host computer.
a. This will provide the drive with power so that it can be securely connected to a phone or computer using the ArmorLock app.
- Open the ArmorLock app on your phone or computer.
a. The mobile app will locate all ArmorLock drives within 10 meters.
- The app will show the current condition of the ArmorLock drive as either Locked or Unlocked and display a status icon matching this condition.
a. If user authentication is enabled, the drive can be locked or unlocked using the biometric features of your smartphone.
-
To Unlock the drive, select the Lock status icon. Once unlocked, the status will change to an open lock icon.
-
To Lock the drive, select the Unlock status icon.
a. Mobile app: The following message will be displayed: "Use the computer to eject and lock the drive." We recommend using the computer to eject the drive to minimize risk of data loss or corruption.
b. Desktop app: Use the ArmorLock app to lock the drive.
- Once the drive is ejected successfully, the app will display the Locked status icon.
Remove a Drive
Use the following steps to disconnect or unpair an ArmorLock drive from the app.
Mobile App
- Open the ArmorLock app.
- Select the 3-dot icon for the Main Menu.
- Select Remove Drive.
a. This will open the Remove Device menu and list all connected ArmorLock drives.
- Select the drive that you want to remove, then select Remove.
- A popup screen will confirm the drive selected to be removed.
- Select Remove to continue or select cancel.
- You may be asked to enter the authentication (fingerprint, face ID, or passcode) for your mobile device.
- The ArmorLock drive will then disconnect and be removed from the list.
Desktop App
-
Open the ArmorLock app.
-
In the List View, select the drive you want to remove.
- At the bottom of the List View, click the - icon to remove a drive.
- A popup screen will confirm the drive selected to be removed.
- Click Remove to continue or click cancel.
- You may be asked to enter the authentication (password) for your computer.
- The ArmorLock drive will then disconnect and removed from the list.
Authorize Local Users
Authorizing additional users can only be done from a phone or computer that is a designated Manager. This section describes how a Manager can authorize another phone or computer to unlock and use or manage an ArmorLock drive when they are all in the same physical location (both within distance to the ArmorLock drive).
Authorization will remain in place until a Manager deauthorizes that user/manager, resets the drive to factory settings, or the Recovery Key is used to regain access to the drive.
User Requesting Access to a Drive
- Download and open the ArmorLock app.
- Add the drive.
a. Mobile – Select Add Drive and scan the QR code on the back of the drive.
b. Desktop – In the List View, click the Add Drive button. Enter the 8-digit Short Code found on the back of the drive, next to the QR code.
- Request access.
a. Mobile – Select Request Access, then select Send Request.
b. Desktop – Click Request Access, then click Send Request. The message "Waiting for Manager Approval" will appear.
Manager Authorizing Access
- Drive manager reviews and rejects or approves the request.
a. Mobile – Select review local access request. You can then edit the User Name and make the user a Manager if needed. Select Scan User ID and scan the QR Code displayed on the new user's device. Access is granted to the new user.
b. Desktop – In list view, the drive will show access request pending. Click the drive and click Authorize to approve the request. Then enter the Short Code from the phone or computer that is requesting access. You should see Short Code Verified, then click Authorize.
- Note: On the requesting device, a QR code and Short Code will be displayed after the request is sent.
- The drive will be automatically authenticated and added to the list of drives.
Authorize Remote Users Before You Ship the Drive
Authorizing additional users can only be done from a phone or computer that is a designated Manager. This section describes how a Manager with an ArmorLock drive in their possession can authorize a remote phone or computer to unlock and use or manage the drive. This procedure is used to authorize access to someone else before
you ship them the drive. Authorization will remain in place until a Manager deauthorizes that user/manager, resets the drive to factory settings, or the Recovery Key is used to regain access to the drive.
User Requesting Access to a Drive
- Download and open the ArmorLock app.
- Go to the Main Menu.
a. Mobile – Select the three-dot icon in the top-left corner then select Share User ID.
b. Desktop – At the top of the Main Menu, click on Share and then Share User ID.
- Select Send User ID and select your preferred method of sending, email or a messaging app.
a. Input the recipient's credentials and send.
b. Close the window.
Manager Authorizing Access
- Open the email or text message from the user and open the link to authorize the User.
a. Mobile – The app will open and a "User ID Added" confirmation will popup. Select Close to continue.
b. Desktop – The app will open, and a popup window will ask you to add the User ID. You can also edit the name of the User. Click Add, and the User will be added to your Authorized Users list. Click OK to continue.
- Select a drive and go to Manager Settings to add the User.
a. Mobile – Select the Gear icon, then select Manager Settings. Select Authorized Users, then select the + icon to authorize a User. Select the User, then click Authorize. You should now see that User added to the list of Authorized Users.
b. Desktop – Click on a drive and then click on Manager ID icon. At the bottom of the card view, click the + icon to see the list of Authorized Users. Click the User and select his or her Role and click Add. You should now see the User added to the drive Manager Settings window.
- The Manager can then ship the drive to the remote User.
User Receives and Adds the Drive
- The User connects the drive to the computer and opens the ArmorLock app.
a. Mobile – Select Add Drive. Locate the QR code on the back of the drive and scan it with your phone.
b. Desktop – In the List View, click the Add Drive button. Enter the unique 8-digit Short Code found on the back of the drive, underneath the QR code.
- The drive will be automatically authenticated and added to your list of drives.
4
More About Your ArmorLock App and Drive
The ArmorLock mobile and desktop app can be used to unlock and lock ArmorLock drives, manage multiple users and drives and track the last known location of a drive. The following are additional features of your ArmorLock app and drive.
Drive Indicators
The LED lights on the ArmorLock drive indicate whether the drive is locked or unlocked. To enable or disable the LED, follow these steps.
- Open the ArmorLock app.
- Select the gear icon of the desired drive located on the main screen.
- Under the Settings section, select the drive indicator button to enable or disable the LED. By default, the LED is enabled.
App Version
To view the version of the ArmorLock app, follow the steps below. This process may be required when contacting support.
-
Open the ArmorLock app.
-
Access the Main Menu.
a. Mobile – Select the 3-dot icon.
b. Desktop – click the ArmorLock menu at the top of the window.
-
Select About.
-
The app version will be displayed with the same syntax as the following example: Version 1.0.0 (303).
User Authentication
When enabled, user authentication uses the biometric features of your smartphone or computer to validate your authorization to use the app. If the Manager of a drive has enabled "User Authentication" then that will be enforced for all drive Users. If a User turns off their biometric authentication feature on their phone or computer, they will not be able to use the app to unlock the drive. To enable or disable this feature, follow these steps.
- Open the ArmorLock app.
- Select the gear icon of the desired drive located on the main screen.
- Under the Manager Settings section, use the slider-button for User Authentication option to enable or disable biometric access.
Location Tracking
This optional feature displays the last known location where the drive was used and adds a map location to each entry. To enable or disable this feature, follow these steps.
- Open the ArmorLock app.
- Select a drive and go to Manager Settings.
a. Mobile – Select the gear icon, then select location tracking.
b. Desktop – Click on a drive and then click on map pin icon. Click track device location.
- A map of the last known location of the drive will appear.
Drive Information
This feature displays the serial number, firmware version, and other information which may be useful when contacting Technical Support.
- Open the ArmorLock app.
- Select a drive and go to Manager Settings.
a. Mobile – Select the gear icon, then select drive information under settings.
b. Desktop – Click on a drive and then click on the 'i' icon.
- The drive information will be displayed and open source licenses available to view.
How to Use Recovery
The following steps illustrate how to use the Recovery process to add a previously-installed drive to the ArmorLock app. Either method (mobile or desktop) can be used. This operation will preserve existing data on the drive, but will remove access for all other users.
- Mobile: Your mobile device can be used to recover a drive.
a. Connect the ArmorLock drive to your computer.
b. Scan the QR Recovery Code saved during initial setup.
c. After the recovery process is complete, a Successful Setup window will open. Select Close.
- Desktop: You can also recover a drive using a macOS system.
a. Connect the ArmorLock drive to your computer.
b. Click Add Drive.
c. Click Use Recovery Key.
d. Type in the 64-character Recovery Code.
e. After the recovery process is complete, a Successful Setup window will open. Click Close.
5
Manager Settings
The Manager of a drive has access to a number of manager-specific settings. In Card view, select the gear icon to view the full list of manager settings.
Adding and Removing Users
The ArmorLock app can be used to manage which users have authorized access to each ArmorLock drive.
Adding a User
- Open the ArmorLock app.
- Select a drive and go to Manager Settings to add the User.
a. Mobile – Select the gear icon, then select Manager Settings. Select Authorized Users, then select the + icon to authorize a User. Select the User, then click Authorize. You should now see that User added to the list of Authorized Users.
b. Desktop – Click on a drive and then click on Manager ID icon. At the bottom of the card view, click the + icon to see the list of Authorized Users. Click the User and select his or her Role and click Add. You should now see the User added to the drive Manager Settings window.
- You can now edit the role and also remove an authorized user at any time.
Removing a User
- Open the ArmorLock app.
- Select a drive and go to Manager Settings.
a. Mobile – Select the gear icon, then select Manager Settings. Select Authorized Users, then select the User Name to be removed. Select the Remove User button.
b. Desktop – Click on a drive and then click on the Manager ID icon. Select on the name of the user to be removed. At the bottom of the card view, click the - icon to remove the user.
User Name
The User Name feature allows the smartphone to be renamed as it is identified in connection with the ArmorLock drive. This does not change the smartphone name.
- Open the ArmorLock app.
- Select a drive and go to Manager Settings.
a. Mobile – Select the gear icon, then select manager settings to edit. Select User Name to edit, then select save changes.
b. Desktop – Click on the ArmorLock menu, then preferences. Click the User Name to edit and click OK to save.
- The manager's User Name is now changed.
New Recovery Key
The New Recovery Key option allows Managers to generate a new Recovery Key if they suspect the existing key has been compromised. Using this feature will make the previous Recovery Key invalid. Use the following steps to create a new Recovery Key.
- Open the ArmorLock app.
- Select a drive and go to Manager Settings.
a. Mobile – Select the gear icon, then select Manager Settings. Select New Recovery Key. Select Generate to continue.
b. Desktop – Click on a drive and then click on key icon. Click Generate New.
- Make sure to save the new Recovery Key.
a. Note: The old Recovery Key will be invalid.
Read-Only Mode
The ArmorLock drive can be set to read-only mode. This prevents users from modifying or deleting files. Note that this feature has a delayed effect; it takes effect after the next unlock.
- Open the ArmorLock app.
- Select a drive and go to Manager Settings.
a. Mobile – Select the gear icon, then select manager settings to edit. Select read-only.
b. Desktop – Click on a drive and then click read-only, under manager settings.
- Changes to read-only will be applied next time the drive is unlocked.
Reset to Factory Settings
The ArmorLock drive can be reset to the factory settings. This action erases all data, settings, authorizations, user IDs, and keys.
- Open the ArmorLock app.
- Select a drive and go to Manager Settings.
a. Mobile – Select the gear icon, then select manager settings to edit. Select reset to factory settings. Select reset to continue.
b. Desktop – Click on a drive and then click reset to factory settings, under manager settings. Click reset to factory settings to continue.
- All data, settings, authorizations, user IDs, and keys will be permanently erased.
6
Keeping ArmorLock Up to Date
Firmware Updates: Using iOS Mobile App
Users are encouraged to use the latest version of the ArmorLock firmware. A notification will appear if an update is available.
- An "Update Available: An ArmorLock NVMe SSD firmware update is available." notification will appear. Connect the ArmorLock drive to the computer.
- Select the notification to open the ArmorLock app.
- Select the Tap to update button.
- Using the computer, eject the drive.
- An "Update Complete" notification will appear.
If you are not ready to update the firmware for your iOS device, select Update Later.
Firmware Updates: Using macOS Desktop App
The ArmorLock firmware can be set to update automatically. If automatic updates are not enabled, use the following steps to install the latest version.
- Connect the ArmorLock drive to the computer.
- Open the ArmorLock app.
- If an update is available, a "Firmware Update Available" message will appear beneath the lock/unlock icon.
a. Note: If your app is out-of-date, the message will be "Firmware Update Required".
- Click Update Firmware Now.
- Eject the drive and reboot.
- A "Firmware Update Complete" message will appear.
If you are not ready to update the firmware for your macOS system, select Update Later.
7
Compliance and Warranty Information
Regulatory Compliance
Safety Compliance
Approved for US and Canada. CAN/CSA C22.2 No. 62368-1-14: Audio/Video, Information and Communication Technology Equipment Part 1: Safety requirements)
NOTE: This device has been tested and found to comply with the limits for a Class B digital device, pursuant to part 15 of the FCC Rules. These limits are designed to provide reasonable protection against harmful interference in a residential installation. This device generates, uses and can radiate radio frequency energy and, if not installed and used in accordance with the instructions, may cause harmful interference to radio communications. However, there is no guarantee that interference will not occur in a particular installation. If this device does cause harmful interference to radio or television reception, which can be determined by turning the device off and on, the user is encouraged to try to correct the interference by one or more of the following measures:
■ Reorient or relocate the receiving antenna.
■ Increase the separation between the device and receiver.
■ Connect the device into an outlet on a circuit different from that to which the receiver is connected.
■ Consult the dealer or an experienced radio/TV technician for help.
Any changes or modifications not expressly approved by the manufacturer could void the user's authority to operate the device.
This transmitter must not be co-located or operating in conjunction with any other antenna or transmitter.
Radiation Exposure Statement:
This equipment complies with FCC radiation exposure limits set forth for an uncontrolled environment. This equipment should be installed and operated with minimum distance 20cm between the radiator and your body.
Industry Canada Statement
This device complies with ISED's license-exempt RSSs. Operation is subject to the following two conditions: (1) This device may not cause harmful interference, and (2) this device must accept any interference received, including interference that may cause undesired operation.
Radiation Exposure Statement:
This equipment complies with ISED radiation exposure limits set forth for an uncontrolled environment. This equipment should be installed and operated with minimum distance 20cm between the radiator and your body.
This device complies with Canadian ICES-003 Class B.
CE Compliance For Europe
Marking by the CE symbol indicates compliance of this system to the applicable Council Directives of the European Union, including Low-Voltage Directive (LVD) 2014/35/EU, the Radio Equipment Directive (RED) (2014/53/EU), and RoHS Directive (2011/65/EU) as amended by 2015/863/EU. Operating characteristics of the wireless radio (a) Frequency band: 2412-2472Mhz (b) Maximum radio-frequency power transmitted in the bands is 8dBm. A “Declaration of Conformity” in accordance with the applicable directives has been made and is on file at Western Digital Europe.
Warranty Information
Obtaining Service
G-Technology values your business and always attempts to provide you the very best of service. If this Product requires maintenance, either contact the dealer from whom you originally purchased the Product or visit our product support website at https://support.g-technology.com for information on how to obtain service or a Return Material Authorization (RMA). If it is determined that the Product may be defective, you will be given an RMA number and instructions for Product return. An unauthorized return (i.e., one for which an RMA number has not been issued) will be returned to you at your expense. Authorized returns must be shipped in an approved shipping container, prepaid and insured, to the address provided on your return paperwork. Your original box and packaging materials should be kept for storing or shipping your WD product. To conclusively establish the period of warranty, check the warranty expiration (serial number required) via https://support.g-technology.com. G-Technology shall have no liability for lost data regardless of the cause, recovery of lost data, or data contained in any Product placed in its possession.
Limited Warranty for Consumer Products
G-Technology, a division of HGST, a Western Digital Company ("G-Technology")
What does this limited warranty cover?
This Limited Warranty applies to new G-Technology storage products purchased from an authorized G-Technology dealer by the original purchaser for normal use and not for resale. G-Technology warrants that a covered product is free from defects in materials and workmanship, with the exceptions stated below.
How long does limited warranty coverage last?
This limited warranty lasts for 1 year, 2 years, 3 years or 5 years, or a fixed period from date of purchase, depending on when and where it was originally purchased. To determine the warranty specifically for your G-Technology product, visit www.g-technology.com. A valid proof of purchase may be required to prove eligibility. If you do not have a valid proof of purchase, the limited warranty period will be measured from the date of sale by G-Technology to the authorized distributor.
What does this limited warranty not cover?
The limited warranty does not cover damage resulting from commercial use, misuse, accident, modification or alteration to hardware or software, tampering, unsuitable physical or operating environment beyond product specifications, improper maintenance, or failure caused by a product for which G-Technology is not responsible. There is no warranty of uninterrupted or error-free operation. There is no warranty for loss of data—you must regularly back up the data stored on your product to a separate storage product. There is no warranty for product with removed or altered identification labels. G-TECHNOLOGY DOES NOT PROVIDE ANY OTHER WARRANTIES OF ANY KIND, INCLUDING, BUT NOT LIMITED TO, THE IMPLIED WARRANTIES OF MERCHANTABILITY AND FITNESS FOR A PARTICULAR PURPOSE. SOME JURISDICTIONS DO NOT ALLOW THE LIMITATION OF IMPLIED WARRANTIES, SO THIS LIMITATION MAY NOT APPLY TO YOU. G-Technology is not responsible for returning to you product that is not under warranty.
What must you do?
If you are having trouble with a product, before seeking limited warranty service, first follow the troubleshooting procedures that G-Technology or your reseller provides. To obtain limited warranty service, you must first obtain a Return Materials Authorization and ship-to address by contacting the appropriate G-Technology Call Center listed at http://www.g-technology.com/support. You must return the covered hard disk drive using approved packaging to our logistics center. Packaging guidelines can be found at http://www.g-technology.com/support. You must pay any associated transportation charges, duties and insurance in shipping the drive to our logistics center. You should remove all personal information from the product prior to its return.
What will G-Technology do?
G-Technology will replace the drive with a functionally equivalent replacement product, transportation prepaid. G-Technology may replace your product with a product that was previously used, repaired and tested to meet G-Technology specifications. You receive title to the replacement product at delivery to the carrier at G-Technology shipping point. You are responsible for importation of the replacement product, if applicable. G-Technology will not return the original drive; therefore, you are responsible for moving data to other media before returning. Data recovery is not covered under this limited warranty and is not part of the returns process. G-Technology warrants that replacement product is covered for the remainder of the original product warranty or 90 days, whichever is greater.
How is our liability limited?
G-TECHNOLOGY AND ITS AFFILIATES, SUPPLIERS, DISTRIBUTORS, AND RESELLERS ARE NOT LIABLE FOR ANY OF THE FOLLOWING: 1) THIRD-PARTY CLAIMS AGAINST YOU FOR DAMAGES (OTHER THAN BODILY INJURY INCLUDING DEATH AND TANGIBLE PERSONAL PROPERTY); 2) LOSS OF OR DAMAGE TO YOUR DATA; OR 3) SPECIAL, INCIDENTAL, OR INDIRECT DAMAGES OR FOR ANY ECONOMIC CONSEQUENTIAL DAMAGES (INCLUDING LOST PROFITS OR SAVINGS), EVEN IF INFORMED OF THE POSSIBILITY. SOME JURISDICTIONS DO NOT ALLOW LIMITATION OF LIABILITY, INCIDENTAL DAMAGES, OR CONSEQUENTIAL DAMAGES, SO THE ABOVE LIMITATIONS MAY NOT APPLY TO YOU.
How do local laws apply?
THIS LIMITED WARRANTY GIVES YOU SPECIFIC LEGAL RIGHTS, AND YOU MAY ALSO HAVE OTHER RIGHTS WHICH VARY FROM JURISDICTION TO JURISDICTION.
Australia/New Zealand
Limited Warranty against Defects for Consumer Products for Australia
What does this limited warranty against defects cover?
This Limited Warranty applies to new G-Technology storage products purchased from an authorized G-Technology dealer in Australia by the original purchaser for normal use and not for resale. G-Technology warrants that a covered product is free from defects in materials and workmanship, with the exceptions stated below.
How long does limited warranty coverage last?
This limited warranty lasts for 1 year, 2 years, 3 years or 5 years, or a fixed period from date of purchase, depending on when and where it was originally purchased. To determine the warranty period for your product, visit www.g-technology.com and enter your serial number. A valid proof of purchase may be required to prove eligibility. If you do not have a valid proof of purchase, the limited warranty period will be measured from the date of sale from G-Technology to the authorized distributor.
What does this limited warranty not cover?
The limited warranty does not cover damage resulting from commercial use, misuse, accident, modification or alteration to hardware or software, tampering, unsuitable physical or operating environment beyond product specifications, improper maintenance, or failure caused by a product for which G-Technology is not responsible. There is no warranty of uninterrupted or error-free operation. There is no warranty for loss of data—you must regularly back up the data stored on your product to a separate storage product. There is no warranty for product with removed or altered identification labels. EXCEPT AS REQUIRED BY APPLICABLE LAW, G-TECHNOLOGY DOES NOT PROVIDE ANY OTHER WARRANTIES OF ANY KIND, INCLUDING, BUT NOT LIMITED TO, THE IMPLIED WARRANTIES OR CONDITIONS OF MERCHANTABILITY AND FITNESS FOR A PARTICULAR PURPOSE. SOME JURISDICTIONS DO NOT ALLOW THE LIMITATION OF IMPLIED WARRANTIES, SO THIS LIMITATION MAY NOT APPLY TO YOU. G-Technology is not responsible for returning to you product which is not covered by this limited warranty.
What must you do?
If you are having trouble with a product, before seeking limited warranty service, first follow the troubleshooting procedures that G-Technology or your reseller provides. To obtain limited warranty service, you must first obtain a Return Materials Authorization and ship-to address by contacting the appropriate G-Technology Call Center listed at
http://www.g-technology.com/support. You must return the covered hard disk drive using approved packaging to our logistics center. Packaging guidelines can be found at: http://www.g-technology.com/support. You must pay any associated transportation charges, duties and insurance in shipping the drive to our logistics center. You should remove all personal information from the product prior to its return.
What will G-Technology do?
G-Technology will replace the drive with a functionally equivalent replacement product, transportation prepaid. G-Technology may replace your product with a product that was previously used, repaired and tested to meet G-Technologyspecifications. You receive title to the replaced product at delivery to carrier at G-Technology shipping point. You are responsible for importation of the replaced product, if applicable. G-Technology will not return the original drive to consumers; therefore, the consumer is responsible for moving data to another media before returning. Data Recovery is not covered under this warranty and is not part of the warranty returns process. G-Technology warrants that the replaced products are covered for the remainder of the original product warranty or 90 days, whichever is greater. The benefits under this limited warranty are in addition to your other rights and remedies under applicable laws.
How does Australian law apply?
Our goods come with guarantees that cannot be excluded under the Australian Consumer Law. You are entitled to a replacement or refund for a major failure and for compensation for any other reasonably foreseeable loss or damage. You are also entitled to have the goods repaired or replaced if the goods fail to be of acceptable quality and the failure does not amount to a major failure.
How is our liability limited?
EXCEPT AS REQUIRED BY APPLICABLE LAW, G-TECHNOLOGY AND ITS AFFILIATES, SUPPLIERS, DISTRIBUTORS, AND RESELLERS ARE NOT LIABLE FOR ANY OF THE FOLLOWING: 1) THIRD-PARTY CLAIMS AGAINST YOU FOR DAMAGES (OTHER THAN BODILY INJURY INCLUDING DEATH AND TANGIBLE PERSONAL PROPERTY; 2) LOSS OF, OR DAMAGE TO, YOUR DATA; OR 3) SPECIAL, INCIDENTAL, OR INDIRECT DAMAGES OR FOR ANY ECONOMIC CONSEQUENTIAL DAMAGES (INCLUDING LOST PROFITS OR SAVINGS), EVEN IF INFORMED OF THE POSSIBILITY. SOME JURISDICTIONS DO NOT ALLOW LIMITATION OF LIABILITY, INCIDENTAL DAMAGES, OR CONSEQUENTIAL DAMAGES, SO THE ABOVE LIMITATIONS MAY NOT APPLY TO YOU. THIS LIMITED WARRANTY GIVES YOU SPECIFIC LEGAL RIGHTS, AND YOU MAY ALSO HAVE OTHER RIGHTS WHICH VARY FROM JURISDICTION TO JURISDICTION.
How to Handle an ArmorLock Drive
G-Technology products are precision instruments and must be handled with care during unpacking and installation. Rough handling, shock, or vibration can damage drives. Always observe the following precautions when unpacking and installing your external storage product:
■ The rugged ArmorLock drive is built to withstand up to a three meter (3m) drop and 1,000 lb. crush resistance. Do not subject the drive to drop or crush events with higher limits.
■ It is always recommended to handle the drive with as much care as possible.
Glossary
Many of the terms used in this User Manual are defined in this section.
Authorized User
A user that can unlock or access an ArmorLock device.
File System
Controls how data is stored and retrieved. Common types include:
■ macOS (HFS+) – Time Machine compatible
■ Windows (NTFS) – Standard Windows filing format
- Windows and macOS (exFAT) – For flexibility between both operating systems
Manager
One of two roles to manage the ArmorLock drive. The manager can unlock the drive, erase/format the drive, authorize/deauthorize additional devices, view/edit logs, and set certain parameters (read-only, etc.). There must be at least one manager per drive, but additional managers can be added.
QR Code
A "Quick Response" matrix barcode which allows instant access to the information hidden within the code. The ArmorLock QR code is located on the back of the drive, and is used with the app.
USB
Universal Serial Bus (USB) is an industry standard for connecting computers and peripherals. The ArmorLock drive features a USB-C connector, and includes USB-A and USB-C cables for connecting the drive to a computer.
User
An authorized phone or computer that can unlock the drive. This role also has the ability to erase or format the drive (unless the manager has prevented this option). A user role is not required to use the drive.
User ID
Information that identifies the user, such as user key and user name.
User Key
A (public) key generated by the app, and assigned to a user. Note that if the app is deleted and reinstalled, a new key is created and the device will need to be paired again.
User Name
The "friendly" name of the user. This information is stored on the drive, but can be changed by the manager.
Index
A
App Compatibility 2
App Version 14
Australia/New Zealand 22
Authorized User 24
Authorizing Users 16
B
Bluetooth Compatibility 3
Box contents 2
C
Compliance, regulatory 19
D
Drive
handling precautions 23
F
FCC Class B Information 19
G
Glossary 24
H
Handling precautions 23
Hardware 2
|
IC Statement 19
ICES-3(B)/NMB-3(B) Compliance 20
K
Kit contents 2
L
LED Light - Enable or Disable 14
Location Tracking 14
Lock 11
N
New Recovery Key 17
P
Physical description 3
Precautions for handling 23
R
Regulatory compliance 19
Remove Device 11
Reset to Factory Settings 17
S
Safety compliance 19
Service 20
T
Technical Notes 2
U
Unlock 11
User 24
User ID 25
User Key 25
User Name 16, 25
W
Warranty Information 20
WD
service, obtaining 20
Information furnished by G-Technology is believed to be accurate and reliable; however, no responsibility is assumed by G-Technology for its use nor for any infringement of patents or other rights of third parties which may result from its use. No license is granted by implication or otherwise under any patent or patent rights of G-Technology. G-Technology, the G-Technology logo and ArmorLock are registered trademarks or trademarks of Western Digital Corporation or its affiliates in the U.S. and/or other countries. Android is a trademark or registered trademark of Google LLC in the United States and/or other countries. macOS is a trademark of Apple Inc., registered in the U.S. and other countries. Windows is either a registered trademark or trademark of Microsoft Corporation in the United States and/or other countries. iOS is a trademark or registered trademark of Cisco in the U.S. and other countries and is used under license by Apple Inc. USB-C™ is a trademark of USB Implementers Forum. The Bluetooth(R) word mark and logos are registered trademarks owned by Bluetooth SIG, Inc. and any use of such marks by Western Digital is under license. All other marks are the property of their respective owners. Pictures shown may vary from actual product. Product specifications subject to change without notice. *As used for storage capacity, 1GB = 1 billion bytes and 1TB = one trillion bytes. Actual user capacity may be less depending on operating environment. **As used for transfer rate, 1 MB/s = 1 million bytes per second. ***On carpeted concrete floor. Based on internal testing; performance may vary depending upon host device, usage conditions, drive capacity, and other factors.
© 2020 Western Digital Corporation or its affiliates. All rights reserved.
Western Digital
5601 Great Oaks Parkway
San Jose, California 95119 U.S.A

- Accessing Online Support
- Table of Contents
- Welcome to ArmorLock....1
- Getting Started....5
- Main Activities.... 11
- More About Your ArmorLock App and Drive....14
- Manager Settings.... 16
- Keeping ArmorLock Up to Date.... 18
- Compliance and Warranty Information....19
- Glossary....24
- Welcome to ArmorLock
- Key Features
- PASSWORDS ARE A THING OF THE PAST
- THE NEW AUTHORITY ON AUTHORIZATION
- ROBUST DRIVE MANAGEMENT
- HIGH-GRADE DATA SECURITY
- ADRENALINE FOR YOUR CONTENT
- BUILT FOR RIGOR
- ArmorLock App
- What's in the Box
- Tech Notes
- Drive Compatibility
- App Compatibility
- USB Host and OS Compatibility
- Bluetooth™ Compatibility
- A Look at the ArmorLock Drive
- 2
- Getting Started
- Get the Mobile App
- Download and Setup the App
- ArmorLock Mobile App Overview
- Add a New Drive with the Mobile App
- Setup and Use the Drive
- Get the Desktop App
- ArmorLock Desktop App Overview
- Add a New Drive with the Desktop App
- 3
- Main Activities
- Unlock and Lock the Drive
- Remove a Drive
- Mobile App
- Desktop App
- Authorize Local Users
- User Requesting Access to a Drive
- Manager Authorizing Access
- Authorize Remote Users Before You Ship the Drive
- User Receives and Adds the Drive
- 4
- More About Your ArmorLock App and Drive
- Drive Indicators
- App Version
- User Authentication
- Location Tracking
- Drive Information
- How to Use Recovery
- 5
- Manager Settings
- Adding and Removing Users
- Adding a User
- Removing a User
- User Name
- New Recovery Key
- Read-Only Mode
- Reset to Factory Settings
- 6
- Keeping ArmorLock Up to Date
- Firmware Updates: Using iOS Mobile App
- Firmware Updates: Using macOS Desktop App
- 7
- Compliance and Warranty Information
- Regulatory Compliance
- Safety Compliance
- Radiation Exposure Statement:
- Industry Canada Statement
- CE Compliance For Europe
- Warranty Information
- Obtaining Service
- Limited Warranty for Consumer Products
- Australia/New Zealand
- How to Handle an ArmorLock Drive
- Glossary
- Authorized User
- File System
- Manager
- QR Code
- USB
- User
- User ID
- User Key
- Index
- A
- B
- C
- D
- F
- G
- H
- |
- K
- L
- N
- P
- R
- S
- T
- U
- W
Brand : G-TECHNOLOGY
Model : ArmorLock
Category : External hard drive