
CMDNB 6186 W - Refrigerator CANDY - Free user manual and instructions
Find the device manual for free CMDNB 6186 W CANDY in PDF.


| Product type | Combined refrigerator with freezer compartment |
| Brand | Candy |
| Model | CMDNB 6186 W |
| Total net capacity | 311 L (refrigerator 237 L, freezer 74 L) |
| Energy class | E (old scale A+++ to D) |
| Annual energy consumption | 251 kWh/year |
| Dimensions (H x W x D) | 185 x 60 x 63 cm |
| Net weight | 62 kg |
| Power supply | 220-240 V, 50 Hz |
| Climate class | N-ST (ambient temperature 16°C to 38°C) |
| Noise level | 40 dB(A) |
| Defrost type | Automatic (refrigerator), manual (freezer) |
| Super Cool function | Yes (rapid cooling of food) |
| Interior lighting | LED |
| Door balconies | 3 height-adjustable balconies |
| Vegetable compartment | 1 vegetable drawer with cover |
| Number of shelves | 4 glass shelves (including 1 removable) |
| Freezer | 3 compartments (drawers), freezing capacity 4 kg/24h |
| Power failure autonomy | 15 hours |
| Refrigerant | R600a (isobutane) |
| Spare parts | Available on Candy official website and from authorized dealers |
| Repairability | Repairability index 7.2/10 (according to manufacturer data) |
Frequently Asked Questions - CMDNB 6186 W CANDY
User questions about CMDNB 6186 W CANDY
0 question about this device. Answer the ones you know or ask your own.
Ask a new question about this device
Download the instructions for your Refrigerator in PDF format for free! Find your manual CMDNB 6186 W - CANDY and take your electronic device back in hand. On this page are published all the documents necessary for the use of your device. CMDNB 6186 W by CANDY.
USER MANUAL CMDNB 6186 W CANDY
English
Contents
1. SAFETY INFORMATION ...... 4
2. INSTALLATION 6
2.1 Location....6 2.2 Door Handle Install Illumination (optional) 6 2.3 Reversing the Door Swing 7 2.4 Door Space Requirements....8 2.5 Levelling the Unit 8 2.6 Cleaning Before Use....9 2.7 Before Using Your Unit 9 2.8 Interior Accessories 10
3. PRODUCT OVERVIEW....10
4. OPERATION 11
4.1 Operation Instructions.... 11 4.2 Noise Inside the Unit! 12 4.3 Tips for Keeping Food in the Unit 12 4.4 Change the Light Bulb 13
5. CLEANING....13
5.1 Defrosting.... 13 5.2 Cleaning the Interior and the Exterior of the Unit.... 13 5.3 Cleaning Tips 13
6. MAINTENANCE 13
6.1 Changing the Internal Light.... 13 6.2 Care When Handling / Moving Your Unit.... 13 6.3 Servicing 13 6.4 Switching Off for Long Periods of Time 13 6.5 Do not shield positions of air outlet and return air inlet of the refrigerator 14 6.6 Do not keep foods of higher temperature close to temperature sensor 14 6.7 Take out drawer of freezing chamber of refrigerator and put foods directly on the glass partition....14
7. TROUBLE SHOOTING .... 14
7.1 Warm tips: 14
8. TIPS FOR ENERGY SAVING....14
9. SCRAPPING OLD APPLIANCES 15
Thank you for purchasing this product.
Before using your refrigerator, please carefully read this instruction manual in order to maximize its performance. Store all documentation for subsequent use or for other owners. This product is intended solely for household use or similar applications such as:
- the kitchen area for personnel in shops, offices and other working environments
- on farms, by clientele of hotels, motels and other environments of a residential type - at bed and breakfasts (B & B)
- for catering services and similar applications not for retail sale.
This appliance must be used only for purposes of storage of food, any other use is considered dangerous and the manufacturer will not be responsible for any omissions. Also, it is recommended that you take note of the warranty conditions.
1. SAFETY INFORMATION
The refrigerator contains a refrigerant gas (R600a: isobutane) and insulating gas (cyclopentane), with high compatibility with the environment, that are, however, inflammable.
We recommend that you follow the following regulations so as to avoid situations dangerous to you:
Before performing any operation, unplug the power cord from the power socket.
- The refrigeration system positioned behind and inside the Wine Coolers contains refrigerant. Therefore, avoid damaging the tubes.
- If in the refrigeration system a leak is noted, do not touch the wall outlet and do not use open flames. Open the window and let air into the room. Then call a service center to ask for repair.
- Do not scrape with a knife or sharp object to remove frost or ice that occurs. With these, the refrigerant circuit can be damaged, the spill from which can cause a fire or damage your eyes.
- Do not install the appliance in humid, oily or dusty places, nor expose it to direct sunlight and to water.
- Do not install the appliance near heaters or
inflammable materials.
- Do not use extension cords or adapters.
- Do not excessively pull or fold the power cord or touch the plug with wet hands.
- Do not damage the plug and/or the power cord; this could cause electrical shocks or fires.
- It is recommended to keep the plug clean, any excessive dust residues on the plug can be the cause fire.
- Do not use mechanical devices or other equipment to hasten the defrosting process.
- Absolutely avoid the use of open flame or electrical equipment, such as heaters, steam cleaners, candles, oil lamps and the like in order to speed up the defrosting phase.
- Do not use or store inflammable sprays, such as spray paint, near the Wine Coolers. It could cause an explosion or fire.
- Do not use electrical appliances inside the food storage compartments, unless they are of the type recommended by the manufacturer.
- Do not place or store inflammable and highly volatile materials such as ether, petrol, LPG, propane gas, aerosol spray cans, adhesives, pure alcohol, etc. These materials may cause an explosion.
- Do not store medicine or research materials in the Wine Coolers. When the material that requires a strict control of storage temperatures is to be stored, it is possible that it will deteriorate or an uncontrolled reaction may occur that can cause risks.
- Maintain the ventilation openings in the appliance enclosure or in the built-in structure, free of obstruction.
- Do not place objects and/or containers filled with water on the top of the appliance.
- Do not perform repairs on this Wine Cooler. All interventions must be performed solely by qualified personnel.
- This appliance can be used by children aged from 8 years and above and by persons with reduced physical, sensory or mental capabilities or with a lack of experience and knowledge, provided that they have been given adequate supervision or instruction concerning use of the appliance in a safe way and understand the hazards involved.
Children should not play with the appliance. Cleaning and user maintenance should not be made by children without supervision.
2. INSTALLATION
2.1 Location
When selecting a position for your unit, you should make sure the floor is flat and firm, and the room is well ventilated. Avoid locating your unit near a heat source, e.g., cooker, boiler, or radiator. Also avoid direct sunlight as it may increase electrical consumption. Extreme cold ambient temperatures may also cause the unit not to perform properly. This unit is not designed for use in a garage or outdoor installation. Do not drape the unit with any covering.
When installing the unit, ensure that 10 cm of free space is left at both sides, 10 cm at the rear, and 30 cm at the top of the unit. This will allow cold air to circulate around the wine cooler and improve the efficiency of the cooling process.
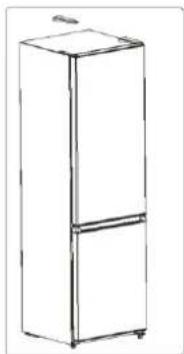
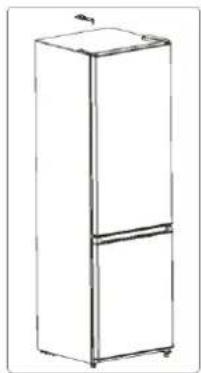
2.2 Door Handle Install Illumination (optional)
1) Take out the screw caps from the door handle holes. 2) Put the handles into the screw holes and then hit them to fix. 3) Cap the screw caps on the handle screws. 4) Take out the screw caps from the handle screw holes. 5) Remove the screws and take the handles down. 6) Cap the screw caps on the door handle holes again. 7) Install the handles into the door handle holes of the other side in accordance with the handle installation instructions.
2.3 Reversing the Door Swing
1) Take off knuckle guard.

3) Take off the door of refrigerating chamber.

4) Take off middle hinge with a screwdriver.

2) Take off top hinge.

7) Assemble the door of the freezer chamber onto the lower hinge.

8) Assemble the middle hinge assembly to the left side of the cabinet.

5) Remove the door of the freezing chamber.

9) Assemble the door of the refrigerating chamber.

6) Remove the hinge assembly with a screwdriver, then assemble the lower hinge assembly to the left side of the cabinet with a screwdriver.
10) Install the knuckle guard.


2.4 Door Space Requirements
The unit's door must be able to open fully as shown.
W×D≥990×1025mm

2.5 Levelling the Unit
To do this, adjust the two levelling feet at the front of the unit.
If the unit is not level, the door and magnetic seal alignments will not be covered properly.
Make sure that the foot touches the ground before use.

Look down from the top, clockwise and counterclockwise loosening, tightening.
2.6 Cleaning Before Use
Wipe the inside of the unit with a weak solution of bicarbonate soda. Then rinse with warm water using a 'wring-out' sponge or cloth. Wash the shelves and salad bin in warm soapy water and dry completely before replacing in the unit. Clean the exterior of the unit with a damp cloth.
If you require more information, refer to the Cleaning section.
2.7 Before Using Your Unit
The refrigerator adopts 220~240V/50Hz AC power. Voltage fluctuations over the range of 187~264V will cause malfunction or even damage.
Do not damage the power cord under any condition to ensure safe use. Do not use when the power cord is damaged or the plug is worn.
Do not put flammable, explosive, volatile, and highly corrosive items in the refrigerator to prevent damage to the product or fire accidents.
Do not place flammable items near the refrigerator to avoid fires.
This product is a household refrigerator and shall be only suitable for the storage of foods.
According to national standards, household refrigerators shall not be used for other purposes, such as storage of blood, drugs, or biological products.
Do not place items such as bottled or sealed containers of fluid, such as bottled beers and beverages, in the freezer to prevent bursts and other losses.
Before placing any food in your unit, turn it on and wait for 24 hours to make sure it is working properly and to allow it time to fall to the correct temperature. Your unit should not be overfilled. Do not damage the power cord under any condition to ensure safe use. Do not use when the power cord is damaged or the plug is worn.
Do not put flammable, explosive, volatile, and highly corrosive items in the refrigerator to prevent damage to the product or fire accidents.
Do not place flammable items near the refrigerator to avoid fires.
This product is a household refrigerator and shall be only suitable for the storage of foods.
According to national standards, household refrigerators shall not be used for other purposes, such as storage of blood, drugs, or biological products.
Do not place items such as bottled or sealed containers of fluid, such as bottled beers and beverages, in the freezer to prevent bursts and other losses.
Before placing any food in your unit, turn it on and wait for 24 hours to make sure it is working properly and to allow it time to fall to the correct temperature. Your unit should not be overfilled.

Before Plugging In
You must check that you have a socket which is compatible with the plug supplied with the unit.
Before Turning On!
Do not turn on until two hours after moving the unit.
2.8 Interior Accessories
Various glass or plastic storage shelves are included with your appliance - different models have different combinations.
You should always slide one of the full-size glass storage shelves into the lowest set of guides, above the fruit and vegetable containers, and keep it in this position. To do this, pull the storage shelf forward until it can be swiveled upwards or downwards and removed.
Please do the same in reverse to insert the shelf at a different height.

In order to make the most of the volume of the fresh food storage compartment and frozen-food storage compartment, the user can remove one or more shelves or drawers out of the appliance, according to your daily use.
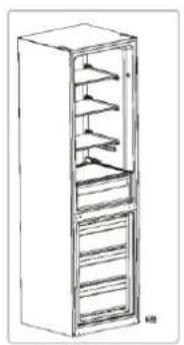
3. PRODUCT OVERVIEW

* Dotted line represents the position of air outlet and return air inlet.
*All images in this instruction manual are for indication only; please refer to your individual unit for details.
4. OPERATION
4.1 Operation Instructions
Temperature control
• Temperature control of fresh food storage compartment.

Key
A.SET: gear setting key.
Display screen
1 Gear 1 2 Gear 2 3 Gear 3 4 Gear 4 5 Gear 5
Display
For the first power-on, the display screen (including the key light) will be displayed in full for 3s, and then the gear in the middle displays the state of running.
Display of normal running
On the occurrence of a failure, the corresponding LED light will give a combined display of failure code (loop display);
Where there is no failure, the LED light will display the current running gear of the refrigerator.
Gear setting
The gear will be changed once every time when you press the key SET. Then, the refrigerator will run under the setting value after 15s.
![graph LR A["Gear 1"] --> B["Gear 2"] B --> C["Gear 3"] C --> D["Gear 4"] D --> E["Gear 5"] E --> F["End"]](/content/2026/05/878401/images/e01a1f64b9dcc87ce04ddc2d8c09d83ddc87ccad39155ec57a05a3eca65f6fd1.jpg)
Fast cool function
Enter: Circulating modulation rapid cooling mode.
Operate: Indicator of rapid cooling lights up, and the refrigerator operates at 2°C.
Exit: 1. Operate 150min under the rapid cooling mode.
- Temperature adjustment can exit from the rapid cooling mode.
• Temperature control of freezing chamber
![graph TD A["Freezer Control"] --> B["NORMAL"] B --> C["COLD (summer)"] C --> D["COLDER (winter)"]](/content/2026/05/878401/images/880076a5146e4eaf6ad34bbdba913aa3acef8b6856245b69f8381fb190837917.jpg)
The freezing temperature is relatively low in "COLDER" position, while the freezing temperature is relatively high in "COLD" position, thus, "NORMAL" position is generally used.
When ambient temperature is high in summer, the temperature shall be in the range from "NORMAL" to "COLD". If the ambient temperature is above 35°C, then "COLD" position shall prevail.
When ambient temperature is low in winter, the temperature shall be in the range from "NORMAL" to "COLDER". If the ambient temperature is below 10°C, then "COLDER" position shall prevail.
4.2 Noise Inside the Unit!
You may notice that your unit makes some unusual noises. Most of these are perfectly normal, but you should be aware of them!
These noises are caused by the circulation of the refrigerant liquid in the cooling system. It has become more pronounced since the introduction of CFC free gases. This is not a fault and will not affect the performance of your unit. This is the compressor motor working, as it pumps the refrigerant around the system.
4.3 Tips for Keeping Food in the Unit
♦ Cooked meats/fishes should always be stored on a shelf above raw meats/fishes to avoid bacterial transfer. Keep raw meats/fishes in a container which is large enough to collect juices and cover it properly. Place the container on the lowest shelf. Leave space around your food, to allow air to circulate inside the unit. Ensure all parts of the unit are kept cool. To prevent transfer of flavours and drying out, pack or cover the food separately. Fruit and vegetables do not need to be wrapped. ◆ Always let pre-cooked food cool down before you put in the unit. This will help to maintain the internal temperature of the unit. To prevent cold air escaping from the unit, try to limit the number of times you open the door. We recommend that you only open the door when you need to put food in or take food out.
4.4 Change the Light Bulb
Lamp replacement by professionals
5. CLEANING
5.1 Defrosting
Auto-defrost for Frost-free Refrigerator
5.2 Cleaning the Interior and the Exterior of the Unit
◆ Remove all the shelves and the salad bin. To remove the salad bin, first remove the lower door shelf. Wipe the inside of the unit with a weak solution of bicarbonate soda, then rinse with warm water using a wrung-out sponge or cloth. Wipe completely dry before replacing the shelves and salad bin. Use a damp cloth to clean the exterior, then wipe with a standard furniture polish. Make sure that the door is closed to avoid the polish getting on the magnetic door seal or inside the unit. The grille of the condenser at the back of the unit and the adjacent components can be vacuumed using a soft brush attachment.
5.3 Cleaning Tips
Condensation may appear on the outside of the unit. This may be due to a change in room temperature. Wipe off any moisture residue. If the problem continues, please contact a qualified technician for assistance.
6. MAINTENANCE
6.1 Changing the Internal Light
Lamp replacement by professionals.
6.2 Care When Handling / Moving Your Unit
Hold the unit around its sides or base when moving it. Under no circumstances should it be lifted by holding the edges of the top surface.
6.3 Servicing
The unit should be serviced by an authorized engineer and only genuine spare parts should be used. Under no circumstances should you attempt to repair the unit yourself. Repairs carried out by inexperienced persons may cause injury or serious malfunction. Contact a qualified technician.
6.4 Switching Off for Long Periods of Time
When the unit is not in use for a long period of time, disconnect it from the mains supply, empty all food and clean the appliance, leaving the door ajar to prevent unpleasant smells.
6.5 Do not shield positions of air outlet and return air inlet of the refrigerator. 6.6 Do not keep foods of higher temperature close to temperature sensor. 6.7 Take out drawer of freezing chamber of refrigerator and put foods directly on the glass partition.
7. Trouble shooting
The following simple issues can be handled by the user. Please call the after-sale service department if the issues are not settled.
| Inoperation | Whether the freezer is plugged and connected to power;Low voltage;Failure power or tripping circuit |
| Odor | Odorous foods should closely wrapped; Whether foods are rotten;Whether the interior shall be cleaned. |
| Long-term operation of compressor | It is normal that refrigerator operates for longer time in summer when the ambient temperature is higher;Do not put too much food in the freezer at one time;Do not put foods until they are cooled;Frequent opening of refrigerator door. |
| Illuminating light does not shine | Whether the refrigerator is connected to power, whether the illuminating light is damaged. |
| The refrigerator door can not be properly closed. | The freezer door is stuck by food packages; Too much food;Tilt refrigerator. |
| Loud noises | Whether the food is leveled, whether the refrigerator is balanced;Whether the refrigerator parts are properly placed. |
7.1 Warm tips:
The refrigerator enclosure may emit heat during operation specially in summer, this is caused by the radiation of the condenser, and it is a normal phenomenon. Condensation: condensation phenomenon will be detected on the exterior surface and door seals of the freezer when the ambient humidity is large, this is a normal phenomenon, and the condensation can be wiped away with a dry towel. Buzz: Buzz will be generated by running compressor specially when starting up or shutting down.
8. TIPS FOR ENERGY SAVING
For better energy saving we suggest:
Installing the appliance away from heat sources and not exposed to direct sunlight and in a well ventilated room.
Avoid putting hot food into the refrigerator to avoid increasing the internal temperature and therefore causing continuous functioning of the compressor.
Do not excessively stuff foods so as to ensure proper air circulation.
Defrost the appliance in case there is ice to facilitate the transfer of cold.
In case of absence of electrical energy, it is advisable to keep the refrigerator door closed.
Open or keep the doors of the appliance open as little as possible.
Avoid adjusting the setting to temperatures too cold.
Remove dust present on the rear of the appliance
9. SCRAPPING OLD APPLIANCES


This appliance is marked according to the European directive 2012/19/EU on Waste Electrical and Electronic Equipment (WEEE).
WEEE contains both polluting substances (which can cause negative consequences for the environment) and basic components (which can be re-used). It is important to have WEEE subjected to specific treatments, in order to remove and dispose properly all pollutants, and recover and recycle all materials. Individuals can play an important role in ensuring that WEEE does not become an environmental issue; it is essential to follow some basic rules:
- WEEE should not be treated as household waste;
- WEEE should be handed over to the relevant collection points managed by the municipality or by registered companies. In many countries, for large WEEE, home collection could be present.
In many countries, when you buy a new appliance, the old one may be returned to the retailer who has to collect it free of charge on a one-to-one basis, as long as the equipment is of equivalent type and has the same functions as the supplied equipment.
Conformity
By placing the CE mark on this product, we are confirming compliance to all relevant European safety, health and environmental requirements which are applicable in legislation for this product.
Italiano
Index
2) Disassemble the upper hinge.

9) Mount the refrigerator door.


2.4 Door clearance
Remove the screws and remove the handles.
2) Remove the upper hinge.


- farms, hotels, motels and other types of residences
- bed and breakfasts (B & B)

3) Remove the refrigerator compartment door.

7) Mount the refrigerator compartment door on the lower hinge.

5) Remove the freezer compartment door.
9) Mount the refrigerator door.
6) Using a screwdriver, remove the hinge assembly. Mount the lower hinge assembly to the left side of the cabinet using a screwdriver.

10) Install the hinge cover.


10) Secure the hinge cover.

The freezer temperature is relatively low in the "COLDER" position, while the freezer temperature is relatively high in the "COLD" position, therefore the "NORMAL" position is generally used.
5) Remove the middle hinge with a screwdriver.

2) Remove the upper hinge.

4) Install the freezer compartment door on the lower hinge.

7) Remove the freezer compartment door.


10) Put the knee protection in place.

Key
This product is marked in accordance with the European Directive 2012/19/EC on waste electrical and electronic equipment (WEEE).
3) Remove the refrigerator door.

8) Mount the refrigerator door.
- ENGLISH
- CONTENTS
- SAFETY INFORMATION
- INSTALLATION
- PRODUCT OVERVIEW
- OPERATION
- CLEANING
- MAINTENANCE
- TROUBLE SHOOTING
- TIPS FOR ENERGY SAVING
- SCRAPPING OLD APPLIANCES
- LOCATION
- DOOR HANDLE INSTALL ILLUMINATION (OPTIONAL)
- REVERSING THE DOOR SWING
- DOOR SPACE REQUIREMENTS
- LEVELLING THE UNIT
- CLEANING BEFORE USE
- BEFORE USING YOUR UNIT
- BEFORE PLUGGING IN
- BEFORE TURNING ON
- INTERIOR ACCESSORIES
- OPERATION INSTRUCTIONS
- KEY
- DISPLAY SCREEN
- DISPLAY
- GEAR SETTING
- FAST COOL FUNCTION
- NOISE INSIDE THE UNIT
- TIPS FOR KEEPING FOOD IN THE UNIT
- CHANGE THE LIGHT BULB
- DEFROSTING
- CLEANING THE INTERIOR AND THE EXTERIOR OF THE UNIT
- CLEANING TIPS
- CHANGING THE INTERNAL LIGHT
- CARE WHEN HANDLING / MOVING YOUR UNIT
- SERVICING
- SWITCHING OFF FOR LONG PERIODS OF TIME
- WARM TIPS
- CONFORMITY
- ITALIANO
- INDEX
- DOOR CLEARANCE
Brand : CANDY
Model : CMDNB 6186 W
Category : Refrigerator