238290000 - Dishwasher Eta - Free user manual and instructions
Find the device manual for free 238290000 Eta in PDF.


| Product Type | Dishwasher |
| Brand | Eta |
| Model | 238290000 |
| Capacity | 12 place settings |
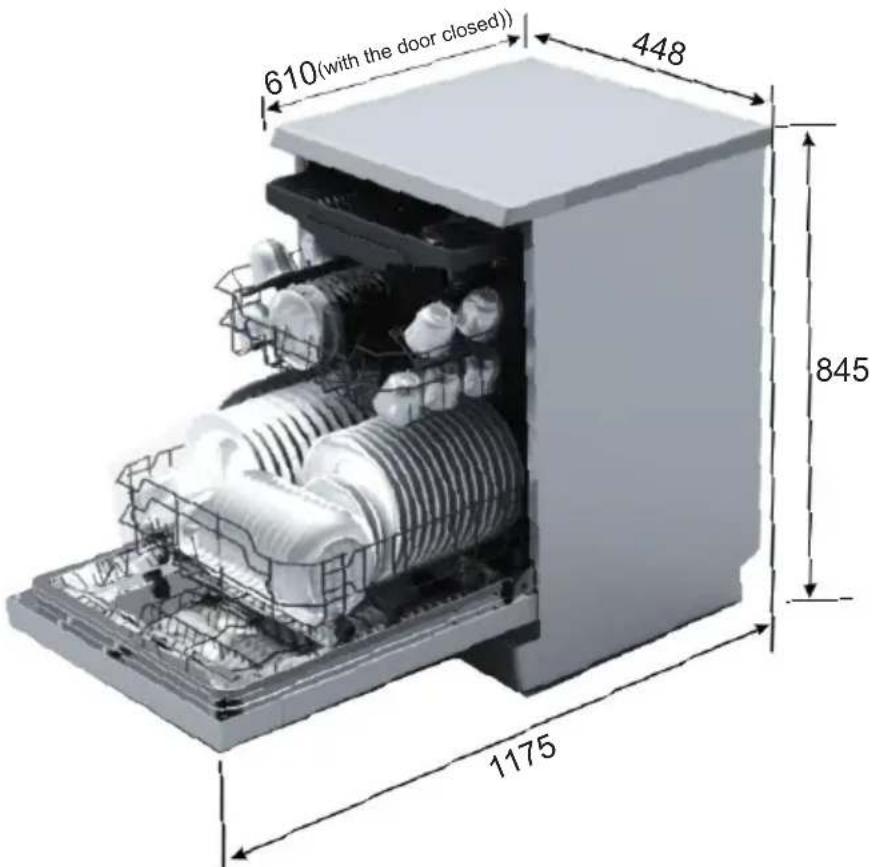
| Dimensions (H x W x D) | 85 x 60 x 60 cm |
| Weight | 45 kg |
| Power Supply | 220-240 V, 50 Hz, 2000 W |
| Energy Class | A++ |
| Noise Level | 47 dB |
| Programs | Normal, Eco, Intensive, Quick, Rinse |
| Drying System | Condensation drying |
| Water Consumption | 10 L per cycle |
| Energy Consumption | 1.05 kWh per cycle |
| Safety Features | Child lock, anti-flood protection, leak detection |
| Maintenance | Clean filter, spray arms, and door seals regularly |
| Spare Parts Availability | Filters, spray arms, racks, heating elements |
| Repairability Index | 7.2 / 10 (estimated) |
| Installation Type | Built-in (under counter) |
| Color | White (typical) |
Frequently Asked Questions - 238290000 Eta
User questions about 238290000 Eta
0 question about this device. Answer the ones you know or ask your own.
Ask a new question about this device
Download the instructions for your Dishwasher in PDF format for free! Find your manual 238290000 - Eta and take your electronic device back in hand. On this page are published all the documents necessary for the use of your device. 238290000 by Eta.
USER MANUAL 238290000 Eta
natural_image
Cutaway view of a white kitchen appliance showing internal components like dish, sink, and washing machine (no text or symbols visible)CZ - Myčka nádobí
flowchart
graph LR
    A["Bottle Icon"] --> B["ECO"]
AUTO→INTENZIVNÍ→
UNIVERZÁLNÍ→EKO→
SKLO→90MIN→
RYCHLY→OPLACH
SPUSŤTE MYČKU
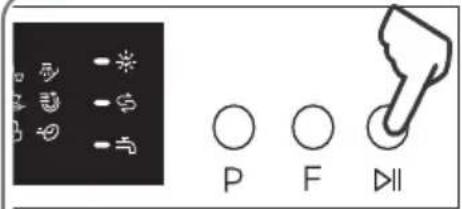
OTEVŘETE VODOVODNÍ KOHOUTEK A STISKNĚTE TLAČÍTKO START / PAUZA
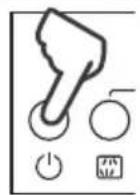
VYPNĚTE SPOTŘEBIČ
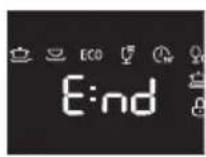
POKUD JSOU DVÍRKA OTEVŘENÁ, NA DISPLEJI SVÍTÍ END A ZAZNĚL ZVUKOVÝ SIGNÁL, PAK PROGRAM SKONČIL.
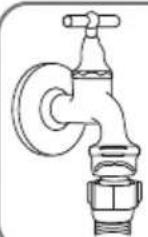
ZAVŘETE VODOVODNÍ KOHOUTEK, VYLOŽTE KOŠÍKY
natural_image
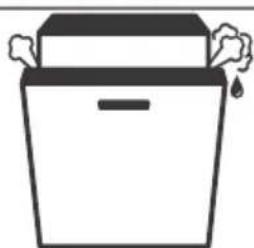
Simple line drawing of a container with a lid and bubbles, no text or symbols present.NEŽ NÁDOBÍ Z MYČKY VYJMETE, MĚLY BYSTE JE NECHAT ASI 15 MINUT VYCHLADNOUT. .
VYČISTĚTE FILTRY
natural_image
Diagram of a mechanical device with rotating components and upward arrows indicating motion (no text or symbols)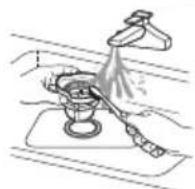
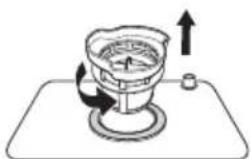
Po KAŽDÉM POUŽITÍ MYČKY ZKONTROLUJTE FILTRY, NEJSOU-LI UCPÁNY.
OBSAH
CZ - MYČKA NÁDOBÍ
I. DÜLEŽITÉ BEZPEČNOSTNÍ INFORMACE ....4
II. LIKVIDACE A EKOLOGIE ....7
III. PROVOZNÍ POKYNY....8
IV. PŘED PRVNÍM POUŽITÍM 9
V. VKLÁDÁNÍ NÁDOBÍ DO KOŠŮ MYČKY DLE EN 60436....15
VI. ZAPNUTÍ SPOTŘEBIČE ......21
VII. ÚDRŽBA A ČIŠTĚNÍ......24
VIII. POKYNY K INSTALACI 27
natural_image
Close-up of a coiled cable or hose component mounted on a black panel, with no visible text or symbols.natural_image
Simple line drawing of a door with a window and starburst symbol, no text or labels presentnatural_image
Line drawing of a hand inserting a device into a device with a screen and plug (no text or symbols)natural_image
Line drawing of a hand pressing down on a device with a slide and scroll (no text or symbols)natural_image
Diagram of a microwave oven with a lid and fan, showing airflow direction (no text or symbols)natural_image
Line drawing of a shopping cart with wheels and an arrow indicating direction (no text or symbols)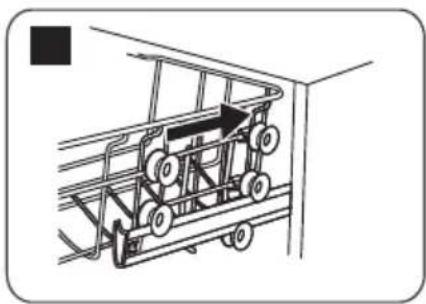
natural_image
Diagram of a mechanical cart with wheels and an arrow indicating direction (no text or symbols)natural_image
Diagram showing two stages of a livestock cage with visible mesh and structural details (no text or symbols)2. Spodní koš
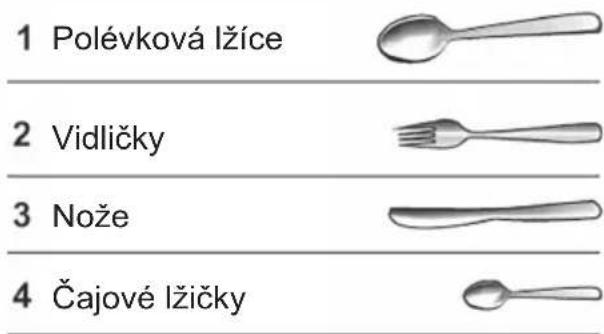
natural_image
3D rendering of a metal grate or rack structure with grid pattern and side connectors (no text or symbols visible)natural_image
3D rendering of a mechanical device with grid and control panel (no visible text or symbols)natural_image
Exterior view of a black plastic enclosure with grid pattern and side connectors (no text or symbols visible)natural_image
Technical diagram of a mechanical component with internal rotation arrows (no text or symbols)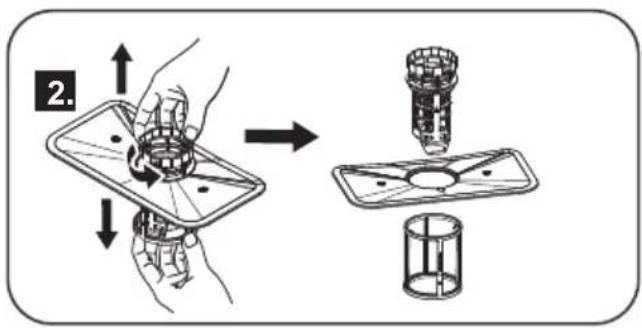
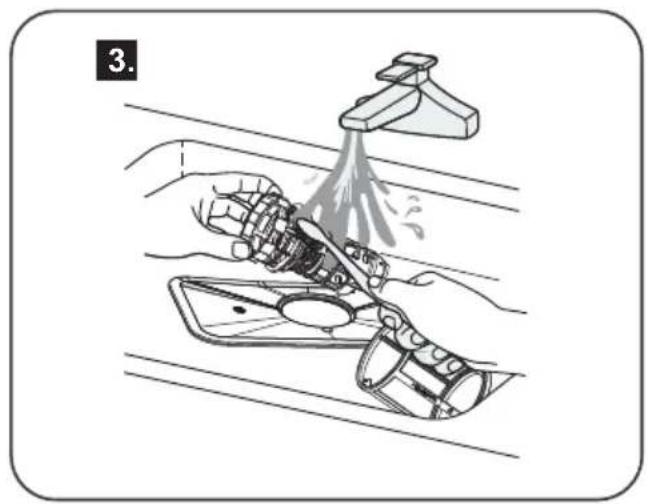
natural_image
Illustration of a hand cleaning a car dashboard with a spray bottle (no text or symbols)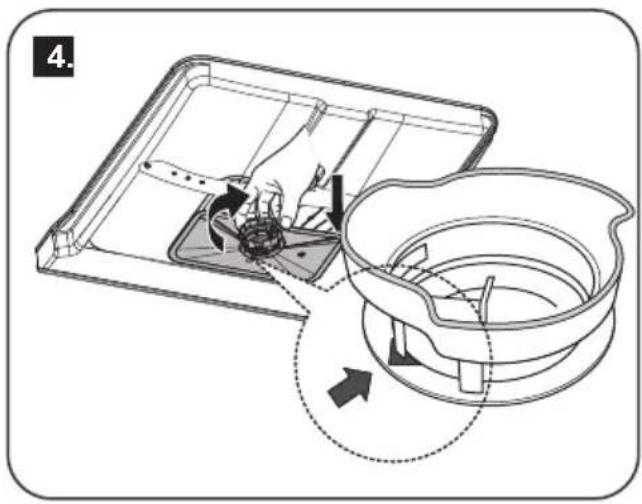
Čištění filtru
natural_image
Technical line drawing of a rectangular electronic device with internal components and mounting brackets (no text or symbols)natural_image
Pure mechanical diagram showing a rectangular frame with two circular components and directional arrows, no text or symbols present.natural_image
Line drawing of a faucet with handle and valve (no text or symbols)PŘIPOJENÍ VYPOUŠTĚCÍ HADICE
natural_image
Technical line drawing of a mechanical assembly with a magnified inset showing a screwdriver inserted into a threaded component (no text or symbols present)POZOR!
natural_image
Pure technical diagram of a mechanical or electrical assembly without any text, numbers, or symbols
PRIPOJTE PRÍVODNÚ HADICU, VYPÚŠŤACÍ HADICU, ELEKTRICKÝ PRÍVOD.
ZAPNITE SPOTREBIČ
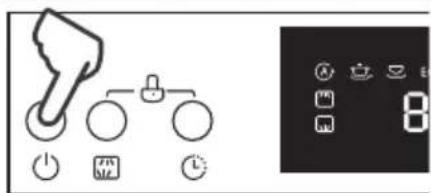
STLAČENÍM TLAČIDLA ON/OFF (ZAPNUTÉ/VYPNUTÉ) ZAPNITE SPOTREBIČ. OTVORTE DVIERKA..
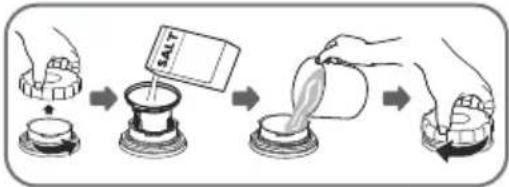
SKONTROLUJTE HLADINU REGENERAČNEJ SOLI
flowchart
graph LR
    A["Initial state"] --> B["Salt with a salt container"]
    B --> C["Extraction of salt into a container"]
    C --> D["Final state"]

POUŽÍVAJTE VŽDY SOL' URČENÚ PRE UMÝVAČKY RIADU.
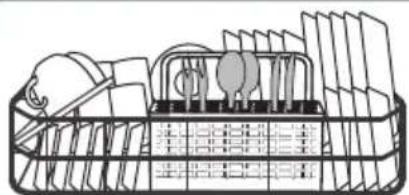
NAPLŇTE KOŠÍKY
natural_image
Illustration of a basket filled with items, including a tray holding a bag and a tray with a bag (no text or symbols)OŠKRABTE VÄCŠÍ KUSY ZVYŠKOV JEDLA. VKLADAJTE LEN RIAD VHODNÝ DO UMÝVAČKY RIADU.
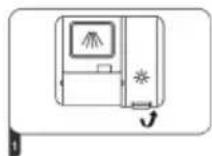
SKONTROLUJTE ÚROVEŇ LEŠTIACEHO PRÍPRAVKU
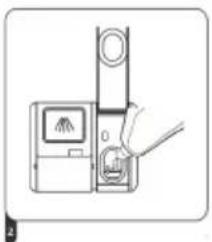
natural_image
Simple line drawing of a hand holding a device with a screen and button (no text or symbols)
LEŠTIACI PRÍPRAVOK, KTORÝ SA VYLEJE, VYTRITE ABSORPČNOU TKANINOU, ABY SA POČAS UMÝVANIA NETVORILA NADBYTOČNÉ PENA. NEZABUDNITE DAŤ VEKO SPÄŤ.
NAPLŇTE DÁVKOVAČ PRE PROSTRIEDOK NA UMÝVANIE
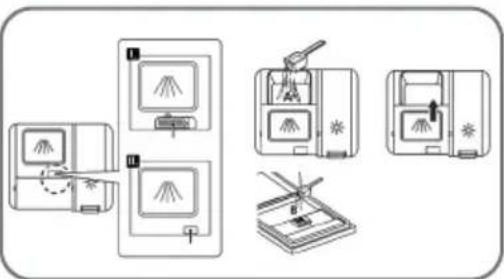
PRIEHRADKA A: PRE KAŽDÝ UMÝVACÍ CYKLUS
NA DVIERKA B: LEN PRE PROGRAMY S PREDMYTÍM
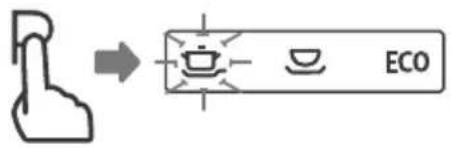
ZVOLTE PROGRAM
flowchart
graph LR
    A["Hand icon"] --> B["Container with ECO label"]
AUTO→INTENZÍVNY→
UNIVERZÁLNY→ EKO→
SKLO->90MIN→
RÝCHLY→ÓPLACH
SPUSŤTE UMÝVAČKU
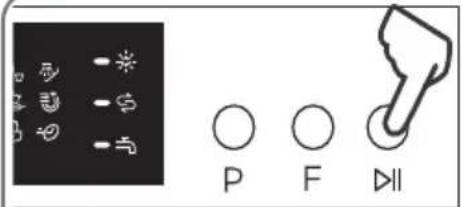
OTVORTE VODOVODNÝ KOHÚTIK A STLAČTE TLAČIDLO START / PAUSE
VYPNITE SPOTREBIČ
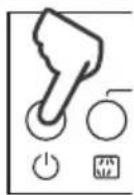
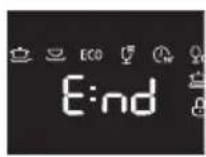
AK SÚ DVIERKA OTVORENÉ, NA DISPLEJI SVIETI END A ZAZNEL ZVUKOVÝ SIGNÁL, POTOM PROGRAM SKONČIL.
ZAVRITE VODOVODNÝ KOHÚTIK, VYLOŽTE KOŠÍKY
natural_image
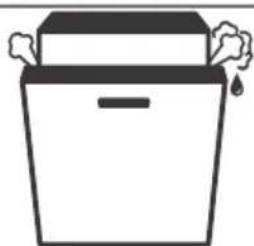
Simple line drawing of a box with a lid and two bubbles above it, no text or symbols present.NEŽ RIAD Z UMÝVAČKY VYBERIETE, MALI BY STE HO NECHAŤ ASI 15 MINÚT VYCHLADNÚŤ.
VYČISTITE FILTRE
natural_image
Diagram of a mechanical device with rotating components and an upward arrow, no text or symbols present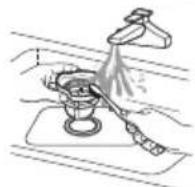
Po KAŽDOM POUŽITÍ UMÝVAČKY SKONTROLUJTE FILTRE, AK NIE SÚ UPCHATÉ.
OBSAH
SK - UMÝVAČKA RIADU
I. PRED POUŽITÍM SI PREČÍTAJTE VŠETKY POKYNY....38
II. LIKVIDÁCIA A EKOLÓGIA 41
III. PREVÁDZKOVÉ POKYNY 42
IV. PRED PRVÝM POUŽITÍM 43
V. VKLADANIE RIADU DO KOŠOV UMÝVAČKY PODĽA EN60436 49
VI. ZAPNUTIE SPOTREBIČA....55
VII. ÚDRŽBA A ČISTENIE ....58
VIII. POKYNY K INŠTALÁCII 61
IX. TIPY PRE RIEŠENIE PROBLÉMOV 64
X. TECHNICKÉ INFORMÁCIE....67
XI. STAROSTLIVOSŤ O ZÁKAZNÍKA A SERVIS 69
natural_image
Symbol of a trash bin crossed with no text or numbers, enclosed in a rounded square (no readable text)flowchart
graph LR
    A["Hand turning on a component"] --> B["Cut the part"]
    B --> C["Shipped into a container with a lid"]
    C --> D["Shipped into a container with liquid"]
    D --> E["Shipped into a container with a lid and lid"]
    E --> F["Final packaging or mixing"]
natural_image
Simple line drawing of a refrigerator with a window and indicator lights, no text or symbols present.natural_image
Line drawing of a hand inserting a device into a vertical panel with a screen and plug (no text or symbols)natural_image
Line drawing of a hand pressing down on a device with a slide and scroll, showing no text or symbols.C. UMÝVACÍ PROSTRIEDOK
natural_image
Simple line drawing of a door with a window and indicator lights, no text or symbols presentnatural_image
Diagram of a shopping cart with wheels and an arrow indicating direction (no text or symbols)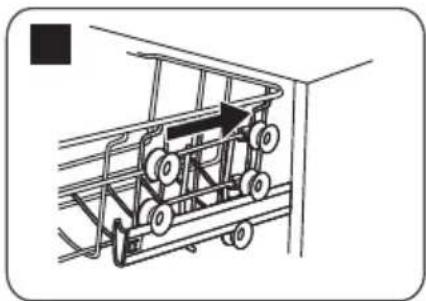
natural_image
Diagram of a mechanical cart with wheels and an arrow indicating direction (no text or symbols)Sklopenie hrotov a políc na šálky
natural_image
Diagram showing two stages of a mechanical or structural assembly, with no visible text or symbols.2. Spodný kôš
natural_image
3D rendering of a metal grate or rack structure with grid pattern and side connectors (no text or symbols visible)natural_image
3D rendering of a mechanical device with grid and control panel (no visible text or symbols)natural_image
Exterior view of a black plastic enclosure with grid pattern and side connectors (no text or symbols visible)natural_image
Technical diagram of a mechanical device with internal components and directional arrows indicating motion (no text or symbols)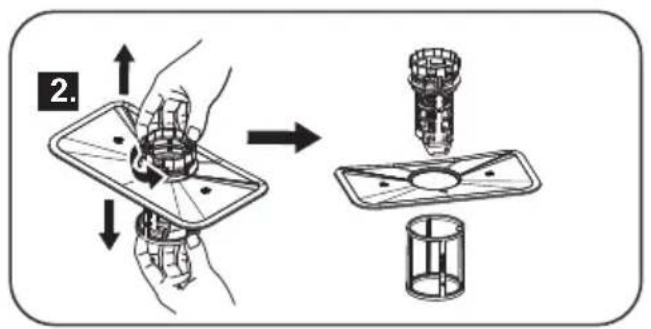
natural_image
Illustration of a hand using a tool to clean or spray liquid from a surface, with no text or symbols present.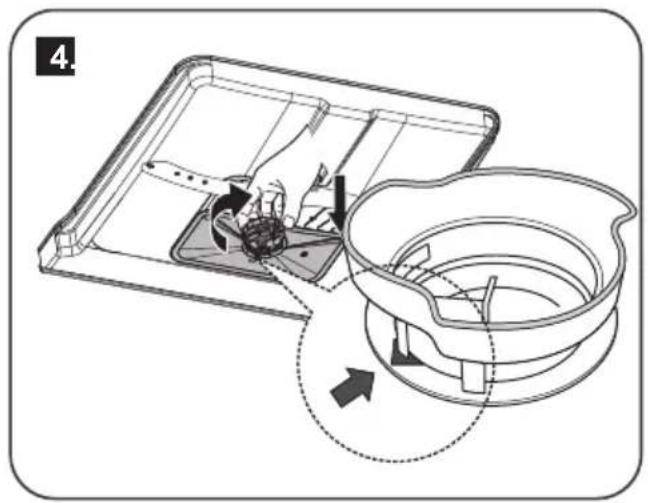
Čistenie filtrov
natural_image
Technical line drawing of a rectangular electronic device with internal components and mounting brackets (no text or symbols)Chráňte pred mrazom
natural_image
Pure mechanical diagram showing a vertical pipe or channel with circular components and directional arrows, no text or symbols present.natural_image
Line drawing of a faucet with handle and valve (no text or symbols)PRIPOJENIE VYPÚŠŤACEJ HADICE
natural_image
Technical line drawing of a mechanical assembly with a magnified inset showing a screw being inserted into a housing (no text or symbols)flowchart
graph LR
    A["Bottle Icon"] --> B["ECO"]
AUTO→INTENSIVE→
UNIVERSAL→ECO→
GLASS→90MIN→
RAPID→SOAK
START THE DISHWASHER
TURN ON THE WATER TAP
AND PRESS THE
START/PAUSE BUTTON.
SWITCH OFF THE APPLIANCE
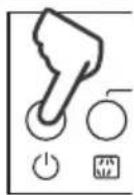
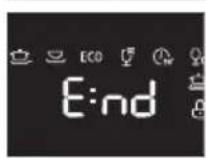
IF THE DOOR IS OPEN, END LIGHTS UP ON THE DISPLAY AND AN ACOUSTIC SIGNAL SOUNDS, THEN THE PROGRAM ENDS.
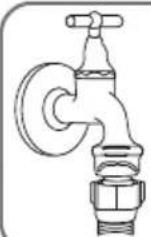
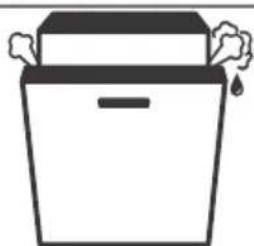
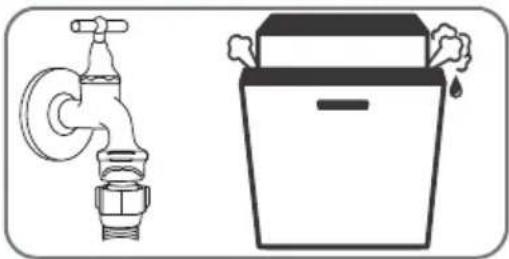
TURN OFF THE WATER TAP, UNLOAD THE BASKETS
natural_image
Simple line drawing of a box with a lid and two bubbles above it, no text or symbols present.YOU SHOULD ALLOW THE DISHES TO COOL FOR ABOUT 15 MINUTES BEFORE REMOVING THEM FROM THE DISHWASHER.
CLEAN THE FILTERS
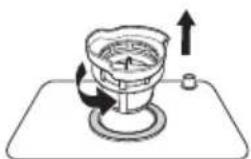
natural_image
Diagram of a mechanical device with rotating components and an upward arrow indicating motion (no text or symbols)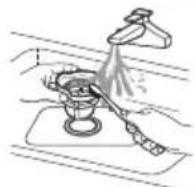
INSPECT THE FILTERS FOR BLOCKING AFTER EVERY TIME THE DISHWASHER HAS BEEN USED.
CONTENT
EN - DISHWASHER
I. IMPORTANT SAFETY INFORMATION ....72
II. DISPOSAL AND ECOLOGY ....75
III. OPERATION INSTRUCTION ....76
IV. PRIOR USING FOR THE FIRST TIME....77
V. LOADING THE DISHWASHER RACKS (EN 60436)......83
VI. TURNING ON THE APPLIANCE....89
VI. MAINTANCE AND CLEANING....92
VIII. INSTALLATION INSTRUCTION 95
IX. TROBLESHOOTING TIPS 98
X.TECHNICAL INFORMATION....101
XI. CUSTOMER CARE AND SERVICE....103
Please read this user manual
Dear Customer,
- Please read this User Information carefully and keep it to refer to at a late r date.
• Pass it on to any subsequent owner of the appliance. - This manual contains sections of Safety Instructions, Operating Instructions, Installation Instructions and Troubleshooting Tips etc.
- Carefully reading it before using the dishwasher will help you to use and maintain the dishwasher properly.
I. IMPORTANT SAFETY INFORMATION
READ ALL INSTRUCTION BEFORE USING
WARNING
When using your dishwasher, follow the below basic precautions including the following:
WARNING!
(valid for the appliances, connected to hot water)
Under certain conditions, Hydrogen gas may be produced in a hot-water system that has not been used for two weeks or more. HYDROGEN GAS IS EXPLOSIVE. If the hot-water system has not been used for such a period, before using the dishwasher turn on all hot-water faucets and let the water f low f rom each for sever al minutes. This will release any accumulated hydrogen gas. As the gas is flammable, do not smoke or use an open flame during this time.
PROPER USE
- Do not abuse, sit on, or stand on the door or dish rack of the dishwasher
- Do not touch the heating element during or immediately after use
- Do not operate your dishwasher unless all enclosure panels are properly in place. Open the door very carefully if the di shwasher is operating. There is a risk of water squirting out.
- Do not place any heavy objects on the door when it is open, or the appliance could tip forward.
When loading items to be washed:
- Locate sharp items so that they are not likely to damage the door seal;
- Load sharp knives with the handles up to reduce the risk of cut-type injuries;
WARNING
knives and other utensils with sharp points must be loaded in the basket with their points down or placed in a horizontal position.
- When using your dishwasher, you should prevent plastic items from contacting with heating element.
- Check that the detergent receptacle is empty after completion of the wash cycle.
- Do not wash plastic items unless they are marked dishwasher safe or the equivalent. For plastic items not so marked, check the manufacturer's recommendations.
- Use only detergent and rinse additives designed for an automatic dishwasher. Never use soap, laundry detergent, or hand washing detergent in your dishwasher.
- Keep children away from detergent and rinse aid, keep children away from the open door of the dishwasher, there could still be some detergent left i nside.
- Young children should be supervised to ensure that they do not play with the appliance.
- The appliance is not intended for use by young children or infirm persons without supervision.
- Dishwasher detergents are strongly alkaline. They can be extremely dangerous if swallowed. Avoid contact with skin and eyes and keep children away from the dishwasher when the door is open.
- The door should not be left in the open position since this could present a tripping hazard.
• This dishwasher is designed for normal household and indoor use.
- If the supply cord is damaged, it must be replaced by the manufacturer or its service agent or a similarly qualified person in order to avoid a hazard.
- Please dispose of packing materials properly.
- Use the dishwasher only for its intended function.
- During installation, the power supply must not be excessively or dangerously bent or flattened.
- Do not tamper with controls.
- The appliance is to be connected to the water mains using new hose sets and the old hose-sets should not be reused.
- This appliance is not intend for use by persons(include children) with reduced physical, sensory or mental capabilities, or lack of experience and knowledge, unless they have been given supervision or instruction concerning use of the appliance by a person responsible for their safety
- Please unplug before cleaning the appliance.

WARNING!
This appliance must be earthed. Improper connection of the equipment's ground wire can lead to the risk of electric shock.

WARNING: Do not use this product near water, in wet areas to avoid fire or injury of electric current. Always turn off the product when you don't use it or before a revision. There aren't any parts in this appliance which are reparable by consumer. Always appeal to a qualified authorized service. The product is under a dangerous tention.
READ AND FOLLOW THIS SAFETY INFORMATION CAREFULLY SAVE THESE INSTRUCTIONS
II. DISPOSAL AND ECOLOGY
We did our best to reduce the amount of packaging and ensure that they are easily divided into 3 materials: cardboard, pulp and stretched polyethylene. This appliance contains materials that can be recycled by a specialist company after disassembly. Please observe the local regulations regarding the handling of packaging materials, discharged batteries and old equipment.
- Do not dispose this product as unsorted municipal waste.
• Collection of such waste separately for special treatment is necessary. - Dispose of the dishwasher packaging material correctly.
- All packaging materials can be recycled.
- Plastic parts are marked with the standard international abbreviations:
PE for polyethylene, e.g. sheet wrapping material
PS for polystyrene, e.g. padding material
POM polyoxymethylene, e.g. plastic clips
PP polypropylene, e.g. Salt filler
ABS Acrylonitrile Butadiene Styrene, e.g. Control Panel.
WARNING!
Packaging material could be dangerous for children!
- For disposing of package and the appliance please go to a recycling centre.
• Therefore cut off the power supply cable and make the door closing device unusable. - Cardboard packaging is manufactured from recycled paper and should be dis posed in the waste paper collection for recycling.
- By ensuring this product is disposed of correctly, you will help prevent potential negative consequences for the environment and human health, which could otherwise be caused by inappropriate waste handling of this product.
- For more detailed information about recycling of this product, please contact your local city office and your household waste disposal service.
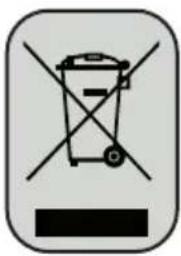
This symbol appearing on the product, on the product accessories or on the product packing means that the product must not be disposed as household waste. When the product/ battery durability is over, please, deliver the product or battery (if it is enclosed) to the respective collection point, where the electrical appliances or batteries will be recycled. The places, where the used electrical appliances are collected, exist in the European Union and in other European countries as well. By proper disposal of the product you can prevent possible negative impact on environment and human health, which might otherwise occur as a consequence of improper manipulation with the product or battery/ accumulator. Recycling of materials contributes to protection of natural resources. Therefore, please, do not throw the old electrical appliances and batteries/ accumulators in the household waste. Information, where it is possible to leave the old electrical appliances for free, is provided at your local authority, at the store where you have bought the product. Information, where you can leave the batteries and accumulators for free, is provided to you at the store, at your local authority.
To get the best performance from your dishwasher, read all operating instructions before using it for the first time.
Control Panel
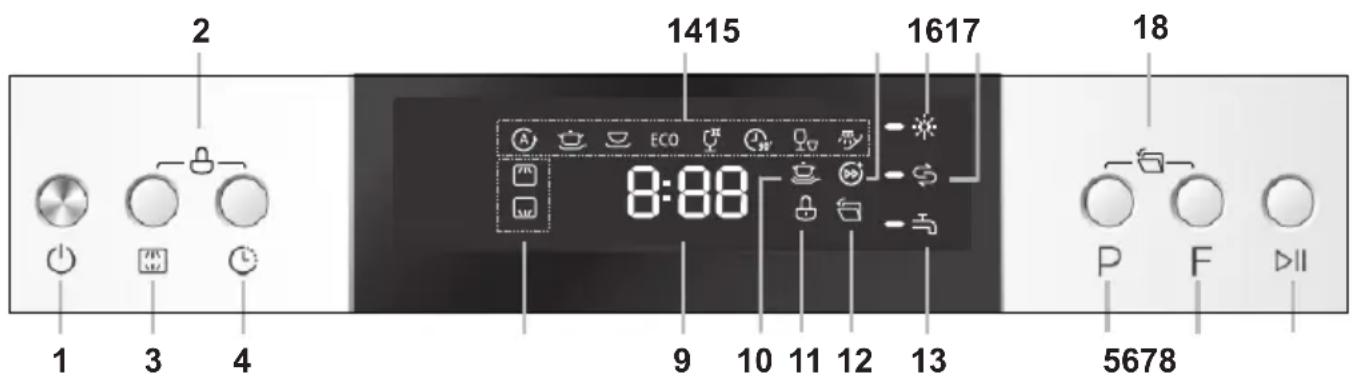
BUTTONS:
- On/Off to switch On/Off the appliance.
- Child lock function: press Delay button and Alt button simultaneously to lock the program.
- Dual zone wash, press the button to select either upper basket or lower basket loaded.
- Delay start: Press the button to add the delay time.
- Program: Press the button to select appropriate Program.
- Function button: To select Extra cleaning or Express+. Additional functions can be used in the washing programs First select the washing program and than the additional function.
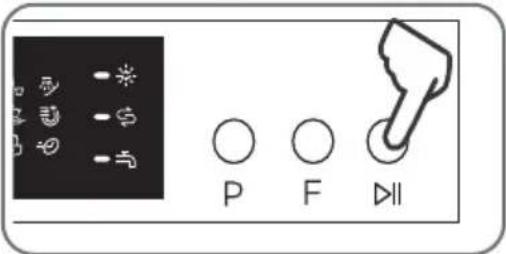
- Start /Pause: To start the selected washing program or pause the washing program when the machine is working starting up or not.
INDICATOR:
- Zone wash Upper spray indicator and Lower spray indicator.
- Display screen: to show the reminding time and delay time, error codes etc.
- Power wash To wash very dirty, hard to clean dishes.(It can only be used with Intensive, Universal, ECO, Glass, 90 min).
- Child lock indicator.
- Auto open after washing, the door will open automatically to achieve better drying effect (It can only be used with Auto, Intensive, Universal, ECO, Glass, 90 min).
- Water faucet indicator (showing weak or no water pressure at the inlet of the dishwashing machine).
- Program indicator: to show program which you have chose.
- Express+ indicator, activate in case you need to decrease the washing time of the selected washing program. (It can only be used with Intensive, Universal, ECO, Glass, 90 min)
- Rinse Aid indicator: Indicates when the dispenser needs to be refilled.
- Add salt indicator: Indicates when the dispenser needs to be refilled.
- Press the P and F buttons together to (de)activate automatic opening.
Dishwasher Features
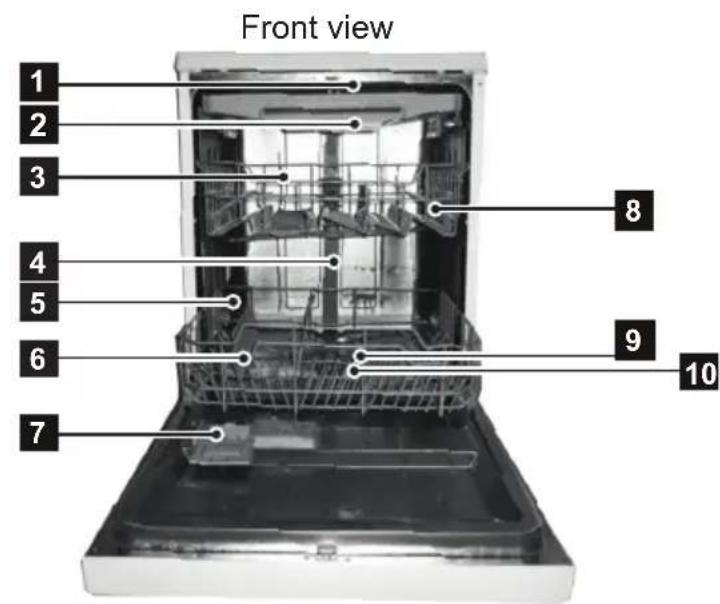
- Top spray arm
- Cutlery rack
- Upper basket
- Inner pipe
- Lower basket
- Salt container
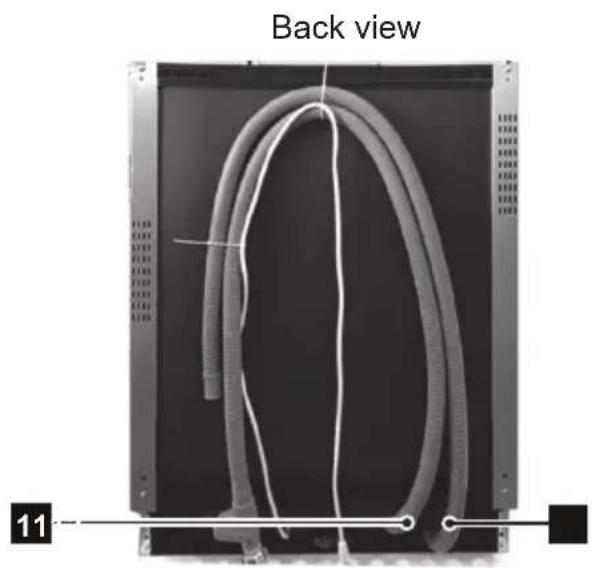
natural_image
Back view of a black electronic device with coiled cable and ventilation slots (no text or symbols visible)- Dispenser
- Cup shelf
- Spray arms
- Filter assembly
- Inlet pipe connector
- Drain pipe
IV. PRIOR USING FOR THE FIRST TIME
Before using your dishwasher for the first time
- Set the water softener
- Add 1.5 Kg dishwasher salt and then full fill the salt container with water
• Fill the rinse aid dispenser - Fill in detergent
A. WATER SOFTENER
- The water softener must be set manually, using the water hardness dial.
- The water softener is designed to remove minerals and salts from the water, which would have a detrimental or adverse effect on the operation of the appliance. The higher the content of these minerals and salts, the harder your water is. The softener should be adjusted according to the hardness of the water in your area. Your local Water Authority can advise you on the hardness of the water in your area.
Adjusting Salt Consumption
The dishwasher is designed to allow for adjustment in the amount of salt consumed based on the hardness of the water used. This is intended to optimise and customise the level of salt consumption.
- Close the door, switch on the appliance;
- Within 60 seconds after the appliance was switched on press the PROGRAM button (5) for more than 5 seconds to start the water softener set model. The display shows H3.
- Press the PROGRAM button (5) to select the proper set according to your local environment, the sets will change in the following sequence: H3>H4>H5>H6>H1>H2>H3
- Press the POWER button (1) to end the setting mode.
| Water Hardness level | Digital display stalls | Salt consumption (gram/cycle) | Regeneration occurs every x programme sequence3) | |
| °dH1) | mmol/P2) | |||
| 0 – 5 0 – | 0.9 H1 0 OFF | |||
| 6 – 11 1.0 | – 2.0 H2 9 10 | |||
| 12 – 17 2.1 | – 3.0 H3* 12 5 | |||
| 18 – 22 3.1 | – 4.0 H4 20 3 | |||
| 23 – 34 4.1 | – 6.1 H5 30 2 | |||
| 35 – 55 6.2 | – 8.0 H6 60 1 | |||
^1) German degree of measurement for the water hardness
2) millimol, international unit for water hardness
*) factory setting
3) Every cycle with a regeneration operation consumes additional 2 litres of water, the energy consumption increases by 0.02 kWh and the programme extents by 4 minutes.
Water softener
- The hardness of the water varies from place to place.
- If hard water is used in the dishwasher, deposits will from on the dishes and utensils.
- The appliance is equipped with a special softener that uses a salt specifically designed to eliminate lime and minerals from the water.
Loading the Salt into the Softener
• Always use salt intende d for use with dis hwasher.
- The salt container is located beneath the rack and should be filled as follows:
ATTENTION!
Only uses alt specifically designed for use in dishwa shers! All other types of salt not specifically designed for use in a dishwas her, especially tablesalt, will damage the water softener. In case of damage s ca used by the use of unsui tabl e salt the manuf acturer does not give any warranty or is liable for any cause damages. Only fill withs alt just before starting one of the complete washing programmes. This will prevent any grains of salt or salty water, which may have been split, remai ni ng of the bottom of the machine for any period of time, which may cause corrosion. After the first wash cycle the control panel light expires .
WARNING:
if salt is not added, it will cause poor cleaning effect of dishes, and will produce scale.
flowchart
graph LR
    A["Hand pressing on lid"] --> B["Add liquid into container"]
    B --> C["Add liquid into lid"]
    C --> D["Hearts to hold lid with liquid and arrow indicating rotation"]
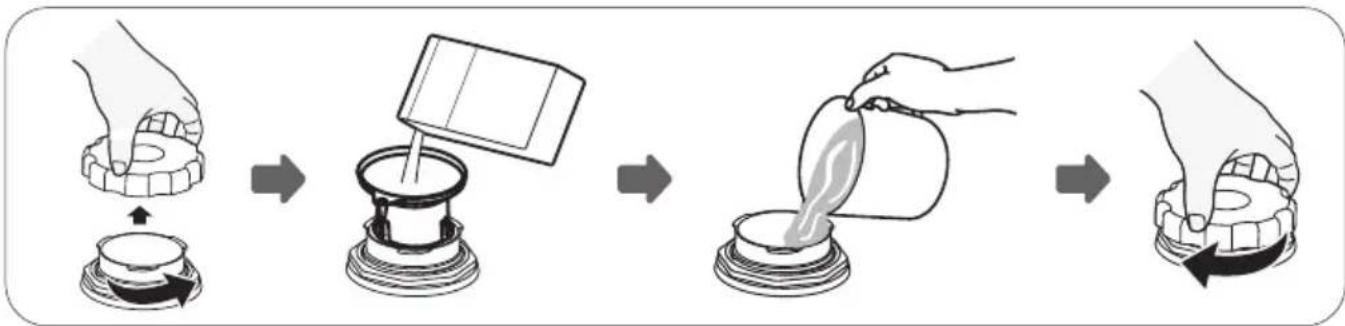
- After the lower basket has been removed, unscrew and remove the cap from the salt container.
- Place the end of the funnel (supplied) into the hole and introduce about 1.5 kg of dishwasher salt.
- Full fill the salt container with water, It is normal for a small amount of water to come out of the salt container.
- After filling the container, screw the cap tightly back clockwise.
- The salt warning light will stop being after the salt container has been filled with salt.
- Immediately after filling the salt into the salt container, a washing program should be started (We suggest to use a short program). Otherwise the filter system, pump or other important parts of the machine may be damaged by salty water. This is out of warranty.
NOTE
- The salt container must be refilled when the salt warning light in 1. the control panel comes on. Though the salt container is filled enough, the indicator light may not black out before the salt fully dissolve. If there is no salt warning light in the control panel (for some models), you can judge when to load the salt into the softener by the cycles that the dishwasher had run (see the foregoing schema).
- If there are spills of the salt, a soak program could be run to wipe them out.
B. RINSE AID
Function of Rinse Aid
Rinse aid is automatically added during the last rinse, ensuring thorough rinsing, and spot and streak free drying. It also improves drying by allowing water to roll off the dishes.
ATTENTION!
Only use branded rinse aid for dishwasher. Never fill the rinse aid dispenser with any other substances (e.g. dishwasher cleaning agent, liquid detergent). This would damage the appliance.
Rinse Aid Dispenser
Your dishwasher is designed to use liquid rinse aids. The rinse aid dispenser is located inside the door next to the detergent dispenser. To fill the dispenser, open the cap and pour the rinse aid into the dispenser until the level indicator turns completely black. The volume of the rinse aid container is about 110 ml.
When to Refill the Rinse Aid Dispenser
- If there is rinse-aid warning light in the control panel.et below 1/4 full.
- As the rinse aid diminishes, the size of the black dot on the rinse aid level indicator changes, as illustrated below.
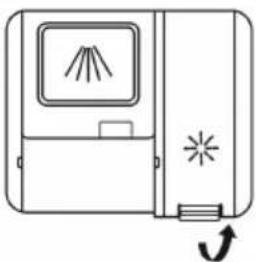
natural_image
Simple line drawing of a device with a screen, fan, and starburst symbol (no text or labels)1 Remove the rinse reservoir cap by lifting up the handle.
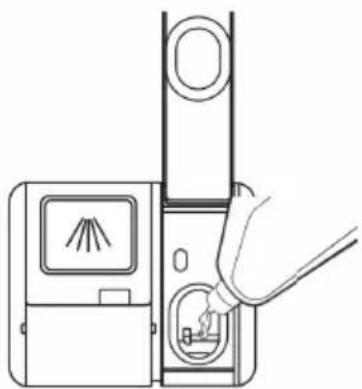
natural_image
Line drawing of a hand inserting a device into a device with a screen and plug (no text or symbols)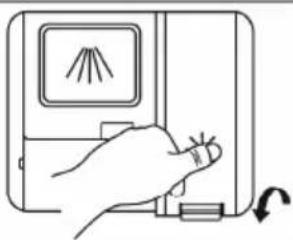
natural_image
Hand holding a device with a screen and scroll, no visible text or symbols3 Close the cap after all.
2 Pour the rinse aid into the dispenser, being careful not to overfill.
ATTENTION!
Clean up any rinse aid split during filling with an absorbent cloth to avoid excess foaming during the next wash.
Adjusting rinse aid dispenser
ADJUSTING RINSE AID DISPENSER
Follow the below steps:
- Close the door, switch on the appliance.
- Within 60 seconds after step 1, press the PROGRAM button (5) more than 5 seconds, the hardness setting H will appear on the display. Then press the DELAY button (4) to enter the set mode, The display will show d3.
- Press the PROGRAM button (5) to select the proper set according to your using habits, the sets will change in the following sequence: d3>d4>d5>d1>d2>d3.
The higher the number, the more rinse aid the dishwasher uses. - Without operation in 5 seconds or press the POWER button (1) to exit the set mode, the set success.
NOTE
Increase the dose if there are drops of water or lime spots on the dishes after washing. Reduce it if there are sticky whitish streaks on the dishes or a bluish film on glassware or knife blades.
C. DETERGENT
Detergents with its chemical ingredients are necessary to remove dirt, crush dirt and transport it out of the dishwasher. Most of commercial quality detergents are suitable for this purpose.
Proper Use of Detergent
- Use only detergent specifically made f or use in dishwashers. Keep your detergent fresh
- and dry. Don't put powder detergent into the dispenser until you're ready to wash dishes.
WARNING:
If the washing powder is not added, the washing effect will be poor, resulting in increased water and electricity consumption for secondary washing
Detergents
There are 3 sorts of detergents:
- With phosphate and with chlorine
- With phosphate and without chlorine
- Without phosphate and without chlorine
Normally new pulverised detergent is without phosphate. Thus the water softener function of phosphate is not given. In this case we recommend to fill salt in the salt container even when the hardness of water is only 6^ dH. If detergents without phosphate are used in the case of hard water often white spots appear on dishes and glasses. In this case please add more detergent to reach better results. Detergents without chlorine do only bleach a little.
Strong and coloured spots will not be removed completely. In this case please choose a program with ahighertemperature.
Coccentrated Detergent
Based on their chemical composition, dishwasher can be split in two basic types:
• conventional, alkaline detergents with caustic components
- low alkaline concentrated detergents with natural enzymes
Detergent tablets
Detergent tablets of different brands dissolve at different speeds. For this reason some detergent tablets cannot dissolve and develop their full cleaning power during short programmes. Therefore please use long programmes when using detergent tablets, to unsure the complete removal of detergent residuals.
Detergent dispenser
The dispenser must be refilled before the start of each wash cycle following the instructions provided in the Wash Cycle Table? Your dishwashers use less detergent and rinse aid then conventional dishwashers. Generally, only one tablespoon of detergent is needed for a normal wash load. Also, more heavily soiled items need more detergent. Always add the detergent just before starting dishwasher, otherwise it could get damp and will not dissolve properly.
WARNING!
Dishwasher detergent is corrosive! Take care to keep it out of reach of children.
Fill in detergent
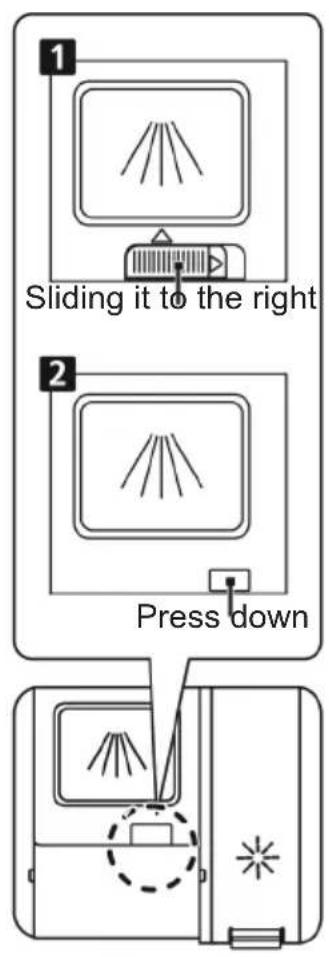
flowchart
graph TD
    A["1: Sliding it to the right"] --> B["2: Press down"]
    B --> C["3: Display with rays"]
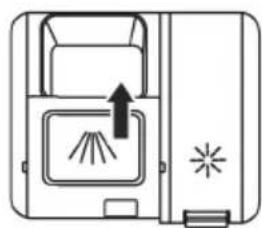
1 Please choose an open way according to the actual situation.
- Open the cap by sliding the release catch.
- Open the cap by pressing down the release catch.
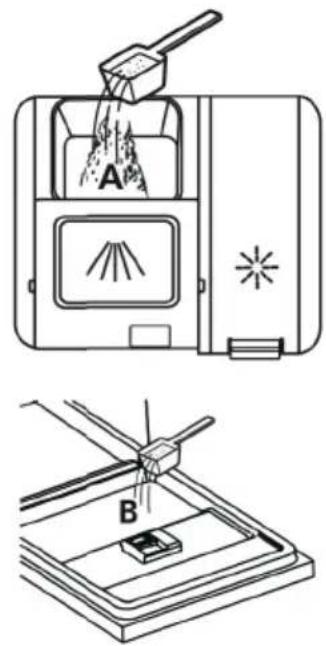
2 Add detergent into the larger cavity (A) for the main wash cycle. For better cleaning result, especially if you have very dirt items, pour a small amount
natural_image
Diagram of a device with a slide and screen, showing light rays and a lightning bolt (no text or symbols)3 Close the flap by sliding it to the front and then pressing it down.
- Please observe the manufacturer dosing and storage recommendations as stated on the detergent packaging.
- Close the lid and press until it locks in place.
- If the dishes are heavily soiled, place an additional detergent dose in the pre-wash detergent chamber. This detergent will take effect during the pre-wash phase.
WARNING:
If the washing powder is not added, the washing effect will be poor, resulting in increased water and electricity consumption for secondary washing
Note
You find information about the amount of detergent for the single programmes on the last page. Please aware, that according to the level soiling and the specific hardness of water differences are possible.
V. LOADING THE DISHWASHER RACKS (EN 60436)
For best performance of the dishwasher, follow these loading guidelines. Features and appearance of racks and silverware baskets may vary from your model.
Recommendation
- Consider buying utensils which are identified as dishwasher-proof.
- Use a mild detergent that is described as 'kind to dishes'. If necessary, seek further informat on from the detergent manufacturers.
- For particular items, select a program with as low a temperature as possible.
- To prevent damage, do not take glass and cutlery out of the dishwasher immediately after the programme has ended.
Attention before or after Loading the Dishwasher Racks
Scrape off any large amounts of leftover food. It is not necessary to rinse the dishes under running water. Place objects in the dishwasher in following way:
- Items such as cups, glasses, pots/pans, etc. are stood upside down.
- Curve items, or those with recesses, should be at a slant so that water can run off.
• They are stacked securely and can not tip over.
• They do not prevent the spray arms from rotating while washing takes place. - Very small items should not be washed in the dishwasher as they could easily fall out of the racks.
WARNING:
If tableware placement is not standard, it will cause poor cleaning effect
Loading the Rack
1. Upper Basket
The upper basket is designed to hold more delicate and lighter dishware such as glasses, coffee and tea cups and saucers, as well as plates, small bowls and shallow pans (as long as they are not too dirty). Position the dishes and cookware so that they will not get moved by the spray of water.
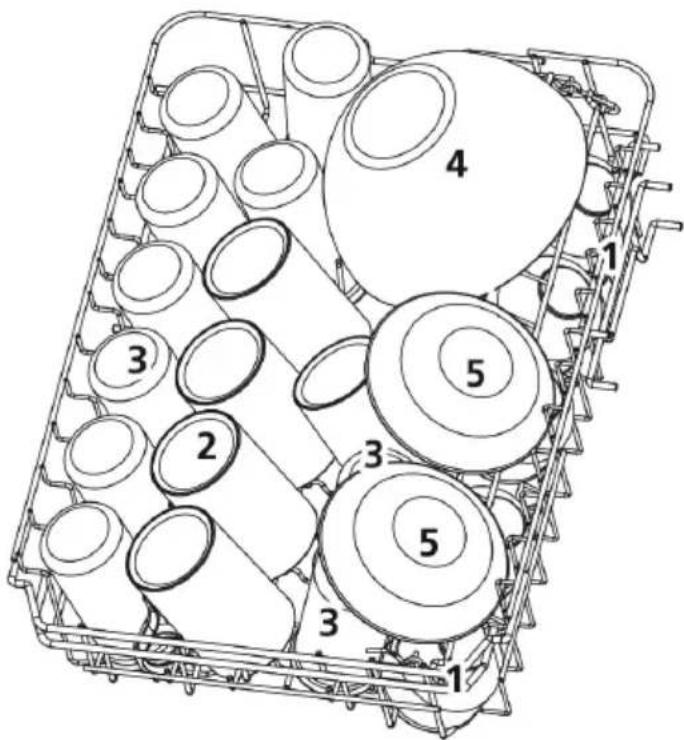
| Dishes | |
| 1 Cup | |
| 2 Saucer | |
| 3 Glass | |
| 4 Glass bowl | |
| 5 Desert bowl |
Adjusting the Upper Basket
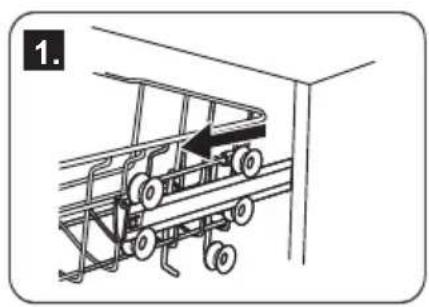
The height of the upper basket can be adjusted in order to create more space for large utensils both for the upper/lower basket. The height of the upper basket can be adjusted by placing the wheels on different height of the rails. 1. Lower position, 3. Upper position. Long items, serving cutlery, salad servers and knives should be placed on the shelf so that they do not obstruct the rotation of the spray arms.
natural_image
Diagram of a mechanical lifting device with wheels and a black arrow indicating direction (no text or symbols)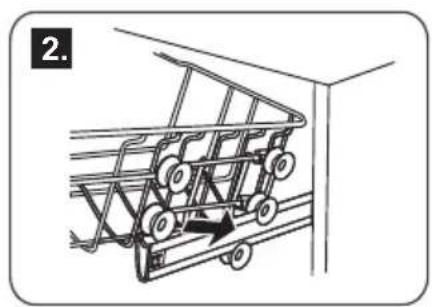
natural_image
Line drawing of a shopping cart with wheels and an arrow indicating motion (no text or symbols)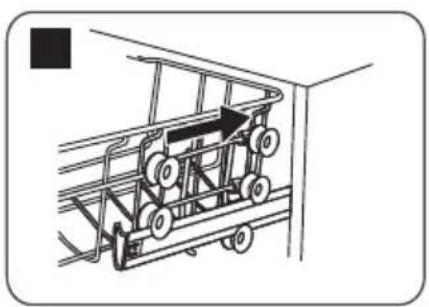
natural_image
Diagram of a mechanical cart with wheels and an arrow indicating direction (no text or symbols)Folding back the cup shelves
For better stacking of pots and pans, the spikes can be folded down as showin the picture right.
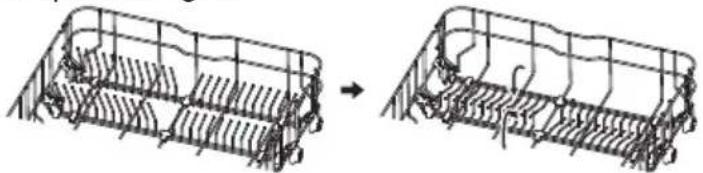
natural_image
Diagram showing two stages of a fish jumping from a cage-like structure to a fish-filled cage (no text or symbols present)2. Lower Basket
We suggest that you place large items and the most difficult to clean items are to be placed into the lower basket: such as pots, pans, lids, serving dishes and bowls, as shown in the figure below. It is preferable to place serving dishes and lids on the side of the racks in order to avoid blocking the rotation of the top spray arm.
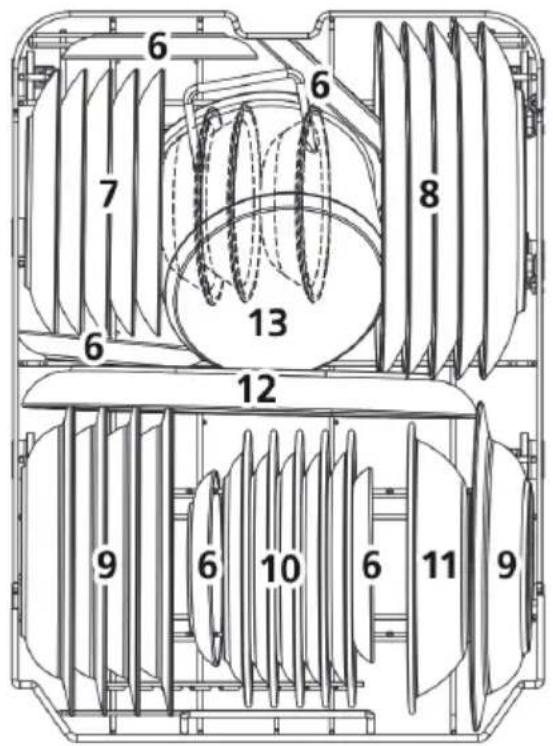
| Dishes | |
| 6 Oven pot | |
| 7 Dessert plate | |
| 8 Dinner plate | |
| 9 Soup plate | |
| 10 Oval plate | |
| 11 Melamine dessert plate | |
| 12 Melamine bowl | |
| 13 Glass bowl |
Please be reminded that:
- Pots, serving bowls, etc, must always be placed topdown.
- Deep pots should be slanted to allow water to flow out.
- The Bottom Basket features folding spikes so that larger or more pots and pans can be loaded.
3. Cutlery rack
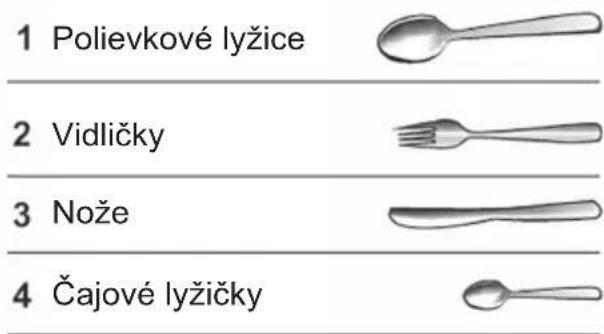
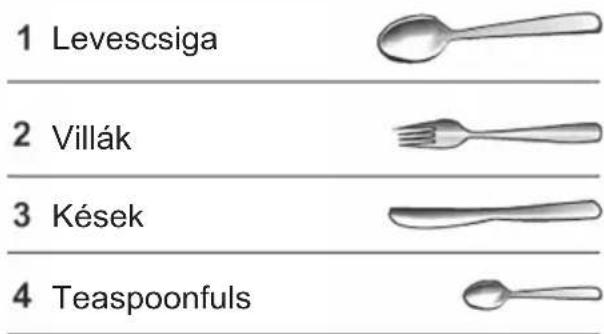
Cutlery should be placed in the cutlery rack separately from each other in the appropriate positions, and do make sure the utensils do not nest together, this may cause bad performance.
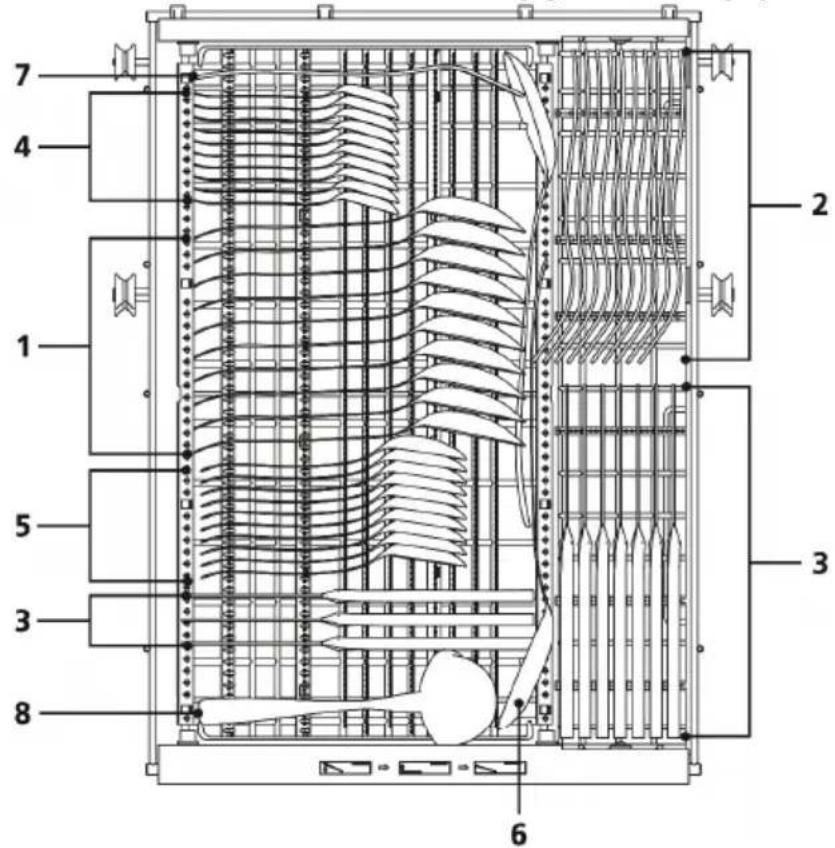
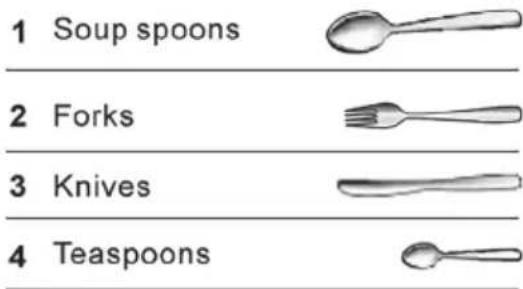
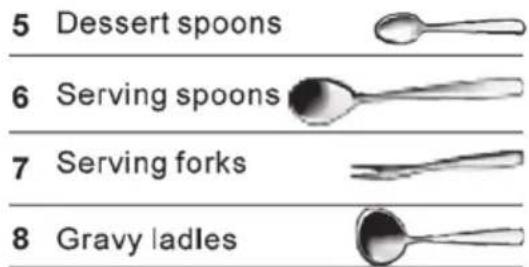
Information for comparability tests in accordance with EN 60436
Capacity: 10 place settings
Position of the upper basket: lower position
Programme: ECO
Rinse aid setting: MAX
Softenersetting: H3
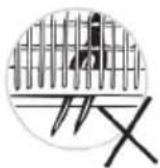
WARNING!
Do not let any item extend through bottom.
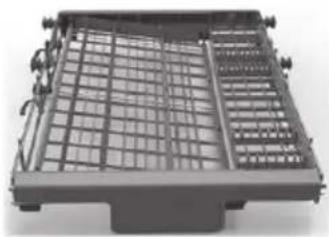
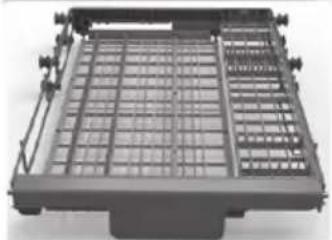
Cutlery basket could be have 2 positions
Mode 1
natural_image
3D rendering of a metal grate or rack structure with grid pattern and side connectors (no text or symbols visible)Position one: lift the left basket up, the left basket is sideling.
Mode 2
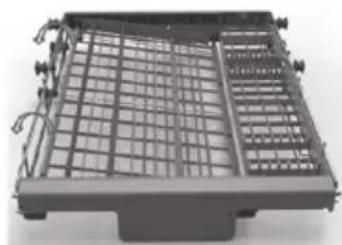
natural_image
3D rendering of a mechanical device with grid and control panel (no visible text or symbols)Position two: adjust the left basket to lower position, and the left basket is flat.
natural_image
Exterior view of a black plastic enclosure with grid pattern and side connectors (no text or symbols visible)For washing in the dishwasher the following cutlery/dishes
Are not suitable
- Cutlery with wooden, horn china or mother-of-pearl handles
- Plastic items that are not heat resistant
- Older cutlery with glued parts that is not temperature resistant
- Bonded cutlery items or dishes
- Pewter or cooper items
- Lead crystal glass
• Steel items subject to rusting - Wooden platters
- Items made from synthetic fibres
Are of limited suitability
- Some types of glasses can become dull after a large number of washes
• Silver and aluminium parts have a tendency to discolour during washing - Glazed patterns may fade if machine washed frequently
Note
- Do not put in items that are dirty of cigarette ash, candle wax, lacquer or paint.
- If you buy new dishes please make sure that they are suitable for dishwashers.
- Please do not overload your dishwasher.
- Do not use dish that is not suitable for dishwashers. This is important for good results and for reasonable energy consume.
Damage to glassware and other dishes
Possible causes
- Type of glass or manufacturing process. Chemical composition of detergent.
• Water temperature and duration of dishwasher programme.
Suggested remedy
- Use glassware or porcelain dishes that have been marked di shwasher-proof by the manufacturer
- Use a mild detergent that is described as kind of dishes If necessary, seek further information from detergent manufacturers.
- Select a program me with as low a temperature.
- To prevent damage, take glass and cutlery out of the di shwasher as soon as possible after the programme has ended.
VI. TURNING ON THE APPLIANCE
Saving energy
- Pre-rinsing of tableware items leads to increased water and energy consumption and is not recommended.
- Washing tableware in a household dishwasher usually consumes less energy and water in the use phase than hand dishwashing when the household dishwasher is used according to the instructions.
Starting a cycle wash
- Draw out the basket, load the dishes and push them back.
- Pour in the detergent (see the section e`ntitled Salt, Detergent and Rinse Aid).
- Insert the plug into the socket. The power supply is 220–240 V AC / 50 Hz, the specification of the socket is 10 A 250 V AC. Make sure that the water supply is turned on to full pressure.
- Close the door, press the ON/OFF button, and the ON/OFF light will turn on.
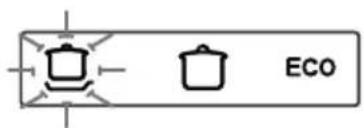
- Press the program button. If a program is selected, the response light will light. Then press the START/PAUSE button, the dishwasher begins to wash.
WARNING!
When you press the START/PAUSE button to pause during washing, the program light will stop blinking and the dishwasher will mooing every minute unless you press the START/PAUSE button to start.
Change the Programme
- You can modified the washing program, just the dishwasher has been running for a short time. Otherwise, the detergent may have already been released, and the appliance may have already drained the wash water. If this is the case, the detergent dispenser must be refilled (see the section entitled “Loading the Detergent”).
- Press the Start/Pause button to pause the washing. Press Program button for more than 3 seconds - the program will cancel. Press the Program button to select the desired program. Press the Start/Pause button, after 1 seconds, the dishwasher will start.



NOTE
If you open the door during a wash cycle, the machine will pause. The program light will stop blinking and the buzzer will mooing every minute unless you close the door. After you close the door, the machine will keep on working after 10 seconds.
- If your model has broken remember function, the machine will go on to finish the selected program afterthe powercut.
Wash cycle table
* Means: need to fill rinse into the Rinse-Aid Dispenser
| Program | Cycle Selection Information | Description of Cycle |
 | Auto sensing wash, lightly, normally or heavily soiled crockery, with or with out dried-on food. | Pre-wash (45°C)Autowash (45-55°C)RinseRinse (60°C)Drying |
Intensive | For heaviest soiled crockery and normally soiled pots, pans, dishes etc with dried on soiling. | Pre-wash(50°C)Wash(65°C)RinseRinseRinse(60°C)Drying |
Universal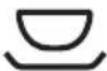 | For normally soiled loads such as pots, plates, glasses and lightly soiled pans. | Pre-wash(45°C)Wash(55°C)RinseRinse(55°C)Drying |
| ECO(*EN 60436) | This is standard programme, it is suitable to clean normally soiled tableware and it is the most efficienr programme in terms of its combiened energy and water consumption for that type of tableware. | Wash(50°C)RinseRinse(45°C)Drying |
Glass | For lightly soiled crockery and glass | Pre-washWash(50°C)RinseRinse(50°C)Drying |
90 minut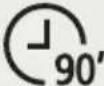 | For normally soiled loads that need quick wash. | Wash(60°C)RinseRinse(50°C)Drying |
Rapid | A shorter wash for lightly soiled loads that do not need drying. | Wash(45°C)Rinse(45°C) |
Soak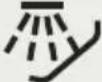 | To rinse dishes that you plan to wash later that day. | Prewash |
Note: ECO (*EN60436) – The ECO program is suitable to clean normally soiled tableware, that for this use, it is the most efficient program in terms of its combined energy and water consumption, and it is used to assess compliance with the EU ecodesign legislation.
| Detergent pre/main | Running time (min) | Energie (kWh) | Water (l) | Rinse Aid | |
| 4/14 g (Or 3 in 1) | 85-150 | 0,790 ~ 1,510 | 9,8 ~ 13,1 | * | |
| 4/14 g (Or 3 in 1) | 205 1,010 | 14,7 | * | ||
| 4/14 g (Or 3 in 1) | 175 0,920 | 11,1 | * | ||
| 4/14 g (Or 3 in 1) | 208 0,593 | 8,0 | * | ||
| 4/14 g (Or 3 in 1) | 120 0,910 | 11,2 | * | ||
| 18 g (Or 3 in 1) | 90 1,120 | 9,6 | * | ||
| 12 g 30 0,810 | 9,9 | ||||
Forget to Add a Dish?
A forgotten dish can be added any time before the detergent cup opens.
- Press the start/pause button.
- Open the door a little to stop the washing.
- After the spray arms stop working, you can open the door completely.
- Add forgotten dishes.
- Close the door.
- Press the start/pause button. The dishwasher will work after ten seconds.
WARNING!
It is dangerous to open the door when washing, because the hot water may scald you.
At the end of the wash cycle
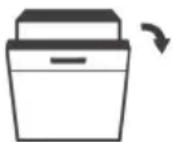
Your dishwasher is equipped with the AUTO OPEN optional function (automatic door opening at the end of the washing program). This function has a positive effect on the drying efficiency of the dishes in the last phase of the washing program. It can only be used with Auto, Intensive, Universal, ECO, Glass, 90 min by pressing the P and F buttons together.
The door opens automatically in the last drying phase - a few minutes before the end of the washing program. They open approximately 75 to 150 mm from the closed door position, so it is necessary to keep enough space in front of the dishwasher during the use of the dishwasher, so that at the end of the program (when opening automatically door lock) did not damage the door lock and the entire opening mechanism.
- Do not remove the dishes from the dishwasher immediately after opening the door (the drying phase is still in progress) - but only after the end of the program.
- The dishwasher will switch off automatically 15 minutes after the end of the program.
• After the dishwasher switches off automatically, turn off the water supply.
Unloading the dishwasher
- It is normal that the dishwasher is wet inside.
• Hot dishes are sensitive to shocks.
You should allow the dishes to cool for about 15 minutes before removing them from the dishwasher.
- Empty the lower basket first and then the upper one. This will avoid water dripping from the upper Basket onto the dishes in the lower one.
VI. MAINTANCE AND CLEANING
Filtering System
- The filter prevent larger remnants of food or other objects from getting inside the pump. This residue can occasionally clog up the filters.
- The filter system consists of a coarse filter, a flat (Main filter) and a microfilter (Fine filter).
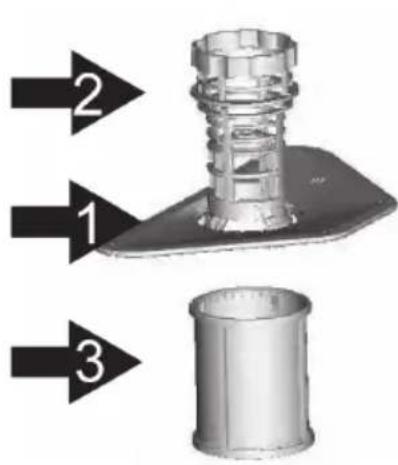
1 - Main filter
Food and soil particles trapped by this filter are pulverized by a special jet on the lower spray arm and washed down the drain.
2 - Coarse filter
Larger items, such as pieces of bones or glass, that could block the drain are trapped in the coarse filter. To remove the items caught by the filter, gently squeeze the tap on the top of this filter and lift out.
3 - Fine filter
This filter holds soil and food residues in the sumparea and prevents it from being redeposit on the dishes during wash cycle.
Filter assembly
- For best performance and results, the filter assembly must be cleaned.
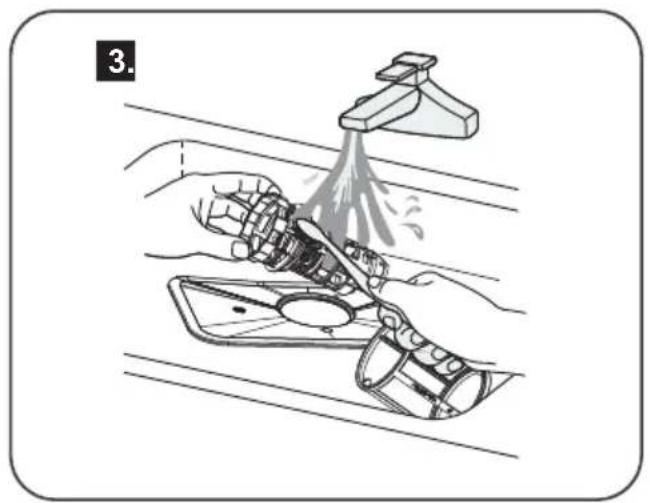
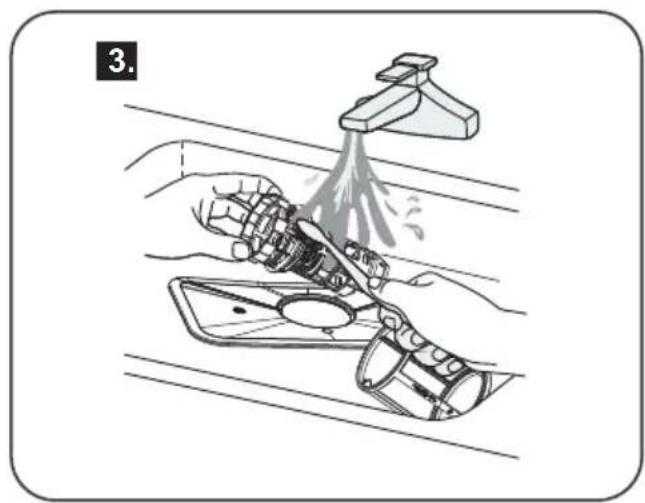
- The filter efficiently removes food particles from the wash water, allowing it to be recirculated during the cycle. For this reason, it is a good idea to remove the larger food particles trapped in the filter after each wash cycle by rinsing the semicircular filter and cup under running water.
natural_image
Technical diagram of a mechanical assembly with a hand operating a component, showing internal components and motion arrows (no text or symbols)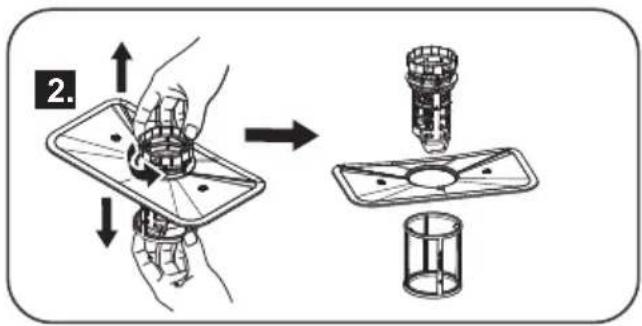
natural_image
Illustration of a hand using a spray gun to clean a car interior (no text or symbols)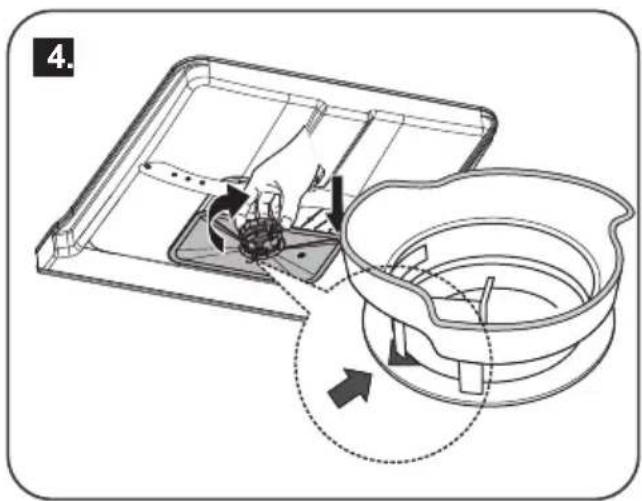
Cleaning the Filters
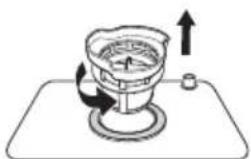
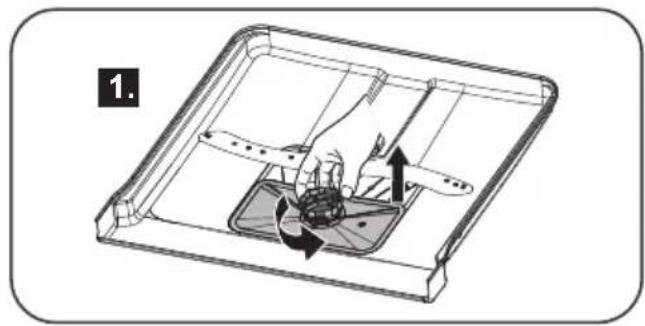
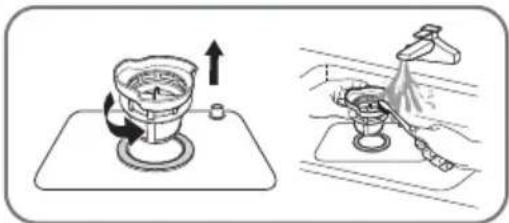
• To remove the filter assembly turn the filter in anti-clockwise direction, lift the system up.
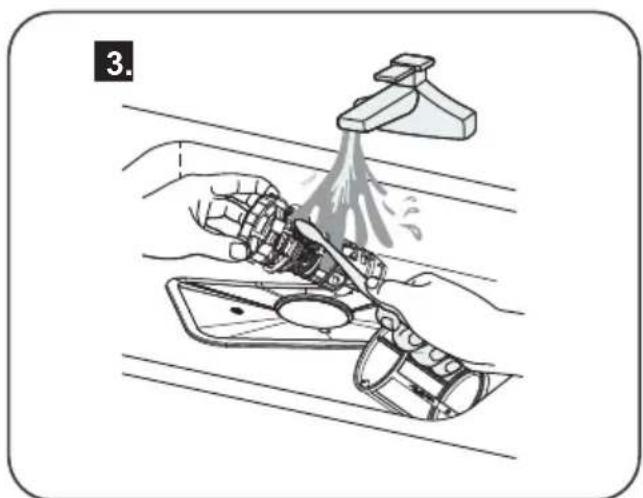
- To clean the coarse filter and the fine filter, use a cleaning brush. Then reassemble the filter parts and put the whole filter unit back in place in the dishwasher in the opposite way.
- When cleaning the filters, don't knock on them. Otherwise, the filters could be contorted and the performance of dishwasher could be debased.
WARNING!
Never run the dishwasher without the filters in place.
Caring for the Dishwasher
- To clean the control panel use a lightly dampened cloth then dry thoroughly. - To clean the exterior use a good appliance polish wax. Never use sharp objects, scouring pads or harsh cleaners on any part of the dishwasher.
- To clean the edge around the door, you should use only a soft warm, damp rag. To prevent penetration of water into the door lock and electrical components, do not use a spray cleaner of any kind.
- Also, never use abrasive cleaners or scouring pads on the outer surfaces because they will scratch the finish. Some papers towels can also scratch or leave marks on the surface.
natural_image
Technical line drawing of a rectangular electronic device with internal components and mounting points (no text or symbols)Protect Against Freezing
If your dishwasher is left in an unheated place during the winter, ask a service technical to:
- Cut off electrical power to the dishwasher.
- Turn off the water supply and disconnect the water inlet pipe from the water valve.
- Drain water from t he inlet pipe and water valve. (Use a pan to catch the wat er)
- Reconnect the water inlet pipe to the water valve.
- Remove the filter in the tub the bottom and use a sponge to use up water in sump.
Cleaning the Spray Arms
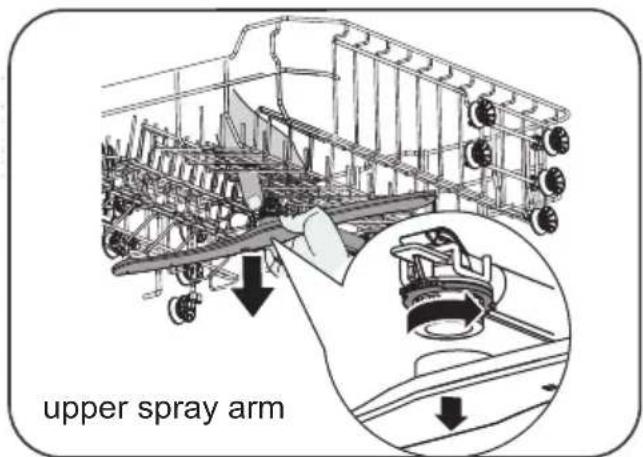
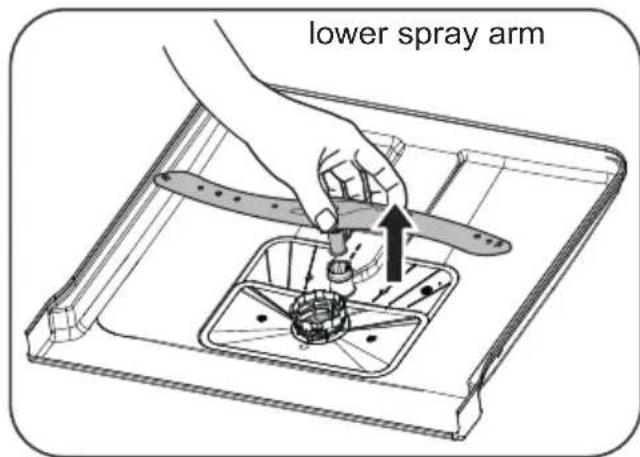
- It is necessary to clean the spray arms regularly for hard water chemicals will clog the spray arm jets and bearings.
• To remove the spray arm, grasp the center of the arm and pull upwards to remove the arm (lower arm) or with one hand grasp the circlip and with the other hand turn the arm counterclockwise (upper arm). - Wash the arms in soapy and warm water and use a soft brush to clean the jets. Replace them after rinsing them thoroughly.
How to Keep Your Dishwasher in Shape
After Every Wash
• After every wash, turn of f the water supply to the appliance and leave the door slightly a jar so that moisture and odors are not trapped inside.
- Remove the Plug
- Before cleaning or performing maintenance, always remove the plug from the socket. Do not run risks.
• No Solvents or Abrasive Cleaning
- To clean the exterior and rubber parts of the dishwasher, do not use solvents or abrasive cleaning products. Rather, use only a cloth and warm soapy water. To remove spots or stains from the surface of the interior, use a cloth dampened with water and a little white vinegar, or a cleaning product made specifically for di shwashers.
When You Go on Holiday
- When you go on holiday, it is recommended that you run a wash cycle with the dishwasher empty and then remove the plug from the socket, turn off the water supply and leave the door of the appliance slightly ajar. This will help the seals last longer and prevent odors from forming within the appliance.
Moving the Appliance
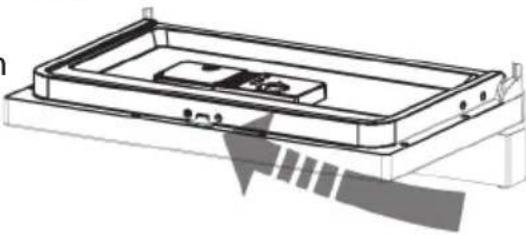
- If the appliance must be moved, try to keep it in the vertical position.
- If absolutely necessary, it can be positioned on its back.
Seals
- One of the factors that cause odors to form in the dishwasher is food that remains trapped in the seals. Periodic cleaning with a damp sponge will prevent this from occurring.
VIII. INSTALLATION INSTRUCTION
Positioning the Appliance
Position the appliance in the desired location. The back should rest against the wall behind it, and the sides, along the adjacent cabinets or wall. The dishwasher is equipped with water supply and drain hoses that can be positioned to the right or the left to facilitate proper installation.
Levelling the appliance
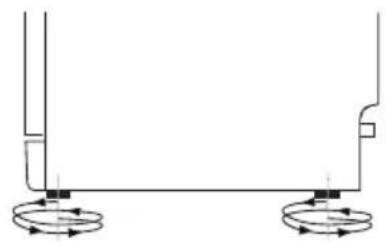
Once the appliance is positioned for levelling, the height of the dishwasher may be altered via adjustment of the screwing level of the feet. In any case, the appliance should not be inclined more than 2". Place level on door and rack track inside the 1 tub as shown to check that the dishwasher is level.
natural_image
Pure mechanical diagram showing two circular components with directional arrows, no text or symbols presentAbout Electricity Connecting
CAUTION!
for personal safety: DO NOT USE AN EXTENSION CORD OR AN ADAPTER PLUG WITH THIS APPLIANCE. DO NOT, UNDER ANY CIRCUMSTANCES, CUT OR REMOVE THE THIRD GROUNDING PRONG FROM THE POWER CORD.
ELECTRICAL REQUIREMENTS
Please see the rating label to know the rating voltage and connect the dishwasher to appropriate power supply, which has a required fuse 10 amp. Time delay fuse or circuit breaker recommended and provide separate circuit serving only this appliance. Insure propar ground
ELECTRICAL CONNECTION
After making sure that the voltage and the frequency values for the current in the home correspond to those on the rating plate and that the electrical system is sized for the max. voltage on the rating plate, insert the plug into an electrical socket which is earthed properly. If the electrical socket to which the appliance must be connected is not appropriate for the plug, replace the socket, rather than using a adaptors or the like as they could cause overheating and burns.
GROUNDING INSTRUCTION
- This appliance must be grounded. In the event of a malfunction or breakdown, grounding will reduce the risk of electric shock by providing a path of least resistance of electric current.
- This appliance is equipped with a cord having an equipment-grounding conductor and a grounding plug. The plug must be plugged into an appropriate outlet that is installed and grounded in accordance with all local codes and ordinances.
WARNING!
Improper connection of the equipment-grounding conductor can result in a risk of electric shock. Check with a qualified electrician or service representative if you are in doubt whether the appliance is properly grounded. Do not modify the plug provided with the appliance; If it is not fit for the outlet. Have a proper outlet installed by a qualified electrician.
Water Connection
WARNING!
In order to avoid that there is more water staying in the inlet hose, please close the hydrant after using.(For the models: no safety inlet hose.)
COLD WATER CONNECTION
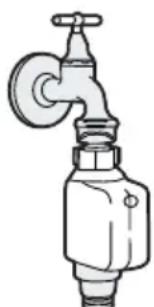
Connect the cold water supply hose to a threaded 3/4 (inch) connector and make sure that it is fastened tightly in place. Water pressure 0.04 – 1.0 MPa. If the water pipes are new or have not been used for an extended period of time, let the water run to make sure that the water is clear and free of impurities. If this precaution is not taken, there is a risk that the water inlet can get blocked and damage the appliance.
natural_image
Line drawing of a faucet with handle and valve (no text or symbols)DRAIN HOSE CONNECTION
- Insert the drain hose into a drain pipe with a minimum diameter of 40 mm, or let it run into the sink, making sure to avoid bending or crimping it. Use the special plastic support.
- The free end of the hose must be at a height max. 1000 mm and must not be immersed in water.
- Please hang up the drain hose either way of A, B.
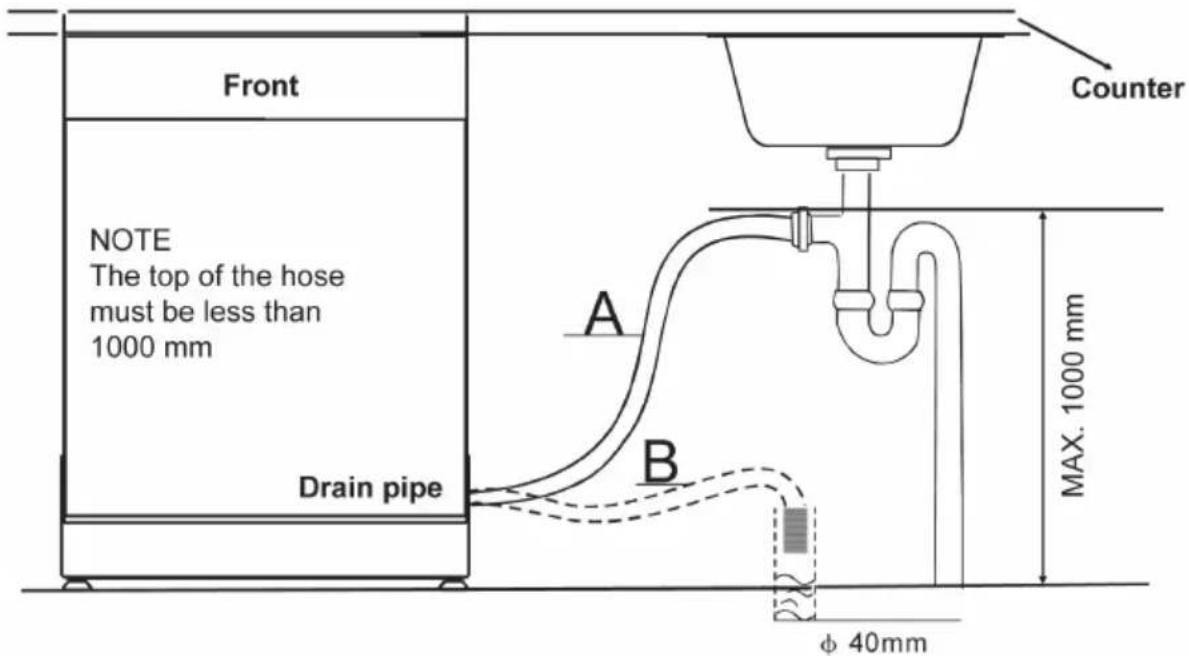
HOW TO DRAIN EXCESS WATER FROM HOSES
- If the sink is 1000 higher from the floor, the excess water in hoses cannot be drained directly into the sink. It will be necessary to drain excesswater from hoses into a bowl or suitable container that is held outside and lower than the sink.
WATER OUTLET
- Connect the water drain hose.
- The drain hose must be correctly fitted to avo id water leaks.
- Ensure that the water inlet hose is not kinked or squashed.
EXTENSION HOSE
- If you need a drain hose extension, observe to use a similar or drain hose.
- It must be no longer than 4 metres; otherwise the cleaning effect of the dishw asher could be reduced.
SYPHON CONNECTION
- The waste connection must be at a height of max.100 cm from the bottom of the dish.
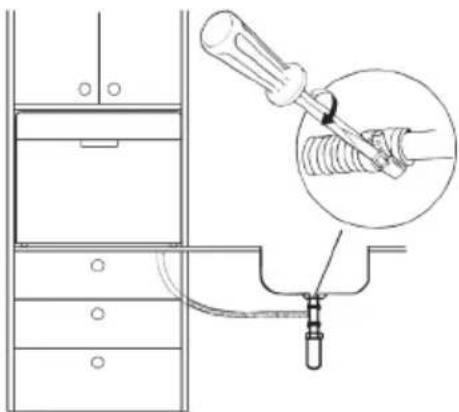
- The water drain hose should be fixed by a hose clip.
Start of dishwasher
The followings should be checked before starting the dishwasher.
- Whether the dishwasher is level and fixed
- Whether the inlet valve is opened
-
Whether there is leakage at the connections of the conducts
-
Whether the wires are tightly connected
-
Whether the power is switched on
-
Whether the inlet and drain hoses are knotted
-
All packing materials and printings should be taken out from the dishwasher
natural_image
Technical line drawing of a mechanical assembly with a magnified inset showing a tool interacting with a spring-like component (no text or symbols present)ATTENTION!
After installation, please put this manual into the bags of printings.
The content of this manual is very helpful to the users.
IX. TROBLESHOOTING TIPS
Before Calling for Service
Review the charts on the following pages may make you be free of calling for service.
| Problem Possible Causes What To Do | ||
| Dishwasher doesn't start | Fuse blown, or the circuit breaker acted | Replace fuse or reset circuit breaker.Remove any other appliances sharing the same circuit with the dishwasher |
| Power supply is not turned on | Make sure the dishwasher is turned on and the door is closed securely.Make sure the power cord is properly plugged into the wall socket. | |
| Water pressure is low | Check that the water supply is connected properly and the water is turned on. | |
| Door of dishwasher not properly closed. | Make sure to close the door properly and latch it. | |
| Water not pumped form dishwasher | Kink in drain hose Check drain hose. | |
| Filter clogged | Check coarse the filter(see section titled “Cleaning The Filter”) | |
| Kitchen sink clogged | Check the kitchen sink to make sure it is draining well. If the problem is the kitchen sink not draining ,you may need a plumber rather than a serviceman for dishwashers | |
| Suds in the tub | Improper detergent | Use only the special dishwasher detergent to avoid suds. If this occurs, open the dishwasher and let suds evaporate Add 1 gallon of cold water to the tub. Close and latch the dishwasher, then select any cycle.Dishwasher will drain out the water at the first step.Open the door after draining is stop and check if the suds is disappeared.Repeat if necessary. |
| Spilled rinse-aid Always wipe up | rinse-aid spills immediately. | |
| Knocking noise in the wash cabinet | A spray arm is knocking against an item in a basket | Interrupt the programme, and rearrange the items which are obstructing the spray arm. |
| Rattling noise in the wash cabinet | Items of crockery are loose in the wash cabinet | Interrupt the programme and rearrange the items of crockery. |
| Problem Possible | Causes What To Do | |
| Knocking noise in the water pipes | This may be caused by on-site installation or the cross-section of the piping. | This has no influence on the dishwasher function.if in doubt, contact a suitably qualified plumber. |
| Stained tub interior | Detergent with colourant was used | Make sure that the detergent is the one without colourant. |
| The dishes are not drying | Improper loading | Load the dishwasher as suggested in the directions. |
| Too little rinse-aid | Increase the amount of rinse-aid/refill the rinse-aid dispenser | |
| Dishes are removed too soon | Do not empty your dishwasher immediately after washing. Open the door slightly so that the steam can escape. Begin unloading the dishwasher only once t he dishes are barely warm to the touch. Empty the low basket first. This prevents water form dropping off dishesin the upper basket. | |
| Wrong program has been selected | In short program the washing temperature is lower. This also lowers cleaning performance. Choose a program with a long washing time. | |
| Use of cutlery with a low-quality coating | Water drainage is more difficult with these items. Cutlery or dishes of this type are not suitable for washing in the dishwasher. | |
| The dishes are not clean | The dishes were not loaded correctly. | See notes in “Loading the Dishwasher Baskets”. |
| The programme was not powerful enough. | Select a more intensive programme. See“Wash Cycle Table „ | |
| Not enough detergent was dispensed. | Use more detergent, or change your detergent. | |
| Items are blocking the path of spray arms. | Rearrange the items so that the spray can rotate freely. | |
| The filter combination in the base of wash cabinet is not clean or is not correctly fitted. This may cause the sp ay arm jets to get blocked. | Clean and/or fit the filter combination correctly.Clean the sp ay arm jets. See „Cleaning the Spray Arms“. | |
| There are rust stains on cutlery | The affected items are not corrosion resistant. | |
| A programme was not run after dishwasher salt was added.Traces of salt have gotten into the wash cycle. | Always run the quick wash programme without any crockery in the dishwasher and without selecting the Turbo function (if present), after adding dishwasher salt. | |
| The lid of the softer is loose Check the lip .Ensure the fix is fine. | ||
| Problem Possible Causes What To Do | ||
| Spots and filming on glasses and flatware | Extremely hard waterLow inlet temperatureOverloading the dishwasherImproper loadingOld or damp powder detergentEmpty rinse agent dispenserIncorrect dosage of detergent | To remove spots from glassware:Take out all metal utensils out of the dishwasher.Do not add detergent.Choose the longest cycle.Start the dishwasher and allow it to run for about 18 to 22 minutes, then it will be in the main wash.Open the door to pour 2 cups of white vinegar intothe bottom of the dishwasher.Close the door and let the dishwasher complete the cycle. If the vinegar does not work:Repeat as above, except use 1/4 cup (60 ml)of citric acid crystals instead of vinegar. |
| Cloudiness on glassware | Combination of soft water and too much detergent | Use less detergent if you have soft water and select a shortest cycle to wash the glassware and to get them clean. |
| Yellow or brown film on inside surface | Tea or coffee stains | Using a solution of 12 cup of bleach and 3 cups warm water to remove the stains by hand.WARNING: You have to wait for 20 minutes after a cycle to let the heating elements cool down before cleaning interior; otherwise, burns will happen. |
| Iron deposits in water can cause an overall film | You have to call a water softener company for a special filter. | |
| White film on inside surface | Hard water minerals | To clean the interior, use a damp sponge with dishwasher detergent and wear rubber gloves. Never use any other cleaner than dishwasher detergent for the risk of foaming or suds. |
| Detergent left in dispenser cups | Dishes block detergent cups Re- | loading the dishes properly. |
| Steam Normal phenomenon | There is some steam coming through the vent by the door latch during drying and water draining. | |
| Black or gray marks on dishes | Aluminum utensils have rubbed against dishes. | Use a mild abrasive cleaner to eliminate those marks. |
| Water standing in the bottom of the tub | This is normal | A small amount of clean water around the outlet on the tub bottom keeps the water seal lubricated. |
| Water flow out | Damaged or detective drain pump | Replace the drain pump |
| Dishwasher leaks | Overfill dispenser or rinse aid spills | Be careful not to overfill the rinse aid dispenser.Spilled rinse aid could cause oversuding and lead to overflowing. Wipe away any spills with a damp cloth. |
| Dishwasher isn't level Make sure | the dishwasher is level. | |
Error codes
When some malfunctions come on, the appliance will display error codes to warn you:
| Codes | Meanings Possible Causes | |
| E1 | Longer inlet time. | Faucets is not opened, or water intake is restricted,or water pressure is too low. |
| E3 | Not reaching required temperature. Malfunction of heating elenent. | |
| E4 | Overflow. Some element of dishwasher leaks. | |
| E8 | Div der valve failed Divider valve failed | |
| Ec | Washing control system error PCB or motor failure | |
| Ed | Failureofcommunicationbetweenmain PCB with TFT PCB. | Open circuit or break of wiring for the communication. |
WARNING!
If overflow occurs, turn off the mainwater supply before calling service. If there is water in the base pan because of an overfill or small leak, the water should be removed before restarting the dishwasher.
WARNING!
If there is an error code that cannot be solved, please request professional assistance.
X.TECHNICAL INFORMATION
EN - 101
Product information sheet (EN 60436)
Supplier's name or trade mark: ETA
General product parameters:
| Parameter Value Parameter Value | ||||
| Rated capacity (ps) (a) 10 Dimensions in cm | Height 85 | |||
| Width 45 | ||||
| Depth 61 | ||||
| EEI (a) 43,9 Energy efficiency class ( | a) C | |||
| Cleaning performance index (a) | 1,125 | Drying performance index (a) | 1,065 | |
| Energy consumption in kWh [per cycle], based on the eco programme using cold water fill. Actual energy consumption will depend on how the appliance is used. | 0,593 | Water consumption in litres [per cycle], based on the eco program. Actual water consumption will depend on how the appliance is used and on the hardness of the water. | 8,0 | |
| Programme duration (h:min) | 3:28 Type | Free-standing | ||
| Airborne acoustical noise emissions (dB(A) re 1 pW) (a) | 44 | Airborne acoustical noise emission class (a) | B | |
| Off-mode (W) (a) | 0,49 Standby mode (W) (a) | N/A | ||
| Delay start (W) (if applicable) | 1,00 | Networked standby (W) (if applicable) | N/A | |
| Minimum duration of the guarantee offered by the supplier: | 24 months | |||
Additional information:
Weblink to the supplier's website, where the information in point 6 of Annex II to Commission Regulation (EU) 2019/2022 is found: www.etasince1943.com.
^(a) with ECO program
We reserve the right to change technical specifications.
- The device meets the European standards and the directives in the current version at delivery.
- LVD 2014/35/EU
- EMC 2014/30/EU
- EU 2019/2022
NOTE:
The above values have been measured in accordance with standards under specified operating conditions. Results may vary greatly according to quantity and pollution of the dishes, water hardness, amount of detergent, etc.
- The manual is based on the European Union's standards and rules.
- Technical information can be found on the type plate inside the appliance (or on its back side) and on the energy label.
- "Information Sheet" and "Directions for Use" can be downloaded at: www.etasince1943.com.
- QR code on the energy label supplied with the appliance provides a web link to information concerning the specification of this appliance in the EU EPREL database.
- Keep the energy label together with user manual and all other documentation supplied with this appliance.
- The same information in the EPREL database can also be found at:
https://eprel.ec.europa.eu - The model name (product number) can be found on the type plate of the appliance and also on the energy label supplied with the appliance.
• We reserve the right to change technical specifications.
XI. CUSTOMER CARE AND SERVICE
• Always use original spare parts.
- When contacting our authorised service or information line, make sure you have the following information available: the model name (product number) and serial number (SN).
- This information can be found on the type plate (or on a separate label near it).
- The manufacturer reserves the right for change without prior notice.
- Original spare parts for particular selected components of the product are available at least 7 or 10 years from the launch of the last piece of the appliance on the market (depending on the type of the component).
- The manufacturer provides standard legal warranty for the appliance for a period of 24 months.
- For more information regarding service and purchase of spare parts, visit our website:
• www.etasince1943.com/support
HU - Mosogatógép
NYISSA KI A VÍZCSAPOT ÉS NYOMJA MEG A START/PAUSE (INDÍTÁS/SZÜNET) GOMBOT!
KAPCSOLJA KI A KÉSZÜLÉKET
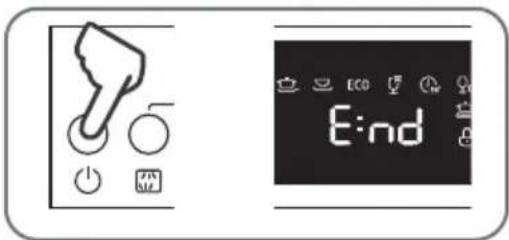
HA AZ AJTÓ NYITVA VAN, A KIJELZÖN KIGYULLAD AZ END ÉS EGY HANGJELZÉS HALLHATÓ, MAJD A PROGRAM BEFEJEZÖDIK.
ZÁRJA EL A VÍZCSAPOT ÉS VEGYE KI AZ EDÉNYEKET
natural_image
Illustration of a faucet and a bucket with water droplets (no text or symbols)HAGYJA 15 PERCIG HÜLNI ÖKET, MIELÖTT KIVESZI A KÉSZÜLÉKBÖL.
TISZTÍTSA MEG A SZÜRÖKET
natural_image
Illustration showing a cooking pot and a hand washing a water dispenser on a surface (no text or symbols)MINDEN HASZNÁLAT UTÁN NÉZZE ÁT A SZÚRŐKET, HOGY VAN-E BENNÜK LERAKÓDÁS.
TARTALOM
HU - MOSOGATÓGÉP
I. FONTOS BIZTONSÁGI INFORMÁCIÓK 106
natural_image
Symbol of a trash bin crossed with no text or numbers, enclosed in a rounded square (no text or numbers present)natural_image
Close-up of a coiled cable or hose component mounted on a black panel, with no visible text or symbols.flowchart
graph LR
    A["Person mixing coffee maker"] --> B["Add dipping into cup"]
    B --> C["Stack with pencil into cup"]
    C --> D["Hearts to be filled with liquid using a container"]
    D --> E["Turn to drop in cup with arrow indicating rotation"]
natural_image
Simple line drawing of a door with a window and starburst symbol, no text or labels presentnatural_image
Line drawing of a hand inserting a device into a vertical panel, showing internal components and a screen with a tree (no text or symbols)natural_image
Line drawing of a hand pressing a button on a device with a slide and scroll (no text or symbols)natural_image
Simple line drawing of a door with a chimney and decorative elements (no text or symbols)natural_image
Line drawing of a shopping cart with wheels and an arrow indicating direction (no text or symbols)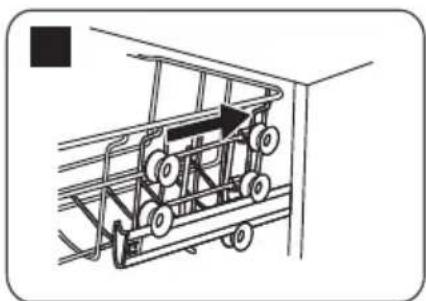
natural_image
Diagram of a mechanical cart with wheels and an arrow indicating direction (no text or symbols)natural_image
Diagram showing two stages of a wire mesh structure, one before and after, with no visible text or symbols.2. Alsó kosár
natural_image
3D rendering of a metal grate or rack structure with grid pattern and side connectors (no text or symbols visible)natural_image
3D rendering of a mechanical device with grid and control panel (no visible text or symbols)natural_image
Exterior view of a black plastic enclosure with grid pattern and side connectors (no text or symbols visible)Az alábbi tárgyak
natural_image
Technical diagram of a mechanical device with internal components and directional arrows indicating rotation (no text or symbols)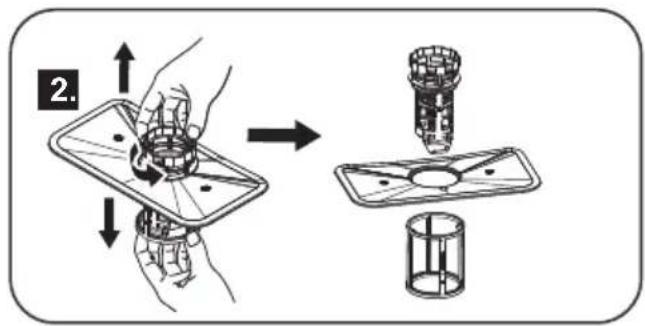
natural_image
Illustration of hands cleaning a car with spray and cleaning equipment (no text or symbols)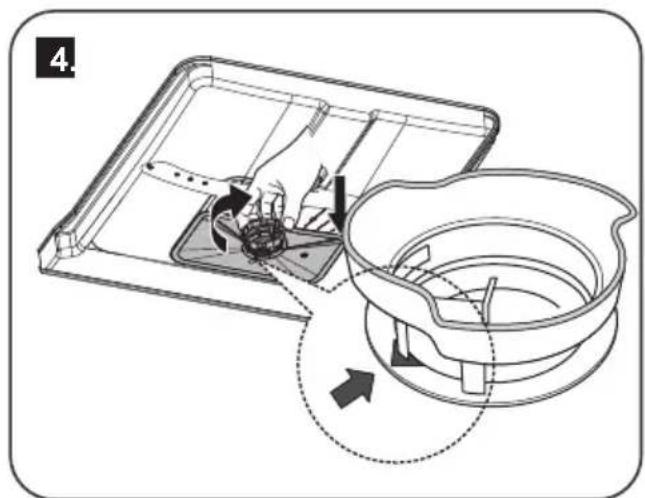
Szürök tisztítása
natural_image
Technical line drawing of a rectangular electronic device with internal components and mounting points (no text or symbols)natural_image
Pure mechanical diagram showing a vertical shaft and two circular components with directional arrows, no text or symbols present.natural_image
Line drawing of a faucet with handle and valve (no text or symbols)SZENNYVÍZ VEZETÉK CSATLAKOZTATÁSA
natural_image
Technical diagram showing a mechanical setup with a tool inserted into a spring, and a magnified inset illustrating the process (no text or labels present)FIGYELEM!
- CZ - Myčka nádobí
- OBSAH
- Spodní koš
- Čištění filtru
- PŘIPOJENÍ VYPOUŠTĚCÍ HADICE
- POZOR!
- SK - UMÝVAČKA RIADU
- UMÝVACÍ PROSTRIEDOK
- Sklopenie hrotov a políc na šálky
- Spodný kôš
- Čistenie filtrov
- Chráňte pred mrazom
- PRIPOJENIE VYPÚŠŤACEJ HADICE
- CONTENT
- EN - DISHWASHER
- Please read this user manual
- Dear Customer,
- IMPORTANT SAFETY INFORMATION
- READ ALL INSTRUCTION BEFORE USING
- WARNING
- WARNING!
- PROPER USE
- READ AND FOLLOW THIS SAFETY INFORMATION CAREFULLY SAVE THESE INSTRUCTIONS
- DISPOSAL AND ECOLOGY
- BUTTONS:
- INDICATOR:
- Dishwasher Features
- PRIOR USING FOR THE FIRST TIME
- WATER SOFTENER
- Adjusting Salt Consumption
- Water softener
- Loading the Salt into the Softener
- ATTENTION!
- WARNING:
- NOTE
- RINSE AID
- Function of Rinse Aid
- Rinse Aid Dispenser
- When to Refill the Rinse Aid Dispenser
- Adjusting rinse aid dispenser
- DETERGENT
- Proper Use of Detergent
- Detergents
- Coccentrated Detergent
- Detergent tablets
- Detergent dispenser
- Fill in detergent
- LOADING THE DISHWASHER RACKS (EN 60436)
- Recommendation
- Attention before or after Loading the Dishwasher Racks
- Loading the Rack
- Upper Basket
- Adjusting the Upper Basket
- Folding back the cup shelves
- Lower Basket
- Cutlery rack
- Cutlery basket could be have 2 positions
- Mode 1
- Mode 2
- For washing in the dishwasher the following cutlery/dishes
- Are not suitable
- Are of limited suitability
- Damage to glassware and other dishes
- Possible causes
- Suggested remedy
- TURNING ON THE APPLIANCE
- Saving energy
- Starting a cycle wash
- Change the Programme
- Wash cycle table
- Forget to Add a Dish?
- At the end of the wash cycle
- Unloading the dishwasher
- MAINTANCE AND CLEANING
- Filtering System
- - Main filter
- - Coarse filter
- - Fine filter
- Filter assembly
- Cleaning the Filters
- Caring for the Dishwasher
- Protect Against Freezing
- Cleaning the Spray Arms
- How to Keep Your Dishwasher in Shape
- After Every Wash
- When You Go on Holiday
- Moving the Appliance
- Seals
- INSTALLATION INSTRUCTION
- Positioning the Appliance
- Levelling the appliance
- About Electricity Connecting
- CAUTION!
- ELECTRICAL REQUIREMENTS
- ELECTRICAL CONNECTION
- GROUNDING INSTRUCTION
- Water Connection
- COLD WATER CONNECTION
- DRAIN HOSE CONNECTION
- HOW TO DRAIN EXCESS WATER FROM HOSES
- WATER OUTLET
- EXTENSION HOSE
- SYPHON CONNECTION
- Start of dishwasher
- TROBLESHOOTING TIPS
- Before Calling for Service
- Error codes
- X.TECHNICAL INFORMATION
- Product information sheet (EN 60436)
- NOTE:
- CUSTOMER CARE AND SERVICE
- HU - Mosogatógép
- TARTALOM
- Alsó kosár
- Az alábbi tárgyak
- Szürök tisztítása
- SZENNYVÍZ VEZETÉK CSATLAKOZTATÁSA
- FIGYELEM!
Brand : Eta
Model : 238290000
Category : Dishwasher