
Nescafé Dolce Gusto Genio S - Coffee maker KRUPS - Free user manual and instructions
Find the device manual for free Nescafé Dolce Gusto Genio S KRUPS in PDF.
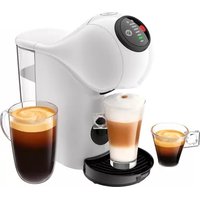


| Product Type | Single-serve capsule coffee machine |
| Brand | Krups |
| Model | Nescafé Dolce Gusto Genio S |
| Dimensions (W x H x D) | 17.5 x 27 x 27 cm |
| Weight | 2.5 kg |
| Power Supply | 220-240 V, 50-60 Hz |
| Power Consumption | 1500 W |
| Water Tank Capacity | 0.8 L |
| Pump Pressure | 15 bar |
| Capsule Compatibility | Nescafé Dolce Gusto capsules |
| Beverage Types | Hot and cold coffee, espresso, cappuccino, latte, tea, chocolate |
| Adjustable Cup Height | Yes, up to 15 cm |
| Automatic Shut-off | Yes, after 5 minutes of inactivity |
| Descaling Indicator | Yes, LED indicator |
| Water Filtration | Recommended but not built-in |
| Drip Tray | Removable for easy cleaning |
| Capsule Ejector | Automatic used capsule ejection |
| Cleaning | Descale every 3 months or after 300 capsules |
| Repairability | Spare parts available; user manual guides basic maintenance |
| Safety Features | Auto shut-off, overheat protection |
Frequently Asked Questions - Nescafé Dolce Gusto Genio S KRUPS
User questions about Nescafé Dolce Gusto Genio S KRUPS
0 question about this device. Answer the ones you know or ask your own.
Ask a new question about this device
Download the instructions for your Coffee maker in PDF format for free! Find your manual Nescafé Dolce Gusto Genio S - KRUPS and take your electronic device back in hand. On this page are published all the documents necessary for the use of your device. Nescafé Dolce Gusto Genio S by KRUPS.
USER MANUAL Nescafé Dolce Gusto Genio S KRUPS
GENIO s

USER MANUAL
www.dolce-gusto.com

TABLE OF CONTENTS
- SAFETY PRECAUTIONS...4
- MACHINE OVERVIEW 6
- KEY FEATURES...7
- 1 INTUITIVE LED CONTROL RING...7
- 2 HOW TO START THE MACHINE...7
- 3 COLD MODE...8.....
- BEVERAGE EXAMPLES 9
- RECOMMENDATIONS FOR SAFE USE...10.....
- FIRST USE RINSING 11
- PREPARING A BEVERAGE...12
- 1 ONE CAPSULE (E.G. LUNGO)....
- 2 TWO CAPSULES (E.G., CAPPUCCINO).... 1
- CLEANING 15
- DESCALING AT LEAST EVERY 3-4 MONTHS.... 16
- TROUBLESHOOTING 18
- 1 ORANGE DESCALING INDICATOR LIGHT TURNS ON 18 10.2 NO LIQUID COMES OUT - NO WATER? 18
- 3 NO LIQUID COMES OUT - CAPSULE BLOCKED? 19
TABLE OF CONTENTS

- 4 NO LIQUID COMES OUT - INJECTOR BLOCKED? 19
- 5 VARIOUS 20
1. SAFETY PRECAUTIONS
Read all instructions and keep these safety instructions. Misuse of the appliance may result in potential injury. In case of any inappropriate use or failure to comply with instructions, the manufacturer accepts no responsibility. The guarantee may not apply.
The guarantee does not cover appliances that do not work properly because they have not been maintained.
INTENDED USE
- This appliance is intended to be used in household and similar applications, such as: staff kitchen areas in shops, offices, and other environments; farmhouses; by clients in hotels, motels, and other residential type environments; bed and breakfast type environments. It is not intended for commercial use.
- Staff kitchen areas in shops, offices, and other environments;
- farm houses; — by clients in hotels, motels and other residential environments; — bed and breakfast type environments;
- Your appliance is intended for domestic use inside an altitude below 3400 m.
ELECTRICAL POWER SUPPLY
- Connect the appliance to a mains power socket with connection only. Mains voltage must be the same as the rating plate. The use of incorrect connection will guarantee and may be hazardous.
- To protect against fire, electric shock and injury to persons, do not immerse the power cord, plugs or the appliance in liquid. Avoid spillage on the plug. Never touch with wet hands. Do not overfill the water tank.
- In case of an emergency, remove the plug from the socket immediately.
- Unplug from the mains power socket when not in use.
- To disconnect, remove the plug from the mains power socket. Do not unplug by pulling the cord.
- Do not let the cord hang over the edge of hot surfaces or sharp edges. Do not allow the cord to cause tripping. Never touch the cord with wet hands.
- Do not operate any appliance with a damaged cord. If the power cord is damaged, it must be replaced by the service agent or similarly qualified persons in order to avoid a hazard. Do not operate any appliance that malfunctions or is damaged in any manner. Unplug the cord immediately. Return the damaged appliance to the nearest authorized service center designated by the MEDADEGUSTO® hotline.
- If the mains power socket does not match the plug, have the plug replaced with a suitable type by after-sales centers designated by the NESEATÉsto® hotline.
CONDITIONS OF USE
- Always use the appliance on a flat, stable, heat-resistant surface away from sources of heat or water splashes. Do not use the appliance without the drip tray to avoid injury, except when a very tall mug is used. Do not use the appliance unless it complies with the water preparation instructions.
- Never turn the machine upside down.
- The use of accessory attachments not recommended by the appliance manufacturer may result in fire, electric shock, and/or injury to persons.
- Do not place on or near a hot gas or electric burner, or in a heated oven. Do not place the appliance on or near a hot surface.
- Do not touch the injector of the machine head.
- Never carry the appliance by the extraction head.
- The capsule holder is equipped with a permanent magnet. Avoid placing the capsule holder near appliances that can be damaged by magnetism, e.g. credit card drives and other data devices, video tapes, televisions with picture tubes, mechanical clocks, hearing aids and loud speakers.
- Do not turn off the appliance during the descaling cycle. After descaling, rinse the water tank and clean the appliance to remove residual descaling agent.
If the appliance is not used for prolonged periods, on holiday, etc., the water tank must be emptied, cleaned and the appliance unplugged. Rinse and operate the rinse cycle before re-using your appliance.
- We recommend using the NESCAUSTO® capsules designed and tested for the DONESCAUSTO® machine.
The power cord and the machine are designed to interact together – the machine provides the in-cup quality that DolNEOAFE is known for. Each capsule is designed to prepare one cup and cannot be reused.
Do not remove hot capsules by hand. Always use the lower socket. Do not dispose of used capsules.
- Always insert the capsule holder in the machine table or counter, or touch will not work if the capsule cord is not inserted. Do not pull out the capsule holder while the indicator is blinking.
- Machines equipped with a locking handle: Scalding the manufacturer its to the locking handle is opened during the brews not pull up the locking handle before the lights or has been stop hashing.
- For health reasons, always fill the water tank with facility drinking water.
- After use of the appliance always remove the capsule on the appliance clean the capsule holder. Empty and clean the d'after sales service capsule bin daily. Food allergy sufferers must rinse appliance according to cleaning procedure.
- The heating element surface is subject to residual plastic housings may feel warm to touch several
- Patients with pacemakers or defibrillators: Do not holder directly over the pacemaker or defibrillator.
- The appliance shall not be placed in a cabinet
RECYCAfNG use and
4min Packaging ponis use de of recyclable materials. Contact
hold counted cap authority for further information on recycle programs. Your appliance contains valuable materials
when the recovered or recycled.
CHILDREN
- Keep the appliance and its cord out of reach of children less than 8 years. Children shall not play with the appliance.
- This appliance can be used by children aged from 8 years and above and persons with reduced physical, sensory or mental capabilities or lack of experience and knowledge if they have been given supervision or instruction concerning use of the appliance in a safe way and if they understand the hazards involved.
- This appliance is not intended for use by children, persons with reduced physical, sensory or mental capabilities, or lack of experience and knowledge, unless they have been given supervision or instruction concerning use of the appliance by a person responsible for their safety. Persons who have a limited understanding of the operation and use of this appliance should fully understand the contents of the user manual and, where appropriate, seek additional guidance on its operation from the person responsible for their safety.
- Children should be supervised to ensure that they do not play with the appliance.
- Cleaning and user maintenance shall not be made by children unless they are older than 8 and supervised by an adult.
- Children should not use the appliance as a toy.
EUROPEAN MARKETS ONLY: Think of the environment
Your appliance contains valuable materials that can be recovered or recycled.
8 years and above leave it at a local civic waste collection point or an approved service centre, where it will be disposed of properly. European Directive 2012/19/EU on Waste Electrical and Electronic Equipment.
The Waste Electrical and Electronic Equipment (WEEE) directive stipulates that used household appliances must not be disposed of in normal unsorted municipal waste. Old appliances must be collected separately to optimize the sorting and recycling of their parts and to reduce the impact on health and the environment.
MAINTENANCE
- Unplug from the mains power socket before cleaning. Allow to cool before putting on or taking off parts, before cleaning the appliance. Never clean wet or immerse appliance in any fluid. Never clean the appliance with running water. Never use detergents to clean the appliance. Clean the appliance only using soft sponges/brushes. The water tank should be cleaned with a clean food-safe brush.
- Any operation, cleaning and care other than normal use must be undertaken by after-sales service centres designated by the NESCAFÉ® Dolce Gusté® hotline. Do not dismantle appliance and do not put anything into openings.
- To reduce the risk of fire or electric shock, do not remove the cover. No user serviceable parts inside. Repair should be done by authorized service personnel only!
- For additional guidance on how to use the appliance, refer to the user manual on www.dolce-gusto.com or call the NESCAFÉ® Dolce Gusto® hotline number.

2. MACHINE OVERVIEW
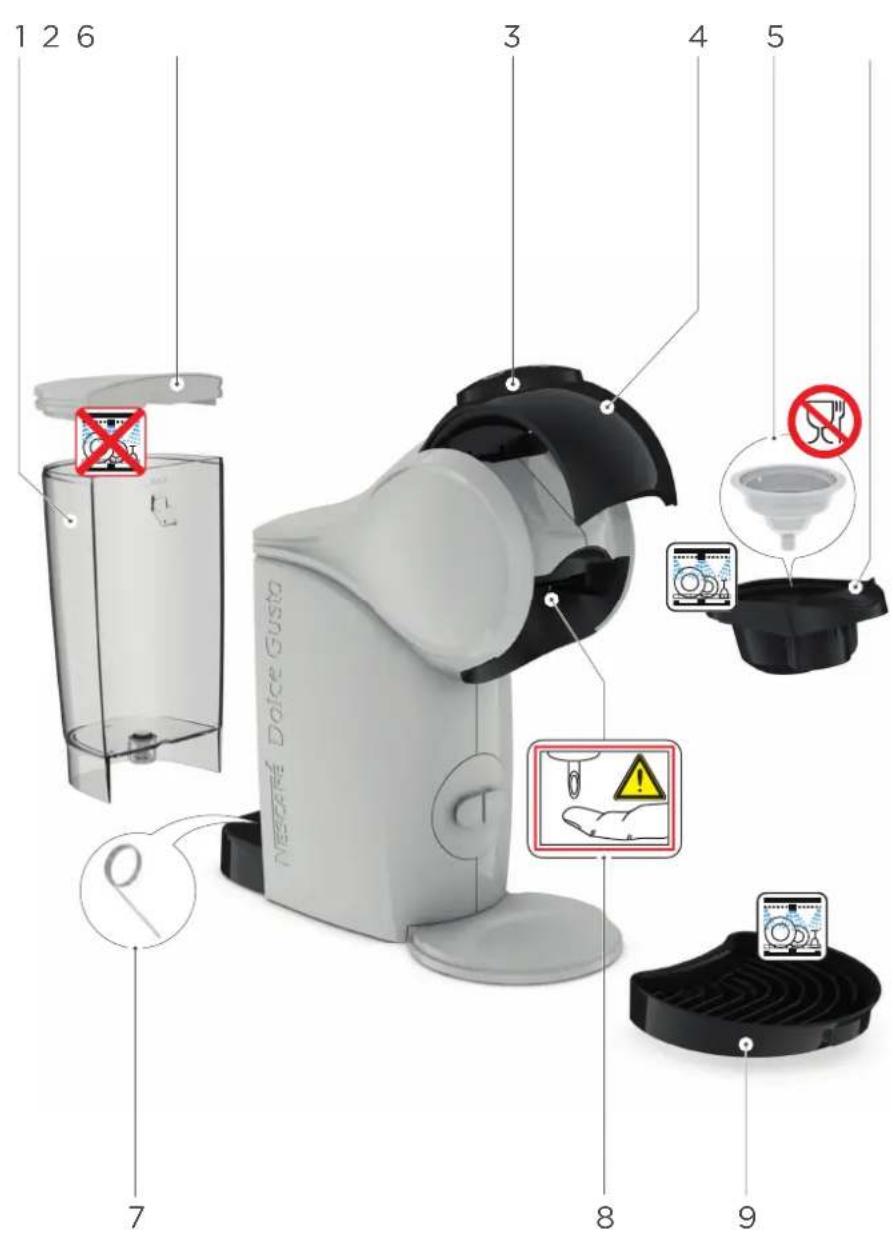
- Water tank
- Water tank cover
- INTUITIVE LED CONTROL RING
- Locking handle
- Rinsing tool
- Capsule holder
- Cleaning needle
- Injector
- Drip tray
ECONOMY MODE:
After 1 minute of non-usage upon an extraction.
5 minutes upon switch-on if no extraction.
Please be aware that the appliance is still using electricity whilst in eco-mode (0.45 Wh).
TECHNICAL DATA

GB / IE
220-240 V, 50/60 Hz, 1340-1600 W

max. 15 bar

0.8 L

~2 kg

5-45°C
41-113°F

A = 11.21 cm
B = 27.32 cm
C = 28.81 cm
3. KEY FEATURES
3.1 INTUITIVE LED CONTROL RING
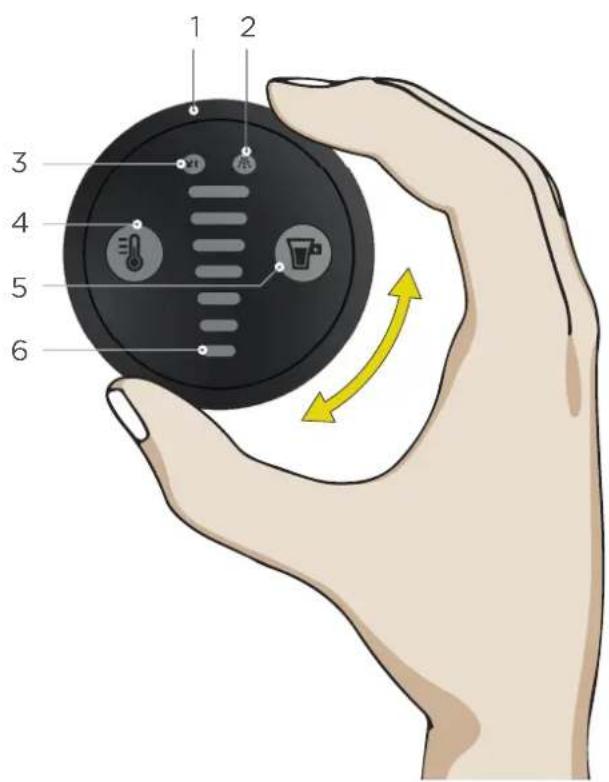

- Control ring: Select the volume for the beverage preparation
- Descaling indicator: The machine needs to be descaled after 300 extractions
- XL function: Prepare an extra large cup
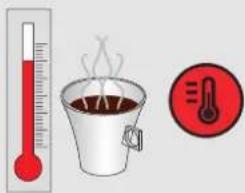
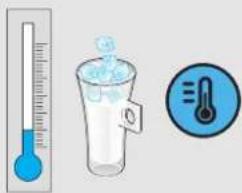
- HOT AND COLD SELECTION: The beverage temperature can be set (2 predefined settings):
Cold Hot


Cold, but the water temperature is still too high
- Start/Stop button
Start/Stop the beverage preparation
- Volume display
Shows the extraction progress by moving down from the selected volume until completion.
3.2 HOW TO START THE MACHINE
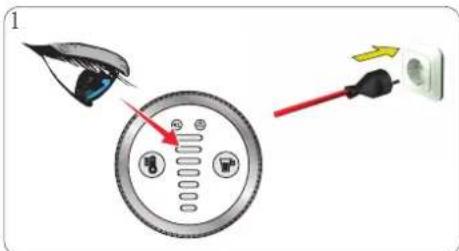
Ensure to use the correct mains voltage "MACHINE OVERVIEW" on page 6. Connect the power plug to the mains power socket.
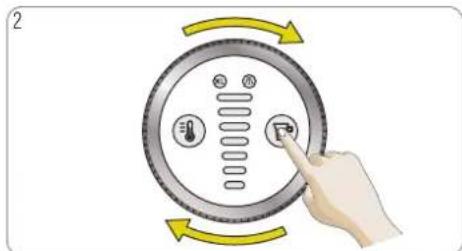
Press the power button or rotate the control ring to start the machine.
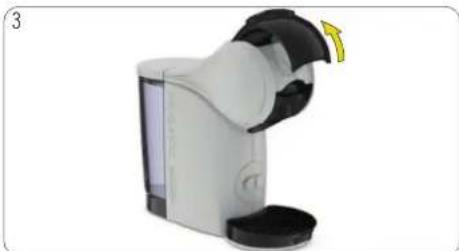
The machine can also be switched on by opening the locking handle.

3. KEY FEATURES
3.3 COLD MODE
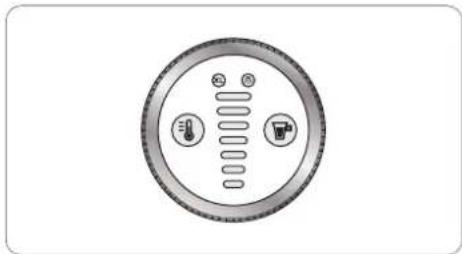
Option A: The machine is switched off.
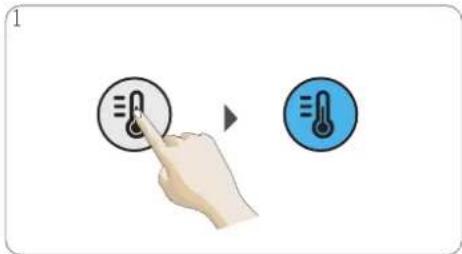
Press the temperature selection button to start the machine in cold mode. Cold mode must only be used with cold products, e.g. Cappuccino Ice. A cold beverage can be prepared immediately.
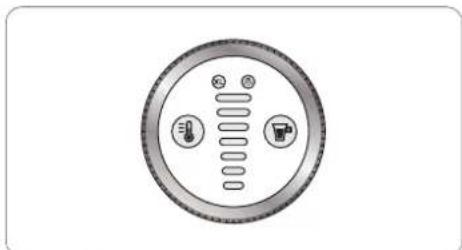
Option B: The machine is switched off.
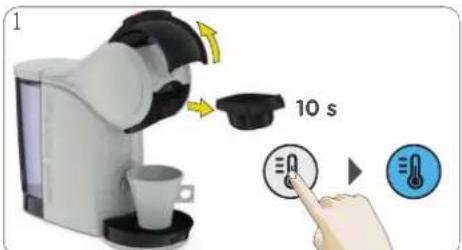
Open the locking handle. The machine switches on automatically. Press the temperature selection button within 10 seconds after starting the machine to change to cold mode (blue). A cold beverage can be prepared immediately.
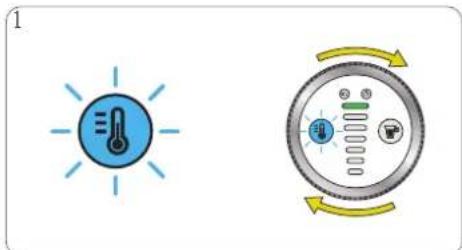
Option C: A hot beverage has been prepared and cold mode was not selected within 10 seconds after starting the machine. Press the temperature selection button to enter cold mode. The temperature selection button will blink to indicate that the machine needs to cool down.
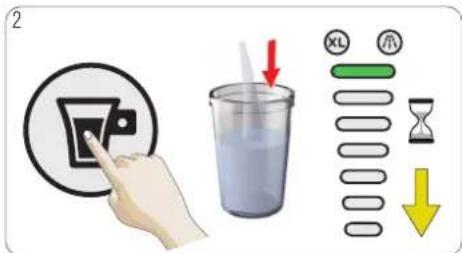
To accelerate the cooling, select level 7 on the display by pressing the start/stop button. The machine will cool down until the volume display bar moves down and the button blinks blue.
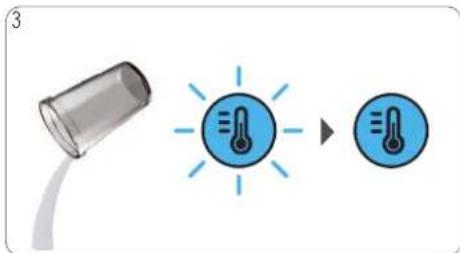
Empty the container. The temperature selection button starts blinking blue to indicate that the machine is cooled down and a cold beverage can be prepared.
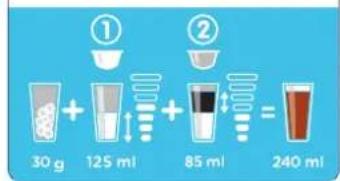
4. BEVERAGE EXAMPLES

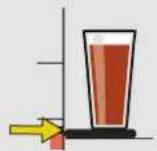
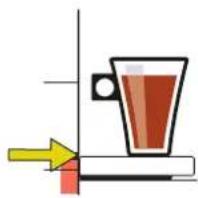
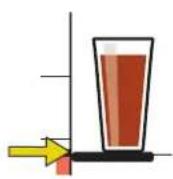
Adjust the drip tray. Choose hot or cold.
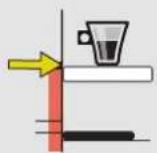
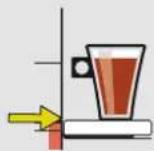
ESPRESSO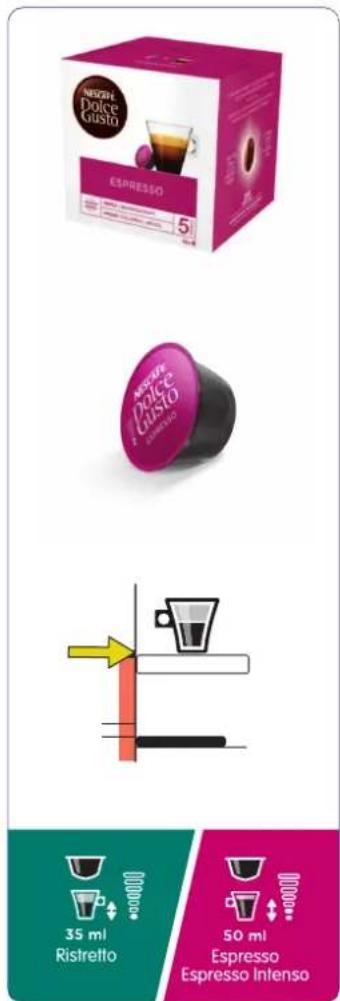
GRANDE/AMERICANO MORNING CUP
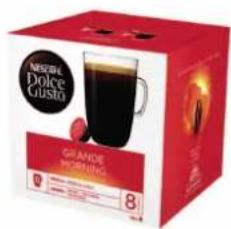

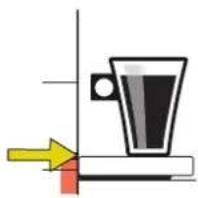

CAPPUCCINO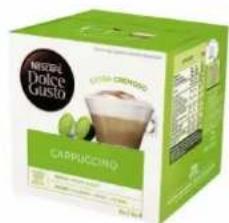
① + ②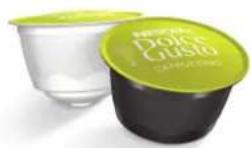
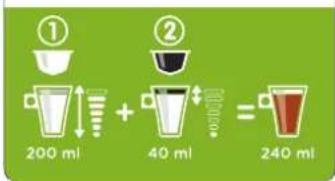
CAPPUCCINO ICE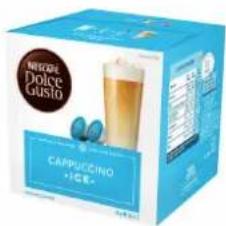
① + ②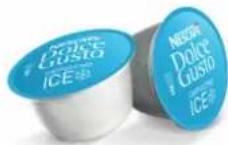

5. RECOMMENDATIONS FOR SAFE USE
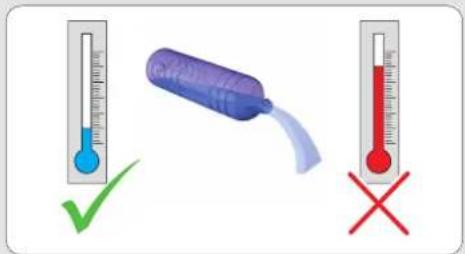

Never add hot water to the water tank.

For rinsing and beverage preparation use only drinking water.
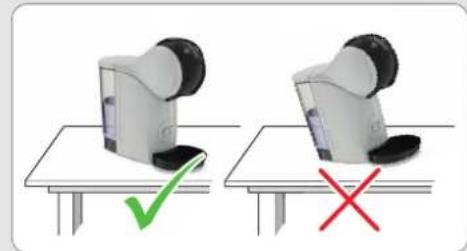
Always keep the machine upright!


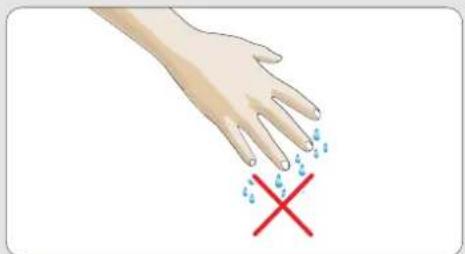

Do not touch the plug with wet hands. Do not touch the machine with wet hands!
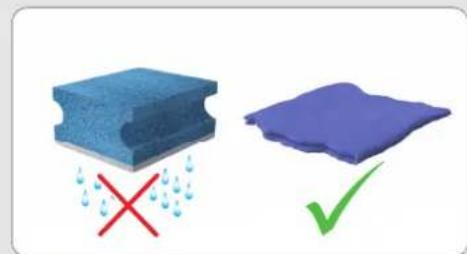

Never touch a wet sponge. Only use a cloth to clean the top of the machine.
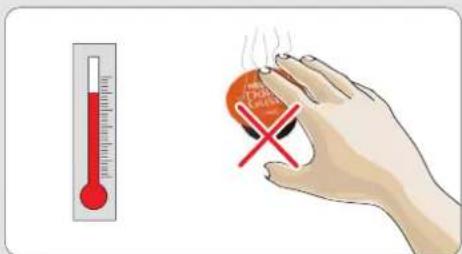

Do not touch the used capsule after the beverage preparation! Hot surface, risk of burns!
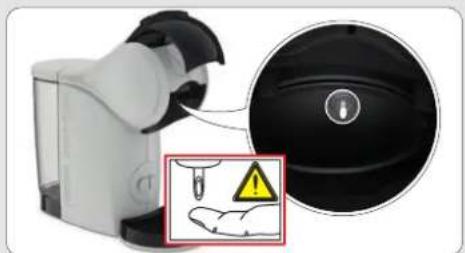

Never touch the injector with the finger!
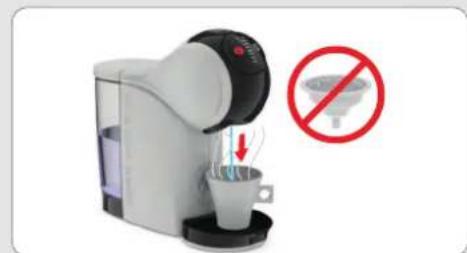

Do not use the rinsing tool for tea or hot preparation.
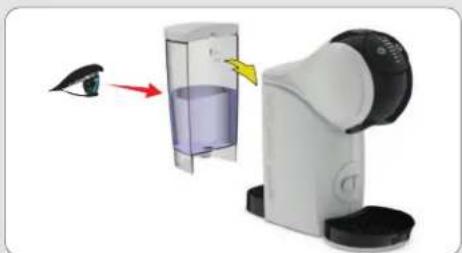

IF LEFT UNUSED FOR MORE THAN 2 DAYS: empty the water tank, rinse it, refill it with fresh water and insert it into the machine. Before use, rinse the machine according to instructions in "CLEANING" on page 15, beginning with step 4 through step 8.
6. FIRST USE RINSING

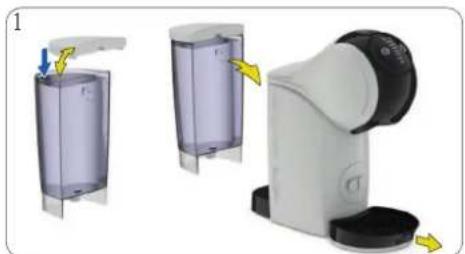
Fill the water tank with fresh drinking water and insert it into the machine. Remove the drip tray.
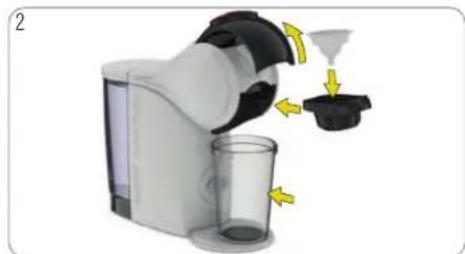
Insert the rinsing tool into the capsule holder. Place a large empty container underneath the coffee outlet.
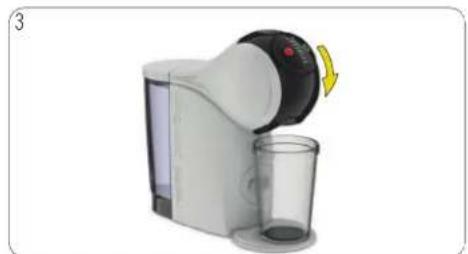
Close the locking handle. Insert the capsule holder into the machine.
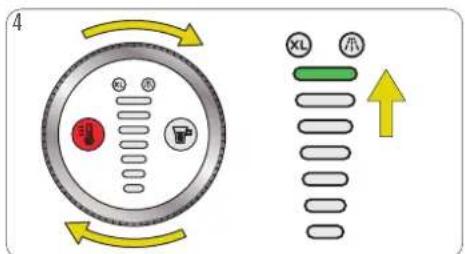
Use the control ring and select level 7 on the display (highest bar).
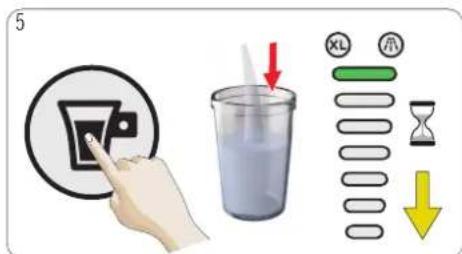
Press the start/stop button. The machine starts rinsing. The temperature selection button and the volume light blink for up to 8 seconds.
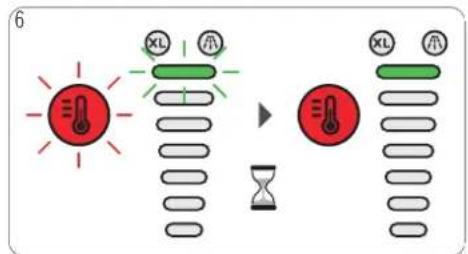
Press the start/stop button. The machine starts rinsing until it stops automatically. The selection button and the volume display blink for up to 18 seconds.
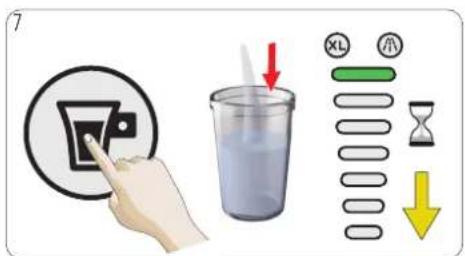
Wait for the locking handle to open. Pull out the capsule holder and remove the rinsing tool. Reinsert the capsule holder. The lights blink for up to 18 seconds.
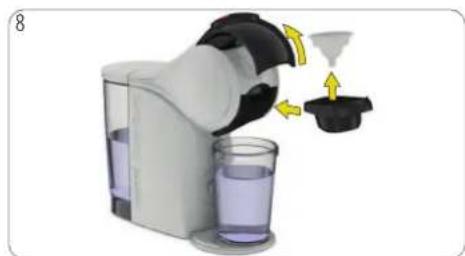
Rinsing tool handle. Pull out the capsule temperature the rinsing tool. Reinsert the cap. Light blink for up to
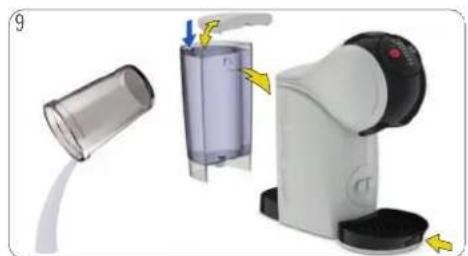
Empty the container. Fill the water tank with water, then hold and insert the water tank into the machine. Place the drip tray. The machine is ready to be used.

7.1 ONE CAPSULE (E.G. LUNGO)
7.1 ONE CAPSULE (E.G., LUNGO)
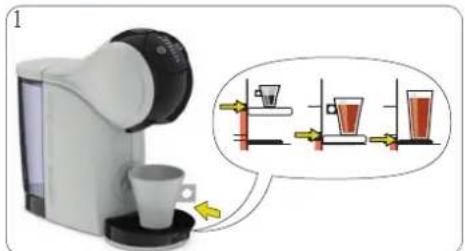
Adjust the drip tray position. Place the cup on the drip tray. See "BEVERAGE" package. Check if the water tank contains drinking water.
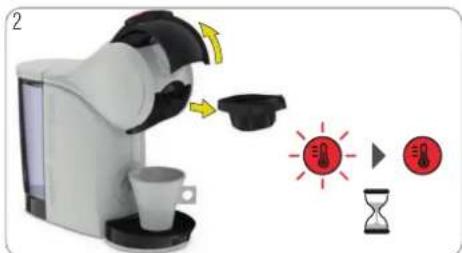
Open the locking handle. The machine switches on. Make sure the rinsing tool is not inside. Insert the capsule holder. Insert it back into the machine. The temperature selection button blinks while the machine is heating up for approximately 40 seconds. Afterwards, the temperature selection button lights steady red. The machine is ready to be used.
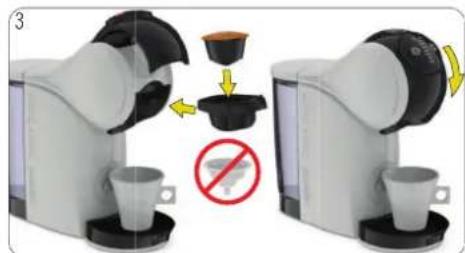
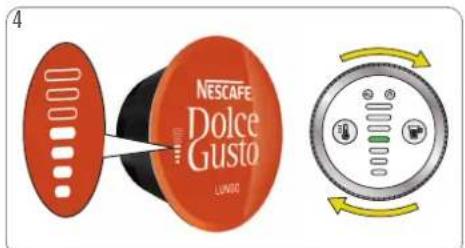
Use the control ring to set the volume in accordance with the number of bars shown on the capsule. Choose the desired volume to your own taste. Choose XL for an extra big cup. Wait around 1.5 min if you prepare a second extra big cup. The beverage preparation starts. Do not open the locking handle during extraction. The extraction volume display light blinks until the extraction stops. The machine depends on the temperature selection. The extraction can be stopped at any time manually by pressing the start/stop button.
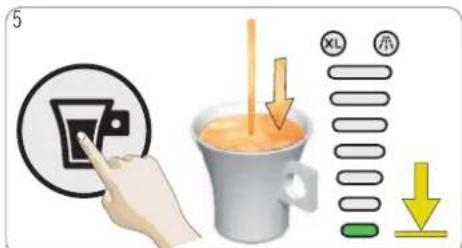
Press the start/stop button. The beverage preparation starts. Do not open the locking handle during extraction. The extraction volume display light blinks until the extraction stops. The machine depends on the temperature selection. The extraction can be stopped at any time manually by pressing the start/stop button.
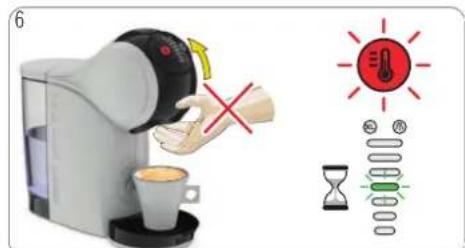
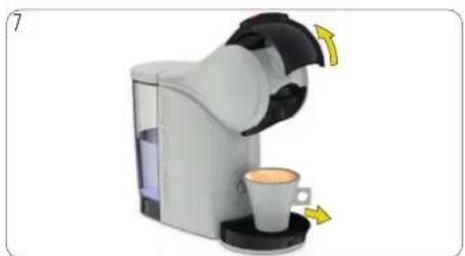
After the extraction is finished, open the locking handle. Remove the cup from the drip tray.
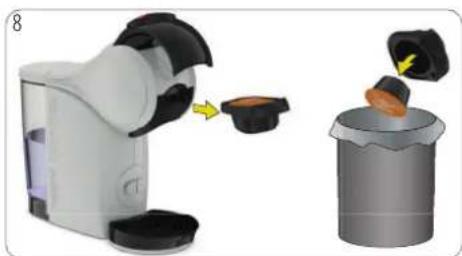
Remove the capsule holder. Remove the used capsule and dispose of it in the dustbin.
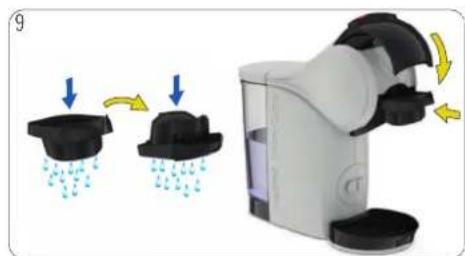
Rinse the capsule holder with fresh water. Dry the capsule holder. Insert it back into the machine. Enjoy your beverage!
7. PREPARING A BEVERAGE

7.2 TWO CAPSULES (E.G. CAPPUCCINO)
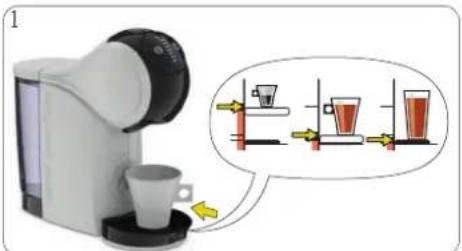
Adjust the drip tray position. Place the cup on the drip tray. See "BEVERAGE" package. Check if the water tank contains drinking water.
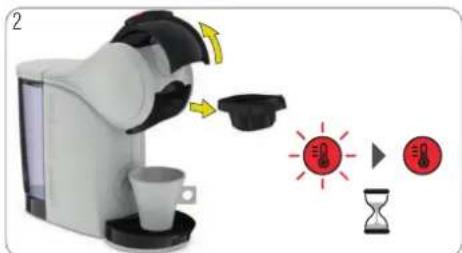
Open the locking handle. The machine switches on. Make sure the rinsing tool is not inside. Insert the capsule holder. Insert it back into the machine. The temperature selection button blinks while the machine is heating up for approximately 40 seconds. Afterwards, the temperature selection button lights steady red. The machine is ready to be used.
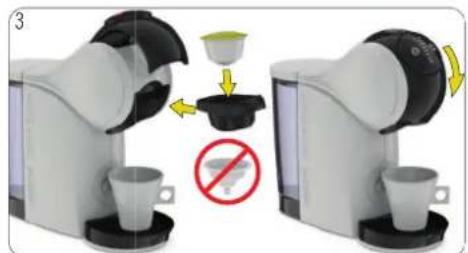
Make sure the rinsing tool is not inside. Insert the capsule holder. Insert it back into the locking handle.
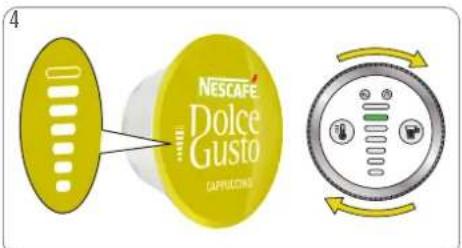
Use the control ring to set the volume in accordance with the number of bars shown on the capsule. Choose the desired volume to your own taste. Choose an extra big cup. Wait around 1.5 min if a second extra big cup is desired.
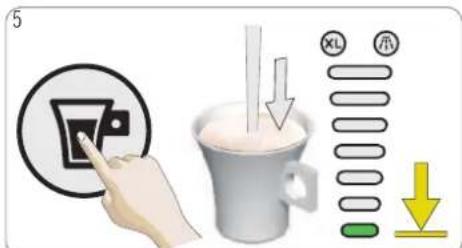
Press the start/stop button. The beverage preparation starts. Do not open the locking handle during extraction. The extraction volume display light blinks until the extraction stops. The machine depends on the temperature selection. The extraction can be stopped at any time manually by pressing the start/stop button.
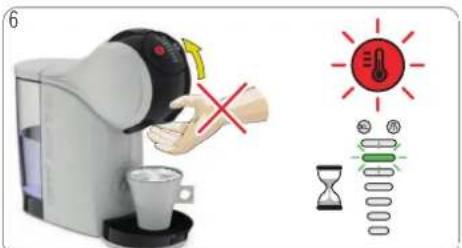
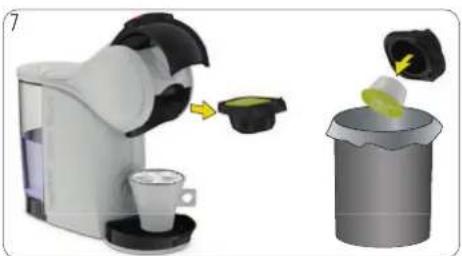
Open the locking handle. Pull out the used capsule. Put the used capsule in
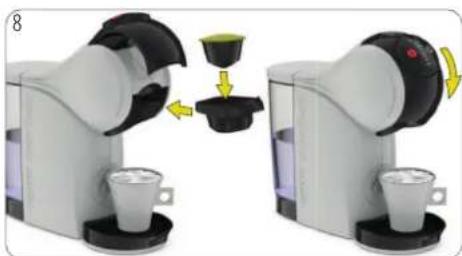
the capsule holder. Remove the capsule from the back of the machine. Close the locking handle.
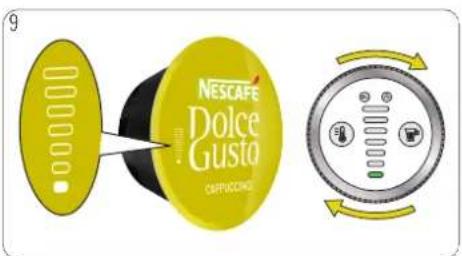
Hold the control ring to set the volume in accordance with the number of bars shown on the capsule or desired volume to your own taste.

7. PREPARING A BEVERAGE
7.2 TWO CAPSULES (E.G. CAPPUCCINO)
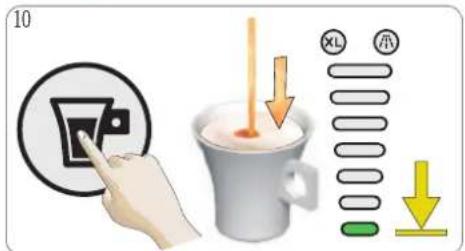
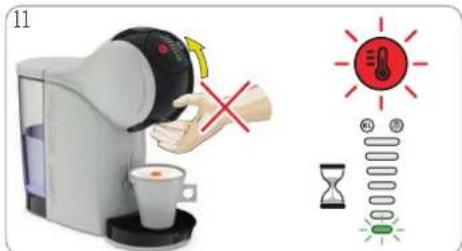
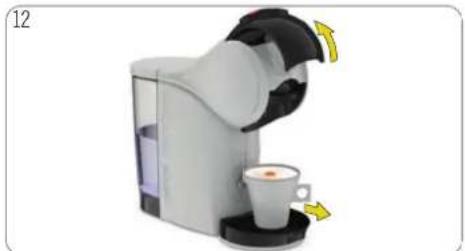
Press the start/stop button. The beverage starts. Do not open the locking handle. Wait until the extraction stops. The machine preparation automatically. The extraction can be stopped at any time manually by pressing the start/stop button.
During the preparation, the extraction volume display shows one section. During that time, do not stop the preparation by pressing the button.
The temperature indicator light blinks. Do not open the locking handle!
When the light is steady green, open the cup from the drip tray.
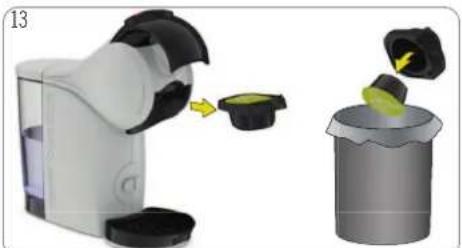
Pull out the capsule holder. Remove the used capsule and dispose of it in the dustbin.
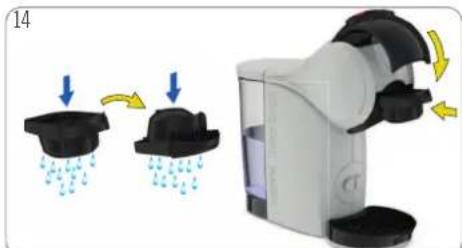
Rinse the capsule holder with fresh drinking water. Dry the capsule holder. Insert it back into the machine. Enjoy your beverage!
8. CLEANING

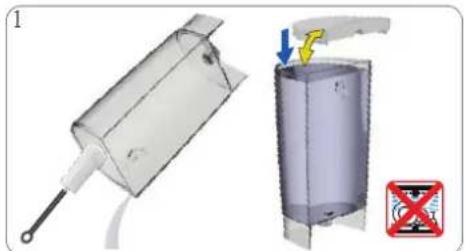
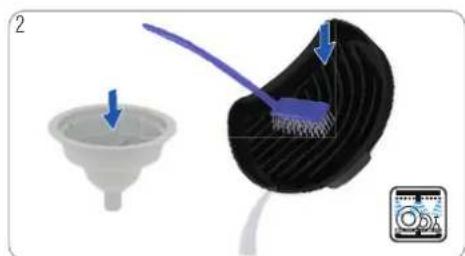
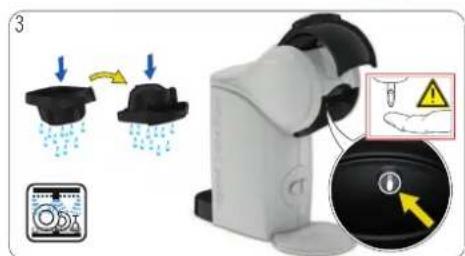
Rinse and clean the water tank. Use a clean cloth to clean the drip tray and the rinsing tool with fresh drinking water. Wash the capsule holder with water and washing-up liquid as needed. Afterwards, rinse with fresh drinking water and insert it into the machine. Alternatively, wash the drip tray in the dishwasher. Dry it afterwards. Clean the head of the machine around the injector with a clean soft cloth. Note: The water tank is not dishwasher proof!
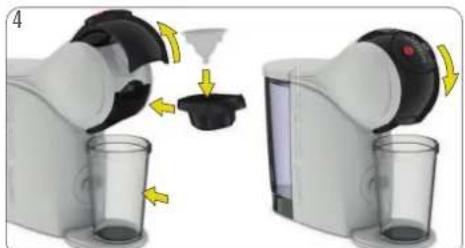
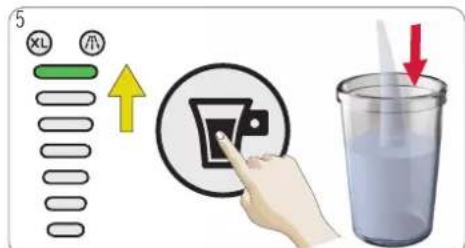
Open the locking handle. Put the rinsing tool into the capsule holder. Insert the capsule holder into the machine. Close the locking handle. Remove the drip tray and place a large empty container underneath the coffee outlet. Turn the control ring and select level 7 or Empty (higher bar). Press the start/stop button. Warning: Hot water! Use with care!
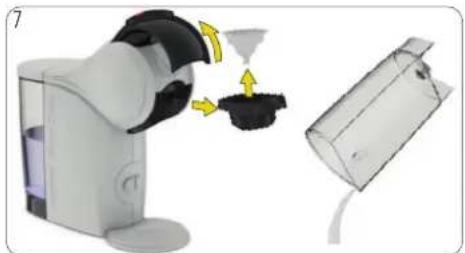
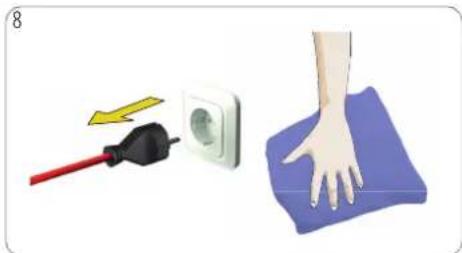
Open the locking handle. Pull out the capsule holder. Switch off the machine. Unplug the power plug! Clean the machine with a soft damp cloth. Dry it afterwards with a clean cloth. Remove the rinsing tool. Keep it in a safe place. If any, remove the water tank.

9. DESCALING AT LEAST EVERY 3–4 MONTHS
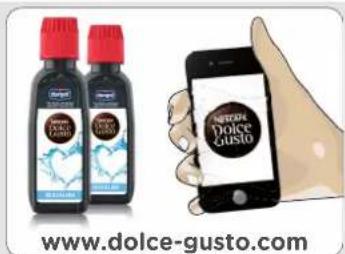
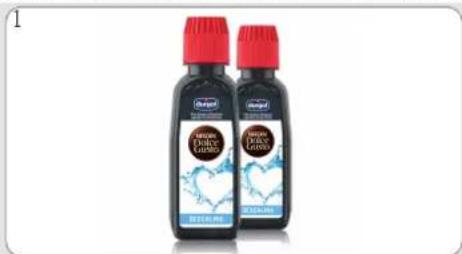
Use NESCAF Dolce Gust® liquid descaler. To order, call the NESCAF® Dolce Gust® hotline or visit the NESCAF Dolce Gust® website.
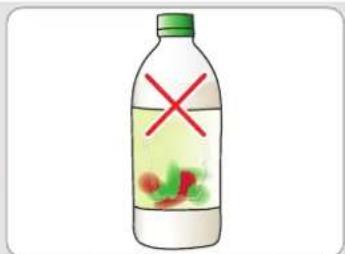
Do not use vinegar for descaling!
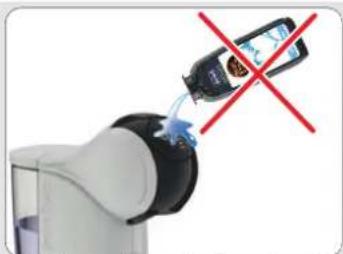
Avoid contact of the descaling solution with any part of the machine.
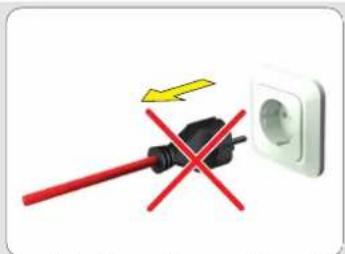
Unplug the machine during descaling.
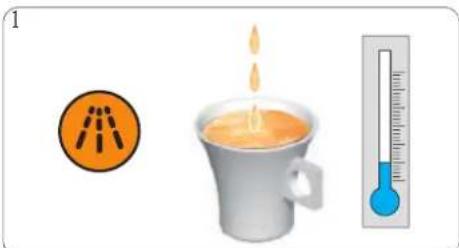
If the orange descaling indicator light turns on, or if the beverage comes out slower than usual (even in droplets), or if it is cooler than usual, the machine needs descaling. Remove the water from the water tank, pour the descaling solution into the water tank, and insert the water tank into the machine.
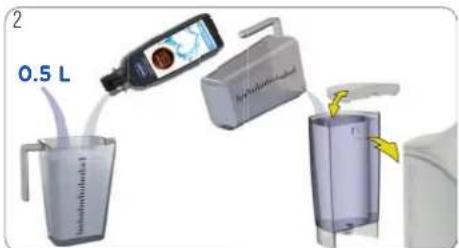
If the orange descaling indicator light turns on, or if the beverage comes out slower than usual (even in droplets), or if it is cooler than usual, the machine needs descaling. Remove the water from the water tank, pour the descaling solution into the water tank, and insert the water tank into the machine.
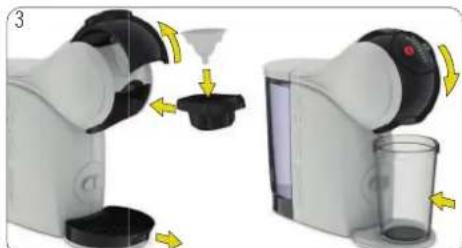
Open the brewing handle. Put the rinsing tool into the capsule holder. Insert the capsule holder into the machine and close the handle. Place a large empty container underneath the coffee outlet.
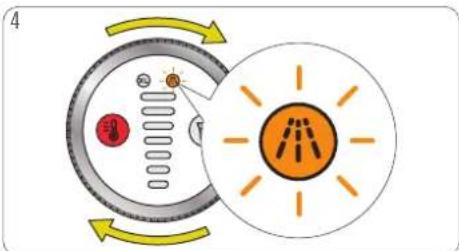
To enter the descaling mode, select XL and rotate the dial four times clockwise until the descaling indicator blinks.
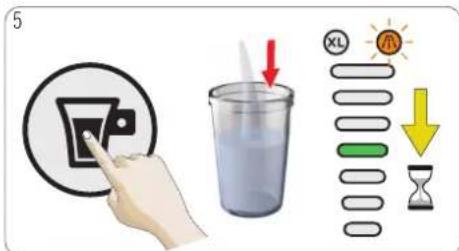
Press the start/stop button. The machine will start descaling; the display bar moves from the threshold level. The machine descales with hot water operation. The machine stops descaling once the water tank is empty.
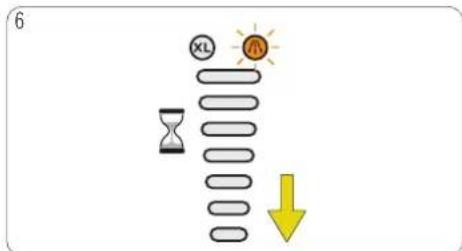
For better descaling efficiency, the machine will pause for approximately 42 minutes. The volume display moves to the stop until it disappears. The water tank
9. DESCALING AT LEAST EVERY 3–4 MONTHS

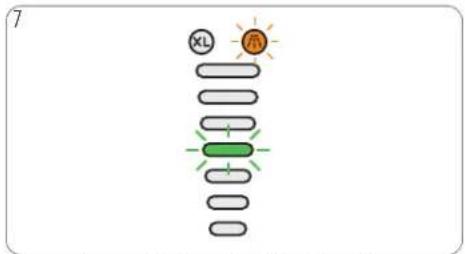
The volume display bar flashes (4)
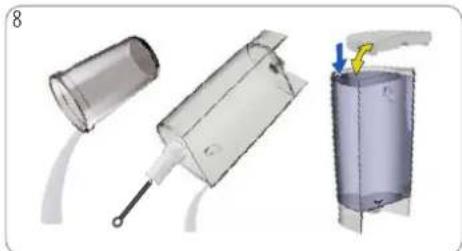
Empty and clean the container. Rinse and press the start/stop button. The machine rinses the tank. Use a clean food-safe brush and washing-up liquid with hot water. The volume display shows the progress. Refill the water tank with fresh drinking water until it disappears. The machine stops rinsing when the water tank is empty. Insert it into the machine. Place the container under the beverage outlet.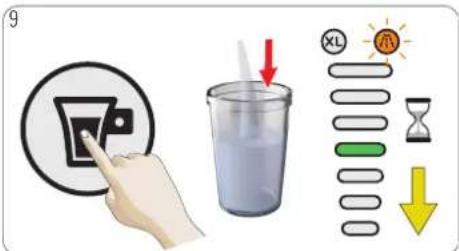
Press the start/stop button. The machine rinses with hot water. The volume display shows the progress. Refill the water tank with fresh drinking water until it disappears. The machine stops rinsing when the water tank is empty.
![graph LR A["Light Lighting"] --> B["Heat Transfer"] B --> C["Temperature Warning"] C --> D["Final Temperature Measurement"]](/content/2026/05/874996/images/8ca724c4b3108b1cc692700a33d12d0a31c7cfe9f2b04c17344d7c3de01df675.jpg)
The descaling indicator turns off, and the temperature of the solution container stabilizes. Empty and clean the machine with a soft damp cloth. Dry it and keep it in a safe place for later cleaning or descaling. Rinse both sides of the capsule holder with fresh drinking water. Reinsert the capsule holder.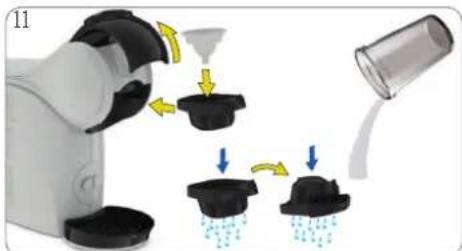
Remove the selection container. Empty and clean the machine with a soft damp cloth. Dry it and keep it in a safe place for later cleaning or descaling. Rinse both sides of the capsule holder with fresh drinking water. Reinsert the capsule holder.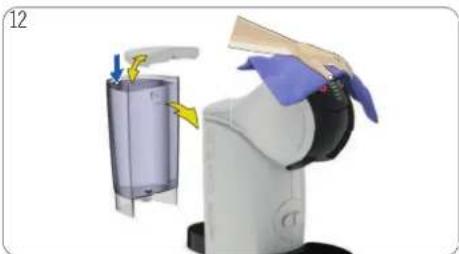

10. TROUBLESHOOTING
10.1 ORANGE DESCALING INDICATOR LIGHT TURNS ON
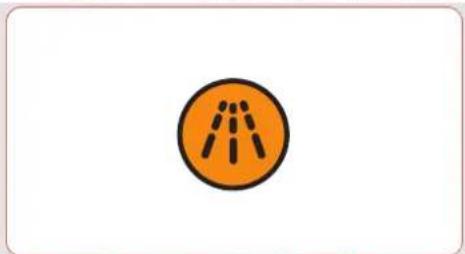
The orange descaling indicator light turns on. This means that the machine needs to be descaled. To do so, please follow the descaling instructions. See 9. "DESCALING AT LEAST EVERY 3-4 MONTHS" on page 16.
10.2 NO LIQUID COMES OUT - NO WATER?
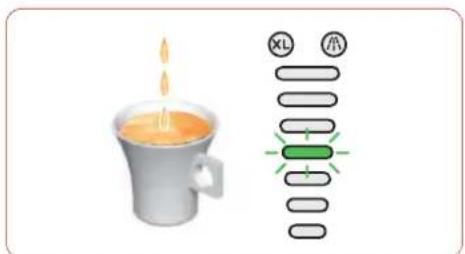
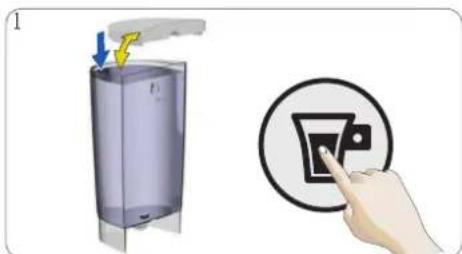
The beverage preparation stops partway during delivery or does not start at all. Check if the water tank contains enough fresh drinking water. If the water level is low, fill with fresh drinking water and press the start/stop button to continue the preparation. If there is still no liquid coming out, check 10.3 "NO LIQUID COMES OUT - CAPSULE BLOCKED?".
10. TROUBLESHOOTING

10.3 NO LIQUID COMES OUT - CAPSULE BLOCKED?
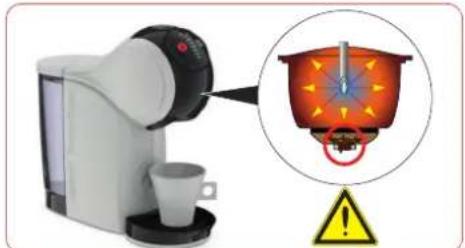
No liquid comes out: The capsule may be blocked due to pressure.
Always keep the machine upright! To stop, press the start/stop button again. Do not open the machine while it is under pressure!
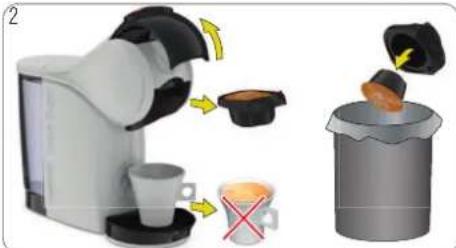
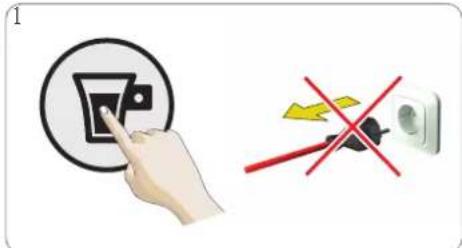
During preparation, the coffee machine is under pressure. Open the locking handle to release the pressure. Remove the capsule and put the used capsule in the dustbin.
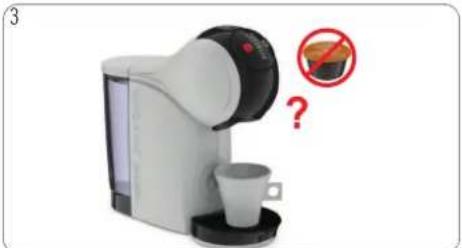
Try to operate the machine without a capsule. If the water flows, it shows that the issue was with the capsule. Just use a different capsule. If not, follow with 10.4 "NO LIQUID COMES OUT - INJECTOR BLOCKED?".
10.4 NO LIQUID COMES OUT – INJECTOR BLOCKED?
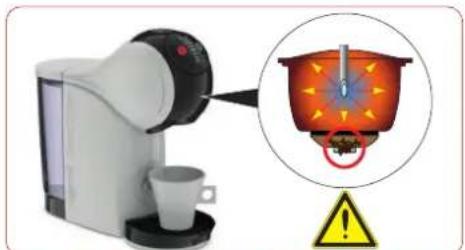
No liquid comes out: The injector may be blocked due to pressure.
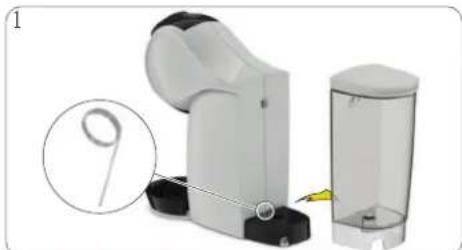
Ensure the under tray is empty. Take out the capsule holder. Keep the needle out of reach of children.
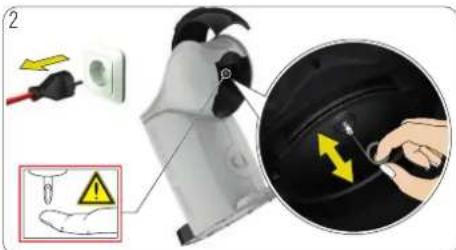
Remove the capsule holder. Open the locking handle and clean the injector with the cleaning needle. Follow instructions in section 9, "DESCALING AT LEAST EVERY 3-4 MONTHS" on page 16.

10. TROUBLESHOOTING
10.5 VARIOUS
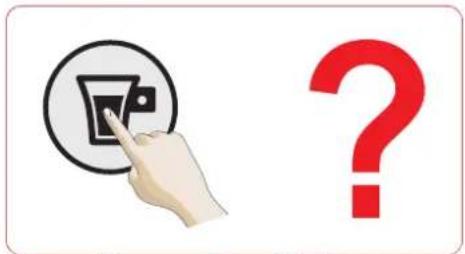
The machine cannot be switched on.
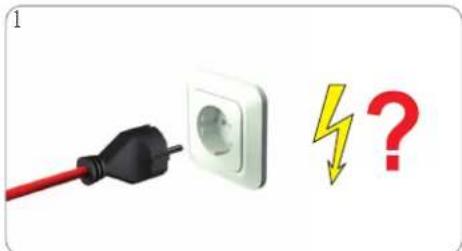
Check if the power plug is correctly plugged into the power socket. If yes, check your electricity supply.
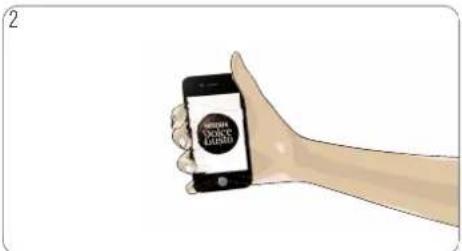
If the machine still cannot be switched on, call the NESCAFÉ® Dolce Gusto® hotline. For the hotline number, see "Machine Hotlines".
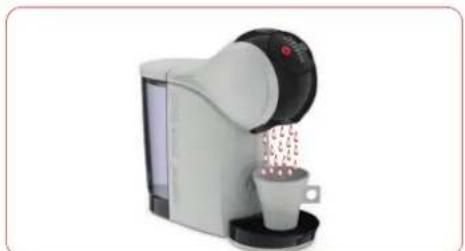
The beverage is splashing out of the
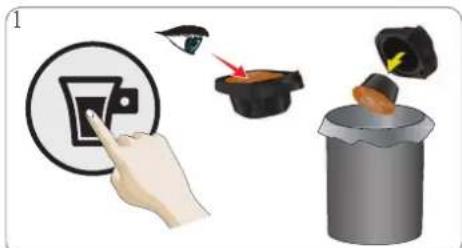
coffee. Press the start/stop button to stop the preparation. Remove the capsule holder. Put the used capsule in
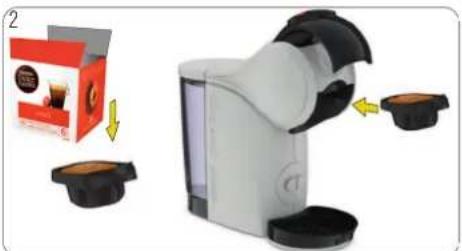
the capsule container. Insert a new capsule into the capsule holder and insert it back into the machine.
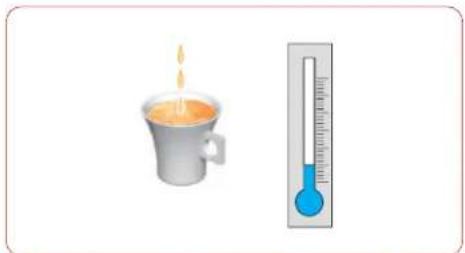
If the beverage comes out slower than usual (e.g., only droplets), or if it is cooler than usual, the machine may need to be descaled.
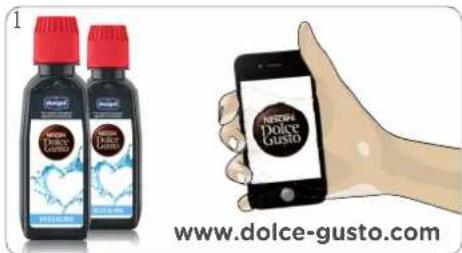
If the beverage comes out slower than usual, please follow the descaling instructions. See section 9, "DESCALING AT LEAST EVERY 3-4 MONTHS" on page 16.
10. TROUBLESHOOTING

10.5 VARIOUS
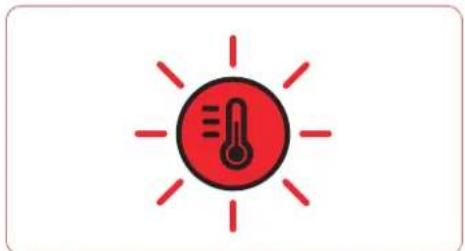
The temperature selection button blinks fast.
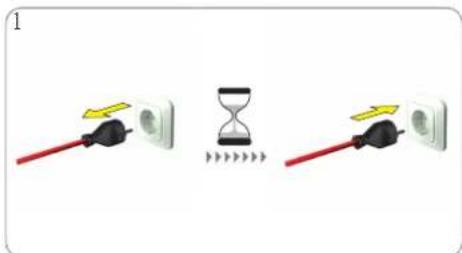
Check if capsule is blocked, see 10.3.
"NO LIQUID COMES OUT - CAPSULE BLOCKED?" or NESCAFÉ Dolce Gusto® hotline. For the hotline number: Unplug the power plug and wait 20 minutes. See afterword page. Insert the power plug into the mains power socket and switch the machine on.
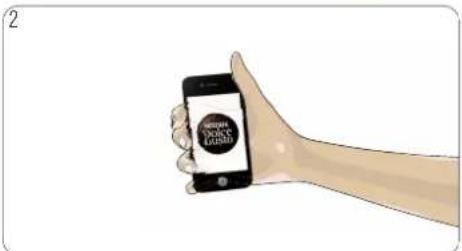
If the temperature selection button still flashes 1
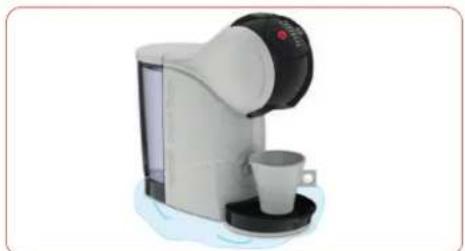
Water accumulates underneath or around the machine. Unplug the power plug! Clear water leaks around the capsule holder during the beverage preparation.
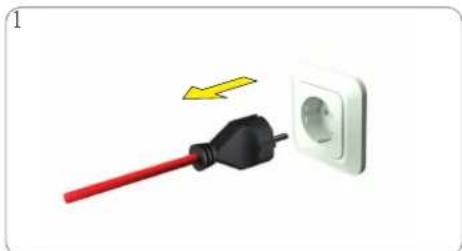
Unplug the power plug! during the
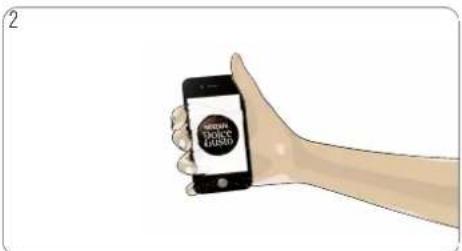
Call the NESCAFÉ Dolce Gusto® hotline or go on the NESCAFÉ® Dolce Gusto® website. For the hotline number see last page.
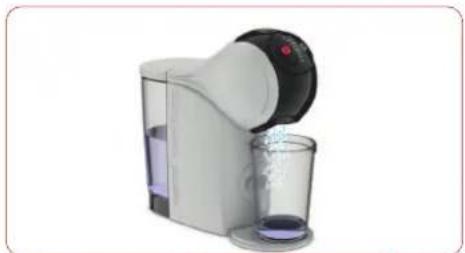
Water is splashing out of the coffee outlet. Put the rinsing tool into the capsule holder. Insert the descaling capsule holder into the machine.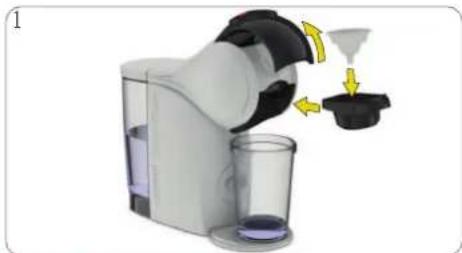




HOTLINES

- TABLE OF CONTENTS
- SAFETY PRECAUTIONS
- INTENDED USE
- ELECTRICAL POWER SUPPLY
- CONDITIONS OF USE
- RECYCAFNG USE AND
- CHILDREN
- EUROPEAN MARKETS ONLY: THINK OF THE ENVIRONMENT
- MAINTENANCE
- MACHINE OVERVIEW
- ECONOMY MODE
- TECHNICAL DATA
- KEY FEATURES
- INTUITIVE LED CONTROL RING
- HOW TO START THE MACHINE
- COLD MODE
- BEVERAGE EXAMPLES
- RECOMMENDATIONS FOR SAFE USE
- FIRST USE RINSING
- ONE CAPSULE (E.G. LUNGO)
- ONE CAPSULE (E.G., LUNGO)
- PREPARING A BEVERAGE
- TWO CAPSULES (E.G. CAPPUCCINO)
- CLEANING
- DESCALING AT LEAST EVERY 3–4 MONTHS
- TROUBLESHOOTING
- ORANGE DESCALING INDICATOR LIGHT TURNS ON
- NO LIQUID COMES OUT - NO WATER
- NO LIQUID COMES OUT - CAPSULE BLOCKED
- NO LIQUID COMES OUT – INJECTOR BLOCKED
- VARIOUS
Brand : KRUPS
Model : Nescafé Dolce Gusto Genio S
Category : Coffee maker