DRON-004 - Drone Steren - Free user manual and instructions
Find the device manual for free DRON-004 Steren in PDF.


| Product Type | Mini Drone |
| Model | DRON-004 |
| Brand | Steren |
| Drone Input Voltage | 3.7 V |
| Remote Control Input | 4.5 V (3 AAA batteries) |
| Frequency | 2.4 GHz |
| Battery Capacity | 3.7 V, 220 mAh |
| Charging Time | Approximately 60 minutes |
| Flight Time | Approximately 7 minutes |
| Flight Modes | Headless Mode, 360° Spin, Speed Levels (3) |
| Calibration | Manual flight calibration via remote |
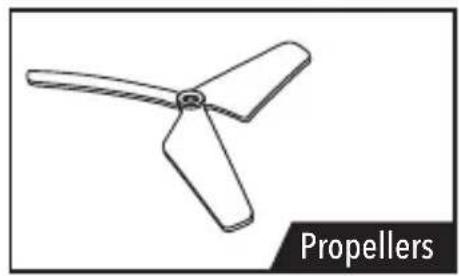
| Propeller Replacement | Yes, with screw (letters marked) |
| Safety Features | Low battery indicator, overload protection |
| Recommended Age | 14 years and above (under adult supervision) |
| Warranty | 3 months on battery, components, and labor |
| Dimensions (Approx.) | 15 cm x 15 cm x 5 cm |
| Weight (Approx.) | 50 g |
Frequently Asked Questions - DRON-004 Steren
User questions about DRON-004 Steren
0 question about this device. Answer the ones you know or ask your own.
Ask a new question about this device
Download the instructions for your Drone in PDF format for free! Find your manual DRON-004 - Steren and take your electronic device back in hand. On this page are published all the documents necessary for the use of your device. DRON-004 by Steren.
USER MANUAL DRON-004 Steren
natural_image
Line drawing of a multi-rotor drone with four propellers and a central body (no text or symbols)natural_image
Line drawing of a drone with multiple propellers and control panels (no text or symbols)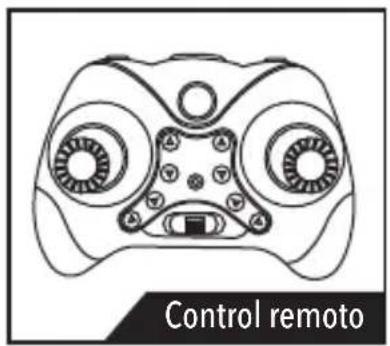
natural_image
Line drawing of a three-bladed propeller (no text or symbols on the propeller itself)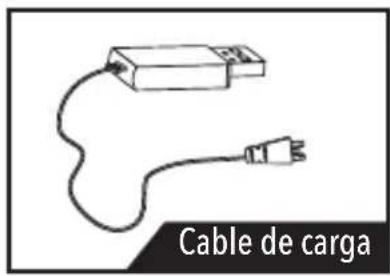
PARTES
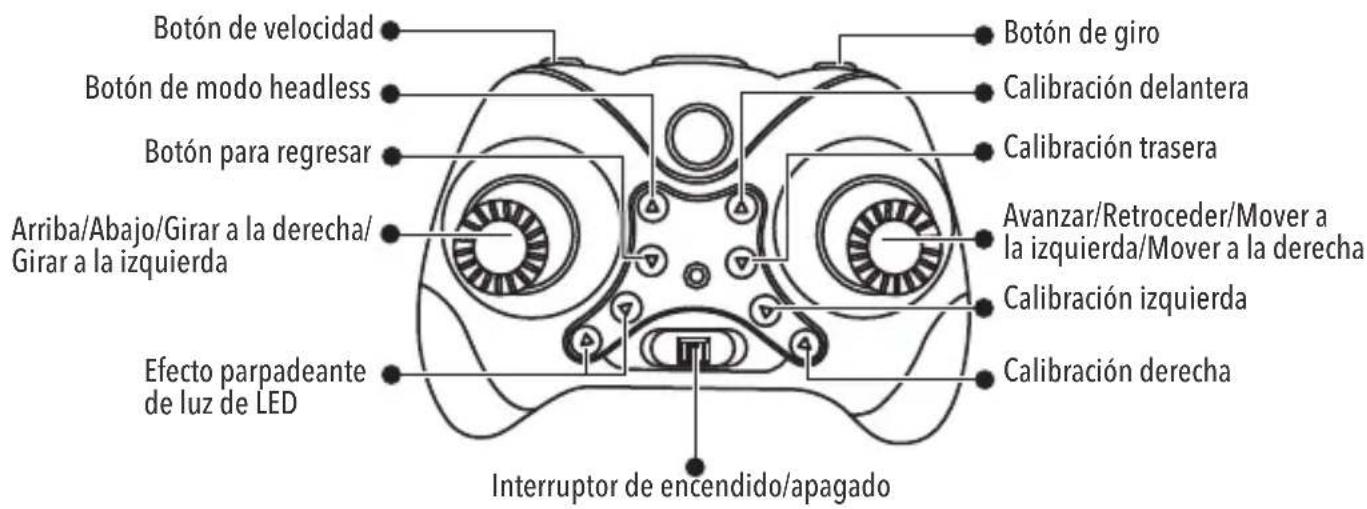
CONTROL REMOTO
CARGAR BATERÍA DEL DRON

natural_image
Diagram showing two connected electrical components with a cable, no text or symbols present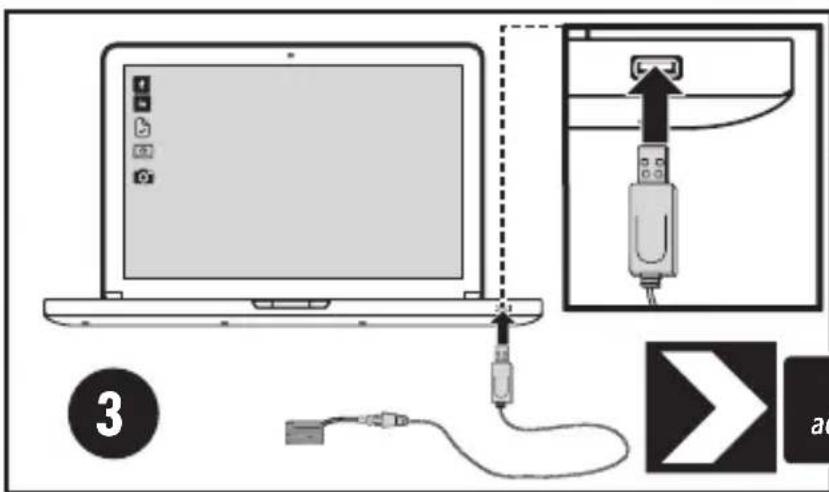
natural_image
Top-down line drawing of a four-bladed drone with propellers and control panel (no text or symbols)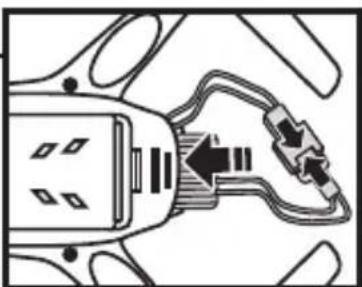
natural_image
Diagram of a plug inserted into a socket with internal wiring (no text or symbols)natural_image
Diagram of a game controller with directional arrows indicating movement or force (no text or symbols)ANTES DE EMPEZAR...
REINICIO
natural_image
Diagram of a device's top view with two circular eyes and directional arrows indicating movement or force (no text or symbols)natural_image
Line drawing of a game controller with a hand pointing to the button (no text or symbols)natural_image
Diagram of a multi-rotor drone with directional arrows indicating movement or force (no text or symbols)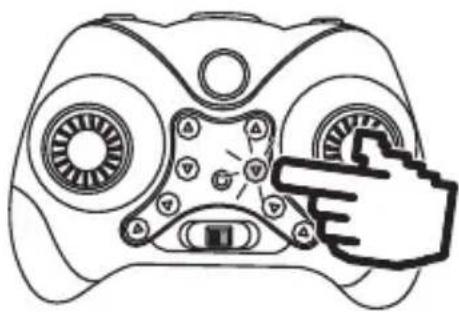
natural_image
Line drawing of a game controller with a hand pointing to the button (no text or symbols)natural_image
Diagram of a drone with four wings and bidirectional arrows indicating top, bottom, and side (no text or symbols)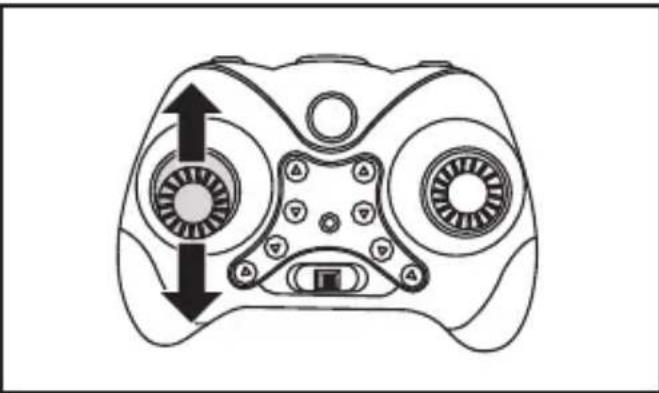
natural_image
Line drawing of a game controller with directional arrows indicating movement or force (no text or symbols)natural_image
Line drawing of a multi-rotor drone with propellers and a central body, shown in motion with no text or symbols.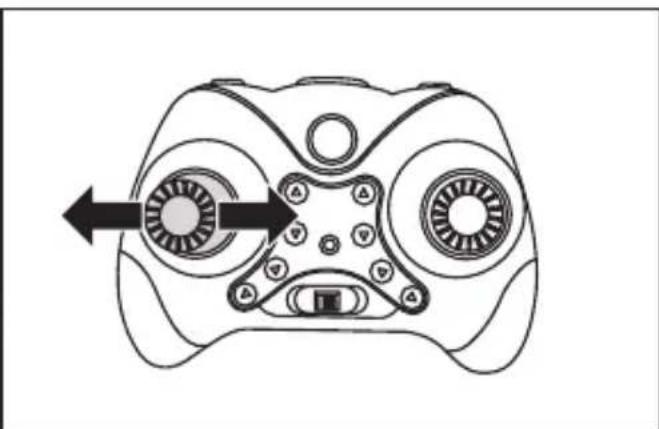
natural_image
Line drawing of a game controller with two circular buttons and directional arrows indicating movement (no text or symbols)
AVANZAR/REGRESAR
natural_image
Diagram of a multi-blade drone with directional arrows indicating top and bottom windings (no text or symbols)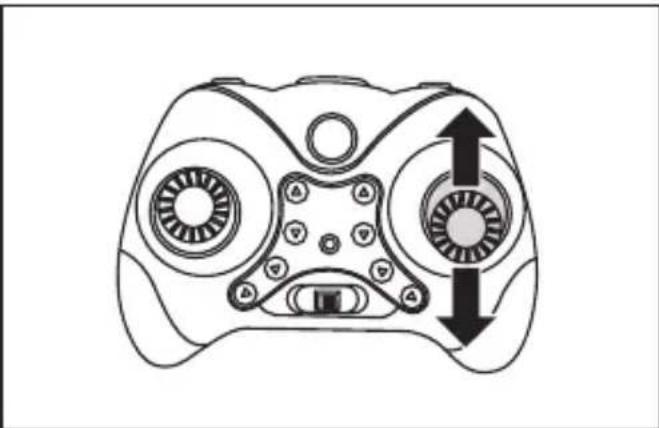
natural_image
Line drawing of a game controller with directional arrows indicating movement or force (no text or symbols)VOLAR HACIA LA DERECHA/IZQUIERDA
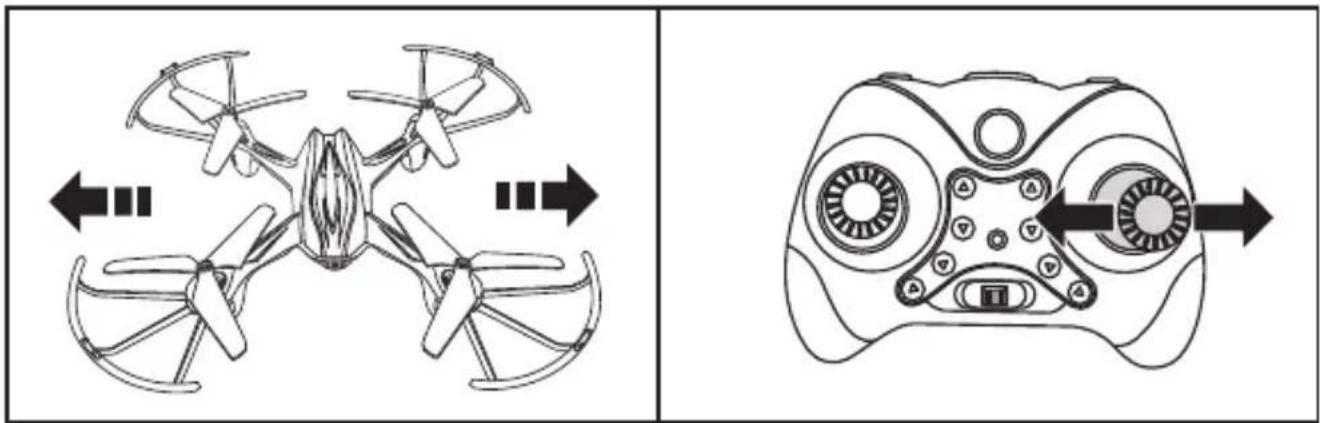
natural_image
Two technical diagrams showing a drone with directional arrows and a control panel with circular elements (no text or symbols)GIRO DE 360°
STEREN PRODUCTO EMPACADO S.A. DE C.V.
Autopista México-Querétaro. Km 26.5 Sin número, Nave Industrial 3-A, Col. Lomas de Boulevares, Tlalnepantla de Baz, Estado de México, C.P. 54020, RFC: SPE-941215-H43
natural_image
Line drawing of a multi-rotor drone with four propellers and a central body (no text or symbols)IMPORTANT
Before to use the product, please read carefully this manual to avoid any malfunction.
The info in this manual is shown as reference. Because to updates can exist difference.
Consult our website (www.steren.com) to obtain the most actual version of this manual.
CAUTIONS
It is essential that the user follows the recommendations and warnings included in this manual. Steren is not responsible by material damages or personal injuries caused by to ignore cautions or by wrong use
- This device should NOT be used by kids under 14 years.
- Children must used this product only under adult supervision.
- Keep an eye always to the drone to avoid colliding with people, animals or objects.
- Don't touch the propellers while working.
- Be careful with the manipulation of the battery, may be hot.
- Don't use the drone with bad weather (rain, strong wind or electric storm).
- Keep away from high tension cables, trees, buildings or others dangerous areas.
- Avoid strong drops, may cause damages.
- This device cannot be used by people with different abilities, unless they have preparation and supervision.
- Don't try to open the device, may cause malfunction and the warranty will be avoid.
- If the battery is hot, leave it some minutes to cool before using again.
- Only use the included charging cable.
- Be sure that the battery connector is in the right position before to insert it into the drone. Never force the connections.
- Don't pull the battery cables; manipulate carefully to avoid damages in the connections.
- If the battery is damaged, you must leave to use it immediately.
- Choose an open area to operate the drone.
- Leave at less 1.5 m of distance between you and the drone at all time.
- Always turn off the control and disconnect the drone cables. If you do not use the drone and control for an extended period of time, remove the batteries after use.
The operation of this device is subject to the following two conditions: (1) it is possible that this device may not cause harmful interference and (2) this device must accept any interference, including interference that may cause undesired operation.
CONTENT
natural_image
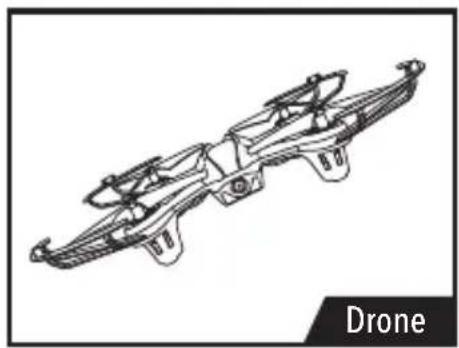
Line drawing of a multi-rotor drone with visible propellers and control panels (no text or symbols)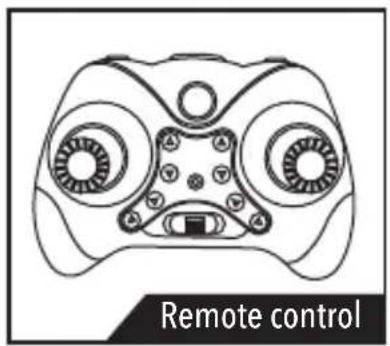
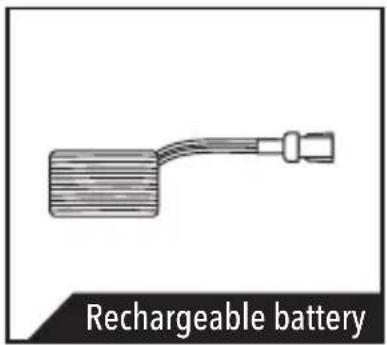
natural_image
Line drawing of a propeller with three blades and a central hub, labeled 'Propellers' (no other text or symbols)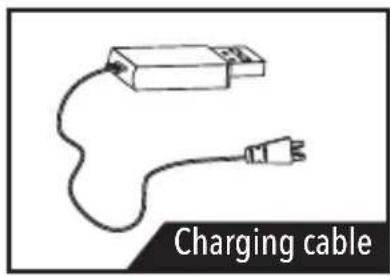
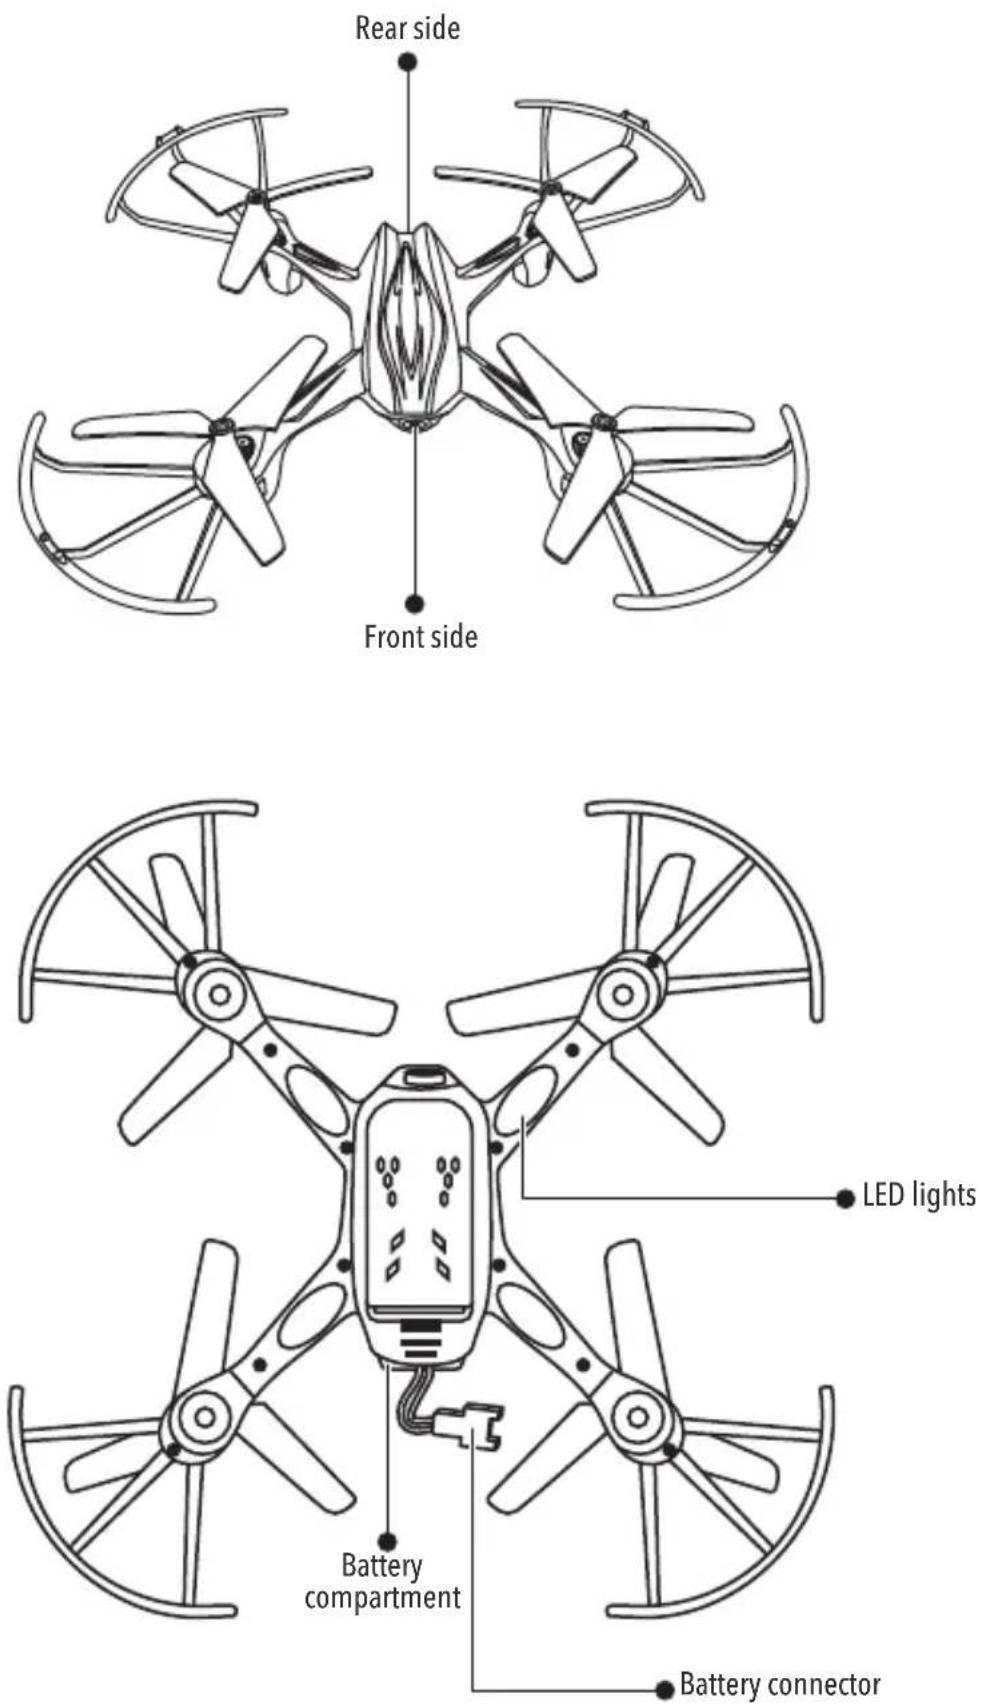
PARTS
REMOTE CONTROL
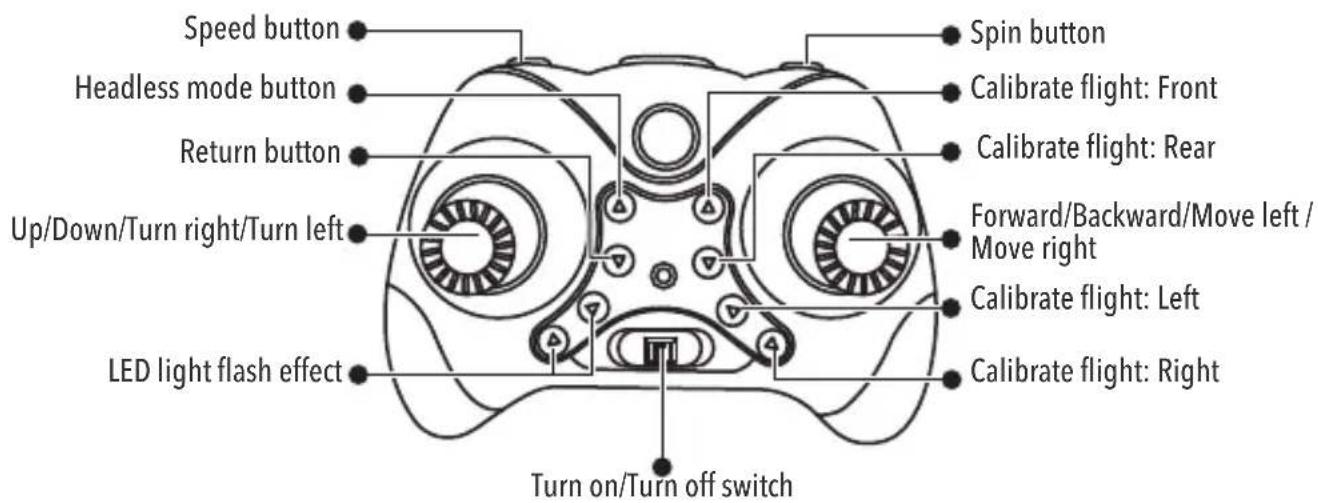
Use 3 AAA batteries
![[UM-41,902] AA81 2V6.2 [UM-41,902] AA81 2V6.2 [UM-41,902] AA81 2V6.2](/content/2026/05/872758/images/28f32ce41c0d7f6bcbd204a9a3baf96aac525ab6b10ea87c0ee75e2a720fe400.jpg)
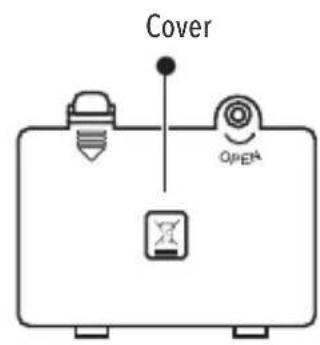
Batteries compartment
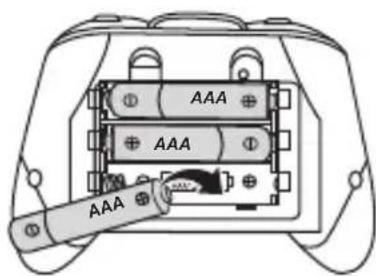
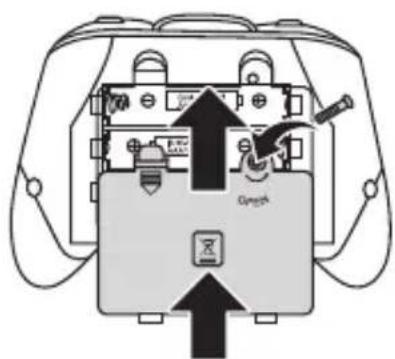
PLACING BATTERIES IN THE REMOTE CONTROL

Place correctly the batteries polarity
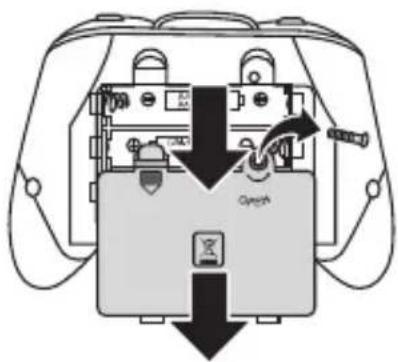
Remove the screw and then the cover.
Insert 3 AAA batteries

Place the cover and then the screw.
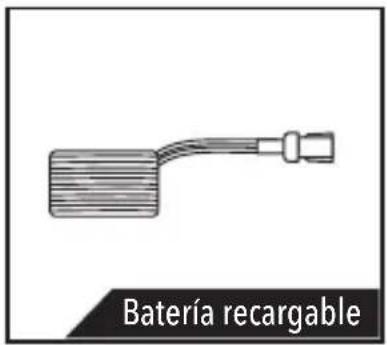
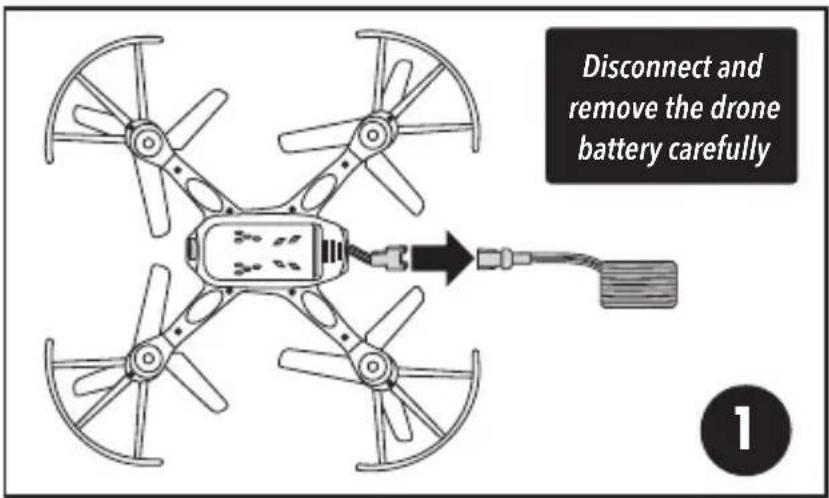
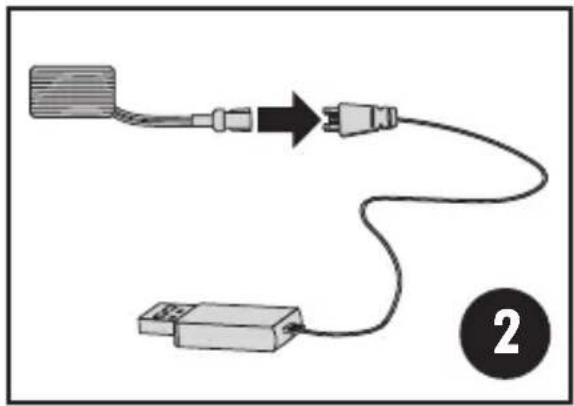
CHARGING DRONE BATTERY

Before using the drone charge the battery for 60 minutes
natural_image
Diagram showing two connected electrical components with a cable, no text or symbols present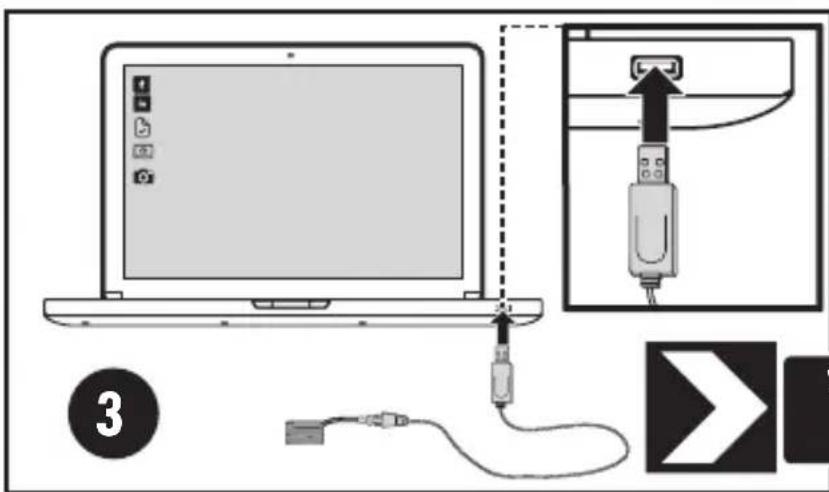
The approximate flight time with the battery fully charged is 7 minutes
You can also use a power adapter (not included)
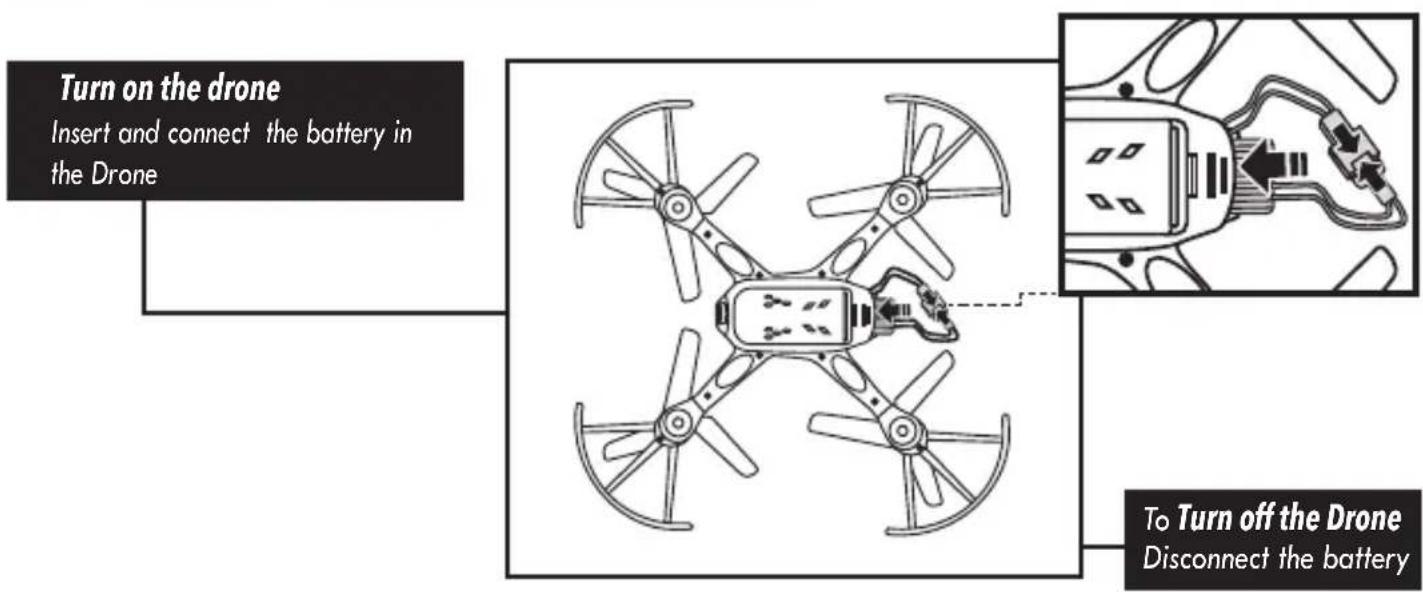
HOW TO TURN THE DRONE ON AND OFF
PAIRING DRONE WITH THE REMOTE CONTROL
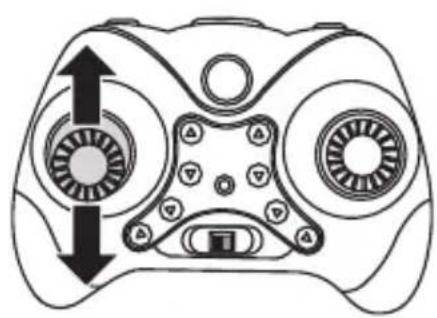
Before turn on the remote control, make sure that the left lever is in the middle.
1 Connect the drone battery.
2 Turn on the remote control. Will hear a Beep
3 Push the lever to up and down. Will hear a Beep
The LED will remain on
natural_image
Line drawing of a game controller with directional arrows indicating movement (no text or symbols)BEFORE TO START...
RESTART
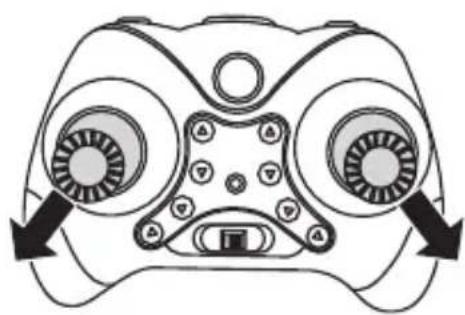
The first time that you use the drone, restart functions to start the flight properly. Later, you can do this operation every time you need to return the drone to the factory settings. All settings made before will be deleted Push the two levers and keep them for a few seconds, as shown in the image.
natural_image
Diagram of a game controller head with two circular buttons and directional arrows indicating motion (no text or symbols)FLIGHT CALIBRATION
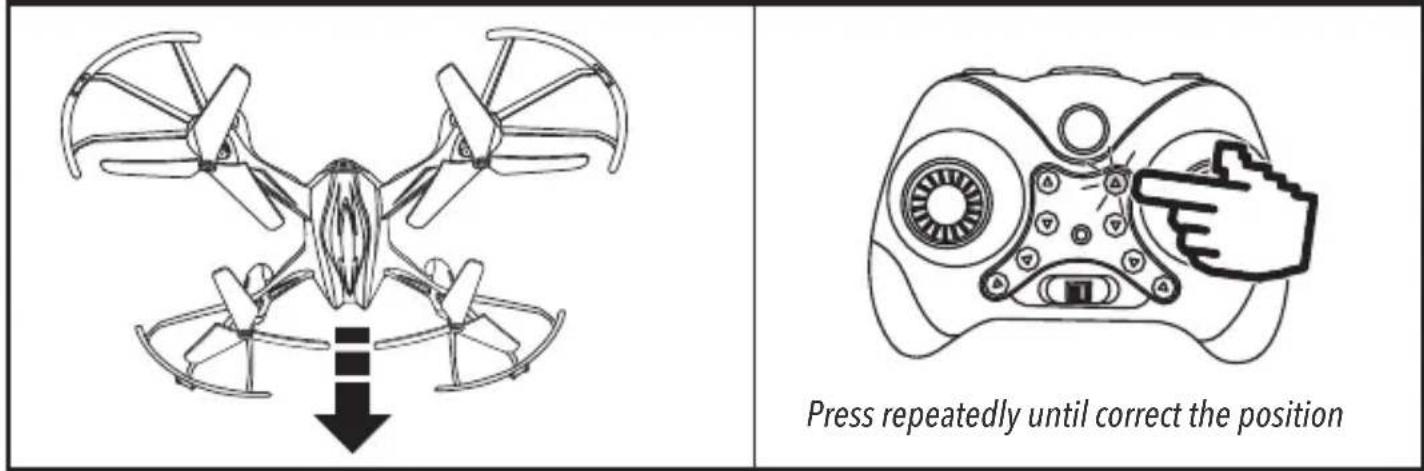
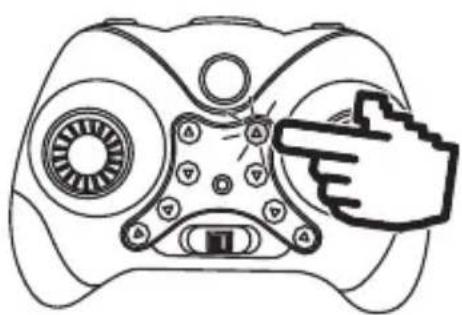
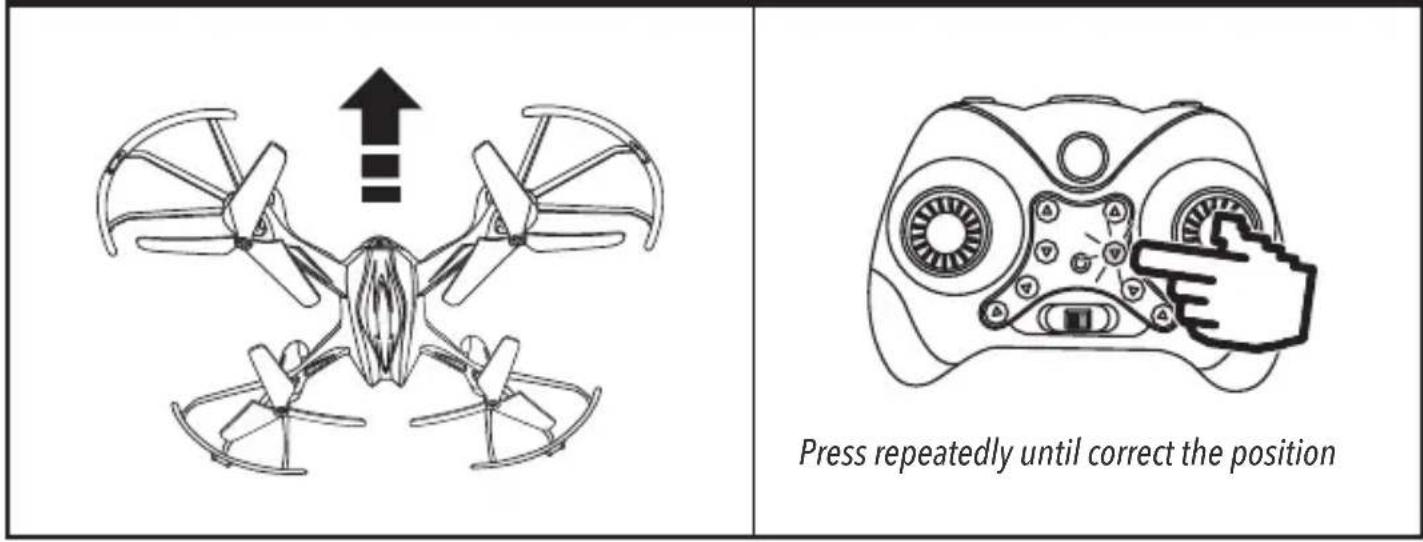
Drone stability can be affected by environmental conditions. If you note that the drone has an unusual inclination towards a particular position, slide calibration buttons corresponding to the opposite direction.
If the drone leans Left slide press the Right Calibration Button, as shown in the image.
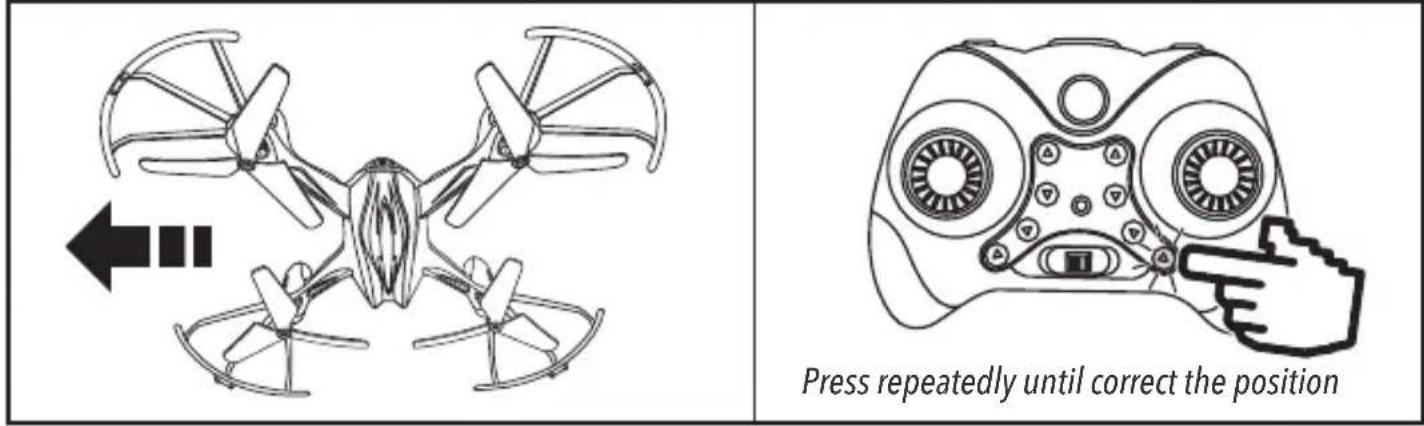
If the drone leans Right slide press the Left Calibration Button, as shown in the image.
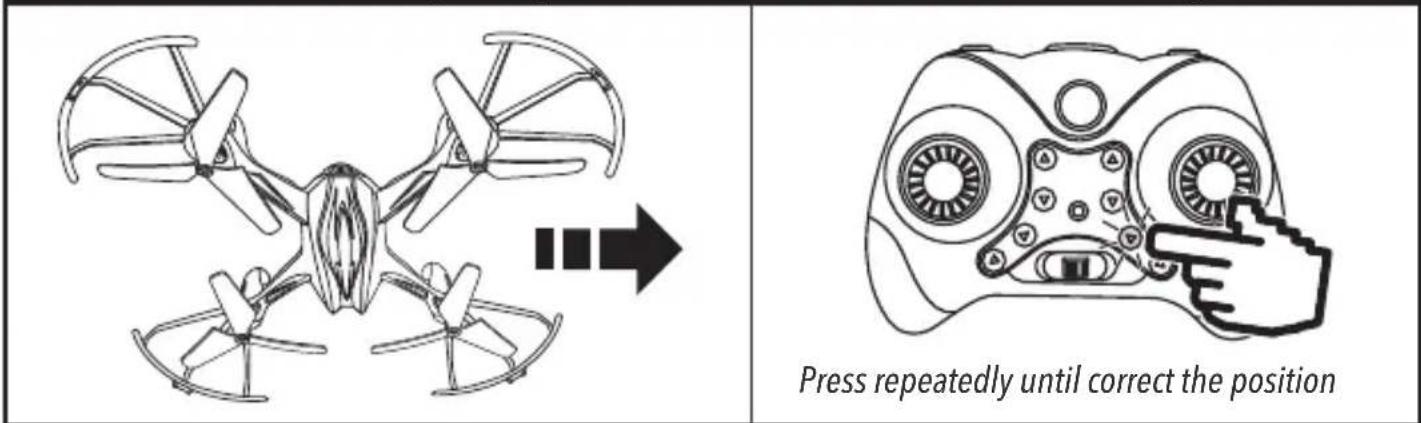
If the drone leans Back slide press the Forward Calibration Button, as shown in the image.
natural_image
Line drawing of a game controller with a hand pointing to the button (no text or symbols)If the drone leans Forward slide press the Backward Calibration Button, as shown in the image.
SPEED SELECTION
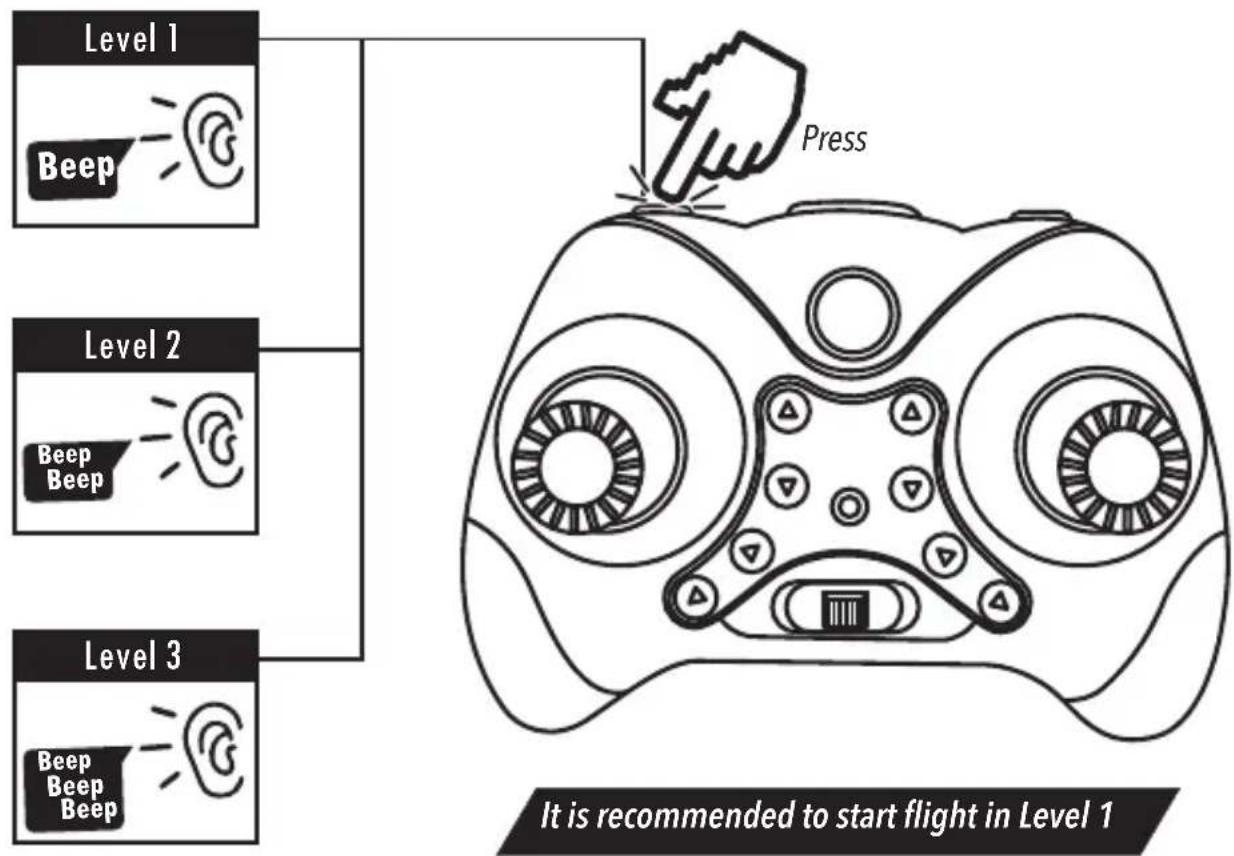
The drone has three speed levels:
flowchart
graph TD
    A["Level 1: Beep"] --> B["Level 2: Beep Beep"]
    B --> C["Level 3: Beep Beep Beep"]
    D["Press"] --> E["Next Step"]

It is recommended to practice drone movements until obtain a controlled and stable flight. Manipulate the levers slowly to avoid drops or sudden shocks.

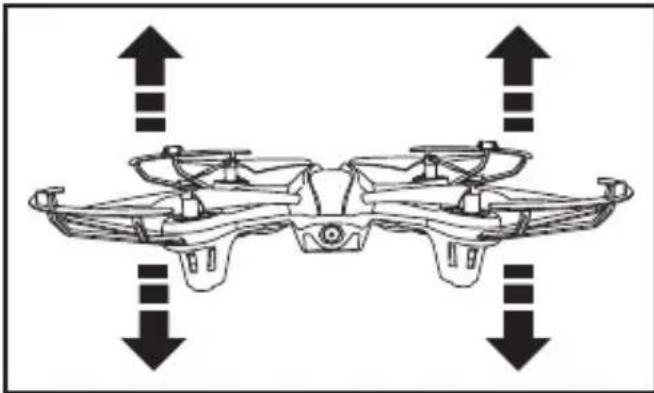
ASCEND/DESCEND
natural_image
Diagram of a drone with four wings and bidirectional arrows indicating force or movement (no text or symbols)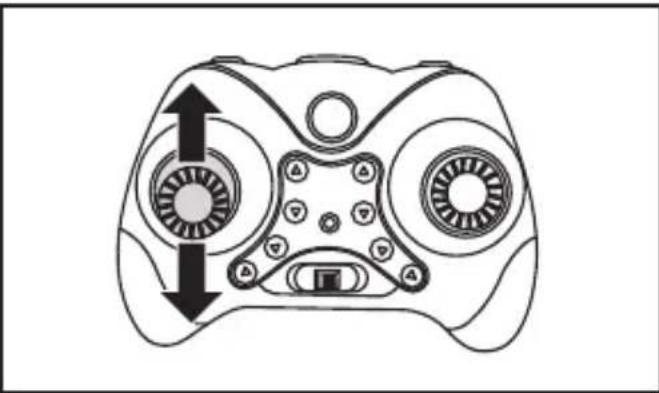
natural_image
Line drawing of a game controller with directional arrows indicating movement or force (no text or symbols)When the drone is at the desired height, hold the lever in this position

natural_image
Line drawing of a multi-rotor drone with propellers and a central body, shown in flight (no text or symbols)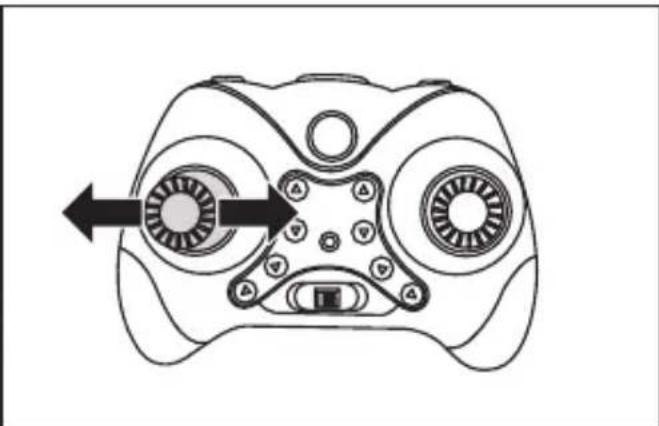
natural_image
Line drawing of a game controller with two circular buttons and directional arrows indicating motion (no text or symbols)
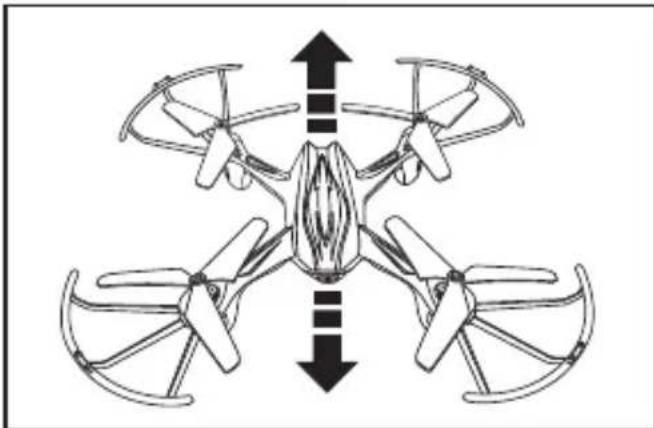
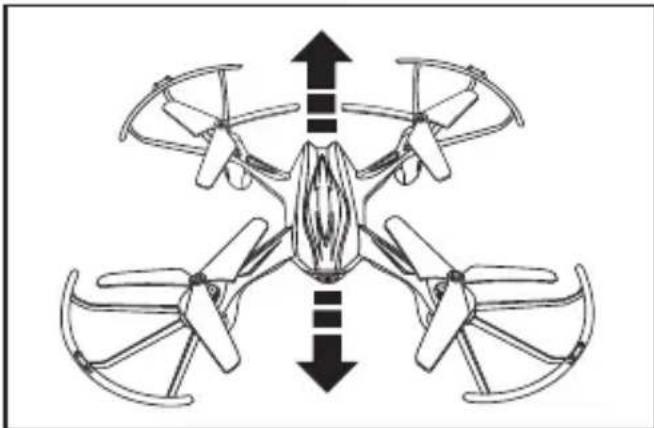
FORWARD/BACKWARD
natural_image
Diagram of a multi-blade drone with directional arrows indicating top and bottom windings (no text or symbols)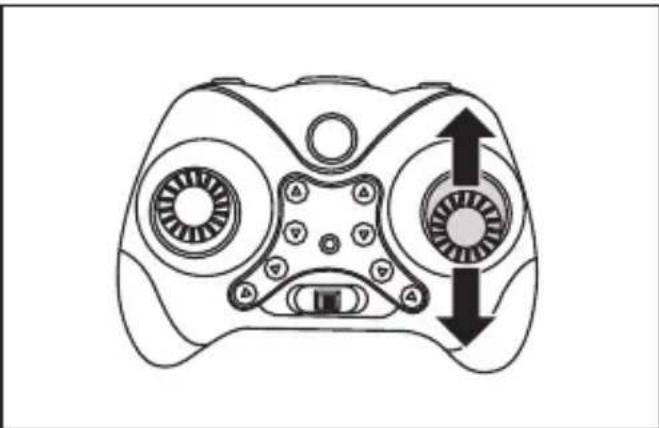
natural_image
Line drawing of a game controller with directional arrows indicating movement or force (no text or symbols)natural_image
Two technical diagrams showing a drone with four propellers and directional arrows, alongside a handheld device with circular control buttons (no text or symbols)360° SPINNING
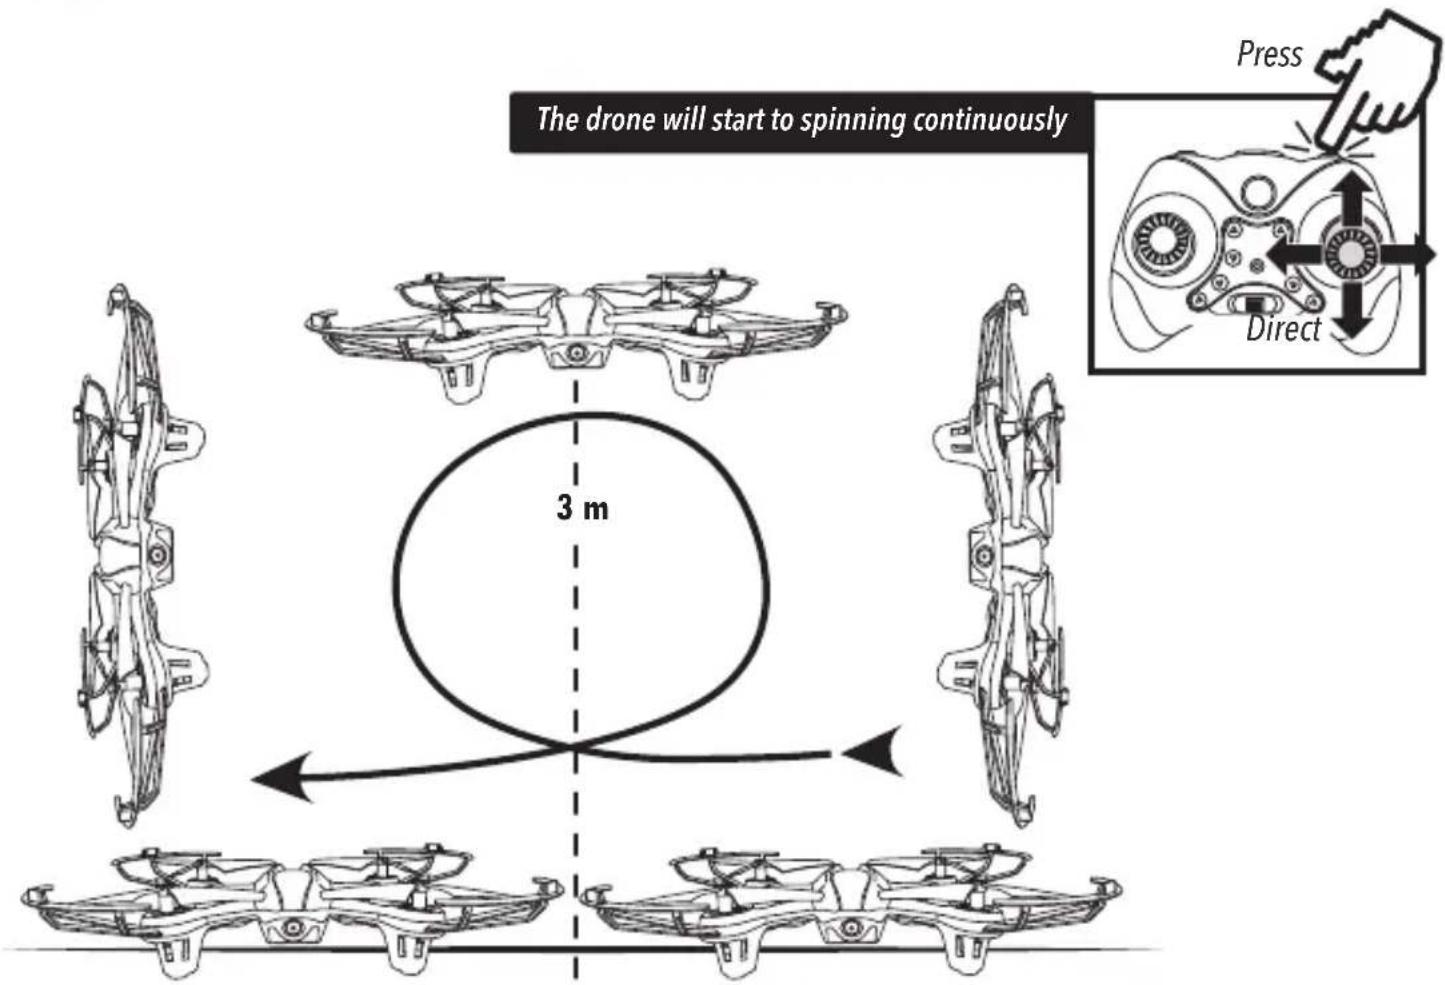
1 Elevate the drone at least 1.5 meters.
2 Press and hold the 360^ spin button and then move movement lever to the side that want to spin the drone.
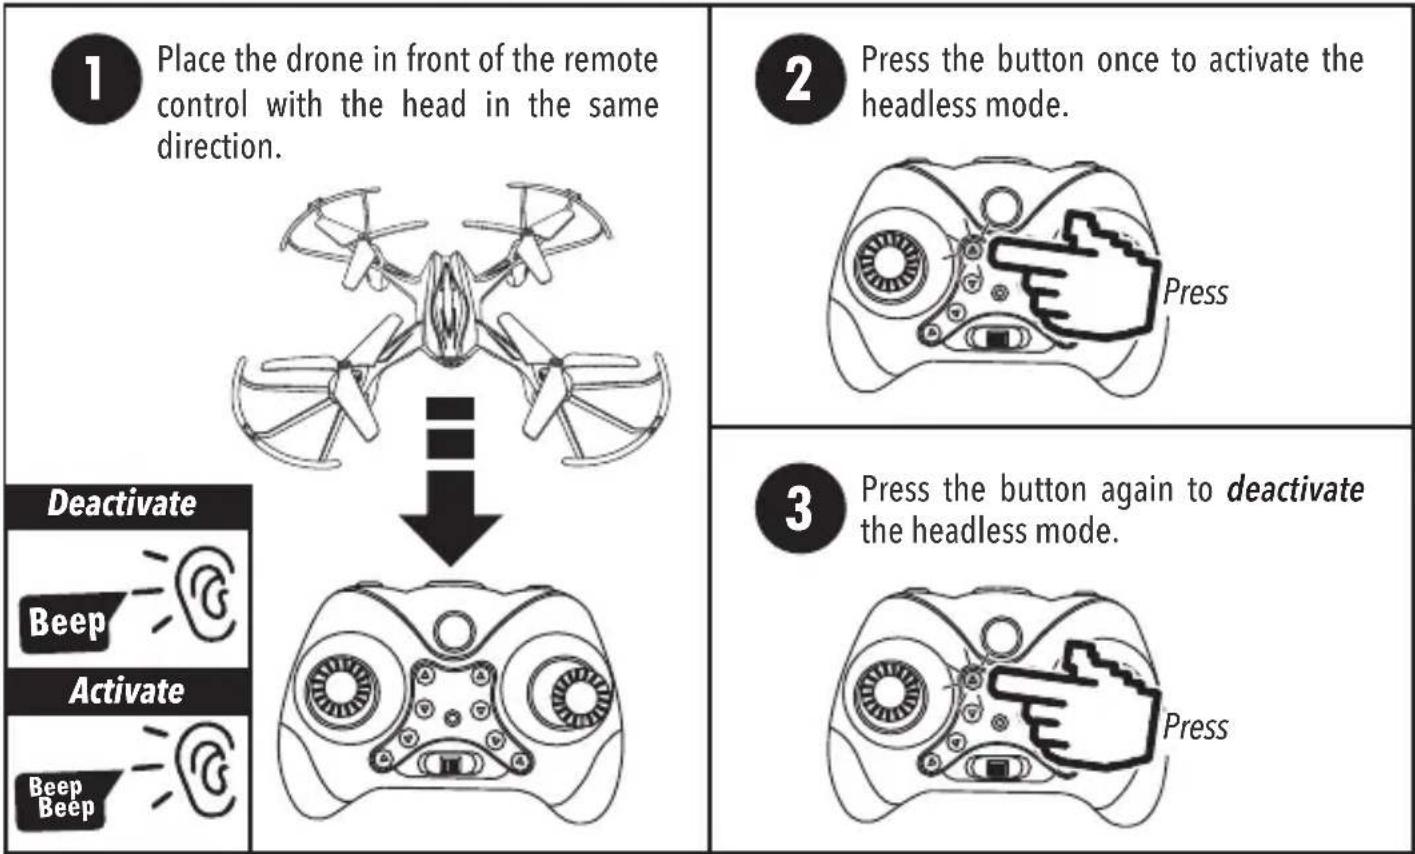
HEADLESS MODE
This function is useful for manipulating the drone when it is at distances where it is difficult to recognize the front. When this mode is activated, the drone will automatically recognize the front position of the remote control as the head.
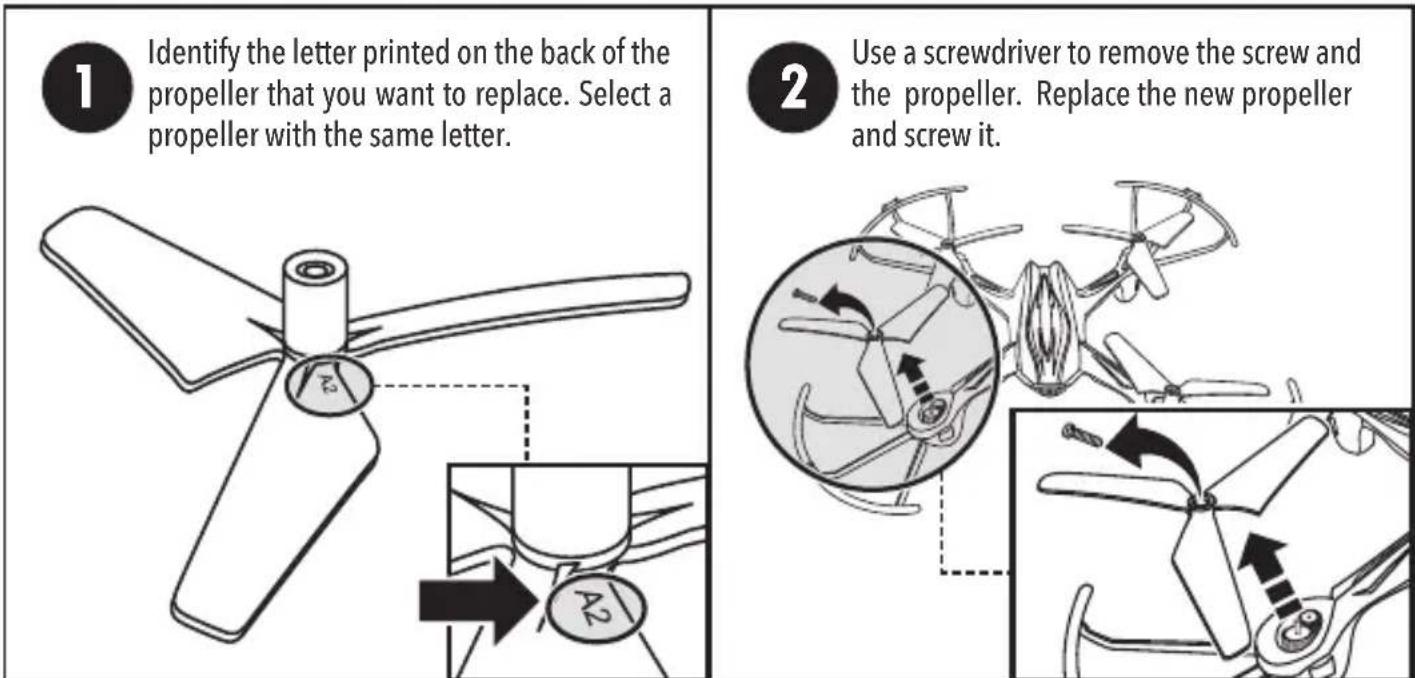
PROPELLERS REPLACEMENT
TROUBLE SOLUTION
| The drone does not turn on | Check the batteries in the remote control, if it is necessary, replace them with new ones.Charge the drone battery at 100%. |
| The drone does not rise | Check that all propellers are in good condition.Follow the flight instructions to operate the device properly. |
SPECIFICATIONS
Specifications may vary without previous notice
Drone input: 3.7 V—
Remote control input: 4.5 V— (3 "AAA" battery type)
Frequency: 2.4 GHz
Battery: 3.7 V--- 220 mAh

STEREN
Product: 6-axis 3-speed MINI DRONE
Part number: DRON-004
Brand: Steren
WARRANTY
This Steren product is warranted under normal usage against defects in workmanship and materials to the original purchaser for three months on the battery, components and labor, from the date of purchase.
CONDITIONS
- This warranty card with all the required information, invoice, product box or package, and product, must be presented when warranty service is required.
- If the product is in the warranty time, the company will repair it free of charge.
- The repairing time will not exceed 30 natural days, from the day the claim was received.
- Steren sell parts, components, consumables and accessories to customer, as well as warranty service, at any of the addresses mentioned later.
THIS WARRANTY IS VOID IN THE NEXT CASES:
If the product has been damaged by an accident, acts of God, mishandling, leaky batteries, failure to follow enclosed instructions, improper repair by unauthorized personnel, improper safe keeping, among others.
a) The consumer can also claim the warranty service in the purchase establishment.
b) If you lose the warranty card, we can reissue it, if you show the invoice or purchase ticket.
RETAILER INFORMATION
Name of the retailer
Address
Product
Brand

01 800 500 9000
- PARTES
- CONTROL REMOTO
- CARGAR BATERÍA DEL DRON
- ANTES DE EMPEZAR...
- REINICIO
- VOLAR HACIA LA DERECHA/IZQUIERDA
- GIRO DE 360°
- IMPORTANT
- CAUTIONS
- CONTENT
- PARTS
- REMOTE CONTROL
- PLACING BATTERIES IN THE REMOTE CONTROL
- CHARGING DRONE BATTERY
- HOW TO TURN THE DRONE ON AND OFF
- PAIRING DRONE WITH THE REMOTE CONTROL
- BEFORE TO START...
- RESTART
- FLIGHT CALIBRATION
- SPEED SELECTION
- ASCEND/DESCEND
- FORWARD/BACKWARD
- 360° SPINNING
- HEADLESS MODE
- PROPELLERS REPLACEMENT
- SPECIFICATIONS
- WARRANTY
- CONDITIONS
- THIS WARRANTY IS VOID IN THE NEXT CASES:
- RETAILER INFORMATION
Brand : Steren
Model : DRON-004
Category : Drone