
DS-2TS03-15XF/W - Camera Hikvision - Free user manual and instructions
Find the device manual for free DS-2TS03-15XF/W Hikvision in PDF.


| Product Type | Thermal Camera |
| Brand | Hikvision |
| Model | DS-2TS03-15XF/W |
| Thermal Sensor Resolution | 384 × 288 pixels |
| Focal Length | 15 mm |
| Detection Range (Object 1.7m×0.5m) | Up to 300 m |
| Field of View | 36.0° × 27.0° |
| Image Enhancement | DDE, Digital Zoom (×4) |
| Network Connector | 1 × RJ45 10/100 Base-T |
| Power Supply | 12 VDC or PoE (802.3af) |
| Power Consumption | ≤ 6 W |
| Dimensions (with Base) | 218.9 × 90.5 × 91.2 mm |
| Weight | Approx. 1.1 kg |
| Ingress Protection | IP67 |
| Operating Temperature | -40 °C to 65 °C |
| Main Functions | Temperature measurement, fire prevention, perimeter detection |
| Cleaning Instructions | Use a soft dry cloth; avoid solvents or abrasive cleaners |
| Safety Precautions | Do not disassemble; avoid direct eye exposure to laser (if any) |
| Spare Parts Availability | Contact Hikvision dealer for replacement parts |
| Reparability | Repair only by authorized service center |
Frequently Asked Questions - DS-2TS03-15XF/W Hikvision
User questions about DS-2TS03-15XF/W Hikvision
0 question about this device. Answer the ones you know or ask your own.
Ask a new question about this device
Download the instructions for your Camera in PDF format for free! Find your manual DS-2TS03-15XF/W - Hikvision and take your electronic device back in hand. On this page are published all the documents necessary for the use of your device. DS-2TS03-15XF/W by Hikvision.
USER MANUAL DS-2TS03-15XF/W Hikvision
Handheld Thermal Monocular
user manual

Legal Information
About this Manual
The Manual includes instructions for using and managing the Product. Pictures, charts, images and all other information hereinafter are for description and explanation only. The information contained in the Manual is subject to change, without notice, due to firmware updates or other reasons. Please find the latest version of this Manual at the company website Please use this Manual with the guidance and assistance of professionals trained in supporting the Product.
Trademarks Acknowledgement
Trademarks and logos mentioned are the properties of their respective owners.
LEGAL DISCLAIMER
TO THE MAXIMUM EXTENT PERMITTED BY APPLICABLE LAW, THIS MANUAL AND THE PRODUCT DESCRIBED, WITH ITS HARDWARE, SOFTWARE AND FIRMWARE, ARE PROVIDED "AS IS" AND "WITH ALL FAULTS AND ERRORS". OUR COMPANY MAKES NO WARRANTIES, EXPRESS OR IMPLIED, INCLUDING WITHOUT LIMITATION, MERCHANTABILITY, SATISFACTORY QUALITY, OR FITNESS FOR A PARTICULAR PURPOSE. THE USE OF THE PRODUCT BY YOU IS AT YOUR OWN RISK. IN NO EVENT WILL OUR COMPANY BE LIABLE TO YOU FOR ANY SPECIAL, CONSEQUENTIAL, INCIDENTAL, OR INDIRECT DAMAGES, INCLUDING, AMONG OTHERS, DAMAGES FOR LOSS OF BUSINESS PROFITS, BUSINESS INTERRUPTION, OR LOSS OF DATA, CORRUPTION OF SYSTEMS, OR LOSS OF DOCUMENTATION, WHETHER BASED ON BREACH OF CONTRACT, TORT (INCLUDING NEGLIGENCE), PRODUCT LIABILITY, OR OTHERWISE, IN CONNECTION WITH THE USE OF THE PRODUCT, EVEN IF OUR COMPANY HAS BEEN ADVISED OF THE POSSIBILITY OF SUCH DAMAGES OR LOSS.
YOU ACKNOWLEDGE THAT THE NATURE OF INTERNET PROVIDES FOR INHERENT SECURITY RISKS, AND OUR COMPANY SHALL NOT TAKE ANY RESPONSIBILITIES FOR ABNORMAL OPERATION, PRIVACY LEAKAGE OR OTHER DAMAGES RESULTING FROM CYBER-ATTACK, HACKER ATTACK, VIRUS INSPECTION, OR OTHER INTERNET SECURITY RISKS; HOWEVER, OUR COMPANY WILL PROVIDE TIMELY TECHNICAL SUPPORT IF REQUIRED.
YOU AGREE TO USE THIS PRODUCT IN COMPLIANCE WITH ALL APPLICABLE LAWS, AND YOU ARE SOLELY RESPONSIBLE FOR ENSURING THAT YOUR USE CONFORMS TO THE APPLICABLE LAW. ESPECIALLY, YOU ARE RESPONSIBLE, FOR USING THIS PRODUCT IN A MANNER THAT DOES NOT INFRINGE ON THE RIGHTS OF THIRD PARTIES, INCLUDING WITHOUT LIMITATION, RIGHTS OF PUBLICITY, INTELLECTUAL PROPERTY RIGHTS, OR DATA PROTECTION AND OTHER PRIVACY RIGHTS. YOU SHALL NOT USE THIS PRODUCT FOR ANY PROHIBITED END-USES, INCLUDING THE DEVELOPMENT OR PRODUCTION OF WEAPONS OF MASS DESTRUCTION, THE DEVELOPMENT OR PRODUCTION OF CHEMICAL OR BIOLOGICAL WEAPONS, ANY ACTIVITIES IN THE CONTEXT RELATED TO ANY NUCLEAR EXPLOSIVE OR UNSAFE
NUCLEAR FUEL-CYCLE, OR IN SUPPORT OF HUMAN RIGHTS ABUSES.
IN THE EVENT OF ANY CONFLICTS BETWEEN THIS MANUAL AND THE APPLICABLE LAW, THE LATER PREVAILS.
Regulatory Information
FCC Information
Please take attention that changes or modification not expressly approved by the party responsible for compliance could void the user's authority to operate the equipment.
FCC compliance: This equipment has been tested and found to comply with the limits for a Class A digital device, pursuant to part 15 of the FCC Rules. These limits are designed to provide reasonable protection against harmful interference when the equipment is operated in a commercial environment. This equipment generates, uses, and can radiate radio frequency energy and, if not installed and used in accordance with the instruction manual, may cause harmful interference to radio communications. Operation of this equipment in a residential area is likely to cause harmful interference in which case the user will be required to correct the interference at his own expense.
FCC Conditions
This device complies with part 15 of the FCC Rules. Operation is subject to the following two conditions:
- This device may not cause harmful interference.
- This device must accept any interference received, including interference that may cause undesired operation.
EU Conformity Statement

This product and - if applicable - the supplied accessories too are marked with "CE" and comply therefore with the applicable harmonized European standards listed under the EMC Directive 2014/30/EU, the RoHS Directive 2011/65/EU
natural_image
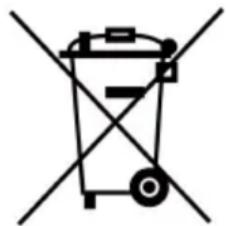
Symbol of a trash bin crossed with a diagonal line, representing waste sorting or disposal (no text or labels)2012/19/EU (WEEE directive): Products marked with this symbol cannot be disposed of as unsorted municipal waste in the European Union. For proper recycling, return this product to your local supplier upon the purchase of equivalent new equipment, or dispose of it at designated collection points. For more information see: www.recyclethis.info
natural_image
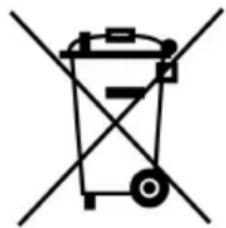
Symbol of a trash bin crossed with a diagonal line, representing waste sorting or disposal (no text or labels)2006/66/EC (battery directive): This product contains a battery that cannot be disposed of as unsorted municipal waste in the European Union. See the product documentation for specific battery information. The battery is marked with this symbol, which may include lettering to indicate cadmium (Cd), lead (Pb), or mercury (Hg). For proper recycling, return the battery to your supplier or to a designated collection point. For more information see:www.recyclethis.info

Industry Canada ICES-003 Compliance
This device meets the CAN ICES-3 (A)/NMB-3(A) standards requirements.
Warning
This is a class A product. In a domestic environment this product may cause radio inter-ference in which case the user may be required to take adequate measures.
Symbol Conventions
The symbols that may be found in this document are defined as follows.
| Symbol Description | ||
 | Danger | Indicates a hazardous situation which, if not avoided, will or could result in death or serious injury. |
 | Caution | Indicates a potentially hazardous situation which, if not avoided, could result in equipment damage, data loss, performance degradation, or unexpected results. |
 | Note | Provides additional information to emphasize or supplement important points of the main text. |
Safety Instruction
These instructions are intended to ensure that user can use the product correctly to avoid danger or property loss.
Laws and Regulations
- The device should be used in compliance with local laws, electrical safety regulations, and fire prevention regulations.
Transportation
- Keep the device in original or similar packaging while transporting it.
Power Supply
- Please purchase the charger by yourself. Input voltage should meet the Limited Power Source (5 VDC, 2A) according to the IEC61010-1 standard. Please refer to technical specifications for detailed information.
- Make sure the plug is properly connected to the power socket.
- DO NOT connect multiple devices to one power adapter, to avoid over-heating or fire hazards caused by overload.
Battery
- Improper use or replacement of the battery may result in explosion hazard.
- The built-in battery cannot be dismantled. Please contact the manufacture for repair if necessary.
- For long-term storage of the battery, make sure it is fully charged every half year to ensure the battery quality. Otherwise, damage may occur.
Maintenance
- If the product does not work properly, please contact your dealer or the nearest service center. We shall not assume any responsibility for problems caused by unauthorized repair or maintenance.
- A few device components (e.g., electrolytic capacitor) require regular replacement. The average lifespan varies, so periodic checking is recommended. Contact your dealer for details.
- Wipe the device gently with a clean cloth and a small quantity of ethanol, if necessary.
Using Environment
- Make sure the running environment meets the requirement of the device. The operating temperature shall be -20^ to 55^
(-4°F to 131°F), and the operating humidity shall be 95% or less.
- Do not expose the device to high electromagnetic radiation or dusty environments.
- Do not aim the lens at the sun or any other bright light.
Emergency
- If smoke, odor, or noise arises from the device, immediately turn off the power, unplug the power cable, and contact the service center.
1 Overview
1.1 Brief Description
The handheld observational thermal monocular is a handheld device with functions of observation, highest temperature target tracking, distance measurement, Wi-Fi hot spot, and so on. The high-sensitivity built-in thermal detector provides you with clear view even in total darkness. The device is mainly applied to outdoor scenarios such as patrolling, law enforcement, searching and rescuing, drug enforcement, anti-smuggling, criminal seizing, hiking, travel, and hunting, etc.
1.2 Function
Distance Measurement
The device can detect the distance between the target and the observation position.
Highest Temperature Tracking
The device can detect the highest temperature in the scene and mark the spot.
Image Correction
The device supports DPC (Defective Pixel Correction) and FFC (Flat Field Correction) which can optimize the image quality.
Hik-Connect APP Connection
The device can capture snapshots, record videos, and set parameters by Hik-Connect APP after being connected to your phone via Wi-Fi or hot spot.
Storage
The built-in memory module supports video recording and snapshot capturing.
1.3 Appearance
1.3.1 Button
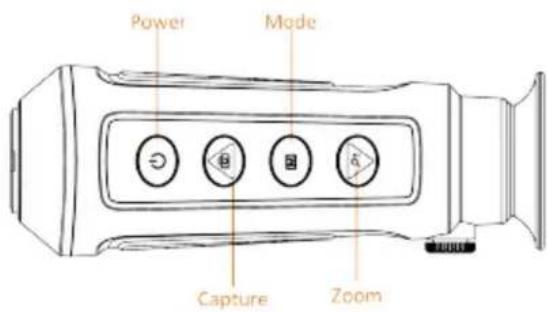
Figure 1-1 Buttons on The Device
Table 1-1 Function of Button
| Icon ButtonFunction | ||
| Power Press: standby mode | ||
| Hold: power on/off | ||
| Capture | Press: captureHold: recording | |
| Mode | Press: palettesHold: menu | |
| Zoom | Press: digital zoomHold: FFC | |
1.3.2 Interface
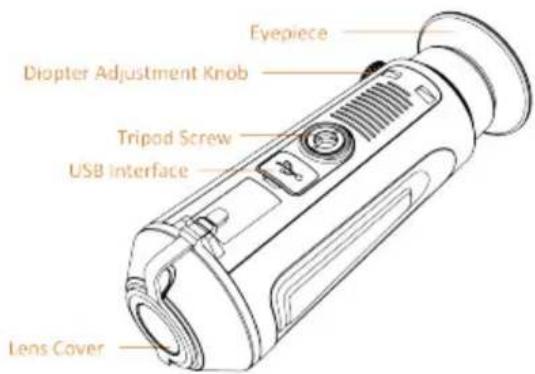
Figure 1-2 Overview of Interfaces
- Lens Cover: protect the lens from dust or scratch.
- Diopter Adjustment Knob: adjust the view according to your degree of myopia.
- USB Interface: charge the device or export files with the supplied USB cable.
- Tripod Screw: connected to tripod.
2 Preparation
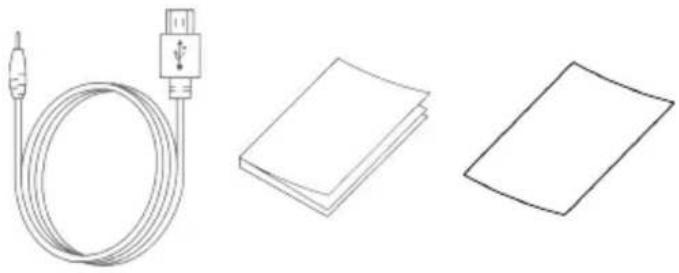
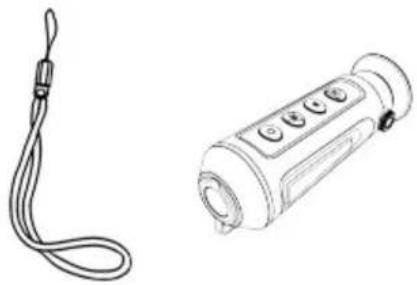
Take out the device and accessories. Check them with the packaging list to confirm device and accessories are included and available for use. Read the user manual to learn the usage methods and cautions.
2.1 Packaging List
Refer to the packaging list to check whether the accessories along with the device are included.
natural_image
Illustration of a cable with a USB port, two blank sheets, and a separate flat sheet (no text or symbols)USB Cable × 1 User Manual × 1 No-Dust Cloth × 1
natural_image
Line drawing of a handheld device with a strap and a cylindrical device (no text or symbols)Wrist Strap × 1 Thermal Camera × 1
2.2 Charge Device
After the device starts up, the OSD (on-screen display) shows the battery status. When the battery is low, charge the device and ensure it works properly.
Before You Start
- The charging temperature should be from 0 °C to 45 °C (32 °F to 113 °F).
- Charge the device with the delivered USB cable.
Steps
- Lift the USB cover.
- Plug in the USB cable and charge the device.
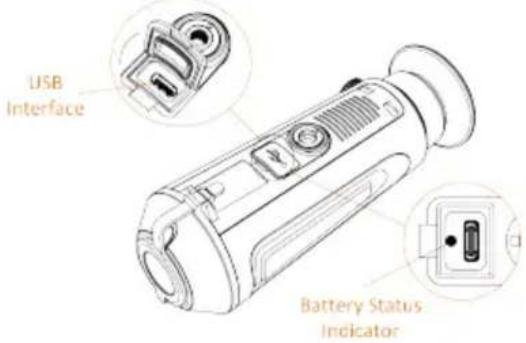
Figure 2-1 USB Interface
- Flashing Red & Green: error occurred.
• Solid Red: battery is properly charged.
• Solid Green: battery is fully charged.
• Off: battery is not charged.
2.3 Power On/Off
Power On
When the device is connected to USB cable or the battery is enough, press to power on the device.
Power Off
When the device is turned on, hold for 2 seconds to power off the device.
2.4 Menu Description
When the device powers on, hold to display the menu.
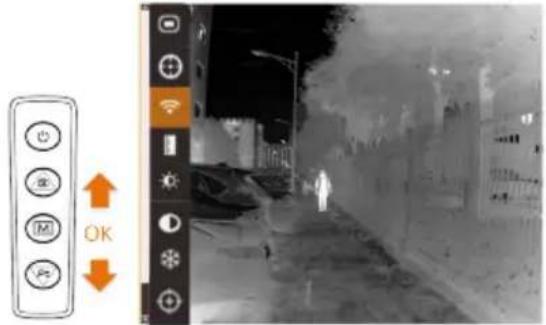
Figure 2-2 Menu Description
- Press to move the cursor up.
- Press to move the cursor down.
- Press to confirm and hold it to exit the menu.
3 Image Settings
You can set palettes, brightness, scenes, FFC (flat field correction), and DPC (defective pixel correction) to display the best image effect.
3.1 Adjust Diopter
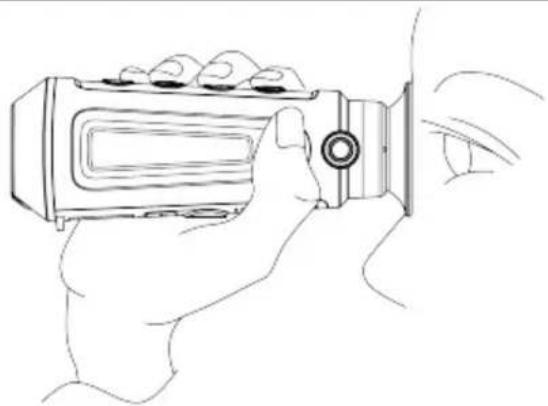
Make sure the eyepiece covers your eye and aim at the target. Adjust the diopter adjustment knob until the OSD text or image is clear.

Note
When adjusting diopter, DO NOT touch the surface of lens to avoid smearing the lens.
natural_image
Line drawing of a hand holding a digital camera with lens, showing no text or symbolsFigure 3-1 View the Target
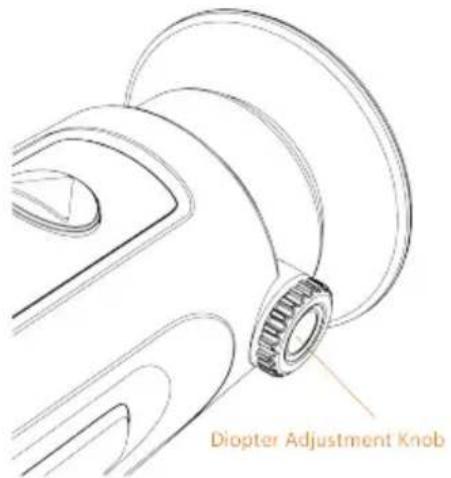
Figure 3-2 Adjust Diopter
3.2 Adjust Brightness
Select and press to adjust brightness. In white hot mode, the higher the value of brightness is, the brighter the image is. The image effect in white hot mode is showed as picture below and effect in black hot mode is opposite.

natural_image
Sequence of five identical white human silhouettes on a dark background, no text or symbols presentFigure 3-3 Adjust Brightness in White Hot Mode
3.3 Adjust Contrast
Select and press to adjust image contrast.
3.4 Select Scene
You can select proper scene according to environment temperature to improve the display effect.
Steps
-
Hold M to go to the menu.
-
Select □ and press to switch scene.
-
refers to summer mode and is recommended in high temperature environment.
-
✿ refers to winter mode and is recommended in low temperature environment.
-
Hold M to save settings and exit.
3.5 Set Palettes
You can select different palettes to display the same scene in different effects. Press to switch palettes.
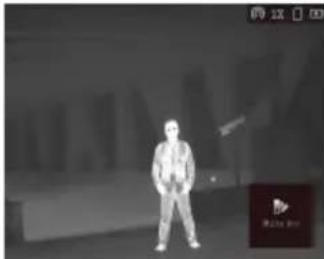
White Hot
The hot part is light-colored in view. The higher the temperature is, the lighter the color is.
natural_image
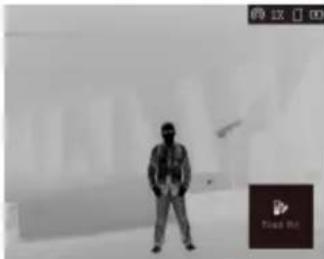
Grayscale photo of a person standing on a stage with abstract background elements (no visible text or symbols)Black Hot
The hot part is black-colored in view. The higher the temperature is, the more black the color is.
natural_image
Silhouette of a person standing in front of a building with abstract background elements (no text or symbols visible)Red Hot
The hot part is red-colored in view. The higher the temperature is, the redder the color is.
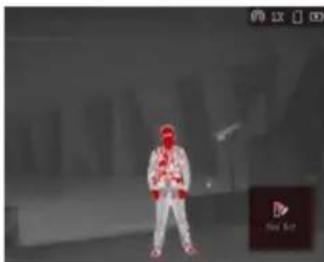
natural_image
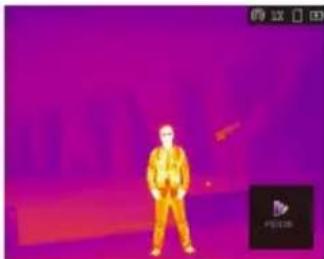
Person in white outfit standing indoors with blurred background (no visible text or symbols)Fusion
From high temperature to low temperature, the image is colored in from white, yellow, red, pink to purple.
natural_image
Thermal image of a person in a yellow suit standing on a stage with a red arrow indicating direction (no text or symbols)3.6 Adjust Digital Zoom
You can zoom the image by using this function.
Press in the view mode, the live view switches between 1 ×, 2 ×, and 4 ×.
3.7 Flat Field Correction
This function can correct non-uniformity of display.
Steps
-
Hold M to go to the menu.
-
Select and press to switch FFC mode.
- Manual: Hold in live view to correct the non-uniformity of display.
- Auto: The device performs FFC automatically according to the set schedule when switching on the camera.
- External: Cover the lens cover, then hold in live view to correct the non-uniformity of display.
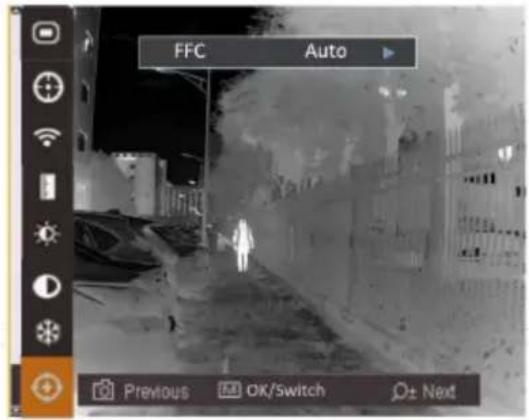
Figure 3-4 Flat Field Correction
- Hold M to save the settings and exit.
3.8 Correct Defective Pixel
The device can correct the defective pixels on the screen which are not performed as expected.
Steps
- Hold M to show the menu.
- Select
- press M to select the offset. The offset refers to the moving length of cursor.
- Press 📷 or to select the moving direction.
- Press to move the cursor to the position of dead pixel. Hold to correct the dead pixel.
If the menu blocks the dead pixel, hold to perform mirror display.
4 Measure the Distance
The device can detect the distance between the target and the observation position.
Before You Start
When measuring the distance, keep the hand and the position steady. Otherwise, the accuracy may be affected.
Steps
- Hold M to show the menu.
- Select □ and press to go to the setting interface.
1) Press or 📋 to select the target from Deer, Wolf, Bear, and Custom.
2) Set the target height.

Note
The available height ranges from 0.1 m to 9.9 m.
3) Press to confirm.
- Align the center of top mark with the edge of target top. Press M.
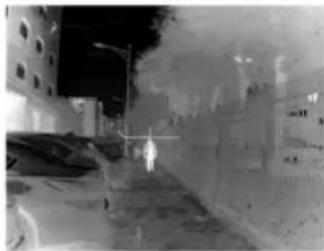
natural_image
Street scene with buildings and a person walking, no visible text or symbolsFigure 4-1 Set the Edge of Target Top
The cursor blinks on the top edge of the target.
- Align the center of bottom mark with the edge of target bottom. Press M
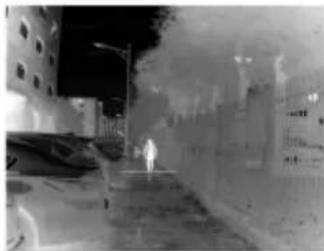
natural_image
Night street scene with a person walking on a sidewalk, buildings and vehicles in the background (no visible text or symbols)Figure 4-2 Set the Edge of Target Bottom
Result
The left top of the image displays the distance measurement result and the height of the target.
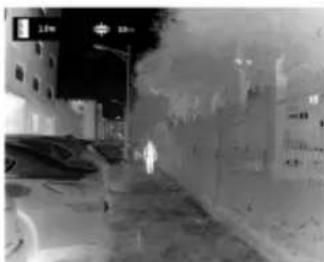
natural_image
Street scene with a car and buildings at night (no visible text or symbols)Figure 4-3 Measurement Result

Note
Go to distance measurement interface, and press to view the result of the previous measuring target.
5 Highest Temperature Tracking
The device can detect the highest temperature spot in the scene and mark it on display.
In the menu, select and press to mark the spot of highest temperature.
When the function is enabled, displays in the spot of highest temperature. When the scene changes, the moves.
6 Picture and Video
You can manually record video or capture picture when displaying live view.
6.1 Capture Picture
On the main live view page, press to capture picture.

Note
- When capturing succeeds, the image freezes for 1 second and a prompt shows on the display.
- For exporting captured pictures, refer to Export Files.
6.2 Record Video
Steps
- In the main live view, hold and start recording.
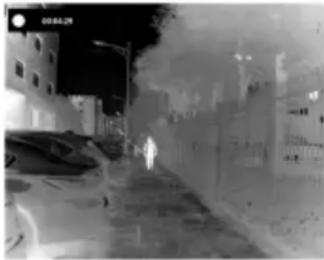
natural_image
Night street scene with illuminated buildings and a vehicle, no visible text or symbolsFigure 6-1 Start Recording
The left top of image displays the information of recording time.
- Hold 📷 again to stop recording.
What to do next
For exporting recording files, refer to Export Files.
6.3 Export Files
This function is used to export recorded videos and captured pictures.
Steps
- Connect the device and PC with USB cable.
- Open computer disk and select the disk of device. Go to DICM → 100EZVIZ.
- Select and copy the files to PC.
- Disconnect the device from your PC.
7 Hik-Connect APP Connection
Connect the device to the Hik-Connect APP via hot spot, then you can capture picture or record video on your phone.
Before You Start
Install the Hik-Connect APP on your phone first.
Steps
- Hold M to show the menu of device.
- Press ☐ to enable hot spot function.
- Turn on the WLAN of your phone and connect to the hot spot.
• Hot Spot Name: Wlan-IPTS Serial No.
- Hot Spot Password: the last 9 digits of serial No.
- Open the APP and connect your phone with the device. You can view the interface of device on your phone.

The hot spot function will be turned off automatically when power is less than 15%.
8 Maintenance
This part introduces the operation of checking device information, upgrading device, and restoring to defaults, etc.
8.1 View Device Information
Steps
- Hold to show the menu of device.
- Select 6, and press M. You can view the device information such as version, and serial No.
8.2 Upgrade Device
Before You Start
Please get the upgrade package first.
Steps
- Connect the device to your PC with USB cable.
- Open the detected disk, copy the upgrade file and paste it to the root directory of the device.
- Disconnect the device from your PC.
- Reboot the device.
Result
The device upgrades automatically. The upgrading process will be displayed in the main interface.
8.3 Restore Device
Steps
- Hold M to show the menu of device.
- Select □ and press to restore the device to defaults according to the prompt.
9 Frequently Asked Questions
9.1 Why does the charge indicator flash improperly?
Check the following items.
- Check whether the device is charged with standard power adapter and the charging temperature is above 0 °C ( 32 °F ).
- The device is equipped with built-in charging protection module. Charge the device in power off status.
9.2 Why is the power indicator off?
Check whether the device is off-battery. Check the indicator after charging the device for 5 minutes.
9.3 The image is not clear, how to adjust it?
Adjust the diopter adjustment knob until the image is clear. Refer to section Adjust Diopter.
9.4 Capturing or recording fails. What's the problem?
Check the following items.
- Whether the device is connected to your PC. Capturing or recording is disabled in this status.
- Whether the storage space is full.
- Whether the device is low-battery.
9.5 Why the PC cannot identify the device?
Check the following items.
- Whether the device is connected to your PC with supplied USB cable.
- If you use other USB cables, make sure the cable length is no longer than 1 m.
- Whether the hot spot function is turned on. If so, go to OSD menu and turn off hot spot.
- Handheld Thermal Monocular
- Legal Information
- About this Manual
- Trademarks Acknowledgement
- LEGAL DISCLAIMER
- Regulatory Information
- FCC Information
- EU Conformity Statement
- Industry Canada ICES-003 Compliance
- Warning
- Symbol Conventions
- Safety Instruction
- Laws and Regulations
- Transportation
- Power Supply
- Battery
- Maintenance
- Using Environment
- Emergency
- Overview
- Brief Description
- Function
- Distance Measurement
- Highest Temperature Tracking
- Image Correction
- Hik-Connect APP Connection
- Storage
- Appearance
- Button
- Interface
- Preparation
- Packaging List
- Charge Device
- Before You Start
- Steps
- Power On/Off
- Power On
- Power Off
- Menu Description
- Image Settings
- Adjust Diopter
- Note
- Adjust Brightness
- Adjust Contrast
- Select Scene
- Set Palettes
- White Hot
- Black Hot
- Red Hot
- Fusion
- Adjust Digital Zoom
- Flat Field Correction
- Correct Defective Pixel
- Measure the Distance
- Result
- Highest Temperature Tracking
- Picture and Video
- Capture Picture
- Record Video
- What to do next
- Export Files
- Hik-Connect APP Connection
- Maintenance
- View Device Information
- Upgrade Device
- Restore Device
- Frequently Asked Questions
- Why does the charge indicator flash improperly?
- Why is the power indicator off?
- The image is not clear, how to adjust it?
- Capturing or recording fails. What's the problem?
- Why the PC cannot identify the device?
Brand : Hikvision
Model : DS-2TS03-15XF/W
Category : Camera