
OR24500 - Television Orima - Free user manual and instructions
Find the device manual for free OR24500 Orima in PDF.


| Product Type | LED TV |
| Screen Size | 24 inches (60 cm) |
| Display Resolution | 1366 x 768 pixels |
| Energy Efficiency Class | A+ |
| On Mode Power Consumption | 19.0 W |
| Standby Power Consumption | 0.50 W |
| Annual Energy Consumption | 27 kWh/annum |
| TV Tuner | DVB-T/C (digital terrestrial/cable) |
| HDMI Inputs | Yes (number not specified) |
| USB Input | Yes (for media playback and recording) |
| SCART Socket | Yes (rear) |
| VGA (PC) Input | Yes (rear) |
| YPbPr Component Input | Yes (via adapter cable) |
| Side AV Input | Yes (audio/video) |
| Headphone Output | Yes (side) |
| SPDIF Coaxial Output | Yes (rear) |
| CI Slot | Yes (side) |
| Remote Control | Yes (with batteries) |
| VESA Wall Mount | 75 x 75 mm, M4 screws |
| Teletext | Yes (analog and digital) |
| Electronic Programme Guide (EPG) | Yes |
| USB Recording | Yes (PVR ready) |
| Timeshift Recording | Yes |
| CEC Support | Yes (HDMI-CEC) |
| Audio Output | Stereo, Dolby Audio supported |
| Dimensions (with stand) | Not specified in manual (approx. 55 x 35 x 15 cm) |
Frequently Asked Questions - OR24500 Orima
User questions about OR24500 Orima
0 question about this device. Answer the ones you know or ask your own.
Ask a new question about this device
Download the instructions for your Television in PDF format for free! Find your manual OR24500 - Orima and take your electronic device back in hand. On this page are published all the documents necessary for the use of your device. OR24500 by Orima.
USER MANUAL OR24500 Orima
MANUAL DE INSTRUÇÕES
INSTRUCTION MANUAL LIBRO DE INSTRUCCIONES

natural_image
Black-and-white exterior view of a modern city skyline at dusk, featuring illuminated skyscrapers and a waterfront promenade (no text or symbols visible)www.orima.pt
facebook.com/orima.pt

MMA
MÁXIMO MARRANDA DE GEMERA
LED TV
OR24500
SERVIÇO DE APOIO AO CLIENTE
Apoio ao Cliente:
Tel.: (+351) 231 467 436 E: apoiocliente@orima.pt
Serviço Pós Venda:
Tel.: (+351) 231 467 427 E: assistencia@orima.pt
Conclusions normalized to operation.
| WARNINGDo not ingest the battery, Chemical Burn HazardThis product or the accessories supplied with theproduct may contain a coin/button cell battery. If thecoin/button cell battery is swallowed, it can causesevere internal burns in just 2 hours and can leadto death.Keep new and used batteries away from children.If the battery compartment does not close securely,stop using the product and keep it away fromchildren.If you think batteries might have been swallowed orplaced inside any part of the body, seek immediatemedical attention. |
| WARNINGNever place a television set in unstable or inclinedlocations. A television set may fall, causing seriouspersonal injury or death. Many injuries, particularlyto children, can be avoided by taking simpleprecautions such as:Using cabinets or stands recommended by themanufacturer of the television set.Only using furniture that can safely support thetelevision set.Ensuring the television set is not overhanging theedge of the supporting furniture.Not placing the television set on tall furniture(for example, cupboards or bookcases) withoutanchoring both the furniture and the television setto a suitable support.Not standing the television set on cloth or othermaterials placed between the television andsupporting furniture.Educating children about the dangers of climbingon furniture to reach the television set or itscontrols. If your existing television set is beingretained and relocated, the same considerationsas above should be applied. |
| WALL MOUNTING WARNINGSRead the instructions before mounting your TVon the wall.The wall mount kit is optional. You can obtain fromyour local dealer, if not supplied with your TV.Do not install the TV on a ceiling or on an inclinedwall.Use the specified wall mounting screws and otheraccessories.Tighten the wall mounting screws firmly to preventthe TV from fall. Do not over-tighten the screws. |
| Caution | Serious injury or death risk |
| Risk of electric shock | Dangerous voltage risk |
| Maintenance | Important maintenance component |
Safety Information

TO REDUCE THE RISK OF ELECTRIC SHOCK DO NOT REMOVE COVER (OR BACK). NO USER-SERVICEABLE PARTS INSIDE. REFER SERVICING TO QUALIFIED SERVICE PERSONNEL

CAUTION: TO REDUCE THE RISK OF ELECTRIC SHOCK DO NOT REMOVE COVER (OR BACK). NO USER-SERVICEABLE PARTS INSIDE. REFER SERVICING TO QUALIFIED SERVICE PERSONNEL.
In extreme weather (storms, lightning) and long inactivity periods (going on holiday) disconnect the TV set from the mains.
The mains plug is used to disconnect TV set from the mains and therefore it must remain readily operable. If the TV set is not disconnected electrically from the mains, the device will still draw power for all situations even if the TV is in standby mode or switched off. Note: Follow the on screen instructions for operating the related features.
IMPORTANT - Please read these instructions fully before installing or
operating
WARNING: Never let people (including children) with reduced physical, sensory or
mental capabilities of lack of experience and / of knowledge use electrical devices unsupervised
- Use this TV set at an altitude of less than 2000 meters above the sea level, in dry locations and in regions with moderate or tropical climates.
- The TV set is intended for household and similar general use but may also be used in public places.
- For ventilation purposes, leave at least 5cm of free space around the TV.
The ventilation should not be impeded by covering or blocking the ventilation openings with items, such as newspapers, table-cloths, curtains, etc.
The power cord plug should be easily accessible. Do not place the TV, furniture, etc. on the power cord.
A damaged power cord/plug can cause fire or give you an electric shock. Handle the power cord by the plug, do not unplug the TV by pulling the power cord. Never touch the power cord/plug with wet hands as
this could cause a short circuit or electric shock. Never make a knot in the power cord or tie it with other cords. When damaged it must be replaced, this should only be done by qualified personnel.
- Do not expose the TV to dripping or splashing of liquids and do not place objects filled with liquids, such as vases, cups, etc. on or over the TV (e.g., on shelves above the unit). - Do not expose the TV to direct sunlight or do not place open flames such as lit candles on the top of or near the TV.
Contents
| Safety Information | 1 |
| Markings on the Product | 2 |
| Environmental Information | 3 |
| Features | 3 |
| Accessories Included | 3 |
| Standby Notifications | 3 |
| TV Control Switch & Operation | 3 |
| Inserting the Batteries into the Remote | 4 |
| Connect Power | 4 |
| Antenna Connection | 4 |
| License Notification | 4 |
| Remote Control | 5 |
| Connections | 6 |
| Switching On/Off | 7 |
| First Time Installation | 7 |
| Media Playback via USB Input | 7 |
| Recording a Programme | 8 |
| Timeshift Recording | 8 |
| Instant Recording | 8 |
| Watching Recorded Programmes | 8 |
| Recording Configuration | 8 |
| Media Browser Menu | 9 |
| CEC and CEC RC Passthrough | 9 |
| TV Menu Contents | 10 |
| General TV Operation | 13 |
| Using the Channel List | 13 |
| Configuring Parental Settings | 13 |
| Electronic Programme Guide (EPG) | 13 |
| Teletext Services | 14 |
| Software Upgrade | 14 |
| Troubleshooting & Tips | 14 |
| PC Input Typical Display Modes | 15 |
| AV and HDMI Signal Compatibility | 15 |
| Supported File Formats for USB Mode | 16 |
| Supported DVI Resolutions | 17 |
To change source:Press the middle of the button in twice(for the second time in total),the source list will appear on the screen. Scroll through the available sources by pushing the button up or down.To turn the TV off:Press the middle of the button in and hold it down for a few seconds,the TV will turn into standby mode.To turn on the TV:Press the middle of the button in, the TV will turn on.Notes:If you turn the TV off,this circle starts again beginning with the volume setting.Main menu OSD cannot be displayed via control buttons.Operation with the Remote ControlPress Menu button on your remote control to display main menu screen. Use the directional buttons to select a menu tab and press OK to enter. Use the directional buttons again to select or set an item. Press Return/Back button or Menu button to quit a menu screen.Input SelectionOnce you have connected external systems to your TV,you can switch to different input sources. Press Source button on your remote control consecutively to select the different sources.Changing Channels and VolumeYou can change the channel and adjust the volume by using the Volume +/- and Programme +/- buttons on the remote.Inserting the Batteries into the RemoteRemove the screw that secure the battery compartment cover on the back side of the remote control first. Lift the cover gently. Press and slide the cover to open. Insert two size AAA batteries. Make sure the (+) and (-) signs match (observe correct polarity). Do not mix old and new batteries. Replace only with same or equivalent type. Place the cover back on. Then screw the cover back on again.  | Connect PowerIMPORTANT:The TV set is designed to operate on 220-240V AC,50 Hz socket. After unpacking,allow the TV set to reach the ambient room temperature before you connect the set to the mains. Plug the power cable to the mains socket outlet.Antenna ConnectionConnect the aerial or cable TV plug to the AERIAL INPUT (ANT) socket located on the back of the TV. License NotificationThe terms HDMI and HDMI High-Definition Multimedia Interface,and the HDMI Logo are trademarks or registered trademarks of HDMI Licensing Administrator, Inc. in the United States and other countries.HDMITMManufactured under license from Dolby Laboratories. Dolby, Dolby Audio and the double-D symbol are trademarks of Dolby Laboratories.The “CI Plus” Logo is a trademark of CI Plus LLP.Information for Users on Disposal of Old Equipment and Batteries[European Union only]Equipment bearing these symbols should not be disposed as general household waste.You should look for appropriate recycling facilities and systems for the disposal of these products.Notice:The sign Pb below the symbol for batteries indicates that this battery contains lead. License NotificationThe terms HDMI and HDMI High-Definition Multimedia Interface,and the HDMI Logo are trademarks or registered trademarks of HDMI Licensing Administrator, Inc. in the United States and other countries.HDMITMManufactured under license from Dolby Laboratories. Dolby, Dolby Audio and the double-D symbol are trademarks of Dolby Laboratories.The “CI Plus” Logo is a trademark of CI Plus LLP.Information for Users on Disposal of Old Equipment and Batteries[European Union only]Equipment bearing these symbols should not be disposed as general household waste.You should look for appropriate recycling facilities and systems for the disposal of these products.Notice:The sign Pb below the symbol for batteries indicates that this battery contains lead.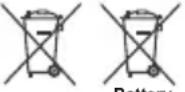 BatteryProducts BatteryProducts |
English -4-
English -3-
| WARNINGApparatus connected to the protective earthing of the building installation through the MAINS connection or through other apparatus with a connection to protective earthing – and to a television distribution system using coaxial cable, may in some circumstances create a fire hazard. Connection to a television distribution system has therefore to be provided through a device providing electrical isolation below a certain frequency range (galvanic isolator, see EN 60728-11) | |
| Environmental InformationThis television is designed to be environment friendly. To reduce energy consumption, you can follow these steps:If you set theEnergy Savingto Minimum, Medium,Maximumor Autothe TV will reduce the energy consumption accordingly. If you like to set theBacklightto a fixed value set asCustomand adjust theBacklight(located under theEnergy Saving setting) manually using Left or Right buttons on the remote. Set asOffto turn this setting off.Note:AvailableEnergy Savingoptions may differ depending on the selectedModein theSystem>Picturemenu.TheEnergy Savingsettings can be found in the System>Picturemenu. Note that some picture settings will be unavailable to be changed.If pressedRightbutton whileAutooption is selected orLeftbutton whileCustomoption is selected, "Screen will be off in 15 seconds." message will be displayed on the screen. SelectProceedand pressOKto turn the screen off immediately. If you don't press any button, the screen will be off in 15 seconds. Press any button on the remote or on the TV to turn the screen on again.Note:Screen Offoption is not available if the Mode is set to Game.When the TV is not in use, please switch off disconnect the TV from the mains plug. This will also reduce energy consumption. | |
| FeaturesRemote controlled colour TVFully integrated digital terrestrial/cable TV (DVB-T-C)HDMI inputs to connect other devices with HDMI socketsUSB inputOSD menu systemScart socket for external devices (such as DVD Players, PVR, video games, etc.)Stereo sound systemTelatext |
HDMI™
15.1.20
When the disconnect reduce ene
- Remote controlled colour TV
- Teletext
• Headphone connection
Operation with the Remote Control
Inserting the Batteries into the Remote
—
F. 1
WARNING
| Connector | Type | Cables | Device |
| Scart Connection (back) | |||
| VGA Connection (back) | |||
| SIDE AV | PC/YPbPr Audio Connection (side) | YPbPr/PC Audio Cable | |
| HDMI Connection (back) | |||
| SPDIF | SPDIF (Coaxial Out) Connection (back) | ||
| SIDE AV | Side AV (Audio/Video) Connection (side) | AV Cable | |
| HEADPHONE | Headphone Connection (side) | ||
| PC to YPBPR | YPbPr Video Connection (back) | PC to YPBPr Connection Cable | |
| USB Connection (side) | |||
| CI Connection (side) | |||
If you want to connect a device to the TV, make sure that both the TV and the device are turned off before making any connection. After the connection is done, you can turn on the units and use them.
| 1. | Standby: Switches On / Off the TV |
| 2. | Numeric buttons: Switches the channel, enters a number or a letter in the text box on the screen. |
| 3. | TV: Switches to TV Source |
| 4. | Mute: Completely turns off the volume of the TV |
| 5. | Volume +/- |
| 6. | Menu: Displays TV menu |
| 7. | Directional buttons: Helps navigate menus, content etc. and displays the subpages in TXT mode when pressed Right or Left |
| 8. | OK: Confirms user selections, holds the page (in TXT mode), views channel list (DTV mode) |
| 9. | Back/Return: Returns to previous screen, opens index page (in TXT mode) |
| 10. | Media browser: Opens the media browsing screen |
| 11. | Info: Displays information about on-screen content, shows hidden information (reveal - in TXT mode) |
| 12. | My button 1 (*) |
| 13. | Coloured Buttons: Follow the on-screen instructions for coloured button functions |
| 14. | Language: Switches among sound modes (analogue TV), displays and changes audio/subtitle language (digital TV, where available) |
| 15. | Subtitles: Turns subtitles on and off (where available) |
| 16. | Rapid reverse: Moves frames backwards in media such as movies |
| 17. | Record: Records programmes |
| 18. | Play: Starts to play selected media |
| 19. | Stop: Stops the media being played |
| 20. | Rapid advance: Moves frames forward in media such as movies |
| 21. | Pause: Pauses the media being played, starts timeshift recording |
| 22. | Screen: Changes the aspect ratio of the screen |
| 23. | Text: Displays teletext (where available), press again to superimpose the teletext over a normal broadcast picture (mix) |
| 24. | My button 2 (*) |
| 25. | EPG (Electronic programme guide): Displays the electronic programme guide |
| 26. | Exit: Closes and exits from displayed menus or returns to previous screen |
| 27. | Quick Menu: Displays a list of menus for quick access |
| 28. | No function |
| 29. | Programme +/- |
| 30. | Swap: Quickly cycles between previous and current channels or sources |
| 31. | Source: Shows all available broadcast and content sources |
Remote Control

(\*) MY BUTTON 1 & MY BUTTON 2:
These buttons may have default functions depending on the model. However you can set a special function to these buttons by pressing on them for five seconds when on a desired source or channel. A confirmation message will be displayed on the screen. Now the selected MY BUTTON is associated with the selected function. Note that if you perform First Time Installation, MY BUTTON 1&2 will return to their default function.
English - 8 -
count
| Switching On/Off | To Switch the TV ON |
TV Menu Contents
| System - Picture Menu Contents | |
| Mode | You can change the picture mode to suit your preference or requirements. Picture mode can be set to one of these options: Cinema, Game(optional), Sports, Dynamic and Natural. |
| Contrast Adjusts the light and dark values on the screen. | |
| Brightness Adjusts the brightness values on the screen. | |
| Sharpness | Sets the sharpness value for the objects displayed on the screen. |
| Colour Sets the colour value, adjusting the colors. | |
| Energy Saving | For setting the Energy Saving to Custom, Minimum, Medium, Maximum, Auto, Screen Off or Off.Note: Available options may differ depending on the selected Mode. |
| Backlight | This setting controls the backlight level. The backlight function will be inactive if the Energy Saving is set to an option other then Custom. |
| Advanced Settings | |
| Dynamic Contrast You can change the dynamic contrast ratio to desired value. | |
| Noise Reduction | If the signal is weak and the picture is noisy, use the Noise Reduction setting to reduce the amount of noise. |
| Colour Temp | Sets the desired colour temperature value. Cool, Normal, Warm and Custom options are available. |
| White Point | If the Colour Temp option is set as Custom, this setting will be available. Increase the 'warmth' or 'coolness' of the picture by pressing Left or Right buttons. |
| Picture Zoom Sets the desired image size format. | |
| Film Mode | Films are recorded at a different number of frames per second to normal television programmes. Turn this feature on when you are watching films to see the fast motion scenes clearly. |
| Skin Tone Skin tone can be changed between -5 and 5. | |
| Colour Shift Adjust the desired colour tone. | |
| HDMI Full Range | While watching from a HDMI source, this feature will be visible. You can use this feature to enhance blackness in the picture. |
| PC Position Appears only when the input source is set to VGA/PC. | |
| Autoposition | If the image is not centered in VGA mode use this option to automatically adjust the position of the image. Press OK to start the auto adjustment. |
| H Position | This item shifts the image horizontally to the right hand side or left hand side of the screen. |
| V Position This item shifts the image vertically towards the top or bottom of the screen. | |
| Dot Clock | Dot Clock adjustments correct the interference that appear as vertical banding in dot intensive presentations like spreadsheets or paragraphs or text in smaller fonts. |
| Phase | Depending on the input source(computer etc.) you may see a hazy or noisy picture on the screen. You can use phase to get a clearer picture by trial and error. |
| Reset | Resets the picture settings to factory default settings (except Game Mode). |
| While in VGA (PC) mode, some items in Picture menu will be unavailable. Instead, VGA mode settings will be added to the Picture Settings while in PC mode. | |
that device from the source list. In that case volume control keys are directed to connected audio device. Note: ARC is supported only via the HDMI1 input.
System Audio Control
Allows an Audio Amplifier/Receiver to be used with the TV. The volume can be controlled using the remote control of the TV. To activate this feature set the Speakers option in the System>Settings>More menu as Amplifier. The TV speakers will be muted and the sound of the watched source will be provided from the connected sound system.
Note: The audio device should support System Audio Control feature and CEC option should be set as Enabled.
not meet the speed requirements. Try connecting another USB disk.
Media Browser Menu
You can play photo, music, and movie files stored on a USB disk by connecting it to your TV. Connect a USB disk to one of the USB inputs located on the side of the TV. Pressing the Menu button while in the Media Browser mode will access the Picture, Sound and Settings menu options. Pressing the Menu button again will exit from this screen. You can set your Media Browser preferences by using the Settings Menu.
| Loop/Shuffle Mode Operation | |
| Start playback with the Play button and activate | All files in the list will be continuously played in original order |
| Start playback with the OK button and activate | The same file will be played continuously (repeat) |
| Start playback with the Play button and activate | All files in the list will be played once in random order |
| Start playback with the Play button and activate | All files in the list will be continuously played in the same random order. |
This function allows to control the CEC-enabled devices, that are connected through HDMI ports by using the remote control of the TV.
The CEC option in the System>Settings>More menu should be set as Enabled at first. Press the Source button and select the HDMI input of the connected CEC device from the Sources List menu. When new CEC source device is connected, it will be listed in source menu with its own name instead of the connected HDMI ports name(such as DVD Player, Recorder 1 etc.).
The TV remote is automatically able to perform the main functions after the connected HDMI source has been selected. To terminate this operation and control the TV via the remote again, press Quick Menu button on the remote, highlight the CEC RC Passthrough and set as Off by pressing Left or Right button. This feature can also be enabled or disabled under the System>Settings>More menu.
The TV supports also ARC(Audio Return Channel) feature. This feature is an audio link meant to replace other cables between the TV and the audio system (A/V receiver or speaker system). When ARC is active, TV does not mute its other audio outputs automatically. So you need to decrease TV volume to zero manually, if you want to hear audio from connected audio device only (same as other optical or co-axial digital audio outputs). If you want to change connected device's volume level, you should select
| Store Mode | Select this mode for store display purposes. Whilst Store Mode is enabled, some items in the TV menu may not be available. | |
| Power Up Mode | This setting configures the power up mode preference. Last State and Standby options are available. | |
| CEC | With this setting you can enable and disable CEC functionality completely. Press Left or Right button to enable or disable the feature. | |
| CEC Auto Power On | This function allows the connected HDMI-CEC compatible device to turn on the TV and switch to its input source automatically. Press Left or Right button to enable or disable the feature. | |
| Speakers | To hear the TV audio from the connected compatible audio device set as Amplifier. You can use the remote control of the TV to control the volume of the audio device. | |
| OSS | Displays Open Source Software license information. | |
| Installation Menu Contents | ||
| Automatic channel scan (Retune) | Displays automatic tuning options. Digital Aerial: Searches and stores aerial DVB stations. Digital Cable: Searches and stores cable DVB stations. Analogue: Searches and stores analogue stations. | |
| Manual Channel Scan | This feature can be used for direct broadcast entry. | |
| Network Channel Scan | Searches for the linked channels in the broadcast system. Digital Aerial: Searches for aerial network channels. Digital Cable: Searches for cable network channels. | |
| Analogue Fine Tune | You can use this setting for fine tuning analogue channels. This feature is not available if no analogue channels are stored. | |
| Installation Settings (Optional) | Displays installation settings menu. Standby Search(*) : Your TV will search for new or missing channels while in standby. Any new found broadcasts will be shown. Dynamic Channel Update(*) : If this option is set as Enabled, the changes on the broadcasts such as frequency, channel name, subtitle language etc., will be applied automatically while watching. (*) Availability depends on model. | |
| Clear Service List | Use this setting to clear channels stored. This setting is visible only when the Country option is set to Denmark, Sweden, Norway or Finland. | |
| Select Active Network | This setting allows you to select only the broadcasts within the selected network to be listed in the channel list. This feature is available only for the country option of Norway. | |
| First Time Installation | Deletes all stored channels and settings, resets TV to factory settings. | |
| System - Sound Menu Contents | |
| Volume Adjusts the volume level. | |
| Equalizer | Selects the equalizer mode. Custom settings can be made only when in User mode. |
| Balance Adjusts whether the sound comes from the left or right speaker. | |
| Headphone | Sets headphone volume.Please ensure before using headphones that the headphone volume is set to a low level, to prevent damage to your hearing. |
| Sound Mode You can select a sound mode (If the viewed channel supports). | |
| AVL (Automatic Volume Limiting) | Sets the sound to obtain fixed output level between programmes. |
| Headphone/Lineout | When you connect an external amplifier to your TV using the headphone jack, you can select this option as Lineout. If you have connected headphones to the TV, set this option as Headphone.Please ensure before using headphones that this menu item is set to Headphone. If it is set to Lineout, the output from the headphone socket will be set to maximum which could damage your hearing. |
| Dynamic Bass Enables or disables the Dynamic Bass. | |
| Surround sound | Surround sound mode can be changed as On or Off. |
| Digital Out Sets digital out audio type. | |
| System - Settings Menu Contents | ||
| Conditional Access Controls conditional access modules when available. | ||
| Language | You may set a different language depending on the broadcaster and the country. | |
| Parental | Enter correct password to change parental settings. You can easily adjust Menu Lock, Maturity Lock, Child Lock or Guidance in this menu. You can also set a new PIN or change the Default CICAM PIN using the related options.Note: Some menu options may not be available depending on the country selection in the First Time Installation. Default PIN can be set to 0000 or 1234. If you have defined the PIN(is requested depending on the country selection) during the First Time Installation use the PIN that you have defined. | |
| Timers | Sets sleep timer to turn off the TV after a certain time. Sets timers for selected programmes. | |
| Date/Time Sets date and time. | ||
| Sources Enables or disables selected source options. | ||
| Accessibility Displays accessibility options of the TV. | ||
| Hard of Hearing Enables any special feature sent from the broadcaster. | ||
| Audio Description | A norration track will be played for the blind or visually impaired audience. Press OK to see all available Audio Description menu options. This feature is available only if the broadcaster supports it.Note: Audio description sound feature is not available in recording or time shifting mode. | |
| More Displays other setting options of the TV. | ||
| Menu Timeout | Changes timeout duration for menu screens. | |
| Standby LED | If set as Off, the standby LED will not light up when the TV is in standby mode. | |
| Software Upgrade | Ensures that your TV has the latest firmware. Press OK to see the menu options. | |
| Application Version | Displays current software version. | |
| Subtitle Mode | This option is used to select which subtitle mode will be on the screen (DVB subtitle / Teletext subtitle) if both is available. Default value is DVB subtitle. This feature is available only for the country option of Norway. | |
| Auto TV OFF | Sets the desired time for the TV to automatically go into standby mode when not being operated. | |
| General TV OperationUsing the Channel ListThe TV sorts all stored stations in the Channel List.You can edit this channel list, set favourites or set active stations to be listed by using the Channel List options.Press the OK button to open the Channel List.You can filter the listed channels by pressing the Blue button or open the Edit Channel List menu by pressing the Green button in order to make advanced changes in the current list.Managing the Favourite ListsYou can create four different lists of your favourite channels. Enter the Channel List in the main menu or press the Green button while the Channel List is displayed on the screen in order to open the Edit Channel List menu. Select the desired channel on the list. You can make multiple choices by pressing the Yellow button. Then press the OK button to open the Channel Edit Options menu and select Add/Remove Favourites option. Press the OK button again. Set the desired list option to On. The selected channel/s will be added to the list. In order to remove a channel or channels from a favourite list follow the same steps and set the desired list option to Off.You can use the Filter function in the Edit Channel List menu to filter the channels in the Channel list permanently according to your preferences. Using this Filter option, you can set one of your four favourite lists to be displayed every time the Channel list is opened. The filtering function in the Channel list menu will only filter the currently displayed Channel list in order to find a channel and tune in it. These changes will not remain the next time the Channel list is opened if you don't save them. To save the changes on the list press the Red button after filtering while the Channel list is displayed on the screen.Configuring Parental SettingsThe Parental Settings menu options can be used to prohibit users from viewing of certain programmes, channels and using of menus. These settings are located in the System>Settings>Parental menu.To display parental lock menu options, a PIN number should be entered. After coding the correct PIN number, Parental Settings menu will be displayed.Menu Lock: This setting enables or disables access to all menus or installation menus of the TV.Maturity Lock: If this option is set, TV gets the maturity information from the broadcast and if this maturity level is disabled, disables access to the broadcast.Note: If the country option in the First Time Installation is set as France, Italy or Austria, Maturity Lock's value will be set to 18 as default. | Child Lock: If this option is set to ON, the TV can only be controlled by the remote control. In this case the control buttons on the TV will not work.Set PIN: Defines a new PIN number.Default CICAM PIN: This option will appear as grayed out if no CI module is inserted into the CI slot of the TV. You can change the default PIN of the CI CAM using this option.Note: Default PIN can be set to 0000 or 1234. If you have defined the PIN(is requested depending on the country selection) during theFirst Time Installationuse the PIN that you have defined.Some options may not be available depending on the country selection in theFirst Time Installation.Electronic Programme Guide (EPG)Some channels send information about their broadcast schedules. Press the Epg button to view the Programme Guide menu.There are 3 different types of schedule layouts available, Timeline Schedule, List Schedule and Now/Next Schedule. To switch between them follow the instructions on the bottom of the screen.Timeline ScheduleZoom (Yellow button): Press the Yellow button to see events in a wider time interval.Filter (Blue button): Views filtering options.Highlight Genre (Subtitles button): Displays Highlight Genre menu. Using this feature, you can search the programme guide database in accordance with the genre. Info available in the programme guide will be searched and results matching your criteria will be highlighted.Options (OK button): Displays event options.Event Details (Info button): Displays detailed information about selected events.Next/Prev Day (Programme +/- buttons): Displays the events of previous or next day.Search (Text button): Displays Guide Search menu.Now (Source button): Displays current event of the highlighted channel.Rec./Stop (Record button): The TV will start to record the selected event. You can press again to stop the recording.IMPORTANT: Connect a USB disk to your TV while the TV is switched off. You should then switch on the TV to enable the recording feature.Note: Switching to a different broadcast or source is not available during a recording.Event OptionsUse the directional buttons to highlight an event and press OK button to displayEvent Optionsmenu. The following options are available.Select Channel: Using this option, you can switch to the selected channel.Record / Delete Rec. Timer: Select the Record option and press the OK button. If the event is going to be broadcasted at a future time, it will be added to Timerslist to be recorded. If the selected event is being broadcasted at the moment, recording will start immediately.To cancel an already set recording, highlight that event and press the OK button and select the optionDelete Rec. Timer. The recording will be cancelled.Set Timer on Event / Delete Timer on Event: After you have selected an event in the EPG menu, press the OK button. SelectSet Timer on Eventoption and press the OK button. You can set a timer for future To cancel an already set timer, highlight that event and press the OK button. Then selectDelete Timer on Eventoption. The timer will be cancelled.Notes: You cannot switch to any other channel or source while there is an active recording or timer on the current channel. It is not possible to set timer or record timer for two or more individual events at the same time interval.Teletext ServicesPress the Textbutton to enter. Press again to activate mix mode, which allows you to see the teletext page and the TV broadcast at the same time. Press once more to exit. If available, sections in the teletext pages | Event Details (Info button): Displays detailed information about selected events.Filter (Text button): Views filtering options.Next Time Slice (Green button): Displays the events of next time slice.Options (OK button): Displays event options.Rec./Stop (Record button): The TV will start to record the selected event. You can press again to stop the recording.IMPORTANT: Connect a USB disk to your TV while the TV is switched off. You should then switch on the TV to enable the recording feature.Note: Switching to a different broadcast or source is not available during a recording.Event OptionsUse the directional buttons to highlight an event and press OK button to displayEvent Optionsmenu. The following options are available.Select Channel:Using this option, you can switch to the selected channel.Record / Delete Rec. Timer: Select the Record option and press the OK button. If the event is going to be broadcasted at a future time, it will be added to Timerslist to be recorded. If the selected event is being broadcasted at the moment, recording will start immediately.To cancel an already set recording, highlight that event and press the OK button and select the optionDelete Rec. Timer. The recording will be cancelled.SetTimer on Event / Delete Timer on Event: After you have selected an event in the EPG menu, press the OK button. SelectSet Timer on Eventoption and press the OK button. You can set a timer for future To cancel an already set timer, highlight that event and press the OK button. Then selectDelete Timer on Eventoption. The timer will be cancelled.Notes: You cannot switch to any other channel or source while there is an active recording or timer on the current channel. Itis not possible to set timer or record timer for two or more individual events at the same time interval.Teletext ServicesPress the Textbutton to enter. Press again to activate mix mode, which allows you to see the teletext page and the TV broadcast at the same time. Press once more to exit. If available, sections in the teletext pages | will become colour-coded and can be selected by pressing the coloured buttons. Follow the instructions displayed on the screen.Digital TeletextPress the Text button to view digital teletext information. Operate it with the coloured buttons, cursor buttons and the OK button. The operation method may differ depending on the contents of the digital teletext. Follow the instructions displayed on the digital teletext screen. When the Textbutton is pressed again, the TV returns to television broadcast.Software UpgradeYour TV is capable of finding and updating the firmware automatically via the broadcast signal.Software upgrade search via user InterfaceOn the main menu selectSystem>Settingsand then More. Navigate toSoftware upgradeand press the OK button. InUpgrade optionsmenu selectScan for upgradeand press OK button to check for a new software upgrade.If a new upgrade is found, it starts to download the upgrade. After the download is completed confirm the question asking about rebooting the TV by pressing the OK to continue with the reboot operation.3 AM search and upgrade modeYour TV will search for new upgrades at 3:00 o'clock if Automatic scanningoption in theUpgrade optionsmenu is set toEnabledand if the TV is connected to an aerial signal. If a new software is found and downloaded successfully, it will be installed at the next power on.Note: Do not unplug the power cord while led is blinking during the reboot process. If the TV fails to come on after the upgrade, unplug, wait for two minutes then plug it back in.Troubleshooting & TipsTv will not turn onMake sure the power cord is plugged in securely to wall outlet. Check if batteries are exhausted. Press the Power button on the TV.Everp pictureCheck if you have selected the correct TV system.Low signal level can cause picture distortion. Please check antenna access.Check if you have entered the correct channel frequency if you have done manual tuning.The picture quality may degrade when two devices are connected to the TV at the same time. In such a case, disconnect one of the devices. |
| Supported File Formats for USB Mode | |||
| Media | Extension | Format Notes | |
| Video | .mpg, .mpeg | MPEG1-2 | MPEG1: 768x576 @ 30P, MPEG2:1920x1080 @ 30P |
| .vob MPEG2 | 1920x1080 @ 30P | ||
| .mp4 | MPEG4, Xvid, H.264 | ||
| .mkv | H.264, MPEG4,VC-1 | ||
| .avi | MPEG2, MPEG4, Xvid, H.264 | ||
| .flv | H.264/VP6/ Sorenson | H.264/VP6: 1920x1080 @ 30PSorenson: 352x288 @ 30P | |
| .mp4, .mov, .3gpp, .3gp, MPEG transport stream, .ts,trp, .tp, .mkv | HEVC/H.265 | 1080P@60fps - 50Mbps | |
| .3gp MPEG4 , H.264 1920x1080 @ 30P | |||
| Audio | .mp3 | MPEG1 Layer 2/3 | Layer2: 32Kbps ~ 448Kbps (Bit rate) / 32kHz, 44.1kHz, 48kHz, 16kHz, 22.05kHz, 24kHz (Sampling rate)Layer3: 32Kbps ~ 320Kbps (Bit rate) / 32kHz, 44.1kHz, 48kHz, 16kHz, 22.05kHz, 24kHz, 8kHz, 11.025kHz, 12kHz (Sampling rate) |
| (works only with video files) | AC3 | 32Kbps ~ 640Kbps (Bit rate) / 32kHz, 44.1kHz, 48kHz (Sampling rate) | |
| AAC | 16Kbps ~ 576Kbps (Bit rate) / 48kHz, 44.1kHz, 32kHz, 24kHz, 22.05kHz, 16kHz, 12kHz, 11.025kHz, 8kHz (Sampling rate) | ||
| EAC3 | 32Kbps ~ 6Kbps (Bit rate) / 32kHz, 44.1kHz, 48kHz (Sampling rate) | ||
| LPCM | Unsigned 8bit PCM, Signed/Unsigned 16bit PCM (big / little endian), 24bit PCM (big endian), DVD LPCM 16/20/24bit (Bit rate)/ 6kHz, 8kHz, 11.025kHz, 12kHz, 16kHz, 22.05kHz, 24kHz, 32kHz, 44.1kHz, 48kHz, 88.2kHz, 96kHz, 176.4kHz, 192kHz (Sampling rate) | ||
| IMA-ADPCM/ MS-ADPCM | 384Kbps (Bit rate) / 8KHz ~ 48Khz (Sampling rate) | ||
| LBR | 32Kbps ~ 96Kbps (Bit rate) / 32kHz, 44.1kHz, 48kHz (Sampling rate) | ||
| Picture | .jpeg | Baseline | Resolution(WxH): 17000x10000 |
| Progressive | Resolution(WxH): 4000x4000 | ||
| .bmp | - | Resolution(WxH): 5760x4096 | |
| Subtitle | .sub, .srt | - | - |
| PC Input Typical Display Modes | ||
| The following table is an illustration of some of the typical video display modes. Your TV may not support all resolutions. Your TV supports up to 1920x1080. | ||
| Index Resolution Frequency | ||
| 1 | 640x480 60 Hz | |
| 2 | 600 56 Hz | |
| 3 | 600 60 Hz | |
| 4 | x768 60 Hz | |
| 5 | 24x768 66 Hz | |
| 6 | x768 60 Hz | |
| 7 | x960 60 Hz | |
| 8 | x1024 60 Hz | |
| 9 | x768 60 Hz | |
| 10 | 0x1050 60 Hz | |
| 11 | 0x1200 60 Hz | |
| 12 | 0x1080 60 Hz | |
| AV and HDMI Signal Compatibility | ||
| Source Supported Signals | Available | |
| EXT(SCART) | PAL 50/60 | O |
| NTSC 60 | O | |
| RGB 50 | O | |
| RGB 60 | O | |
| Side AV | PAL 50/60 | O |
| NTSC 60 | O | |
| PC/YPbPr | 480I, 480P | 60Hz O |
| 576I, 576P | 50Hz O | |
| 720P | 50Hz,60Hz | |
| 1080I | 50Hz,60Hz | |
| 1080P 50Hz,60Hz | O | |
| HDMI | 480I 60Hz O | |
| 480P | 60Hz O | |
| 576I, 576P | 50Hz O | |
| 720P | 50Hz,60Hz | |
| 1080I | 50Hz,60Hz | |
| 1080P | 24Hz, 25Hz30Hz, 50Hz,60Hz | |
| (X: Not Available, O: Available)In some cases a signal on the TV may not be displayed properly. The problem may be an inconsistency with standards from the source equipment (DVD, Set-top box, etc.). If you do experience such a problem please contact your dealer and also the manufacturer of the source equipment. | ||
Supported DVI Resolutions
When connecting devices to your TV's connectors by using DVI converter cable(DVI to HDMI cable - not supplied), you can refer to the following resolution information.
| 56Hz 60Hz 66Hz 70Hz 72Hz 75Hz | ||||||
| 640x400 | ☑ | |||||
| 640x480 | ☑ | ☑ | ☑ | ☑ | ||
| 800x600 | ☑ | ☑ | ☑ | ☑ | ☑ | |
| 832x624 | ☑ | |||||
| 1024x768 | ☑ | ☑ | ☑ | ☑ | ☑ | |
| 1152x864 | ☑ | ☑ | ☑ | |||
| 1152x870 | ☑ | |||||
| 1280x768 | ☑ | ☑ | ||||
| 1360x768 | ☑ | |||||
| 1280x960 | ☑ | ☑ | ||||
| 1280x1024 | ☑ | ☑ | ||||
| 1400x1050 | ☑ | ☑ | ||||
| 1440x900 | ☑ | ☑ | ||||
| 1600x1200 | ☑ | |||||
| 1680x1050 | ☑ | |||||
| 1920x1080 | ☑ | |||||
| A | VESA WALL MOUNT MEASUREMENTS | ||
| B | Hole Pattern Sizes (mm) | W | H |
| 75 | 75 | ||
| C | Screw Sizes | ||
| D | Length (X) | min. (mm) | 5 |
| max. (mm) | 8 | ||
| E | Thread (Y) | M4 | |

| A B C D E | |||||
| English | VESA WALL MOUNT MEASUREMENTS | Hole Pattern Sizes (mm) Screw Sizes Length (X) Thread (Y) | |||
| Deutsch | MASSANGABEN FÜR VESA-WANDMONTAGE | Lochmustergrößen (mm) | Schraubengrößen | Länge (X) | Gewinde (Y) |
| Français | DIMENSIONS DU SUPPORT DE FIXATION MURALE VESA | Dimensions des modèles de trous de montage (mm) | Dimensions des vis | Longueur (X) | Filetage (Y) |
| Italiano | Misurazioni installazione a parete VESA | Dimensioni schema foro (mm) | Dimensioni vite | Lunghezza (X) | Filettatura (Y) |
| Português | MEDIÇÕES DE MONTAGEM MURAL VESA | Dimensões do molde de furação (mm) | Tamanhos do parafuso | Comprimento (X) | Rosca (Y) |
| Español | MEDIDAS DEL MONTAJE DE PARED VESA | Tamaños de patrón para agujero (mm) | Tamaños de tornillo | Longitud (X) | Rosca (Y) |
| Türkçe | VESA DUVARA MONTAJ APARATI ÖLÇÜLERİ | Açılacak Delik Ölçüleri (mm) | Vida Ölçüleri | Uzunluk (X) | Yüzey (Y) |
| Ελληνικ | ΔΙΑΣΤΑΣΕΙΣ ΒΑΣΗΣ ΤΟΙΧΟΥ VESA | Μεγέθη συήματος οπών (mm) | Μεγέθη βιδών | Μήκος (X) | Επείσωμα (Y) |
| Polski | WYMIARY DO MONTAZU NAŚCIENNEGO VESA | Rozmiary szablonu otworów (mm) | Rozmiary wkrętów | Długość (X) | Gwint (Y) |
| čeština | ROZMĚRY DRŽÁKU NA ZEŐ VESA | Rozměry velikosti děr (mm) | Rozměry śroubů | Délka (X) | Závit (Y) |
| Magyar | VESA FALI TARTÓ MÉRETEK | Lyukak méretének nagysága(mm) | Csavar méret | Hossz (X) | Menet (Y) |
| Română | MĂSURĂTORI SUPORT PERETE VESA | Dimensiuni tipar gaură (mm) | Dimensiuni şuruburi | Lungime (X) | Filet (Y) |
| Svenska | VESA VÄGGMONTERINGSMÄTT | Hålmönsterstorlear (mm) | Skruvstorlekar | Längd (X) | Trád (Y) |
| Nederlands | VESA WANDMONTAGE METINGEN | Grootte booropening (mm) | Schroefgroote | Lengte (X) | Draad (Y) |
| Suomi | VESA-SEINĂASENNUKSEN MITAT | Reikäkuvion koot (mm) | Ruuvinkoot | Pituus (x) | Kierre (Y) |
| Norsk | VESA VEGGMONTERINGSMÄL | Hullmønster størrelser (mm) | Skruestørrelser | Lengde (x) | Trád (Y) |
| Dansk | VESA VÆGMONTERINGS-MÄL | Hulmønster-størrelser (mm) | Skruestørrelser | Længde(X) | Trád (Y) |
| Русский | РАЗМЕРЫ НАСТЕННОГО КРЕПЛЕНИЯ VESA | Размеры системы отверстий | Размеры винтов | Длина(X) | Резьба (Y) |
| беларуская | ПАМЕРЫ НАСЦЕННАГА МАЦАВАННЯ VESA | Памеры сістãмы адтулін | Памеры вінтоў | Даўжыня (X) | Разьба (Y) |
| македонски | МЕРКИ ЗА МОНТИРАЊЕ НА СИД ЗА „BECA“ | Шема на големини на дупката (мм) | Големина на шрафот | Должина (X) | Навој (Y) |
| українська | РОЗМІРИ НАСТИННОГО КРІПЛЕННЯ VESA | Відстань між кріпильними отворами, мм | Розміри гвинтів | Довжина (X) | Діаметр різьби (Y) |
| Srpski | DIMENZIJE VESA ZIDNOG NOSAČA | Dimenzije šablona za bušenje | Dimenzije zavrtnjeva | Dužina (X) | Navoj (Y) |
| Slovenčina | ROZMERY DRŽIAKA NA STENU VESA | Rozmery veľkosti dier (mm) | Rozmery skrutiek | Dĺžka (X) | Závit (Y) |
| Slovenščina | MERE STENSKEGA NOSILCA VESA | Velikosti vzorca lukanj (mm) | Velikosti vijakov | Dožina (X) | Navoj (Y) |
| Hrvatski | VESA MJERE ZIDNOG DRŽAČA | Veličine uzorka otvora (mm) | Veličine vijka | Dužina (X) | Navoji (Y) |
| Bosanski | DIMENZIJE VESA ZIDNOG NOSAČA | Dimenzije šablona za bušenje | Dimenzije vijaka | Dužina (X) | Navoj (Y) |
| Български | РАЗМЕРИ ЗА КОМПЛЕКТ ЗА МОНТАЖ НА СТЕНА VESA | Размери на отвора (mm) | Размер на болта | Дължинат (X) | Резба (Y) |
| Lietuvių | VESA TVIRTINIMO PRIE SIENOS MATAVIMAI | Angos šablono dydis (mm) | Varztų dydis | Ilgis (X) | Sriegis (Y) |
| Latviešu | VESA SIENAS STIPRINĀJUMA IZMĚRI | Caurumu šablona izmērs (mm) | Skrūvju izmēri | Garums (X) | Vitne (Y) |
| Eesti | VESA SEINALE KINNITAMISE MÔÖDUD | Kruvi suuruse mööt (mm) | Kruvi suurus | Kõrgus(x) | Keere (Y) |
| Shqip | PËRMASAT E NJÊSISE SË MONTIMIT NË MUR VESA | Madhësitë modele të vrimave (mm) | Madhësitë e vidhave | Gjatësia (X) | Filetimi (Y) |
| عربي | مغابيس للتشبیت على الجدار | (م) أَحْجامِال sequوب (م) | (طول) | (السون) | (السون) |
| لازلاي | VESA مزد نوره بزد نوره بزد نوره بزد نوره بزد نوره بزد نوره بزد نوره بزد نوره بزد نوره بزد نوره بزد نوره بزد نوره بزد نوره بزد نوره بزد نوره بزد نوره بزد نوره بزد ن Oregon | (م) (م) (م) (م) (م) (م) (م) (م) (م) (م) (م) (م) (م) (م) (م) (م) (م) (م) (م) (م) (م) (م) (م) (م) (م) (م) (م) (م) (م) (م) (م) (م) (م) (م) (м) (م) (م) (م) (م) (م) (م) (م) (م) (م) (م) (م) (م) (م) (م) (م) (م) (م) (م) (م) (م) (م) (م) (م) (م) (م) (م) (م) (م) (م) (م) (م) (م) (م ́) (م) (م) (م) (م) (م) (م) (م) (م) (م) (م) (م) (م) (م) (م) (م) (م) (م) (م) (م) (م) (م) (م) (م) (م) (م) (م) (م) (م) (م) (م) (م) (م) (م). | |||
TR: İşbu belgede; VESTEL Elektronik Sanayi ve Ticaret A.Ş., telsiz ekipmanı tipi TFT IDTV 'nin 2014/53/AB sayılı direktife uygun olduğunu beyan eder. AB uygunluk beyanının tam metni internet adresinde mevcuttur: doc.vosshub.com
EN: Hereby, VESTEL Elektronik Sanayi ve Ticaret A.Ş., declares that the radio equipment type TFT IDTV is in compliance with Directive 2014/53/EU. The full text of the EU declaration of conformity is available at the following internet address: doc.vosshub.com
BG: С настоящото VESTEL Elektronik Sanayi ve Ticaret A.Ş., декларира, че този тип радиосъоръжение TFT IDTV е в съответствие с Директива 2014/53/EC. Цялостният текст на ЕС декларацията за съответствие може да се намери на следния интернет адрес: doc.vosshub.com
CZ: Tímto VESTEL Elektronik Sanayi ve Ticaret A.Ş., prohlašuje, že typ rádiového zařízení TFT IDTV je v souladu se směrnici 2014/53/EU. Úplné znění EU prohlášení o shodě je k dispozici na této internetové adrese: doc.vosshub.com
DA: Hermed erklærer VESTEL Elektronik Sanayi ve Ticaret A.Ş., at radioudstyrstypen TFT IDTV er i overensstemmelse med direktiv 2014/53/EU. EU-overensstemmelseserklæringens fulde tekst kan findes på følgende internetadresse: doc.vosshub.com
DE: Hiermit erklärt VESTEL Elektronik Sanayi ve Ticaret A.Ş., dass der Funkanlagentyp TFT IDTV der Richtlinie 2014/53/EU entspricht. Der vollständige Text der EU-Konformitätserklärung ist unter der folgenden Internetadresse verfügbar: doc.vosshub.com
EL: Με την παρούσα ο/η VESTEL Elektronik Sanayi ve Ticaret A.Ş., δηλώνει ότι ο radioεξοπλισμός TFT IDTV πληροί την οδηγία 2014/53/ΕΕ. Το πλήρες κείμενο της δήλωσης συμμόρφωσης ΕΕ διατίθεται στην ακόλουθη ιστοσελίδα στο διαδίκτυο: doc.vosshub.com
ES: Por la presente, VESTEL Elektronik Sanayi ve Ticaret A.Ş., declara que el tipo de equipo radioeléctrico TFT IDTV es conforme con la Directiva 2014/53/UE. El texto completo de la declaración UE de conformidad está disponible en la dirección Internet siguiente: doc.vosshub.com
ET: Käesolevaga deklareerib VESTEL Elektronik Sanayi ve Ticaret A.Ş., et käesolev raadioseadme tüüp TFT IDTV vastab direktiivi 2014/53/EL nõuetele. ELi vastavusdeklaratsiooni täielik tekst on kättesaadav järgmisel internetiaadressil: doc.vosshub.com
FI: VESTEL Elektronik Sanayi ve Ticaret A.Ş., vakuuttaa, että radiolaitetyyppi TFT IDTV on direktiivin 2014/53/EU mukainen. EU-vaatimustenmukaisuusvakuutuksen täysimittainen teksti on saatavilla seuraavassa internetosoitteessa: doc.vosshub.com
FR: Le soussigné, VESTEL Elektronik Sanayi ve Ticaret A.Ş., déclare que l'équipement radioélectrique du type TFT IDTV est conforme à la directive 2014/53/UE. Le texte complet de la déclaration UE de conformité est disponible à l'adresse internet suivante: doc.vosshub.com
HR: VESTEL Elektronik Sanayi ve Ticaret A.Ş., ovime izjavljuje da je radijska oprema tipa TFT IDTV u skladu s Direktivom 2014/53/EU. Cjeloviti tekst EU izjave o sukladnosti dostupan je na sljedećoj internetskoj adresi: doc.vosshub.com
HU: VESTEL Elektronik Sanayi ve Ticaret A.Ş., igazolja, hogy a TFT IDTV típusú rádióberendezés megfelel a 2014/53/EU irányelvnek. Az EU-megfelelőségi nyilatkozat teljes szövege elérhető a következő internetes címen: doc.vosshub.com
IT: Il fabbricante, VESTEL Elektronik Sanayi ve Ticaret A.Ş., dichiara che il tipo di apparecchiatura radio TFT IDTV è conforme alla direttiva 2014/53/UE. Il testo completo della dichiarazione di conformità UE è disponibile al seguente indirizzo Internet: doc.vosshub.com
LT: Aš, VESTEL Elektronik Sanayi ve Ticaret A.Ş., patvirtinu, kad radijo įrenginių tipas TFT IDTV atitinka Direktyvą 2014/53/ES. Visas ES atitikties deklaracijos tekstas prieinamas šiuo interneto adresu: doc.vosshub.com
LV: Ar šo VESTEL Elektronik Sanayi ve Ticaret A.Ş., deklarē, ka radioiekārta TFT IDTV atbilst Direktīvai 2014/53/ES. Pilns ES atbilstības deklarācijas teksts ir pieejams šādā interneta vietnē: doc.vosshub.com
MT: B'dan, VESTEL Elektronik Sanayi ve Ticaret A.Ş., niddikjara li dan it-tip ta' taghmir tar-radju TFT IDTV huwa konformi mad-Direttiva 2014/53/UE. It-test kollu tad-dikjarazzjoni ta' konformità tal-UE huwa disponibbli f'dan l-indirizz tal-Internet li gej: doc.vosshub.com
NL: Hierbij verklaar ik, VESTEL Elektronik Sanayi ve Ticaret A.Ş., dat het type radioapparatuur TFT IDTV conform is met Richtlijn 2014/53/EU. De volledige tekst van de EU-conformiteitsverklaring kan worden geraadpleegd op het volgende internetadres: doc.vosshub.com
PL: VESTEL Elektronik Sanayi ve Ticaret A.Ş., niniejszym oświadcza, że typ urządzenia radiowego TFT IDTV jest zgodny z dyrektywą 2014/53/UE. Pełny tekst deklaracji zgodności UE jest dostępny pod następującym adresem internetowym: doc.vosshub.com
PT: O(a) abaixo assinado(a) VESTEL Elektronik Sanayi ve Ticaret A.Ş., declara que o presente tipo de equipamento de rádio TFT IDTV está em conformidade com a Diretiva 2014/53/UE. O texto integral da declaração de conformidade está disponível no seguinte endereço de Internet: doc.vosshub.com
RO: Prin prezenta, VESTEL Elektronik Sanayi ve Ticaret A.Ş., declară că tipul de echipamente radio TFT IDTV este în conformitate cu Directiva 2014/53/UE. Textul integral al declarației UE de conformitate este disponibil la următoarea adresă internet: doc.vosshub.com
SK: VESTEL Elektronik Sanayi ve Ticaret A.Ş., týmto vyhlasuje, že rádiové zariadenie typu TFT IDTV je v súlade so smernicou 2014/53/EÚ. Uplné EÚ vyhlásenie o zhode je k dispozícii na tejto internetovej adrese: doc.vosshub.com
SL: VESTEL Elektronik Sanayi ve Ticaret A.Ş., potrjuje, da je tip radijske opreme TFT IDTV skladen z Direktivo 2014/53/EU. Celotno besedilo izjave EU o skladnosti je na voljo na naslednjem spletnem naslovu: doc.vosshub.com
SV: Härmed försäkrar VESTEL Elektronik Sanayi ve Ticaret A.Ş., att denna typ av radioutrustning TFT IDTV överensstämmer med direktiv 2014/53/EU. Den fullständiga texten till EU-försäkran om överensstämmelse finns på följande webbadress:doc.vosshub.com
| A | Product Fiche | ||
| B | Commercial Brand:ORIMA | ||
| C | Product No. | 10122104 | |
| D | Model No. | OR24500 | |
| E | Energy efficiency class | A+ | |
| F | Visible screen size (diagonal,approx.) (inch/cm) | 24 inches | 60 cm |
| G | On mode average power consumption (Watt) | 19,0 | |
| H | Annual energy consumption (kWh/annum) (*) | 27 | |
| I | Stand by power consumption (Watt) | 0,50 | |
| J | Off mode power consumption (Watt) | N/A | |
| K | Display resolution (px) | 1366x768 | |
| A | B | C | D | E | F | ||
| English Product Fiche Commercial Brand Product No. Model No. Energy efficiency class Visible screen size(diagonal, a approx.) (inch/cm) | |||||||
| Deutsch | Produkt-Datenblatt Markenzeichen Produkt-Nr. Modell-Nr. Energieeffizienzklasse Sichtbare Bildschirmgröße(diagonal,ca.) (Zoll /cm | ||||||
| العربية عربية قابس المتح | العربية ئيوياني نبوياني نبوياني نبوياني نبوياني نبوياني نبوياني نبوياني نبوياني نبوياني نبوياني نبوياني نبوياني نبوياني نبوياني نبوياني نبوياني نبوياني نبوياني نبوياني نبوياني نبوياني نبوياني نبوياني نبوياني نبوياني ننراللهاللهاللهاللهاللهاللهاللهاللهاللهاللهاللهاللهاللهاللهاللهاللهاللهاللهاللهاللهاللهاللهاللهاللهاللهاللهاللهاللهاللهاللهاللهاللهاللهاللهاللهاللهاللهاللهاللهاللهاللهاللهاللهاللهاللهاللهاللهاللهاللهاللهالhnاللهاللهاللهاللهاللهاللهاللهاللهاللهاللهاللهاللهاللهاللهاللهاللهاللهاللهاللهاللهاللهاللهاللهاللهاللهاللهاللهاللهاللهاللهاللهاللهاللهاللهاللهاللهاللهاللهاللهاللهاللهاللهاللهاللهاللهاللهاللهاللهاللهالhealalalalalalalalalalalalalalalalalalalalalalalalalalalalalalalalalalalalalalalalalalalalalalalalalalalalalalalalalalalalalalalalalalalalalalalalalalalalalalalalalalalalalalalalalalalalalalalalalalalalulalalalalalalalalalalalalalalalalalalalalalalalalalalalalalalalalalalalalalalalalalalalalalalalalalalalalalalalalalalalalalalalalalalalalalalalalalalalalalalalalalalalalalalalalalalalalalalalalalalal alalalalalalalalalalalalalalalalalalalalalalalalalalalalalalalalalalalalalalalalalalalalalalalalalalalalalalalalalalalalalalalalalalalalalalalalalalalalalalalalalalalalalalalalalalalalalalalalalalalaladalalalalalalalalalalalalalalalalalalalalalalalalalalalalalalalalalalalalalalalalalalalalalalalalalalalalalalalalalalalalalalalalalalalalalalalalalalalalalalalalalalalalalalalalalalalalalalalalalalalahalalalalalalalalalalalalalalalalalalalalalalalalalalalalalalalalalalalalalalalalalalalalalalalalalalalalalalalalalalalalalalalalalalalalalalalalalalalalalalalalalalalalalalalalalalalalalalalalalalalallalalalalalalalalalalalalalalalalalalalalalalalalalalalalalalalalalalalalalalalalalalalalalalalalalalalalalalalalalalalalalalalalalalalalalalalalalalalalalalalalalalalalalalalalalalalalalalalalalalalai alalalalalalalalalalalalalalalalalalalalalalalalalalalalalalalalalalalalalalalalalalalalalalalalalalalalalalalalalalalalalalalalalalalalalalalalalalalalalalalalalalalalalalalalalalalalalalalalalalaladialalalalalalalalalalalalalalalalalalalalalalalalalalalalalalalalalalalalalalalalalalalalalalalalalalalalalalalalalalalalalalalalalalalalalalalalalalalalalalalalalalalalalalalalalalalalalalalalalalalalaslinala linala linala linala linala linala linala linala linala linala linala linala linala linala linala linala linala linala linala linala linala linala linala linala linala linala linala linala linala linala linala linala linala linala lina linala linala linala linala linala linala linala linala linala linala linala linala linala linala linala linala linala linala linala linala linala linala linala linala linala linala linala linala linala linala linala linala linala laia laia laia laia laia laia laia laia laia laia laia laia laia laia laia laia laia laia laia laia laia laia laia laia laia laia laia laia laia laia laia laia laia laia laia laia laia laia laia laia laia laia laia laia laia laia laia laia laia laia lai laia laia laia laia laia laia laia laia laia laia laia laia laia laia laia laia laia laia laia laia laia laia laia laia laia laia laia laia laia laia laia laia laia laia laia laia laia laia laia laia laia laia laia laia laia laia laia laia laia laianla laia laia laia laia laia laia laia laia laia laia laia laia laia laia laia laia laia laia laia laia laia laia laia laia laia laia laia laia laia laia laia laia laia laia laia laia laia laia laia laia laia laia laia laia laia laia laia laia laia laie laia laia laia laia laia laia laia laia laia laia laia laia laia laia laia laia laia laia laia laia laia laia laia laia laia laia laia laia laia laia laia laia laia laia laia laia laia laia laia laia laia laia laia laia laia laia laia laia laia laialla laia laia laia laia laia laia laia laia laia laia laia laia laia laia laia laia laia laia laia laia laia laia laia laia laia laia laia laia laia laia laia laia laia laia laia laia laia laia laia laia laia laia laia laia laia laia laia laia laiala laia laia laia laia laia laia laia laia laia laia laia laia laia laia laia laia laia laia laia laia laia laia laia laia laia laia laia laia laia laia laia laia laia laia laia laia laia laia laia laia laia laia laia laia laia laia laia laia laia Laia laia laia laia laia laia laia laia laia laia laia laia laia laia laia laia laia laia laia laia laia laia laia laia laia laia laia laia laia laia laia laia laia laia laia laia laia laia laia laia laia laia laia laia laia laia laia laia laia laia La iia laia laia laia laia laia laia laia laia laia laia laia laia laia laia laia laia laia laia laia laia laia laia laia laia laia laia laia laia laia laia laia laia laia laia laia laia laia laia laia laia laia laia laia laia laia laia laia laia laiaLa iia laia laia laia laia laia laia laia laia laia laia laia laia laia laia laia laia laia laia laia laia laia laia laia laia laia laia laia laia laia laia laia laia laia laia laia laia laia laia laia laia laia laia laia laia laia laia laia laia laila iia laia laia laia laia laia laia laia laia laia laia laia laia laia laia laia laia laia laia laia laia laia laia laia laia laia laia laia laia laia laia laia laia laia laia laia laia laia laia laia laia laia laia laia laia laia laia laia laia laio laia laia laia laia laia laia laia laia laia laia laia laia laia laia laia laia laia laia laia laia laia laia laia laia laia laia laia laia laia laia laia laia laia laia laia laia laia laia laia laia laia laia laia laia laia laia laia laia laia laiola iia laia laia laia laia laia laia laia laia laia laia laia laia laia laia laia laia laia laia laia laia laia laia laia laia laia laia laia laia laia laia laia laia laia laia laia laia laia laia laia laia laia laia laia laia laia laia laia laia La iialla iialla iialla iialla iialla iialla iialla iialla iialla iialla iialla iialla iialla iialla iialla iialla iialla iialla iialla iialla iialla iialla iialla iialla iialla iialla iialla iialla iialla iialla iialla iialla iialla iialla ii iialla iialla iialla iialla iialla iialla iialla iialla iialla iialla iialla iialla iialla iialla iialla iialla iialla iialla iialla iialla iialla iialla iialla iialla iialla iialla iialla iialla iialla iialla iialla iialla iiallai iialla iialla iialla iialla iialla iialla iialla iialla iialla iialla iialla iialla iialla iialla iialla iialla iialla iialla iialla iialla iialla iialla iialla iialla iialla iialla iialla iialla iialla iialla iialla iialla iialla ini iialla iialla iialla iialla iialla iialla iialla iialla iialla iialla iialla iialla iialla iialla iialla iialla iialla iialla iialla iialla iialla iialla iialla iialla iialla iialla iialla iialla iialla iialla iialla iialla iialna iialna iialna iialna iialna iialna iialna iialna iialna iialna iialna iialna iialna iialna iialna iialna iialna iialna iialna iialna iialna iialna iialna iialna iialna iialna iialna iialna iialna iialna iialna iialna iialna iialna ii iialna ii iialna ii iialna ii iialna ii iialna ii iialna ii iialna ii iialna ii iialna ii iialna ii iialna ii iialna ii iialna ii iialna ii iialna ii iialna ii iialna ii iialna ii iialna ii iialna ii iialna ii iialna ii iialna ii iialna ii iialnaii iialna ii iialna ii iialna ii iialna ii iialna ii iialna ii iialna ii iialna ii iialna ii iialna ii iialna ii iialna ii iialna ii iialna ii iialna ii iialna ii iialna ii iialna ii iialna ii iialna ii iialna ii iialna ii iialna ii iialna ii iialna iii iialna iii iialna iii iialna iii iialna iii iialna iii iialna iii iialna iii iialna iii iialna iii iialna iii iialna iii iialna iii iialna iii iialna iii iialna iii iialna iii iialna iii iialna iii iialna iii iialna iii iialna iii iialna iii iialna iii iialna iii iialnaiii iialna iii iialna iii iialna iii iialna iii iialna iii iialna iii iialna iii iialna iii iialna iii iialna iii iialna iii iialna iii iialna iii iialna iii iialna iii iialna iii iialna iii iialna iii iialna iii iialna iii iialna iii iialna iii iialna iii iialna iii iialna III I I I I I I I I I I I I I I I I I I I I I I I I I I I I I I I I I I I I I I I I I I I I I I I I I I I I I I I I I I I I I I I I I I I I I I I I I I I I I I I I I I I I I I I I I I I I I I I I I I I I II I I I I I I I I I I I I I I I I I I I I I I I I I I I I I I I I I I I I I I I I I I I I I I I I I I I I I I I I I I I I I I I I I I I I I I I I I I I I I I I I I I I I I I I I I I I I I I I I I I II I I I I I I I I I I I I I I I I I I I I I I I I I I I I I I I I I I I I I I I I I I I I I I I I I I I I I I I I I I I I I I I I I I I I I I I I I I I I I I I I I I I I I I I I I I I I I I I I I I III I I I I I I I I I I I I I I I I I I I I I I I I I I I I I I I I I I I I I I I I I I I I I I I I I I I I I I I I I I I I I I I I I I I I I I I I I I I I I I I I I I I I I I I I I I I I I I I I I I I.I I I I I I I I I I I I I I I I I I I I I I I I I I I I I I I I I I I I I I I I I I I I I I I I I I I I I I I I I I I I I I I I I I I I I I I I I I I I I I I I I I I I I I I I I I I I I I I I I I I I | العربية مоступостه مоступостه مоступостه مоступостه مоступостه مоступостه مоступостه مоступостه مоступостه مоступостه مоступостه مоступостه مоступостه مоступостه مоступостه مоступостه مоступостه مоступостه مоступостه مоступостه مоступосте моступосте моступосте моступосте моступосте моступосте моступосте моступосте моступосте моступосте моступосте моступосте моступосте моступосте моступосте моступосте моступосте моступосте моступосте моступосте моступосте مоступосте моступосте моступосте моступосте моступосте моступосте моступосте моступосте моступосте моступосте моступосте моступосте моступосте моступосте моступосте моступосте моступосте моступосте моступосте моступост. | العربية مоступостه مоступостه مоступостه مоступостه مоступостه مоступостه مоступостه مоступостه مоступостه مоступостه مоступостه مоступостه مоступостه مоступостه مоступостه مоступостه مоступостه مоступостه مоступостه моступостه مоступостه مоступостه مоступостه مоступостه مоступостه مоступостه مоступостه مоступостه مоступостه مоступостه مоступостه مоступостه مоступостه مоступостه مоступостه مоступостه مоступостه مоступостه مоступостه моступост. | العربية مоступостه مоступостه مоступостه مоступостه مоступостه مоступостه مоступостه مоступостه مоступостه مоступостه مоступостه مоступостه مоступостه مоступостه مоступостه مоступостه مоступостه مоступостه моступостه مоступост. | العربية مоступостه مоступостه مоступостه مоступостه مоступостه مоступостه مоступостه مоступостه مоступостه مоступостه مоступостه مоступостه مоступостه مоступостه مоступостه مоступостه مоступостه مоступостه مostупост. | العربية مоступостه مоступостه مоступостه مоступостه مоступостه مоступостه مоступостه مоступостه مоступостه مоступостه مоступостه مоступостه مоступост. | العربية مоступостه مоступостه مоступостه مоступостه مоступостه مоступостه مоступостه مоступостه مоступостه مоступост. |
| Балайын и кейный | Балайын и кейный | Балайын и кейный | Балайын и кейный | Балайын и кейный | Балайын и кейный | Балайын и кейный | Балайын и кейный |
(*) English Energy consumption kWh per year, based on the power consumption of the television operating 4 hours per day for 365 days. The actual energy consumption will depend on how the television is used.
- MANUAL DE INSTRUÇÕES
- IMPORTANT - Please read these instructions fully before installing or
- operating
- HDMI™
- 15.1.20
- When the disconnect reduce ene
- - Remote controlled colour TV
- Operation with the Remote Control
- Inserting the Batteries into the Remote
- WARNING
- (\*) MY BUTTON 1 & MY BUTTON 2:
- English - 8 -
Brand : Orima
Model : OR24500
Category : Television