POICE1211 - Ice Maker Point - Free user manual and instructions
Find the device manual for free POICE1211 Point in PDF.
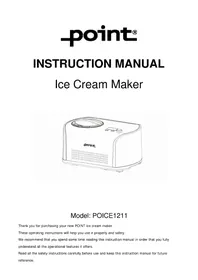


| Product Type | Ice Maker |
| Brand | Point |
| Model | POICE1211 |
| Dimensions (approx) | 30 x 25 x 30 cm |
| Weight | 8.5 kg |
| Power Supply | 220-240V ~ 50Hz, 150W |
| Ice Production Capacity | 12 kg per 24 hours |
| Ice Shape | Bullet ice |
| Water Tank Capacity | 2.2 L |
| Control Type | Push button with indicator lights |
| Refrigerant | R600a |
| Noise Level | ≤ 45 dB |
| Safety Features | Overheat protection, anti-splash lid |
| Maintenance | Self-cleaning function |
| Material | Stainless steel and plastic |
| Color | White |
| Energy Efficiency Class | A |
| Ice Cycle Duration | 6-15 minutes |
| Included Accessories | Ice scoop, drip tray |
| Warranty | 2 years |
Frequently Asked Questions - POICE1211 Point
User questions about POICE1211 Point
0 question about this device. Answer the ones you know or ask your own.
Ask a new question about this device
Download the instructions for your Ice Maker in PDF format for free! Find your manual POICE1211 - Point and take your electronic device back in hand. On this page are published all the documents necessary for the use of your device. POICE1211 by Point.
USER MANUAL POICE1211 Point
Model: POICE1211
Thank you for purchasing your new POINT ice cream maker.
These operating instructions will help you use it properly and safely.
We recommend that you spend some time reading this instruction manual in order that you fully understand all the operational features it offers.
Read all the safety instructions carefully before use and keep this instruction manual for future reference.
IMPORTANT NOTICES
Please read all the instructions and familiarise yourself with the features and operation of your unit before using the appliance. Make sure you read all the safety notes carefully and retain for future reference.
- Before using this appliance ensure that the voltage of your electricity supply is the same as that indicated on the rating plate of the appliance.
- If the mains cable is damaged it must be replaced by the manufacturer, its service agent, or similarly qualified persons in order to avoid a hazard.
- Use the appliance only on heat resistant surfaces. If the work surface is excessively smooth the appliance should be placed on a non-slip mat.
- Do not immerse the appliance or the mains cable or plug in water or other liquids.
- Always disconnect the unit from the power supply if it is left unattended and before assembling, disassembling or cleaning
- Do not cover the ventilations holes of the appliance and keep the appliance at least a distance of 8cm away from other heat-releasing objects.
- Do not use attachments or accessories that did not come with this appliance, or that are not recommended by the manufacturer.
- Ensure that the mains cable does not touch any hot surface and that it does not overhang a table edge.
- To avoid damage to the compressor, allow the appliance to cool down for at least 5 minutes before switching it on again.
- Metal sheets or other electrical objects must not be inserted into the appliance to avoid fire and short circuit.
- When taking out the ice cream, do not knock the barrel or the edge
of the barrel to protect the barrel from damage.
- Do not operate the appliance when the barrel or the blender blade is not installed completely.
- The initial temperature of the ingredients is 25 ± 5°C. Do not put the ingredients into the freezer for pre-freezing, as it will easily block the blender blade.
- Do not remove the blender blade when the appliance is operating.
- Do not use the appliance outdoors.
- Never clean with scouring powders or hard implements.
- This appliance can be used by children aged from 8 years and above and persons with reduced physical, sensory or mental capabilities or lack of experience and knowledge if they have been given supervision or instruction concerning use of the appliance in a safe way and understand the hazards involved. Children shall not play with the appliance. Cleaning and user maintenance shall not be made by children without supervision.
- Children should be supervised to ensure that they do not play with the appliance.
- This appliance is for normal household use only. Do not use it for professional catering.
Warning: Do not store explosive substances such as aerosol cans with a flammable propellant in this appliance.
Warning: Keep ventilation openings, in the appliance enclosure or in the built-in structure, clear of obstruction.
Warning: Do not use mechanical devices or other means to accelerate the defrosting process, other than those recommended by the manufacturer.
Warning: Do not damage the refrigerant circuit.
Warning: Do not use electrical appliances inside the food storage compartments of the appliance, unless they are of the type recommended by the manufacturer.

This is a fire warning sign. Caution: risk of fire.
Product Overview
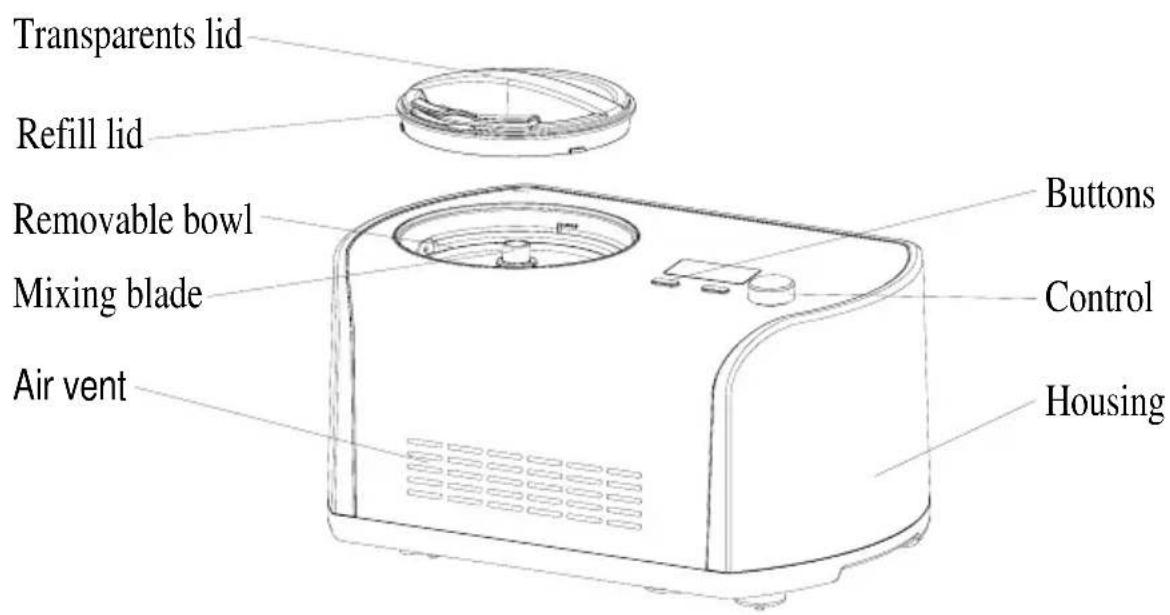
2) Function buttons Overview
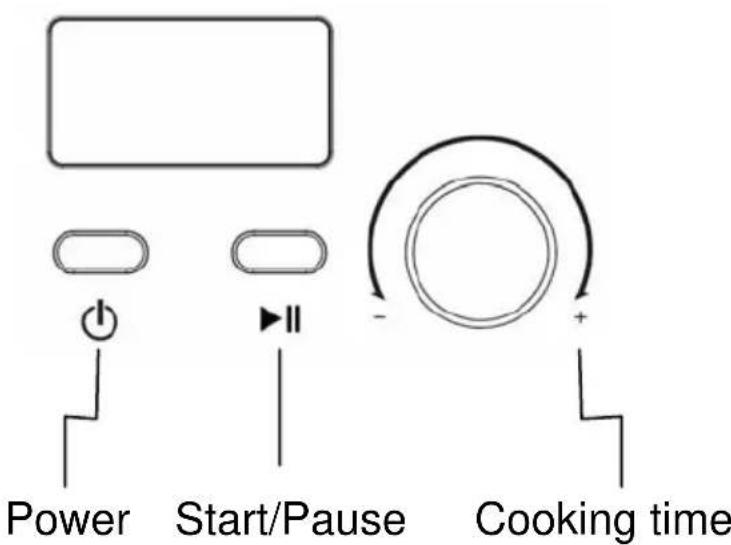
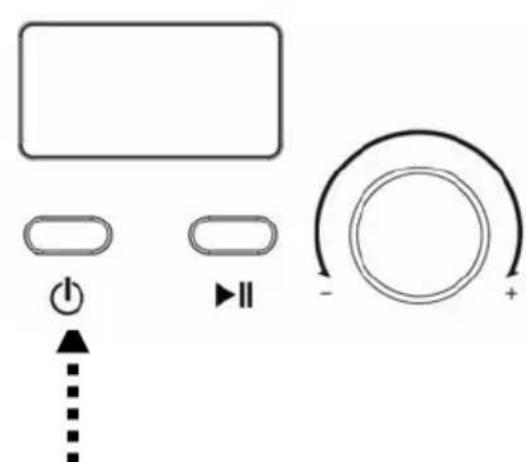
Power button: After plugging in, the appliance will enter into standby mode. Touch the power button to enter into the setting mode. Touch the power button at any time during operation to power off the appliance.
Cooking time control: Once the pre-prepared materials have been put into the removable bowl, turn this control to select the working time.
Start/Pause button: After setting the menu and time, press this button to start the working mode. Press this button during operation to pause the mixing (the time countdown will pause as well).
MAKING ICE CREAM
Cleanness: Before use, thoroughly wash all parts that will be in contact with the ice cream (including the fixed bowl, removable bowl, mixing blade, transparent lid, refill lid, measuring cup and spoon).
Warning: Please be sure the power cable is unplugged.
Important: Always place the appliance upright on a flat surface in order that the built-in COMPRESSOR can provide the best performance.
Step 1. Prepare ingredients:
Prepare ingredients from your own recipe or from the recipes in this manual. Note: You do not need to freeze the bowl in advance for hours in a freezer, as this appliance has a BUILT-IN COMPRESSOR that freezes the ingredients during operation to make the ice cream.
Step 2. Pour the prepared ingredients and warm water into the removable bowl, then have a uniform mixing (See picture).
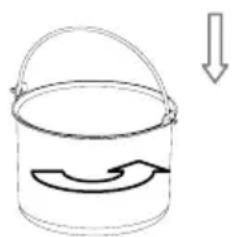
Pour into recipe ingredients and mix it.
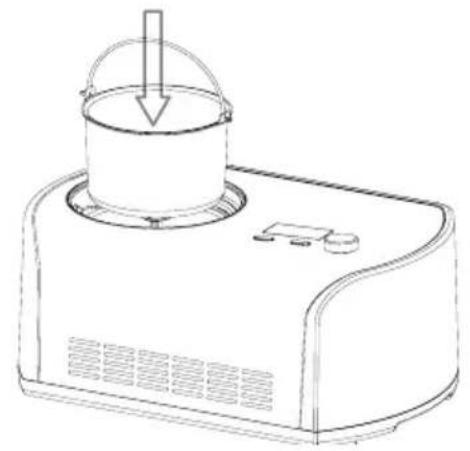
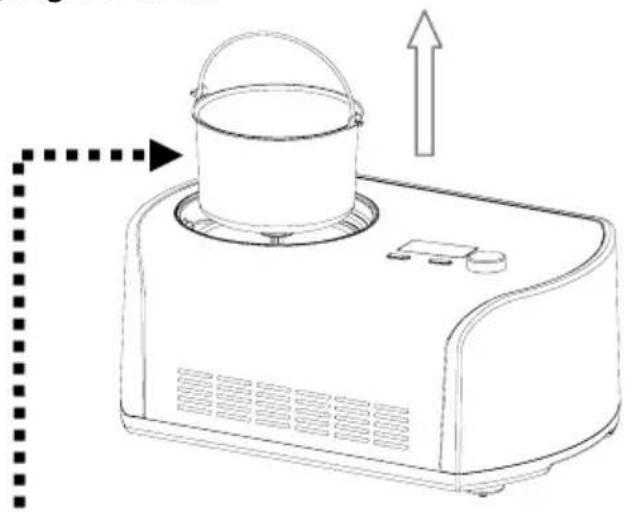
Step 3. Put the removable bowl into the appliance and slightly turn to make the bowl fit into place. (See picture).
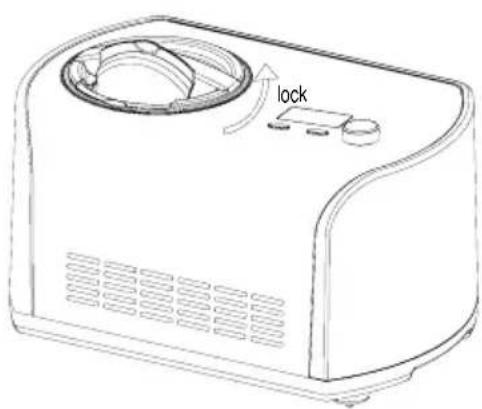
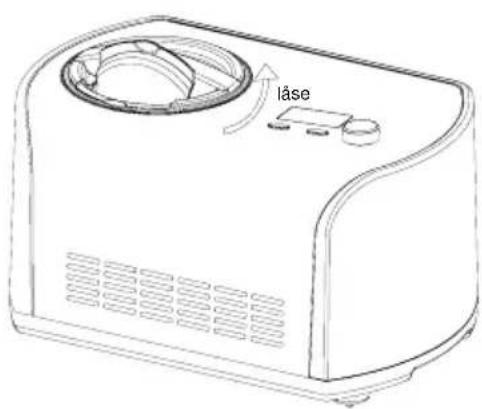
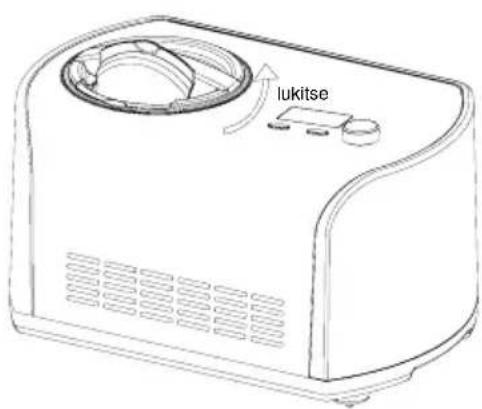
Step 4. Place the mixing blade into the removable bowl and keep the mixing blade bottom hole fitted well with the motor axis. Then put the transparent lid onto the appliance and lock it anticlockwise (See picture).
Step 5. Touch the Power button.
Step 6. Turn the Cooking time control to choose the working time.
Step 7. Touch the Start/Pause button to start working.
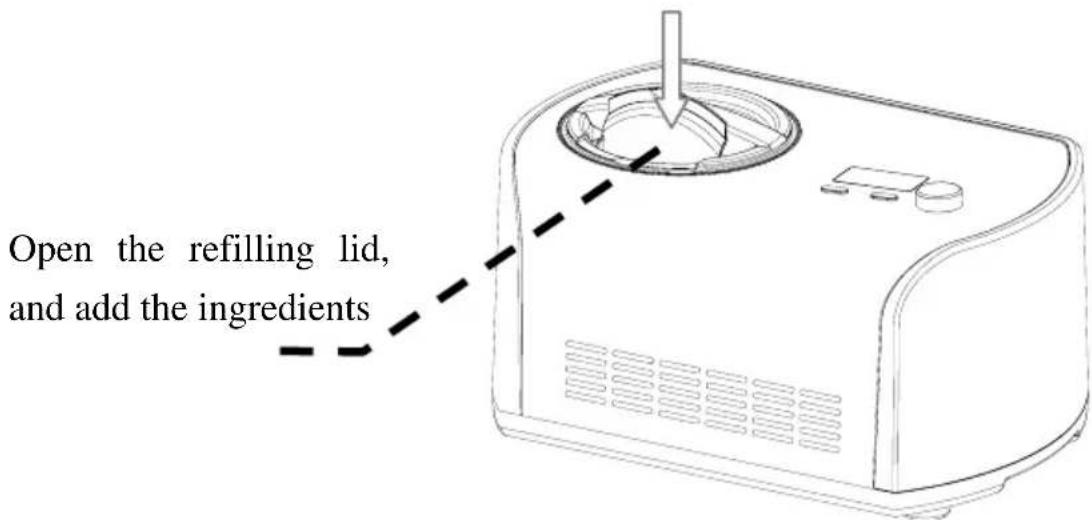
Step 8. You can add your favorite ingredients by opening the refill cover during ice cream making (see picture below).
Step 9. After the operation is over, turn off the appliance first, then pull out the removable bowl.
1. Turn off the appliance.
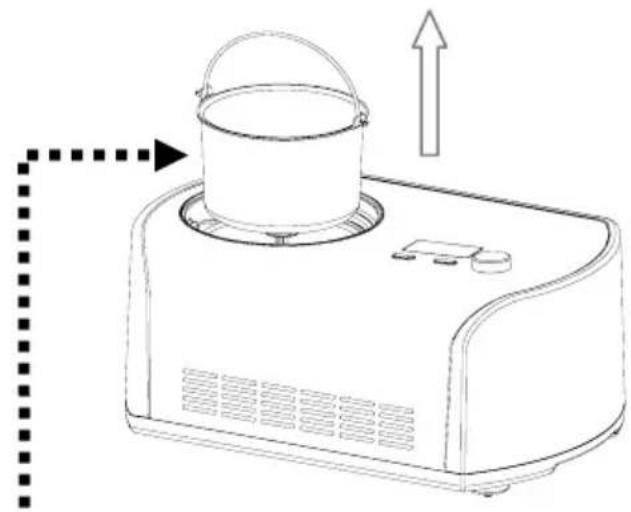
2. Pull out the removable bowl.
FUNCTION
Keep cool function
When the ice cream is ready, the appliance will automatically start the keep cool function, which can keep the ice cream cool for 1 hour. After 1 hour, the appliance will enter standby mode.
Motor self-protection function
As the ice cream becomes harder, the mixing motor might get blocked. The motor protection device makes the mixing motor stop working by detecting its temperature to ensure the life of the motor.
Controlling the Volume of the Ingredients
To avoid overflow and waste, please make sure that the ingredients do not exceed 60% of the capacity of the removable bowl (ice cream expands when being formed).
Cleaning
Caution: The plug must be removed before cleaning to avoid an electric shock.
(1) Take out the mixing blade and wipe it with a dampened cloth. (2) Take out the removable bowl and clean it with a dampened soft cloth. (3) Wipe the transparent lid and refill lid with a dampened cloth.
(4) Remove any dirt on the body or other places with a dampened cloth. Do not pour water on the mains cable, plug, or air vent. Do not immerse the appliance in water or any other liquids.
(5) Use a dry cloth to dry the appliance thoroughly before storage.
ICE CREAM RECIPE
VANILLA ICE CREAM
Makes eight 1/2-cup servings.
1 cup whole milk
1/2 cup granulated sugar
1.5 cups heavy cream, well chilled
1 – 2 teaspoons pure vanilla extract or to taste
In a medium bowl, use a hand mixer or whisk to combine the milk and granulated sugar until the sugar is dissolved, about 1 – 2 minutes on a low speed. Stir in the heavy cream and vanilla to taste. Turn the appliance on, and pour the mixture into a freezer bowl through the ingredient spout and let the mix set until thickened, about 30 – 40 minutes.
Nutritional analysis per serving:
Calories 239 (68% from fat) . carbo. 17g . pro 2g . fat 18g . sat. fat 11g . chol. 69mg .
VARIATIONS:
Mint Chip:
Omit the vanilla and replace with 1 to 1.5 teaspoons pure peppermint extract (to taste). Chop your favorite 4-ounce bittersweet or semi-sweet chocolate bar into tiny uneven pieces. Add the chopped chocolate during the last 5 minutes of mixing.
Butter Pecan:
Melt 1 stick unsalted butter in a 10-inch skillet. Add 1 cup of roughly chopped pecans and 1 teaspoon of kosher salt. Cook over medium-low heat, stirring frequently, until the pecans are lightly browned. Remove from the heat, then strain (the butter will have a pecan flavor and may be used for another dish). Allow the pecans to cool completely. Add the toasted buttered pecans during the
last 5 minutes of mixing.
Cookies & Cream:
Add 3/4 cup of coarsely chopped cookies or your favorite candy (chocolate chip, Oreos, Mint Oreos, etc.) during the last 5 minutes of mixing.
BASIC CHOCOLATE ICE CREAM
Makes eight 1/2-cup servings.
1 cup whole milk
1/2 cup granulated sugar
240g or 8 ounces bittersweet or semi-sweet chocolate
broken into 1/2-inch pieces
1 cup heavy cream, well chilled
1 teaspoon pure vanilla extract
Heat the whole milk until it is just bubbling around the edges (this may be done on the stovetop or in a microwave). In a blender or food processor fitted with the metal blade, pulse the sugar with the chocolate until the chocolate is very finely chopped. Add the hot milk, process until well blended and smooth. Transfer to a medium bowl and let the chocolate mixture cool down completely. Stir in the heavy cream and vanilla to taste.
Turn the appliance on and pour the mixture into the freezer bowl through the ingredient spout and let the mix set until thickened, about 30–40 minutes.
Nutritional analysis per serving:
Calories 370 (60% from fat), carbohydrates 34g, protein 3g, fat 25g, cholesterol 65mg.
VARIATIONS:
Chocolate Almond:
Add 1/2 teaspoon of pure almond extract along with the vanilla. Add 1/2 to 3/4 cup of chopped toasted almonds or chopped chocolate-coated almonds during the last 5 to 10 minutes of mixing.
Chocolate Cookie:
Add 1/2 to 1 cup chopped cookies during the last 5 minutes of mixing.
Chocolate Fudge Brownie:
Add 1/2 to 1 cup chopped day-old brownies during the last 5 minutes of mixing.
Chocolate Marshmallow Swirl:
When removing the ice cream to a container for freezing, layer it with dollops of your favorite chocolate sauce and scoops of marshmallow crème (fluff).
FRESH STRAWBERRY ICE CREAM
Makes eight 1/2-cup servings.
250g or 1 pint fresh ripe strawberries, stemmed and sliced
1.5 tablespoons freshly squeezed lemon juice, 1/2 cup sugar, 1 cup whole milk, 1 cup heavy cream, 1 teaspoon pure vanilla extract
In a small bowl, combine the strawberries and the lemon juice with 1/2 cup of sugar; stir gently and allow the strawberries to macerate in the juices for 2 hours.
In a medium bowl, use a hand mixer or a whisk to combine the milk and granulated sugar until the sugar is dissolved, about 1–2 minutes on low speed. Stir in the heavy cream, plus any accumulated juices from the strawberries, and the vanilla. Turn the appliance on, pour the mixture into the freezer bowl through the ingredient spout, and let the mix set until thickened, about 30–40 minutes. Add the sliced strawberries during the last 5 minutes of mixing.
Note: this ice cream will have a “natural” appearance of very pale pink; if a deeper pink is desired, sparingly add drops of red food coloring until the desired color is achieved.
Nutritional analysis per serving:
Calories 222 (61% from fat) . carb. 17g . pro 3g . fat 15g . chol. 57mg .
FRESH LEMON SORBET
Makes eight 1/2-cup servings.
1.5 cups sugar 1.5 cups water 1 cup freshly squeezed lemon juice 1 tablespoon finely chopped lemon zest *
Combine the sugar and water in a medium saucepan and bring to a boil over medium-high heat. Reduce the heat to low and simmer without stirring until the sugar dissolves, about 3–5 minutes. Cool completely. This is called a simple syrup, and may be made ahead in larger quantities to have on hand for making fresh lemon sorbet. Keep refrigerated until ready to use.
When cool, add the lemon juice and zest; then stir to combine. Turn the appliance on, pour the lemon mixture into the freezer bowl through the ingredient spout, and mix until thickened, about 30–40 minutes.
When zesting a lemon or lime, use a vegetable peeler to remove the colored part of the citrus rind.
Nutritional analysis per serving:
Calories 204 (0% from fat) . carb. 52g . pro .19g . fat 0g . chol. 0mg .
VARIATION:
Fresh Pink Grapefruit Sorbet:
Substitute 1-1/2 cups freshly squeezed pink grapefruit juice for the lemon juice, and 1 tablespoon of finely chopped grapefruit zest for the lemon zest. Add 1/4 cup orgeat syrup to the mixture (Orgeat syrup is used for cocktails such as a Mai Tai or Scorpion and can be found with the drink mixers or in most grocery stores).
CHOCOLATE FROZEN YOGURT
Makes eight 1/2-cup servings.
1 cup whole milk
180g or 6 ounces bittersweet or semisweet chocolate, chopped
2 cups low-fat vanilla yogurt
1/4 cup sugar
Combine the milk and chocolate in a blender or food processor fitted with the metal blade and process until well blended and smooth, about 20 – 30 seconds. Add the yogurt and sugar; then process until smooth, about 15 seconds. Turn the appliance ON, pour the mixture into freezer bowl through ingredient spout and let the mix set until thickened, about 50 – 60 minutes.
Nutritional analysis per serving:
Calories 222 (31% from fat) . carbo. 36g . pro 3g . fat 8g . chol. 4mg
SPECIFICATIONS:
Model: POICE1211
Capacity: 1.2L
Voltage: 220-240V/50Hz
Power Consumption: 135W
Unit Dimensions: 400 (L) X260 (W) X223 (H) mm
Packing Dimensions: 462 (L) X 322 (W) X 275 (H) mm
Correct Disposal of this product
This marking indicates that this product should not be disposed with other household wastes throughout the EU. To prevent possible harm to the environment or human health from uncontrolled waste disposal, recycle it responsibly to promote the sustainable reuse of material resources.
Imported and Exclusively marketed by:
Expert AS
PO Box 43,
N-1483 Hagan
Customer helpline number Norge: 815 48 100
Customer helpline number Finland: 020 7100 670
Customer helpline number Danmark +45 70 70 17 07
Model: POICE1211
Model: POICE1211
Turn off the device
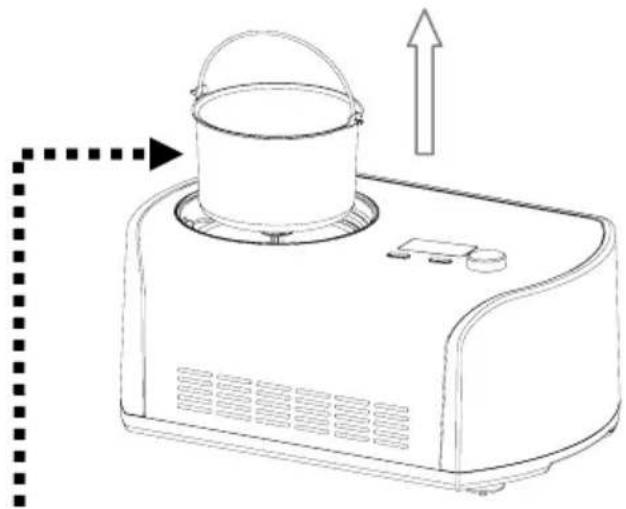
Pull out the removable bowl
FUNCTION
Model: POICE1211
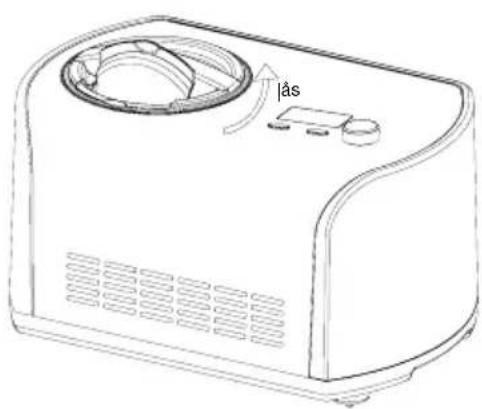
Turn off the appliance.
Model: POICE1211
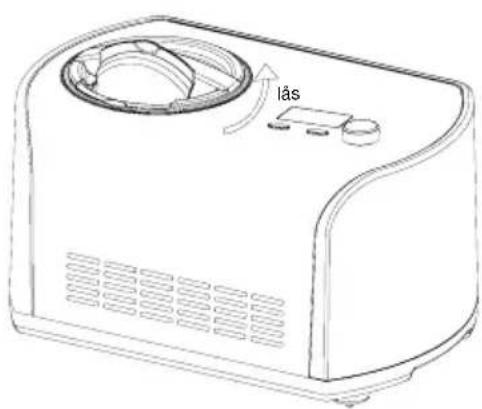
Turn off the appliance.
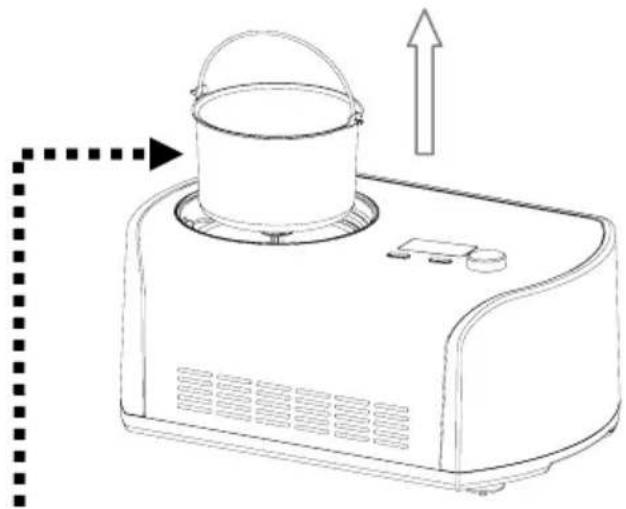
Remove the removable bowl.
FUNCTION
Chocolate Marshmallow Swirl:
FROZEN CHOCOLATE YOGURT
Makes eight 1/2-cup (0.75 dl) servings.
- MODEL: POICE
- IMPORTANT NOTICES
- PRODUCT OVERVIEW
- FUNCTION BUTTONS OVERVIEW
- MAKING ICE CREAM
- STEP 1. PREPARE INGREDIENTS
- FUNCTION
- KEEP COOL FUNCTION
- MOTOR SELF-PROTECTION FUNCTION
- CONTROLLING THE VOLUME OF THE INGREDIENTS
- CLEANING
- ICE CREAM RECIPE
- VANILLA ICE CREAM
- VARIATIONS
- MINT CHIP
- BUTTER PECAN
- COOKIES & CREAM
- BASIC CHOCOLATE ICE CREAM
- CHOCOLATE ALMOND
- CHOCOLATE COOKIE
- CHOCOLATE FUDGE BROWNIE
- CHOCOLATE MARSHMALLOW SWIRL
- FRESH STRAWBERRY ICE CREAM
- FRESH LEMON SORBET
- VARIATION
- CHOCOLATE FROZEN YOGURT
- SPECIFICATIONS
- CORRECT DISPOSAL OF THIS PRODUCT
- FROZEN CHOCOLATE YOGURT
Brand : Point
Model : POICE1211
Category : Ice Maker