
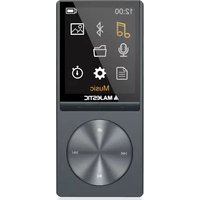
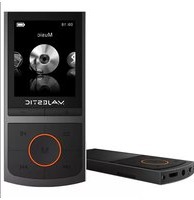
SDA-8064R - Mp3 player MAJESTIC - Free user manual and instructions
Find the device manual for free SDA-8064R MAJESTIC in PDF.


| Product Type | MP3/MP4 Player with LCD Display |
| Model | Majestic SDA-8064R |
| Dimensions | 9 x 4.7 x 1 cm |
| Weight | Approx. 50 g (estimated) |
| Display | 2.4" TFT LCD, 320x240 pixels |
| Power Supply | Built-in rechargeable Li-Polymer battery (via USB) |
| Charging Time | 3 to 4 hours |
| Music Formats | MP3, WMA, WAV, AAC, APE, FLAC, OGG, AMR |
| Video Formats | AVI (XVID) after conversion; supports various codecs |
| Image Formats | JPEG, BMP, GIF (limited rotation/zoom) |
| Text Formats | TXT (with LRC lyrics support) |
| Recording | Voice recording via built-in microphone; WAV or MP3 format |
| Camera | Built-in camera for photos and video; resolutions up to 2048x1536 |
| Memory | Internal flash (size not specified) + microSD slot (supports up to 16GB) |
| Connectivity | USB 2.0 (full speed) |
| Audio Output | 3.5mm headphone jack; max output 9mW per channel (32 Ohm) |
| Battery Life | Not specified; estimated several hours depending on usage |
| System Requirements | Windows XP/Vista/7; USB port |
| Languages | English, Italian |
| Additional Functions | Stopwatch, calculator, calendar, PC camera (webcam), firmware upgrade |
Frequently Asked Questions - SDA-8064R MAJESTIC
User questions about SDA-8064R MAJESTIC
0 question about this device. Answer the ones you know or ask your own.
Ask a new question about this device
Download the instructions for your Mp3 player in PDF format for free! Find your manual SDA-8064R - MAJESTIC and take your electronic device back in hand. On this page are published all the documents necessary for the use of your device. SDA-8064R by MAJESTIC.
USER MANUAL SDA-8064R MAJESTIC
- Nome del file
9.Autore
- Album
11.Genere musicale
3.scegliere "Select new firmware file

natural_image
Symbol of a trash bin with crossed x and y lines, no text or numbers presentDIGITAL MULTIMEDIA, VOICE RECORDING AND LCD DISPLAY
Instruction manual

1. Introduction
Congratulations for the purchasing of the MP4 Player. The high integration reduces the device weight and the dimensions and the use is comfortable. The big display with TFT technology offers clear and sharp information and the USB 2.0 interface make easier the data transfer operation from/to the computer. The MP3 Player has built-in a Li-Polymer battery rechargeable by computer USB port. By the microphone inside it is possible to record voice messages and play them directly with the device or by computer.
Before using this product, please read this manual and retain the instruction for future reference.
2. Description
Here below you will find a product descriptio
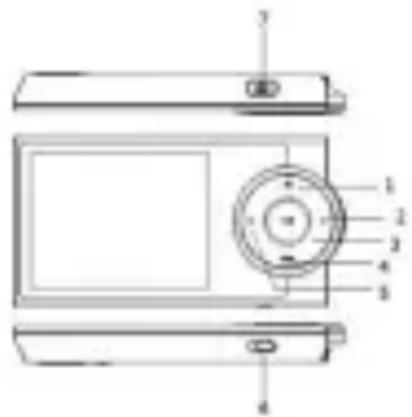
- Memu
- Next / Forward
3.Play [▶] / Pause [ ]
4.Volume
5.Previous / Backward
6.Power ON /OFF
7.Shutter
3.Display
Here below you will find a display descriptio
- Battery Life
2.Time
3.Repeat mode
4.A-B repeat
5.EQ Model

- Album Cover
- Current song location
- File name
- Artist
10.Album
11.Genre
12.Total Time
13.Current song - Total Number of songs
4.Use
a) Power ON/OFF
Powering On:.
- Turn on On/Off button to On position
2.Hold the PLAY [▶ Ⅱ] button for 2 seconds to power on screen
Powering Off:
-
Hold the PLAY [▶] key for 4 seconds to switch to standby mode.
-
Then, turn the On/Off button to Off position.
-
Under the state of stop, the player may power off automatically if a sleep time is predefined in System Menu.
b) Recharge the Player
MP3 player is supplied of a rechargeable battery. It is advised to long charge the player at first use
During charging, You should first turn on your PC and your player, and then connect the player to the PC through the USB cable. The player should be fully charged in 3 to 4 hours.
5. Main Menu
After powering on the MP3 player, you can see the main menu with 9 submenus, which allow you to select different functions and options.
By using the [▶] or [◀] buttons, you can select the desire option, and then press Play button to confirm the selection.

The available options are:
| Music: Select this option to play song. | |
| Video: Select this option to play video. | |
| Picture: | Select this option to browse and see photos. |
| Ebook: Select this option to read text. | |
| Record: | Select this option to record voice messages by the microphone inside. |
| Browser: | Select this option to explore the Folder of the Flash memory |
| Camera: Select this option to take pictures | |
| Tools: | Select this option to use stopwatch, calculator, PC camera |
| Setting: Select this option to access at system setup. | |
a)Music Mode
The music player option allows playing songs. To activate this option please follow here below instruction:
-
Power ON the MP3 Player, Then press the[▶ II] button, The screen will display the main menu
-
By using [▶] or [◀] buttons, select MUSIC option then press PLAY [▶] button.
-
Choose the song and press PLAY [▶] button to start playing.
i.Key Function at MUSIC Mode
During the song play it is possible to activate the following controls.
| PLAY [▶ II ]: | Press the PLAY [▶] to start to play a song. Press the play button again to pause the song. To restart to play the song press play button again.Hold the play button and mode button at the same time will eventually turn off the player |
| REW & FFWD [◀]][▶ | Press [▶] or [◀] to select the next or the previous song.Press and Hold the [▶] or [◀] buttons to rewind or fast forward the song. |
| Volume(VOL+ and VOL-): | First long press [VOL] button to show the Volume Mark. Then press [▶] button to increase the volume and press [◀] button to decrease the volume. |
ii.Music Submenu
By long pressing the MENU [M] button, you can find the following music submenus. Press[▶] or [◀] to choose, and then press PLAY [▶ ||]key to confirm each submenus. Use the same technique to navigate inside each of the submenus. Press [M] button to return previous menu till exit main menu
| Status Submenu Options | |
| While music is on | Play mode |
| EQ | |
| Screen Mode | |
| Add to my playlist | |
| Add Tag | |
| A-B Repeat | |
| VariableSpeed playback | |
| delete | |
| Advanced | |
| EQ setting | |
| Information | |
Play mode:
Five play modes are listed including Sequence, Repeat One, Repeat All, shuffle and Intro.
EQ :
With preset 8 equalizers including Normal, Rock, Pop, Classic, Soft, Jazz, DBB and User EQ
Screen Mode:
Two screen modes are listed including spectrum and Lyrics. Spectrum mode will show a small graphic equalizer, while under lyrics mode the song texts will be shown in LRC format (where available). The LRC file name must be the same as the song name and they must be on the same folder!
For example:
Song title: My heart will go on.mp3
Text file name: My heart will go on. Ir
A-B repeat:
The player can loop-playing a specified music interval of a song. While Playing Music, Press and hold M button for a few seconds, Then select the "A-B repeat" option press PLAY [▶ II] button to set repeat start point A, and then press PLAY [▶ III] button again to set repeat end point B. The player will then loop-play the content between point A and B.
Note: further info about this function can be found on related submenu.
Delete:
Delete specific song you wan
b)VIDEO Mode
The VIDEO mode allows to play movies. To activate this option please follow here below instruction:
-
Power ON the MP3 Player, Then press the[▶ II] button, The screen will display the main menu.
-
By using [▶] or [◀] buttons, select VIDEO mode option then press PLAY [▶] button.
-
Choose the video and press PLAY [▶] button to start playing.
i.Key Function at Video Mode
During the song play it is possible to activate the following controls.
| PLAY [▶ II]: | Press the PLAY [▶] to start to play a song. Press the play button again to pause the song. To restart to play the song press play button again.Hold the play button and mode button at the same time will eventually turn off the player |
| REW & FFWD [◀][▶] | Press [▶] or [◀] to select the next or the previous song.Press and Hold the [▶] or [◀] buttons to rewind or fast forward the song. |
| Volume (VOL+ and VOL-): | First long press [VOL] button to show the Volume Mark. Then press [▶] button to increase the volume and press [◀] button to decrease the volume. |
ii.Video Submenu
By long pressing the MENU [M] button while movie is on, you can find the following music submenus. Press [▶]or[◀] to choose, and then press PLAY [▶] key to confirm each submenus. Use the same technique to navigate inside each of the submenus, Press MENU [M] button to return previous menu till exit main menu
| Status Submenu options | |
| While Video is on | Playback Mode |
| Scan Speed | |
| Add Tag | |
| Screen Size | |
| Resume | |
| Delete | |
| Information | |
Playback Mode
Fou repeat modes are listed including Sequence, Repeat One, Repeat Alland Shuffle
Screen Speed
You can adjust the speed of rewind or fast forward the movie by using [▶]or[◀] buttons.
Screen Size
Three screen size are listed including full screen, original size and scale.
Delete
Delete specific video you wan
How to convert the movie files
Note: to convert some formats it is necessary to install the related codec (ex. Quicktime© for “.mov” or DivX Codec© for some “.avi” files
Installation: insert a CD in your computer, execute the file "Setup.exe" in the folder "MediaPlayerUtilities_V5.21" to start the program installation.
At the end of installation, you will find MediaPlayerUtilities_
V5.21 programs on your PC; select Video Converter to start the conversion.
- Run "Video Converter", click 📄 to choose the folder where to save the files, then click 📄 to select the position where the original files are

- Select the file to be converted, then click , the icon will be highlighted into and a dialog box will show. Choosing the setting of Video Type AVI (XVID) and the resolution 320x240.
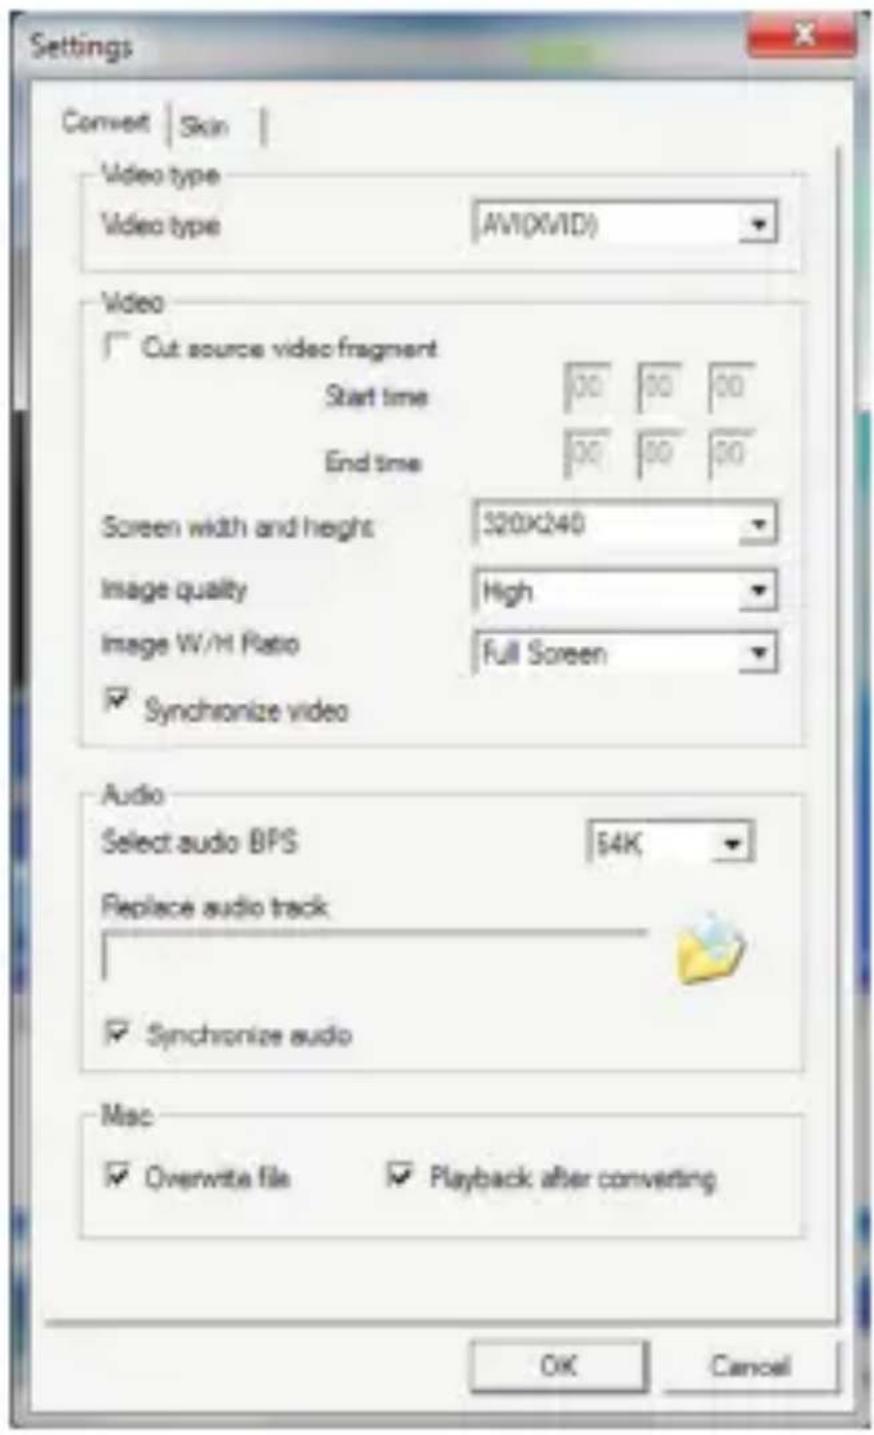
- Click to start converting.

- after conversion, the file will be automatically played. Now you can copy on the micro SD card and play it with your player!
d) PHOTO (Photo Viewer)
The Photo option allows viewing photos. To activate this
option please follow here below instruction:
- Power ON the MP3 Player, Then press the play[] button, The screen will display the main menu.
- By using the [ ]or[ ] buttons select PHOTO, and then press play[ ]button to enter the PHOTO MENU.
- Use [ ]or[ ] buttons to choose the photo.
- Press play[ ] button to start showing the photo.
- press [M] button to return to previous menu.
Status Submenu Options
| When playing photos (long press [M]) | Rotate |
| Zoom | |
| Slideshow interval | |
| Slide effect | |
| Delete | |
| Information |
Rotate
It is possible to rotate photos 90, 180 or 270 degree (can not support photo in GIF format)
Zoom
Can increase or reduce the photo zoom (can not support photo in GIF format).
Slideshow interval
You can set the playback interval between a photo and another in slideshow mode.
Slide effect
Effect used during picture slideshow mode.
Delete
Delete the selected picture.
Information
This function shows the info related to the currently played file
E) EBOOK
The EBOOK option allows reading text file in TXT format. To activate this option please follow here below instruction:
- Power ON the MP3 Player, Then press the play[▶] II button, The screen will display the main menu.
- By using the [▶]or[◀] buttons select TEXT, and then press play[▶] button to confirm
| Dir List | Press play[▶] button to enter into local folder and show all TXT file |
| Tag List | Press play[▶ 11] button to enter into and show all tag files |
-
Use[▶]or[◀] buttons to choose the file
-
Press play[▶] button to start reading the file, short press play[▶] button to switch manual playing mode and auto playing mode.
-
When manual playing, press[▶]or[◀] to cross or return to previous page.
-
Reading TXT file, long press [M] to enter into sub-menu
| Status Submenu Options | |
| When reading TXT | Skip To |
| Auto reading speed | |
| Add Tag | |
| Language | |
| Font size | |
| Font color | |
| Page effect | |
| Delete file |
Skip To
This option allows to select a specific position of the text (i percentage),
Auto reading speed
This option allows to set the waiting time for pages scrolling in auto scrolling mode.
Add Tag
Choose Add Tag and press play[▶ II ] button can add current reading file a tag which can be resumed in a second time from "tag list".
Language
This option allows to choose the language including English and Italiano.
Font size
It is possible to set the font size.
Font color
It is possible to set the font color shown on text files
Page effect
This option allows to set the transition effect during page switch.
Delete
Delete the displayed TEXT.
f) Record (Voice messages recorder)
This option allows to record voice messages by using the microphone inside. To record voice message, please follow here below instruction:
- Power ON the MP3 Player, Then press the play[▶ II] button, The screen will display the main menu.
- By using [▶]or[◀] buttons, select RECORD option then press play[▶] button.
| Now format | Press play[▶]button to enter, By using [ ] ▶ or[◀] buttons to choose WAV or MP3recording format, press play[▶] button to confir |
| Rec Quality | Press play[▶ ||]button to enter, By using [▶]or[◀] buttons to choose Low, medium and high recording quality .Press play[▶] || button to confir |
-
When recording, you can press play[▶ III] button to stop or keep on recording, Long press [M] to save recording file.
-
You can listen to your save file under the MUSIC/ recording list submenu.
-
Press [M]button to return previous menu till exit main menu.
g) BROWSER
Under the BROWSER menu, you can play all kinds of files including music, videos, recordings, photos, and text files. And you can enjoy these files directly from here. To use it, please follow here below instruction:
- Power ON the MP3 Player, Then press the play[▶] button, The screen will display the main menu
- By using [▶]or[◀] buttons, select BROWSER option then press play[▶] button to confirm
- You will see all folders containing all kinds of files.
- You can choose files from the flash, press play[▶] button to confirm and enjoy these file
- Press [M] to return to the folder menu.
h) CAMERA
Under the CAMERA, menu, you can take pictures and take video, option, To activate this option please follow here below instruction:
- Power ON the MP3 Player, Then press the play[▶ II] button, The screen will display the main menu.
- By using the [▶]or[◀] buttons to select CAMERA, and then press play[▶] button to enter the CAMERA MENU. And press [◀] button to enter the DV menu.
- By using the [shutter] button to take pictures or take video.
- In photo mode keep pressed [◀] button for few seconds to switch to video mode.
Camera Submenu
Under camera function long press the MENU [M] button to enter the submenus.
Here below you will find the camera option list
| Picture Playback: | Select this option to play stored pictures |
| White Balance: | Select this option to choose the white balance |
| Brightness: | Select this option to choose the LCD brightness |
| Exposure Mode: | Select this option to choose the exposure Mode according to the position where you will take the photo |
| Special Effect: | Select this option to choose the Special Effect to the photos. |
| Resolution: | Select this option to choose the resolution including 2048X1536,1600X1200, 1280X1024,1024X768.640X480. |
| Memory Free Space: | Select this option to see Memory Free Space. |
| Self-timer: | Select this option to choose the self-timer between 5/10/15/20 seconds. |
| Shutter Sound: | Select this option to choose the shutter sound when you take a photo. |
| Date Stamp: | Select this option to add the date and time to the photos taken. |
i) Setting
The SETTING option allows to access to MP3 Player setup system. To access at system setup please follow here below instruction:
- Power ON the MP3 player, button, Then press the play[▶ III] button, The screen will display the main menu.
- By using the [▶]or[◀] select SYSTEM option then press play[▶]button to enter the SYSTEM MENU.
- By using the [▶]or[◀] select the system setup parameter and press play[▶] button.
The parameters available in the setup system are:
| Power Saving | This option allows setting of the power off time and sleep time. |
| Display: | This option allows setting of the display parameters. |
| Date/Time: | This option allows setting of the Date/Time parameters. |
| Language Select | This option can choose different languages |
| Sync media playlist | This option is used to upgrade the playlist after some new music have been added |
| Advanced: | This option allows setting of the information, Key tone, Effect and reset default setting parameters |
J) Tools
To activate this option please follow here below instruction:
-
Power ON the MP3 Player, then press the play [▶ II] button, the screen will display the main menu.
-
By using the [▶] or [◀] buttons select Tools, and then press play[▶]button to enter the Tools MENU. Here below you will find the tools list
| Stopwatch: Select this option to use stopwatch function | |
| Calculator: Select this option to use calculator function | |
| Calendar: Select this option to use calendar function. | |
| PCcamera: | Select this option to use the player like a webcam; in order to use the player in PC camera mode you need first to install the program "PCCAM_Driver_setup_V12" supplied with installation CD, then you select the option PC Camera on the player and connect the USB cable to the PC.Wait for Windows to complete the driver installation and start the program installed named AMCap. |
Upgrade your player
When new firmware will be released, it will be possible to download them from our website www.newmajestic.com

Firmware upgrade is to improve player's
performance; you can still use it normally without doing upgrade process
Player may not work by incorrect process! Please read this manual carefully before doing upgrade process.
The upgrade software cannot work for other player and vice verse.
You can use installation tools to upgrade player's firmware
- Connect player to PC
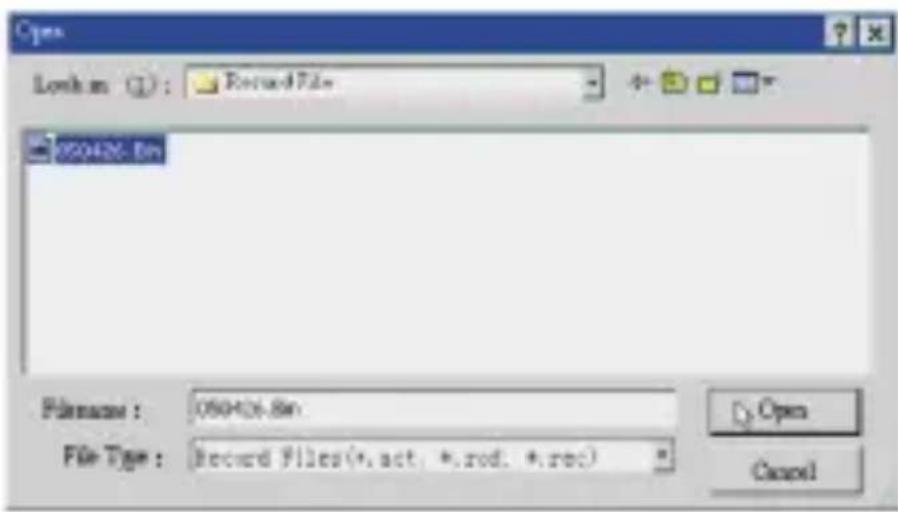
- Running upgrade tools MP3 Player Upgrade Tool (supplied on installation CD), then click 'Select new firmware fil to choose the upgrade file
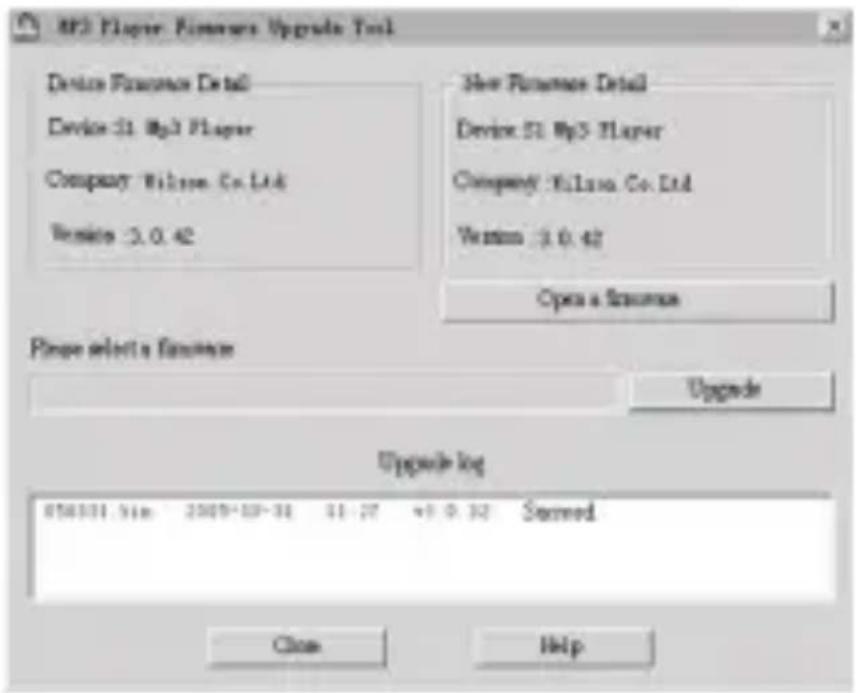
- Select a new firmware file
- Click 'Begin Upgrading', the upgrade process will start.

- when the upgrade is finished, close the program and disconnect the player from the PC.
Specifications
| Size 9*4,7*1 cm | ||
| Screen 2.4" LCD (resolution 320*240 pixels) | ||
| Computer connection | USB 2.0 (full speed) | |
| MicroSD memory card | 4GB/8GB/16GB | |
| REC | Sample ratio 8KHz/16 | KHz/24KHz/32KHz |
| Recording format | WAV(32/64/192/384Kbps)、MP3(64/128/256 Kbps) | |
| MP3, WMA | Max output power (L) | 9mW + (R) 9mW(32Ohm) |
| MP3 bit rate 8K bps - | 320K bps | |
| WMA bit rate 32K bps | -384K bps | |
| Frequency response 2 | 0Hz-20KHz | |
| SNR 85dB | ||
| Lack fidelity <+_0.05 | ||
| Music format MP3/WMA/WAV/AAC/APE/FLAC/OGG/AMR | ||
| Temperature -5 to 40 degree centigrade | ||
| Language English and Italian | ||
| Operating system | Windows XP/Vista/7 | |

- Introduction
- Description
- 3.Display
- 4.Use
- a) Power ON/OFF
- b) Recharge the Player
- Main Menu
- a)Music Mode
- i.Key Function at MUSIC Mode
- ii.Music Submenu
- Play mode:
- EQ :
- Screen Mode:
- A-B repeat:
- Delete:
- b)VIDEO Mode
- i.Key Function at Video Mode
- ii.Video Submenu
- Playback Mode
- Screen Speed
- Screen Size
- Delete
- How to convert the movie files
- d) PHOTO (Photo Viewer)
- Rotate
- Zoom
- Slideshow interval
- Slide effect
- Information
- E) EBOOK
- Skip To
- Auto reading speed
- Add Tag
- Language
- Font size
- Font color
- Page effect
- f) Record (Voice messages recorder)
- g) BROWSER
- h) CAMERA
- Camera Submenu
- i) Setting
- J) Tools
- Upgrade your player
Brand : MAJESTIC
Model : SDA-8064R
Category : Mp3 player