
AV400/PMA400 TV CRADLE - Multimedia Accessories ARCHOS - Free user manual and instructions
Find the device manual for free AV400/PMA400 TV CRADLE ARCHOS in PDF.
| Product type | TV docking station for multimedia player |
| Brand | ARCHOS |
| Model | AV400 / PMA400 TV CRADLE |
| Category | Multimedia accessories |
| Dimensions (approx.) | 15 × 10 × 5 cm |
| Weight (approx.) | 250 g |
| Power supply | Via mains adapter (not included) or TV USB port |
| Connectivity | SCART and RCA connectors (audio/video input/output) |
| Main functions | Charges the player, composite video and stereo audio output to TV |
| Compatibility | ARCHOS AV400 and PMA400 |
| Care and cleaning | Wipe with a soft dry cloth; do not use abrasive products |
| Safety instructions | Do not expose to moisture or extreme temperatures |
| Spare parts and repairability | Parts not available individually; device not user-serviceable |
| General information | User manual available for download at notice-facile.com |
Frequently Asked Questions - AV400/PMA400 TV CRADLE ARCHOS
User questions about AV400/PMA400 TV CRADLE ARCHOS
0 question about this device. Answer the ones you know or ask your own.
Ask a new question about this device
Download the instructions for your Multimedia Accessories in PDF format for free! Find your manual AV400/PMA400 TV CRADLE - ARCHOS and take your electronic device back in hand. On this page are published all the documents necessary for the use of your device. AV400/PMA400 TV CRADLE by ARCHOS.
USER MANUAL AV400/PMA400 TV CRADLE ARCHOS
English Language Manual
Archos™ TV Cradle
For Archos™ AV400 series and PMA400 series
natural_image
Illustration of a digital camera with a palm tree beach and a computer mouse, no text or symbols visible on the device itself.Manual for Archos TV Cradle ver. 3.0
Please visit our website to download the most recent manual and software for this product.
Table of contents
1 TV Cradle Description 3
1.1 Remote Control Description 5
2 How to connect 7
2.1 Connect & Test Method 7
2.2 Connection 1: the Multi-connect Plug 8
2.3 Connection ②: the Adapter/Charger 8
2.4 Connection ③: the audio-visual output (AV Out) 9
2.5 Connection ④: the audio-visual input (AV In) 10
2.6 Europe only: What if there is no Video Out Connection? 11
2.7 Connection 5: the S-Video In 12
2.8 Connection 6: the Infrared Emitter 12
TV Cradle connection diagrams are located at the back of this manual.
1 TV Cradle Description
By installing the TV cradle, you have an easy way to connect and disconnect your AV400 or PMA400 to or from your home entertainment system. Simply slip your Archos device into or take it out of the TV Cradle as needed. If you have scheduled television recordings to make, then just slip it into the cradle, turn it on, and let it make the recording while you are away. If you want to make TV recordings from a place other than where your TV Cradle is connected, then you can purchase the "Audio-Video Travel Cable" to bring along with your Archos device and record from any other audio/video source.
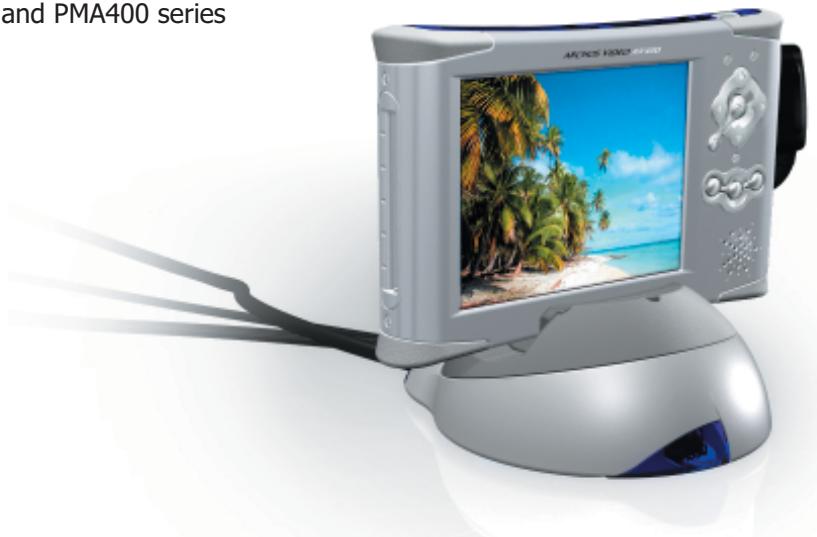
a Multi-connect Plug: Connects to the AV device's multi-connect jack.
b Rotating mount: Allows the AV device to be viewed at a 60 or 90 degree angle.
c Device Slot: the slot to place the AV device into.
d Rubber fitting shoe: size varies slightly depending on which AV device you have.
e Stylus from the PMA400 for the touch screen.
f DC-In power jack: Plug only the included Archos adapter/charger into this jack.
g Infrared out: Connect the IR emitter here.
h Serial connection: For future use.
i AV OUT: The audio and video cables OUT from your AV device. Goes to TV INPUTS.
j AV IN: Connectors to get Audio and Video IN to your AV device. Goes to TV tuner OUTPUTS.
k* S-Video IN: Used to get high quality S-video into your AV device. Goes to TV tuner S-video OUT.
text_image
a b c d e f g h k jInfrared receptor: Point your Archos remote control at this surface to control your AV device.
*Attention: Do not connect both the S-video IN and the yellow Video-IN at the same time.
natural_image
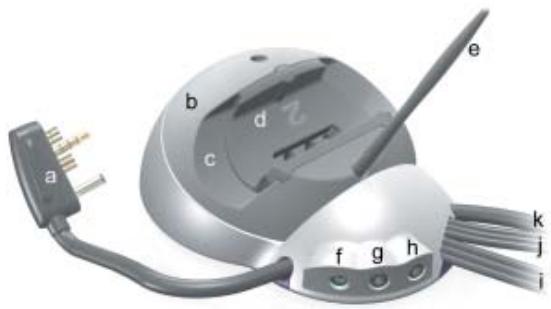
Close-up of a white and gray electronic device with a labeled 'L' on the base (no visible text or symbols beyond branding)1.1 Remote Control Description
| Same as your PMA400/AV400 function buttons |  | [30H0] | Standby / Wake Up*Attention: The AV400 must be turned on first by hand before this button can be used. | |
| Switch between Built-in & External Video |  | Numeric entry | ||
| Same as AV400/PMA400 Navigate, Execute & Escape |  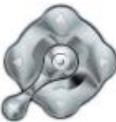 |  | Go up or down one screen of files in the browser mode | |
| Play, Pause, fast Forward, fast Reverse |  |  | Jump to Previous / Next fileLeave Music Player to browse / Stop | |
| Open pre-recording screen / start recording | [S87A] |  | Increase / Decrease Volume | |
| Change the TV channel up / down (If the infrared emitter is connected). |  |  | Mute sound |
*AV400: Each time you place the AV400 into the TV Cradle, you must turn it on via the ENTER button, not by the remote control's STANDBY/WAKE UP button. Once turned on in this way, you can use the remote control's STANDBY/WAKE UP button normally. It is just upon placing the AV400 into the cradle that you must turn it on by its ENTER button.
*PMA400: The PMA400 is always in standby mode when not on. Thus, you can wake up the PMA400 with the remote control once you slip it into the cradle and connect the multi-connect plug.
2 How to connect
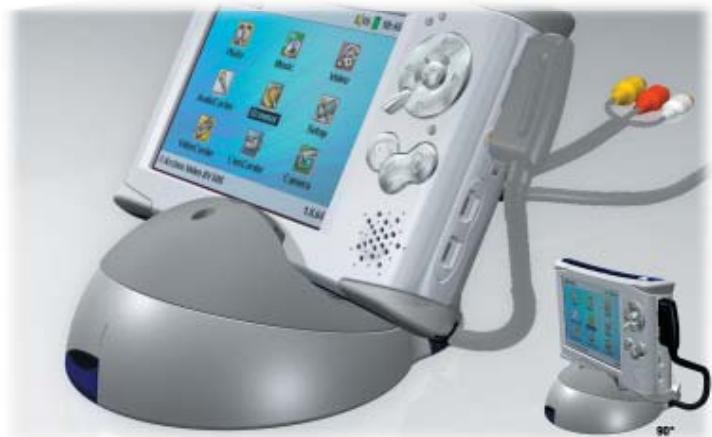
natural_image
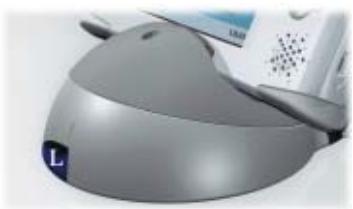
Illustration of a medical device with monitor and earplifier, no visible text or symbolsThe Archos device correctly placed in the cradle (60° angle option) and multi-connect plug correctly inserted.
2.1 Connect & Test Method
Even if connecting audio-visual equipment is not your strong suit, by following our instructions and applying our Connect & Test method, you will be able to verify your connections as you go along, and not after you have hooked up everything and it doesn't work as expected. Refer to the connection diagrams in the back of this manual while reading through each section.
The key to a successful installation of your TV Cradle is to make each connection then test it. If the test works, that's great, then go on to the next step. If it doesn't work, then there is no sense in connecting more wires and making your situation more complicated. Just go back and see if you can determine why the
7
previous step didn't work. The TEST IT section for each connection is there for you to verify that it works as explained before going on to the next step. By connecting and testing as you go along, you have a better chance of doing everything correctly the first time.
2.2 Connection ①: the Multi-connect Plug
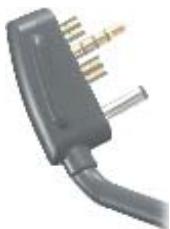
natural_image
Close-up of a black electrical plug with wires attached (no visible text or symbols)Set the TV Cradle on a flat and stable surface near enough to your television system so that the cables can reach around to the back of your devices. Before placing your AV device into the cradle, you can rotate the top dark rotating mount so that your device sits at a 90 degree or 60 degree angle. Now, slide your AV device into the cradle from the top downward (do not slide it in from the right or left). Try to put your device in the center as shown in the picture at the start of this chapter. Now push the multi-connect plug into the AV device until it is solidly touching the body of your Archos AV device.
2.3 Connection ②: the Adapter/Charger
To power the TV Cradle and your AV device, plug the Archos adapter/charger into a wall outlet and the other end into the left most jack (labeled DC IN) on the back of the TV cradle. You should see the green charging light on the AV device turn on, indicating that power has been connected.
TEST IT: Verify that you made the correct connections.
- With your Archos AV in the cradle, turn it on*.
- Point your remote control (don't forget to put the batteries in) at the cradle.
- While pointing at the TV Cradle, press the UP or DOWN buttons on the remote control.
- If the Archos AV responds to your remote control commands, this verifies a correct connection.
* On the AV400, press and hold the enter button on the AV400 itself. After this point the remote control's Standby / Wake Up button will work normally.
2.4 Connection ③: the audio-visual output (AV Out)
natural_image
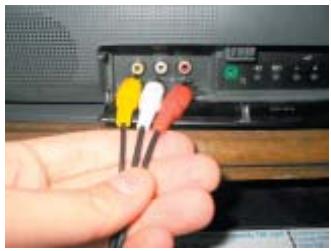
Close-up of a hand holding three colored audio/video cables (yellow, white, red) with no visible text or symbols on the cables.To be able to view photos and videos on your television, use the set of three plugs (red, white, yellow) that are labeled AV OUT. These are your audio and video cables to plug into your television's auxiliary inputs (could be on the back or front of your television).
North America: Plug the Yellow connector into your television's Video Input, the Red into your television's right audio input, and the White into your television's left audio input. If your television does not support Stereo sound (it has only one audio input), plug just the Red cable into the audio input of your television.
Europe: If connecting to the SCART connector on the back of the television, use the included SCART IN block. Connect the three colored AV OUT cables to the SCART IN block and then plug that into your television. If connecting to the front of your television, simply plug the colored AV OUT cables directly into those front jacks.
TEST IT: Test now to see if you made the correct connections.
- With the device in the cradle, play one of the sample video files.
- Hold down on the TV/LCD button for 3 seconds (Switch to external video).
• The screen on your AV should go black. - You should see the video now playing on your television.
- If not, switch your television to auxiliary input (often called L1 or L2 just below channel 1)
- Europe: If you don't see the video, check to make sure you used the SCART IN block.
2.5 Connection ④: the audio-visual input (AV In)
If you want to be able to record from your television or another video device into your Archos AV device, you will have to send the video and audio signals into it. You will use the three cables labeled AV IN.
North America: You will most likely get your video and audio signals from your Cable box, Satellite receiver box, or VCR (newer large screen TVs often have video and audio outputs on the back that can also be used). Connect the AV IN cable's yellow connector to the yellow Video Out jack on your cable box, satellite box, or VCR, or TV. See the diagram that most nearly resembles your television set up. Now connect the Red and White cables to the cable box, satellite box, VCR, or TV's Red and White Audio Out jacks. What ever is going out of the cable box, satellite box, or VCR to your television, is now also going to your AV400 device.
Europe: If your cable box, video cassette recorder, or satellite receiver has audio-visual outputs (red, white, yellow), then plug the three AV IN cables into those connections. If your cable box, video cassette recorder, or satellite receiver has an extra SCART output, then connect the TV Cradle's red, white, and yellow AV IN cables into the included OUT SCART block (Attention: the IN and OUT SCART connectors look very similar) and then plug it into your device's extra SCART output. If you have neither the audio-visual outputs nor an extra SCART output, see the next section.
TEST IT: Verify that you made the correct connections
- Turn on your cable box, satellite box, or video cassette recorder (VCR).
• Make sure you see a good clear television image. - Select the icon on the AV screen called VideoCorder.
- The pre-recording screen should now show the same image on the built-in screen.
- Press the ON/ENTER button ⬤ to record what is showing on the screen (or use the Archos remote control).
- North America: If you do not see an image (or see the message 'No Signal'), check that you connected the yellow cable of the AV IN to the video output of your cable box, satellite receiver, or VCR.
- Europe: If you are using a SCART output on your video cassette recorder and you do not see the image on the Archos device's screen (or you see the message 'No Signal'), check the manual of your video cassette recorder to make sure that the SCART connection that you plugged into is capable of video and audio output, not just input.
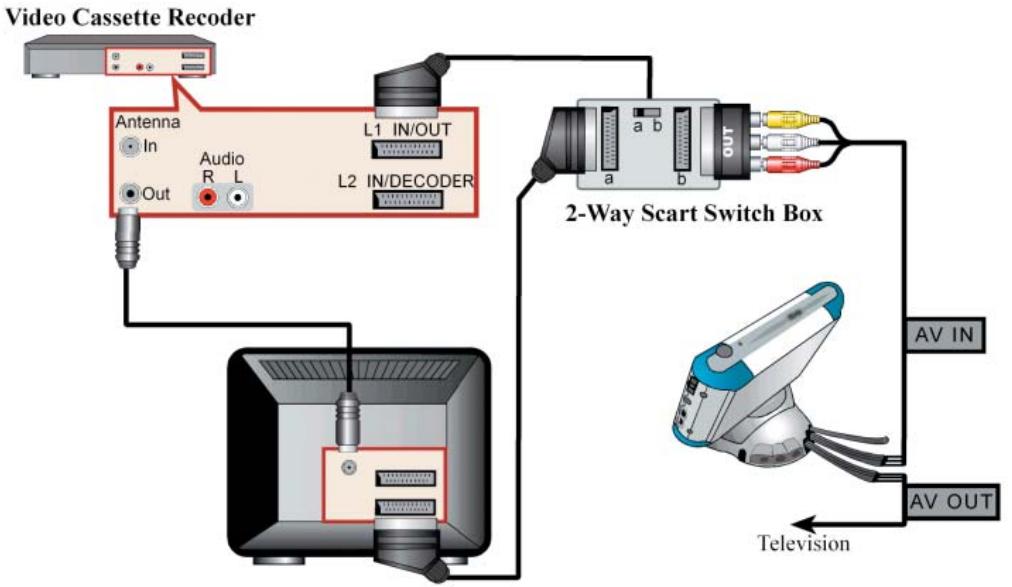
2.6 Europe only: What if there is no Video Out Connection?
In the case that you do not have a second video out SCART or RCA type outputs on your video cassette recorder, you can obtain a 2 -1 SCART switch box from an electronics retailer or the store where you bought your Archos product, which will allow you to send the Video Cassette Recorder's video and audio signals to your television (normal TV viewing) or to your Archos TV cradle (to make a recording). In the following example set up, you would switch the box to side b when you want to make a video recording. Attention: Do not purchase a simple splitter but rather a switchable a/b box. Splitting the video signal will degrade its quality.
flowchart
graph TD
    A["Video Cassette Recorder"] --> B["Antenna In Audio R L"]
    B --> C["Out"]
    C --> D["2-Way Scart Switch Box"]
    D --> E["AV IN"]
    D --> F["AV OUT"]
    G["Television"] --> H["Computer"]
2.7 Connection ⑤: the S-Video In

If you would like to get a higher quality video recording, and your video recorder, cable box or other video device has an S-video output, you can connect the S-video cable of your TV cradle into it. This will carry only the video signal to the TV Cradle and your AV400/PMA400, not the audio.
DO NOT PLUG IN BOTH THE S-VIDEO CONNECTOR AND THE STANDARD YELLOW AV IN CONNECTOR AT THE SAME TIME.
TEST IT: You can test this connection the same way you test the AV In connection above.
2.8 Connection ⑥: the Infrared Emitter
Infrared (IR)
Emitter
This is an optional connection. You will need to use this if you would like to change TV channels with the Archos remote control or if want to be able to make scheduled recordings. This emitter, once stuck on to your cable box, satellite receiver, or video cassette recorder, will be able to turn the device on and off and select channels while you are not home. If you simply leave your cable box, satellite receiver box, or video cassette recorder on one channel, then without the Infrared Emitter connected, you will only be able to record from one channel. That is, there will be no way for the TV Cradle to tell your cable box, satellite receiver, or video cassette recorder to change the channel unless you have connected this Infrared Emitter.
Which device to control?
You will affix the IR Emitter to the device you normally change your TV channels with. Do you change TV channels with your video cassette recorder remote control, your cable box remote control, or your satellite receiver remote control? Which ever one of these devices changes the channel that you view, then it is on this device that you will affix the IR Emitter.
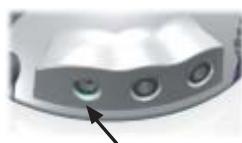
Locating the Infrared Receptor on your VCR or Cable box
First, you must locate the infrared detector on the device. This is the small dark window (looks black or deep red actually) which you point your remote control at to change the channels. We will use a video cassette recorder (vcr) as an example, but the following is true also for a cable box or satellite receiver.
Look in your VCR user manual to see if it shows you where the infrared detector window is. If you find it, then jump to the next step "Connecting it to the TV Cradle".
One way to locate the infrared receptor on your VCR is to cover up various parts of the face of your VCR with your hand while changing the channels and notice at what point your VCR's remote control stops working. By covering up various parts of the face, you will stop the infrared beam from reaching the infrared receptor. Keep changing the channels with your remote control, moving your hand over various areas until you have found where the infrared receptor is.
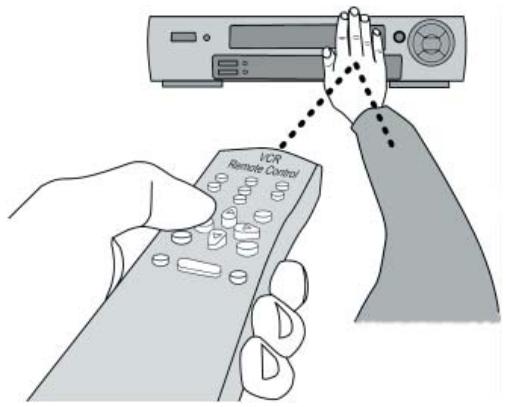
text_image
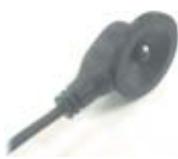
VCR Remote ControlConnecting it to the TV Cradle
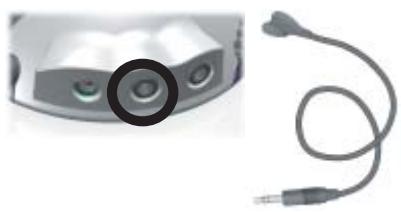
natural_image
Close-up of a medical device with a circular annotation highlighting a lens and a separate cable (no text or symbols visible)Plug the connector end of the Infrared Emitter to the center jack on the back of the TV Cradle. This Emitter will act as your remote control for your scheduled recordings.
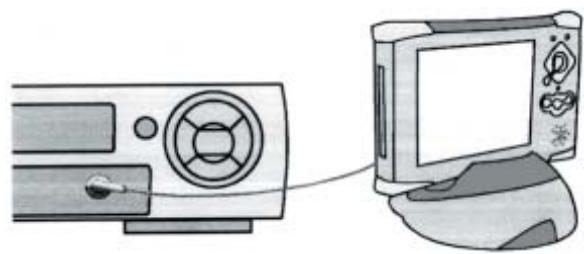
Affixing it onto your device and Setting the IR Emitter code
Now that you know where the infrared receptor is, you need to set the correct infrared emitter code on your AV400 or PMA400 and then affix the IR emitter to your device. Every VCR, cable box, and satellite receiver has a different infrared code to tell it to turn on and off and how to change channels. With the IR emitter in one hand, move it over the infrared receptor on your cable box, VCR, or satellite receiver and then set the infrared code as explained in the full AV400 or PMA500 User Manual. Once you get the Archos unit to start controlling your device by infrared signals (there are test buttons in the infrared TV Control setting to help you), you can then peak off the white ring protecting the adhesive, and affix the IR emitter to your device. If your regular remote control for this device is sensitive to distances, you could affix the IR emitter slightly to the left or right of the device's receptor so as not to impede the functioning of the regular remote control.
natural_image
Illustration of a computer monitor connected to a CD-ROM and a cable (no text or symbols)(3) See section 2.8 for instructions on connecting the infrared emitter. Referez-vous au chapitre 2.8 de ce manuel pour les explications concernant l'emteuer IR. Eine Erklaurung zum I/R-Sender fi nden Sie in Abschnitt 2.8 dieses Bentzerhanduchs.
flowchart
graph TD
    A["European Connection Diagram #1 (cable or satellite)"] --> B["TV Out"]
    A --> C["TV R"]
    A --> D["Audio VCR"]
    A --> E["Satellite / Cable In"]
    A --> F["Cable"]
    A --> G["SVIDIA In"]
    A --> H["AV In"]
    A --> I["Future accessories AV Out"]
    A --> J["Infrared IR emitter (3)"]
    A --> K["ArchHOS Adapter/Charger"]
    A --> L["Cable Dish"]
    A --> M["Cable Box or Satellite Receiver"]
    A --> N["Television (back)"]
    A --> O["Television (front)"]
    A --> P["Antenna in 1"]
    A --> Q["Antenna in 2"]
    A --> R["AV Out"]
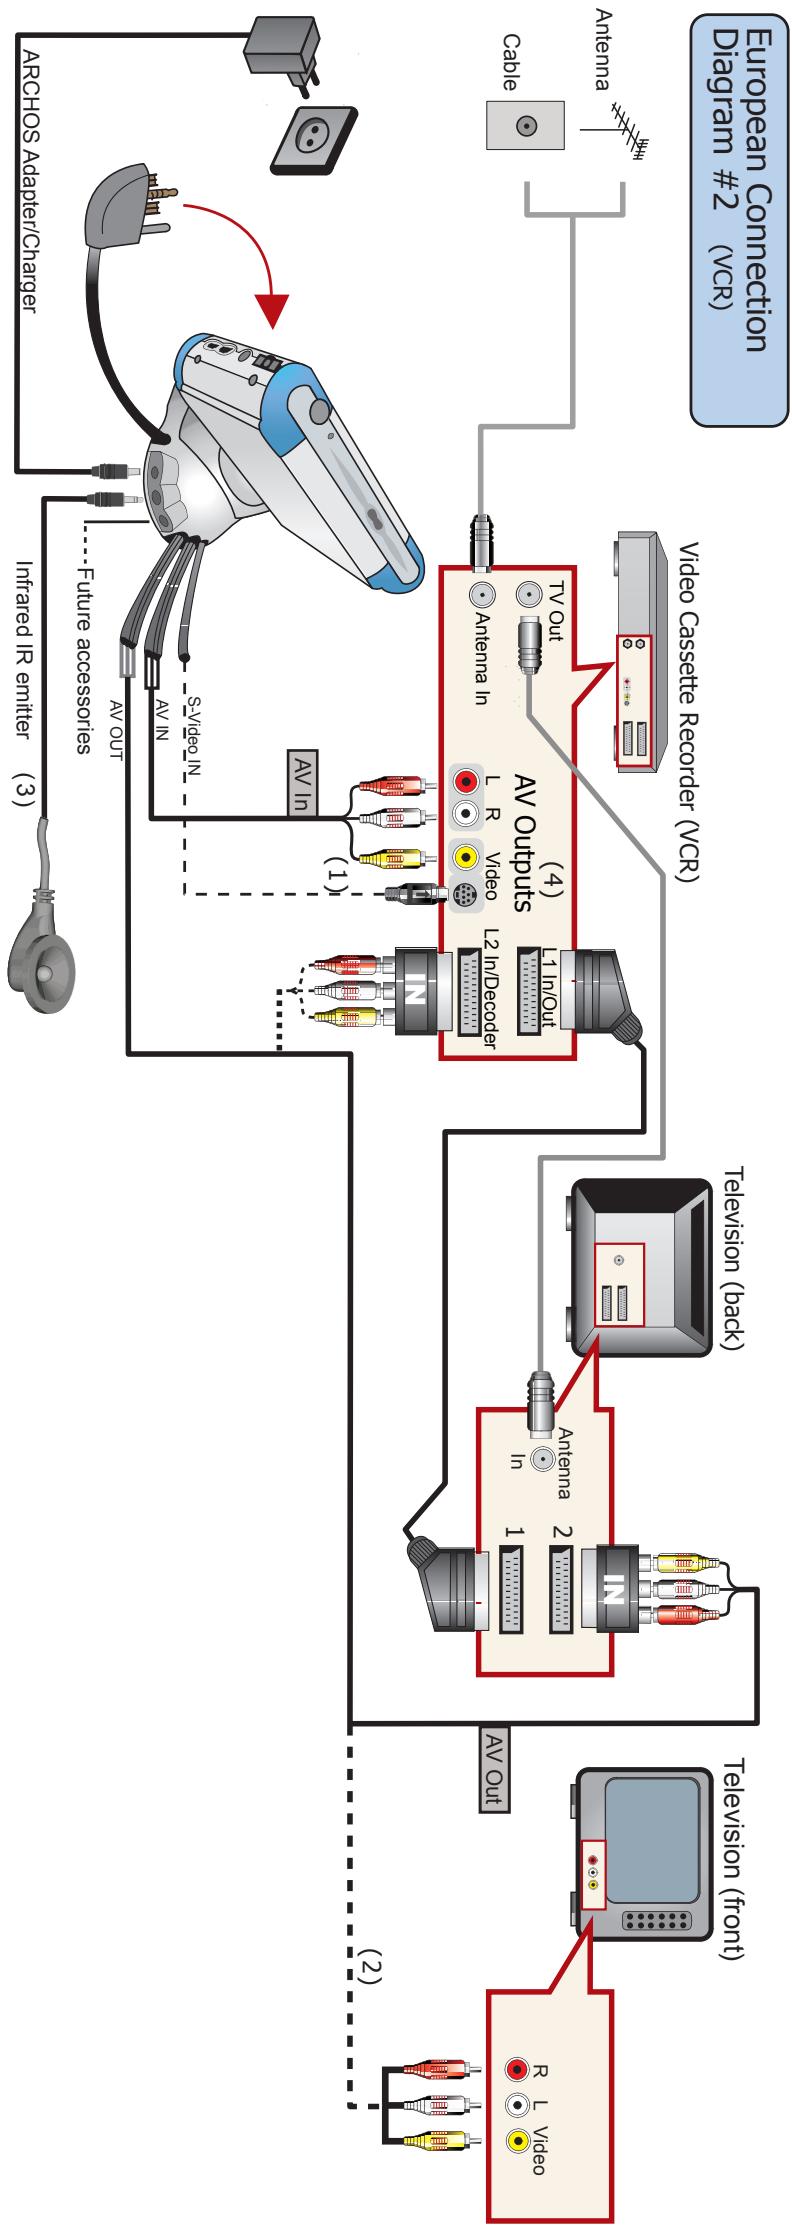
(4) If you don't have AV outputs on your video Cassette Recorder, see section 2.6.
Si virtue magnetoscope ne propose pas une série de sorties AV, referez-vous au chapitre 2.6 de ce manuel.
Fails an Irrem VCR Keine AV-Ausgänge zur Verfüngung stehen, vgl. Abschnitt 2.6 dieses Benutzerhandurchs.
(3) See section 2.8 for instructions on connecting the infrared emitter.
Referee-vous au chapitre 2.8 de ce manuel pour les explicitions concernant l'immeter IR.
Eine Erkäsiung zum I/R-Sender fi nden Sie in Abschnitt 2.8 dieses Benutzheranduchs.
(2) If your television does not have two scart connectors, use the connections on the front.
Si vôte téléseur ne possede pas deux connecteurs peritel, vous pouvez conjecter la sortie AV2 du magnetoscope ou aux connecteurs de type RCA situe à Javant de votre télé.
Fails Ihr TV-Gerat an der Rücksite uber keine zwite SCART-Buchse verfügt, sind für die AV-Ausgänge die RCA-Anschlussse an der Vorderseite zu verwenden.
(1) Connect either the S-video cable or the yellow AV in cable, not both.
SI vous utilise tente de-S-video, ne branchez pas le cable d'entreje jaune portant l'indicaton AV in, un seul connecteur suitit pour la video.
Wern Sie als Videedingang den S-video-Aschluus verwenden, dart keine Verbindung mit den gelden AViN-Kabeln hregestellt verden. Niemals bide Aschlusse
gleicheziting fur die videoburetragung verwenden.
flowchart
graph TD
    A["TV OUT"] --> B["Video cassette recorder (VCR)"]
    B --> C[" television (back) "]
    C --> D[" Television (front) "]
    D --> E[" AV Out "]
    E --> F[" Antenna in 1 "]
    F --> G[" Antenna 2 in 1 "]
    G --> H[" TV In/DCoder "]
    H --> I[" AV Outputs (4) "]
    I --> J[" Infarred IR emitter (3) "]
    J --> K[" Future accessories "]
    K --> L[" AV Out "]
    L --> M[" AI adapter "]
    M --> N[" ArcCHOS Adapter/Charger "]
    N --> O[" Cable "]
    O --> P[" Antenna "]
    P --> Q[" Video cassette recorder (VCR) "]
    Q --> R[" TV OUT (Back) "]
    R --> S[" Television (front) "]
    S --> T[" AV Out "]
    T --> U[" AV Out "]
    U --> V[" Video cassette recorder (VCR) "]
    V --> W[" TV In/DCoder "]
    W --> X[" AV Outputs (4) "]
    X --> Y[" AI adapter "]
    Y --> Z[" Cable "]
(3) See section 2.8 in this manual for instructions on connecting the infrared emitter. (4) Connecting the AV in of the cycle to the AV outputs of your cable box or satellite receiver can also be done.
(1) Connect the AV Out cables to the front of your television if the back of your television does not have connectors. (2) Connect either the S-video cable or the yellow AV in cable, not both.
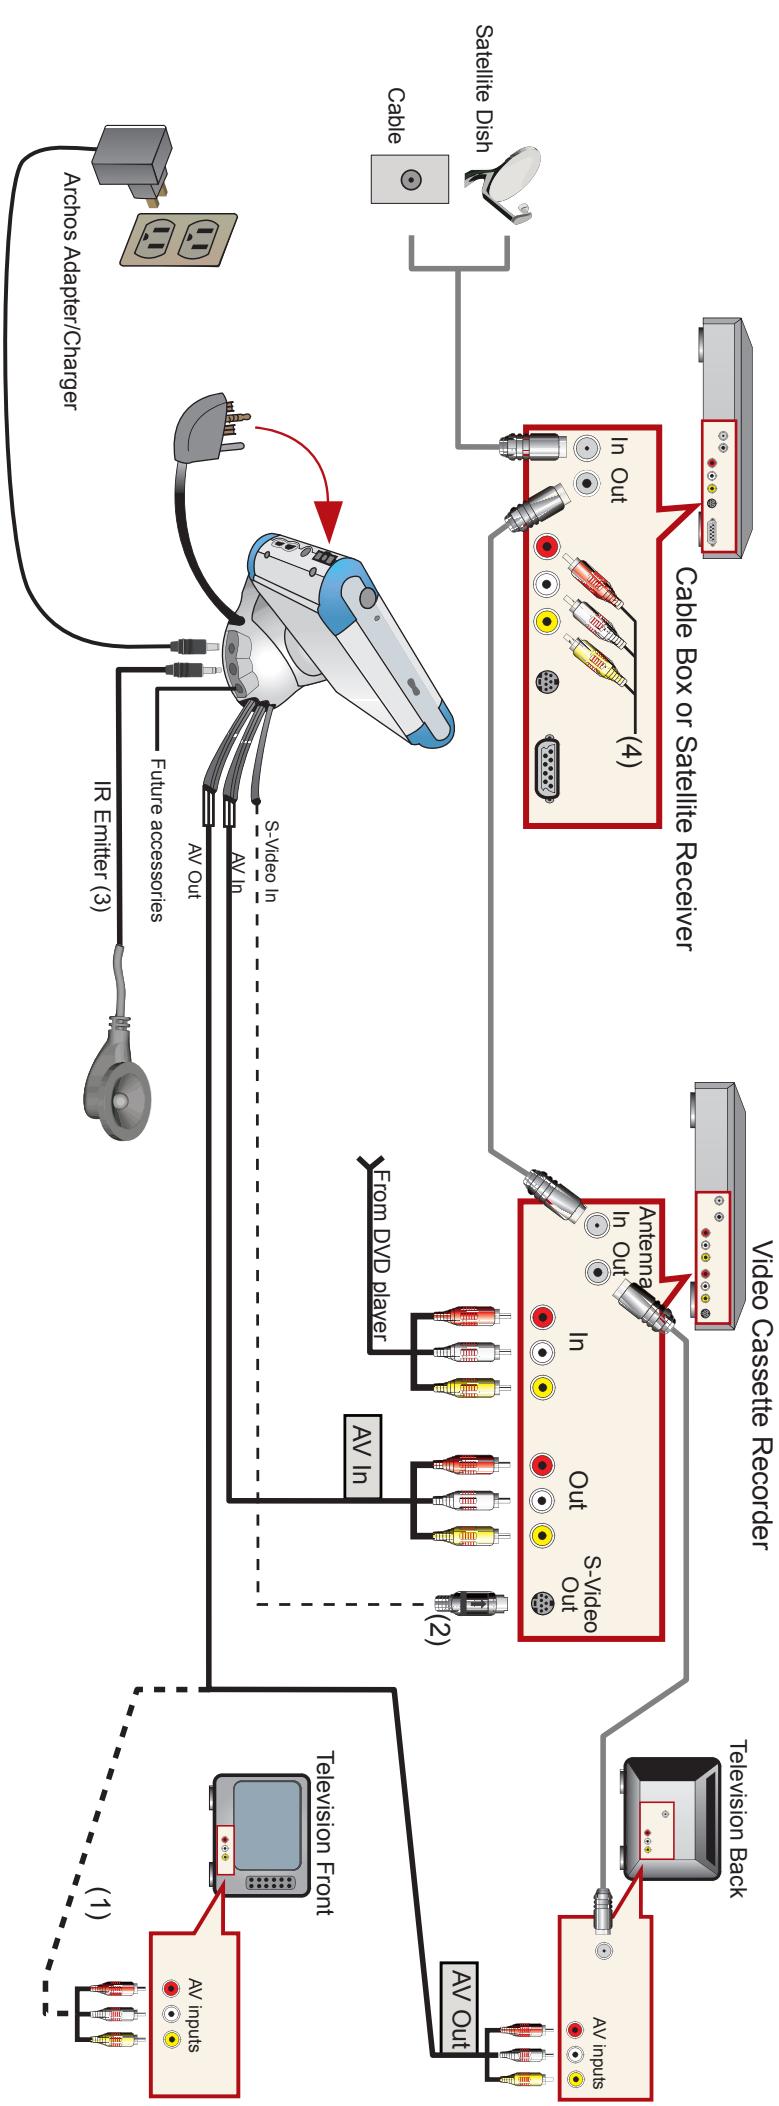
flowchart
graph TD
    A["Television Front"] -->|AV Inputs| B["TV"]
    A -->|AV Out| C["TV"]
    B --> D["Television Back"]
    C --> E["Video Cassette Recorder"]
    D --> F["Antenna In Out"]
    E --> G["Video Cassette Receiver"]
    F --> H["S-Video Out"]
    G --> I["Cable Box or Satellite Receiver"]
    H --> J["In Out"]
    I --> K["In Out"]
    J --> L["Antenna In Out"]
    K --> M["Cable Box or Satellite Receiver"]
    L --> N["Analog Cable"]
    M --> O["Analog Cable with Antenna In Out"]
    N --> P["Airies/Adapters Charger"]
    O --> Q["Airies/Adapters Charger"]
    P --> R["Archos Adapter/Charger"]
    Q --> S["Archos Adapter/Charger"]
    R --> T["Future accessories AV Out"]
    S --> U["Future accessories AV In"]
    T --> V["IR Entity (3)"]
    U --> V
    V --> W["ARHOS Adapter/Charger"]
North American Convention Diagram