C-DMM-125 - Uncategorized Havis - Free user manual and instructions
Find the device manual for free C-DMM-125 Havis in PDF.


| Product Type | Vehicle Dock/Mount |
| Brand | Havis |
| Model | C-DMM-125 |
| Compatible Devices | Laptops and Tablets up to 15.6 inches |
| Mounting Type | Vehicle Floor or Console Mount |
| Dimensions (W x H x D) | 12.5 x 2.0 x 8.0 inches |
| Weight | 3.5 lbs |
| Power Input | 12V DC from vehicle |
| Output Voltage | 19V DC (for laptop) / 5V USB |
| Material | Steel with powder coat finish |
| Main Functions | Secure device mounting, power delivery, cable management |
| Adjustability | Tilt, swivel, and height adjustable |
| Installation | Bolts directly to vehicle floor or console |
| Cleaning & Maintenance | Wipe with damp cloth; avoid solvents |
| Safety Features | Locking mechanism, vibration dampening |
| Spare Parts | Mounting brackets, screws, power adapters available |
| Repairability | Modular design; components replaceable |
| Certifications | SAE J1455, MIL-STD-810G |
| Operating Temperature | -20°C to 60°C |
| Warranty | 3 years limited |
| Additional Information | Supports multiple device configurations; custom cradles available |
Frequently Asked Questions - C-DMM-125 Havis
User questions about C-DMM-125 Havis
0 question about this device. Answer the ones you know or ask your own.
Ask a new question about this device
Download the instructions for your Uncategorized in PDF format for free! Find your manual C-DMM-125 - Havis and take your electronic device back in hand. On this page are published all the documents necessary for the use of your device. C-DMM-125 by Havis.
USER MANUAL C-DMM-125 Havis
INSTALLATION INSTRUCTIONS
C-DMM-125
2013-2016 Ford Fusion
SWING-OUT DASH MONITOR MOUNT
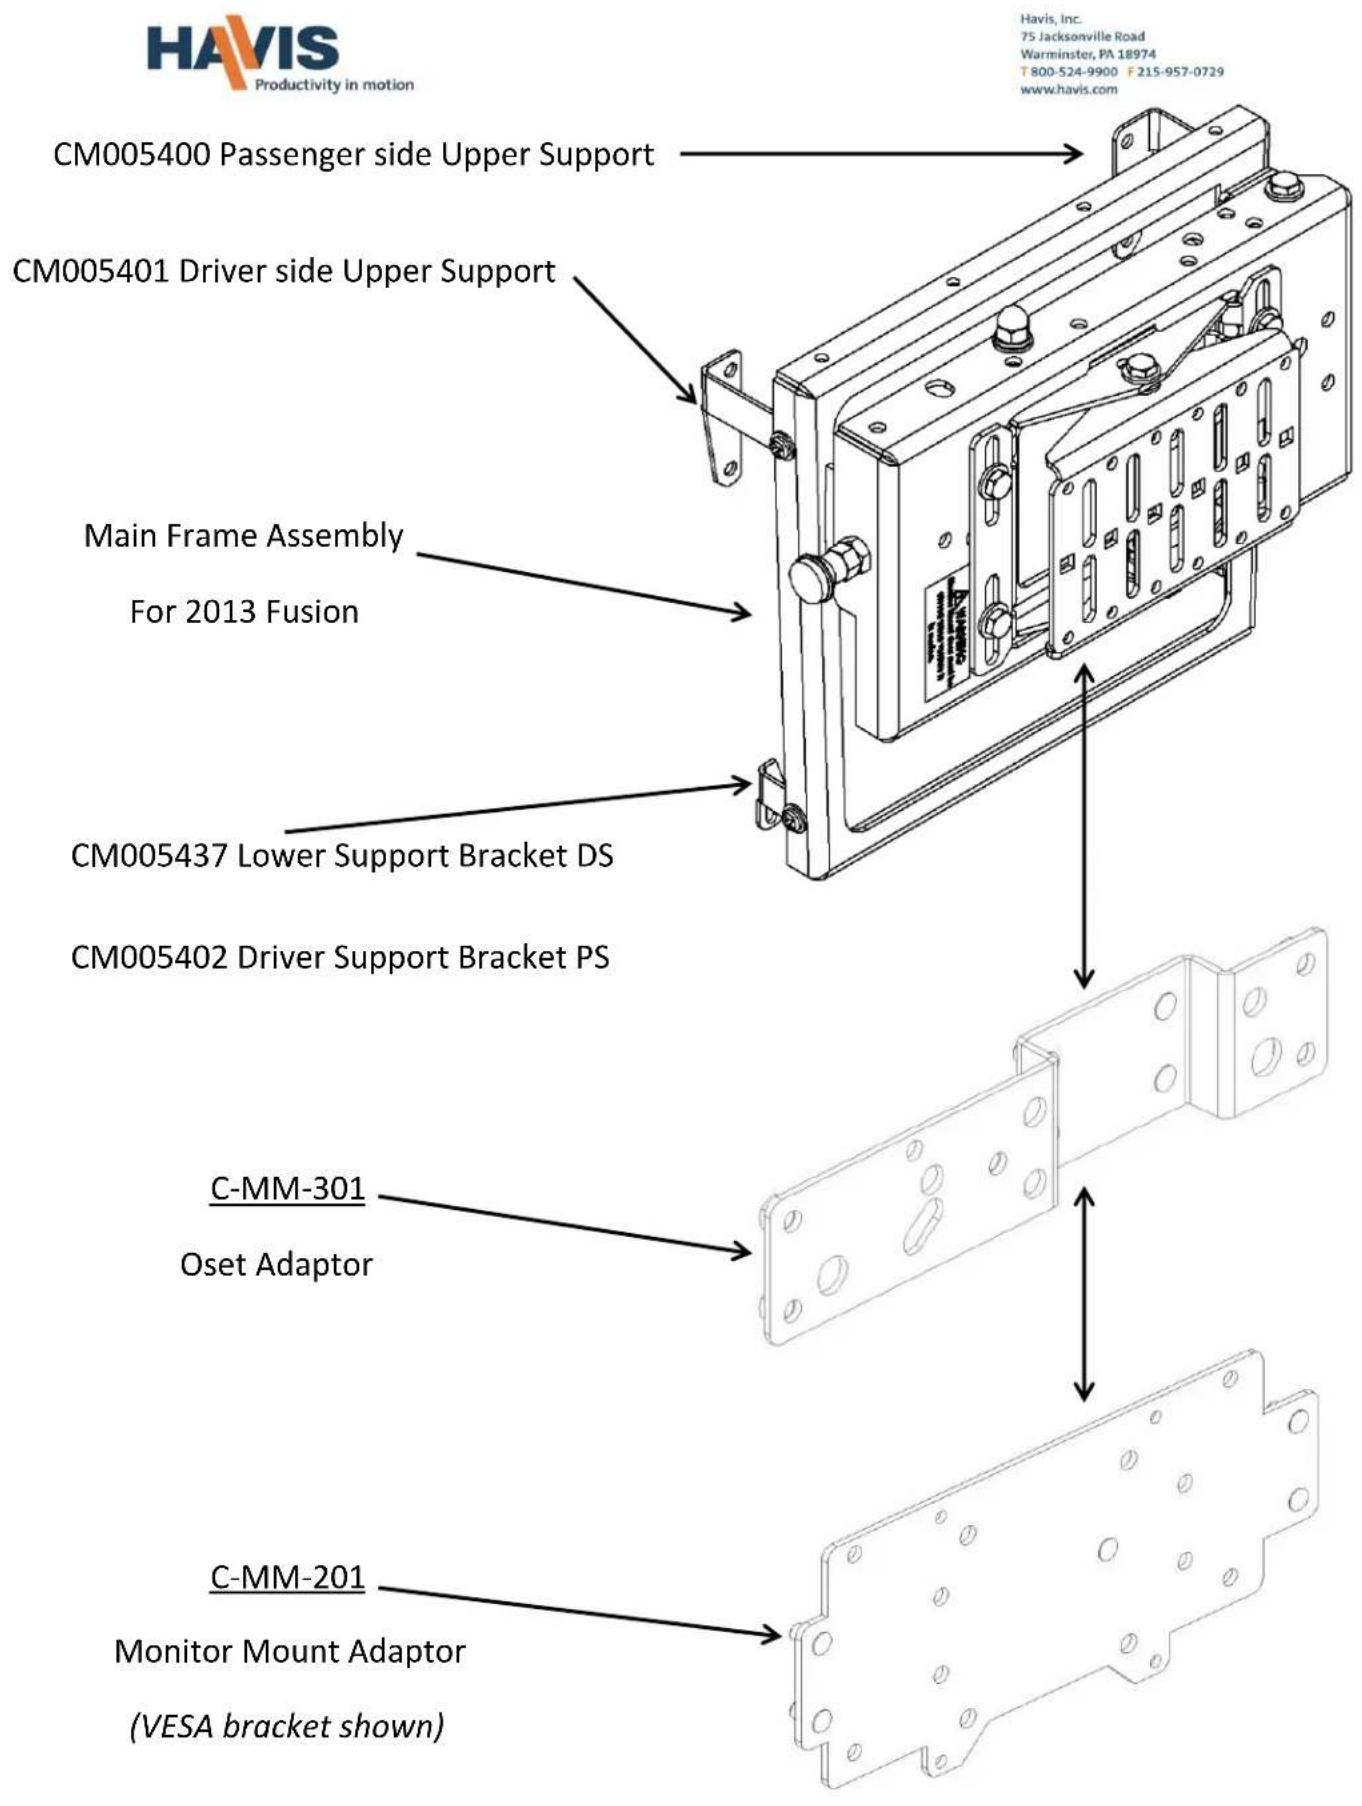
The Dash Monitor Mount bracket system requires two or three main parts that are sold separately. See web site Monitor Congurator for more detailed bracket informaon.
hp://www.havis.com/monitor_mounts.htm
• 1 - Vehicle Specific dash mount bracket. (C-DMM-125)
• 1 - Computer Specific Monitor adaptor bracket. (C-MM-200 series)
• 1 - Oset adaptor bracket. (C-MM-301)
The C-MM-301 oset adaptor goes between the C-DMM-125 and C-MM-2XX.
It may not be required in some applicaons.
Docking staons for tablet applicaons can be bolted directly to C-DMM without adaptor. Oset adaptor C-MM-303 is available if additional poisoning opons are desired for docking staon.
TOOLS REQUIRED:
Ratchet Wrench Phillips Screwdriver
Socket Set Dash panel removal tool
Open End Wrench - 7/16"
HARDWARE and PARTS:
QTY: DESCRIPTION: PART #:
1 Upper Support Bracket Passenger side CM005400
1 Upper Support Bracket Driver side CM005401
1 Lower Support Bracket Passenger side CM005402
1 Lower Support Bracket Driver side CM005437
4 1/4" Serrated Flange Hex Nut GSM30023
4 10-32x 1/2" Pan Head Phillips Machine Screw GSM33118
4 # 10 Flat Washer GSM31003
1 Monitor Adapter Hardware Included with C-MM-2XX kit
Note: The swing door ulizes a gas spring to assist in opening the door and to eliminate the possibility of it slamming shut. If additional damping is desired because of heavier equipment, an oponal stronger gas spring is available under
Part Number CM86662-30 (sold separately) Installer must change out gas spring as needed.
Always!
Read all instrucons before installing any Havis, Inc. products.
➢ Check for obstrucons (Wires, brake lines, fuel tank, etc.) before drilling any holes!
➢ Use hardware provided with install kit
natural_image
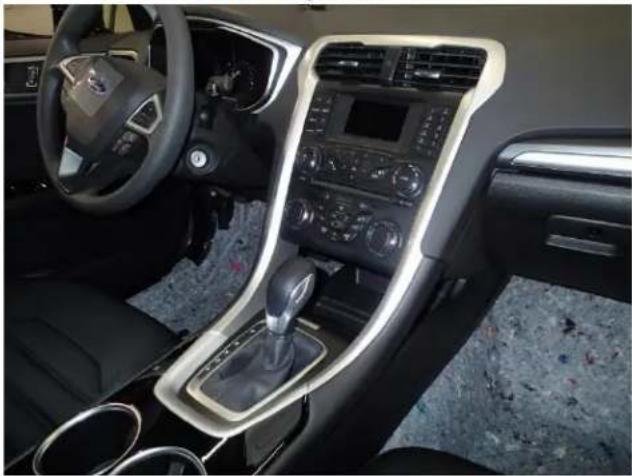
Interior view of a modern car dashboard with steering wheel, dashboard, and air intake (no visible text or symbols)View of dash instrument panel.
Havis, Inc.
75 Jacksonville Road
Warminster, PA 18974
T800-524-9900 F215-957-0729
www.havis.com
natural_image
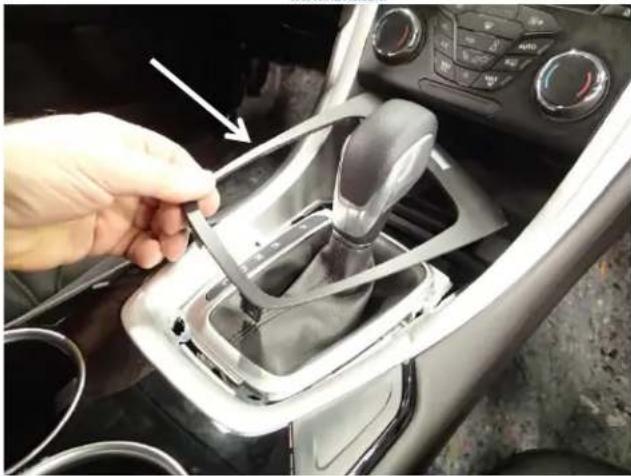
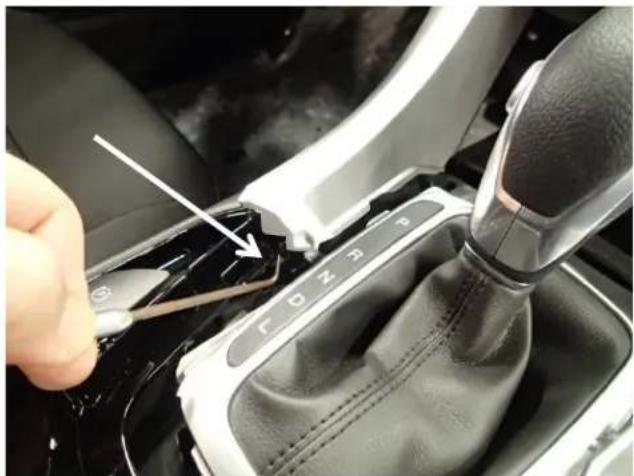
Close-up of a car gear shift lever inside a vehicle, with hand adjusting the component (no visible text or symbols)Carefully remove (unsnap) shier trim bezel
natural_image
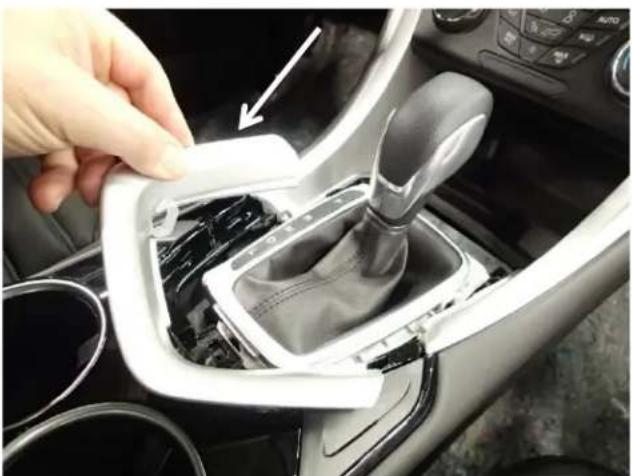
Close-up of a car gear shift lever inside a vehicle, showing the shaft and gear assembly (no text or symbols visible)Carefully remove (unsnap) lower / center dash panel
natural_image
Close-up of a car gear shift lever mechanism with a hand adjusting the component (no visible text or symbols)Trim removal tool with hook works well.
natural_image
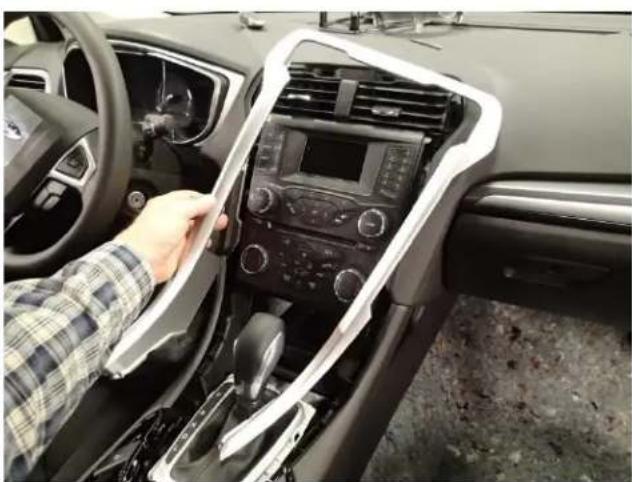
Interior view of a car showing the dashboard and steering wheel, with a person adjusting the seat (no visible text or symbols)Carefully remove (unsnap) Upper / center dash panel.
natural_image
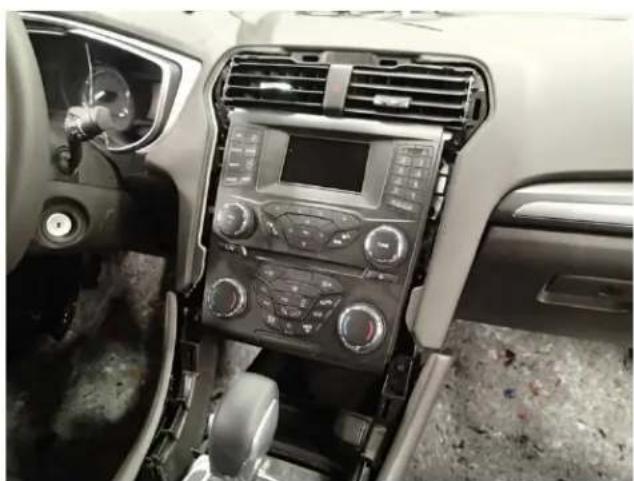
Interior view of a car dashboard and air intake unit (no visible text or symbols)Dash Trim removed
natural_image
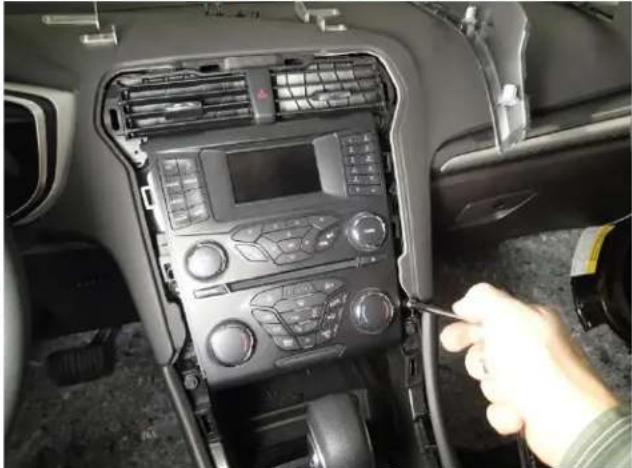
Interior view of a car infotainment system showing dashboard, air conditioners, and control panel (no visible text or labels)Remove lower screws holding on Instrument panel.
(7mm socket)
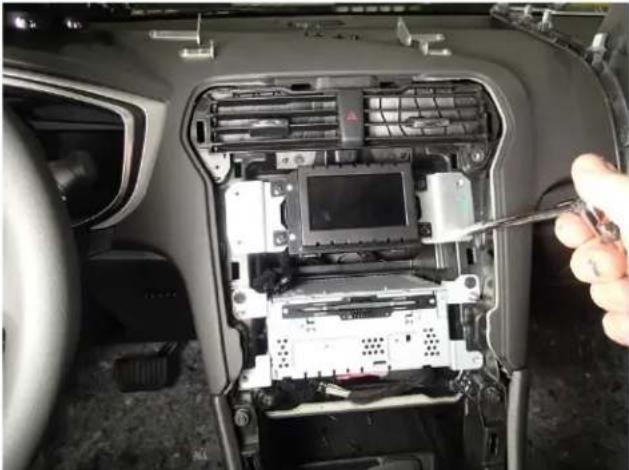
natural_image
Interior view of a car showing an open electronic device with a hand holding a screwdriver (no visible text or symbols)Remove and reuse OEM dash screws as shown in following steps.
(7MM socket)
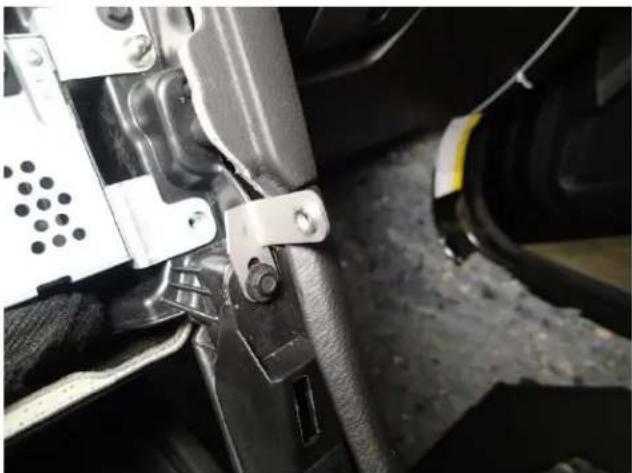
natural_image
Close-up of a mechanical assembly with metal brackets and mounting feet (no visible text or symbols)Lower Passenger side support bracket
Havis, Inc.
75 Jacksonville Road
Warminster, PA 18974
T800-524-9900 F215-957-0729
www.havis.com
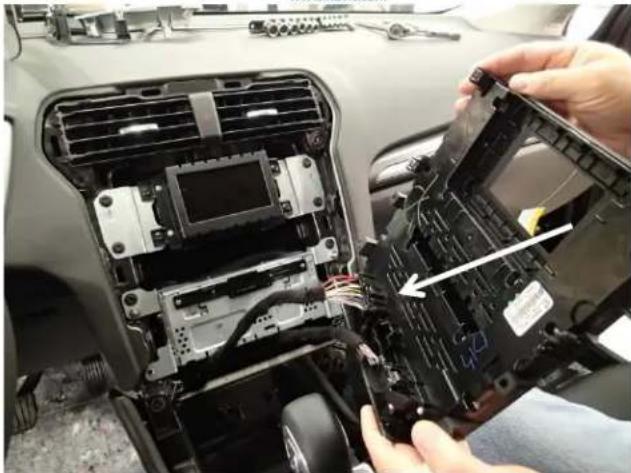
natural_image
Close-up of hands installing or adjusting electronic components on a car chassis (no visible text or symbols)Remove and unplug Instrument panel.
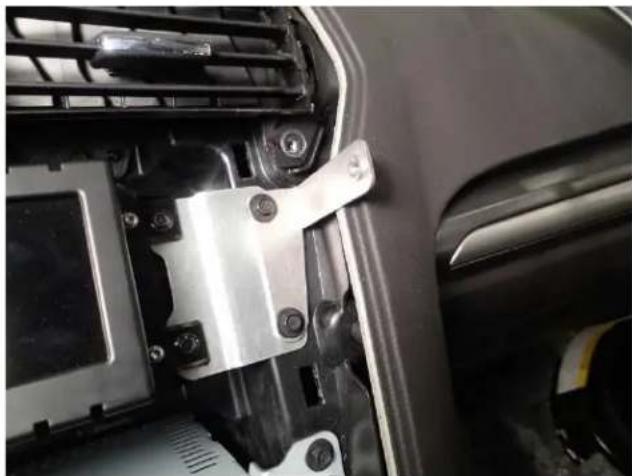
natural_image
Close-up of a car's front panel showing metal bracket and mounting hardware (no visible text or symbols)Upper Passenger side support bracket
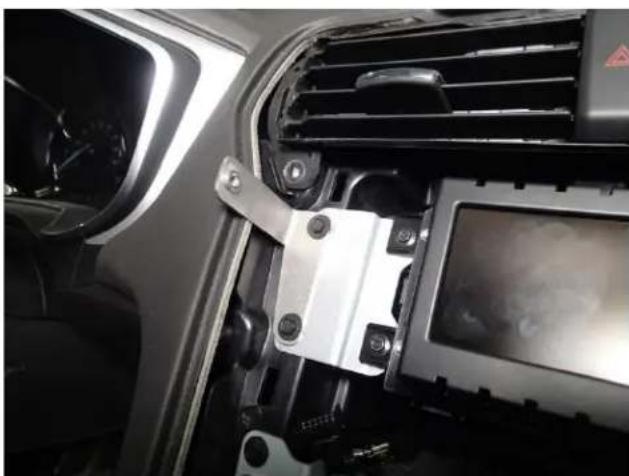
natural_image
Interior view of a car dashboard and air conditioner unit (no visible text or symbols)Upper Driver side support bracket
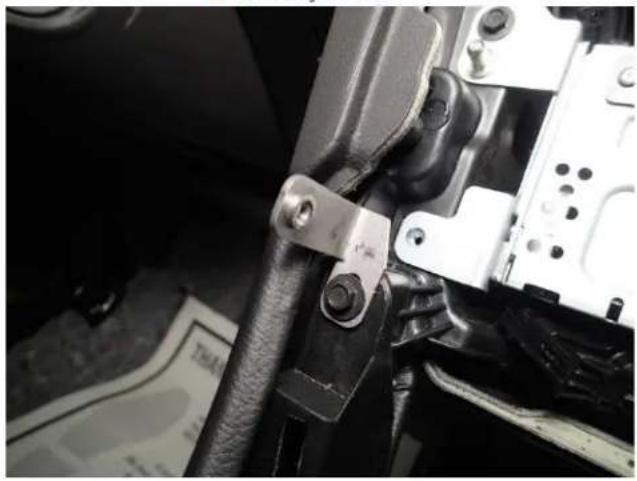
natural_image
Close-up of a mechanical assembly with metal brackets and connectors (no visible text or symbols)Lower Driver side support bracket
Havis, Inc.
75 Jacksonville Road
Warminster, PA 18974
T800-524-9900 F215-957-0729
www.havis.com
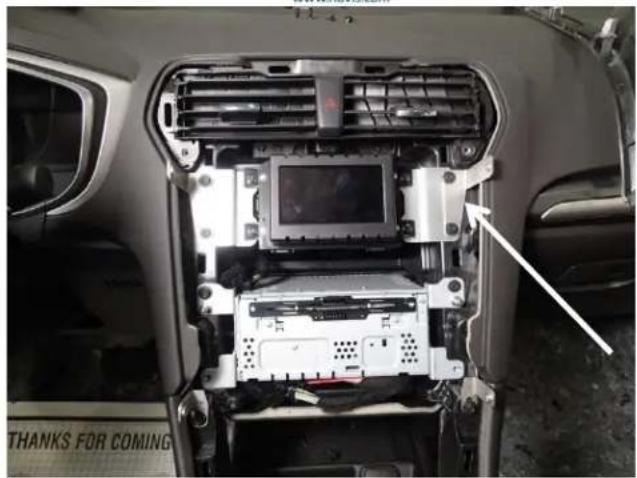
natural_image
Interior view of a car showing a mounted electronic device with ventilation grilles and a monitor, no visible text or symbols.Support brackets now in place
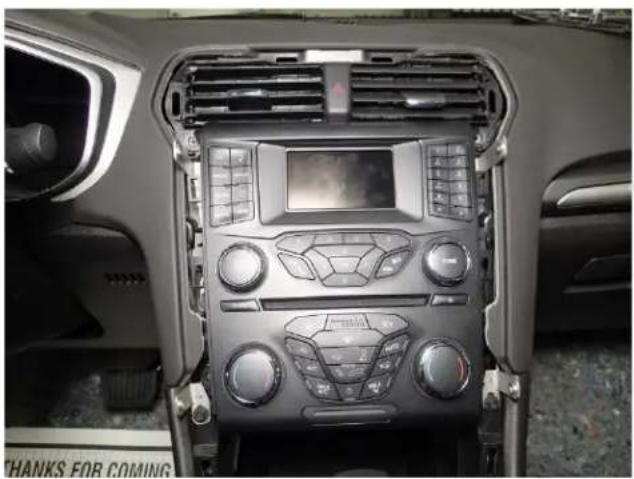
natural_image
Interior view of a car dashboard with air conditioners and a digital display (no visible text or symbols)Re-install Instrument panel
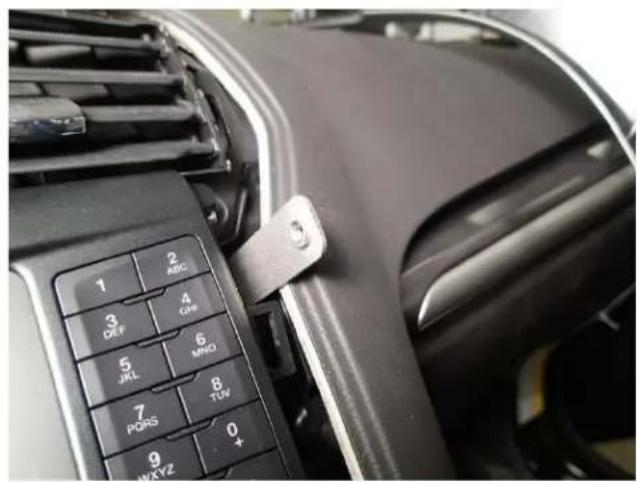
Upper support brackets should be ght to the edge of dash opening
Passenger side shown
natural_image
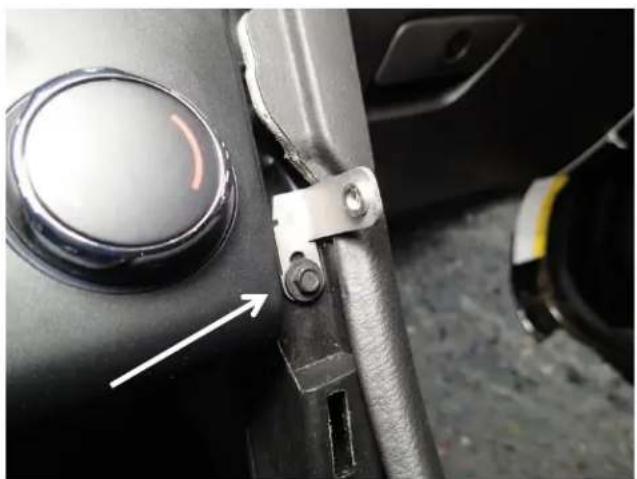
Close-up of a mechanical component with a circular button and a white arrow pointing to a bolted joint (no text or symbols visible)Make sure lower support brackets are posioned with oset up and to the outside.
natural_image
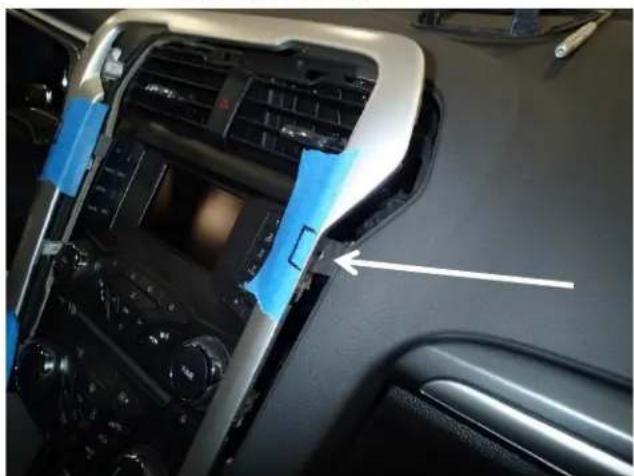
Interior view of a car dashboard with blue plastic clips and a white arrow pointing to a component (no visible text or symbols)Hold upper dash trim onto original locaon
natural_image
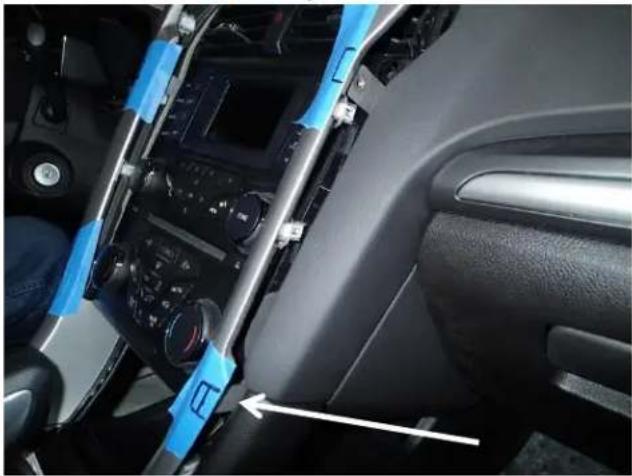
Interior view of a car dashboard with blue tape and white directional arrow indicating left side (no visible text or symbols)Mark locaons for all brackets to determine locaons to be cut.
natural_image
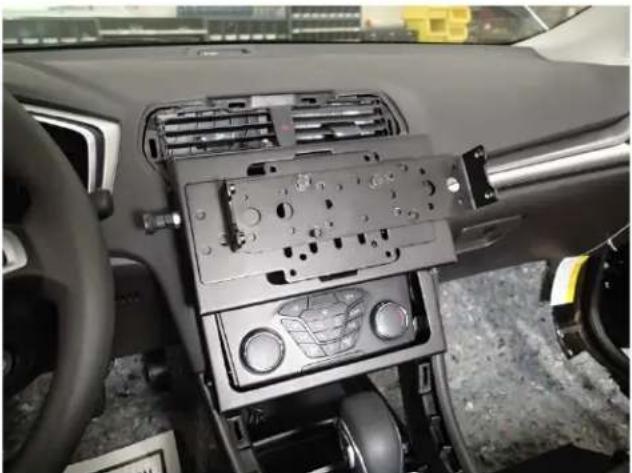
Interior view of a car dashboard with airbags and control panel (no visible text or symbols)Mount DMM frame and door assembly onto support brackets with 10/32 x 12 " machine screws.
natural_image
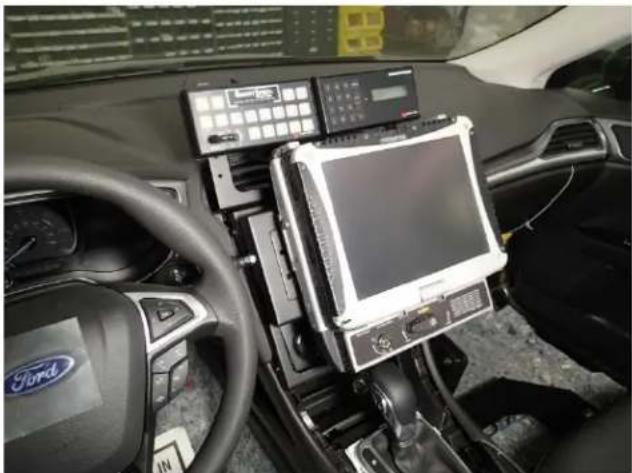
Interior view of a Ford vehicle's steering wheel and dashboard, showing steering wheel, dashboard display with control panel, and steering wheel (no visible text or symbols)Run wiring as needed
Note: Photo shows special control head brackets mounted to top frame. These brackets are not C-DMM-125 INST 4-13 rev 9-13 included with the C-DMM-125.
Havis, Inc.
75 Jacksonville Road
Warminster, PA 18974
T800-524-9900 F215-957-0729
www.havis.com
natural_image
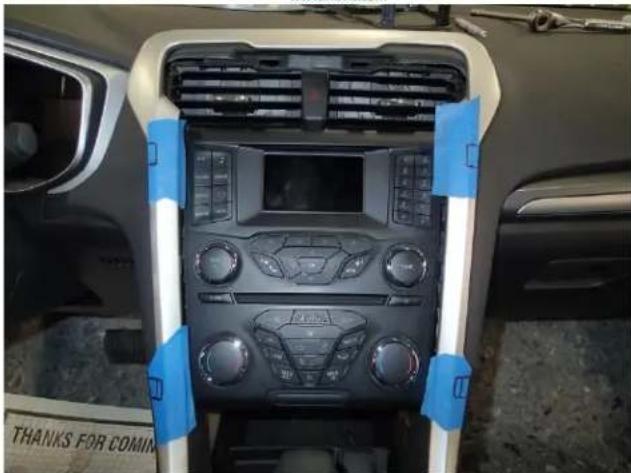
Interior view of a car dashboard with air filters and control panels (no visible text or symbols)Note: Prior to cung notches in trim, you should place DMM frame and door assembly onto brackets to double check correct placement.
natural_image
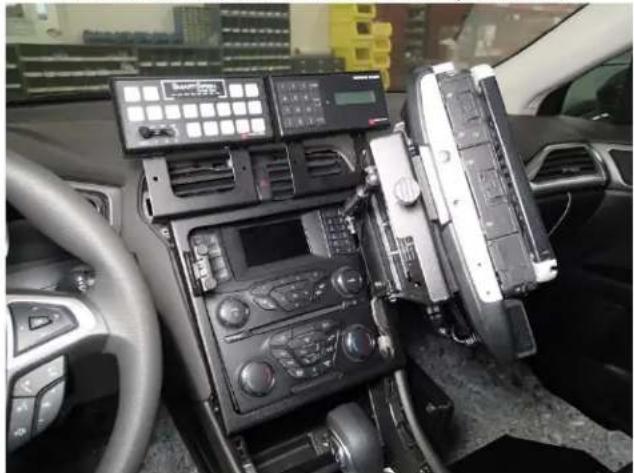
Interior view of a car cockpit with multiple air conditioning units and dashboard (no visible text or symbols)Aach computer display into desired posion
natural_image
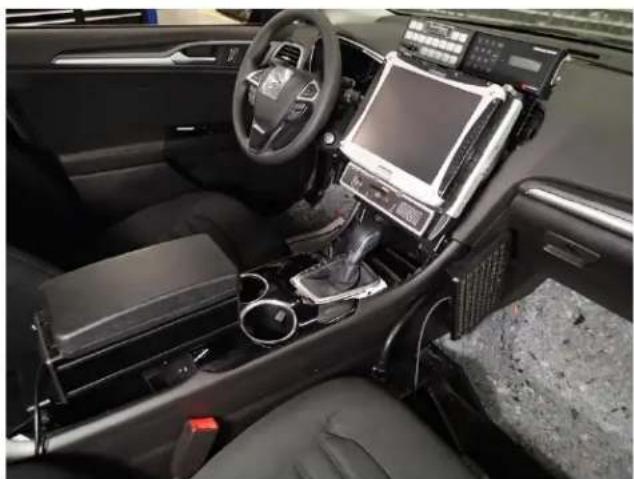
Interior view of a modern electric car cockpit with digital dashboard and control panel (no visible text or symbols)Example of C-DMM-125 Dash Monitor Mount complete.
Brand : Havis
Model : C-DMM-125
Category : Uncategorized