C-DMM-120 - Uncategorized Havis - Free user manual and instructions
Find the device manual for free C-DMM-120 Havis in PDF.


| Product Type | Swing-Out Dash Monitor Mount |
| Brand | Havis |
| Model | C-DMM-120 |
| Compatible Vehicles | 2011-2017 Ford Explorer (Retail) - Not for Interceptor Utility |
| Required Parts (sold separately) | C-DMM-123 (vehicle specific bracket), C-MM-200 series (monitor adapter bracket), C-MM-301 (offset adapter) |
| Material | Steel with corrosion-resistant coating |
| Weight (approx.) | 2.5 lbs (1.1 kg) for main frame assembly |
| Dimensions (main frame) | 6.5" x 4" x 2" (165 x 102 x 51 mm) |
| Mounting Type | Dash-mounted with swing-out arm |
| Gas Spring | Included; optional stronger spring CM86662-30 |
| Monitor Size Compatibility | Varies based on adapter bracket (C-MM-200 series) |
| Tools Required for Installation | Ratchet wrench, socket set, air saw or plastic cutting tool, dash panel removal tool, 7/16" open end wrench, file, Phillips screwdriver |
| Hardware Included | Main frame, 2 upper support brackets, 2 lower support brackets, 4 flange nuts, 4 machine screws, 4 star washers, monitor adapter hardware |
| Torque Specifications | 3 Nm (27 in-lbs) for support bracket screws |
| Modification Required | Cutting/notching OEM trim bezels for bracket clearance |
| Safety Precautions | Check for obstructions (wires, brake lines, fuel tank) before drilling; use only provided hardware |
| Maintenance | Clean with mild detergent and damp cloth; lubricate pivot points as needed |
| Spare Parts Availability | Replacement gas spring (CM86662-30); OEM trim bezels (driver BB5Z 78061A17-AA, passenger BB5Z 78061A16-AA) |
| Warranty | Standard Havis warranty (check manufacturer website) |
Frequently Asked Questions - C-DMM-120 Havis
User questions about C-DMM-120 Havis
0 question about this device. Answer the ones you know or ask your own.
Ask a new question about this device
Download the instructions for your Uncategorized in PDF format for free! Find your manual C-DMM-120 - Havis and take your electronic device back in hand. On this page are published all the documents necessary for the use of your device. C-DMM-120 by Havis.
USER MANUAL C-DMM-120 Havis
INSTALLATION INSTRUCTIONS C-DMM-120
2011-2017 FORD EXPLORER (RETAIL)
SWING-OUT DASH MONITOR MOUNT
***Does NOT work in the Ford Interceptor Utility vehicle***
The Dash Monitor Mount bracket system requires two or three main parts that are sold separately. See web site Monitor Congurator for more detailed bracket informaon. hp://www.havis.com/monitor_mounts.htm
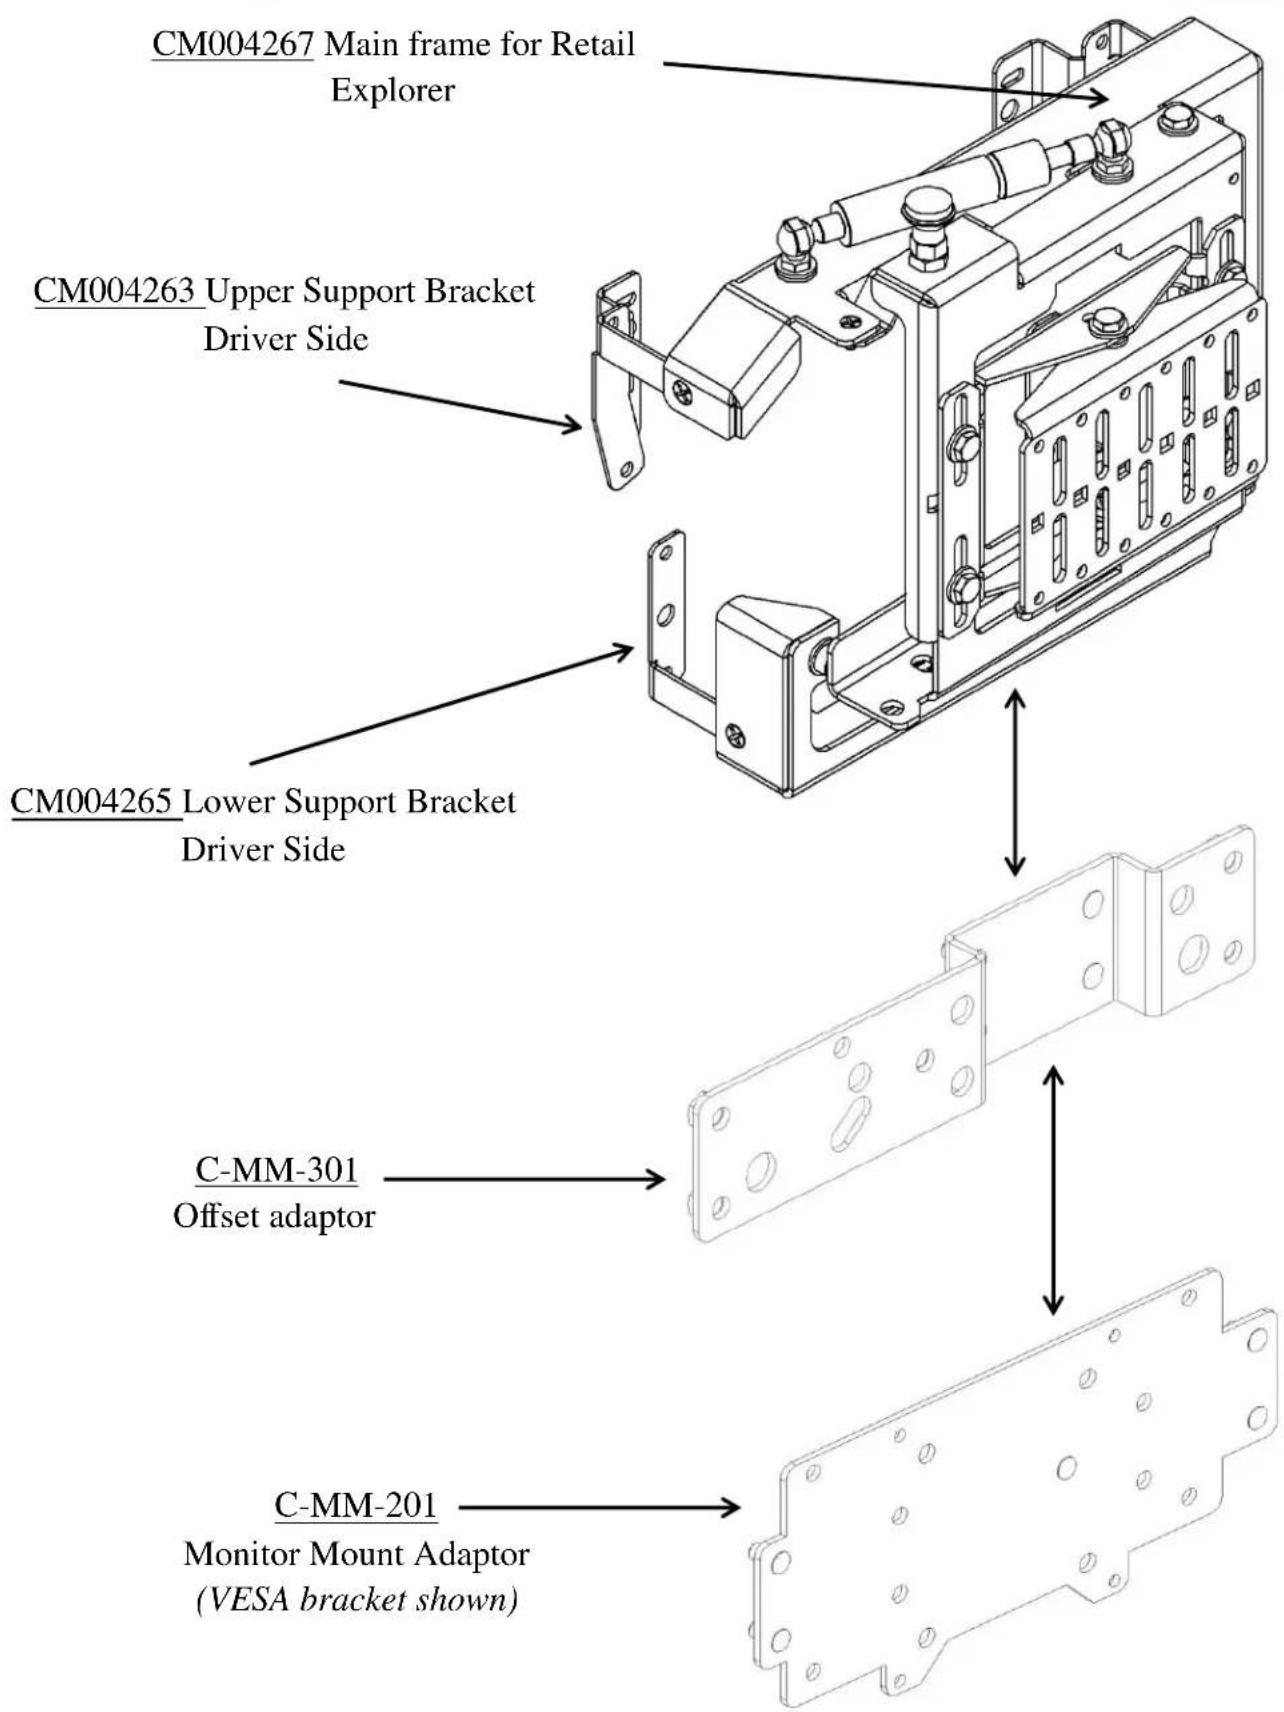
• 1 - Vehicle Specific dash mount bracket. (C-DMM-123)
• 1 - Computer Specific Monitor adaptor bracket. (C-MM-200 series)
• 1 - Oset adaptor bracket. (C-MM-301)
The C-MM-301 oset adaptor goes between the C-DMM-123 and C-MM-2XX. It may not be required in some applications.
Docking staons for tablet applicaons can be bolted directly to C-DMM without adaptor. Oset adaptor C-MM-303 is available if additional poisoning opons are desired for docking staon.
TOOLS REQUIRED:
- Ratchet Wrench Air Saw or Plasc cung tool
- Socket Set Dash panel removal tool
- Open End Wrench - 7/16" File
• Phillips Screwdriver
HARDWARE and PARTS:
| QTY: | DESCRIPTION: | PART #: |
| 1 | Main Frame Assembly | CM004267 |
| 1 | Upper Support Bracket Driver Side | CM004263 |
| 1 | Upper Support Bracket Passenger Side | CM004264 |
| 1 | Lower Support Bracket Driver Side | CM004265 |
| 1 | Lower Support Bracket Passenger Side | CM004266 |
| 4 | 1/4" Serrated Flange Hex Nut | GSM30023 |
| 4 | # 10 x 1/2" Phillips Pan head machine screw | GSM33118 |
| 4 | # 10 Star Washer | GSM31034 |
| 1 | Monitor Adapter Hardware | Varies (monitor specic) |
Always!
Read all instrucons before installing any Havis, Inc. products.
➢ Check for obstrucons (Wires, brake lines, fuel tank, etc.) before drilling any holes!
➢ Use hardware provided with install kit
Note: The swing door ulizes a gas spring to assist in opening the door and to eliminate the possibility of it slamming shut. If additional damping is desired because of heavier equipment, an oponal stronger gas spring is available under Part Number CM86662-30 (sold separately) Installer must change out gas spring as needed
natural_image
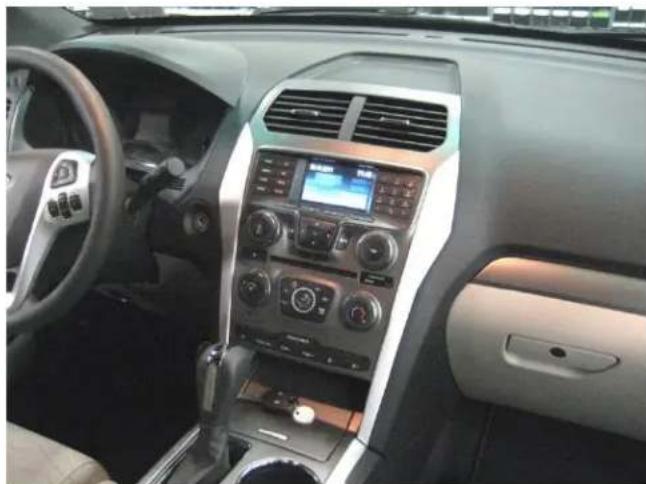
Interior view of a car dashboard with air conditioners, steering wheel, and digital display (no visible text or symbols)View of Retail Ford Explorer dash instrument panel.
Note: Many of the photos in these instrucons show a Ford Interceptor Utility applicaon, however the moung procedure is the same for both vehicles.
natural_image
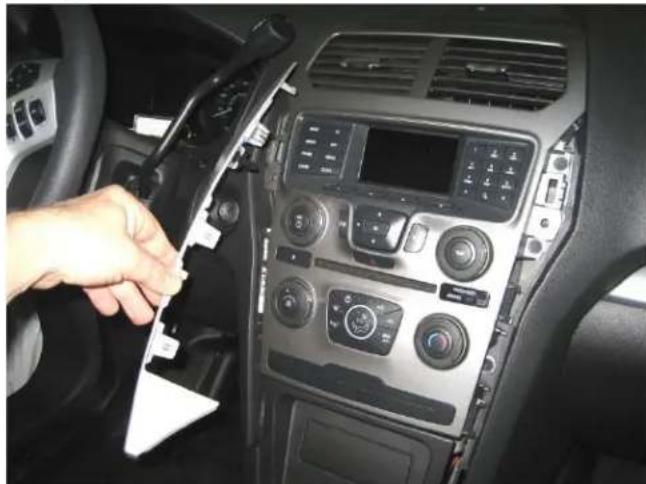
Interior view of a car dashboard with infotainment and control panels (no visible text or symbols)Carefully remove (unsnap) driver side Dash trim bezel.
natural_image
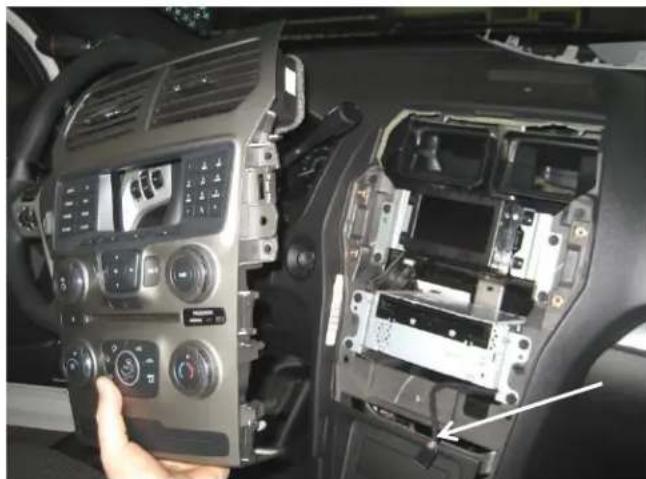
Interior view of a car dashboard showing the air condition panel and internal electronics (no visible text or symbols)Unplug and remove center control panel
natural_image
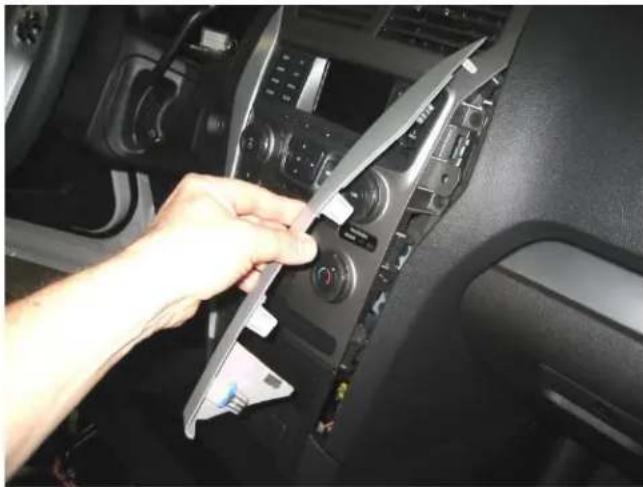
Hand inserting a cable into the dashboard of a car (no visible text or symbols)Carefully remove (unsnap) passenger side Dash trim bezel. Trim removal tool and 90° picking tool recommended.
natural_image
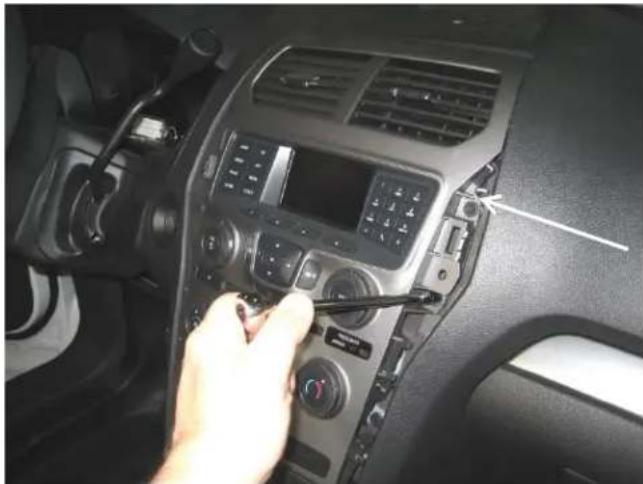
Interior view of a car dashboard with a hand adjusting the controls (no visible text or symbols)Remove screws holding center control panel. (7mm socket)
natural_image
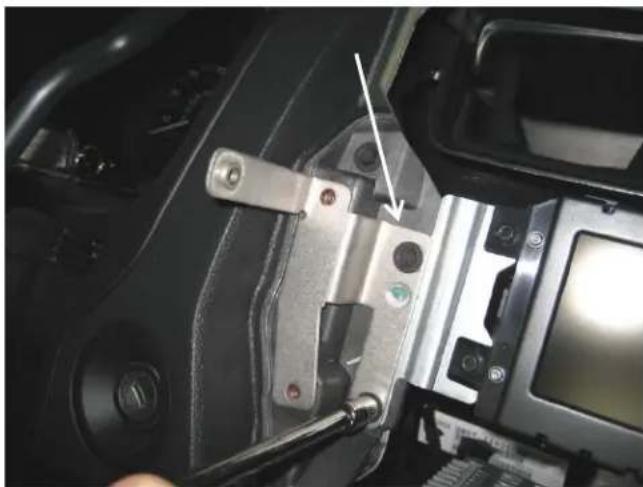
Close-up of a mechanical assembly with metal components and a white arrow pointing to a component (no visible text or symbols)Aach driver and passenger side upper support bracket with OEM display screws. Driver side shown. Torque to 3 Nm (27 in-lbs)
natural_image
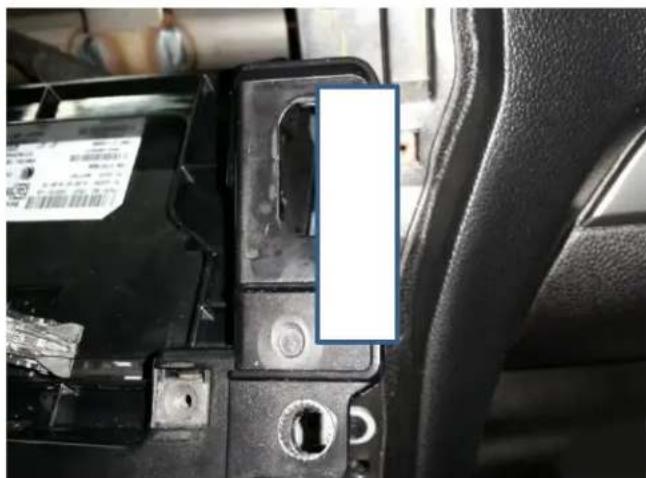
Close-up of a car's front seatbelt mechanism with visible mounting holes and a blue rectangular label (no readable text or symbols)If vehicle has Ford Sync System, the plasc brackets needs to be cut / notched for DMM bracket. Once the bracket is cut, the DMM bracket needs to be installed behind the Ford sync bracket
natural_image
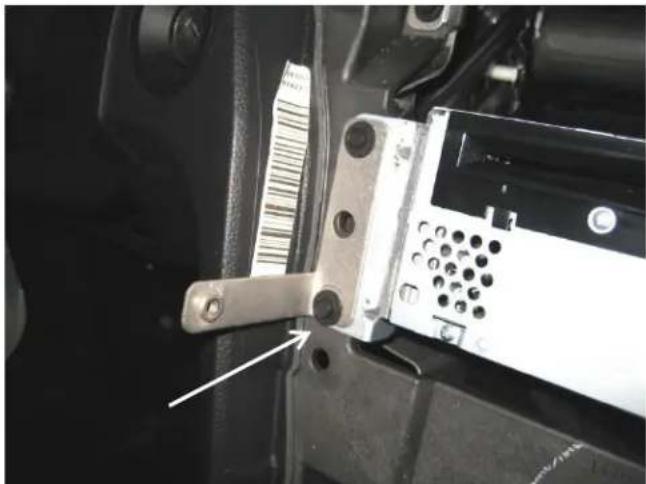
Close-up of a mechanical device with a metallic bracket and a control panel, showing no visible text or symbols.Aach driver side lower support bracket with OEM screws as shown. Torque to 3 Nm (27 in-lbs)
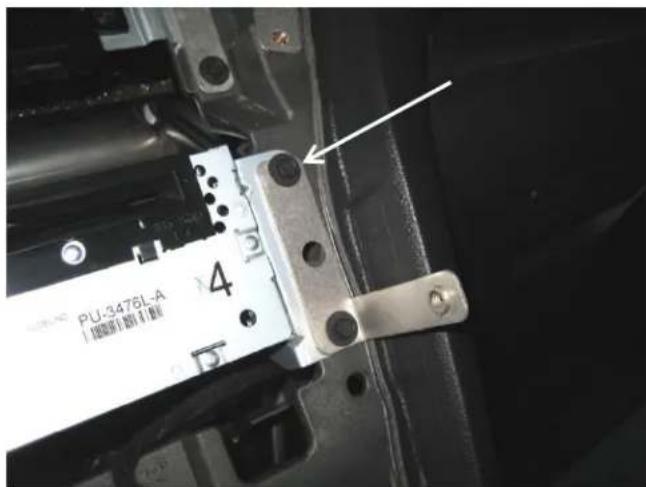
Aach passenger side lower support bracket with OEM screws as shown. Torque to 3 Nm (27 in-lbs)
natural_image
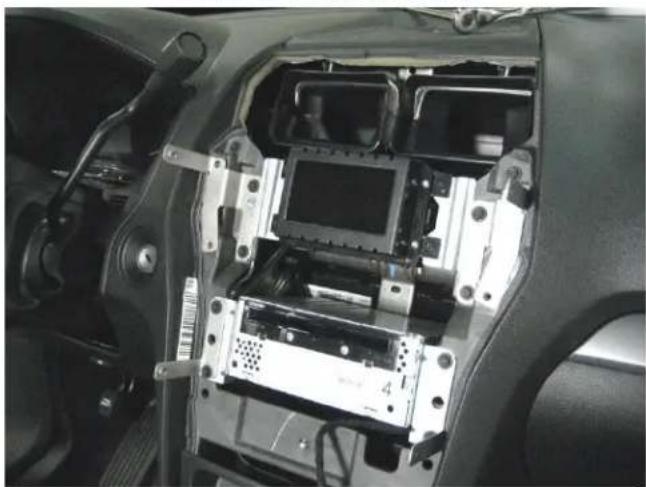
Interior view of a car showing internal components like electronic devices and a monitor (no visible text or symbols)Upper and lower support brackets now in place. Tighten hardware.
natural_image
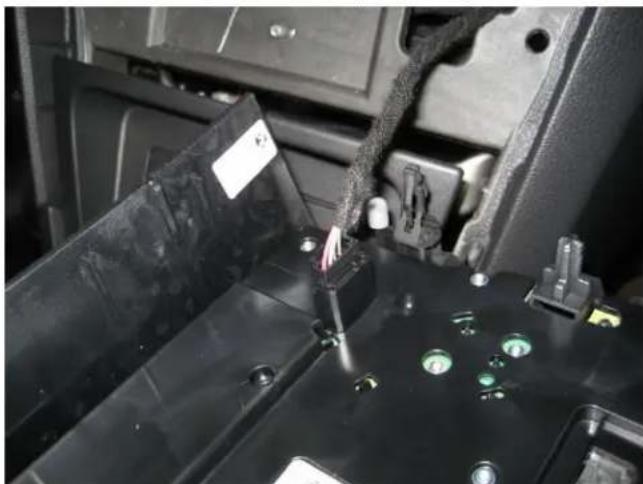
Close-up of a mechanical assembly with a tool inserted into a black housing, showing green circular components and wiring (no visible text or symbols)Insert plug back into center control panel and put panel back into dash.
natural_image
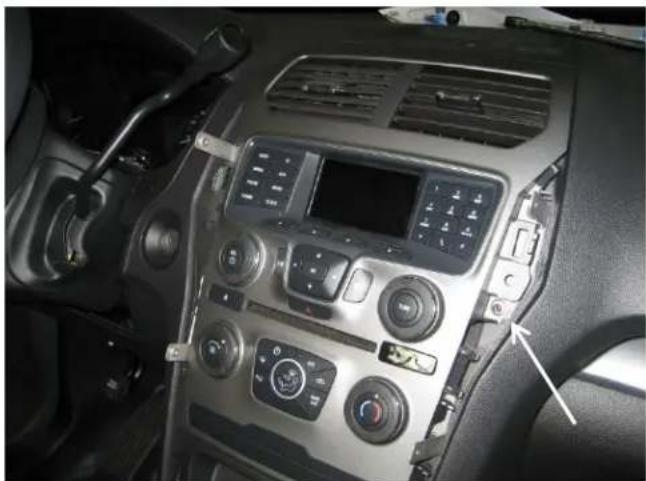
Interior view of a car dashboard with air conditioners and control panels (no visible text or symbols)Mount center control panel back into original posion with original screws. Torque to 3 Nm (27 in-lbs)
natural_image
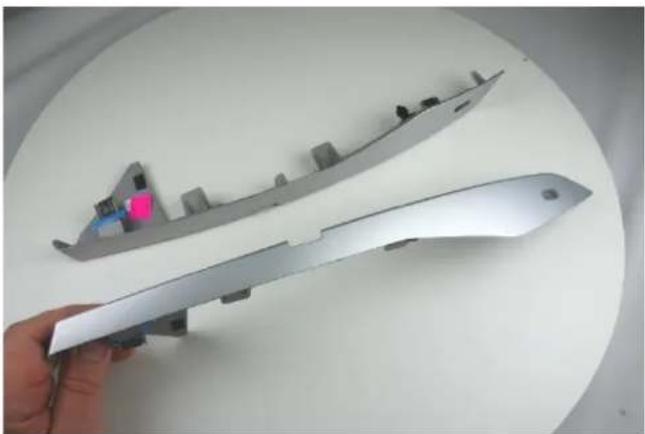
Hand holding a metallic mechanical component with visible internal structure and part highlighted in pink (no text or symbols)View of OEM Dash trim bezels removed.
Carefully modify as shown in the following steps.
NOTE: If replacement bezels are needed, the \\ OEM part numbers are: Driver side # BB5Z 78061A17-AA
Passenger side # BB5Z 78061A16-AA
natural_image
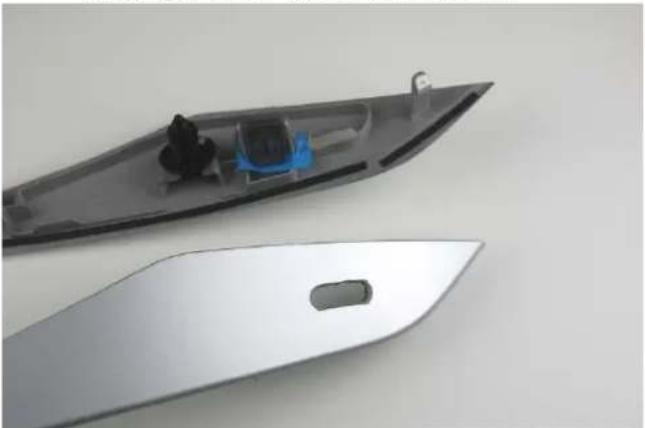
Two views of a device showing internal components and a metallic blade (no text or symbols visible)View of upper trim bezels with slot.
Note: It works best to use a 1/4" (.250") drill bit to locate each end of slot.
natural_image
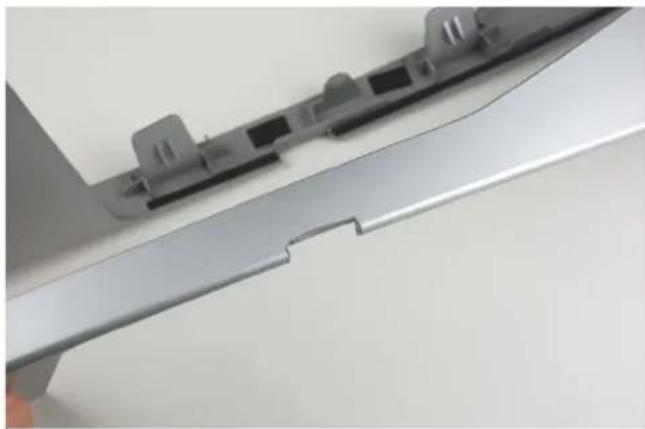
Close-up of a metallic mechanical component with a bracket and internal slots (no text or symbols visible)View of trim bezels with notch.
Note: It works best to use a small Air Saw and or C-DMM-120_INST_7-12rev 9-13
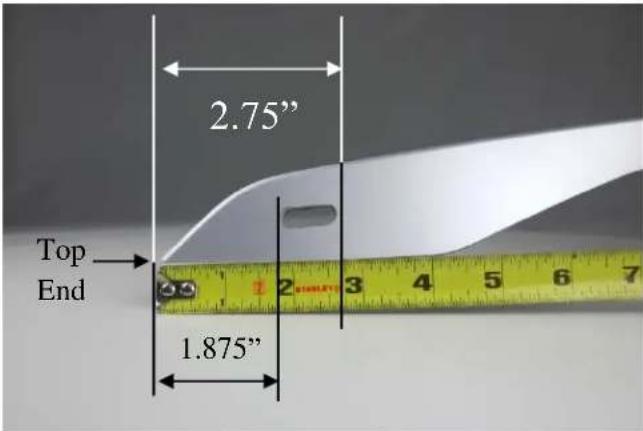
Make a .250" x .875 Oval slot in trim bezels for upper support brackets.
Measure 1.875" to 2.75" from top end of trim as shown. (.250" wide slot)
Slot is in the center of trim (.75" from each side)
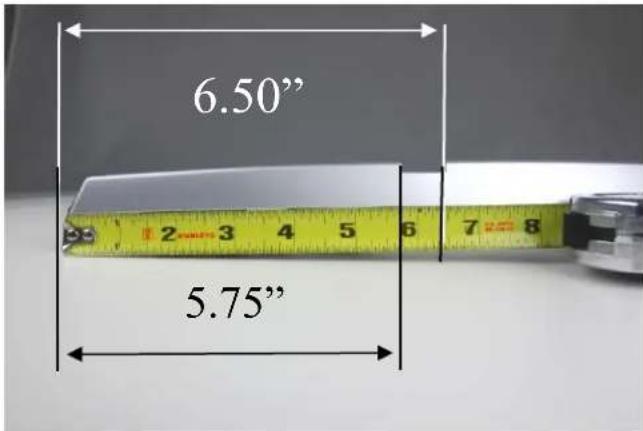
Make a .187" x .75" notch on inside edge of trim bezels for lower support brackets.
Measure 5.75" to 6.50" from boom end of trim as shown. (.187" wide notch)
natural_image
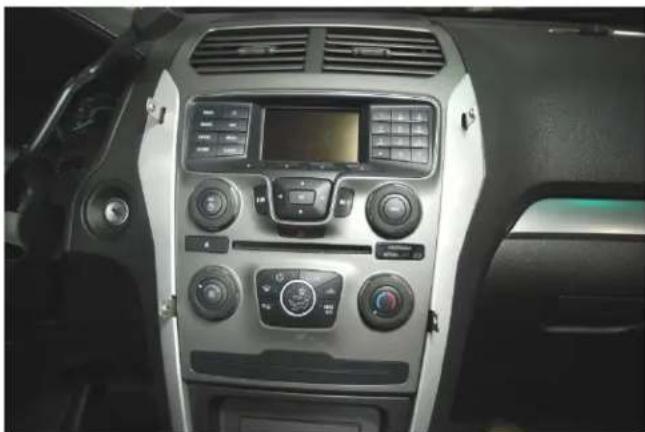
Interior view of a car dashboard with air conditioners and a digital display (no visible text or symbols)Reaach modified trim bezels over support brackets and make sure they snap in properly.
natural_image
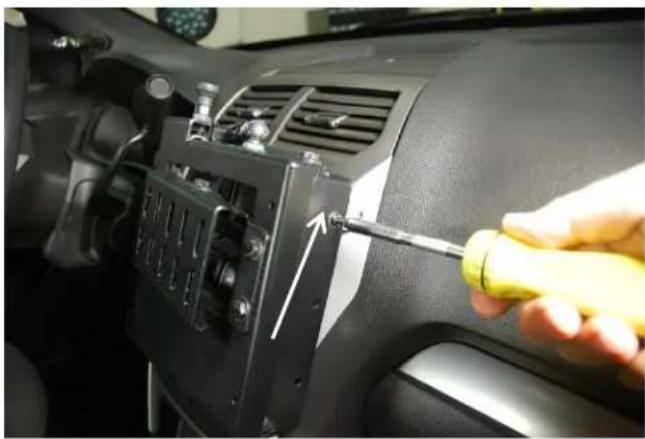
Close-up of a car interior with a hand holding a screwdriver, showing the engine compartment and dashboard (no visible text or symbols)Aach main frame to support brackets with four (4) # 10 x 1/2" Phillips machine screws and star washers. Tighten Hardware.
natural_image
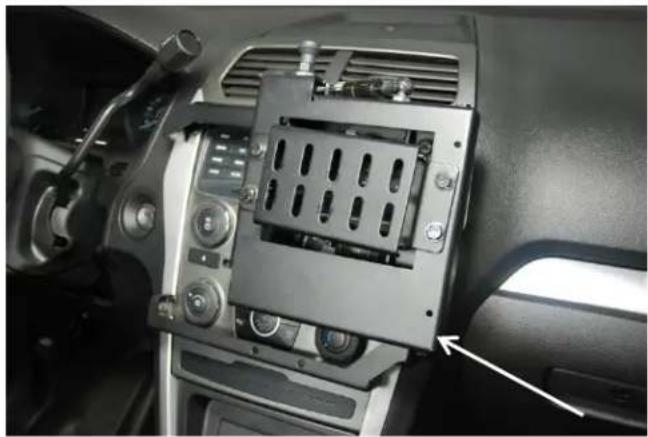
Interior view of a car dashboard with air vent and control panel (no visible text or symbols)Main assembly is now in place.
Note: Computer wire harnesses will run down the passenger side of dash as desired
natural_image
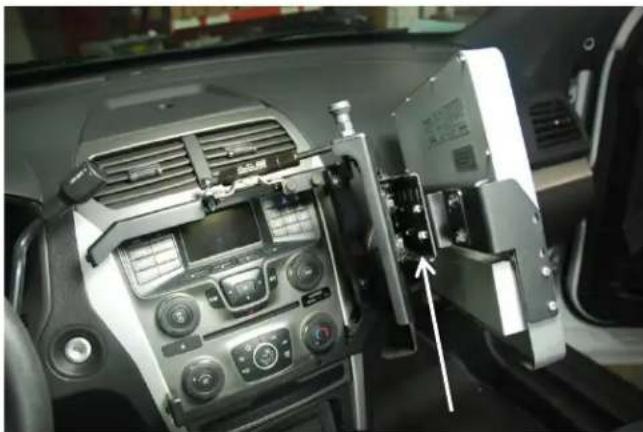
Interior view of a car dashboard with air conditioners and a mounted device (no visible text or symbols)Aach monitor mount adaptors to back of monitor. Aach monitor adaptor to swing door with 1/4"serrated nuts and poison as desired. Tighten hardware.
natural_image
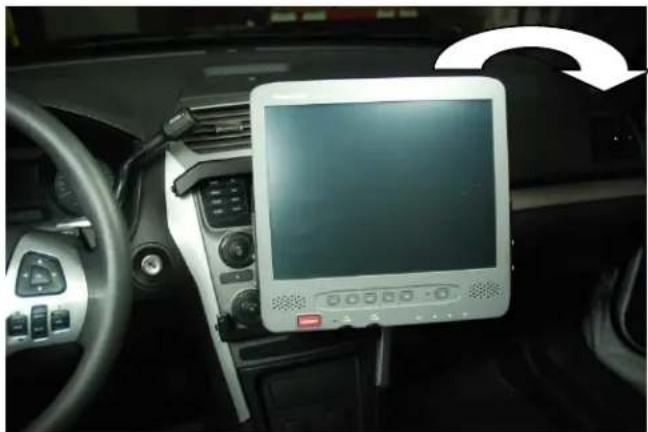
Interior view of a car dashboard with a mounted electronic device (no visible text or symbols)Note: Monitor can be slightly rotated clockwise. Loosen monitor bracket and swivel bracket hardware, turn clockwise and ghten.
natural_image
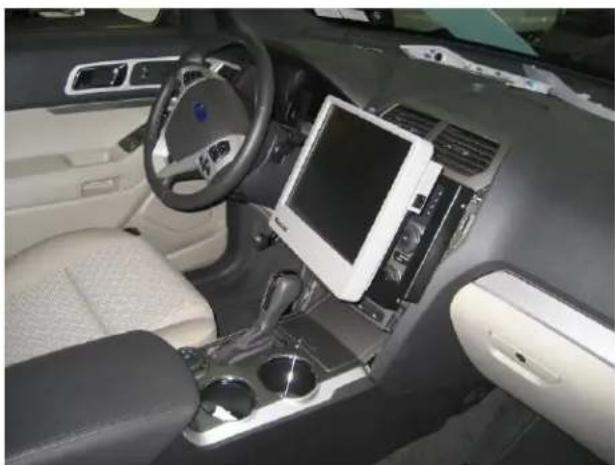
Interior view of a car dashboard with steering wheel, dashboard console, and steering wheel (no visible text or symbols)Example of completed Dash Monitor Mount.
Brand : Havis
Model : C-DMM-120
Category : Uncategorized