
CHAF210 - Freezer Champion - Free user manual and instructions
Find the device manual for free CHAF210 Champion in PDF.


| Product Type | Air Fryer |
| Model | CHAF210 |
| Brand | Champion |
| Power Supply | 220-240V, 50-60Hz |
| Power Consumption | Approximately 1400W |
| Capacity (Basket) | 3.2L (approx.) |
| Temperature Range | 80°C to 200°C |
| Timer | 0-60 minutes with automatic shut-off and bell |
| Heating Method | Hot air circulation (oil-free) |
| Material | Plastic housing, non-stick coated basket and pot |
| Dimensions (approx.) | 30 x 30 x 35 cm (L x W x H) |
| Weight (approx.) | 4 kg |
| Dishwasher Safe Parts | Yes (basket and pot) |
| Safety Features | Overheat protection, automatic shut-off, cool-touch handle |
| Cleaning | Non-abrasive sponge, degreasing liquid; do not immerse housing |
| Warranty | Standard manufacturer warranty (details in manual) |
| Accessories Included | Basket, pot, cleaning brush |
Frequently Asked Questions - CHAF210 Champion
User questions about CHAF210 Champion
0 question about this device. Answer the ones you know or ask your own.
Ask a new question about this device
Download the instructions for your Freezer in PDF format for free! Find your manual CHAF210 - Champion and take your electronic device back in hand. On this page are published all the documents necessary for the use of your device. CHAF210 by Champion.
USER MANUAL CHAF210 Champion
natural_image
Black CHAMPION air fryer with French fries being opened, no visible text or symbols on the device itself.EN - English
SE - Svenska
DK - Danske
NO - Norsk
FI - Suomi
Manual
Attention!
Please read the instruction manual carefully before using the Aero Fryer
EN
Danger!
- Never immerse the housing, which contains electrical components, and the heating elements in water nor rinse the unit under the tap.
- Avoid any liquid entering the air fryer to prevent electric shock or short circuit.
- Keep food in the basket and prevent any contact from heating elements.
- Do not cover the air inlet/outlet when the air fryer is working.
- Do not fill the tank with oil as it may cause a fire hazard.
- Do not touch the internal of the air fryer while it is operating.
Warning!
- Check that the power supply voltage corresponds to that shown on the Aero Fryer (alternating current).
- The Aero Fryer is designed for household use only. In case of professional use, inappropriate use or failure to comply with the instructions, the manufacturer accepts no responsibility and the warranty will be void.
- Read and follow the instructions before use, keep them for future reference.
- Do not operate the Aero Fryer with a damaged cord or plug, or if it malfunctions, or has been dropped or damaged in any manner. Return the air fryer to purchase center or contact authorized service center. Do not take the air fryer apart yourself.
- Do not use an extension wire. If you accept liability for doing so, only use an extension wire which is in good condition and is suited to the power of the air fryer.
- Do not leave the cord hanging over the desk or counter top.
- Always unplug the Aero Fryer immediately after use and during cleaning or maintenance.
- Do not touch the hot pot, as it may cause you injury. Only hold the pot by the handle.
Use
Before the First Use
- Remove all packaging materials.
- Remove any stickers or labels from the Aero Fryer. (Except the rating label)
- Thoroughly clean the basket and the tank with hot water, dish wash liquid and a non-abrasive sponge. Note: You can also clean these parts in the dishwasher.
- Wipe the inside and outside of the Aero Fryer with a moist cloth. This is a Healthy Electric Oil Free fryer that works on hot air. Do not fill the basket with oil or frying fat.
During the Use
- Use on a flat and stable, heat resistant work plane, away from any water splashes or any sources of heat.
- When operating, never leave the Aero Fryer unattended.
- This product is not designed to be used by people aged 8 or below, or people with physical, sensory or mental impairment, or people without knowledge or experience, unless they are supervised or given prior instructions concerning the usage of the Aero Fryer by someone responsible for their safety.
- Children must be supervised to ensure that they do not play with the appliance.
- This electrical appliance operates at high temperatures which may cause burns. Do not touch the hot surfaces of the Aero Fryer (tank, air outlet).
- Keep the Aero Fryer in use away from flammable materials (tablecloth, curtains etc.), and keep distance from external heat source (gas stove, hot plate etc.).
- In the event of fire, never try to extinguish the flames with water. Unplug, then put out the flames with a damp cloth.
- Do not move the Aero Fryer when it is full with hot food.
- Never immerse the appliance in water!
- When the pot is pulled out during cooking, the heating element of the Aero Fryer stops working, never try to touch the inside of the Aero Fryer for it is extremely hot. Appliance starts working when the pot is back into place.
Caution: Do not put anything on top of the Aero Fryer. It disrupts the airflow and affects the cooking result.
Automatic Off
The Aero Fryer is equipped with a timer. To switch off, when the timer has counted down to 0, the Aero Fryer switches off automatically with a bell ring. To switch off the air fryer manually, turn the timer knob anticlockwise to 0.
How to Pull Out the Pot and Remove Basket from the Pot
- Pull out the pot by handle, but do not press the button when pulling (see No.1).
- Put the pot on plane position, open the transparent cover on the top of the handle, press the button and lift up the handle with basket (see No.2).

natural_image
Hand placing a hand into a green and white air fryer with a black handle (no text or symbols visible)No.1
No.2

natural_image
Product photo of a green and white air fryer with black side panels, being handled by a hand (no text or symbols visible)Note: The button on the top of the handle is only for releasing the basket from the pot. Do not press the button when you pull out the pot from the air fryer.
Use the Aero Fryer
- Connect the power with the plug.
- Warm up the Aero Fryer without food inside for approx. 4 minutes.
- After warming up, pull the pot out of the Aero Fryer.
- Put food into the basket.
Note: Never fill the basket exceed the amount indicated in the following table, as this could affect the quality of the cooking result. There is no need fill the pot with oil and fat for meat, but a little oil for vegetables.
- Push the pot back into the Air Fryer.
Note: Do not use the pot without the basket in it. -
After above procedure, do as below:
-
Turn the temperature/time control knob to the required temperature/time.
- Choose required cooking time for the food. See table below to determine the right temperature and time.
- Some food need to be tumbled during cook in order to get good cook result. Pull the pot out of the Aero Fryer, tumble the food with fork, and then push the pot back into the Aero Fryer.
Caution: Do not press the basket release button when tumbling food.
- When a bell ring appears, the set cooking time finishes. Pull the pot out of the Aero Fryer and place it on a heat-resistant surface. Check if the food is cooked well.; if not yet, push the pot back into the Aero Fryer and re-cook the food according to the temperature and time you require.
- To remove the food, press the basket release button and lift up the basket out of the pot. Use a fork or suitable kitchen tool to take out the food.
Tips
The table below helps you to select the basic settings for the food you want to cook, please refer to the recipe booklet for more different food.
Note: These settings are for reference. Food is different in size, shape, etc. so the cooking result with below setting may need to be altered.
| Type | Min to Max(g) | Time(mins) | Temp | Remark | ||
| Frozen chips | 200-500 | 12-20 | 200 | Shake | ||
| Home-made chips | 200-500 | 18-30 | 180 | Add 1/2 spoon of oil, Shake | ||
| Breadcrumbed | cheese | snacks | 200-300 | 8-15 | 190 | |
| Chicken Nuggets | 100-500 | 10-15 | 200 | |||
| Fillet of Chicken | 100-500 | 18-25 | 200 | Reverse if needed | ||
| Drumsticks | 100-500 | 18-22 | 180 | Reverse if needed | ||
| Steak | 100-500 | 8-15 | 180 | Reverse if needed | ||
| Pork chops | 100-500 | 10-20 | 180 | Reverse if needed | ||
| Hamburger | 100-500 | 7-14 | 180 | Add 1/2 spoon of oil | ||
| Frozen fish fingers | 100-400 | 6-12 | 200 | Add 1/2 spoon of oil | ||
| Cup | cake | 5 | units | 15-18 | 200 | |
- Small size and quantity of the food usually require a shorter cooking time, while large size and quantity of food require a longer cooking time.
• Tumbling smaller size food during cooking optimizes the cooking result and help to prevent unevenly fried food.
- For a crispy result, add a little oil to fresh potatoes and fry it in the Aero Fryer.
- Snacks that can be cooked in an oven can also be cooked in the Aero Fryer.
- The optimal amount for cooking crispy fries is 500 grams.
- You can also use the Aero Fryer to re-heat. To re-heat, set the temperature 150^ for 10 minutes.
Care & Cleaning
- Clean the Aero Fryer after use.
-
Do not use metal kitchen utensils or abrasive cleaning materials to clean the pot, bake tray, basket and the inside of the appliance, as this may damage surface of them.
-
Remove the plug and let the Aero Fryer cool down.
Note: pull out the pot to make the Aero Fryer cool down quicker.
- Clean the pot and basket with hot water and a soft sponge. You can use degreasing liquid to remove any remains.
Note: The pot and basket are dish washer proof.
Tip: If dirt is stuck to the basket or the bottom of the pot, fill the pot with hot water and some washing-up liquid. Put the basket in the pot, and leave the pot and the basket in the liquid for about 10 minutes.
- Clean the inside of the Aero Fyer with a non-abrasive sponge.
- Clean the heating elements with a cleaning brush to remove any food remains.
- Wipe the outside of the appliance with a moist cloth.
- Make sure all parts are clean and dry.
- Push the cord into the cord storage compartment.
FAQ
Breakdown Causes Solutions
The Aero Fryer does not work. 1. Power plug is not connected with the socket. 1. Insert the plug into the socket. 2. Turn the switch.
- The start switch is not on.
Food is not cooked well. 1. Too much food in the frying basket. 1. Put less food into the frying basket.
- The cooking temperature is too low. 2. Adjust the temperature as required
- The cooking time is too short. 3. Adjust the time as required.
Food is not baked evenly. Some food should be reversed during Reverse the food during the process of the process of cooking. cooking.
The pot cannot be push into too much food is in the basket. Take out some food from the basket. the Aero Fryer.
White smoke comes out of the Aero Fryer. 1. Food with much fat or oil. 2. Oil remain was left after last cooking 1. It is normal. 2. Clean the pot and basket before cooking.
Correct Disposal of this product
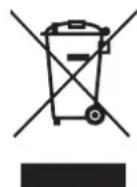
This marking indicates that this product should not be disposed with other household wastes throughout the EU. To prevent possible harm to the environment or human health from uncontrolled waste disposal, recycle it responsibly to promote the sustainable reuse of material resources.

CHAMPION
Champion ®
Makadamgatan 14 | 254 64 Helsingborg | Sweden
Designed in Sweden I Assembled in China
Manual
Viktigt!
natural_image
Hand holding a green and white electric food blender with a black handle (no visible text or symbols)No.1
No.2

natural_image
Product photo of a green and white air fryer with a black cooking pan, being handled by a hand (no text or symbols visible)Designed in Sweden | Assembled in China

Brugervejledning
Vigtigt!
natural_image
Hand placing a green and white air fryer into a black tray (no text or symbols visible)No.1
No.2

natural_image
Product photo of a green and white cooking appliance with a black side panel, being handled by a hand (no visible text or symbols)Designed in Sweden I Assembled in China
Manual
Viktig!
Before the First Use
natural_image
Hand placing a green and white air fryer into a black tray (no text or symbols visible)No.2

natural_image
Product photo of a green and white cooking appliance with a black side dish being handled by a hand (no visible text or symbols)Designed in Sweden | Assembled in China

Käyttöohje
Tärkeää!
natural_image
Hand placing a green and white appliance into a black tray (no text or symbols visible)No.2

natural_image
Product photo of a green and white electric food oven with black and black grilles, being handled by a hand (no text or symbols visible)Designed in Sweden | Assembled in China


- Manual
- Attention!
- EN
- Danger!
- Warning!
- Use
- Before the First Use
- During the Use
- Automatic Off
- How to Pull Out the Pot and Remove Basket from the Pot
- Use the Aero Fryer
- Tips
- Care & Cleaning
- FAQ
- Breakdown Causes Solutions
- Correct Disposal of this product
- Viktigt!
- Brugervejledning
- Vigtigt!
- Viktig!
- Käyttöohje
- Tärkeää!
Brand : Champion
Model : CHAF210
Category : Freezer