
VTC 881 NB - Tumble dryer HOOVER - Free user manual and instructions
Find the device manual for free VTC 881 NB HOOVER in PDF.


| Product Type | Condenser Tumble Dryer |
| Brand | Hoover |
| Model | VTC 881 NB |
| Capacity | 8 kg (Cottons), 4 kg (Synthetics) |
| Drum Volume | 115 litres |
| Dimensions (H x W x D) | 85 cm x 60 cm x 60 cm |
| Energy Class | B |
| Voltage | 220-240 V ~ 50 Hz |
| Rated Current | 10 A |
| Programmes | Extra Dry, Cupboard Dry, Iron Dry, Wool Finish, Relax 12, Rapid 40, Timed (30-150 min), Refresh |
| Drying Levels | Extra Dry, Cupboard Dry, Iron Dry |
| Delay Start | 3, 6, or 9 hours |
| Filter Care Indicator | Yes |
| Water Tank Indicator | Yes |
| Condenser Type | Air-cooled condenser |
| Control Type | Dial and push buttons |
| Installation Type | Freestanding |
| Colour | White |
| Door Type | Solid door with handle |
| Noise Level | Not specified |
Frequently Asked Questions - VTC 881 NB HOOVER
User questions about VTC 881 NB HOOVER
0 question about this device. Answer the ones you know or ask your own.
Ask a new question about this device
Download the instructions for your Tumble dryer in PDF format for free! Find your manual VTC 881 NB - HOOVER and take your electronic device back in hand. On this page are published all the documents necessary for the use of your device. VTC 881 NB by HOOVER.
USER MANUAL VTC 881 NB HOOVER
INSTRUCTION BOOK VTC 881NB
Condenser Tumble Dryer
VISIONTECH
English 2
Dansk 13
Norsk 24
Svenska 35
Suomi 46
8kg
Introduction 3
Delivery Information 3
Unpacking the Product 3
Safety Reminders 3
Use 3
Installation 4
The Laundry 4
Environmental Issues 4
Gias Service 4
Installation 5
Electrical Requirements 5
Adjusting the Feet 5
Ventilation 5
Preparing the Load 6
Clothes Preparation 6
Do Not Tumble Dry 6
Energy Saving 6
Sorting the Load 6
Drying Guide 6
Controls and Indicators 7
Selecting the Programme 8
Door and Filter 9
Opening the Door 9
Filter 9
Filter Care Indicator 9
Water Container 9
To Remove the Container 9
Condenser 10
To Remove the Condenser 10
Operation 10
Delay Start Function 11
Cancelling and Resetting the Programme 11
Cleaning and Routine Maintenance 11
Cleaning the Dryer 11
Technical Specifications 11
Troubleshooting 12
Customer Service 12
Spares 12
Gias Service 12
INTRODUCTION
Please read and follow these instructions carefully and operate the machine accordingly. This booklet provides important guidelines for safe use, installation, maintenance and some useful advice for best results when using your machine.
Keep all documentation in a safe place for future reference or for any future owners.
Delivery Information
Please check that the following items are delivered with the appliance:
- Instruction manual
- Guarantee card
- Energy label
⚠️ Check that no damage has occurred to the machine during transit. If it has, call for service by GIAS.
⚠️ Failure to comply with the above can compromise the safety of the appliance. You may be charged for a service call if a problem with your machine is caused by misuse.
UNPACKING THE PRODUCT

natural_image
Line drawing of a hand holding a door handle, showing structural details (no text or symbols)Remove the machine from its packaging close to the final location of the machine.
1- Cut carefully around the base of the packaging and up one corner.
2- Remove the polythene sleeve and lift the dryer off the polystyrene base.
⚠ Dispose of the packaging safely. Make sure it is out of the reach of children, it is a potential source of danger.
SAFETY REMINDERS
Use
- This appliance is not intended for use by persons (including children) with reduced physical, sensory or mental capabilities, or lack of experience and knowledge, unless they have been given supervision or instruction concerning use of the appliance by a person responsible for their safety.
- Children should be supervised to ensure that they do not play with the appliance.
- WARNING Misuse of a tumble dryer may create a fire hazard.
- This machine is solely for domestic use, i.e. to dry household textiles and garments.
- This machine should only be used for its intended purpose as described in this manual. Ensure that the instructions for installation and use are fully understood before operating the appliance.
- Do not touch the appliance when hands or feet are damp or wet.
- Do not lean on the door when loading the machine or use the door to lift or move the machine.
- Do not allow children to play with the machine or its controls.
- WARNING Do not use the product if the fluff filter is not in position or is damaged; fluff could be ignited.
- WARNING Where the hot surface symbol is located the temperature rise during operation of the tumble dryer may be in excess of 60 degrees C.
- Remove the plug from the electricity supply. Always remove the plug before cleaning the appliance.
- Do not continue to use this machine if it appears to be faulty.
- Lint and fluff must not be allowed to collect on the floor around the outside of the machine.
- The drum inside may be very hot. Always allow the dryer to complete the cool down period before removing the laundry.
Installation
- Check that the product has no visible signs of damage before use. If damaged do not use and please call GIAS Service.
- Do not use adapters, multiple connectors and/or extensions.
- Never install the dryer against curtains and be sure to prevent items from falling or collecting behind the dryer.
- The appliance must not be installed behind a lockable door, a sliding door or a door with a hinge on the opposite side to that of the tumble dryer.
The Laundry
- Do not dry unwashed items in the tumble dryer.
- WARNING Do not tumble dry fabrics treated with dry cleaning fluids.
-
WARNING Foam rubber materials can, under certain circumstances, when heated become ignited by spontaneous combustion. Items such as foam rubber (latex foam), shower caps, waterproof textiles, rubber backed articles and clothes or pillows fitted with foam rubber pads MUST NOT be dried in the tumble dryer.
-
Always refer to the laundry care labels for directions on suitability for drying.
- Clothes should be spin dried or thoroughly wrung before they are put into the tumble dryer. Clothes that are dripping wet should not be put into the dryer.
- Lighters and matches must not be left in pockets and NEVER use flammable liquids near the machine.
- Glass fibre curtains should NEVER be put in this machine. Skin irritation may occur if other garments are contaminated with the glass fibres.
- Items that have been soiled with substances such as cooking oil, acetone, alcohol, petrol, kerosene, spot removers, turpentine, waxes and wax removers should be washed in hot water with an extra amount of detergent before being dried in the tumble dryer.
- Fabric softeners, or similar products, should be used as specified by the fabric softener instructions.
Environmental Issues
- All packaging materials used are environmentally-friendly and recyclable.
Please help dispose of the packaging via environmentally-friendly means. Your local council will be able to give you details of current means of disposal. - To ensure safety when disposing of an old tumble dryer disconnect the mains plug from the socket, cut the mains power cable and destroy this together with the plug. To prevent children shutting themselves in the machine break the door hinges or the door lock.
European Directive 2002/96/EC
This appliance is marked according to the European directive 2002/96/EC on Waste Electrical and Electronic Equipment (WEEE).
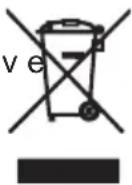
By ensuring this product is disposed of correctly, you will help prevent potential negative consequences for the environment and human health, which could otherwise be caused by inappropriate waste handling of this product. The symbol on the product indicates that this product may not be treated as household waste. Instead it shall be handed over to the applicable collection point for the recycling of electrical and electronic equipment.
For more detailed information about treatment, recovery and recycling of this product, please contact your local city office, your household waste disposal service or the shop where you purchased the product. Disposal must be carried out in accordance with local environmental regulations for waste disposal.
GIAS Service
- To ensure the continued safe and efficient operation of this appliance we recommend that any servicing or repairs are only carried out by an authorised GIAS service engineer.
⚠️ If the appliance is not running properly or breaks down, switch it off and disconnect the plug from the socket. Consult GIAS Service for possible repair.
Electrical Requirements
Tumble dryers are supplied to operate at a voltage of 220-240 V, 50 Hz single phase. Check that the supply circuit is rated to at least 10A.
Electricity can be extremely dangerous.
This appliance must be earthed. The socket outlet and the plug on the appliance must be of the same type. Do not use multiple adapters and/or extension leads.
The plug should be accessible for disconnection after the appliance has been installed.
CE Appliance complies with European Directive 2004/108/EC, 2006/95/EC and subsequent amendments.
You may be charged for a service call if a problem with your machine is caused by incorrect installation.
If the mains cord on this appliance is damaged, it must be replaced by a special cord which is ONLY obtainable from the spares service. It must be installed by a competent person.
Do not plug the machine in and switch it on at the mains until the installation is completed. For your safety, this dryer must be correctly installed. If there is any doubt about installation, call GIAS Service for advice.
Adjusting the Feet
Once the machine is in place the feet should be adjusted to ensure that the machine is level.

natural_image
Illustration of a hand holding a small object with arrows indicating rotation or movement (no text or symbols)VENTILATION
Adequate ventilation must be provided in the room where the tumble dryer is located to prevent gases from appliances burning other fuels, including open fires, being drawn into the room during operation of the tumble dryer.
- Exhaust air must not be discharged into a flue which is used for exhausting fumes from appliances burning gas or other fuels.
- Check regularly that the air flowing through the dryer is not restricted.
- Check the fluff filter after use, and clean, if necessary.
- The inlet and outlets should be kept free from obstructions. To ensure adequate ventilation the space between the bottom of the machine and the floor must not be obstructed. There should be also a gap of at least 12 mm between the machine and any obstructions.
- Prevent items from falling or collecting behind the dryer as these may obstruct the air inlet and outlet.
- NEVER install the dryer up against curtains.

Do not install the product in a low temperature room or in a room where there is a risk of frost occurring. At temperature around freezing point the product may not be able to operate properly: there is a risk of damage if the water is allowed to freeze in the hydraulic circuit (valves, hoses, pumps). For a better product performance the ambient room temperature must be between +2°C and +35°C. Please note that operating in cold condition (between +2 and +15°C) might imply some water condensation and water drops on floor.
PREPARING THE LOAD
Before using the tumble dryer for the first time:
- Please read this instruction book thoroughly.
- Remove all items packed inside drum.
- Wipe the inside of the drum and door with a damp cloth to remove any dust which may have settled in transit.
Clothes Preparation
Make sure that the laundry you are going to dry is suitable for drying in a tumble dryer, as shown by the care symbols on each item.
Check that all fastenings are closed and that pockets are empty. Turn the articles inside out. Place clothes loosely in the drum to make sure that they don't get tangled.
Do Not Tumble Dry:
Woollens, silk, delicate fabrics, nylon stockings, delicate embroidery, fabrics with metallic decorations, garments with PVC or leather trimmings, training shoes, bulky items such as sleeping bags, etc.

IMPORTANT: Do not dry articles which have been treated with a dry cleaning fluid or other clothes (danger of fire or explosion).
During the last 15 minutes the load is always tumbled in cool air.
Energy Saving
Only put into the tumble dryer laundry which has been thoroughly wrung or spin-dried. The drier the laundry the shorter the drying time thus saving electricity.
ALWAYS
- Try to dry the maximum weight of laundry, this will save time and electricity.
- Check that the filter is clean before every drying cycle.
NEVER
- Exceed the maximum weight, this will waste time and electricity.
- Put dripping wet items into the tumble dryer, this may damage the appliance.
- Exceed the maximum weight, this will waste time and electricity. - Put dripping wet items into the tumble dryer, this may damage the appliance.
Maximum Drying Weight
• Cottons Max. 8 kg
• Synthetics Max. 4 kg

Do not overload the drum, large items
when wet can exceed the maximum admissible clothes load (for example: sleeping bags, duvets).
Sort the Load as Follows
- By care symbols
These can be found on the collar or inside seam:

Suitable for tumble drying.

Tumble drying at high temperature.

Tumble drying at low temperature only.

Do not tumble dry.
If the item does not have a care label it must be assumed that it is not suitable for tumble drying.
- By amount and thickness
Whenever the load is bigger than the dryer capacity, separate clothes according to thickness (e.g. towels from thin underwear).
- By type of fabric
Cottons/linen: Towels, cotton jersey, bed and table linen.
Synthetics: Blouses, shirts, overalls, etc. made of polyester or polyamid, as well as for cotton/synthetic mixes.
- By drying level
Sort into: iron dry, cupboard dry, etc. For delicate articles press the Delicates button to select low drying temperature.
Drying Guide
The table shows approximate drying times, depending on the type of fabric and dampness of the clothes.
| FABRIC | HEAT SETTING | HEAVY LOAD | MEDIUM LOAD | LIGHT LOAD |
| COTTON | HIGH | 140-165min | 70-80min | 50-65min |
| SYNTHETICS | LOW | --- | 70-80min | 40-55min |
| ACRYLIC | LOW | --- | 50-65min | 30-40min |
CONTROLS AND INDICATORS

Control Panel and Indicator Lights
Programme Selector – Select the required programme
Delay Start button ⏻ – Allows the user to delay the start of the drying cycle (see details of Operation on page 10)
Start/Pause button ▷III – Press to commence the selected drying programme
Delicates button ☑ – Press to reduce the heat level for delicate items, the indicator above the button will light up. To change the heat setting the programme must be reset
Low Heat – Indicator light ON
High Heat – Indicator light OFF
Filter Care indicator 📋 – lights when the filter needs cleaning
Empty Water indicator 📋 – lights when the water container is full
Progress display
DRY – When the programme is selected the DRY indicator will flash, when the programme starts the DRY indicator will light up.
- Indicator lights when there is a short time left until completion of the programme. At this stage of the drying cycle the machine enters the Cool Down phase.
The length of the Cool Down phase varies between 10 and 15 minutes depending on the programme.
END – Indicator lights when the programme is finished.
SELECTING THE PROGRAMME
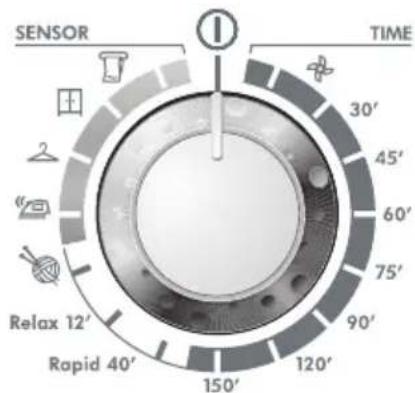
The Sensor Dry machine gives many options for drying the laundry to suit all circumstances.
The table on the next page lists the programmes and the function of each programme.
Note: The sensor may not detect a small load of small articles. For small loads and separate items or pre-dried fabrics with low moisture content, use the timed programmes.
Set the programme between 30 and 75 minutes depending on the load size and dryness required, and select high or low heat depending upon the fabric type.
If the sensor does not detect the item the dryer will only operate for 10 minutes before going into cooldown.
If the load is too large or too wet to tumble dry the dryer will automatically go into cooldown after approximately 3 hours.
SELECTING THE PROGRAMME
| PROGRAMME | DESCRIPTION |
| All Towels [1486] | Select the degree of dryness that you require. This ranges from ☐ for bath towels and bathrobes, through ☐ for items that will be put away without ironing, to the programme that leaves the laundry suitable for ironing. ☑ |
| Extra Dry [1647] | |
| Cupboard Dry [2678] | |
| Iron Dry [3642] | |
| Wool Finish [WOWH] | A gentle programme specially created to get woollens softer after air-drying. This delicate warm air cycle, lasting 12 minutes, can also be used to get woollens 'refreshed' after being stored in the wardrobe. |
| Relax 12 | The Relax programme provides a conditioning and anticrease function. The dryer will heat the load for 9 minutes followed by a 3 minute cool down period and is especially good for garments which may have been left for some time prior to ironing, in a linen basket for example. Garments may also become stiffened when dried outside on a washing line or inside on radiators. This programme relaxes the creases in the fabric making ironing quicker and easier. |
| Rapid 40' | The Rapid 40' programme allows a drying cycle to be completed quickly. This is an ideal programme for having dry, refreshed and ready-to-wear clothes in less than 40'. This special programme constantly monitors the dryness and temperature in the drum thanks to the sensor using, using the exact time and energy you need! The machine finishes the cycle when the cupboard dry level is reached. The stated cycle length could vary according to fabric types, load size and residual moisture in the garments. The maximum load is 2kg and the programme is suitable for all types of fabric where tumble drying is appropriate. |
| 150' | 150' minutes of drying |
| 120' | 120' minutes of drying |
| 90' | 90' minutes of drying |
| 75' | 75' minutes of drying |
| 60' | 60' minutes of drying |
| 45' | 45' minutes of drying |
| 30' | 30' minutes of drying |
| Refresh ☑ | Tumbling the laundry in cool air for 20 minutes |
Opening the Door
natural_image
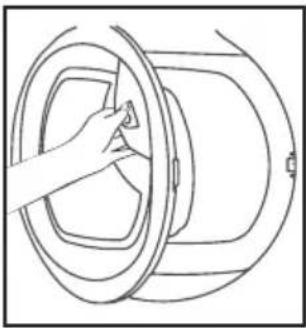
Line drawing of a hand adjusting a circular component with a handle (no text or symbols)Pull on handle to open the door.
To restart the dryer, close the door and press.
WARNING! When the tumble dryer is in use the drum and door may be VERY HOT. Never stop a tumble dryer before the end of the drying cycle unless all items are quickly removed and spread out so that the heat is dissipated.
Filter
IMPORTANT: To maintain the efficiency of the dryer check that the fluff filter is clean before each drying cycle.
-
Pull the filte upwards.
-
Open filter as shown.
-
Gently remove lint using a soft brush or your fingertips.
-
Snap the filter together and push back into place.

natural_image
Line drawing of a hand inserting a card into a car door (no text or symbols)Filter Care Indicator
Lights when the filter needs cleaning.
If the laundry is not drying check that the filter is not clogged.

natural_image
Illustration of two hands holding a folded or folded object, no text or symbols presentDO NOT USE WATER TO CLEAN THE FILTER.
WATER CONTAINER
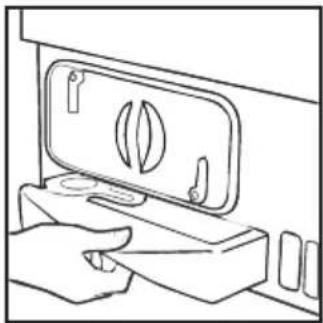
The water removed from the laundry during the drying cycle is collected in a container at the bottom of the dryer. When the container is full the indicator on the control panel will light, and the container MUST be emptied. However, we recommend that the container is emptied after each drying cycle.
NOTE: Very little water will collect during the first few cycles of a new machine as an internal reservoir is filled first.
To Remove the Container
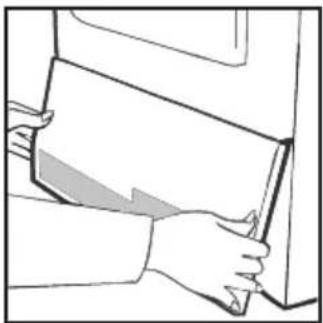
- Gently pull the bottom of the kickplate so that it unclips from the dryer. The top section can then be unhinged allowing the kickplate to be completely removed.

natural_image
Line drawing of a person holding a folder, no text or symbols present- Pull firmly on the handgrip and slide the water container out of the dryer
natural_image
Line drawing of a hand pressing down on a device with a handle (no text or symbols)Support the container with both hands. When full, the water container will weigh about 4kg.
- Open the lid located on the top of the container and empty the water.

natural_image
Line drawing of a hand holding a rectangular object with a circular hole, no text or symbols present- Refit the lid and slide the water container back into position.
PUSH FIRMLY INTO PLACE.
- Refit the kickplate by engaging the hinges at the top and 'snapping' the lower clips into place.

natural_image
Line drawing of a hand holding a ring on a wooden surface with two circular holes (no text or symbols)Important: Always switch off and remove the plug from the electricity supply before cleaning the condenser.
To maintain the efficiency of the dryer regularly check that the condenser is clean.
To Remove the Condenser
-
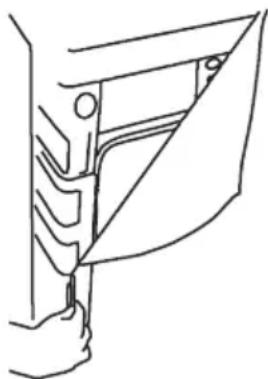
Remove the kickplate
-
Turn the two locking levers anti-clockwise and pull out the condenser.
-
Pull out the condenser unit.
-
Gently remove any dust or fluff with a cloth, then wash the unit by holding it under a running tap turning it so that water flows between the plates, to remove any dust or fluff.
-
Refit the condenser ensuring it is in the correct way (as indicated by the arrow) and pushed firmly into place. Lock the two levers by turning them clockwise.
-
Refit the kickplate..
natural_image
Line drawing of a person holding a folder, no text or symbols present
natural_image
Simple line drawing of a mechanical component with no text or symbols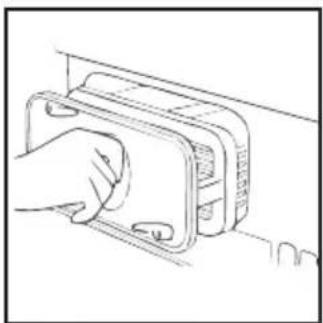
natural_image
Line drawing of a hand inserting a component into a device (no text or symbols)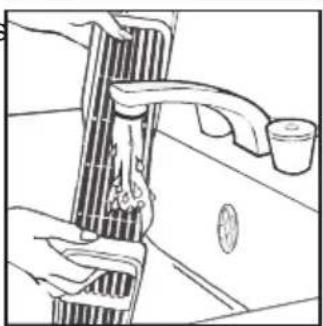
natural_image
Line drawing of a person using a showerhead to clean or wash the shower, with no visible text or symbols.OPERATION
-
Open the door and load the drum with laundry. Ensure that garments do not hinder closure of the door.
-
Gently close the door pushing it slowly until you hear the door 'click' shut.
-
Turn the Programme Selector dial to select the required drying programme (see Programme Guide).
-
If drying synthetics, acrylics or delicate items, press the 📋 button to reduce the heat level. The light next to the push button will light up when the machine is in low heat setting. To deselect in the first few minutes of the programme, press the 📋 button, after this time reset the machine to change the setting.
-
Press the ▷■ button. The dryer will start automatically and the DRY indicator will be continuously lit.
-
If the door is opened during the programme to check the laundry, it is necessary to press ▷III to recommence drying after the door has been closed.
-
When the cycle is nearing completion the machine will enter the cool down phase, the clothes will be tumbled in cool air allowing the load to cool down.
-
When the programme is complete the END indicator will light.
-
Following the completion of the cycle the drum will rotate intermittently to minimize creasing. This will continue until the machine is switched OFF or the door is opened.
Delay Start Function
The Delay Start Function ⏻ allows the user to delay the start of the drying cycle by 3, 6 or 9 hours.
When the function is first selected the display will show a delay of 3 hours, subsequent presses of the button will increase the delay to 6 or 9 hours.
To commence the programme press ▷ and the appliance will complete the drying cycle at the end of this time. The 3, 6 or 9 hour indicator light will flash to indicate that the start delay is in progress.
Cancelling and Resetting the Programme
To cancel a programme press the ▷ III button for 3 seconds. The DRY light will flash to indicate that it has been reset.
CLEANING AND ROUTINE MAINTENANCE
Cleaning the Dryer
- Clean the filter and empty the water container after every drying cycle.
• Regularly clean the condenser. - After each period of use, wipe the inside of the drum and leave the door open for a while to allow circulation of air to dry it.
- Wipe the outside of the machine and the door with a soft cloth.
- DO NOT use abrasive pads or cleaning agents.
- To prevent the door sticking or the build up of fluff, clean the inner door and gasket with a damp cloth after every drying cycle.

WARNING! The Drum, door and load may very hot.
Technical Specifications
| Drum capacity | 115 litres |
| Maximum load | 8 kg |
| Height | 85 cm |
| Width | 60 cm |
| Depth | 60 cm |
| Energy Label Band | B |
Information for Test Laboratory
EN 61121 Programme Programme To Use
| -DRY COTTON | -CUPBOARD DRY |
| -IRON DRY COTTON | -IRON DRY |
| -EASY-CARE TEXTILE | -CUPBOARD DRY + SYNTHETIC |
IMPORTANT Always switch off and remove the plug from the electricity supply before cleaning this appliance.
For electrical data refer to the rating label on the front of the dryer cabinet (with the door open).
TROUBLESHOOTING
What Might be the Cause of...
Defects you can remedy yourself
Before calling GIAS Service for technical advice please run through the following checklist. A charge will be made if the machine is found to be working or has been installed incorrectly or used incorrectly.
If the problem persists after completing the recommended checks, please call GIAS Service, they may be able to assist you over the telephone.
Drying time is too long/clothes are not dry enough...
- Have you selected the correct drying time/programme?
- Were the clothes too wet? Were the clothes thoroughly wrung or spindried?
- Does the filter need cleaning?
• Is the dryer overloaded? - Has the ⑨ option been selected from a previous cycle?
The dryer does not operate...
- Is there a working electricity supply to the dryer? Check using another appliance such as a table lamp.
- Is the plug properly connected to the mains supply?
• Is there a power failure? - Has the fuse blown?
- Is the door fully closed?
- Is the dryer switched on, both at the mains supply and at the machine?
- Has the drying time or the programme been selected?
- Has the machine been switched on again after opening the door?
The dryer is noisy...
- Switch off the dryer and contact GIAS Service for advice.
The Indicator is on...
- Does the filter need cleaning?
The 📋 Indicator is on...
- Does the water container need emptying?
CUSTOMER SERVICE
Should there still be a problem with your dryer after completing all the recommended checks, please call GIAS Service for advice.
They may be able to assist you over the telephone or arrange for a suitable appointment for an engineer to call under the terms of your guarantee. However, a charge may be made if any of the following applies to your machine:
• Is found to be in working order.
- Has not been installed in accordance with the installation instructions.
- Has been used incorrectly.
Spares
Always use genuine spares, available direct from GIAS Service.
GIAS Service
For service and repairs call your local GIAS Service engineer.
The manufacturer declines all responsibility in the event of any printing mistakes in this booklet. The manufacturer also reserves the right to make appropriate modifications to its products without changing the essential characteristics.
Introduktion
Leveringsoplysninger 14
natural_image
Line drawing of a hand holding a door handle, showing structural details (no text or symbols)natural_image
Illustration of a hand holding a small object with directional arrows indicating rotation or movement (no text or symbols)VENTILATION
natural_image
Line drawing of a hand adjusting a circular component with a handle (no text or symbols)natural_image
Illustration of hands holding a folded or folded object with visible structural details (no text or symbols)BRUG IKKE VAND TIL RENG∅RING AF FILTERET
VANDBEHOLDER
natural_image
Line drawing of a person holding a folder, no text or symbols present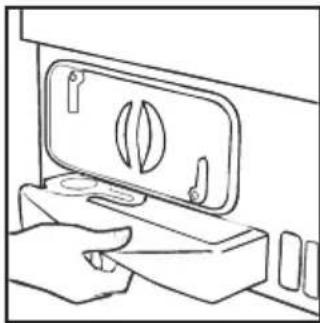
natural_image
Line drawing of a hand pressing down on a door panel with a leaf symbol (no text or labels)
natural_image
Line drawing of a hand holding a device with a scroll wheel (no text or symbols)
natural_image
Simple line drawing of a hand holding a ring above a wooden surface with two circular holes (no text or symbols)natural_image
Line drawing of a person holding a rectangular object, no text or symbols present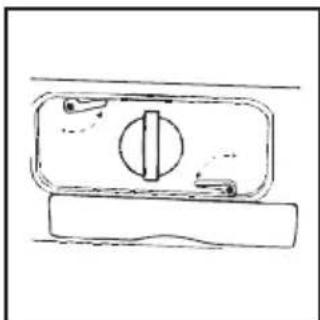
natural_image
Simple line drawing of a mechanical component with a central circular feature and two attached parts (no text or symbols)
natural_image
Line drawing of a hand inserting a card into a device (no text or symbols)
natural_image
Line drawing of a person cleaning a car with a pipe and cup (no text or symbols)BETJENING
Indikator for filteredlikehold 31
Vannbeholder 31
natural_image
Line drawing of a hand holding a door panel with a handle, showing structural details (no text or symbols)SIKKERHETSPÅMINNELSER
Bruk
SIKKERHETSPÅMINNELSER
Installasjon
natural_image
Line drawing of a hand adjusting a circular component with a handle (no text or symbols)natural_image
Line drawing of a hand holding a rectangular object inside a car (no text or symbols)Indikator For Filtervedlikehold
natural_image
Illustration of two hands holding a folded or folded object with internal components (no text or symbols)IKKE BRUK VANN TIL Å GJ∅RE FILTERET RENT
VANNBEHOLDER
natural_image
Line drawing of a person holding a folder or document, no text or symbols present
natural_image
Line drawing of a hand pressing down on a door panel with a leaf symbol (no text or labels)
natural_image
Line drawing of a hand holding a tablet device (no text or symbols)
natural_image
Simple line drawing of a hand holding a ring above a wooden surface with a small circular mark (no text or symbols)natural_image
Illustration of hands holding a rectangular object with a shaded section, no text or symbols present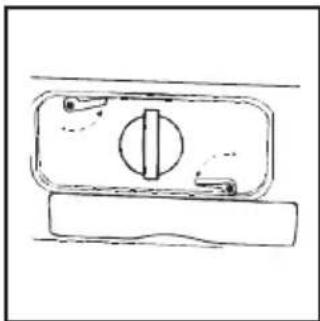
natural_image
Simple line drawing of a mechanical component with no text or symbols
natural_image
Line drawing of a hand inserting a component into a device (no text or symbols)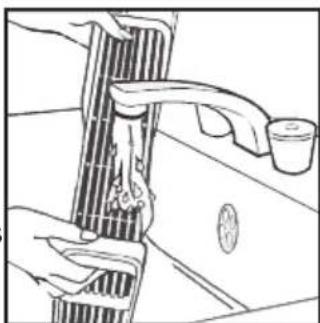
natural_image
Line drawing of a person using a showerhead to clean or wash the shower, with no visible text or symbols.DRIFT
UPPACKNING AV PRODUKTEN
natural_image
Line drawing of a hand holding a mechanical component, no text or symbols presentnatural_image
Hand holding a small object with directional arrows indicating rotation or movement (no text or symbols)VENTILATION
natural_image
Line drawing of a hand adjusting a circular component with a handle (no text or symbols)natural_image
Line drawing of a hand opening a car door with a seat cover (no text or symbols)Filterindikator
natural_image
Illustration of two hands assembling or folding a mechanical component (no text or symbols visible)RENGÖR ALDRIG FILTRET MED VATTEN
VATTENBEHÅLLARE
natural_image
Illustration of a person holding a folder, no text or symbols visible
natural_image
Line drawing of a hand pressing down on a wall-mounted device with a leaf-shaped lid (no text or symbols)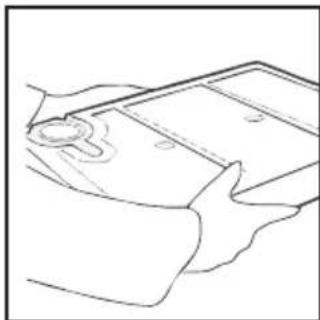
natural_image
Line drawing of a hand holding a rectangular object with a circular mark on the surface (no text or symbols)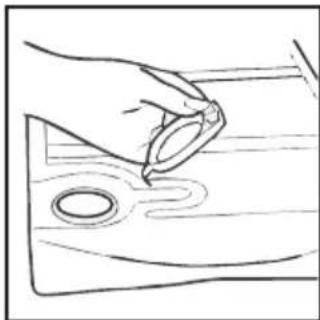
natural_image
Simple line drawing of a hand holding a ring above a wooden surface with two circular holes (no text or symbols)natural_image
Line drawing of a person holding a folder or document (no text or symbols visible)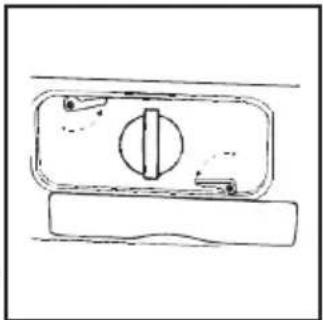
natural_image
Simple line drawing of a mechanical switch or lever mechanism (no text or symbols)
natural_image
Line drawing of a hand inserting a card into a device (no text or symbols)
natural_image
Line drawing of a person using a handheld device to clean or wash the air (no text or symbols visible)FUNKTION
natural_image
Line drawing of a hand holding a mechanical component, showing internal structure and alignment (no text or symbols)natural_image
Illustration of a hand holding a small object with arrows indicating motion or direction (no text or symbols)POISTOTUULETUS
natural_image
Line drawing of a hand adjusting a circular component with a handle (no text or symbols)natural_image
Line drawing of a hand inserting a card into a car door (no text or symbols)natural_image
Line drawing of two hands holding a folded or folded object, no text or symbols present
ÄLÄ PUHDISTA SUODATINTA VEDELLÄ
VESISÄILIÖ
natural_image
Line drawing of a person holding a folder with a pen, no text or symbols presentnatural_image
Line drawing of a hand inserting a device into a box with a leaf symbol (no text or labels)natural_image
Line drawing of a hand holding a rectangular object with a circular mark on the left (no text or symbols)natural_image
Hand holding a ring on a wooden surface with two circular holes, no text or symbols presentnatural_image
Line drawing of a person holding a rectangular object, no text or symbols present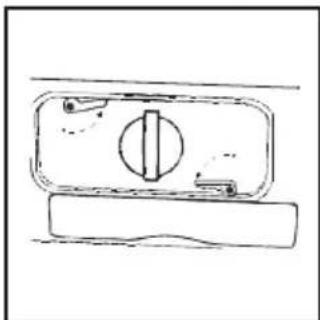
natural_image
Simple line drawing of a mechanical component with a central circular feature and two rectangular bases (no text or symbols)
natural_image
Line drawing of a hand inserting a component into a device (no text or symbols)
natural_image
Line drawing of a person using a showerhead to clean water, with no text or symbols present.KONEEN KÄYTTÖ
- INSTRUCTION BOOK VTC 881NB
- Condenser Tumble Dryer
- INTRODUCTION
- Delivery Information
- UNPACKING THE PRODUCT
- SAFETY REMINDERS
- Use
- Installation
- The Laundry
- Environmental Issues
- European Directive 2002/96/EC
- GIAS Service
- Electrical Requirements
- Electricity can be extremely dangerous.
- The plug should be accessible for disconnection after the appliance has been installed.
- Adjusting the Feet
- VENTILATION
- PREPARING THE LOAD
- Clothes Preparation
- Do Not Tumble Dry:
- Energy Saving
- ALWAYS
- NEVER
- Maximum Drying Weight
- Sort the Load as Follows
- - By care symbols
- - By amount and thickness
- - By type of fabric
- - By drying level
- Drying Guide
- CONTROLS AND INDICATORS
- Control Panel and Indicator Lights
- Progress display
- SELECTING THE PROGRAMME
- Opening the Door
- Filter
- Filter Care Indicator
- WATER CONTAINER
- To Remove the Container
- PUSH FIRMLY INTO PLACE.
- To Remove the Condenser
- OPERATION
- Delay Start Function
- Cancelling and Resetting the Programme
- CLEANING AND ROUTINE MAINTENANCE
- Cleaning the Dryer
- Information for Test Laboratory
- TROUBLESHOOTING
- What Might be the Cause of...
- Defects you can remedy yourself
- Drying time is too long/clothes are not dry enough...
- The dryer does not operate...
- The dryer is noisy...
- The Indicator is on...
- The 📋 Indicator is on...
- CUSTOMER SERVICE
- Spares
- Introduktion
- VANDBEHOLDER
- BETJENING
- SIKKERHETSPÅMINNELSER
- Bruk
- Installasjon
- Indikator For Filtervedlikehold
- VANNBEHOLDER
- DRIFT
- UPPACKNING AV PRODUKTEN
- Filterindikator
- VATTENBEHÅLLARE
- FUNKTION
- POISTOTUULETUS
- VESISÄILIÖ
- KONEEN KÄYTTÖ
Brand : HOOVER
Model : VTC 881 NB
Category : Tumble dryer