
MSZ-PAH12VA-H1 - Air-conditioner MITSUBISHI - Free user manual and instructions
Find the device manual for free MSZ-PAH12VA-H1 MITSUBISHI in PDF.


| Product Type | Split-type air conditioner (indoor + outdoor unit) |
| Model | MSZ-PAH12VA-H1 |
| Brand | Mitsubishi Electric |
| Refrigerant | R410A |
| Pipe Sizes | Liquid: 6.35 mm (0.8 mm thickness); Gas: 9.52 mm (0.8 mm thickness) |
| Power Supply | 220–240 V, 50 Hz, single phase, dedicated circuit required |
| Power Cord Length (Left/Right) | 0.75 m / 1.5 m |
| Connection Cable | 4-core rubber wire (1.5 mm²), YZW type |
| Operation Modes | Cooling, Heating, Drying, Fan only, I-warm, Quick Heating, Cool Feeling, Sleep, Powerful |
| Temperature Control | I FEEL (Human Sense MOVE EYE) with floor and wall temperature detection; adjustable set point (16–31 °C) |
| Humidity Control | Adjustable 40%–70% in Cooling and Drying modes; Reheat Drying function |
| Airflow Adjustment | Auto, Low, Medium, High, Long distance; horizontal and vertical vanes (4-piece horizontal vane with independent motors) |
| Timer Functions | Simple ON/OFF timer (0.5–12 h), Time Set timer (10‑minute increments, combined ON/OFF) |
| Remote Controller | LCD display, signal range ~7 m, battery type: AAA (LR03) × 2, life ~1 year |
| Emergency Operation | Switch on indoor unit for cooling/heating at fixed settings (24 °C, medium fan) if remote fails |
| Special Features | Human Sense MOVE EYE detection, Indirection/Direct flow, Circulation mode, Absence detection (energy saving/auto off), Auto restart after power failure |
| Indoor Unit Display | I FEEL temperature display (8–37 °C), operation indicator (blue/orange/green for cooling/heating/drying), area display for human detection |
| Maintenance – Filters | Washable air strainers (2 each side); clean with vacuum or mild detergent, dry in shade; do not use hot water >50 °C |
| Maintenance – Other Parts | Panel: soft cloth; heat exchanger: vacuum with brush; vanes: soft cloth; avoid water, solvents, hard brushes |
| Safety Features | Earth leakage circuit breaker required; dedicated earth wire; auto shutoff if horizontal vane safety stoppers not installed; three-minute restart delay for compressor protection |
| Installation | Professional installation mandatory; refrigerant pipes must be vacuumed; maximum pipe length: refer to manual; wall hole diameter 65 mm |
| Operating Temperature Range | Cooling: ~21–43 °C; Drying: ~1–43 °C; Heating: below 24 °C |
| Warranty | Standard 3‑year guarantee (subject to professional installation and valid warranty card) |
| Repairability | User‑replaceable: filters, batteries; other repairs must be performed by authorized service personnel |
Frequently Asked Questions - MSZ-PAH12VA-H1 MITSUBISHI
User questions about MSZ-PAH12VA-H1 MITSUBISHI
0 question about this device. Answer the ones you know or ask your own.
Ask a new question about this device
Download the instructions for your Air-conditioner in PDF format for free! Find your manual MSZ-PAH12VA-H1 - MITSUBISHI and take your electronic device back in hand. On this page are published all the documents necessary for the use of your device. MSZ-PAH12VA-H1 by MITSUBISHI.
USER MANUAL MSZ-PAH12VA-H1 MITSUBISHI
natural_image
Illustration of hands cleaning a large air conditioner panel with a scroll inside (no text or symbols)用手扣住打開,翻開到支撐位
natural_image
Diagram of a car air conditioner unit with a hand inserting a cable into the door (no text or symbols visible)natural_image
Two identical grid-patterned panels with no visible text, numbers, or symbols.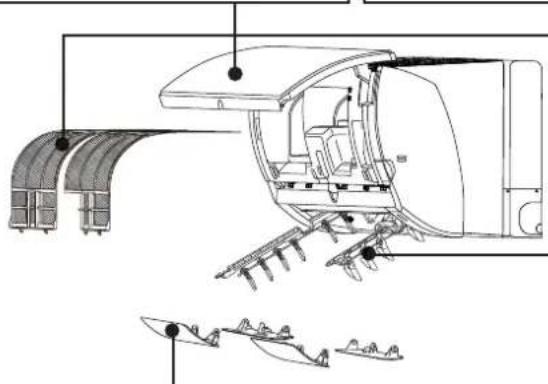
natural_image
Technical line drawing of a mechanical assembly with no visible text or symbolsnatural_image
Line drawing of a hand inserting a cable into a wall-mounted air conditioner (no text or symbols)natural_image
Illustration of hands inserting a plug into a wall-mounted air conditioner (no text or symbols)6
natural_image
Illustration of hands pulling a car with spring (no text or symbols)部品的清潔維護(清潔方法)
natural_image
Illustration of hands using a tool to press or mark a textured surface (no text or symbols)※按住過濾網,不要使之變形。
面板(若發現污垢)
請使用軟布擦拭。
注意
natural_image
Technical line drawing of a mechanical assembly with no visible text or symbols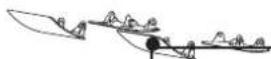
熱交換器(如發現污垢時)
natural_image
Diagram of a hand pressing a button on a device panel (no text or symbols visible)先拆下空氣過濾網。
用吸塵器(帶刷)吸掉灰塵
注意
natural_image
Line drawing of a hand using a tool to clean or repair a component inside a mechanical device (no text or symbols)注意
natural_image
Diagram of a car air conditioner unit with a hand inserting a fan into the chamber (no text or labels visible)〈空氣過濾網位置〉
左侧 右側
表面
表面
natural_image
Line drawing of hands installing or adjusting a wall-mounted air conditioner unit (no text or symbols)- 按3個地方
natural_image
Diagram of a car air conditioner panel with directional arrows indicating airflow or movement (no text or symbols)
如面板没有裝好,運轉時會產生異常音。
左右導風板
natural_image
Illustration of hands adjusting a wall-mounted air conditioner with arrows indicating motion (no text or symbols)沿導風板的上側插入
natural_image
Hand holding a tool with directional arrows indicating movement or force (no text or symbols)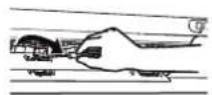
安装在指定位置上。
安裝時應按先下後上的順序。
natural_image
Illustration of a white air conditioner unit with a grid-patterned grille and side-mounted cooling unit (no text or symbols)natural_image
Illustration of two adults handling a large box near a child (no text or symbols)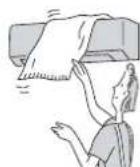
員聯系
natural_image
Line drawing of a cylindrical air conditioner unit with two handles, no text or symbols present5-3 補充製冷劑
Opearating And Installing Instructions
R410A
Product names
MSZ-AH09VA-H1
MSZ-AH12VA-H1
MSZ-PAH09VA-H1
MSZ-PAH12VA-H1
Contents
Safety precautions 2
Part name 4
Preparation before operation 6
Human Sense MOVE EYE Control Operation 7
Cooling·Heating Operation (Control the | FEEL temperature) 8
Drying Operation 9
Airflow Velocity-Direction Adjustment 10
I-warm Mode 11
Quick Heating Mode 12
Cool Feeling Operation 12
Sleep Mode 13
Powerful Mode 13
Simple Timer Operation 14
Time Set Timer 15
Menu switchover (I FEEL·Absence detection(to save energy)) ..... 16
Switch the indicator of the indoor unit 18
Switch the operation sound 18
Part maintenance 19
Cleaning the parts (Cleaning methods) 20
Install the parts 21
Before you call for the maintenance personal, please check the
following contents one more time 22
Is it a malfunction? 23
Instructions for users 27
Removal · Inspection 29
Safety precautions for installation 29
Installation instructions 32
Please don't connect the power supply of air conditioners to other generating and supply electric equipment.
If connected, air conditioners may be damaged.
⚠ Warning
Incorrect handling could cause serious hazard, such as death, serious injury, property loss, etc., with a high probability.
Caution
Incorrect handling could make the conditioners not working normally or causing damage.
After installation, installers should take care to attach a barcode according to settlement bill and warranty card.
Thank you very much for purchasing this Mitsubishi Electric's room air conditioner.
- To use this unit correctly and safely, be sure to read this instruction manual before use. Keep this manual carefully for later reference.
- Be sure to receive a guarantee card from your dealer and check that the purchased data and shop name,etc.are entered correctly.
- This air conditioner should not be installed by the customer(Safety and performance functions cannot be assured due to customer's installation. Our company is not responsible for the resulting safety problem. Conditioners installed by customer are not covered in the range of 3-R guarantee.)
For the sake of your own and others safety and prevention of property loss, be sure to follow the[safety precautions].
| Warning | Incorrect installation may cause great loss such as severe injury and even death. |
| Caution | Incorrect installation may cause injury or loss of houses, property and etc. |
For installation
Warning
Don't install the air conditioner by yourself.
Incorrect installation may cause fire, electric shock, injury due to the falling unit or water leakage. Please contact your dealer or the after-sales center of our company. Please contact dealer or the after-sales center
Don't install the unit where flammable and corrosive gas could leak.
If gas leaks and collects around the unit, it may cause explosion or damage the unit.
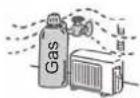

Installation not permitted
Install an electricity leakage circuit breaker.
Without such a circuit breaker, there may be danger of electric shock.

Install an electricity leakage circuit breaker
Be sure to use the power supply socket dedicated to the air conditioner.
If dedicated power supply sockets are not used, heat and fire may occur.

Dedicated power supply sockets
Earth the unit.
The air conditioner socket shall have a dedicated earth wire which can't be connected to a gas pipe, water pipe, lightning rod or the earth of a telephone. If the earth wire is not available or the earthing is incorrect, it may cause electric shock. Before use, be sure to confirm whether there is an earth wire or whether it is connected as required.
Don't use refrigerant other than R410A.
Or it may cause serious accidents such as failure and crack.

Be earthed

Prohibited
Caution
The drain must ensure smooth drainage.
If the drain doesn't work well, water may drop from the indoor and outdoor unit. This may wet and damage the furniture.
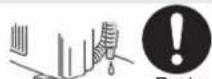
For unit relocation · repair
Warning
Don't repair or remove the unit by yourself.
If this is done incorrectly, it may cause fire, electric shock, or injury from the unit falling, water leakage, etc. Contact your dealer or the after-sales service center of our company.
If the power supply cord is damaged, it must be replaced by the manufacturer or its service agent or similar professional personnel to avoid hazard.

Please contact your dealer
If the air conditioner can't cool down or warm the air up, one of the major causes is lack of refrigerant. In such a case, contact the dealer.
If refrigerant needs adding or repair is needed, please confirm with the after-sales service persons.
The refrigerant used in the air conditioner is safe. Normally, the refrigerant will not escape from the air conditioner. However, if it does, detrimental gas will be produced when the leaked refrigerant makes contact with the warm air blower, heating radiators, gas stove and alike. Please

Please confirm with the after-sales persons
Meanings of symbols used in this manual:
| Forbidden to do. | Be sure to follow the instructions. | ||
| Be sure not to touch with wet hands. | Must be gronuged. | ||
| Be sure not to use water. | Be sure to disconnect the power supply plug |
Shut down the air conditioner and contact your dealer or the after-sales center of our company, when abnormality or bad conditions occur
For operation
Warning
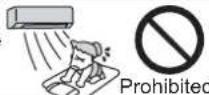
Don't expose your skin directly to cool air for a long time.
This could damage your health.
Don't insert your finger or a stick,etc. into the air inlet,drain or outlet. The installation height for the indoor unit shall ensure the fan is more than 2.3m above the floor.
The rotating fan at a high speed, which may cause personal injury, is used in this product. Take care of the children and don't allow them to play with the air conditioner.
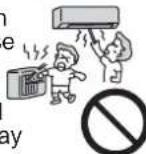
Prohibited
Don't damage or process the power supply cord.
Do not put heavy object on the power supply cord and do not damage or process the cord. The cord may be damaged and this may cause fire or electric shock.
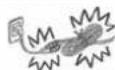

Prohibited
Don't disconnect the power supply plug during operation.
This may produce spark and cause fire.
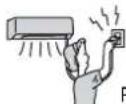

Prohibited
When the power supply plug is inserted, you shall not only remove dust from the plug but also confirm whether there is dust, block or abnormality in the socket and ensure the plug is fully inserted in the socket.
Or it may cause accidents such as fire or electric shock.

Remove the dust
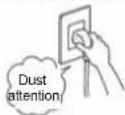

Warning
Don't use intermediate connection of the power supply cord or the extension cord and do not use multi-way sockets.
Fire or electric shock may be resulted from poor contact, poor insulation and exceeding the
permissible current.
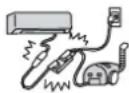

Prohibited
When an abnormality (burning smell, etc.) occurs, stop the air conditioner and disconnect the power supply switches.
If the unit continues to be operated in an abnormal condition, it may cause fire, trouble, etc. In this case,
Contact your dealer or the technical service center.

Pull out the
power supply plug

Caution
Don't use the air conditioner for other applications.
The air conditioner is not used to preserve precise apparatus, food, animals and plants and artwork due to probability of lowering their quality.

Prohibited
Don't operate a switch by a wet hand.
Risk of electric shock.

No wet hand
When using the air conditioner together with a combustion apparatus, you shall ventilate the room frequently.
Insufficient oxygen may result.
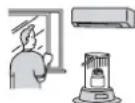

Ventilate
Don't put a combustion apparatus in a place directly facing the airflow outlet.
Incomplete combustion for combustion apparatus may result.
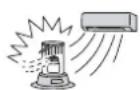

Prohibited

Caution
Don't pull the power supply cord, when the plug is pulled out.
The core wire of the power supply cord may be broken and this may cause
accidents such as fire or electric shock.
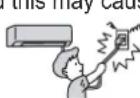

Prohibited
The core wire of the power supply cord may be broken and this may cause accidents such as fire or electric shock.
The unit may fall and this may cause injury.

Prohibited
Don't clean the air conditioner with water.
Water may enter the unit and degrade the insulation. This may cause electric shock.
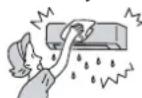

No installation
Don't put a pet or houseplant where it will be exposed to direct airflow.
This could injure the pet or plant.
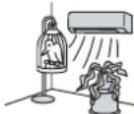

Prohibited
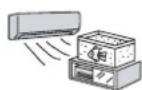
Don't put other electric appliance, furniture and etc. below the indoor and outdoor units.
Water drops may cause pollution and failure of equipment.


No installation
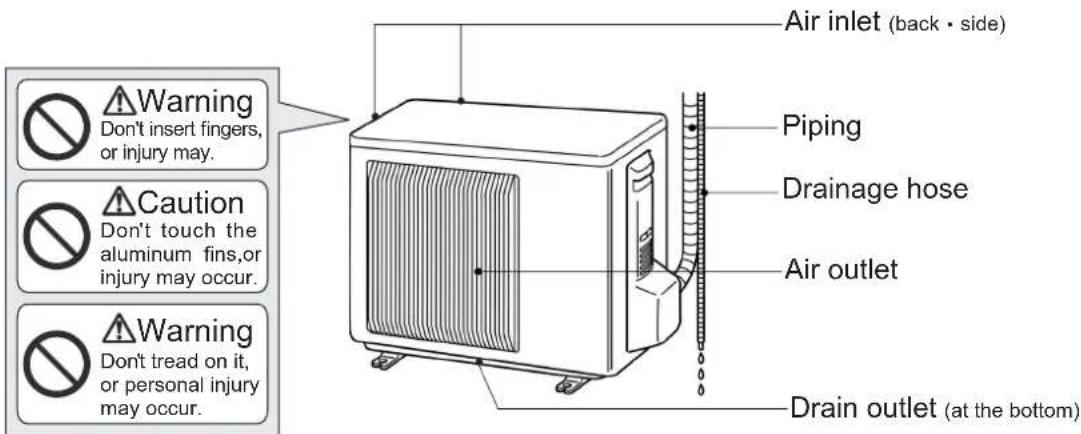
Don't touch the air inlets and aluminum fins of the indoor and outdoor units.
This may cause personal injury.
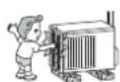
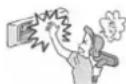

Prohibited
Don't step or put anything on the outdoor unit.
This may cause an injury, etc. if you or something falls down.


Prohibited
Don't step onto an unstable bench when servicing the unit,etc.
You may fall down and get injured.
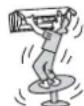

Prohibited
Don't use insecticide, disinfectant or flammable spray.
This may cause fire or deformation.
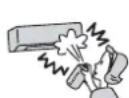

Prohibited
When lightning attacks, pull out the power supply plug.
Lightning strike may cause trouble to the unit.

Pull out the power supply plug
When the unit is to be cleaned, switch it off and pull out the power supply plug.
Since the fan rot during operation
this may cause injury.
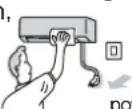

√ Pull out the power supply plug
When the unit is not going to be used for a long time, pull out the power supply plug.
Otherwise, dirt may collect and this may cause fire and accidents.

Pull out the power supply plug
Don't operate the unit for a long time in high humidity, e.g. leaving the door or window open.
In the cooling mode, if the unit is operated in a room with high humidity (80% or more) for a long time, water condensed in the air conditioner may drop and wet or damage furniture, etc.

No running
Don't charge or disassemble the batteries and do not throw them into fire.
Don't charge or disassemble the batteries and do not throw them into fire.

Prohibited
Don't charge or disassemble the batteries and do not throw them into fire.
Using an old battery together with a new one may result in heat generation, leakage or explosion.


Same type
If the air conditioner has been used for many years, please maintain or inspect the unit in time.
If dust or foreign material collects on the indoor unit, bad smell will be generated and the drain pipe will be blocked, which may cause leakage of water. Professional knowledge and skill are needed for the
unit inspection, so in this case, contact your dealer or the after-sales service center of our company. Ins

Inspection and maintenance
Indoor unit
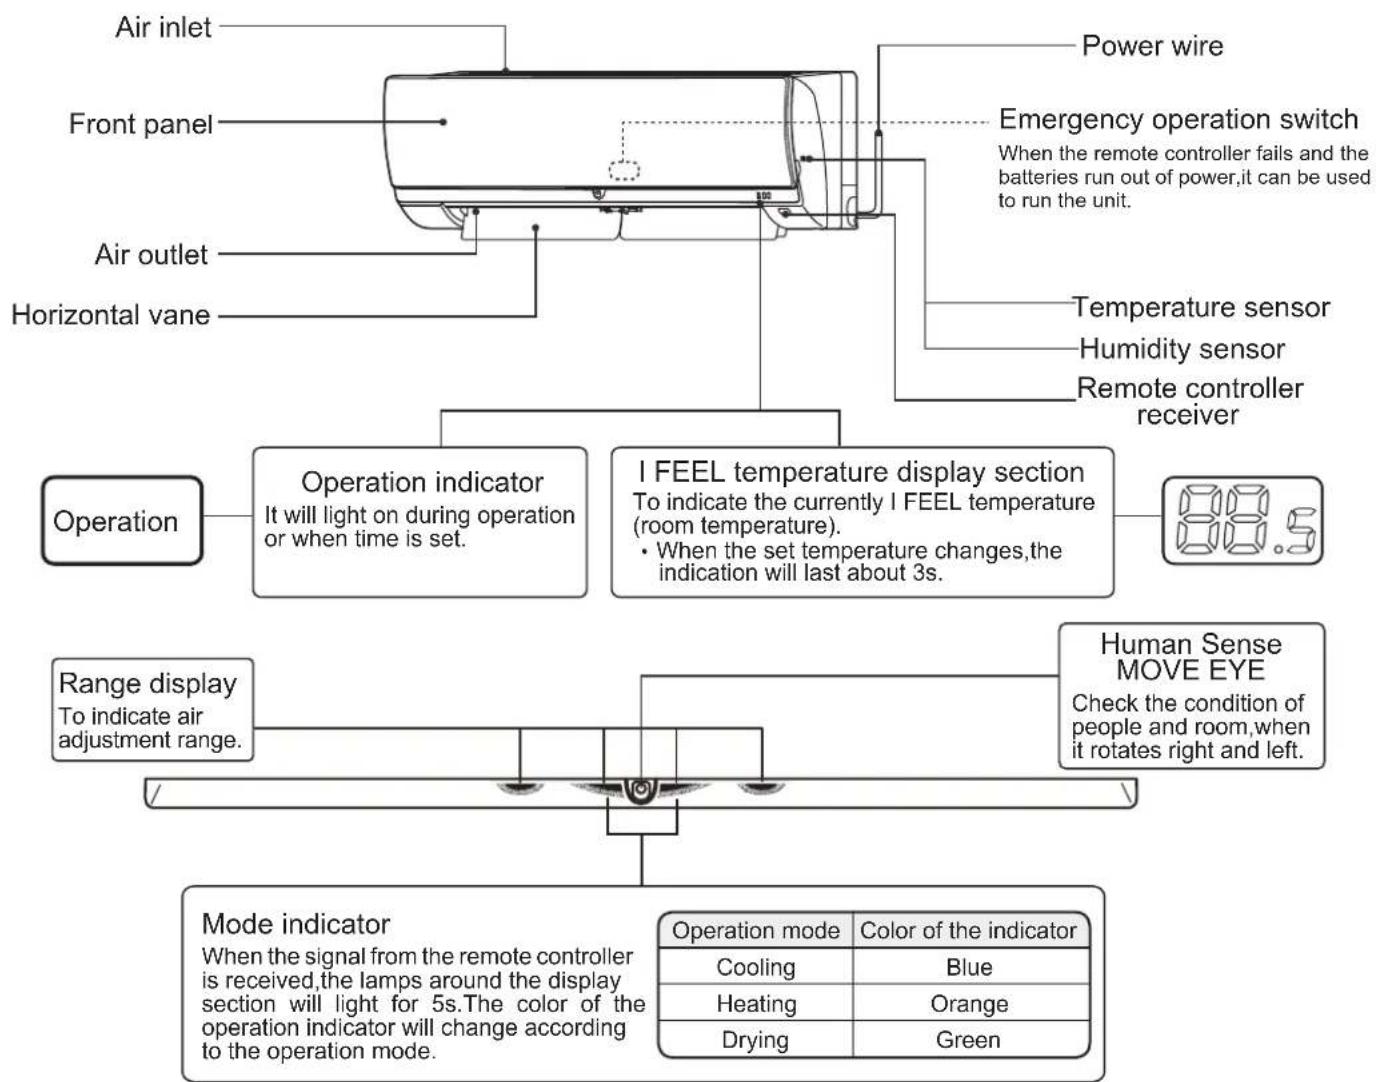
flowchart
graph TD
    A["Air inlet"] --> B["Front panel"]
    B --> C["Air outlet"]
    C --> D["Horizontal vane"]
    B --> E["Operation indicator"]
    E --> F["I FEEL temperature display section"]
    F --> G["Range display"]
    G --> H["Operation mode"]
    H --> I["Color of the indicator"]
    I --> J["Cooling"]
    I --> K["Blue"]
    I --> L["Heating"]
    I --> M["Orange"]
    I --> N["Drying"]
    I --> O["Green"]
    P["Power wire"] --> Q["Emergency operation switch"]
    Q --> R["When the remote controller fails and the batteries run out of power, it can be used to run the unit."]
    S["Temperature sensor"] --> T["Remote controller receiver"]
    U["Humidity sensor"] --> T
    V["Operation indicator"] --> W["It will light on during operation or when time is set."]
    X["I FEEL temperature display section"] --> Y["To indicate the currently I FEEL temperature (room temperature)."]
    Y --> Z["When the set temperature changes, the indication will last about 3s."]
    AA["Operation mode"] --> AB["Color of the indicator"]
Outdoor unit
Remote Controller
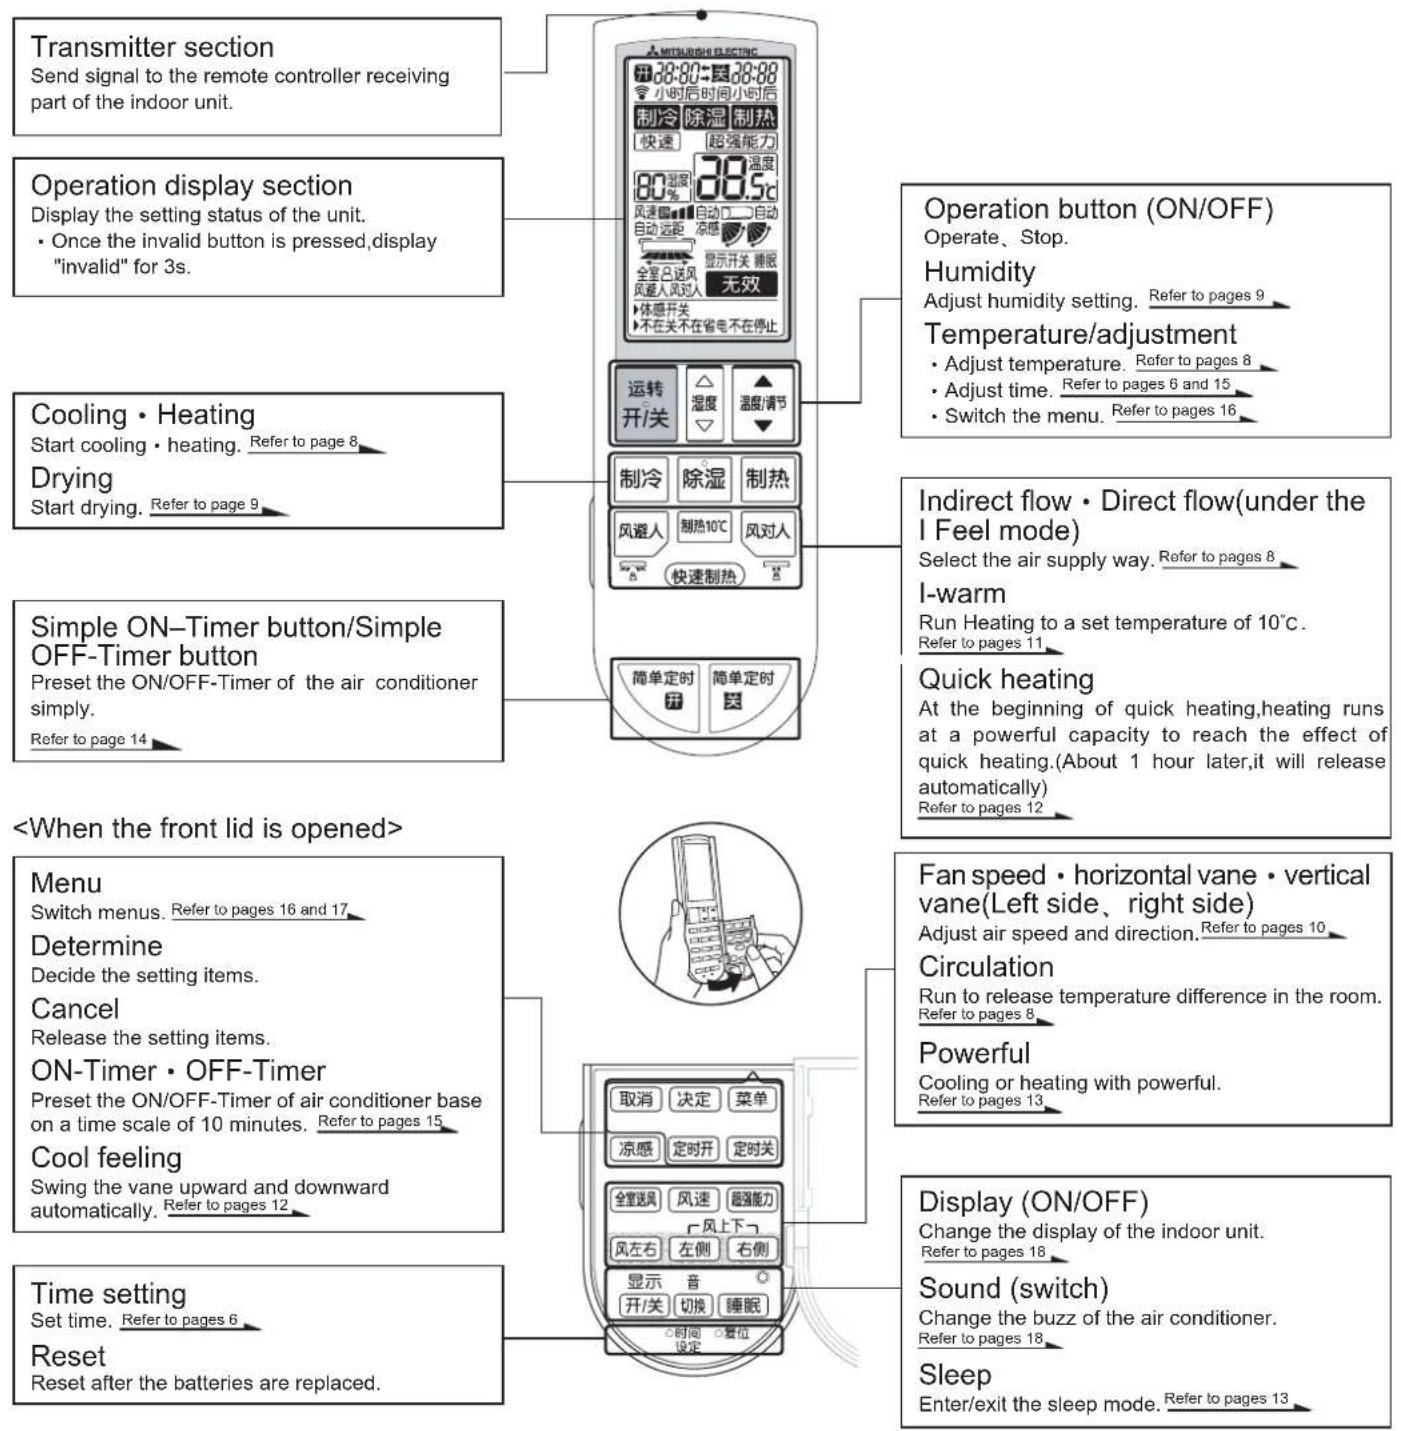
Preparation Before Operation
Please contact your dealer to install the air conditioner.
■ Select mounting location(please do it before installing the batteries)
According to the actual mounting location of the indoor unit, set the location to mount the remote controller accordingly.
| Left | Center | Right | |
| Calculate the mounting locationPlease confirm the mounting location of the indoor unit in the room. | Installed at the left side (The distance is not more than 50cm) | Installed in the center | Installed at the right side (within a distance of 50cm as required) |
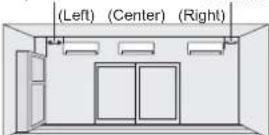 | |||
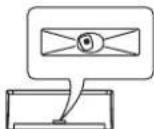
| Remote controller settingRemove the back lid of the controller and set it based on the mounting location of the indoor unit. | 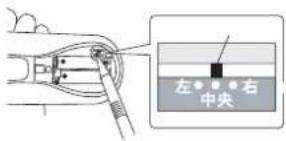 | ||
| Display on the remote controllerChanges are displayed in the form of menus. | 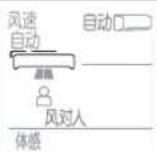 | 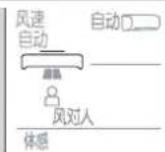 | 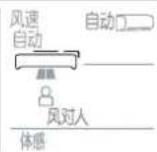 |
- If the mounting location is selected incorrectly, it will cause poor cooling or heating effect.
- When the air conditioner is mounted at the left or right side and stops running, the Human Sense MOVE EYE will turn to the center of the room.
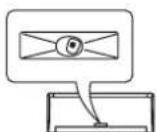
L
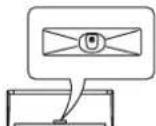
Center Right
How to use the remote controller
Send signal to the signal receiving section of the remote controller of the indoor unit.
● The range that the signal can reach is about 7m when the remote controller is pointed at the front of the indoor unit.
- Be sure not to place any articles which will block the signal transfer between the remote controller and the indoor unit.
● Be sure not to place the remote controller at places directly exposed to sunlight or near stoves.
● No signal, no display and dim display (refer to page 27).
- When the remote controller needs hanging on the wall, pull out the installation hook from the back of the remote controller and hang it on the wall.
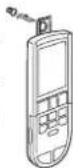
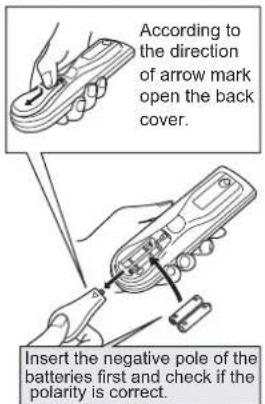
- If the batteries of the remote controller almost run out, the indoor unit will not respond to the remote control signal and the display will become dim. At this time, please replace them with 2 new no.7 alkaline batteries (LR03) (whose life span is about 1 year).
● Be sure not to use batteries of different types or mix the new one with the old one. - Be sure not use rechargeable batteries or manganese batteries. This may cause malfunction.
- Be sure not to place them at the place where kids can reach, to avoid the risk of eating by mistake.
How to set time
1 Remove the back lid of the remote controller and insert the batteries.
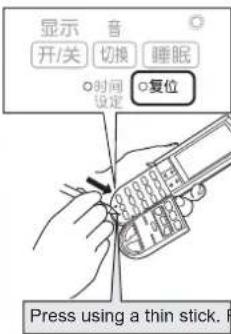
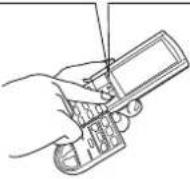
2 Open the front lid and press the 复位 button.
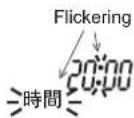
4 Press the button to adjust the time. The 24-hour system is used.
5 Press the button. 决定
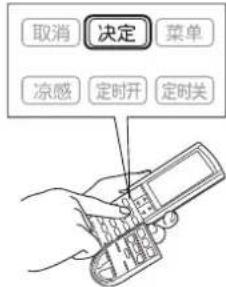
● After the time is set, the button 决定 must be pressed. When the flickering of the time setting content changes to be light on, the setting is finished.
- If the time fails to be set within 30s, the time setting function will be released.
● Press the 复位 button and each function setting will restore to the ex-work setting.
Human Sense MOVE EYE Control Operation
Human Sense MOVE EYE can detect the temperature of floor and wall and location and activity of persons and control the actually I FEEL temperature by persons, controlling air temperature by taking people as the center.
| The function I FEEL is set to「On」 | ||
| Direct flow • Indirect flow mode | Circulation mode | |
| Measure the floor temperatureHuman Sense MOVE EYE can avoid overheating or subcooling through measuring the floor temperature and room temperature at the same time.Each time of running,the Human Sense MOVE EYE will detect the changes of the room temperature and activity of people and correctly memorize the shape of the room. | Detection of the activity area of peopleOnly adjust the air at places where there are people and control the room temperature based on the activity of the people.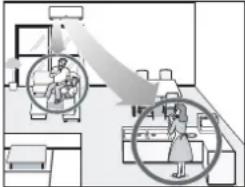 | Control of the memory about people's living areaMemorize the area where people always stay as the living area.Set the I FEEL function to "on" and begin to keep a memory of the living area.Select to run the air conditioner with Circulation to realize the operation with a uniform temperature in the living area.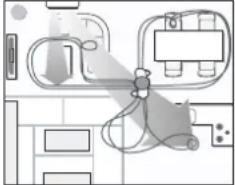 |
The detection range of Human Sense MOVE EYE
The Human Sense MOVE EYE can detect temperature in a scope covered in a wide angle of 150^ , except the following range.
- The wall where the air conditioner is mounted
• The place right below the air conditioner - Places where there is block (furniture,etc.) between the air conditioner
In the following cases, Human Sense MOVE EYE can't correctly detect people, windows and doors.
- In the mid summer when the air conditioner just starts, the temperature of the floor and wall is high
- When you are covered in quilts or wear heavy clothes without skin exposed
- When there are objects whose temperature changes greatly in short time
Display of the area display section
When the air conditioner runs with Indirect flow • Direct flow • Circulation, display the areas where the air conditioner is controlling the air.
When the air conditioner runs with Direct flow and Indirect flow, display the area where there are people currently. When the air conditioner runs with Circulation: display the memorized living area.
- Set Indirect flow • Direct flow function. From the start of operation till when the place where there are people is detected, the indicator is on all the time.
- In the following case, the area display section will be of no display.
- When the airflow direction is set to what you want
- In the situation of 「Circulation」, press the button (全室送风) one more time - Based on the different indoor unit mounting locations set by the remote controller, when there are people right in front of the
indoor unit, the places which light on the indicator are also different.
Mounted in the leftMounted in the center Mounted at the right
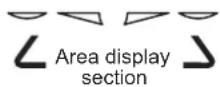
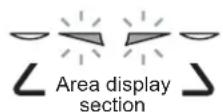
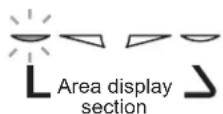
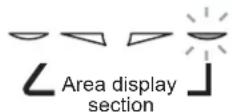

- When the air conditioner is of the initial settings in the factory, the 「I FEEL」 function is set to 「On」.
Cooling·Heating Operation(Control The I FEEL Temperature)
The I FEEL temperature control is activated through Human Sense MOVE EYE which not only can detect the room temperature, but also the floor temperature, location and activity of people, carrying out control accurately.
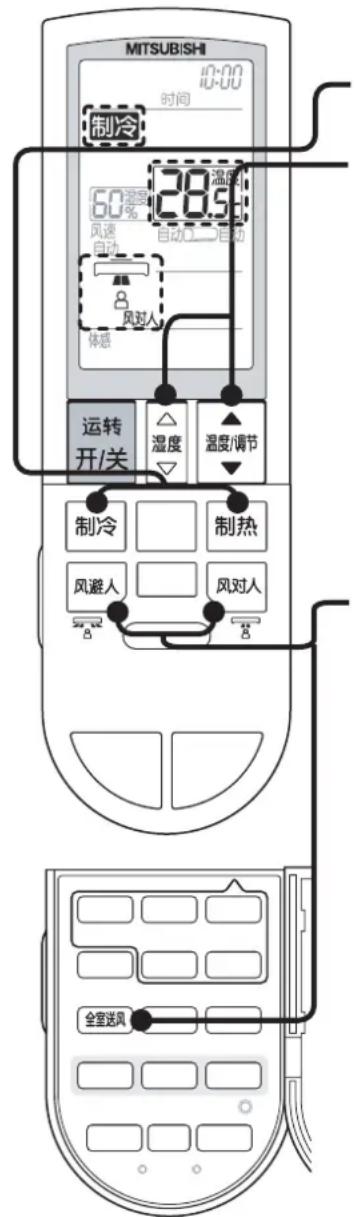
Press either button between
带and
制热
The air conditioner starts running.
■ Press the 🔊 buttons to adjust temperature and humidity
▶ Each time the □ button is pressed, the temperature will change by 0.5°C.
(Setting range:16\~31°C)
Each time the button is pressed, the humidity will change by 10%. (Setting range:40\~70%)
In Heating operation, the Humidity setting is invalid.
(The temperature settings recommended for energy saving>
| Cooling | The temperature is set to above 28°C (humidity is set to 60%) |
| Heating | The temperature is set to below 20°C. |
During operation, press any button among


全室送风
Direct flow:cool and heat quickly centered in the area where there are people. Indirect flow:make the feeling of wind become weaker and meanwhile adjust the air to prevent the skin from being dry.
Circulation: take the area where there are most people in the room as the memory of living area. Adjust the air to remove temperature difference in the living area.
When the air codnitioner is of the ex-work settings, the airflow direction is set to 「Circulation」.
The horizontal air direction and the vertical air direction are auto.
When the unit shuts down
During operation, press the

utton
If press the 运转开/关 button to start operation, the unit will recall the last operation setting and run under the same condition before it shuts down last time.
For example: if the unit is set to Cooling operation last time, it will start with Cooling operation this time.

I FEEL Cooling · Heating Operation
Set [I FEEL] to [On], and Human Sense MOVE EYE starts working and controls not only the room temperature, but also the floor temperature, the location and activity of people so as to carry out control over the I FEEL temperature.
With the I FEEL Cooling function, humidity control is also considered.
- When the air conditioner is of the initial settings in the factory, the 「I FEEL」 function is set to 「On」.
- Simple Cooling · Heating operation
Set [I FEEL] to [Off], and Human Sense MOVE EYE will not work. The air conditioner carries out standard operation at room temperature. Moreover, the function of Indirect flow • Direct flow • Circulation becomes invalid. In Cooling operation, the humidity control is also invalid.
- If the temperature is set to 16^ or 31^ and the humidity to 40% or 70% , the unit will beep.
- At the beginning of Heating operation, during the preheating, the horizontal vane will turn horizontal. (for about 3 minutes)
- Even if the function 「Indirect flow」 is selected, if you feel the air is blowing toward you, you can adjust the airflow direction as you like.
- The function 「Direct flow」: In Cooling mode, the air blows to your head and in Heating mode, the air blows to your feet. There may be the phenomenon that the air doesn't blow directly to people.
Control humidity removal when the room temperature goes down. Please select it in the high humidity seasons such as the plum rain season.
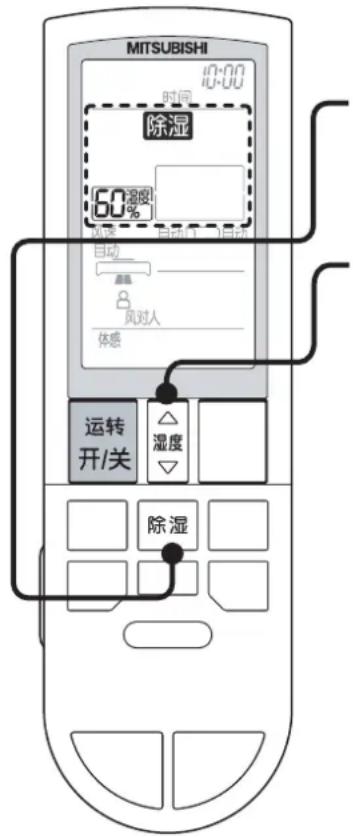
The air conditioner starts running.

Press the button, set the humidity
Each time when the button is pressed, the humidity changes by 10%. (setting range: 40% \~ 70%)
| Humidity | 60% |
When the unit shuts down
During operation, press the

Details about Drying Operation
- The Drying mode of this air conditioner possess the way of Reheat Drying which is used to improve comfort, avoid discomfort due to the too low temperature in the room and maintain a fixed room temperature.
- When you want to maintain the room temperature without reducing the humidity of the room, please select the Drying mode to run the air conditioner. Reheat Drying mode can realize humidity removal with the ambient temperature not dropping thus to improve your comfort.
For instance: in the plum rain season when the ambient temperature is 20^ C and the relative humidity is 90%, if you want to reduce the humidity in the room while not to run the Cooling mode (in Cooling mode, the room temperature will drop and may make your family feel uncomfortable), then you can select the Drying mode of this air conditioner to set corresponding relative humidity (setting range: 40% \~ 70%). Our air conditioner will help you to keep the room temperature at about 21^ C, remove humidity from your room and greatly improve your comfort. - The ambient temperature range recommended to run the Reheat Drying mode of this air conditioner: 10^ 32^ .

- The temperature can't be set. Temperature setting display on the remote controller will disappear.
- When the Drying mode operates, to detect the room temperature correctly, the air conditioner will start supplying air for about 3 minutes.
- When the humidity is set to 40% or 70% , the air conditioner will beep.
- In Drying mode: with the Reheat Drying way, dehumidify the room without decreasing the room temperature to a very low level. When the humidity in the room is very high and the temperature outside is rather low, the set humidity may not be obtained. The power consumption may vary with the humidity conditions.
Airflow Velocity · Direction Adjustment
Set the airflow velocity and direction until you feel comfortable.
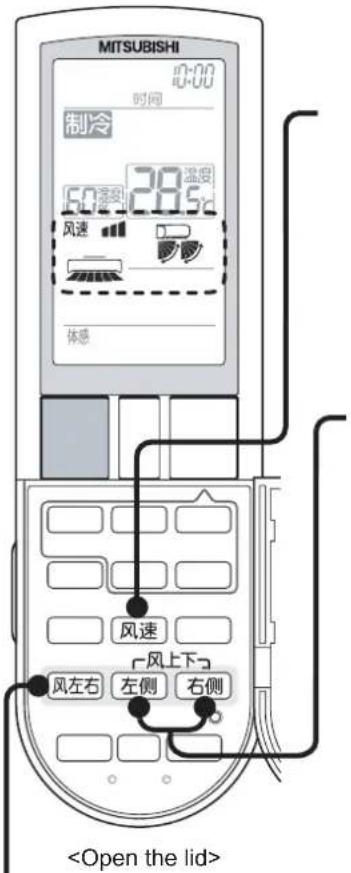
How to adjust airflow velocity
■ Press the 减速ton
Each time the button is pressed, the airflow velocity is changed in the following sequence.

flowchart
graph LR
    A["Auto"] --> B["Static"]
    B --> C["(Low) (Medium) (High)"]
    C --> D["Long distance"]
Select「Long distance」mode to increase the airflow velocity. If you want the air to blow further, this function can be selected.
Horizontal air direction adjustment
■ Press the 左buttons
Each time the button is pressed, the airflow direction is changed in the following sequence.
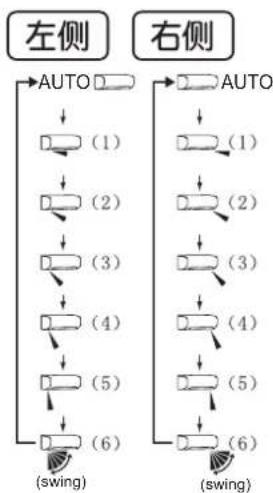
flowchart
graph TD
    A["左侧"] --> B["AUTO"]
    B --> C["(1)"]
    C --> D["(2)"]
    D --> E["(3)"]
    E --> F["(4)"]
    F --> G["(5)"]
    G --> H["(6)"]
    H --> I["(swing)"]

    J["右侧"] --> K["AUTO"]
    K --> L["(1)"]
    L --> M["(2)"]
    M --> N["(3)"]
    N --> O["(4)"]
    O --> P["(5)"]
    P --> Q["(6)"]
    Q --> R["(swing)"]
| AUTO | In Cooling • Drying mode,the air blows horizontally;in Heating mode,it blows downward. |
| Please make choice according to your feeling of comfort.The actual acting range of the vertical vaneActing rangeCoolingDryingHeating | |
| (1)(2)(3)(4)(5) | ●The angle displayed on the remote controller is different from the actual angle of the horizontal vane.In the Cooling • Drying mode,the air can't blow downward for long so as to prevent water from dropping.The airflow direction may change automatically. |
 | Every certain interval,the horizontal vane will swing automatically.When they swing to the upper and lower limits,they will stay there for a short time. |
※To achieve comfortable airflow direction control, this air conditioner uses the two-segment upper and lower vaneshorizontal vane, which are respectively controlled by independent stepping motors. Therefore, though the same air supply locations are set for the upper and lower vaneshorizontal vane, there still will be small difference between the upper and lower vanes in actual operation.
| Airflow velocity setting | Cooling • Drying | Heating |
| Settings other than long distance air supply | ||
| When the long distance air supply is set |
Vertical air direction adjustment
■ Press the button
Each time the button is pressed, the airflow direction is changed in the sequence on the right chart.
Between the Cooling (Drying) and Heating modes, the angle may be of slight difference.
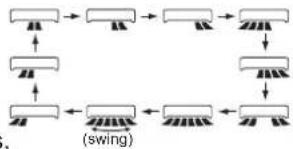
flowchart
graph TD
    A["Start"] --> B["Start"]
    B --> C["End"]
    C --> D["Switch (swing)"]
    D --> E["End"]
    E --> F["Switch (swing)"]
    F --> G["End"]
    G --> H["Switch (swing)"]

- When the airflow velocity and the horizontal air direction are switched to「Auto」and the vertical air direction to the unit will beep.
- When the horizontal air direction and the vertical air direction are adjusted, the function of Indirect flow • Direct flow • Circulation will be canceled.
- If long distance air supply is set for the airflow velocity, there will be the maximum velocity.
Caution
- During operation, don't use your hand to turn the vanes for horizontal airflow as well as the vertical airflow, or trouble will occur.
In Heating mode, when you wish to operate the unit with the temperature set to 10^ C.
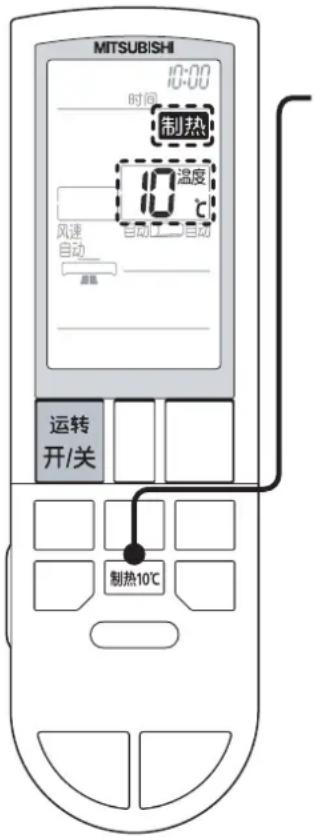
In Heating mode, press the button
The temperature is displayed to be 10^ on the remote controller.
To release
Press the button once again
When the set temperature is increased or the mode is switched to Cooling • Drying mode, it can be released.
Details about I-warm mode
- When you leave the room and shut down the air conditioner, the temperature in the room will go down due to the shutdown. But if you select the I-warm mode at this point, then when you go back to the room, you will not feel very cold and the heating effect in the room can also be enhanced.
- In cold seasons, if nobody stays at home because the family are out on vacation, certain temperature needs maintaining in the room to reduce the possibility of damaging the buildings due to too low temperature.
Then you can select the I-warm mode and the electric power consumed by the air conditioner will be apparently less than that consumed in the Heating Mode.

- In the modes other than Heating, the unit can't run in the I-warm mode.
- In the condition of not releasing it, the I-warm mode will not be kept after the unit is shutdown. So when the unit restarts, it will go back to its original Heating Mode.
At the beginning of Heating operation, quick heating may be desired.
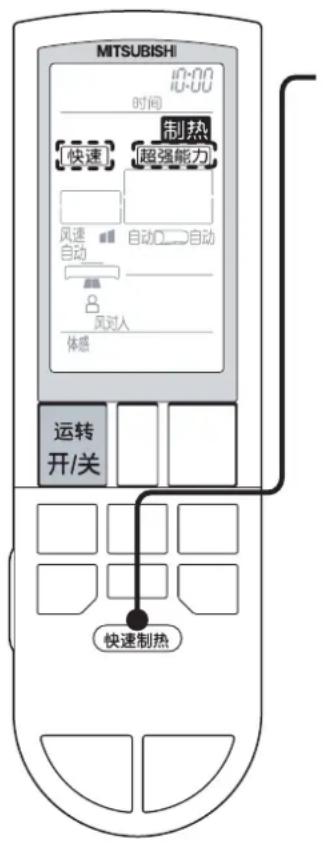
During the Heating operation and in the I FEEL mode, press the 快速器
Enter Quick Heating mode.
The airflow velocity is switched to [Auto] and the horizontal air direction is switched to [Auto], the vertical air direction to [Direct flow].
To release
Press the button once again
It can also be released when the 超强能力、睡眠、风速、风避人、全室送风 制热10℃ buttons are pressed, the operation mode is switched and the horizontal air direction and the vertical air direction are switched.
Quick Heating mode will be released automatically 1 hour after the start.
When the Quick Heating mode is released, the airflow velocity and direction will be resumed to the status before Quick Heating mode is set.
Details about Quick Heating Mode
- Within about 15 minutes, the unit runs at a powerful capacity to improve the outlet air temperature and runs with the set temperature increased by about 3^ .
- To quickly increase the outlet air temperature, the upper part of the horizontal vane may blow air horizontally and the lower part may do that downward.
● The Quick Heating operation is effective in the I FEEL mode.

● The unit can't carry out Quick Heating operation in the mode other than heating mode.
- When the start of the unit is timed, the Quick Heating operation can't run.
Cool Feeling Operation
It can be used when you want to enjoy healthy, comfortable and power saving Cooling operation.
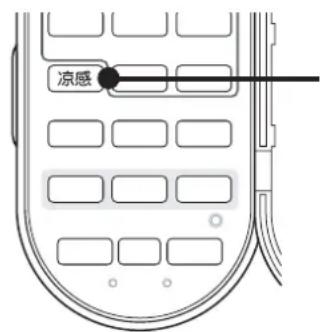
In the Cooling mode, press the 原感on
「Cool feeling」 will be displayed on the remote controller and 「swing」 be displayed for the horizontal air direction.
To release
Press the button once again
It can also be released, when the 左侧 and 右侧 buttons 超强能力 pressed.

- In [Indirect flow] mode, cool feeling operation can't be set.
- At the upper and lower limits of the swing range, the vanes will stay for a while.
Use it to avoid feeling too cold or too hot during sleeping.
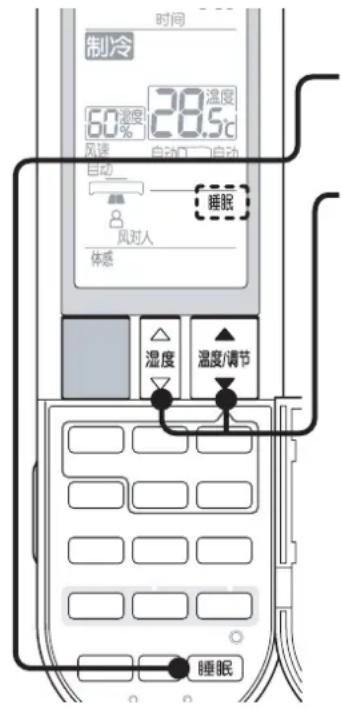
■ Set the temperature · humidity in Sleep operation
Humidity can't be set in Heating mode.
Temperature can't be set in Drying mode.
To release
Press the button once again
It can also be released by pressing the 超强能力 button 或 switching the operation modes.
Details about Sleep mode
- In Cooling • Heating • Drying modes, for about 30 minutes' operation, set the temperature • humidity before the Sleep mode. About 30 minutes later, switch to the temperature • humidity set for the Sleep mode.
- Once the temperature and humidity are set for the Sleep mode, the last set temperature · humidity will be displayed when the 睡眠 button is pressed again.
- When the 📊 on is pressed, the display on the indoor unit will become dim, the fan speed will become 「auto」, and the unit will run in Silent mode.
Powerful Mode
Please select it when you desire powerful cooling or heating effect.
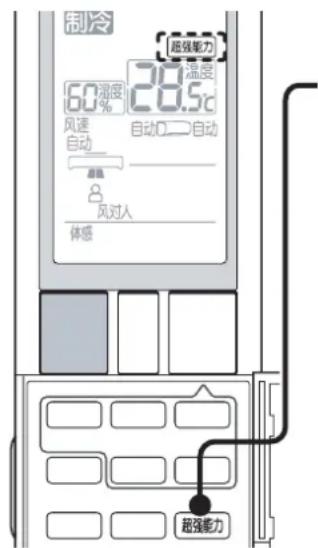
「Powerful」is displayed on the remote controller and the fan speed becomes 「auto」.
To release
Press the button once again
It can also be released by pressing the 睡眠 and 风道 buttons 滑感 switching the operation modes.
After the unit runs for about 1 hour in the Powerful mode, it will be released automatically and the display of [Powerful] will also disappear.
If the Powerful mode is released, the fan speed will change to the speed before the setting.
Details about Powerful operation
- In Heating mode, the unit will run the Powerful operation for about 15 minutes to increase the outlet air temperature, and the set temperature increased by about 3^ .
- In Cooling mode, the unit will run with the set temperature decreased by about 3°C.

● The Powerful operation will not run in the mode other than Cooling · Heating modes.
- In the ON-Timer mode, the Powerful operation can't be set.
- In the Cooling mode, if you switch on 「I FEEL」, you may not switch to the Powerful operation immediately even if you press the 超强能力 button. In this condition, 3 minutes later, it will switch to the Powerful operation to blow cool air.
Switch the air conditioner On/Off after the set time.
With only one button, you can set the simple timer.
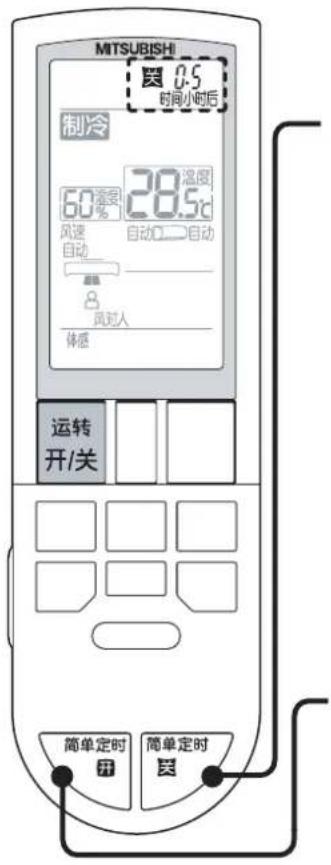
Simple OFF-Timer Operation
In the operation modes, press the button
Each time the button is pressed, the switch will go in the following sequence.
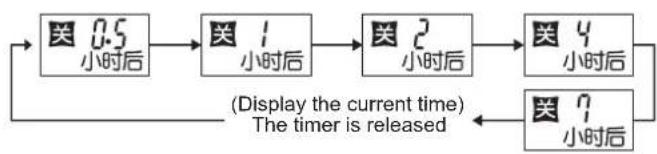
flowchart
graph LR
    A["关 0.5 小时后"] --> B["关 1 小时后"]
    B --> C["关 2 小时后"]
    C --> D["关 4 小时后"]
    D --> E["关 7 小时后"]
    E --> F["(Display the current time)<br>The timer is released"]
Simple OFF-Timer can set timed Off 0.5,1,2,4 and 7 hours later.
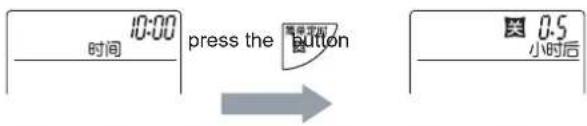
Simple ON-Timer Operation
When the unit is running or shuts down, press the button
Each time the button is pressed, the switch will go in the following sequence.
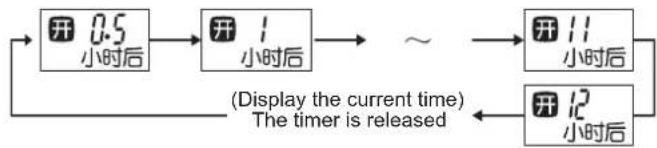
flowchart
graph LR
    A["开 0.5 小时后"] --> B["开 1 小时后"]
    B --> C["~"]
    C --> D["开 11 小时后"]
    D --> E["开 12 小时后"]
    E --> F["(Display the current time)<br>The timer is released"]
Simple ON-Timer can set timed On 0.5,1,2,3,4,5,6,7,8,9,10,11 and 12 hours later.
If Simple ON-Timer is set in the operation time, it will stop running after the setting and when the setting is canceled, it will resume running.
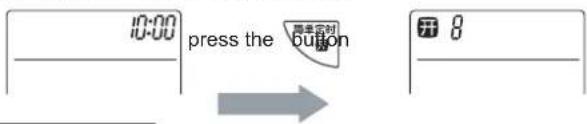
To release
Press the 取消
Press the button the timed appointment will be released and all the operation will stop.

- The Simple ON-Timer and the Simple OFF-Timer can't be used in combination. If you want to set the ON-Timer and OFF-Timer simultaneously, please use Time to set the Timer.
● The Simple timer and time set timer can't be used in combination. - When you set the Simple ON-Timer," □" will be displayed in the I FEEL temperature display section on the indoor unit during the operation is stopping.
- When the time is appointed, the time display will disappear.
It can set the ON/OFF-Timer of the air conditioner at the same time with a time scale of 10 minutes.
The set timer is only for once operation, so it shall be reset each time of use.
- Please set against the current time. If the current time is not set, you can't use Time Set ON/OFF-Timer.
● ON-Timer can also be set in the shutdown status.
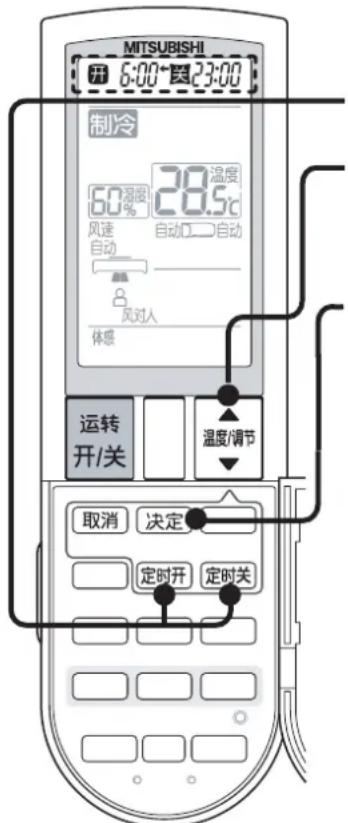
1 In operation, press the 定时开button 定时关
2 Press the 🔊 button, adjust to the appointed time
Switch it on a 10-minute scale. Press the button and hold it to realize fast switching.
3 Press the button
The indoor unit will beep.
「开」or「关」will light on,and the setting is finished.
When ON-Timer and OFF-Timer are used at the same time, repeat the operation in the sequence 1→2→3.
To change the set time, follow the sequence 1→2→3.
If the ON-Timer is set in operation, the unit will stop running after the setting is finished.
1 Press the button, press the button to adjust to the desired time and then press the button

2 Press the button, press the button to adjust to the desired time and press the button

When the temperature and humidity are to be set, please first press the 决定 button and then set them.
To release
Press the 取消on
When you want to cancel one between the ON-Timer and OFF-Timer, please press the button for the timer you want to cancel. Then press the button. 取消
Press the ☐运转开/关 button, the set timer will be canceled and all operation will be stopped.

- When the timer is set, please put the remote controller where the remote control signal can reach the indoor unit. When the set time is reached, even if the signal from the remote controller can't reach the indoor unit, the timing function will operate. However, the operating time may deviate from the set time.
- When the ON-Timer is set," " will be displayed on the I FEEL temperature display section of the indoor unit even the unit is stopping. The set content for the operation will be displayed inside the controller.
- In the case that the 「开」 or 「关」 is flickering, the set time will be released if no operation is carried out within about 30 seconds.
Through switching the menu, 「I FEEL」「Absence detection (to save energy)」 could be set.
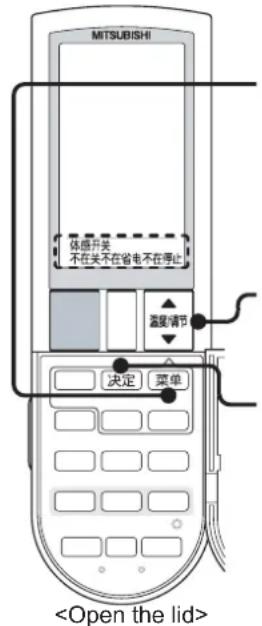
■ Press the 执放on and select the item to be changed
The content of the selected item will flicker. Each time the button is pressed, the switchover will happen in the following sequence.
I FEEL OUT
■ Press change the setting
The content for the set item will flicker.
■ Press the button
The indoor unit will beep.
If the 决定 button is not pressed, the changed content will be invalid.
During the setting, press the 取消, button or not operate for about 30 seconds, the status before the setting will be resumed.
About Absence Detection (to save energy) and Absence Detection (to turn off) operation
[ Absence detection (to save energy) operation]
If the Human Sense MOVE EYE detects nobody is in the room, the unit will be switched to the set temperature automatically 10 minutes after the detection and begin the 「Absence detection (to save energy)」 operation. If it detects there are people in, the unit will return to the operation mode used before the 「Absence detection (to save energy)」 operation.
• Cooling: raise the set temperature by about 1°C
- Heating: decrease the set temperature by about 1^
- Drying: increase the set humidity by about 10% .
[Absence detection (to turn off) operation]
If the Human Sense MOVE EYE detects nobody is in the room, the unit will stop running automatically 3 hours after it switches to [Absence detection (to save energy)] operation. When the unit stops running, even if people are detected, it will not restart.
At this point, please start it with the remote controller.
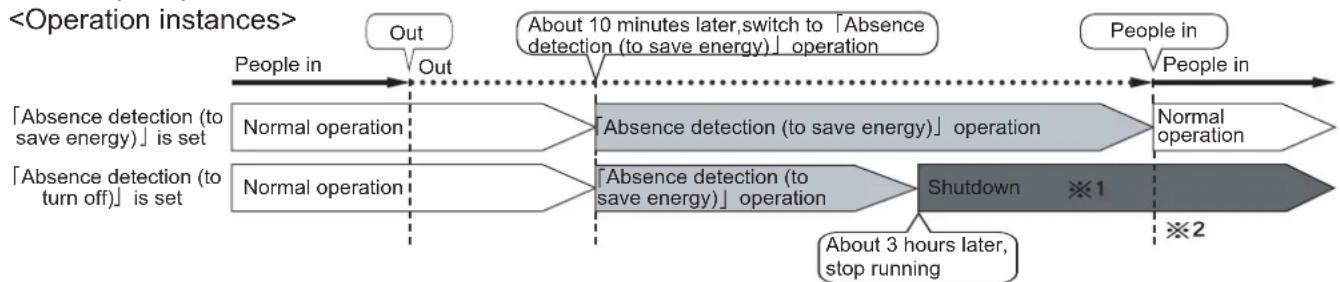
flowchart
graph LR
    A["People in"] --> B["Out"]
    B --> C["About 10 minutes later, switch to 'Absence detection (to save energy)」 operation"]
    C --> D["People in"]
    E["Normal operation"] --> F["Absent detection (to save energy)」 operation"]
    G["Normal operation"] --> H["Absent detection (to save energy)」 operation"]
    I["Shutdown ※1"] --> J["About 3 hours later, stop running"]
    K["※2"] --> L["People in"]
    style A fill:#f9f,stroke:#333
    style E fill:#f9f,stroke:#333
    style G fill:#f9f,stroke:#333
    style I fill:#f9f,stroke:#333
    style K fill:#f9f,stroke:#333
※1 During operation, if nobody is detected at any time, even if 「Absence detection (to turn off)」 is set, the unit still will not stop running.
※2 On the occasion where the unit shut down according to the setting for Absence Detection (to turn off) operation, even if people are detected, the unit will not restart automatically. Please use the remote controller to start it.
- In the following occasions, nobody can be detected. Even if there are people, the unit may also turn to 「Absence detection (to save energy)」 operation and 「Absence detection (to turn off)」 operation. It is suggested to set to 「Absence detection (to cancel)」 (i.e 「Absence detection」 function changes to 「Off」).
- Occasion where there are babies and pets that provide small area of skin contact
- Occasion where the temperature of the wall and floor is almost the same with that of the human body in hot summer
- Occasion where people are covered with quilts, wear thick clothes and don't expose skin
- Occasion beyond the detection range of Human Sense MOVE EYE
- During [Absence detection (to save energy)] operation, the temperature and humidity display on the remote controller doesn't change.
- According to the setting for Absence detection (to turn off), even if the operation stops, the display on the remote controller will keep the same as during the operation.
- If you want to start the unit again, please press the button and then start the operation again.
- If you appoint Timed Off, then give priority to it.
- In Sleep mode and powerful operation, 「Absence detection (to turn off)」 and 「Absence detection (to save energy)」 operations are not available.
■ Items for function switchover
| Items Setting | Operation content explanation | Display on the remote controller | ||
| During setting | After setting | |||
| I FEEL(ex-work setting:On) | On | Human Sense MOVE EYE starts working.It is an operation mode which can not only detects the room temperature,but also consider the floor temperature,location and activity of people,being able to control the temperature which can be actually perceived by people(I FEEL temperature).● I FEEL Cooling Operation also considers humidity control. | ▸ I FEEL ON | I FEEL |
| Off | Operation mode only in light of room temperature.Human Sense MOVE EYE doesn't work. | ▸ I FEEL OFF | No display | |
| Absence detection (to save energy)(ex-work setting:Off) | Off | Maintain the set operation on the remote controller. | ▸ Absence detection (to cancel) | No display |
| Absence detection (to save energy) | When there is nobody in the room,the unit will switch to Econo operation automatically.● Please set [I FEEL] to [ON]. | ▸ Absence detection (to save energy) | Absence detection (to save energy) | |
| Absence detection (to turn off) | When there is nobody in the room for long,the unit will stop running automatically.● Please set [I FEEL] to [ON]. | ▸ Absence detection (to turn off) | Absence detection (to turn off) | |

● After the batteries of the remote controller are replaced, press the 复位 button to restore the ex-work settings.
Switch The Indicator Of The Indoor Unit
If it is set to 「Off」, the section indicator of the indoor unit will go out and that for operation and I FEEL temperature mode will become dim.
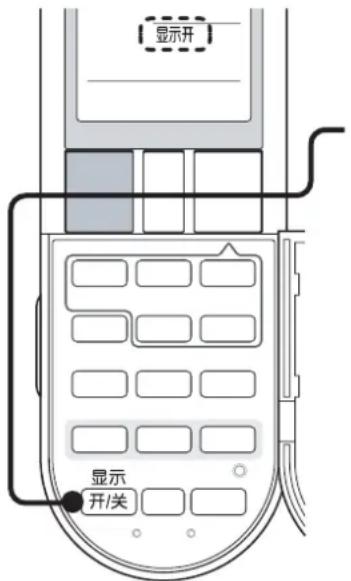
During operation or during shutdown, press the button
显示 开/关
On the remote controller, 「Display Off」 will appear.
When it is purchased, the display is set to [Display On].

Even if it is set to off, the display will become light on for a short time in the following conditions.
- During operation, when the set temperature is changed : display the set temperature
- During operation, settings other than temperature are changed : display the current I FEEL temperature (room temperature)
Switch The Operation Sound
For the receiving sound of the indoor unit, the scale can be selected between available and not available.
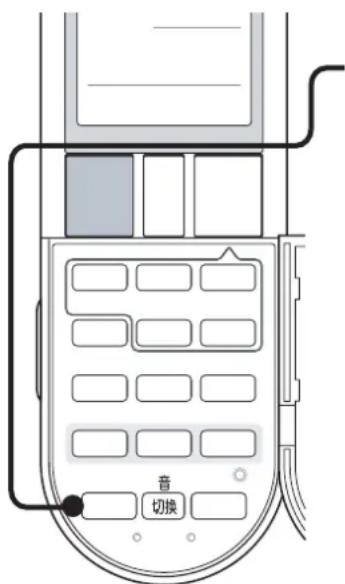
During operation, press the button
There is no related display on the remote controller.
When it is ex-work, the sound is set to 「Scale available」.
When scale is available
After the signal from the remote controller is received and the following operation is being carried out, there will be different sounds of scale from the indoor unit.
- When the operation mode is changed during the period from shutdown status to the start of operation and during the operation, three will be 3 successive sounds to prompt the operation mode.
- Successive sound will be the prompt for set temperature and humidity change.
When scale is not available
When the signal from the remote controller is received, there will be no change to the scale and the indoor unit gives single sound.

● The remote controller will be of no display of [scale available] and [scale not available].
- If the temperature is set to 16^ or 31^ and the humidity to 40% or 70% , the unit will beep.
Part Maintenance
■ Please follow the sequence 1\~2 to handle the air strainer. If you find the strainer is dirty, please maintain (clean) it.
■ When other parts are handled, please follow the methods for removing each of them.
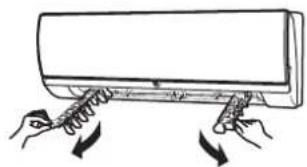
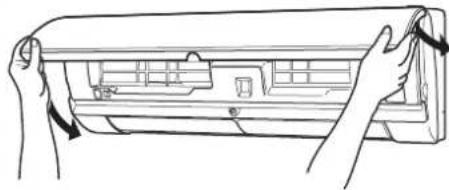
① Front panel
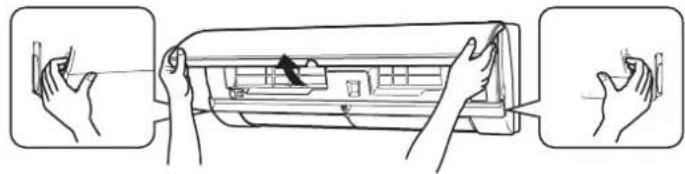
natural_image
Illustration of hands cleaning a large air conditioner panel (no text or symbols)Open the panel by fastening it with hands and turn it to the support location

Do not step onto an unstable bench when handling the unit. This may cause injury if you fall down.
When the unit is to be handled, for the sake of safety, please disconnect the power supply plug or cut off the power supply.
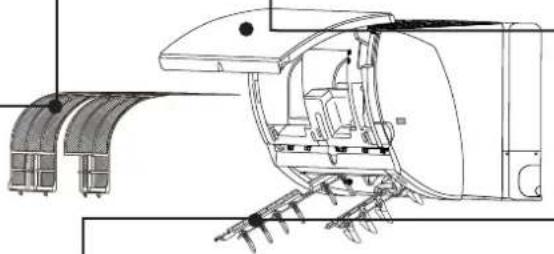
② Air strainer (2 on each side)
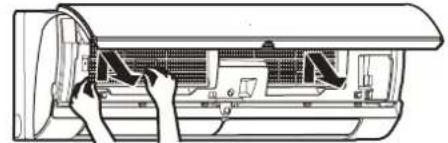
natural_image
Diagram of a car air conditioner unit with hands operating the panel (no text or symbols visible)Hold the handle of the strainer, raise it slightly and then draw it outward.
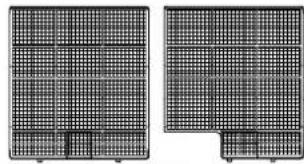
natural_image
Two identical grid-patterned panels with no visible text, numbers, or symbols.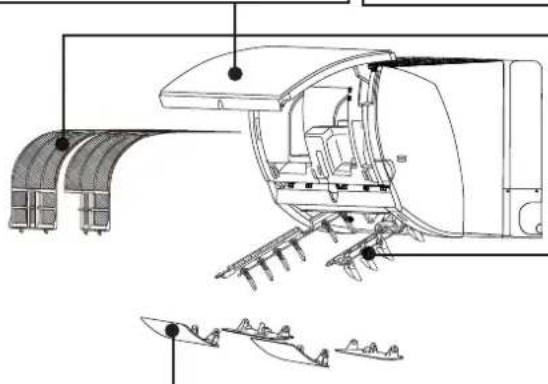
natural_image
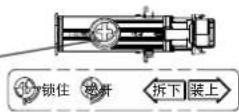
Technical line drawing of a mechanical assembly with no visible text or symbolsHorizontal vanes (4 pieces in total:upper left,lower left, upper right,lower right)
1 Open the vane downward
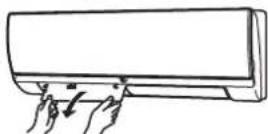
Please open the vane gently and slowly, or damage may be caused to related parts.
2 Use a screwdriver to loosen the locking device of the safety stopper on the vanes
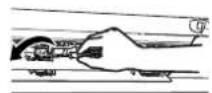
Locking device
3 Remove the safety stopper along the direction of the arrow
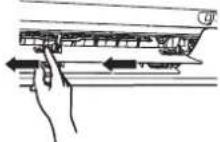
4 Draw out the vanes
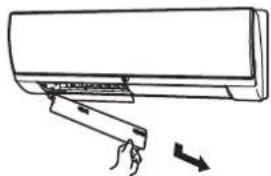
natural_image
Line drawing of a hand inserting a device into an air conditioner unit (no text or symbols)The 4 pieces of vanes mentioned above are respectively removed by following steps ① \~ ④. When they are removed, follow the sequence of upper first and then lower.
Vertical vanes
5 Draw it out in the direction of the arrow by pressing the handle
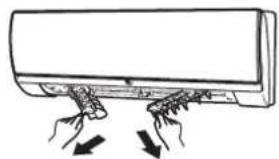
natural_image
Illustration of hands inserting a plug into a wall-mounted air conditioner (no text or symbols)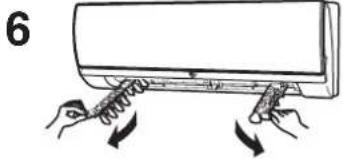
natural_image
Illustration of hands pulling a cylindrical object with spring (no text or symbols)Cleaning The Parts (Cleaning Methods)
Caution: When the unit is used in places where there is lot of dust and smoke and places such as kitchens where there is oil dirt, please remove the strainer from the indoor unit if you feel it is too dirty.
Air strainer
- Use vacuum cleaner to remove the dust or wash it with water.
- Wipe the water off with a soft cloth and dry it in the shade.
Caution
- Don't use a brush or broom to rub the strainer.
- If the dirt is noticeable, wash the strainer with a solution of mild detergent diluted in lukewarm water. After it is rinsed, install it after drying in the shade.
- Do not expose the air strainer to direct sunlight or heat from a fire or use air blowers when drying it. This may cause deformation or discoloration.
- Don't use hot water above 50°C to clean it.
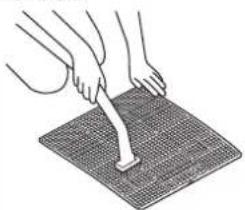
natural_image
Illustration of hands using a tool to press or mark on a textured surface (no text or symbols)※Press the strainer securely and don't make it deformed.
Panel (If dirt is detected)
Please use soft cloth to clean it.
Caution
- If the dirt is noticeable, wash it with a solution of mild detergent diluted in lukewarm water.
- Don't use gasoline, volatile oil, thinner, rubbing powder and etc.
- Don't use hard objects such as brush and sponge to clean it.
- Don't bath the panel directly.
- Do not expose it to direct sunlight or heat from a fire or use air blowers when drying it. This may cause deformation or discoloration.
- For PAH series, it is strongly prohibited to use the cleaning liquid clearly marked not to be used for metallic products to scrub the panel of the indoor unit.
natural_image
Technical line drawing of a mechanical assembly with conveyor and support components (no text or symbols)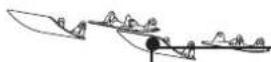
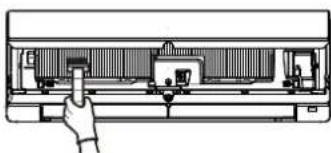
Heat exchange
(When dirt is detected)
natural_image
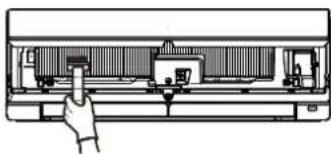
Diagram of a hand pressing a component into a device casing (no text or symbols visible)First remove the air strainer.
Remove the dust with a vacuum cleaner (With brush)
Caution
- When the brush is used, don't brush it with force.
● Please put on gloves to do it. - Don't use corrosive liquid to scrub it.
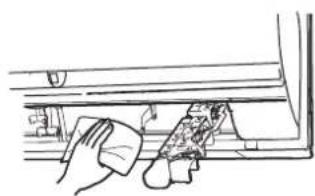
Air outlet, horizontal vanes, vertical vanes and vanes (When dirt is detected)
Please clean them with soft cloth.
natural_image
Line drawing of a hand using a tool to clean or repair a mechanical component (no text or symbols visible)Caution
- Please confirm the fan stops.
- If the dirt is noticeable, wash it with a solution of mild detergent diluted in lukewarm water.
- Don't use gasoline, volatile oil, thinner, rubbing powder and etc.
- Do not expose it to direct sunlight or heat from a fire or use air blowers when drying it. This may cause deformation or discoloration.
- Please don't apply high external force on the internal vanes. This may cause break.
Install The Parts
■ After the air strainer is maintained, be sure to install it following the sequence 1\~2.
■ When other parts are handled, please follow the installation methods for each of them.
When maintenance is being done, for the sake of safety, please pull out the power supply plug or cut off the power supply.
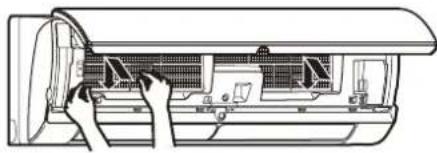
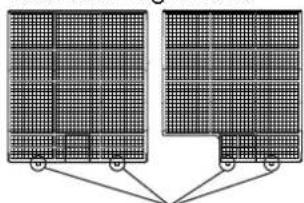
① Air strainer (2 on each side)
natural_image
Technical line drawing of an air conditioner unit with internal components and airflow direction arrows (no text or labels)Left side Right side
natural_image
Two identical grid-patterned panels connected by a small arrowhead, no text or symbols presentEnd
Surface
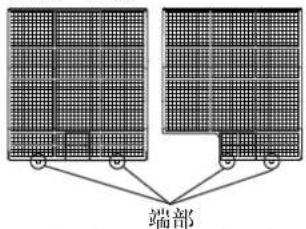
The side of the air filter where there are letters faces outward and is inserted into the bottom along the strainer guide rail. The end is inserted in place.
Surface
② Panel
1. Close
natural_image
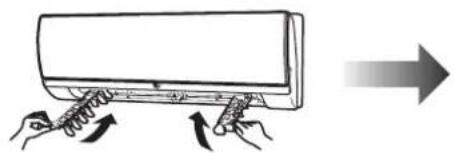
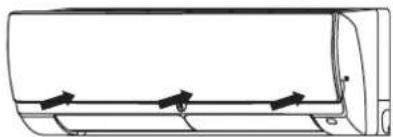
Line drawing of hands installing or adjusting a wall-mounted air conditioner unit (no text or symbols visible)2.Hold 3 places
natural_image
Diagram of a car air conditioner panel with directional arrows indicating airflow or movement (no text or symbols)
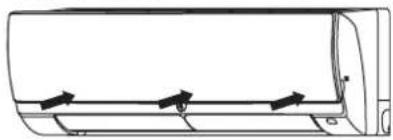
If the panel is not installed, there will be abnormal sound during operation.
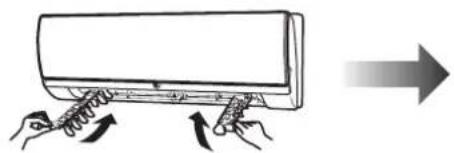
Vertical vanes
natural_image
Illustration of hands inserting a spring into a wall-mounted air conditioner unit, with an arrow indicating direction (no text or symbols)Insert along the upper side of the air vane
Horizontal vanes (upper left, upper right, lower left, upper left, 4 pieces)
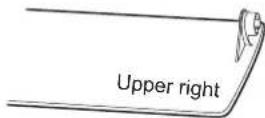
Be installed in the specified location. Install them in the sequence of lower first and then the upper ones.
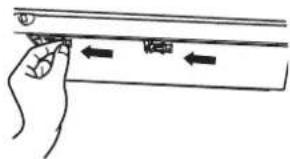
Move the safety stopper along the direction it is installed until the click sound is heard.
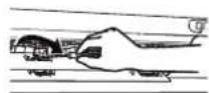
If the safety stopper is not installed properly, all the indicators will flicker and the unit can't be started.
Lock the locking device.
Finally
- Insert the power supply plug.
- Press the button on the remote controller, and the unit will start running.
Before You Call For The Maintenance Personal, Please Check The Following Contents One More Time.
If the following is displayed on the indoor unit
| Malfunction | Display contents | |
| When the operation On button is pressed, the unit still can't run. | The I FEEL temperature display section is flickering, and all the other display sections are flickering.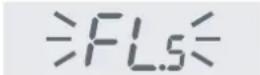 | Maybe the safety stoppers of the horizontal vanes haven't been installed in place.Please install them step by step until the click sound is heard. |
| During Heating operation | Display on the I FEEL temperature display section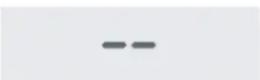 | The frost in the outdoor unit is being thawed.(defrosting)Defrosting operation may run once every 30 minutes to 1 hour.The Defrosting operation runs for 10 minutes at the most and reenter the Heating operation after defrosting. |
| During Cooling or Heating Operation | Display on the I FEEL temperature display section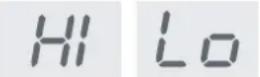 | The display range of the I FEEL temperature is 8~37°C and display appears every 0.5°C.Below 7.5°C,Lois displayed and above 37.5°C,HIis displayed. |
| At the time of shutdown | Display on the I FEEL temperature display section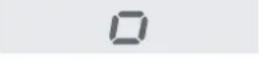 | Standby in ON-Timer mode. |
| Immediately after the operation begins | The display on the I FEEL temperature display section and the operation indicator becomes dim | Is Sleep mode set or the [I FEEL display] of the remote controller is set to be [Off]? |
| Out of operation | The numbers on the I FEEL temperature display section are flickering.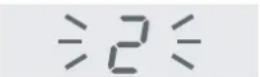 The operation indicator is also flickering. The operation indicator is also flickering. | This is a fault and the operation stops.Please contact your dealer or the after-sales service center of our company.When you call for maintenance,please inform the flickering numbers. |
Please check the following points before you entrust to repair the unit.
| Is it a malfunction? | Answer (No) | |
| Out of operationtoo cold | The air conditioner cannot be operatedThere is no display on the indoor unit | ● Is the power supply switch dedicated to the air conditioner is Off?● Does the power supply plug fall off?● Is the setting on the remote controller [Off] ? |
| The air conditioner cannot be operated for about 3 minutes when restarted | ● This protects the air conditioner.3 minutes later, it will run. Please wait. | |
| The air blows less and less during the Drying operation | ● To prevent too low temperature in the room, the outlet air becomes weaker. | |
| Air does not blow out soon in the heating operation | ● Please wait as the air conditioner is preparing to blow out sufficient warm air. | |
| The Human Sense MOVE EYE can't operate | ● Is [I FEEL] set to be [Off] ?● If the [I FEEL] is set to be [Off], the area temperature sensor will not operate. | |
| The operation is stopped for about 10 minutes in the heating operation | ● Defrosting of the outdoor unit is being done, since this is completed in 10 minutes at the most, please wait. | |
| Remote Controller Fe | The indoor unit does not respond to the remote control signalThe display on the remote controller doesn't appearThe display on the remote controller is dim | Are the batteries exhausted?Is the polarity (+),(-) of the batteries correct?After the batteries are installed in the remote controller,is the复位button pressed?Do you use the remote controller for TV or Video recorders by mistake?When you press the remote controllers for TV or video recorders and hold for while,the air conditioner may not receive signal of the remote controller.When the room temperature is too low,the air conditioner may not receive the signal of the remote controller. |
| Feel too cold in Cooling • Drying mode | ● In Cooling Operation,are the set temperature and airflow direction proper?● When the outside temperature is low,the room temperature may also drop. | |
| Is it a malfunction? | Answer (No) | |
| Not cold/not hot/humidity can't decrease | Not coldNot hot | ● Is the set temperature and wind intensity proper?● When the wind intensity is set to be, (Low), the cooling and heating speed may decrease.● Please change the air velocity to [mediu] and (H).● Is air strainer clean?● Is the vane inside the air conditioner clean?● Are there any obstacles blocking the air inlet or outlet of the indoor or outdoor unit?● Is the window or door open?● In answer to the size of the room and the outdoor temperature, it may take longer time to reach the set temperature or even the set temperature can't be reached.● When a ventilation fan or a gas cooker is used in the room, the cooling load increases, resulting in an insufficient cooling effect. |
| During cooling operationThe outlet air is not cold | ● In I FEEL Cooling mode, since the temperature and humidity are controlled by auto switching the Cooling operation and Drying operation, Reheat Drying Operation will be switched to when the set temperature is approached, which makes the outlet air not very cool. If you don't want to switch to the Drying operation automatically, you can the [I FEEL] to [Off] in the menu. | |
| When the set humidity can't be reached | ● When the humidity in the room is too high or the outdoor temperature is too low, the set humidity may not be reached. | |
| Water leakage/discharge of mist | Mist is discharged from the air outlet of the indoor unit | ● The cool air from the air conditioner rapidly cools moisture in the air inside the room,and it turns into mist. |
| Water leaks from the indoor unit | ● Is the panel installed properly?● Is the end of the outdoor drain pipe broken or pulled upward?● After you confirm all the above and there is still problem,please contact your dealer or the after-sales service center of our company. | |
| Water and vapor flow from the outdoor unit | ● During Cooling operation,pipe or pipe connecting sections are cooled and this causes water to condense and drip.● In the Heating operation,the defrosting operation on the outdoor unit will make water or vapor flow out.The vapor looks like white smoke.● In the Heating operation,water condensed on the heat exchanger drips down.Water volume varies with temperature and humidity. | |
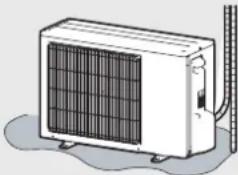 | ● This is not a malfunction,but if the water leakage brings trouble to you,please contact your dealer or the after-sales service center of our company to negotiate water drainage issue.● In some cold areas,water drainage may not be carried out due to ice covered on the outdoor unit. | |
| Is it a malfunction? | Answer (No) | |
| AirDiscoloration | Air can't be blown right (left) | ● Is the installation location correct?Confirm whether the setting on the remote controller is correct. |
| In Cooling • Drying operationWhen the upward and downward air direction is changed,the adjustment will be invalid | ● When the horizontal vanes face downward as in status 5 for about 30 minutes to 1 hour,to prevent water dripping from the horizontal vanes,the air direction is switched to position 3 automatically. | |
| Set [Indirect flow],but there is still air toward peopleSet [Direct flow],but there is no air toward people | ● It is possible that the Human Sense MOVE EYE is difficult to detect people.When you are not satisfied with the air direction,the horizontal vertical air direction can be adjusted. | |
| In Cooling operation,even though the set temperature is reached,the air still doesn't stop | ● In Cooling operation,even though the room temperature (I FEEL temperature) reaches the set one,air will not stop running out.The fan still runs at the set air velocity. | |
| When heating begins or during operationThe horizontal air direction changes halfwayNo adjustment can be madeThe outlet air stop | ● When the unit starts running and gets ready to send warm air,the horizontal vanes will become horizontal.(about 3 minutes)● The frost on the outdoor unit is being thawed(Defrosting operation).It is possible to run once between every 30 minutes to 1 hour.When the outdoor temperature is low and humidity is high,it is liable to frost.In Defrosting operation,to prevent cold air from coming out,the horizontal vanes become horizontal and stop supplying air.The defrosting operation will stop at most 10 minutes later.Thereafter,the Heating operation restarts.However,based on different outdoor temperature,it may take several minutes to blow out warm air.● When the indoor temperature (I FEEL temperature) is higher than the set one,to prevent overheat,the outdoor unit will stop running.At this point,to prevent cool air from coming out,the horizontal vanes become horizontal and supply slight air. | |
| The aluminum fins on the right of the indoor heat exchanger is discoloring and appear burned like | ● The discoloration may be caused during manufacturing the indoor heat exchanger (the heat in welding leads to the discoloration of the resin coat on the surface of the aluminum fins).It isn't caused by the operation of the air conditioner.Moreover,the performance of the heat exchanger may not be influenced. | |
| SoundBad smell | Hissing and cracking sound is heard | ●This sound is generated by the expansion • contraction of the panel,etc. due to change in temperature.●This sound is generated by the operating of the refrigerant control valve.(in Cooling • Drying operation) |
| Water flowing and burbling sound is heard | ●This is the sound of refrigerant flowing inside the air conditioner or refrigerant flowing direction switching. | |
| The sound of flopping is heard | ●This sound is heard when the outside air is absorbed from the drain hose in turning on the vacuum exhauster or the ventilation fan and that makes water flowing in the drain hose sucked up together with air.This sound is also heard when the outside wind is strong.Please set the outlet of the drain hose off the airflow. | |
| The air from the indoor unit smells strange | ●The air conditioner may suck in an odor adhering to the wall,carpet, furniture,cloth,etc. and blow it out with the air.Suggest cleaning the air conditioner. | |
| Display | The display on the indoor unit is blurring | ●In Sleep operation or when the off status is displayed,the display will automatically become dim. |
| The location displayed on the indoor unit location display section is different from the actual location of people. | ●It may take about 3 minutes to detect the location of people.●Since what is detected is the skin temperature,if little skin is exposed,it maybe impossible to detect it correctly.●On the occasion where the floor temperature is very high when the unit starts running in very hot summer,the location of people may not be detected correctly. | |
| The temperature displayed on the display section of the I FEEL temperature doesn't correspond to temperature displayed on the thermometer inside the room and the setting on the remote controller. | ●On the occasion where the"I FEEL" is set to "ON",the I FEEL temperature will be displayed.Since the I FEEL temperature is different from the room temperature,the display on the thermometer may also be different.●When Powerful operation is set,the displayed temperature may be lower than the set one by 3°C in Cooling operation and higher by 3°C in Heating operation. | |
About operation
- If the air conditioner runs at the outdoor ambient temperature other than that shown in the table on the right, the protection device may start thus to cause the air conditioner out of operation.
- When the unit runs for long in Cooling • Drying mode with the indoor humidity above 80%, water may condensate on the air outlet of the indoor unit and drip down.
- When the air conditioner shuts down due to power outage, the air conditioner will remain the status of shutdown after the power supply is resumed.
At this time, please press the button on the remote controller to restart the air conditioner.
| Operation mode | Outdoor ambient temperature |
| Cooling operation | About 21~43°C |
| Drying operation | About 1~43°C |
| Heating operation | Below 24°C |
When the remote controller can't be used (Emergency Operation)
When the batteries of the remote controller run out or the remote controller malfunctions, the emergency operation can be done using the EMERGENCY OPERATION switch.
1 Press the EMERGENCY OPERATION switch
Each time the EMERGENCY OPERATION switch is pressed, the unit will operate in the following sequence. <Disp

flowchart
graph LR
    A["Emergency cooling"] --> B["Emergency Heating"]
    B --> C["STOP"]
    D["↑"] --> A
※ No operation mode other than this can be operated. The temperature control does not work for 30 minutes in test run and the unit is set to continuous operation, The fan speed is h).
During shutdown
Press the Emergency Operation switch
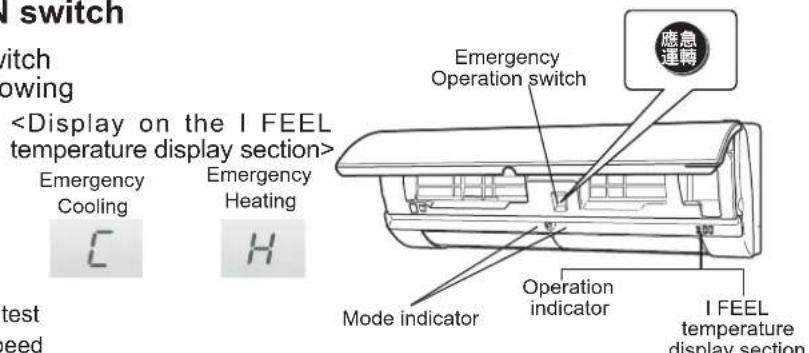
30 minutes later, the operation contents are shown as in the following table.
| Operation content | Cooling | Heating |
| Set temperature | 24°C | 24°C |
| Fan speed | Mediu) | (Mediu) |
| Horizontal vanes | Auto | Auto |
When the air conditioner is not going to be used for a long time
To prevent the air conditioner from malfunctioning so as to use it on a long term, please pay attention to the following.
- Turn off the power supply or pull out the power supply plug, after the air conditioner shuts down.
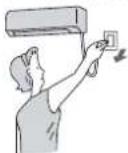
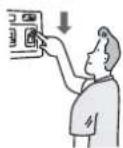
- To prevent liquid leakage, take out all batteries when the remote controller is not going to be used for a long time.
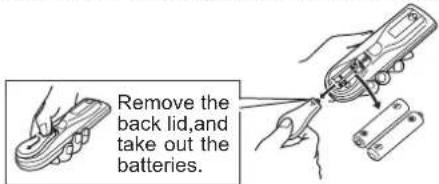
Electrical work
● Provide a dedicated circuit for the power supply of the air conditioner
- Be sure to observe the power supply switch capacity.
When the air conditioner is to be used again
- Check that the air inlet and outlet of the indoor • outdoor units are not blocked with any obstacles.
- Check that the earth is connected securely and doesn't fall off. The earth may be connected on the indoor unit side.
natural_image
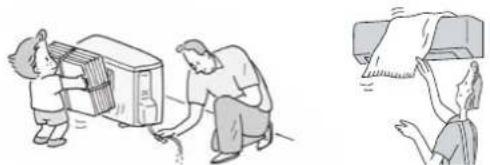
Illustration of two people handling a server and a printer, with no visible text or symbols.Please contact the professional personnel for air conditioner relocation
- When the air conditioner is to be removed or reinstalled because of rebuilding, moving, etc., please contact your dealer or the after-sales service center of our company.
Please recheck the following items before you call for the repair personnel.
When the following problems occur, they are not the problems of air conditioner.
When you think 「problems occur」
In Heating Operation...
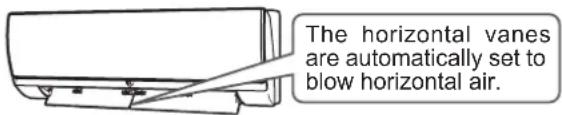
When the heating operation just starts or when cool air is prevented from blowing out or during defrosting operation or when the room temperature exceeds the set temperature, it will be set automatically to blow air horizontally.
■ The air conditioner can't receive the signal of remote controller.
Please refer to page 23 for the details.
■ From the outdoor unit...
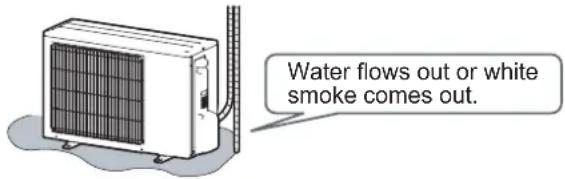
During Heating operation, water flows out from the outdoor unit or the vapor produced due to defrosting looks like white smoke.
The I FEEL temperature is displayed as F_5 and all indicators are flickering.
Please reinstall the horizontal vanes.
When the following occur, please contact the repair personnel.
● After you confirm the items on page 23, the indoor unit still leaks water.
- When the remote controller can't be used.
(When inverter-type fluorescent lamp lights and when the power supply to LCD and plasma TV and etc. is connected)
- When the power supply cord generates heat.
(When the socket is loose)
- When the operation indicator and numbers in I FEEL temperature display section are flickering.
- When the power supply cord is partly damaged.
● The air conditioner may interfere with radio or TV reception.
(A signal amplifier is recommended to be installed in areas where the reception is weak.)
- When foreign material is inserted into the air conditioner or water is sprinkled on the air conditioner.
- When the air switch frequently trips.
When you have any doubt or ask for repair, please contact the dealer or the after-sales service center of our company.
■ When the air conditioner is used for several seasons, the performance may be lowered due to dirt inside the unit.
■ Depending on the condition, an odor may be generated or condensate water may not drain out smoothly due to dirt, dust, etc.
It is recommended that the unit be inspected and repaired by professional technicians in addition to normal maintenance. Please contact your dealer or the after-sales service center of our company.
■ Do not put an object around the air outlet of the outdoor unit. This may lower the capacity or increase the volume of the operating sound.
If an abnormal sound is heard during operation, please contact your dealer or the after-sales service center of our company.
RelocationInspection
When the air conditioner is to be removed or re-installed because of rebuilding, moving, etc., professional technicians are needed.
⚠ Warning
Repairs or relocation should not be done by the user.
If this is done incorrectly, it may cause fire, electric shock, or injury from the unit falling, water leaking, etc. The refrigerant with substance such as air mixed will cause pressure rise and lead to crack and etc. Therefore, please contact your dealer or the after-sales service center of our company.
Safety Precautions For Installation
1. To ensure safety, please pay attention to the following
Warning
| The user should not install this unit. | When installing or relocating the unit,make sure that no substance other than the specified refrigerant enters the refrigerant loop.Any presence of foreign substance such as air can cause abnormal pressure rise and may result in crack and etc. |
| If installation is done incorrectly,it may cause fire,electric shock,or injury from the unit falling,water leaking etc.Therefore,please contact your dealer or the after-sales service center of our company. | |
| Install the unit securely in a place which can bear the weight of the unit. | When the unit is installed or relocated,don't seal in the refrigerant other than the specified type. |
| If the installation location cannot bear the weight of the unit,the unit could fall causing injury. | If other types of refrigerant are sealed in,it may cause problems such as unsmooth operation,error operation and mechanical fault.Sometimes,there may be possibility of major safety problems. |
| Use the specified wires to connect the indoor and outdoor units securely and attach the wires firmly to the terminal block so the external stress is not directly applied on it.Incomplete connecting and securing could cause fire. | When the refrigerant is being reclaimed,shut down the compressor before the connecting pipe is removed.If the refrigerant pipes are disconnected while the compressor is running and the stop valve is open,air could be drawn in and the pressure in the refrigeration cycle could become abnormally high.This could cause the pipes to burst or injury. |
| When installing the unit,securely connect the refrigerant pipes before starting the compressor.If the compressor is started before the refrigerant pipes are connected and when the stop valve is open,air could be drawn in and the pressure in the refrigeration cycle could become abnormally high.This could cause the pipes to burst or injury. | Perform the installation accurately referring to the installation manual.Incomplete installation could cause fire or electric shock,injury due to the unit falling,or leakage of water. |
| If the refrigerant gas leaks during the installation, please replace the gas.If refrigerant gas comes into contact with naked fire,toxic gas will be generated. | Electrical work should be performed according to the installation manual.Be sure to use an exclusive circuit.If the capacity of the power circuit is insufficient or there is incomplete electrical work,it could result in fire or electric shock. |
Warning
| Attach the electrical cover to the indoor unit and the service panel to the outdoor unit securely.If the electrical cover of the indoor unit and the service panel of the outdoor unit are not attached securely,it could result in fire or electric shock due to incoming dust,water,etc. | Perform the drainage and piping work securely according to the installation manual.If there is defect in the drainage and piping work or the indoor unit tilts,water could drop from the unit,soaking and damaging household goods. |
| Be sure to use the parts provided or specified parts for the installation work.The use of improper parts could cause accidents such as fire,electric shock or injury due to,the unit falling or leakage of water etc. | Do not use intermediate connection of the power cord to connect the power supply.This must cause error action of the unit,leading to abnormal operation. |
| Do not use intermediate connection of the power cord or the extension cord and do not connect many devices to one AC outletIt could cause fire or electric shock due to defective contact,defective insulation,exceeding the permissible load,etc. | On the occasion where rain,small insects and foreign material may enter the room,the external holes on the wall through which the refrigerant pipe penetrates shall be sealed.Electrical work should be performed according to the installation manual.Be sure to use an exclusive circuit. |
| Earthing must be done.The socket for the air conditioner shall have exclusive earth wires.If there is no earth wire or the wires are not connected securely,electric shock may occur.Do not connect the earth to gas pipe,water pipe,lightning rod or telephone earth. | Please install the air conditioner strictly in accordance with GB17790 Installation codes for household or similar purpose air conditioners. |
| Do not install the unit in a place where inflammable gas may leak.If gas leaks and accumulates in the area around the unit,it could cause an explosion. | The unit shall be installed in accordance with national wiring regulations. |
| Leakage protectors shall be installed.If there are no leakage protectors,electric shock may occur. | Check that the refrigerant gas does not leak after installation has been completed.If the flexible power supply cord is damaged,it shall be replaced by exclusive cord or the exclusive assemblies purchased from the repair department.Then,if you have more doubts,please contact your dealer or the after-sales service center of our company. |
2. Precautions for R410A refrigeration system
2-1 Air conditioners applicable to R410A refrigeration
Warning
- Use C1220 copper phosphorus (for copper and copper alloy seamless pipes) to connect the refrigerant pipes. Make sure the insides of the pipes are clean and do not contain any harmful contaminants such as sulfuric compounds, oxidants, debris, or dust. Use pipes with the specified thickness.
- Use ester oil, ether oil, alkylbenzene oil (small amount) as the refrigeration oil applied to the flared sections. If mineral oil is mixed in the refrigeration oil, oil deterioration may result.
- Do not use refrigerant other than R410A. If another refrigerant is used, the chlorine will cause the oil to deteriorate.
- Use the following tools specifically designed for use with R410A refrigerant. The following tools are necessary to use R410A refrigerant. Contact your nearest dealer for any questions.
| Tools (for R410A) | |
| Pressure gauge | Flare tool |
| Dosing hose | Size measurement gauge |
| Gas leak detector | Vacuum pump adapter |
| Torque wrench | Electronic scale |
- Be sure to use the correct tools. If dust, debris, moisture enters the refrigerant lines, refrigeration oil deterioration may result.
- Do not use a charging cylinder. If a charging cylinder is used, the composition of the refrigerant will change and the efficiency will be lowered.
2-2 Precautions for equipment using R410A refrigerant
Warning
- When installing or relocating the air conditioner, use only the specified refrigerant (R410A) to charge the refrigerant lines. Do not mix it with any other refrigerant and do not allow air to remain in the lines. Air enclosed in the lines can cause pressure peaks resulting in rupture and other hazards.
| MSZ-(P)AH09/12VA-H1 | |
| Liquid pipes | 6.35mm (Thickness 0.8mm) |
| Gas pipe | 9.52mm (Thickness 0.8mm) |
- Do not use pipes thinner than those specified above. Do not share the vacuum pump with R22 refrigerant systems.
Precautions for installation and operation
- When the air conditioner is to be installed, please contact your dealer or the after-sales service center of our company.
Please don't install your air conditioner in the following places which are liable to cause failure.
- Avoid dangerous places where there is leakage of flammable gas.
- Where there are high frequency supersonic machines and wireless machines.
• Where there is much machine oil.
• Salty places such as the seaside.
• Where sulfide gas is generated such as a hot spring.
- Avoid places where there is flying oil or a lot of oil smoke.
- Avoid places where there may be snow cover to block the outdoor unit.
- Avoid places where handling depends on cranes or ships.
- Select places where airflow is not blocked.
- Select places where cool air spreads over the entire room.
- The maximum distance and height difference between the indoor and outdoor units: Refer to the "extreme pipe length".
- Select rigid wall without vibration.
- Avoid places where it is exposed to direct sunshine.
- At a distance 1 m or more away from your radio and 3 m or more away from your TV antenna.(or operation of the air conditioner may interfere with TV images or produce noises.)
- In a place as far away as possible from fluorescent and incandescent lights (or the infrared remote control can't operate the air conditioner normally).
- Select places where the air strainer can be removed and replaced freely and easily.
- Select places not affected greatly by heavy wind or blowing snow. In areas with heavy snow, be sure to have measures against the snow (suggest installing a canopy, and/or a pedestal).
- Select places where airflow is good and dustless.
- Select places where rain or direct sunlight can be avoided as much as possible.
- Avoid any places where the ambient air quality is poor.
- Avoid places where there are volatile, corrosive and combustible chemicals.
※Places where water is easy to drain.
※ In places with bad ventilation condition and which is very easy to cause air flow short circuit, the refrigeration performance may decrease and the power consumption may rise by about 10%. At this point, please install wind scoopers (to be purchased otherwise) to improve the performance of air conditioners.
● In order to reduce operation noise or vibration, you shall firmly install the unit in a solid frame.
- Select places where operation noise or blown hot air can't bother neighbor.
- Be sure not to put objects near the air outlet of the outdoor unit. Otherwise, this may cause the decrease in performance of the air conditioner and increase in operation noise.
- When installing the unit in a higher place, you have to fix the feet of the unit.
- Be sure to install the unit horizontally.
● Easy for maintenance and repair.
● In operation, if there is abnormal sound, please contact your dealer or the after-sales service center.
When the installation location of the outdoor unit should be at least 3 m away from the antennas for TV sets, radios, etc. provide larger distance to improve the reception quality if there is still apparent signal disturbance.
Keep the fire alarm at least 1.5 m away from the air outlet of the indoor unit.
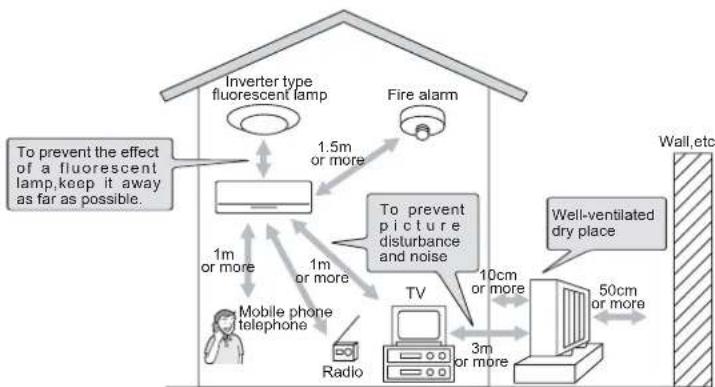
flowchart
graph TD
    A["Inverter type fluorescent lamp"] -->|1.5m or more| B["Fire alarm"]
    C["Mobile phone telephone"] -->|1m or more| B
    D["Radio"] -->|3m or more| E["TV"]
    F["Well-ventilated dry place"] -->|10cm or more| E
    G["Wall,etc"] -->|50cm or more| E
    H["To prevent the effect of a fluorescent lamp, keep it away as far as possible."] --> A
    I["To prevent picture disturbance and noise"] --> B
Caution
- When new furniture is purchased or the room is being finished or the floor is rubbed with wax, don't use the air conditioner. After the finishing, if you want to use the air conditioner, please ventilate the room completely. Otherwise, the volatile substance produced in rubbing the wax may adhere to the inside of the air conditioner and lead to water leakage or flying dew from the air conditioner.
1. Installation diagrams and accessories
Packing list (Before installation, users are advised to verify the amount of parts based on the packing list)
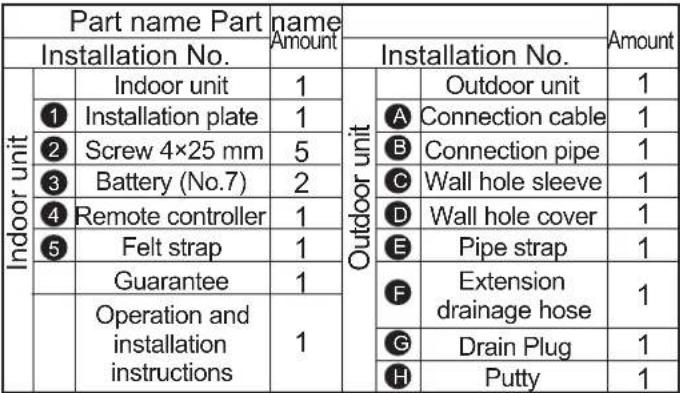 |
Installation dimension:
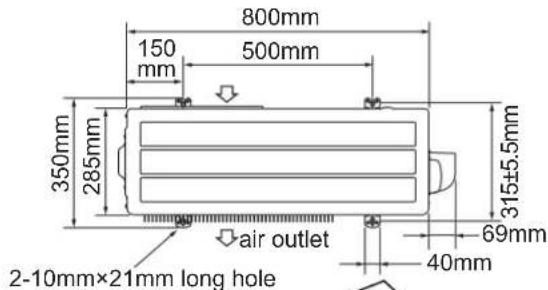
Caution
(1) Don't use the drainage pipe connector and rubber stopper in cold areas. Failure may result from drainage freezing.
Steps for installing drainage pipe
(1) Select a drain hole in the base for draining and connect the drainage pipe connector to the hole.
(2) Block residual drain holes in the base with rubber stopper.
(3) Connect the drainage pipe to the connector. Keep the drainage pipe to tilt downwards to make a smooth draining.
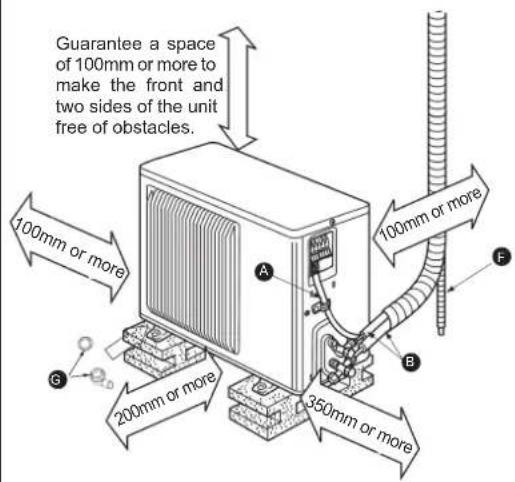
Flared joint
● The unit is equipped with flared joints at indoor and outdoor unit side.
● As shown in the figure below, refrigerant pipe is used to connect indoor and outdoor unit.
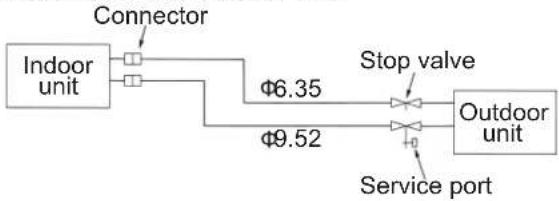
flowchart
graph LR
    A["Indoor unit"] --> B["Connector"]
    B --> C["Stop valve"]
    C --> D["Outdoor unit"]
    D --> E["Service port"]
    C --> F["φ6.35"]
    D --> G["φ9.52"]
| Limit | |
| Pipe length | 12 m |
| Height difference | 8 m |
| Amount of bends | 10 pieces |
- Adjustment of refrigerant…If the pipe length exceeds the scope in the table below,refrigerant (R410A) should be supplemented.(Filling refrigerant to the outdoor unit with refrigerant shall be subject to the following pipe length.)
| Pipe length | Type | Dosage of refrigerant |
| Over 6 meters | MSZ(Inverter) | 30g×(pipe length(m)-6) |
● Note: Excessive extension of piping will cause cooling and heating capacity to decrease.
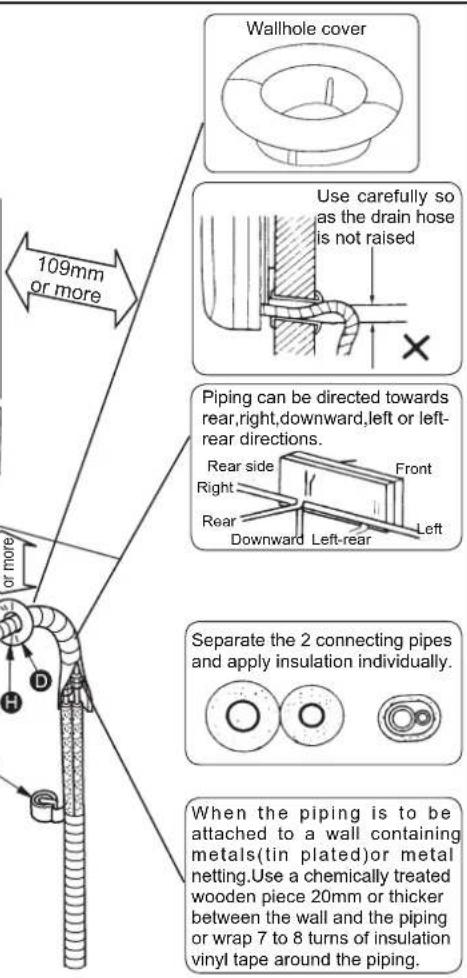
Units should be installed by licensed contractor according to local code requirement.
1-1 How to set slide switch(inside battery box of remote controller)
Details of slide switch
① Remove the front lid on the lower back of the remote controller.
② Be sure to set the slide switch inside the remote controller battery box to an appropriate position(in accordance with the installed position of the indoor unit.) If the switch is not set correctly, the air conditioner may not function properly and then the air conditioner is impossible to reach the optimum operation status. Note: If the indoor unit installed more than 50 cm away from the side walls, cabinets or other nearby objects, set the switch to the "center" position.
③ Insert the two(AAA)1.5V batteries in the place.
④ Close the front lid on the lower back of the remote controller.
⑤ Press the 复位 button with a thin object(pen).
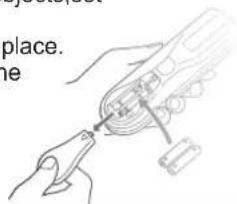
2.Installation for indoor unit
2-1 Fixing the mounting plate
● Take a structural part on the wall (such as a pole) as the reference so that you are sure to fix the mounting panel horizontally. If the indoor unit declines, the furniture will be wet and contaminated by water drop from the unit.
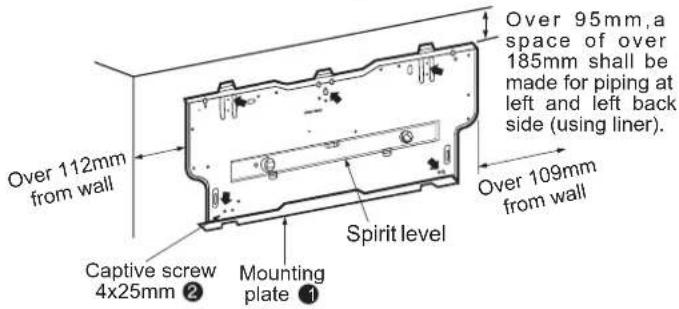
In order to avoid slight vibration of the mounting plate, ← Holes marked with should be fixed.
- If the user needs to break down the bore in the middle of the mounting plate, please stick plastic tape on the end face of the bore to prevent from being scratched (the tape shall be prepared by the user).
- When using expansion screws buried into cement wall, you shall use elliptical holes of 11×20 and 11×26 with 45cm apart from each other to fix the mounting plate. If the expansion screw is too long, use short screws sold in market.
2-2 Drilling hole in the wall
①Confirm the hole position in wall.
②Drill a hole(diameter:65mm)tilting slightly downwards from inside to outside.
③Insert wall hole sleeve Ⓐ in the wall hole.
④Embed the putty Ⓗ between wall hole and sleeve.
Confirm the hole position
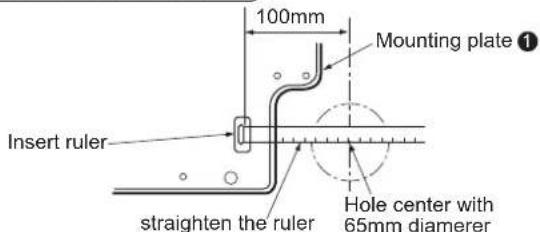
Hole of left shall be processed by the same way
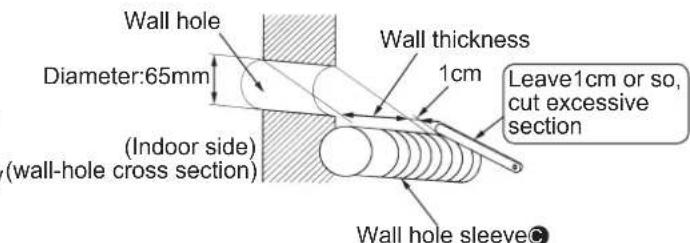
Always use the wall hole sleeve, which prevents the connection wires between indoor and outdoor unit from contacting the metallic parts inside wall and rodent pest from occurring.
2-3 Specifications for power cord and connection wires
● Use special cables for the air conditioner
| Power cord length(Length stretching from left/length stretching from right) | 0.75/1.50m |
| Connection wires between indoor and outdoor unit.Specification of cables | YZW cable with the section area of 1.5mm ^2 |
● Lead out a power cord from the left or right bottom of the indoor unit.
Caution
• Each air conditioner should be equipped with special power supply line. Power supply specification should accord with national regulations and be installed with independent switch.
- Don't cut off the power cord and connect it to other lines, or fire may occur.
When the power supply cord is left, please don't fold it into short part or press it in a small place. In addition don't press the power supply cord for the indoor unit between the wall and mounting plate and between the plate and the indoor unit. This may cause damage to the cord and result in heat, fire and etc. Don't bind the left cord together, but be sure to place it in the space behind the unit as shown in
the following figure and store it properly.
2-4 Connection of indoor • outdoor wires
① Remove the corner plate on the right bottom.
② Remove the fixing clamp of the wire.
③ Connect the earth to the grounding terminal on the electrical box.
④ Fix the connection wire for the indoor • outdoor unit on the terminal bed.(figure 1)
⑤ Make the fixing clamp hold the connection wire and then fix it with screws.
⑥ Install the corner plate properly.
(Figure 1)
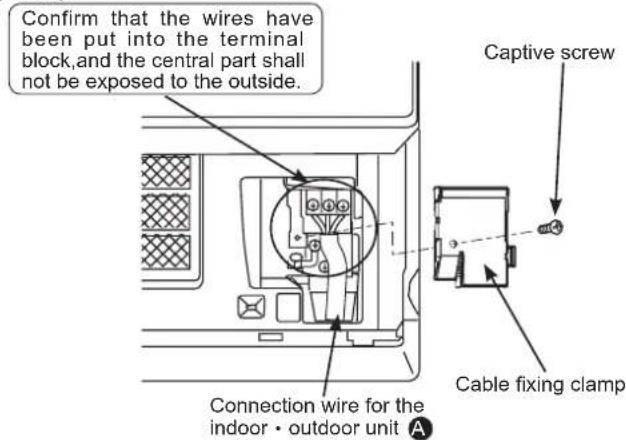
⚠ Warning
- Cables between indoor and outdoor unit shall be connected in good order using specified cables and connecting terminals be fixed well without being affected by external force.
Fire may result from poor connection or fixture. - Cable fixing clamps and electrical cover shall be fixed well, otherwise, fire or electric shock may result from entry of dust and moisture.
- Be sure not to make wrong connection.
• Electric shock may result from wrong grounding.
Caution
- Tighten terminal screws to avoid looseness.
- After tightening of the screws, pull the wires slightly to verify whether they are tightened.
- If the wires are not connected to the terminal block, the air conditioner can't operate correctly.
⚠ Warning
- Wires between indoor and outdoor terminal block shall be marked with number for corresponding connection.
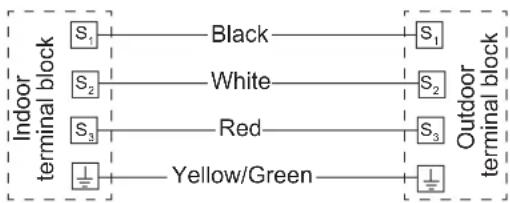
flowchart
graph LR
    subgraph Indoor terminal block
        S1["S₁"] --> Black["Black"]
        S2["S₂"] --> White["White"]
        S3["S₃"] --> Red["Red"]
        Yellow["Yellow/Green"] --> YellowGreen["Yellow/Green"]
    end
    subgraph Outdoor terminal block
        S1["S₁"] --> S2["S₂"]
        S2["S₂"] --> S3["S₃"]
        S3["S₃"] --> Yellow["Yellow/Green"]
        Yellow["Yellow/Green"] --> YellowGreen["Yellow/Green"]
    end
MSZ model
Frequency conversion model
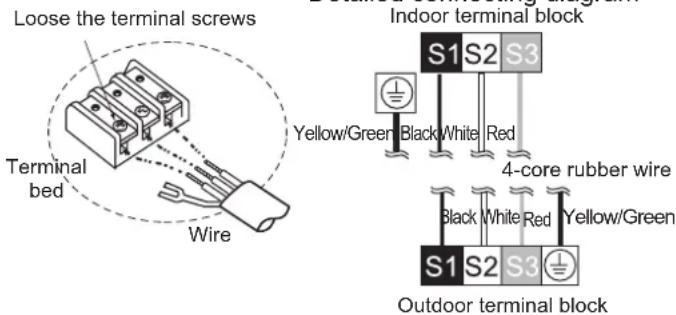
⚠ Warning
- Neutral line, live line and earth wire inside power socket at home shall be connected as shown in figure reliably without wrong connection and internal short circuit
- Fire may result from wrong connection.
Power supply check
Diagram for power socket in user's home
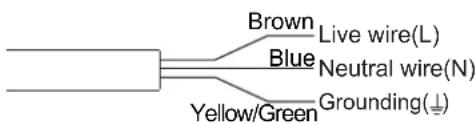
2-5 Auto restart function
When the air conditioner is controlled by the remote controller, indoor unit electrical board will memorize operation mode, set temperature and fan speed. If there is a power-off during operation, Auto restart function is enabled to restart the air conditioner after recovery of power supply.
How to set "Auto Restart Function"
① Remove the front panel and then remove the emergency operation button assemblies.
② Remove the screw of the electrical cover.
③ Remove the electrical cover.
④ Remove the connector of blade motor from CN151 and pull out the lower limit switch connector from CN1R1. Remove the vane motor conductor inside the electrical box.
Pull out the electrical board and disconnect the resistor JR07 on it.
Operation
① The operation setting is still reserved at power-off.
② 3 minutes after recovery of power supply, the air conditioner will restart automatically according to the
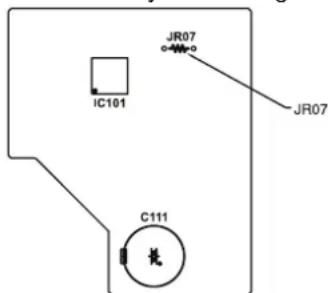
Caution
- 10 seconds after operating the remote controller, the operation setting will be reserved.
- When the Auto ON/OFF-Timer is activated, the timer setting will be cancelled in the event of power-off or power failure. As Auto Restart function is equipped inside the models, once the power is recovered, the air conditioner will start to operate three minutes later.
- If the air conditioner is turned off by the remote controller before power-off, Auto Restart function will be disabled due to power button's Off status in the remote controller.
- In order to prevent impulse current from affecting the power supply, please arrange a sequence to start other household appliances to avoid simultaneous power-on.
2-6 Piping work
- Be sure to place drainage hose under refrigerant pipe.
- Don't upheave or bend the drainage hose.
- Don't bind up the hose by pulling it.
- Be sure to bind up the drainage hose with commercially available insulated material when the hose goes through room.
- First wrap pipes with E, then the drainage hose with felt tape E and put them into the pipe keeping section behind the indoor unit. Liquid pipe
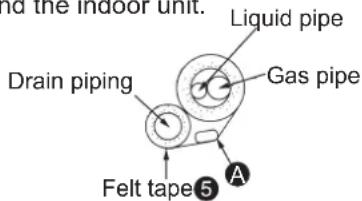
Laying pipes backwards, rightwards and downwards
Piping
● Pipe layout
Put refrigerant pipe and drainage pipe together, wrap them with band.
Take care not to ra the drainage hose.
Cut this part when connecting E pipe downwards.
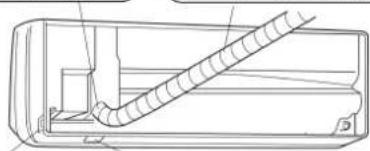
natural_image
Technical line drawing of a mechanical component with a coiled spring or hose assembly (no text or symbols)Cut this part when connecting pipe rightwards.
Cut this part when connecting pipe downwards.
- Insert the refrigerant pipe and drainage pipe into the wall hole sleeve Ⓐ, hang the indoor unit's upper half on the mounting plate 1.
- Move the air conditioner right and left to check if it is hung on the mounting plate ① firmly.
● Push the unit's lower half into the mounting plate ①.
Lay pipes leftwards or rear leftwards
- Pipe layout
Put refrigerant pipe and drainage pipe together, wrap them with band first and then with felt tape⑤.
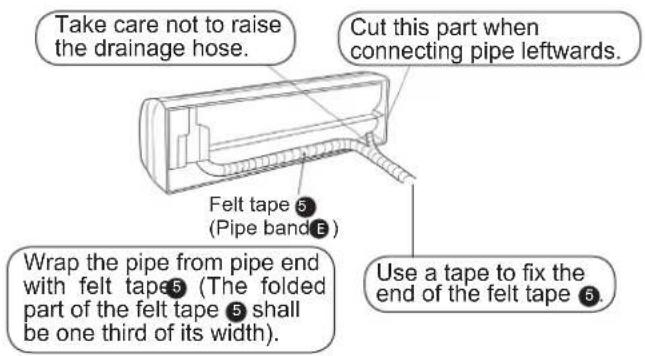
Refitting for drainage hose
● The drainage hose should be refitted in the event of piping leftwards and rear leftwards. Otherwise, water dripping may result.
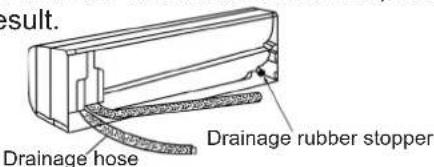
- The rubber stopper at the rear right of indoor unit. Remove the rubber stopper by grasping the sharp lug.
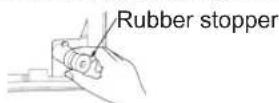
- Remove the drainage hose at the rear left side of the indoor unit. Pull out the drainage hose by grasping the handle knob shown by arrow in the direction.
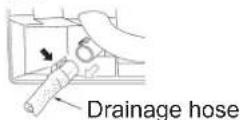
3.Slip the rubber stopper into the position in which the drainage pipe is installed at the rear of indoor unit. Use an Allen key to press the stopper into the joint of the drain plate.
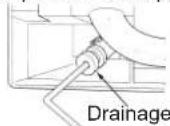
Drainage rubber stopper
- Connect the drainage hose to the corresponding connection position at the rear right of indoor unit. Insert the drainage hose in the joint of the drain plate. Be sure to confirm if the hose is clamped into the prominent detent.
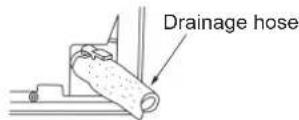
Connection between the refrigerant pipe and extension pipe
If extension pipes or wires have been buried into a wall, please perform piping as described in the following key points.
①Hook the mounting plate ① with indoor unit's upper part. After considering inclusion of the pipe and placing the unit as possible as close to the left, cut off a piece of packing material (used as liner) to lock the rear lug, raise the indoor unit as shown in right figure..
- Connect the refrigerant pipe and extension pipe B. Cut off a part of packing material (used as liner) Lock the rear lug
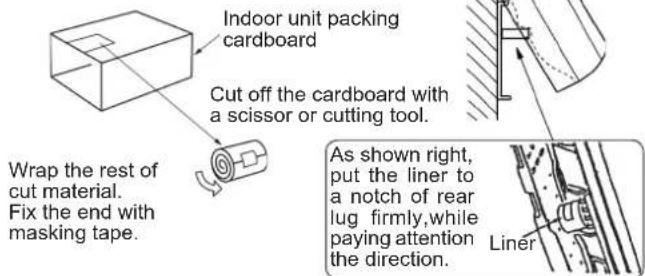
Installation of indoor unit
● Pass the pipe through the wall, hang and install the unit on the mounting plate ①, then push in the unit until a click is heard.
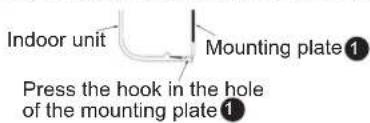
2-7 Laying drainage pipe
In order to make a smooth drainage, the drainage pipe shall be connected tilting downwards. (Figure 1)
Don't connect the pipe as shown in Figure 2-3.
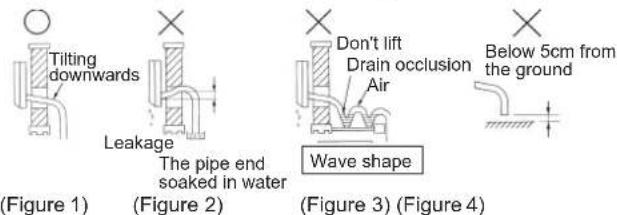
If it is not long enough for the drainage hose installed at the indoor unit, you can use the drainage hose F in accessory for connection.
When the hose goes through room, be sure to bind up the drainage hose with commercially available insulated material.
3. Installation of outdoor unit
Connection between indoor and outdoor unit
- Connect the wires from the indoor unit to the terminal block correctly.
• Take care not to enable the wires to contact pipe.
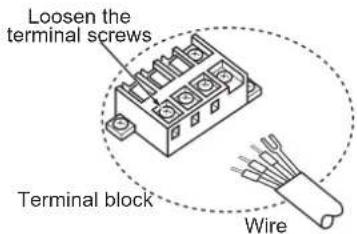
Caution
- Don't make wrong connection. The air conditioner can't operate normally in case of wrong connection.
- Tighten the screws to avoid looseness.
- Pull the wires slightly to verify whether they are tightened
Be sure to use this wire clip to fix indoor • outdoor unit's connection wire A in good order.
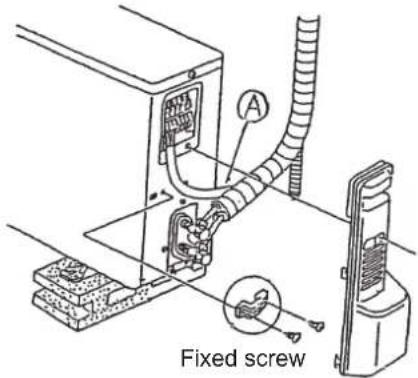
⚠ Warning
Fix the service board of outdoor unit well. Otherwise, fire and electric shock may result from entry of dust and moisture.
Caution
- The mounting surface of the air conditioner should be solid enough to bear the weight. The bearing capacity shall not be lower than actually born weight (at least 200kg / m^2 ).
- The mounting surface is decorated with wooden, metallic or non-metallic structure. Corresponding measures like reinforcement support and anti-vibration shall be taken in case of insufficient strength.
• Installation rack shall be such a fixture that the air conditioner can be fixed securely on the mounting surface. - Confirm the diameter and depth of the mounting hole for the fixture based on hardness of the mounting surface material, select applicable expansion bolt to ensure unit's stability, firmness and reliability.
- Try to avoid rainy days, windy and snowy days as well as thundery days during installation. If necessary, relevant measures shall be taken to protect people from injury.
4. Complete indoor · outdoor unit connection and perform test run
4-1 Piping connection
① Indoor unit piping
Connect liquid and gas pipes to the unit.
- First, align with the center, tighten the pipe nut with hand until you can't proceed.
- Refer to the following torque table, use two wrenches to tighten the indoor unit side connection pipe connector. Take care not to tighten it excessively to avoid damaging the flared part.
| Pipe diameter | torque Tightened | ||
| mm | Inch | N·m | kgf·cm |
| 6.35 | 1/4 | 13.7 to 17.7 | 140 to 180 |
| 9.52 | 3/8 | 34.3 to 41.2 | 350 to 420 |
| 12.7 | 1/2 | 49.0 to 56.4 | 500 to 575 |
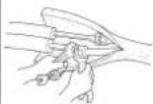
⚠ Warning
- When installing the unit, securely connect the refrigerant pipes before starting the compressor.
②Outdoor unit connection
As the same connection with that of indoor unit, connect the pipe to the outdoor unit stop valve(two or three-way)pipe connector.
● Tighten the connector with the same torque as that of indoor unit by torque wrench or common wrench.
Heat insulation and wrapping band
① Pipes and valves connected at side of indoor unit should be heat insulated.
② All pipes starting from the outdoor unit's pipe entrance shall be wrapped with bandE.
● Fix the end of band with tape.
- If the pipe goes through ceiling, toilet or other locations with high temperature and high humidity, please wrap the pipe with commercially available heat insulated band to avoid condensation.
4-2 Vacuumizing and leak detection test
| Vacuumizing |
| Connect the refrigerant pipe(liquidnd gas)between indoor and out door unit |
| Remove the stop valve's service cap at the gas pipe of outdoor unit(Vacuumizing can't be done without removing the cap) |
| When vacuum pump is recommended to be used |
| Connect the Manifold valve with gauge and vacuum pump to the stop valve's service port at the gas pipe of outdoor unit |
| Run the vacuum pump(vacuumize the pipe over 15 minutes) |
| Check the vacuum with the manifold valve with gauge, close the vavle and stop the pump |
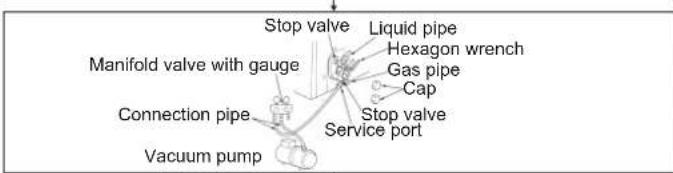
| Remove the Manifold valve with gauge from the stop valve service port quickly |
| Open all the stop valves at liquid and gas pipes,or performance reduction or failure may result |
| It's unnecessary to add refrigerant if pipe length is within the scope | It's necessary to add proper refrigerant if pipe length exceeds the scope |
| Screw the service cap securely |
| Screw the caps of two stop valves securely |
| Make a leakage detection test |
| Tightening torque | ||
| N·m | kgf·cm | |
| Service cap | 13.7 to 17.7 | 140 to 180 |
| Shut off valve cap | 19.6 to 29.4 | 200 to 300 |
4-3 Test run
MSZ model Frequency conversion model
- Before the test run, recheck if there is wrong connection. Wrong connection may hinder normal operation or lead to fusing as well as malfunction.
- Perform the test run by emergency button. At the time of pressing the button, the machine begins to operate in cooling mode based on op-tional mode for 30 minutes. The thermostat will be disabled within the 30 minutes. After the duration, the machine starts emergency operation in cooling or heating mode at the set temperature of 24^ .
● Test run shall be performed in the following process.
Operation process
- Press the emergency button. Each time the button is pressed, switching is made in the following sequence.

※ No operation mode other than it can be run. In the first 30 minutes, the temperature can't be adjusted and the unit will run continuously. The fan speed is (high).
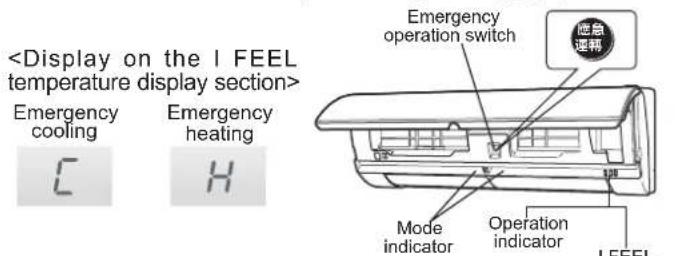
Caution:
• This is the indication in emergency operation mode.
Make sure to receive the signal from the remote controller
After pressing the button of the remote controller, please confirm whether there is beep from the indoor unit. Then press the button again to turn off the unit.
Under the control of remote controller, the unit will quit the emergency operation when receiving the signal from the remote controller.
- In order to protect the compressor, the outdoor unit will not be enabled even if the air conditioner restarts three minutes after stopping operation.
4-4 Notice for user information
- Based on operating instructions, please describe the way to adjust and control temperature, disassembly of air filter and vertical vane, way of cleaning and precautions in operation.
5.Relocation and maintenance after installation
5-1 How to install front frame
① Set the horizontal vane to position No. 3 (page 10) before installing the front frame.
② Insert the bottom side of front frame under the horizontal vane.
③ Fix the top of the front frame securely.
④ Press the agraffe of front frame and fix the front frame on the air conditioner.
5-2 Remove the indoor unit
Pull out the bottom part of indoor unit from the mounting plate.
Loosen two angles
As shown below, pull the left and right corner part of indoor unit downwards and forwards and loosen the hook.
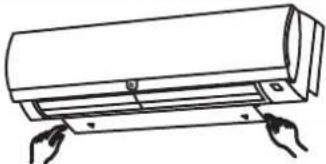
natural_image
Line drawing of a cylindrical air conditioner unit with two handles, no text or symbols present5-3 Supply of refrigerant
① Connect a gas bottle to the service port of stop valve (three way).
② Purge the pipe or hose using the refrigerant from the gas bottle.
③ Supply the refrigerant with specified amount during air conditioner operation in cooling mode.
Precautions
- During supply of the refrigerant, don't place the gas bottle upside down, or problems may result.
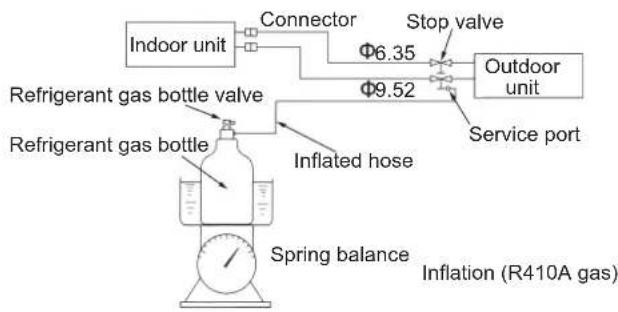
flowchart
graph LR
    A["Indoor unit"] --> B["Connector"]
    B --> C["Stop valve"]
    C --> D["Outdoor unit"]
    D --> E["Service port"]
    E --> F["Inflated hose"]
    F --> G["Refrigerant gas bottle valve"]
    G --> H["Refrigerant gas bottle"]
    H --> I["Spring balance"]
    I --> J["Inflation (R410A gas)"]
- In order to keep high pressure in gas bottle, heat the bottle with warm water (40°C) in cold weather. But don't heat it with fire or steam.
Note:① An indoor wiring diagram is stuck inside indoor unit front panel.
② Outdoor wiring diagram is stuck on outdoor unit electrical control box.
5-4 How to reclaim refrigerant
① Be sure to use a pressure gauge. ② Enable a cooling operation first.
③ Then, close the valve (liquid valve) at high pressure side completely with the readings of 0-0.05MPa (about 30-40s) in pressure gauge, finally close the valve (gas valve) at low pressure side to stop operation immediately.
④ You can't remove the connection pipe until you ensure the closure of the two valves (liquid and gas) and power-off.
Warning
- When pumping down the refrigerant, stop the compressor before disconnecting the refrigerant pipes. The compressor may burst if air etc. get into it.
- 部品的清潔維護(清潔方法)
- 面板(若發現污垢)
- 注意
- 熱交換器(如發現污垢時)
- 用吸塵器(帶刷)吸掉灰塵
- 員聯系
- 5-3 補充製冷劑
- Opearating And Installing Instructions
- Contents
- For installation
- Warning
- Caution
- For unit relocation · repair
- For operation
- Remote Controller
- Preparation Before Operation
- Please contact your dealer to install the air conditioner.
- ■ Select mounting location(please do it before installing the batteries)
- How to use the remote controller
- How to set time
- Human Sense MOVE EYE Control Operation
- The detection range of Human Sense MOVE EYE
- Display of the area display section
- Cooling·Heating Operation(Control The I FEEL Temperature)
- Press either button between
- ■ Press the 🔊 buttons to adjust temperature and humidity
- During operation, press any button among
- 全室送风
- When the unit shuts down
- During operation, press the
- Press the button, set the humidity
- Details about Drying Operation
- Airflow Velocity · Direction Adjustment
- How to adjust airflow velocity
- ■ Press the 减速ton
- Horizontal air direction adjustment
- ■ Press the 左buttons
- Vertical air direction adjustment
- ■ Press the button
- In Heating mode, press the button
- To release
- Press the button once again
- Details about I-warm mode
- During the Heating operation and in the I FEEL mode, press the 快速器
- Details about Quick Heating Mode
- Cool Feeling Operation
- In the Cooling mode, press the 原感on
- ■ Set the temperature · humidity in Sleep operation
- Details about Sleep mode
- Powerful Mode
- Details about Powerful operation
- Simple OFF-Timer Operation
- In the operation modes, press the button
- Simple ON-Timer Operation
- When the unit is running or shuts down, press the button
- Press the 取消
- Press the 取消on
- ■ Press the 执放on and select the item to be changed
- ■ Press change the setting
- About Absence Detection (to save energy) and Absence Detection (to turn off) operation
- Switch The Indicator Of The Indoor Unit
- During operation or during shutdown, press the button
- Switch The Operation Sound
- During operation, press the button
- When scale is available
- When scale is not available
- Part Maintenance
- Vertical vanes
- Cleaning The Parts (Cleaning Methods)
- Air strainer
- Panel (If dirt is detected)
- Heat exchange
- Air outlet, horizontal vanes, vertical vanes and vanes (When dirt is detected)
- Install The Parts
- Horizontal vanes (upper left, upper right, lower left, upper left, 4 pieces)
- Finally
- Before You Call For The Maintenance Personal, Please Check The Following Contents One More Time.
- About operation
- When the remote controller can't be used (Emergency Operation)
- Press the EMERGENCY OPERATION switch
- Press the Emergency Operation switch
- When the air conditioner is not going to be used for a long time
- Electrical work
- When the air conditioner is to be used again
- Please contact the professional personnel for air conditioner relocation
- When you think 「problems occur」
- In Heating Operation...
- ■ The air conditioner can't receive the signal of remote controller.
- ■ From the outdoor unit...
- The I FEEL temperature is displayed as F_5 and all indicators are flickering.
- When the following occur, please contact the repair personnel.
- RelocationInspection
- ⚠ Warning
- Safety Precautions For Installation
- To ensure safety, please pay attention to the following
- Precautions for R410A refrigeration system
- Precautions for installation and operation
- Installation diagrams and accessories
- Steps for installing drainage pipe
- Flared joint
- 1-1 How to set slide switch(inside battery box of remote controller)
- 2.Installation for indoor unit
- 2-1 Fixing the mounting plate
- 2-2 Drilling hole in the wall
- 2-3 Specifications for power cord and connection wires
- 2-4 Connection of indoor • outdoor wires
- MSZ model
- Frequency conversion model
- Power supply check
- Diagram for power socket in user's home
- 2-5 Auto restart function
- How to set "Auto Restart Function"
- Operation
- 2-6 Piping work
- Laying pipes backwards, rightwards and downwards
- Piping
- ● Pipe layout
- Lay pipes leftwards or rear leftwards
- - Pipe layout
- Refitting for drainage hose
- Connection between the refrigerant pipe and extension pipe
- Installation of indoor unit
- 2-7 Laying drainage pipe
- Installation of outdoor unit
- Complete indoor · outdoor unit connection and perform test run
- 4-1 Piping connection
- Heat insulation and wrapping band
- 4-2 Vacuumizing and leak detection test
- 4-3 Test run
- MSZ model Frequency conversion model
- Operation process
- Caution:
- Make sure to receive the signal from the remote controller
- Under the control of remote controller, the unit will quit the emergency operation when receiving the signal from the remote controller.
- 4-4 Notice for user information
- 5.Relocation and maintenance after installation
- 5-1 How to install front frame
- 5-2 Remove the indoor unit
- Loosen two angles
- 5-3 Supply of refrigerant
- Precautions
- 5-4 How to reclaim refrigerant
Brand : MITSUBISHI
Model : MSZ-PAH12VA-H1
Category : Air-conditioner