
P-Touch 2110 - Label printer BROTHER - Free user manual and instructions
Find the device manual for free P-Touch 2110 BROTHER in PDF.


| Product Type | Label Printer |
| Brand | Brother |
| Model | P-Touch 2110 |
| Dimensions (approx) | 6.7 x 4.5 x 2.8 in (170 x 115 x 70 mm) |
| Weight (approx) | 1.1 lbs (500 g) without batteries |
| Power Supply | 6 AA alkaline batteries (LR6) or AC adapter (AD-24) |
| Display | LCD with contrast adjustment (5 levels) |
| Supported Tape Widths | 9/64", 1/4", 3/8", 1/2", 3/4" (3.5, 6, 9, 12, 18 mm) |
| Maximum Number of Lines | 5 lines on 3/4" tape, 3 on 1/2", 2 on 3/8" and 1/4", 1 on 9/64" |
| Fonts | Helsinki, Brussels, Florida, Calgary |
| Character Sizes | Auto, 42, 36, 24, 18, 12, 9, 6 pt |
| Character Styles | Bold, Outline, Shadow, Solid, Italic, Vertical, Underline, Strikeout |
| Frames | 16 frame styles |
| Print Resolution | 180 dpi (typical for thermal transfer) |
| Print Speed | Approx. 10 mm/sec |
| Auto Power Off | 5 minutes (standalone), 60 minutes (connected to PC) |
| Memory | Up to 50 label files; data lost after 2 min without power |
| Connectivity | USB (cable not included with PT-2100) |
| Tape Cutting | Automatic cutter; Feed & Cut or Feed Only options |
| Barcode Support | Yes, multiple symbologies |
| Languages | 14 languages for menu display |
| Operating Temperature | 50°F to 95°F (10°C to 35°C) |
| Cleaning | Print head with optional cleaning cassette; exterior with soft dry cloth |
| Warranty | 1 year limited (USA); consumables 90 days |
Frequently Asked Questions - P-Touch 2110 BROTHER
User questions about P-Touch 2110 BROTHER
0 question about this device. Answer the ones you know or ask your own.
Ask a new question about this device
Download the instructions for your Label printer in PDF format for free! Find your manual P-Touch 2110 - BROTHER and take your electronic device back in hand. On this page are published all the documents necessary for the use of your device. P-Touch 2110 by BROTHER.
USER MANUAL P-Touch 2110 BROTHER
Read this User's Guide before you start using your P-touch.
Keep this User's Guide in a handy place for future reference.
natural_image
Line drawing of a vintage telephone receiver with keypad and front panel (no text or symbols)| 1 | INTRODUCTION | P. 4 |
| 2 | GETTING STARTED | P. 12 |
| 3 | EDITING A LABEL | P. 25 |
| 4 | LABEL PRINTING | P. 49 |
| 5 | USING THE FILE MEMORY | P. 56 |
| 6 | MAINTAINING YOUR P-TOUCH LABELER | P. 60 |
| 7 | TROUBLESHOOTING | P. 62 |
| 8 | APPENDIX | P. 68 |
| 9 | INDEX | P. 71 |
Federal Communications Commission (FCC) Declaration of Conformity (For USA Only)
Responsible Party : Brother International Corporation
100 Somerset Corporate Boulevard
Bridgewater, NJ 08807-0911 USA
declares that the product
Product Name : Brother P-touch labeler Electronic Labeling System
Model Number: PT-2100/2110
This device complies with 15 of the FCC Rules. Operation is subject to the following two conditions: (1) this device may not cause harmful interference, and (2) this device must accept any interference received, including interference that may cause undesired operation.
This equipment has been tested and found to comply with the limits for a Class B digital device, pursuant to Part 15 of the FCC Rules. These limits are designed to provide reasonable protection against harmful interference in a residential installation. This equipment generates, uses, and can radiate radio frequency energy and, if not installed and used in accordance with the instructions, may cause harmful interference to radio communications. However, there is no guarantee that interference will not occur in a particular installation. If this equipment does cause harmful interference to radio or television reception, which can be determined by turning the equipment off and on, the user is encouraged to try to correct the interference by one or more of the following measures:
- Reorient or relocate the receiving antenna
- Increase the separation between the equipment and receiver.
- Connect the equipment into an outlet on a circuit different from that to which the receiver is connected.
- Consult the dealer or an experienced radio/TV technician for help.
- The enclosed interface cable should be used in order to ensure compliance with the limits for a Class B digital device.
- Changes or modifications not expressly approved by Brother Industries, Ltd. could void the user's authority to operate the equipment.
• IBM is a trademark of International Business Machines, Inc.
• The Brother and P-touch logos are registered trademark of Brother Industries, Ltd.
- Microsoft and Windows are registered trademarks of Microsoft Corporation, USA.
- The names of other software or products used in this document are trademarks or registered trademarks of the respective companies that developed them.
Brother® One-Year Limited Warranty and Replacement Service (USA Only)
Who is covered:
- This limited warranty ("warranty") is given only to the original end-use/retail purchaser (referred to in this warranty as "Original Purchaser") of the accompanying product, consumables and accessories (collectively referred to in this warranty as "the machine").
- If you purchased a product from someone other than an authorized Brother reseller in the United States or if the product was used (including but not limited to floor models or refurbished product), prior to your purchase you are not the Original Purchaser and the product that you purchased is not covered by this warranty.
What is covered:
- The machine includes a Machine and Consumable and Accessory Items. Consumable and Accessory Items include but are not limited to label cassettes, cutters, stamps, power adapters, cases and batteries.
- Except as otherwise provided herein, Brother warrants that the Machine and the accompanying Consumable and Accessory Items will be free from defects in materials and workmanship, when used under normal conditions.
- This warranty applies only to products purchased and used in the United States. For products purchased in, but used outside, the United States, this warranty covers only warranty service within the United States (and does not include shipping outside the United States).
What is the length of the Warranty Periods:
• Machines: one year from the original purchase date.
- Accompanying Consumable and Accessory Items: 90 days from the original purchase date or the rated life of consumable, whichever comes first.
What is NOT covered:
This warranty does not cover:
(1) Physical damage to the machine;
(2) Damage caused by improper installation, improper or abnormal use, misuse, neglect or accident (including but not limited to transporting the machine without the proper preparation and/or packaging);
(3) Damage caused by another device or software used with the machine (including but not limited to damage resulting from use of non Brother ^® -brand parts and Consumable and Accessory Items);
(4) Consumable and Accessory Items that expired in accordance with a rated life; and,
(5) Problems arising from other than defects in materials or workmanship.
This limited warranty is VOID if the machine has been altered or modified in any way (including but not limited to attempted warranty repair without authorization from Brother and/or alteration/removal of the serial number).
What to do if you think your Product is eligible for warranty service:
Report your issue to our P-touch Customer Service Hotline at 1-877-478-6824 or to a Brother Authorized Service Center within the applicable warranty period. Supply Brother or the Brother Authorized Service Center with a copy of your dated bill of sale showing that the machine was purchased within the U.S. For the name of local Brother Authorized Service Center(s), call 1-800-521-2846.
What Brother will ask you to do:
After contacting Brother or a Brother Authorized Service Center, you may be required to deliver (by hand if you prefer) or send the Product properly packaged, freight prepaid, to the Authorized Service Center together with a photocopy of your bill of sale.
You are responsible for the cost of shipping, packing product, and insurance (if you desire). You are also responsible for loss or damage to the machine in shipping.
What Brother will do:
If the problem reported concerning your Machine and/or accompanying Consumable and Accessory Items is covered by this warranty and if you first reported the problem to Brother or an Authorized Service Center within the applicable warranty period, Brother or its Authorized Service Center will repair or replace the Machine and/or accompanying Consumable and Accessory Items at no charge to you for parts or labor. The decision as to whether to repair or replace the Machine and/or accompanying Consumable and Accessory Items is made by Brother in its sole discretion.
Brother reserves the right to supply a refurbished or remanufactured replacement Machine and/or accompanying Consumable and Accessory Items and use refurbished parts provided such replacement products conform to the manufacturer's specifications for new product/parts.
The repaired or replacement Machine and/or accompanying Consumable and Accessory Items will be returned to you freight prepaid or made available for you to pick up at a conveniently located Authorized Service Center.
If the Machine and/or accompanying Consumable and Accessory Items are not covered by this warranty (either stage), you will be charged for shipping the Machine and/or accompanying Consumable and Accessory Items back to you and charged for any service and/or replacement parts/products at Brother's then current published rates.
The foregoing are your sole (i.e., only) and exclusive remedies under this warranty.
What happens when Brother elects to replace your Machine:
When a replacement Machine is authorized by Brother, and you have delivered the Machine to an Authorized Service Center, the Authorized Service Center will provide you with a replacement Machine after receiving one from Brother. If you are dealing directly with Brother, Brother will send to you a replacement Machine with the understanding that you will, after receipt of the replacement Machine, supply the required proof of purchase information, together with the Machine that Brother agreed to replace. You are then expected to pack the Machine that Brother agreed to replace in the package from the replacement Machine and return it to Brother using the pre-paid freight bill supplied by Brother in accordance with the instructions provided by Brother. Since you will be in possession of two machines, Brother will require that you provide a valid major credit card number. Brother will issue a hold against the credit card account number that you provide until Brother receives your original Product and determines that your original Product is entitled to warranty coverage. Your credit card will be charged up to the cost of a new Product only if: (i) you do not return your original Product to Brother within five (5) business days; (ii) the problems with your original Product are not covered by the limited warranty; (iii) the proper packaging instructions are not followed and has caused damage to the product; or (iv) the warranty period on your original Product has expired or has not been sufficiently validated with a copy of the proof of purchase (bill of sale). The replacement Machine you receive (even if refurbished or remanufactured) will be covered by the balance of the limited warranty period remaining on the original Product, plus an additional thirty (30) days. You will keep the replacement Machine that is sent to you and your original Machine shall become the property of Brother. Retain your original Accessory Items and a copy of the return freight bill, signed by the courier.
Limitations:
Brother is not responsible for damage to or loss of any equipment, media, programs or data related to the use of the machine. Except for that repair or replacement as described above, Brother shall not be liable for any direct, indirect, incidental or consequential damages or specific relief. Because some states do not allow the exclusion or limitation of consequential or incidental damages, the above limitation may not apply to you.
THIS WARRANTY IS GIVEN IN LIEU OF ALL OTHER WARRANTIES, WRITTEN OR ORAL, WHETHER EXPRESSED BY AFFIRMATION, PROMISE, DESCRIPTION, DRAWING, MODEL OR SAMPLE. ANY AND ALL WARRANTIES OTHER THAN THIS ONE, WHETHER EXPRESS OR IMPLIED, INCLUDING IMPLIED WARRANTIES OF MERCHANTABILITY AND FITNESS FOR A PARTICULAR PURPOSE, ARE HEREBY DISCLAIMED.
- This Limited Warranty is the only warranty that Brother is giving for the machine. It is the final expression and the exclusive and only statement of Brother's obligations to you. It replaces all other agreements and understandings that you may have with Brother or its representatives.
- This warranty gives you certain rights and you may also have other rights that may vary from state to state.
- This Limited Warranty (and Brother's obligation to you) may not be changed in any way unless you and Brother sign the same piece of paper in which we (1) refer to the machine and your bill of sale date, (2) describe the change to this warranty and (3) agree to make that change.
Important:
We recommend that you keep all original packing materials, in the event that you ship the machine.
Important Information
Should you have questions, or need information about your Brother Product, we have a variety of support options for you to choose from:
USA-Customer Service:
Customer Service
877-478-6824 (voice)
Customer Service
877-4-PTouch (voice)
Customer Service
901-379-1210 (fax)
Customer Service
custsrv@brother.com (Email)
Automated Faxback
800-521-2846
World Wide Web
www.brother.com
Supplies / Accessories
www.brothermall.com
or 888-879-3232
BROTHER INTERNATIONAL CORPORATION
100 SOMERSET CORPORATE BLVD.
BRIDGEWATER, NEW JERSEY 08807-0911
Please record your model and serial number and your date and location of Purchase below for your records.
Keep this information with your proof of purchase (bill of sale) in case your Product requires service.
Model # ____
Serial #
Date of purchase: ____
Store where purchased: ____
Location of store: ____
Important: We recommend that you keep all original packing materials, in the event you ship this product.
Save Time - Register On-Line!
Don't stand in line at the post office or worry about lost mail. Visit us on-line at
www.registermybrother.com
Your product will immediately be registered in our database and you can be on your way!
Also, while you're there, look for contests and other exciting information!
Contents
1. INTRODUCTION ...... 4
What You Can Do 4
Safety Precautions 6
General Precautions.... 10
Symbols Used in this Guide 10
Quick Index 11
2. GETTING STARTED 12
Unpacking Your P-touch labeler.... 12
General Description.... 13
LCD Display & Keyboard.... 14
LCD Display 14
Key Names and Functions.... 15
Power Supply 17
Battery.... 17
AC Adapter 18
Inserting a Tape Cassette 19
Turning Power On/Off 21
Feeding Tape 22
Feed & Cut....22
Feed Only 22
LCD Display 23
LCD Contrast 23
Setting Language and Unit.... 24
Language 24
Unit....24
3. EDITING A LABEL......25
Entering and Editing Text.... 25
Entering Text from the Keyboard 25
Adding a New Line....25
Adding a New Block.... 25
Moving the Cursor.... 25
Inserting Text 26
Inserting a Tab 26
Deleting Text....26
Entering Symbols 27
Entering Symbols Using Key 27
Entering Symbols Using the Symbol Function.... 27
Symbol List 28
INTRODUCTION
Entering Accented Characters ....29
Accented Character List ....30
Setting Character Attributes ....31
Setting Character Attributes by Label ....31
Setting Character Attributes by Each Line....31
Font & Size Options 32
Width & Style Options 33
Setting Auto Fit Style 34
Setting Label Attributes 35
Framing Options ....36
Using Auto-Format Layouts 37
Using Templates - Example creating an Asset Tag....37
Using Block Layouts 41
Creating a Bar Code Label....45
Setting Bar Code Parameters....45
Entering Bar Code Data....46
Editing and Deleting a Bar Code 48
4. LABEL PRINTING 49
Label Preview....49
Printing a Label 49
Printing a Single Copy 50
Printing Multiple Copies 50
Auto-numbering Labels....51
Mirror Printing 52
Tape Cutting Options 53
Adjusting the Label Length....55
Attaching Labels....55
5. USING THE FILE MEMORY 56
Storing a Label into Memory 56
Opening a Stored Label File 57
Printing a Stored Label File....58
Deleting a Stored Label File....59
6. MAINTAINING YOUR P-touch Labeler 60
Resetting the P-touch Labeler....60
Maintenance....60
Cleaning the exterior of the P-touch labeler 60
Cleaning the Print Head....60
Cleaning the Tape Cutter....61
- TROUBLESHOOTING.... 62
What to do when.... 62
Error Messages....65
- APPENDIX....68
Specifications 68
- INDEX....71
INTRODUCTION
Thank you for purchasing the P-touch labeler PT-2100/2110.
Your new P-touch labeler is an easy to operate, feature packed labeling system that makes creating professional, high quality labels a breeze. In addition to easy label creation via pre-formatted label layouts, the P-touch labeler editing software features advanced label formatting, block formats, bar codes and auto-numbering functions.
What You Can Do
■ Create a label with the P-touch labeler
1 Prepare the P-touch labeler.
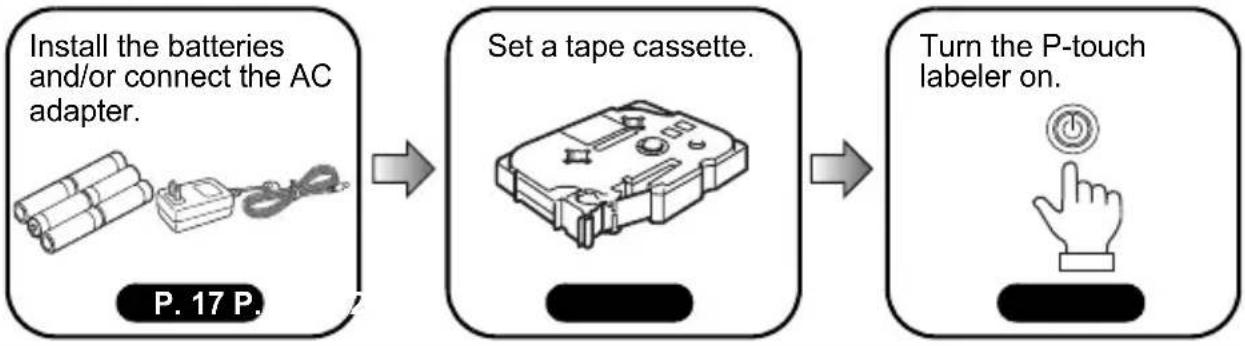
flowchart
graph LR
    A["Install the batteries and/or connect the AC adapter."] --> B["Set a tape cassette."]
    B --> C["Turn the P-touch labeler on."]
2| Enter the label text.
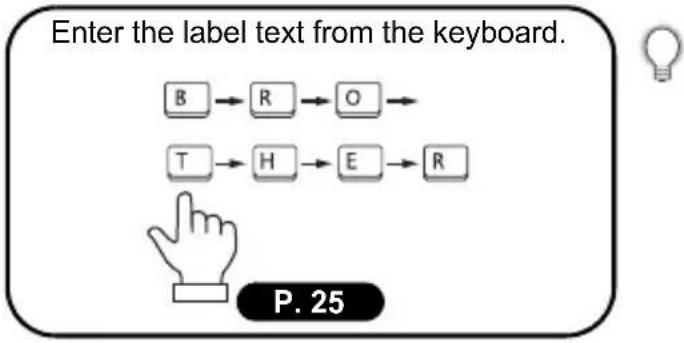
flowchart
graph TD
    B["B"] --> R["R"]
    R --> O["O"]
    T["T"] --> H["H"]
    H --> E["E"]
    E --> R["R"]
In addition to entering text, the P-touch labeler has a large range of editing functions.
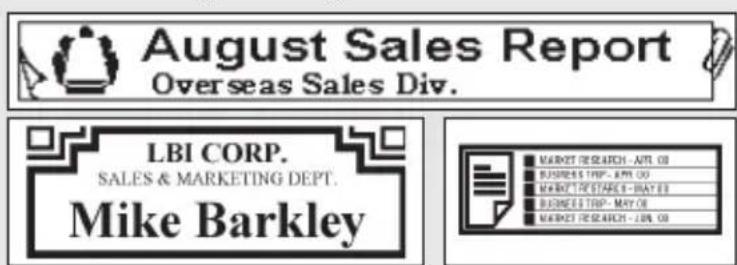
"Create labels like these"
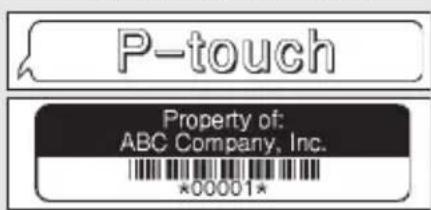
3 | Print the label.
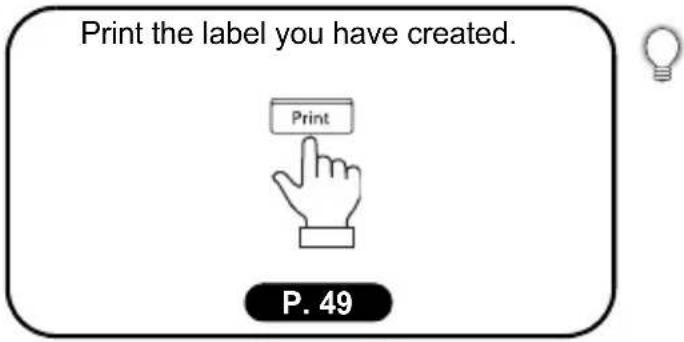
You can check the layout of your label before printing.
Checking the label preview before printing prevents wasting tape on incomplete labels.
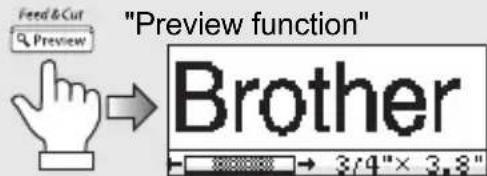
■ Create a label with your personal computer
1 | Prepare the P-touch labeler. (Refer to step 1 in the previous section.)
2| Prepare the personal computer. *(USB cable not included with the purchase of PT-2100.)
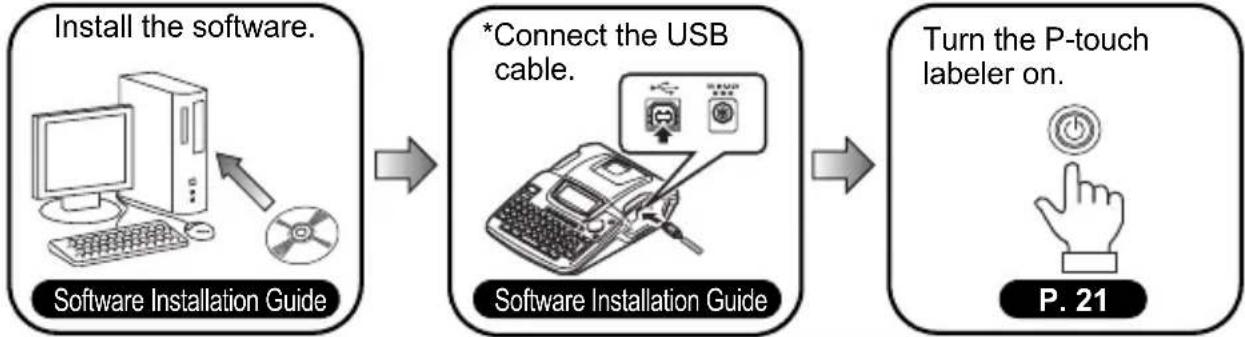
flowchart
graph LR
    A["Install the software."] --> B["*Connect the USB cable."]
    B --> C["Turn the P-touch labeler on."]
3| Enter the label text using P-touch Quick Editor.
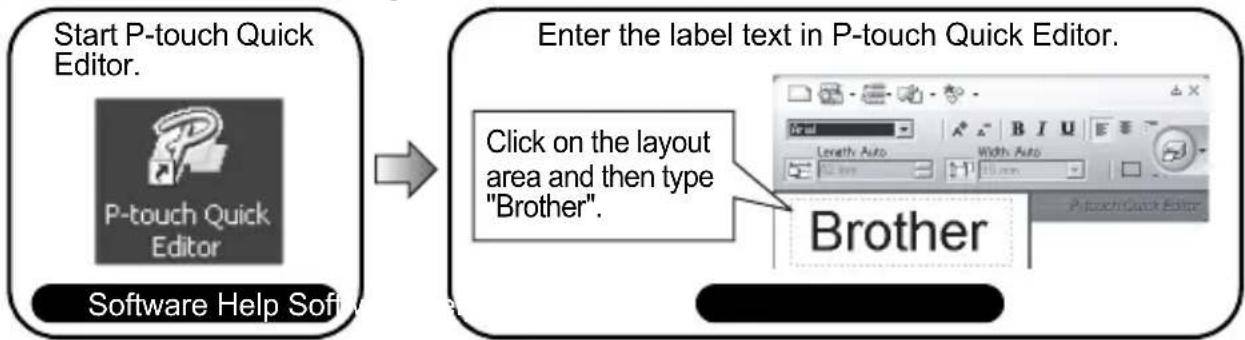
flowchart
graph LR
A["Start P-touch Quick Editor.<br>P-touch Quick Editor<br>Software Help Soft"] --> B["Enter the label text in P-touch Quick Editor.<br>Click on the layout area and then type "Brother".<br>Brother"]
4 | Print the label.
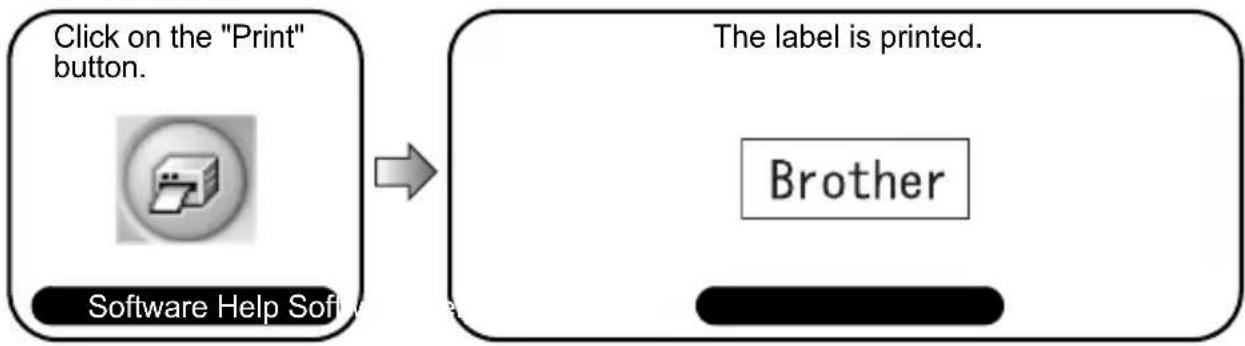
flowchart
graph LR
    A["Click on the "Print" button."] --> B["Software Help Software Button"]
    B --> C["The label is printed."]
    C --> D["Brother"]

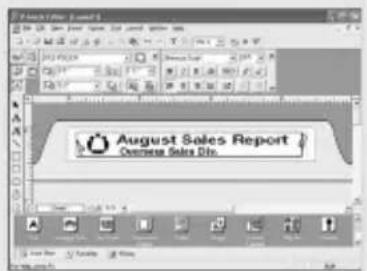
There is two types of Editing software provided with this product. First there is the P-touch Quick Editor (simple label editing software) is ideal for creating simple labels. Than there is the P-touch Editor (full featured label editing software) that can create labels with more complex designs.
"P-touch Editor" "Create labels with complex designs like these"
Safety Precautions
To prevent injury and damage, important notes are explained using various symbols. The symbols and their meanings are as follows:
 | WARNING | Tells you what to do to avoid the risk of injury. |
 | CAUTION | Tells you about procedures you must follow to prevent damage to the P-touch. |
The symbols used in this manual are as follows:
 | Action NOT allowed to do | DO NOT disassemble the product. | |
 | DO NOT splash the product with or immerse the product in water. | DO NOT touch a given portion of the product. | |
 | Mandatory action Unplugging | ||
 | Safety alert | Alerts to the possibility of electrical shock |

WARNING
AC adapter
Follow these guidelines to avoid fire, damage, electric shock, or failure.

Use only the AC adapter (AD-24) designed exclusively for your P-touch. Failure to observe this may result in an accident or damage. Brother shall not assume any responsibility for any accident or damage resulting from not using the specified AC adapter.

Unplug the power cord immediately and stop using the machine during an electrical storm. There may be a remote risk of electric shock from lightning.

Do not touch the AC adapter or power plug with wet hands.

Do not use the AC adapter in places of high humidity such as bathrooms.

Do not use a damaged power cord.

Do not overload the power outlet.

Do not place heavy objects on, damage or modify the power cord or plug. Do not forcibly bend or pull the power cord.

Do not drop, hit or otherwise damage the AC adapter.

Make sure that the plug is fully inserted to the power outlet. Do not use an outlet that is loose.
Battery
Follow these guidelines to avoid liquid leakage, heat, rupture of the battery.

Do not use metallic articles, such as tweezers or a metallic pen, when exchanging the batteries.

Do not throw into fire, heat up, or disassemble the battery.

WARNING
P-touch
Follow these guidelines to avoid fire, damage, electric shock, and choking.

Do not allow the P-touch to get wet in any way.

Do not touch any metal parts near the print head. The print head becomes very hot during use and remains very hot immediately after use. Do not touch it directly with your hands.
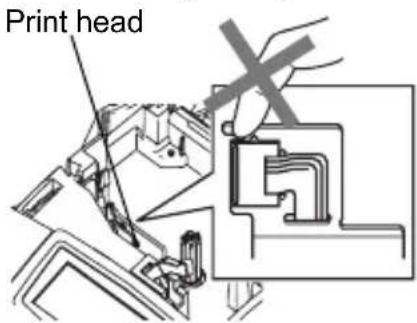

Do not use the P-touch with a foreign object in it. If water, metallic substance or any foreign object enters the P-touch, disconnect the AC adapter and remove batteries, and contact the retail outlet where the P-touch was purchased or your local authorized service center.

Do not disassemble the P-touch. For inspection, adjustment, and repair of the P-touch, contact the retail outlet where the P-touch was purchased or your local authorized service center.

Dispose of plastic bags correctly and keep away from babies and children. Do not wear or play with plastic bags.

Disconnect the AC adapter and remove batteries immediately and stop using when you notice abnormal odor, heat, discoloration, deformation or anything unusual while using or storing it.

Do not drop, hit or otherwise bang the P-touch.

CAUTION
Tape Cutter
Follow these guidelines to avoid personal injury and damage of the P-touch.

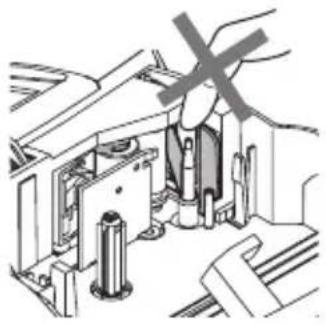
Do not touch the blade of the cutter unit.

Do not open the tape compartment cover when operating the cutter unit.

Do not apply excessive pressure to the cutter unit.
natural_image
Technical illustration of a mechanical assembly with a hand holding a cross-shaped component (no text or symbols visible)AC adapter

Be sure to disconnect the AC adapter from the power outlet and the P-touch when not using the P-touch for any extended period of time.

Always hold the plug when disconnecting the power cord from the power outlet.
Battery
Follow these guidelines to avoid liquid leakage, heat, rupture of the battery.

Do not use old and new batteries together.

Do not mix alkaline batteries with other type batteries.

Do not set the positive and negative end in the wrong position.

Remove the batteries if you do not intend to use the P-touch for an extended period of time.
P-touch
Follow these guidelines to avoid personal injury and damage of the P-touch.

Place the P-touch on a flat, stable surface such as a desk.

Do not place any heavy objects on top of the P-touch. Do not press on the LCD display.
Tape

Depending on the location, material, and environmental conditions, the label may unpeel or become irremovable, the color of the label may change or be transferred to other objects.
Before applying the label, check the environmental condition and the material.
Memory

Any data stored in memory will be lost due to failure or repair of the P-touch, or if the battery expires.

When power is disconnected for more than two minutes, all text and format settings will be cleared. Any text files stored in the memory will also be cleared.
General Precautions
- Do not use the P-touch labeler in any way or for any purpose not described in this guide. Doing so may result in accidents or damage the machine.
- Use only Brother TZ tapes with this machine. Do not use tapes that do not have the mark.
- Do not pull or press on the tape in the cassette.
- Do not put any foreign objects into the tape exit slot, AC adapter connector, or USB port, etc.
- Do not try to print labels using an empty tape cassette or without a tape cassette set in the P-touch labeler. Doing so will damage the print head.
- Do not touch the print head with your fingers.
- Do not clean the machine with alcohol or other organic solvents. Only use a soft, dry cloth.
- Do not place the P-touch labeler in direct sunlight, near heaters or other hot appliances, in any location exposed to extremely high or low temperatures, high humidity, or dusty locations. Standard operating temperature range: 50^ to 95^ .
- It is recommended that you use the USB cable supplied with the P-touch labeler. (USB cable not included with the purchase of PT-2100.) Should another USB cable need to be used, ensure it is of high quality construction.
- Be careful not to scratch the CD-ROM. Do not place the CD-ROM in any location exposed to high or low temperatures. Do not place heavy objects on the CD-ROM or bend it.
- The software on the CD-ROM is intended for use with the P-touch labeler and may be installed on more than one PC.
- We strongly recommend that you read this User's Guide carefully before using your P-touch labeler, and then keep it nearby for future reference.
Symbols Used in this Guide
The following symbols are used throughout this guide to indicate additional information.

This symbol indicates information or directions that may result in damage or injury if ignored, or operations that will result in errors.

This symbol indicates information or directions that may help you understand and use the P-touch labeler more efficiently.

This section provides quick and easy access to information on tasks often needed by users. Simply look for your task below and then go to the page indicated. If the task you are looking for is not shown here, try the Contents or Index pages.
To enter text, symbols and accent characters...
Entering text/symbols/accent characters

P. 25
To change the label format...
Text/Label format functions
P. 31
natural_image
Gray icon depicting a cut with diagonal stripes and 'CUT' label, no readable text or symbols beyond the graphic design.To change the cutting and margin settings
Tape cutting options
P. 53
To make formatted label easily...
Auto-Format function
P. 37
To print multiple copies (with auto-numbering)...
Multiple copy/auto-numbering functions
P. 50
To save a label layout...
File memory function
P. 56
GETTING STARTED
Unpacking Your P-touch labeler
Check that the package contains the following before using your P-touch labeler.
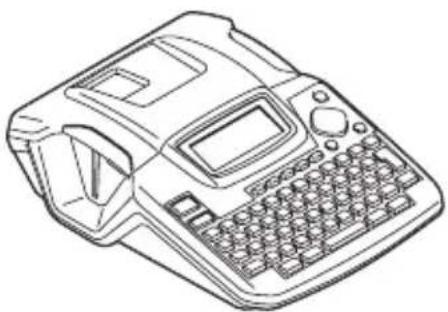
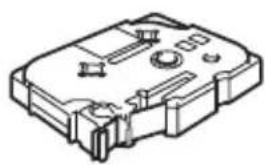
P-touch labeler PT-2100 TZ tape cassette
natural_image
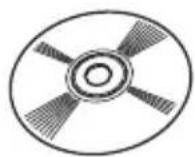
Line drawing of a handheld electronic device with keyboard, display, and control panel (no text or symbols)CD-ROM
(Drivers, Labeling Editing Software packages)
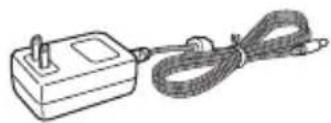
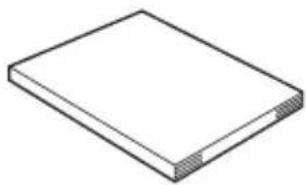
AD-24 User's Guide
natural_image
Simple line drawing of a rectangular device connected to a coiled cable (no text or symbols)Software Installation Guide
natural_image
Isometric line drawing of a rectangular panel with a recessed top and side gap (no text or symbols)(Starter Cassette)
natural_image
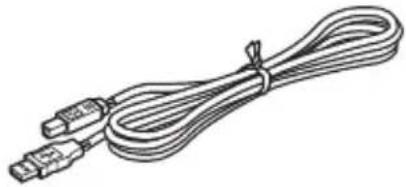
Technical line drawing of a mechanical device housing (no text or symbols)USB cable
(USB cable not included with the purchase of PT-2100.)
natural_image
Line drawing of a coiled cable with two connectors (no text or symbols)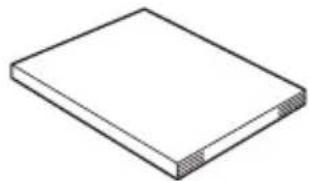
natural_image
Simple line drawing of a rectangular block with a flat top and side grooves (no text or symbols)General Description
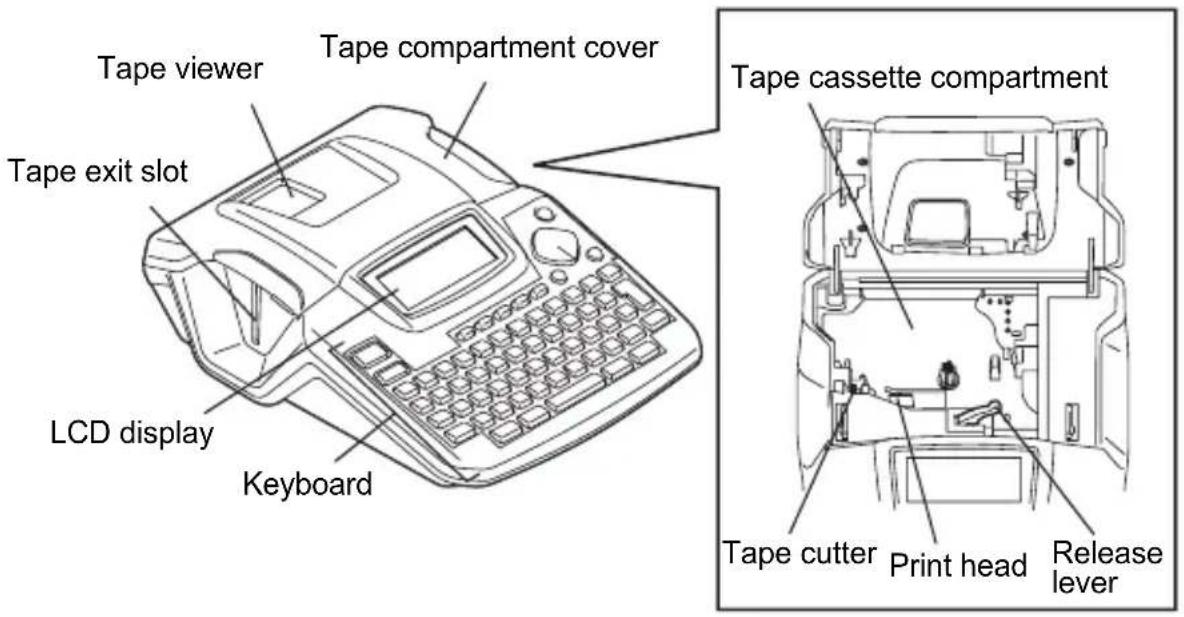

When shipped from the factory, the Tape compartment cover and the LCD display are covered with a protective sheet to prevent damage. Remove this sheet before using the P-touch.
LCD Display & Keyboard
LCD Display
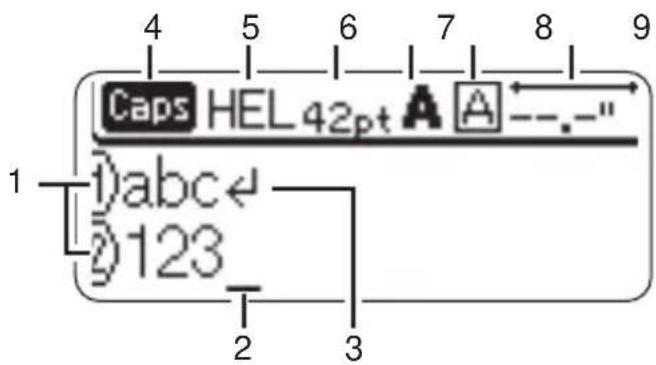
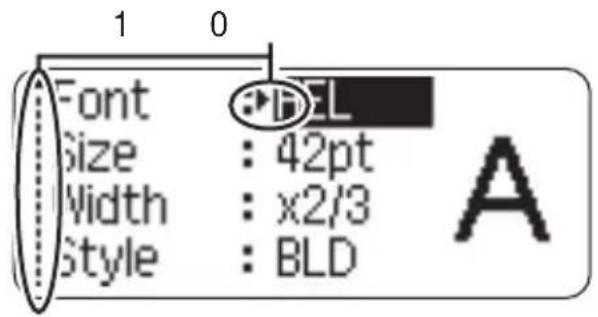
1. Line number
Displayed at the beginning of each line, this mark indicates the line number within the label layout.
2. Cursor
Indicates the current position of the cursor. New characters are entered to the left of the cursor, and the character to the left of the cursor is deleted when the key is pressed.
3. Return mark
Indicates the end of a line of text.
4. Caps mode
Indicates that the Caps mode is on.
5.\~8. Style guidance
Indicates the current font (5), character size (6), character style (7) and frame (8) settings.
9. Tape length
Indicates the approximate length of the label with the text entered presently in the machine.
10.Cursor selection
Indicates that you can use the cursor keys to select the items on the screen. Use the ▲ and keys to select a menu item, and the ▲ and keys to change the setting.

Refer to “LCD Display” on page 23 to adjust the LCD's contrast.
Key Names and Functions
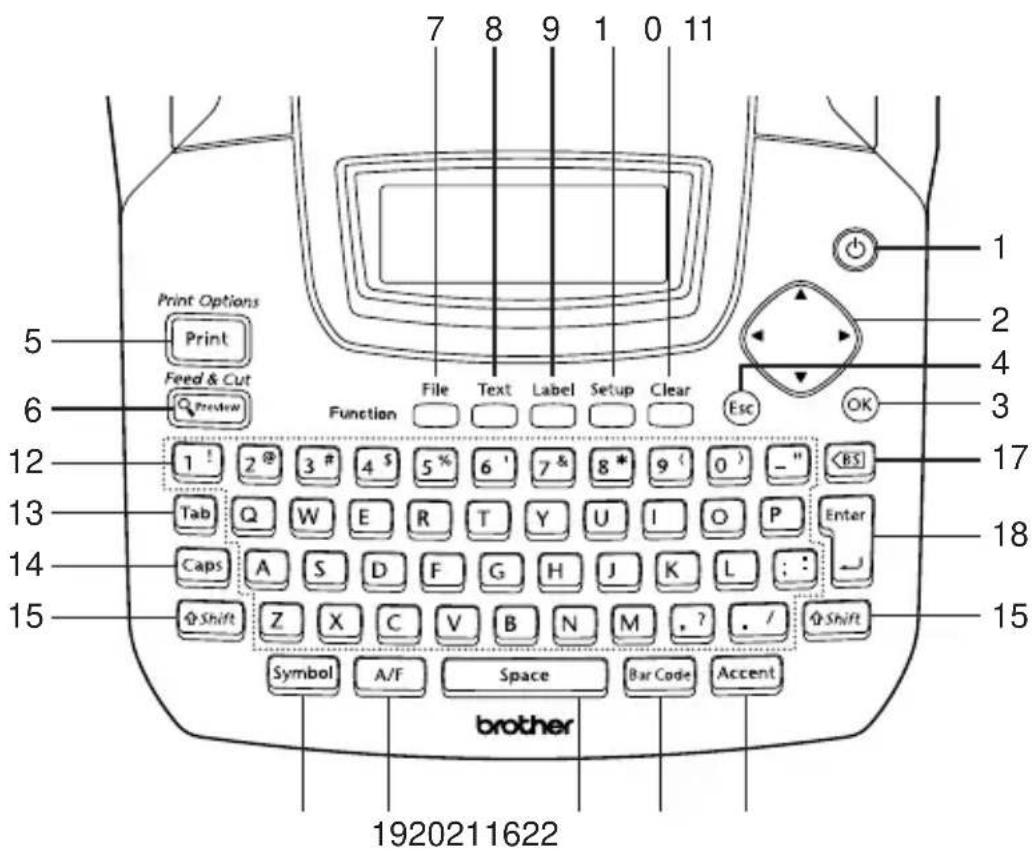
natural_image
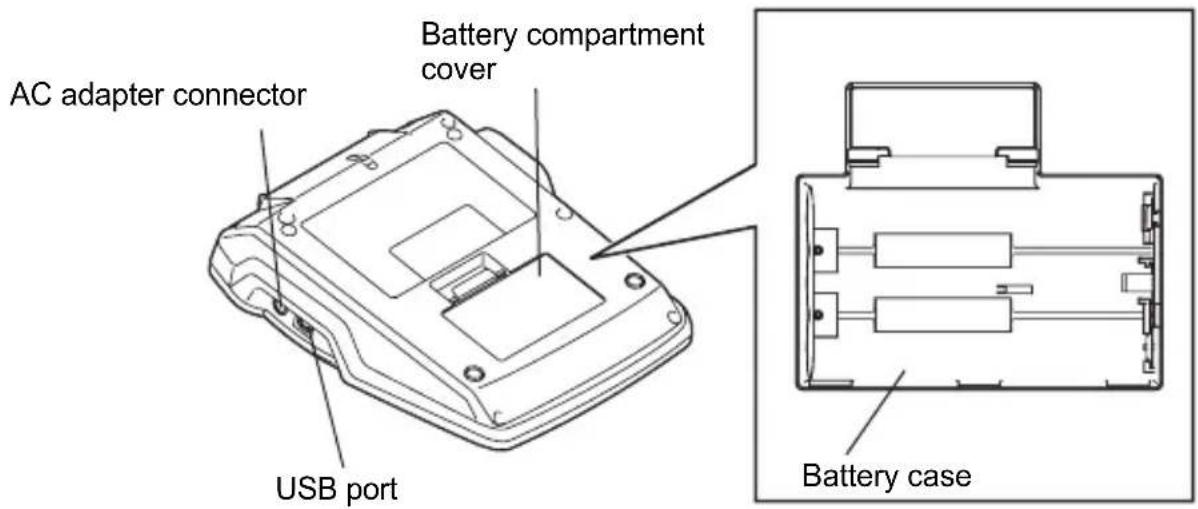
Diagram of a battery pack with an open circuit board and two batteries inserted (no text or symbols)natural_image
Technical line drawing of a device casing with a button and mounting holes (no text or symbols)CAUTION
If you do not intend to use the P-touch labeler for an extended period of time it is recommended that the batteries be removed.AC Adapter
Connect the AC adapter directly to the P-touch labeler.  1 Insert the plug on the AC adapter cord into the connector marked DC IN 9-9.5V on the P-touch labeler. 2 Insert the AC adapter plug into a standard electrical outlet. \- Turn the P-touch labeler off before disconnecting the AC adapter. - Do not pull or bend the AC adapter cord. To safe guard and backup the labeler's memory, when the AC adapter is unplugged it is recommended to have AA-size alkaline batteries (LR6) installed into the machine.WARNING
- Use only the adapter (AD-24), which is designed exclusively for your P-touch. Failure to observe this may result in an accident or damage. Brother shall not assume any responsibility for any accident or damage resulting from not using the specified AC adapter. - Do not connect the AC adapter to a non-standard electrical outlet. Failure to observe this may result in an accident or damage. Brother shall not assume any responsibility for any accident or damage resulting from not using a standard electrical outlet.CAUTION
- Disconnect the AC adapter from the P-touch and electrical outlet when you do not intend to use the P-touch for an extended period. - When power is disconnected for more than two minutes, all text and format settings will be cleared. Any text files stored in the memory will also be cleared.Inserting a Tape Cassette
This P-touch labeler accepts tape cassettes of 9/64", 1/4", 3/8", 1/2" or 3/4" (3.5mm, 6mm, 9mm, 12mm, or 18mm) width.  \- If the new tape cassette has a cardboard stopper, be sure to remove the stopper before inserting the cassette. \- If the ink ribbon is loose, use your finger to wind the toothed wheel in the direction of the arrow as shown on the tape cassette. natural_image
Isometric line drawing of a mechanical device with an arrow pointing to a component (no text or symbols)natural_image
Hand inserting a plug into a device casing (no text or symbols visible)natural_image
Line drawing of a vintage typewriter with open lid and keyboard (no text or symbols)natural_image
Technical illustration of a car's open hood with a keyboard inserted, showing internal components and a close-up view of the engine compartment (no text or symbols present)Turning Power On/Off
Press the Ⓞkey to turn the P-touch labeler on. Press the Ⓞkey again to turn the P-touch labeler off.   - Your P-touch labeler has a power saving function that automatically turns itself off if there is no keys pressed within a certain time under certain operating conditions. Refer to the Auto Power-Off Time table below for details. - If the batteries are installed or the P-touch labeler is connected to an electrical outlet by the AC adapter, the previous session's information is maintained and will displayed when the power is turned on. Auto Power-Off Time| P-touch labeler only Connected to PC | ||
| With AC adapter / With battery | 5 minutes 60 minutes | |
Feeding Tape
Feed & Cut
This function will advance the tape approximately 0.92" (23 mm) and then cut the tape, resulting in a blank label. This action may be needed when installing a new tape cassette to remove a bend in the tape and or ensure correct feeding of the tape. 1 Hold down the key and press the key "Feed & Cut?" will appear on the LCD display. 2 Using the or select the "Feed & Cut" option and then press either or The message "Feeding Tape... Please Wait" appears while the tape is fed, and then the tape is cut. To exit or cancel this function pressFeed Only
This function will advance the tape approximately 0.92" (23 mm) resulting in a blank label sticking out the tape cassette. This action is recommended when using Fabric and Extra Strength Adhesive tapes, which should be cut using scissors. 1 Hold down the key and press the key "Feed & Cut?" will appear on the LCD display. 2 Using the or select the "Feed Only" option and then press either or The message "Feeding Tape... Please Wait" appears while the tape is fed. To exit or cancel this function pressLCD Display
LCD Contrast
This function allows the user to adjust the contrast setting of the LCD display to make the screen easier to read. There are five levels from Dark (+2) to Light (-2) the factory default setting is "0". 1 Press the ☑ key to display the Setup menu, select "LCD Contrast" using the ▲ or key, and then press the ⏻ or key.  2 Select a contrast level using the ▲ or ▼ key. The screen contrast changes each time you press the ▲ or ▼ key, allowing you to set the most suitable contrast.  3 Press the or key.  - Press the key to return to the previous step. - Pressing the while in the contrast function will return the setting to the default of "0".Setting Language and Unit
Language
Select the language ("English", "Español", "Français", "Italiano", "Magyar", "Nederlands", "Norsk", "Poliski", "Português", "Suomi", "Svenska", "Český", "Dansk" or "Deutsch") for menu commands and messages shown on the LCD display. The default setting is "English". 1 Press the ☑ key to display the Setup menu, select "Language" using the or key, and then press the ☑ or ☑ key.  2 Select a language using the ▲ or key.  3 Press the or key.  Press the key to return to the previous step.Unit
Select the units ("inch" or "mm") for dimensions shown on the LCD display. The default setting is "inch". 1 Press the set key to display the Setup menu, select "Unit" using the or key, and then press the or key.  2 Select a unit using the or key.  3 Press the or key.  Press the key to return to the previous step.EDITING A LABEL
Entering and Editing Text
Using the keyboard of your P-touch labeler is very similar to using a typewriter, word processor, or personal computer.Entering Text from the Keyboard
• To enter a lowercase letter or a number, simply press the desired key. • To enter a blank space in the text, press the key. - To enter an uppercase letter or one of the symbols on the number keys, hold down the key and then press the desired key. • To enter uppercase letters continuously, press the key to enter Caps mode, and then press the desired keys.  • To exit Caps mode, press the key again. - To enter a lowercase letter while in Caps mode, hold down the key and then press the desired key.Adding a New Line
• To end the current line of text and start a new line, press the key. A return mark appears at the end of the line and the cursor moves to the start of the new line.  - There is a maximum number of lines of text that can be entered for each tape width. A maximum of 5 lines can be entered for 3/4" (18mm) tape, 3 lines for 1/2" (12mm) tape, 2 lines for 3/8" (9mm) and 1/4" (6 mm) tape, and 1 line for 9/64" (3.5mm) tape. - If you press the key when max lines already exist, an error message is displayed. - To change the character attribute of each line, refer to “Setting Character Attributes by Each Line” on page 31.Adding a New Block
• To create a new block of text/lines to the right of your current text, press the key while holding down the key. A mark will appear at the end of the block and the cursor moves to the start of the new block.  A maximum of 5 blocks can be entered in one label.Moving the Cursor
- To move the cursor left, right, up or down, press the < or keys. Each press of the key moves the cursor one space or line. - To move the cursor to the beginning or end of the current line, hold down the key and then press theInserting Text
\- To insert additional text into an existing line of text, move the cursor to the character to the right of the position where you want to start inserting text and then enter the additional text. The new text is inserted to the left of the cursor.Inserting a Tab
\- To insert a tab space between the existing line of text, move the cursor where you wish to add a tab and press the key. A mark appears to indicate the position which the tab space will be entered.  - To change the length setting of the tab, refer to “Setting Label Attributes” on page 35. - The tab space can also be entered by pressing the key to open the Setup menu and selecting "Tab" by using or keys, and then pressing the or key.Deleting Text
■ Deleting one character at a time
• To delete a character from an existing line of text, move the cursor to the character to the right of the position you want to start deleting text and then press the| 1 | Press the key.The Clear options are displayed. | 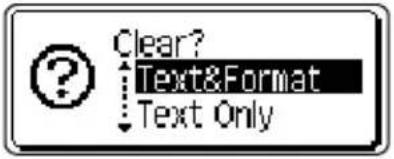 |
| 2 | Using the or keys, select “Text Only” to delete all text while retaining the current format settings, or select “Text & Format” to delete all text and format settings.Press the key to return to the text entry screen, without erasing (or clearing) text or format. | 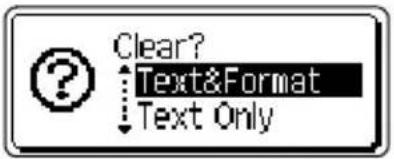 |
| 3 | Press the or key.All text is deleted. All format settings are also deleted if Text & Format was selected. | 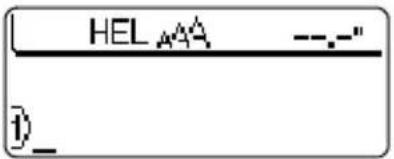 |
Entering Symbols
In addition to the symbols available on the keyboard, there are various symbols (including international and extended ASCII characters) available with the symbol function. There are two methods of entering symbols: - Using the key. • Using the Symbol function.Entering Symbols Using Key
Symbols printed in upper-right corner of the keys on the keyboard can be entered using the Shift key. • To enter one of these symbols, hold down the key and then press the desired key.Entering Symbols Using the Symbol Function
1 | Press the key. A list of symbol categories and symbols in that category is displayed.  The last symbol entered is selected in the list displayed.  2| Select a symbol category (Punctuation, Business, Mathematics, etc.) using the ▲ or ▶ key or by pressing the ▶ key repeatedly, and then select a symbol using the ◀ or ▶ keys.  3| Press the or key. The selected symbol is inserted into the line of text.   - Press the key to return to the previous step. - Refer to the Symbol List table on page 28 for a complete list of symbols and symbol categories.Symbol List
| Category Symbols | |
| Punctuation | . , : ; " ' • ? ! ¿ i - & ~ _ \ / § |
| Business | @ # % ® © TM CE √ |
| Mathematics | + - × ÷ ± = * |
| Bracket | ( ) [ ] < > |
| Arrow | → ← ↑ ↓ ↔ [ ] |
| Unit | $ ¢ € £ ¥ ° |
| International | α β γ δ μ Ω φ a o |
| Number | 2 3 2 3 1/4 1/2 3/4 |
| Pictograph | ★ ● ○ □ △ ♪ |
| Electrical | ⊥ ~ == +- ⏻ ⊗ ⇔ |
| Others | |
Entering Accented Characters
The P-touch labeler can display and print a set of accented characters such as other language specific characters. 1 Enter the character you wish to change to composite character.  Caps mode can be used with the Accent function.  2 | Press the key. The character you entered will change to an accented character.  3 Press the key repeatedly until the desired accented character is selected, or select it by using the or keys.  The order of composite characters which appear on display differ by the selected LCD language.  4 Press the or key. The selected composite character is inserted into the line of text.   \- Press the key to return to the previous step. \- Refer to the Accented Character List table on page 30 for a complete list of all accented characters available. - Accented Character List| Character Accented Characters | |
| a | á à â ä æ ã a á ã ā |
| A | Á Á Á Á Á E Á A Á Á Á |
| c | ç č ć |
| C | Ç Č Ć |
| d | d' ð d |
| D | Ď Đ |
| e | é è ê ë e ë è ë ë |
| E | É É É É É É É É É |
| g | ġ ğ |
| G | G Ğ |
| i | í i î î i î i |
| l | í i î î l î l |
| k | k |
| K | K |
| l | t í l ' |
| L | Ł L L L' |
| n | ñ ñ ñ ñ ñ |
| N | Ñ ñ ñ ñ ñ |
| o | ó ò ò ø ò ò ø ò ò |
| O | Ó ò ò ∅ ò ò ò ò ò ò |
| r | ř f r |
| R | Ř R R |
| s | š ś s s B |
| S | Š S S S B |
| t | t' t b |
| T | Ť T P |
| u | ú ù ù ù u ù ù ù |
| U | Ú ù ù ù U ù ù ù ù |
| y | ý ÿ |
| Y | Ý ÿ |
| z | ž ž z |
| Z | ž Ž Ž |
Setting Character Attributes
Setting Character Attributes by Label
Using the key, you can select a font and apply size, width, style, line, and alignment attributes.| 1 | Press the key.The current settings are displayed. | 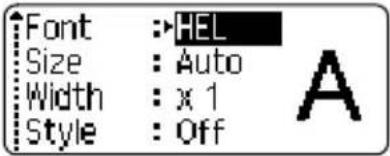 |
| 2 | Select an attribute using the or keys, and then set a value for that attribute using the or keys. | 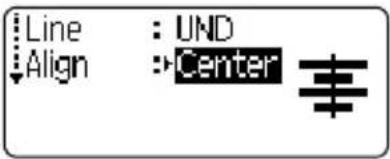 |
| 3 | Press the or key to apply the settings.New settings are NOT applied if you do not press the or key. | 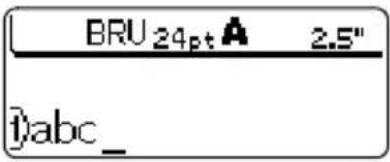 |
Setting Character Attributes by Each Line
When a label consists two or more lines of text, you can set different value of character attributes (font, size, width, style, line and alignment) for each line. Move the cursor to the line you wish to change the character attribute by using the ▲ or keys. Next, press the key while holding down key to display the attributes. (A on the screen indicates that you are now applying the attribute for that specific line only.)  When different value of attribute is set for each line, the value will be displayed as \*\*\*\* when you press the key. When you change the setting on this screen by using the or keys, the same change will be applied to all lines of the label.  - Font & Size Options| Attribute Value Result | ||
| Font | HEL (Helsinki) | ABCabc |
| BRU (Brussels) | ABCabc | |
| FLO (Florida) | ABCabc | |
| CAL (Calgary) | ABCabc | |
| Size | Auto | When Auto is selected, the text is automatically adjusted to print in the largest size available for each tape width. |
| 42pt | ABCabc | |
| 36pt | ABCabc | |
| 24pt | ABCabc | |
| 18pt | ABCabc | |
| 12pt | ABCabc | |
| 9pt | ABCabc | |
| 6pt | ABCabc | |
| Attribute Value Result | ||
| Width | x2 | ABCabc |
| x1 | ABCabc | |
| x2/3 | ABCabc | |
| x1/2 | ABCabc | |
| Style | Off | ABCabc |
| BLD (Bold) | ABCabc | |
| OUT (Outline) | ABCabc | |
| SHD (Shadow) | ABCabc | |
| SLD (Solid) | ABCabc | |
| ITL (Italic) | ABCabc | |
| I+BLD (Italic Bold) | ABCabc | |
| I+OUT (Italic Outline) | ABCabc | |
| I+SHD (Italic Shadow) | ABCabc | |
| I+SLD (Italic Solid) | ABCabc | |
| VRT (Vertical) | AMO O O | |
| Line | Off | ABCabc |
| UND(Underline) | ABCabc | |
| STR(Strikeout) | ABCabc | |
| Align(Alignment) | Left | ABCabc |
| Center | ABCabc | |
| Right | ABCabc | |
| Just(Justify) | A B C a b c | |
Setting Auto Fit Style
When "Size" is set to "Auto" and "Length" is set to a specific length, you can select the way of reducing the text size to fit within the label length. When "Text Size" is selected, the total text size is modified to fit within the label. When "Text Width" is selected, the text width will be reduced to the size of x1/2 setting. (If further size reduction is required to fit the text into the selected label length, the total text size will be modified after reducing the text width to x1/2 setting.) 1 Press the key to display the Setup menu, Select "Auto Fit Style" using the or keys, and then press the or key. The Auto Fit Style screen is displayed.  2 | Select the style using the ▲ or keys.  3 | Press the or key to apply the setting.  - Press the key to return to the previous step. - Press the key to set the style to the default setting ("Text Size").Setting Label Attributes
Using the key, you can create a label with a frame around the text and specify the label length and tab length. (Cut Options which may be needed when printing a label can also be set by using the key. Refer to "Tape Cutting Options" on page 53 and 54.) 1 Press the key. The current settings are displayed.  2 Select an attribute using the ▲ or keys, and then set a value for that attribute using the ◄ or keys.  - When setting the tab length, hold down the keys to change the value faster. - When setting the label length, refer to “Adjusting the Label Length” on page 55  3| Press the or key to apply the settings.  New settings are NOT applied if you do not press the OK or key.   - Press the key to return to the previous step. - Press the key to set the selected attribute to the default value. - Refer to the Setting Options table for a list of all available settings. Framing Options| Attribute Value Result | ||
| Frame | Off | ABCabc |
| 1 | 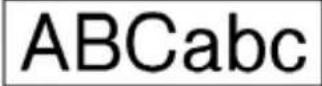 | |
| 2 | 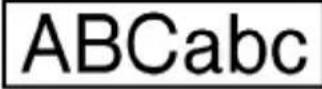 | |
| 3 | 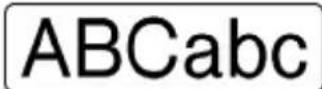 | |
| 4 | 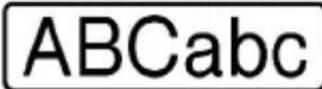 | |
| 5 | ABC abc ABCABC abc ABCABC abc ABC | |
| 6 |  | |
| 7 | 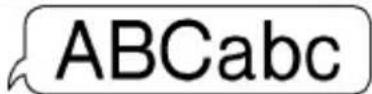 | |
| 8 |  | |
| 9 | 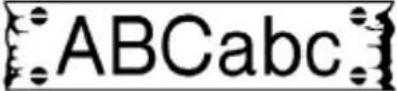 | |
| 10 | 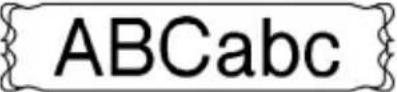 | |
| 11 |  | |
| 12 | 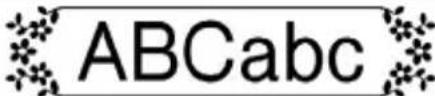 | |
| 13 | 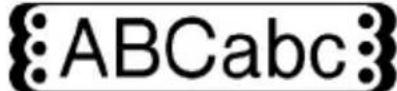 | |
| 14 | 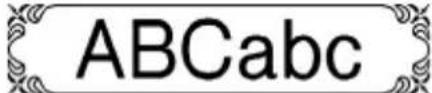 | |
| ABC | abc | ABC |
| ABC | abc | ABC |
| ABC | abc | ABC |
| Attribute Value Result | ||
| Frame | 15 | |
| 16 | ||
| Length | The length of the label can be set within the range 1.2" (30mm) - 12.0" (300mm). When Auto is selected, the length of the label is automatically adjusted based on the amount of text entered. | |
| Tab Length | The length of the tab can be set within the range 0.0" (0mm) - 4.0"(100mm). The default setting is 2.0" (50mm). | |
Using Auto-Format Layouts
Using the Auto-Format function you can quickly and easily create labels for a variety of purposes, such as file tabs, equipment labels, name badges, etc. Simply select a layout from the templates or block layouts, enter the text and apply formatting as desired.  Symbols and accented characters can also be used in auto-format layouts.Using Templates - Example creating an Asset Tag
1 Press the key to display the Auto-Format screen, and then select "Templates" using the or keys.  2 Press the or key. The last template used is displayed.  3| Select a template using the ▲ or keys.  4 Press the or key. The Style screen is displayed. EDITING A LABEL
| 5 | Select an attribute using the ▲ or keys, and then set a value for that attribute using the ◄ or keys. | 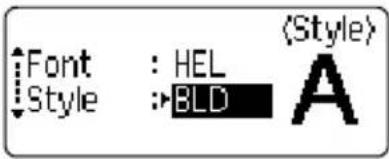 |
| 6 | Press the ☑ or key .The Bar Code Setup screen is displayed. | 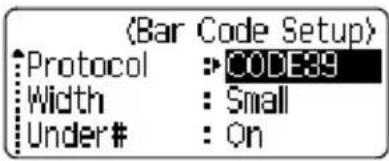 |
| 7 | Select an attribute using the ▲ or keys, and then set a value for that attribute using the ◄ or keys.The "C-Digit" (Check Digit) attribute is only available for the CODE39, I-2/5 and CODABAR protocols. | 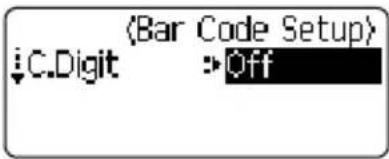 |
| 8 | Press the ☑ or key.The template text entry screen is displayed.Caps mode can be used when entering text. | 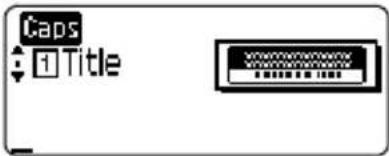 |
| 9 | Enter the text and then press the ☑ or key .Repeat this for each text field.After all text fields are entered, the print menu is displayed when the ☑ or key is pressed. | 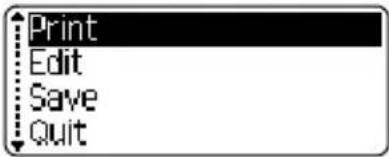 |
| 10 | Select "Print" using the ▲ or keys and then press the ☑ or key to print the label.Select "Edit" to change the text data or style settings.Select "Save" to store the label in a file memory.Select "Quit" to exit the Auto-Format function. |
| Attribute Value Details | ||
| Template Name | Binder Spine |  (3/4" x 8.6" [18mm x 219mm]) (3/4" x 8.6" [18mm x 219mm]) |
| File Folder Tab |  (1/2" x 3.2" [12 mm x 82 mm]) (1/2" x 3.2" [12 mm x 82 mm]) | |
| Divider Tab(Hanging Folder) | 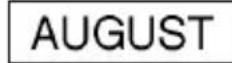 (1/2" x 1.6" [12 mm x 42 mm]) (1/2" x 1.6" [12 mm x 42 mm]) | |
| Asset Tag | 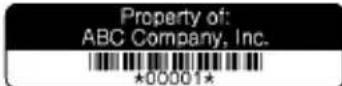 (3/4" x 2.7" [18 mm x 70 mm]) (3/4" x 2.7" [18 mm x 70 mm]) | |
| Bin Box | 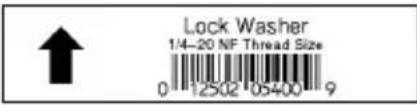 (3/4" x 3.0" [18 mm x 76 mm]) (3/4" x 3.0" [18 mm x 76 mm]) | |
| Equipment Label | 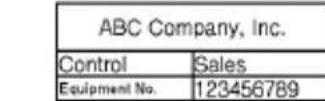 (3/4" x 2.2" [18 mm x 58 mm]) (3/4" x 2.2" [18 mm x 58 mm]) | |
| Faceplate (VRT) |  (1/2" x 2.7" [12 mm x 70 mm]) (1/2" x 2.7" [12 mm x 70 mm]) | |
| Cable Wrap | 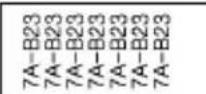 (3/4" x 1.5" [18 mm x 39 mm]) (3/4" x 1.5" [18 mm x 39 mm]) | |
| Name Badge 1 | 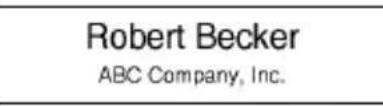 (3/4" x 2.8" [18 mm x 72 mm]) (3/4" x 2.8" [18 mm x 72 mm]) | |
| Name Badge 2 |  (1/2" x 2.8" [12 mm x 72 mm]) (1/2" x 2.8" [12 mm x 72 mm]) | |
| Template Name | CD Case Spine 1 | My Favorite Music(1/4" x 4.4" [6 mm x 113 mm]) |
| CD Case Spine 2 | My Favorite Music(9/64" x 4.4" [3.5 mm x 113 mm]) | |
| VHS Spine | Mike's Favorite FilmsCanada, Active Home0101900(3/4" x 5.5" [18 mm x 140 mm]) | |
| MiniDV Spine | Julie's Wedding(3/8" x 1.6" [9 mm x 42 mm]) | |
Using Block Layouts
| 1 | Press the key to display the Auto-Format screen, and then select “Block Layouts” using the ▲or▼ keys. | 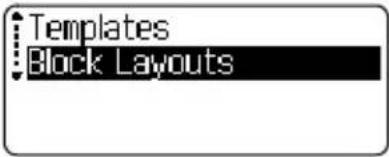 |
| 2 | Press the ☑ or 📋 key to display the Tape Width screen, and then select a tape width using the ▲or▼ keys. | 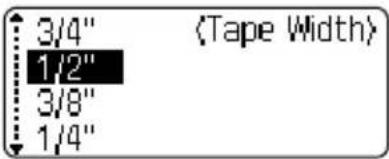 |
| 3 | Press the ☑ or 📋 key.When the tape width has not changed, the last block layout selected is displayed. When the tape width has changed, the default layout for the new tape width is displayed. | 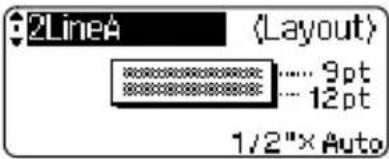 |
| 4 | Select a block layout using the ▲or keys. | 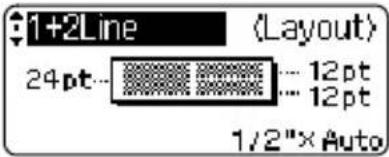 |
| 5 | Press the ☑ or 📋 key.The Style screen is displayed. | 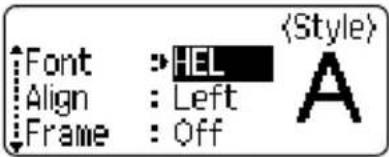 |
| 6 | Select an attribute using the ▲ or keys, and then set a value for that attribute using the ▲ or keys.Press the key to set the selected attribute to the default value. | |
| 7 | Press the ☑ or ☐ key.The block layout text entry screen is displayed.Caps mode can be used when entering text. | |
| 8 | Enter text and then press the ☑ or ☐ key.Repeat for each text field.After all text fields are completed, press the ☑ or ☐ key to display the print menu. | |
| 9 | Select "Print" using the ▲ or keys and then press the label.Select "Edit" to change the text data or style settings.Select "Save" to store the label in a file memory.Select "Quit" to exit the Auto-Format function.Select "Change Layout" to use a different layout. | OK or ☐ to print the |
| Attribute Value Details | ||
| Block layout (3/4" [18 mm] tape) | 2LineA | 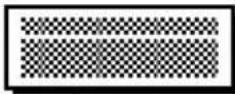 .... 12pt.... 24pt .... 12pt.... 24pt |
| 2LineB | 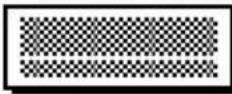 .... 24pt.... 12pt .... 24pt.... 12pt | |
| 3Line | 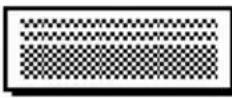 .... 9pt.... 9pt.... 24pt .... 9pt.... 9pt.... 24pt | |
| 1+2LineA | 42pt... 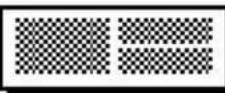 .... 18pt.... 18pt .... 18pt.... 18pt | |
| 1+2LineB | 42pt... 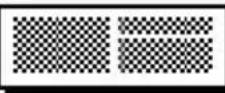 .... 12pt.... 24pt .... 12pt.... 24pt | |
| 1+3Line | 42pt... 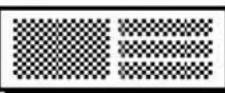 ... 12pt ... 12pt | |
| 1+4Line | 42pt... 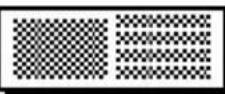 ... 9pt ... 9pt | |
| 1+5Line | 42pt... 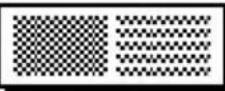 ... 9pt ... 9pt | |
| Block layout (1/2" [12 mm] tape) | 2LineA | 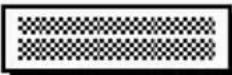 .... 9pt.... 12pt .... 9pt.... 12pt |
| 2LineB | 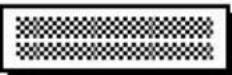 .... 12pt.... 9pt .... 12pt.... 9pt | |
| 3Line | 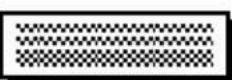 .... 6pt.... 6pt.... 12pt .... 6pt.... 6pt.... 12pt | |
| 1+2Line | 24pt... 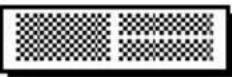 .... 12pt.... 12pt .... 12pt.... 12pt | |
EDITING A LABEL
| Attribute Value Details | ||
| Block layout(3/8" [9 mm]tape) | 2LineA | 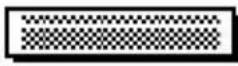 .... 6pt....12pt .... 6pt....12pt |
| 2LineB | 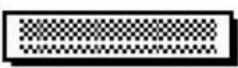 ....12pt....6pt ....12pt....6pt | |
| 1+2Line | 18pt... 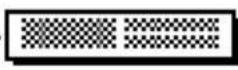 .... 9pt....9pt .... 9pt....9pt | |
| Block layout(1/4" [6 mm]tape) | 1+2Line | 12pt...| 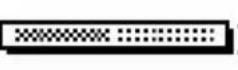 .... 6pt....6pt .... 6pt....6pt |
Creating a Bar Code Label
Using the Bar Code function you can create labels with one dimensional bar codes for use with cash registers, stock control systems or other bar code reader systems, or even asset control tags used in an asset management system.  - The P-touch labeler is not designed exclusively for creating bar code labels. Always check that bar code labels can be read by the bar code reader. - For best results, print bar code labels in black ink on white tape. Some bar code readers may not be able to read bar code labels created using colored tape or ink. - Use the “Large” setting for “Width” whenever possible. Some bar code readers may not be able to read bar code labels created using the “Small” setting. - Continuously printing a large number of labels with bar codes can overheat the print head, which may effect printing quality.Setting Bar Code Parameters
1 Press the 📄 key to display the Setup menu, select "Bar Code Setup" using the ▲ or keys, and then press the 📄 or 📋 key. The Bar Code Setup screen is displayed.   Pressing key while holding down key will also allow you to go to "Bar Code Setup". 2 Select an attribute using the or keys, and then set a value for that attribute using the or keys.   The "C-Digit" (Check Digit) attribute is only available for the CODE39, I-2/5 and CODABAR protocols.  Characters may not appear below the bar code even when "On" is selected for "Under #", depending on the tape width being used, the number of lines entered, or the current character style settings. 3 Press the or key to apply the settings.  New settings are NOT applied if you do not press the OK or key.  - Press the key to return to the previous step. - Press the key to set the selected attribute to the default value. - Refer to the Bar Code Settings table on page 46 for a list of all available settings. Bar Code Settings| Attribute Value | |
| Protocol | CODE39, CODE128, EAN8, EAN13, EAN128, UPC-A, UPC-E, I-2/5 (ITF), CODABAR |
| Width | Large |
| Small | |
| Under# (characters printed below bar code) | On |
| Off | |
| C.Digit(check digit) | Off |
| On(only available for the CODE39, I-2/5 and CODABAR protocols) |
Entering Bar Code Data
| 1 | Press thekey.The Bar Code Input screen is displayed.[206T] Up to five bar codes can be entered on a label. | 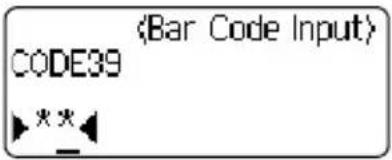 |
| 2 | Type in the bar code data.Special characters can be entered in the bar code when using the CODE39, CODABAR, CODE128 or EAN128 protocols. When not using special characters, go to step 5. | 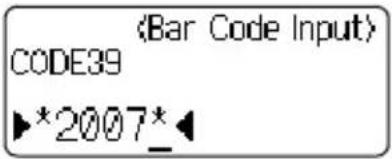 |
| 3 | Press thekey.A list of characters available for the current protocol is displayed. | 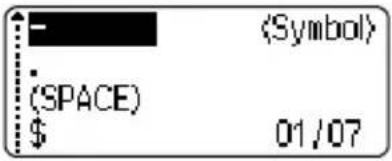 |
| 4 | Select a character using the▲or keys, then press theOKor key to insert the character in the bar code data. | 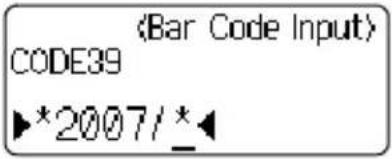 |
Special Character List
CODE39 CODABAR| Code | Special Character |
| 0 | - |
| 1 | . |
| 2 (SPACE) 2 | |
| 3 | $ |
| 4 | / |
| 5 | + |
| 6 | % |
| Code | Special Character |
| 0 | - |
| 1 | $ |
| : | |
| 3 | / |
| 4 | . |
| 5 | + |
| Code | Special Character | Code | Special Character | Code | Special Character |
| 0 (S | PACE) 24 48 DC3 | \ | |||
| 1 25 | 49 DC4 ! | ] | |||
| 2 26 | 50 '' NAK | ^ | |||
| 3 27 | 51 # SYN | - | |||
| 4 28 | NUL 52 $ ETB | ||||
| 5 29 | 53 % CAN | . | |||
| 6 | & | 30 | SOH | 54 | EM |
| 7 | ' | 31 | STX | 55 | SUB |
| 8 | ( | 32 | ETX | 56 | ESC |
| 9 33 | EOT | 57 | { | ||
| 10 | * | 34 | ENQ | 58 | FS |
| 11 35 | +ACK | 59 | | | ||
| 12 | , | 36 | BEL | 60 | GS |
| 13 37 | - BS | 61 | } | ||
| 14 | . | 38 | HT | 62 | RS |
| 15 39 | / LF | 63 | ~ | ||
| 16 | : | 40 | VT | 64 | US |
EDITING A LABEL
| Code | Special Character | Code | Special Character | Code | Special Character |
| 17 41 | FF 65 DEL | ||||
| 18 42 | CR 66 FNC3 | ||||
| 19 43 | SO 67 FNC2 | ||||
| 20 44 | SI 68 FNC4 | ||||
| 21 45 | DLE 69 FNC1 | ||||
| 22 46 | DC1 a | ||||
| 23 47 | DC2 c |
Editing and Deleting a Bar Code
- To edit the bar code data position the cursor beneath either of the bar code marks on the data entry screen and then open the Bar Code Input screen. Refer to “Entering Bar Code Data” on page 46. - To edit the "Width" and "Under#" settings on a bar code already placed on the screen, position the cursor beneath either of the bar code marks on the data entry screen and then open the Bar Code Setup screen. Refer to "Setting Bar Code Parameters" on page 45. - To delete a bar code from a label, position the cursor to right of the bar code marks on the data entry screen and press the ◀key.LABEL PRINTING
Label Preview
Using the Preview function you can check the layout of the label before printing it onto the label.1
Press the  An image of the label is displayed on the screen. The length of the label is shown in the lower-right corner of the screen. Press the ◄ or keys to scroll the preview to the left or right. Press the ▲ or keys to change the magnification of the preview.   - Press the Etc key to return to the text entry screen. (You can also return to the text entry screen by pressing OK or key.) - To scroll the preview to the left or right end, hold down the Shift key and press the or keys. - To print the label directly from the preview screen, press the key or open the print options screen and select a print option. Refer to "Printing a Label" below for details. - The print preview is a generated image of the label, and may differ from the actual label when printed.Printing a Label
After entering the text and formatting the label, you are ready to print your label. In addition to printing a single copy of a label, your P-touch labeler has several printing features that allow you to print multiple copies of a label, sequentially numbered labels and mirror-printed labels.!
- Do not pull the label coming out of the tape exit slot. Doing so will cause the ink ribbon to be discharged with the tape. - Do not block the tape exit slot during printing or when feeding tape. Doing so will cause the tape to jam. - Be sure to check that there is enough tape remaining when printing several labels continuously. If tape is running low, set fewer copies, print labels one at a time, or replace the tape cassette. - Striped tape indicates the end of the tape cassette. If this appears during printing, press the key to turn the P-touch labeler off. Attempting to print with an empty tape cassette may damage the machine.LABEL PRINTING
Printing a Single Copy
| 1 | Make sure that the appropriate tape cassette is inserted and ready for printing. |
| 2 | Press the key.The message shown on the right is displayed while the label is being printed. |
| Printing... Copies | 1/1 |
Printing Multiple Copies
Using this function you can print up to 9 copies of the same label.| 1 | Make sure that the appropriate tape cassette is inserted and ready for printing. | |
| 2 | Hold down the key and press the key to display the print options screen, and then select "Copies" using the or keys. | CopiesNumberingMirrorABCABC |
| 3 | Press the or key to display the Copies screen, and then select the number of copies to be printed using the or keys, or type the number using the number keys.Hold down the or keys to change the number of copies faster.Pressing the key when setting the number of copies resets the value to 1, the default. | (Copies)5 |
| 4 | Press the or key.The message shown on the right is displayed while the labels are being printed. | Printing... 2/5Copies |
| Copies |
| Numbering |
| Mirror |
| :5 | 〈Copies〉 |
Auto-numbering Labels
Using the numbering function you can create a set of sequentially numbered labels from a single label format. 1 Make sure that the appropriate tape cassette is inserted and ready for printing. 2 Hold down the key and press the key to display the print options screen, and then select "Numbering" using the or keys.  3 Press the or key. The numbering start point screen is displayed.  To apply auto-numbering to a bar code, select the bar code here. After selecting the bar code you will be prompted to enter the number of labels to be printed (step 6).  4 Move the cursor to the first character to be incremented in the numbering sequence and press the OK or key. The numbering end point screen is displayed.  5 Move the cursor to the last character to be incremented in the numbering sequence and press the OK or key. The number of labels to be printed is displayed.  6 Select the number of labels to be printed using the ▲ or ▼ keys, or type the number using the number keys.  \- Hold down the or keys to change the number of labels faster. - Pressing the key when selecting the number of copies resets the value to 1, the default.  7 Press the or key. The labels are printed. As each label is printed the number of copies printed is shown. LABEL PRINTING
 - Press the key to return to the previous step. - Unless set otherwise, the tape is automatically cut after each copy is printed. Refer to “Tape Cutting Options” on page 53 to change this setting. - The figures shown on the screen during printing indicate the “count / number of copies”. - Auto-numbering can also be applied to bar codes. When a bar code contains an auto-numbering sequence, no other fields in the label can contain an auto-numbering sequence. - The auto-number portion of the label is incremented after each label is printed. - Only one auto-numbering sequence can be used in a label. - Any symbols or other non-alphanumeric characters in the auto-numbering sequence are ignored. - An auto-numbering sequence can only contain a maximum of five characters.  \- Letters and numbers increase as shown below:  Spaces (shown as underlines “\_” in the example below) can be used to adjust the spacing between characters or to control the number of digits that are printed. Mirror Printing
Using the mirror printing function you can create labels with the text printed in reverse so that they can be read from the opposite side when attached to glass or other transparent material.| 1 | Make sure that the appropriate tape cassette is inserted and ready for printing. | |
| 2 | Hold down the key and press the key to display the print options screen, and then select “Mirror” using the or key. | 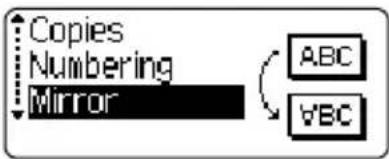 |
| 3 | Press the or key.The message “Mirror Print?” is displayed | 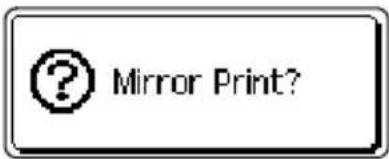 |
| 4 | Press the or key.The message shown on the right is displayed while the label is being printed. | 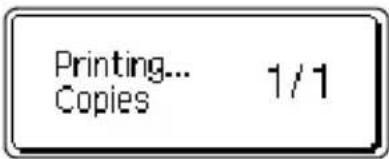 |
Tape Cutting Options
The tape cutting options allow you to specify how the tape is fed and cut when printing labels. In particular, the “Chain” and “No Cut” options greatly reduce the amount of wasted tape by using smaller margins and eliminating blank sections cut between labels. 1 | Press the ☑ key to display the Label menu.  2 Select "Cut Option" using the or keys, and then set the value by using the or keys.  3 Press the or key to apply the settings.  New settings are NOT applied if you do not press the OK or key.  - Press the key to return to the previous step. - Refer to the Tape Cutting table on page 54 for a list of all available settings. Tape Cutting| Setting Description Example | ||
| Large Margin | Automatically cuts the tape after each label is printed. The labels have a 0.94" (24 mm) margin on the left and right ends. | 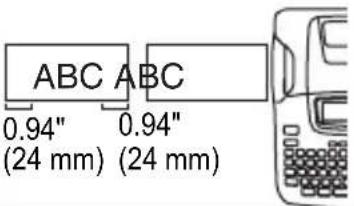 |
| Small Margin | When printing labels one at a time: Automatically cuts a piece of blank tape before printing the label, and then cuts the tape after the label is printed.When printing several labels continuously: Automatically cuts a piece of blank tape before printing the first label, and then cuts the tape after each label is printed.The labels have a 0.16" (4 mm) margin on the left and right ends. | 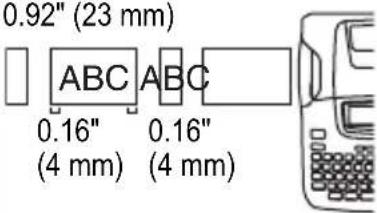 |
| Chain | When printing labels one at a time: Automatically cuts a piece of blank tape before printing the label, and then does not cut the tape after the label is printed.When printing several labels continuously: Automatically cuts a piece of blank tape before printing the first label, and then cuts the tape after each label is printed.The labels have a 0.16" (4 mm) margin on the left and right ends.The tape is not fed and cut after the last label is printed. | 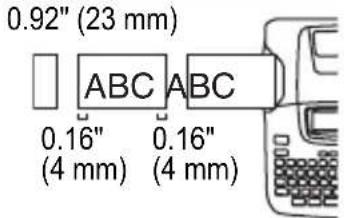 |
| No Cut | Use this setting to print a strip of labels with no cuts in between.Pressing the white holding down Shift key will feed and cut the last label printed. | 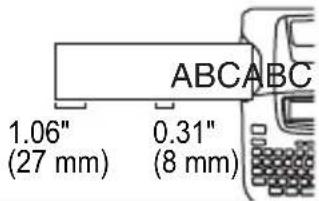 |
Adjusting the Label Length
You can adjust the length of the printed label in levels of -5 to +5. 1 Press the set key to display the setup menu, select "Adjust Length" using the or key, and then press the or key.  2 Select "Adjust Length" by using the ▲ or ▶ key, and then set the value by using the ▲ or ▶ key.  3| Press the or key to apply the setting.  - Press the key to return to the previous step. - Press the key to set the value to default setting. - Approximately 1% of the total label length will be adjusted by 1 level.Attaching Labels
1 If necessary, trim the printed label to the desired shape and length using scissors, etc. 2| Peel the backing from the label.  The backing of some types of tapes may be pre-cut to make it easier to peel the backing. 3 Position the label and then press firmly from top to bottom with your finger to attach the label.  - Labels may be difficult to attach to surfaces that are wet, dirty, or uneven. The labels may peel off easily from these surfaces. - Be sure to read the instructions provided with Fabric Iron-On Tapes, Extra Strength Adhesive Tapes or other special tapes and observe all precautions noted in the instructions.USING THE FILE MEMORY
You can store up to 9 of your most frequently used labels in the file memory. Each label is stored as a file, allowing you to quickly and easily recall your label when needed again.  - When the file memory is full, each time you save a file you will need to overwrite one of your stored files. - You will lose your stored files if the AC adapter is disconnected and the batteries are removed for more than two minutes.Storing a Label into Memory
1 After entering the text and formatting the label, press the key to display the File screen.  2 Select "Save" using the ▲ or keys.  3 | Press the or key. A file number is displayed. A label text is also displayed if a label is already stored in that file number.  4 Select a file number using the or key, and then press the or key to save the label under the selected file number.  The file is saved and the screen returns to the text entry screen.  When there is already a stored file in the selected number, the data will be overwritten by the file you try to save.   - Press the key to return to the previous step. - Up to 200 characters can be saved in one file, depending on the number of lines. However, there is a maximum of 1800 characters for the total number of characters saved in up to 9 files. Text and layout formatting data is also saved in the file. - To store a label created by using the Auto-Format Layouts, refer to “Using Auto-Format Layouts” on page 37.Opening a Stored Label File
1 Press the ⚠ key to display the File screen.  2 Select "Open" using the ▲ or keys.  3 Press the or key. The file number of a stored label is displayed. The label text is also displayed to identify the label.  4 Select a file number using the ▲ or key, and then press the Ⓞ or key to open the selected file. The file is opened and displayed on the text entry screen.   Press the key to return to the previous step.Printing a Stored Label File
1 Press the key to display the File screen.  2 Select "Print" using the ▲ or keys.  3 Press the or key. The file number of a stored label is displayed. The label text is also displayed to identify the label.  4 Select a file number using the or key, and then press the or key to print the selected label. The label is printed from the machine.   - Press the key to return to the previous step. - The message "No Text!" is displayed when you try to print a file with no text.Deleting a Stored Label File
1 Press the ⚠ key to display the File screen.  2| Select "Delete" using the ▲ or keys.  3 | Press the or key. The file number of a stored label is displayed. The label text is also displayed to identify the label.  4 Select a file number using the ▲ or key, and then press the Ⓞ or key. The message "Delete?" is displayed.  5 | Press the or key to delete the file. The file is deleted and the screen returns to the text entry screen.  Press the Ⓞkey to cancel deleting the file and return to the previous screen.MAINTAINING YOUR P-touch Labeler
Resetting the P-touch Labeler
You can reset the P-touch labeler internal memory to clear all saved label files and revert the machine back to factory settings. 1 Turn off the machine. Press and hold the and . Continue to hold the and press and release the . Now, release the and . The P-touch labeler's internal memory is now reset. Shift  Release the key before releasing the other keys.  All text, format settings, option settings and stored label files are cleared when you reset the P-touch labeler. Language and unit settings will also be cleared.Maintenance
Your P-touch labeler should be cleaned on a regular basis to maintain its performance.  Always remove the batteries and disconnect the AC adapter prior to cleaning the P-touch labeler.Cleaning the exterior of the P-touch labeler
Wipe any dust and marks from the main unit using a soft, dry cloth. Use a slightly dampened cloth with water on difficult to remove marks.  Do not use paint thinner, benzene, alcohol or any other organic solvent. These may deform the case or damage the appearance of your P-touch labeler.Cleaning the Print Head
Streaks or poor quality characters on printed labels generally indicates that the print head is dirty. Clean the print head using a dry cotton swab or optional print head cleaning cassette (TZ-CL4).  Refer to the instructions provided with the print head cleaning cassette for directions on how to use it. Print head WARNING
Do not touch the print head directly with your bare hands. The print head maybe hot.Cleaning the Tape Cutter
About once every year, wipe the cutter blades using a cotton swab moistened with isopropyl alcohol (rubbing alcohol). Tape adhesive can build up on the cutter blade after repeated use, taking the edge off the blade which may result in the tape jamming in the cutter. CAUTION
Do not touch the cutter blade directly with your bare hands. natural_image
Technical line drawing of an internal mechanical assembly (no text or symbols)TROUBLESHOOTING
What to do when...| Problem Possible | Cause Recommendation | |
| The screen locks-up freezes, or the P-touch labeler does not respond normally. | Refer to “Resetting the P-touch Labeler” on page 60 and reset the internal memory to the initial settings. If resetting the P-touch labeler does not solve the problem, disconnect the AC adapter and remove the batteries for more than 10 minutes. | |
| The display remains blank after turning on the power. | Is the AC adapter connected correctly? | Check that the AC adapter designed exclusively for your P-touch labeler is connected correctly. |
| Are you using the correct AC adapter? | Check that the label on the AC adapter indicates it is a Brother AD-24 adapter. Using a wrong adapter can damage the machine. | |
| Are the batteries installed correctly? | Remove and re-install the batteries. | |
| The label is not printed after pressing the key. | Has text been entered? A label will not be printed if there is no text entered. | |
| Is the tape cassette installed correctly, and is there enough tape remaining? | Check that the tape cassette is installed correctly, and that there is enough tape remaining. | |
| Is the end of the tape bent? If bent, cut the bent section of tape with scissors and thread the tape through the tape exit slot correctly. | ||
| Is the tape jammed? If jammed, remove the tape cassette, carefully pull out the jammed tape, and then cut the tape with scissors. Check that the end of the tape passes through the tape guide, and reinstall the tape cassette. | ||
| Does the tape compartment cover open? | If so, close the tape compartment cover correctly. | |
| Problem Possible Cause Recommendation | ||
| The LCD messages are displayed in a foreign language. | Is the language set properly? | |
| The label is not printed correctly. | Is the tape cassette installed correctly? | |
| Is the print head clean? If not clean the print head using a cotton swab or optional print head cleaning cassette (TZ-CL4). | ||
| Is Cut Option set to Chain or No Cut? | ||
| The ink ribbon is separated from the ink roller. | Is the ink ribbon in the tape cassette loose, or did you pull on the label coming out of the tape exit slot? | |
| Problem Possible Cause Recommendation | ||
| The P-touch labeler stops while printing a label. | Is there enough tape remaining in the tape cassette? | The striped tape indicates you have reached the end of the tape. Replace the tape cassette when the striped tape appears. |
| Are the batteries weak and the AC adapter not connected or is the AC adapter the Brother AD-24? | Replace all batteries or connect the AC adapter (Brother AD-24) directly to the P-touch labeler. | |
| The label is not cut automatically. | Is Cut Option set to Chain or No Cut? | When these options are set, the tape is not fed after printing the label. Check the Cut Option setting, or hold down the key and press the key to feed and cut the tape. |
| Is Manual Cutting set to ON? | When using Fabric Iron-On Tapes or Extra Strength Adhesive Tapes, please use scissors to cut the tape after printing. | |
| Does the tape compartment cover open? | If so, close the tape compartment cover correctly. | |
| Label files saved previously are now empty. | Have the batteries and AC adapter been disconnected? | All files stored in the internal memory is lost if the batteries and AC adapter are disconnected for longer than two minutes. |
| Is there enough power remaining in the batteries? | All data stored in the internal memory is lost if the batteries become empty. | |
| Have you used the Reset function? | The reset function clears all data stored in the internal memory, including label files. | |
Error Messages
When an error message appears on the display, follow the directions provided below.  Press any key to clear the error message.| Message Cause/Remedy | |
 Battery Weak! Battery Weak! | The installed batteries are getting weak. |
 Check Battery! Check Battery! | The installed batteries are about to run out of power. Replace with new batteries or connect the AC adapter before continuing. |
 Wrong Type Of Adapter Connected! Wrong Type Of Adapter Connected! | An incompatible AC adapter is connected. Use only the AC adapter (Brother AD-24) designed exclusively for your P-touch labeler. |
 Cutter Error! Cutter Error! | The tape cutter is closed when you try to print or feed tape with the cover closed and the tape cassette inserted. Turn the P-touch labeler off and then on again before continuing. When tape is tangled in the cutter, remove the tape. |
 No Text! No Text! | There is no text, symbols or bar code data entered when you try to print or preview a label. Enter data before continuing. |
 Insert Tape Cassette! Insert Tape Cassette! | There is no tape cassette installed when you try to print or preview a label, or feed tape. Install a tape cassette before continuing. |
 Tape Cassette Changed! Tape Cassette Changed! | The tape cassette is changed while printing, etc. Make sure the correct tape cassette is inserted before printing. |
 Line Limit! Max 5 Lines Line Limit! Max 5 Lines | There are already five lines of text when you press the key. Limit the number of lines to five. |
 Tape Width Limit! Max 3 Lines Tape Width Limit! Max 3 Lines | There are more than three lines of text when you press the Print or Print or Print while using 1/2" (12 mm) tape. Limit the number of lines to three, or replace with tape cassette of larger tape width. |
| [HABW] Tape Width Limit!Max 2 Lines | There are more than two lines of text when you press thePrint Options or key while using 3/8" or 1/4" (9 mm or 6 mm) tape. Limit the number of lines to two, or replace with tape cassette of larger tape width. |
 Tape Width Limit!Max 1 Line Tape Width Limit!Max 1 Line | There is more than one line of text when you press thePrint Options or key while using 9/64" (3.5mm) tape. Limit the number of lines to one, or replace with tape cassette of larger tape width. |
 Block Limit!Max 5 Blocks Block Limit!Max 5 Blocks | There are already five blocks of text. Limit the number of blocks to five. |
| [SZD3] Text Full! | The maximum number of characters have already been entered. Edit the text and use fewer characters. |
 Length Limit! Length Limit! | The length of the label to be printed using the text entered is longer than 39.37" (1 m). Edit the text so that the length of the label is less than 39.37" (1 m). |
 Insert 3/4" Tape Cassette! Insert 3/4" Tape Cassette! | An 3/4" (18 mm) tape cassette is not installed when an Auto-Format for 3/4" (18 mm) tape is selected. Install an 3/4" (18 mm) tape cassette. |
 Insert 18mm Tape Cassette! Insert 18mm Tape Cassette! | |
 Insert 1/2" Tape Cassette! Insert 1/2" Tape Cassette! | A 1/2" (12 mm) tape cassette is not installed when an Auto-Format for 1/2" (12 mm) tape is selected. Install a 1/2" (12 mm) tape cassette. |
 Insert 12mm Tape Cassette! Insert 12mm Tape Cassette! | |
 Insert 3/8" Tape Cassette! Insert 3/8" Tape Cassette! | A 3/8" (9 mm) tape cassette is not installed when an Auto-Format for 3/8" (9 mm) tape is selected. Install a 3/8" (9 mm) tape cassette. |
 Insert 9mm Tape Cassette! Insert 9mm Tape Cassette! | |
| A 1/4" (6 mm) tape cassette is not installed when an Auto-Format for 1/4" (6 mm) tape is selected. Install a 1/4" (6 mm) tape cassette. | |
| A 9/64" (3.5mm) tape cassette is not installed when an Auto-Format for 9/64" (3.5mm) tape is selected. Install an 9/64" (3.5mm) tape cassette. | |
| The maximum number of characters for the selected layout have already been entered. Edit the text to use fewer characters or use a different layout. | |
| The value entered for setting the tape length, tab length, multiple copies, or numbering function is invalid. Enter a valid value for the setting. | |
| The tape length set using the tape length setting is shorter than the total length of the left and right margins applied for the "Large Margin" cutting option. Select a different cutting option. | |
| The length of the label to be printed using the text entered is longer than the length setting. Edit the text to fit within the set length or change the length setting. | |
| The text size is too large. Select a different size option. | |
| The number of digits entered in the bar code data does not match the number of digits set in the bar code parameters. Enter the correct number of digits. | |
| The bar code data entered does not have the required start/stop code (A, B, C, or D required at the beginning and end of the bar code data for the CODABAR protocol). Enter the bar code data correctly. | |
| There are already 5 bar codes entered in the text data when you try to enter a new bar code. You can only use up to five bar codes in each label. |
Specifications
Main Unit| Item Specification | |
| Input Device (Keyboard) | 65-key, QWERTY layout keyboard |
| Display | |
| Display device Dot matrix LCD | |
| Character display 16 | characters x 1 guidance and 2 lines (128 dot x 48 dot) |
| Back light display No | |
| Printing | |
| Print method Thermal | printer |
| Print head 128 dot / 1 | 80 dpi |
| Print height 0.62" (15 | 8 mm) max. (when using 3/4" (18 mm) tape) |
| Print speed Approx. 0 | .39" (10 mm) / sec. |
| Tape cassette Standard TZ tape cassette (9/64", 3/8", 1/2", 3/4" [3.5, 6, 9, 12, 18 mm] widths) | |
| Tape cutter Built-in automatic cutter | |
| No. of lines 3/4" (18 mm) tape: 1 - 5 lines; 1/2" (12 mm) tape: 1 - 3 lines; 3/8" (9 mm) tape: 1 - 2 lines; 1/4" (6 mm) tape: 1 - 2 lines; 9/64" (3.5 mm) tape: 1 line | |
| Print direction Horizontal, Vertical | |
| Continuous printing 1 | ~ 9 labels |
| Print preview Yes | |
| Cut and feed Large Margin, Small Margin, Chain, No Cut | |
| Characters | |
| Internal character set: | Total of 301 characters (62 alphanumeric, 92 symbols, 147 accented characters.) |
| Text buffer | 200 characters max. |
| Fonts | Helsinki, Brussels, Florida, Calgary |
| Character size Auto, | 42pt, 36pt, 24pt, 18pt, 12pt, 9pt, 6pt |
| Character style | Off, Bold, Outline, Shadow, Solid, Italic, Italic Bold, Italic Outline, Italic Shadow, Italic Solid, Vertical |
| Character width | 2, 1, 2/3, 1/2 |
| Text alignment | Left, Center, Right, Justify |
| Memory | |
| Memory size Maximum 1800 characters | |
| File storage Maximum 9 files | |
| Other Features | |
| Frame Total of 16 frame patterns (including shaded pattern) | |
| Auto-Format Templates: 14Block layouts: 3/4"(18 mm): 8, 1/2" (12 mm): 4, 3/8" (9 mm): 3, 1/4" (6 mm): 1 | |
| Screen contrast 5 levels (+2, +1, 0, -1, -2) | |
| Power Supply | |
| Power supply AC adapter (AD-24), Six AA-size alkaline batteries (LR6). | |
| Auto Power-off P-touch only: 5 minutesConnected PC: 60 minutes | |
| Size | |
| Dimensions 6.98"(W) x 9.14" (D) x 2.68" (H)[177.2 mm (W) x 232.1 mm (D) x 68.0 mm (H)] | |
| Weight 1.72lb (780g) (without tape cassette and batteries) | |
| Other | |
| Operating temperature / humidity | 50 ~ 95°F / 20 ~ 80% humidity (without condensation) |
APPENDIX
Operating Environment: Windows®| Item Specification | |
| OS | Microsoft® Windows® 2000 Professional/XP/Windows VistaTM |
| Memory | Windows® 2000 Pro, XP: 128MB or more requiredWindows VistaTM: 512MB or more |
| Hard disk | 70MB or more required |
| Monitor | SVGA High Color graphics support or higher |
| Interface | USB Port (USB specification 1.1 or later protocol) |
| Other | CD-ROM drive for installation |
INDEX
A
AC adapter 18 Accented Character List 30 accented characters 29 alignment 31 Auto power-off time 21C
Caps mode 14,25 contrast 23 cursor keys 25D
deleting text and formatting 26 text only 26E
entering symbols 27 text 25 uppercase letter 25F
Feed & Cut function 22 font 31 Font Options 32 formatting character attributes 31 label attributes ...... 35K
Keyboard 14L
length 35 line 31 Line number 14N
new line 25P
Power Supply 17R
Return mark 14s
size ....31 Size Options ......32 style 31 Style Options ......33 Symbol List ......28 symbols 27T
tape cassettes ....19 Tape length 14 text entering and editing .....25 lines 25U
uppercase letter 25W
width 31 Width Options ....33Contact Information (For USA Only)
Service Center Locations
If you need a local service center, please call 1-800-284-HELP (4357) to locate the authorized service center closest to you. Note: Be sure to call the Service Center before your visit. Service centers do not provide operational assistance. See "Operational Assistance".Operational Assistance
For technical and operational assistance you may call Brother Customer Service at: Voice 1-877-4-PTouch or 1-877-478-6824 Fax 1-901-379-1210 Email custsrv@brother.comAssistance on the Internet
For product information: http://www.brother.com For downloading the latest drivers: http://solutions.brother.com For purchasing accessories and certain Brother products: http://www.brothermall.comAccessories and Supplies
To order Brother accessories or supplies by Visa, MasterCard, Discover or American Express, you may call toll tree 1-888-879-3232, or complete the order form in your user's guide and fax both sides of the form to 1-800-947-1445. For purchasing accessories on the Internet: http://www.brothermall.com To order by mail or pay by check, please complete the accessory order form and mail it along with payment to: Brother International Corporation Attn: Consumer Accessory Division P.O. Box 341332 Bartlett, TN 38133-1332Fax-Back System
Brother Customer Service has installed an easy-to-use Fax-Back System so you can get instant answers to common technical questions and product information for all Brother products. This system is available 24 hours a day, 7 days a week. You can use the system to send the information to any fax machine, not just the one you are calling from. Please call 1-800-521-2846 and follow the voice prompts to receive faxed instructions on how to use the system and an index of Fax-Back subjects.Save Time - Register On-Line!
Don't stand in line at the post office or worry about lost mail. Visit us on-line atwww.registermybrother.com
Your product will immediately be registered in our database and you can be on your way! Also, while you're there, look for contests and other exciting information!P-touch®
PT-2100/PT-2110
GUÍA DE USUARIO
 Antes de usar su equipo por primera vez, lea cuidadosamente esta Guía de Usuario. Guarde esta Guía de Usuario para futuras referencias. natural_image
Line drawing of a vintage telephone receiver with keypad and front panel (no text or symbols)| 1 | INTRODUCCIÓN | P. 4 |
| 2 | PARA EMPEZAR | P. 12 |
| 3 | EDICIÓN DE ETIQUETAS | P. 25 |
| 4 | IMPRESIÓN DE ETIQUETAS | P. 51 |
| 5 | UTILIZACIÓN DE LA MEMORIA DE ARCHIVOS | P. 58 |
| 6 | MANTENIMIENTO DE SU Etiquetadora P-touch | P. 62 |
| 7 | SOLUCIÓN DE PROBLEMAS | P. 64 |
| 8 | APÉNDICE | P. 72 |
| 9 | ÍNDICE | P. 75 |
Declaración de conformidad de la Comisión Federal de Comunicaciones (FCC) (sólo para EE.UU.)
Parte responsible: Brother International Corporation 100 Somerset Corporate Boulevard Bridgewater, NJ 08807-0911 USA TEL: (908) 704-1700 declara que el producto Nombre del producto: Sistema de etiquetado electrónico P-touch de Brother Número de modelo: PT-2100/2110 Este dispositivo cumple con la Parte 15 de la normativa de la FCC. El funcionamiento está sujeto a las dos condiciones siguientes: (1) este dispositivo no puede causar interferencias nocivas y (2) este dispositivo debe aceptar cualquier interferencia que reciba, incluidas las interferencias que puedan provocar un funcionamiento no deseado. Este equipo ha sido sometido a diversas pruebas y se ha comprobado que cumple con los límites establecidos para los dispositivos digitales de Clase B, de acuerdo con la Parte 15 de la normativa de la FCC. Dichos límites están diseñados para proporcionar una protección razonable contra las interferencias nocivas en las instalaciones residenciales. Este equipo genera, utiliza y puede irradiar energía de radiofrecuencias y, si no se instala y utiliza siguiendo las instrucciones suministradas, podría provocar interferencias nocivas en las comunicaciones de radio. No obstante, no existe garantía alguna de que no se produzcan dichas interferencias en una instalación determinada. Si este equipo causara interferencias nocivas en la recepción de radio o televisión, lo cual se puede determinar apagando y encendiendo el equipo, se recomienda al usuario intentar corregir la interferencia mediante una o más de las siguientes medidas: - Cambie la orientación o la ubicación de la antena de recepción. - Aumente la separación entre el equipo y el receptor. - Conecte el equipo a la salida de un circuito distinto al que está conectado el receptor. - Consulte a su distribuidor o a un técnico experto en radio/TV para obtener ayuda. - El cable de conexión incluido se debe utilizar para garantizar el cumplimiento con los límites establecidos para los dispositivos digitales de Clase B. - Si se realizan cambios o modificaciones no aprobadas expresamente por Brother Industries, Ltd. se podría anular la autoridad del usuario para utilizar el equipo. - IBM es una marca comercial de International Business Machines, Inc. - Los logotipos Brother y P-touch son marcas registradas de Brother Industries, Ltd. - Microsoft y Windows son marcas comerciales registradas de Microsoft Corporation, EE UU. - Los nombres de otros productos y del software mencionados en este documento son marcas comerciales o marcas comerciales registradas de las empresas que los desarrollaron.Garantía limitada de un año y Servicio de sustitución de Brother® (sólo en Estados Unidos)
Cobertura:
- Esta garantía limitada ("garantía") sólo se concede al comprador original final (en adelante el "Comprador original") del producto al que acompaña, consumibles y accesorios (denominados colectivamente en esta garantía "la máquina"). - Si ha adquirido este producto a alguien que no es un distribuidor autorizado de Brother en los Estados Unidos, o si el producto ha sido utilizado (incluyendo, pero sin limitarse a modelos de exposición o productos reacondicionados) antes de que el usuario lo comprara, entonces dicho usuario no es el Comprador original y el producto adquirido no estará cubierto por esta garantía.Alcance de la cobertura:
- Este producto incluye una máquina y artículos consumibles y accesorios. Los artículos consumibles y accesorios incluyen, pero no se limitan a casetes de etiquetas, cortadores, estampas, adaptadores eléctricos, cajas y pilas. - A excepción de lo dispuesto en este documento, Brother garantiza que la máquina y los artículos consumibles y accesorios que la acompañan no presentarán ningún defecto en sus materiales ni de mano de obra, si se utilizan en condiciones normales. - Esta garantía se aplica exclusivamente a los productos adquiridos y utilizados en los Estados Unidos. En el caso de aquellos productos que se hayan comprado dentro de los Estados Unidos, pero se han utilizado fuera de sus fronteras, esta garantía sólo cubre el servicio de garantía dentro de los Estados Unidos (es decir, no incluye los gastos de transporte fuera de los Estados Unidos).Duración del periodo de garantía:
\- Máquinas: un año a partir de la fecha de compra original. \- Consumibles y accesorios incluidos: 90 días a partir de la fecha de compra original o la duración prevista del consumible, lo que suceda antes.Aspectos NO CUBIERTOS:
Esta garantía no cubre: (1) Daños físicos a la máquina; (2) Daños provocados por una instalación incorrecta, uso anormal o incorrecto, abuso, negligencia o accidente (incluyendo pero sin limitarse al transporte de esta máquina sin la preparación o embalaje adecuados); (3) Daños provocados por otro dispositivo o software utilizado con esta máquina (incluyendo pero sin limitarse a daños como consecuencia del uso de piezas, artículos consumibles y accesorios que no sean de la marca Brother®); (4) Los artículos consumibles y accesorios que caducaron de acuerdo con la duración establecida para los mismos, y, (5) Problemas resultantes de otras causas que no son defectos en los materiales o mano de obra. Esta garantía limitada quedará ANULADA si esta máquina se altera o modifica de alguna forma (incluyendo pero sin limitarse al intento de una reparación en garantía sin la autorización de Brother o la alteración/eliminación del número de serie).Procedimiento que debe seguir si su Producto cumple con los requisitos del servicio en garantía:
Informe del problema a nuestra Línea directa de atención al cliente de P-touch llamando al número 1-877-478-6824 o a un Centro de servicio autorizado de Brother dentro del periodo de garantía aplicable. Presente a Brother, o al centro de servicio autorizado de Brother, una copia de la factura de venta fechada donde se pueda comprobar que la máquina se adquirió en los Estados Unidos. Si desea conocer el nombre de un Centro de servicio autorizado Brother en su localidad, llame al 1-800-521-2846.Brother le pedirá que realice lo siguiente:
Tras ponerse en contacto con Brother o con un Centro de servicio autorizado de Brother, es posible que tenga que entregar (personalmente si lo prefiere) o enviar el producto debidamente empaquetado, con el transporte ya abonado, al Centro de servicio autorizado junto con una fotocopia de la factura de compra. El usuario será el responsable de sufragar los gastos de transporte, empaquetado del producto y seguro (si lo desea). El usuario también será responsable de la pérdida o los daños que pueda sufrir el producto durante su transporte.Brother, por su parte, actuará de la siguiente forma:
Si el problema del que se informa con relación a la máquina o artículos consumibles y accesorios está cubierto por esta garantía y si usted ya informó del mismo problema a Brother o a un Centro de servicio autorizado dentro del plazo de garantía aplicable, Brother o su Centro de servicio autorizado reparará o sustituirá la máquina o los artículos consumibles y accesorios sin cobrarle las piezas ni la mano de obra. Brother, bajo su propio criterio, decidirá si va a reparar o a sustituir la máquina o los artículos consumibles y accesorios. Brother se reserva el derecho a proporcionar una máquina reacondicionada o los artículos consumibles y los accesorios que la acompañan, y utilizar piezas reacondicionadas siempre y cuando los productos reacondicionados cumplan con las especificaciones del fabricante respecto a productos o piezas nuevas. La máquina reparada o sustituida, o los artículos consumibles y accesorios que la acompañan se devolverán al usuario por transporte pagado o se pondrán a su disposición para que los recoja personalmente en un Centro de servicio autorizado situado en un lugar conveniente. Si la máquina o los artículos consumibles y accesorios no están cubiertos por esta garantía (ninguna de sus dos fases), se cobrarán al usuario los gastos de transporte en los que se incurra para devolverle el equipo y los artículos consumibles y accesorios, así como por cualquier servicio o pieza/producto de repuesto, a las tarifas publicadas actuales de Brother. Lo anteriormente descrito constituye los únicos recursos que tiene el usuario bajo esta garantía.Qué sucede cuando Brother decide sustituir la máquina:
Si Brother ha autorizado una Máquina de sustitución y usted lleva la máquina a un Centro de servicio autorizado, éste le proporcionará una máquina de sustitución tras recibirla de Brother. Si está tratando directamente con Brother, Brother le enviará un equipo de sustitución con el entendimiento de que el usuario, tras recibir el mencionado equipo de sustitución, proporcionará la prueba requerida de la compra, junto con el equipo que Brother se comprometió a sustituir. Se espera entonces que el usuario empaquete la máquina que Brother se ha comprometido a sustituir en el paquete donde se ha entregado la máquina de sustitución y que lo devuelva a Brother utilizando el documento de envío prepagado suministrado por Brother de acuerdo con las instrucciones indicadas por Brother. El usuario dispondrá de dos equipos, por ello, Brother exigirá que le proporcione el número de una tarjeta de crédito válida. Brother emitirá un cargo contra ese número de cuenta de la tarjeta de crédito hasta que reciba el producto original y determine que dicho producto original cumple con los requisitos de la cobertura de la garantía. Sólo se cargará en su tarjeta de crédito el importe de un producto nuevo si: (i) no devuelve el producto original a Brother en un plazo de cinco (5) días hábiles; (ii) los problemas del producto original no están cubiertos por la garantía limitada; (iii) no se siguen las instrucciones correctas para empaquetar el producto y éste ha sufrido algún daño como consecuencia de ello; o (iv) el periodo de garantía del producto original ha vencido o usted no ha presentado una copia de la prueba de compra válida (factura de compra). La máquina de sustitución que recibe el usuario (incluso si se trata de un equipo reacondicionado) quedará cubierta durante el resto del periodo de garantía limitada que le quedaba al producto original, más treinta (30) días adicionales. El usuario conservará la máquina de sustitución que se le envía y el equipo original pasará a ser propiedad de Brother. Conserve los artículos de accesorio originales y una copia del documento de envío de devolución, firmada por el servicio de transporte.Limitaciones:
Brother no se responsabiliza de los daños o pérdida de un equipo, soporte, programas o datos relacionados con el uso de esta máquina. Excepto en el caso de las reparaciones o sustituciones descritas anteriormente, Brother no será responsable de ningún daño directo, indirecto, accidental o consecuente, ni de desagravio específico. Algunos estados no autorizan esta exclusión o limitación de los daños consecuentes o accidentales, por tanto, es posible que la limitación anterior no se aplique en su caso. ESTA GARANTÍA INVALIDA CUALQUIER OTRA GARANTÍA, ESCRITA U ORAL, YA SEA EXPRESADA MEDIANTE UNA AFIRMACIÓN, PROMESA, DESCRIPCIÓN, DIBUJO, MODELO O PRUEBA. TODAS Y CADA UNA DE LAS GARANTÍAS DISTINTAS DE ESTA, SEAN EXPLÍCITAS O IMPLÍCITAS, INCLUIDAS LAS GARANTÍAS DE COMERCIABILIDAD Y ADECUACIÓN A UN PROPÓSITO DETERMINADO, QUEDAN POR EL PRESENTE RECHAZADAS. - Esta garantía limitada es la única garantía que Brother ofrece para esta máquina. Se trata de la expresión última y la declaración única y exclusiva de las obligaciones de Brother para con el usuario. Sustituye todos los acuerdos o negociaciones que se puedan haber establecido con Brother o sus representantes. - Esta garantía le otorga ciertos derechos y usted también puede gozar de derechos adicionales en función del estado donde se encuentre. - Esta garantía limitada (y la obligación de Brother para con el usuario) no puede modificarse de ninguna forma a menos que el usuario y Brother firmen el mismo documento en el que (1) se haga referencia a esta máquina y la factura con la fecha de compra, (2) se describa la modificación de esta garantía y (3) se esté de acuerdo en la aplicación de esa modificación.Importante:
Le recomendamos que conserve todo el material de empaque original por si tuviera que transportar la máquina.Información importante
Si usted tiene alguna pregunta o necesita información acerca de su producto Brother, le ofrecemos una variedad de opciones entre las cuales puede elegir: Servicio al cliente en Estados Unidos: Customer Service 877-478-6824 (voz) Customer Service 877-4-PTouch (voz) Customer Service 901-379-1210 (fax) Customer Service custsrv@brother.com (correo electrónico) Respuesta automática por fax 800-521-2846 Web www.brother.com Suministros / Accesorios www.brothermall.com u 888-879-3232BROTHER INTERNATIONAL CORPORATION 100 SOMERSET CORPORATE BLVD.
BRIDGEWATER, NEW JERSEY 08807-0911
Por favor anote su modelo y el número de serie y la fecha y el lugar de compra indicados abajo para sus archivos. Conserve esta información junto con su comprobante de compra (factura de venta) en caso de que su producto requiera servicio técnico. Modelo N° Serie N° Fecha de compra: Nombre de la tienda donde lo compró: Dirección de la tienda: Importante: le recomendamos conservar todos los materiales originales de embalaje, en caso de que tenga que devolvernos este producto.Ahorre tiempo: ¡registre su producto en línea!
No haga cola en la oficina de correos ni se preocupe por cartas perdidas. Visite nuestra página web en línea en:www.registermybrother.com
¡Su producto quedará registrado inmediatamente en nuestra base de datos sin que usted tenga que hacer nada más! De igual modo, mientras visite esta página web, busque en ella anuncios sobre concursos y otra información de interés.ÍNDICE
1. INTRODUCCIÓN......4
Lo que puede hacer .... 4 Precauciones de seguridad....6 Precauciones generales.... 10 Símbolos utilizados en esta guía.... 10 Guía rápida.... 112. PARA EMPEZAR.... 12
Desembalaje de la etiquetadora P-touch 12 Descripción general.... 13 Pantalla LCD y teclado.... 14 Pantalla LCD 14 Funciones y nombre de las teclas 15 Alimentación eléctrica 17 Baterías.... 17 Adaptador de CA 18 Instalación de un cartucho de cinta.... 19 Encendido y apagado....21 Avance de la cinta....22 Avanzar y cortar....22 Solo avanzar....22 Pantalla LCD 23 Contraste de la pantalla LCD 23 Ajuste del idioma y las unidades 24 Idioma 24 Unidad....243. EDICIÓN DE ETIQUETAS.... 25
Introducción y edición de texto.... 25 Introducción de texto mediante el teclado 25 Adición de una nueva línea.... 25 Adición de un nuevo bloque.... 25 Desplazamiento del cursor 25 Inserción de texto....26 Para insertar una tabulación.... 26 Eliminación de texto.... 26 Introducción de símbolos 27 Introducción de símbolos con la tecla 27 Introducción de símbolos con la función de símbolos 27 Lista de símbolos 28INTRODUCCIÓN
Introducción de caracteres acentuados ....29 Lista de caracteres acentuados ....30 Configuración de los atributos de caracteres....31 Ajuste de los atributos de caracteres por etiqueta....31 Ajuste de los atributos de caracteres por cada línea....31 Opciones de fuente y tamaño 32 Opciones de anchura y estilo 33 Ajuste del estilo de encaje automático 35 Configuración de los atributos de etiqueta....36 Opciones de recuadro 37 Utilización de diseños de formato automático....38 Utilización de plantillas; ejemplo de creación de una Etiqueta de activos......38 Utilización de diseños de bloque 43 Creación de una etiqueta de código de barras 47 Configuración de los parámetros de códigos de barras 47 Introducción de datos del código de barras....48 Edición y eliminación de códigos de barras....504. IMPRESIÓN DE ETIQUETAS 51
Vista previa de la etiqueta....51 Impresión de etiquetas....51 Impresión de una sola copia....52 Impresión de múltiples copias ....52 Numeración automática de etiquetas ....53 Impresión en modo espejo ....54 Opciones de corte de cinta 55 Ajuste de la longitud de la etiqueta 57 Colocación de etiquetas....575. UTILIZACIÓN DE LA MEMORIA DE ARCHIVOS.... 58
Almacenamiento de etiquetas en la memoria ....58 Apertura de un archivo de etiqueta almacenado 59 Impresión de un archivo de etiqueta almacenado ....60 Eliminación de un archivo de etiqueta almacenado....616. MANTENIMIENTO DE SU Etiquetadora P-touch.... 62
Restablecimiento de la etiquetadora P-touch 62 Mantenimiento....62 Limpieza del exterior del etiquetador P-touch 62 Limpieza del cabezal de impresión....63 Limpieza de la cortadora de cinta....63 7. SOLUCIÓN DE PROBLEMAS.... 64 Qué hay que hacer cuando.... 64 Mensajes de error 68 8. APÉNDICE....72 Especificaciones....72 9. ÍNDICE.... 75INTRODUCCIÓN
¡Muchas gracias por adquirir la etiquetadora P-touch PT-2100/2110. Su nueva etiquetadora P-touch es un sistema de etiquetado fácil de utilizar y con numerosas funciones que simplifica al máximo la creación de etiquetas profesionales de gran calidad. Además de la sencilla creación de etiquetas mediante diseños previamente establecidos, la etiquetadora P-touch incluye funciones de software de edición como formato avanzado de etiquetas, formatos de bloque, códigos de barras y funciones de numeración automática.Lo que puede hacer
■ Creación de etiquetas con la etiquetadora P-touch
1 | Prepare su etiquetadora P-touch.
flowchart
graph LR
    A["Instale las baterías y/o conecte el adaptador de corriente alterna."] --> B["Instale un cartucho de cinta.."]
    B --> C["Encienda la etiquetadora P-touch."]
2 | Introduzca el texto de la etiqueta.
flowchart
graph LR
    B --> R --> O --> T --> H --> E --> R
3 | Imprima la etiqueta.
 Puede comprobar el diseño de la etiqueta antes de proceder a su impresión. La vista previa de la etiqueta permite revisarla antes de imprimirla con el fin de evitar que se desperdicie cinta en etiquetas incompletas. ■ Creación de etiquetas con su computadora personal
1 Prepare su etiquetadora P-touch. (Consulte el paso 1 de la sección anterior.) 2 Prepare su computadora personal. \*(El cable USB no se incluye con la compra del PT-2100.) flowchart
graph LR
    A["Instale el software.<br>Guía de instalación del software"] --> B["* Conecte el cable USB.<br>Guía de instalación del software"]
    B --> C["Encienda la P-touch.<br>P. 21"]
flowchart
graph LR
A["Inicie P-touch Quick Editor.<br>P-touch Quick Editor<br>Ayuda del software"] --> B["Introduzca el texto de la etiqueta en P-touch Quick Editor.<br>Haga clic en el área de creación de diseño y escriba "Brother".<br>Brother"]
B --> C["Ayuda del software"]
flowchart
graph LR
    A["Haga clic en el botón "Imprimir"."] --> B["Ayuda del software A"]
    B --> C["La etiqueta se imprimirá."]
    C --> D["Brother"]
Precauciones de seguridad
Para prevenir lesiones y daños incluimos notas importantes utilizando diversos símbolos. Los símbolos y sus significados son los siguientes: ADVERTENCIA ADVERTENCIA | Le informa sobre lo que debe hacer para evitar el riesgo de lesiones. |
 PRECAUCIÓN PRECAUCIÓN | Le informa sobre los procedimientos que debe seguir para evitar daños en la P-touch. |
 | Acción NO permitida NO desmontar el producto. | |
 | NO salpicar ni sumergir en agua. | |
 | Acción obligatoria Desenchufar | |
 | Alerta de seguridad | |
ADVERTENCIA
Adaptador de CA
Respete estas pautas para evitar incendios, descargas eléctricas o fallas.  Utilice sólo el adaptador de CA (AD-24) diseñado exclusivamente para este equipo. Si no se siguen estas indicaciones, se podrían producir un accidente o daños. Brother no asume responsabilidad alguna respecto a los accidentes o daños causados por no utilizar el adaptador de CA especificado.  En caso de tormenta eléctrica, deje de utilizar la máquina y desenchufe el cable de alimentación inmediatamente. Puede existir un riesgo remoto de electrocución a causa de un rayo.  No toque el adaptador de CA ni el enchufe de alimentación con las manos mojadas.  No utilice el adaptador de CA en lugares sumamente húmedos como, por ejemplo, en baños.  No utilice un cable de alimentación dañado.  No sobrecargue la toma de alimentación.  No coloque objetos pesados sobre el enchufe o el cable de alimentación, ni dañe ni modifique el enchufe o el cable de alimentación. No doble excesivamente ni tire del cable de alimentación.  No permita que el adaptador de CA se caiga, reciba golpes o resulte dañado de alguna otra forma.  Asegúrese de que el enchufe está completamente insertado en la toma de alimentación. No utilice una toma eléctrica que esté suelte.Baterías
Siga estas pautas para evitar derrames de líquido, calor excesivo o la rotura de la batería.  No utilice artículos metálicos, como pinzas o bolígrafos metálicos, al cambiar las batteries.  No la arroje al fuego ni la caliente ni intente desarmar la batería. ADVERTENCIA
P-touch
Siga estas instrucciones para evitar incendios, daños, electrocución y asfixia.  No permita que la P-touch se moje de ninguna manera.  No toque las piezas metálicas cerca del cabezal de impresión. El cabezal de impresión se calienta mucho durante su uso y sigue muy caliente inmediatamente después de usarlo. No lo toque directamente con sus manos. Cabezal de impresión   No desarme la P-touch. Para revisar, ajustar y reparar la P-touch, póngase en contacto con la tienda donde la adquirió o con el centro de servicio autorizado de su localidad.  Deseche correctamente las bolsas de plástico y manténgalas fuera del alcance de bebés y niños. Prohibido ponerse las bolsas de plástico encima o jugar con ellas.  Desconecte el adaptador de corriente alterna y retire las baterías inmediatamente y deje de usar esta unidad si nota algún olor o calor extraños, decoloración, deformación o cualquier cosa fuera de lo común durante el uso o el almacenamiento de esta unidad.  No deje caer ni golpee la P-touch, ni permita que sufra otro tipo de impactos.  No utilice la P-touch si cae algún objeto extraño en su interior. Si cae agua, alguna sustancia metálica o algún objeto extraño en el interior de la P-touch, desconecte el adaptador de corriente alterna y saque las baterías; seguidamente comuníquese con la tienda donde adquirió la P-touch o con el centro de servicio autorizado de su localidad. PRECAUCIÓN
Cortadora de cinta
Respete estas pautas para evitar lesiones corporales y daños a la P-touch.  No toque la hoja de la cortadora.  No abrir la tapa del compartimiento de la cinta al trabajar con la unidad cortadora.  No aplique una presión excesiva sobre la cortadora. natural_image
Technical illustration of a mechanical assembly with a hand operating a tool (no text or symbols visible)Adaptador de CA
 Asegúrese de desconectar el adaptador de CA de la toma de alimentación y la P-touch si no va autilizar esta última durante un período prolongado de tiempo.  Para desconectar el cable de alimentación de la toma eléctrica, tire siempre del enchufe.Baterías
Siga estas pautas para evitar derrames de líquido, calor excesivo o la rotura de la batería.  No use baterías viejas y nuevas al mismo tiempo.  No mezcle baterías alcalinas con baterías de otro tipo.  No coloque los polos positivo y negativo en la posición incorrecta.  Retire las baterías si no piensa usar la P-touch durante un período prolongado de tiempo.P-touch
Respete estas pautas para evitar lesiones corporales y daños a la P-touch.  Coloque la P-touch en una superficie plana y estable, como por ejemplo, un escritorio.  No coloque objetos pesados encima de la P-touch. No presione la pantalla LCD.Cinta
 En función de la ubicación, material y condiciones ambientales, la etiqueta podría despegarse o no poder eliminarse, y el color de la etiqueta podría cambiar o transferirse a otros objetos. Antes de pegar la etiqueta, compruebe la condición ambiental y el material.Memoria
 Los datos almacenados en la memoria se perderán si se produce una avería o si se repara la P-touch, o si se agota la batería.  Si se desconecta el suministro eléctrico durante más de 2 minutos, se borrarán todos los ajustes de texto y formato. También se borrarán todos los archivos de texto guardados en la memoria.Precauciones generales
- No utilice la etiquetadora P-touch de manera o para fines distintos a los descritos en esta guía. Si lo hace, podrían producirse accidentes o dañar el equipo. - Utilice únicamente cintas Brother TZ con esta máquina. No utilice cintas que no tengan la marca TZ. - No tire ni empuje la cinta en el cartucho. - No coloque ningún objeto extraño en la ranura de salida de la cinta, el conector del adaptador de CA, el puerto USB, etc. - No intente imprimir etiquetas con un cartucho vacío o sin un cartucho de cinta en la etiquetadora P-touch. Si lo hace, el cabezal de impresión podría resultar dañado. - No toque el cabezal de impresión con los dedos. - No limpie la máquina con alcohol u otros disolventes orgánicos. Use únicamente un paño suave y seco. - No coloque la etiquetadora P-touch de forma que quede expuesta a la luz solar directa, cerca de calentadores u otras fuentes de calor, ni en ningún lugar donde quede expuesta a temperaturas extremadamente altas o bajas, a una humedad elevada o a mucho polvo. Rango de temperatura de funcionamiento estándar: 50 °F a 95° F (10° C a 35 °C). - Se recomienda utilizar el cable USB que viene con la P-touch. (El cable USB no se incluye con la compra del PT-2100.) Si se debe utilizar otro cable USB, asegúrese de que sea un cable de alta calidad. - Tenga cuidado de no rayar el CD-ROM. No coloque el CD-ROM en un lugar donde quede expuesto a temperaturas muy elevadas o muy bajas. No coloque objetos pesados sobre el CD-ROM ni lo doble. - El software incluido en el CD-ROM está diseñado para utilizarlo con la etiquetadora P-touch y se puede instalar en más de una PC. - Recomendamos enfáticamente que usted lea esta Guía del usuario con detenimiento antes de usar su etiquetadora P-touch y conserve esta guía a mano para que le sirva de referencia en el futuro.Símbolos utilizados en esta guía
Los siguientes símbolos se utilizan a lo largo de toda esta guía para ofrecer información adicional.  Este símbolo proporciona información o instrucciones que, si se ignoran, podrían provocar daños o lesiones personales, u operaciones que pueden provocar un funcionamiento incorrecto.  Este símbolo proporciona información o instrucciones que podrían ayudarle a comprender mejor o a utilizar la etiquetadora P-touch con mayor eficiencia.  Esta sección le permite acceder de forma rápida y sencilla a la información acerca de las tareas que los usuarios suelen utilizar con más frecuencia. Sólo hay que buscar la tarea aquí debajo y, a continuación, ir a la página indicada. Si no encuentra aquí la tarea que está buscando, intente encontrarla en el índice o en el contenido de la guía.  Para introducir texto, símbolos y caracteres acentuados... Introducción de texto/símbolos/caracteres acentuados P. 25  Para cambiar el formato de la etiqueta... Funciones de formato de texto/etiqueta P. 31 natural_image
Pure electrical circuit lines without any symbolsPARA EMPEZAR
Desembalaje de la etiquetadora P-touch
Compruebe que el paquete contiene los siguientes elementos antes de utilizar la etiquetadora P-touch.Etiquetadora P-touch PT-2100 Cartucho de cinta TZ
natural_image
Line drawing of a vintage typewriter with keyboard, display, and control panel (no text or symbols)natural_image
Technical line drawing of a mechanical device casing (no text or symbols)CD-ROM
(Controladores, paquete de software de edición de etiquetas)Cable USB
(El cable USB no se incluye con la compra del PT-2100.)  AD-24 Guía de usuario natural_image
Simple line drawing of a rectangular device connected to a coiled cable (no text or symbols)natural_image
Line drawing of a broadband cable with two connectors (no text or symbols)natural_image
Isometric line drawing of a rectangular electronic component or panel (no text or symbols)natural_image
Isometric line drawing of a rectangular block with a flat top and a side recess (no text or symbols)Descripción general
  Cuando se recibe de fábrica, la tapa del compartimento de cinta y la pantalla LCD están cubiertas por una lámina para evitar daños. Quite dicha lámina antes de utilizar la etiquetadora P-touch. Pantalla LCD y teclado
Pantalla LCD
 1. Número de línea
Aparece al principio de cada línea, esta marca indica el número de línea dentro del diseño de la etiqueta.2. Cursor
Indica la posición actual del cursor. Los nuevos caracteres se introducen a la izquierda del cursor, y el caracter a la izquierda del cursor se borra cuando se oprime la tecla3. Marca de retorno
Indica el final de una línea de texto.4. Modo "Caps" (Bloqueo de mayúsculas)
Indica que el modo Caps está activado.5.\~8. Guía de estilo
Indica la configuración actual de la fuente (5), el tamaño (6) del caracter, el estilo (7) del caracter y el marco (8).9. Longitud de la cinta
Indica la longitud aproximada de la etiqueta con el texto introducido en la máquina.10. Selección del cursor
Indica que puede utilizar las teclas de cursor para seleccionar los elementos de la pantalla. Utilice las teclas ▲ y para seleccionar una opción del menú y las teclas ◀ y para cambiar la configuración.  Consulte la sección “Pantalla LCD” en la página 23 donde se explica cómo ajustar el contraste de la pantalla LCD.Funciones y nombre de las teclas
 1. (Encendido): Enciende y apaga la etiquetadora P-touch. 2. ◇ (▲ ▼ ◀ ▶ ): Desplaza el cursor en la dirección de la flecha cuando se introducen o editan caracteres, cuando se introducen símbolos o caracteres acentuados, y cuando se configuran los atributos de la etiqueta en los menús de funciones. 3. OK: Selecciona la opción mostrada cuando se configuran los atributos de la etiqueta en los menús de funciones, o cuando se introducen símbolos o caracteres acentuados. 4. (Escape): Cancela el comando actual y regresa a la pantalla de introducción de datos o al paso anterior. 5. Print Options: \- Imprime el diseño de etiqueta actual en la cinta. \- Abre el menú "Print Options" (Opciones de impresión) cuando se utiliza junto con la tecla Shift 6. Feed & Cut Preview : \- Muestra una vista previa de la etiqueta. \- Hace avanzar 0.92" (23 mm) de cinta en blanco y, a continuación, la corta automáticamente, si se usa en combinación con la tecla Shift 7. File : Abre el menú Archivo donde podrá imprimir, guardar, abrir o borrar las etiquetas que utilice frecuentemente en la memoria de archivos. 8. Text : - Abre el menú "Text" (Texto), en el que se pueden establecer los atributos de los caracteres que se utilizan en la etiqueta. - Los atributos de caracteres pueden ajustarse para cada línea de la etiqueta, si se abre el menú de Texto en combinación con la tecla Shift 9. Label: Abre el menú "Label" (Etiqueta), en el que se pueden establecer los atributos de etiqueta para la etiqueta en cuestión. 10. Setup : Abre el menú "Setup" (Configuración), en el que se pueden establecer las preferencias de funcionamiento para la etiquetadora P-touch. 11. Clear: Borra todo el texto introducido, o todo el texto y los ajustes actuales de etiquetas. 12. 1 \~ . / : - Utilice estas teclas para escribir letras o números. - Las letras en mayúsculas y los símbolos se pueden introducir usando estas teclas en combinación con la tecla 📄a tecla ⒽShift. 13. Tab : Inserta una tabulación en la posición del cursor en la pantalla de introducción de texto. 14. Caps : Activa y desactiva el modo Caps (Bloqueo de mayúsculas). Cuando este modo está activado, se pueden introducir letras en mayúsculas oprimiendo simplemente una tecla de letra. 15. Shift : Utilice esta tecla junto con las teclas de letras o de números deseadas para escribir las letras en mayúsculas o los símbolos indicados en las teclas numéricas. 16. Symbol : Utilice esta función para seleccionar e introducir un símbolo de la lista de símbolos disponibles. 17. (Retroceso): - Borra el caracter situado a la izquierda del cursor. - Borra todo el texto introducido o todos los ajustes de texto y etiqueta actual si se usa en combinación con la tecla Shift 18. - Introduce una línea nueva durante la introducción de texto. - Introduce un nuevo bloque si se utiliza en combinación con la tecla Shift 19. (Formato automático): Abre el menú "Auto-Format" (Formato automático), en el que puede crear etiquetas mediante las plantillas predefinidas o los formatos de bloque. 20. Space : - Introduce un espacio en blanco. - Recupera el valor por defecto de la configuración. 21. Bar Code : - Abre la pantalla de Ajustr códig de barras para introducir los datos de código de barras. - Abre la pantalla de configuración de código de barras para establecer los parámetros de código de barras si se utiliza en combinación con la tecla Shift 22. Accent : Utilice esta opción para seleccionar e introducir un caracter acentuado.Alimentación eléctrica
Baterías
1 Dé la vuelta al etiquetador P-touch y quite la tapa del compartimento de las baterías. Si las baterías ya están en la máquina, retírelas. Si está sustituyendo las baterías, asegúrese de que el etiquetador está apagado antes de abrir el compartimento de las baterías. natural_image
Technical line drawing of a device casing with internal components and mounting holes (no text or symbols)natural_image
Diagram of a device's internal structure with battery pack and connector (no text or symbols)natural_image
Technical line drawing of a handheld electronic device with a screen and internal components (no text or symbols)PRECAUCIÓN
Si no va a usar el etiquetador P-touch durante un largo periodo de tiempo, es recomendable quitar las baterías.Adaptador de CA
Conecte el adaptador de CA directamente a la etiquetadora P-touch.  1 Inserte el enchufe del cable del adaptador de CA en el conector marcado DC IN 9-9.5 V de la etiquetadora P-touch. 2 Inserte el enchufe del adaptador de CA en una toma eléctrica estándar.  \- Apague la etiquetadora P-touch antes de desconectar el adaptador de CA. - No tire del cable del adaptador de CA ni lo doble.  Para proteger y hacer una copia de seguridad de la memoria del etiquetador, cuando se desenchufe el etiquetador CA, se recomienda disponer de baterías alcalinas AA (LR6) instaladas en la máquina. ADVERTENCIA
- Utilice sólo el adaptador de CA (AD-24) diseñado exclusivamente para este equipo. Si no se siguen estas indicaciones, se podrían producir un accidente o daños. Brother no asume responsabilidad alguna respecto a los accidentes o daños causados por no utilizar el adaptador de CA especificado. - No conecte el adaptador de CA a una toma eléctrica no estándar. Si no se siguen estas indicaciones, se podrían producir un accidente o daños. Brother no asume responsabilidad alguna frente a los accidentes o daños causados por no utilizar una toma eléctrica estándar. PRECAUCIÓN
- Desconecte el adaptador de CA de la P-touch y de la toma eléctrica si no va a utilizar la P-touch durante un período prolongado de tiempo. - Si se desconecta el suministro eléctrico durante más de 2 minutos, se borrarán todos los ajustes de texto y formato. También se borrarán todos los archivos de texto guardados en la memoria.Instalación de un cartucho de cinta
Este etiquetador P-touch admite cartuchos de cinta de anchuras 9/64", 1/4", 3/8", 1/2" ó 3/4" (3.5 mm, 6 mm, 9 mm, 12 mm ó 18 mm).  - Si el cartucho nuevo tiene algún tipo de protección de cartón, asegúrese de quitársela antes de insertar el cartucho en la etiquetadora. - Si la cinta de tinta está suelta, haga girar con el dedo la rueda dentada en la dirección de la flecha tal y como se muestra en el cartucho de cinta. natural_image
Isometric technical drawing of a mechanical device casing with no visible text or symbolsnatural_image
Illustration of a hand using a screwdriver to press or install a component on a base (no text or symbols visible)natural_image
Technical diagram of a mechanical device with internal components and a circular arrow indicating direction (no text or symbols)natural_image
Line drawing of a vintage typewriter with open lid and keyboard (no text or symbols)natural_image
Technical diagram of a printer's internal components, showing part assembly and insertion (no text or labels)Encendido y apagado
Oprima la tecla para encender la etiquetadora P-touch. Vuelva a oprimir la tecla para apagar la etiquetadora P-touch.   - Su etiquetadora P-touch tiene una función de ahorro de energía con la que se apaga automáticamente si no se oprime alguna tecla durante un determinado periodo de tiempo y en determinadas condiciones de funcionamiento. Consulte abajo la tabla "Desconexión automática" para obtener información más detallada. - Si las baterías están instaladas o el etiquetador P-touch está conectado a una toma eléctrica mediante el adaptador de CA, cuando se enciende el equipo se muestra en pantalla la información relativa a la sesión anterior. Desconexión Automática| Sólo la etiquetadora P-touch | conectada a una PC | |
| Con adaptador de CA / Con la batería | 5 minutos 60 minutos |
Avance de la cinta
Avanzar y cortar
Esta función hará avanzar la cinta a 0.92" (23 mm) aproximadamente y la cortará, produciendo una etiqueta en blanco. Esta acción puede ser necesaria al instalar un nuevo cartucho de cinta para eliminar una comba en la cinta o garantizar la correcta alimentación de cinta. 1 Mantenga pulsada la tecla y pulse la tecla . El mensaje "Aliment.&corte?" aparece en la pantalla. Para salir o cancelar esta función pulse 2 Mediante o seleccione la opción "Aliment.&corte" y pulse o El mensaje "Alimentando cinta... Espere" aparece cuando la cinta avanza y, a continuación, se corta la cinta.Solo avanzar
Esta función hará avanzar la cinta 0.92" (23 mm) aproximadamente haciendo que salga una etiqueta en blanco del cartucho de cinta. Esta acción se recomienda cuando utilice cintas adhesivas de tela o extra fuertes, que haya que cortar con tijeras. 1 Mantenga pulsada la tecla y pulse la tecla . Aparece "Aliment.&corte?" en la pantalla. Para salir o cancelar esta función pulse 2 Mediante ▲o, seleccione la opción "Sólo aliment." y pulse o OK El mensaje "Alimentando cinta... Espere" aparece mientras se alimenta la cinta.Pantalla LCD
Contraste de la pantalla LCD
Esta función permite al usuario ajustar el contraste de la pantalla LCD para facilitar la lectura en pantalla. Existen cinco niveles de oscuro (+2) a claro (-2) el ajuste por defecto de fábrica es "0". 1 Oprima la tecla para que aparezca el menú Configuración, seleccione "Contraste de pantalla" oprimiendo la tecla o la tecla y seguidamente oprima la tecla o la tecla. Ajustar código barras Entrda código brrs Tabulado Contraste de pantalla 2 Seleccione un nivel de contraste con la tecla ▲o . ▼ El contraste de la pantalla cambia cada vez que se oprime la tecla ▲o , permitiéndole establecer el contraste más adecuado. +2 +1 0 -1 -2 〈Cont. Pantalla〉 [ABCDE] [abcde] 3 Oprima la tecla Ⓞ.  \- Oprima la tecla para regresar al paso anterior. - Si pulsa la tecla durante la función de contraste, el ajuste volverá a "0".Ajuste del idioma y las unidades
Idioma
Seleccione el idioma ("English", "Español", "Français", "Italiano", "Magyar", "Nederlands", "Norsk", "Poliski", "Português", "Suomi", "Svenska", "Český", "Dansk" o "Deutsch") para los comandos de menú y los mensajes que aparecen en la pantalla LCD. El ajuste por defecto es "English".      Oprima la tecla para regresar al paso anterior.Unidad
Seleccione la unidad ("pulgadas" o "mm") con la que desea que se indiquen las medidas en la pantalla LCD. El ajuste por defecto es "pulgadas".      Oprima la tecla para regresar al paso anterior.EDICIÓN DE ETIQUETAS
Introducción y edición de texto
La utilización del teclado de la etiquetadora P-touch es muy similar a como se utiliza el teclado de una máquina de escribir, un procesador de textos o una computadora.Introducción de texto mediante el teclado
- Para introducir una letra en minúscula o un número, basta con oprimir la tecla deseada. - Para introducir un espacio en blanco en el texto, oprima la tecla . Space - Para introducir una letra en mayúsculas o uno de los símbolos que aparecen en la parte superior de las teclas numéricas, mantenga oprimida la tecla y, a continuación, oprima la tecla deseada. - Para introducir letras en mayúsculas siempre, oprima la tecla para activar el modo "Caps" (Bloqueo de mayúsculas) y, a continuación, oprima las teclas deseadas.  - Para desactivar el modo Caps, vuelva a oprimir la tecla Caps - Para introducir una letra en minúscula en el modo Caps, mantenga oprimida la tecla y, a continuación, oprima la tecla deseada.Adición de una nueva línea
\- Para poner fin a la línea actual de texto y empezar una nueva línea, oprima la tecla. Aparecerá una marca de retorno al final de la línea y el cursor pasa al comienzo de una nueva línea.  - En cada ancho de cinta sólo se puede introducir un número máximo de líneas de texto. Se puede introducir un máximo de 5 líneas para la cinta de 3/4" (18 mm), 3 líneas para la cinta de 1/2" (12 mm), 2 líneas para las cintas de 3/8" (9 mm) y de 1/4" (6 mm), y 1 línea para la cinta de 9/64" (3.5 mm). - Si pulsa la tecla cuando ya hay el máximo de líneas, aparecerá un mensaje de error. - Para cambiar el atributo de los caracteres de cada línea, consulte la sección “Ajuste de los atributos de caracteres por cada línea” en la página 31.Adición de un nuevo bloque
\- Para crear un nuevo bloque de texto/líneas a la derecha de su texto actual, oprima la tecla mientras mantiene oprimida la tecla. Aparecerá una marca al final del bloque y el cursor pasa al comienzo de un nuevo bloque.  Es posible introducir un máximo de 5 bloques en una etiqueta.Desplazamiento del cursor
- Para desplazar el cursor hacia la izquierda, derecha, arriba o abajo, oprima las teclas ◀, ▶ Cada vez que oprima la tecla desplazará el cursor un espacio o una línea. - Para llevar el cursor al principio o al final de la línea actual, mantenga oprimida la tecla y seguidamente oprima las teclas o. - Para llevar el cursor al principio o al final del texto, mantenga oprimida la tecla y seguidamente oprima las teclas ▶o . ▼Inserción de texto
\- Para insertar texto adicional en una línea de texto existente, coloque el cursor a la derecha del caracter donde desea insertar el texto y, a continuación, introduzca el texto adicional. El texto nuevo se insertará a la izquierda del cursor.Para insertar una tabulación
\- Para insertar un espacio de tabulación entre la línea de texto existente, lleve el cursor donde desea añadir la tabulación y oprima la tecla. Aparece una marca para indicar la posición donde se introducirá el espacio de tabulación.  - Para cambiar el ajuste de longitud de la tabulación, consulte la sección “Configuración de los atributos de etiqueta” en la página 36. - También se puede introducir el espacio de tabulación oprimiendo la tecla para abrir el menú de Configuración y seleccionando "Tabulado" con la tecla ▲ la tecla y, a continuación, oprimiendo la tecla Ⓞ.Eliminación de texto
■ Eliminación de un caracter cada vez
\- Para eliminar un caracter de una línea de texto existente, coloque el cursor a la derecha del caracter donde desea comenzar a borrar el texto y, a continuación, oprima la tecla El caracter situado a la izquierda del cursor se borra cada vez que oprime la tecla  Si mantiene oprimida la tecla, los caracteres a la izquierda del cursor se borran uno tras otro.- Eliminación de todo el texto de una sola vez
\- Utilice la tecla para borrar todo el texto de una sola vez.  Pulse la tecla Clear Aparecerán las opciones de Borrado.   Oprimiendo las teclas 🔒, seleccione "Sólo texto" para borrar todo el texto conservando los ajustes de formato actuales o seleccione "Text&formato" para borrar todos los ajustes de texto y formato.   Oprima la tecla para regresar a la pantalla de introducción de texto sin eliminar (o borrar) el texto o el formato.  Oprima la tecla Ⓞ. Se eliminará todo el texto. Todos los valores de formato se eliminan también si se selecciona "Text & formato". Introducción de símbolos
Además de los símbolos disponibles en el teclado, hay diversos símbolos (incluidos los caracteres extendidos ASCII y los caracteres internacionales) disponibles con la función de símbolos. Hay dos métodos para introducir símbolos: - Con la tecla . Shift - Utilización de la función de símbolos.Introducción de símbolos con la tecla Shift
Los símbolos impresos en la esquina superior derecha de las teclas del teclado se pueden introducir con la tecla Shift \- Para introducir uno de estos símbolos, mantenga oprimida la tecla y/a continuación, oprima la tecla deseada.Introducción de símbolos con la función de símbolos
1 | Oprima la tecla Symbol Aparecerá una lista de categorías de símbolos y símbolos de esa categoría.  El último símbolo introducido se selecciona en la lista que aparece en pantalla.  2 Seleccione una categoría de símbolos (puntuación, negocios, matemáticas, etc.) oprimiendo la tecla ▼ o la tecla repetidamente y seleccione después un símbolo oprimiendo la tecla ◦.  3 Oprima la tecla 📄. El símbolo seleccionado se insertará en la línea de texto.   - Oprima la tecla para regresar al paso anterior. - Consulte la tabla de Lista de símbolos de la página 28 para obtener una lista completa de todos los grupos y símbolos disponibles.Lista de símbolos
| Categoría Símbolos | |
| Puntuación | . , : ; " ' • ? ! ¿ i - & ~ _ \ / § |
| Negocios | @ # % ® © TM CE √ |
| Matemáticas | + - × ÷ ± = * |
| Paréntesis | ( ) [ ] < > |
| Flecha | → ← ↑ ↓ ↔ [5 7] |
| Unidad | $ ¢ € £ ¥ ° |
| Internacional | α β γ δ μ Ω φ a o |
| Número | 2 3 2 3 1/4 1/2 3/4 |
| Pictograma | ★ ● ○ □ △ ♪ |
| Electricidad | ↓ ~ == +- ⏻ ⊗ ⇔ |
| Otros | |
Introducción de caracteres acentuados
La etiquetadora P-touch puede mostrar e imprimir una serie de caracteres acentuados como es el caso de los caracteres específicos de otros idiomas. 1 Introduzca el caracter que desea cambiar a un caracter compuesto. El modo "Caps" (Bloqueo de mayúsculas) se puede utilizar junto con la función de acentos.  2 | Oprima la tecla Accent El caracter que introdujo cambiará a un caracter acentuado.  3 Oprima la tecla repetidamente hasta seleccionar el caracter acentuado deseado o selecciónelo utilizando las teclas ◄. El orden de los caracteres compuestos que aparecerán en la pantalla será diferente según el idioma seleccionado para la pantalla LCD.  4 | Oprima la tecla 📄. El caracter compuesto seleccionado se insertará en la línea de texto.   - Oprima la tecla para regresar al paso anterior. - Consulte la tabla Lista de caracteres acentuados en la página 30 para obtener una lista completa de los caracteres acentuados disponibles. - Lista de caracteres acentuados| character Caracteres acentuados | |
| a | á à â ä æ ã a á ã ā |
| A | Á Á Á Á Á E Á A Á Á Á |
| c | ç č ć |
| C | Ç Č ć |
| d | d' ð d |
| D | Đ Đ |
| e | é è ê ë e ë è ë ë |
| E | É É É É É É É É É |
| g | g ğ |
| G | G G |
| i | í i í í i í |
| l | Í I I I I I I |
| k | k |
| K | K |
| l | t í l ' |
| L | L L L L' |
| n | ñ ñ ñ ñ ñ |
| N | Ñ ñ ñ ñ ñ |
| o | ó ò ò ø ò ò ø ò |
| O | Ó ò ò ∅ ò ò ò ò ò |
| r | ř ř ř |
| R | Ř R R |
| s | š ś ś ś β |
| S | Š Ś Ś Ś β |
| t | t' t b |
| T | Ť T P |
| u | ú ú ú ú ú ú ú |
| U | ú ù ù ù ù ù ù ù |
| y | ý ÿ |
| Y | Ý ÿ |
| z | ž ž z |
| Z | ž Ž Ž |
Configuración de los atributos de caracteres
Ajuste de los atributos de caracteres por etiqueta
Oprimiendo la tecla, usted puede seleccionar una fuente y aplicar atributos de tamaño, ancho, estilo, línea y alineación. 1 Oprima la tecla . Los valores configurados actuales aparecen en pantalla.  2 Seleccione un atributo oprimiendo la tecla ▲o la tecla ▼y seguidamente ajuste un valor para ese atributo oprimiendo la tecla ◀o la tecla .  3 Oprima la tecla o para aplicar los ajustes.  La nueva configuración NO SE APLICA si usted no oprime la tecla OK o la tecla 📋.  - Oprima la tecla para regresar al paso anterior. - Oprima la tecla para que el atributo seleccionado recupere su valor por defecto. - Consulte la tabla Opciones de configuración para obtener una lista de todos los valores disponibles. - Los caracteres pequeños pueden resultar difíciles de leer cuando se aplican determinados estilos (por ejemplo, Sombreado + Cursiva).Ajuste de los atributos de caracteres por cada línea
Cuando una etiqueta consiste en dos o más líneas de texto, usted puede ajustar un valor diferente de atributos de caracteres (fuente, tamaño, ancho, estilo, línea y alineación) para cada línea. Desplace el cursor hasta la línea en la que desea cambiar el atributo de caracteres oprimiendo la tecla ▲ o ▼ seguidamente oprima la tecla mientras mantiene oprimida la tecla para mostrar los atributos. ( en la pantalla indica que ahora está aplicando el atributo sólo para esa línea específica).  ! Cuando se establezca un valor diferente de atributo para cada línea, el valor se mostrará como \*\*\*\* al oprimir la tecla. Al cambiar el ajuste en esta pantalla oprimiendo las teclas ▲▼, se aplicará el mismo cambio a todas las líneas de la etiqueta.  - Opciones de fuente y tamaño| Atributo Valor Resultado | ||
| Fuente | HEL (Helsinki) | ABCabc |
| BRU (Bruselas) | ABCabc | |
| FLO (Florida) | ABCabc | |
| CAL (Calgary) | ABCabc | |
| Tamaño | Auto | Al seleccionar Auto, el texto se ajusta automáticamente para imprimirse con el mayor tamaño disponible para cada ancho de cinta. |
| 42pt | ABCabc | |
| 36pt | ABCabc | |
| 24pt | ABCabc | |
| 18pt | ABCabc | |
| 12pt | ABCabc | |
| 9pt | ABCabc | |
| 6pt | ABCabc | |
| Atributo Valor Resultado | ||
| Ancho | x2 | ABCabc |
| x1 | ABCabc | |
| x2/3 | ABCabc | |
| x1/2 | ABCabc | |
| Estilo | Apgdo (desactivado) | ABCabc |
| Negrt (Negrita) | ABCabc | |
| Contr (Perfilado) | ABCabc | |
| Sombra (Sombreado) | ABCabc | |
| Sólido | ABCabc | |
| Cursv (Cursiva) | ABCabc | |
| C+Neg (Cursiva negrita) | ABCabc | |
| C+Con (Cursiva perfilada) | ABCabc | |
| C+Som (Cursiva sombreada) | ABCabc | |
| C+Sól (Cursiva sólida) | ABCabc | |
| Vertcl (Vertical) | AMO SO O | |
EDICIÓN DE ETIQUETAS
| Atributo Valor Resultado | ||
| Línea | Apgdo (desactivado) | ABCabc |
| Subray (Subrayado) | ABCabc | |
| Tachd (Tachado) | ABCabc | |
| Alinear (Alineación) | Izqda. | ABCabc |
| Centro | ABCabc | |
| Derch | ABCabc | |
| Just (Justificar) | A B C a b c | |
Ajuste del estilo de encaje automático
Si "Tamaño" se ajusta a "Auto" y "Longitud" se ajusta a una longitud específica, usted puede seleccionar la forma de reducir el tamaño del texto para adaptarlo a la longitud de la etiqueta. Si se selecciona "Tamaño del texto", el tamaño total del texto se modifica para encajarlo dentro de la etiqueta. Si se selecciona "Ancho del texto", el ancho del texto se reducirá al tamaño del ajuste de x1/2. (Si se desea una mayor reducción de tamaño para que el texto pueda caber en la longitud de etiqueta seleccionada, el tamaño total del texto se modificará después de reducir el ancho del texto al ajuste de x1/2.) 1 Oprima la tecla para mostrar el menú de Configuración, seleccione "Estilo de autoajuste" oprimiendo la tecla ▲, y seguidamente oprima la tecla Ⓞ. Aparece la pantalla Estilo de autoajuste. Estilo de autoajuste Ajustar longitud Idioma Unidad 2 Seleccione el estilo oprimiendo la tecla ▲o la tecla ▼. 〈Estilo de autoajuste〉 Tamaño del texto Ancho del texto 3 Oprima la tecla o la tecla para aplicar el ajuste.  \- Oprima la tecla para regresar al paso anterior. - Oprima la tecla para ajustar el estilo al valor por defecto ("Tamaño del texto").Configuración de los atributos de etiqueta
Oprimiendo la tecla, usted puede crear una etiqueta con un marco alrededor del texto y especificar la longitud y tabulación de la etiqueta. (Las opciones de corte que pueden ser necesarias al imprimir una etiqueta también se pueden ajustar pulsando la tecla. Consulte las "Opciones de corte de cinta" en la página 55 y 56.) 1 Oprima la tecla Los valores configurados actuales aparecen en pantalla.  2 Seleccione un atributo oprimiendo la tecla ▲▼ y seguidamente ajuste un valor para ese atributo oprimiendo las teclas ◄.  \- Al establecer la longitud de la tabulación, mantenga oprimida la tecla ◄ para cambiar el valor más rápidamente. - Al establecer la longitud de la etiqueta, consulte “Ajuste de la longitud de la etiqueta” en la página 57. 3 Oprima la tecla 🔒 para aplicar los ajustes. La nueva configuración NO SE APLICA si usted no oprime la tecla 🔒.  - Oprima la tecla para regresar al paso anterior. - Oprima la tecla para que el atributo seleccionado recupere su valor por defecto. - Consulte la tabla Opciones de configuración para obtener una lista de todos los valores disponibles. - Opciones de recuadro| Atributo Valor Resultado | ||
| Marco | Apgdo | ABCabc |
| 1 | ABCabc | |
| 2 | ABCabc | |
| 3 | ABCabc | |
| 4 | ABCabc | |
| 5 | ||
| 6 | ABCabc | |
| 7 | ABCabc | |
| 8 | ||
| 9 | ||
| 10 | ||
| 11 | ||
| 12 | ||
| 13 | ||
| 14 | ||
| Marco | 15 | 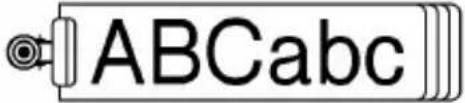 |
| 16 | ABCabc | |
| Longitud | La longitud de la etiqueta se puede ajustar entre 1.2" (30 mm) y 12.0" (300 mm). Al seleccionar Auto, la longitud de la etiqueta se ajusta automáticamente dependiendo del texto introducido. | |
| Longitud Tab | La longitud de la tabulación se puede ajustar entre 0.0" (0 mm) y 4.0" (100 mm). El ajuste predeterminado es 2.0" (50 mm). | |
Utilización de diseños de formato automático
La función de Formato automático le permite crear rápida y fácilmente etiquetas para diversos fines, por ejemplo, pestañas de archivos, etiquetas de equipos, placas de identificación, etc. Sólo tiene que seleccionar un diseño entre las plantillas o entre los diseños de bloque disponibles, introducir el texto y aplicar el formato deseado.  También puede utilizar símbolos y caracteres acentuados en los diseños de formato automático.Utilización de plantillas; ejemplo de creación de una Etiqueta de activos
1 Oprima la tecla para que aparezca la pantalla Auto-Format (Formato automático) y, a continuación, seleccione "Plantillas" con la tecla ▲ o ▼.  2 Oprima la tecla 📄. Aparecerá la última plantilla utilizada.  3 Seleccione una plantilla oprimiendo la tecla ▲. ▼ | 4 | Oprima la tecla 🔒. Aparece la pantalla "Estilo". | 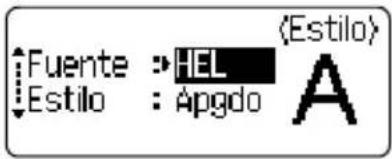 |
| 5 | Seleccione un atributo oprimiendo la tecla ▲o▼ y seguidamente ajuste un valor para ese atributo oprimiendo las teclas ◄.▶ | 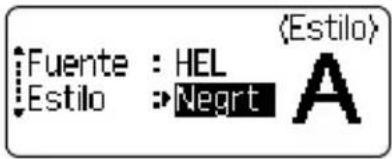 |
| 6 | Oprima la tecla 🔒 o 🔒. Aparece la pantalla “Ajustr códig barrs”. | 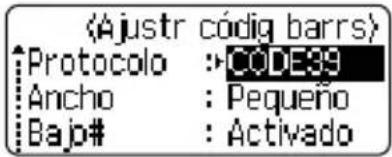 |
| 7 | Seleccione un atributo oprimiendo la tecla ▲o la tecla▼y seguidamente ajuste un valor para ese atributo oprimiendo la tecla ◄.▶El atributo "Dígito cntrl" sólo está disponible para los protocolos CODE39, 1-2/5 y CODABAR. | 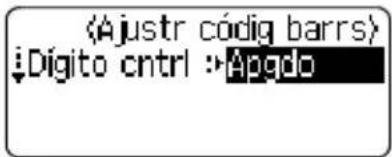 |
| 8 | Oprima la tecla 🔒. Aparece la pantalla de introducción de texto en la plantilla.Puede utilizar el modo "Caps" (Bloqueo de mayúsculas) para introducir texto. | 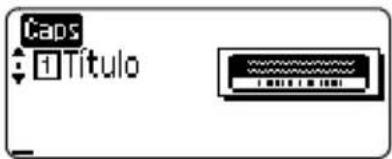 |
| 9 | Introduzca el texto y seguidamente oprima la tecla 🔒 o 🔒. Repita este proceso para cada campo de texto. Después de haber introducido texto en todos los campos, aparece el menú Imprimir si se oprime la tecla 🔒. | 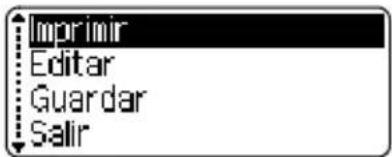 |
| 10 | Seleccione "Imprimir" oprimiendo la tecla ▲o la tecla▼ y seguidamente oprima la tecla 🔒 para imprimir la etiqueta. |
| Atributo Valor Detalles | ||
| Nombre de la plantilla | Lomo de carpeta |  (3/4" x 8.6" [18 mm x 219 mm]) (3/4" x 8.6" [18 mm x 219 mm]) |
| Pestaña de archivador | 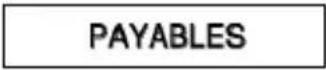 (1/2" x 3.2" [12 mm x 82 mm]) (1/2" x 3.2" [12 mm x 82 mm]) | |
| Pestaña de divisor | 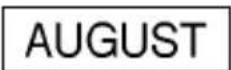 (1/2" x 1.6" [12 mm x 42 mm]) (1/2" x 1.6" [12 mm x 42 mm]) | |
| Etiqueta de inventario | 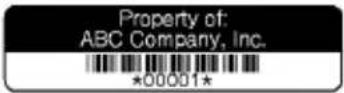 (3/4" x 2.7" [18 mm x 70 mm]) (3/4" x 2.7" [18 mm x 70 mm]) | |
| Bandejas | 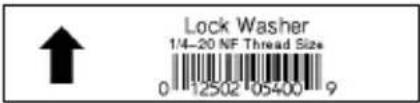 (3/4" x 3.0" [18 mm x 76 mm]) (3/4" x 3.0" [18 mm x 76 mm]) | |
| Etiqueta de equipo | 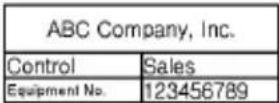 (3/4" x 2.2" [18 mm x 58 mm]) (3/4" x 2.2" [18 mm x 58 mm]) | |
| Placa (VRT) |  (1/2" x 2.7" [12 mm x 70 mm]) (1/2" x 2.7" [12 mm x 70 mm]) | |
| Envoltura de cable | 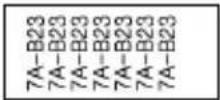 (3/4" x 1.5" [18 mm x 39 mm]) (3/4" x 1.5" [18 mm x 39 mm]) | |
| Nombre de la plantilla | Etiqueta 1 de nombre | Robert BeckerABC Company, Inc.(3/4" x 2.8" [18 mm x 72 mm]) |
| Etiqueta 2 de nombre | Robert Becker(1/2" x 2.8" [12 mm x 72 mm]) | |
| Dorso caja CD 1 | My Favorite Music(1/4" x 4.4" [6 mm x 113 mm]) | |
| Dorso caja CD 2 | My Favorite Music(9/64" x 4.4" [3.5 mm x 113 mm]) | |
| Dorso de VHS | Mike's Favorite FilmsCanada, Allen, Fisar (3/4" x 5.5" [18 mm x 140 mm]) | |
| Dorso MiniDV | Julie's Wedding(3/8" x 1.6" [9 mm x 42 mm]) | |
Utilización de diseños de bloque
| 1 | Oprima la tecla A/F para que aparezca la pantalla de Auto-Format (Formato automático) y seguidamente seleccione “Diseños de bloque” oprimiendo la tecla ▲ o la tecla ▼ | 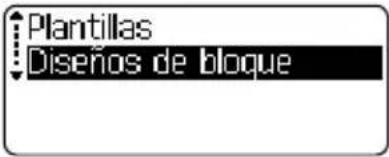 |
| 2 | Oprima la tecla OK o la tecla 📋 para mostrar la pantalla Ancho de cinta y seguidamente seleccione un ancho de cinta oprimiendo la tecla ▲ o la tecla . ▼ | 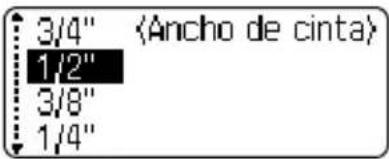 |
| 3 | Oprima la tecla OK o 📋. Si el ancho de cinta no se modifica, aparecerá el último diseño de bloque seleccionado. Si se modifica el ancho de cinta, aparecerá el diseño por defecto para el nuevo ancho de cinta. | 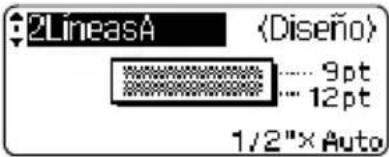 |
| 4 | Seleccione un diseño de bloque oprimiendo la tecla ▲ o la tecla ▼ | 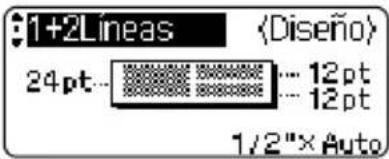 |
| 5 | Oprima la tecla OK o 📋. Aparece la pantalla "Estilo". | 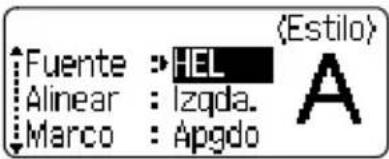 |
| 6 | Seleccione un atributo oprimiendo la tecla ▲ o y seguidamente ajuste un valor para ese atributo oprimiendo la tecla ◄ o . ▶ | 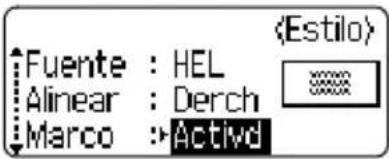 |
| Oprima la tecla para que el atributo seleccionado recupere su valor por defecto. | ||
| 7 | Oprima la tecla OK o 📋. Aparece la pantalla de introducción de texto para el diseño de bloque. | 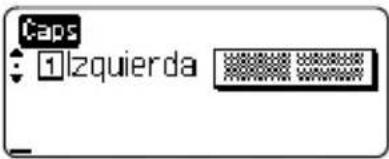 |
| Puede utilizar el modo "Caps" (Bloqueo de mayúsculas) para introducir texto. | ||
| 8 | Introduzca el texto deseado y, a continuación, oprima la tecla OK o la tecla 📋. Repita este proceso para cada campo de texto. El menú "Imprimir" aparece cuando se oprime la tecla OK o la tecla 📋 después de haber introducido texto en todos los campos de texto. | 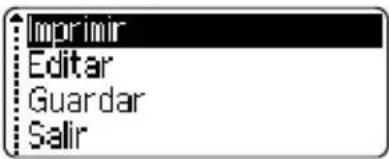 |
9
Seleccione "Imprimir" oprimiendo la tecla ▲o la tecla y seguidamente oprima la tecla Ⓞk o 📋 para imprimir la etiqueta.  - Seleccione "Editar" para cambiar los datos de texto o la configuración de estilo. - Seleccione "Guardar" para guardar la etiqueta en la memoria de archivos. - Seleccione "Salir" para salir de la función de formato automático. - Seleccione "Cambiar diseño" para utilizar un diseño distinto.  - Oprima la tecla para regresar al paso anterior. - Consulte la tabla Diseños de bloques en la página 45 para obtener una lista de todos los diseños disponibles. - Aparecerá el mensaje "¿Borrar todo el texto?" al pulsar la tecla. Oprima la tecla o la tecla para borrar todo el texto u oprima la tecla para no borrar el texto. - Para imprimir múltiples copias, numeradas secuencialmente, o una imagen espejo de la etiqueta, acceda al menú de impresión, mantenga oprimida la tecla Shift y oprima la tecla para que aparezca el menú "Print Options" (Opciones de impresión).!
- Si el ancho del cartucho de cinta actual no coincide con el ancho establecido para el diseño seleccionado, aparecerá un mensaje de error cuando intente imprimir la etiqueta. Oprima la tecla 📄 cualquier otra, para borrar el mensaje de error e introduzca un cartucho de cinta que tenga el ancho correcto. - Si el número de caracteres introducido supera el límite, aparecerá un mensaje de error cuando oprima la tecla o la tecla . Oprima la tecla , o cualquier otra, para borrar el mensaje de error y editar el texto para que tenga menos caracteres. - Cuando se utiliza la función de formato automático, la etiqueta se corta con un margen en los extremos izquierdo y derecho, independientemente de la configuración de la opción de corte de la cinta (consulte la página 55). Diseños de bloques| Atributo Valor Detalles | |||
| Diseño debloques(cinta de 3/4"[18 mm]) | 2LíneasA | 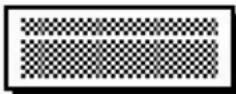 | ...12pt...24pt |
| 2LíneasB | 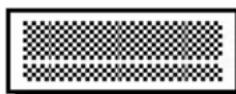 | ...24pt...12pt | |
| 3Líneas | 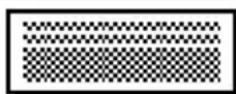 | ...9pt...9pt...24pt | |
| 1+2LineasA | 42pt... | 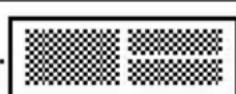 ...18pt...18pt ...18pt...18pt | |
| 1+2LíneasB | 42pt... | 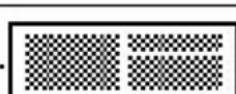 ...12pt...24pt ...12pt...24pt | |
| 1+3Líneas | 42pt... | 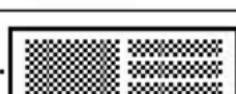 ]...12pt ]...12pt | |
| 1+4Líneas | 42pt... |  ]...9pt ]...9pt | |
| 1+5Líneas | 42pt... |  ]...9pt ]...9pt | |
| Diseño debloques(cinta de 1/2"[12 mm]) | 2LíneasA |  | ...9pt...12pt |
| 2LíneasB |  | ...12pt...9pt | |
| 3Líneas |  | ...6pt...6pt...12pt | |
| 1+2Lineas |  | ...12pt...12pt | |
EDICIÓN DE ETIQUETAS
| Atributo Valor Detalles | ||
| Diseño de bloques (cinta de 3/8" [9 mm]) | 2LíneasA | 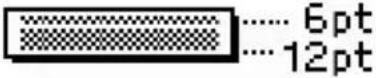 |
| 2LíneasB | 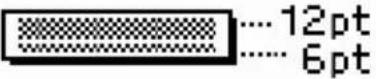 | |
| 1+2Lineas |  | |
| Diseño de bloques (cinta de 1/4" [6 mm]) | 1+2Lineas |  |
Creación de una etiqueta de código de barras
La función de código de barras le permite crear etiquetas con códigos de barras que se pueden utilizar en cajas registradoras, sistemas de control de existencias u otros sistemas de lectura de códigos de barras, o incluso, las etiquetas de control de activos utilizadas en los sistemas de administración de activos.  - La etiquetadora P-touch no está diseñada exclusivamente para crear etiquetas de códigos de barras. Compruebe siempre que el lector de código de barras puede leer las etiquetas de códigos de barras. - Para obtener mejores resultados, imprima las etiquetas de código de barras con tinta negra en cinta blanca. Es posible que algunos lectores de códigos de barras no puedan leer las etiquetas de código de barras si se han creado en una cinta de color o con tinta de color. - Utilice el valor “Grande” para “Ancho” siempre que sea posible. Es posible que algunos lectores de códigos de barras no puedan leer las etiquetas de código de barras si se han creado con el valor “Pequeño”. - El cabezal de impresión se puede recalentar si se imprime continuamente un gran número de etiquetas con códigos de barras, lo cual podría afectar la calidad de impresión.Configuración de los parámetros de códigos de barras
1
Oprima la tecla para mostrar el menú Setup (Configuración), seleccione "Ajustr códig barrs" oprimiendo la tecla o la tecla y seguidamente oprima la tecla o la tecla. Aparece la pantalla "Ajustr códig barrs".  Si oprime la tecla mientras mantiene oprimida la tecla también podrá entrar en "Ajustr códig barrs". 2
Seleccione un atributo oprimiendo la tecla ▲o y▼ seguidamente ajuste un valor para ese atributo oprimiendo la tecla ◦o .▶  El atributo "Dígito cntrl" sólo está disponible para los protocolos CODE39, I-2/5 y CODABAR.  Es posible que los caracteres no aparezcan debajo del código de barras aun cuando se haya seleccionado la opción "Activado" para "Bajo#", dependiendo del ancho de cinta que se esté utilizando, el número de líneas que se ha introducido o la configuración actual del estilo del caracter. 3
Oprima la tecla 🔒 la tecla para aplicar los ajustes.  La nueva configuración NO SE APLICA si usted no oprime la tecla Ⓗ.  - Oprima la tecla para regresar al paso anterior. - Oprima la tecla para que el atributo seleccionado recupere su valor por defecto. - Consulte la tabla Configuración de código de barras en la página 48 para obtener una lista de todos los valores disponibles. - Configuración de código de barras| Atributo Valor | |
| Protocolo | CODE39, CODE128, EAN8, EAN13, EAN128, UPC-A, UPC-E, I-2/5 (ITF), CODABAR |
| Ancho | Grande |
| Pequeño | |
| Bajo# (caracteres impresos debajo del código de barras) | Activado |
| Apgdo | |
| Dígito cntrl (comprobar dígito) | Apgdo |
| Activado (sólo disponible para los protocolos CODE39, I-2/5 y CODABAR) |
| 1 | Oprima la tecla ☐Aparece la pantalla de Entrda código brrs. | 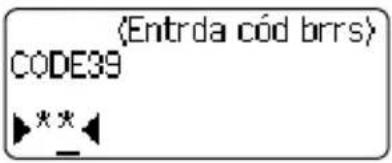 |
| Se pueden incluir hasta cinco códigos de barras en cada etiqueta. | ||
| 2 | Escriba los datos del código de barras.Los caracteres especiales se pueden introducir en el código de barras cuando se utilizan los protocolos CODE39, CODABAR, CODE128 o EAN128. Si no va a utilizar ningún caracter especial, continúe en el paso 5. | 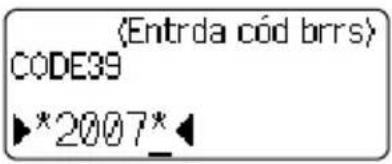 |
| 3 | Oprima la tecla ☐Aparecerá una lista de los caracteres disponibles para el protocolo actual. | 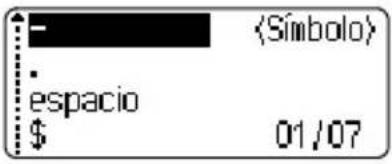 |
| 4 | Seleccione un caracter oprimiendo la tecla ▲la tecla▼, seguidamente oprima la tecla ☐la tecla para insertar el caracter en los datos del código de barras. | 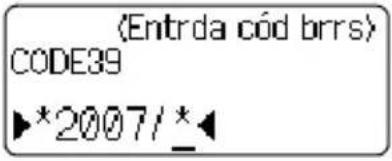 |
| 5 | Oprima la tecla ☐la tecla para insertar el código de barras en la etiqueta.Aparecerán dos marcas de código de barras en el texto. | 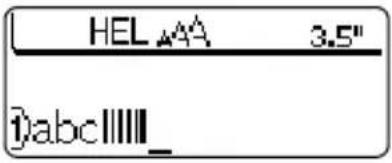 |
- Lista de caracteres especiales
CODE39 CODABAR| Código | Caracter especial |
| 0 | - |
| 1 | . |
| 2 (ESPACIO) 2 | |
| 3 | $ |
| 4 | / |
| 5 | + |
| 6 | % |
| Código | Caracter especial |
| 0 | - |
| 1 | $ |
| : | |
| 3 | / |
| 4 | . |
| 5 | + |
| Código | Caracter especial | Código | Caracter especial | Código | Caracter especial |
| 0 (ES | SPACIO) 24 48 DC3 | \ | |||
| 1 25 | 49 DC4 ! | ] | |||
| 2 26 | 50 NAK '' | ^ | |||
| 3 27 | 51 SYN # | - | |||
| 4 28 | NUL 52 EJB | ||||
| 5 29 | 53 CAN % | . | |||
| 6 30 | SOH & 54 | EM | |||
| 7 31 | STX 55 SUB | ||||
| 8 32 | ETX 56 ESC | ||||
| 9 33 | EOT 57 ) | { | |||
| 10 34 | *ENQ 58 | FS | |||
| 11 35 | ACK 59 + | | | |||
| 12 36 | BEL , 60 | GS | |||
| 13 37 | - BS | 61 | } | ||
| 14 38 | . HT | 62 | RS | ||
| 15 39 | / LF | 63 | ~ | ||
| 16 40 | : VT | 64 | US | ||
| 17 41 | ; FF | 65 DEL | |||
| 18 | < | 42 | CR | 66 | FNC3 |
| 19 | = | 43 | SO | 67 | FNC2 |
| 20 | > | 44 | SI | 68 | FNC4 |
| 21 45 | DLE 69 FNC1 | ||||
| 22 46 | DC1 | ||||
| 23 47 | DC2 |
Edición y eliminación de códigos de barras
- Para editar los datos del código de barras, coloque el cursor debajo de las marcas de código de barras que hay en la pantalla de introducción de datos y, seguidamente, abra la pantalla Entrda código brrs. Consulte la sección "Introducción de datos del código de barras" en la página 48. - Para editar los valores “Ancho” y “Bajo#” de un código de barras ya colocado en una etiqueta, coloque el cursor debajo de cualquiera de las marcas del código de barras de la pantalla de introducción de datos y, a continuación, abra la pantalla Ajustr códig barrs. Consulte la sección “Configuración de los parámetros de códigos de barras” en la página 47. - Para eliminar un código de barras de una etiqueta, coloque el cursor a la derecha de las marcas de código de barras de la pantalla de introducción de datos y oprima la teclaIMPRESIÓN DE ETIQUETAS
Vista previa de la etiqueta
Con la función de Vista previa, puede comprobar el diseño de la etiqueta antes de imprimirla.1
Oprima la tecla  Aparece en la pantalla una imagen de la etiqueta. La longitud de la etiqueta se muestra en la esquina inferior derecha de la pantalla. Oprima la tecla o para desplazar la vista previa hacia la izquierda o la derecha. Oprima la tecla ▲o para cambiar el tamaño de la vista previa.   - Oprima la tecla para regresar a la pantalla de introducción de texto. (Puede volver asimismo a la pantalla de introducción de texto oprimiendo OK o .) - Para desplazar la vista previa hacia la izquierda o hacia la derecha, mantenga oprimida la tecla Shift y oprima la tecla ◄. - Para imprimir la etiqueta directamente desde la pantalla de vista previa, oprima la tecla o abra la pantalla de opciones de impresión y seleccione una de esas opciones. Consulte abajo el apartado "Impresión de etiquetas" para obtener información más detallada. - La vista previa de impresión es una imagen generada de la etiqueta y puede diferir de la etiqueta real cuando se imprime.Impresión de etiquetas
Después de introducir el texto y el formato de la etiqueta, usted ya puede imprimir la etiqueta. Además de imprimir una sola copia de una etiqueta, su etiquetadora P-touch tiene varias funciones de impresión que le permiten imprimir múltiples copias de una etiqueta, etiquetas numeradas secuencialmente y etiquetas impresas en imagen espejo.  - No tire de la etiqueta que sale por la ranura de salida de la cinta. Si lo hace, la cinta de tinta saldrá expulsada junto con la propia cinta de etiquetas. - No bloquee la ranura de salida de la cinta durante el proceso de impresión ni cuando la cinta está avanzando. Si lo hace, la cinta se atascará. - Asegúrese de comprobar que queda suficiente cinta cuando vaya a imprimir varias etiquetas una tras otra. Si queda poca cinta, indique un número menor de copias, imprima las etiquetas de una en una o sustituya el casete de cinta. - Si la cinta presenta franjas, esto indica el final del cartucho. Si esto aparece durante la impresión, oprima la tecla para apagar la etiquetadora P-touch. Si continúa imprimiendo se podría producir algún daño.Impresión de una sola copia
| 1 | Asegúrese de que se ha introducido el cartucho correcto y de que la etiquetadora está lista para imprimir. | |
| 2 | Oprima la teclaPrint Options.Aparece el mensaje que se muestra a la derecha mientras se está imprimiriendo la etiqueta. | 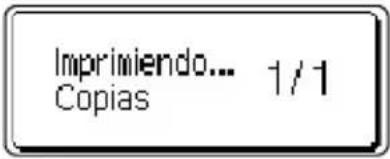 |
Impresión de múltiples copias
Esta función le permite imprimir hasta 9 copias de la misma etiqueta.| 1 | Asegúrese de que se ha introducido el cartucho correcto y de que la etiquetadora está lista para imprimir. | |
| 2 | Mantenga oprimida la tecla y oprima la tecla para que aparezca la pantalla de opciones de impresión y, a continuación, seleccione “Copias” con la tecla ▲▼. | 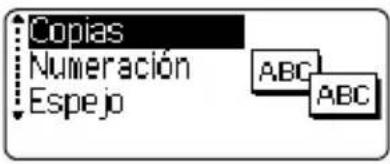 |
| 3 | Oprima la tecla ola tecla para que aparezca la pantalla de Copias y, a continuación, indique el número de copias que desea imprimir oprimiendo la tecla o la tecla , escriba el número utilizando las teclas numéricas. | 〈Copias〉 |
| Mantenga oprimida la tecla o la tecla para cambiar el número de copias con mayor rapidez.Si oprime la tecla cuando está definiendo el número de copias, se restablece el valor a 1, es decir, el valor por defecto. | ||
Numeración automática de etiquetas
La función de numeración le permite crear un conjunto de etiquetas numeradas secuencialmente a partir de un solo formato de etiqueta. 1 Asegúrese de que se ha introducido el cartucho correcto y de que la etiquetadora está lista para imprimir. 2 Mantenga oprimida la tecla y seguidamente oprima la tecla para que aparezca la pantalla de opciones de impresión y entonces seleccione "Numeración" oprimiendo la tecla ▲o la tecla .  3 Oprima la tecla 🔒. Aparece la pantalla de punto de inicio de numeración.  Para aplicar la numeración automática a un código de barras, seleccione el código de barras aquí. Cuando lo haya seleccionado, se le pedirá que introduzca el número de etiquetas que desea imprimir (paso 6).  4 Lleve el cursor al primer caracter que se va a aumentar en la secuencia de numeración y oprima la tecla 🔒 la tecla . 📋 Aparece la pantalla de punto final de numeración.  5 Lleve el cursor al último caracter que se va a aumentar en la secuencia de numeración y oprima la tecla 🔒 la tecla . Aparece el número de etiquetas que se van a imprimir.  6 Seleccione el número de etiquetas que se van a imprimir con la tecla ▲o la tecla , ▼ escriba el número con las teclas numéricas.  \- Mantenga oprimida la tecla o la tecla para cambiar el número de etiquetas con mayor rapidez. - Si oprime la tecla cuando está seleccionando el número de copias, se restablece el valor a 1, es decir, el valor por defecto.  7 Oprima la tecla 📄. Se imprimirán las etiquetas. A medida que se va imprimiriendo cada etiqueta, se muestra el número de copias impresas.   - Oprima la tecla para regresar al paso anterior. - A menos que se indique lo contrario, la cinta se corta automáticamente después de imprimir cada copia. Consulte la sección “Opciones de corte de cinta” en la página 55 donde se explica cómo cambiar esta configuración. - Las cifras que se muestran en la pantalla durante la impresión indican el "recuento/número de copias". - La numeración automática también se puede aplicar a los códigos de barras. Cuando un código de barras contiene una secuencia de numeración automática, ningún otro campo de la etiqueta puede contener otra secuencia de numeración automática. - La parte de numeración automática de la etiqueta se incrementa después de imprimir cada etiqueta. - En una etiqueta sólo se puede utilizar una secuencia de numeración automática. - Se ignorará cualquier símbolo u otro caracter no alfanumérico de la secuencia de numeración automática. - Las secuencias de numeración automática sólo pueden contener un máximo de cinco caracteres.  \- Las letras y los números aumentarán como se muestra a continuación: $$ \begin{array}{ccccccccc}0&\rightarrow&1 \dots 9&\rightarrow&0&\rightarrow&\dots\\A&\rightarrow&B \dots Z&\rightarrow&A&\rightarrow&\dots\\a&\rightarrow&b \dots z&\rightarrow&a&\rightarrow&\dots\\A0&\rightarrow&A1 \dots A9&\rightarrow&B0&\rightarrow&\dots\end{array} $$ Los espacios (mostrados como subrayados "\_" en el ejemplo siguiente) podrán utilizarse para ajustar el espacio entre caracteres o para controlar el número de dígitos que se van a imprimir. $$ \begin{array}{cccccc}\_9&\rightarrow&10\ldots 99&\rightarrow&00&\rightarrow&\ldots\\\_Z&\rightarrow&AA\ldots ZZ&\rightarrow&AA&\rightarrow&\ldots\\\_1\_9&\rightarrow&2\_0\ldots 9\_9&\rightarrow&0\_0&\rightarrow&\ldots\end{array} $$Impresión en modo espejo
La función de impresión en modo espejo le permite crear etiquetas con el texto impreso al revés, de forma que se pueda leer correctamente cuando se pega en un cristal o algún otro tipo de material transparente. 1 Asegúrese de que se ha introducido el cartucho correcto y de que la etiquetadora está lista para imprimir. 2 Mantenga oprimida la tecla y oprima la tecla Print Options Print para que aparezca la pantalla de opciones de impresión y, a continuación, seleccione “Espejo” con la tecla ▲o . ▼ 3 Oprima la tecla 🔒. Aparecerá el mensaje "¿Imprimir espejo?".  4
Oprima la tecla 🔒 la tecla . Aparece el mensaje que se muestra a la derecha mientras se está imprimiriendo la etiqueta. Imprimiendo... Copias 1/1  - Oprima la tecla para regresar al paso anterior. - El texto debe imprimirse en cinta transparente cuando se utiliza la función de impresión en modo espejo. - Las funciones de copia y de numeración automática no se pueden utilizar conjuntamente con la función de impresión en modo espejo.Opciones de corte de cinta
Las opciones de corte de cinta le permiten especificar cómo avanza y se corta la cinta cuando se imprimen las etiquetas. En particular, las opciones "Cadna" y "Sin corte" reducen en gran medida la cantidad de cinta desperdiciada ya que utilizan unos márgenes más pequeños y eliminan el corte de las secciones blancas entre las etiquetas.1
Oprima la tecla para mostrar el menú Label (Etiqueta). 2
Seleccione "Op. corte" oprimiendo la tecla ▲o la tecla ▼y seguidamente ajuste el valor oprimiendo la tecla ◄o la tecla . ▶ 3
Oprima la tecla 🔒 la tecla para aplicar los ajustes.  La nueva configuración NO SE APLICA si usted no oprime la tecla Ⓞ.  - Oprima la tecla para regresar al paso anterior. - Consulte la tabla Corte de cinta en la página 56 para obtener una lista con todos los valores disponibles.Corte de cinta
| Configuración | Descripción Ejemplo | |
| Margn grande | Corta automáticamente la cinta después de imprimir cada etiqueta. Las etiquetas tienen un margen de 0.94" (24 mm) en los lados izquierdo y derecho. | 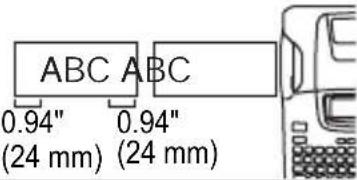 |
| Mrgn pequñ | Para imprimir etiquetas de una en una: Automáticamente se corta un trozo de cinta en blanco antes de imprimir la etiqueta y, a continuación, se corta la cinta después de imprimir la etiqueta.Cuando se imprimen varias etiquetas una tras otra: Automáticamente se corta un trozo de cinta en blanco antes de imprimir la primera etiqueta y, a continuación, se corta la cinta después que se imprime cada etiqueta.Las etiquetas tienen un margen de 0.16" (4 mm) en los lados izquierdo y derecho. | 0.92" (23 mm)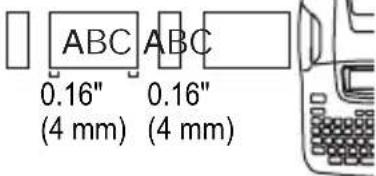 |
| Cadna | Para imprimir etiquetas de una en una: Automáticamente se corta un trozo de cinta en blanco antes de imprimir la etiqueta y, a continuación, no se corta la cinta después de imprimir la etiqueta.Cuando se imprimir varias etiquetas una tras otra: Automáticamente se corta un trozo de cinta en blanco antes de imprimir la primera etiqueta y, a continuación, se corta la cinta después de imprimir cada etiqueta.Las etiquetas tienen un margen de 0.16" (4 mm) en los lados izquierdo y derecho.La cinta no avanza ni se corta después de imprimir la última etiqueta. | 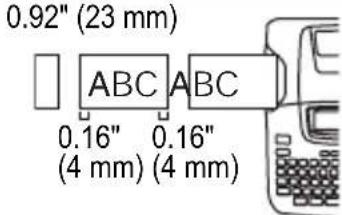 |
| Sin corte | Utilice esta opción para imprimir una serie de etiquetas sin efectuar un corte entre ellas.Si se oprime la tecla mientras se mantiene oprimida la tecla se hace avanzar y se corta la última etiqueta impresa. | 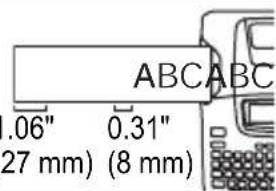 1( 1( |
Ajuste de la longitud de la etiqueta
Puede ajustar la longitud de la etiqueta impresa en niveles de -5 a +5. 1 Pulse la tecla para ver el menú de configuración, seleccione "Ajustar longitud" mediante la tecla ▶ y luego pulse la tecla 🔒. Estilo de autoajuste Ajustar longitud Idioma Unidad 2 Seleccione "Ajustar longitud" mediante la tecla ▲o ▼, y luego indique el valor mediante la tecla ▲o . ▼Colocación de etiquetas
1 Si es necesario, recorte la etiqueta impresa con unas tijeras para obtener la forma y longitud deseadas, etc. 2 | Quite la lámina protectora que cubre la parte trasera de la etiqueta.  La lámina protectora posterior de algunas cintas puede venir ya con un corte para que se pueda desprender la lámina con facilidad. 3 Coloque la etiqueta y, a continuación, presione con firmeza desde la parte superior a la inferior con un dedo para pegar la etiqueta.  - Puede resultar difícil adherir la etiqueta a superficies húmedas, sucias o disparejas. Las etiquetas pueden desprenderse fácilmente de esas superficies. - Asegúrese de leer las instrucciones que vienen con las cintas de tela para transferencias, cintas adhesivas extra fuertes o de otro material especial, y respete todas las notas de precaución indicadas en las instrucciones.UTILIZACIÓN DE LA MEMORIA DE ARCHIVOS
La memoria de archivos le permite almacenar hasta 9 de las etiquetas que utiliza con mayor frecuencia. Cada etiqueta se almacena como un archivo, de esta forma usted podrá recuperar la etiqueta posteriormente con rapidez y facilidad cuando la necesite.  - Cuando la memoria ya está llena, se sobrescribirá uno de los archivos almacenados cada vez que se guarda un archivo. - Usted perderá todos sus archivos almacenados si se desenchufa el adaptador de CA y se retiran las baterías durante más de 2 minutos.Almacenamiento de etiquetas en la memoria
| 1 | Después de introducir el texto y formatear la etiqueta,oprima la tecla para mostrar la pantalla deArchivos. | 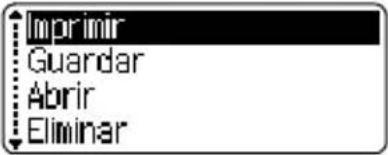 |
| 2 | Seleccione "Guardar" oprimiendo la tecla ▲ la tecla▼. | 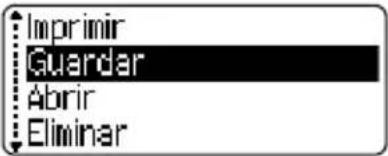 |
| 3 | Oprima la tecla ◎ la tecla .Aparece un número de archivo.También se muestra el texto de la etiqueta si ya se haguardado una etiqueta con ese número de archivo. | 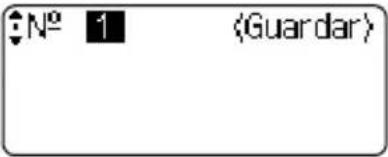 |
| 4 | Seleccione un número de archivo con la tecla ▲ la tecla▼ seguidamente oprima la tecla ○la teclapara guardar la etiqueta con el número de archivoseleccionado.El archivo se guarda y vuelve a aparecer la pantallade introducción de texto.Si ya hubiera un archivo almacenado en el número seleccionado, los datos quedarán sobrescritos por el archivo que se está guardando. | 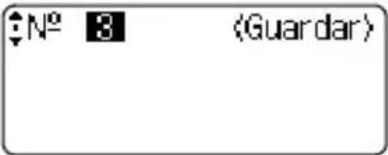 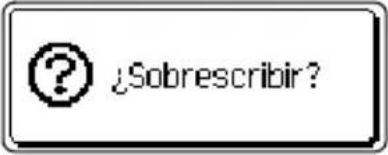 |
Apertura de un archivo de etiqueta almacenado
1 Oprima la tecla para mostrar el menú Archivo.  2 | Seleccione "Abrir" oprimiendo la tecla ▲o la tecla . ▼  3 Oprima la tecla 📄 la tecla . Aparece el número de archivo de una etiqueta almacenada. El texto de la etiqueta también aparece para identificar la etiqueta.  4 Seleccione un número de archivo utilizando la tecla ▲ o la tecla ▼ y seguidamente pulse la tecla o la tecla para abrir el archivo seleccionado. El archivo se abre y aparece en la pantalla de introducción de texto.   Oprima la tecla para regresar al paso anterior.Impresión de un archivo de etiqueta almacenado
1 Oprima la tecla para mostrar el menú Archivo.  2 Seleccione "Imprimir" utilizando la tecla ▲o la tecla ▼.  3 Oprima la tecla 🔒 la tecla . Aparece el número de archivo de una etiqueta almacenada. El texto de la etiqueta también aparece para identificar la etiqueta.  4 Seleccione un número de archivo con la tecla o la tecla y seguidamente oprima la tecla, o la tecla para imprimir la etiqueta seleccionada. La etiqueta se imprime desde la máquina.   - Oprima la tecla para regresar al paso anterior. - Aparecerá el mensaje "No hay texto!" cuando intente imprimir un archivo que no contiene texto ninguno.Eliminación de un archivo de etiqueta almacenado
1 Oprima la tecla para mostrar el menú Archivo.  2 | Seleccione "Eliminar" con la tecla ▲o la tecla . ▼  3 Oprima la tecla 📄 la tecla . Aparece el número de archivo de una etiqueta almacenada. El texto de la etiqueta también aparece para identificar la etiqueta.  4 Seleccione un número de archivo con la tecla ▲o la tecla ▼y seguidamente oprima la tecla o la tecla Aparece el mensaje "Borrar?".  5 Oprima la tecla o la tecla para eliminar el archivo. El archivo se elimina y vuelve a aparecer la pantalla de introducción de texto.  Oprima la tecla para cancelar la eliminación del archivo y regresar a la pantalla anterior.MANTENIMIENTO DE SU Etiquetadora P-touch
Restablecimiento de la etiquetadora P-touch
Puede restaurar la memoria interna del etiquetador P-touch para borrar todos los archivos de etiquetas guardados y restablecer la máquina a sus ajustes de fábrica. 1 Apague la máquina y seguidamente, manteniendo oprimidas las teclas Shift R, oprima para volver a encenderla. Por último, suelte y Shift R La etiquetadora P-touch se enciende con la memoria interna ya restablecida.  Suelte la tecla antes de soltar las otras teclas.  Cuando se restablece la etiquetadora P-touch se borra todo el texto, la configuración de formato, la configuración de las opciones y los archivos de etiquetas almacenados. También se borran los ajustes de idioma y de la unidad.Mantenimiento
La etiquetadora P-touch se debe limpiar con regularidad para conservar su rendimiento.  Antes de comenzar a limpiar el P-touch, extraiga siempre las baterías y desconecte el adaptador de CA.Limpieza del exterior del etiquetador P-touch
Utilice un paño seco y suave para limpiar el polvo y cualquier mancha o suciedad que haya en la unidad principal. Utilice un paño ligeramente humedecido pasándolo sobre la suciedad o las manchas difíciles de limpiar.  No utilice diluyente de pintura, gasolina, alcohol ni otros disolventes orgánicos. Dichos productos podrían deformar la cubierta o dañar el acabado de la etiquetadora P-touch.Limpieza del cabezal de impresión
Si los caracteres de la etiqueta se imprimen con franjas o con calidad deficiente, por lo general esto indica que el cabezal de impresión está sucio. Limpie el cabezal de impresin con un bastoncillo de algodn seco o con una cinta para limpiar cabezales de impresin (TZ-CL4).  Consulte las instrucciones suministradas con la cinta de limpieza para cabezales de impresión para saber cómo debe utilizarla. ADVERTENCIA
No toque el cabezal de impresión directamente con las manos. El cabezal de impresión puede estar caliente. Cabezal de impresión natural_image
Technical line drawing of a mechanical assembly with no visible text or symbolsLimpieza de la cortadora de cinta
Una vez al año aproximadamente, limpie las hojas de la cuchilla mediante un bastoncillo de algodón humedecido con alcohol isopropílico. El uso continuado de la cortadora puede hacer que el adhesivo de la cinta se acumule en su cuchilla, lo cual puede desafilarla y provocar que la cinta se atasque en la cortadora. PRECAUCIÓN
No toque la cuchilla del cortador directamente con las manos. natural_image
Technical line drawing of a mechanical assembly or enclosure with no visible text or symbols| Problema Causa | posible Recomendación | |
| La pantalla se "bloquea", o el etiquetador P-touch no responde correctamente. | Consulte la sección "Restablecimiento de la etiquetadora P-touch" en la página 62 y restablezca la configuración inicial de la memoria interna. Si el problema no se soluciona tras restablecer la etiquetadora P-touch, desconecte el adaptador de CA y extraiga las baterías durante más de 10 minutos. | |
| La pantalla permanece apagada tras encender el equipo. | ¿Está el adaptador de CA bien conectado? | Compruebe que el adaptador de CA diseñado exclusivamente para la etiquetadora P-touch está correctamente conectado. |
| ¿Está utilizando el adaptador de CA adecuado? | Compruebe que la etiqueta en el adaptador CA indica que es un adaptador Brother AD-24. Usar un adaptador incorrecto puede dañar la máquina. | |
| ¿Las baterías están correctamente instaladas? | Extraiga las baterías y vuelva a instalarlas. | |
La etiqueta no se imprime cuando se oprime la tecla  | ¿Ha introducido texto? Si no | se ha introducido ningún texto, no se imprimirá ninguna etiqueta. |
| ¿Se ha instalado correctamente el cartucho de cinta y queda cinta suficiente? | Compruebe que el cartucho de cinta se ha instalado correctamente y que queda suficiente cinta. | |
| ¿Está torcido el extremo de la cinta? | Si lo está, corte la sección torcida con unas tijeras y pase correctamente la cinta por la ranura de salida de la cinta. | |
| ¿Se ha atascado la cinta? | Si está atascada, retire el cartucho de cinta, tire cuidadosamente de la cinta atascada y corte la cinta con unas tijeras. Compruebe que el extremo de la cinta pasa por la guía de la cinta y vuelva a instalar el cartucho de cinta. | |
| ¿Está abierta la tapa del compartimiento de la cinta? | De ser así, cierre bien la tapa del compartimiento de la cinta. | |
| Los mensajes en la pantalla LCD se muestran en un idioma desconocido. | ¿Se seleccionó el idioma correctamente? | Consulte la sección “Ajuste del idioma y las unidades” en la página 24 y seleccione el idioma deseado para los mensajes en pantalla. |
| La etiqueta no se imprime correctamente. | ¿Está el cartucho de cinta instalado correctamente? | Cuando coloque un cartucho de cinta, presione con firmeza hasta que oiga un chasquido que le indica que está en su sitio. |
| ¿Está limpio el cabezal de impresión? | Si no lo está, limpie el cabezal de impresión con un bastoncillo de algodón o con una cinta para limpiar cabezales de impresión (TZ-CL4). | |
| ¿Qué opción se ha seleccionado en el menú "Op. corte", "Cadna" o "Sin corte"? | Cuando se selecciona alguna de estas opciones, la cinta no avanza tras imprimir la etiqueta. Compruebe cuál opción está seleccionada en el menú “Op. corte” o mantenga oprimida la tecla y oprima la tecla para hacer avanzar la cinta y cortarla. | |
| La cinta de tinta está separada del rodillo de tinta. | ¿Está la cinta de tinta suelta en el cartucho de cinta o usted tiró de una etiqueta que estaba saliendo por la ranura de salida de la cinta? | Si la cinta de tinta está rota, sustituya el cartucho de cinta completo. Si no está rota, deje la cinta sin cortar y extraiga el cartucho de cinta y, a continuación, enrolle la cinta de tinta suelta en el carrete como se muestra en la figura.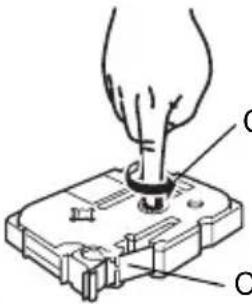 Carreteinta de tinta Carreteinta de tinta |
| La etiquetadora P-touch se detiene durante la impresión de una etiqueta. | ¿Queda suficiente cinta en el cartucho de cinta? | Cuando la cinta muestra franjas, esto indica que se ha llegado al final de la cinta. Sustituya el cartucho de cinta usado con un nuevo cartucho de cinta cuando aparezcan estas franjas. |
| ¿Le queda poca carga a las baterías y el adaptador de CA no está conectado o no es el adaptador Brother AD-24? | Reemplace todas las baterías o conecte directamente el adaptador de CA (Brother AD-24) a la etiquetadora P-touch. | |
| La etiqueta no se corta automáticamente. | ¿Qué opción se ha seleccionado en el menú "Op. corte", "Cadna" o "Sin corte"? | Cuando se selecciona alguna de estas opciones, la cinta no avanza tras imprimir la etiqueta. Compruebe cuál opción está seleccionada en el menú "Op. corte" o mantenga oprimida la tecla y oprima la tecla para hacer avanzar la cinta y cortarla. |
| ¿Está activada la función de Corte manual? | Cuando vaya a trabajar con cintas de tela para transferencias o cintas adhesivas extra fuertes, utilice unas tijeras para cortar la cinta al término de la impresión. | |
| ¿Está abierta la tapa del compartimiento de la cinta? | De ser así, cierre bien la tapa del compartimiento de la cinta. | |
| Los archivos de etiquetas guardados anteriormente están vacíos ahora. | ¿Se han desconectado las baterías y el adaptador de CA? | Todos los archivos almacenados en la memoria interna se pierden si las baterías y el adaptador de CA se desconectan durante más de 2 minutos. |
| ¿Queda suficiente carga en las baterías? | Todos los datos almacenados en la memoria interna se pierden si las baterías se descargan totalmente. | |
| ¿Ha utilizado la función de Restablecimiento? | La función de Restablecimiento borra todos los datos almacenados en la memoria interna, incluidos los archivos de etiquetas. | |
Mensajes de error
Si aparece un mensaje de error en pantalla, siga las instrucciones que se indican a continuación.  Oprima cualquier tecla para que desaparezca el mensaje de error.| Mensaje Causa/Solución | |
 ¡Batería bajal ¡Batería bajal | Las baterías instaladas se están agotando. |
 ¡Revisar Bat.! ¡Revisar Bat.! | Las baterías instaladas están a punto de agotarse.Reemplace las baterías usadas con baterías nuevas o conecte el adaptador de CA antes de proseguir. |
 Se ha conectado un adaptador de tipo incorrecto Se ha conectado un adaptador de tipo incorrecto | Se ha conectado un adaptador de CA incompatible. Utilice sólo el adaptador de CA (Brother AD-24) diseñado exclusivamente para su etiquetadora P-touch. |
 Error ortador Error ortador | El cortador de cinta se cierra si se intenta imprimir o hacer avanzar la cinta con la tapa cerrada y el casete de la cinta insertado. Apague y vuelva a encender la etiquetadora P-touch antes de proseguir.Si la cinta queda enredada en la cortadora, retire la cinta. |
 ¡No hay texto! ¡No hay texto! | No se ha introducido texto, símbolos ni datos de códigos de barras cuando se intenta imprimir u obtener una vista previa de una etiqueta. Introduzca los datos antes de proseguir. |
 Introduzca casete de cinta Introduzca casete de cinta | No hay ningún cartucho de cinta instalado cuando se intenta imprimir u obtener una vista previa de una etiqueta, o se intenta hacer avanzar la cinta. Instale un cartucho de cinta antes de proseguir. |
 Casete de cinta cambiada Casete de cinta cambiada | El cartucho de cinta se cambia durante la impresión, etc.Asegúrese de introducir el cartucho de cinta correcto antes de iniciar la impresión. |
 Límité de línea 5 líneas máx. Límité de línea 5 líneas máx. | Ya hay cinco líneas de texto cuando se oprime la teclaLimite el número de líneas a cinco. |
 Límite de ancho de cinta 3 líneas máx Límite de ancho de cinta 3 líneas máx | Hay más de tres líneas de texto cuando se oprime la teclaFerd & Cuto cuando se usa una cinta de 1/2" (12 mm).Limite el número de líneas a tres o reemplace el cartucho de cinta con una cinta de mayor ancho. |
 Límite de ancho de cinta2 líneas máx Límite de ancho de cinta2 líneas máx | Hay más de dos líneas de texto al oprimir la tecla tecla al usar cinta de 3/8" o 1/4" (9 mm o 6 mm). Limite el número de líneas a dos o reemplace el cartucho de cinta con una cinta de mayor ancho. |
 Límite de ancho de cinta1 línea máx Límite de ancho de cinta1 línea máx | Hay más de una línea de texto al oprimir la tecla tecla al usar una cinta de 9/64" (3.5 mm). Limite el número de líneas a una o reemplace el cartucho de cinta con una cinta de mayor ancho. |
 Límite de bloques5 bloques máx Límite de bloques5 bloques máx | Ya hay cinco bloques de texto. Limite el número de bloques de texto a cinco. |
 Texto lleno Texto lleno | Ya se ha introducido el número máximo de caracteres. Edite el texto para utilizar menos caracteres. |
 Límite longitud Límite longitud | La longitud de la etiqueta que se va a imprimir basada en el texto introducido es superior a 39.37" (1 m). Edite el texto para que la longitud de la etiqueta sea inferior a 39.37" (1 m). |
 Introduzca casete de cinta de 3/4 pulgada Introduzca casete de cinta de 3/4 pulgada | El cartucho de cinta instalado no es de 3/4" (18 mm) cuando está seleccionada la opción de cinta de 3/4" (18 mm) en la función de formato automático. Instale un cartucho de cinta de 3/4" (18 mm). |
 Introduzca casete de cinta de 18mm Introduzca casete de cinta de 18mm | |
 Introduzca casete de cinta de 1/2 pulgada Introduzca casete de cinta de 1/2 pulgada | El cartucho de cinta instalado no es de 1/2" (12 mm) cuando está seleccionada la opción de cinta de 1/2" (12 mm) en la función de formato automático. Instale un cartucho de cinta de 1/2" (12 mm). |
 Introduzca casete de cinta de 12mm Introduzca casete de cinta de 12mm | |
 Introduzca casete de cinta de 3/8 pulgada Introduzca casete de cinta de 3/8 pulgada | El cartucho de cinta instalado no es de 3/8" (9 mm) cuando está seleccionada la opción de cinta de 3/8" (9 mm) en la función de formato automático. Instale un cartucho de cinta de 3/8" (9 mm). |
 Introduzca casete de cinta de 9mm Introduzca casete de cinta de 9mm | |
 Introduzca casete de cinta de 1/4 pulgada Introduzca casete de cinta de 1/4 pulgada | El cartucho de cinta instalado no es de 1/4" (6 mm) cuando está seleccionada la opción de cinta de 1/4" (6 mm) en la función de formato automático. Instale un cartucho de cinta de 1/4" (6 mm). |
 Introduzca casete de cinta de 6mm Introduzca casete de cinta de 6mm | |
 Introduzca casete de cinta de 9/64 pulgada Introduzca casete de cinta de 9/64 pulgada | El cartucho de cinta no es de 9/64" (3.5 mm) cuando está seleccionada la opción de cinta de 9/64" (3.5 mm) en la función de formato automático. Instale un cartucho de cinta de 9/64" (3.5 mm). |
 Introduzca casete de cinta de 3,5mm Introduzca casete de cinta de 3,5mm | |
 Demasiado text para este dsñ Demasiado text para este dsñ | Ya se ha introducido el número máximo de caracteres para el diseño seleccionado. Edite el texto para utilizar menos caracteres o utilice un diseño diferente. |
 Valor incorrecto Valor incorrecto | El valor introducido para fijar la longitud de la cinta, la longitud de la tabulación, las copias múltiples o la función de numeración no es válido. Introduzca un valor válido para la longitud de la cinta. |
 ¡Elegir otra opc. de corte! ¡Elegir otra opc. de corte! | La longitud de la cinta establecida en el ajuste para la longitud de la cinta es más corta que la longitud total de los márgenes izquierdo y derecho aplicados a la opción de corte "Margn grande". Seleccione una opción de corte diferente. |
 Texto demasiado largo Texto demasiado largo | La longitud de la etiqueta que se va a imprimir basada en el texto introducido es superior a la longitud establecida. Edite el texto para que se ajuste al valor de longitud establecido o cambie dicho valor establecido. |
 ¡Texto demasiado alto! ¡Texto demasiado alto! | El tamaño del texto es demasiado grande. Seleccione una opción de tamaño diferente. |
 Comprobar #de de dígitos introducido Comprobar #de de dígitos introducido | El número de dígitos introducido en los datos del código de barras no coincide con el número de dígitos establecido en los parámetros del código de barras. Introduzca el número de dígitos correcto. |
Especificaciones
Unidad principal| Elemento Especificación | |
| Dispositivo de entrada (teclado) | 65 teclas, teclado con disposición QWERTY de las teclas |
| Pantalla | |
| Dispositivo de visualización | LCD matricial de puntos |
| Visualización de caracteres | 16 caracteres x 1 guía y 2 líneas (128 puntos x 48 puntos) |
| Pantalla con iluminación de fondo | No |
| Impresión | |
| Método de impresión Impresora térmica | |
| Cabezal de impresión 128 puntos / 180 ppp | |
| Alto de impresión 0.62" (15.8 mm) máx. (al usar una cinta de 3/4" (18 mm)) | |
| Velocidad de impresión | 0.39" (10 mm) /segundo aprox. |
| Cartucho de cinta | Cartuchos de cinta estándar TZ (9/64", 3/8", 1/2", 3/4" [3.5, 6, 9, 12, 18 mm] de ancho) |
| Cortadora de cinta Cortadora automática integrada | |
| N° de líneas | Cinta de 3/4" (18 mm) : 1 - 5 líneas; cinta de 1/2" (12 mm) : 1 - 3 líneas; cinta de 3/8" (9 mm) : 1 - 2 líneas; cinta de 1/4" (6 mm) : 1 - 2 líneas; cinta de 9/64" (3.5 mm) : 1 línea |
| Dirección de impresión | Horizontal, vertical |
| Impresión continua 1 ~ 9 etiquetas | |
| Vista previa de la impresión | Sí |
| Avance y corte Margn grande, Mrgn pequñ, Cadna, Sin corte | |
| Caracteres | |
| Conjunto de caracteres internos: | Hay un total de 301 caracteres (62 alfanuméricos, 92 símbolos y 147 caracteres acentuados.) |
| Memoria intermedia de texto | 200 caracteres máx. |
| Fuentes | Helsinki, Brussels, Florida, Calgary |
| Tamaño de caracteres Auto, 42pt, 36pt, 24pt, 18pt, 12pt, 9pt, 6pt | |
| Estilo de caracteres | Normal, Negrita, Perfilado, Sólido, Sombreado, Cursiva, Negrita cursiva, Perfilado cursivo, Sólido cursivo, Sombreado cursivo, Vertical |
| Ancho de caracteres 2, | 1, 2/3, 1/2 |
| Alineación del texto Izquierda, centro, derecha, justificado | |
| Memoria | |
| Tamaño de la memoria | Máximo de 1800 caracteres |
| Almacenamiento de archivos | Máximo de 9 archivos |
| Otras características | |
| Frame (Marco) Total de | 16 patrones de marco (incluido patrón sombreado) |
| Formato automático Plantillas: 14Diseños de bloques: 3/4"(18 mm):8, 1/2" (12 mm) : 4, 3/8" (9 mm) : 3, 1/4" (6 mm) : 1 | |
| Contraste de pantalla 5 | niveles (+2, +1, 0, -1, -2) |
| Alimentación eléctrica | |
| Alimentación eléctrica Adaptador de CA (AD-24), seis baterías alcalinas de tamaño AA (LR6). | |
| Desconexión automática | Solo P-touch: 5 minutosPC conectado: 60 minutos |
| Size (Tamaño) | |
| Dimensiones 6.98" (Ancho) x 9.14" (Fondo) x 2.68" (Alto)[177.2 mm (Ancho) x 232.1 mm (Fondo) x 68.0 mm (Alto)] | |
| Peso 1.72lb (780 g) (sin el casete de cinta ni las baterías) | |
| Otros | |
| Temperatura / humedad de funcionamiento | 50 ~ 95°F (10 ~ 35 °C) / 20 ~ 80% de humedad (sin condensación) |
APÉNDICE
Entorno operativo: Windows®| Elemento Especificación | |
| OS | Microsoft® Windows® 2000 Professional / XP/Windows VistaTM |
| Memoria | Windows® 2000 Pro, XP: Se requieren 128MB o másWindows VistaTM: 512 MB o más |
| Disco duro | Se requieren 70MB o más |
| Monitor | Tarjeta gráfica SVGA con color de alta densidad, o superior |
| Interface | Puerto USB (especificación USB con protocolo 1.1 o posterior) |
| Otros | Unidad de CD-ROM para la instalación |
ÍNDICE
A
Adaptador de CA 18 Alimentación eléctrica 17 alineación 31 ancho 31 Avance y corte, función 22C
Caps, modo 14, 25 caracteres acentuados 29 Cartuchos de cinta 19 contraste 23 cursor, teclas 25D
desconexión automática 21E
eliminar sólo texto 26 texto y formato 26 estilo 31F
formato atributos de caracteres ..... 31 atributos de etiqueta 36 fuentes 31I
introducir letras en mayúsculas 25 símbolos 27 texto 25L
letras en mayúsculas ......25 línea 31 línea nueva 25 lista de caracteres acentuados .....30 lista de símbolos .....28 longitud ....36 longitud de la cinta 14M
marca de retorno .....14N
Número de línea 140
Opciones de anchura 33 Opciones de estilo ....33 Opciones de fuente 32 Opciones de tamaño 32S
símbolos 27T
tamaño 31 Teclado 14 texto introducir y editar .....25 líneas 25Información de contacto (sólo para EE.UU.)
Centros de servicio
Si necesita un centro de servicio local, llame al teléfono 1-800-284-HELP (4357) para averiguar cuál es el centro de servicio autorizado que le queda más cerca. Nota: Llame al centro de servicio antes de desplazarse. Los centros de servicio no prestan asistencia operativa. Consulte "Asistencia operativa".Asistencia operativa
Si necesita asistencia técnica y operativa, puede llamar al Servicio de atención al cliente de Brother en: Voz 1-877-4-PTouch, o 1-877-478-6824 Fax 1-901-379-1210 Correo electrónico custsrv@brother.comAsistencia por Internet
Para obtener información sobre productos : http://www.brother.com Para descargar los últimos controladores: http://solutions.brother.com Para adquirir accesorios y determinados productos Brother: http://www.brothermall.comAccesorios y suministros
Para pedir accesorios y suministros Brother pagando con Visa, MasterCard, Discover o American Express, puede llamar al número gratuito 1-888-879-3232 o rellenar el formulario de pedido que encontrará en la Guía del usuario y enviar ambas caras del formulario por fax al número 1-800-947-1445. Para adquirir accesorios en Internet: http://www.brothermall.com Para hacer su pedido por correo o pagar con talón, rellene el formulario de pedido de accesorios y envíelo con el abono a nombre de: Brother International Corporation Attn: Consumer Accessory Division P.O. Box 341332 Bartlett, TN 38133-1332Sistema de respuesta por fax
El Servicio de atención al cliente de Brother ha instalado un sencillo sistema de respuesta por fax que le permitirá obtener respuesta instantánea a preguntas técnicas frecuentes, así como información sobre todos los productos de Brother. Este sistema está disponible 24 horas al día, 7 días a la semana. Puede usar el sistema para enviar la información a cualquier número de fax, no sólo al número desde el que llama. Llame al 1-800-521-2846 y siga las indicaciones de voz para recibir por fax instrucciones sobre cómo usar el sistema, así como un índice de los temas de respuesta por fax. Ahorre tiempo - Regístrese en Linea! No pierda tiempo al teléfono. Despreocúpese por el correo. Visítenos en www.registermybrother.com Regístre su producto inmediatamente en nuestra base y listo. También en su visita, encuentre información útil y participe en sorteos!brother®
- Federal Communications Commission (FCC) Declaration of Conformity (For USA Only)
- Brother® One-Year Limited Warranty and Replacement Service (USA Only)
- Who is covered:
- What is covered:
- What is the length of the Warranty Periods:
- What is NOT covered:
- What to do if you think your Product is eligible for warranty service:
- What Brother will ask you to do:
- What Brother will do:
- What happens when Brother elects to replace your Machine:
- Limitations:
- Important:
- Important Information
- BROTHER INTERNATIONAL CORPORATION
- SOMERSET CORPORATE BLVD.
- BRIDGEWATER, NEW JERSEY 08807-0911
- Save Time - Register On-Line!
- www.registermybrother.com
- Contents
- INTRODUCTION ...... 4
- GETTING STARTED 12
- EDITING A LABEL......25
- INTRODUCTION
- LABEL PRINTING 49
- USING THE FILE MEMORY 56
- MAINTAINING YOUR P-touch Labeler 60
- What You Can Do
- ■ Create a label with the P-touch labeler
- Prepare the P-touch labeler.
- 2| Enter the label text.
- | Print the label.
- ■ Create a label with your personal computer
- Safety Precautions
- WARNING
- AC adapter
- Battery
- P-touch
- CAUTION
- Tape Cutter
- Tape
- Memory
- General Precautions
- Symbols Used in this Guide
- GETTING STARTED
- Unpacking Your P-touch labeler
- P-touch labeler PT-2100 TZ tape cassette
- CD-ROM
- AD-24 User's Guide
- Software Installation Guide
- (Starter Cassette)
- USB cable
- General Description
- LCD Display & Keyboard
- LCD Display
- Line number
- Cursor
- Return mark
- Caps mode
- 5.\~8. Style guidance
- Tape length
- 10.Cursor selection
- Key Names and Functions
- Text :
- Label :
- Setup :
- Clear :
- 1' \~ . / :
- Tab :
- Caps :
- Shift :
- Symbol :
- (Backspace):
- 18.
- A/F (Auto-Format):
- Space :
- BarCode :
- Accent :
- Power Supply
- Inserting a Tape Cassette
- Turning Power On/Off
- Feeding Tape
- Feed & Cut
- Feed Only
- LCD Contrast
- Setting Language and Unit
- Language
- Unit
- EDITING A LABEL
- Entering and Editing Text
- Entering Text from the Keyboard
- Adding a New Line
- Adding a New Block
- Moving the Cursor
- EDITING A LABEL Inserting Text
- Inserting a Tab
- Deleting Text
- ■ Deleting one character at a time
- ■ Deleting all text at once \- Use the key to delete all text at once. 1Press the key.The Clear options are displayed.2Using the or keys, select “Text Only” to delete all text while retaining the current format settings, or select “Text & Format” to delete all text and format settings.Press the key to return to the text entry screen, without erasing (or clearing) text or format.3Press the or key.All text is deleted. All format settings are also deleted if Text & Format was selected. Entering Symbols
- Entering Symbols Using Key
- Entering Symbols Using the Symbol Function
- Symbol List
- Entering Accented Characters
- Setting Character Attributes
- Setting Character Attributes by Label
- Setting Character Attributes by Each Line
- Setting Auto Fit Style
- Setting Label Attributes
- Using Auto-Format Layouts
- Using Templates - Example creating an Asset Tag
- Using Block Layouts
- Creating a Bar Code Label
- Setting Bar Code Parameters
- Entering Bar Code Data
- Special Character List
- Editing and Deleting a Bar Code
- LABEL PRINTING
- Label Preview
- 1
- Printing a Label
- !
- Printing a Single Copy
- Printing Multiple Copies
- Auto-numbering Labels
- Mirror Printing
- Tape Cutting Options
- Adjusting the Label Length
- Attaching Labels
- USING THE FILE MEMORY
- Storing a Label into Memory
- Opening a Stored Label File
- Printing a Stored Label File
- Deleting a Stored Label File
- MAINTAINING YOUR P-touch Labeler
- Resetting the P-touch Labeler
- Maintenance
- Cleaning the exterior of the P-touch labeler
- Cleaning the Print Head
- Cleaning the Tape Cutter
- TROUBLESHOOTING
- Error Messages
- Specifications
- APPENDIX
- INDEX
- A
- C
- D
- E
- F
- K
- L
- N
- P
- R
- s
- T
- U
- W
- Contact Information (For USA Only)
- Service Center Locations
- Operational Assistance
- Assistance on the Internet
- Accessories and Supplies
- Fax-Back System
- P-touch®
- PT-2100/PT-2110
- GUÍA DE USUARIO
- Declaración de conformidad de la Comisión Federal de Comunicaciones (FCC) (sólo para EE.UU.)
- Garantía limitada de un año y Servicio de sustitución de Brother® (sólo en Estados Unidos)
- Cobertura:
- Alcance de la cobertura:
- Duración del periodo de garantía:
- Aspectos NO CUBIERTOS:
- Procedimiento que debe seguir si su Producto cumple con los requisitos del servicio en garantía:
- Brother le pedirá que realice lo siguiente:
- Brother, por su parte, actuará de la siguiente forma:
- Qué sucede cuando Brother decide sustituir la máquina:
- Limitaciones:
- Importante:
- Información importante
- BROTHER INTERNATIONAL CORPORATION 100 SOMERSET CORPORATE BLVD.
- Ahorre tiempo: ¡registre su producto en línea!
- ÍNDICE
- INTRODUCCIÓN......4
- PARA EMPEZAR.... 12
- EDICIÓN DE ETIQUETAS.... 25
- INTRODUCCIÓN
- IMPRESIÓN DE ETIQUETAS 51
- UTILIZACIÓN DE LA MEMORIA DE ARCHIVOS.... 58
- MANTENIMIENTO DE SU Etiquetadora P-touch.... 62
- Lo que puede hacer
- ■ Creación de etiquetas con la etiquetadora P-touch
- | Prepare su etiquetadora P-touch.
- | Introduzca el texto de la etiqueta.
- | Imprima la etiqueta.
- ■ Creación de etiquetas con su computadora personal
- Precauciones de seguridad
- ADVERTENCIA
- Adaptador de CA
- Baterías
- PRECAUCIÓN
- Cortadora de cinta
- Cinta
- Memoria
- Precauciones generales
- Símbolos utilizados en esta guía
- PARA EMPEZAR
- Desembalaje de la etiquetadora P-touch
- Etiquetadora P-touch PT-2100 Cartucho de cinta TZ
- Cable USB
- Descripción general
- Pantalla LCD y teclado
- Pantalla LCD
- Número de línea
- Marca de retorno
- Modo "Caps" (Bloqueo de mayúsculas)
- 5.\~8. Guía de estilo
- Longitud de la cinta
- Selección del cursor
- Funciones y nombre de las teclas
- Alimentación eléctrica
- Instalación de un cartucho de cinta
- Encendido y apagado
- Avance de la cinta
- Avanzar y cortar
- Solo avanzar
- Contraste de la pantalla LCD
- Ajuste del idioma y las unidades
- Idioma
- Unidad
- EDICIÓN DE ETIQUETAS
- Introducción y edición de texto
- Introducción de texto mediante el teclado
- Adición de una nueva línea
- Adición de un nuevo bloque
- Desplazamiento del cursor
- Inserción de texto
- Para insertar una tabulación
- Eliminación de texto
- ■ Eliminación de un caracter cada vez
- - Eliminación de todo el texto de una sola vez
- Introducción de símbolos
- Introducción de símbolos con la tecla Shift
- Introducción de símbolos con la función de símbolos
- Lista de símbolos
- Introducción de caracteres acentuados
- Configuración de los atributos de caracteres
- Ajuste de los atributos de caracteres por etiqueta
- Ajuste de los atributos de caracteres por cada línea
- Ajuste del estilo de encaje automático
- Configuración de los atributos de etiqueta
- Utilización de diseños de formato automático
- Utilización de plantillas; ejemplo de creación de una Etiqueta de activos
- Utilización de diseños de bloque
- 9
- Creación de una etiqueta de código de barras
- Configuración de los parámetros de códigos de barras
- 2
- 3
- - Lista de caracteres especiales
- Edición y eliminación de códigos de barras
- IMPRESIÓN DE ETIQUETAS
- Vista previa de la etiqueta
- Impresión de una sola copia
- Impresión de múltiples copias
- Numeración automática de etiquetas
- Impresión en modo espejo
- 4
- Opciones de corte de cinta
- Corte de cinta
- Ajuste de la longitud de la etiqueta
- Colocación de etiquetas
- UTILIZACIÓN DE LA MEMORIA DE ARCHIVOS
- Almacenamiento de etiquetas en la memoria
- Apertura de un archivo de etiqueta almacenado
- Impresión de un archivo de etiqueta almacenado
- Eliminación de un archivo de etiqueta almacenado
- MANTENIMIENTO DE SU Etiquetadora P-touch
- Restablecimiento de la etiquetadora P-touch
- Mantenimiento
- Limpieza del exterior del etiquetador P-touch
- Limpieza del cabezal de impresión
- Limpieza de la cortadora de cinta
- Mensajes de error
- Especificaciones
- APÉNDICE
- I
- M
- 0
- Información de contacto (sólo para EE.UU.)
- Centros de servicio
- Asistencia operativa
- Asistencia por Internet
- Accesorios y suministros
- Sistema de respuesta por fax
- brother®
Brand : BROTHER
Model : P-Touch 2110
Category : Label printer