
Bremen RCM 127 - Car radio BLAUPUNKT - Free user manual and instructions
Find the device manual for free Bremen RCM 127 BLAUPUNKT in PDF.


| Product Type | Car Stereo |
| Brand | Blaupunkt |
| Model | Bremen RCM 127 |
| Chassis Size | 1-DIN (approx. 178 x 50 mm) |
| Weight | Approx. 0.5 kg |
| Power Supply | 12V DC (negative ground) |
| Power Output | 4 x 20W RMS (max 50W) |
| Tuner | AM/FM with RDS |
| CD Player | Yes, supports CD, CD-R/RW |
| USB Input | Yes, front USB port |
| AUX Input | Yes, 3.5mm front AUX |
| Display | LCD with adjustable illumination |
| Audio Features | Bass, Treble, Balance, Fader controls |
| Preset Stations | 30 (18 FM, 12 AM) |
| Remote Control | Included wired remote |
| Fuse Rating | 10A (blade type) |
| Maintenance | Clean with soft dry cloth; avoid liquids |
| Safety | Disconnect battery before installation |
| Spare Parts | Fuse, wiring harness, mounting sleeve available |
Frequently Asked Questions - Bremen RCM 127 BLAUPUNKT
User questions about Bremen RCM 127 BLAUPUNKT
0 question about this device. Answer the ones you know or ask your own.
Ask a new question about this device
Download the instructions for your Car radio in PDF format for free! Find your manual Bremen RCM 127 - BLAUPUNKT and take your electronic device back in hand. On this page are published all the documents necessary for the use of your device. Bremen RCM 127 by BLAUPUNKT.
USER MANUAL Bremen RCM 127 BLAUPUNKT
Operating instructions

BLAUPUNKT
Bosch Gruppe
Table of contents
Traffic safety.... 2
Important information.... 3
Quick reference 5
KeyCard - Anti-theft system.... 10
Detailed operating instructions .... 14
First-time installation ....14
Operating the radio with RDS....17
RDS information 23
PTY - Programme Type....25
Traffic message reception with RDS-EON.... 29
Traffic Memo (TIM) 32
⚠ Warning 37
Operating the tape player.... 39
Operating the CD changer (optional) 44
Operating the AUX mode.... 52
Audio settings 53
DNC 54
EQ (equalizer)....56
Manual equalizer ....56
Hi-fi calibration ....57
Programming with DSC 61
Muting the audio source while using the car phone....66
Specifications.... 67
Traffic safety
As the driver of a motor vehicle, it is your responsibility to pay attention to the traffic situation at all times. Never use your car radio in a way that could distract you.
Please keep in mind that you travel a distance of 14 m per second at a speed of only 50 km/h.
Should the traffic situation become particularly demanding, we advise you not to use the car radio equipment.
Always make sure that you are still able to hear any warning signals coming from outside of the vehicle, such as police or fire engine sirens, so that you can react accordingly.
As a result, you should always select a moderate volume for playing your car radio equipment while you are driving.
Important information
Precautions
Before operating your new car radio for the first time, please read the following information carefully.
Installation
If you would like to install your new car radio yourself or add other audio components to the existing ones, then please read the enclosed instructions on installation and connection carefully.
Car phone
If there is a mobile telephone installed in your vehicle, the radio, tape player or CD player (optional) can be muted automatically when the phone is being used.
It is possible to program the system so that traffic messages or the playback of stored traffic messages always have priority over the use of the telephone. (For more information, please refer to the section on muting the audio source while using the car phone.)
Accessories
Use accessories and spare parts approved by Blaupunkt only. You can use the following Blaupunkt products with this car radio:
Amplifier: All Blaupunkt amplifiers, the pre-amp out cable 7 607 893 093 is required.
Sub out: Subwoofer pre-amp out for connecting an amplifier.
Changer: CDC F 07
Remote control:
With the infrared remote control RC 07 you can control all of the important functions of your car radio system from the steering wheel.
Navigation: The Blaupunkt RGN 06 navigation component can be added to allow active route guidance (expected to be available: mid 1997) Navigation components can only be installed by specialised Blaupunkt navigation dealerships.
Other components are currently in the planning.

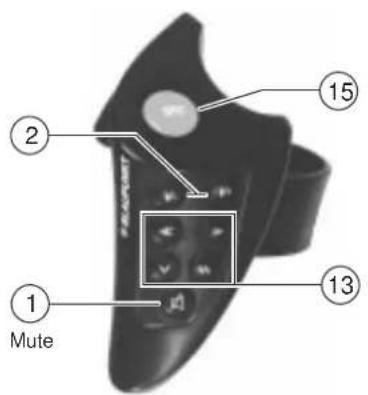
Remote control RC 07 (optional)
Quick reference
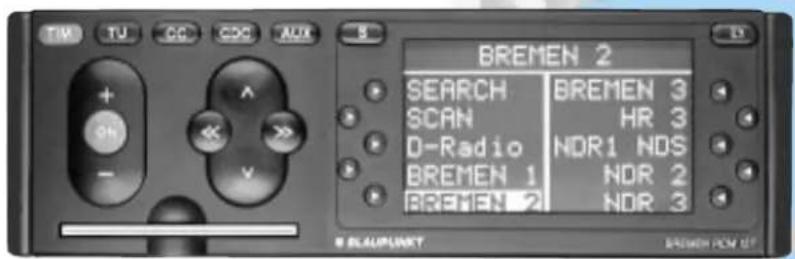
① ON / Mute
Switching on/off:
Press ON.
To switch the set on with the ON button, the KeyCard has to be inserted. The unit will play at the pre-adjusted volume level (VOL FIX).
To switch the set off, press ON for longer than 0.5 seconds.
Mute:
On/off:
Press ON or on the remote control briefly. MUTE will appear in the display when the mute function has been activated.
The set will switch off automatically if it is set to mute for longer than 5 minutes.
Switching the set on for the first time:
If the set is switched on for the first time or after the power supply has been disconnected, the FIRST INSTALL menu will appear in the display.
If you would like to alter any of the settings, read the instructions in the section on "First installation".
You can exit the FIRST INSTALL menu by pressing the selection button marked EXIT ◀.
Switching on/off with the KeyCard:
Switch the set on by pressing ON.
Note
First read the information in the section on the "KeyCard anti-theft system".
Switching on/off with the ignition:
It is possible to switch the set on and off with the vehicle ignition if it has been installed to do so.
After the set has been switched off using the ignition, a double beep will remind you to remove the KeyCard before you leave the vehicle.
Switching the set on when the ignition is off:
The set can be switched on again by pressing ON if the KeyCard is left in the set after the double beep.
After playing for one hour, the set will switch off again automatically in order to save battery power.
If you press ON again, the set will play again for one hour.
② + / -
Adjusting the volume:
The volume can be adjusted from VOLUME +0 to VOLUME +80. Press + or - to adjust the volume in either direction in 15 increments per second.
Each time the set is switched on, it will play at the pre-adjusted volume level. The pre-adjusted volume level (VOL FIX) can be altered. Read the information in the section on "Programming with DSC – VARIOUS".
Switching the volume to zero immediately:
Press ON briefly. MUTE will then appear in the display and the volume will be reduced to zero immediately.
Press ON again, and the set will resume playing at the volume level last set.
The set will switch off automatically if it is set to mute for longer than 5 minutes.
③ TIM (traffic memo)
Setting the TIM times:
Press TIM for approximately 1 second.
Recalling stored traffic messages:
Press TIM briefly.
Switching TIM off while using a car wash:
Press ON to switch the set off and then press TIM. TIM-FUNCTION DEACTIVATED will appear briefly in the display. The motor antenna will retract.
Be sure to read the section on "Traffic Memo (TIM)" for more important information.
④ TU (tuner)
Press this key to switch to operating the radio (main menu). If you press TU while the radio is playing, the set will switch between the main menu and the menu selected last.
⑤ CC (compact cassette)
Press to switch to operating the tape player.
⑥ CDC (CD changer)
Press to switch to operating the CD changer (optional). If the Blaupunkt CDC F 07 changer has not been connected, NO CHANGER CONNECTED will appear in the display.
⑦ AUX
Press to switch to any additional equipment connected. Refer to "Accessories" to find out which auxiliary equipment can be added to this system.
⑧ S (select)
Press S briefly:
The current time will appear in the display header.
The menu for the sound settings will appear in the display.
Press ▶to retrieve the function you would like to alter.

Press ∧/∨ or << / >> to select TREBLE, BASS, FADER or BALANCE.
If LOUDNESS is highlighted in the display, this means that this function is currently active. Switch it off by pressing the corresponding softkey again. Refer to the section on "Programming with DSC – VARIOUS" to set the intensity.
The settings for EQ (equalizer) and DNC are described separately.
DSC main menu:
Press S for approximately 1 second.:
This activates the DSC MAIN MENU.
Here you can adjust the programmable basic settings. For further information, read: "Programming with DSC".
⑨ Display/Selection menu
The selected mode of operation and the functions which can be selected appear in the display. It is possible to preselect colour, illumination and other settings. Refer to the operating instructions in the section on "Display settings".
⑩ Display header
Indicates the current selections, e.g. when operating the radio, the station; when operating the tape player, the track.
⑪ Cassette eject
Open/close panel. Eject/insert cassette.
12 ▶ / Softkeys
Use these keys to select the functions appearing in the display (a new menu will appear).
Other functions can be switched on/off (alternates between normal and highlighted display).
Press EXIT ◀ to return to the previous (main) menu.
⑬ Multi-functional rocker switch or remote control buttons (optional)
Radio mode

<</> Switching between reception and memory table (preference menu)
^/Scrolling in the selected table
^ up / \down
Using the remote control, you can select the following or previous station.
Cassette mode

^Select the title (S-CPS)
^ forwards / \reverse
fast forward
<< fast rewind
Stop the function by pressing the opposite key.
CD changer mode (optional)

Select CD
up
<< down
Select track
up: Press briefly.
down: Press two or more times in quick succession.
CUE - fast forward (audible):
Hold /pressed down.
Restart same track:
Press \briefly.
Review - fast reverse (audible):
Hold Vpressed down.
Additional functions for the rocker switch:
Other settings can be selected in combination with the
S (select) key.
⑭ KeyCard anti-theft system
You must insert the KeyCard in order to be able to operate this set.

Inserting the KeyCard
While the KeyCard tongue is protruding out of its opening, insert the KeyCard into the slot with the contact area facing up.
If necessary, press the KeyCard tongue to release it. Be sure to read the information in the section on the "KeyCard anti-theft system".
Flashing KeyCard tongue
It is possible to program this unit so that the KeyCard tongue will flash when the set is switched off and the KeyCard has been removed. This flashing light indicates to thieves that it is useless to try and steal the set.
The flashing light can be switched off if desired.
For further information, read the section on "Programming with DSC".
15 SRC
Remote control (optional)
Press SRC as often as necessary in order to switch between the different operating modes for radio, tape player, CD changer (optional), AUX (if activated).
The KeyCard anti-theft system
One KeyCard is included with the set.
You can, however, also use a second KeyCard with your set. You can purchase a second KeyCard at any specialised dealership.
Starting up the unit
- Press ON to switch the set on.
With the KeyCard tongue protruding out of its opening, insert the KeyCard into the slot with the contact area facing up. Make sure that the KeyCard is inserted properly.
The car radio is now ready to operate.
If a KeyCard which does not belong to the set is inserted, KEYCARD ERROR will appear in the display. Do not attempt to use the equipment in this case.
After approximately 10 seconds the unit will switch off automatically.
If you insert any other type of card (e.g. telephone or credit card) into the slot, the display will indicate THIS IS NO KEYCARD for approximately 2 seconds.
Remove the incorrect card and insert the correct KeyCard into the unit.
Following KEYCARD ERROR or THIS IS NO KEYCARD
- press ON to switch the unit on.

Removing the KeyCard
- Press the KeyCard tongue.
The KeyCard can now be removed. - Pull the KeyCard out of the slot.
"Training" the second KeyCard / replacing the KeyCard
A KeyCard can be "trained" as an additional KeyCard if the unit is still being operated with the original KeyCard.
If you want to "train" a second KeyCard:
- insert the original KeyCard and switch the unit on.
- Press S for approximately 1 second. DSC-MAIN MENU will appear in the display header.
- Select the following functions one after the other: KEYCARD (playback will be set to mute) and ▶ LEARN KO.
PLEASE CHANGE CARD will appear in the display.
- Remove the original KeyCard and insert the new KeyCard. LEARNING READY will then appear in the display, the new KeyCard is now "trained".
The new KeyCard can now be used to operate the set. This car radio will not accept more than two KeyCards.
When trying to "train" a third KeyCard, the KeyCard which was not used in the "training" process will automatically become invalid.


Displaying the radio pass data
After inserting the original KeyCard, you can have the radio pass data such as the model name, the product number (7 6...) and the serial number shown in the display.
- Insert the original KeyCard and switch the unit on.
- Press S for approximately 1 second. DSC-MAIN MENU will appear in the display header.
- Select the following functions one after the other: ▶ KEYCARD and ▶ READ KC.
The radio pass data will appear in the display. If the data does not appear in the display, then a replacement KeyCard or an incorrect (WRONG) KeyCard has been inserted.
- Press EXIT ◀ (repeatedly if necessary) to exit the menu.
Short Additional Memory (S.A.M)
Using the second KeyCard which can be purchased at any specialised dealership, you can program a short text by selecting the DSC menu item READ KC. This text might be the telephone number of a car repair service or the emergency call number of your auto club.
Any specialised dealer with the proper equipment can program the desired text with up to a maximum of 54 characters onto the KeyCard.
Turn On Message (T.O.M.)
Using the second KeyCard which can be purchased at any specialised dealership, you can program the unit to display a selected "Turn On Message" after the set is switched on.
Any specialised dealer with the proper equipment can program the desired text with up to a maximum of 48 characters onto the KeyCard.
Each time you switch on your car radio using the second KeyCard, this text will appear in the display.


Optical indication of anti-theft protection
Flashing KeyCard tongue
When the radio has been switched off and the KeyCard removed, the KeyCard tongue can be programmed to flash as a warning to thieves.
The following requirements must be fulfilled for this to function correctly:
The positive power supply line and the permanent +12 V lead must be connected properly, as described in the installation instructions.
In the DSC mode, the LED setting must be switched to "LED ON".
If necessary, please refer to the section on "Programming with DSC – VARIOUS, KC LED".
Switching off the flashing light
The flashing light can be switched off by pushing in the KeyCard tongue to lock it. Before inserting the KeyCard, make sure that the KeyCard tongue is in the out position.
If you would like to deactivate the flashing tongue permanently, switch the LED setting to "LED OFF" in the DSC menu.
For further information, read the section on "Programming with DSC – VARIOUS, KC LED".
Taking care of your KeyCard
In order to ensure that the KeyCard always functions correctly, it is important for the contacts to be free from any foreign particles. Avoid direct skin contact.
If necessary, clean the KeyCard contacts using a cotton swab dipped in alcohol.
Detailed operating instructions
First-time installation
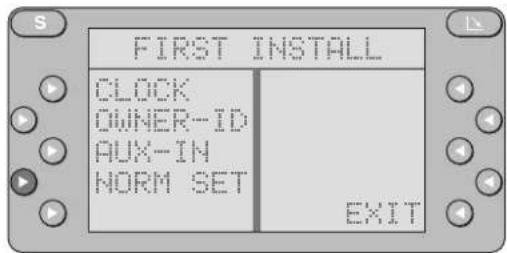
If the set is switched on for the first time or after the power supply has been disconnected, FIRST INSTALL will appear in the display header.
Using this menu you can adjust the following settings:
▶ CLOCK Set the clock
▶ OWNER-ID Enter proof of ownership
▶ AUX-IN Activate AUX / Enter name of auxiliary equipment
▶ NORM SET Reset to original factory settings
Press EXIT ◀ to exit the menu.
You can activate this menu if you switch the radio off, then press down S and hold it while you switch the set on again.
Setting the clock
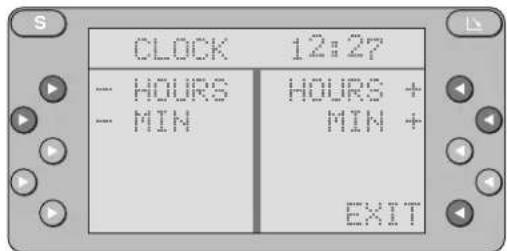
- Press ▶ CLOCK. The current time will appear in the display header.
- Press ▶ - HOURS / HOURS + ◀ to alter the hours and ▶ - MIN / MIN + ◀ to alter the minutes.
When you have completed the setting,
- press EXIT
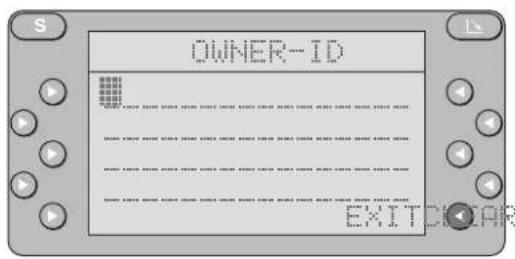
Entering OWNER ID
On four lines (max. 64 characters) you can enter information as proof of ownership.
- Press ▶ OWNER-ID. OWNER-ID will appear in the display header.
- Press ∧/V to select the characters.


- Press << / >> to select the entry position. If you are at one of the end positions (first or last character), you can move directly to the opposite end position by pressing << / >>.
Press ▶ / ◀n order to select the line.
Press ▶ CLEAR to delete the entire entry.
Press EXIT ◀ to exit the menu. The last setting will be stored automatically.
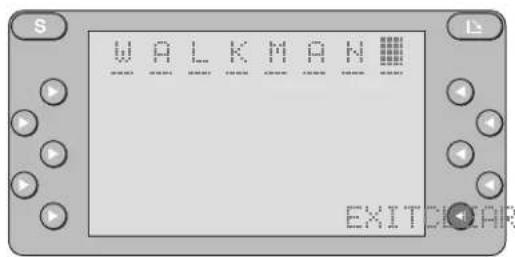
Activating AUX / Entering the name of the auxiliary equipment
If you want to operate an additional piece of equipment, you must activate the AUX setting first. You can enter any name (max. 8 characters) for this equipment.
- Press ▶ AUX-IN.
- Press ▶ AUX. The function is activated when AUX is highlighted. AUX can now also be selected with the RC 07 remote control.
- Press ▶ AUX-NAME and enter the name of the auxiliary equipment, such as Walkman.
- Press / to select the characters.
- Press << / >> to select the entry position.
Press ▶ CLEAR to delete the entire entry.
Press EXIT ◀ to exit the menu. The last setting will be stored automatically.

Resetting to original factory settings
Using NORM SET you can return all of the altered settings except for the current time to the original factory settings.
Warning!
You will delete all of the adjusted settings such as DSC, OWNER-ID, equalizer settings, preference tables, etc.
If you want to reset all of the altered settings to the original factory settings,
- press ▶ NORM_SET for approximately 4 seconds. The following message will appear in the display:
PLEASE WAIT.
ALL ADJUSTMENTS ARE SET TO DEFAULT VALUES.
As soon as the FIRST INSTALL menu appears in the display, the settings have all been returned to the original factory settings.
Press EXIT ◀ to exit the menu.

Radio operation with RDS (Radio Data System)
This radio is equipped to receive the following wavebands: FM, MW and LW.
In combination with the two FM tuners, the Radio Data System guarantees excellent reception quality and more convenience when listening to the radio.
RDS functions such as station recognition, including a regional identifier, and the display of the station name have become standard features. Using PTY (programme type identification) you can select which type of programme, e.g. news, sports, light classical music, etc., you would like to listen to. However, the PTY signal is not yet broadcast by all radio stations.
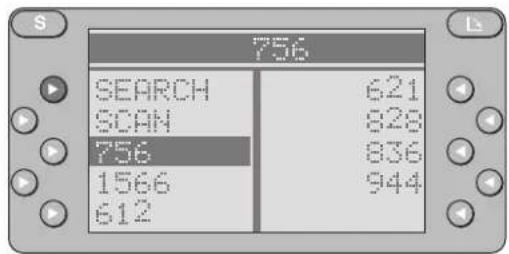
During FM operation, the station names in the reception table indicate which stations you can tune into. Stations which do not transmit an RDS signal are listed at the bottom of the table along with their frequencies.
The display header indicates the current status.
You can use the softkeys to select the corresponding stations directly.
It is possible to store a preference table (memory table) for each of the wave-bands. These tables will display the stations you have stored.
Switching to the radio mode
- Press TU (tuner). The TU main menu will appear in the display (radio menu). The display will indicate the status selected last.
Selecting the waveband
You must have the TU main menu in the display.
- Press TU once or repeatedly as necessary.
- Select the desired waveband with the corresponding softkey, e.g. select ▶FM.
The display will now show the reception table, i.e. all of the stations within reception range will be displayed for this waveband.

Switching from the reception table to the preference table
During FM reception, you can choose whether you want to display the reception table including all of the stations currently within reception range or the preference menu with all of the stations you have previously stored.
The display header will be highlighted in the preference menu.
During MW or LW reception, it is only possible to display the preference menu.
In order for this function to operate properly, it is necessary to store stations first. Otherwise, the search menu will appear for MW and LW reception and the reception table for FM reception.
Switching from one table to the other
- Press << or >>.
Scrolling in the table
The table may consist of several pages.
To scroll through the entries:
- press ∧ or ∨
Selecting a station ...
The display header will indicate the station name or, if the set does not receive an RDS signal, the station frequency of the station currently playing.
There are several different ways of selecting a station:
... from the reception or preference table
- When listening to an FM station, select the desired table by pressing << />>.
- Select the station by pressing ▶ or ◀
The station name or the frequency will appear in the display header.


Note:
If a station is displayed but crossed out in the preference menu, this means that either the reception is very poor or that the station could not be clearly identified as the one stored.
Stations on the same frequency which do not transmit an RDS signal cannot be clearly differentiated from one another.
... by station search or manually
You must select the station search menu first.
You can switch from the reception or preference table
• by pressing SEARCH.
The search menu has been selected when SCAN appears in the upper left corner of the display.
Start the station search function by pressing
• ∧ (up) or ∨(down).
The station search will stop at the next station within reception range.
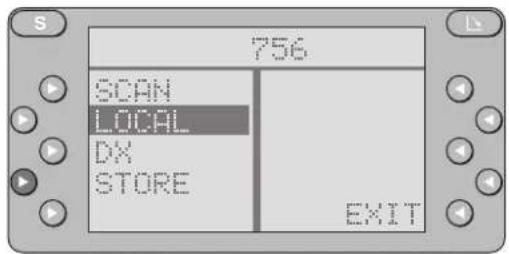
The station search sensitivity selected LOCAL or DX (distant) will be highlighted in the display.
- You can toggle between the two levels of station search sensitivity by pressing the corresponding softkey ▶.
The station search sensitivity can be set separately for LOCAL and DX. For more information refer to the section on "Programming with DSC – TUNER, S-LO or S-DX".
If you hold down ∧, the station search will run forwards or backwards quickly.
Start the manual station search by pressing << or >>, the frequency will move up or down in increments.
If you hold << or >> down, then the frequencies will run through quickly.


... with SCAN
The SCAN feature will briefly play all of the stations listed in the table displayed.
FM SCAN
If the reception table is displayed, all of the FM stations within reception range will be scanned.
If the preference table is displayed (display header highlighted), all of the stored FM stations will be scanned.
Start SCAN:
- Press ▶ SCAN.
The display will indicate the station name, or if no RDS signal is received, the frequency of the station being scanned. SCAN will appear in the display header.
End SCAN:
- Press EXIT, the last station scanned will begin normal play.
MW/LW SCAN
If the preference table is displayed (display header highlighted), all of the stored stations will be scanned.
In the SEARCH menu it is possible to scan all of the stations currently within reception range.
Select the corresponding menu.
Select preference table:
Select SEARCH menu:
- Press TU, ▶ MW or ▶ LW, SEARCH
If no stations have been stored on the MW waveband it is not possible to select SEARCH. SCAN can only be used in the SEARCH menu.
Start SCAN:
- Press ▶ SCAN.
If no station is selected during the scanning process then the station that was selected originally will be played.
End SCAN:
- Press EXIT, the last station scanned will begin normal play.
Storing stations
FM stations
Up to 16 FM stations from the reception table can be stored in the preference table.
Select reception table to store stations:
- Press TU and ▶FM one after the other, the display header should not be highlighted, if it is, switch by pressing << or >>.
The stations within reception range will appear in the display.
Store selected station:
- Press o▶ for the station you wish to store, e.g. NDR 2, for approximately 1 second until you hear a beep.
This station will be stored in the preference table. The stations will appear in the order in which they are stored.
You will hear a double beep when the table is full. Then you have already stored 16 FM stations.


Storing MW/LW stations
Up to 8 MW stations from the search menu can be stored in the preference table. 8 LW stations have already been stored in the preference table.
Select search menu to store stations:
- Press TU, ▶ MW or ▶ LW, ▶ SEARCH
If no stations have been stored on the MW waveband it is not possible to select SEARCH.
Select station with search or manually:
- Station search (up) or (down).
- manually >> (up) or << (down).
The station currently received will appear in the display header.
Store selected station:
- Press STORE for approximately 1 second until you hear a beep. STORE will disappear from the display when 8 stations have been stored.
Deleting stored station:
- Select preference table.
- Press ▶ or ◀ for the station you wish to delete for approximately 4 seconds, until you hear a beep.
This station will be deleted.
RDS information (RDS - Radio Data System)
RDS offers you more convenience when listening to FM radio. Most radio stations now transmit RDS information along with their regular programming. RDS offers you a number of interesting advantages:
Station name
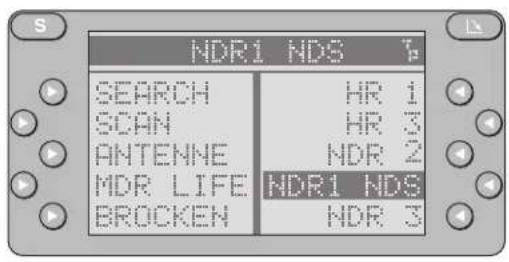
If it is possible to identify a station, the station name including a regional identifier, if applicable, will appear in the display, for example, NDR1 NDS (regional programme in Lower Saxony, Germany).
Alternative frequency
If a station has been identified as an RDS station, the radio will automatically select the frequency with the best reception for the station selected.
This means that you can drive all through northern Germany, for example, after selecting the station (e.g. NDR 2) you wish to listen to only once. You will hear this station in the best possible reception quality the entire time without having to adjust your set.
If you leave the reception area for the station selected - you will notice a considerable decrease in reception quality - we recommend that you tune into a different station.
A station which is not currently within your reception range will appear crossed out in the preference table.
This station will be deleted from the reception table as soon as it is no longer within the radio's reception range.

REG – Regional programmes
At certain times of the day or on a permanent basis, certain radio stations divide their FM programmes into different regional programmes providing local information.
You can select these regional programmes directly from the reception or preference table.
If you are listening to a regional programme and wish to continue doing so then REGIONAL must be highlighted in the radio's main menu.
If the regional programme function has been activated, the radio optimises the reception only for the selected regional programme. If the radio cannot find an alternative frequency offering better better reception of the regional programme, the selected programme will continue to play even if the reception quality deteriorates.
Switching the regional programme function on/off
To switch the regional programme function on/off, you must activate the main radio menu. Depending on the situation
- press TU once or twice until FM is highlighted in the display.
If REGIONAL is highlighted as well, the regional programme function has also been activated.
To switch the regional programme function on/off,
- press REGIONAL ◀ briefly.
Selecting a regional radio station
If the regional programme function has been activated, a regional radio station will be displayed in the display header of the main radio menu as: NDR 1 NDS REG-E, for example.


REG indicates that the regional programme function is switched on. The letter following (A to L is possible) indicates which regional programme has been selected.
If you are currently somewhere where several different versions of the regional station are within reception range then you can select another alternative.
- Briefly press the softkey for the station selected.
If there are no alternative stations within reception range there will be no change.
PTY – Programme type
PTY is an RDS service now being offered by an increasing number of radio stations.
This feature allows you to select FM stations according to the type of programme they broadcast. After you have chosen the type of programme you wish to listen to, you can select the corresponding stations directly by pressing the softkeys.
Switching the PTY menu on/off
You can activate the PTY menu in the main radio menu.
Call up the main radio menu by
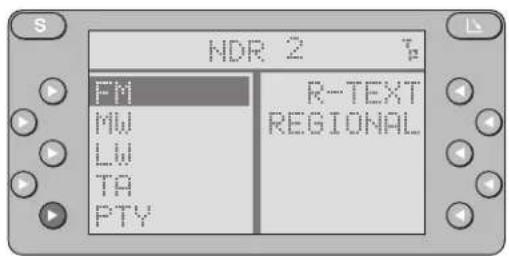
- pressing TU. F# will be highlighted in the display.
To switch on:
- Press ▶ PTY.
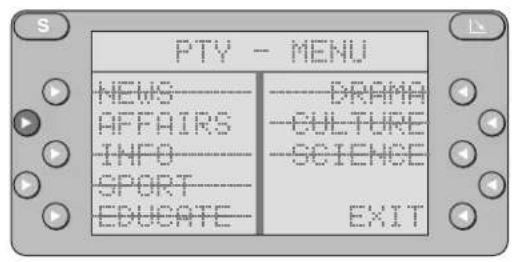
The programme types will appear in the display.
Press EXIT ◀to exit the menu.

Programme type
Use the softkeys ▶ or ▶ to select the programme type, use or ^to "turn" to the next page.
You can use DSC to switch the language to German, English or French (refer to "Programming with DSC – TUNER, PTY LANG").
All of the programme types listed below are available.
The letters printed in bold are identical to the actual PTY display.
NEWS
CURRENT AFFAIRS
INFORMATION
SPORT
EDUCATE
DRAMA
CULTURE
SCIENCE
VARIED
POP MUSIC
ROCK MUSIC
M.O.R. M (middle of the road music)
LIGHT M (light classical)
CLASSICS (serious classical)
OTHER M (other music)
PTY 16 to PTY 30 have not yet been assigned.

Switching PTY on / Selecting the programme type
You can activate the PTY menu in the main radio menu. In the PTY menu you can select the programme type.
- Press TU. FM will be highlighted in the display.
- Press ▶ PTY.
The programme types will appear in the display.
Any programme types which are crossed out on the list are not currently available. If any of the 30 different types of programmes are listed, then
- press on in order to "turn" to the next page.
- Select the programme type by pressing ▶ or ◀
All radio stations which are currently broadcasting the programme type selected will appear in the display.
- Select the station by pressing ▶ or ◀
You will receive this station in the selected programme type.
A programme type which is not currently available (crossed out in the display) can be selected anyway.
If this type of programme should then become available within the station chain, the radio will switch to it automatically provided that ACTIVATE is highlighted (is switched on). If necessary,
- press ACTIVATE
As soon as this programme can no longer be received, the radio will switch back to the previous station.
If you would like to switch this function off (deactivate),
- press DEACT in the PTY menu.
If there are no stations available in the programme type selected, the station table for this programme type will remain blank if selected.


Giving radio stations a name
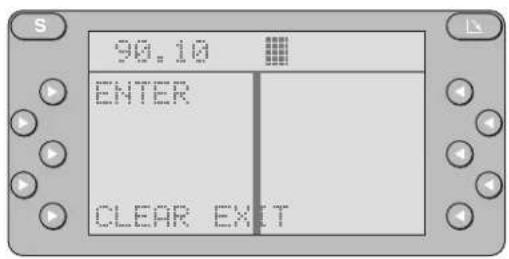
If only the frequency of a radio station is displayed, it is possible to give this station a name with up to 8 characters. It is not possible to name RDS stations which already have a station name.
Start entry:
- Press S for approximately 1 second. DSC-MAIN MENU will appear in the display header.
- Select ▶ TUNER, ▶ ST NAME, ▶ NAMING one after the other. The station frequency and the first entry position (highlighted) will appear in the display header.
- Select the desired character by pressing ∧/∨.
- Select the entry position by pressing << / >>.
In this way you can enter up to 8 characters.
Press ▶ CLEAR to delete the entire entry.
End entry:
- Press EXIT ◀. The entry will be stored automatically.
You can alter the name by entering other characters and storing them (overwrite).
Traffic message reception with RDS-EON
The abbreviation "EON" stands for Enhanced Other Networks, meaning the exchange of information within a radio network.
Many FM radio stations offer traffic messages for their service area at regular intervals.
In addition to their programmes, all traffic programme stations transmit a special carrier signal which is decoded by your car radio. If this signal is identified, TP (traffic programme) or TH (traffic announcement priority) will appear in the display.
There are also stations which do not actually transmit traffic programmes themselves, but by using RDS-EON it is possible for them to receive the traffic messages broadcast by another traffic programme station in the same radio network.
If you want traffic announcements to have priority while you are listening to one of these stations (e.g. NDR3), TA must appear in the display panel.
If a traffic announcement is broadcast, the radio will automatically switch to the linked traffic programme station (in this case, NDR2) for the duration of the message and return to the original programme (NDR3) afterwards.
Switching traffic announcement priority on/off
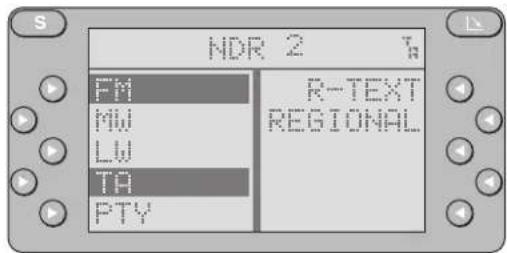
If you are tuned into a traffic programme station, T ^R will light up in the upper right corner of the display if the traffic priority is activated or TP if it has been switched off.
You can switch the priority on or off in the main radio menu.
Depending on the situation, call up the main radio menu
- by pressing MENU ←, EXIT ← or TU. FM will be highlighted in the display. If TH is highlighted as well, the priority is switched on.


Switching the priority on/off:
- Press ▶ TA.
Interrupting a traffic message when it is being broadcast:
Press EXIT ◀ or SRC on the remote control during the message. This interrupts the priority for this message only.
The set will then switch back to the previous mode of operation. The recording of this message in the TIM memory will only be interrupted if the message was switched through by EON.
The priority for other traffic messages will remain active.
If you press ▶H OFF you will switch off the priority status for traffic messages.
Warning beep
Situation: The priority for traffic messages is activated, TH is lit up in the display. If you select a radio station which does not broadcast traffic announcements or leave the reception area of the traffic programme station you are currently tuned into, TH will disappear from the display and you will hear a warning beep approximately every 30 seconds.
This beep indicates that not all of the traffic message functions are activated.
Switching the warning beep off
Tune into another station which broadcasts traffic information or switch off the priority for traffic announcements in the main radio menu by pressing TA.
Automatic start of station search
(when operating the tape or optional CD player)
When you leave the reception area of the traffic programme station you are tuned into while listening to a tape or a CD, the system will automatically start searching for a new TA programme.

If no such station is found within approximately 30 seconds, you will hear a warning beep every 30 seconds. Switch the warning beep off as described above.
Adjusting the volume for traffic announcements
This volume was preset at the factory, though you can alter the value using the DSC function (see "Programming with DSC – TUNER, TA VOL").
Adjusting the sound stage for traffic messages and TIM
You can adjust the treble, bass, balance and fader settings separately for both traffic announcements and TIM.
It is, for example, possible to have only the front left (or right) speaker transmit the traffic messages.
This provides the driver with the important traffic information without unnecessarily bothering the passengers in the vehicle.
To alter the setting:
During an announcement
- press S briefly.
- Select the settings you wish to adjust by pressing the corresponding key, e.g. treble.
- Press << / >> or / to adjust the sound as you wish to hear it for future traffic messages.
The last setting made will be stored automatically. 8 seconds after the last setting is made, the unit will switch back to the previous menu. You can return to the previous menu immediately by
- pressing EXIT

Traffic Memo (TIM)
This set is equipped with a digital speech memory which can automatically record up to four traffic messages lasting a maximum of four minutes.
As soon as TP appears in the display, the system will record all incoming traffic messages broadcast by the station when the radio is switched on.
If the priority for traffic announcements is activated (TA shown in the display panel), the set will also record the messages broadcast by the traffic station of the same programme network (see also "Traffic message reception with RDS-EON").
If "TIM ACTIVE" appears briefly in the display when the radio is switched off, the TIM standby mode is active. In this case the radio will record the traffic information broadcast for 90 minutes before and after the programmed TIM times even if it is switched off.
The radio will also record the traffic messages broadcast by the last station it was tuned into for three hours after the set has been switched off.
Depending on the length of the new message, the oldest messages will be deleted automatically.
If a message is longer than four minutes, "OVERFLOW" will appear in the display header for 2 seconds after you have activated TIM to indicate that the system was unable to record the message in full.
⚠ Warning
Your motor antenna may be damaged in a car wash
If your vehicle is equipped with a motor antenna, then please be sure to read the important warning note at the end of this section.

Setting the exact time
TIM needs the exact time in order to operate precisely. Note that the clock also has to be reset after any interruption in the power supply. If the time display is highlighted there has been an interruption in the power supply. When you switch the radio on, the FIRST INSTALL menu will appear automatically.
Setting the clock following an interruption in the power supply
- Press ▶ CLOCK and the time will be appear in the display header.
To set the clock
- alter the hours by pressing -→HOURS / HOURS + and the minutes by pressing ▶ - MIN / MIN + ◀ When you have completed resetting the clock
- press EXIT ◀. Return to the previous menu by way of the FIRST INSTALL menu.
Displaying the time
The time will appear in the display header if you
- press S briefly.
Correcting the time
The clock can be reset in the FIRST INSTALL menu and in the DSC-MAIN MENU.
If necessary, call up one of these menus and set the exact time.
Using the FIRST INSTALL menu
- Switch the unit off.
- Press S (and hold it down) and switch the unit back on. The FIRST INSTALL menu will appear in the display.
- Select ▶ CLOCK and set the correct time.

Using the DSC MAIN MENU
- Press S for approximately 1 second. DSC-MAIN MENU will appear in the display header.
- Press ▶ VARIOUS, ▶ CLOCK one after the other and set the correct time.
Programming the TIM standby mode / TIM times
You can programme two TIM times (TIMER 1 and TIMER 2).
For example, TIMER 1 could be for the time that you leave home in the morning, TIMER 2 for the time that you drive home after work.
The TIM times to be programmed should correspond to the approximate times of departure. The radio will then record the traffic information broadcast for 90 minutes before - and after - this time, i.e. lasting a total of three hours.
Attention: During this period, a motor antenna will remain fully extended. Be sure to read the important warning note at the end of this section.

The motor antenna
will remain fully extended.
Calling up the TIM menu:
- Press TIM for approximately 1 second. The TIM menu will appear in the display. You can set the TIM times.

Checking TIM times:
The TIM time of the timer marked by a highlighter bar will appear in the display header.
If you want to see the time set for the other timer,
- press the corresponding key o▶.
Setting TIM times:
You can set the TIM times for TIMER 1 and TIMER 2 in the TIM menu. The timer which you can programme will be highlighted. TIMER will appear in the display header along with the preset time.
- Select ▶ TIMER 1 or TIMER 2 ◀.
- Alter the hours by pressing ▶ - HOURS / HOURS_ ◀ and the minutes by pressing ▶ - MIN / MIN + ◀
Alter the other TIM time if necessary. After completing the settings, exit the TIM menu by
- pressing EXIT
Recalling stored traffic messages
- Press TIM briefly or press SRC on the remote control for approximately 1 second.
The display will indicate the recorded traffic messages T1 to T4 with each of the corresponding recording times.
The messages will be played back automatically, starting with T4, T3, T2 and T1, depending on how many messages have been recorded. If no messages have been recorded, NO TIM MESSAGE will appear in the display panel.
Calling up specific messages:
You can call up any of the individual messages by
- pressing the corresponding key ▶.


Fast forward or reverse in a message:
Press and hold down ◀ CUE or ◀ REVIEW and you will be able to hear the message as it is fast forwarded or reversed.
End playback:
Playback will stop automatically after T1 has been played.
You can end the playback immediately by
- pressing TIM, EXIT ◀ or SRC on the remote control.
TIM standby mode while the radio is switched off
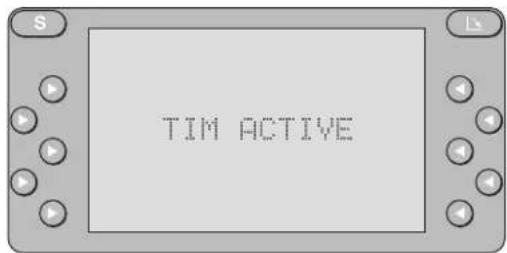
The TIM standby mode is active if the display shows TIM ACTIVE after the radio has been switched off.
In this case the radio will record all traffic bulletins broadcast by the tuned in station for three hours after the set has been switched off.
During this period a motor antenna will remain fully extended.
The set will also record the traffic information broadcast for 90 minutes before and after the programmed TIM times. During these periods a motor antenna will also remain out.
Switching the TIM standby mode on/off
Automatically:
The TIM standby mode will switch off automatically if the car radio is not turned on within 72 hours.
Switching the set back on re-activates the standby function.

Manually:
Select the TIM menu by
- pressing TIM for approximately 1 second while the radio is switched on.
- Press ▶ACTIVE to switch the TIM standby mode on or off.
If ACTIVE is not highlighted, then the TIM standby mode is switched off.
In this case, a motor antenna will retract when the radio is switched off.
⚠ Warning note
Your motor antenna may be damaged in a car wash
If your vehicle is equipped with a motor antenna, it will remain fully extended if the TIM timer is active when the radio is switched off.
The antenna may also come out inside the car wash even if the set is turned off but the TIM timer active. This can cause serious damage!
Please read the next section for more information on how to interrupt the TIM standby mode temporarily before driving into a car wash.
Temporarily interrupting the TIM standby mode (before driving into a car wash)
- Switch off the radio before driving into the car wash.
If the display switches off immediately, the TIM standby mode is inactive and the motor antenna will retract.
You can now drive into the car wash.
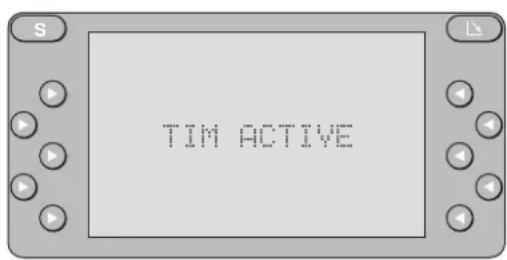
However, if TIM ACTIVE lights up briefly in the display panel when the set is turned off, the TIM standby mode is active.
- Press TIM.
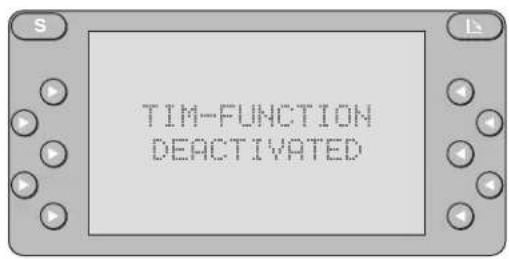
TIM-FUNCTION DEACTIVATED will appear briefly in the display.
The antenna will retract (please check to be sure) and will stay that way until the unit is switched back on.
Now the TIM standby mode is temporarily inactive.
You can drive into the car wash.
The standby function will be automatically re-activated as soon as you switch the radio on again. The motor antenna will then extend.
Warning!
In order to prevent possible damage, do not switch on the radio until after you have left the car wash!
Cassette operation
The car radio must be switched on.
The unit automatically switches to tape operation when a cassette is inserted. If a cassette is already inserted in the tape player you can switch to the tape player mode from any other operating mode by
- pressing CC.
Inserting a tape
- Turn on the set.
- Press ▲. The front panel (operating panel) will open downwards.
- Insert a tape with side 1 or A facing up, the open side facing to the right.
The tape will be transported to the playback position automatically. The display header will indicate which side will start to play.
Removing a tape
- Press . The front panel (operating panel) will open downwards. The cassette will eject.
If the cassette is not removed from the tape player within approximately 15 seconds, it will be transported back into the unit.

Fast forward/Fast rewind


Fast forward

Fast rewind

Select a recorded title (S-CPS) forwards

reverse
Stop the function by pressing the opposite key.
Selecting a recorded title with S-CPS
(Super cassette programme search)
Press ∧ (forwards) / √(reverse) to repeat or skip recorded titles
You can skip over as many as 15 titles.
- Press the rocker switch /^as often as required.
The number of titles to be skipped will appear in the display panel.
If necessary, you can correct your entry by pressing the opposite key.
Stop immediately by pressing PLAY ◀.
For S-CPS to function correctly there has to be an unrecorded tape portion of at least three seconds between the individual titles.

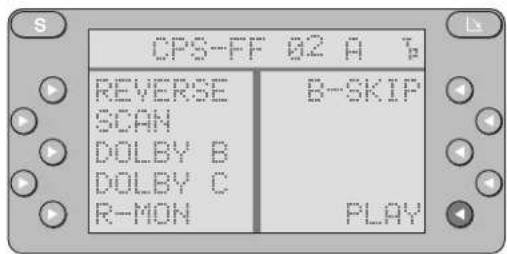
Switching tracks (REVERSE)
To change the tape track during cassette playback:
- Press ▶ REVERSE.
At the end of a track, the tape player will automatically change directions to play the other side of the tape (autoreverse). The display header will indicate PLAY SIDE A or PLAY SIDE B.
Note:
If there is too much tension on the tape during playback, the set may switch over to the opposite track before it has reached the end of the tape side. In this case check the condition of the cassette tape. Sometimes it helps to rewind the tape completely.
Tape equalisation
The tape mechanism is able to recognise which type of tape is playing (ferrous oxide, CrO_2 or metal) and will automatically adjust to the correct setting. This is not indicated in the display.
Scanning cassette titles (SCAN)
Use the scan function to briefly play the cassette titles. If you like a title, stop the scan to continue listening to that song.
To start/stop the scan function:
- Press ▶ SCAN.
You can adjust the scan time to your individual preference in the DSC menu (see "Programming with DSC - SCANTIME").
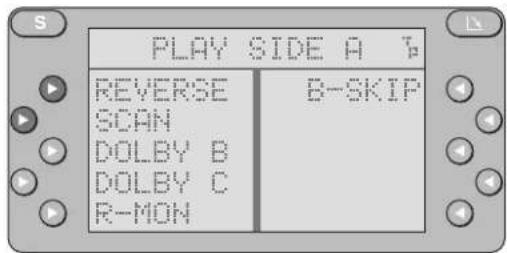
Dolby B·C NR\*
Noise reduction for playing cassette tapes in the best possible quality for the system.
Dolby C-NR is an improvement on the Dolby B-NR system and reduces undesirable noise still further.
Depending on how the tape has been recorded, select the corresponding type of playback:
Dolby B-NR, Dolby C-NR, no Dolby NR.
Press ▶ DOLBY_B or ▶ DOLBY_C to switch from one mode to the other. A highlighter bar will mark the function currently activated in the display. If neither DOLBY B or DOLBY C is highlighted, then the Dolby NR function has been deactivated.
* Noise Reduction system manufactured under license from Dolby Laboratories Licensing Corporation. "Dolby" and the double-D symbol are trademarks of Dolby Laboratories Licensing Corporation.
Listening to the radio during fast tape winding (R-MON = Radio Monitor)
While a tape is fast forwarded or rewound (also with S-CPS), the radio will normally be muted. To listen to the radio during fast winding, switch on R-MON.
To switch R-MON on and off:
- Press ▶ R-MON.
When the function is active, a highlighter bar will mark R-MON in the display.

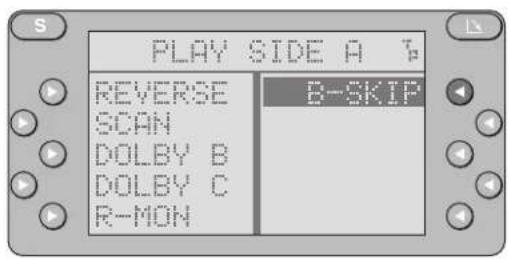
Skipping unrecorded tape portions (B-SKIP = Blank Skip)
If this function has been activated, it will detect any unrecorded tape portion which is longer than 15 seconds. The tape player will automatically fast forward the cassette to the beginning of the next title.
To switch the Blank Skip function on and off:
- Press B▶SKIP.
When the function has been activated, B-SKIP will be highlighted in the display.
Care and maintenance tips
We recommend that you use only C-60/C-90 type cassette tapes in your car tape player. Store your tapes in a cool place away from dirt, dust and temperatures exceeding 50 °C. Allow very cold tapes to warm up before playing them in order to prevent uneven tape transport. After approximately 100 hours of use, dust particles collected on the playback head or roller may lead to problems in transporting the tape and sound distortions.
Use a head cleaning tape to remove normal dirt build-up. For tougher cases, use a cotton swab (Q-Tip) dipped in rubbing alcohol. Never insert hard objects into the tape player.
Note that the front panel will automatically close again after approximately 15 seconds.
CD changer operation (optional)
This car radio offers you convenient control of a Blaupunkt CD changer CDC-F 07.
This changer is not included with the car radio equipment and is available for purchase from any specialised dealer.
Note:
Use only perfectly circular CDs.
CDs manufactured in the shape of a butterfly or a beer mug, for example, are not suitable for use with this equipment.
Using such CDs can very likely result in the destruction of the CD and the CD drive.
We assume no responsibility for damages caused by using unsuitable CDs.
Switching to the CD changer mode
A magazine containing at least one CD must be inserted correctly.
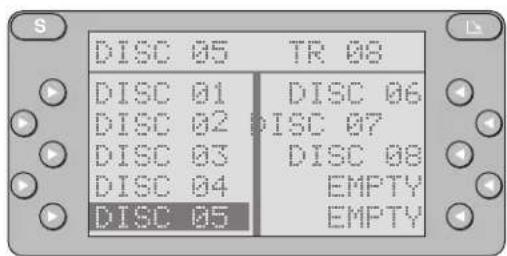
- Press CDC. The display header will indicate the CD and the track number of the song currently playing.
Depending on the situation, the display will indicate
a) the occupied and empty slots in the magazine
b) the changer functions such as MIX, SCAN, REPEAT, TPM, TPM CLR, CDC_NAME, TIME.
To switch
- press CDC.

Selecting a CD and a track
The display header will indicate the current selection.

Selecting a CD
up
<< down
You can also select a CD directly by pressing the corresponding softkey ▶.
Selecting a track
^ up: press briefly.
CUE - fast forward (audible): hold pressed down.
down: press twice or several times in quick succession.
To restart the track currently playing: press once.
REVIEW - fast reverse (audible): hold pressed down.
MIX
CD tracks can also be played back in random order.
Select the menu for the changer functions. If necessary,
- press CDC.
- Press ▶ MIX repeatedly until the function you wish to select appears briefly in the display header.

MIX DISC - The tracks of the selected CD will be played back in random order. The next discs will be selected in numerical order. The tracks on these CDs will be played in random order.
MIX MAG – All of the tracks on all of the CDs in the magazine will be played in random order.
MIX OFF - The mix function has been deactivated. MIX is no longer highlighted in the display. CDs and their tracks will be played in numerical order.
SCAN
Scan the tracks of all of the CDs.
Select the changer functions menu. If necessary,
- press CDC.
Start SCAN:
- Press ▶ SCAN. The function has been activated when a highlighter bar marks SCAN in the display.
The tracks on all of the CDs will be played briefly in ascending order. The scan time can be altered (see "Programming with DSC - VARIOUS, SCANTIME").
End SCAN:
- Press SEAN.
The track scanned last will now play.
The SCAN function will also end if you press
• TU, CC, AUX, S, << / >> or ∨.


Repeat a CD or a track (REPEAT)
You can repeat any CD or track (continuously).
Select the changer functions menu. If necessary,
- press CDC.
- Press ▶ REPEAT until the desired function appears briefly in the display header.
REPEAT TRACK – The track selected will repeat (continuously).
REPEAT DISC - The CD selected will repeat (continuously).
REPEAT OFF - REPEAT has been switched off. REPEAT is no longer highlighted in the display. CDs and tracks will play back in numerical order.
TPM
Track programme memory
To store and play back favourite CD tracks.
It is possible to catalogue up to 99 CDs with a maximum of 20 tracks each.
Select the changer functions menu. If necessary,
- press CDC.
Storing a track with TPM
The TPM function must be switched off (TPM is not highlighted in the display).
If necessary,
- switch TPM on/off by pressing ▶ TPM.
- Select the CD and the track by pressing << / >> and ∧/∨The CD and the track number will appear in the display header.
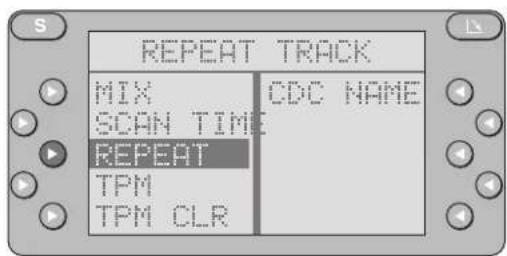
- Press T ^TM until you hear a beep.
The track has been stored. TPM PROGRAMMED will appear in the display header.
Select the next track and store it by pressing ▶TPM etc., as described above.
You can store tracks at any time while they are being played. Both TPM and SCAN must be switched off.
CD playback with TPM
The TPM function must be switched on (TPM appears highlighted in the display).
The tracks stored with TPM will be played in ascending order. Any tracks which have not been stored will be skipped.
If a CD without TPM is selected while TPM is active, then NO TPM ON DISC will appear in the display header. This CD will be played back normally. TPM will be active again for the next CD selected automatically.
Deleting the TPM memory (TPM CLR)
Using TPM CLR (clear) you can delete individual tracks, all of the tracks on one CD, all of the tracks on the magazine currently inserted or all of the magazines.
If the TPM memory is empty, NOT MEMORIZED will appear in the display header.
Select the changer functions menu. If necessary,
- press CDC.
a) Deleting the TPM memory for one track:
- Select the track by pressing ∧/∨.
- Press ▶ TPM_CLR for approximately 1 second. TPM TRACK CLRD will appear in the display header. You will hear a beep at the same time.
This track has been deleted in the TPM memory.
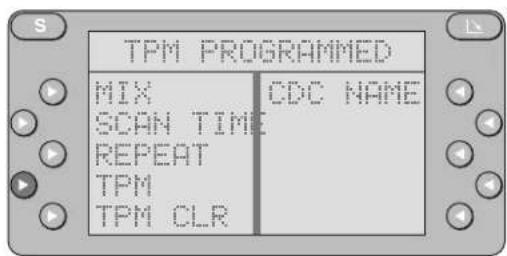


b) Deleting the TPM memory for one CD:
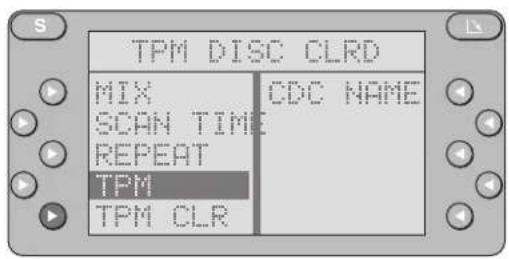
- Press ▶ TPM, CLR for approximately 4 seconds. TPM DISC, CLRD will appear in the display header. You will hear a beep at the same time. This CD has been deleted in the TPM memory.
c) Deleting the TPM memory for all of the magazines:
- Press ▶ TPM, CLR for approximately 8 seconds. TPM MEMO, CLRD will appear in the display header. You will hear a beep at the same time. All of the CDs have been deleted in the TPM memory.
Giving CDs a name (CDC NAME)
You can allocate names to 99 CDs.
Select the changer functions menu. If necessary,
- press CDC.
Start entry:
- Press CDC_NAME ◀ 8 dashes will appear in the display header.
- Press ∧/∨ to select a character.
- Press << / >> to select the entry position.
In this way you can select up to 8 characters.
Press ▶ CLEAR to delete the entry.

Selecting the next CD:
- Press NEXT CD ◀.
Selecting the previous CD:
- Press PREV CD.
Complete the entry:
- Press EXIT. The entry will be stored automatically.
You can alter the name by entering other characters and storing them (overwrite).
Deleting the name of a CD (CDC NAME)
Select the changer functions menu. If necessary,
- press CDC.
- Press << / >> to select the CD whose name you wish to delete.
- Press CDC _□ NAME ◀. The name of the CD will appear in the display header.
- Press CLEAR. The name will be deleted.
Proceed in the same way for all of the CDs whose names you wish to delete.
You can delete the name and the TPM memory of a CD at the same time. If necessary, refer to "Programming with DSC – CD CLEAR".
Complete the entry:
- Press EXIT


Selecting the display mode (TRACK/TIME)
You can select the display mode of the display header for CD playback:
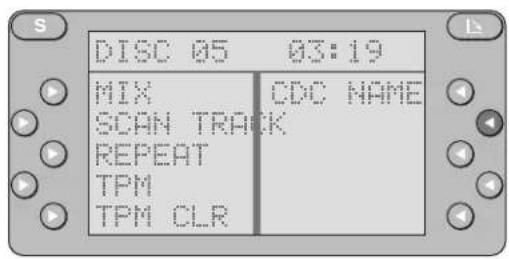
TRACK – the track number, e.g. "TR 10" will appear in the display.
TIME – the time a track has played, e.g. "3:19" will be displayed in minutes.
Switching between display modes:
Select the changer functions menu. If necessary,
- press CDC.
- Press TRACK ◀ or TIME ◀
AUX mode
External equipment can be connected to this stereo system.
a) Any type using AUX-IN, e.g. a Walkman
b) A navigation unit (expected to be available starting mid 1997)
Switching on AUX
AUX must be activated in the FIRST INSTALL menu.
- Press AUX. The AUXILIARY MENU will appear in the display listing all of the additional equipment connected. If AUX has not been activated, NO EXTERNAL SOURCE CONNECTED will appear in the display.
- Select the desired piece of equipment by pressing ▶.
Refer to the operating instructions for the auxiliary equipment for further information.
Audio settings
Bass, treble, balance, fader
You can alter the settings for BASS
TREBLE
BALANCE left/right
FADER front/rear.
BASS and TREBLE can be set individually for every mode of operation (TU, CC, CDC, AUX). If you wish to make any adjustments, select the mode of operation concerned and
- press S briefly.
Press ▶to select the function you wish to alter. The function selected and the currently valid setting will appear in the display header, e.g. TREBLE +5. - Press / Or < / >> to alter the setting as desired.
- Press EXIT ◀ to exit the menu.
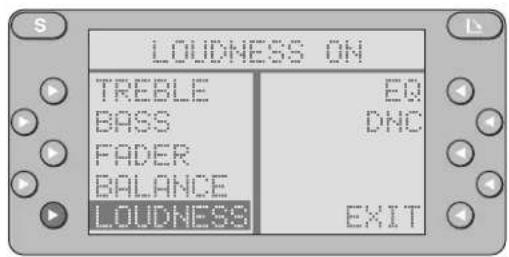
Loudness
Adjusts the low bass frequencies for a more natural sound.
Switching Loudness on/off:
- Press S briefly.
If LOUDNESS is highlighted, this function is active. Switch it off - by pressing ▶ LOUDNESS. The currently selected mode will appear in the display header.
You can adjust the intensity with "Programming with DSC – VARIOUS, LOUDNESS".

DNC – Dynamic Noise Covering
With the help of DNC it is possible to enjoy the same volume while driving that you find pleasant in the stationary vehicle.
The volume is increased at different rates for different frequency bands, depending on the noise in the moving vehicle.
In this way, the volume and the sound balance remain pleasant to the ear, regardless of whether the vehicle noise increases or decreases. Noise of very short duration, e.g. crossing railway tracks, is ignored.
Adjusting DNC
For DNC to operate correctly, it is necessary to first perform a calibration procedure with the help of a microphone. Using the enclosed self-adhesive Velcro tape, install the microphone permanently in the immediate vicinity of the console, but not close to sources of noise such as heating vents and air-conditioning.
The mouth of the microphone must face into the passenger area. Select a quiet area for the calibration and switch the engine off.
- Press S briefly.
- Press ▶ DNC for approximately 1 second. DNC-ADJUST will appear in the display header.
The DNC calibration procedure has begun and will run through automatically.
You can abort the procedure by
- pressing STOP .
As soon as DNC-ADJUST READY appears in the display, the calibration procedure has been completed.

Adjusting DNC sensitivity
You can select three different levels for adjusting the volume: DNC-LEVEL LOW, -MID, -HIGH.
Select DNC-LEVEL LOW if the vehicle is loud and the music has a distinct bass sound.
Select DNC-LEVEL HIGH if the vehicle is quiet and you play a lot of classical music.
Try out the different levels to find out which one you find the most pleasant.
- Press S briefly.
- Then press DNC . The level selected will appear in the display header.
- Alter the level by pressing << / >>. When DNC OFF appears in the display, then the DNC function has been switched off.
Approximately 8 seconds after the last adjustment is made, the system will automatically switch back to the previous display. You can return to this display immediately by pressing EXIT ▶.

EQ (Equalizer)
Equalizer functions
The quality of the stereo playback inside your vehicle is affected by such factors as the vehicle interior (upholstery, windows), the position of the loudspeakers, etc.
Using the integrated equalizer, it is possible to adjust nine frequency bands per channel:
63 Hz, 125 Hz, 250 Hz, 500 Hz, 1 kHz, 2 kHz, 4 kHz, 8 kHz, 16 kHz.
It is possible to store and recall three automatic and one manual equalizer setting on four memories.
Use ▶ EQ OFF to switch off the equalizer.
The following functions are available to provide optimum sound quality:
Automatic equalizer (AUTO-EQ 1 - 3)
(Hi-fi calibration)
The car radio is equipped with a self-adjusting, adaptive 9-band equalizer for four channels.
Three different settings can be stored.
Manual equalizer
Separate equalizer settings can be set manually for the front and the rear.
Hi-fi calibration
You can set and store automatic calibrations for three different situations.
The calibrations are started and called up using the softkey (▶).
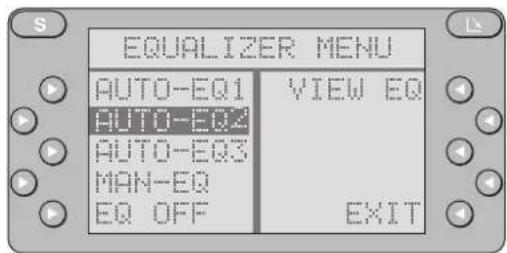
You can select the following settings:
AUTO-EQ1 for the driver alone
AUTO-EQ2 for the driver and front-seat passenger
AUTO-EQ3 for passengers in the front and rear.
Press ▶ EQ OFF to switch off the equalizer (EQ OFF in the display header).
To make the calibration hold the microphone in the corresponding position (do not cover microphone opening).
For setting 1 (driver alone), position the microphone directly at the height of the driver's head. For setting 2, place the microphone between the driver and the passenger on the front seat. For setting 3, place the microphone centrally between the front and rear seats.
Start Hi-fi calibration
During the calibration process it is important that the surroundings are very quiet. Any outside noises will distort the readings.
The loudspeakers should not be blocked by any objects.
The car radio must be switched on.
- Place the microphone in the desired position.
The readings will be distorted if the microphone is placed in an incorrect position.
Depending on the vehicle and the position of the loudspeakers, the calibration can be linear or can boost the bass sounds.
Try the settings to find out which one you prefer.
Use DNC for the preliminary check.
DNC-LEVEL OFF means linear frequency
DNC-LEVEL LOW means slight emphasis on bass sound
DNC-LEVEL MID means medium emphasis on bass sound
DNC-LEVEL HIGH means heavy emphasis on bass sound.
- Press S, EQ ◀ one after the other.
Place the microphone in one of the positions.
- Press the corresponding softkey (AUTO-EQ1 ... AUTO-EQ3) for approximately 1 second.
PLEASE PLACE MICROPHONE 10 ... 9, the countdown has begun. The calibration procedure will run automatically after the countdown.
Make sure that the surroundings are as quiet as possible during the calibration procedure. Press STOP ◀ to abort the calibration if necessary.
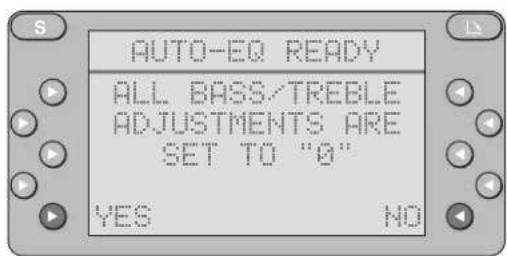
As soon as the calibration procedure has been completed, AUTO-EQ READY ... will appear in the display. The following question will appear in the display: ALL BASS/TREBLE ADJUSTMENTS ARE SET TO "0".
- Press either YES or NO.
The calibration process for this setting has been completed.
Checking/altering Hi-fi calibration
If necessary, you can check or correct the automatic calibration for any of the channels:
- Press S, EQ ◀ one after the other.
- Press the corresponding softkey briefly (AUTO-EQ1 ... AUTO-EQ3). The function selected, e.g. AUTO-EQ2 will be highlighted in the display.
- Press VIEW EQ ◀. VIEW AUTO-EQ 2 will appear in the display header, for example. The display will indicate the equalizer settings for the front left loudspeaker.

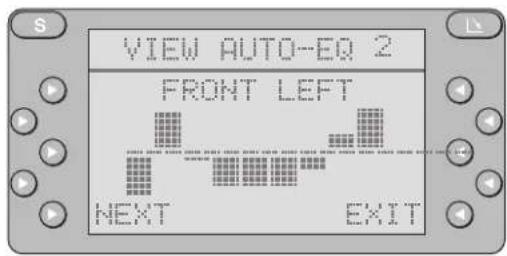
- Press << / >> to select the frequency band you wish to correct, e.g. 1 kHz. The selected frequency band will appear in the bottom line.
- Press ∧/∀to adjust the frequency range as desired.
After completing the adjustments, press ▶ NEXT and adjust the loudspeaker on the front right, rear left and rear right.
If necessary, adjust the other channels as described above.
- Press EXIT ◀ to exit the menu.
During the calibration procedure, loudspeakers should be hooked up to all four connections.
If one of the loudspeakers is not detected during calibration because it is defective, not connected or obstructed, then a linear equalizer control will be done for this loudspeaker pair.
The balance/fader settings can be adjusted in a limited range only.
Calling up the Hi-fi calibration
If you want the playback to function according to the Hi-fi calibration,
- press S, EQ ◀ and the corresponding softkey (AUTO-EQ1 ... AUTO-EQ3) one after the other.

Setting the equalizer manually
If you would rather set the equalizer manually, you can set nine different frequency bands from 63 Hz to 16 kHz for the front and rear loudspeakers separately. In this case,
- press S, EQ ◀ and ▶MAN-EQ if necessary one after the other. MAN-EQ (manual equalizer) must be highlighted.
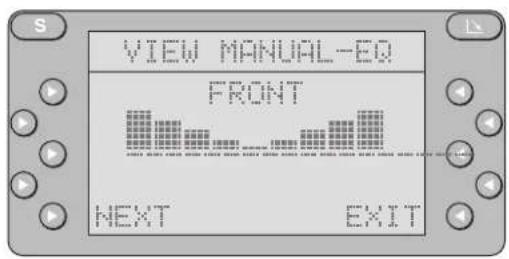
- Press VIEW_EQ ◀ VIEW MANUAL-EQ will appear in the display header. The display will indicate the equalizer setting for the front loudspeakers.
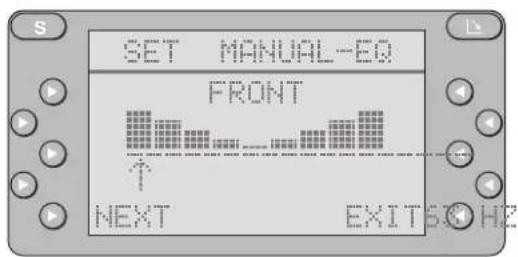
- Select the frequency band by pressing << / >>. The frequency band selected will appear at the bottom of the display.
- Alter the sound level by pressing ∧/∨.
After you have completed the adjustments, press ▶ NEXT. REAR will appear in the display. Adjust the equalizer for the rear loudspeakers.
- Press EXIT to exit the menu.
The last setting will be stored.
Calling up the manual equalizer setting
If you want the playback to take place with the manual equalizer setting,
- press S, EQ ◀ and ▶MAN-EQ if necessary one after the other. MAN-EQ (manual equalizer) must be highlighted.
Programming with DSC
The car radios have been pre-programmed at the factory.
Using the DSC (Direct Software Control) MAIN MENU you can customise certain settings and functions to suit your own personal needs and preferences.
If you wish to alter any of the programming,
- press S for approximately 1 second. DSC-MAIN MENU will appear in the display header.
- Select a sub-menu, e.g. TUNER. A list of the DSC functions which can be altered in the TUNER MENU will appear in the display.
- Adjust the settings by pressing << / >> or ^/VThe new settings will appear in the display header.
▶ TUNER TIM TIME Set TIM times.
Refer to "Traffic Memo (TIM)".
TA VOL Set the volume for traffic messages.
If "VOL +00" is set, the music or radio will play-back at the last volume setting selected.
PTY-LANG Select PTY language: GERMAN, ENGLISH, FRENCH.
SPEECH Sound adjustment for voice programmes
In future many RDS radio stations will differentiate between music and speech programmes.
You can alter the tone for speech programmes from "M/S-LEVEL 0 ... 4".
LEVEL 0:
Music/speech off


LEVEL 1:
Linear reproduction (bass, treble and Loudness set to "0"). Equalizer settings remain the same.
LEVEL 2-4:
Different settings for volume, bass and treble with the Loudness switched off. Equalizer settings remain the same. Try out which SPEECH setting you like most.
ST NAME Appears only during radio operation.
Allocate a name to the radio station (not for RDS stations).
S-LO Set the station search sensitivity for local radio stations
LO 1 - high sensitivity
LO 3 - normal sensitivity
S-DX Set the station search sensitivity for distant radio stations
DX 1 - high sensitivity
DX 3 - normal sensitivity
TABLE Set the size of the station table, depending on the sensitivity
TABLE SIZE 1 -
longest station table (all stations within reception range)
TABLE SIZE 3 -
shortest station table (stations with strong reception signals only)
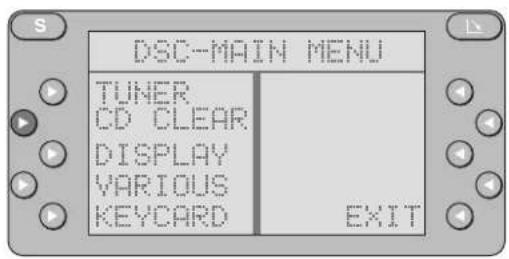
▶ CD CLEAR Appears only when the DSC MAIN MENU is called up while the changer is in operation. It is possible to delete both the name and the TPM title of a CD at the same time. CLEAR - delete PREV CD - select previous CD NEXT CD - select next CD.
▶ DISPLAY COLOUR Adjust the colour of the display. GREEN / ORANGE
ANGLE Set the angle of the display to your individual needs from -3, 0, +3. Choose the best setting.
BRIGHT You can set the brightness of the display from 1 to 15. You can select two different settings for day and night. Selecting the night brightness: Switch on the vehicle lights and programme the brightness setting. The car radio's lighting connector must be hooked up to the vehicle's electric system for this to function properly.
POS/NEG Select whether the characters in the display should appear positively or negatively. ALWAYS POSITIVE - The characters will always appear positively. ALWAYS NEGATIVE - The characters will always appear negatively.

AUTO POS/NEG -
Automatic switch.
When the vehicle lights are switched off, the characters appear positively. When the vehicle lights are switched on, the characters appear negatively.
MENU OFF Menu or selected function display
If MENU OFF is activated (highlighted), the contents of the display header will appear in the large display area 15 seconds after the last setting is adjusted.
▶ VARIOUS CLOCK Setting the time
Press ▶ - HOURS / HOURS + ◀ to alter the hours and ▶ - MIN / MIN + ◀ to alter the minutes.
BEEP Set the volume of the warning beep from 0 to 9 (0 = off).
KC LED You can choose between LED ON and LED OFF.
The KeyCard tongue will flash if LED has been set to ON as an additional warning for the anti-theft system when the radio has been switched off and the KeyCard removed. Set by pressing ▶ KC LED.
LOUDNESS Creates a more natural sound by boosting the low frequency range.
LEVEL 1 = low boost
LEVEL 6 = maximum boost
SCAN TIME Set scan time from 5 to 30 seconds.

VOL FIX Set the volume at which the car radio will play when first switched on. Press << / >> to set the desired volume. If you select "VOL +00" the unit will begin playing at the volume set before it was switched off last.
▶ KEYCARD LEARN KC "Train" a second KeyCard. Refer to the information in the section on "KeyCard anti-theft system - Training second KeyCard" READ KC Read the data stored on the KeyCard. Using the original KeyCard it is possible to display the model name, product and serial number.
Press EXIT ◀to exit the menu.

Muting the audio source while using the car phone
If you operate a car phone in your vehicle, you can have the radio, tape player, CD changer (optional) automatically switch to mute (telephone mute).
PHONE will then appear in the display.
Traffic messages will have priority if TA has been activated (highlighted in the display).
Interrupt the traffic message by pressing EXIT ◀.
During a telephone call you can retrieve stored traffic messages with TIM.
Specifications
Output power: 4 x 23 W RMS power acc. to DIN 45324 at 14.4 V 4 x 35 W max. power
Tuner
Wavebands:
FM : 87.5 - 108 MHz
MW : 531 - 1602 kHz
LW : 153 - 279 kHz
FM sensitivity: 0.9 ∝ V at 26 dB
signal-to-noise ratio
FM frequency response:
30 - 16 000 Hz
Tape player
Frequency response:
25 - 20 000 Hz
Subject to modifications!
Blaupunkt telephone hotline
Address of the next service centre in your vicinity (only for Germany)
If you would like to know the address of the next Blaupunkt service centre of your area without having our service list at hand:
- Find out your area code.
- Then call the following chargeable phone number: 01 80 / 5 25 56 66.
- Using the area code to be entered you will be automatically given the address and phone number of the next Blaupunkt service centre. You can also request this information by fax.


- BLAUPUNKT
- Table of contents
- Traffic safety
- Important information
- Precautions
- Installation
- Car phone
- Accessories
- Remote control:
- Quick reference
- ⑭ KeyCard anti-theft system
- Inserting the KeyCard
- Flashing KeyCard tongue
- SRC
- The KeyCard anti-theft system
- Starting up the unit
- Removing the KeyCard
- "Training" the second KeyCard / replacing the KeyCard
- Displaying the radio pass data
- Short Additional Memory (S.A.M)
- Turn On Message (T.O.M.)
- Optical indication of anti-theft protection
- Switching off the flashing light
- Taking care of your KeyCard
- Detailed operating instructions
- First-time installation
- Setting the clock
- Entering OWNER ID
- Activating AUX / Entering the name of the auxiliary equipment
- Resetting to original factory settings
- Warning!
- Radio operation with RDS (Radio Data System)
- Switching to the radio mode
- Selecting the waveband
- Switching from the reception table to the preference table
- Switching from one table to the other
- Scrolling in the table
- Selecting a station ...
- ... from the reception or preference table
- Note:
- ... by station search or manually
- Start the station search function by pressing
- ... with SCAN
- FM SCAN
- Start SCAN:
- End SCAN:
- MW/LW SCAN
- Storing stations
- FM stations
- Select reception table to store stations:
- Store selected station:
- Storing MW/LW stations
- Select search menu to store stations:
- Select station with search or manually:
- Deleting stored station:
- RDS information (RDS - Radio Data System)
- Station name
- Alternative frequency
- REG – Regional programmes
- Switching the regional programme function on/off
- Selecting a regional radio station
- PTY – Programme type
- Switching the PTY menu on/off
- Programme type
- NEWS
- CURRENT AFFAIRS
- Switching PTY on / Selecting the programme type
- Giving radio stations a name
- Start entry:
- End entry:
- Traffic message reception with RDS-EON
- Switching traffic announcement priority on/off
- Warning beep
- Switching the warning beep off
- Automatic start of station search
- Adjusting the volume for traffic announcements
- Adjusting the sound stage for traffic messages and TIM
- Traffic Memo (TIM)
- ⚠ Warning
- Your motor antenna may be damaged in a car wash
- Setting the exact time
- Setting the clock following an interruption in the power supply
- Displaying the time
- Correcting the time
- Programming the TIM standby mode / TIM times
- Recalling stored traffic messages
- TIM standby mode while the radio is switched off
- Switching the TIM standby mode on/off
- ⚠ Warning note
- Temporarily interrupting the TIM standby mode (before driving into a car wash)
- Cassette operation
- Inserting a tape
- Removing a tape
- Fast forward/Fast rewind
- Selecting a recorded title with S-CPS
- Switching tracks (REVERSE)
- Tape equalisation
- Scanning cassette titles (SCAN)
- Dolby B·C NR\*
- Listening to the radio during fast tape winding (R-MON = Radio Monitor)
- Skipping unrecorded tape portions (B-SKIP = Blank Skip)
- Care and maintenance tips
- CD changer operation (optional)
- Switching to the CD changer mode
- Selecting a CD and a track
- Selecting a track
- MIX
- SCAN
- Repeat a CD or a track (REPEAT)
- TPM
- Storing a track with TPM
- CD playback with TPM
- Deleting the TPM memory (TPM CLR)
- a) Deleting the TPM memory for one track:
- b) Deleting the TPM memory for one CD:
- c) Deleting the TPM memory for all of the magazines:
- Giving CDs a name (CDC NAME)
- Deleting the name of a CD (CDC NAME)
- Selecting the display mode (TRACK/TIME)
- AUX mode
- Switching on AUX
- Audio settings
- Bass, treble, balance, fader
- Loudness
- DNC – Dynamic Noise Covering
- Adjusting DNC
- Adjusting DNC sensitivity
- EQ (Equalizer)
- Equalizer functions
- Automatic equalizer (AUTO-EQ 1 - 3)
- Manual equalizer
- Hi-fi calibration
- Start Hi-fi calibration
- Checking/altering Hi-fi calibration
- Calling up the Hi-fi calibration
- Setting the equalizer manually
- Calling up the manual equalizer setting
- Programming with DSC
- LEVEL 1:
- LEVEL 2-4:
- Muting the audio source while using the car phone
- Specifications
- Tuner
- Tape player
- Blaupunkt telephone hotline
- Address of the next service centre in your vicinity (only for Germany)
Brand : BLAUPUNKT
Model : Bremen RCM 127
Category : Car radio