
TRC 2446 RDS - Car radio BLAUPUNKT - Free user manual and instructions
Find the device manual for free TRC 2446 RDS BLAUPUNKT in PDF.
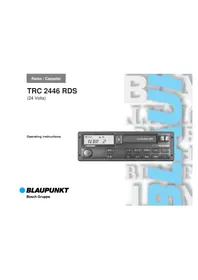


| Product Type | Car Stereo |
| Brand | Blaupunkt |
| Model | TRC 2446 RDS |
| Form Factor | 1 DIN |
| Dimensions (W x H x D) | 178 x 50 x 100 mm |
| Weight | 0.8 kg |
| Power Supply | 12 V DC (negative ground) |
| Max Power Output | 4 x 50 W |
| Tuner Bands | FM / AM |
| RDS Function | Yes (Radio Data System) |
| Disc Playback | CD / CD-R / CD-RW |
| USB Port | Front USB (MP3/WMA playback) |
| AUX Input | 3.5 mm front AUX |
| Bluetooth | No |
| Equalizer | Preset EQ (Rock, Pop, Classic, etc.) |
| Remote Control | Included (IR) |
| Display | LCD, black/white |
| Steering Wheel Control Compatible | Yes (requires adapter) |
| Maintenance | Clean with dry soft cloth; avoid liquids |
| Safety | Use correct fuses; disconnect battery before installation |
| Spare Parts | Contact Blaupunkt service center for parts |
| User Manual | Available for free download at notice-facile.com |
Frequently Asked Questions - TRC 2446 RDS BLAUPUNKT
User questions about TRC 2446 RDS BLAUPUNKT
0 question about this device. Answer the ones you know or ask your own.
Ask a new question about this device
Download the instructions for your Car radio in PDF format for free! Find your manual TRC 2446 RDS - BLAUPUNKT and take your electronic device back in hand. On this page are published all the documents necessary for the use of your device. TRC 2446 RDS by BLAUPUNKT.
USER MANUAL TRC 2446 RDS BLAUPUNKT
Operating instructions


BLAUPUNKT
Bosch Gruppe

- Please take out the "Radio Card" and keep it in a safe place outside of the car.
Contents
Quick reference 16
Important notes 18
Radio operation while driving 18
Anti-theft protection 18
Entry of a wrong code number 18
Switching on security coding.... 19
Re-start following an interruption of the power supply 19
Switching off security coding.... 19
Optical indication for extra security ..... 19
Radio operation 20
Switching the unit on/off 20
Adjusting the volume, tone
and balance 20
Volume 20
Tone 20
Loudness 20
Balance / Fader 20
Automatic centre position 20
Selecting the waveband 20
Selecting FM.... 20
Selecting MW, LW or SW 21
Automatic tuning 21
Manual tuning 21
Selecting the tuning sensitivity ...... 21
Switching from stereo to mono 21
Changing the memory bank 21
Storing stations 22
Storing stations with Travelstore ..... 22
Recalling stored stations 22
Radio scan 22
Receiving traffic information (TI) 23
Switching traffic messages on/off ...... 23
Adjusting the message volume 23
Warning beep.... 23
Switching the warning beep off..... 23
The RDS system
(Radio Data System) 24
Switching RDS on/off 24
REG - regional programme 24
The RDS-EON function.... 24
Tape operation.... 25
Inserting a tape 25
Fast winding 25
Changing the tape direction 25
Removing a tape 25
Switching the audio source 25
Care notes 25
Muting 26
Remote control (option)...... 26
Specifications 26
ISO connector.... 66
Quick reference
① On/off knob
- To switch the unit on and off, press the knob.
- To adjust the volume,
turn the knob as desired.
Higher:

Lower:

② MOD button
- Press the button briefly to switch between BALANCE (volume balance between the left and right channels) and FADER (volume balance between the main speakers and other loudspeakers optionally connected via a separate amplifier). Adjust your preferred settings using the station seek buttons ∧ or ∨.
- To access the MOD menu,
first press the MOD button for 2 seconds, then press it briefly as many times as needed.
Use the ∧ or ∨ button to adjust the functions or values.
The following menus are available:
- CODE ON/OFF: To activate or deactivate the security code.
- LOUDNESS 0 ... 6: To boost the low frequency range when listening at low volume.
- Anti-theft LED ON/OFF: To activate/deactivate the LED warning light.
- Seek tuning sensitivity LOCAL 1 ... 3:
To alter the seek tuning sensitivity for the reception of local stations.
1 = high seek tuning sensitivity 3 = low seek tuning sensitivity
- DISTANCE 1 ... 3:
To alter the seek tuning sensitivity for the reception of distant stations.
1 = high seek tuning sensitivity 3 = low seek tuning sensitivity
③ 2: &button
- Press button briefly to switch between BASS (adjustment of low frequency range) and TREBLE (adjustment of high frequency range). Adjust your favourite settings using the station seek buttons ▲ or ▼
- To reset to neutral values:
- keep button depressed for approximately 2 sec. "RESET" will appear in the display.
④ Anti-theft LED
⑤ Button 1 - 6
- To retrieve a stored station, • press button briefly.
- To store six stations per memory bank U, T and M, L, K. The selected preset position is indicated in the display.
⑥ TI button (Traffic Information)
- To switch traffic programmes on and off. When the TI function is active, the system will play traffic stations only. The announcement volume is boosted.
⑦ M·L·K button
- To select the medium wave frequencies from
531 to 1602 kHz, long wave frequencies from 153 to 279 kHz and short wave frequencies from 5.850 to 6.300 MHz, - press button as many times as required.
⑧ U·T button
- To select the FM range from 87.5 to 108 MHz and switch between the FM memory banks U and T,
- press button briefly. Use the T (Travelstore) bank to store the six most powerful stations of the reception area automatically.
- Keep button depressed for approximately 2 sec.
⑨ SCAN button
- To sample all stations to be received for 8 seconds each. The display then shows SCAN.
⑩ RDS button (Radio Data System)
- To switch RDS on during FM operation,
- Press button briefly. The following RDS functions are available:
- Indication of the programme name in plain text (e.g. NDR 2).
- Automatic searching for a better frequency offering the same programme (alternative frequency).
- RDS-EON – Enhanced Other Networks When listening to a station which does not actually transmit traffic
programmes itself, RDS-EON makes it possible to receive the traffic messages broadcast by another traffic programme station in the same radio network (e.g. from NDR 3 to NDR 2 and backwards). For this it is necessary that the TI function is active as well.
- Switching the REGIONAL function on and off:
- Press button for approximately 2 seconds.
⑪LOC button
- To switch between automatic and manual seek tuning,
- Press button briefly. Display shows MANUAL:
Manual, step-by-step seek tuning. Display shows LOCAL:
Automatic seek tuning with normal sensitivity for reception of local stations.
Display shows DISTANCE:
Automatic seek tuning with high sensitivity for reception of distant stations.
- To switch between mono and stereo reception,
- Press button for approximately 2 seconds and alter setting using ▲ or ▼
⑫ SRC button
- Press button to switch between cassette and radio playback. Be sure that a tape is inserted.
⑬ ^ button
- For seek tuning in upwards direction, either automatically or manually.
- To alter values in the settings menus.
14 button
- For seek tuning in downwards direction, either automatically or manually.
- To alter values in the settings menus.
⑮ <◀◀▶▶, ≈buttons
- Tape drive control buttons:

⑯ Cassette loading slot
⑰ △ button
- To eject the tape.
18 Display
- The display shows you the selected functions, the tuned in frequency and with RDS also the station name.
Radio

Cassette TRACK 1 - Side 1 is being played.
Radio operation while driving
Today's traffic conditions require the full attention of all road users.
Therefore, you should only operate your radio equipment if permits the current traffic situation.
Should the traffic situation become particularly demanding, we advise you not to use the radio.
Always adjust the volume such that you are able to hear any warning signals coming from outside.
Anti-theft protection Important
This unit is supplied with inactive code protection. In order to switch the security coding system on, proceed as described in the following.
If the coding system is active while the power supply to the system is interrupted (e.g. theft or disconnection of the car battery), the set will be electronically blocked. In such a case it can only be made operable again by entering the correct code number given on the Radio Card.
Entry of a wrong code number
It should not be possible for a thief to find out the correct code number by trial and error. This is why the set will be blocked for 10 seconds after a wrong code number has been entered. The display will then show “----”.
After the third unsuccessful attempt, the system will lock for 60 seconds; after further attempts, the waiting time extends to one hour.
After 20 unsuccessful attempts you can no longer re-start the unit.
Notice:
Keep your Radio Card with the code number in a safe place in order to avoid unauthorised access to your radio.
When the security code system is activated,
the unique code must be entered each time the power to the unit was interrupted.
The radio will function again as soon as you have entered the correct code.
If you have forgotten the code number and lost your Radio Card, you will not be able to make the set operable again after an interruption of the power supply.
In such a case contact your dealer.
Switching on security coding
To activate the coding system:
- Turn on the radio.
- Press the MOD button for approximately 2 seconds. The display shows "CODE OFF".
- Then press the ^ button. "CODE ON" appears in the display. The set will automatically switch to radio operation.
Now security coding is switched on. "CODE" will be briefly displayed every time the set is switched on.
Re-start following an interruption of the power supply
(coding system is activated)
- Turn on the radio. The display shows "CODE".
- Press button 1-6. The display shows "0000". The first position is blinking. Now enter the code number given on your Radio Card.
Example: The code number is "5214".
- Press the button five times; the display shows "5000".
- Press button 1-6.
- Press the button twice; the display shows "5200".
- Press button 1-6.
- Press the button once; the display shows "5210".
- Press button 1-6.
- Press the button four times; the display shows "5214".
To confirm the code number:
- Press the MOD button.
Now your unit is ready for operation again. If the display shows four dashes, you have entered a wrong code. Re-enter the correct code after the waiting time ("CODE" will appear in the display).
If you switch off the set while it is blocked, the waiting time will start anew as soon as the radio is turned on again.
Switching off security coding
- Turn on the radio.
- Press the MOD button for approximately 2 seconds. The display shows "CODE ON".
- Then press the button. "CODE" appears in the display.
- Enter the code number given on your Radio Card and confirm; see example "Re-start following...".
Now security coding is switched off.
Optical indication for extra security
When the ignition of your vehicle is switched off, you may let an LED blink for extra security to indicate that your unit is equipped with security coding.
- Press the MOD button for approximately 2 seconds. The display shows "CODE ON" or "CODE OFF".
- Then press the MOD button until either "LED OFF" (LED deactivated) or "LED ON" (LED activated) appears in the display.
- To set the desired function press the or button.
The menu is automatically quit after 8 seconds.
Radio operation
Switching the unit on/off
- Press the OI knob. The system will play back the station selected last or the tape.
The system features an ignition logic making it possible to turn it on and off with the ignition.
Do not press the OI knob on the radio if you wish to turn the system on and off with the ignition!
In addition, the set can also be switched on with the OI button when the ignition is switched off.
The system turns off automatically after approximately 1 hour.
You can turn it on again as often as desired.
Adjusting the volume, tone and balance
Volume
- Turn the OI knob.
Turns up the volume,
Turns down the volume.
Tone
- Press the button to select the BASS or the TREBLE function.
- Adjust the setting to suit your personal preferences using the (+) or (-) button.
BASS/TREB + 8 Highest value
0 Centre setting
- 8 Lowest value
Loudness
The Loudness function creates a more natural sound by boosting the bass frequency range.
To adjust the Loudness,
- press the MOD button for approximately 2 seconds. The display shows "CODE ON" or "CODE OFF".
- Then press the MOD button again. "LOUD" and a number between 0 and 6 appears in the display.
- Press (+) or (-) to adjust the desired value. LOUD 0 Loudness off LOUD 6 max. boost
Balance / Fader
- Press the MOD button to select the BALANCE or FADER function.
- Make the setting using the ∧ (+) or ∨ (-) buttons.
BAL + 8 Playback on right channel
0 Centre position
- 8 Playback on left channel
FADER + 8 Only front speakers
0 Centre position
- 8 Only rear speakers
Notice:
If you hold the ∧ or ∨ button depressed, the value continuously changes in the corresponding direction. The function stops once the centre position is reached. Then press the button again.
After the setting has been made, the menu is automatically quit after 8 seconds.
Automatic centre position
To re-set the bass, treble, balance, fader and loudness to neutral values,
- press the button for approximately 2 seconds. The bass and treble settings are only reset for the audio source currently active (radio or tape).
In contrast to this, the balance, fader and loudness adjustments are re-set to "0" with general effect.
Selecting the waveband
Selecting FM
- Press the U·T button briefly.
The display will show "U" for FM, the "T" memory bank indicator for Travelstore operation and an FM frequency.
Selecting MW, LW or SW
- Press the M·L·K button until the display shows "M" for MW or "L" for LW or "K" for SW and a frequency of the corresponding band.
Automatic tuning
- Depending on the current reception conditions, use the LOC button to switch to LOCAL (normal seek tuning sensitivity) or DISTANCE (high seek tuning sensitivity - "dx" displayed).
DISTANCE
For this, press the LOC button as many times as required.
To tune in a station in upwards direction,
- press the button.
To tune in a station in downwards direction,
- press the button.
Seek tuning will stop as soon as a station has been found.
Manual tuning
- Press the LOC button until the display shows "man" (MANUAL).
MANUAL
To tune in a station in upwards direction,
- press the ^ button.
To tune in a station in downwards direction,
- press the ▼ button.
When holding down the ▲ or ▼ button, the frequency scan is speeded up. If you have found the desired frequency,
- release the button.
Selecting the tuning sensitivity
Since the reception conditions widely differ from country to country, you can fine-adjust the seek tuning sensitivity separately in the LOCAL and DISTANCE modes (FM or LW/MW/SW).
- Select the desired waveband.
- Press the MOD button for approximately 2 seconds.
"CODE ON" or "CODE OFF" appears in the display.
- Then press the MOD button as many times until the display shows "LOCAL" or "DIST" and a number between 1 and 3.

To select the desired degree of sensitivity 1 = high / 3 = low,
- press the or button.
This setting will be stored automatically.
Switching from stereo to mono
If FM reception is poor, you may get better sound quality by switching to mono:
- Press the LOC button for approximately 2 seconds.
STEREO
To switch to mono,
press the button.
"MONO" appears in the display.
To return to stereo reception,
press the button.
If you switch off the set in the mono mode, stereo playback will be activated automatically each time the radio is switched back on.
Changing the memory bank
On FM, you can shift between the memory banks U and T in order to store stations and recall them later. On AM, you can choose between M, L and K for medium-, long- and short-wave stations.
Switch the U·T or M·L·K button until the desired memory bank is displayed.
Storing stations
You can store six stations on each memory bank.
- Select the desired bank by pressing the U·T or M·L·K button.
- Use button 1-6 to choose the preset position for the new station you wish to store.
- Press the button to tune into the desired station (either automatically or manually).
- Hold down the 1-6 button until the radio resumes play after the muting.
Now the station has been stored.
Proceed in the same way to store more stations.
In order to facilitate the storage of further stations, you can tune in the next desired frequency directly after having stored a station and store it on the following preset position automatically by keeping button 1-6 depressed.
The display will show the new preset position.
Notice:
If you tune in a station which has already been stored before, the corresponding pre-set position will briefly flash in the display.
Storing stations with Travelstore
You can let the system automatically store the six most powerful FM stations of your current reception area.
This function is particularly convenient on longer trips.
- Press the U·T button for approximately 2 seconds.
The radio will start searching for the most powerful FM stations and store them on the memory bank "T" (Travelstore). The display shows "UT>>".

When this process has been completed, the radio will play the first station.
If desired, stations can also be stored manually on the Travelstore bank.
Recalling stored stations
To recall a stored station,
Select the FM waveband and one of the memory banks U or T, or adjust the unit to MW, LW, or SW.
Briefly press the 1-6 button repeatedly until the desired preset position appears in the display.
Radio scan
Beginning with the station currently tuned in, you can scan the waveband. The radio will play each station for 8 seconds.
Activate the scan by pressing the SCAN button.
While searching for the next station to be sampled, the display shows "SCAN".
During the actual scanning process, the station frequency or, with RDS stations, the programme station name will be blinking in the display.
If the scanned station has already been stored before, the corresponding preset position will briefly flash in the display.
In order to continue listening to a sampled station or terminate the scan function,
press the SCAN button again.
If no station is selected, the scan function will be automatically switched off after the frequency band has been run through completely. The unit will tune in the station listened to before starting the scan.
Receiving traffic information (TI)
Many FM broadcasters offer traffic messages for their service area at regular intervals. All traffic programme stations transmit a special carrier signal alongside their programmes, which is decoded by your car radio.
Switching traffic messages on/off
To activate the reception of traffic programmes,
- press the TI button.
"TI" will appear in the display.
The system automatically switches to FM. When starting the seek tuning, Travelstore or scan function in the TI mode, the unit will stop at traffic programme stations only.
When a traffic message comes through, the volume will be boosted and the tape drive will stop, if you are listening to a cassette.
When pressing TI while a message is being broadcast, the volume boost and tape stop will be cancelled for this message.
However, the TI function will remain active. To switch off the function,
- press the TI button.
Adjusting the message volume
The playback volume of a traffic message can be adjusted with the volume control while a message is active.
This volume level will be stored and used for all subsequent traffic announcements.
Note that the volume adjusted automatically at the beginning of a message cannot be lower than the audio volume selected before. If you have not stored your own message volume, the system will automatically use a volume level adjusted at the factory.
Warning beep
If you leave the reception area of the traffic programme station currently tuned into, you will hear a warning beep after approximately 30 seconds.
This alarm tone will also be released after 10 seconds when selecting a station which does not offer traffic programmes.
When leaving the reception area of the tuned in traffic programme station while listening to a tape or after having turned down the volume completely, the system will automatically start searching for a new TI programme.
If no such station is found within approximately 60 seconds, tape operation will be stopped and a warning beep will sound.
Switching the warning beep off
To switch off the warning beep,
• deactivate the TI function or - tune in a station offering traffic information.
The RDS system (Radio Data System)
Most FM radio stations broadcast an inaudible RDS data telegram alongside their programmes.
RDS offers you benefits such as the indication of the programme station name or automatic switching to an alternative frequency offering better reception of the same RDS programme.
Due to these benefits we recommend you to take advantage of this service and to switch on RDS.
Switching RDS on/off
To switch the RDS function on or off,
- press the RDS button.
To tune in and store stations on the U or T memory bank proceed as described above.
If you have selected an FM RDS station which can be decoded by the set, the station name will appear on the display panel.

Should the transmitted RDS signal be too weak, the display shows “*U” and the corresponding frequency. If the reception conditions do not improve within approximately 30 seconds, the system will automatically start searching for an alternative frequency.
During this period the display shows "SEARCH".
The search process will be aborted as soon as the system has found a better frequency of the same RDS station.
If there is no such stronger frequency available, the unit will return to the original station.
REG - regional programme
Certain radio programmes are split up at times into regional programmes offering local information. If you are listening to one programme and move to an area where another linked regional programme becomes stronger, the unit will switch to that programme. If you wish to continue listening to the first programme, switch on the regional function:
- Press the RDS button for approximately 2 seconds.
"REG ON" or "REG OFF" appears in the display.

If the display shows "REG OFF", press the RDS button again for 2 seconds.
To deactivate the regional function,
- hold down the RDS button until "REG OFF" appears in the display.
The RDS-EON function
Enhanced Other Networks (available in some countries)
There are also FM stations which do not actually transmit traffic programmes themselves, but by using RDS-EON they offer the possibility to receive the traffic messages broadcast by another traffic programme station in the same radio network.
To activate the RDS-EON function,
- press buttons RDS and TI.
If a traffic announcement is broadcast, the radio will automatically switch to the linked traffic programme station for the duration of the message and return to the original programme afterwards. The name of the transmitting station will appear in the display.
Tape operation
This radio cassette combination is equipped with an autoreverse tape drive.
Inserting a tape
- Turn on the set.
- Insert the tape into the cassette loading slot with side A or 1 facing up and the open side showing to the right.
Tape playback starts in the direction used last. The display shows "TRACK 1" for the A side or "TRACK 2" for the B side of the cassette.

During tape playback you can have the tuned in radio frequency displayed by pressing one of the seek tuning buttons ∧ or ∨ once.
When pressing one of the buttons 1-6, U·T, RDS, M·L·K or ∧ while the frequency is still being displayed, the system will execute the corresponding function.
Tape playback will remain uninterrupted.
Fast winding
Fast forward
- Press the button. At the end of a tape side, the mechanism changes directions automatically to play the other side.
Stopping fast forward operation
- S lightly press the button.
Fast rewind
- Press the button. At the beginning of the tape, the mechanism will automatically start playback.
Stopping fast rewind operation
- Slightly press the ▶ button.
Changing the tape direction
To change the tape direction during cassette playback:
- Press the two buttons ⇄ simultaneously. The display shows you the side currently being played.
Notice:
If there is too much tension on the tape during playback, the set may switch over by itself before having reached the end of the tape side. In this case check the condition of the cassette tape. Sometimes it helps to rewind it completely.
Removing a tape
To eject the tape,
- Fully depress the button and remove the cassette from the slot.
Switching the audio source
Using the SRC button you can switch between radio and tape playback.
- Press SRC button to toggle.
Care notes
To avoid possible problems, you should not use cassette tapes longer than 60 or 90 minutes (C60/C90). Store your tapes in a cool place away from dirt, dust and temperatures exceeding 50 °Celsius. Allow very cold tapes to warm up before playing them in order to avoid uneven tape transport. After approximately 100 hours of use, dust particles collected on the playback head or roller may lead to tape run problems and sound distortions.
Use a head cleaning tape to remove normal dirt build-up. For tougher cases, use a cotton swab (Q-Tip) soaked with alcohol. Never use any metal tools!
Muting
If you are operating a phone or CB unit in your vehicle, you can connect this set to the radio such that the volume will be muted during radio or tape playback when the corresponding piece of equipment is in operation. The display shows "MUTE".
The desired muting volume level can be set with the volume control while muting is active. Choose a value from between 0 and the radio volume adjusted before the muting. This volume value will be stored and used for all subsequent muting actions until it is re-adjusted.
Infrared remote control with the following functions:
- Radio on/off.
- Waveband selection U, T, M, L, S (press briefly).
- Source selection (press longer). • Starting automatic seek tuning.
- Activation of stored stations. • Volume adjustment.
SpecificationsRemote control
Operating voltage : + 24 V
Radio section
Wavebands FM : 87.5 - 108 MHz MW : 531 - 1602 kHz LW : 153 - 279 kHz SW : 5.850 - 6.300 MHz
FM frequency response : 80 Hz - 16 kHz
Amplifier section
RMS output power (into 4 ohms): 2 x 20 W Line output: 2 x 0.3 V
Subject to modifications!


- BLAUPUNKT
- CONTENTS
- QUICK REFERENCE
- ① ON/OFF KNOB
- ② MOD BUTTON
- ③ 2: &BUTTON
- ④ ANTI-THEFT LED
- ⑤ BUTTON
- ⑥ TI BUTTON (TRAFFIC INFORMATION)
- ⑦ M·L·K BUTTON
- ⑧ U·T BUTTON
- ⑨ SCAN BUTTON
- ⑩ RDS BUTTON (RADIO DATA SYSTEM)
- ⑪LOC BUTTON
- DISPLAY SHOWS DISTANCE
- ⑫ SRC BUTTON
- ⑬ ^ BUTTON
- BUTTON
- ⑮
- ⑯ CASSETTE LOADING SLOT
- ⑰ △ BUTTON
- DISPLAY
- RADIO OPERATION WHILE DRIVING
- ANTI-THEFT PROTECTION IMPORTANT
- ENTRY OF A WRONG CODE NUMBER
- NOTICE
- SWITCHING ON SECURITY CODING
- RE-START FOLLOWING AN INTERRUPTION OF THE POWER SUPPLY
- SWITCHING OFF SECURITY CODING
- OPTICAL INDICATION FOR EXTRA SECURITY
- RADIO OPERATION
- SWITCHING THE UNIT ON/OFF
- ADJUSTING THE VOLUME, TONE AND BALANCE
- VOLUME
- TONE
- LOUDNESS
- BALANCE / FADER
- AUTOMATIC CENTRE POSITION
- SELECTING THE WAVEBAND
- SELECTING FM
- SELECTING MW, LW OR SW
- AUTOMATIC TUNING
- DISTANCE
- MANUAL TUNING
- MANUAL
- SELECTING THE TUNING SENSITIVITY
- SWITCHING FROM STEREO TO MONO
- STEREO
- CHANGING THE MEMORY BANK
- STORING STATIONS
- STORING STATIONS WITH TRAVELSTORE
- RECALLING STORED STATIONS
- RADIO SCAN
- RECEIVING TRAFFIC INFORMATION (TI)
- SWITCHING TRAFFIC MESSAGES ON/OFF
- ADJUSTING THE MESSAGE VOLUME
- WARNING BEEP
- SWITCHING THE WARNING BEEP OFF
- THE RDS SYSTEM (RADIO DATA SYSTEM)
- SWITCHING RDS ON/OFF
- REG - REGIONAL PROGRAMME
- THE RDS-EON FUNCTION
- TAPE OPERATION
- INSERTING A TAPE
- FAST WINDING
- FAST FORWARD
- STOPPING FAST FORWARD OPERATION
- FAST REWIND
- STOPPING FAST REWIND OPERATION
- CHANGING THE TAPE DIRECTION
- REMOVING A TAPE
- SWITCHING THE AUDIO SOURCE
- CARE NOTES
- MUTING
- SPECIFICATIONSREMOTE CONTROL
- RADIO SECTION
- AMPLIFIER SECTION
Brand : BLAUPUNKT
Model : TRC 2446 RDS
Category : Car radio