
Rollo Home Control 731005 - Remote control RADEMACHER - Free user manual and instructions
Find the device manual for free Rollo Home Control 731005 RADEMACHER in PDF.


| Product Type | DuoFern Standard Manual Transmitter (Remote Control) |
| Model Numbers | 3248 03 66 (6 groups), 3248 03 61 (1 group) |
| Dimensions (L x W x H) | 140 x 43 x 18 mm |
| Weight | 70 g |
| Power Supply | 3V CR2450 battery |
| Battery Life | Approx. 2 years (5 actuations/day) or 5 years standby |
| Transmission Frequency | 434.5 MHz |
| Transmission Power | 10 mW |
| Range (Free Field) | Approx. 100 m |
| Range (Indoors) | Approx. 30 m (depends on building materials) |
| Max. Number of End Devices | 48 |
| Max. Groups (Model 3248 03 66) | 6 |
| Max. Groups (Model 3248 03 61) | 1 |
| Permissible Ambient Temperature | +5 °C to +40 °C |
| Supported Devices | Roller shutters, blinds, awnings, dimmers, electrical consumers |
| Main Functions | Manual control, registration/deletion of end devices, end point setting, rotational direction reversal, jog mode, purge, reset |
| Indoor Use Only | Yes (dry rooms) |
| CE Mark | Complies with EU directive 1999/5/EC (R&TTE) |
| Warranty | 24 months (see manual for conditions) |
| Included in Box | Remote control, CR2450 battery, manual |
Frequently Asked Questions - Rollo Home Control 731005 RADEMACHER
User questions about Rollo Home Control 731005 RADEMACHER
0 question about this device. Answer the ones you know or ask your own.
Ask a new question about this device
Download the instructions for your Remote control in PDF format for free! Find your manual Rollo Home Control 731005 - RADEMACHER and take your electronic device back in hand. On this page are published all the documents necessary for the use of your device. Rollo Home Control 731005 by RADEMACHER.
USER MANUAL Rollo Home Control 731005 RADEMACHER
EN DuoFern Standard manual transmitter Operating instructions 27
natural_image
White remote control with buttons and a white square (no text or symbols visible)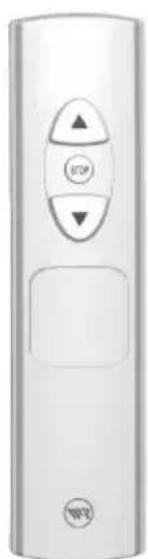
natural_image
White remote control device with three buttons (Up, Down, Left) and a 'WP' mark at the bottom right (no text or symbols on the device itself)natural_image
Simple diagram with a horizontal line and two shaded circles (two filled, one outlined) on a gray background, no text or symbols present.natural_image
Hand holding a screwdriver next to a control panel with circular buttons (no visible text or symbols)natural_image
Hand holding a pen touching a button on an electronic device (no visible text or symbols)natural_image
Hand holding a pen inserted into a device (no visible text or symbols)
natural_image
Simple graphic with a black triangle pointing right and two circles below, no text or symbols present.natural_image
Hand inserting a button into an electronic control panel (no text or symbols visible)
service@rademacher.de
EN DuoFern Standard manual transmitter Operating instructions 27
natural_image
Front view of a silver remote control with buttons and a white body (no visible text or symbols)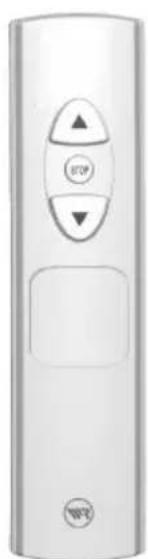
natural_image
White remote control device with three buttons (Up, Down, Left) and a logo at the bottom right corner (no readable text or symbols beyond icons)Item no. 3248 03 66/3248 03 61
VBD 473-2 (05.13)

Dear customer ...
EN
...in purchasing this DuoFern Standard manual transmitter, you have decided on a quality product manufactured by RADEMACHER. We would like to thank you for your confidence.
This manual transmitter has been developed with such aspects as optimum operability and convenience in mind, as well as those of solidity and durability. With uncompromising quality requirements and after an extensive test series phase, we are now proud to present you with this innovative product.
All of our highly qualified staff at RADEMACHER stand behind this product.
These operating instructions...
... describe the installation, the electrical connection and the operation of your manual transmitter.
Please read these instructions completely and observe all of the safety instructions before commencing with the installation. Please keep these instructions in a safe place and include them with the device in the event it changes owners.
The warranty becomes null and void in the event of any damage or loss caused by failure to observe these operating and safety instructions. We accept no liability for any consequential losses or damage resulting from non-observance of these instructions.
i contents
EN
Dear customer ....28
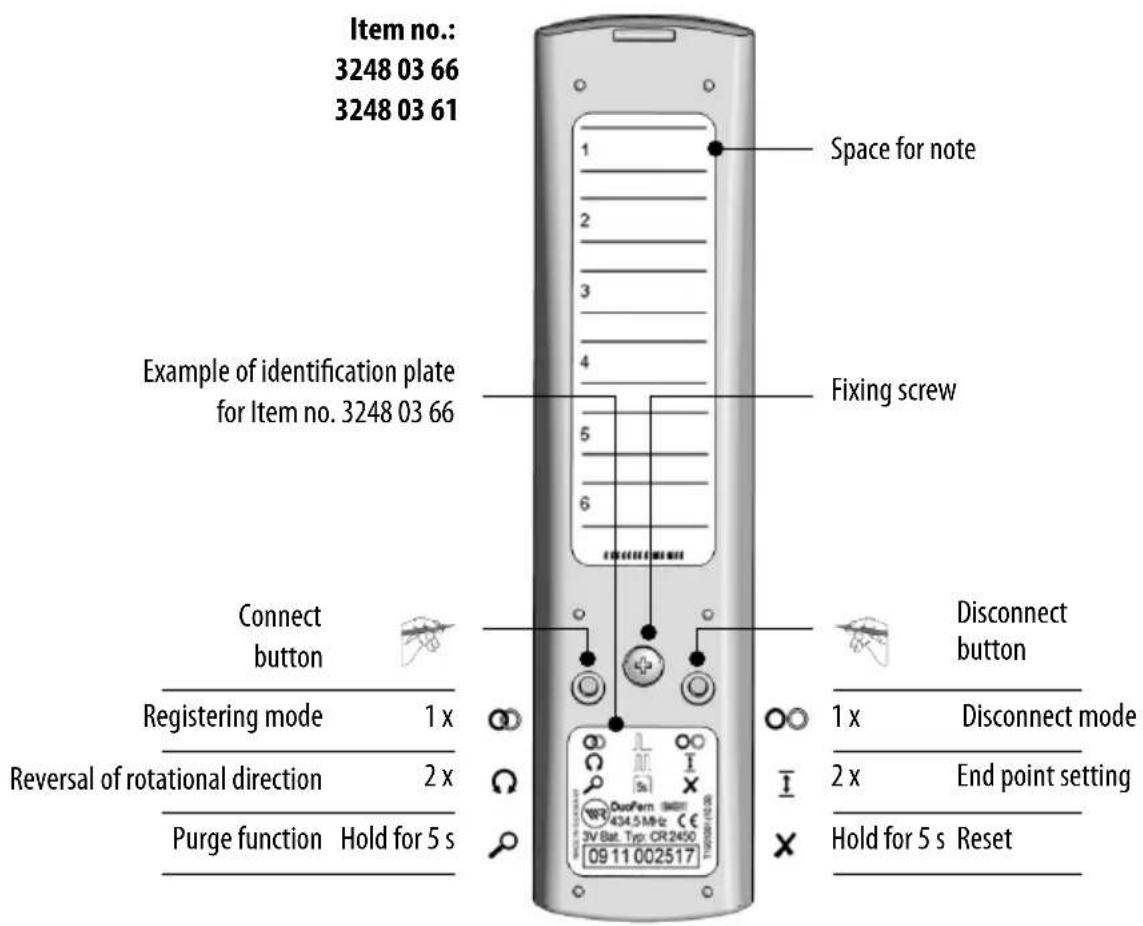
General view/Operating elements 30
Rear side of device 31
Key to symbols 32
General safety advice 32
Proper use / operating conditions ......33
Improper use 33
Short description of the
DuoFern Standard manual transmitter ....34
Register DuoFern end devices
(applies to item nos. 3248 03 66) ......36
Register DuoFern end devices
(applies to item nos. 3248 03 61) ......38
Delete DuoFern end devices 40
End point setting....41
Reversal of rotational direction 43
Activate "purge" function 45
Manual operation of actuators with
several channels 46
Manual operation 46
Controlling blinds and dimmers in jog mode ..47
Switching jog mode on and off 47
Delete settings (Reset) 48
Technical Data 49
Battery change....50
CE Mark and EC Conformity 51
Warranty conditions 52

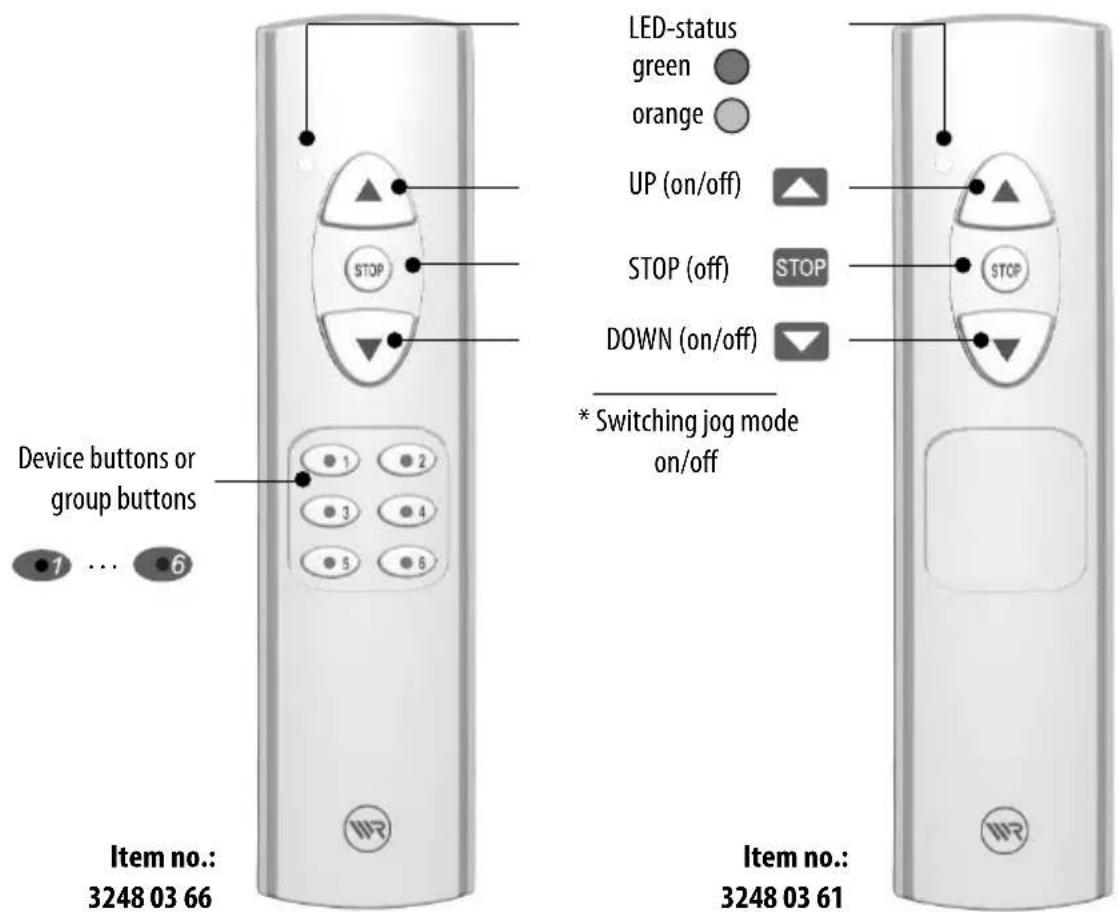
General view/Operating elements
EN

Rear side of device
EN
i Key to symbols


This concerns your safety.
Please pay particular attention to and carefully follow all instructions with this symbol.

This symbol advises of malpractices that may cause damage to people and property.
NOTE NOTE/IMPORTANT/CAUTION
This heading indicates information that is important to the proper functioning of the device.
i General safety advice

Improper use increases risk of injury.
◆ Children must not be allowed to play with the DuoFern Standard manual transmitter.
◆ Please store the DuoFern Standard manual transmitter in such a way that it cannot unintentionally be operated by playing children, for example.
i Proper use / operating conditions

Use the DuoFern Standard manual transmitter only for the remote control of:
◆ Roller shutters
◆ Electrical consumers (e.g. lighting)
Operating conditions
◆ The DuoFern radio system may only be operated with and installed in systems and devices in which transmitter or receiver faults do not present any danger to persons or property or for which these hazards are removed by the use of other safety equipment.
◆ Use the DuoFern Standard manual transmitter only in dry rooms.
i Improper use

Never use controls with DuoFern radio technology (e. g. RolloTron Comfort DuoFern and DuoFern Standard manual transmitter) for remote operation of devices and equipment with increased safety requirements or increased risk of accident. Additional safety equipment is required to do so. Please observe the relevant legal regulations for setting up such systems.

Short description of the DuoFern Standard manual transmitter
EN
The DuoFern wireless system enables bidirectional data exchange between the various participants of a wireless network. All switching commands from a DuoFern transmitter will be confirmed by the DuoFern receivers.
Using the DuoFern Standard manual transmitter you can manually remotely control various DuoFern devices (e.g. RolloTron Comfort/Standard DuoFern or DuoFern actuators for lighting).
Command buttons
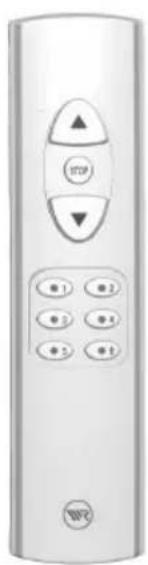
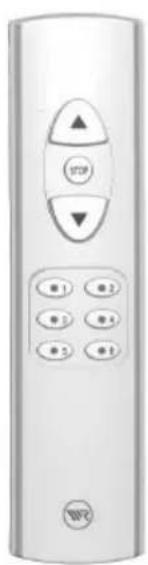
With the aid of the three command buttons, UP (on/off)/STOP (off) / DOWN (on/off), see page 30, you can transmit manual switching commands to the registered DuoFern end devices.
Device buttons or group buttons (only for item nos. 3248 03 66)
DuoFern Standard manual transmitter 3248 03 66 has 6 device or group buttons (see page30) which you can allocate to any DuoFern end device (see table on page 35). In this way it is possible to have an individual as well as a group control of various devices (see page 37).
Connect button
You can call up the following functions with the connect button:
◆ Registering mode Register DuoFern end device on manual transmitter.
◆ Reversal of rotational direction. Reverse rotational direction of tubular motor or switchover between the devices and the lighting function.
◆ Purge Delete the connection between manual transmitter and actuators that no longer exist.

Short description of the DuoFern Standard manual transmitter
EN
Disconnect button
You can call up the following functions with the disconnect button:
◆ Disconnect mode
Disconnect DuoFern end devices from manual transmitter.
◆ End point setting Set the end points of RADEMACHER electronic tubular motors.
◆ Reset Resetting to factory settings.
Status LED
The two-coloured status LED shows whether all DuoFern end devices have received and confirmed the switch signal.
List of models with number of controllable groups and DuoFern end devices.
| Item no.: | Number of groups | Number of end devices for each group | Maximum number of end devices |
| 3248 03 66 | 6 | 8 | 48 |
| 3248 03 61 | 1 | 48 | 48 |

Register DuoFern end devices (applies to item no. 3248 03 66)
EN
In order to be able to operate a DuoFern end device with the DuoFern Standard manual transmitter, this must be registered with the DuoFern end device concerned.
TIP
Use a thin, not too sharp object to press the connect button.
| 1. |  | Switch the desired DuoFern end device or DuoFern actuator to registering mode.(see corresponding operating instructions) | |
| 2. | Switch the DuoFern Standard manual transmitter to registering mode.In order to do so, briefly press the "connect" button. | ||
| 3. | 60 seconds | The LED's from all device buttons or group buttons light up.NOTE◆ A fully allocated group button does not light up.◆ The register mode remains active for 60 seconds. | |
| 1 ... 6 |
| 60 seconds |

Register DuoFern end devices (applies to item no. 3248 03 66)
EN
4.
natural_image
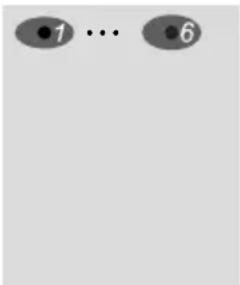
Simple diagram with a horizontal line and two shaded circles (two filled, one outlined) on a gray background, no text or symbols present.Press the desired device button that you wish to use later to select the device.
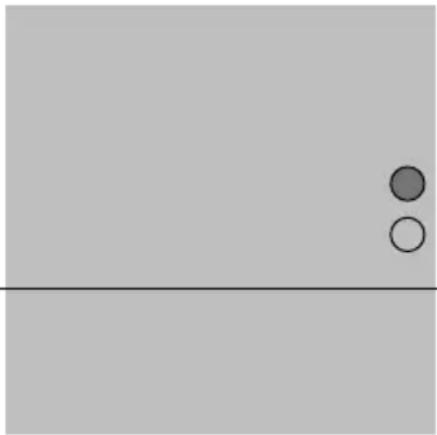
Observe the status LED
Green: The registration was successful.
Orange: The button is already fully allocated.
5.1...4.
- ... 4.
Repeat points 1 to 4 in order to register the next device or the next actuator.
ADVICE 1
◆ If a device has several channels (e.g. 2-channel actuator), you must select a group button for each channel.
◆ In the case of devices with several channels, it will jump automatically to point 3 until all of these channels have been worked through.
◆ If a channel should not be allocated or should be skipped over, you must press the stop button.
ADVICE 2
You can also register a device several times, e. g. to realise an individual control and a group control:
- RolloTron Standard DuoFern 1 on button 1
- RolloTron Standard DuoFern 2 on button 2
- RolloTron Standard DuoFern 3 on button 3
- RolloTron Standard DuoFern 1/2/3 on button 4
Please observe the maximum possible number of devices per button (see page 35).

Register DuoFern end devices (applies to item no. 3248 03 61)

No devices or group buttons can be selected or pressed for DuoFern Standard manual transmitter 3248 03 61. The registered actuators are automatically allocated to the only existing group.
NOTE
When registering actuators with several channels, all channels are always registered in the group for DuoFern Standard manual transmitter 3248 03 61 (1 group).

Register DuoFern end devices (applies to item no. 3248 03 61)

| 1. |  | Switch the desired DuoFern end device or DuoFern actuator to registering mode.(see corresponding operating instructions) | |
| 2. | 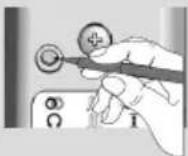 | 1 x | Switch the DuoFern Standard manual transmitter to registering mode.In order to do so, briefly press the "connect" button. |
| 3. | Observe the status LEDGreen: The registration was successful.Orange: The button is already fully allocated. | ||
| 4. | Points 1 and 2 must be repeated for each actuator. |

Delete DuoFern end devices
EN
1.

1x2.
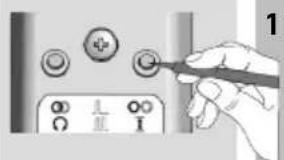
Switch desired DuoFern end devices to delete mode.
(see corresponding operating instructions)
Switch the DuoFern Standard manual transmitter to delete mode.
In order to do so, briefly press the "disconnect" button.
3.


If the deletion is successful the green status LED lights up.
NOTE
The DuoFern end device has been deleted from all device buttons or group buttons.

End point setting
EN
You can subsequently set or correct the end points of connected tubular motors using this function.
NOTE
◆ The end point setting can only be adjusted when only one device (actuator) is registered within the selected group; if more than one component is registered within the selected group then the function is blocked.
◆ The end point setting can only be made for RADEMACHER electronic tubular motors from 2000 onwards that are controlled with a correctly installed DuoFern actuator.
◆ The end point setting cannot be adjusted for tubular motors connected in parallel.
◆ The function is automatically cancelled if no button is pressed for approx. 30 seconds.
1.

2 x / second

Select the desired DuoFern end device.
2.
natural_image
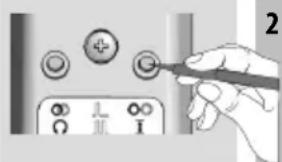
Hand holding a pen touching a button on an electronic device panel (no visible text or symbols)Activate the „end point setting“ function.
In order to do so, press the "disconnect" button twice in short succession within one second (similar to the double-click of a computer mouse).

End point setting
EN
3.


The status LED flashes (approx. twice per second) on successful activation.
4.

Set the upper end point.
Keep the button pressed until the desired end point is reached.
5.

Release the button as soon as the upper end point is reached.
6.

Set the lower end point.
7.

Release the button as soon as the lower end point is reached.
8.
STOP
Cancel end point setting.
The manual transmitter returns to normal operating mode (regular flashing of the status LED is cancelled).
You can subsequently set or correct the rotational direction of connected tubular motors using this function.
Alternative use for reversal of directional rotation:
Switch over between lighting function and device function
In case of universal actuators for lighting or for devices (e.g. DuoFern universal actuator or DuoFern socket actuator), reversing the rotational direction switches over between the lighting function and the device function.
NOTE
◆ Reversal of rotational direction or switching over between the lighting function and the device function can only be carried out when only one device (actuator) is registered within the selected group; if more than one component is registered within the selected group then the function is blocked.
◆ Not all devices support the reversal of rotational direction function or switchover between the lighting and device function. You should therefore check in the operating instructions of the respective device whether this function is available.
◆ The following applies for manual transmitter 3248 03 61:
If a multichannel actuator is registered (e. g. DuoFern universal actuator) then the reversal of rotational direction or switchover between the lighting and the device function is always applied to both channels.

Reversal of rotational direction
EN
| 1. |  | Select the desired DuoFern end device. | |
| 2. | 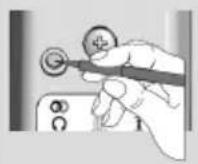 | 2 x / second | Activate the “reversal of rotational direction” function.In order to do so, press the “connect” button twice in short succession within one second (similar to the double-click of a computer mouse). |
| 3. | If successfully activated, the tubular motor connected to the actuator confirms this by starting up for a short time.In case of universal actuators, the lighting / device switches on or off briefly to confirm activation. | ||
| i) |  [DXD] [DXD] | > the actuator switches off.  > the actuator switches on. > the actuator switches on. | How to determine whether the lighting function or the device function is active:The lighting function is activated.The device function is activated. |

Activate "purge" function
EN
This function deletes all DuoFern end devices that are registered but that no longer react. This could be necessary, for example, in the case of a faulty device which can no longer be deleted as described above.
NOTE
◆ All battery powered DuoFern devices are not to be/cannot be deleted in this way.
◆ To delete all DuoFer end devices from the DuoFern Standard manual transmitter, you must perform the function "Reset delete settings" (see page 48).
1.
natural_image
Hand holding a pen with a circular button on a device (no text or symbols visible)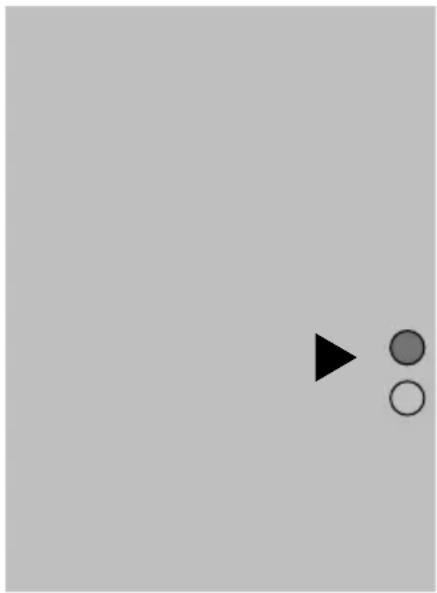
natural_image
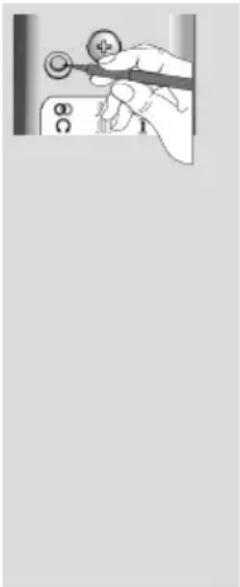
Simple graphic with a black triangle pointing right and two circles below, no text or symbols present.Press the "connect" button for approx. 5 seconds until the green status LED lights up.
The DuoFern Standard manual transmitter now sends a control signal to all registered DuoFern dend devices. The devices which do not confirm the signal will be automatically deleted.
Observe the status LED
Green: The purge was successful
Orange flashing: The purge mode is still active

Manual operation of actuators with several channels
EN
When registering actuators with several channels, all channels in the group are always registered for DuoFern Standard manual transmitter 3248 03 61 (1 group). Operation of single channels is therefore not possible using these manual transmitters.

Manual operation
1.
2.
3.
4.
 | Press the desired device or group button (where applicable). | |
 | Open the roller shutter or switch electrical consumer on/off | |
 | Stop the roller shutter or switch off electrical consumer | |
 | Close the roller shutter or switch electrical consumer on/off | |
 | Observe the status LEDOrange: Switch signal is being transmitted | |
 | Green: Confirmation received |
Observe the status LED

Controlling blinds and dimmers in jog mode
EN
Functional description of jog mode
◆ If the UP and DOWN buttons are pressed briefly in jog mode, a jog command is transmitted. This enables convenient adjustment of Venetian blind slats, as the motor only runs briefly.
When used in combination with dimmers, jog mode causes the brightness to be increased or decreased by 10%.
◆ If the UP and DOWN buttons are pressed for a longer duration (>1/2 second) then the normal UP and DOW signals are transmitted. Jog mode can be switched on and off separately for each group, where applicable.

Switching jog mode on and off
2.

STOP approx. 10 s
flowchart
graph TD
    A["1"] --> C["3x+"]
    B["6"] --> C["3x+"]

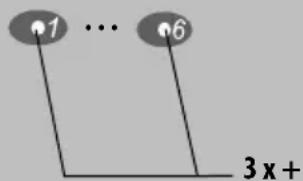
Select the desired group (1-6) with the corresponding group button, where applicable.
Press and hold the STOP button for approx. 10 seconds.
Observe the button LED and status LED:
The LED for the selected group button flashes three times and the status LED lights up:
green (jog mode is switched on)
orange (jog mode is switched off).
NOTE Actuators which do not support jog mode will ignore jog commands.

Delete settings (Reset)
EN
1.
natural_image
Hand inserting a button into a control panel (no text or symbols visible)
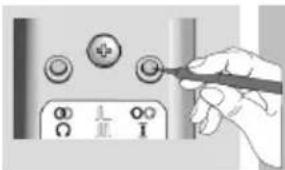
Press the "disconnect" button for approx. 5 seconds until the orange status LED flashes.
The status LED flashes orange
2.
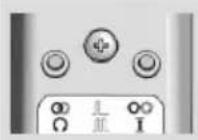
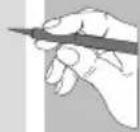
Let go of the „disconnect button“ as soon as the orange status LED is permanently lit up
All settings on the DuoFern Standard manual transmitter are deleted.
TD Technical Data
EN
Transmission frequency: 434,5 MHz
Transmitting power: 10 mW
Range:
- Free field: approx. 100 m
- Indoors: approx. 30 m
(depending upon the building fabric)
Supply voltage: 3 V
Battery type: CR2450
- Service life 1: approx. 2 years, if actuated 5 times per day
- Service life 2: approx. 5 years, Stand-by
Max. number of groups:
- item no. 3248 03 66: 6
- item-no. 3248 03 61: 1
Max. number of end devices:
- Item no. 3248 03 66/3248 03 61: 48
Permissible ambient temperature: +5 °C bis +40 °C
Dimensions L x W x H: 140 x 43 x 18 mm
Weight: 70 g
TD
Battery change
EN
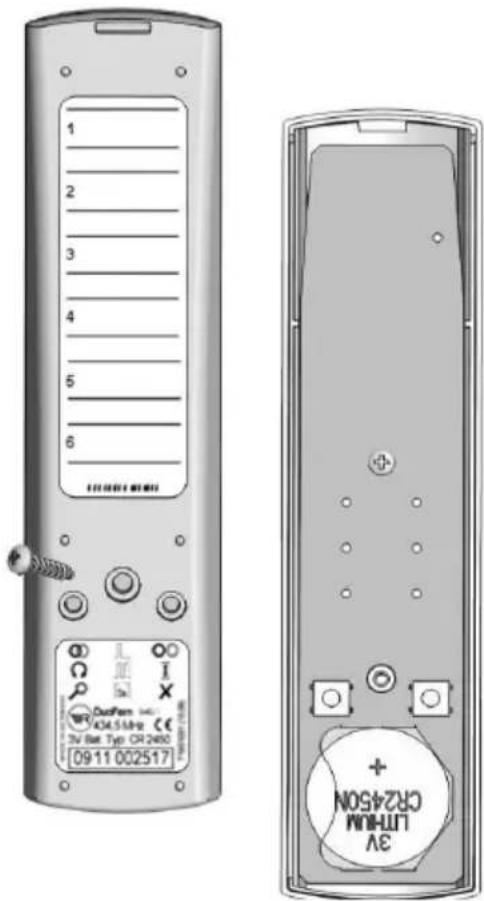
If the battery is almost empty, the status LED flashes orange when you operate the DuoFern Standard manual transmitter.
◆ The battery can be found in the battery compartment on the rear of the DuoFern Standard manual transmitter.
◆ Unfasten the rear housing with a screwdriver.
◆ Carefully lift off the rear housing.
◆ Push the battery out from the side.
When you insert the battery ensure that the polarity is correct. The plus connector (+) of the battery must be at the top.
NOTE
Empty batteries are hazardous waste and must not be disposed of with non-recyclable refuse.

CE Mark and EC Conformity

The DuoFern Standard manual transmitter (item no. 3248 03 66/3248 03 61) complies with the requirements of the current European and national directives.

1999/5/EC
R&TTE directive
Conformity has been verified. The corresponding declarations and documentation are available on file at the manufacturer's premises.
46414 Rhede (Germany)

Warranty conditions
EN
RADEMACHER Geräte-Elektronik GmbH&Co. KG offers a 24 month guarantee for new devices that have been installed in accordance with the installation manual. The guarantee covers all design faults, material faults and fabrication faults.
The guarantee does not cover:
◆ Incorrect mounting or installation
◆ Non-observance of the installation and operation manual
◆ Improper operation or utilisation
◆ External influences such as knocks, blows or weather
◆ Repairs and modifications made by unauthorised third parties
◆ Use of unsuitable accessory parts
◆ Damage due to inadmissible voltage surges (e.g. caused by lightning)
◆ Dysfunction due to superimposed radio frequencies and other radio disturbances.
Any defects occurring within the period of guarantee will be rectified by RADEMACHER at no cost either by repairing or replacing the parts concerned or by delivery of a device of the same value or a new replacement. Generally the original guarantee period will not be extended because of replacement delivery or repair resulting from the guarantee.
RADEMACHER
46414 Rhede (Germany)
info@rademacher.de
www.rademacher.de
Service:
Hotline 01807 933-171*
Fax +49 2872 933-253
service@rademacher.de
* 30 seconds free of charge, subsequently 14 cents / minute from German fixed line networks and max. 42 cents / minute from German cellular networks.

- Dear customer ...
- These operating instructions...
- i contents
- EN
- Rear side of device
- i Key to symbols
- i General safety advice
- i Proper use / operating conditions
- Use the DuoFern Standard manual transmitter only for the remote control of:
- Operating conditions
- i Improper use
- Short description of the DuoFern Standard manual transmitter
- Command buttons
- Device buttons or group buttons (only for item nos. 3248 03 66)
- Connect button
- Disconnect button
- Status LED
- Register DuoFern end devices (applies to item no. 3248 03 66)
- TIP
- ADVICE 1
- ADVICE 2
- Register DuoFern end devices (applies to item no. 3248 03 61)
- NOTE
- Delete DuoFern end devices
- End point setting
- Alternative use for reversal of directional rotation:
- Switch over between lighting function and device function
- Reversal of rotational direction
- Activate "purge" function
- Press the "connect" button for approx. 5 seconds until the green status LED lights up.
- Observe the status LED
- Manual operation of actuators with several channels
- Manual operation
- Controlling blinds and dimmers in jog mode
- Functional description of jog mode
- Switching jog mode on and off
- Delete settings (Reset)
- TD Technical Data
- TD
- Battery change
- CE Mark and EC Conformity
- Warranty conditions
- The guarantee does not cover:
- RADEMACHER
Brand : RADEMACHER
Model : Rollo Home Control 731005
Category : Remote control