
HomeCare FC8189 - Vacuum Cleaner PHILIPS - Free user manual and instructions
Find the device manual for free HomeCare FC8189 PHILIPS in PDF.
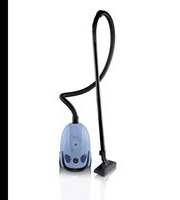


| Product Type | Canister Vacuum Cleaner |
| Brand | Philips |
| Model | HomeCare FC8189 |
| Dustbag Type | Reusable fabric dustbag |
| Dustbag Full Indicator | Yes, color-change indicator |
| Motor Protection Filter | Washable? (Shake clean; replace if necessary) |
| Exhaust Filter | Shake clean; replace if necessary |
| Suction Power Control | Electronic slider on appliance + slide on handgrip |
| Cord Rewind | Yes, with button |
| Parking Feature | Yes, integrated parking slot on nozzle |
| Accessories Included | Floor nozzle (with brush strip), crevice tool, small nozzle, 2 tubes, handgrip |
| Safety Features | Motor protection filter mandatory; do not vacuum liquids or hot ashes |
| Replacement Dustbag Part Number | 9965 0001 6015 |
| Power Supply | Mains cord with plug (voltage as per local) |
Frequently Asked Questions - HomeCare FC8189 PHILIPS
User questions about HomeCare FC8189 PHILIPS
0 question about this device. Answer the ones you know or ask your own.
Ask a new question about this device
Download the instructions for your Vacuum Cleaner in PDF format for free! Find your manual HomeCare FC8189 - PHILIPS and take your electronic device back in hand. On this page are published all the documents necessary for the use of your device. HomeCare FC8189 by PHILIPS.
USER MANUAL HomeCare FC8189 PHILIPS

ENGLISH 6
INDONESIA 11
KOREAN 16
BAHASA MELAYU 21
THAI 26
VIETNAMESE 30
TRADITIONAL CHINESE 35
SIMPLIFIED CHINESE 39
Introduction
Congratulations on your purchase and welcome to Philips! To fully benefit from the support that Philips offers, register your product at www.philips.com/welcome.
General description (Fig. 1)
1 Carrying handle 2 Release tab to open dustbag compartment 3 Reusable dustbag 4 Dustbag fixation tab 5 Hose connection opening 6 Hose connector 7 Motor protection filter 8 Rear wheel 9 Dustbag-full indicator 10 On/off button 11 Cord rewind button 12 Electronic suction power control 13 Floor nozzle 14 Storage/parking ridge 15 Small nozzle 16 2 tubes 17 Suction power slide 18 Handgrip 19 Parking slot 20 Exhaust filter 21 Filter grille 22 Mains cord with plug 23 Crevice tool holder 24 Crevice tool 25 Carrying grip 26 Swivel wheel 27 Type plate 28 Storage slot
Important
Read this user manual carefully before you use the appliance and save it for future reference.
Danger
- Never suck up water or any other liquid. Never suck up flammable substances and do not suck up ashes until they are cold.
Warning
- Check if the voltage indicated on the appliance corresponds to the local mains voltage before you connect the appliance.
- Do not use the appliance if the plug, the mains cord or the appliance itself is damaged.
- If the mains cord is damaged, you must have it replaced by Philips, a service centre authorised by Philips or similarly qualified persons in order to avoid a hazard.
- This appliance is not intended for use by persons (including children) with reduced physical, sensory or mental capabilities, or lack of experience and knowledge, unless they have been given supervision or instruction concerning use of the appliance by a person responsible for their safety.
- Children should be supervised to ensure that they do not play with the appliance.
- Do not point the hose, the tube or any other accessory at the eyes or ears nor put it in your mouth when it is connected to the vacuum cleaner and the vacuum cleaner is switched on.
Caution
- When you use the vacuum cleaner to vacuum ashes, fine sand, lime, cement dust and similar substances, the pores of the dustbag become clogged. As a result, the dustbag-full indicator will indicate that the dustbag is full. Replace the dustbag, even if it is not full yet (see chapter 'Emptying the reusable dustbag').
- Never use the appliance without the motor protection filter. This damages the motor and shortens the life of the appliance.
Electromagnetic fields (EMF)
- This Philips appliance complies with all standards regarding electromagnetic fields (EMF). If handled properly and according to the instructions in this user manual, the appliance is safe to use based on scientific evidence available today.
Preparing for use
Hose
1 To connect the hose, push it into the appliance (1) and turn it clockwise (2) ('click') (Fig. 2). 2 To disconnect the hose, turn it anticlockwise and pull it out of the appliance (Fig. 3).
Tube
1 To connect the tube parts to each other, insert the narrow section into the wider section and turn it a little. (Fig. 4) 2 To connect the tube to the handgrip of the hose, insert the narrow section into the wider section and turn it a little (Fig. 5).
- To disconnect the tube or tube parts, pull and turn a little.
- Connect and disconnect the accessories in the same way.
Floor nozzle
The floor nozzle enables you to clean the floor efficiently. You can use the floor nozzle on carpet with the brush strips folded in or on hard floors (for instance for tiled, parqueted, laminated and linoleumed flooring) with the brush strips folded out.
1 To connect the floor nozzle to the tube, insert the narrow section into the floor nozzle and turn a little (Fig. 6). 2 Push the rocker switch on top of the floor nozzle with your foot to make the brush strip for cleaning hard floors come out of the nozzle housing (Fig. 7) 3 Push the rocker switch on the other side to make the brush strip disappear into the floor nozzle housing (Fig. 8)
Crevice tool
- You can use the crevice tool to clean hard-to-reach places quickly and conveniently.
- You find the crevice tool in the crevice tool compartment of the appliance. (Fig. 9)
- You can connect the crevice tool to the tube or directly to the handgrip of the hose.
1 To connect the crevice tool, insert the tube or handgrip while turning it a little.
Small nozzle
- You can use the small nozzle to clean small areas, e.g. the seats of chairs and sofas (Fig. 10).
- You can connect the small nozzle to the tube or directly to the handgrip of the hose.
1 To connect the small nozzle, insert the tube or handgrip while turning it a little.
Using the appliance
Vacuuming
1 Pull the mains cord out of the appliance and put the plug in the wall socket. 2 Press the on/off button on top of the appliance with your foot to switch on the appliance (Fig. 11).
Adjusting suction power
During vacuum cleaning, you can adjust the suction power with:
- the slide on the handgrip of the hose, or (Fig. 12)
- the electronic suction power control on the vacuum cleaner (Fig. 13).
Note: Use maximum suction power to vacuum very dirty carpets and hard floors. Use minimum suction power to vacuum curtains, tablecloths etc.
Parking the tube
- If you want to pause for a moment, insert the ridge on the nozzle into the parking slot to park the tube in a convenient position (Fig. 14).
Storage
1 Switch off the appliance and remove the mains plug from the wall socket. 2 Press the cord rewind button to rewind the mains cord (Fig. 15). 3 After use, store the crevice tool in its holder (Fig. 9). 4 Put the appliance in upright position and insert the ridge on the floor nozzle into the storage slot on the appliance (Fig. 16).
Emptying the reusable dustbag
Always unplug the appliance before you empty the reusable dustbag.
Empty the dustbag as soon as the dustbag-full indicator has changed colour permanently, i.e. even when the nozzle is not placed on the floor (Fig. 17).
Emptying the reusable dustbag
1. Place your fingers under the release tab (1) and open the dustbag compartment (2) (Fig. 18). 2. Pull the dustbag fixation tab (1) forward and remove the dustbag (2) (Fig. 19). 3. To empty the dustbag, shake the contents out over a dustbin. 4. Pull the fixing tab forwards (1) and place the empty dustbag between the ridges (2) (Fig. 20).
Note: Make sure the arrow on the dustbag points upwards.
5. Release the fixing tab to fix the dustbag in position.
6. Close the cover ('click') (Fig. 21).
Note: You cannot close the cover if no dustbag has been inserted.
Cleaning the filters
Exhaust filter
1. To detach the filter grille, push the tab downwards (Fig. 22). 2. Take out the exhaust filter. Shake out the dirt over a dustbin (Fig. 23). 3. Put back the exhaust filter (Fig. 24). 4. To reattach the filter grille to the vacuum cleaner, align the two ridges of the grille with the two slots on the vacuum cleaner and close the grille ('click') (Fig. 25).
Motor protection filter
Never use the appliance without the motor protection filter. This damages the motor and shortens the life of the appliance.
1. Take the motor protection filter out of the appliance. 2. Clean the filter by shaking the dirt out of it over a dustbin.
Replacement
Replace the dustbag if it can no longer be cleaned properly. Reusable dustbags are available under service number 9965 0001 6015.
Environment
Do not throw away the appliance with the normal household waste at the end of its life, but hand it in at an official collection point for recycling. By doing this, you help to preserve the environment (Fig. 26).
Guarantee and service
If you need service or information or if you have a problem, please visit the Philips website at www.philips.com or contact the Philips Consumer Care Centre in your country (you find its phone number in the worldwide guarantee leaflet). If there is no Consumer Care Centre in your country, go to your local Philips dealer.
Troubleshooting
Problem Possible cause Solution
| The suction power is insufficient | The suction power slide on the handgrip is open. | Close the suction power slide on the handgrip. |
| The electronic suction power control is set to a low setting. | Set the electronic suction power control to a higher setting. | |
| The dustbag is full. Empty the reusable dustbag. | ||
| The motor protection filter and/or the exhaust filter is dirty. | Shake these filters over a dustbin to clean them. | |
Problem Possible cause Solution
The nozzle, tube or hose is blocked up.
To remove the obstruction, disconnect the blocked-up item and connect it (as far as possible) the other way around. Switch on the vacuum cleaner to suck the obstruction out of the blocked-up item.
1 public address: public address in the United States
2 Lây bộ lọc thoát khí ra. Lắc để cho bụi rơi vào thùng rác (Hình 23).
3 Đặt bộ lọc thoát khí trở lại (Hình 24).
4 public law, l'acquisition of the law, a legal law, a legal law, a legal law, a legal law, a legal law, a legal law, a legal law, a legal law, a legal law, a legal law, a legal law, a legal law, a legal law, a legal law, a legal law, a legal law, a legal law, a legal law, a legal law, a legal law, a legal law, a legal law, a legal law, a legal law, a legal law, a local law, a local law, a local law, a local law, a local law, a local law, a local law, a local law, a local law, a local law, a local law, a local law, a local law, a local law, a local law, a local law, a local law, a local law, a local law, a local law, a local law, a local law, a local law, a local law, a local law, a national law, a national law, a national law, a national law, a national law, a national law, a national law, a national law, a national law, a national law, a national law, a national law, a national law, a national law, a national law, a national law, a national law, a national law, a national law, a national law, a national law, a national law, a national law, a national law, a national law, a National Law Law Law Law Law Law Law Law Law Law Law Law Law Law Law Law Law Law Law Law Law Law Law Law Law Law Law Law Law Law Law Law Law Law Law Law Law Law Law Law Law Law Law Law Law Law Law Law Law Law Law Law Law Law Law Law Law Law Law Law Law Law Law Law Law Law Law Law Law Law Law Law Law Law Law Law Law Law Law Law Law Law Law Law Law Law Law Law Law Law Law Law Law Law Law Law Law Law Law Law
Motor protection filter


- INTRODUCTION
- GENERAL DESCRIPTION (FIG. 1)
- IMPORTANT
- DANGER
- WARNING
- CAUTION
- ELECTROMAGNETIC FIELDS (EMF)
- PREPARING FOR USE
- HOSE
- TUBE
- FLOOR NOZZLE
- CREVICE TOOL
- SMALL NOZZLE
- USING THE APPLIANCE
- VACUUMING
- ADJUSTING SUCTION POWER
- PARKING THE TUBE
- STORAGE
- EMPTYING THE REUSABLE DUSTBAG
- CLEANING THE FILTERS
- EXHAUST FILTER
- MOTOR PROTECTION FILTER
- REPLACEMENT
- ENVIRONMENT
- GUARANTEE AND SERVICE
- TROUBLESHOOTING
- PROBLEM POSSIBLE CAUSE SOLUTION
Brand : PHILIPS
Model : HomeCare FC8189
Category : Vacuum Cleaner