
KA1VA2 - Range hood SMEG - Free user manual and instructions
Find the device manual for free KA1VA2 SMEG in PDF.
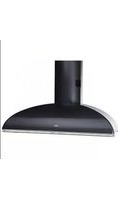


| Product Type | Range Hood |
| Brand | Smeg |
| Model | KA1VA2 |
| Dimensions (W x D x H) | 600 mm x 500 mm x 200 mm |
| Weight | 15 kg |
| Power Supply | 220-240 V ~ 50/60 Hz |
| Motor Power | 200 W |
| Airflow Rate (Max) | 600 m³/h |
| Noise Level (Max) | 65 dB(A) |
| Number of Speeds | 3 |
| Controls | Electronic push buttons |
| Lighting | LED, 2 x 3 W |
| Filter Type | Metal grease filter, dishwasher safe |
| Material | Stainless steel |
| Energy Class | A |
| Installation | Wall-mounted, ducted or recirculating mode |
| Duct Diameter | 150 mm |
| Maintenance | Clean metal filters monthly; replace carbon filter if recirculating |
| Safety Features | Automatic shut-off timer, thermal overload protection |
| Spare Parts Availability | Filters, bulbs, motor, control board available via authorized service |
| Warranty | 2 years (check local regulations) |
Frequently Asked Questions - KA1VA2 SMEG
User questions about KA1VA2 SMEG
0 question about this device. Answer the ones you know or ask your own.
Ask a new question about this device
Download the instructions for your Range hood in PDF format for free! Find your manual KA1VA2 - SMEG and take your electronic device back in hand. On this page are published all the documents necessary for the use of your device. KA1VA2 by SMEG.
USER MANUAL KA1VA2 SMEG
- Read the instructions carefully before installing and/or using the hood.
- Before connecting, make sure that the mains voltage corresponds to the voltage on the rating plate inside the hood. (see fig. 7)
- Once you remove the appliance from its packaging, make sure it is intact. If the product is damaged, do not use it and contact the Smeg assistance network.
- It is recommended that a qualified technician performs installation and adjustment operations.
- The minimum distance between the cooker and the lower part of the hood must be 750mm for gas cookers and 650 mm for electric cookers.
- Before carrying out any kind of maintenance or cleaning, disconnect the hood from the mains supply.
- Inspect and clean the filters thoroughly and in accordance with the intervals suggested by the manufacturer.
- Do not cook or fry in a way that could result in flames being sucked into the hood and causing a fire.
- The hood surface can be cleaned with a damp cloth and a non-bleach liquid detergent. • Make sure the room is properly ventilated when using the hood and other gas appliances at the same time. • Comply with the regulations on air discharge when operating the hood.
- The extracted air must not be routed into a duct used to discharge fumes of gas-operated appliances.
- This appliance must not be used by children without an adult supervision and disabled people may require assistance. • THE MANUFACTURER CANNOT BE HELD RESPONSIBLE IF THE ABOVE INSTRUCTIONS ARE NOT FOLLOWED.
OPERATION
This appliance has been designed to work as a DUCTING hood (evacuation of the air) or RECYCLING hood (recycling of the filtered air).
- DUCTED MODE: In order to use the hood in the ducted mode, connect the motor intake, by means of a suitable ducting hose not less than 120mm diameter, directly to the external fumes outlet.
Note: Remove any carbon filters.
RECIRCULATION MODE: If it is not possible to discharge fumes outside, the hood can be used to filter and recycle the air. This way, air and fumes are filtered by the anti-odour carbon filters and recirculated through the aerating grids on the sides of the chimney.
INSTALLATION INSTRUCTIONS:


The hood is supplied with all the necessary accessories for installation. The minimum distance between the cooker and the lower part of the hood must be 750 mm for gas cookers and 650 mm for electric cookers (Fig. 1). The hood is supplied with a motor intake (Fig 2). If it has not been assembled by the manufacturer, you can assemble it using the supplied screws (for type 1) or pushing (for type 2). If the motor intake is equipped with a non-return valve, make sure it opens and closes perfectly.
The following instructions will assist installation:
a) The hood should be centred with respect to the cooker. b) The hood is supplied with two supports/hooks (a) (Fig 3) or bracket (b) that need to be fixed to the wall by means of wall anchors. The L1 holes for these supports are on the back of the hood (fig. 4) c) Remove the anti-grease filters, put the hood on the wall and mark the position of the holes for the supports/hooks. d) Drill the two previously marked holes after removing the hood from the wall. e) Fix the two supports/hooks to the wall. f) Mark the L2 holes on the wall to fix the hood safely. (fig. 4) Drill and put the anchors in the holes. g) Hang the hood on to the supports/hooks (fig. 5) and level by means of the adjusting screw (fig.3). h) Fix the hood safe by tightening both wall anchors.
Ducted mode or Recirculation mode installation:
Ducted mode:
In the ducted mode, connect the motor outlet to the fumes outlet duct not less than 120mm diameter.
Warning: if the hood is equipped with an active carbon filter, it must be removed (see page 7)


Recirculation mode:
Leave the motor intake free. Install the active carbon filters as shown in page 6.
Warning: if the hood is not supplied with an active carbon filter, it is necessary to buy it separately and assemble it before using the hood.
i) Chimney assembly:
Adjust the two telescopic chimneys to the required length (fig. 6).
Secure the chimneys by tightening the two H screws. Place the chimney group on the top side of the hood carefully. Put the chimney bracket K on the B chimney (fig. 6). Mark the holes on the wall for fixing the chimney bracket to the wall.
Remove the chimney set, drill and fix the support bracket to the wall using wall anchors. Put the chimney group back in place and fix it to the hood with the Z screws and to the chimney bracket with the L screws as shown in figure 6.
ELECTRICAL CONNECTION
It is recommended that all electrical connection operations be performed by a qualified technician.
The appliance is supplied WITHOUT A PLUG. It is therefore necessary to fit a plug to the cable or hard wire it directly to a spur. The plug and fuse must be in accordance with the rating plate inside the hood. Then connect it to a nearby, easily reachable socket in accordance with the rules in force.
In the case of a direct connection to the mains supply, it is necessary to install a switched spur between the appliance and the mains supply. The switch must be suitable for the load, compliant with the rules in force, and must have a minimum contact opening of not less than 3mm.
OPERATING INSTRUCTIONS:
√ CONTROL PANEL:
In order to achieve the best performance, it is recommended to start the hood a few minutes before starting cooking and keep it on for at least 15 minutes after finishing cooking or after all fumes and odours have disappeared.
To start the hood, identify your type of control panel and follow the instructions:

SLIDER:
- Key (A) to turn on/off the hood's light.
- Four-position Cursor (B):
0: Off
1/2/3: On/Speed adjustment
ELECTROMECHANICAL PUSHBUTTONS:
Light ON/OFF Button 0 Motor OFF button 1-2-3 On/speed adjustment button
WITH KNOBS:
- Two-position Knob (A) to turn on/off the light (0-1)
- Four-position Knob (B):
0 Motor OFF
1-2-3 Speed adjustment

➢ ELECTRONIC PUSHBUTTONS:

Lights ON/OFF
0/1
OFF/1 speed
2-3-4
Speed adjustment

Filters reset button
OPTIONAL FUNCTIONS:
- AUTO POWER-OFF TIMER: Pushing one of the speed adjustment buttons (2-3-4) twice, you will activate the "Auto power-off timer" function that turns the motor and light off after 10 mins. The activation of such function is signalled by the blinking LED above the pressed button.
- FILTERS CLEANING WARNING: When all 4 LEDs blink at the same time (programmed to happen every 100 hours of operation), the user is required to clean or replace the filters.
Pressing the Reset button

will restart the 100-hour count.
Note: Pressing the reset button accidentally before the end of the 100-hour cycle does not reset the filters cleaning memory.
It is recommended that grease filters be cleaned every 100 hours and active carbon filters be replaced every 200 hours.
CLEANING AND MAINTENANCE:
Before performing any cleaning and/or maintenance operation, always disconnect the hood from the mains supply.
Regular cleaning will ensure good performance and extend the working life of the hood. Special attention should be given to the grease filters and carbon filters (for recycling hoods only).
Note: An excess of grease in the filter, as well as affecting the performance of the hood, can also be a fire risk.
EXTERNAL CLEANING:
External and internal cleaning of the hood should be performed with a damp cloth and a non-bleach liquid detergent, absolutely avoiding solvents or abrasive substances. It is advisable to use specific products, following their instructions. When cleaning the steel of the hood, we suggest rubbing in the same direction as the grain.
METAL FILTERS CLEANING:

Special attention should be reserved for the metal grease filters. An excess of grease in the filter, as well as affecting the performance of the hood, can also be a fire risk. To avert fires, the filters must be cleaned regularly at least once a month or more frequently in the case of heavy use of the appliance.
According to your hood's model, remove one filter at a time as shown in these pictures. Wash the filters thoroughly with a non-bleach detergent, either by hand or machine. Re-assemble the filters, making sure that the handle faces the outside of the hood.
CARBON FILTERS REPLACEMENT: (For recirculated version only)

The carbon filters can only retain odours for a limited period of time. They cannot be washed, therefore, it is recommended they are replaced at least once every six months or more frequently in the case of a heavy use of the appliance.
Before starting, make sure the hood is disconnected from the mains supply.
To reach the active carbon filters, it is necessary to remove the metal filters as shown above. Use the pictures to find the carbon filter kit of your hood.
Round filter: simply rotate the filters 90 degrees as shown in fig. A and then remove them from their seats.
Spring-held cartridge filter (fig. B): press enough to overcome the spring's resistance and remove the filter.
Cartridge filter with bracket and threaded knob (fig. C): unscrew the knob, remove the locking bracket and then remove the active carbon filter.
Re-assemble the carbon and metal filters by reversing the procedure.
Note: only for the electronic controlled hood, reset the filter cleaning warning by pressing the Filter reset button.
LIGHTS REPLACEMENT:

Before performing any cleaning and/or maintenance operation, disconnect the hood from the mains supply.
According to the model, the hood can be equipped with different kind of lighting such as incandescent, halogen and neon lamps.
a) Incandescent lamps: E14 – 40W 230V lamps. To replace them, remove the transparent fixture from the control panel, unscrew the lamp and screw in the new one.
b) Halogen lamps: G4, 20W - 12V lamps. To replace the lamp, use a screwdriver to remove the glass-supporting ring. Then remove the old lamp and insert the new one. Put the glass back, securing it with the ring.
c) Biax neon lamps: G23 11W lamp. Once the fixture has been removed, remove the biax lamp from its seat and support. Put a new lamp in, performing the same operations backwards.
d) Neon lamp: 15/18W neon tube. To reach the neon tube, unscrew the glass framework screws. Rotate the tube 90 degrees and remove the neon lamp. Install the new neon tube and put the glass framework back.
WARRANTY AND TECHNICAL ASSISTANCE SERVICE
The hood packaging includes, together with this operating and maintenance booklet, the Smeg Warranty Booklet. Please read the Smeg Warranty Booklet for complete information about the warranty (N.B. bulbs and filters are not covered by your warranty).

In the case of failure, please call
Customer Service
0870 9909907
and provide the following data:
• The model indicated inside the hood (fig. 7) - Your full address - Your telephone number • Information on the kind of failure - Your proof of purchase
- OPERATION
- INSTALLATION INSTRUCTIONS
- DUCTED MODE OR RECIRCULATION MODE INSTALLATION
- DUCTED MODE
- RECIRCULATION MODE
- CHIMNEY ASSEMBLY
- ELECTRICAL CONNECTION
- OPERATING INSTRUCTIONS
- √ CONTROL PANEL
- SLIDER
- ELECTROMECHANICAL PUSHBUTTONS
- WITH KNOBS
- ➢ ELECTRONIC PUSHBUTTONS
- OPTIONAL FUNCTIONS
- CLEANING AND MAINTENANCE
- EXTERNAL CLEANING
- METAL FILTERS CLEANING
- CARBON FILTERS REPLACEMENT: (FOR RECIRCULATED VERSION ONLY)
- LIGHTS REPLACEMENT
- WARRANTY AND TECHNICAL ASSISTANCE SERVICE
- AND PROVIDE THE FOLLOWING DATA
Brand : SMEG
Model : KA1VA2
Category : Range hood