
EDF 300643 BlackLine - Dishwasher ECG - Free user manual and instructions
Find the device manual for free EDF 300643 BlackLine ECG in PDF.


| Product Type | Freestanding / Built-in Dishwasher |
| Brand | ECG |
| Model | EDF 300643 BlackLine |
| Capacity | 10 place settings |
| Dimensions (H x W x D) | 820 x 600 x 580 mm (built-in) |
| Weight | Approx. 45 kg |
| Power Supply | 220-240 V, 50 Hz |
| Current | 10/13/16 A fuse |
| Water Pressure | 0.04 - 1.0 MPa |
| Programmes | Intensive, Universal, ECO, Glass, 90 min, Rapid, Soak |
| Energy Consumption (ECO programme) | 0.674 kWh |
| Water Consumption (ECO programme) | 9.0 L |
| Noise Level | 49 dB(A) re 1 pW (estimated) |
| Features | Delayed start (up to 24h), Extra drying, Child lock, Half load, Salt and rinse aid indicators, Automatic door opening (EnergySave) |
| Safety | Safety supply hose, Child lock, Anti-flood system |
| Filter System | Triple filter (coarse, fine, micro) |
| Interior Material | Stainless steel |
| Warranty | 24 months |
Frequently Asked Questions - EDF 300643 BlackLine ECG
User questions about EDF 300643 BlackLine ECG
0 question about this device. Answer the ones you know or ask your own.
Ask a new question about this device
Download the instructions for your Dishwasher in PDF format for free! Find your manual EDF 300643 BlackLine - ECG and take your electronic device back in hand. On this page are published all the documents necessary for the use of your device. EDF 300643 BlackLine by ECG.
USER MANUAL EDF 300643 BlackLine ECG
Read carefully and save for future use!
Warning: The safety measures and instructions, contained in this manual, do not include all conditions and situations possible. The user must understand that common sense, caution and care are factors that cannot be integrated into any product. Therefore, these factors shall be ensured by the user/s using and operating this appliance.
We are not liable for damages caused during shipping, by incorrect use, voltage fluctuation or the modification or adjustment of any part of the appliance.
Follow the instructions in this manual. Before using for the first time, read the entire written instructions carefully and keep them for future reference.
To protect against a risk of fire or electric shock, basic precautions shall be taken while using electrical appliances, including the following:
- This appliance may be used by children over 8 years of age and persons with limited physical and mental abilities and persons without experience and knowledge of the appliance, provided that supervision and/or instruction is provided with regard to the use of the appliance in a safe manner so that the hazards associated with its use are understood. Children must not play with this appliance. Children cannot clean or otherwise maintain the appliance without supervision.
- Do not place unsuitable and heavy objects in the basket. Do not overfill the basket. The manufacturer is not liable for any damage to the internal parts of the appliance caused by improper use of the appliance.
- Do not open the appliance door during the washing cycle. If you still open the door during the wash cycle, the safety device will stop the appliance from operating.
-
To prevent an accident, do not leave the door open. Do not leave the dishwasher door in the open position as this poses a tripping hazard.
-
Warning: Knives and other household utensils with sharp points must be placed in a basket with the points facing downwards or placed in a horizontal position.
- A damaged power cord may only be replaced by the manufacturer, its service technician, or another similarly qualified person.
- If the EnergySave function is active, the appliance door will open at the end of the program. Do not apply pressure to the closed door to avoid damaging the door mechanism. To ensure efficient drying, the door must be opened after 30 minutes (models with automatic door opening system).
- Warning: When the acoustic signal sounds to open the door automatically, you must not stand directly in front of the door.
- Keep packaging material out of the reach of children.
- Do not allow children to play with the appliance or start it.
- Keep cleaning supplies away from children.
- Children must be kept away from the appliance when the door is opened after the washing cycle, as detergent residues may be present in the appliance.
- Ensure that children and pets are kept at a safe distance from the appliance during operation.
- Make sure that the used appliance does not pose a threat to your children. There are known cases where children have been trapped in an old used appliance. To prevent this situation, break the door lock of the old appliance and cut off the power cord.
- Ensure that the water and electrical appliance are connected by a qualified technician in accordance with the manufacturer's instructions and local safety regulations.
- Repair of the appliance by a person other than an authorized service employee will void the warranty.
- Before repairing the appliance, make sure that the appliance is disconnected from the power supply. Switch off the fuse or disconnect the appliance from the power supply by pulling the plug of the power cord out of the socket. When disconnecting the
appliance from power, pull on the plug, not on the cable. Check if you closed the water supply.
-
This appliance is intended for household use and similar areas, such as:
-
kitchen corners in shops, offices and other workplaces,
- in agriculture.
- by guests in hotels, motels and other residential establishments;
-
in Bed and Breakfast accommodations.
-
Use a new set of hoses included with the appliance. Do not reuse the old hoses set.
-
Always disconnect the appliance from the power supply and turn off the water supply after use.
-
For your safety, insert the power cord plug into a grounded three-prong outlet. Carefully check and make sure that the outlet is grounded in a correct and reliable way.
-
Before using the appliance, carefully remove all elements of the packaging and anti-movement security. Otherwise, serious damage to the appliance may occur.
-
Do not install the dishwasher in very wet or damp rooms, as well as in rooms where appear explosive or corrosive gases.
-
Do not step or sit on the dishwasher.
-
Do not lean on the door of the dishwasher.
-
Do not close the door violently. If the dishwasher door is difficult to close, check that whether there are too many dishes in the dishwasher or whether the dishes are well spaced.
-
The use of highly flammable and explosive or toxic solvents is prohibited. Do not use petrol or alcohol etc. as cleaning agents.
-
When the washing programme is finished, wait and then carefully open the dishwasher door.
-
When you open the dishwasher door, be careful of the rising hot steam, which can cause health complications if you are careless.
PRODUCT DESCRIPTION

Cutlery compartment Upper basket Bottom basket

Upper spray arm Stand for cups
Note: Images are for reference only, different models may vary.
INSTALLATION INSTRUCTIONS
RISK OF ELECTRIC SHOCK
Before installing the dishwasher, disconnect the electricity supply. Failure to obey can lead to fatal electric shock.
The installation of piping and electrical connections must be done by professionals.
Connection to the power supply
Power supply requirements
Check on the label of the appliance that the rated voltage corresponds to the mains to which it will be connected. The mains circuit should be dedicated to the dishwasher only and must be protected by a 10/13/16 A fuse, time fuse or a protective switch.
Electrical wiring
Check that the supply voltage and frequency correspond to the values on the appliance label. Only connect the power cord to a power outlet that is properly grounded. If the mains socket to which the appliance is to be connected does not match the power cord plug, replace the outlet. There is a risk of overheating and ignition when using the adapter.
- Make sure the appliance is properly grounded before using it.
Water supply and drain hose
The water distribution system must be suitable for the installation of the dishwasher. We also recommend that you install a filter at the water inlet to prevent damage to the appliance due to contamination by dirt (sand, clay, rust, etc.) that may be in the plumbing or domestic water mains. This will prevent the dishes from yellowing and dirt from accumulating in the appliance.
Cold water connection
Connect the cold water supply hose to the 3/4-inch diameter screw fitting and make sure it is securely attached. If the supply pipe is new or has not been used for a long time, let the water flow for a while until it is completely clean. This will prevent possible blockage of the water supply and damage to the device.

natural_image
Illustration of two hand tools: a wrench and a faucet (no text or symbols present)Safety supply hose
The hose has double walls. The hose system ensures that the water flow is shut off in the event of a hose break or water ingress into the space between the double hose walls.
Connecting the safety water supply hose
- Pull the safety supply hose completely out of its storage compartment at the back of the dishwasher.
- Attach the cap to the water supply with 3/4 inch thread and tighten fittings.
- Open the water supply tap fully before using the dishwasher.
Connecting the drain hose
Connect the waste hose to the waste pipe with a minimum diameter of 4 cm or insert it into the sink and ensure that it does not bend or break. The hose outlet must be located at a height of less than 1000 mm. The free end of the hose must not be immersed in water to prevent water flowing back.

How to remove residual water from the hose
If the connection to the drain pipe is located higher than 1000 mm, excess water may remain in the drain hose. In this case, the residual water must be allowed to flow out of the hose into a bowl or other suitable container located below the level of the sink.
Water drainage
Attach the drain hose. The drain hose must seal perfectly to prevent water leaking from the joint. Make sure that the drain hose is not twisted or wrinkled.
Extension hose
If you need an extension drain hose, use a similar type. It must not be longer than 4m , otherwise the performance of the dishwasher will be reduced.
Water shut-off connection
The drain hose connection must be located 1000 mm (maximum) above the bottom of the dishwasher.
Placement of the dishwasher
Place the appliance in the desired location. The back should face the wall and the sides should face adjacent cabinets or walls. The dishwasher is equipped with hoses for water supply and drainage, which can be positioned on the right and left, thus allowing for an ideal installation.
Levelling the dishwasher
Once the dishwasher is in place, its height can be adjusted using the adjustment bolts located at the bottom. The dishwasher must not be tilted by more than 2^ .
Free standing installation
Assembly into an existing line
The dishwasher height of 845 mm was designed so that it could be placed between existing cabinets of the same height in modern kitchens. The machine's laminated top plate does not require any special care as it is resistant to heat, scratches and stains.

Under an existing worktop
(in assembly under a worktop)
Most modern custom-made kitchens include only a single worktop under which cabinets and electrical appliances are placed. In this case, remove the dishwasher's worktop by unscrewing the bolts under the back edge of the board (a).

English
Attention!
After removing the worktop, the bolts have to be screwed back in under the back edge of the board (b).
Choosing the best location for your dishwasher
The dishwasher should be installed close to the supply and drainage pipes and the electricity supply. Illustration of cabinet dimensions and installation position of the dishwasher.
- The built-in dimensions are given with a distance between the top of the dishwasher and the cabinet top of less than 5 mm and with the door in the plane of the cabinets.

- If the dishwasher is installed in a corner, there should be a clear space when the door is opened.
Depending on the location of the electrical outlet, you may need to cut a hole on the opposite side of the cabinet.

USING THE DISHWASHER

flowchart
graph LR
    A["SALT"] --> B["Add salt into mortar"]
    B --> C["Divine with bar chart"]
    C --> D["Clean washing machine with lid, drain, lamp, and bag"]
- Put salt in the softener, adjust the water hardness and add polish if necessary.
- Prepare dishes and place them in the dishwasher.
- Fill the dispenser with detergent.
- Select the programme and start the dishwasher.
SALT INSERTION, WATER HARDNESS ADJUSTMENT AND POLISH FILLING
Always use dishwasher-safe salt. The salt container is located under the bottom basket.
Warning:
- Use only salt which is safe to use in dishwashers! Other types of salts, which are not intended for dishwashers, for example kitchen salt would damage the water softener. In case of damage caused by use of improper salt the manufacturer does not keep warranty and is not responsible for any damage.
- Only fill the salt before starting the cycle. This will prevent salt grains released from the tray from collecting on the bottom of the dishwasher for prolonged time, where they could cause a corrosion process.
When regulating salt consumption, please do the following:

flowchart
graph LR
    A["Hand holding a cup"] --> B["Add salt to a container"]
    B --> C["Salt being added"]
    C --> D["Add salt into a container"]
    D --> E["Hearts the steps of adding and pouring the salt"]
- Remove the bottom basket and unscrew the tank cap.
- Insert a funnel (supplied) into the opening of the dispenser and pour into it about 1.5 kg of salt.
- Refill the reservoir with water. A small amount of water usually overflows from the dispenser.
- After filling the container, screw the cap on tightly.
- When the salt tank is full, the salt indicator light stops illuminating.
- Immediately after filling the salt reservoirs, start a washing programme (we recommend the quick wash programme). Failing to do so can lead to salt water damaging the filter system, pump or other important component. In such case, the warranty shall be void.
Notes:
- Salt should be added when on the control panel the salt indicator (⇌) lights up. As the salt dissolves quickly, the salt indicator is lit even after the salt has been replenished. If there is no salt indicator on the control panel (for some types), estimate the time of adding salt to the softener by the number of wash cycles performed.
- If salt has spilled, run a rinse or quick programme to remove it.
Water softener
Set the water softener manually using the rotary control of water hardness. The function of the water softener is to remove from the water minerals and salts that could adversely affect the operation of the dishwasher. The more minerals in it, the harder the water. The water softener can be adjusted according to the hardness level of the water in your area. Your water supplier should provide you with information about your water hardness.
Setting the salt consumption
The dishwasher allows to regulate the consumption of salt depending on the hardness of the water used. Thus can be the salt consumption optimized and regulated.
When regulating salt consumption, please do the following:
-
Close the door, switch on the appliance.
-
Within 60 seconds of switching on the appliance, press the P programme button for more than 5 seconds to enter the water softener setting mode.
- Press the programme button again to select the correct set for your local environment, the settings will change in the following order: H1 -> H2 -> H3 -> H4 -> H5 -> H6.
- To exit setup mode, press the ⏻ power button.
| WATER HARDNESS SCALE | Level setting Salt consumption | |||
| German (dH) French (fH) British (Clarke) Mmol/l | ||||
| 0–5 0–9 0–6 0–0.94 H1 0 | ||||
| 6–11 10–20 7–14 1.0–2.0 H2 9 | ||||
| 12–17 21–30 15–21 2.1–3.0 H3 | 12 | |||
| 18–22 31–40 22–28 3.1–4.0 H4 | 20 | |||
| 23–34 41–60 29–42 4.1–6.0 H5 | 30 | |||
| 35–55 61–98 43–69 6.1–9.8 H6 | 60 | |||
1^ = 1.25^ = 1.78^ = 0.178mmol/l
Factory settings: H3
Filling the polish dispenser
The polish is released during the final phase of the program during polishing. This prevents forming drops on the dishes, which would leave them with stains and smudges. Also, it speeds drying and water draining from the dishes. Liquid polish is used in your dishwasher.
Use only brand name polishes for the dishwasher. Never fill the polish dispenser with any other substances (e.g. dishwasher detergent, liquid detergent). You could damage the appliance.
Setting of polish dispenser:
In order to achieve a higher drying performance with a limited amount of polish, the dishwasher is designed to adjust the consumption according to the user. Follow the steps below.
- Close the door and switch on the appliance.
- Within 60 seconds after step 1, press and hold the Program P button for at least 5 seconds, and then press the delay start button (2) to enter setup mode.
- Use the Program P button to select the desired settings in the following order: D3 -> D4 -> D5 -> D1 -> D2 -> D3. The higher the number, the more polish the dishwasher will use.
- Press the ⏻ power button to complete the setup. The setting will also be saved after 5 seconds of no activity.
When to replenish the polish
The regularity of the polish refill depends on the frequency of dishwashing and the setting used.
- If more polish is needed, the polish shortage indicator will light up (※).
• Do not overfill the polish dispenser
FILING THE BASKETS WITH DISHES
- Consider buying dishes and flatware that are designed for dishwashers.
• For certain types of dishes, select the programme that operates at the lowest possible temperature. - Remove the glass and knives from the dishwasher as soon as possible after washing. This will prevent possible damage.
These dishes are not dishwasher safe:
• Cutlery with wooden, porcelain, keratin or pearl handles.
• Plastic dishes which are not heat resistant.
- Older flatware with glued parts that are not heat resistant.
• Tin and copper objects.
- Crystal glass.
• Steel objects which corrode. - Wooden bowls.
- Objects made of synthetic fibres.
- Certain types of glass, which may be tarnished after repeated washing.
• Silver and aluminium parts which tend to lose color during washing. - Glazed patterns may fade when frequently washed in a dishwasher.
Recommendations for filling the dishwasher
Remove larger food leftovers from the dishes. Let the leftover burnt food soften in the pan first. It is not necessary to pre-rinse the dishes under running water.
You will achieve the best cleaning results if you follow these instructions. The function and the appearance of the baskets can vary according to the model of the dishwasher.
Load the objects in the dishwasher as follows:
- Objects such as cups, glasses, pots, bowls, etc. put in bottom up.
- Lay diagonally any curved or arched parts of the dishes to allow water to run out.
- Arrange all objects so that they cannot be overturned.
- Arrange all objects so that the spray arms can move freely.
- Hollow items such as cups, glasses, bowls, etc. load upside down, so that the water does not collect in them.
- Dishes and flatware must not lie inside one another and may not overlap. To avoid damage, glasses should not touch each other.
- The upper basket is designed for more delicate and smaller items such as glasses, cups and mugs.
- Long-bladed knives loaded in an upright position are a danger!
- Long or sharp objects, such as carving knives, must be positioned horizontally in the upper basket.
- Never overload the dishwasher. Only in this way you will get good results and save energy.
WARNING: THE DISHES WILL BE HOT!
To avoid burns, do not remove glass and flatware from the dishwasher for approximately 15 minutes after the programme has finished.
Note: You should not put very small objects in the dishwasher; they could fall through the basket easily.
Filling the upper basket
The upper basket is designed for smaller and more fragile items such as glasses, mugs, cups and saucers, as well as plates, bowls and shallow bowls (if they are not too dirty). Load the dishes and the flatware in such a way that they cannot be overturned by streaming water.

natural_image
Cross-sectional diagram of a mechanical assembly (no text or labels)Filling the lower basket
Longer objects and objects that are difficult to clean, i.e. pots, pans, lids, plates and bowls, should be placed in the lower basket as shown in the picture. We recommend putting plates and lids to the grooves on the sides of the basket so as not to impede the rotation of the upper spray arm. The maximum recommended diameter of the plates in front of the detergent dispenser is 19 cm so as not to obstruct its opening.

natural_image
Pure diagram of vertical panels arranged in a grid pattern without any text, numbers, or symbolsFilling the flatware compartment
Flatware should be placed separately in the compartment in the appropriate places. Do not place flatware too close together to prevent insufficient washing.
WARNING:
Make sure that no object can pass through the bottom. Always load sharp objects with blades downward!
Filling of baskets according to EN60436
Fully filling the dishwasher helps save energy and water.
Upper basket

- Cups
- Mugs
- Glasses
- Glass bowls
- Dessert bowls
Bottom basket

- Pans
- Desert plates
- Shallow plates
- Deep plates
- Melamine dessert plates
- Melamine bowls
- Oval plates
- Small pans
Cutlery compartment
English


- Soup spoons
- Forks
- Blades
- Teaspoons
- Dessert spoons
- Serving spoons
- Serving forks
- Ladles
Information for comparability
Tested to EN60436
Capacity: 10 dish sets
Upper basket position: lower position
Program: ECO
Polishing settings: Max.
Setup of the softener H3
Adjusting the the upper basket position
The height of the upper basket can be easily adjusted to accommodate taller dishes in the upper or lower basket. To adjust the height of the upper basket, follow these instructions.
Option 1:

natural_image
Diagram of a car chassis with wheels and an arrow indicating direction (no text or symbols)1 Pull out the upper basket. Take out the upper basket.

natural_image
Line drawing of a shopping cart with wheels and an arrow indicating direction (no text or symbols)ket.

natural_image
Diagram of a shopping cart with wheels and a directional arrow, no text or symbols present3 Reinstall the upper basket on the upper or lower casters.

natural_image
Diagram of a car chassis with wheels and an arrow indicating direction (no text or symbols)4 Slide the upper basket in.
Option 2:

natural_image
Line drawing of a mechanical assembly with hands operating a component (no text or symbols)1 To lift the upper basket, simply lift the upper basket by gripping the middle of each side until the basket locks in the top position. No need to lift the adjustment handle.

2 To lower the position of the upper basket, lift the adjustment handles on either side to release the basket and lower it to the lower position.
Open the glass compartments
To make room for taller items in the upper basket, lift the glass holder up. You can then lean tall objects against it.

natural_image
Diagram showing two mechanical or structural configurations with rotational arrows, no text or symbols presentFolding plate compartments
The compartments in the lower basket are used to store plates. They can be folded to give you more space for large items.

natural_image
Diagram showing a structural change before and after assembly, with no visible text or symbolsDETERGENT FILLING (TABLETS)

flowchart
graph TD
    A["1"] --> B["2"]
    B --> C["3"]


-
Choose the opening method of the lid according to your model.
-
Open the cap by sliding the catch (1).
-
Open the cap by pressing the catch (2).
-
For the main wash cycle, add detergent to the larger opening (A). For better cleaning results, especially if your dishes are very dirty, pour a small amount of detergent on the door. The additional detergent is consumed during the pre-wash phase.
- Close the flap by sliding it forward and pushing it down.
Note: Read the recommendations of the manufacturer on the detergent's packaging.
CONTROL PANEL AND PROGRAMME SELECTION

flowchart
graph TD
    A["Program"] --> B["9"]
    B --> C["10"]
    C --> D["2"]
    C --> E["4"]
    C --> F["3"]
    G["Intensive"] --> H["90 mins 90°"]
    I["Universal"] --> J["Rapid"]
    K["ECO ECO"] --> L["Pre-wash"]
    M["Glass"] --> N["8"]
    O["P ½"] --> P["5"]
    O --> Q["6"]
    O --> R["7"]
1 Power
Press this button to switch the dishwasher on, the screen will light up.
2 Delayed start
Press this button to set the washing delay hours. You can delay the start of washing by up to 24 hours. One press of this button delays the start of washing by one hour.
3 Extra drying
For better dried dishes (can only be used with the Intensive, Universal, ECO, Glass and 90 min programmes). When you press this button, the corresponding indicator will light up.
4 Child lock
This option allows you to lock buttons on the control panel (apart from the power button) so that children cannot accidentally launch the dishwasher by pressing the buttons on the control panel. Lock or unlock the buttons on the control panel by pressing and holding simultaneously the Delayed start + Extra drying buttons for 3 seconds. When you press this button, the corresponding indicator will light up.
5 Programme
Press this button to select the respective washing programme; its indicator will light up.
6 Half load
If you have approximately half or less than half of the dishes to wash, you can select this function to save energy and water (can only be used with the Intensive, Universal, ECO, Glass and 90 min programmes).
7 Start/Pause
Launching the selected programme or selecting a new programme while the dishwasher is in operation.
8 Programme indicator
Displays the selected programme (see table below).
9 Warning indicators

Polish
If the polish indicator lights up, the dishwasher is low on polish and needs to be refilled.

Salt
If the salt indicator lights up, it means that the dishwasher is low on salt and needs to be refilled.

Tap
If the water tap indicator lights up, it means that the water tap is closed.
10 Screen
Display of remaining programme time and time of delay, error code, etc.
Table of wash programmes (EDF 100243)
| Programme | Programme description | Suitable dishes | Amount of detergent (pre-wash / wash) | Duration (min) | Energy (kWh) | Water consumption (l) | Polish |
 Intensive Intensive | Pre-wash (50 °C)Wash (65 °C)RinsingRinsingRinse (65 °CDrying) | Heavily soiled dishes, including pots and pans with dried-on residue. | 4/14 g1 or 2 tablets | 205 1.378 | 15.3 Yes | ||
 Universal Universal | Pre-wash (45 °C)Wash (55 °C)RinsingRinse (65 °CDrying) | For normally soiled dishes, such as pots, plates, glasses and lightly dirty pans. | 4/14 g1 or 2 tablets | 175 1.287 | 13.1 Yes | ||
 *EN60436 *EN60436 | Wash (45 °C)RinsingRinse (60 °CDrying) | This is a standard programme suitable for normally soiled dishes, such as pots, plates, glasses and lightly soiled pans. | 18 g1 or 2 tablets | 235 0.755 | 9.0 Yes | ||
 Glass Glass | Pre-washWash (50°C)RinsingRinse (65 °CDrying) | For lightly soiled dishes and glass-ware. | 4/14 g1 or 2 tablets | 120 0.934 | 13.1 Yes | ||
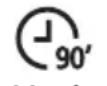 90 min 90 min | Wash (60 °C)RinsingRinse (65 °CDrying) | For normally soiled dishes that need to be washed quickly. | 18 g1 or 2 tablets | 90 1.234 | 10.2 Yes | ||
 Rapid Rapid | Wash (50°C)RinsingRinse (45 °C) | Short wash for lightly soiled dishes which are not necessary to dry. | 12 g 30 0.61 | 11 10.0 No | |||
 Soak Soak | Pre-wash | To rinse dishes you plan to wash later that day. | -15 0.020 | 3.6 No |
Table of wash programmes (EDF 300443 / EDF 300643)
| Programme | Programme description | Suitable dishes | Amount of detergent (pre-wash / wash) | Duration (min) | Energy (kWh) | Water consumption (l) | Polish |
 Intensive Intensive | Pre-wash (50 °C)Wash (65 °C)RinseRinseRinse (60 °CDrying | Heavily soiled dishes, including pots and pans with dried-on residue. | 4/14 g1 tablet | 205 1.19 | 9 15.2 Yes | ||
 Universal Universal | Pre-wash (45 °C)Wash (55 °C)RinseRinseRinse (60 °CDrying | For normally soiled dishes, such as pots, plates, glasses and lightly dirty pans. | 4/14 g1 tablet | 175 0.97 | 2 15.1 Yes | ||
 *EN60436 *EN60436 | Wash (45 °C)RinseRinse (45 °CDrying | This is a standard programme suitable for normally soiled dishes, such as pots, plates, glasses and lightly soiled pans. | 18 g1 tablet | 215 0.67 | 4 9.0 Yes | ||
| Glass | Pre-wash (40 °C)Wash (50°C)RinseRinse (50 °CDrying | For lightly soiled dishes and glass-ware. | 4/14 g1 tablet | 120 0.73 | 4 12.4 Yes | ||
 90 min 90 min | Wash (55 °C)RinseRinse (50 °CDrying | For normally soiled dishes that need to be washed quickly. | 18 g1 tablet | 90 0.659 | 9.5 Yes | ||
 Rapid Rapid | Wash (40 °C))Rinse (40 °C)Rinse (45 °C) | Short wash for lightly soiled dishes which are not necessary to dry. | 12 g1 tablet | 30 0.600 | 10.2 No | ||
 Soak Soak | Pre-wash | To rinse dishes you plan to wash later that day. | - 15 0.020 3.6 No |
* The ECO programme is suitable for cleaning normally soiled dishes, is the most efficient programme for this use in terms of combined energy and water consumption and is used to assess compliance with EU ecodesign directives.
Save Power
- Pre-rinsing dishes leads to increased water and energy consumption and is not recommended.
- Washing dishes in a household dishwasher usually uses less energy and water than washing dishes by hand, if the household dishwasher is used as instructed.
Program start
- Pull out both baskets, fill them with dishes and load them back. We recommend filling the lower basket first and then the upper one.
- Insert detergent.
- Connect the power supply to a mains outlet. See the product information sheet for power supply information. Check that the water supply is fully open.
- Close the door and press the power button.
- Select a programme, the response light will come on. Then press the Start/Pause button and the dishwasher starts the wash cycle.
Changing the programme during washing
The programme can only be changed if it has only been running for a short period of time, otherwise detergent may have already been released or water and detergent have already been discharged. The dishwasher should then be switched off and the detergent tank refilled. To reset the dishwasher, follow the instructions below:
- By pressing the Start/Pause button, you stop the wash cycle.
- Press the Programme button for more than three seconds and the appliance will switch to the programme selection mode.
- You can change the programme to the desired cycle setting.
MAINTENANCE AND CLEANING
Exterior of the appliance
Doors and door seals
Clean the door seals regularly with a soft, damp cloth to remove food deposits. When the dishwasher is being filled, food and drink residues may drip down the sides of the dishwasher door. These areas are outside the wash cabinet and water from the spray arms cannot reach them. Any deposits must be wiped off before closing the door.
Control panel
If cleaning is required, wipe the control panel with a soft damp cloth only.
WARNING:
Do not use any spray cleaners, they could cause water to enter the door lock and electrical components. Never use abrasive cleaners or steel wools on external surfaces as they may scratch the surface. Some paper towels can also scratch or leave marks on the surface.
Inside of the appliance
Filtration system
A filtration system at the bottom of the wash cabinet collects coarse dirt from the wash cycle, including foreign objects such as toothpicks or shards. The collected coarse dirt can cause clogging of the filters. Regularly check the condition of the filters, carefully remove foreign objects and clean parts of the filtration system with water if necessary. Follow the instructions below to clean the filter.
- Hold the coarse filter and turn it counterclockwise to unlock it. Lift the filter up and remove it from the dishwasher.
- The fine filter can be removed from the bottom of the filtration assembly. The coarse filter can be separated from the main filter by gently pressing the tabs at the top and pulling it out.
-
Larger food residues can be cleaned by rinsing the filter under running water. For a more thorough cleaning, use a soft cleaning brush.
-
Reassemble the filters in the reverse order of disassembly, replace the filter insert and turn it clockwise to the closing arrow.
WARNING:
- Do not tighten the filters too much. Put the filters back in the correct order, otherwise coarse dirt could enter the dishwasher and cause a blockage.
- Never use the dishwasher without the filters in place. Incorrect replacement of a filter may reduce the performance of the appliance and damage dishes and the appliance.
Spray arms
Regular cleaning of the spray arms of chemicals from hard water is important because emerging limescale clogs jets and bearings.
To clean the washer arms, follow the instructions below:
- To remove the upper washer arm, hold the nut in the middle and turn the washer arm counterclockwise.
- To remove the lower spray arm, pull it upwards.
- Rinse the spray arms in warm, soapy water and clean the jets using a soft brush.
TROUBLESHOOTING
Before calling the service centre
If you read the content of the tables on the following pages, you may not need to call the service centre.
| Problem Possible cause What to do | ||
| The dishwasher does not start. A blown fuse or circuit breaker has blown the circuit. | Replace the fuse or switch back the breaker. Disconnect all other electrical appliances sharing the same mains circuit with the dishwasher. | |
| The power is not on. Make sure the dishwasher is turned on and the door is properly closed. Make sure that the power cord plug is securely plugged into the wall outlet. | ||
| Water pressure is low. Make sure the water supply is connected properly and the supply valve is open. | ||
| The dishwasher door is not properly closed. Check that the door is properly closed. | ||
| No water is drained from the dishwasher. | Over-twisted or trapped drain hose. | Check the drain hose. |
| The filter is clogged. Check the filtration system. | ||
| The kitchen sink is clogged. Check the kitchen sink to make sure it drains well. If the water does not drain from the sink, contact a plumber. | ||
| Soaps in the sump. Wrong detergent | Use only special dishwasher | detergents to prevent foaming. If foam forms, open the dishwasher door and let the foam disappear. Pour 1 litre of cold water into the sump. Close the dishwasher door and select any programme. Initially, the dishwasher will drain the water. When the draining phase is complete, open the door and check if the foam has disappeared. Repeat if necessary. |
| Overflowing polish. Always wipe off | any excess polish immediately. | |
| Rusted interior of the sump Detergent with dye may have been used. | Make sure you use a dye-free product. | |
| White coating on the inner surface. | Hard water scale. To clean the interior, use a sponge soaked in detergent for dishwashers. Use rubber gloves. Never use any other cleaner than for dishwasher to prevent formation of foaming or suds. | |
| Rust stains remain on the flatware. | This flatware is not corrosion resistant. | Do not wash items that are not corrosion-resistant in the dishwasher. |
| The dishwasher will not start after adding salt. Salt has entered the wash cycle. | After adding salt, always start the dishwashing programme without dishes. Do not turn on the Turbo function (if available) after adding salt to the dishwasher. | |
| The salt softener lid is loose. Check | that the softener lid is firmly secured. | |
| Clattering in the dishwasher. The spray arm is hitting an object in the basket. | Interrupt the programme and rearrange the dishes that are obstructing the spray arm. | |
| Rattling in the dishwasher. The porcelain dishes are too loose inside. | Stop the programme and rearrange the dishes. | |
| Pounding in the water pipes. This may be due to local installation or pipe cross-section size. | This has no effect on the function of the dishwasher. If in doubt, contact a qualified plumber. | |
| The dishes aren't clean. The dishes | were not arranged properly. | See preparing and loading dishes. |
| An insufficiently powerful programme was chosen. | Select a more powerful programme. | |
| Not enough detergent has been released. | Add more detergent or use a different type. | |
| Pieces of dishes interfere with the movement of the spray arms. | Rearrange the dishes so that they do not obstruct the spray arms. | |
| Filtration system in the bottom of the wash compartment is not properly seated or is not clean. This can cause the spray jets to become blocked. | Clean the filter or assemble its parts together properly. Clean the spray jets. | |
| Coating on glassware. The combination of soft water and an excessive amount of detergent. | If you are using soft water, use less detergent for glass washing and select a shorter programme. | |
| White spots appear on dishes and glasses. | Hard water areas can cause limescale build-up. | Check the water softener settings or the salt reservoir fill level. |
| Black or grey spots on the dishes. | Aluminium objects came into contact with other dishes. | To remove these stains use a mild abrasive cleaner. |
| Detergent remained in the dispenser container. | Dishes were covering the dispenser container. | Rearrange the dishes. |
| Dishes will not dry. Incorrect placement in the basket. | If there is any detergent residue on the dishes, wear gloves to prevent skin irritation. | |
| The dishes were removed too soon. | ||
| Wrong program has been selected. | ||
| Use of flatware with poor quality surface | ||
WARNING:
Self- or non-professional repair can cause serious safety hazards to the user of the appliance and affect the warranty.
ERROR CODES AND THEIR MEANING
| Code | Meaning Possible cause | |
| E1 The | water is taking longer than expected to fill. | The valve is closed, the water pressure is too low or the water supply has been interrupted. |
| E3 The | desired temperature could not be reached. | Heating element malfunction. |
| E4 Water | overflow. Water leakage occurred. | |
| Ed Electronic communication error. A short circuit or electronic circuit failure has occurred. | ||
USE AND DISPOSAL OF WASTE
Wrapping paper and corrugated paperboard – deliver to scrapyard. Packing foil, PE bags, plastic elements – throw into plastic recycling containers.
DISPOSAL OF PRODUCTS AT THE END OF LIFETIME
Disposal of electric and electronic equipment (valid in EU member countries and other European countries with an implemented recycling system)
The represented symbol on the product or package means the product shall not be treated as domestic waste. Hand over the product to the specified location for recycling electric and electronic equipment. Prevent negative impacts on human health and the environment by properly recycling your product. Recycling contributes to preserving natural resources. For more information on the recycling of this product, refer to your local authority, domestic waste processing organization or store, where you purchased the product.
This product complies with EU directives on electromagnetic compatibility and electrical safety.
The operating manual is available at www.ecg-electro.eu.
Changes of text and technical parameters reserved.

08/05

Please refer to the attached Warranty Sheet or www.ecg-electro.eu for professional service of this product.
- The warranty for this product is 24 months.
- Spare parts listed in EU 2019/2022 are available for 7 or 10 years depending on the type of spare part.
- You can access the product database, where model information is stored (according to EU 2019/2017) by reading the QR code on the energy label.
SICHERHEITSHINWEISE
GEFAHR EINES STROMSCHLAGS!
natural_image
Illustration of two hand tools: a faucet and a water tap (no text or symbols)natural_image
Diagram showing a hand holding a tool with an arrow indicating motion, enclosed in a dashed circle (no text or symbols)
natural_image
Line drawing of a kitchen sink with a grid-patterned wall and cabin (no text or symbols)
natural_image
Technical line drawing of a mechanical assembly with rollers and housing (no text or symbols)natural_image
Pure diagram of vertical slats arranged in a grid pattern with no text or symbols
natural_image
Diagram of a car chassis with wheels and an arrow indicating direction (no text or symbols)natural_image
Line drawing of a shopping cart with wheels and an arrow indicating direction (no text or symbols)2 Oberkorb heraus.

natural_image
Line drawing of a shopping cart with wheels and a directional arrow (no text or symbols)natural_image
Diagram of a car chassis with wheels and an arrow indicating direction (no text or symbols)natural_image
Line drawing of a mechanical assembly with hands operating a component (no text or symbols)natural_image
Technical illustration of a tracked vehicle with a hand operating a tool, showing mechanical components and a magnified inset (no text or symbols)natural_image
Diagram showing two stages of a structural component with rotational arrows indicating motion (no text or symbols)natural_image
Diagram showing two stages of a livestock breeding cage with visible mesh and feeding details (no text or symbols)BEFÜLLEN VON WASCHMITTEL (TABLETTEN)

flowchart
graph TD
    A["1"] --> B["2"]
    B --> C["3"]


natural_image
Illustration of a hand holding a faucet and a water tap (no text or symbols)flowchart
graph LR
    A["SALT"] --> B["Bar chart with vertical bars"]
    B --> C["Water washing machine with cleaning and dust removal"]
flowchart
graph LR
    A["Hand holding a cup"] --> B["Add salt into a pot"]
    B --> C["Salt being added to the pot"]
    C --> D["Hand pouring liquid into a container with a lid"]
    D --> E["Back to a container with a lid and arrow indicating rotation"]
natural_image
Technical line drawing of a mechanical component with rollers and housing (no text or symbols)natural_image
Pure geometric line drawing of a fence with vertical supports (no text or symbols)
natural_image
Diagram of a car chassis with wheels and an arrow indicating direction (no text or symbols)natural_image
Line drawing of a shopping cart with wheels and an arrow indicating direction (no text or symbols)2

natural_image
Diagram of a car chassis with wheels and a directional arrow, no text or symbols presentnatural_image
Diagram of a car chassis with wheels and an arrow indicating direction (no text or symbols)natural_image
Line drawing of a mechanical assembly with hands operating a component (no text or symbols)natural_image
Technical illustration of a tracked vehicle with gear and a hand operating a tool, showing mechanical components (no text or symbols)natural_image
Diagram showing two mechanical assembly stages with rotating components and a final view (no text or symbols)natural_image
Diagram showing two stages of a livestock breeding or processing system, with no visible text or symbols.PLNĚNÍ MYCÍHO PROSTŘEDKU (TABLETY)

flowchart
graph TD
    A["1"] --> B["2"]
    B --> C["3"]


natural_image
Illustration of two hand tools: a faucet with handle and a tap wrench (no text or symbols)natural_image
Diagram showing a hand holding a tool with an arrow indicating motion, no text or symbols present
natural_image
Line drawing of a kitchen sink with a grid-patterned wall (no text or symbols)flowchart
graph LR
    A["SALT"] --> B["Add salt into mortar"]
    B --> C["Divine with vertical bars"]
    C --> D["Clean in a microwave oven with lid, drain, lamp, and bag"]
flowchart
graph LR
    A["Hand holding a cup with a lid"] --> B["Add salt to a cup with a salt container"]
    B --> C["Salt being added to the cup"]
    C --> D["Hearts from adding to a container with liquid pouring"]
    D --> E["Backfilling into a cup with a lid"]
natural_image
Technical line drawing of a mechanical component with rollers and housing (no text or symbols)natural_image
Pure geometric diagram of vertical lines within a rectangular frame, no text or symbols presentEvőeszköz fiók

natural_image
Diagram of a car chassis with wheels and an arrow indicating direction (no text or symbols)natural_image
Line drawing of a shopping cart with wheels and an arrow indicating direction (no text or symbols)6 kosarat.

natural_image
Line drawing of a shopping cart with wheels and a directional arrow (no text or symbols)natural_image
Diagram of a car chassis with wheels and an arrow indicating direction (no text or symbols)natural_image
Line drawing of a mechanical assembly with hands operating a component (no text or symbols)natural_image
Technical illustration of a tracked vehicle with a hand operating the engine, showing gear and wheel components (no text or symbols)natural_image
Diagram showing two mechanical assembly stages with rotating components and a curved base structure (no text or symbols)natural_image
Diagram showing a structural change before and after assembly, with no visible text or symbolsMOSOGATÓSZER (TABLETTA) ADAGOLÁSA

flowchart
graph TD
    A["Step 1: Lighting"] --> B["Step 2: Laser"]
    B --> C["Step 3: Device with LED indicator"]


POKYNY NA INŠTALÁCIU
NEBEZPEČENSTVO ÚRAZU ELEKTRICKÝM PRÚDOM!
natural_image
Illustration of two hand tools: a faucet and a water tap (no text or symbols)natural_image
Diagram showing a lever mechanism with a hand holding a tool, no text or symbols present
natural_image
Line drawing of a kitchen sink with a grid-patterned wall and cabinetry (no text or symbols)flowchart
graph LR
    A["SALT"] --> B["Add salt"]
    B --> C["Add 10% of bars into wash tube"]
    C --> D["Add 10% of 10% of bars into washing machine with cleaning bag"]
- Vložte sol'do zmäkčovadla, nastavte tvrdost' vody a v prípade potreby doplňte leštidlo.
- Pripravte a vložte do umývačky riadu.
- Naplňte dávkovač umývacieho prostriedku.
- Zvolte program a spustite umývačku.
VKLADANIE SOLI, NASTAVENIE TVRDOSTI VODY A PLNENIE LEŠTIDLA
flowchart
graph LR
    A["Hand holding a cup"] --> B["Salt with a lid"]
    B --> C["Add to a cup with a salt bag"]
    C --> D["Add to a container with liquid"]
    D --> E["Transfer from salt to container"]
natural_image
Technical line drawing of a mechanical assembly with rollers and brackets (no text or symbols)natural_image
Pure geometric line drawing of a vertical structure with parallel planes, no text or symbols present- Šálky
- Hrnčeky
- Poháre
- Sklenené misky
- Dezertné misky
Spodný kôš

- Pekáče
- Dezertné taniere
- Plytké taniere
- Hlboké taniere
- Melamínové dezertné taniere
- Melamínové misky
- Oválne taniere
- Malé panvice
natural_image
Line drawing of a car chassis with wheels and an arrow indicating direction (no text or symbols)natural_image
Line drawing of a car with wheels and a black arrow indicating motion (no text or symbols)2

natural_image
Diagram of a car chassis with wheels and a directional arrow, no text or symbols presentnatural_image
Diagram of a mechanical cart with wheels and an arrow indicating direction (no text or symbols)natural_image
Line drawing of a mechanical assembly with hands operating a component (no text or symbols)natural_image
Illustration of a tracked vehicle with mechanical components and a hand adjusting a tool, showing no text or symbols.natural_image
Diagram showing two mechanical or structural configurations with rotational arrows, no text or symbols presentSklopenie priehradiek na taniere
natural_image
Diagram showing a structural change before and after assembly, with no visible text or symbolsPLNENIE UMÝVACIEHO PROSTRIEDKU (TABLETY)

flowchart
graph TD
    A["1"] --> B["2"]
    B --> C["3"]

flowchart
graph TD
    A["Light Lighting"] --> B["Reinforced Lighting"]
    B --> C["Reinforced ECO"]
    C --> D["Reinforced Glass"]
    D --> E["Reinforced ECO Pre-wash"]
    E --> F["Reinforced ECO Rapid"]
    F --> G["Reinforced ECO Intensive 90 mins 90°"]
    G --> H["Reinforced ECO Plastic P ½ Box 5"]
    H --> I["Reinforced ECO Plastic Box 6"]
    I --> J["Reinforced ECO Plastic Box 7"]
1 Napájanie
■ The manufacturer takes no responsibility for printing errors contained in the product's user's manual

- Read carefully and save for future use!
- PRODUCT DESCRIPTION
- INSTALLATION INSTRUCTIONS
- RISK OF ELECTRIC SHOCK
- Connection to the power supply
- Power supply requirements
- Electrical wiring
- Water supply and drain hose
- Cold water connection
- Safety supply hose
- Connecting the safety water supply hose
- Connecting the drain hose
- How to remove residual water from the hose
- Water drainage
- Extension hose
- Water shut-off connection
- Placement of the dishwasher
- Levelling the dishwasher
- Free standing installation
- Assembly into an existing line
- Under an existing worktop
- Attention!
- Choosing the best location for your dishwasher
- SALT INSERTION, WATER HARDNESS ADJUSTMENT AND POLISH FILLING
- Warning:
- Notes:
- Water softener
- Setting the salt consumption
- Filling the polish dispenser
- Setting of polish dispenser:
- When to replenish the polish
- FILING THE BASKETS WITH DISHES
- These dishes are not dishwasher safe:
- Recommendations for filling the dishwasher
- Load the objects in the dishwasher as follows:
- WARNING: THE DISHES WILL BE HOT!
- Filling the upper basket
- Filling the lower basket
- Filling the flatware compartment
- Filling of baskets according to EN60436
- Information for comparability
- Adjusting the the upper basket position
- Option 1:
- Option 2:
- Open the glass compartments
- Folding plate compartments
- DETERGENT FILLING (TABLETS)
- CONTROL PANEL AND PROGRAMME SELECTION
- Power
- Delayed start
- Extra drying
- Child lock
- Programme
- Half load
- Start/Pause
- Programme indicator
- Warning indicators
- Screen
- Save Power
- Program start
- Changing the programme during washing
- MAINTENANCE AND CLEANING
- Exterior of the appliance
- Doors and door seals
- Control panel
- Inside of the appliance
- Filtration system
- Spray arms
- TROUBLESHOOTING
- Before calling the service centre
- ERROR CODES AND THEIR MEANING
- USE AND DISPOSAL OF WASTE
- DISPOSAL OF PRODUCTS AT THE END OF LIFETIME
- SICHERHEITSHINWEISE
- GEFAHR EINES STROMSCHLAGS!
- BEFÜLLEN VON WASCHMITTEL (TABLETTEN)
- PLNĚNÍ MYCÍHO PROSTŘEDKU (TABLETY)
- Evőeszköz fiók
- MOSOGATÓSZER (TABLETTA) ADAGOLÁSA
- POKYNY NA INŠTALÁCIU
- VKLADANIE SOLI, NASTAVENIE TVRDOSTI VODY A PLNENIE LEŠTIDLA
- Sklopenie priehradiek na taniere
- PLNENIE UMÝVACIEHO PROSTRIEDKU (TABLETY)
- Napájanie
Brand : ECG
Model : EDF 300643 BlackLine
Category : Dishwasher