
C5 MBC1270GB - Vacuum Cleaner MIDEA - Free user manual and instructions
Find the device manual for free C5 MBC1270GB MIDEA in PDF.


| Product Type | Cylinder Vacuum Cleaner |
| Brand | Midea |
| Model | C5 MBC1270GB |
| Power | 700 W |
| Voltage / Frequency | 220-240 V ~ 50-60 Hz |
| Dust Capacity | 1.5 L |
| Filtration | EPA10 Filter |
| Cord Length | 4.5 m |
| Weight | 4.9 kg |
| Dimensions (W x D x H) | 350 x 200 x 350 mm |
| Annual Energy Consumption | 27 kWh/yr (Class A) |
| Suction Control | Slider on handle |
| Accessories Included | Floor brush, crevice nozzle, round brush |
| Floor Brush Adjustment | Button for hard floor (down) / carpet (up) |
| Cord Rewind | Yes, with button |
| Maintenance | Washable exhaust and inner filters |
| Spare Parts Available | Dust bin, filter set, and other accessories |
| Safety Features | Overheat protection (automatic shutdown), cord damage replacement handled by professionals |
| Manual Languages | EN, PL, CZ, SK, HU, RU, UK, ET, LT, LV, RO, SL |
Frequently Asked Questions - C5 MBC1270GB MIDEA
User questions about C5 MBC1270GB MIDEA
0 question about this device. Answer the ones you know or ask your own.
Ask a new question about this device
Download the instructions for your Vacuum Cleaner in PDF format for free! Find your manual C5 MBC1270GB - MIDEA and take your electronic device back in hand. On this page are published all the documents necessary for the use of your device. C5 MBC1270GB by MIDEA.
USER MANUAL C5 MBC1270GB MIDEA
PLEASE READ THE MANUAL CAREFULLY BEFORE USING AND KEEP IT PROPERLY FOR FUTURE USE
natural_image
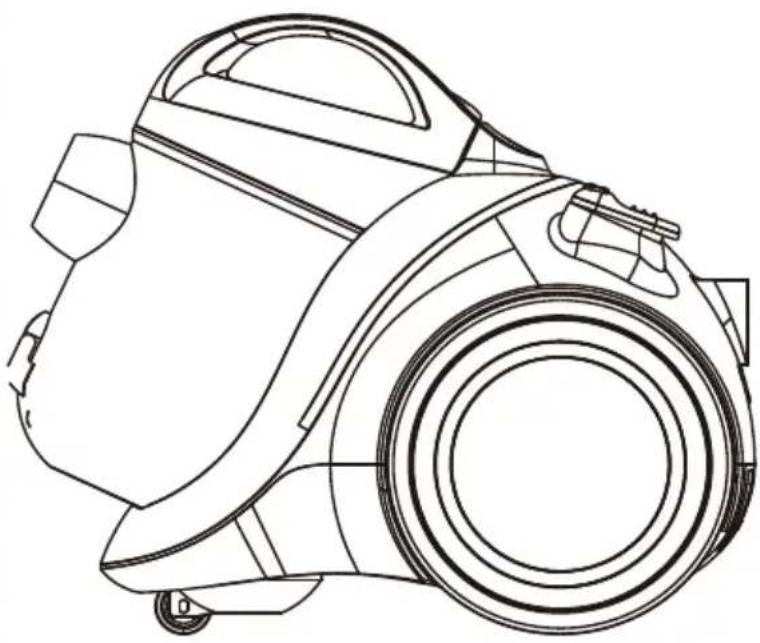
Line drawing of a vacuum cleaner's head and side profile (no text or symbols)Warning notices: Before using this product, please read this manual carefully and keep it for future reference.
The design and specifications are subject to change without prior notice for product improvement. Consult with your dealer or manufacturer for details.
EN, PL, CZ, SK, HU, RU, UK, ET, LT, LV, RO, SL
natural_image
Simple line drawing of two cylindrical objects with an arrow indicating direction, no text or symbols present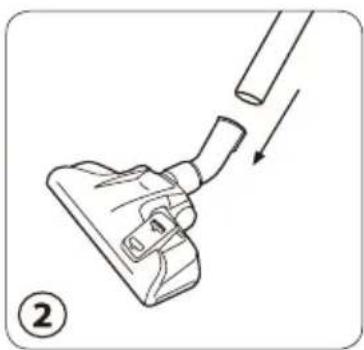
natural_image
Diagram of a hair clip being inserted into a handle, showing a downward arrow indicating force (no text or symbols present)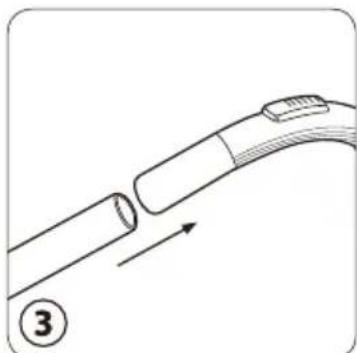
natural_image
Diagram of a medical or laboratory procedure showing a tool interacting with a curved tube, with an arrow indicating direction (no text or symbols present)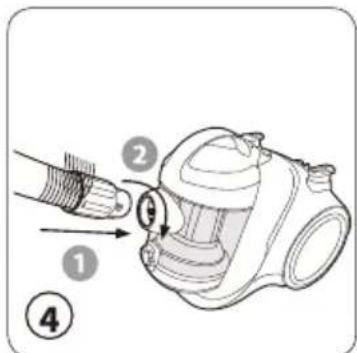
natural_image
Line drawing of a plug inserted into a socket (no text or symbols)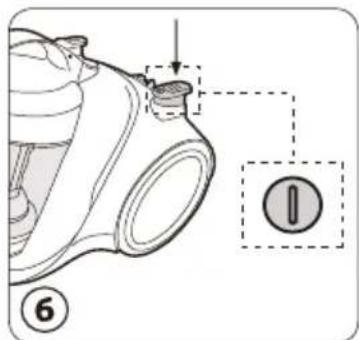
natural_image
Diagram of a hand gripping a device with directional arrows indicating movement (no text or symbols)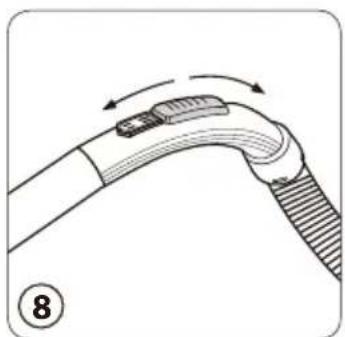
natural_image
Illustration of a hand holding a curved cable with a small object inside, showing motion arrows (no text or symbols)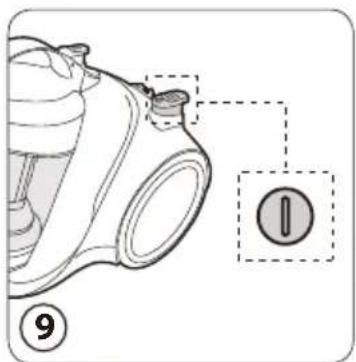
natural_image
Technical diagram of a mechanical assembly with pipe and clamped components (no text or symbols)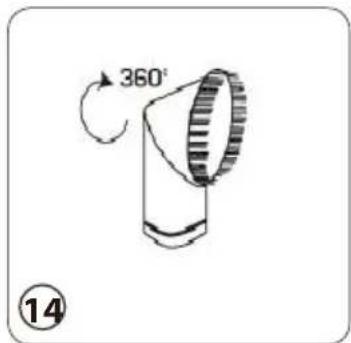
natural_image
Technical line drawing of a mechanical device with a component, showing internal structure and an arrow indicating direction (no text or symbols)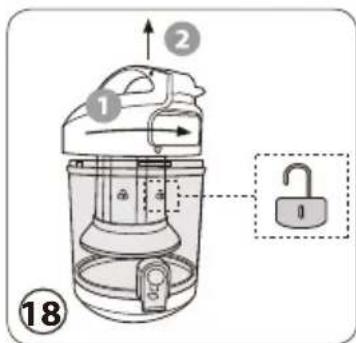
natural_image
Diagram of a heat exchanger with cooling fins and a hand operating the lid (no text or symbols)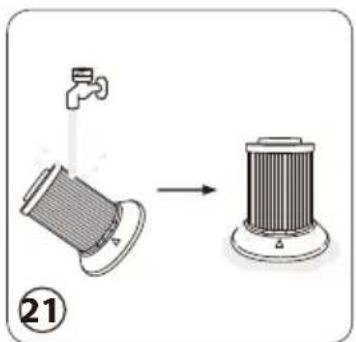
natural_image
Diagram showing a faucet opening a cylindrical component and its side view with a base (no text or symbols)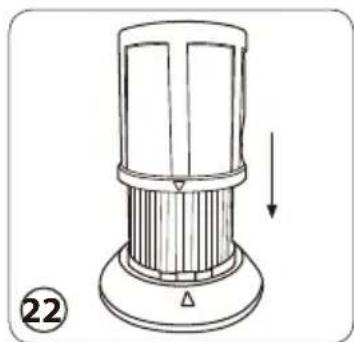
natural_image
Line drawing of a vertical bar magnet with an arrow indicating downward motion (no text or symbols)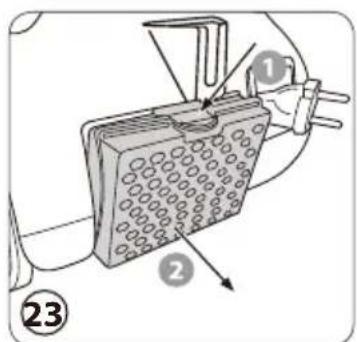
English.... 5-9
Polish....10-15
Czech.... 16-21
Slovakian....22-27
Hungarian.... 28-33
Russian....34-39
Ukrainian....40-45
Estonian.... 46-51
Lithuanian....52-57
Latvian....58-63
Romanian....64-69
Slovenian....70-75
Safety Introduction
- For the first operation, it is advisable to read the manual carefully before hand and keep it properly for future use.
- Before the first operation, make sure the dust cup or the dust bag is properly installed.
- Make sure the power supply is 220-240V\~ 50-60Hz
- Do not vacuum water and inflammable material.
- Do not vacuum burning material and ashes.
- Do not use the machine without a motor protection filter filled.
- Please change the dust bag immediately when it was damaged.
- Do not store or use the machine close to high temperature places.
- Dot not let children use the machine in case of danger.
- If abnormal noise, smell, smoke or any other failure or breakage is found during the operation, you should turn off the switch and unplug it. Then contact with your service center for repair. Do not repair by yourself.
-
If the supply cord is damaged, it must be replaced by the manufacturer or its service agent or a similarly qualified person in order to avoid a hazard.
-
This appliance is not intended for use by persons (including children) with reduced physical, sensory or mental capabilities, or lack of experience and knowledge, unless they have been given supervision or instruction concerning use of the appliance by a person responsible for their safety.
-
Children should be supervised to ensure that they do not play with the appliance.
Warning:
The plug must be removed from the power socket before any maintenance or replacement.
If the power cord is damaged, replace them only by the factory or maintenance center or similarly qualified persons.
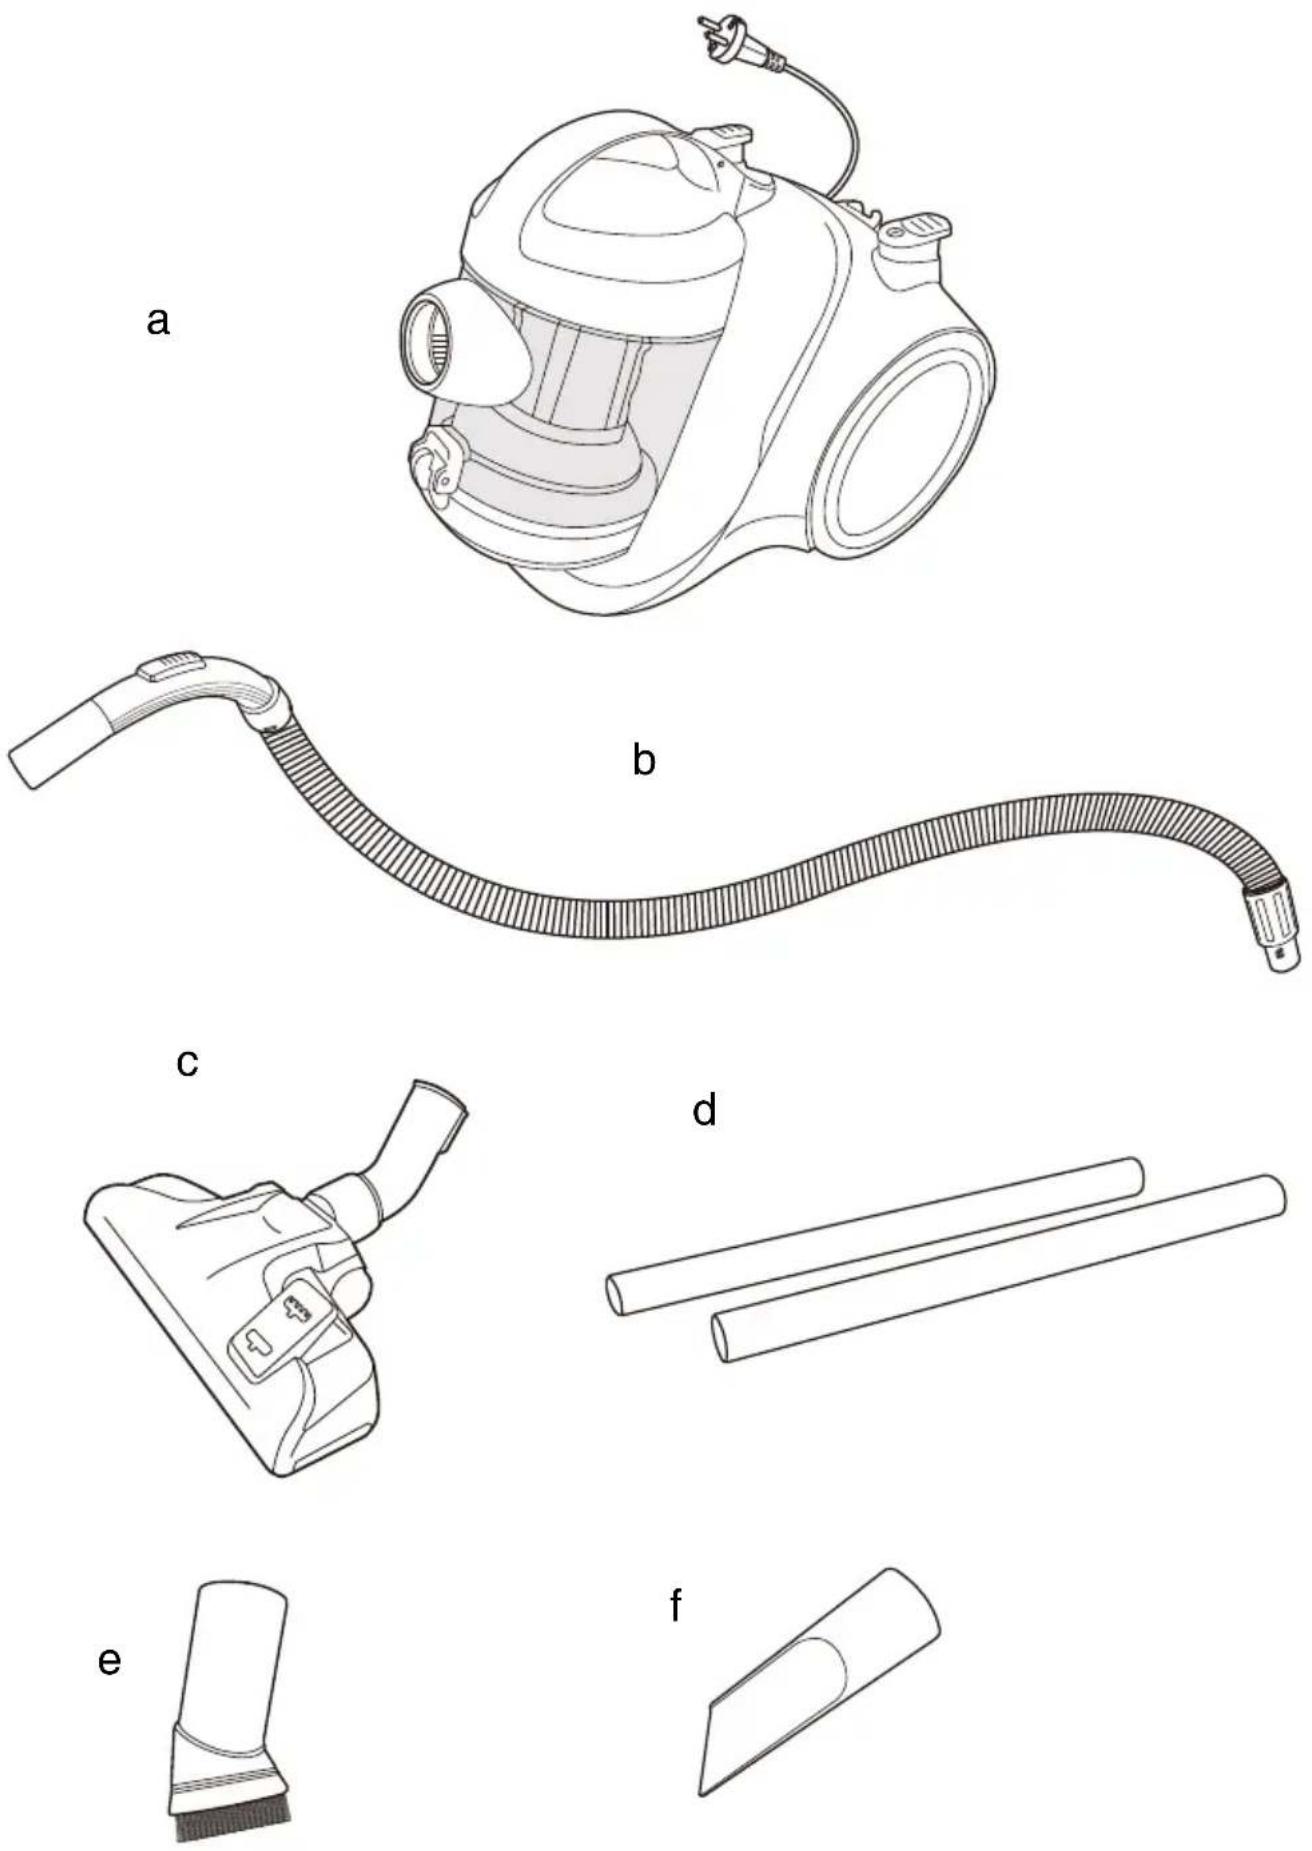
| GETTING TO KNOW YOUR CLEANER | |
| a. Main cleaner d. Pipes | |
| b. Hose e. Round brush | |
| c. Floor brush f. Crevice nozzle | |
Product operation
1. BEFORE FIRST USE
- Unpack the device.
- After taking out all the parts from package, please check for possible transport damage immediately. If your product is damaged or incomplete, please contact our after-sales service.
2. PRODUCT USE
When first use, your product may give off a slight odor, it is normal. The smell will only be temporary and will wear off quickly.
Illustrations 1 to 17:
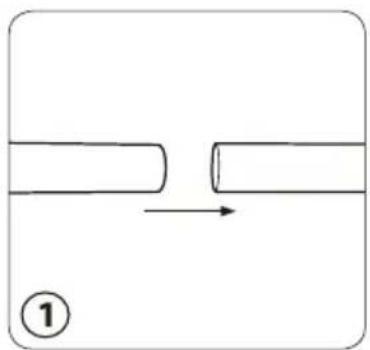
III1. Connect the pipes. Diameters are different at both ends.
III2. Connect the pipe to floor brush.
III3. Connect the hose handle to the pipe.
III4. Insert the end of hose into the suction base in the front of dust bin. Turn the end of the hose clockwise watch, until the hose engages properly.
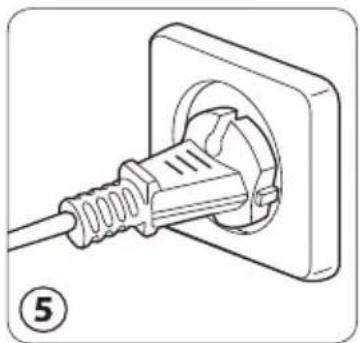
III5. Pull out the power cord to the desired length, then connect the plug to socket.
III6. Switch on: press the on / off button.
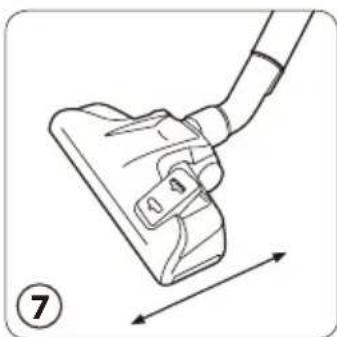
III7. Push the floor brush back and forth to clean the floor.
III8. Thanks to the slide on the handle, you can adjust the suction power with it.
III9. Switch off: press the on / off switch.
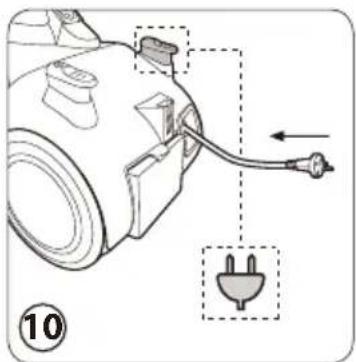
III10. Unplug the cable and press the button to wind the cord.
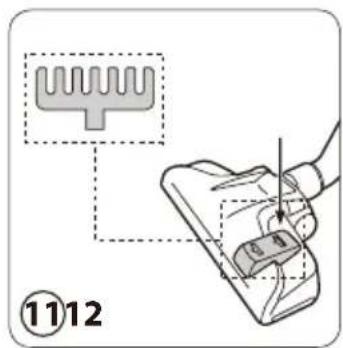
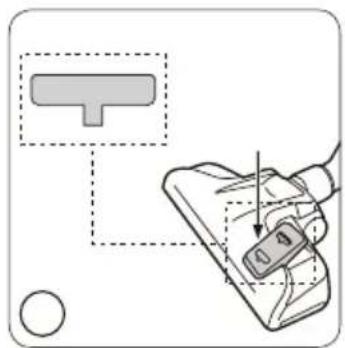
III11. Hard floor: push down the button on the floor brush.
III12. Carpet: push up the button on the floor brush.
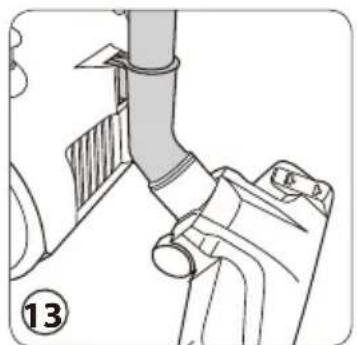
III13. During rest or storage, you can hang the floor brush on the back of the vacuum cleaner.
III14. Thanks to the extra nozzles supplied, you can clean the joints and cushions.
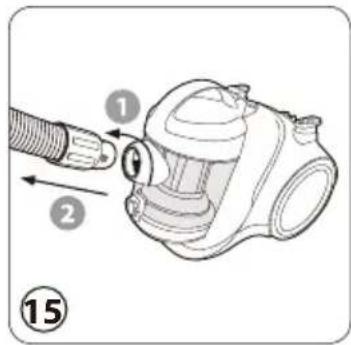
III15. To take off the suction hose, turn the end of the hose counterclockwise and pull it out.
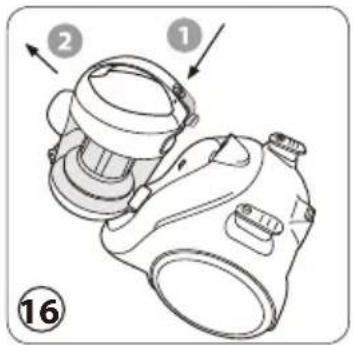
III16. Take off the dust bin: press the release button.
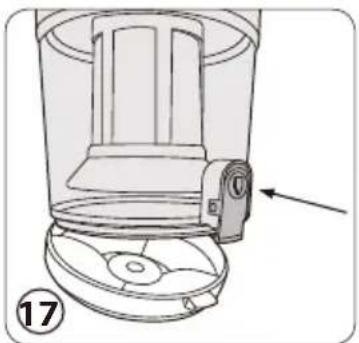
III17. Empty the dust bin: press the locker to open the bottom cover of the dust bin.
3. CLEANING AND MAINTENANCE
This type of vacuum cleaner requires regular maintenance to remove dust.
 | Warning! Before cleaning, be sure to turn off the power. Always unplug the power cord from the outlet and allow the appliance to cool down before cleaning it. |
 | Warning! Never immerse the electrical parts of the device in water or any other liquid during cleaning or operation. Never expose electrical parts to water. |
- Clean the device with a soft, slightly damp cloth. Make sure that no moisture gets into the device while cleaning it.
- Never use corrosive detergents, a wire brush, abrasive scouring pad, metal, or sharp tools to clean your machine.
- Dry the device completely after cleaning.
Filter maintenance: To obtain an optimal suction power, we advise to clean the internal filters at each empty. The exhaust filter should also be cleaned regularly, especially when the suction volume is declining.
Illustrations from 18 to 24:
III18: Turn the cover of the dust bin counterclockwise to disassemble.
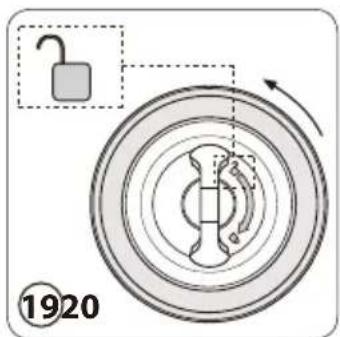
III19: Turn the inner filter screen counterclockwise to disassemble.
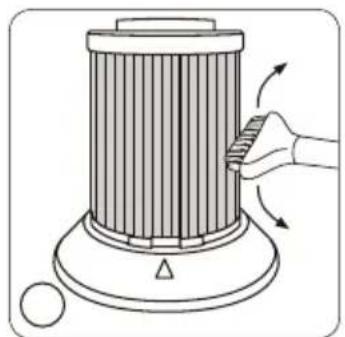
III20: Clean the grid and filter with a small brush.
III21: Wash the filter in water. Let the filter dry completely before reassembly..
III22: When you reassemble the filter, the arrows on the two parts should point towards each other
III23: You can remove the air outlet filter to clean it. Hold the button at the top of the frame and pull it back.
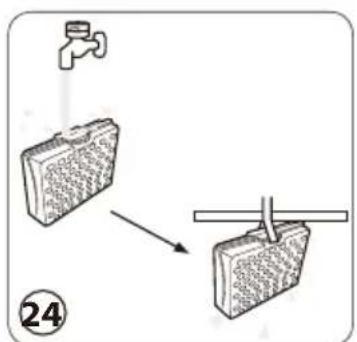
III24: Rinse the filter in water. Let the filter dry completely before reassembly.
Storage: Store the device in a cool, dry place out of the reach of children and pets.
TROUBLESHOOTING
In case of malfunction, please refer to the following table
| SolutionProblem Possible reason | ||
| The vacuum cleaner does not switch on | - Too much dust in the dust bin- Filter is blocked- Brush duct is blocked- Hasn't been fully dried after washing | - Empty the dust bin in time- Clean the sponge filter- Clean the blockage- Dry the sponge filter in cool place after washing |
| The machine does not work | -The power plugs are loose on the socket or the power socket is not live-The switch fails to be opened | - Inspect whether power plugs are tight or not or the socket is live or not- Press the switch button |
| The machine suddenly stops | - The dust bin is full- The sponge filter is blocked- Suction inlet of brush or the other accessory is blocked | - Empty the dust bin in time- Clean the sponge filter- Clean the blockage |
| Brand | Midea |
| Series | C5 |
| Model | MBC1270GB |
| Power | 700W |
| Rating | 220-240V~50-60Hz |
| Annual Energy | 27kWh/yr (Class A) |
| Capacity 1.5L | |
| Power cord | 4.5m |
| Filter | EPA10 |
| GW | 4.9kg |
| Product size | 350*200*350mm |
INSTRUKCJA OBSŁUGI
ODKURZACZ C5 MBC1270GB
PRZED ROZPOCZĘCIEM UŻYTKOWANIA NALEŻY DOKŁADNIE PRZECZYTAĆ INSTRUKCJĘ I ZACHOWAĆ JĄ DO WYKORZYSTANIA W PRZYSZŁOŚCI
natural_image
Line drawing of a vacuum cleaner head and side panel (no text or symbols)natural_image
Line drawing of a vacuum cleaner's head and side profile (no text or symbols)natural_image
Line drawing of a vacuum cleaner head and side panel (no text or symbols)natural_image
Line drawing of a vacuum cleaner's head and side profile (no text or symbols)natural_image
Line drawing of a vacuum cleaner's head and side profile (no text or symbols)natural_image
Line drawing of a vacuum cleaner head and side panel (no text or symbols)natural_image
Line drawing of a vacuum cleaner head and side panel (no text or symbols)DULKIŲ SIURBLYS C5 MBC1270GB
PRAŠOME ATIDŽIAI PERSKAITYTI VADOVĄ PRIEŠ NAUDOJANT IR TINKAMAI IŠSAUGOTI JĄ, KAD NAUDOTI ATEIČIAU
natural_image
Line drawing of a vacuum cleaner's head and side profile (no text or symbols)natural_image
Line drawing of a vacuum cleaner head and side panel (no text or symbols)2. PRODUKTA LIETOŠANA
natural_image
Line drawing of a vacuum cleaner's head and side profile (no text or symbols)natural_image
Line drawing of a vacuum cleaner's head and side profile (no text or symbols)Opozorila: Pred uporabo tega izdelka natančno preberite ta priročnik in ga shranite za nadaljnjo uporabo.
Jiangsu Midea Cleaning Appliances Co., Ltd
No.39, Caohu Avenue, Xiangcheng Zone, Suzhou, China
Made in China
Brand : MIDEA
Model : C5 MBC1270GB
Category : Vacuum Cleaner