
Taurus 2 - Juicer Orava - Free user manual and instructions
Find the device manual for free Taurus 2 Orava in PDF.


| Product Type | Juicer |
| Brand | Orava |
| Model | Taurus 2 |
| Power Consumption | 800 W |
| Voltage | 220-240 V ~ 50/60 Hz |
| Juicing Method | Centrifugal |
| Juice Container Capacity | 1.0 L |
| Pulp Container Capacity | 1.5 L |
| Feeding Chute Diameter | 75 mm |
| Speed Settings | 2 speeds |
| Dimensions (W x D x H) | 30 x 20 x 40 cm |
| Weight | 3.5 kg |
| Material | Stainless steel micro-mesh filter, BPA-free plastic |
| Safety Features | Safety locking arm, non-slip feet, overload protection |
| Cleaning | Dishwasher-safe parts (filter, pulp container, juice cup) |
| Accessories Included | Juice cup, pulp container, cleaning brush |
| Warranty | 2 years |
| Spare Parts Availability | Filter, pusher, lids available separately |
Frequently Asked Questions - Taurus 2 Orava
User questions about Taurus 2 Orava
0 question about this device. Answer the ones you know or ask your own.
Ask a new question about this device
Download the instructions for your Juicer in PDF format for free! Find your manual Taurus 2 - Orava and take your electronic device back in hand. On this page are published all the documents necessary for the use of your device. Taurus 2 by Orava.
USER MANUAL Taurus 2 Orava
natural_image
Black and transparent digital juice brush holder with three empty cups (no text or symbols visible)CE
Taurus 2
Intended use of the device
The equipment is intended exclusively for the extraction of soft fruit and vegetable juice, to the extent determined by the technical and operational parameters and functions of the equipment, the safety and user instructions and the external effects of the operating environment.
ORAVA electrical appliances are manufactured according to state-of-the-art knowledge and recognized safety regulations. Nevertheless, improper or improper use or improper use may result in injury or endangerment to the life of the user or a third party, or to a third party. damage to equipment and other property.
1. GENERAL SAFETY INSTRUCTIONS AND WARNINGS
- This document contains important safety instructions and warnings for safe, correct and economical operation of the electrical equipment. Its compliance helps the user avoid risks, increase reliability and product life.
- In this document, the general term product is used in text parts such as: electrical equipment - any device used for the production, conversion, transmission, distribution or use of electricity.
-
From the point of view of the purpose of using electricity, the concept of electrical equipment in the strict sense of the word will include the following categories:
-
household electric appliances,
- information and communication equipment,
- consumer electronics,
- lighting equipment,
- electrical and electronic tools,
- toys and equipment for sporting and recreational purposes,
- medical devices (aids),
- monitoring and control devices,
- vending machines.
1.1 General safety instructions
- Before operating the unit, we recommend that you carefully read the instruction manual and operate the equipment in accordance with the instructions!
- The safety instructions and warnings in this manual do not cover all the possible conditions and situations that may arise when using the device. The user must understand that a factor that cannot be incorporated into any of the products is personal responsibility and caution. These factors must therefore be ensured by users serving this device.
- Failure to follow the safety instructions and warnings is forbidden by the manufacturer for any damage to health or property!
- Keep the instruction manual as close to the device as possible throughout its service life. Always keep the instruction manual together with the appliance for future use and use by new users.
- Use the appliance only for the intended purpose and in the manner specified by the manufacturer.
- The appliance is intended for home and similar indoor use without special focus.
- This appliance is intended, in addition to domestic use, for the following uses:
- in shops, offi ces and other similar work environments;
- in economic buildings;
- in hotels, motels and other residential environments;
-
in bed and breakfast establishments.
-
It is not a professional device for commercial use.
- Do not change the technical parameters and features of the device by unauthorized modification or modification of any part of the device.
- The manufacturer is not responsible for damages caused during transportation, misuse, damage or destruction of the equipment due to adverse weather conditions.
1.2 Safety of the operating environment
- Do not use the device in an industrial environment or outside environment!
-
Do not expose the appliance to:
-
sources of excessive heat or open flame,
- dripping or splashing water,
- vibration and excessive mechanical stress,
- insects, animals and plants,
-
aggressive and chemical substances.
-
The operating environment of the device must always be in accordance with the basic characteristics set out.
-
Features of the operating environment:
-
Ambient temperature: +5 ÷ +40 °C
- Humidity: 5 ÷ 85%
- Altitude: ≤ 2 000 m
- Occurrence of water: intermittent condensation of water or occurrence of water vapor
- Occurrence of foreign bodies: quantity and type of dust are insignificant
- Protection degree: min. IP20 (device protected from touching dangerous parts by hand and non-waterproof)
- This degree of protection is not indicated on the product and on the technical parameters in the operating instructions.
- If the protection class of the product is different from IPX0, this information is then displayed on the label of the appliance or in the technical data of the operating instructions.
- Other characteristics of the domestic operating environment (mechanical stress - vibrations and vibrations, occurrence of plant, animals, weather effects ...) are negligible in terms of effect on the correct and safe use of electrical equipment.
1.3 Electrical safety
- Before connecting the appliance to the power supply for the first time, make sure that the voltage on the appliance label corresponds to that of the household electrical outlet.
- The electric appliance is designed to power from 1/N/PE \~ 230 V 50 Hz.
- The electrical safety of the appliance is guaranteed only if it is properly connected to the mains.
- Electrical protection class I equipment is equipped with a protection against electric shock by means of protective earthing of inanimate parts, which can become dangerous when the device is malfunctioning. Always connect such devices to properly installed mains sockets that are equipped with earthing conductors and have a properly grounded earthing conductor.
All electrical equipment is equipped with a three-wire power supply.
- Class II electrical equipment is protected against electric shock by double insulation or by enhanced insulation of hazardous live electrical parts. Device of protection class II it must not be equipped with means to connect protective earthing.
All electrical equipment is equipped with two-wire power supply.
- Class III electrical equipment is a device that is powered by a small safe voltage source (battery or accumulator) and does not present any danger to the user from electrical shock.
- In order to provide increased safety against the risk of electric shock due to the use of electrical appliances by laypersons, it is recommended to install the power supply circuit for sockets with a rated current not exceeding 20 A RCD with a rated operating current not exceeding 30 mA.
To ensure the safety and correctness of the electrical installation, consult a qualified electrician.
- Only use a power cord with a plug (mains lead) supplied with the device and compatible with a wall socket. Using another cable may result in fire or electric shock.
- Always connect an electrical appliance to an easily accessible mains socket. In the event of an operating fault, the appliance must be switched off as soon as possible and disconnected from mains supply.
- The power cord and mains plug must always be easily accessible for safe disconnection of the electrical appliance from the power supply.
- Do not pull off the power cord by pulling the cable. Disconnect the power cord by pulling the plug behind the power cord plug.
- If you use an extension cord, make sure that the total rated power of all devices connected to the extension cord does not exceed the max. current load on the extension cable.
- If you need to use an extension cord or power supply block, make sure that the extension cord or power pack is plugged into a power socket, and not to another extension cord or power supply. The extension power cord or power supply block must be designed for grounded electrical plugs and connected to a properly grounded electrical socket.
- The power plug of the appliance must be compatible with the mains socket. Never use any adapters or modify the socket in any other way. Do not use inappropriate or damaged drawers!
-
To avoid electrical shock, plug the power cables into properly grounded electrical sockets. If the device is equipped with a 3-pole plug, do not use adapters that do not have a grounding element or remove the grounding element from the plug or adapter.
-
Do not bend, crush or otherwise expose the power cord of the appliance to mechanical stress or external heat sources. Damage to the power cord may result in electric shock.
- When the power cord is damaged, disconnect the appliance from the mains and do not use it again.
- If the power cord is damaged, it must be replaced by the manufacturer, its service department or a similarly qualified person to avoid the risk of electric shock.
- Regularly check and maintain the electrical appliance as well as the power cord and power socket. Disconnect the power plug regularly and clean it if necessary. Pollution by dust or other substances may cause disruption of the insulating state and consequently fi re.
- Do not expose the appliance to water or moisture. The ingress of water into the appliance increases the risk of electric shock.
If the power cord is wet or the water has penetrated the water, disconnect it immediately from the mains. If the appliance is plugged into a mains socket and if possible, turn off the power circuit before attempting unplug the power. If you are pulling wet wires from a live power source, be very careful.
- If the electrical equipment is installed (connecting) the protective covers are dismantled, the electrical parts must not be accessible to the user when the installation is finished.
1.4 Safety of persons
- This appliance is intended for use and operation by persons without electrotechnical qualification - lay people, according to the instructions specified by the manufacturer.
- Device operation includes activities such as switching on and off, user manipulation and setting of operating parameters, visual or auditory inspection of the equipment, and user cleaning and maintenance.
- This appliance can be used by children under the age of 8 and persons with reduced physical, sensory or mental capabilities or lack of experience or knowledge when supervised or instructed to use the appliance safely and understand the dangers involved.
• Children may not play with the appliance. - Cleaning and maintenance for users may not be performed by children unattended.
• Always keep the appliance out of reach of children during use and operation. Be sure to download the appliance even for a freely accessible power cord. - Always be careful when operating the electric appliance! Do not use an electric appliance if you are overly tired, under the influence of medication or narcotic drugs that reduce attention and focus.
- Inattention during operation may result in serious injury.
1.5 Cleaning, maintenance and repairs
- Observe the normal user cleaning and maintenance of the appliance in the recommended way. Do not use solvents or harsh cleaners for cleaning. Pollution and visible stains from fi nger contact, respectively. The hands can be cleaned using detergent detergents specially designed to clean household appliances.
- If you do not use the appliance, clean it or disconnect the appliance from the power supply when the appliance is faulty.
- Electrical appliances that are cleaned after use and are not intended to be completely or partly immersed in water or other liquid, protect against the effects of dripping and / or splashing water and before immersion.
- Electric household appliances, like all other technical devices, are subject to the surrounding environment and natural wear. Since the legal framework of regular maintenance is not laid down for lay-in electrical household appliances, the manufacturer recommends that the user have the appliance checked and cleaned at least once a year by a specialist workshop.
- By doing so, it is possible to achieve safety, operational reliability and increased service life.
-
Do not disassemble the electric appliance! The appliance works with a dangerous voltage. For this reason, always switch off the appliance and disconnect it from the mains supply during user maintenance. In the event of a fault, please have the repair serviced by an authorized service center.
• Before calling a service: -
Verify that you are unable to remedy the malfunction yourself according to the procedure described in the chapter „Remedy of operating faults“.
- Turn the appliance off and on to make sure the fault reappears.
- If the malfunction of the appliance still persists after these operations, call the nearest specialist service center.
- Never repair the electric appliance yourself!
- Unauthorized, unqualified and improper use of an electric appliance may result in electric shock or other serious injury.
- Only carry out the warranty or post-warranty repair of an electrical appliance to an authorized qualified person ^* .
(*) Competent qualified expert: the sales department of the manufacturer or importer or the person qualified and authorized to carry out this type of activity with the ability to avoid all risks.
2. Special safety instructions.
Read carefully!
The electrical equipment shall be designed and manufactured in such a way as to allow safe operation and use by persons without professional qualifications. Despite all the precautions taken by the manufacturer for safe use and operation, there are certain residual risks and potential hazards associated with them. The following symbols and their meanings have been used on the device and in the accompanying documentation to indicate potential hazards:
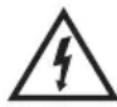
This symbol alerts users that the device is operating with hazardous electrical voltages. Do not remove protective covers on the device.
Failure to follow the safety instructions while using and operating the equipment may result in:
Risk of electric shock! Risk of serious injury or death!

This symbol alerts users that if the safety instructions for using and operating the equipment are not followed, there is a risk of:
Risk of serious injury or death! Risk of equipment damage or other property damage!

This symbol alerts users that if the safety instructions for using and operating the equipment are not followed, there is a risk of:
Risk of cutting or rubbing fingers!

This symbol indicates that the product is made with double insulation between hazardous live parts (parts with dangerous voltage from the mains) and parts that are accessible in normal use.
Use only identical spare parts for repairs.
Transportation/Transfer
- During transport and use eg. Take care when moving the truck to prevent the machine from toppling over.
- Only transport/carry the equipment after thoroughly inspecting the area and routes, which must be clear of obstructions.
- Carry the device firmly with both hands on the bottom edge of the base or solid body parts.
- When carrying, ensure that your hands and equipment are not damp or slippery.
- To maintain safety (taking into account the dimensions and weight of the device), only competent and physically fit persons should carry the device.
- Never carry the machine while it is in operation. Do not carry the device while it is connected to a power outlet.
Warning!
- Some surfaces may heat up while the unit is operating. Do not touch heated surfaces!
Risk of serious injury! Risk of equipment damage!
Unpack/Packaging
- Unpack the device and accessories before use and dispose of all parts of the packaging materials and labels. Store packaging materials in a safe place, especially out of the reach of children and incapacitated persons, or dispose of them safely. Risk of serious injury!
Risk of suffocation!
Inspection/Commissioning
- The appliance is intended for food preparation. Therefore, thoroughly clean all parts before commissioning as described in the “Commissioning” section. „Cleaning and maintenance“.
- Never clean the device (its drive unit with electrical parts and controls) and the power cord with plug in a way (under running water) that could cause liquid to flow into the device.
- Clean these parts only with a damp cloth and wipe them dry or allow them to dry.
- Only clean the unit when it is turned off and unplugged.
- We recommend that you perform initial and subsequent periodic inspections of the equipment.
- Never use the appliance if it is incomplete, damaged or any part of it has been damaged during transport or use.
Do not use non-original and incomplete parts of the device and its accessories. Risk of serious injury!
Risk of electric shock!
Location/Installation
- Only place the appliance on flat, firm and stable bases - on kitchen desks and furniture parts suitable for placing kitchen appliances.
- Always make sure that the area where you want to place the machine has sufficient space, mechanical strength, and adequate lighting.
Warning!
Do not expose the device to:
- direct sunlight, heat-producing sources and equipment,
- vibration and mechanical stresses,
- excessive dust,
- water and excessive moisture,
- insect,
- aggressive external environment. Do not use or place the device:
- for unstable tables or furniture parts,
- on uneven and dirty surfaces,
- on the tight edge of tables or parts of furniture,
- in the vicinity of containers containing water or other liquids.
- Do not partially cover the device. Do not place any objects on the device. Do not insert or allow foreign bodies to enter the openings of the machine's covers.
- Do not block the air vents of the covers. Air ventilation ensures reliable and safe operation of the device. Risk of electric shock!
Risk of fi re!
Warning!
- Place the device in a place where children cannot reach freely.
- Keep children away from the device. The device may topple over and cause serious injury to children.
- Mechanical damage (rupture or breakage of parts and covers) of the device can cause serious injury.
Risk of serious injury!
There is a risk of damage to the equipment or other property damage!
- Do not place or use this product near containers containing water. If the device falls into the water, do not remove it! Unplug the power cord from the wall outlet before removing the machine from the water. In such cases, take the equipment to a professional service center to check that it is safe and functioning properly.
Risk of electric shock!
Risk of electric short circuit!
Operation/Supervision
Note!
- This equipment should only be used with original parts and accessories.
- Before using the machine, always make sure that the machine is complete, correctly assembled, and none of its parts are damaged. Do not use incomplete, improperly assembled, or damaged equipment.
- Always turn off the machine and unplug the power cord from the wall outlet before changing accessories or accessible parts, before installing or removing them, and before cleaning and maintenance.
Risk of serious injury!
• Always keep the unit under supervision during use and operation!
- This equipment is not intended to be operated by a programmer, external timer or remote control because there is a risk of fire if the equipment is covered or improperly positioned.
• Always unplug the appliance when it is left unattended.
- Make sure that the controller (main switch) is in the "0" (off) position each time the machine is connected to the mains.
- Do not turn the machine on or off by plugging in or unplugging the power cord.
- Always connect the machine to the wall outlet (wall socket) in normal use, and then turn on the power switch.
- After use, turn off the machine with the power switch, and then unplug the power cord.
- Do not use the machine if the power switch does not work.
- The equipment is under dangerous voltage when the AC power is connected.
Risk of serious injury!
- The machine contains sharp-edged rotating parts - a rotating sieve (thread).
Warning!
- Never push your fingers into the fi ller hole or use any objects (eg fork, spoon, knife, etc.) to handle the fruit and vegetables in the juicer's fi ller neck. For this purpose, use only the specified accessories of the device - pressure roller.
- In the case of necessary manipulation in the working area (cleaning of rotating parts from trapped food) always, but only when the machine is switched off, disconnected from the power supply and the rotating parts have stopped completely, use exclusively designated accessories of the machine or suitable object, eg. plastic knife, plastic bag/spatula. Do not use metal objects!
Warning!
- After the unit has been switched off, the drive of the rotating parts is still running for some time. Always wait until the rotating parts have come to a complete stop before handling the machine or the working area of the container.
Risk of serious injury!
Risk of cutting fi ngers!
- Be careful not to get your hair, loose decorative chains or loose clothing in contact with the rotating parts while using or operating the machine.
Risk of serious injury!
- Do not bundle the power cord. The power cord must remain accessible for safe disconnection from the power supply.
- Do not let the power cord hang freely and do not allow it to be freely accessible and reachable by children.
- Never leave the machine unsupervised and do not use it with an open power cord. Children could pull the device off the power cord.
- Do not store the device with the power cord wrapped around its body. Fold the power cord loosely in the way it was put together in the original packaging from the manufacturer.
- Never overload the device beyond the limits specified in the technical data!
- Do not turn on the machine until the food container is filled with enough food.
- Do not exceed the maximum content / volume of processed food indicated on the containers or recommended in the food processing information in this manual.
- Do not process frozen foods.
- Always divide the unit's operating mode (continuous operation / activity and break time) into the recommended work intervals and follow these instructions.
- If you notice any abnormal effects (vibrations, sounds, smells, smoke, etc.) while using the device, turn off the device immediately and unplug it. Have the device checked by a specialist garage. Risk of serious injury!
There is a risk of damage to the equipment or other property damage!
- Only install and remove the device and its parts when the device is turned off and unplugged.
Risk of serious injury!
- Always clean the equipment and accessories immediately after use and remove any residues from the food being processed.
- Store the unit upright - especially its drive unit.
- If any safety part (mechanical, electrical/electronic) is part of the unit, never put it out of operation! Do not use the appliance if the safety part/component is damaged or inoperative!
- Do not use safety parts/components for switching on or off. turn off the device.
- Do not use the appliance if the rotary screen is damaged.
- The operating time of the unit is 40 seconds. After this time, stop the operation for at least 2 minutes. If you are using the juicer for juicing hard foods or large doses, we recommend that you stop the operation after 20 to 30 seconds and restart the juicer after 1 to 2 minutes.
- Never underestimate possible dangers and be careful !!!
Description of parts
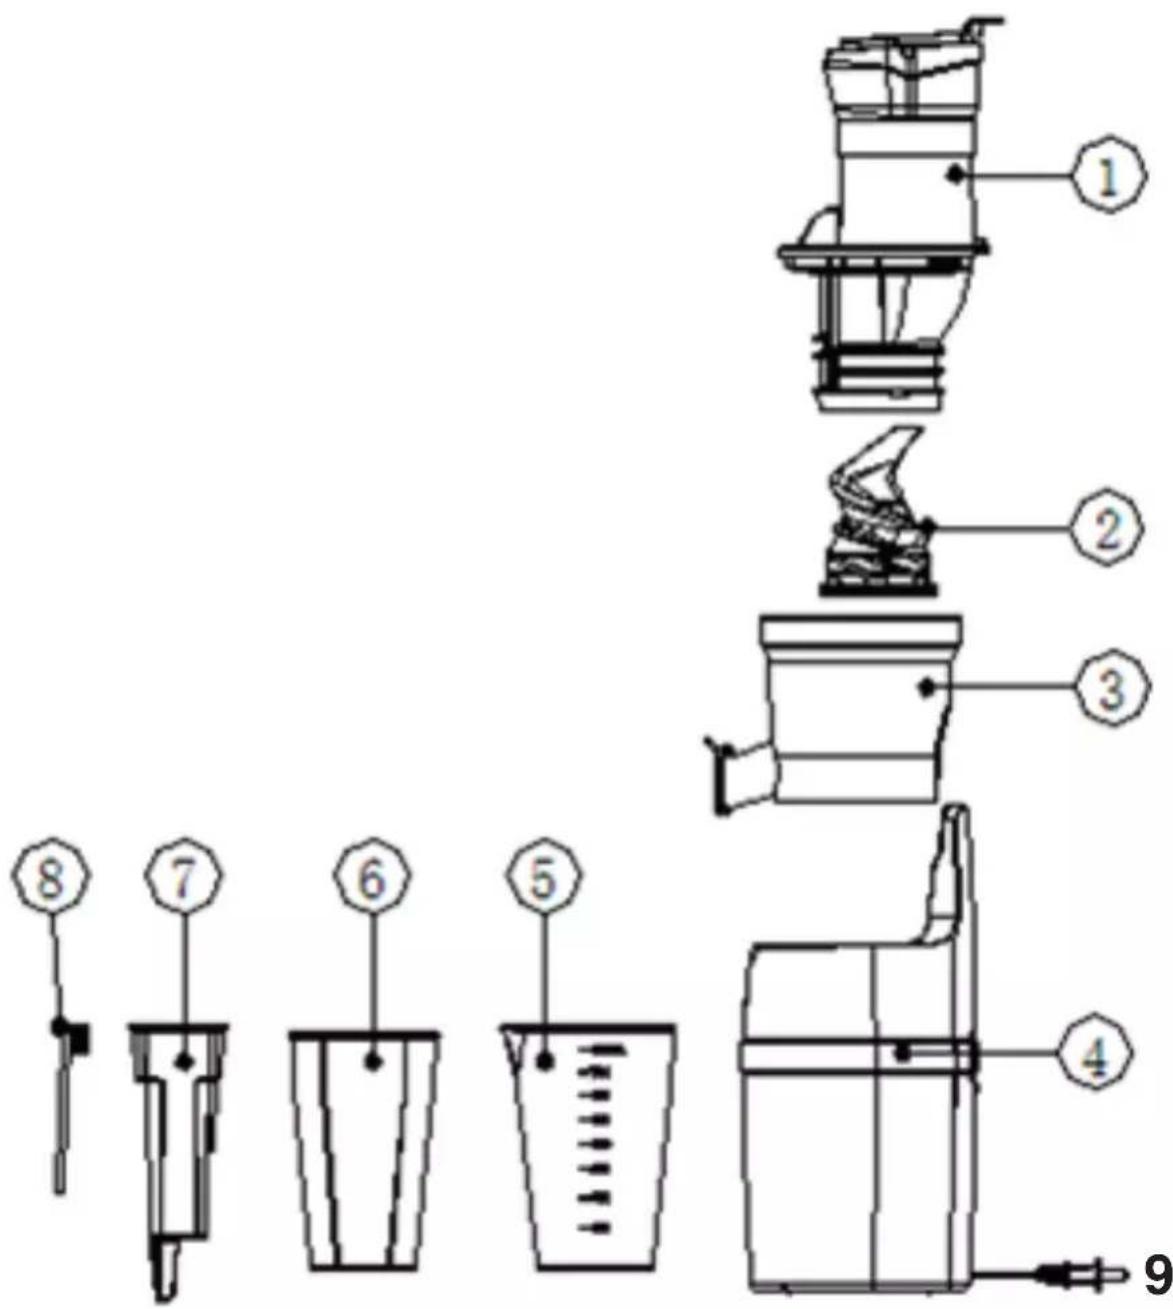
1 Feeding neck with auger cavity and strainer
2 Juicing auger
3 Juicing container
4 Base with motor unit
5 Juice container
6 Pulp container
7 Pressure roller
8 Cleaning brush
9 Power cord
Preparation before use
Do not connect the device to the mains during preparation.
Unpack the device and remove all packaging material. To remove any dirt that may have formed during the packaging process, clean the inside and the cover with a dry, lint-free cloth. When cleaning the inside, be careful not to injure yourself on sharp parts. (See „Cleaning and Maintenance“ in this manual.)
Rinse the accessories in lukewarm water. Do not immerse the housing of the motor in water! Clean the surface with a cloth dampened in water.
Dry all parts thoroughly.
Assembly of accessories and mounting on the motor unit
Disconnect the device from the mains before assembling the device. The device must be switched off.
1 Place the base with the motor unit on a fl at and fi rm surface (table).
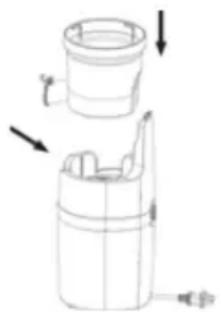
2 Place the juicing container on the base. (pic. 1)
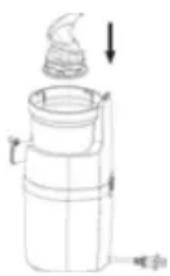
3 Push the juicing auger firmly into the center of the jar, making sure it touches the bottom, otherwise the lid will not close. (pic. 2)
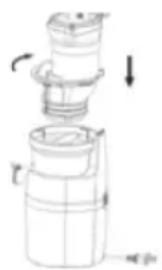
4 Place the feed spout assembly on the juicing container so that the stop of the lock points to point 🔍. Then turn the assembly in the direction until the container locks. In order for the device to function properly, the stop must point to the lock
mark 🔒, which activates the safety lock and the device is assembled and ready for operation. (pic. 3)
Warning!
If the entire assembly is not assembled correctly, the cover will not close properly.
Check the proper fit of the thread in the bowl and turn it to lock it into place.
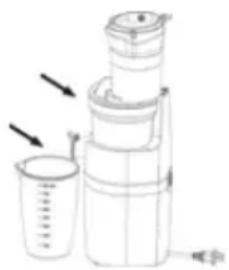
5 Place the juice container and the pulp container under the respective drain parts. (fi g. 4)
Advice:
In order to make the juicer easier to clean, insert a microtene bag into the pulp container, which you then throw away when full, or reuse its contents.
natural_image
Technical line drawing of a mechanical component with arrows indicating assembly or transformation (no text or symbols)pic. 1
natural_image
Line drawing of a mechanical device with a lid and base, showing internal components and a downward arrow (no text or symbols)pic. 2
natural_image
Line drawing of a mechanical device with no visible text or symbolspic. 3
natural_image
Line drawing of a multi-tiered blender with a bucket and lid, no text or symbols presentpic. 4
Operation
Warning!
- To prevent electric shock, do not operate the machine with wet hands.
- Never use the appliance without food inserted (empty).
- Do not run the engine continuously for more than 15 minutes.
Juicing
1 Place the assembled device on a fl at and fi rm surface (table, sink) and place a juicing container under the juice outlet and a fruit pulp container under the waste outlet.
2 Connect the device to the mains.
3 Wash the fruit and put the whole fruit (or cut the fruit into smaller pieces) inside the feed spout and, when necessary, push it down into the feed spout with the pressure roller when the device is switched on.
It is advisable to cut the food into small pieces for optimal juice extraction. The diameter of the fruit or vegetable must be smaller than the diameter of the feeding neck.
Remove any large stones or pits or peel from citrus fruits. Always wash the food before juicing.
Do not overfi ll the feeding neck. Use the pressure roller only at the end of juicing. Food must pass through the throat freely.
4 Turn on the device with the main power switch.
The switch has three positions:
- Switch on the device
0 Switch off the device
R Reverse
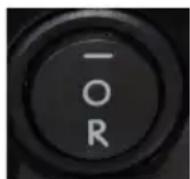
Do not operate the switch with wet hands, there is a risk of electric shock!
5 Turn the -/0/R (On/Off/Reverse) switch to the - position to turn on the device.
6 Continue to insert the fruit and push it in slowly with the push roller. Do not use hands or tools other than the pressure roller to push.
7 After fi nishing the work, switch off the device and disconnect it from the mains.
The cover may not open easily if there is too much pulp left in the juicing bowl.
If the device stops during juicing
Switch the switch -/0/R to position 0 and then to position R for a few seconds (approx
- 3 seconds). Reverse is activated. Reverse only works as long as you hold the switch in the R position.
When reversing, the rest of the fruit is pushed out into the throat.
If the device is too clogged, repeat the reversing process as needed.
Disassemble the device as described in the section on cleaning the device
Operation tips and alerts
- Never push fruit/vegetables in with your fingers. There is a risk of injury!
• Overfi lling will not speed up the juicing process. There is a risk of the device overheating. - Do not use the device for too long during continuous engine operation. It can overheat.
- If longer operation is required, stop using the device. Do not use the juicer continuously for more than 30 minutes, always let the motor cool down for about 30 minutes and then continue working.
If the juicer overheats, it will automatically shut down to protect the motor.
In this case, turn off the power switch to the „0“ position. Wait 10 minutes for the juicer to cool down before turning it back on and using it.
- When operating the juicer without raw material inserted, the thread may be damaged.
- Do not insert fingers or other objects into the fi ller neck. Always use a pressure roller. If you insert other objects into the fi ller neck during operation, these materials can get stuck, damage the parts of the juicer or cause injury.
- Do not put dried or hard fruit components such as whole grains, fruit with hard seeds, frozen fruit or fruit with stones into the juicer.
They can damage parts of the juicer (e.g. bowl, thread and strainer).
- You can use beans or grains if they have been soaked overnight or pre-cooked.
- Fruits with hard stones (eg nectarines, peaches, mangoes, cherries and plums) must be pitted before juicing.
- If you use frozen fruit with small seeds (eg grapes), thaw it completely before putting it in the juicer.
- Do not use ingredients that contain excessive amounts of vegetable oil or animal fat.
- Do not use a juicer to extract vegetable oils from oily raw materials.
If vegetable/animal oils remain on the juicing thread, performance may be reduced and some parts may be damaged.
- Do not put already juiced pulp into the juicer. This may cause the juicer to stop or the cover to be unable to open.
- After juicing fruit with seeds (eg grapes), thoroughly clean all the slots on the lower part of the thread.
Tips and warnings about raw foods
Damage to the juicer due to negligence or failure to observe the operating instructions is not covered by the warranty.
DO NOT put the following fruits and vegetables in the juicer:
With hard stones
Peaches, nectarines, apricots, plums, mangoes, etc. Pinch them before juicing.
With a hard or dried skin
Pineapple, melon, mango, orange, etc. Peel them before juicing.
Frozen fruit or ice cream/ice
Frozen strawberries, blueberries, raspberries, etc.
Defrost fruit fully before juicing. Do not use ice cream/ice.
Vegetable/animal oils
Sesame seeds, butter, margarine, etc.
Do not juice ingredients containing vegetable or animal oils. This can reduce the power and even damage the juicer.
Other
Coconut, sugar cane, whole grains, etc. Do not juice raw materials without water.
Enjoy the best quality juice by knowing the characteristics of each type of fruit and vegetables and knowing how to work best with them.
This juicer is an innovative product that uses patented slow juicing technology to efficiently extract juice from the raw material. The juicer is designed to give you the best results with solid, high-water ingredients. For best results, prepare and juice each ingredient depending on its characteristics and properties.
Warning!
The appliance is not intended for juicing berry fruits with small grains (raspberries, currants, blueberries). The sieve may clog.
Preparation of raw foods
Before you start
- If the juicer is stuck or the cover cannot be opened, press and hold the R button until the juicer/cover is released.
Repeat the -/0/R button as necessary.
- Continue juicing until all the ingredients in the bowl are juiced. The lid may not open easily if there is a lot of flesh in the juicer.
• Each ingredient contains different amounts of juice.
Yield
- For optimal juicing and maximum juice recovery, cut the ingredients as described later in this section.
- Load the ingredients slowly and watch them juice.
The juice yield may vary depending on the juicing speed.
Soft fruits and vegetables (eg oranges, tomatoes):

PREPARATION:
• Cut large ingredients into smaller pieces.
JUICING:
- Insert the ingredients slowly one at a time.
- Use a push roller when inserting chunks into the neck.
(The pressure roller also prevents splashing of juice from the filler neck when juicing raw material with a high water content.)
- When juicing raw materials that produce excessive foam when juicing, leave the drain cover open.
(In case of operation with closed drain cover, foam may accumulate.)
• We recommend consuming the juice within 48 hours after extraction. Depending on the density, it may form a crust.
• If excessive foam has formed, sieve the juice using a sieve.
Outlet tap (optional):
- Juicing with the drain tap on and closed allows you to mix juices from different fruits, vegetables and liquids.
- When juicing, close the juice drain tap to prevent excess juice from dripping, especially when removing the bowl from the base.
- When preparing different juices, quickly rinse previous flavors by pouring a glass of water into the juicer with the drain cover closed.
- When juicing ingredients that produce excessive foam (eg apples, celery), leave the drain tap open while extracting.
- Be careful when operating the juicer with the drain tap closed. Juice can flow if it accumulates in a juicing bowl and exceeds its capacity (open the tap when the bowl is about half full).
Cap open
Cap closed
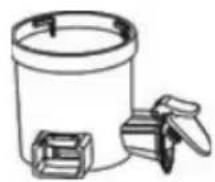
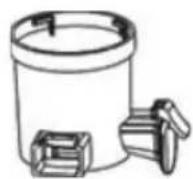
To set the amount of pulp in juice:
Hard fruits and vegetables (eg carrots, potatoes, beets):

PREPARATION:
- Cut food into chunks to a thickness of 2.5 cm or cut into pieces 2.5 cm wide and 5 to 15 cm long.
- Soak hard ingredients (eg carrots, ginger) in cold water before juicing.
JUICING:
- Put the fruit chunks slowly one at a time.
- Phase the juicing so that each raw material is juiced thoroughly.
- Juice fruits and vegetables with a high water content to increase yield.
Ingredients with small grains (eg pomegranate, grapes):
Load small grain materials slowly to prevent grain from clogging the sifter.

natural_image
Three purple cartoon face expressions with expressive eyes and frowning faces (no text or symbols)Load small grain materials slowly to prevent grain from clogging the sifter.

natural_image
Cartoon illustration of two smiling fruits: a yellow pear and a red apple (no text or symbols)For best results, juice ruit with higher water content (eg apples, pears).

natural_image
Cartoon illustration of a purple grapevine character with green leafy hair and expressive eyes (no text or symbols)PREPARATION:
- Defrost frozen ingredients (eg strawberries) completely before juicing them.
- Rinse raw foods such as grapes thoroughly. Remove the grapes from the stem.
- Peel the skin of the pomegranate and juice only the inner part.
JUICING:
- Depending on the size of the grapes, load 3-5 grapes and observe the juicing process.
- Defrost frozen ingredients and place approx. 1 tablespoon (5 g) at a time.
- Frozen raw materials usually lose a signifi cant amount of residual liquid when defrosted. When juicing, add milk or yoghurt to replenish lost liquids.
Warning!
If the lid cannot be opened due to the excessive amount of small pips left in the bowl, run the juicer for about 30 seconds without a break to extract any remaining pips.
If the cover is still stuck, reuse the -/0/R buttons until the ingredients are released.
Then turn the cover to the open position and press it down with your hands for a while (depending on the raw material, pour some water into the filler neck to allow the flush to release).
Fibrous or hard deciduous raw materials (eg celery, tusk, pineapple):
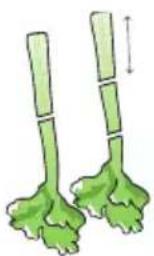
Fibrous raw materials such as celery and tusk must be cut before juicing
natural_image
Illustration of two green leafy vegetables with stems and leaves, no text or symbols presentWhen juicing leaf vegetables (celery and tusk), do not juice more than 500 g at a time. Before further juicing, disassemble and wash the top juicer assembly - juicing will be more efficient.
natural_image
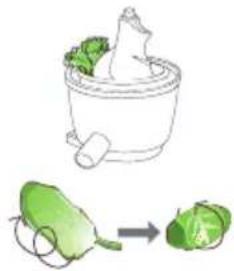
Illustration of a bowl containing leafy greens and a small green vegetable being converted into a whole vegetable (no text or symbols)If leaf vegetables are wrapped around the thread, before continuing in juicing, open the cover and remove the fibers.

natural_image
Cartoon illustration of two smiling fruits: a yellow pear and a red apple (no text or symbols)It is best to juice apples or carrots with ingredients with a higher liquid content. [Recommended ratio] Carrot, apple: fi brous raw material in a 9:1 ratio

natural_image
Cartoon illustration of a green cabbage character with a pointing finger (no text or symbols)PREPARATION:
- Soak the fi ber raw material in cold water for about 30 minutes before slicing.
- Separate each stem. Cut the outer depths, which are thick and firm, to a length of approx. 10 cm or less.
JUICING:
- Load the material slowly one at a time.
- Do not load another piece of raw material until the previous piece has been juiced.
- Roll the leaves in a spiral before placing them in the juicer.
- Insert the leaf section first, and then insert the leaf section and the deep section alternately.
- For ingredients such as lettuce, take a handful from it and place it in a bundle.
Warning!
- Fiber from celery can be wrapped around the thread and affect the juicer performance. Cut hard depths into pieces of 10 cm or less.
- Foam may form when juicing fi brous raw materials. Pour the juice through a sieve and remove the foam before serving.
- For raw materials such as. cut the pineapple from its bark and cut it into wheels and smaller pieces.
- The recommended amount of juice is 500 g. If you want to juice more than 500 g, disassemble and wash the top assembly after each partial juicing, and then continue juicing.
- If the juicer is overloaded, there is a risk of breaking the cover with the feed spout. FAILURE TO FOLLOW THE INSTRUCTIONS FOR USING THE EQUIPMENT WILL NOT ACCEPT A WARRANTY.
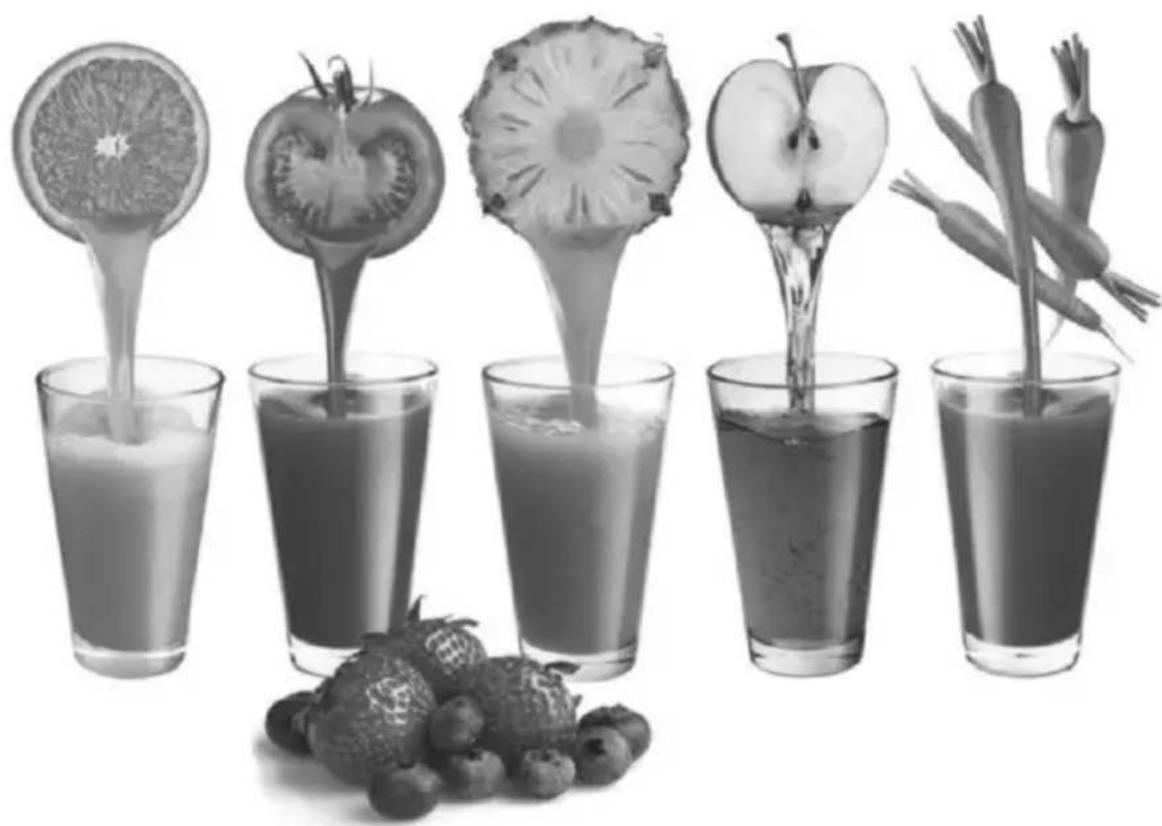
Top 10 slow juicing recipes
Immune booster
Strengthen the immune system against viruses with this tasty drink.
Ingredients:
Apple - 1
Medium Carrot - 3
Medium Garlic - 2
Months Ginger - 1 pc
Parsley - 1 handful
Approach:
Juice all ingredients in the juicer, mix and serve.
Celery detox
Detoxify your body and get it to work fully.
Ingredients:
Apple - 1
Medium Carrot - 3
Medium Beet - 1/2
Celery - 2 large
Parsley - 1 handful
Approach:
Juice all ingredients in the juicer, mix and serve.
Strengthening metabolism
This recipe is recommended by many personal trainers to achieve a fl at stomach effect.
Ingredients:
Apple - 1
Large Carrot - 2
Large Celery - 2
Large Cucumber - 1/2
Spinach - 2 Cups
Approach:
Juice all ingredients in the juicer, mix and serve.
Invincible
Improving digestion, preventing lung cancer, lowering cholesterol, lowering blood pressure and improving skin with this amazing combination.
Ingredients:
Apple (green) - 1 large
Beet - 1 pc
Carrots - 4 large
Celery - 3 pcs,
Large Cucumber - 1/2
Ginger - 1/2
Approach:
Juice all ingredients in the juicer, mix and serve.
Green juice
Juice for people looking for a tasty green juice. It is sweet and at the same time has a pleasant citrus taste.
Ingredients:
Apple (green) - 3 medium sized
Celery - 4 large
Ginger - 1/4
Lemon (with peel) - 1/2
Orange (peeled) - 1 large
Spinach - 5 cups
Approach:
You don't have to peel the lemon only orange. The orange peel is very bitter and can destroy the taste. Juice all ingredients in the juicer, mix and serve.
Miraculous green juice
Discover all the benefits of raw juice with enriching power and the taste of deciduous vegetables.
Ingredients:
Apple (green) - 1 medium sized
Cucumber - 1/2
Celery - 3 large
Lemon - 1/2
Spinach - 3 cups
Parsley - 1/2 cup
Ginger - 1/2
Approach:
Juice all ingredients in the juicer, mix and serve.
Do not forget
A drink that is very popular in Singapore because it has great health effects.
Ingredients:
Apple (green) - 1 medium sized
Beetroot - 1
Carrot - 2 large
Approach:
Juice all ingredients in the juicer, mix and serve.
Strength in the muscles
Build muscle in the most natural way with raw spinach.
Ingredients:
Apple - 2 medium sized
Cucumber - 1/2
Lime - 1
Spinach - 5 cups
Approach:
Juice all ingredients in the juicer, mix and serve.
Energy from cereal sprouts
The cereal sprouts drink offers the same nutritional value as 10 kg of cooked spinach. A slightly sweet taste will surprise your taste buds.
Ingredients:
Cereal sprouts - 1/4 of a medium size bowl
Approach:
Juice, stir and serve.
Soya milk
Soy milk is an alternative option to cow's milk for people with lactose intolerance. It is also a rich source of protein.
Ingredients:
Boiled soybeans Water
Approach:
Mix the soybeans with water in a 1:1 ratio. Carefully juice the mixture in a juicer. Then process the soy milk in the juicer a second time to make it fi ner.
natural_image
Black-and-white photo of five glasses filled with various fruits and beverages, including a halved orange spoon, tomato, apple, carrot, and strawberries (no text or symbols)Cleaning and maintenance
- Before each cleaning, first disconnect the device from the mains and let it cool down.
- Use only a slightly damp cloth to clean the device itself.
- Do not use any solvents or harsh cleaning agents.
- Wash the parts in warm water with detergent, wipe them and dry them carefully. Do not leave parts wet.
Do not use solvents or harsh detergents to clean any elements.
- Wash the accessories immediately after use so that the remains of fruits and vegetables do not dry on them.
- Do not wash the parts of the device or the motor unit in a dishwasher or in other dishwashers operating at high temperatures.
Do not dry parts with heating devices.
Disassembly of equipment for cleaning purposes
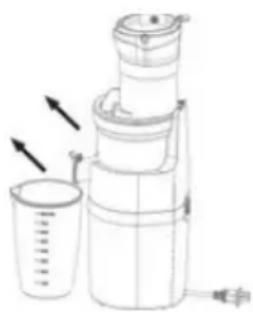
1 Put aside the containers for juice and pulp. (pic. 1)
2 Remove the feeding neck assembly. Rotate the assembly counter-clockwise to the point 📋 and lift upwards. (pic. 2)
3 Remove the juicing container from the base by lifting upwards. If the going gets tough, rock it gently while pulling it up. (pic. 3)
4 Remove the auger by pulling it vertically upwards. (pic. 4)
natural_image
Line drawing of a multi-tiered blender with a cup and side arm, no text or symbols presentpic. 1 pic. 2 pic. 3 pic. 4
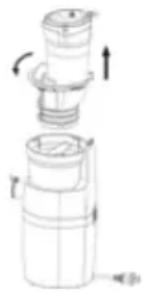
natural_image
Technical line drawing of a mechanical device with no visible text or symbols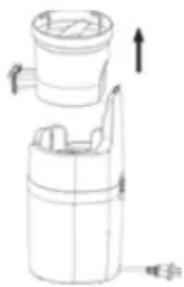
natural_image
Technical line drawing of a mechanical component with no visible text or symbols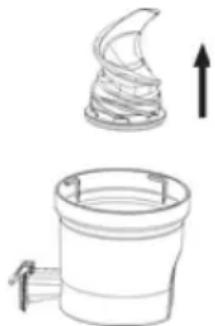
natural_image
Technical line drawing of a mechanical component with an upward arrow indicating motion (no text or symbols)After disassembly, clean the individual parts according to the cleaning instructions.
Always wash the juicing parts immediately after each use, otherwise the pulp could stick firmly in the juicing container and auger, which would affect disassembly, cleaning and juicing performance.
Wash the disassembled parts with water. If the strainer is clogged with pulp, use the supplied cleaning brush to remove the dirt.
Notifi cations:
- Do not use an iron wire brush, abrasive or sharp objects to clean the unit.
- Do not use water with a temperature above 40^ .
If there are any residues left in the mouth of the drain on the pulp, pull out the silicone valve according to picture 5 and clean it under running water.
Silicone valve
Pull to open
natural_image
Technical line drawing of a mechanical component with a pointed tip and base (no text or symbols)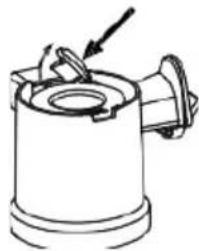
natural_image
Technical line drawing of a mechanical component with a pointed tip and base (no text or symbols)pic. 5
After cleaning, press the silicone valve to close it and close it tightly.
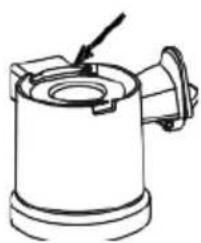
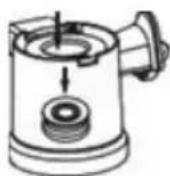
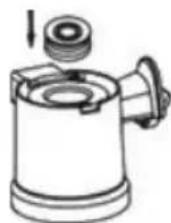
To clean the sealing ring (gasket) in the juicing container, follow these steps:
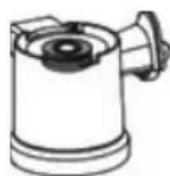
a For easier handling, turn the juicing container upside down and press out the sealing ring (pic. 1) with your thumb and clean it with water.
b After cleaning, insert the gasket back into the center hole. The ribbed surface must face upwards (pic. 2). Make sure that the groove of the sealing ring fi ts perfectly into the juicing container.
c The large smooth surface of the sealing ring will be inside and the small ribbed surface will be outside the juicing container. (pic. 3)
pic. 1 pic. 2
pic. 3
Do not immerse the base with the motor unit in water when cleaning. Wipe it only with a damp cloth.
After cleaning, dry all parts thoroughly and store them in a dry and cool place. Do not clean any parts of the juicer in the dishwasher! It is necessary to use a brush to clean the holes of the strainer.
Notifi cations!
Never immerse the motor unit of the device in water or any other liquid! Wipe the motor unit and the power cord with a dry cloth.
The motor is lubricated with long-lasting petroleum jelly. Does not require lubrication.
The right to make changes reserved
Problemsolving
If you experience any problems with the machine before contacting a service center or a dealer for repair, try the following steps to resolve the problem. If this does not solve the problem, contact your dealer or service center.
| Problem | Control | Solution |
| When the device is turned on nothing happens. | Check the power cord and make sure it is plugged in. | Plug in the power cord. |
| Check the machine and parts to make sure they are all well assembled | Rebuild the device and parts thereof according to assembly instructions. | |
| The machine stops working during operation. | In the throat is a lot of raw material that caused overload or blockage. | Press the “R” button to seconds, remove the blockage source and reuse the device. |
| Device overheated and an automatic break has been activated. | Treat your device break for 20 - 30 minutes and use again. | |
| Leaking out of the container | Check the rubber stopper is correctly fitted. | Fit the rubber correctly plug. |
| In the bowl and thread is too much raw material. | Check that they are not in the juice other ingredients. | Equipment thoroughly clean and allow to dry.Do this after each use. |
| Nonstandard noise during operation. | Check that it emits noise thread. | It's a common pheno-menon.Throat and don't put too much raw material in bowls. |
| Damaged strainer. | This may be due to frozen fruits, seeds and other hard foods or too much raw material. | Read this manual carefully before use. Make sure all instructions are followed.Do not put too much food into the feeder and container. |
Technical specifications
Power supply: 220-240 V\~50/60 Hz
Power consumption: 200 W
Dimensions (W x H x D): 17,8 x 45 x 15,2 cm (with accessories)
Weight: 2,6 kg (with accessories))
Speed: 110 rpm
Volume: Juice container: 800 ml, pulp container: 600 ml
Continuous operation time (KB): 15 min. at reverse max. 5 min.
The declared noise emission value of this appliance is 65 dB (A), which represents the sound power level A with respect to the reference sound power of 1 pW.
We reserve the right to make changes!
Producer:
ORAVA retail 1, a.s.
Seberíniho 2
821 03 Bratislava
Slovenská republika
Importer:
ORAVA retail 1, a.s.
Seberíniho 2
821 03 Bratislava
Slovenská republika
ORAVA distribution CZ, s.r.o.
Ostravská 494
739 25 Sviadnov
Česká republika
INSTRUCTIONS AND INFORMATION REGARDING THE DISPOSAL OF USED PACKAGING
Dispose of used packaging material at a municipal waste disposal site.
DISPOSAL OF USED ELECTRICAL AND ELECTRONIC EQUIPMENT
This symbol on the products or in the accompanying documents means that used electrical and electronic products should not be mixed with general household waste. For proper disposal, recovery and recycling, please return these products to designated collection points. Alternatively, in some countries of the European Union or other European countries, you may return your products to your local retailer when purchasing an equivalent new product. By ensuring this product is disposed of correctly, you will help prevent potential negative consequences for the environment natural resources and help prevent potential negative effects on environment and human health, which could be the consequences of improper disposal waste. Contact your local authority or nearest offi ce for more details collection point. Improper disposal of this type of waste may result in penalties in accordance with national regulations.
For business entities in the countries of the European Union
If you wish to discard electrical and electronic equipment, please request the necessary information from your seller or supplier.
Disposal in other countries outside the European Union
This symbol is valid in the European Union. If you wish to discard this product, please request obtain the necessary information on the correct method of disposal from the local authorities or from the your supplier.

This product complies with all the essential requirements of the EU directives that apply to it.

- Intended use of the device
- GENERAL SAFETY INSTRUCTIONS AND WARNINGS
- General safety instructions
- Safety of the operating environment
- Electrical safety
- Safety of persons
- Cleaning, maintenance and repairs
- Special safety instructions.
- Read carefully!
- Transportation/Transfer
- Warning!
- Unpack/Packaging
- Inspection/Commissioning
- Location/Installation
- Operation/Supervision
- Note!
- Description of parts
- Preparation before use
- Assembly of accessories and mounting on the motor unit
- Advice:
- Operation
- Juicing
- If the device stops during juicing
- Operation tips and alerts
- Tips and warnings about raw foods
- With hard stones
- With a hard or dried skin
- Frozen fruit or ice cream/ice
- Vegetable/animal oils
- Other
- Preparation of raw foods
- Before you start
- Yield
- Soft fruits and vegetables (eg oranges, tomatoes):
- PREPARATION:
- JUICING:
- Outlet tap (optional):
- To set the amount of pulp in juice:
- Hard fruits and vegetables (eg carrots, potatoes, beets):
- Ingredients with small grains (eg pomegranate, grapes):
- Fibrous or hard deciduous raw materials (eg celery, tusk, pineapple):
- Top 10 slow juicing recipes
- Immune booster
- Ingredients:
- Approach:
- Celery detox
- Strengthening metabolism
- Invincible
- Green juice
- Miraculous green juice
- Do not forget
- Strength in the muscles
- Energy from cereal sprouts
- Soya milk
- Cleaning and maintenance
- Disassembly of equipment for cleaning purposes
- Notifi cations:
- Silicone valve
- Pull to open
- Notifi cations!
- Problemsolving
- Technical specifications
- Producer:
- Importer:
- INSTRUCTIONS AND INFORMATION REGARDING THE DISPOSAL OF USED PACKAGING
- DISPOSAL OF USED ELECTRICAL AND ELECTRONIC EQUIPMENT
- For business entities in the countries of the European Union
- Disposal in other countries outside the European Union
Brand : Orava
Model : Taurus 2
Category : Juicer