
FZH 2020 - Irrigation system Fieldmann - Free user manual and instructions
Find the device manual for free FZH 2020 Fieldmann in PDF.


| Product Type | Irrigation System |
| Brand | Fieldmann |
| Model | FZH 2020 |
| Power Source | Battery-powered (AA type) or USB |
| Watering Method | Programmable sprinkler with multiple spray patterns |
| Max Watering Area | 200 m² |
| Watering Duration | 1 to 120 minutes per zone |
| Number of Zones | 3 independent zones |
| Timer Control | Digital LCD display with push buttons |
| Frequency Settings | Daily, weekly, or custom schedule |
| Rain Delay | 24, 48, or 72 hour delay |
| Manual Override | Start/stop watering instantly |
| Water Inlet | ¾ inch female thread |
| Water Outlet | ¾ inch male thread (multiple) |
| Dimensions (W x H x D) | 200 x 150 x 80 mm |
| Weight | 650 g |
| Protection Rating | IP54 (splashproof) |
| Safety Features | Automatic shut-off in case of malfunction, low battery indicator |
| Maintenance | Clean filter and nozzle regularly; store in dry place during winter |
| Spare Parts Available | Replacement hoses, connectors, sprinkler heads, batteries |
| Repairability | User-replaceable parts; service centers available |
Frequently Asked Questions - FZH 2020 Fieldmann
User questions about FZH 2020 Fieldmann
0 question about this device. Answer the ones you know or ask your own.
Ask a new question about this device
Download the instructions for your Irrigation system in PDF format for free! Find your manual FZH 2020 - Fieldmann and take your electronic device back in hand. On this page are published all the documents necessary for the use of your device. FZH 2020 by Fieldmann.
USER MANUAL FZH 2020 Fieldmann
natural_image
Abstract black and white spiral pattern with no text or symbolsFIELDMANN®
Home & Garden Performance
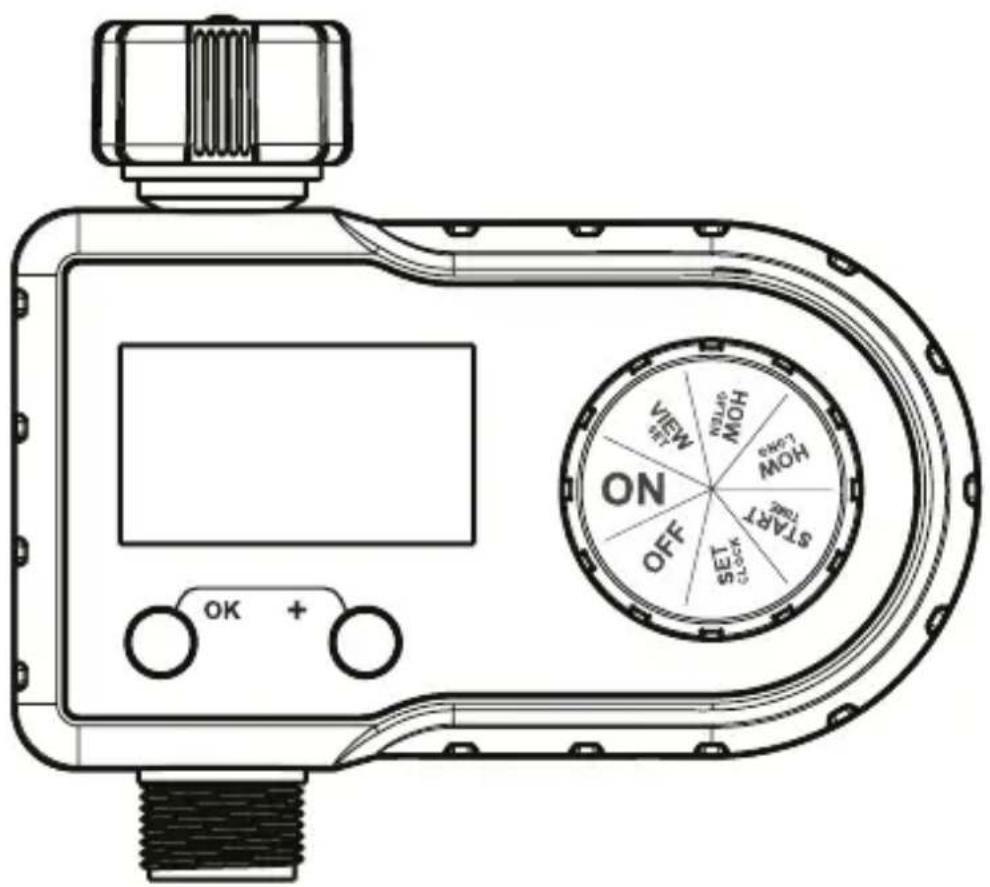
FZH 2020
IRRIGATION TIMER
Thank you for purchasing our products. If you have any questions, please contact us.
PRODUCT OVERVIEW
AT A GLANCE
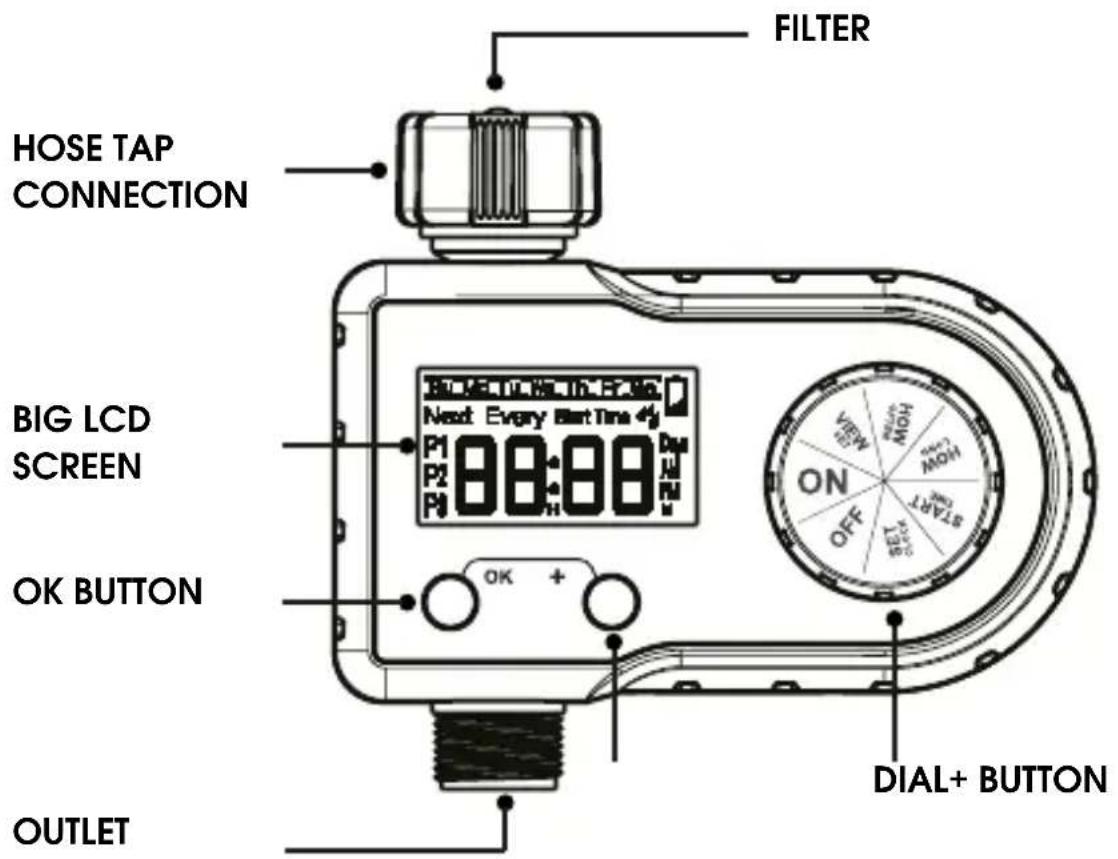
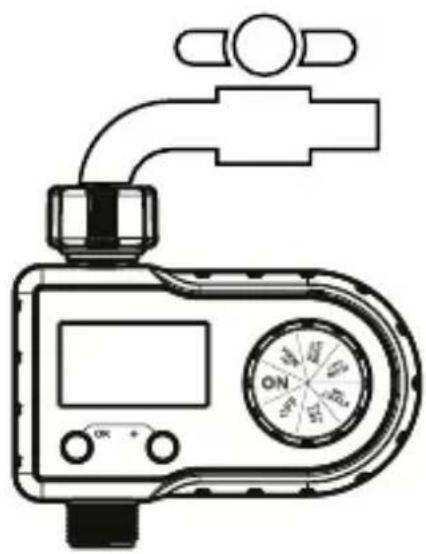
- DIAL—Rotate the dial to set your watering schedule and confirm the change.
- OK BUTTON—Press to confirm or cancel time and system setup.
-
- BUTTON—Press to adjust time and system setup.
- LCD SCREEN
| Low battery indicator | |
 | Flashing during watering |
 | The selected day of the week |
| Every _ Days Interval | watering days |
| Next The time left to the next watering | |
| Start Time The start time of watering | |
| P1/P2/P3 Watering plans for one day | |
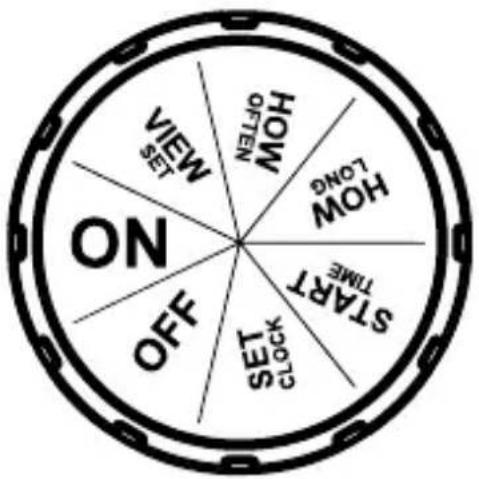
| DIAL POSITION FUNCTION | |
| SET CLOCK Set current time | |
| START TIME Set the time of start watering (Every watering plan has its own start time) | |
| HOW LONG Set watering duration (1 minute to 3 hours 59 minutes) (Every watering plan has its own watering duration) | |
| HOW OFTEN Set watering frequency of the week (3 watering plans share 1 watering frequency) | |
| VIEW SET View all your settings of 3 plans | |
| ON Start automatic watering based on your programs | |
| OFF Turn off all watering programs and shut off the valve |
| Min/Max Operating Pressure 0.5bar-8bar (7.25 psi-116 psi) |
| Working Temperature 3 °C -50 °C (37.4 °F -122 °F) |
| Power By 2 AA (1.5V) alkaline batteries (not included) |
| Working Voltage DC 2.3V~DC 3.3V |
| Watering Times Per Day 1 to 3 times a day (Up to 3 watering plans a day) |
| Watering Days Monday to Sunday OR Every 2/3/4/5/6 days |
| Watering Duration From 1 minute to 3 hours 59 minutes (4 hours) |
PRODUCT INSTALLATION
INSTALLING THE BATTERIES
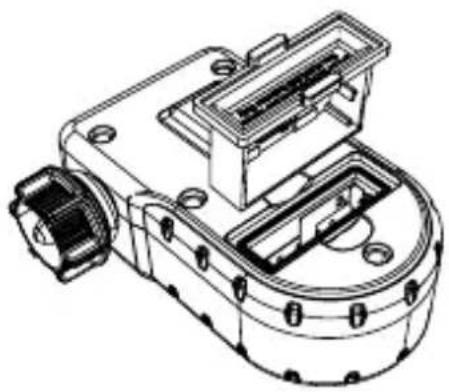
Remove the battery compartment on back of the timer.
Install 2 new AA (1.5V) alkaline batteries (not included).
* Firmly reinstall the battery back into the timer.

NOTE:
- Firmly restore the battery to ensure water resistance.
- Removed old batteries at the end of the watering season and disposed of them properly.
- Used or dead batteries must be removed from the timer and disposed of them properly.
- Do not dispose of batteries in fire. Batteries may explode or leak.
- Replace batteries when the low battery indicator appears on displayer.
natural_image
Technical line drawing of a mechanical component with no visible text or symbolsINSTALLING THE TIMER
Attach the timer to an outdoor hose faucet.
Please turn on the tap after programming the timer.

NOTE:
- When programming the timer, please turn off the tap to avoid getting wet.
- Do not install the timer with tools. Hand tighten only.
- Keep away from freezing. Timer should be removed to avoid freezing damage.
- To prolonging life of timer, keep the filter clean and in place when using the timer
natural_image
Line drawing of a digital pressure meter with a water tap and dial (no text or symbols)PROGRAMMING YOUR TIMER
STEP 1: SET CLOCK
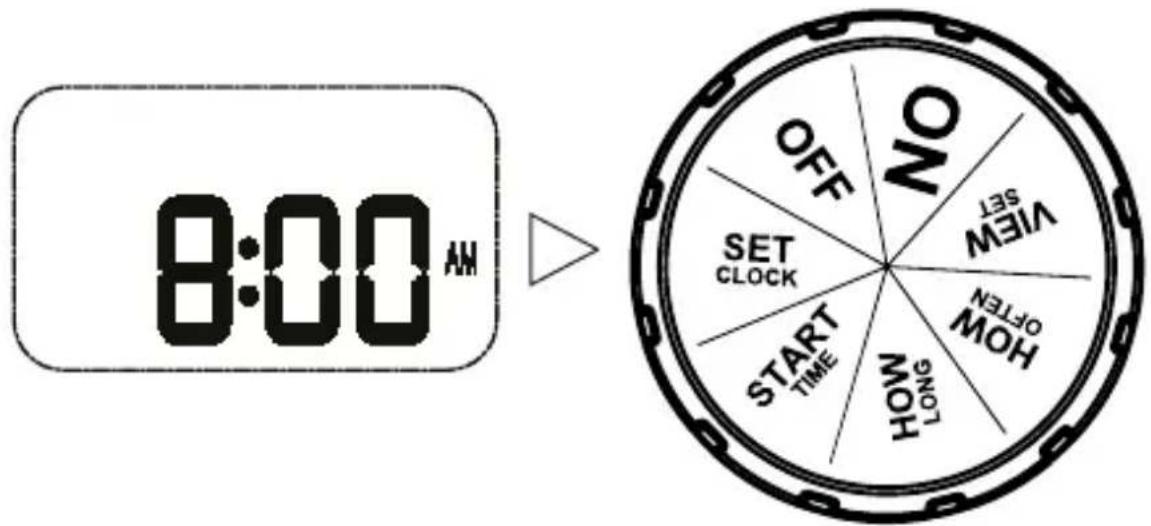
Turn dial to SET CLOCK.
Hold the „OK“ button to switch time display of 12H or 24H mode.
12H mode: with "AM" and "PM"
B:00-
24H mode: without "AM" and "PM"
8:00
* "■" flash: Using the „+” button to set the day of a week and press „OK" to confirm.
* "00:" flash: Using the "+" button to set hour and press, "OK" to confirm.
“:00” flash: Using the „+” button to set minute and turn dial to save changes.
Tips:
- Hold the "+" button can increase the time quickly.
- At the end of setting, please turn dial to save changes. If you press "OK" at the end, it will go back to the first setting.
STEP 2: START TIME
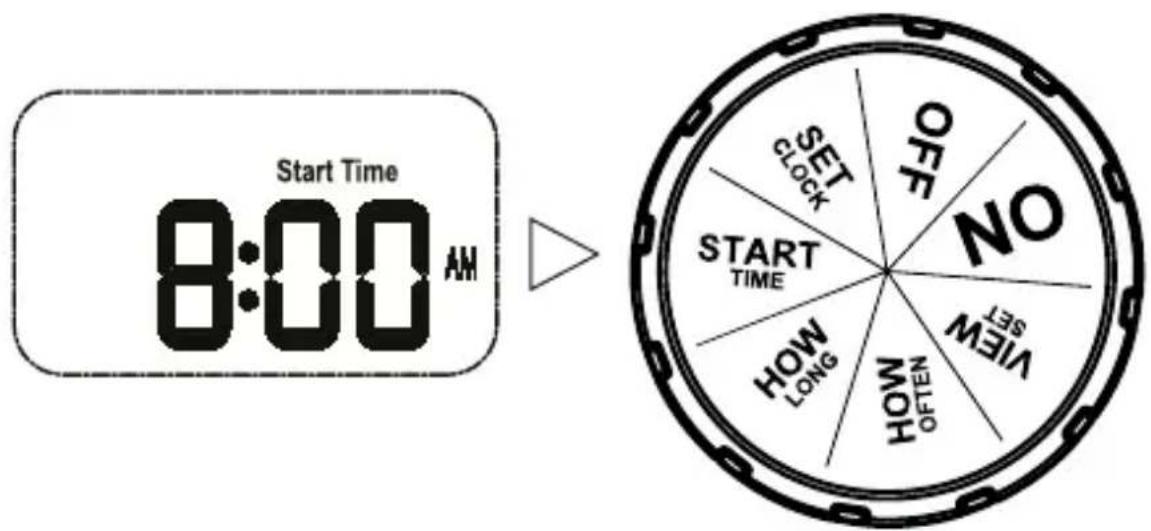
Turn the dial to START TIME.
Using the „+“ button to set the start time and press „OK“ to confirm.
After confirmed the previous plan, press "OK" again to switch to the next plan.
Turn dial to confirm the changes.
To turn off the start time of certain plan, please press the "+" button when setting that plan to set the start time to "24 : xx" (24H mode) or "12 : xx PM" (12H mode).
At the same time, a flashing "OFF" will appear on the screen. Then, press "OK" to confirm turn off that plan.
Tips:
- Hold the "+" button can increase the time quickly.
- If you want to reactivate the "OFF" plan, please press the "+" button again at that plan to set its start time.
- At the end of setting, please turn dial to save changes. If you press "OK" at the end, it will go back to the first setting.
STEP 3: HOW LONG
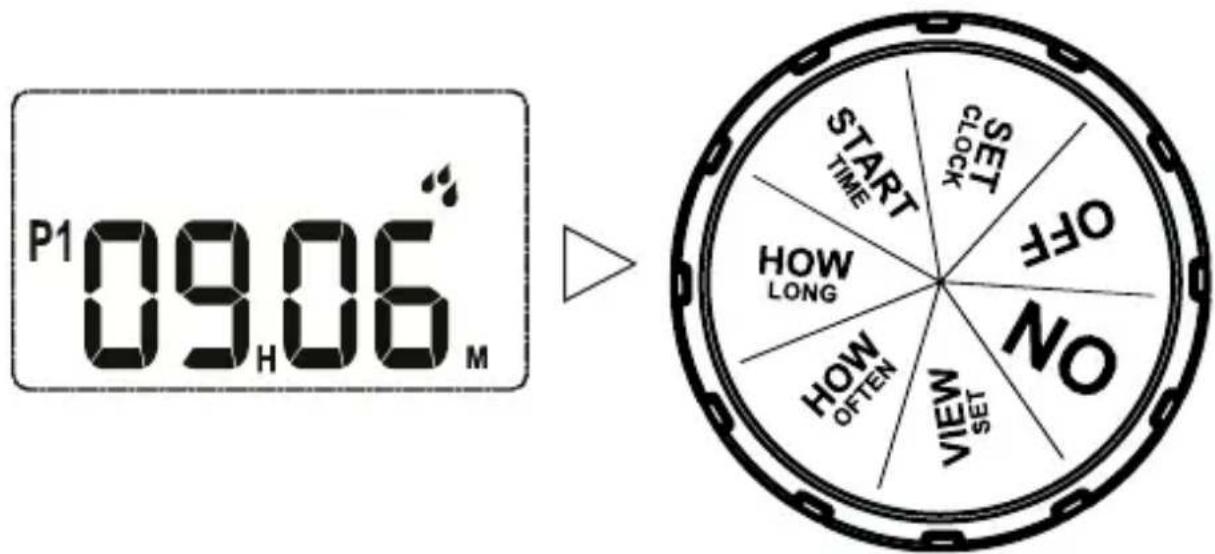
Turn the dial to HOW LONG. (Will display on the screen)
Using the „+“ button to set the watering duration press „OK“ to confirm. (Watering Duration: from 00 hour 1 minute to 03 hour 59 minutes)
After confirming the previous plan, press "OK" again to turn to set the next plan.
Turn dial to confirm the changes.
To turn off the watering duration of a certain plan, please press the "+" button at that plan to set the duration to "00 H 00 M". At the same time, a flashing "OFF" will appear on the screen. Then, press "OK" to confirm turn off that plan.
Tips:
- Hold the "+" button to increase the time quickly.
- If you want to reactivate the „OFF“ plan, please press the „+“ button again at that plan to set its start time.
- At the end of setting, please turn dial to save changes. If you press "OK" at the end, it will go back to the first setting.
STEP 4: HOW OFTEN
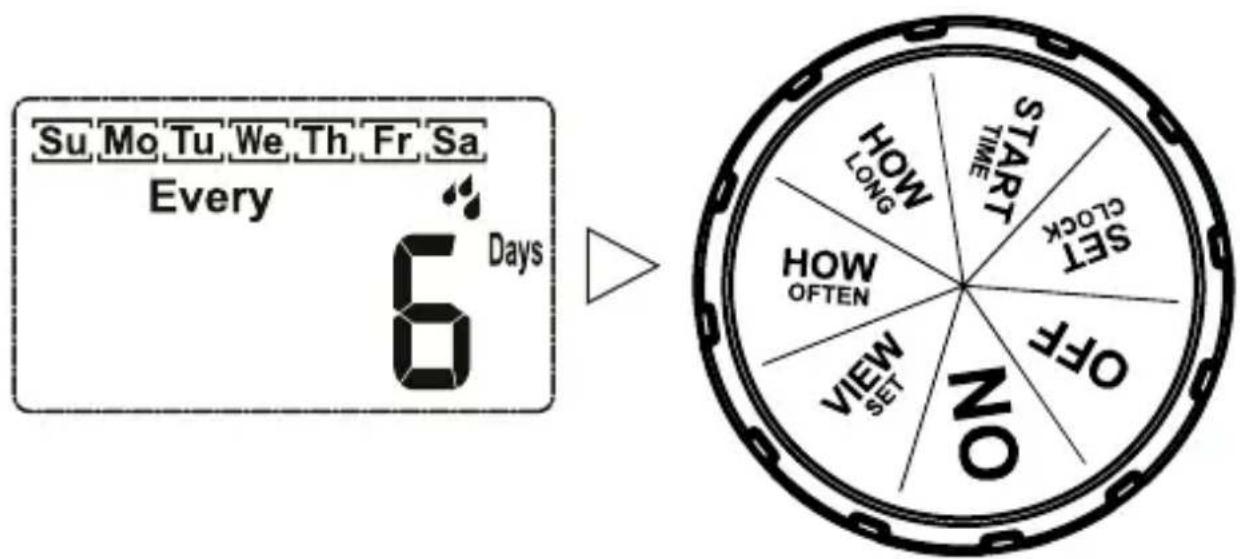
Turn the dial to HOW OFTEN.
There are 2 setting modes for watering frequency.
a. Monday to Sunday (the day of the week)
Su Mo Tu We Th Fr Sa Every
(Watering plans will run every Sunday, Wednesday, Thursday and Friday)
b. Every 2/3/4/5/6 days
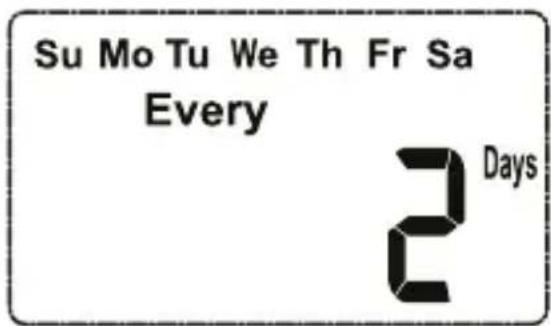
(Watering plans will run every 2 days)
WeekdayMode
a. When "hhh" is flashing
Using the „+“ button to select the day of the week, press „OK“ to confirm.
b. When "hhh" always there
The day has been selected. Press "OK" again can cancel the selection.
c. Turn dial to confirm the changes.
Every 2/3/4/5/6 Days Mode
a. Switch to Every 2/3/4/5/6 Days Mode
Press „+“ button to select, press "OK" to confirm.
("hhh" will flash from "Su" to "Sa" first, and then go to "Every" mode)
b. Using the „+“ button to select the interval watering days of 2/3/4/5/6.
c. Turn dial to confirm the changes.

Note:
- You can only choose one of the 2 setting modes of watering frequency. Once confirm one of the two, the other will be eliminated.
- At the end of setting, please turn dial to save changes. If you press "OK at the end, it will go back to the first setting.
STEP 5: VIEW SET
Turn the dial to VIEW SET.
Press "OK button to check the START TIME, HOW LONG and HOW OFTEN settings of the 3 watering plans.
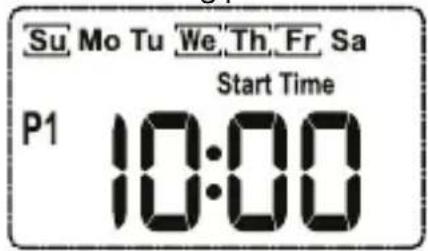
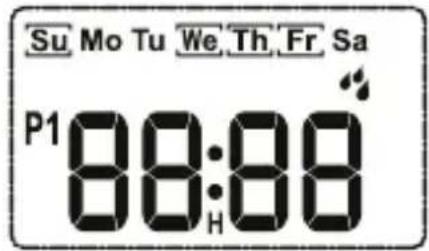
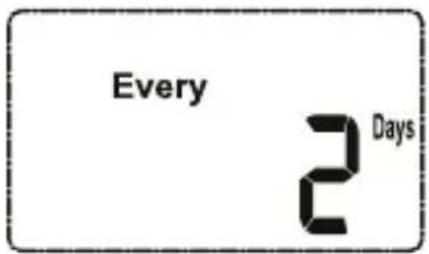
(The start time of P1) (The watering duration of P1) (Watering frequency)
STEP 6: AUTO WATERING
Turn the dial to ON.
(All watering plans being set will run automatically)
Duringwatering:
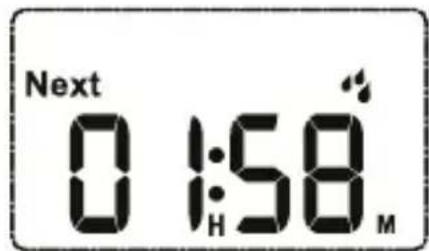
a. Display the remaining watering time and bbb will flash.
b. Press the „+“ button, and then the current day and time will be displayed.
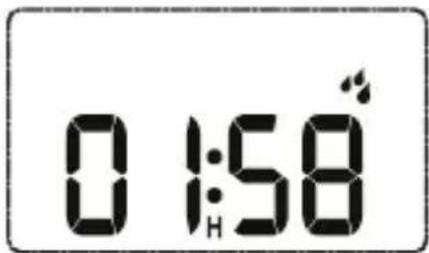
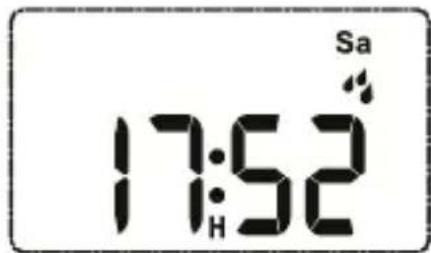
When not watering:
a. If there is no watering plans being set, it will only display the current day and time.
b. If there are plans being set but not running yet, it will display the current day and time, and followed by how much time is left to the next watering plan..
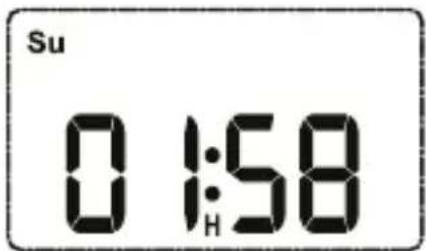

Note:
- There is no watering plans being set, which means the start time or watering duration of all 3 watering plans are turned off.
- To turn off a certain plan, please turn off the start time or watering duration of that plan. (About how to turn off the start time or watering duration, please refer to the section (STEP 2: START TIME) and (STEP 3: HOW LONG) of Chapter (PROGRAMMING YOUR TIMER))
ADDITIONAL FEATURES
MANUAL/HAND WATERING
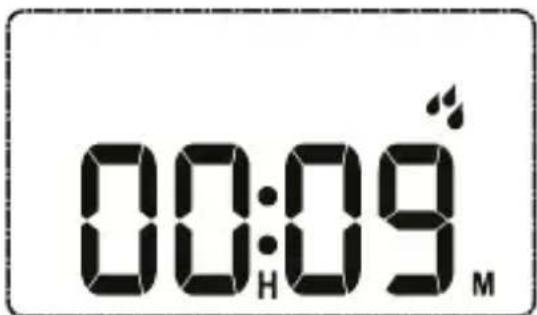
This feature allows you to water without interrupting your set watering schedule.
Please follow the steps below to start manual watering.
With the dial in the "ON" position, and hold the "OK" button to start watering manually. The default duration of manual watering is 10 minutes and it can not be changed.
2 ways to stop manual watering:
a. Hold the "OK" button again;
Or
b. Turn the dial to "OFF" and then back to "ON".

Note: There will be a slight delay between the time the "OK" button is pressed and when watering begins.
OFF MODE
OFF
If you wish to stop all 3 watering plans for an extended period, turn the dial to OFF. (Your settings will be saved)
The timer will not run automatically while in OFF mode. (The screen will display OFF)
To start watering again, turn the dial back to ON to resume your programmed watering schedule.
TROUBLESHOOTING
| PROBLEM CHECK IF | |
| Timer does not work at desired time | Clock is set to correct time and day. (Set 12H/24H mode correctly)The dial is turned to ON.START TIME is set to desired time.HOW LONG is not OFF.HOW OFTEN is set to desired time. |
| Timer does not water or has low water flow | The dial is turned to ON.Hose faucet is on.Batteries are low.Clock is set to correct time and day. (Set 12H/24H mode correctly)Filter washer screen is clean.Water pressure is above 10 psi.START TIME is set to desired time.HOW LONG is not OFF.HOW OFTEN is set to desired time. |
| Water won't turn off • | HOW LONG is set to desired time.HOW OFTEN is set to desired time.Batteries are low.Clock is set to correct time and day. (Set 12H/24H mode correctly) |
| Timer is leaking • Filter | washer is in place.Filter washer is clean and undamaged.Faucet connection is hand tight. |
WARNINGS
For outdoor use ONLY.
Clean the filter regularly and replace If It Is worn In order to extend the working life of timer.
Do not use water over 120^ F( 50^ C), or less than 38^ F( 3^ C).
In winter, please remove batteries, drain and store it indoor to away from freezing.
Do not install the timer with tools. Hand tighten ONLY. Use of tools may damage the timer.
Do not subject the product to extreme force and shock.
Severe electrical shock could result if water is sprayed into outlets or sources of electrical current. Never immerse the product into water.
DISPOSAL

These tools, rechargeable battery, accessories and packaging must be sorted to ensure that they are recycled in an environmentally-friendly manner.
Do not dispose of electric tools and rechargeable batteries in common household waste!
FOR EU COUNTRIES ONLY:
natural_image
Simple line drawing of a trash bin with crossed lines indicating no waste or discharge (no text or symbols)Pursuant to the European Directive 2012/19/EU, electric tools that are no longer used, and in compliance with the European Directive 2006/66/EC, faulty or used battery packs/batteries must be collected separately and disposed of in a manner considerate to the environment.
INSTRUCTIONS AND INFORMATION ON THE DISPOSAL OF DISCARDED PACKAGING MATERIALS
Please return all used packaging at the waste disposal site established by the local waste disposal authorities.
DISPOSAL OF DISCARDED ELECTRICAL AND ELECTRONIC EQUIPMENT
natural_image
Symbol of a trash bin crossed with no text or numbers, representing waste sorting or disposal (no text present)This symbol on products or accompanying documents means that used electric or electronic products must not be added to standard municipal waste. Please return these products at the designated collection points where they will be subject to correct disposal, renewal and recycling. In some EU or European countries, you can return your products to your local dealer when buying a new corresponding product. Correct disposal of this product helps save valuable natural resources and prevents possible adverse impacts on the environment and human health that might be caused by improper waste disposal. For further information, please contact your local authorities or the nearest waste collection site. Improper disposal of this type of waste may lead to penalties in accordance with the national regulations in force.
For companies functioning in the EU countries
To dispose of electric or electronic devices, ask your retailer or supplier for the necessary information. Disposal in countries outside the European Union. To dispose of the product, ask your local authorities or dealer for necessary information on how to dispose of the product.

This product meets all the basic requirements of all applicable EU directives.
Text, design and technical specifications may change without prior notice and we reserve the right to make such changes.
User's manual in original language.

FIELDMANN®
Home & Garden Performance
Model /Modell /Modelis:
Conditions of guarantee
This product is warranted for the period of 24 months from the date of purchase to the end-user. Warranty is limited to the following conditions. Warranty is referred only to the customer goods using for common domestic use. The claim for service can be applied either at dealer's shop where the product was bought, or at below mentioned authorized service shops. The end-user is obligated to set up a claim immediately when the defects appeared but only till the end of warranty period. The end-user is obligated to cooperate to certify the claiming defects. Only completed and clean (according to hygienic standards) product will be accepted. In case of eligible warranty claim the warranty period will be prolonged by the period from the date of claim application till the date of taking overthe product by end-user, or the date the end-user is obligated to take it over. To obtain the service under this warranty, end-user is obligated to certify his claim with duly completed following documents: receipt, certificate of warranty, certificate of installation...
This warranty is void especially if apply as follows: ■ Defects which were put on sale. ■ Wear-out or damage caused by common use. ■ The product was damaged by unprofessional or wrong installation, used in contrary to the applicable instruction manual, used in contrary to legal enactment and common process of use or used for another purpose which has been designed for. ■ The product was damaged by uncared-foror insufficient maintenance. ■ The product was damaged by dirt, accident of force majeure (natural disaster, fire, flood, ...). ■ Defects on functionality caused by low duality of signal, electromagnetic field interference etc. ■ The product was mechanically damaged (e.g. broken button, fall...). ■ Damage caused by use of unsuitable media, fillings, expendable supplies (batteries) or by unsuitable working conditions (e.g. high temperatures, high humidity, quakes,...). ■ Repair, modification or other failure action to the product by unauthorized person. ■ End-user did not prove enough his right to claim (time and place of purchase). ■ Data on presented documents differs from data on products. ■ Cases when the claiming product can not be identified according to the presented documents (e.g. the serial number or the warranty seal has been damaged).
Home & Garden Performance
- FIELDMANN®
- FZH 2020
- IRRIGATION TIMER
- PRODUCT OVERVIEW
- AT A GLANCE
- PRODUCT INSTALLATION
- INSTALLING THE BATTERIES
- NOTE:
- INSTALLING THE TIMER
- PROGRAMMING YOUR TIMER
- Tips:
- WeekdayMode
- Every 2/3/4/5/6 Days Mode
- STEP 5: VIEW SET
- Turn the dial to VIEW SET.
- STEP 6: AUTO WATERING
- ADDITIONAL FEATURES
- MANUAL/HAND WATERING
- OFF MODE
- TROUBLESHOOTING
- WARNINGS
- DISPOSAL
- FOR EU COUNTRIES ONLY:
- INSTRUCTIONS AND INFORMATION ON THE DISPOSAL OF DISCARDED PACKAGING MATERIALS
- DISPOSAL OF DISCARDED ELECTRICAL AND ELECTRONIC EQUIPMENT
- For companies functioning in the EU countries
- Home & Garden Performance
- Model /Modell /Modelis:
- Conditions of guarantee
Brand : Fieldmann
Model : FZH 2020
Category : Irrigation system