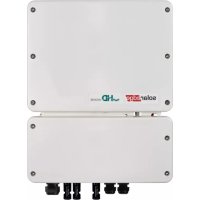
SolarEdge Home Hub - Solar panel

Home Hub - Solar panel SolarEdge - Free user manual and instructions

Find the device manual for free Home Hub SolarEdge in PDF.

📄 2 pages English EN Download 💬 AI Question 10 questions ⚙️ Specs
Notice SolarEdge Home Hub - page 1
Pick your language and provide your email: we'll send you a specifically translated version.
Product TypeSingle-Phase Solar Inverter with Home Hub
BrandSolarEdge
Weight12.6 kg
MountingWall bracket included
InputPV string(s); compatible with SolarEdge Home Battery 400V
OutputUp to 6 kW backup power (with appropriate protective device)
CommunicationBuilt-in SolarEdge Home Network antenna; optional Wi-Fi (separate purchase) and LAN
WiringAC grid L, N, G; PV string(s); battery 400V; backup interface; RS485 for multiple inverters
ProtectionOvercurrent protection required (28A min, 50A max for backup)
GroundingGround cable connection required per local regulations
LED IndicationsRed (fault), Green (power production), Blinking Green (grid connected), Blue (communication)
CommissioningVia SetApp mobile application
MonitoringRemote monitoring via SolarEdge platform
EnvironmentalIndoor/outdoor installation; clearance dimensions provided in manual
Accessories IncludedWall mount bracket, SolarEdge Home Network antenna, communication board
Safety ComplianceRead handling and safety instructions; disconnect power before service
Battery CompatibilitySolarEdge Home Battery 400V (wired or wireless connection via Home Network)

Frequently Asked Questions - Home Hub SolarEdge

Can I install the SolarEdge Home Hub inverter outdoors?
Yes, it is suitable for outdoor installation. Ensure proper clearance (at least 20 cm on sides, 40 cm below, 20 cm above) and avoid direct sunlight exposure as per manual.
How do I connect the inverter to my home Wi-Fi?
The inverter supports optional Wi-Fi. Purchase a separate Wi-Fi antenna, connect it to the inverter, then configure via SetApp. LAN connection is also available for wired networking.
What types of batteries are compatible?
The Home Hub is designed to work with the SolarEdge Home Battery 400V. Connection can be wired or wireless using the built-in SolarEdge Home Network.
How do I commission the inverter?
After installation, download the SetApp from your mobile app store. Turn on the inverter, hold the button for 2 seconds, release, and follow the on-screen instructions in SetApp.
What does the red LED mean?
A solid red LED indicates a fault. Check the manual for fault codes or refer to the online LED guide at https://www.solaredge.com/leds. For remote monitoring, use the SolarEdge platform.
Can I connect multiple SolarEdge inverters together?
Yes. Use a leader-follower configuration via RS485. The leader must connect to LAN or Wi-Fi. Refer to section G of the manual for wiring details.
What is the maximum backup power output?
With a properly rated protective device (28A min, 50A max), the inverter can provide up to 6 kW backup power. This applies to all models.
Is professional installation required?
Installation should be performed by a qualified electrician following local regulations. The manual includes warnings about electric shock and grounding requirements.
How do I download the full manual?
The manual is available for free download on notice-facile.com in PDF format. You can also find it on the SolarEdge knowledge center at the provided links in the manual.
What warranty does the SolarEdge Home Hub have?
SolarEdge offers a standard warranty. For specific terms, refer to the product warranty document included in the package or contact SolarEdge support. The manual is subject to change without notice.

User questions about Home Hub SolarEdge

0 question about this device. Answer the ones you know or ask your own.

Ask a new question about this device

The email remains private: it is only used to notify you if someone responds to your question.

No questions yet. Be the first to ask one.

Download the instructions for your Solar panel in PDF format for free! Find your manual Home Hub - SolarEdge and take your electronic device back in hand. On this page are published all the documents necessary for the use of your device. Home Hub by SolarEdge.

USER MANUAL Home Hub SolarEdge

What's in the Package
SolarEdge Home Hub - 1
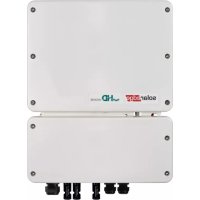
Inverter

SolarEdge Home Hub - 2
Wall mount bracket

SolarEdge Home Hub - 3
SolarEdge Home Network Antenna

SolarEdge Home Hub - 4
WARNING!

This symbol denotes a hazard. It calls attention to a procedure that if not correctly performed or adhered to could result in injury or loss of life. Do not proceed beyond a warning note until the indicated conditions are fully understood and met.

SolarEdge Home Hub - 5

CAUTION! Denotes a hazard. It calls attention to a procedure that, if not correctly performed or adhered to, could result in damage or destruction of the product. Do not proceed beyond a caution sign until the indicated conditions are fully understood and met.

solaredge.com

SolarEdge Technologies GmbH, Werner-Eckert-Str. 6, 81829 Munich, Germany

Subject to change without notice.

© SolarEdge Technologies, Ltd.

All rights reserved. March 2023.

SolarEdge Home Hub - 6

WARNING! To avoid danger, read the HANDLING AND SAFETY INSTRUCTIONS provided with this product, or refer to:

https://www.solaredge.com/sites/default/files/se_handling_and_safety_instructions.pdf

Before installation, read the datasheet provided with this product, or refer to: https://knowledge-center.solaredge.com/sites/kc/files/se-home-hub-single-phase-inverter-datasheet-eu.pdf

SolarEdge Home Hub - 7

SolarEdge Home Hub - 8

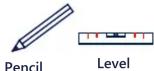
Tools and Materials
SolarEdge Home Hub - 9

SolarEdge Home Hub - 10

SolarEdge Home Hub - 11

SolarEdge Home Hub - 12

SolarEdge Home Hub - 13

SolarEdge Home Hub - 14

SolarEdge Home Hub - 15

SolarEdge Home Hub - 16

SolarEdge Home Hub - 17

SolarEdge Home Hub - 18

A
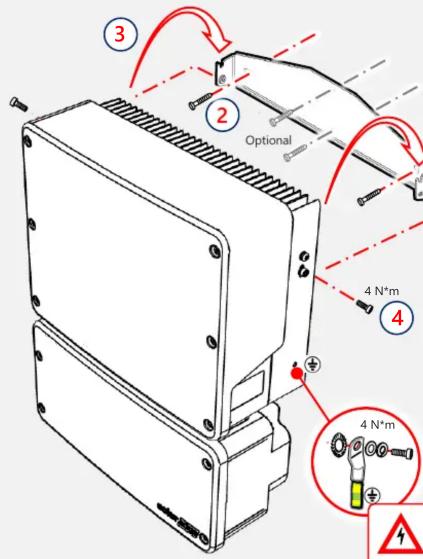
Mounting
12.6 KG Optional Holes Ø 9mm

3 2 Optional 4 N*m 4 N*m 1

20 cm 20 cm 10 cm 40 cm 20 cm ⑤ ⑥

SolarEdge Home Hub - 22
WARNING! Connect a ground cable if required by local regulation.
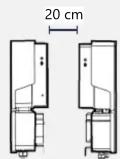
SolarEdge Home Hub - 23

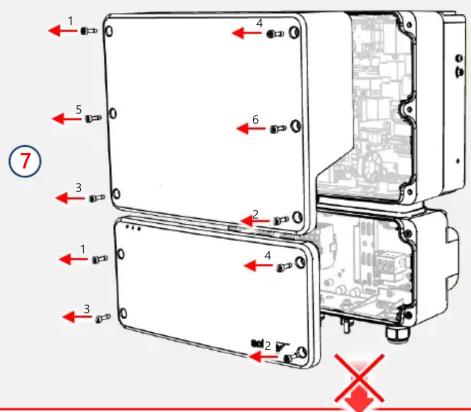
1 4 5 0 6 3 2 7 1 4 3 2 3 2

CAUTION!DO NOT rest the inverter vertically on the connectors

B
Wiring
PV String(s) 2 AC Grid 1 WARNING! HAZARD OF ELECTRIC SHOCK. DISCONNECT POWER BEFORE INSTALLATION OR SERVICE WARNING! Connect the grounding wire first NOTE: Use a protective device according to regulation 1 WARNING! Do NOT connect a protective device with a higher rating than 50A. Make sure to use a…

SolarEdge Home Hub - 26

WARNING! Before installing or operating SolarEdge Home Battery 400V, read the safety and handling instructions provided with the battery.

IMPORTANT! The connection to units and accessories shown here is for reference only. For detailed information, refer to the specific product guide.

Connecting to LAN or Wi-Fi
(In Leader-Follower configuration, LAN or Wi-Fi MUST connect to the Leader inverter)
C
Optional Location Wi-Fi LAN 5.5 N*m Ethernet Cable NOTE: Wi-Fi antenna is optional and may be purchased separately. Wi-Fi Router 1.1 N*m Router WWW

Connecting to SolarEdge Home Network

(SolarEdge home network module and antenna are included with this product)
E
Optional Location 5.5 N*m 1.1 N*m Inline Meter Smart Energy Hot Water SolarEdge Home Battery 400V

Connecting Multiple Inverters
G
RS485-2 RS485-1 5.5 N*m Communication Board Leader (first) SW2 Follower SW2 Follower (last) RS485 Cable (CAT 5e/6) 1.5 N*m RS485 B A G RS485 B A G RS485 B A G

Commissioning the Inverter
|
graph TD A["SolarEdge Home Battery 400V"] -->|ON| B["On"] B --> C["4 N*m"] C --> D["5 P (Hold and release within 2 seconds)"] D --> E["6 SetApp"] E --> F["Run SetApp and follow the instructions on the screen"]

Connecting to SolarEdge Home Battery 400V
(Optionally, connect battery communication wirelessly using SolarEdge Home Network)
D
Leader Inverter 1.5 N*m 2nd Inv. Battery Battery G En A B 5.5 N*m Power Cables Communication Cables (CAT 5e/6) G A B Ground Cable 6-10 mm², as for the number of batteries Warning! Connect a ground cable according to local regulation requirements. For connection, See section A. SolarEdge Home Battery…

Connecting to Backup Interface
F
F 5.5 N*m Backup Interface 1.5 N*m Backup Interface 12V RSD RS485 G A B Communication Cables (CAT 5e/6) G A B 12-12+

Connecting to Meter and External RSD Switch
M
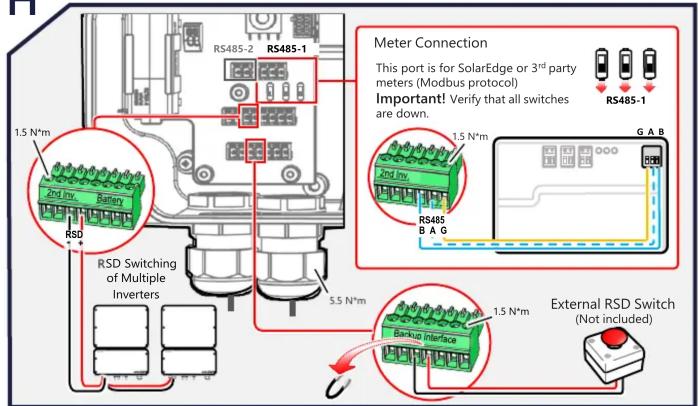
RS485-2 RS485-1 1.5 N*m RSD RSD Switching of Multiple Inverters 5.5 N*m Meter Connection This port is for SolarEdge or 3rd party meters (Modbus protocol) Important! Verify that all switches are down. 1.5 N*m RS485 B A G G A B External RSD Switch (Not included)

LED Indications
J
Red: fault Green: power production, Blinking Green: Grid connection ok Blue: communication ok For more indications refer to: https://www.solaredge.com/leds For remote status, fault indications, and system performance, refer to Remote Monitoring at: https://www.solaredge.com/products/pv-monitoring#/

Manual assistant
Powered by Anthropic
Waiting for your message
Product information

Brand : SolarEdge

Model : Home Hub

Category : Solar panel