
Bolide - Uncategorized Chipolino - Free user manual and instructions
Find the device manual for free Bolide Chipolino in PDF.


| Product Type | Kids' Toy Tricycle |
| Brand | Chipolino |
| Model | Bolide |
| Age Range | 1.5 years and up |
| Maximum User Weight | 25 kg |
| Materials | Plastic, metal, textile |
| Number of Wheels | 3 (1 front, 2 rear) |
| Tire Maximum Pressure | 3 Bar (50 PSI) |
| Brakes | Rear wheel parking brakes (foot pedals) |
| Pedal Lock | Yes, with lock/unlock button |
| Adjustable Backrest | Yes, multiple positions |
| Adjustable Foot Rest | Yes, retractable with push button |
| Upper Foot Rest | Yes |
| Canopy | Adjustable, open/close with levers |
| Push Handle | Removable, with bottom and top sections |
| Safety Bumper | Included |
| Storage Basket | Max load 0.5 kg |
| Parking Device | Yes, blocks rear wheels |
| Assembly Required | Yes, adult only |
| Maintenance | Clean with damp cloth, oil moving parts, avoid sand |
| Safety Standards | EU Toy Safety Directive 2009/48/EC |
| Warning | No brakes, use under adult supervision, not for children over 25 kg |
Frequently Asked Questions - Bolide Chipolino
User questions about Bolide Chipolino
0 question about this device. Answer the ones you know or ask your own.
Ask a new question about this device
Download the instructions for your Uncategorized in PDF format for free! Find your manual Bolide - Chipolino and take your electronic device back in hand. On this page are published all the documents necessary for the use of your device. Bolide by Chipolino.
USER MANUAL Bolide Chipolino
IMPORTANT! PLEASE READ CAREFULLY THIS INSTRUCTION MANUAL AND KEEP IT IN A SAFE PLACE FOR FUTURE REFERENCE!
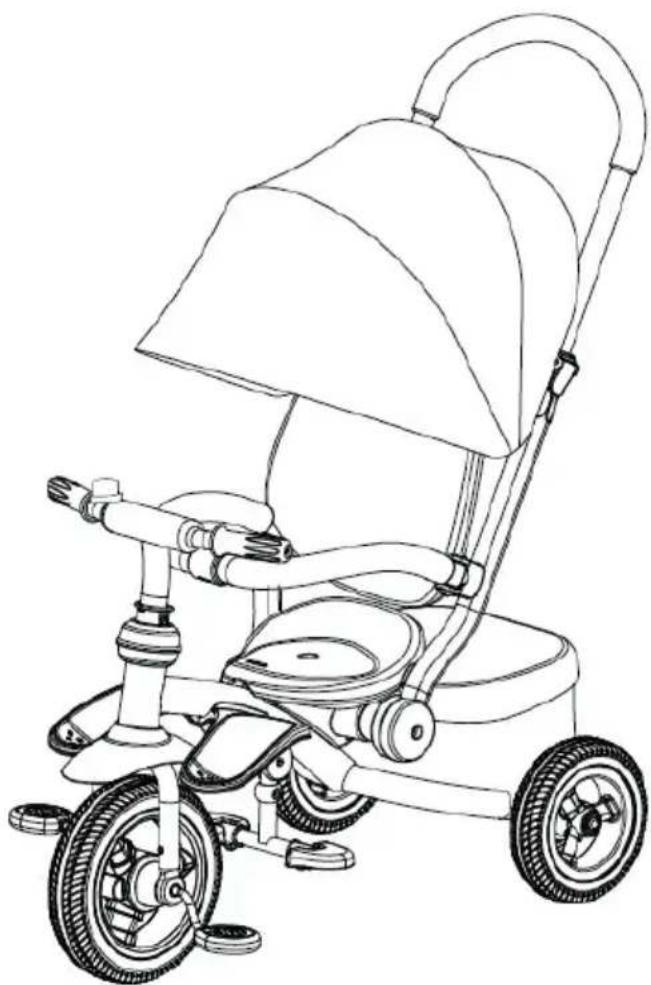
INSTRUCTION MANUAL FOR KIDS' TOY TRICYCLE „BOLIDE”
natural_image
Line drawing of a two-story tricycle with canopy and wheels (no text or symbols)This product is produced in accordance with requirements of Toy safety Directive 2009/48/EC of the European Parliament and the Council, Regulation regarding Essential Requirements and Conformity Assessment of Toys, Regulation regarding Conformity Marking and the standards applicable for this toy.
FOLLOW ALL WARNINGS, INSTRUCTIONS AND RECOMMENDATIONS IN THIS MANUAL IN ORDER TO GUARANTEE THE SAFE USE OF THIS PRODUCT:
CAUTION! WARNINGS!
CAUTION! USE ONLY UNDER DIRECT ADULT SUPERVISION!
CAUTION! THIS TOY HAS NO BRAKES!
✿ CAUTION! THE TOY IS SUITABLE FOR CHILDREN AGED 1.5 YEARS AND UP AND WEIGHING NOT MORE THAN 25 kg!
✿ CAUTION! DO NOT USE FOR CHILDREN OVER 25KG – DANGER OF OVERLOADING THE TOY!
✿ CAUTION! BEFORE USING THE TRICYCLE, TEACH THE CHILD THE CORRECT WAY TO USE IT AND THE SAFETY RULES.
CAUTION! USE THE TOY ONLY FOR ITS PURPOSE.
✿ CAUTION! USE THE TOY ONLY DURING THE DAY ON EVEN PLAYGROUNDS AND AT A SAFE DISTANCE FROM STREETS OR ROAD LANES FOR VEHICLES.
✿ CAUTION! TO AVOID THE DANGER OF INJURY ALWAYS REMOVE THE PUSH HANDLE WHENEVER THE CHILD IS RIDING THE TOY ON HIS OWN!
CAUTION! KEEP AWAY FROM FIRE OR OTHER HEAT SOURCES!
✿ ONLY adult assembly of the TOY is required!
DO NOT allow presence of children under 3 years before assembly of the TOY is complete. In this way, you will avoid their access to small or loose parts!
The TOY is intended for one child at a time ONLY!
DO NOT let other children push the tricycle!
The TOY is NOT suitable for running or skating!
DO NOT use the TOY if you find missing or damaged parts.
DO NOT let the child stand on the footrest or the seat to avoid injury.
❖ The child must wear shoes when using the TOY!
DO NOT tie strings or accessories to the TOY in order to avoid the risk of suffocation.
DO NOT place more than 0,5 kg load in the storage basket.
DO NOT put items or luggage in the handle bar or the parent handle in order to avoid risk of injury resulting from the TOY's instability and tipping over!
✿ Follow the instructions for allowed maximum pressure in tires! Always before use the tricycle check the pressure! Pressure of tires must NOT exceed 3 Bar (50 P.S.I)!
DO NOT place items or heavy objects in the TOY or on it during storage or transportation to avoid damage to the frame.
DO NOT use another transport means to move the TOY by pulling it.
DO NOT allow the child using the TOY or other children around it to touch the wheels or put items in them.
Use away from rivers, pools, stairs or hurdles!
Do not make changes or modifications to the TOY frame! If necessary, contact the retailer or an authorized service center for advice and repair.
Use only spare parts, which are approved by the producer and recommended by the distributor or company service! The producer revokes all responsibility in case parts different from the original ones have been used.
- Keep nylon packages away from children to avoid risk of suffocation!
PRODUCT FEATURES
This is a functional TOY whose purpose is to create in the child initial skills to coordinate its arms and feet when riding a tricycle or bicycle.
IMPORTANT! Remove the parent handle when you are sure that the child can ride the tricycle on his own and unaided.
- Suitable for children older than 1.5 years with weight up to 25 kg;
- Can be driven by the child using the pedals;
Can be pushed by an adult and the child lays his feet on the foot rest;
Safety bumper;
◆ Adjustable backrest;
◆ Adjustable foot rest;
◆ Upper foot rest;
◆ Adjustable canopy;
Parking device;
◆ Storage basket.
MAIN PARTS
| A | 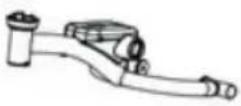 | G | 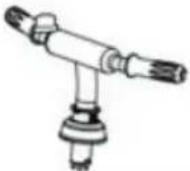 | M | 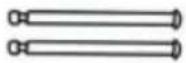 |
| B | 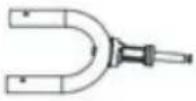 | H | 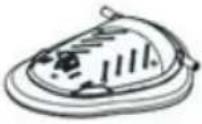 | N | 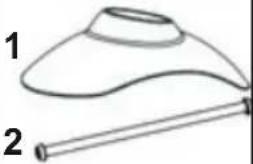 |
| C | 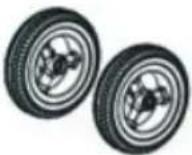 | I | 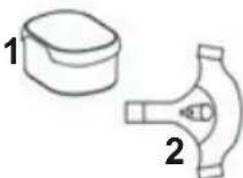 | O | 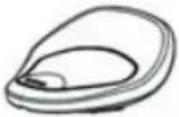 |
| D | 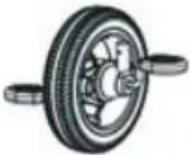 | J | 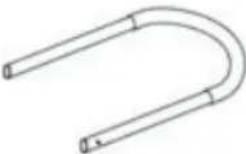 | P | 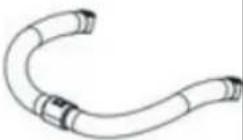 |
| E | 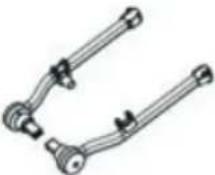 | K | 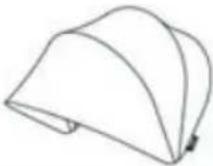 | Q | 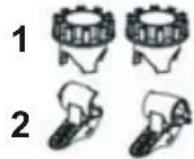 |
| F | 1 2 3 4 5 6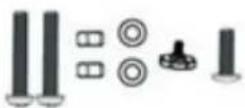 | L | 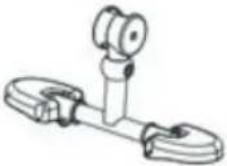 | R | 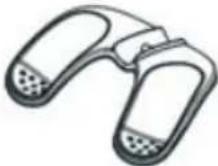 |
 | |||||
| A Frame F-5 M6x45 Screw M Rear axle | ||||
| B Front fork F-6 Bracket N-1 Mudguard | ||||
| C Rear wheels G Steering bar N-2 Rod | ||||
| D Front wheel H Back rest O Seat | ||||
| E Push bar (bottom) | I-1 | Storage basket | P | Safety bumper |
| F-1 M6x30 Screw | I-2 | Seat pad | Q-1 | Parking device parts 1 |
| F-2 M6 Cap nut | J | Push bar (top) | Q-2 | Parking device parts 2 |
| F-3 6 mm Shim | K | Canopy | R Upper foot rest | |
| F-4 Screw | L | Lower foot rest | ||
ASSEMBLY AND MOUNTING
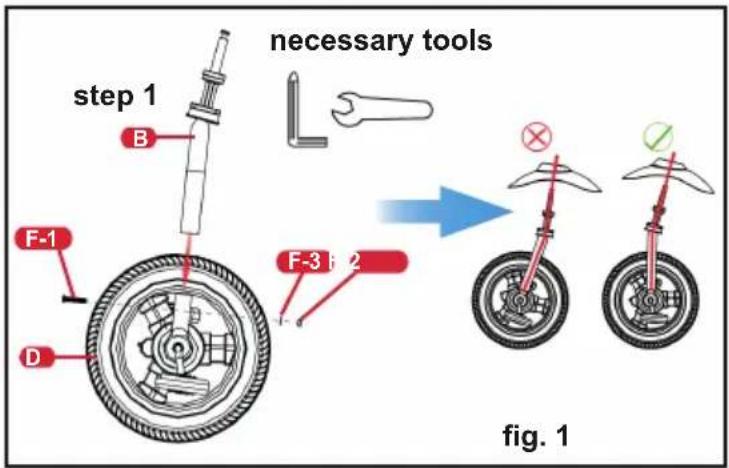
- Insert the front fork (B) to the front wheel (D).
IMPORTANT: Please pay attention to the correct position of the front fork to the frame!
-
Fix with a (M6x30) screw, 6mm shim and M6 Cap nut
-
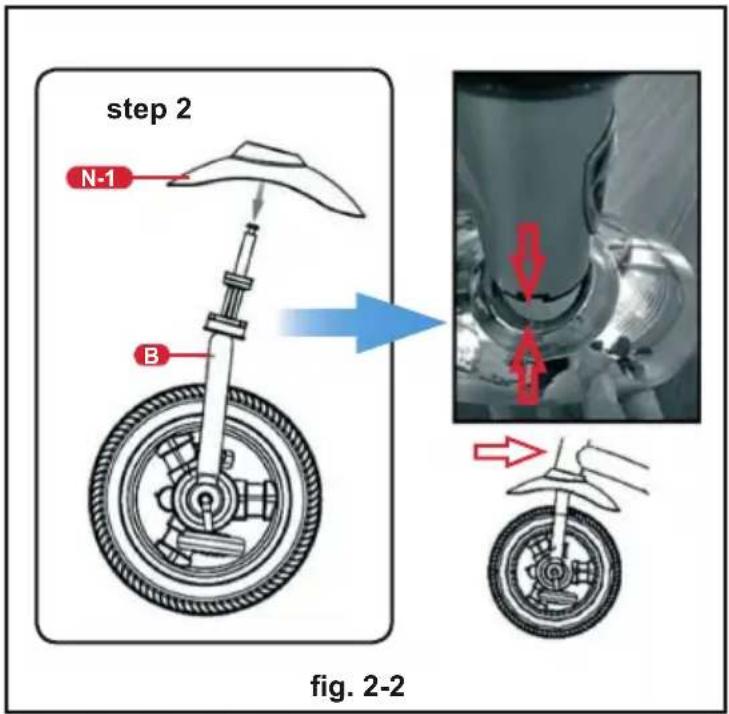
Place the mudguard (N) onto the front fork. Note that the shorter side of the mudguard must face forward, and the longer one – face the frame. Push care fully down until the mudguard touches the shoulders of the front fork (fig.2-2).
-
Align the front tube of the frame (A) with the front fork. Position the convex part of the mudguard to the slot in the frame as shown in fig.2-2.
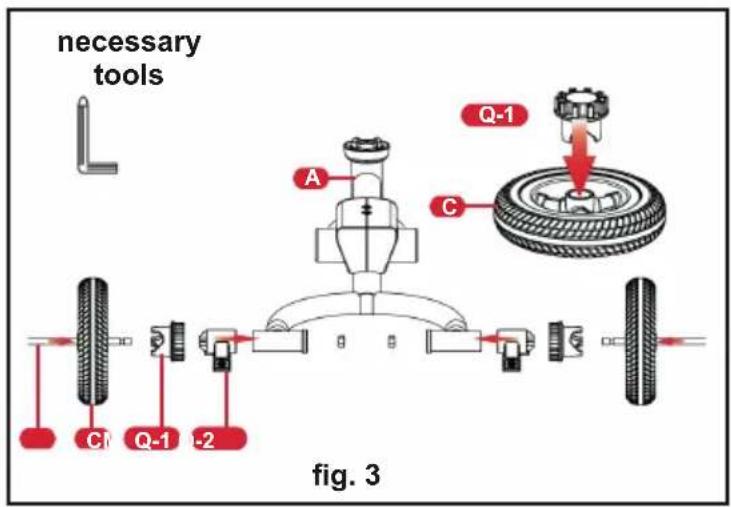
- Place the parking device parts 2 (Q-2) to the rear tubes of the frame A (fig.3).
- Place the parking device parts 1 (Q-1) to the rear tubes of the frame C (fig.3).
- Place each of the rear axles (M) on to the rear wheels as shown on fig.3.
- Put the assembled rear wheels on to the rear tubes of the frame and the already assembled brake parts 2.
- Fix the rear wheels to the frame with cap nut F-2.
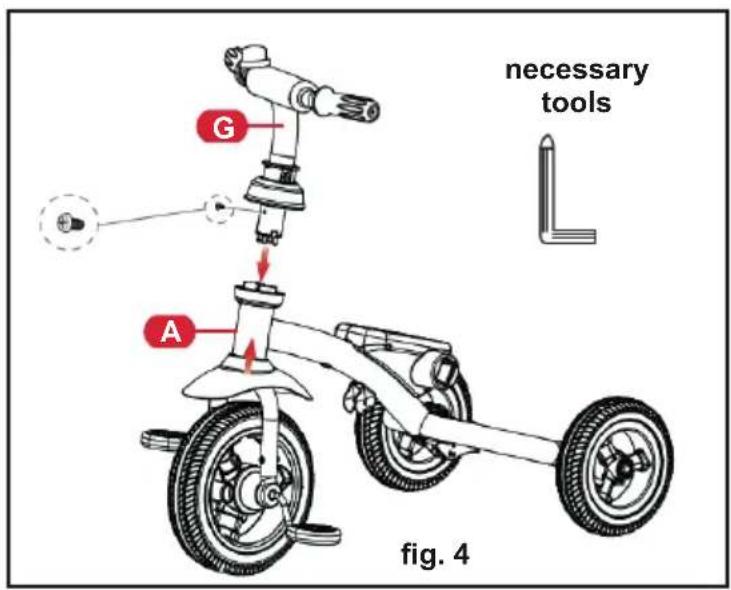
- Remove the screw from the steering bar (G).
- Put the stem of the handle bar on to the tube of the frame so that the openings in the tubes of the handle bar and the frame will match (fig.4)
- Fix with a screw.
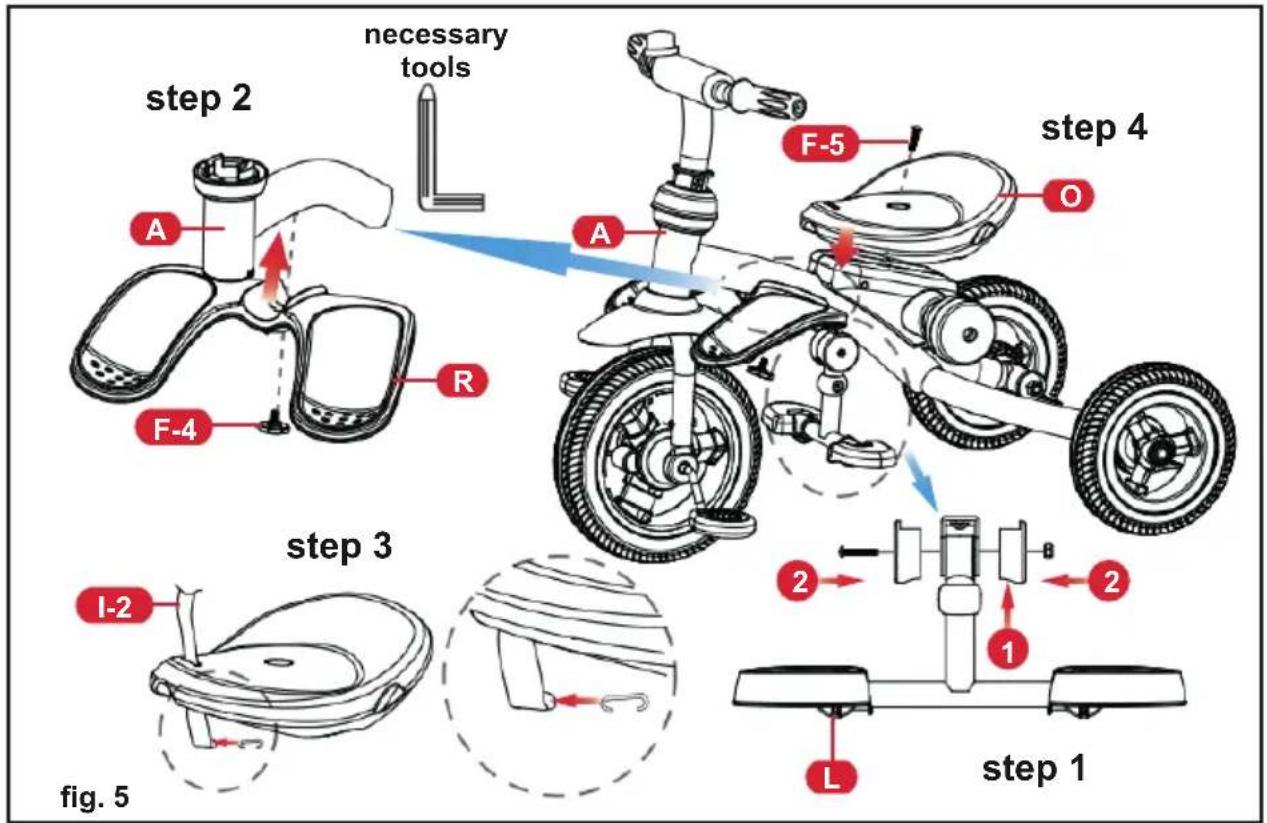
13. Fig. 5 – Step 1:
Remove the screw, nut and plastic ends of the lower foot rest (L). Put the lower foot rest on to the respective place in the tube of the frame so that the openings in the foot rest and the frame will match. Fix with the plastic ends, screw and nut.
14. Fig. 5 – Step 2:
Put the upper foot rest (R) on to the respective place in the tube of the frame so that the openings in the foot rest and the frame will match. Fix with a screw (F-4).
15. Fig. 5 – Step 3:
Remove the bracket (F-6) from the harness of the seat pad (I-2). Insert the harness through the upper parts of the seat (O), after that put back the bracket of the (F-6).
16. Fig. 5 – Step 4:
Attach the seat to the respective spot on the frame and fix with a M6x45 screw.
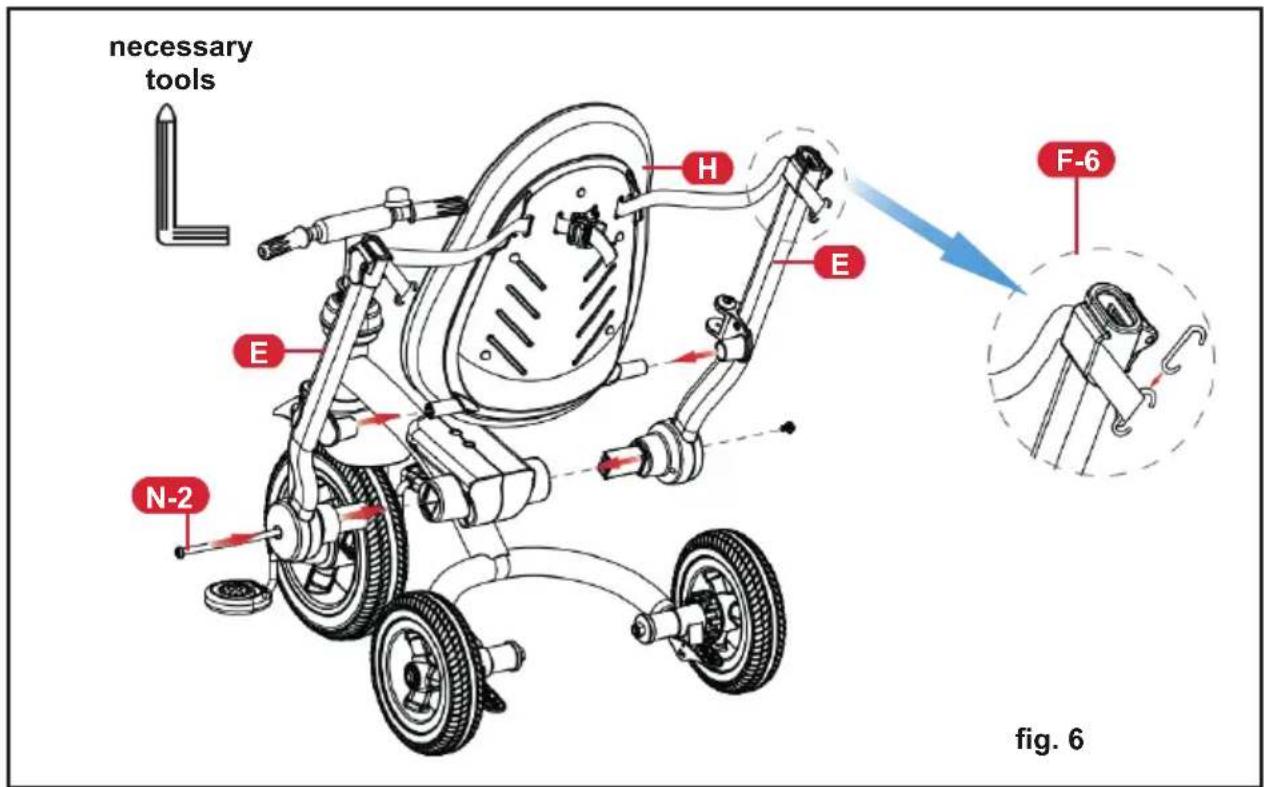
- Insert the tube of the left bottom push bar (E) in the opening in the frame tube under the seat (fig.6).
- Insert the tube of the backrest (H) in the opening in the bottom part of the push bar (fig.6).
- Insert the tube of the right bottom push bar (E) in the opening in the frame tube under the seat (fig.6).
- Insert the tube of the backrest (H) in the opening in the bottom part of the push bar (fig.6).
- Fix with a screw (N-2), as shown in fig.6.
- Remove the brackets (F-6) from both ends of the harnesses (at the back side of the backrest) Slide the harnesses through the respective openings in the tubes of the bottom pushbar, after that put them back the brackets on the harnesses as shown in fig.6.
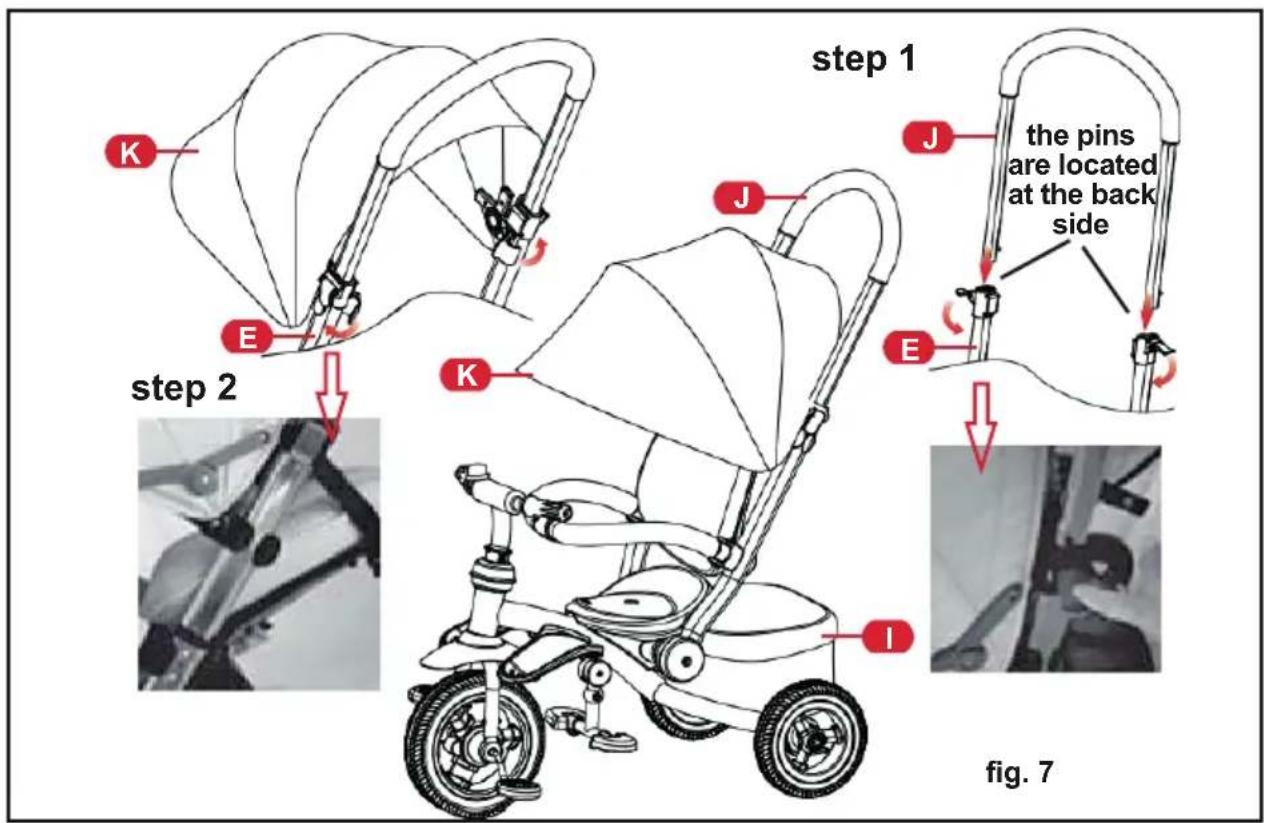
-
WARNING! When assembling the upper push bar (J) the pins must remain at the back side of the frame (fig.7 – Step 1). Lift up the plastic lever located on the tubes of the bottom push bar. Insert the tubes of the upper push bar (J) on to the openings in the tubes of the bottom push bar. Push down the plastic lever to tighten (fig. 7 – step 1).
-
Open the plastic brackets of the canopy (K). Place the canopy on the tubes of the bottom push bar and close the brackets (fig.7 – Step 2). To remove the canopy, open the two brackets.
natural_image
Two black-and-white photos showing a person adjusting a mesh object, with red arrows highlighting the features (no text or symbols present)fig. 8
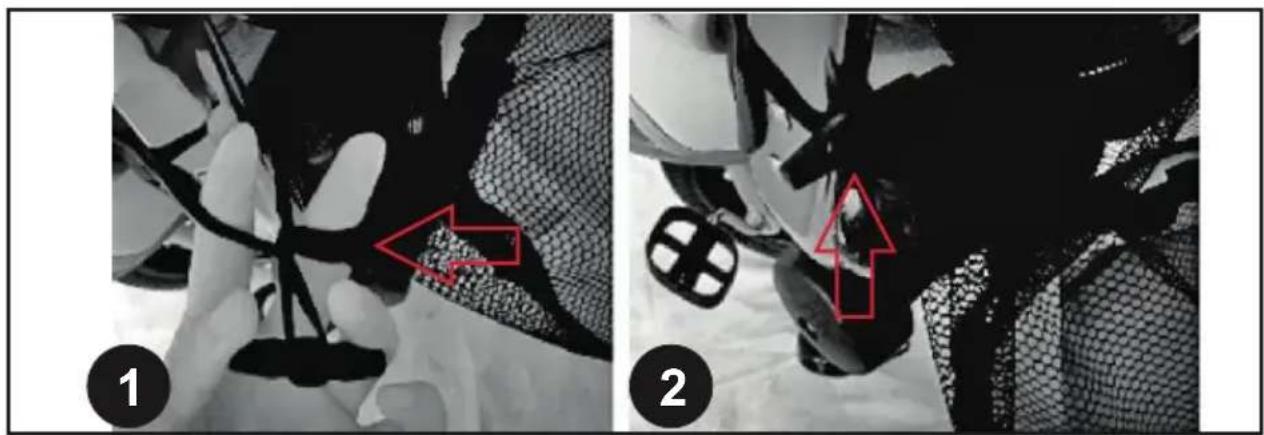
- Place the storage basket (I-1) on to the rear side of the frame. Fix it with the buttons on the side tubes of the push bar as shown in fig. 8-1 and fig. 8-2.
ATTENTION! Do not place more than 0.5kg load in the storage basket. Overloading will disturb the balance and endanger the safety of the child in it!
FUNCTIONS
natural_image
Line drawing of a two-wheeled stroller with a canopy and blue directional arrow indicating rotation (no text or symbols)fig. 9
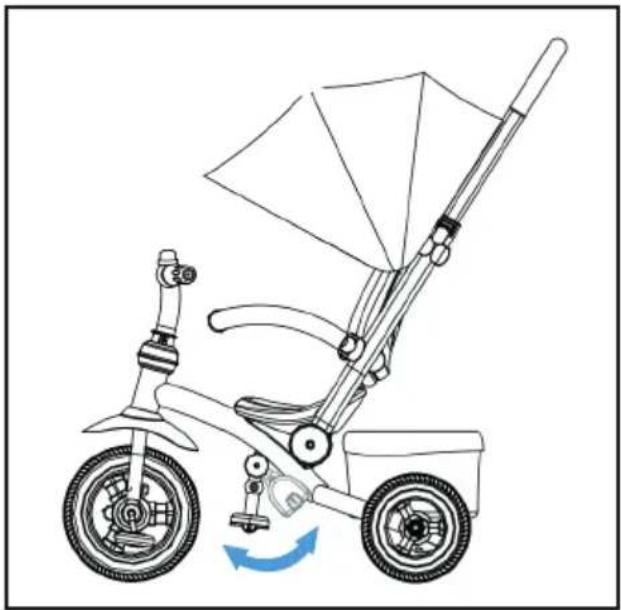
The foot rest can be retracted to the frame by pushing the button and moving the foot rest up until you hear a click and it is fixed (fig. 9).
To use the foot rest, press the pin and move it down until you hear a click and it is fixed. Open the two ends of the foot rest as shown in fig. 9.
When you push the tricycle, use the foot rest open, when the child drives the tricycle, close the foot rest up to the frame.
natural_image
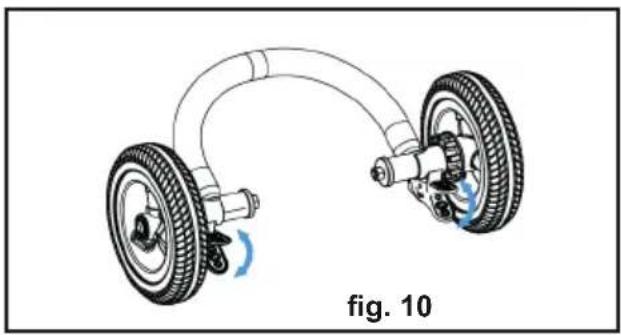
Diagram of a two-wheeled vehicle with wheels and suspension components, labeled 'fig. 10' (no text or symbols on the diagram itself)The tricycle has braking devices, which block the two rear wheels and the movement of the tricycle.
Press with foot each if the two pedals on the rear wheels (fig.10) to block the movement of the tricycle.
Lift the pedals with your feet to release the braking devices.
WARNING! Always engage the braking devices when the tricycle is not moving! Do not leave the tricycle on sloped surface when there is a child, even if the braking devices are engaged.
WARNING! Engage the braking device whenever putting the child in or taking it out of the tricycle!
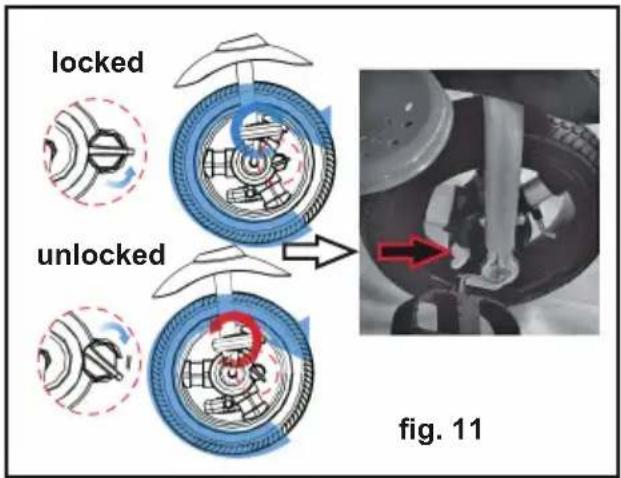
The tricycle has a function of blocking the pedals. This prevents the risk of injuring the child's feet when the tricycle is pushed by an adult.
Turn the pedal blocking button to the position shown on fig.11 "locked" to block the pedals.
Turn the button in position "unlock" (fig.11) to release the pedals.
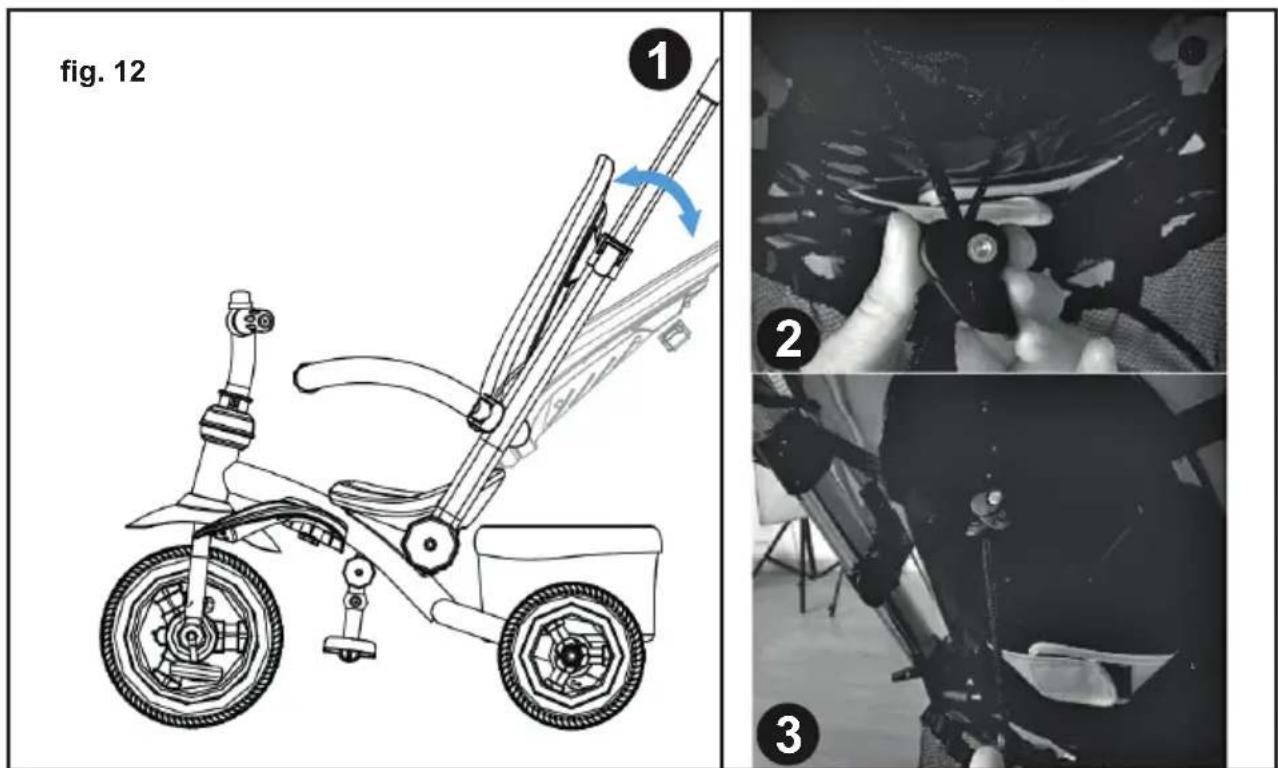
The back rest can be adjusted in several positions by means of a mechanism on the back (fig. 12-1). To lower the back rest, press with fingers the buckle on the mechanism (fig. 12-2) and pull the buckle down. Release the buckle to fix into the desired position. To lift the backrest, take both ends of the harness, press the buckle with fingers and move it up (fig.12-3) to the desired position. After that release the buckle to fix the chosen position.
WARNING! You must not adjust the position of the backrest while there is a child in the tricycle. In case you decide to change the position of the back rest while the child is in the tricycle, the child shoul by no means lean on the back rest!
natural_image
Line drawing of a two-wheeled stroller with a canopy and wheel handle, showing motion direction (no text or symbols)fig. 13
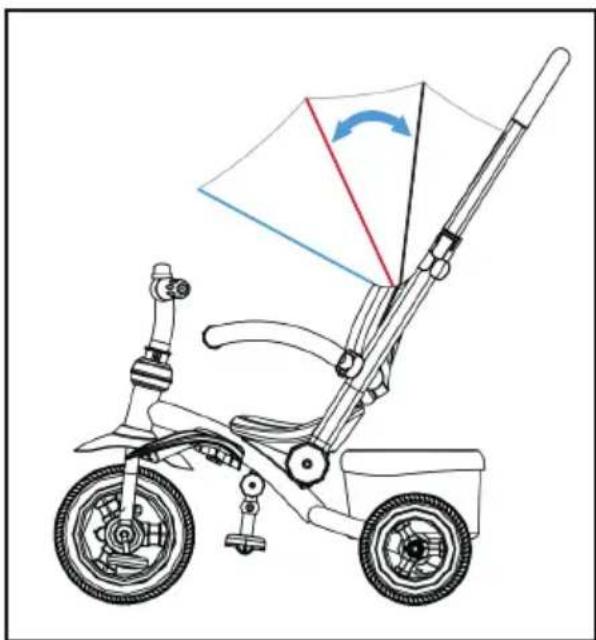
The canopy can be closed or opened by means of the levers in its both ends.
To open the canopy pull it and press both levers down (fig. 13).
To close the canopy, pull both levers up.
natural_image
Line drawing of a two-wheeled stroller with canopy and wheels (no text or symbols)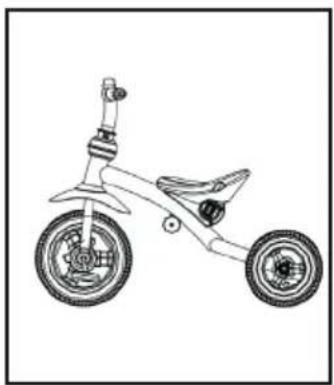
natural_image
Line drawing of a tricycle with two wheels and a side-mounted seat (no text or symbols)fig. 14 fig. 15
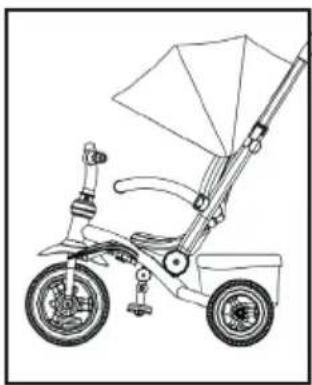
Fig. 14 shows the assembled tricycle, which can be pushed by the adult.
The push bar and the foot rest can be removed and child can drive the tricycle alone.
Fig. 15 shows the tricycle which the child can drive.
WARNING! Remove the push bar when you are completely confident that the child can drive the tricycle unaided!
MAINTENANCE GUIDELINES
Periodically check the good working order of the tricycle parts.
Do not wash the TOY and do not soak the TOY in water. Use a soft damp cloth and water or neutral liquid detergent.
Do not use aggressive detergents, containing abrasive particles, ammonia, bleach or spirits.
◆ Regularly oil the moving parts.
Do not use on sand.
Do not store the TOY in hot environment or near strong sources of heat, in order to avoid the plastic parts from deforming.
Store the TOY in clean and dry place indoors. Do not expose to direct sunlight, rain, high temperature intervals, moisture or harsh weather!
❖ Always let the TOY to dry out fully before storing or using it, in order to avoid mold and rust.
- Contact your authorized dealer if consultation or repair is needed.
Materials used: plastic, metal, textile.

natural_image
Pure electrical circuit symbols without any text or labelsTRKBLD02xxxxx /698


- IMPORTANT! PLEASE READ CAREFULLY THIS INSTRUCTION MANUAL AND KEEP IT IN A SAFE PLACE FOR FUTURE REFERENCE!
- INSTRUCTION MANUAL FOR KIDS' TOY TRICYCLE „BOLIDE”
- FOLLOW ALL WARNINGS, INSTRUCTIONS AND RECOMMENDATIONS IN THIS MANUAL IN ORDER TO GUARANTEE THE SAFE USE OF THIS PRODUCT:
- CAUTION! WARNINGS!
- PRODUCT FEATURES
- ASSEMBLY AND MOUNTING
- Fig. 5 – Step 1:
- Fig. 5 – Step 2:
- Fig. 5 – Step 3:
- Fig. 5 – Step 4:
- FUNCTIONS
- MAINTENANCE GUIDELINES
Brand : Chipolino
Model : Bolide
Category : Uncategorized