
FAX 1190L - Fax RICOH - Free user manual and instructions
Find the device manual for free FAX 1190L RICOH in PDF.


| Product Type | Fax Machine |
| Technology | Laser |
| Paper Size | A4 |
| Modem Speed | 33.6 kbps |
| Memory Capacity | Up to 420 pages |
| Paper Input Capacity | 250 sheets (cassette) + 1 sheet (multi-purpose tray) |
| Paper Output Capacity | 100 sheets |
| Automatic Document Feeder | 50 sheets |
| Copy Function | Yes |
| Phone Function | Yes, with handset |
| Dimensions (W x D x H) | 420 x 395 x 340 mm |
| Weight | 11.5 kg |
| Power Supply | 220-240V, 50/60Hz |
| Power Consumption | Standby < 3W, Operation < 600W |
| Duty Cycle | Up to 10,000 pages per month |
| Connectivity | RJ-11 phone line |
| Display | 2-line LCD |
| Resolution | Maximum 600 x 600 dpi |
| Transmission Speed | Approximately 3 seconds per page |
| Maintenance & Cleaning | Clean exterior with soft cloth; clean scanner glass with lint-free cloth; replace toner and drum when indicated |
| Safety | Laser safety; use grounded outlet; avoid moisture; keep away from children |
| Spare Parts & Repairability | Toner cartridge, drum unit, ADF roller kit, handset cord; user-replaceable parts |
| General Information | Designed for office use; supports plain paper fax; includes starter toner and drum |
Frequently Asked Questions - FAX 1190L RICOH
User questions about FAX 1190L RICOH
0 question about this device. Answer the ones you know or ask your own.
Ask a new question about this device
Download the instructions for your Fax in PDF format for free! Find your manual FAX 1190L - RICOH and take your electronic device back in hand. On this page are published all the documents necessary for the use of your device. FAX 1190L by RICOH.
USER MANUAL FAX 1190L RICOH
natural_image
Abstract grayscale pattern with a curved, dotted-line structure on the right side (no text or symbols)FAX 1190L
User's Guide

natural_image
Line drawing of a handheld electronic device with control panel and ports (no text or symbols)Safety precautions
We use the following icons throughout this User's Guide.

Warnings or cautions tell you what to do to prevent possible personal injury.

Electrical Hazard icons alert you to a possible electrical shock.

Hot Surface icons warn you not to touch machine parts that are hot.

Indicates points to pay attention to when using the machine, and explanations of likely causes of paper misfeeds, damage to originals, or loss of data. Be sure to read these explanations.

Improper Setup icons alerts you to devices and operations that are not compatible with the machine.

Notes tell you how you should respond to a situation that may arise or give tips about how the operation works with other features.
To use the machine safely
Please keep these instructions for later reference and read them before attempting any maintenance.
 | CAUTION | |
 | There are high voltage electrodes inside the machine. Before you clean the inside of the machine, make sure you have unplugged the telephone line cord first and then the power cord from the electrical socket. |  |
 | Do not handle the plug with wet hands. Doing this might cause an electrical shock. |  |
 | After you use the machine, some internal parts are extremely HOT!To prevent injures, be careful not to put your fingers in the area shown in the illustration. | 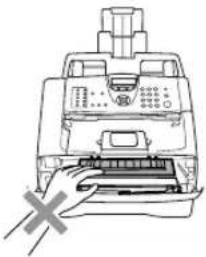  |

CAUTION

The fuser unit is marked with a caution label. Please do not remove or damage the label.


Use caution when installing or modifying telephone lines. Never touch telephone wires or terminals that are not insulated unless the telephone line has been disconnected at the wall socket. Never install telephone wiring during a lightning storm. Never install a telephone wall socket in a wet location.
This product must be installed near an electrical socket that is easily accessible. In case of an emergency, you must disconnect the power cord from the electrical socket to shut off the power completely.
■ To reduce the risk of shock or fire, use only a No. 26 AWG or larger telecommunication line cord.

Do not use a vacuum cleaner to clean up scattered toner. Doing this might cause the toner dust to ignite inside the vacuum cleaner, potentially starting a fire. Please carefully clean the toner dust with a dry, lint-free cloth and dispose of it according to local regulations.

Do NOT use flammable substances or any type of spray to clean the inside or outside of the machine. Doing this may cause a fire or electrical shock.

CAUTION
IMPORTANT SAFETY INSTRUCTIONS
When using your telephone equipment, basic safety precautions should always be followed to reduce the risk of fire, electric shock and injury to people, including the following:
- Do not use this product near water, for example, near a bath tub, wash bowl, kitchen sink or washing machine, in a wet basement or near a swimming pool.
- Avoid using this product during an electrical storm. There may be a remote risk of electric shock from lightning.
- Do not use this product to report a gas leak in the vicinity of the leak.
- Use only the power cord supplied with this machine.
SAVE THESE INSTRUCTIONS
Certification
Declaration of conformity
CE
Notice to Users in EU Countries
This product complies with the essential requirements and provisions of Directive 1999/5/EC of the European Parliament and of the Council of 9 March 1999 on radio equipment and telecommunications terminal equipment and the mutual recognition of their conformity.
Notice to Users Accessing Analog PSTN in EU Countries
This product is designed to be able to access analog PSTN in all EU countries. Local PSTN compatibility is dependent on software switch settings. Please contact your service representative if relocating this product to another country. In the event of problems, please contact your service representative in the first instance.
FAX 1190L: The CE declaration of Comformity is available on the Internet at URL :
http://www.ricoh.co.jp/fax/ce_doc
CE Marking Traceability Information (For EU Countries Only.)
Manufacturer:
Ricoh Co., Ltd.
3-6 Nakamagome 1-chome, Ohta-ku, Tokyo, 143-8555 Japan
Authorized representative:
Ricoh Europe PLC
66 Chiltern Street London
Symbols for the main power switch
In accordance with IEC 60417, this machine uses the following symbols for the main power switch:
- means POWER ON.
- means POWER OFF.
Quick Reference Guide
Sending Faxes
Automatic Transmission
1 If it is not illuminated in green, press

2 Load your document.
3 Enter the fax number using One-Touch, Speed-Dial, Search or the dial pad.
4 Press ◆ Start.
Storing numbers
Storing One-Touch Dial numbers
1 Press Menu/Set, 2, 3, 1.
2 Press the One-Touch key where you want to store the number.

Note
To access One-Touch numbers 11 to 20, hold down Shift as you press the One-Touch key.
3 Enter the number (up to 20 digits).
Press Menu/Set.
4 Enter the name up to 15 characters (or leave it blank).
Press Menu/Set.
5 Press ©/c Stop/Exit.
Storing Speed-Dial numbers
1 Press Menu/Set, 2, 3, 2.
2 Using the dial pad, enter a three-digit Speed-Dial location number (001 - 200). Press Menu/Set.
3 Enter the number (up to 20 digits). Press Menu/Set.
4 Enter the name up to 15 characters (or leave it blank).
Press Menu/Set.
5 Press ⑦/c Stop/Exit.
Dialling operations
One-Touch Dialling / Speed-Dialling
1 If it is not illuminated in green, press

2 Load your document.
3 Press the One-Touch key of the number you want to call.

Note
To dial One-Touch numbers 11 to 20, hold down Shift Shift as you press the One-Touch key.
—OR—
Press

Search/Speed Dial,
press #. Press the three-digit
Speed-Dial number.
4 Press ◇ Start.
Using Search
1 If it is not illuminated in green, press

(Fax).
2 Load your document.
3 Press Search/Speed, Blad
then enter the first letter of the name you're looking for.
4 Press or to search the memory.
5 Press ◆ Start.
Making copies
Single copy
1 Press (Copy) to illuminate it in green.
2 Load your document.
3 Press ◆ Start.
Sorting copies using the ADF
1 Press (Copy) to illuminate it in green.
2 Load your document.
3 Use the dial pad to enter the number of copies you want (up to 99).
4 Press Options and ▲ or ▼ to select Stack/Sort.
Press Menu/Set.
5 Press ▲ or ▼ to select Sort.
Press Menu/Set.
6 Press ◆ Start.
Table of Contents
1 Introduction
Using this Guide 1-1
Choosing a location 1-2
To view Documentation....1-3
Control panel overview (For EU only)....1-4
Control panel overview (For USA, Canada and Asia/Oceania)......1-6
Load document....1-8
Using the automatic document feeder (ADF) 1-8
About paper 1-9
Recommended paper 1-9
Choosing acceptable paper....1-9
Paper capacity of the paper trays....1-10
How to load paper 1-11
To load paper or other media in the paper tray 1-11
To load paper or other media in the manual feed slot....1-12
About fax machines 1-13
Custom features 1-13
Do you have BT's Call Minder/Voice Mail on the phone line?......1-13
Why should there be problems?......1-13
How can you avoid possible problems? 1-13
Fax tones and handshake 1-14
ECM (Error Correction Mode)....1-14
2 Getting started
Initial setup 2-1
Setting the Date and Time....2-1
Setting Tone and Pulse dialling mode (Not available in some countries) 2-1
Setting the Station ID....2-2
Setting the Phone Line Type (For EU model only) 2-3
PABX (PBX) and TRANSFER 2-3
General Setup 2-4
Setting the Mode Timer 2-4
Setting the Paper Type....2-4
Setting the Paper Size....2-5
Setting the Ring Volume....2-5
Setting the Beeper Volume....2-6
Setting the Speaker Volume....2-6
Setting the Handset Volume (For USA and Canada only) 2-6
Choosing the Handset Volume (For Volume Amplify) (For USA and Canada only) 2-7
Setting Volume Amplify (For USA and Canada only) 2-7
Turning on Automatic Daylight Savings Time....2-8
Toner Save 2-8
Sleep Time 2-8
Setting the LCD Contrast....2-9
Security....2-9
Memory Security....2-9
Setting up the password 2-10
Changing the Memory Security password....2-10
Turning Memory Security on 2-11
Turning Memory Security off 2-11
Setting Lock....2-11
Setting up the password ....2-11
Changing the Setting Lock password 2-12
Turning Setting Lock on....2-12
Turning Setting Lock off....2-12
3 Setup Send
How to enter Fax mode ....3-1
How to dial....3-1
Manual dialling....3-1
One-Touch Dialling....3-1
Speed-Dialling 3-2
Search 3-2
Fax Redial 3-3
How to Fax....3-3
Automatic transmission 3-3
Faxing from the ADF 3-3
Manual transmission....3-3
Sending a fax at the end of a conversation 3-4
Out of Memory message 3-4
Basic sending operations....3-4
Sending faxes using multiple settings 3-4
Contrast 3-5
Fax Resolution....3-5
Dual Access....3-6
Real Time Transmission....3-6
Broadcasting....3-7
Checking job status 3-8
Cancelling a fax in progress 3-8
Cancelling a scheduled job....3-8
Advanced sending operations 3-9
Composing the electronic Cover Page 3-9
Composing your own comments 3-9
Cover page for the next fax only....3-9
Send a cover page for all faxes 3-10
Using a printed cover page....3-10
Overseas Mode 3-10
Delayed Fax 3-11
Delayed Batch Transmission....3-11
Setup for Polled Transmit (Standard) 3-12
Setup for Polled Transmit with Secure Code
(For EU and Asia/Oceania only)....3-13
4 Setup Receive
Basic receiving operations....4-1
Choosing the Receive Mode 4-1
To select or change your Receive Mode....4-2
Setting the Ring Delay 4-2
Setting the F/T Ring Time (Fax/Tel mode only)....4-3
Fax Detect (Easy Receive for USA and Canada)......4-3
Printing a reduced incoming fax (Auto Reduction) 4-4
Receiving a fax at the end of a conversation....4-5
Advanced receiving operations....4-5
Printing a fax from the memory 4-5
Setting the Print Density....4-5
Reception into memory....4-6
If Memory Receive is On at this time....4-6
If Memory Receive is Off at this time....4-6
Polling....4-6
Setup for Polling Receive (Standard) 4-6
Secure Polling (For EU and Asia/Oceania only)....4-7
Setup for Polling Receive (Secure) (For EU and Asia/Oceania only)......4-7
Setup for Polling Receive (Timer) (For EU and Asia/Oceania only)......4-7
Sequential Polling....4-7
5 Quick-Dial numbers and dialling options
Storing numbers for easy dialling 5-1
Storing One-Touch numbers ....5-1
Storing Speed-Dial numbers 5-2
Changing One-Touch / Speed-Dial numbers 5-2
Setting up Groups for Broadcasting 5-3
Dialling options 5-4
Access codes and credit card numbers....5-4
Pause 5-4
Tone or Pulse 5-4
6 Remote Fax Options
Setting Remote Fax Options....6-1
Setting up Fax Forwarding 6-1
Setting Fax Storage....6-1
Programming your pager number (For USA and Canada only) 6-2
Turning off Remote Fax Options 6-2
Changing Remote Fax Options 6-3
Setting your Remote Access Code....6-3
Remote Retrieval....6-4
Using your Remote Access Code....6-4
Remote commands 6-5
Retrieving fax messages 6-6
Changing your Fax Forwarding number 6-6
7 Printing reports
Fax settings and activity 7-1
Customizing the Transmission Verification Report....7-1
Setting the Journal Period 7-2
Printing reports 7-2
How to print a report ....7-2
8 Making copies
Using the machine as a copier 8-1
Enter Copy mode....8-1
Making a single copy 8-2
Making multiple copies 8-2
Stop copying....8-2
Using the temporary Copy key 8-2
Changing the temporary copy settings 8-3
Enlarging or reducing the image copied....8-4
Quality 8-5
Sorting copies using the ADF 8-5
Making N in 1 copies (Page Layout)......8-6
Changing the default copy settings....8-7
Quality 8-7
Adjusting contrast 8-7
Out of Memory message 8-7
9 Important information for EU
IEC 60825-1 Specification ....9-1
Laser Diode 9-1
Disconnect device 9-1
Radio interference (220-240V Model only)....9-1
Important safety instructions....9-2
Trademarks 9-3
10 Important information for USA and Canada
Standard telephone and FCC Notices
These notices are in effect on models sold and used in the United States only. 10-1
Federal Communications Commission (FCC) Declaration of Conformity
(USA only) 10-2
Caution 10-2
Important - about the interface cable....10-2
Industry Canada Compliance Statement (Canada only) 10-2
RESTRICTIONS CONCERNANT LE RACCORDEMENT DE MATÉRIEL....10-3
AVIS 10-3
AVIS 10-3
Disconnect device 10-3
Laser safety 10-3
FDA regulations....10-3
Important safety instructions....10-4
Trademarks 10-5
11 Troubleshooting and routine maintenance
Troubleshooting....11-1
Error messages 11-1
Checking if the machine has faxes in its memory 11-4
Forwarding faxes to another fax machine 11-4
Document jams....11-4
Paper jams 11-5
Paper is jammed inside the machine....11-5
Paper is jammed at the back of the machine 11-6
Paper is jammed inside the drum unit and toner cartridge assembly.....11-7
If you are having difficulty with your machine 11-9
Improving the print quality 11-13
Cleaning the drum unit 11-14
Compatibility....11-17
Packing and shipping the machine....11-17
Routine maintenance....11-18
Cleaning the outside of the machine 11-18
Cleaning the scanner....11-19
Cleaning the laser scanner window....11-20
Cleaning the corona wire....11-21
Replacing the toner cartridge 11-21
How to replace the toner cartridge 11-22
Replacing the drum unit....11-24
Machine Information 11-26
Checking the Serial Numbers....11-26
Checking the Page Counters....11-26
Checking the Drum Life....11-27
A Appendix A
Telephone services for U.K. ...... A-1
BT Call Sign (For U.K. Only) ...... A-1
To enable the machine to work with BT Call Sign (Only with your external phone) ...... A-1
Setting up telephone services (for USA and Canada)...... A-1
Distinctive Ring...... A-2
What does your telephone company's 'Distinctive Ring' do?...... A-2
What does 'Distinctive Ring' do?...... A-2
Do you have Voice Mail?...... A-2
Before you choose the ring pattern to register A-3
Registering the Distinctive Ring pattern A-3
Turning off the Distinctive Ring...... A-3
Caller ID.... A-4
Viewing Caller ID List A-4
Printing Caller ID List.... A-4
Call Waiting A-5
Telephone Service for Australia...... A-5
Telstra® FaxStream® Duet® (Distinctive Ringing)...... A-5
What is the Advantage of using Telstra® FaxStream® Duet® Function?..... A-6
How does Telstra® FaxStream® Duet® Work? ...... A-6
Set the Distinctive Ringing to ON A-7
Caller ID (Caller IDentification) A-7
Advantages of Caller ID.... A-7
How Does the Caller ID Work?...... A-7
The Caller ID Appears on the Display When Your Telephone Rings..... A-7
The Caller ID is Stored in Your Machine Memory ...... A-7
Viewing Caller ID List ...... A-8
Printing Caller ID List....A-8
Telephone Service for New Zealand A-8
FaxAbility A-8
How Will the Fax Machine Treat All Other Numbers?...... A-8
What is the Advantage of Using the FaxAbility Function?...... A-8
How Does FaxAbility Work? A-9
How to Turn FaxAbility OFF or ON...... A-9
Caller ID (Caller IDentification) A-10
Advantages of Caller ID.... A-10
How Does the Caller ID Work?...... A-10
The Caller ID Appears on the Display When Your Telephone Rings..... A-10
Viewing Caller ID List A-10
Printing Caller ID List.... A-11
Telephone Service for Some Countries.... A-11
Distinctive Ringing (For Singapore and Hong Kong)...... A-11
Setting the Distinctive Ringing.... A-12
Caller ID (For Singapore and Hong Kong) ...... A-12
Viewing Caller ID List A-12
Printing Caller ID List.... A-12
Advanced receiving operations...... A-13
Operation from extension telephones.... A-13
For Fax/Tel mode only.... A-13
Using a cordless external handset A-13
Changing the remote codes A-14
Connecting an external device to your machine...... A-14
Connecting an external telephone.... A-14
Type A ...... A-14
Type B A-14
Type C....A-15
Type D.... A-15
Connecting an external telephone answering device (TAD) ...... A-15
Sequence A-15
Type A ...... A-16
Type B A-16
Type C....A-16
Type D.... A-16
Connections...... A-17
Recording outgoing message (OGM) on an external TAD...... A-17
Special line considerations for U.K. A-17
Using extension telephones (For U.K. only) ...... A-17
Special line considerations for USA and Canada...... A-18
Roll over phone lines.... A-18
Two-line phone system.... A-18
Converting telephone wall outlets.... A-19
Installing machine, external two-line TAD and two-line telephone ...... A-19
Multi-line connections (PBX) A-20
If you are installing the machine to work with a PBX.... A-20
Custom features on your phone line.... A-20
B Appendix B
On-screen programming...... B-1
Menu table...... B-1
Memory storage...... B-1
Navigation keys B-2
Entering Text ...... B-11
Inserting spaces ...... B-11
Making corrections ...... B-11
Repeating letters ...... B-11
Special characters and symbols ...... B-11
G Glossary
S Specifications
Product description.... S-1
General S-1
Print media.... S-3
Copy S-3
Fax.... S-4
Printer S-5
Interfaces S-6
You can download the latest printer driver from our Website S-6
Computer requirements.... S-7
Consumable items.... S-8
Index
R Remote Retrieval Access card

natural_image
Plain light blue background with no text, symbols, or discernible features1 Introduction
Using this Guide
Throughout this Guide you will see special symbols alerting you to important warnings, notes and actions. Special fonts identify keys you should press, messages that appear on the LCD, and important points or related topics.
Bold Bold typeface identifies specific keys on the machine's control panel.
Italics Italicized typeface emphasizes an important point or refers you to a related topic.
Courier Courier type face identifies the messages on the LCD of the machine.

Warnings or cautions tell you what to do to prevent possible personal injury.

Electrical Hazard icons alert you to a possible electrical shock.

Hot Surface icons warn you not to touch machine parts that are hot.

Indicates points to pay attention to when using the machine, and explanations of likely causes of paper misfeeds, damage to originals, or loss of data. Be sure to read these explanations.

Improper Setup icons alerts you to devices and operations that are not compatible with the machine.

Notes tell you how you should respond to a situation that may arise or give tips about how the operation works with other features.
Choosing a location
Place your machine on a flat, stable surface that is free of vibration and shocks, such as a desk. Put the machine near a telephone socket and a standard, grounded electrical socket. Choose a location where the temperature remains between 10^ C and 32.5^ C.

IMPORTANT
■ Avoid placing your machine in a high-traffic area.
Do not place the machine near heaters, air conditioners, water, chemicals, or refrigerators.
- Do not expose the machine to direct sunlight, excessive heat, moisture, or dust.
- Do not connect your machine to an electrical socket controlled by wall switches or automatic timers.
- Disruption of power can wipe out information in the machine's memory.
- Do not connect your machine to an electrical socket on the same circuit as large appliances or other equipment that might disrupt the power supply.
- Avoid interference sources, such as speakers or the base units of cordless phones.


natural_image
Illustration of a printer emitting a CD to a speaker (no text or symbols present)To view Documentation
From the Start menu, select TYPE 1190 from the Programs Group and then select User's Guide.
—OR—
1 Turn on your PC. Insert the CD-ROM for Type 1190 into your CD-ROM drive.
2 If the model name screen appears, click your model name.
3 If the language screen appears, click your language.

The CD-ROM main menu will appear.

Note
If this window does not appear, use Windows® Explorer to run the setup.exe program from the root directory of the CD-ROM.
4 Click Documentation.
5 Click the documentation you want to read.
- Quick Setup Guide: Setup and Software Installation Instructions
- User's Guide (2 manuals): User's Guide for stand-alone operations and Software User's Guide
Control panel overview (For EU only)

1 One-Touch Keys
These 10 keys give you instant access to 20 previously stored dial numbers.
2 Fax and telephone keys:

Redial/Pause
Redials the last number you called. It also inserts a pause in quick dial numbers.

Tel/R
This key is used to have a telephone conversation after picking up the external handset in F/T pseudo-ringing.
Also, use this key to gain access to an outside line, or to transfer a call to another extension when it is connected to a PABX (PBX).

Resolution
Sets the resolution when you send a fax.
3 Navigation keys:
Menu/Set
The same key is used for Menu and Set operations.
Lets you access the Menu to program and store your settings in the machine.

In standby mode you can press these keys to adjust the ring volume.


Search/Speed Dial
Lets you look up numbers that are stored in the dialling memory. It also lets you dial stored numbers by pressing # and a three-digit number.

Press to scroll forward or backward to a menu selection.

Press to scroll through the menus and options.
4 Dial Pad
Use these keys to dial telephone or fax numbers and as a keyboard for entering information into the machine.
The # key lets you temporarily switch the dialling mode during a telephone call from Pulse to Tone.
5 ◆ Start
Lets you start sending faxes or make copies.
6 ⑦/c Stop/Exit
Stops an operation or exits from the menu.
7 Reports
8 Mode keys:

Fax
Lets you access Fax mode.

Copy
Lets you access Copy mode.
9 Liquid Crystal Display (LCD)
Displays messages on the screen to help you set up and use your machine.
10 Copy key (Temporary settings):

Options
You can quickly and easily select temporary settings for copying.
11 Shift Shift
To access One-Touch numbers 11 to 20, hold down Shift as you press the One-Touch key.
Control panel overview (For USA, Canada and Asia/Oceania)

One-Touch Keys
These 10 keys give you instant access to 20 previously stored dial numbers.
② Fax and telephone keys:
Redial/Pause
Redials the last number you called. It also inserts a pause in quick dial numbers.
Hook/Hold
Lets you dial telephone and fax numbers without lifting the handset.
—OR—
Lets you place telephone calls on hold.
(for USA and Canada only)
Resolution
Sets the resolution when you send a fax.
3 Navigation keys:
Menu/Set
The same key is used for Menu and Set operations.
Lets you access the Menu to program and store your settings in the machine.

In standby mode you can press these keys to adjust the ring volume.
—OR—
When using the handset, listening to the speaker in Fax mode or on standby, you can press these keys to adjust the volume. (for USA and Canada only)
▼ Search/Speed Dial
Lets you look up numbers that are stored in the dialling memory. It also lets you dial stored numbers by pressing # and a three-digit number.

Press to scroll forward or backward to a menu selection.

Press to scroll through the menus and options.
4 Dial Pad
Use these keys to dial telephone or fax numbers and as a keyboard for entering information into the machine.
The # key lets you temporarily switch the dialling mode during a telephone call from Pulse to Tone. (Not available in USA and New Zealand)
5 Start
Lets you start sending faxes or making copies.
6 Stop/Exit
Stops an operation or exits from the menu.
7 Reports
Print the Transmission Verification Report, Help List, Quick-Dial List, Fax Journal, User Settings
8 Mode keys:

Fax
Lets you access Fax mode.

Copy
Lets you access Copy mode.
9 Liquid Crystal Display (LCD)
Displays messages on the screen to help you set up and use your machine.
10 Copy key (Temporary settings):
Options
You can quickly and easily select temporary settings for copying.
11 Shift
To access One-Touch numbers 11 to 20, hold down Shift as you press the One-Touch key.
Load document
You can send a fax and make copies from the ADF (automatic document feeder).
Using the automatic document feeder (ADF)
The ADF can hold up to 20 pages, feeding each one individually through the machine. Use standard 80g / m^2 paper and always fan the pages before putting them in the ADF.

IMPORTANT
■ DO NOT use paper that is curled, wrinkled, folded, ripped, stapled, paper-clipped, pasted or taped.
■ DO NOT use cardboard, newspaper or fabric.
■ Make sure documents written with ink are completely dry.
■ Documents to be faxed must be from 147.3 to 215.9 mm wide and 100 to 356 mm long.
1 Pull out the ADF document support.

natural_image
Line drawing of a printer with control panel and paper feed (no text or symbols)2 Fan the pages well. Make sure you insert the documents face down, top edge first in the ADF until you feel them touch the feed roller.

3 Adjust the paper guides to fit the width of your documents.

IMPORTANT
DO NOT pull on the document while it is feeding.
About paper
Recommended paper
To get the best print quality, we suggest using the following paper.
(For EU and Asia/Oceania)
| Paper Type Item | |
| Plain paper Xerox | Premier 80 g/m ^2 |
| Xerox Business 80 g/m ^2 | |
| M-real DATACOPY 80 g/m ^2 | |
| IGEPA X-Press 80 g/m ^2 | |
| Recycled paper Xerox Recycled Supreme | |
| Transparency 3M CG 3300 | |
| Labels Avery laser | label L7163 |
■ Use paper that is made for plain-paper copying.
■ Use paper that is 75 to 90 g/m ^2 .
■ Use neutral paper. Do not use acidic or alkaline paper.
■ Use long-grain paper.
■ Use paper with a moisture content of approximately 5%.
(For USA and Canada)
| Paper Type Item | |
| Plain paper Xerox | 4200DP 20 lb |
| Hammermill Laser Paper 24 lb | |
| (Xerox Premier 80 g/m2)(Xerox Business 80 g/m2)(M-real DATACOPY 80 g/m2)(IGEPA X-Press 80 g/m2) | |
| Recycled paper (Xerox Recycled Supreme) | |
| Transparency 3M CG 3300 | |
| Labels Labels Avery laser label #5160(Avery laser label L7163) | |
■ Use paper that is made for plain-paper copying.
■ Use paper that is 20 to 24 lb (75 to 90 g/m ^2 ).
■ Use neutral paper. Do not use acidic or alkaline paper.
■ Use long-grain paper.
■ Use paper with a moisture content of approximately 5%.
Choosing acceptable paper
We recommend that you test paper (especially special sizes and types of paper) on the machine before purchasing large quantities.
For optimum printing, use a recommended type of paper, especially for plain paper and transparencies. For more information on paper specifications, call your nearest authorized sales representative or the place where you purchased your machine.
■ Use labels or transparencies that are designed for use in laser printers.
If you are using special paper and the machine has problems feeding from the paper tray, try again using the manual feed slot.
■ You can use recycled paper in this machine.
■ You can use recycled paper that meets the DIN 19309 specification.

IMPORTANT
Do not use the following types of paper or envelopes, they may cause a paper jam and damage your machine.
Do not use:
- Inkjet paper;
- Coated paper, such as vinyl coated paper;
- Pre-printed or highly textured paper, or paper with an embossed letterhead;
- Label sheets that have had any labels removed;
• Paper that has been previously printed on; - Paper that cannot be arranged uniformly when stacked;
• Paper that is made with a short grain; - Damaged, curled, wrinkled, or irregularly shaped paper.

Do not use:
- Envelopes that are of a baggy construction;
- Envelopes that are embossed (have raised writing on them);
- Envelopes that are self-adhesive;
- Envelopes that have clasps on them;
- Envelopes that are not sharply creased;
- Envelopes that are pre-printed on the inside.
Paper capacity of the paper trays
| Paper size Paper types No. of sheets | |||
| Paper tray A4, Letter, E | executive, A5, A6,B5 and B6Legal (for North America only) | Plain paper, Recycled paper up to 250(80 g/m2) | |
| Transparency up to 10 | |||
| Manual feed slot Width | 69.9 - 215.9 mm(2.75 - 8.5 in.)Length: 116 - 406.4 mm(4.56 - 16 in.) | Plain paper, Recycled paper,Bond paper, Envelope,Labels and Transparency | 1 |
How to load paper
To load paper or other media in the paper tray
1 Pull the paper tray completely out of the machine.

natural_image
Illustration of a hand inserting a card into a printer into a slot (no text or symbols visible)2 While pressing the paper guide release lever, slide the adjusters to fit the paper size.
Check that the guides are firmly in the slots.

natural_image
Illustration showing two mechanical assembly steps with arrows indicating movement (no text or symbols present)3 Fan the stack of paper well to avoid paper jams and mis-feeds.

natural_image
Illustration of two hands holding a curved, folded paper or document (no text or symbols visible)4 Put paper in the paper tray.

5 Put the paper tray firmly back in the machine. Lift the ADF document output support and unfold the output paper tray support flap before you use the machine.

natural_image
Illustration of a hand inserting a card into a printer (no text or symbols visible)Output Paper Tray Support Flap

Note
When you put paper in the paper tray, please remember the following:
- Check that the paper is flat in the tray and below the maximum paper mark, and that the paper guides are touching the sides of the paper stack.
■ The side to be printed on must be face down.
To load paper or other media in the manual feed slot
You can load envelopes and special print media one at a time into this slot. Use the manual feed slot to print or copy on labels, envelopes or thicker paper.
1 Slide the paper guides to fit the paper size.

natural_image
Line drawing of a hand inserting a card into a digital counting machine (no text or symbols visible)2 Using both hands put one sheet of paper in the manual feed slot until you feel the front edge of the paper touch the paper feed roller. Let go of the paper when you feel the machine feed the paper in a short distance.

natural_image
Line drawing of hands using a handheld machine to press a sheet of paper (no text or symbols visible)
Note
When you put paper in the manual feed slot, please remember the following:
■ The side to be printed on must be face up.
■ Put the leading edge (top of the paper) in first and push it gently into the slot.
■ Make sure that the paper is straight and in the proper position on the manual feed slot. If it is not, the paper may not be fed properly, resulting in a skewed printout or a paper jam.
■ Do not put more than one sheet or envelope in the manual feed slot at a time or you may cause the machine to jam.
About fax machines
Custom features
Do you have BT's Call Minder/Voice Mail on the phone line?
If you have Call Minder/Voice Mail on the phone line where you will install your new machine, there is a strong possibility that Call Minder/Voice Mail and the machine may conflict with each other while receiving incoming calls.
Why should there be problems?
Since both the machine and Call Minder/Voice Mail will pick up the call, after the number of rings you have set, each of them has the ability to keep the other from receiving calls.
For example, if Call Minder/Voice Mail is set to answer after two rings and your machine is set to answer after four, Call Minder/Voice Mail will stop your machine from receiving faxes.
If you set Call Minder/Voice Mail and this machine to answer after the same number of rings, there is no way of knowing which one will answer first. It is important to remember that neither Call Minder/Voice Mail nor the machine can pass the call back to the other after the call has been answered.
How can you avoid possible problems?
A very good way to avoid problems like the one mentioned, is to get a second phone number on your present phone line.
Many people with Call Minder/Voice Mail choose an alternative service, which is called "BT Call Sign", and they are very satisfied with it.
Another way to avoid possible problems is to replace Call Minder/Voice Mail with an answering machine. This machine is designed to work with an answering machine or TAD (telephone answering device). (See Connecting an external telephone answering device (TAD) on page A-15.)
Fax tones and handshake
When someone is sending a fax, the fax machine sends fax calling tones (CNG tones). These are quiet, intermittent beeps every 4-seconds. You'll hear them after you dial and press Start and they will continue for about 60 seconds after dialling. During that time, the sending machine must begin the "handshake" or connection with the receiving machine.
Each time you use automatic procedures to send a fax, you are sending CNG tones over the phone line. You will soon learn to listen for these quiet beeps each time you answer a phone on your fax line, so you will know if you are receiving a fax message.
The receiving fax responds with fax receiving tones, which are loud, chirping sounds. A receiving fax chirps for about 40 seconds over the phone line, and the LCD shows Receiving.
If your machine is set to the Fax Only mode, it will answer every call automatically with fax receiving tones. If the other person hangs up, your machine will continue to send the "chirps" for about 40 seconds, and the LCD continues to show Receiving. To cancel receiving, press Stop/Exit.
The fax ‘handshake’ is the time in which the sending machine’s CNG tones and the receiving machine’s “chirps” overlap. This must be for at least 2 to 4 seconds, so both machines can understand how each is sending and receiving the fax. The handshake cannot begin until the call is answered, and the CNG tones only last for about 60 seconds after the number is dialled. So it is important for the receiving machine to answer the call in as few rings as possible.
ECM (Error Correction Mode)
The Error Correction Mode (ECM) is a way for the machine to check a fax transmission while it is in progress. If the machine detects errors during fax transmission, it resends the pages of the fax that had an error. ECM transmissions are only possible between fax machines that both have this feature. If they do, you may send and receive fax messages that are continuously being checked by the machine.
2 Getting started
Initial setup
Setting the Date and Time
When the machine is not in use it will display the date and time. If you set up the Station ID the date and time displayed by your machine will be printed on every fax you send. If there is a power failure, you may have to reset the date and time. No other settings will be affected.

Note
Your machine can store the date and time up to 4 days if there is a power failure.
1 Press Menu/Set, 0, 2.
- Date/Time
2 Enter the last two digits of the year. Press Menu/Set.
3 Enter two digits for the month.
Press Menu/Set.
(For example, enter 09 for September, or 10 for October.)
4 Enter two digits for the day. Press Menu/Set.
(For example, enter 06 for 6th.)
5 Enter the time in 24-Hour format. Press Menu/Set.
(For example, enter 15:25 for 3:25 P.M.)
6 Press ⑦/c Stop/Exit.
The LCD now shows the date and time whenever the machine is idle in Fax mode.
When the machine is in Sleep mode, the LCD shows Sleep. (See Sleep Time on page 2-8.)
Setting Tone and Pulse dialling mode (Not available in some countries)
1 Press Menu/Set, 0, 4.
4. Tone/Pulse
2 Press ▲ or ▼ to select Pulse (or Tone).
Press Menu/Set.
3 Press ⑦/c Stop/Exit.
Setting the Station ID
You should store your name or company name and fax number so they print on all fax pages you send.
It is important that you enter the fax number in the internationally standardised format, i.e. in accordance with the following strict sequence:
■ The “+” (plus) character (by pressing * key)
■ Your Country Code (e.g. "44" for the United Kingdom, "41" for Switzerland)
- Your local area code minus any leading "0" ("9" in Spain)
A space
- Your number on the local exchange, using spaces to aid readability as appropriate.
As an example, if the machine is installed in the United Kingdom and the same line is to be used for both fax and voice calls, and your national telephone number is 0161 444 5555, then you must set the fax and telephone number parts of your station ID as: +44 161 444 5555.
1 Press Menu/Set, 0, 3.
- Station ID
2 Enter your fax number (up to 20 digits). Press Menu/Set.
3 Enter your telephone number (up to 20 digits).
Press Menu/Set.
(If the telephone number and fax number are the same, enter the same number again.)

Note
■ You cannot enter a hyphen in the number. To enter a space press ▶ once between numbers.
■ The telephone number you enter is only used for Cover Page features. (See Composing the electronic Cover Page on page 3-9.)
4 Use the dial pad to enter your name (up to 20 characters).
(See Entering Text on page B-11).
Press Menu/Set.
5 Press ⑦/c Stop/Exit.

Note
If the Station ID has already been programmed, the LCD will ask you to press 1 to make a change or 2 to exit without changing.
NOTICE (For USA)
The Telephone Consumer Protection Act of 1991 makes it unlawful for any person to use a computer or electronic device to send any message via a telephone fax machine unless such messages clearly contain, in a margin at the top or bottom of each transmitted page, or on the first page of the transmission, the date and time it is sent and an identification of the business or other entity or other individual sending the message and the telephone number of the sending machine or such business, other entity or individual.
To program this information into your machine, see Setting the Date and Time on page 2-1 and Setting the Station ID on page 2-2.
Setting the Phone Line Type (For EU model only)
If you are connecting the machine to a line that features a PABX (PBX) or ISDN to send and receive faxes, it is also necessary to change the Phone Line Type accordingly by completing the following steps.
1 Press Menu/Set, 0, 5.
5.Phone Line Set
2 Press ▲ or ▼ to select PBX, ISDN (or Normal).
Press Menu/Set.
3 Press ☑/c Stop/Exit.
PABX (PBX) and TRANSFER
The machine is initially set to Normal, which lets the machine connect to a standard PSTN (Public Switched Telephone Network) line. However, many offices use a central telephone system or Private Automatic Branch Exchange (PABX). Your machine can be connected to most types of PABX (PBX). The machine's recall feature supports timed break recall only (TBR). TBR will work with most PABX (PBX) systems allowing you to gain access to an outside line, or transfer calls to another extension. The feature works
when Tel/R is pressed.
Note
You can program a Tel/R key press as part of a number stored in a One-Touch or Speed-Dial location. When programming the One-Touch or Speed-Dial number (Menu/Set
2, 3, 1 or 2, 3, 2) press 📧 Tel/R first (the screen displays "!"), then enter the telephone number. If you do this, you do not need to
press Tel/R each time before you dial using a One-Touch or Speed-Dial location. (See Storing numbers for easy dialling on page 5-1.) However, if PBX is not selected in the Phone Line Type setting, you cannot use the One-Touch or Speed-Dial number that
Tel/R press is programmed into.
General Setup
Setting the Mode Timer
The machine has two temporary mode keys on the control panel: Fax and Copy. You can change the number of seconds or minutes the machine takes after the last Copy operation before it returns to Fax mode. If you select Off, the machine stays in the mode you used last.

natural_image
Front view of a car's head panel with two icons: one labeled 'CP' and the other a document icon (no text or symbols beyond icons)1 Press Menu/Set, 1, 1.
- Mode Timer
2 Press ▲ or ▼ to select 0 Sec, 30 Secs, 1 Min, 2 Mins, 5 Mins or Off.
Press Menu/Set.
3 Press ☉/c Stop/Exit.
Setting the Paper Type
To get the best print quality, set the machine for the type of paper you are using.
1 Press Menu/Set, 1, 2.
- Paper Type
2 Press ▲ or ▼ to select Plain, Thin, Thick, Thicker, Transparency (Transparency) or Recycled (Recycled paper).
Press Menu/Set.
3 Press ☉/c Stop/Exit.
Note
The machine ejects paper with printed surfaces face down onto the output paper tray in the front of the machine. When you use transparencies or labels, remove each sheet immediately to prevent smudging or paper jams.
- You can select Transprncy in Step 2 if Letter, Legal or A4 paper size has been selected (Menu/Set, 1, 3).
Setting the Paper Size
You can use eight sizes of paper for printing copies: Letter, Legal, A4, B5, A5, B6, A6 and Executive and two sizes for printing faxes: Letter and A4. When you change the size of paper you load in the paper tray, you will need to change the paper size setting at the same time so your machine can fit an incoming fax or a reduced copy on the page.

Note
If you selected Transparency as the paper type (Menu/Set, 1, 2) you will only be able to select Letter or A4 size paper in Step 2.
■ Legal size is available only for USA and Canada.
1 Press Menu/Set, 1, 3.
3.Paper Size
2 Press ▲ or ▼ to select Letter, Legal, A4, A5, A6, B5, B6 or Executive.
Press Menu/Set.
3 Press ☑/c Stop/Exit.
Setting the Ring Volume
You can turn the ring off or you can select the ring volume level.
1 Press Menu/Set, 1, 4, 1.
- Ring
2 Press ▲ or ▼ to select Low, Med, High or Off.
Press Menu/Set.
3 Press ⑦/c Stop/Exit.
—OR—
You can adjust the ring volume when your machine is idle (not being used).
In mode (Fax), press or to adjust the volume level. Every time you press these keys, the machine will ring so you can hear the active setting as the LCD shows it. The volume changes with each key press. The new setting will stay until you change it again.
Setting the Beeper Volume
You can change the beeper volume. The default setting is Med. When the beeper is on, the machine will beep when you press a key, make a mistake, or after you sent or received a fax.
1 Press Menu/Set, 1, 4, 2.
2.Beeper
2 Press ▲ or ▼ to select Low, Med, High or Off.
Press Menu/Set.
3 Press Ⓤ/c Stop/Exit.
Setting the Speaker Volume
You can adjust the machine's one-way speaker volume.
1 Press Menu/Set, 1, 4, 3.
3.Speaker
2 Press ▲ or ▼ to select Low, Med, High or Off.
Press Menu/Set.
3 Press ⑦/c Stop/Exit.
—OR—
(Only for North America Model)
In Fax mode, you can adjust the speaker volume by pressing Hook/Hold, and then selecting a speaker volume level.
Press or to adjust the volume level. The LCD shows the setting you are choosing. Each key press changes the volume to the next level. The new setting will remain until you change it again.
Setting the Handset Volume (For USA and Canada only)
1 Press Menu/Set, 1, 4, 4.
- Handset
2 Press ▲ or ▼ to select High or Low.
Press Menu/Set.
3 Press Stop/Exit.
—OR—
You can adjust the handset volume any time you are talking on the telephone. There are two handset volume levels, Low and High. The default setting is Low.
Press or to adjust the volume level. The LCD shows the setting are choosing. The new setting will remain until you change it again.
Choosing the Handset Volume (For Volume Amplify) (For USA and Canada only)
Before you begin to use the machine, you must decide if you need to set the handset volume to Vol Amplify: On for a user who is hearing-impaired. The AMPLIFY volume level complies with FCC standard.
Vol Amplify:Off
This default setting is appropriate if none of the users are hearing-impaired. During a conversation, users can press or
▶ on the control panel to adjust the volume the two volume levels. When the handset is replaced, the handset volume will remain until you change it again.
Vol Amplify: On—Temporary
This setting is appropriate if some of the users are hearing-impaired. During a conversation, users can press or
▶ on the control panel to adjust the three volume levels.
Vol Amplify: On—Permanent
Choose Vol Amplify: On—Permanent if all of the users are hearing-impaired. During conversation, users can press or
▶ on the control panel to adjust the three volume levels. When the handset is replaced, the handset volume returns to the default setting of Volume Amplify.

Note
When you press or on the control panel to adjust the volume, the LCD shows the setting you are choosing. Each key press changes the volume to the next level.

CAUTION
It is important that you do NOT choose Permanent unless ALL the users are hearing-impaired. Otherwise, the default setting of Volume Amplify may damage the hearing of some users.
Setting Volume Amplify (For USA and Canada only)
Please carefully read Choosing the Handset Volume (For Volume Amplify) (For USA and Canada only) on page 2-7 before you do the following steps;
1 Press Menu/Set, 1, 4, 5.
- Volume Amplify
2 If none of the users are hearing-impaired, press ▲ or ▼ to select Vol Amplify:Off, and then press Menu/Set and go to Step 4. —OR—
If some or all of the users are hearing-impaired, select Vol Amplify: On, and then press Menu/Set.
3 If all the users are hearing-impaired, press to select Permanent, and then press Menu/Set.
—OR—
If only some or all of the users are hearing-impaired, select Temporary, and then press Menu/Set.
4 Press Stop/Exit.
Turning on Automatic Daylight Savings Time
You can set the machine to change automatically for Daylight Savings Time. It will reset itself forward one hour in the Spring and backward one hour in the Autumn. Make sure you have set the correct date and time in the Date/Time setting.
1 Press Menu/Set, 1, 5.
- Auto Daylight
(for Asia/Oceania)
- Clock Change
2 Press ▲ or ▼ to select On (or Off).
(For Asia/Oceania, To Summer time or To Winter time.)
Press Menu/Set.
3 Press Ⓤ/c Stop/Exit.
Toner Save
You can conserve toner using this feature. When you set Toner Save to On, print appears lighter. The default setting is Off.
1 Press Menu/Set, 1, 6, 1.
1.Toner Save
2 Press ▲ or ▼ to select On (or Off).
Press Menu/Set.
3 Press Ⓞ/c Stop/Exit.
Sleep Time
Setting the Sleep Time reduces power consumption by turning off the fuser inside the machine while it is idle. You can choose how long the machine is idle (from 00 to 99 minutes) before it goes into sleep mode. The timer is automatically reset when the machine receives a Fax or makes a copy. While the machine is in sleep mode you will see Sleep on the LCD. If you try to print or copy in sleep mode, there will be a short delay while the fuser warms up to its working temperature.
1 Press Menu/Set, 1, 6, 2.
2.Sleep Time
2 Use the dial pad to enter the length of time the machine is idle before it goes into sleep mode (00 to 99).
Press Menu/Set.
3 Press ☺/c Stop/Exit.
Note
If you want to turn off sleep mode, press ◇ Start and ☐ Options simultaneously in Step 2.
If the machine is in sleep mode when you change the Sleep Time, the new setting will take effect the next time the machine copies, prints or is turned off and on.
Setting the LCD Contrast
You can change the contrast to help the LCD look lighter or darker.
1 Press Menu/Set, 1, 7.
- LCD Contrast
2 Press ▲ or ▼ to select Light or Dark.
Press Menu/Set.
3 Press ☎/c Stop/Exit.
Security
You can set up your machine with multiple levels of security using Memory Security.
Memory Security
Memory Security lets you prevent unauthorized access to the machine. You will not be able to continue to schedule Delayed Faxes or Polling jobs. However, any pre-scheduled Delayed Faxes will be sent even if you turn on Memory Security, so they won't be lost.
While Memory Security is on, the following operations are available:
■ Receiving faxes into memory (limited by memory capacity)
■ Fax Forwarding
(if Fax Forwarding was already on)
■ Remote Retrieval
(if Fax Storage was already on)
While Memory Security is on, the following operations are NOT available:
■ Sending faxes
■ Printing received faxes
■ Copying
With the attached handset (For USA and Canada only)
■ Receiving telephone calls with the attached handset (For USA and Canada only)
■ Making telephone calls with the attached handset (For USA and Canada only)

Note
To print the faxes in memory, turn off Memory Security.
Setting up the password

Note
If you have already set the password and want to change it, please see Changing the Memory Security password below.
■ When you forget the password, contact your sales or service representative.
1 Press Menu/Set, 1, 8, 1.
- Mem Security
② Enter a four-digit number for the password.
Press Menu/Set.
If you are entering the password for the first time, the LCD shows Verify.
3 Re-enter the password.
Press Menu/Set.
4 Press Ⓤ/c Stop/Exit.
Changing the Memory Security password
1 Press Menu/Set, 1, 8, 1.
1. Mem Security
2 Press ▲ or ▼ to select Set Password.
Press Menu/Set.
3 Enter the registered four-digit password.
Press Menu/Set.
4 Enter a four-digit number for the new password.
Press Menu/Set.
5 If the LCD shows Verify, re-enter the new password.
Press Menu/Set.
6 Press Ⓤ/c Stop/Exit.
Turning Memory Security on
1 Press Menu/Set, 1, 8, 1.
- Mem Security
2 Press ▲ or ▼ to select Set Security.
Press Menu/Set.
3 Enter the registered four-digit password.
Press Menu/Set.
The machine goes offline and the LCD shows Secure Mode.

Note
If there is a power failure, the data in the memory will remain for up to 4 days.
Turning Memory Security off
1 Press Menu/Set.
Enter the registered four-digit password.
2 Memory Security is automatically turned off and the LCD shows the date and time.

Note
If you enter the wrong Password, the LCD shows Wrong Password and stays offline. The machine will stay in Secure Mode until the registered password is entered.
Setting Lock
Setting Lock lets you prevent unauthorized access to the machine settings.
While Setting Lock is On, the following operations are NOT available without password:
Date & Time
■ Station ID
■ Set Quick-Dial (One-Touch Dial, Speed-Dial and Setup Groups)
■ Mode Timer
Paper Type
Paper Size
Volume
■ Auto Daylight (Clock Change)
■ Ecology (Toner Save and Sleep Time)
LCD Contrast
■ Security (Memory Security and Setting Lock)
Setting up the password

Note
If you have already set the password and want to change it, please see Changing the Setting Lock password on next page.
■ When you forget the password, contact your sales or service representative.
1 Press Menu/Set, 1, 8, 2.
- Setting Lock
② Enter a four-digit number for the password.
Press Menu/Set.
If you are entering the password for the first time, the LCD shows Verify.
3 Re-enter the password.
Press Menu/Set.
4 Press Ⓤ/c Stop/Exit.
Changing the Setting Lock password
1 Press Menu/Set, 1, 8, 2.
- Setting Lock
2 Press ▲ or ▼ to select Set Password.
Press Menu/Set.
3 Enter the registered four-digit password. Press Menu/Set.
4 Enter a four-digit number for the new password.
Press Menu/Set.
5 If the LCD shows Verify, re-enter the new password.
Press Menu/Set.
6 Press ⑦/c Stop/Exit.
Turning Setting Lock on
1 Press Menu/Set, 1, 8, 2.
2. Setting Lock
2 Press ▲ or ▼ to select On.
Press Menu/Set.
3 Enter the registered four-digit password. Press Menu/Set.
4 Press ⑦/c Stop/Exit.
Turning Setting Lock off
1 Press Menu/Set, 1, 8, 2.
2. Setting Lock
2 Enter the registered four-digit password. Press Menu/Set twice.
3 Press ☉/c Stop/Exit.
Note
If you enter the wrong Password, the LCD shows Wrong Password. The machine will stay in Setting Lock mode until the registered password is entered.
3 Setup Send
How to enter Fax mode
Before sending faxes or changing fax send or receiving settings, make sure (Fax) is
illuminated in green. If it is not, press (Fax) to enter Fax mode. The default setting is Fax mode.

flowchart
graph TD
    A["Hand holding phone icon"] --> B["Target with 'CP'"]
    style A fill:#f9f,stroke:#333
    style B fill:#bbf,stroke:#333
How to dial
You can dial in any of the following ways.
Manual dialling
Press all of the digits of the phone or fax number.

One-Touch Dialling
Press the One-Touch key of the location you want to call. (See Storing One-Touch numbers on page 5-1.)

To dial One-Touch numbers 11 to 20, hold down Shift Shift as you press the One-Touch key.

Speed-Dialling
Press 📄/Search/Speed Dial, #, and then the three digit Speed-Dial number. (See Storing Speed-Dial numbers on page 5-2.)

flowchart
graph TD
    A["Start: Search/Speed Dial"] --> B["Step 1: Insert Search/Speed Dial"]
    B --> C["Step 2: Insert Three-digit number"]
    C --> D["Step 3: Insert Three-digit number"]

Note
If the LCD shows Not Registered when you enter the One-Touch or Speed-Dial number, a number has not been stored at this location.
Search
You can search for names you have stored in the One-Touch and Speed-Dial memories.
Press
Search/Speed Dial and the
navigation keys to search. (See Storing One-Touch numbers on page 5-1 and Storing Speed-Dial numbers on page 5-2.)

flowchart
graph TD
    A["Search/Speed Dial"] --> B["To search numerically"]
    B --> C["Menu Set"]
    C --> D["To search alphabetically*"]
    D --> E["Final UI icon with checkmark"]
* To search alphabetically, you can use the dial pad to enter the first letter of the name you are looking for.
Fax Redial
If you are sending a fax manually and the line is busy, press Redial/Pause, and then
press ◇ Start to try again. If you want to make a second call to the last number dialled, you can save time by pressing

Redial/Pause and ◊Start.

Redial/Pause only works if you dialled he control panel.
If you are sending a fax automatically and the line is busy, the machine will automatically redial up to three times at five minute intervals.
How to Fax
Automatic transmission
This is the easiest way to send a fax.
Press ◆ Start immediately after dialling. (For an example of automatic faxing, follow the steps in Faxing from the ADF on this page.)
3
Faxing from the ADF
1 If it is not illuminated in green, press

(Fax).
2 Put the document face down in the ADF.
3 Dial the fax number.
Press ◇ Start. The machine starts scanning the document.
Manual transmission
Manual transmission lets you hear the dialling, ringing and fax-receiving tones while sending a fax.
(For EU and Asia/Oceania model, use the handset and dial of the external phone)
1 If it is not illuminated in green, press

(Fax).
2 Load your document.
3 Pick up the handset and listen for a dial tone.
4 On the external phone, dial the fax number you want to call.
5 When you hear the fax tone, press
◇ Start.
6 Replace the handset.
Sending a fax at the end of a conversation
At the end of a conversation you can send a fax to the other party before you both hang up.
1 Ask the other party to wait for fax tones (beeps) and then to press the Start or Send key before hanging up.
2 If it is not illuminated in green, press (Fax).
3 Load your document. Press Start.
4 Replace the handset.
Out of Memory message
If you get an Out of Memory message while scanning the first page of a fax, press
©/c Stop/Exit to cancel the fax.
If you get an Out of Memory message while scanning a subsequent page, you will have the option to press Start to send the pages scanned so far, or to press Stop/Exit to cancel the operation.

Note
If you get an Out of Memory message while faxing and you do not want to delete your stored faxes to clear the memory, you can send the fax in real time. (See Real Time Transmission on page 3-6.)
Basic sending operations
Sending faxes using multiple settings
When you send a fax you can choose any combination of these settings: cover page, contrast, resolution, overseas mode, delayed fax timer, polling transmission or real time transmission.
1 If it is not illuminated in green, press
(Fax).
After each setting is accepted, the LCD will ask if you want to enter more settings:
Next 1.Yes 2.No
(For EU and Asia/Canada)
—OR—
Other Settings 1.Yes 2.No
(For USA and Canada)
2 Press 1 to select more settings. The LCD will return to the Setup Send menu.
—OR—
Press 2 if you have finished choosing settings and go to the next step.
Contrast
If your document is very light or very dark, you may want to change the contrast.
Use Light to send a light document.
Use Dark to send a dark document.
1 If it is not illuminated in green, press
CP (Fax).
2 Load your document.
3 Press Menu/Set, 2, 2, 1.
- Contrast
4 Press ▲ or ▼ to select Auto, Light or Dark.
Press Menu/Set.
Fax Resolution
After you load the document, you can use the
Resolution key to change the setting temporarily (for this fax only). In Fax mode
, press ■ Resolution and ▲ or ▼ to select the setting you want, and then press Menu/Set.
—OR—
You can change the default setting:
1 If it is not illuminated in green, press
(Fax).
2 Press Menu/Set, 2, 2, 2.
- Fax Resolution
3 Press ▲ or ▼ to select the resolution you want.
Press Menu/Set.
Standard Suitable for most typed documents.
Fine Good for small print and transmits a little slower than Standard resolution.
S. Fine Good for small print or artwork and transmits slower than Fine resolution.
Photo Use when the document has varying shades of grey or is a photograph. This has the slowest transmission time.
Dual Access
You can dial a number, and begin scanning the fax into memory—even when the machine is sending from memory, receiving faxes. The LCD shows the new job number.

Note
The number of pages you can scan into the memory will vary depending on the data that is printed on them.
If you get an Out of Memory message while scanning the first page of a fax, press Stop/Exit to cancel scanning. If you get an Out of Memory message while scanning a subsequent page, you can press Start to send the pages scanned so far, or press Stop/Exit to cancel the operation.
Real Time Transmission
When you are sending a fax, the machine will scan the documents into the memory before sending. Then, as soon as the phone line is free, the machine will start dialling and sending.
If the memory is full, the machine will send the document in real time (even if Real Time TX is set to Off).
Sometimes, you may want to send an important document immediately, without waiting for memory transmission. You can set Real Time TX to On for all documents or Next Fax: On for the next fax only.
1 If it is not illuminated in green, press

(Fax).
2 Press Menu/Set, 2, 2, 5.
- Real Time TX
3 To change the setting, press ▲ or ▼ to select On, Next Fax: On, Next Fax: Off or Off.
Press Menu/Set.
Broadcasting
Broadcasting is when the same fax message is automatically sent to more than one fax number. You can include Groups, One-Touch, Speed-Dial numbers and up to 50 manually dialled numbers in the same broadcast.
Press Menu/Set between each of the numbers. Use Search/Speed Dial to help you choose the numbers easily. (To set up Group dial numbers, see Setting up Groups for Broadcasting on page 5-3.)
After the broadcast is finished, a Broadcast Report will be printed to let you know the results.
1 If it is not illuminated in green, press

2 Load your document.
3 Enter a number using One-Touch, Speed-Dial, a Group number, Search or manual dialling using the dial pad. Press Menu/Set after each number.
4 After you have entered all the fax numbers, press Start.
Note
If you did not use up any of the numbers for Groups, access codes or credit card numbers, you can 'broadcast' faxes to as many as 270.
The available memory will vary depending on the types of jobs in the memory and the number of locations used for broadcasting. If you broadcast to the maximum numbers available, you will not be able to use Dual Access and Delayed fax.
■ Enter the long dialling sequence numbers as you would normally, but remember that each One-Touch and Speed-Dial number counts as one number, so the number of locations you can store becomes limited. (See Access codes and credit card numbers on page 5-4.)
If the memory is full, press ☑/c Stop/Exit to stop the job or if more than one page has been scanned, press Start to send the portion that is in the memory.
Checking job status
Check which jobs are still waiting in the memory to be sent. (If there are no jobs, the LCD shows No Jobs Waiting.)
1 Press Menu/Set, 2, 6.
6.Remaining Jobs
2 If you have more than one job waiting, press ▲ or ▼ to scroll through the list.
3 Press Stop/Exit.
Cancelling a fax in progress
If you want to cancel a fax, while the machine is scanning, dialling or sending it, press ©/c Stop/Exit.
Cancelling a scheduled job
You can cancel a fax job that is stored and waiting in the memory.
1 Press Menu/Set, 2, 6.
6.Remaining Jobs
Any jobs that are waiting will appear on the LCD.
2 If you have more than one job waiting, press ▲ or ▼ to select the job you want to cancel.
Press Menu/Set.
—OR—
If you only have one job waiting, go to Step 3.
3 Press 1 to cancel.
To cancel another job go to Step 2.
—OR—
Press 2 to exit without cancelling.
4 Press Stop/Exit.
Advanced sending operations
Composing the electronic Cover Page
The Cover Page is sent to the receiving party's machine. Your Cover Page includes the name stored in the One-Touch or Speed-Dial memory. If you are dialling manually, the name is left blank.
The Cover Page shows your Station ID and the number of pages you're sending. (See Setting the Station ID on page 2-2.) If you have Cover Page set to On for all faxes (Menu/Set, 2, 2, 7), the number of pages is not shown on the cover page.
You can select a comment to include on your Cover Page.
- Comment Off
- Please Call
- Urgent
- Confidential
Instead of using one of the preset comments, you can enter two personal messages of your own, up to 27 characters long. Use the chart on B-11 for help entering characters. (See Composing your own comments on this page.)
- (User Defined)
- (User Defined)
Most of the Setup Send settings are temporary to allow you to make changes for each fax you send. However, when you set up your Cover Page and Cover Page Comments, you are changing the default settings so they will be available while faxing.
Composing your own comments
You can set up two comments of your own.
1 If it is not illuminated in green, press
(Fax).

2 Press Menu/Set, 2, 2, 8.
- Coverpage Note
3 Press ▲ or ▼ to choose 5 or 6 for your own comment. Press Menu/Set.
4 Use the dial pad to enter your customized comment. Press Menu/Set. (See Entering Text on page B-11.)
Cover page for the next fax only
If you have not yet set your Station ID this feature will not work. Make sure you have programmed the Station ID before continuing. (See Setting the Station ID on page 2-2.) If you only want to send a Cover Page with a particular fax, your machine will ask you to enter the number of pages you are sending so it can be printed on the Cover Page.
1 If it is not illuminated in green, press
(Fax).

2 Load your document.
3 Press Menu/Set, 2, 2, 7.
- Coverpg Setup
4 Press ▲ or ▼ to select Next Fax: On (or Next Fax: Off).
Press Menu/Set.
5 Press ▲ or ▼ to select one of the standard or your own comments. Press Menu/Set.
6 Enter two digits to show the number of pages you are sending. Press Menu/Set.
(For example, press 0 2 for 2 pages or enter 0 0 to leave the number of pages blank. If you make a mistake, press ◀ to back up and re-enter the number of pages.)
Send a cover page for all faxes
If you have not yet set your Station ID this feature will not work. Make sure you have programmed the Station ID before continuing. (See Setting the Station ID on page 2-2.)
You can set the machine to send a cover page whenever you send a fax. The number of pages in your fax is not included when you use this setting.
1 If it is not illuminated in green, press (Fax).
2 Press Menu/Set, 2, 2, 7.
7.Coverpg Setup
3 Press ▲ or ▼ to select On (or Off).
Press Menu/Set.
4 If you selected On, press ▲ or ▼ to select one of the standard or your own comments.
Press Menu/Set.
Using a printed cover page
If you prefer to use a printed cover page that you can write on, you can print the sample page and attach it to your fax.
1 If it is not illuminated in green, press (Fax).
2 Press Menu/Set, 2, 2, 7.
7. Coverpg Setup
3 Press ▲ or ▼ to select Print Sample. Press Menu/Set.
4 Press ◇ Start. Your machine prints a copy of your cover page.
Overseas Mode
If you are having difficulty sending a fax overseas due to possible interference on the phone line, we recommend that you turn on the Overseas Mode. After you send a fax using this feature, the feature will turn itself off.
1 If it is not illuminated in green, press (Fax).
2 Load your document.
3 Press Menu/Set, 2, 2, 9.
- Overseas Mode
4 Press ▲ or ▼ to select On (or Off). Press Menu/Set.
Delayed Fax
During the day you can store up to 50 faxes in the memory to be sent within 24 hours. These faxes will be sent at the time of day you enter in Step 4.
1 If it is not illuminated in green, press
CP (Fax).
2 Load your document.
3 Press Menu/Set, 2, 2, 3.
3.Delayed Fax
4 Press Menu/Set to accept the displayed time.
—OR—
Enter the time you want the fax to be sent (in 24-hour format).
(For example, enter 19:45 for 7:45 PM.)
Press Menu/Set.
1.Doc 2.Memory
Press 1 to leave the paper document waiting in the ADF.
—OR—
Press 2 to scan the document into the memory.

Note
The number of pages you can scan into the memory depends on the amount of data that is printed on each page.
Delayed Batch Transmission
Before sending the delayed faxes, your machine will help you economize by sorting all the faxes in the memory by destination and scheduled time. All delayed faxes that are scheduled to be sent at the same time to the same fax number will be sent as one fax to save transmission time.
1 If it is not illuminated in green, press

(Fax).
2 Press Menu/Set, 2, 2, 4.
- Batch TX
3 Press ▲ or ▼ to select On (or Off).
Press Menu/Set.
4 Press Stop/Exit.
Setup for Polled Transmit (Standard)
Polled Transmit is when you set up the machine to wait with a document so another fax machine can retrieve it.

Note
■ When someone polls your machine to receive a fax, they pay for the call.
If you poll someone's fax machine to receive a fax, you pay for the call.
1 If it is not illuminated in green, press

(Fax).
2 Load your document.
3 Press Menu/Set, 2, 2, 6.
6.Polled TX
4 Press ▲ or ▼ to select Standard (For EU and Asia/Oceania) or On (or Off) (for USA and Canada).
Press Menu/Set.
1.Doc 2.Memory
Press 1 to leave the paper document waiting in the ADF.
—OR—
Press 2 to scan the document into the memory.

Note
If you press 1 in Step 4, the document remains in the ADF until your machine is polled. If you want to use the ADF before the polled transmission occurs, you must use Menu/Set, 2, 6 to cancel the job.
If you press 2 in Step 4, the document will be stored in the machine's memory and can be retrieved from any other fax machine until you delete the fax from memory by using the Cancelling a Job menu setting. (See Cancelling a scheduled job on page 3-8.)
Setup for Polled Transmit with Secure Code (For EU and Asia/Oceania only)
Polled Transmit with Secure Code is a way to keep documents from falling into the wrong hands while the machine is set up for polling.

Note
■ When someone polls your machine to receive a fax, they pay for the call.
If you poll someone's fax machine to receive a fax, you pay for the call.
1 If it is not illuminated in green, press

(Fax).
2 Load your document
3 Press Menu/Set, 2, 2, 6.
6.Polled TX
4 Press ▲ or ▼ to select Secure.
Press Menu/Set.
5 Enter a four-digit number.
Press Menu/Set.
1.Doc 2.Memory
Press 1 to leave the paper document waiting in the ADF.
—OR—
Press 2 to scan the document into the memory.

Note
If you press 1 in Step 5, the document remains in the ADF until your machine is polled. If you want to use the ADF before the polled transmission occurs, you must first cancel this job.
If you press 2 in Step 5 the document will be stored in the machine's memory and can be retrieved from any other fax machine until you delete the fax from memory by using the Cancelling a Job menu setting. (See Cancelling a scheduled job on page 3-8.)
■ You can use Secure Polling only with another FAX 1190L fax machine.
4
Setup Receive
Basic receiving operations
Choosing the Receive Mode
There are four different Receive Modes for your machine. You can choose the mode that best suits your needs.
| LCD How it works When to use it | ||
| Fax Only(automatic receive) | The machine automatically answers every call as a fax. | For dedicated fax lines. |
| Fax/Tel(fax and telephone)(with an external or extension telephone) | The machine controls the line and automatically answers every call. If the call is a fax it will receive the fax. If the call is not a fax it will ring (pseudo/double ring) for you to pick up the call. | Use this mode if you expect to receive lots of fax messages and few telephone calls. You cannot use an answering machine on the same line, even if it is on a separate phone socket on the same line. You cannot use the telephone company's Voice Mail in this mode. |
| External TAD(with an external telephone answering machine only) | The external telephone answering machine (TAD) automatically answers every call.Voice messages are stored on the external TAD. If it is a fax call, the machine receives the Fax. | Use this mode, if you want to use an answering machine connected to your machine.The External TAD setting works only with an external answering machine. Ring Delay does not work in this setting. |
| Manual(manual receive)(with an external or extension telephone or BT Call Sign or Distinctive Ring) | You control the phone line and must answer every call yourself unless you are using BT Call Sign or the Distinctive Ring feature. | Use this mode if you do not receive many fax messages, use BT Call Sign or the Distinctive Ring, or if you are using a computer on the same line.If you answer and hear fax tones, wait until the machine takes over the call, then hang up. (See Fax Detect (Easy Receive for USA and Canada) on page 4-3.) |
To select or change your Receive Mode
1 Press Menu/Set, 0, 1.
1. Receive Mode
2 Press ▲ or ▼ to select Fax Only, Fax/Tel, External TAD or Manual. Press Menu/Set.
3 Press Stop/Exit.

Setting the Ring Delay
The Ring Delay sets the number of times the machine rings before it answers in Fax Only or Fax/Tel mode.
1 If it is not illuminated in green, press (Fax).
2 Press Menu/Set, 2, 1, 1.
3 Press ▲ or ▼ to select how many times the line rings before the machine answers (00 - 04).
Press Menu/Set.
(If you select 00, the line won't ring at all.)
4 Press Stop/Exit.
Setting the F/T Ring Time (Fax/Tel mode only)
If you set the Receive Mode to Fax/Tel, you'll need to decide how long the machine will signal you with its special pseudo/double-ring when you have a voice call. (If it's a fax call, the machine receives the fax.)
This pseudo/double-ring happens after the initial ringing from the phone company. Only the machine rings and no other phones on the same line will ring with the special pseudo/double-ring. However, you can still answer the call on any telephone on the same line as the machine. (See For Fax/Tel mode only on page A-13.)
1 If it is not illuminated in green, press

(Fax).
2 Press Menu/Set, 2, 1, 2.
2.F/T Ring Time
3 Press ▲ or ▼ to select how long the machine will ring to alert you that you have a voice call (20, 30, 40 or 70 seconds).
Press Menu/Set.
4 Press Stop/Exit.

Note
Even if the caller hangs up during the pseudo/double-ringing, the machine will continue to ring for the set time.
Fax Detect (Easy Receive for USA and Canada)
When you use this feature, you don't have to press ◆ Start or the Fax Receive Code ✦51 when you answer a fax call. Selecting On allows the machine to receive fax calls automatically, even if you lift the handset of an extension or external phone. When you see Receiving on the LCD or when you hear 'chirps' through the handset of an extension phone connected to another wall socket/phone socket, just replace the handset and your machine will do the rest.
Semi (For USA and Canada only) lets the machine receive the fax only if you've answered it at the machine.

Note
If your machine does not connect a fax call when you lift an extension or external phone handset (either because this feature is set to Off or due to telephone line problems), you will need to activate the machine manually. You can do this by pressing Start on the machine.
—OR—
by pressing ☑1 if you are not at your machine. (See Operation from extension telephones on page A-13.)
If you send faxes from a computer on the same phone line and the machine intercepts them, set Fax Detect to Off.
1 If it is not illuminated in green, press
CP (Fax).
2 Press Menu/Set, 2, 1, 3.
(For EU and Oceania)
- Fax Detect
(For USA and Canada)
3.Easy Receive
3 Press ▲ or ▼ to select On, (Semi) or Off.
Press Menu/Set.
4 Press Stop/Exit.
Printing a reduced incoming fax (Auto Reduction)
If you choose On, the machine automatically reduces an incoming fax to fit on one page of Letter or A4 size paper. The machine calculates the reduction ratio by using the page size of the document and your Paper Size setting (Menu/Set, 1, 3).
1 If it is not illuminated in green, press
(Fax).
2 Press Menu/Set, 2, 1, 5.
- Auto Reduction
3 Use ▲ or ▼ to select On (or Off).
Press Menu/Set.
4 Press Stop/Exit.
Note
■ Turn on this setting if you receive faxes that are split onto two pages. However, if the document is too long the machine may still print on two pages.
■ If left and right margins are cut off, turn on this setting.
When this feature is set to On, the A4 faxes people send to you may appear slightly shrunk even though your machine prints them on A4 paper. This is because the machine has to print the Station ID of the sending machine at the top of the page.
Receiving a fax at the end of a conversation
At the end of a conversation you can ask the other party to fax you information before you both hang up.
1 Ask the other party to place the document in their machine and to press Start or Send key.
2 When you hear the other machine's CNG tones (beeps), press Start.
3 Replace the handset.
Advanced receiving operations
Printing a fax from the memory
If you have selected Fax Storage (Menu/Set, 2, 5, 1), you can still print a fax from the memory when you are at your machine. (See Setting Fax Storage on page 6-1.)
1 Press Menu/Set, 2, 5, 3.
3.Print Document
2 Press Start.
Setting the Print Density
You can adjust print density, making your printed pages darker or lighter.
1 If it is not illuminated in green, press
(Fax).

2 (for EU and Asia/Oceania) Press Menu/Set, 2, 1, 7.
7.Print Density
(for USA and Canada)
Press Menu/Set, 2, 1, 6.
6.Print Density
3 Press ▲ to make the print darker.
—OR—
Press ▼ to make the print lighter.
Press Menu/Set.
4 Press Stop/Exit.
Reception into memory
As soon as the paper tray becomes empty during fax reception, the screen will display No Paper Fed; please put some paper in the paper tray. (See How to load paper on page 1-11.)
If Memory Receive is On at this time...
The current fax reception will continue, with the remaining page(s) being stored in memory, subject to available memory. Subsequent incoming faxes will also be stored into memory until the memory is full, following this no further incoming fax calls will be automatically answered. To print all data put fresh paper in the paper tray, and then press Start.
If Memory Receive is Off at this time...
The current fax reception will continue, with the remaining page(s) being stored in memory, subject to available memory. Subsequent incoming fax calls will not be automatically answered until fresh paper is put in the paper tray. To print the last fax received, put paper in the paper tray, and then press Start.
1 If it is not illuminated in green, press
CP (Fax).
2 (for EU and Asia/Oceania)
Press Menu/Set, 2, 1, 6.
- Memory Receive
3 Press ▲ or ▼ to select On (or Off).
Press Menu/Set.
4 Press Stop/Exit.
Note
■ For USA and Canada, Memory Receive is always On.
Polling
Polling is the process of retrieving faxes from another fax machine. You can use your machine to 'poll' other machines.
Everyone who is involved in Polling needs to set up their fax machines for Polling.
Note
If you poll someone's fax machine to receive a fax, you pay for the call.
■ Some fax machines do not respond to the Polling feature.
Setup for Polling Receive (Standard)
Polling Receive is when you call another fax machine to receive a fax from it.
1 If it is not illuminated in green, press
(Fax).
2 (for EU and Asia/Oceania)
Press Menu/Set, 2, 1, 8.
- Polling RX
(for USA and Canada)
Press Menu/Set, 2, 1, 7.
- Polling RX
3 Press ▲ or ▼ to select Standard.
Press Menu/Set.
4 Enter the fax number you are polling.
Press Start.
The LCD shows Dialing.
Secure Polling (For EU and Asia/Oceania only)
Secure Polling is a way to keep the documents from falling into the wrong hands while the other fax machine is set up for polling.
Setup for Polling Receive (Secure) (For EU and Asia/Oceania only)
You need to make sure you are using the same secure code as the other party.
1 If it is not illuminated in green, press (Fax).
2 Press Menu/Set, 2, 1, 8. 8.Polling RX
3 Press ▲ or ▼ to select Secure.
Press Menu/Set.
4 Enter a four-digit secure code. This is the same as the security code of the fax machine you are polling.
5 Press Menu/Set.
6 Enter the fax number you are polling.
7 Press Start. The LCD shows Dialing.

Note
You can use Secure Polling only with another FAX 1190L fax machine. Anyone who polls to receive a fax must enter the polling secure code.
Setup for Polling Receive (Timer) (For EU and Asia/Oceania only)
You can set the machine to begin Polling Receive at a later time.
1 If it is not illuminated in green, press (Fax).
2 Press Menu/Set, 2, 1, 8.
8. Polling RX
3 Press ▲ or ▼ to select Timer.
Press Menu/Set.
4 Enter the time (in 24-hour format) you want to begin polling.
For example, enter 21:45 for 9:45 PM.
5 Press Menu/Set.
6 Enter the fax number you are polling.
Press Start.
The machine makes the polling call at the time you entered.

Note
You can set up only one Delayed Polling.
Sequential Polling
The machine can request documents from several fax machines in a single operation. You just specify several destinations in Step 5. Afterwards, a Sequential Polling Report will be printed.
1 If it is not illuminated in green, press (Fax).
2 (for EU and Asia/Oceania)
Press Menu/Set, 2, 1, 8.
- Polling RX
(for USA and Canada)
Press Menu/Set, 2, 1, 7.
- Polling RX
3 (for USA and Canada)
Go to Step 5.
(for EU and Asia/Oceania)
Press ▲ or ▼ to choose Standard, Secure or Timer.
Press Menu/Set when the screen displays the setting you want.
4 If you selected Standard or On, go to Step 5.
- If you selected Secure, enter a four-digit number and press Menu/Set, and then go to Step 5.
- If you selected Timer, enter the time (in 24-hour format) you want to begin polling and press Menu/Set, and then go to Step 5.
5 Specify the destination fax machines, you wish to poll by using One-Touch, Speed-Dial, Search, a Group (See Setting up Groups for Broadcasting on page 5-3) or the dial pad. You must press Menu/Set between each location.
6 Press Start.
The machine polls each number or group in turn for a document.
Note
- Press ☑/c Stop/Exit while the machine is dialling to cancel the polling process.
■ To cancel all sequential polling receive jobs, press Menu/Set, 2, 6. (See Cancelling a scheduled job on page 3-8.)
5
Quick-Dial numbers and dialling options
Storing numbers for easy dialling
You can set up your machine to do following types of easy dialling: One-Touch, Speed-Dial and Groups for Broadcasting faxes. When you dial a quick-dial number, the LCD shows the name, if you stored it, or the number.

Note
If you lose electrical power, the quick-dial numbers that are in the memory will not be lost.
Storing One-Touch numbers
Your machine has 10 One-Touch keys where you can store 20 fax or phone numbers for automatic dialling. To access numbers 11 to 20, hold down Shift as you press the One-Touch key. The LCD shows the name, if you stored it, or the number.

1 Press Menu/Set, 2, 3, 1.
- One-Touch Dial
2 Press the One-Touch key where you want to store a number.
3 Enter the phone or fax number (up to 20 digits).
Press Menu/Set.
4 Use the dial pad to enter the name (up to 15 characters).
Press Menu/Set.
(You can use the chart on page B-11 to help you enter letters.)
—OR—
Press Menu/Set to store the number without a name.
5 Go to Step 2 to store another One-Touch number.
—OR—
Press Stop/Exit.
Storing Speed-Dial numbers
You can store Speed-Dial numbers, so that when you dial you will only have to press a few keys (Search/Speed Dial, #, the three-digit number, and Start). The machine can store 200 Speed-Dial numbers.
1 Press Menu/Set, 2, 3, 2.
- Speed-Dial
2 Use the dial pad to enter a three-digit Speed-Dial location number. (001 - 200)
(For example, press 005.)
Press Menu/Set.
3 Enter the phone or fax number (up to 20 digits).
Press Menu/Set.
4 Use the dial pad to enter the name (up to 15 characters).
Press Menu/Set.
(You can use the chart on page B-11 to help you enter letters.)
—OR—
Press Menu/Set to store the number without a name.
5 Go to Step 2 to store another Speed-Dial number.
—OR—
Press Stop/Exit.
Changing One-Touch / Speed-Dial numbers
If you try to store a One-Touch or Speed-Dial number where a number has already been stored, the LCD will show the name that has been stored there (or number) and will ask you to do one of the following:

flowchart
graph TD
    A["#005:MIKE"] --> B["1. Change 2.Exit"]
    B --> A
Press 1 to change the stored number.
—OR—
Press 2 to exit without making a change.
How to change the stored number or name:
- If you want to change a character, use ◀ or ▶ to position the cursor under the character you want to change, and then type over it.
- If you want to erase the whole number or whole name, press Stop/Exit when the cursor is under the first digit or letter. The characters above and to the right of the cursor will be deleted.
2 Enter a new number.
Press Menu/Set.
3 Follow the directions beginning at Step 4 in Storing One-Touch Dial numbers and Storing Speed-Dial numbers. (See Storing One-Touch numbers on page 5-1 and Storing Speed-Dial numbers on this page.)
Setting up Groups for Broadcasting
Groups, which can be stored on a One-Touch key or a Speed-Dial location, allow you to send the same fax message to many fax numbers by pressing only a One-Touch key and ◆ Start or 📄/Search/Speed Dial, #, the three-digit location and ◆Start. First, you'll need to store each fax number as a One-Touch or Speed-Dial number. Then, you can combine them into a Group. Each Group uses up a One-Touch key or a Speed-Dial location. You can have up to eight Groups, or you can assign up to 219 numbers to one large Group.
(See Storing One-Touch numbers on page 5-1 and Storing Speed-Dial numbers on page 5-2.)
1 Press Menu/Set, 2, 3, 3.
- Setup Groups
2 Decide where you wish to store the Group.
—AND—
Press a One-Touch key.
—OR—
Press Search/Speed Dial and enter the three digit location, and then press Menu/Set.
(For example, press One-Touch key 2, or press Search/Speed Dial 0 4 5 for Speed-Dial location 045.)
③ Use the dial pad to enter the Group number (1 to 8).
Setup Group:G01
Press Menu/Set.
(For example, press 1 for Group 1.)
4 To include One-Touch or Speed-Dial numbers in the Group, press them as follows:
For example, for One-Touch number 4, press One-Touch key 4. The LCD shows ✦004. For Speed-Dial location 009, press Search/Speed Dial, and then 0 0 9 on the dial pad.
G01: *004#009
5 Press Menu/Set to accept the numbers for this Group.
6 Use the dial pad and the chart on page B-11 to enter a name for the Group.
Press Menu/Set.
(For example, type NEW CLIENTS).
7 Press Stop/Exit.
Note
You can print a list of all One-Touch and Speed-Dial numbers. Group numbers will be marked in the GROUP column. (See Printing reports on page 7-2.)
Dialling options
Access codes and credit card numbers
Sometimes you may want to choose from several long distance carriers when you make a call. Rates may vary depending on the time and destination. To take advantage of low rates, you can store the access codes or long-distance carriers and credit card numbers as One-Touch and Speed-Dial numbers. You can store these long dialling sequences by dividing them and setting them up on separate One-Touch and Speed Dial numbers in any combination. You can even include manual dialling using the dial pad. (See Storing One-Touch numbers on page 5-1 and Storing Speed-Dial numbers on page 5-2.)
For example, perhaps you have stored '555' on One-Touch key 1 and '7000' on One-Touch key 2. If you press One-Touch key 1, One-Touch key 2, and ◆ Start, you will dial '555-7000'.
To temporarily change a number, you can substitute part of the number with manual dialling using the dial pad. For example, to change the number to 555-7001 you could press One-Touch key 1 and then press 7001 using the dial pad.
Pause
Press Redial/Pause to insert a 3.5-second pause between numbers. If you are dialling overseas, you can press
☐/☐。 Redial/Pause as many times as needed to increase the length of the pause.
Tone or Pulse
If you have a Pulse dialling service, but need to send Tone signals (for example, for telephone banking), follow the instructions below. If you have Touch Tone service, you will not need this feature to send tone signals.
1 Lift the handset of the external phone.
2 Press # on the control panel of your machine. Any digits dialled after this will send tone signals.
When you hang up, the machine will return to the Pulse dialling service.
6
Remote Fax Options
Setting Remote Fax Options

Note
■ You can only use one remote fax option at a time:
Fax Forwarding—OR—Paging*—OR—Fax Storage—OR—Off.
* Paging available for USA and Canada only
If you change the remote fax options and received faxes are left in your machine's memory, an LCD message will appear. (See Changing Remote Fax Options on page 6-3.)
Setting up Fax Forwarding
When you select Fax Forward, your machine stores the received fax in the memory. The machine will then dial the fax number you've programmed and forward the fax message.
1
Press Menu/Set, 2, 5, 1.
(for EU and Asia/Oceania)
- Forward/Store
(for USA and Canada)
- Fwd/Page/Store
2
Press ▲ or ▼ to select Fax Forward.
Press Menu/Set.
The LCD will ask you to enter the fax number to which faxes will be forwarded.
3
Enter the forwarding number (up to 20 digits).
Press Menu/Set.
4
Press ▲ or ▼ to select
Backup Print:On or
Backup Print:Off.
Backup Print:On
Press Menu/Set.

Note
If you select Backup Print: On, the machine will also print the fax at your machine so you will have a copy. This is a safety feature in case there is a power failure before the fax is forwarded or a problem at the receiving machine. This machine can store faxes up to 4 days if there is a power failure.
5
Press Stop/Exit.
Setting Fax Storage
If you select Fax Storage, your machine stores the received fax in the memory. You will be able to retrieve fax messages from another location using the Remote Retrieval commands.
1
Press Menu/Set, 2, 5, 1.
(for EU and Asia/Oceania)
- Forward/Store
(for USA and Canada)
1.Fwd/Page/Store
2
Press ▲ or ▼ to select Fax Storage.
Press Menu/Set.
3
Press Stop/Exit.

Note
If you have set Fax Storage, a backup copy will automatically be printed at the machine.
Programming your pager number (For USA and Canada only)
When Paging is selected, your machine dials the pager number you've programmed, and then dials your Personal Identification Number (PIN). This activates your pager so you will know that you have a fax message in the memory.
1 Press Menu/Set, 2, 5, 1.
1.Fwd/Page/Store
2 Press ▲ or ▼ to select Paging.
Press Menu/Set.
3 Enter your pager phone number followed by # # (up to 20 digits).
Press Menu/Set.
Do not include the area code if it is the same as that of your machine.
For example, press: 1 8 0 0 5 5 5 1 2 3 4 # #.
4 If your pager needs a PIN, enter the PIN, press #, press Redial/Pause, enter your fax number followed by # # .
Press Menu/Set.
For example, press: 12345# Redial/Pause 18005551212##
—OR—
If you do not need a PIN, press Redial/Pause, enter your fax number followed by # # .
Press Menu/Set.
For example, press: Redial/Pause 1 8 0 0 5 5 5 1 2 1 2 # #
5 Press Stop/Exit.

■ You cannot change a Paging number or PIN remotely.
If you have set Paging, a backup copy of the received fax will automatically be printed at the machine.
Turning off Remote Fax Options
1 Press Menu/Set, 2, 5, 1. (for EU and Asia/Oceania)
- Forward/Store
(for USA and Canada)
- Fwd/Page/Store
2 Press ▲ or ▼ to select off.
Press Menu/Set.
3 Press Stop/Exit.

If you set the remote fax options to Off and received faxes are left in your machine's memory, further LCD messages appear after Step 2. (See Changing Remote Fax Options.)
Changing Remote Fax Options
If received faxes are left in your machine's memory when you change the remote fax option the LCD will ask you the following question:

flowchart
graph TD
    A["Erase All Doc?"] --> B["1.Yes 2.No"]
    C["Print All Fax?"] --> D["1.Yes 2.No"]
    B --> E["*"]
    D --> F["OR-"]
* Erase All FAX ? will be displayed for USA and Canada.
If you press 1, faxes in the memory will be erased or printed before the setting changes.
If you press 2, faxes in the memory will not be erased or printed and the setting will be unchanged. If a backup copy has already been prited it will not be printed again.
If you press 1, and Backup Print is set to On, faxes in the memory will be erased before the setting changes. If you press 1 and Backup print is set to Off, faxes in the memory will be sent to your PC before the setting changes.
If you press 2, faxes in the memory will not be erased or transferred to your PC and the setting will be unchanged.
Setting your Remote Access Code
The remote access code lets you access the Remote Retrieval features when you are away from your machine. Before you use the remote access and retrieval features, you have to set up your own code. The default code is inactive code (--- *)
1 Press Menu/Set, 2, 5, 2.
2.Remote Access
② Enter a three-digit code using numbers 0-9, * or #.
Press Menu/Set. (The preset ‘* cannot be changed.)

Do not use the same code as your Fax Receive Code (51) or Telephone Answer Code (#51). (See Operation from extension telephones on page A-13.)
3 Press Stop/Exit.

You can change your code at any time by entering a new one. If you want to make your code inactive, press Stop/Exit in Step 2 to restore the inactive setting (---) and press Menu/Set.
Remote Retrieval
You can call your machine from any touch tone telephone or fax machine, then use the Remote Access Code and remote commands to retrieve fax messages. Be sure to cut out the Remote Retrieval Access Card on the last page and keep it with you at all times.
Using your Remote Access Code
1 Dial your fax number from a telephone or another fax machine using touch tone.
2 When your machine answers, immediately enter your Remote Access Code (3 digits followed by ✕
3 The machine signals if it has received fax messages:
1 long beep — Fax messages
No beeps — No messages
4 The machine gives two short beeps to tell you to enter a command. The machine will hang up if you wait longer than 30 seconds to enter a command. The machine will beep three times, if you enter an invalid command.
5 Press 9 0 to reset the machine when you've finished.
6 Hang up.

Note
If your machine is set to Manual mode and you want to use the remote retrieval features, you can access your machine by waiting about 2 minutes after it starts ringing, and then entering the Remote Access Code within 30 seconds.
Remote commands
Follow the commands below to access features when you are away from the machine. When you call the machine and enter your Remote Access Code (3 digits followed by ), the system will give two short beeps and you must enter a remote command.
| Remote commands Operation details | ||
| 95 Change the Fax Forwarding or Fax Storage settings | ||
| 1 OFF You can select off after you have retrieved or erased all your messages. | ||
| 2 Fax Forwarding If you hear one long beep, the change has been accepted. If you hear three short beeps, you cannot change it because the conditions have not been met (for example, registering a fax forwarding or Paging number). You can register your Fax Forwarding number by entering 4. (See Changing your Fax Forwarding number on page 6-6.) Once you have registered the number, Fax Forwarding will work. | ||
| 3 Paging (For USA and Canada only) | ||
| 4 Fax Forwarding number | ||
| 6 Fax Storage | ||
| 96 Retrieve a fax | ||
| 2 Retrieve all faxes Enter the number of a remote fax machine to receive stored fax message(s). (See page 6-6.) | ||
| 3 Erase faxes from the memory If you hear one long beep, fax messages have been erased from the memory. | ||
| 97 Check the receiving status | ||
| 1 Fax You can check whether your machine has received any faxes.If yes, you will hear one long beep. If no, you will hear three short beeps. | ||
| 98 Change the Receive Mode | ||
| 1 External TAD If you hear one long beep, your change has been accepted. | ||
| 2 Fax/Tel | ||
| 3 Fax Only | ||
| 90 Exit | Press 90 to exit Remote Retrieval. Wait for the long beep, then replace the handset. | |
Retrieving fax messages
You can call your machine from any touch tone phone and have your fax messages sent to a fax machine.
1 Dial your fax number.
2 When your machine answers, immediately enter your Remote Access Code (3 digits followed by ✕ If you hear one long beep, you have messages.
3 As soon as you hear two short beeps, use the dial pad to press 9 6 2.
4 Wait for the long beep, and then use the dial pad to enter the number of the remote fax machine where you want your fax messages sent to followed by ## (up to 20 digits).

Note
You cannot use *and # as dial numbers. However, press # if you want to store a pause.
5 Press 9 0 to reset the machine when you've finished.
6 Hang up after you hear your machine beep. Your machine will call the other fax machine, which will then print your fax messages.
Changing your Fax Forwarding number
You can change the default setting of your fax forwarding number from another telephone or fax machine using touch tone.
1 Dial your fax number.
2 When your machine answers, immediately enter your Remote Access Code (3 digits followed by ✕ If you hear one long beep, you have messages.
3 When you hear two short beeps, use the dial pad to press 9 5 4.
4 Wait for the long beep, and then use the dial pad to enter the new number of the remote fax machine where you want your fax messages forwarded followed by ## (up to 20 digits).

Note
You cannot use *and # as dial numbers. However, press # if you want to store a pause.
5 Press 9 0 to reset the machine when you've finished.
6 Hang up after you hear your machine beep.
7
Printing reports
Fax settings and activity
You need to set up the Transmission
Verification Report and Journal Period in the menu table.
Press Menu/Set, 2, 4, 1.
1.XMIT Report
* Transmission will be displayed for USA and Canada.
—OR—
Press Menu/Set, 2, 4, 2.
2.Journal Period
Customizing the Transmission Verification Report
You can use the Transmission Report as proof that you sent a fax. This report lists the time and date of transmission and whether the transmission was successful (OK). If you select On or On+Image, the report will print for every fax you send.
If you send a lot of faxes to the same place, you may need more than the job numbers to know which faxes you must send again.
Selecting On+Image or Off+Image will print a section of the fax's first page on the report to help you remember.

Note
When the Verification Report is turned Off or Off+Image, the Report will only print if there is a transmission error, with ERROR in the RESULT column.
1 Press Menu/Set, 2, 4, 1.
1.XMIT Report
2 Press ▲ or ▼ to select On, On+Image, Off or Off+Image.
Press Menu/Set.
3 Press Stop/Exit.
Setting the Journal Period
You can set the machine to print a journal at specific intervals (every 50 faxes, 6, 12 or 24 hours, 2 or 7 days). If you set the interval to Off, you can print the report by following the steps on Printing reports.
The default setting is Every 50 Faxes.
1 Press Menu/Set, 2, 4, 2.
2.Journal Period
2 Press ▲ or ▼ to choose an interval.
Press Menu/Set.
(If you choose 7 days, the LCD will ask you to choose a day on which to begin the 7-day countdown.)
③ Enter the time to begin printing in 24-hour format.
Press Menu/Set.
(For example: enter 19:45 for 7:45 PM.)
4 Press Stop/Exit.
Note
If you select 6, 12, 24 hours, 2 or 7 days, the machine will print the report at the selected time and then erase all jobs from its memory. If the machine's memory becomes full with 200 jobs before the time you selected has passed, the machine will print the Journal early and then erase all jobs from memory. If you want an extra report before it is due to print, you can print it without erasing the jobs from memory.
If you select Every 50 Faxes, the machine will print the Journal when the machine has stored 50 jobs.
Printing reports
Following reports are available:
- XMIT Verify/Transmission Prints a Transmission Verification Report for your last transmission.
- Help List Prints the Help List so you can see at-a-glance how to quickly program your machine.
- Quick-Dial Lists names and numbers stored in the One-Touch and Speed-Dial memory, in numerical order.
- Fax Journal
Lists information about the last incoming and outgoing faxes.
(TX means Transmit.) (RX means Receive.)
5.User Settings Lists your settings.
How to print a report
1 Press Reports.
2 Press ▲ or ▼ to select the report you want.
Press Menu/Set.
—OR—
Enter the number of the report you want to print.
For example, press 2 to print the Help List.
8
Making copies
Using the machine as a copier
You can use your machine as a copier, making up to 99 copies at a time.
Enter Copy mode
Before making copies, make sure that
(Copy) is illuminated in green. If it is
not, press (Copy) to enter Copy mode.
The default setting is Fax mode. You can change the number of seconds or minutes that the machine stays in Copy mode.
(See Setting the Mode Timer on page 2-4.)

flowchart
graph TD
    A["Hand holding folder icon"] --> B["Download icon"]
    B --> C["Arrow pointing down"]
The LCD shows the default copy setting

(for EU and Asia/Oceania)
The printable area of your machine begins at approximately 2 mm from both sides and 3 mm from the top or bottom of the paper.

(for USA and Canada)
The printable area of your machine begins at approximately 0.16 in. (4 mm) from both sides and 0.12 in. (3 mm) from the top or bottom of the paper.


Note
This printable area shown above is for a single copy or a 1 in 1 copy using A4 size paper. The printable area changes with the paper size.
Making a single copy
1 Press (Copy) to illuminate it in green.
② Load your document.
(See Load document on page 1-8.)
3 Press Start.
Making multiple copies
1 Press (Copy) to illuminate it in green.
2 Load your document.
3 Use the dial pad to enter the number of copies you want (up to 99).
4 Press Start.
Note
To sort the copies, press □ Options and ▲ or ▼ to select Stack/Sort. (See Sorting copies using the ADF on page 8-5.)
Stop copying
To stop copying, press Stop/Exit.
Using the temporary Copy key
When you want to quickly change the copy settings temporarily for the next copy, use the
Options key. You can use different combinations.

Note
The machine returns to its default settings 60 seconds after it finishes copying, or if the Mode Timer returns the machine to Fax mode. (See Setting the Mode Timer on page 2-4.)
■ You can save the quality and contrast settings you use most often by setting them as default. (See Changing the default copy settings on page 8-7.)
Changing the temporary copy settings
Use the ☐ Options key to quickly set the following copy settings temporarily for the next copy.
Press (For EU) (For EU) Options Options (For USA, Canada and Asia/Oceania) (For USA, Canada and Asia/Oceania) | Menu Selections Options Page \ select select | ||
| Enlarge/Reduce | 50%/70%/78%/83%/85%/91%/94%/97%/100%/104%/141%/200%/Custom(50-200%)/Auto | 8-4 | |
| Quality Auto | TextPhoto | 8-5 | |
| Stack/Sort Stack | Sort | 8-5 | |
| Contrast ▼ -□□□□■+ ▲ | ▼ -□□□□□+ ▲▼ -□□□□□+ ▲▼ -□□□□□+ ▲▼ -■□□□□+ ▲ | 8-5 | |
| Page Layout Off(1 in 1) | 2 in 1 (P)2 in 1 (L)4 in 1 (P)4 in 1 (L) | 8-6 |

Note
The factory settings are shown in Bold.
After you choose your settings by pressing Menu/Set, the LCD shows Set temporarily. Press Start if you have finished choosing settings.
Enlarging or reducing the image copied
You can select the following enlargement or reduction ratios.
Auto automatically calculates the reduction ratio for the paper size set for the machine (Menu/Set, 1, 3).
Custom(50-200%) allows you to enter a ratio from 50% to 200%.
| Press | 100% |
 | 104% EXE→LTR |
| 141% A5→A4 | |
| (For EU) | 200% |
| Auto | |
| Custom (50-200%) | |
 | 50% |
| 70% A4→A5 | |
 (For USA, Canada and Asia/Oceania)and ▲ or ▼ to selectEnlarge/Reduce (For USA, Canada and Asia/Oceania)and ▲ or ▼ to selectEnlarge/Reduce | 78% LGL→LTR |
| 83% LGL→A4 | |
| 85% LTR→EXE | |
| 91% Full Page | |
| 94% A4→LTR | |
| 97% LTR→A4 |
1 Press (Copy) to illuminate it in green.
② Load your document.
3 Use the dial pad to enter the number of copies you want (up to 99).
4 Press Options and ▲ or ▼ to select
Enlarge/Reduce.
Press Menu/Set.
5 Press ▲ or ▼ to select the enlargement or reduction ratio you want.
Press Menu/Set.
—OR—
Use the dial pad to enter an enlargement or reduction ratio from 50% to 200%.
Press Menu/Set.
(For example, press 5 3 to enter 53%.)
6 Press Start.
Note
Special Copy Options (2 in 1 (P), 2 in 1 (L), 4 in 1 (P) or 4 in 1 (L)) are not available with Enlarge/Reduce.
Quality
You can select the copy quality. The default setting is Auto.
| Auto Suitable for documents that contain both text and photographs. |
| Text Suitable for documents containing only text. |
| Photo Suitable for copying photographs. |
1 Press (Copy) to illuminate it in green.
2 Load your document.
3 Use the dial pad to enter the number of copies you want (up to 99).
4 Press Options and ▲ or ▼ to select Quality.
Press Menu/Set.
5 Press ▲ or ▼ to select the copy quality you want (Auto, Text or Photo).
Press Menu/Set.
6 Press Start.
Sorting copies using the ADF
You can sort multiple copies. Pages will be stacked in the order (1,2,3) , (1,2,3) and so on.
1 Press (Copy) to illuminate it in green.
2 Load your document.
3 Use the dial pad to enter the number of copies you want (up to 99).
4 Press Options and ▲ or ▼ to select Stack/Sort.
Press Menu/Set.
5 Press ▲ or ▼ to select Sort.
Press Menu/Set.
6 Press Start.
Contrast
You can adjust copy contrast to make copies darker or lighter.
1 Press (Copy) to illuminate it in green.
2 Load your document.
3 Use the dial pad to enter the number of copies you want (up to 99).
4 Press Options and ▲ or ▼ to select Contrast.
Press Menu/Set.
5 Press ▲ to increase the contrast.
—OR—
Press ▼ to decrease the contrast
Press Menu/Set.
6 Press Start.
Making N in 1 copies (Page Layout)
You can reduce the amount of copies by using the N in 1 copy feature. This allows you to copy two or four pages onto one page, allowing you to save paper.

Note
■ Please make sure paper size is set to Letter or A4.
■ You can use N in 1 copy feature with 100% copy size only.
(P) means Portrait and (L) means Landscape.
1 Press (Copy) to illuminate it in green.
2 Load your document.
3 Use the dial pad to enter the number of copies you want (up to 99).
4 Press Options and ▲ or ▼ to select Page Layout.
Press Menu/Set.
5 Press ▲ or ▼ to select 2 in 1 (P), 2 in 1 (L), 4 in 1 (P) or 4 in 1 (L).
Press Menu/Set.
6 Press ◆ Start to scan the document.
When using the ADF, place the document face down in the direction shown below.

flowchart
graph LR
    A["1"] --> B["2"]
    B --> C["1 2"]

flowchart
graph LR
    A["Σ"] --> B["∫"]
    B --> C["1"]
    B --> D["2"]

flowchart
graph LR
    A["1"] --> B["2"]
    C["3"] --> D["4"]
    E["1'"] --> F["1'"]
    G["1'"] --> H["1'"]
    I["1'"] --> J["1'"]
    K["1'"] --> L["1'"]
    M["1'"] --> N["1'"]
    O["1'"] --> P["1'"]
    Q["1'"] --> R["1'"]
    S["1'"] --> T["1'"]
    U["1'"] --> V["1'"]
    W["1'"] --> X["1'"]
    Y["1'"] --> Z["1'"]
    AA["1'"] --> AB["1'"]
    AC["1'"] --> AD["1'"]
    AE["1'"] --> AF["1'"]
    AG["1'"] --> AH["1'"]
    AI["1'"] --> AJ["1'"]
    AK["1'"] --> AL["1'"]
    AM["1'"] --> AN["1'"]
    AO["1'"] --> AP["1'"]
    AQ["1'"] --> AR["1'"]
    AS["1'"] --> AT["1'"]
    AU["1'"] --> AV["1'"]
    AW["1'"] --> AX["1'"]
    AY["1'"] --> AZ["1'"]
    BA["3'"] --> BB["3'"]
    BC["4'"] --> BD["4"]


Changing the default copy settings
You can save the quality and contrast settings you use most often by setting them as default. These settings will remain until you change them again.
Quality
1 Press Menu/Set, 3, 1.
1.Quality
2 Press ▲ or ▼ to select Auto, Text or Photo.
Press Menu/Set.
3 Press Stop/Exit.
Adjusting contrast
You can adjust copy contrast to make copies darker or lighter.
1 Press Menu/Set, 3, 2.
- Contrast
2 Press ▲ to increase the contrast.
—OR—
Press ▼ to decrease the contrast.
Press Menu/Set.
3 Press Stop/Exit.
Out of Memory message
If the memory becomes full while you are making copies, the LCD message will guide you through the next step.
If you get an Out of Memory message while scanning a subsequent page, you will have the option to press Start to copy the pages scanned so far, or to press Stop/Exit to cancel the operation.

Note
To gain extra memory, you can turn off Fax Storage.
(See Turning off Remote Fax Options on page 6-2.)
—OR—
Print the faxes that are in the memory. (See Printing a fax from the memory on page 4-5.)
When you get an Out of Memory message, you may be able to make copies if you first print incoming faxes in the memory to restore the memory to 100%.
9
Important information for EU
IEC 60825-1 Specification
This machine is a Class 1 laser product as defined in IEC60825-1:2007 (EN60825-1:F2007) specifications. The label shown below is attached in countries where required.

This machine has a Class 3B Laser Diode which emits invisible laser radiation in the Scanner Unit. The Scanner Unit should not be opened under any circumstances.
Laser Diode
Wave length: 770 - 810 nm
Output: 5 mW max.
Laser Class: Class 3B

CAUTION
Use of controls, adjustments or performance of procedures other than those specified in this manual may result in hazardous radiation exposure.
Disconnect device
This product must be installed near an electrical socket that is easily accessible. In case of emergencies, you must disconnect the power cord from the electrical socket to shut off power completely.
Radio interference (220-240V Model only)
This product complies with EN55022 (CISPR Publication 22)/Class B. When connecting the machine to a computer, ensure that you use the following interface cables.
- A USB cable which must not exceed 2.0 metres in length.
- A shielded parallel interface cable with twisted-pair conductors and that is marked "IEEE 1284 compliant". The cable must not exceed 2.0 metres in length.
Important safety instructions
1 Read all of these instructions.
2 Save them for later reference.
3 Follow all warnings and instructions marked on the product.
4 Unplug this product from the wall socket before cleaning inside of the machine. Do not use liquid or aerosol cleaners. Use a damp cloth for cleaning.
5 Do not place this product on an unstable cart, stand, or table. The product may fall, causing serious damage to the product.
6 Slots and openings in the cabinet and the back or bottom are provided for ventilation; to ensure reliable operation of the product and to protect it from overheating, these openings must not be blocked or covered. The openings should never be blocked by placing the product on a bed, sofa, rug, or other similar surface. This product should never be placed near or over a radiator or heater. This product should never be placed in a built-in installation unless proper ventilation is provided.
7 This product should be operated from the type of power source indicated on the label. If you are not sure of the type of power available, call your dealer or local power company.
8 This product is equipped with a 3-wire grounded plug. This plug will only fit into a grounded power outlet. This is a safety feature. If you are unable to insert the plug into the outlet, call your electrician to replace your obsolete outlet. Do not defeat the purpose of the grounded plug.
9 Use only the power cord supplied with this machine.
10 Do not allow anything to rest on the power cord. Do not place this product where people can walk on the cord.
11 Do not place anything in front of the machine that will block received faxes. Do not place anything in the path of received faxes.
12 Wait until pages have exited the machine before picking them up.
13 Never push objects of any kind into this product through cabinet slots, since they may touch dangerous voltage points or short out parts resulting in the risk of fire or electric shock. Never spill liquid of any kind on the product. Do not attempt to service this product yourself because opening or removing covers may expose you to dangerous voltage points and other risks and may void your warranty.
14 Unplug this product from the power socket and refer all servicing to your Authorized Service Personnel under the following conditions:
- When the power cord is damaged or frayed.
- If liquid has been spilled into the product.
- If the product has been exposed to rain or water.
- If the product does not operate normally when the operating instructions are followed. Adjust only those controls that are covered by the operating instructions. Improper adjustment of other controls may result in damage and will often require extensive work by a qualified technician to restore the product to normal operation.
- If the product has been dropped or the cabinet has been damaged.
- If the product exhibits a distinct change in performance, indicating a need for service.
15 To protect your product against power surges, we recommend the use of a power protection device (Surge Protector).
16 To reduce the risk of fire, electric shock and injury to people, note the following:
- Do not use this product near appliances that use water, a swimming pool or in a wet basement.
- Do not use the machine's telephone during an electrical storm (there is the remote possibility of an electrical shock) or to report a gas leak in the vicinity of the leak.
- Do not dispose of batteries in a fire. They may explode. Check with local codes for possible special disposal instructions.
Trademarks
Windows and Microsoft are registered trademarks of Microsoft in the U.S. and other countries.
Each company whose software title is mentioned in this manual has a Software License Agreement specific to its proprietary programs.
All other brand and product names mentioned in this User's Guide, are registered trademarks of their respective companies.
10
Important information for USA and Canada
Standard telephone and FCC Notices
These notices are in effect on models sold and used in the United States only.
This equipment is hearing-aid compatible.
When programming emergency numbers or making test calls to emergency numbers:
■ Remain on the line and briefly explain to the dispatcher the reason for the call before hanging up.
■ Perform these activities in the off-peak hours, such as early morning or late evening.
This equipment complies with Part 68 of the FCC rules and the requirements adopted by the ACTA. On the backside of this equipment is a label that contains, among other information, a product identifier in the format US: AAAEQ##TXXXX. If requested, this number must be provided to the telephone company.
You may safely connect this equipment to the telephone line by means of a standard modular jack, USOC RJ11C.
A plug and jack used to connect this equipment to the premises wiring and telephone network must comply with the applicable FCC Part 68 rules and requirements adopted by the ACTA. A compliant telephone cord and modular plug is provided with this product. It is designed to be connected to a compatible modular jack that is also compliant. See installation instructions for details.
The REN is used to determine the number of devices that may be connected to a telephone line. Excessive RENs on a telephone line may result in the devices not ringing in response to an incoming call. In most but not all areas, the sum of RENs should not exceed five (5.0). To be certain of the number of devices that may be connected to a line, as determined by the total RENs, contact the local telephone company. The REN for this product is part of the product identifier that has the format US:AAAEQ##TXXXX.The digits represented by ## are the REN without a decimal point (e.g., 06 is a REN of 0.6). For earlier products, the REN is separately shown on the label.
If this equipment causes harm to the telephone network, the telephone company will notify you in advance that temporary discontinuance of service may be required. But if advance notice isn't practical, the telephone company will notify the customer as soon as possible. Also, you will be advised of your right to file a complaint with the FCC if you believe it is necessary.
The telephone company may make changes in its facilities, equipment, operations or procedures that could affect the operation of the equipment. If this happens the telephone company will provide advance notice in order for you to make necessary modifications to maintain uninterrupted service.
If trouble is experienced with this equipment, for repair or warranty information, please contact please contact Ricoh Americas Corporation.
CUSTOMER SUPPORT DEPT. at 1-800-FASTFIX. In the event of operation problems (document jam, copy jam, communication error indication), refer to the trouble shooting section in this manual.
If the equipment is causing harm to the telephone network, the telephone company may request that you disconnect the equipment until the problem is resolved.
Connection to party line service is subject to state tariffs. Contact the state public utility commission, public service commission or corporation commission for information.
If your home has specially wired alarm equipment connected to the telephone line, ensure the installation of this equipment does not disable your alarm equipment. If you have questions about what will disable alarm equipment, call your telephone company or a qualified installer.
If you are not able to solve a problem with your machine, please contact RICOH CORP. CUSTOMER SUPPORT DEPT. at 1-800-FASTFIX.

WARNING
For protection against the risk of electrical shock, always disconnect all cables from the wall outlet before servicing, modifying or installing the equipment.
This equipment may not be used on coin service lines provided by the telephone company or connected to party lines.
- Ricoh cannot accept any financial or other responsibilities that may be the result of your use of this information, including direct, special or consequential damages. There are no warranties extended or granted by this document.
This machine has been certified to comply with FCC standards, which are applied to the USA only. A grounded plug should be plugged into a grounded AC power outlet after checking the rating of the local power supply for the machine to operate properly and safely.
Federal Communications Commission (FCC) Declaration of Conformity (USA only)
Responsible Party:
Ricoh Americas Corporation
Address: 5 Dedrick Place, West Caldwell, NJ 07006
Telephone number: 973-882-2000
declares, that the products
Product Name:
Facsimile Transceiver
Model Number:
FAX 1190L
comply with Part 15 of the FCC Rules. Operation is subject to the following two conditions: (1) This device may not cause harmful interference, and (2) this device must accept any interference received, including interference that may cause undesired operation.
This equipment has been tested and found to comply with the limits for a Class B digital device, pursuant to Part 15 of the FCC Rules. These limits are designed to provide reasonable protection against harmful interference in a residential installation. This equipment generates, uses, and can radiate radio frequency energy and, if not installed and used in accordance with the instructions, may cause harmful interference to radio communications. However, there is no guarantee that interference will not occur in a particular installation. If this equipment does cause harmful interference to radio or television reception, which can be determined by turning the equipment off and on, the user is encouraged to try to correct the interference by one or more of the following measures:
■ Reorient or relocate the receiving antenna.
■ Increase the separation between the equipment and receiver.
■ Connect the equipment into an outlet on a circuit different from that to which the receiver is connected.
- Consult the dealer or an experienced radio/TV technician for help.
Caution
Changes or modifications not expressly approved by the party responsible for compliance could void the user's authority to operate the equipment.
Important - about the interface cable
A shield interface cable should be used to ensure compliance with the limits for a Class B digital device.
Industry Canada Compliance Statement (Canada only)
This Class B digital apparatus complies with Canadian ICES-003.
This product must be installed near an AC power outlet that is easily accessible. In case of emergencies, you must disconnect the power cord from the AC power outlet to shut off power completely.
Laser safety
This machine complies with the requirements of IEC60825-1:2007 for class 1 laser product. This equipment is certified as a Class 1 laser product under the U.S. Department of Health and Human Services (DHHS) Radiation Performance Standard according to the Radiation Control for Health and Safety Act of 1968. This means that the equipment does not produce hazardous laser radiation.
Since radiation emitted inside the equipment is completely confined within protective housings and external covers, the laser beam cannot escape from the machine during any phase of user operation.
FDA regulations
U.S. Food and Drug Administration (FDA) has implemented regulations for laser products manufactured on and after August 2, 1976. Compliance is mandatory for products marketed in the United States. One of the following labels on the back of the machine indicates compliance with the FDA regulations and must be attached to laser products marketed in the United States.
Manufactured:
RICOH COMPANY LTD,
3-6, Naka-magome 1-Chome Ohta-ku, Tokyo 143-8555, Japan
Complies with FDA performance standards for laser products except for deviations pursuant to Laser Notice No. 50, dated June 24, 2007.

WARNING
Use of controls, adjustments or performance of procedures other than those specified in this manual may result in hazardous invisible radiation exposure.
Internal laser radiation
Max. Radiation Power 5 mW
Wave Length 770 - 810 nm
Laser Class Class 3B
Important safety instructions
1 Read all of these instructions.
2 Save them for later reference.
3 Follow all warnings and instructions marked on the product.
4 Unplug this product from the wall outlet before cleaning inside of the machine. Do not use liquid or aerosol cleaners. Use a damp cloth for cleaning.
5 Do not place this product on an unstable cart, stand, or table. The product may fall, causing serious damage to the product.
6 Slots and openings in the cabinet and the back or bottom are provided for ventilation; to ensure reliable operation of the product and to protect it from overheating, these openings must not be blocked or covered. The openings should never be blocked by placing the product on a bed, sofa, rug, or other similar surface. This product should never be placed near or over a radiator or heater. This product should never be placed in a built-in installation unless proper ventilation is provided.
7 This product should be operated from the type of power source indicated on the label. If you are not sure of the type of power available, call your dealer or local power company.
8 This product is equipped with a 3-wire grounded plug. This plug will only fit into a grounded power outlet. This is a safety feature. If you are unable to insert the plug into the outlet, call your electrician to replace your obsolete outlet. Do not defeat the purpose of the grounded plug.
9 Do not allow anything to rest on the power cord. Do not place this product where people can walk on the cord.
10 If an extension cord is used with this product, make sure that the total ampere ratings on the products plugged into the extension cord do not exceed the extension cord ampere rating. Also, make sure that the total of all products plugged into the AC power outlet does not exceed 15 amperes (USA only).
11 Do not place anything in front of the machine that will block received faxes. Do not place anything in the path of received faxes.
12 Wait until pages have exited the machine before picking them up.
13 Never push objects of any kind into this product through cabinet slots, since they may touch dangerous voltage points or short out parts resulting in the risk of fire or electric shock. Never spill liquid of any kind on the product. Do not attempt to service this product yourself because opening or removing covers may expose you to dangerous voltage points and other risks and may void your warranty. Refer all servicing to your service representative.
14 Unplug this product from the AC power outlet and refer all servicing to your service representative under the following conditions:
- When the power cord is damaged or frayed.
- If liquid has been spilled into the product.
- If the product has been exposed to rain or water.
- If the product does not operate normally when the operating instructions are followed. Adjust only those controls that are covered by the operating instructions. Improper adjustment of other controls may result in damage and will often require extensive work by a qualified technician to restore the product to normal operation.
- If the product has been dropped or the cabinet has been damaged.
- If the product exhibits a distinct change in performance, indicating a need for service.
15 To protect your product against power surges, we recommend the use of a power protection device (Surge Protector).
16 To reduce the risk of fire, electric shock and injury to people, note the following:
- Do not use this product near appliances that use water, a swimming pool or in a wet basement.
- Do not use the machine's telephone during an electrical storm (there is the remote possibility of an electrical shock) or to report a gas leak in the vicinity of the leak.
- Do not dispose of batteries in a fire. They may explode. Check with local codes for possible special disposal instructions.
17 Caution - To reduce the risk of fire, use only No.26 AWG or larger telecommunication line cord.
Trademarks
Windows and Microsoft are registered trademarks of Microsoft in the U.S. and other countries.
Each company whose software title is mentioned in this manual has a Software License Agreement specific to its proprietary programs.
All other brand and product names mentioned in this User's Guide, are registered trademarks of their respective companies.
11
Troubleshooting and routine maintenance
Troubleshooting
Error messages
As with any sophisticated office product, errors may occur. If this happens, your machine identifies the problem and displays an error message. The most common error messages are shown below.
You can correct most problems by yourself.
| ERROR MESSAGES | ||
| ERROR MESSAGE | CAUSE ACTION | |
| Back Cover Open | The back cover is not completely closed. | Close the back cover of the machine. |
| BT Call Sign On | The machine is set BT Call Sign to On. You cannot change the Receive Mode from Manual to another mode. | Set BT Call Sign to Off.See BT Call Sign (For U.K. Only) on page A-1. |
| Change Drum Soon | The drum unit is near the end of its life. | Use the drum unit until you have a print quality problem; then replace the drum unit with a new one.See Replacing the drum unit on page 11-24. |
| Comm.Error Poor p | phone line quality caused a communication error. | Try sending the fax again or try connecting the machine to another telephone line. If the problem continues, call the telephone company and ask them to check your phone line. |
| Connection Fail | You tried to poll a fax machine that is not in Polled Waiting mode. | Check the other fax machine's polling setup. |
| Cooling Down Wait for a while | The temperature of the drum unit or toner cartridge is too hot. The machine will pause its current print job and go into cooling down mode. During the cooling down mode, you will hear the cooling fan running while the display on the machine shows Cooling Down, and Wait for a while. | You must wait 20 minutes for it to cool. |
| Cover is Open The | front cover is not completely closed. | Close the front cover of the machine. |
| Data Remaining P | print data is left in the machine's memory. | Re-start printing from your computer. |
| Disconnected The | other person or other person's fax machine stopped the call. | Try to send or receive again. |
| ERROR MESSAGE CAUSE ACTION | ||
| Document Jam The | document was not inserted or fed properly, or the document scanned from the ADF was too long. | See Document jams on page 11-4.See Using the automatic document feeder (ADF) on page 1-8. |
| Drum Error | The drum unit needs to be cleaned. | See Cleaning the corona wire on page 11-21. |
| DR Mode in Use The | the machine is set to Distinctive Ring mode. You can not change the Receive Mode from Manual to another mode. | Set Distinctive Ring to Off.See Turning off the Distinctive Ring on page A-3. |
| Fail to Warm up | The fuser unit is too cold. | Turn off the machine's power switch, and check the machine's environment. If it is in a location that is too hot or too cold, try to cool or warm the room by turning on the air conditioner or heater. Or, change the location. Then, turn on the machine's power switch.(The machine can be disconnected for up to 4 days without losing faxes stored in the memory.) |
| Unit is too Hot | The fuser unit is too hot. | |
| Machine too Hot | The inside of the machine is too hot. | Listen to the machine to check that the cooling fan is spinning.Make sure that the air vents are not covered up or blocked.If the fan is spinning and air vents are clear, you should let the machine cool down for several minutes before using it again.If the fan is not spinning, follow the suggestions below.Turn off the machine's power switch and then on again. If the error message continues leave the machine for several minutes and then try it again. (The machine can be turned off for up to 4 days without losing faxes stored in the memory.) |
| No cartridge The | toner cartridge and drum unit assembly is not installed or is not installed properly. | Reinstall the toner cartridge. |
| No Paper Fed The | machine is out of paper or paper is not properly loaded in the paper tray. | Refill the paper in the paper tray and then press◇ Start.—OR—Remove the paper and load it again and then press◇ Start. |
| No Response/Busy | The number you dialled does not answer or is busy. | Verify the number and try again. |
| Not Registered Y | You tried to access a One-Touch or Speed Dial number that is not programmed. | Set up the One-Touch or Speed Dial number.(See Storing One-Touch numbers on page 5-1 and Storing Speed-Dial numbers on page 5-2.) |
| Out of Memory | The machine's memory is full. | (Fax sending or copy operation in progress)Press Start to send or copy the scanned pages.—OR—Press Stop/Exit and wait until the other operations in progress have finished and then try again.—OR—Clear the faxes from the memory. (See Out of Memory message on page 8-7.) (Printing operation in process)Reduce print resolution.—OR—Clear the faxes from the memory. (See Out of Memory message on page 8-7.)Turn on the Page Protection function. |
| Paper jam Inside | The paper is jammed inside the machine. | (See Paper jams on page 11-5.) |
| Paper Jam Rear | The paper is jammed in the back of the machine. | (See Paper jams on page 11-5.) |
| Paper Jam Tray | The paper is jammed in the paper tray of machine. | (See Paper jams on page 11-5.) |
| Toner Life End | The toner cartridge and drum unit assembly is not installed properly.—OR—The toner is used up and printing is not possible. | Re-install the toner cartridge and drum unit assembly.—OR—Replace the toner cartridge with a new one.(See Replacing the toner cartridge on page 11-21.) |
| Toner Low | If the LCD shows Toner Low, you can still print, however, the machine is telling you that toner is near the end of its life and will soon need replacing. | Order a new toner cartridge now. |
| Unable to Init. (Initialize) | The machine has a mechanical problem. | Turn off the machine's power switch and then on again. If the error message continues leave the machine for several minutes and then try to print, copy or scan again. (The machine can be turned off for up to 4 days without losing faxes stored in the memory.) |
| Unable to Print | ||
| Unable to Scan | ||
| Wrong Paper Size | Paper is not the correct size. Load the correct size of paper (Letter or A4) and then press Start. | |
Checking if the machine has faxes in its memory
1 Press Menu/Set, 9, 0, 1.
2 If the LCD shows No Data, there are no faxes left in the machine's memory.
—OR—
If the LCD shows Enter Fax No. there are faxes in the machine's memory.

Note
You can transfer the Fax Journal report to another fax machine by pressing Menu/Set, 9, 0, 2 in Step 1.
You can transfer the faxes to another fax machine. See Forwarding faxes to another fax machine.
Forwarding faxes to another fax machine
If you have not set up your Station ID you cannot enter fax forward mode. (See Setting the Station ID on page 2-2.)
1 Enter the fax number to which the faxes will be forwarded.
2 Press Start.
Document jams
If the document is jammed, follow the steps below.
Documents can jam if they are not inserted or fed properly, or if they are too long. Follow the steps below to clear a document jam.
1 Open the control panel cover.
② Carefully pull the jammed document toward the front of the machine.

natural_image
Line drawing of a printer with hands operating it, showing paper sheet and printer casing (no text or symbols)3 Close the control panel cover. Press Stop/Exit.
Paper jams
To clear paper jams, please follow the steps in this section.

CAUTION
After you have just used the machine, some parts inside the machine are extremely hot. When you open the front cover or back cover of the machine, never touch the shaded parts shown in the following diagram.


natural_image
Line drawing of a printer with a paper airplane being inserted (no text or symbols)
Paper is jammed inside the machine
1 Pull the paper tray completely out of the machine.
2 Pull the jammed paper out of the paper tray opening.

natural_image
Line drawing of a printer with hands inserting a card into the machine (no text or symbols visible)③ Open the front cover.

natural_image
Line drawing of hands operating a printer with a paper roll (no text or symbols visible)4 Pull out the drum unit and toner cartridge assembly. The jammed paper may be pulled out with the toner cartridge and drum unit assembly, or this may release the paper so you can pull it out of drum unit or the paper tray opening.

flowchart
graph TD
    A["Start"] --> B["Printer Printing"]
    B --> C["End"]
IMPORTANT
To prevent damage to the machine caused by static electricity, do not touch the electrodes shown in the following diagram.

natural_image
Diagram of a machine tool interacting with mechanical components, showing a close-up view of the mechanism (no text or symbols present)Chapter 11
5 Put the drum unit and toner cartridge assembly back into the machine.

natural_image
Line drawing of a printer with a hand inserting a slot into the front panel (no text or symbols visible)6 Close the front cover.

natural_image
Line drawing of a printer with internal components and ventilation slots (no text or symbols)7 Put the paper tray in the machine.
Paper is jammed at the back of the machine
1 Open the front cover.

natural_image
Illustration of hands operating a printer with a paper feed into the case (no text or symbols visible)② Pull out the drum unit and toner cartridge assembly.

natural_image
Line drawing of a printer with a hand inserting a slot into the front panel (no text or symbols visible)3 Open the back cover.

natural_image
Line drawing of a printer with a hand inserting a card into the cover (no text or symbols)4 Pull the tab toward you to open the rear chute cover.

natural_image
Illustration of a hand inserting a component into a printer, showing internal structure and a magnified view (no text or symbols)5 Pull the jammed paper out of the fuser unit. If the jammed paper cannot be pulled out easily, push down the blue tab with one hand as you gently pull out the paper with the other hand.

natural_image
Illustration of hands using a computer to adjust or install a device, with a magnified inset showing a drop in the action (no text or symbols present)6 Close the back cover.
7 Put the drum unit and toner cartridge assembly back into the machine.

natural_image
Line drawing of a printer with a hand inserting a slot into the main body (no text or symbols visible)8 Close the front cover.
Paper is jammed inside the drum unit and toner cartridge assembly
1 Open the front cover.

natural_image
Illustration of hands operating a printer with a scroll wheel (no text or symbols visible)2 Pull out the drum unit and toner cartridge assembly.

natural_image
Line drawing of a printer with internal components and a hand inserting a cable (no text or symbols visible)3 Hold down the lock lever on the left and pull the toner cartridge out of the drum unit. Take out the jammed paper if there is any inside the drum unit.

natural_image
Illustration of hands using a handheld device to interact with a circular diagram showing a hand holding a tool, no text or symbols present.Chapter 11
4 Put the toner cartridge back into the drum unit until you hear it lock into place. If you put it in properly, the lock lever will lift automatically.

natural_image
Illustration of a mechanical component being processed with a magnified inset showing internal components (no text or symbols)5 Put the drum unit and toner cartridge assembly back into the machine.

natural_image
Line drawing of a printer with internal components and a hand inserting a cable (no text or symbols visible)6 Close the front cover.
If you are having difficulty with your machine
If you think there is a problem with the way your faxes look, make a copy first. If the copy looks good, the problem is probably not your machine. Check the chart below and follow the troubleshooting tips.
| DIFFICULTY SUGGESTIONS | |
| Printing or Receiving Faxes | |
| Condensed printHorizontal streaksTop and bottom of sentences are cut off.Missing lines | Usually this is caused by a poor telephone connection. If your copy looks good, you probably had a bad connection with static or interference on the telephone line. Ask the other party to send the fax again. |
| Poor print quality. See Improving the | print quality on page 11-13. |
| Vertical black lines when receiving | Sometimes you may see vertical streaks/black lines on the faxes you receive. Your machine's primary corona wire may be dirty, or the sending party's fax scanner may be dirty. Clean your primary corona wire (See Cleaning the corona wire on page 11-21), or ask the sender to make a copy to see if the problem is with the sending machine. Try receiving from another fax machine. If the problem continues, contact your sales or service representative. |
| Received faxes appear as split or blank pages. | If the received faxes are divided and printed on two pages or if you get an extra blank page, your Paper Size setting may not be correct for the paper you are using. (See Setting the Paper Size on page 2-5.) Make sure that auto reduction menu setting is turned on. (See Printing a reduced incoming fax (Auto Reduction) on page 4-4.) |
| Phone Line or Connections | |
| Dialling does not work. | Check for a dial tone. Change Tone/Pulse setting. (See Tone or Pulse on page 5-4.) Check all line cord connections. Check power cord connection. If an external phone is connected to the machine, send a manual fax by lifting the handset of the external phone and dialling the number. Wait to hear fax receiving tones before pressing Start. |
| The machine does not answer when called. | Make sure the machine is in the correct receiving mode for your setup. (See Basic sending operations on page 3-4.) Check for a dial tone. If possible, call your machine to hear it answer. If there is still no answer, check the telephone line cord connection. If there is no ringing when you call your machine, ask your telephone company to check the line. |
| Sending Faxes | |
| Poor fax send quality | Try changing your resolution to Fine or S.Fine. Make a copy to check your machine's scanner operation. If the copy quality is not good, clean the scanner.(See Cleaning the scanner on page 11-19.) |
| Transmission Verification Report says 'RESULT:NG' or 'RESULT:ERROR'. | If you send a PC FAX message and get 'RESULT:NG' on the Transmission Verification Report, your machine may be out of memory. To gain extra memory, you can turn off Fax Storage (See Turning off Remote Fax Options on page 6-2), print fax messages in memory (See Printing a fax from the memory on page 4-5) or cancel a Delayed Fax or Polling Job (See Cancelling a fax in progress on page 3-8). If the problem continues, ask the telephone company to check your phone line. |
| If you frequently get transmission errors due to possible interference on the phone line, try changing the Compatibility setting to Basic or Normal. When you change the Compatibility to Basic, the ECM feature is not available. | |
| Vertical black lines when sending. | If the copy you made shows the same problem, your scanner is dirty.(See Cleaning the scanner on page 11-19.) |
| Handling Incoming Calls | |
| The machine 'Hears' Voice as CNG Tone. | If Fax Detect is set to On, your machine is more sensitive to sounds. It may mistakenly interpret certain voices or music on the line as a calling fax machine and respond with fax receiving tones. Deactivate the machine by pressingStop/Exit.Try avoiding this problem by turning Fax Detect to Off.(See Fax Detect (Easy Receive for USA and Canada) on page 4-3.) |
| Sending a Fax Call to the machine. | If you answered at the machine, pressStartand hang up immediately. If you answered on an external or extension phone, press your Fax Receive Code (default setting is(1). When your machine answers, hang up. |
| Custom features on a single line. | If you have Call Waiting, Call Waiting/Caller ID, Voice Mail, an answering machine, an alarm system or other custom feature on a single phone line with your machine, it may create a problem sending or receiving faxes.For Example:If you subscribe to Call Waiting or some other custom service and its signal comes through the line while your machine is sending or receiving a fax, the signal can temporarily interrupt or disrupt the faxes. The ECM feature of this product should help overcome this problem. This condition is related to the telephone system industry and is common to all devices that send and receive information on a single, shared line with custom features. If avoiding a slight interruption is crucial to your business, a separate line with no custom features is recommended. |
| Menu Setting Difficulties | |
| The machine beeps when you try to access the Setup Receive and Setup Send menus. | If the Faxkeyis not illuminated, press it to turn on Fax mode. The Setup Receive setting (Menu/Set, 2, 1) and Setup Send setting (Menu/Set, 2, 2) are available only when the machine is in Fax mode. |
| Copy Quality Difficulties | |
| Vertical streaks appear in copies. | Sometimes you may see vertical streaks on your copies. Either the scanner or the primary corona wire is dirty. Clean them both. (See Cleaning the scanner on page 11-19, Cleaning the laser scanner window on page 11-20 and Cleaning the drum unit on page 11-14.) |
| Printer Difficulties | |
| The machine does not print. Please | make sure:• The machine is plugged in and the power switch is turned On. (See the Quick Setup Guide on page 7.)—OR—• The toner cartridge and drum unit are installed properly. (See Replacing the drum unit on page 11-24.)—OR—• The interface cable is securely connected between the machine and computer. (See the Quick Setup Guide.)—OR—• The correct printer driver has been installed and selected.—OR—• Check to see if the LCD is showing an error message. (See Error messages on page 11-1.)—OR—• The machine is online. Click Start and then Printers and Faxes. Right-click 'TYPE 1190'. Make sure that “Use Printer Offline” is unchecked. |
| The machine prints unexpectedly or it prints garbage. | Turn off the machine's power switch and then on again. If the error message continues leave the machine for several minutes and then try it again. (The machine can be turned off for up to 4 days without losing faxes stored in the memory.) |
| The machine prints first couple of pages correctly, then some pages have text missing. | Your computer is not recognizing the machine's input buffer full signal. Please make sure you connect the interface cable correctly. (See the Quick Setup Guide.) |
| The machine cannot print full pages of a document.Out of Memory message occurs. | Reduce the printing resolution.Reduce the complexity of your document and try again. Reduce the graphic quality or the number of font sizes within your application software.Turn on the Page Protection function. |
| My headers or footers appear when I view my document on the screen but do not appear when I print them. | Your machine can print 62 lines per page. The top two lines and bottom two lines are a restricted area that will not accept print. Adjust the top and bottom margins in your document to allow for this. |
| Paper Handling Difficulties | |
| The machine does not feed paper.The LCD shows No Paper Fed or a Paper Jam message. | If there is no paper, load a new stack of paper into the paper tray. If there is paper in the paper tray, make sure it is straight. If the paper is curled, you should straighten it. Sometimes it is helpful to remove the paper, turn the stack over and put it back into the paper tray. Reduce the amount of paper in the paper tray, and then try again. Check that the manual feed mode is not selected in the printer driver.If the LCD shows Paper Jam and you still have a problem, see Paper jams on page 11-5. |
| The machine does not feed paper from the manual feed slot. | Reinsert the paper firmly, load one sheet at a time. Make sure that manual feed mode is selected in the printer driver. |
| How can I load envelopes? | You can load envelopes from the manual feed slot. Your application software must be set up to print the envelope size you are using. This is usually done in the Page Setup or Document Setup menu of your software. You should refer to the manual provided with your software application. |
| What paper can I use? | You can use plain paper, recycled paper, envelopes, transparencies and labels that are made for laser machines. (For information on paper you can use, see About paper on page 1-9.) |
| How can I clear paper jams? See Paper jams on page 11-5. | |
| Print Quality Difficulties | |
| Printed pages are curled. | Low quality thin or thick paper can cause this problem. Make sure you select the Paper Type that suits the media type you use. (See About paper on page 1-9.) |
| Printed pages are smeared. | The Paper Type setting may be incorrect for the type of print media you are using—OR—The print media may be too thick or have a rough surface. |
| Printouts are too light. | If this problem occurs when making copies or printing received faxes, turn off Toner Save mode in the machine's menu setting. (See Toner Save on page 2-8.) Set Toner Save mode to off in the Advanced tab in the printer driver. |
Improving the print quality
| Examples of poor print quality Recommendation | |
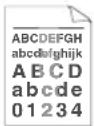 Faint Faint | Check the machine's environment. Conditions such as humidity, high temperatures, and so on may cause this print fault. (See Choosing a location on page 1-2.)If the whole page is too light, Toner Save mode may be on. Turn off Toner Save mode in the Advanced tab of printer driver Properties.—OR—If this problem occurs when making copies or printing received faxes, turn off Toner Save mode in the machine's menu setting. (See Toner Save on page 2-8.) Clean the scanner window and the primary corona wire on the drum unit. (See Cleaning the laser scanner window on page 11-20 and Cleaning the corona wire on page 11-21.) If the print quality has not improved, install a new drum unit. (See Replacing the drum unit on page 11-24.) Install a new toner cartridge. (See Replacing the toner cartridge on page 11-21.) |
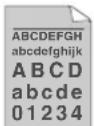 Grey background Grey background | Make sure that you use paper that meets the recommended specifications. (See About paper on page 1-9.)Check the machine's environment - high temperatures and high humidity can increase the amount of background shading. (See Choosing a location on page 1-2.)Install a new toner cartridge. (See Replacing the toner cartridge on page 11-21.) Clean the primary corona wire on the drum unit. (See Cleaning the corona wire on page 11-21.) If the print quality has not improved, install a new drum unit. (See Replacing the drum unit on page 11-24.) |
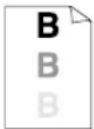 Ghost Ghost | Make sure you use paper that meets our specifications. Rough-surfaced paper or thick print media may cause this problem. (See About paper on page 1-9.) Make sure that you choose the appropriate media type in the printer driver or in the machine's Paper Type menu setting. (See Setting the Paper Type in this User's Guide.) Install a new drum unit. (See Replacing the drum unit on page 11-24.) |
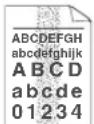 Toner specks Toner specks | Make sure that you use paper that meets our specifications. Rough-surfaced paper may cause the problem. (See About paper on page 1-9.) Clean the primary corona wire and the drum unit. (See Cleaning the corona wire on page 11-21 and Cleaning the drum unit on page 11-14.) If the print quality has not improved, install a new drum unit. (See Replacing the drum unit on page 11-24.) |
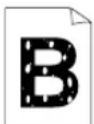 Hollow print Hollow print | Make sure that you use paper that meets our specifications. (See About paper on page 1-9.) Choose Thick paper mode in the printer driver or in the machine's Paper Type menu setting, or use thinner paper than you are currently using. Check the machine's environment because conditions such as high humidity can cause hollow print. (See Choosing a location on page 1-2.) Clean the primary corona wire on the drum unit. (See Cleaning the corona wire on page 11-21.) If the print quality has not improved, install a new drum unit. (See Replacing the drum unit on page 11-24.) |
 All black All black | Clean the primary corona wire on the drum unit. (See Cleaning the corona wire on page 11-21.) If the print quality has not improved, install a new drum unit. (See Replacing the drum unit on page 11-24.) |
Examples of poor print quality Recommendation

White Spots on black text and graphics at 78.5 mm intervals

Black Spots at 78.5 mm intervals
Cleaning the drum unit
Dust, paper powder, glue, and so on may stick to the surface of the photosensitive drum (OPC) and cause black or white spots to appear on printed documents.
Make a few copies of a blank, white sheet of paper. (See Making multiple copies on page 8-2.)
If you still see the spots on printed documents after making multiple copies, clean the drum unit as follows:
1 Remove the drum unit and toner cartridge assembly, and then remove the toner cartridge from the drum unit.
2 Position the print sample in front of the drum unit so you will know the exact position on the drum that is causing the poor print.

natural_image
Line drawing of hands holding a rolled-up document or scroll (no text or symbols visible)3 Turn the black gear on the drum as you check the surface of the OPC drum.
Do not touch the OPC drum with your fingers.

4 When you find the substance on the drum surface that matches the print sample, gently dab the surface of the OPC drum with a cotton swab that is lightly dampened with isopropyl alcohol.
Do not use a scrubbing or wiping motion because this might damage the drum.

natural_image
Line drawing of a mechanical device on a sheet of paper (no text or symbols)Do not try to clean the surface of the OPC drum with a sharp object, such as a ball-point pen, because this might cause permanent damage to the drum unit.
If the print quality still has not improved you need to install a new drum. (See Replacing the drum unit on page 11-24.)
| Examples of poor print quality Recommendation | |
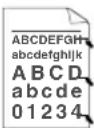 Black toner marks across the page Black toner marks across the page | Make sure that you use paper that meets our specifications. (See About paper on page 1-9.)If you use label sheets for laser printers, the glue from the sheets may sometimes stick to the OPC drum surface. Clean the drum unit. (See Cleaning the drum unit on page 11-14.)Do not use paper that has clips or staples because they will scratch the surface of the drum.If the unpacked drum unit is in direct sunlight or room light, the unit may be damaged.The drum unit may be damaged. Put in a new drum unit. (See Replacing the drum unit on page 11-24). |
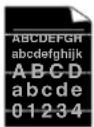 White lines across the page White lines across the page | Make sure that you use paper that meets our specifications. A rough surfaced paper or thick print media can cause the problem. (See About paper on page 1-9.)Make sure that you choose the appropriate media type in the printer driver or in the machine's Paper Type menu setting. (See Setting the Paper Type in this User's Guide.)The problem may disappear by itself. Try printing multiple pages to clear this problem, especially if the machine has not been used for a long time.You may clear the problem by wiping the laser scanner window with a soft cloth. (See Cleaning the laser scanner window on page 11-20.)The drum unit may be damaged. Put in a new drum unit. (See Replacing the drum unit on page 11-24.) |
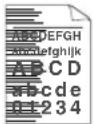 Lines across the page Lines across the page | Clean the primary corona wire in the drum unit. (See Cleaning the corona wire on page 11-21.)You may clear the problem by wiping the laser scanner window with a soft cloth. (See Cleaning the laser scanner window on page 11-20.)The drum unit may be damaged. Put in a new drum unit. (See Replacing the drum unit on page 11-24.) |
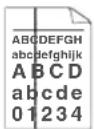 Black lines down the pagePrinted pages have toner stains down the page. Black lines down the pagePrinted pages have toner stains down the page. | Clean the primary corona wire of the drum unit. (See Cleaning the corona wire on page 11-21.)Make sure the primary corona wire's blue tab is at the home position (▲).The drum unit may be damaged. Install a new drum unit. (See Replacing the drum unit on page 11-24.)The toner cartridge may be damaged. Put in a new toner cartridge. (See Replacing the toner cartridge on page 11-21.) Make sure that a torn piece of paper is not inside the machine covering the laser scanner window.The fixing unit may be smudged. Contact your sales or service representative. |
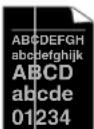 White lines down the page White lines down the page | You may clear the problem by wiping the laser scanner window with a soft cloth. (See Cleaning the laser scanner window on page 11-20.)The toner cartridge may be damaged. Put in a new toner cartridge. (See Replacing the toner cartridge on page 11-21.) |
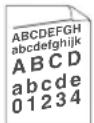 Page skewed Page skewed | Make sure the paper or other print media is loaded properly in the paper tray and that the guides are not too tight or too loose against the paper stack.Set the paper guides correctly.If you are using the manual feed slot, see To load paper or other media in the manual feed slot on page 1-12.The paper tray may be too full.Check the paper type and quality. (See About paper on page 1-9.) |
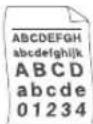 Curl or wave Curl or wave | Check the paper type and quality. High temperatures and high humidity will cause paper to curl.If you don't use the machine very often, the paper may have been in the paper tray too long. Turn over the stack of paper in the paper tray. Also, fan the paper stack and then rotate the paper 180° in the paper tray. |
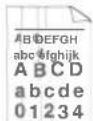 Wrinkles or creases Wrinkles or creases | Make sure that paper is loaded properly.Check the paper type and quality. (See About paper on page 1-9.)Turn over the stack of paper in the tray or rotate the paper 180° in the input tray. |
Compatibility
If you are having difficulty sending or receiving a fax due to possible interference on the phone line, we recommend that you adjust the Equalization for compatibility to reduce the modem speed for fax operations.
1 Press Menu/Set, 2, 0, 1.
- Compatibility
2 Press ▲ or ▼ to select Basic or Normal or High.
Press Menu/Set.
3 Press Stop/Exit.

Note
■ Basic reduces the modem speed to 9600 bps. Unless interference is a recurring problem on your phone line, you may prefer to use it only when needed.
■ Normal sets the modem speed at 14400 bps.
■ High sets the modem speed at 33600 bps.
■ When you change the Compatibility to Basic, the ECM feature is not available.
Packing and shipping the machine
When you transport the machine, use the packing materials that came with your machine. If you do not pack the machine properly, you could void your warranty.
1 Turn off the machine's power switch.
2 Unplug the machine from the telephone wall socket.
3 Unplug all the cables and AC power cord from the machine.
4 Open the front cover.
5 Remove the drum unit and toner cartridge assembly. Leave the toner cartridge installed in the drum unit.
6 Place the drum unit and toner cartridge assembly into the plastic bag and seal the bag.
7 Close the front cover.
Remove the ADF document output support.
Remove the handset and handset curl cord. (For USA and Canada)
8 Wrap the machine in the plastic bag and place it in the original carton with the original packing material.
9 Pack the drum unit and toner cartridge assembly, AC power cord, telephone line cord, ADF document output support flap and printed materials in the original carton as shown below:

flowchart
graph TD
    A["Receipt"] --> B["Printer Printer"]
    B --> C{Processing}
    C -->|Yes| D["Output Box"]
    C -->|No| E["Final Package"]
(for EU and Asia/Oceania)

flowchart
graph TD
    A["Receipt"] --> B["Printer"]
    B --> C{Processing}
    C -->|Yes| D["Output"]
    C -->|No| E["Return"]
    D --> F["Final Box"]
    E --> G["Final Box"]
(for USA and Canada)
10 Close the carton and tape it shut.
Routine maintenance
IMPORTANT
The drum unit contains toner, so handle it carefully. If toner scatters and your hands or clothes get dirty, immediately wipe or wash it off with cold water.
Cleaning the outside of the machine
IMPORTANT
■ Use neutral detergents. Cleaning with volatile liquids such as thinner or benzine will damage the outside surface of the machine.
■ Do not use cleaning materials that contain ammonia.
- Do not use isopropyl alcohol to remove dirt from the control panel. It may crack the panel.
1 Pull the paper tray completely out of the machine.

natural_image
Line drawing of a hand inserting a card into a digital counting machine (no text or symbols)2 Wipe the outside of the machine with a soft cloth to remove dust.

natural_image
Line drawing of a printer with handle and control panel (no text or symbols)3 Remove any paper that is in the paper tray.
4 Wipe the inside of the paper tray with a soft cloth to remove the dust.

natural_image
Line drawing of a hand using scissors to cut or adjust internal components of a mechanical part (no text or symbols)5 Re-load the paper and put the paper tray in the machine.
Cleaning the scanner
1 Turn off the machine's power switch.
2 Lift the control panel cover.
3 Moisten a small clean soft, lint-free cloth with isopropyl alcohol and carefully remove dirt from the glass cover and the white bar above it.

4 Close the control panel cover.
Cleaning the laser scanner window

IMPORTANT
■ Do not use isopropyl alcohol to clean the laser scanner window.
■ Do not touch the laser scanner window with your fingers.
1 Before you clean the inside of the machine, turn off the machine's power switch.
Unplug the telephone line cord first, and then unplug the power cord from the electrical socket.
2 Open the front cover and pull out the drum unit and toner cartridge assembly.

natural_image
Line drawing of a printer with internal components and a hand inserting a cable (no text or symbols visible)
CAUTION
Just after you have used the machine, some internal parts of the machine are extremely HOT! When you open the front cover of the machine, never touch the shaded parts shown in the diagram below.


natural_image
Line drawing of a printer with a paper airplane being inserted (no text or symbols)
IMPORTANT
To prevent damage to the machine from static electricity, do not touch the electrodes shown below.

natural_image
Illustration of a mechanical device with a magnified inset showing internal components (no text or symbols)3 Gently clean the laser scanner window by wiping it with a clean soft, dry cloth. Do not use isopropyl alcohol.

4 Put the drum unit and toner cartridge assembly back into the machine.

natural_image
Line drawing of a printer with internal components and a hand inserting a cable (no text or symbols visible)5 Close the front cover.
6 Plug the machine's power cord back into the electrical socket first, and then plug in the telephone line cord.
Turn on the machine's power switch.
Cleaning the corona wire
We recommend placing the drum unit and toner cartridge assembly on a cloth or a large piece of disposable paper to avoid spilling and scattering toner.
1 Open the front cover and pull out the drum unit and toner cartridge assembly.

natural_image
Line drawing of a printer with a hand inserting a slot into the main body (no text or symbols visible)2 Clean the primary corona wire inside the drum unit by gently sliding the blue tab from right to left several times.

natural_image
Diagram of a heat exchanger with airflow direction indicated, showing internal components and a close-up inset (no text or symbols)3 Return the blue tab and snap it into the Home position (▼).
IMPORTANT
If you do not return the blue tab to the Home position (▼), your printed pages may have vertical black stripes on them.
4 Reinstall the drum unit and toner cartridge assembly in the machine.
5 Close the front cover.
Replacing the toner cartridge
The toner cartridge can print up to 2,500 pages. When the toner cartridge is running low, the LCD shows Toner Low. Actual page count will vary depending on your average type of document (i.e., standard letter, detailed graphics).
Note
It is a good idea to keep a new toner cartridge ready for use when you see the Toner Low warning.
Discard the used toner cartridge according to local regulations, keeping it separate from domestic waste. Be sure to seal the toner cartridge tightly so toner powder does not spill out of the cartridge. If you have questions, call your local waste disposal office.
We recommend that you clean the machine and drum unit when you replace the toner cartridge. (See Cleaning the laser scanner window on page 11-20 and Cleaning the corona wire on page 11-21.)
How to replace the toner cartridge

CAUTION
Just after you use the machine, some internal parts of the machine will be extremely HOT! Never touch the shaded parts shown in the illustration.

1 Open the front cover and pull out the drum unit and toner cartridge assembly.

natural_image
Line drawing of a printer with internal components and a hand inserting a cable (no text or symbols)
IMPORTANT
To prevent damage to the machine from static electricity, do not touch the electrodes shown below.

natural_image
Diagram of a printer with mechanical components being inserted into it, showing internal parts and no visible text or symbols.2 Hold down the lock lever on the left and pull the toner cartridge out of the drum unit.

natural_image
Illustration of hands using a handheld device to interact with a person's face, showing motion and hand positioning (no text or symbols)
IMPORTANT
■ Place the drum unit on a drop cloth or large piece of disposable paper to avoid spilling and scattering the toner.
■ Handle the toner cartridge carefully. If toner scatters on your hands or clothes, immediately wipe it off or wash it with cold water.
3 Unpack the new toner cartridge. Place the used toner cartridge into the aluminium bag and discard it according to local regulations.
Troubleshooting and routine maintenance

IMPORTANT
This machine is designed to work with toner of a particular specification and will work to a level of optimum performance when used with genuine our branded toner cartridges. We cannot guarantee this optimum performance if toner or toner cartridges of other specifications are used. We do not therefore recommend the use of cartridges other than genuine our branded cartridges with this machine.
If damage is caused to the drum unit or other part of this machine as a result of using other manufacturer's products with this machine, any repairs required as a result may not be covered by the warranty.
■ Wait to unpack the toner cartridge until immediately before you install it in the machine. If a toner cartridge is left unpacked for a long period of time, the toner life is shortened.
■ Do not touch the shaded parts shown in the illustrations to prevent any degradation to the print quality.

natural_image
Illustration of two hand-drawn views of a mechanical component, one showing internal structure and the other holding a textured surface (no text or symbols)4 Gently rock the toner cartridge from side to side five or six times to distribute the toner evenly inside the cartridge.

natural_image
Line drawing of hands holding a device with arrows indicating direction (no text or symbols)5 Remove the protective cover.

natural_image
Diagram of a heat exchanger or cooling unit with airflow direction indicated by arrows (no text or symbols)6 Insert the new toner cartridge in the drum unit until it clicks into place. If you put it in properly, the lock lever will lift automatically.

natural_image
Technical illustration of a mechanical component being inserted into a sheet, with close-up insets showing the process (no text or symbols present)Chapter 11
7 Clean the primary corona wire inside the drum unit by gently sliding the blue tab from right to left several times. Return the blue tab to the Home position (▼) before reinstalling the drum unit and toner cartridge assembly.

natural_image
Diagram of a heat exchanger with a hand adjusting its internal structure, showing a zoomed-in view of the component (no text or symbols present)8 Install the drum unit and toner cartridge assembly in the machine.
9 Close the front cover.
Replacing the drum unit
The machine uses a drum unit to create print images on paper. If the LCD shows
Change Drum Soon, the drum unit is near the end of its life and it is time to buy a new one.
Even if the LCD shows Change Drum Soon, you may be able to continue printing without having to replace the drum unit for a while. However, if there is a noticeable deterioration in the output print quality (even before Change Drum Soon appears), then the drum unit should be replaced. You should clean the machine when you replace the drum unit. (See Cleaning the laser scanner window on page 11-20.)

IMPORTANT
When removing the drum unit, handle it carefully because it contains toner. If toner scatters and your hands or clothes get dirty, immediately wipe or wash with cold water.

Note
The drum unit is a consumable item, and it is necessary to replace it periodically. There are many factors that determine the drum life, such as temperature, humidity, type of paper and how much toner you use for the number of pages per print job. The estimated drum life is up to 12,000 pages. The actual number of pages your drum will print may be significantly less than these estimates.
Because we have no control over the many factors that determine the actual drum life, we cannot guarantee a minimum number of pages that will be printed by your drum.
Troubleshooting and routine maintenance

CAUTION
Just after you have used the machine, some internal parts of the machine are extremely HOT! So please be careful.

1 Open the front cover and pull out the drum unit and toner cartridge assembly.

natural_image
Line drawing of a printer with internal components and a hand inserting a paper into the machine (no text or symbols visible)
IMPORTANT
To prevent damage to the printer from static electricity, do not touch the electrodes shown below.

natural_image
Illustration of a machine tool inserting into a device, showing mechanical components and wiring (no text or symbols present)2 Hold down the lock lever on the left and pull the toner cartridge out of the drum unit.

natural_image
Illustration of hands using a mechanical device to interact with a surface, showing a magnified inset of the hand (no text or symbols present)
Note
Discard the used drum unit according to local regulations, keeping it separate from domestic waste. Be sure to seal the drum unit tightly so toner powder does not spill out of the unit. If you have questions, call your local waste disposal office.

IMPORTANT
Wait to unpack the new drum unit until immediately before installing it. Place the old drum unit into the plastic bag.
3 Unpack the new drum unit.
4 Install the toner cartridge into the new drum unit until it clicks into place. If you put it in properly, the lock lever will lift automatically.

natural_image
Illustration of a mechanical component being processed with tool, showing assembly and disassembly (no text or symbols)5 Reinstall the drum unit and toner cartridge assembly in the machine.
6 Do not close the front cover.
7 Press Options.
Replace Drum?
1.Yes 2.No
To confirm you are installing a new drum, press 1.
8 When the LCD shows Accepted, close the front cover.

IMPORTANT
If toner scatters and your hands or clothes get dirty, immediately wipe off or wash with cold water.
Machine Information
Checking the Serial Numbers
You can view the machine's serial number on the LCD.
1 Press Menu/Set, 4, 1.
1.Serial No.
2 Press Stop/Exit.
Checking the Page Counters
You can view the machine's page counters for copies, printer pages, reports and lists, faxes or a summary total.
1 Press Menu/Set, 4, 2.
2.Page Counter
2 Press ▲ or ▼ to select Total, Copy, Print or List/Fax.
| Total | :XXXXXX |
| Copy | :XXXXXX |
| :XXXXXX | |
| List/Fax | :XXXXXX |
3 Press Stop/Exit.
Checking the Drum Life
You can view the machine's drum life on the LCD.
1 Press Menu/Set, 4, 3.
3.Drum Life
Remaining:XXX%
2 Press Stop/Exit.
A
Appendix A
Telephone services for U.K.
BT Call Sign (For U.K. Only)
This machine feature lets you use the BT Call Sign subscriber service which allows you to have at least two separate telephone numbers on one phone line. Each phone number has its own distinctive ringing pattern, so you know which phone number is ringing. This is one way you can have a separate phone number for your machine.
Your machine has a BT Call Sign compatible distinctive ringing function, allowing you to dedicate a second phone number (on the same phone line) just for receiving faxes.

Note
■ You can switch BT Call Sign off temporarily, then turn it back on. When you get a new fax number, make sure you reset this function. The machine will automatically answer incoming calls that use your new fax number.
■ When you set the BT Call Sign feature to ON, the receive mode is set to Manual automatically. Manual mode will not respond to incoming telephone calls, since the number you use for telephone calls will use the normal ring pattern.
To enable the machine to work with BT Call Sign (Only with your external phone)
1 Press Menu/Set, 2, 0, 2.
The screen displays the current setting of this feature.
2 Press ▲ or ▼ to select On (or Off).
3 Press Menu/Set.
4 Press Stop/Exit.

Note
If you turn off BT Call Sign, the receive mode stays set to Manual. You will need to set receive mode again. (See Choosing the Receive Mode on page 4-1.)
Setting up telephone services (for USA and Canada)
Your machine supports the Distinctive Ring and Caller ID subscriber telephone services that some telephone companies offer.

Note
If you have Voice Mail, Call Waiting, Call Waiting/Caller ID, RingMaster, an answering service, an alarm system or other custom features on your telephone line, it may affect the way your machine works. (See Custom features on page 1-13 and Custom features on a single line. on page 11-10.)
■ If you have Voice Mail on your phone line, please read the following carefully.
Distinctive Ring
This user's guide uses the term ‘Distinctive Ring’ but different telephone companies have other names for this service such as SmartRing, RingMaster, Teen-Ring, Indent-a-Call or Indent-a-Ring.
What does your telephone company's 'Distinctive Ring' do?
Your telephone company's Distinctive Ring service allows you to have more than one number on the same phone line. If you need more than one phone number, it is cheaper than paying for an extra line. Each phone number has its own distinctive ring pattern, so you will know which phone number is ringing. This is one way you can have a separate phone number for your machine.

Note
Please call your telephone company for availability and rates.
What does 'Distinctive Ring' do?
The machine has a Distinctive Ring feature that allows you to use your machine to take full advantage of the telephone company's Distinctive Ring service. The new phone number on your line can just receive faxes.

Note
You must pay for your telephone company's Distinctive Ring service before you program the machine to work with it.
Do you have Voice Mail?
If you have Voice Mail on the phone line that you will install your new machine on, there is a strong possibility that Voice Mail and the machine will conflict with each other while receiving incoming calls. However, the Distinctive Ring feature allows you to use more than one number on your line, so both Voice Mail and the machine can work together without any problems. If each one has a separate phone number, neither will interfere with the other's operations.
If you decide to get the Distinctive Ring service from the telephone company, you will need to follow the directions on next page to 'register' the new Distinctive Ring pattern they give you. This is so your machine can recognize its incoming calls.

Note
You can change or cancel the Distinctive Ring pattern at any time. You can switch it off temporarily, and turn it back on later. When you get a new fax number, make sure you reset this feature.
Before you choose the ring pattern to register
You can only register one Distinctive Ring pattern with the machine. Some ring patterns cannot be registered. The ring patterns below are supported by this machine. Register the one your telephone company gives you.
| Ring Pattern | Rings | |
| 1 long-long |  | |
| 2 short-long-short |  | |
| 3 short-short-long |  | |
| 4 very long (normal pattern) |  | |

Note
If the ring pattern you received is not on this chart, please call your telephone company and ask for one that is shown.
■ The machine will only answer calls to its registered number.
The first two rings are silent on the machine. This is because the fax must «listen» to the ring pattern (to compare it to the pattern that was ‘registered’). (Other telephones on the same line will ring.)
If you program the machine properly, it will recognize the registered ring pattern of the 'fax number' within 2 ring patterns and then answer with a fax tone. When the 'voice number' is called, the machine will not answer.
Registering the Distinctive Ring pattern
Very important!
After you have set the Distinctive Ring feature to ON, the receive mode is set to Manual automatically. Unless you have a TAD or Voice Mail set up on the Distinctive Ring number, Manual mode means you must answer all the calls yourself. You can not change the receive mode to another mode while the Distinctive Ring is set to on.
1 Press Menu/Set, 2, 0, 2.
- Distinctive
2 Press ▲ or ▼ to select Set.
Press Menu/Set.
3 Press ▲ or ▼ to select the stored ring pattern you want to use.
Press Menu/Set.
(You will hear each pattern as you scroll through the four patterns. Make sure you choose the pattern that the telephone company gave you.)
4 Press Stop/Exit. Distinctive Ring is now set to on.
Turning off the Distinctive Ring
1 Press Menu/Set, 2, 0, 2.
- Distinctive
2 Press ▲ or ▼ to select off.
Press Menu/Set.
3 Press Stop/Exit.

Note
If you turn off Distinctive Ring, the machine will stay in Manual receive mode. You will need to set the Receive Mode again. (See To select or change your Receive Mode on page 4-2.)
Caller ID

Note
The Caller ID feature lets you use the Caller ID subscriber service offered by many local telephone companies. This service displays the telephone number, or name if it is available, of your caller as the line rings.
After a few rings, the LCD shows the telephone number of your caller (and name, if available). Once you pick up the handset, the Caller ID information disappears from the LCD, but the call information remains stored in the Caller ID memory.
■ You will see the first 16 characters of the number (or name).
■ Out of Area display means call originated outside your Caller ID service area.
■ Private Call display means the caller has intentionally blocked transmission of information.
You can print a list of Caller ID information received by your machine. (See Printing Caller ID List on page A-4.)
Caller ID service varies with different carriers. Call your local telephone company to determine the kind of service available in your area.
Viewing Caller ID List
Caller ID memory stores information for up to thirty calls. When the thirty-first call comes in, information about the first call is erased. You can scroll through Caller ID information to review those calls made to your machine.
1 Press Menu/Set, 2, 0, 3.
- Caller ID
2 Press ▲ or ▼ to select Display#.
Press Menu/Set.
The caller ID of the last call will appear on the display. If no ID is stored, the beeper will sound and No Caller ID will appear on the display.
3 Press ▲ or ▼ to scroll through the Caller ID memory to select the Caller ID you want to view, and then press Menu/Set. The LCD shows the caller's number and the date and time of the call.
4 Press to return to the Caller ID listing. —OR—
Press Stop/Exit.
Printing Caller ID List
1 Press Menu/Set, 2, 0, 3.
- Caller ID
2 Press ▲ or ▼ to select Print Report. Press Menu/Set.
If no ID is stored, the beeper will sound and No Caller ID will appear on the display.
3 Press Start.
4 After printing has finished, press Stop/Exit.
Call Waiting
The Call Waiting feature lets you use the Call Waiting subscriber service offered by many local telephone companies. This feature enables you to take a second call on your machine, without disconnecting the first caller.
1 To answer a Call Waiting signal while you are talking on the phone, ask the other party if you can put them on Hold to catch the other call.
2 Press Search/Speed Dial to switch to the second call.
3 To switch back to the first call, press Search/Speed Dial again.

Note
Either caller can hang up at any time. However, if you hang up you will disconnect both callers.
Telephone Service for Australia
Telstra® FaxStream® Duet® (Distinctive Ringing)
Telstra® FaxStream® Duet® is an enhanced Public Switched Telephone Service (PSTS) offered by Telstra® that allows you to have an additional number on one phone line, with its own distinctive ring pattern. Telstra® FaxStream® Duet® is a call handling feature that helps users distinguish voice and facsimile calls. With FaxStream® Duet®, incoming calls to a fax number are announced by a different, distinctive ring signal. Only one call can be answered (or made) at any one time and while this call is in progress, incoming calls to either number will be presented with a busy tone.
Your machine has a Distinctive Ringing function, allowing you to dedicate one phone number just for receiving faxes.

Note
After you have set the Distinctive Ring feature to On, the receive mode is set to Manual automatically. If you don't have a TAD or Voice Mail set up on the Distinctive Ring number, Manual mode means you must answer all the calls yourself. You can not change the receive mode from Manual mode while the Distinctive Ring is set to on.
What is the Advantage of using Telstra® FaxStream® Duet® Function?
Using Telstra® FaxStream® Duet® is the most efficient way to receive both fax and telephone calls on the same line. When the voice call comes in, all phones (extension and external) and the fax machine will ring to alert you to pick it up. If a fax call comes in, the fax machine will answer automatically without ringing, whereas the extension and external phones will ring with a distinctive ring pattern. It is also a more efficient way of operating a Fax machine with an extension phone as you do not have to use the remote activation codes. It gives you two independent numbers without the higher cost of a second line.
How does Telstra® FaxStream® Duet® Work?
Incoming calls to the voice number, will have the standard ring pattern of long, long tone, followed by a pause, repeated, while the new fax number will have a different ring pattern of three short bursts of ring, repeated at regular intervals.
When FaxStream® Duet® is On and you receive a voice call all extension and external phones will ring with a standard ring pattern. The fax machine will ring on the third ring with a standard ring pattern. All external and the extension phones will continue to ring until you or a telephone answering device can answer the voice number.
When FaxStream® Duet® is On and you receive a fax call on the Duet® number the Fax machine will answer and automatically receive the fax message without ringing. On the other hand, all extension and external phones will ring with a distinctive ring pattern. Do not answer the phone as you are receiving a fax message.

flowchart
graph TD
    A["Incoming Call\n(either Voice or Fax)"] --> B["All extension phones ring,\nfax machine is silent."]
    B --> C["Registered Duet (Fax) Number"]
    B --> D["Main number (Voice Number)"]
    C --> E["Fax machine automatically receives and prints fax message without ringing."]
    D --> F["Fax machine begins ringing on third ring."]
    E --> G["You answer the call at an external phone or an extension phone."]
    F --> H["Telephone Answering Device (TAD) answers the call."]
Set the Distinctive Ringing to ON
1 Press Menu/Set, 2, 0, 2.
- Distinctive
The screen displays the current setting of this feature.
2 Press ▲ or ▼ to select On (or Off).
Press Menu/Set.
3 Press Stop/Exit.
Caller ID (Caller IDentification)
Caller ID is a telephone service that allows the subscriber to see a display of the caller's phone number or name as the telephone rings. It is a fast way to screen your calls. You can respond quickly to calls you missed, because Caller IDs are received and stored in your machine memory.

Note
To get the Caller ID Service: apply for the Caller ID service at your local telephone company, if available.
Advantages of Caller ID
For Business
All businesses profit from a quicker response to customer calls. Businesses that provide mail order services, money-lending services or provide confidential information, can protect themselves from false orders or acceptance of false identification.
At Home
Residential customers can protect themselves from unwanted calls.
How Does the Caller ID Work?
The Caller ID Appears on the Display When Your Telephone Rings
As your telephone rings, the display shows you the caller's phone number or name if the name has stored in the One-Touch and Speed-Dial. Once you pick up the handset, the caller's ID disappears. You will see up to the first 16 characters of the number on the display.

Note
If Out of Area appears on the display, it means that the call came from outside your caller ID service area or a public phone. *
If Private Call appears on the display, it means the caller intentionally blocked the transmission of his/her ID. *
If Unavailable appears on the display, it means that the call came from outside your caller ID service area or from a public phone.
* Depends on network Function.
The Caller ID is Stored in Your Machine Memory
The machine can store a maximum of the last 30 incoming caller IDs in the memory, along with the time and date of reception. The 31st call will cause the oldest ID to be erased.
The Caller ID information stored in the memory can be used for the following.
■ Printing the Caller ID List.
You can review calls you received by checking the Caller IDs in memory. This report will list the Date, Time, Phone Number (Caller ID) name, and type of Call (Comment) if available.
Viewing Caller ID List
Caller ID memory stores information for up to thirty calls; when the thirty-first call comes in, information about the first call is erased. You can scroll through Caller ID information to review those calls made to your machine.
1 Press Menu/Set, 2, 0, 3.
- Caller ID
2 Press ▲ or ▼ to select Display# and press Menu/Set.
3 Press ▲ or ▼ to scroll through the Caller ID memory to select the Caller ID you want to view and press Menu/Set.
The next screen shows the caller's telephone number and the date and time of the call.
4 Press Stop/Exit.
Printing Caller ID List
1 Press Menu/Set, 2, 0, 3.
2 Press ▲ or ▼ to select
Print Report.
Press Menu/Set.
3 Press Start.
Telephone Service for New Zealand
FaxAbility
FaxAbility is a service offered by Telecom that allows you to have an additional number on one phone line, with its own distinctive ring pattern. This way, when you get an incoming call, you can identify the number being called by its ring.
How Will the Fax Machine Treat All Other Numbers?
FaxAbility mode ensures that the machine will answer calls to the FaxAbility (secondary) number. When a call comes in to your main number, all the phones will ring. You can set an external answering device (TAD) to answer calls on the other number(s). (See the chart in the following page.)
What is the Advantage of Using the FaxAbility Function?
Using FaxAbility is the most efficient way to receive both fax and telephone calls on the same line. It is much easier for your callers who dial manually. The fax machine will answer with receiving tones so they will not have to press an activation code. And the people who call to talk on your main number will not have to talk to your fax machine. Basically, it gives you two independent numbers without the higher cost of a second line.
How Does FaxAbility Work?
Your telephone number will have the standard ring pattern of long, long tone, while the new number will have a ring pattern of long, silence, long, etc. When FaxAbility is On, you will not hear the first ring of all incoming calls on the fax machine. Extension phones will ring as usual. If the fax machine recognizes the ring pattern, all ringing will stop and the fax machine will answer and automatically receive the fax message. Otherwise, you will hear the extension phones and the fax machine continue to ring. The fax machine always listens to the ring pattern before it answers, so do not pick up the phone during that time. You will quickly learn to recognize the ring pattern for faxes, so you will not be tempted to answer that number. Either you or a telephone answering device can answer the main number(s).

flowchart
graph TD
    A["Incoming Call\n(either Voice or Fax)"] --> B["All extension phones ring,\nfax machine is silent."]
    B --> C["Registered Duet (Fax) Number"]
    B --> D["Main number (Voice Number)"]
    C --> E["Fax machine automatically receives and prints fax message without ringing."]
    D --> F["Fax machine begins ringing on third ring."]
    E --> G["You answer the call at an external phone or an extension phone."]
    F --> H["Telephone Answering Device (TAD) answers the call."]

Note
After you have set the FaxAbility feature to On, the receive mode is set to Manual automatically. Unless you have a TAD or Voice Mail set up on the FaxAbility number, Manual mode means you must answer all the call yourself. You can not change the receive mode to the other mode while the FaxAbility is set to on.
How to Turn FaxAbility OFF or ON
The FaxAbility function is designed to accommodate the FaxAbility service provided by Telecom. To change the setting, repeat Steps 1-3; Step 2 is where you can select either On or Off.
Call Waiting beeps caused by incoming calls on your main number can affect fax transmissions. If you have FaxAbility Service but don't have Call Waiting, you need do nothing at this stage. If you do have Call Waiting as well as FaxAbility, set the Call Waiting menu option to On. See below.
1 Press Menu/Set, 2, 0, 2.
The screen displays
2.Faxability
2 Press ▲ or ▼ to set FaxAbility to On or Off.
If you have FaxAbility service, select On. Press Menu/Set.
3 Press ▲ or ▼ to set Call Waiting to On or Off. If you have Call Waiting service, select On to avoid the trouble caused by Call Waiting.
Press Menu/Set.
4 Press Stop/Exit.
Caller ID (Caller IDentification)
Caller ID is a telephone service that allows the subscriber to see a display of the caller's phone number and name if available as the telephone rings. It is a fast way to screen your calls. You can respond quickly to calls you missed, because Caller IDs are received and stored in your machine memory.

Note
To get the Caller ID Service: apply for the Caller ID service at your local telephone company, if available.
Advantages of Caller ID
For Business
All businesses profit from a quicker response to customer calls. Businesses that provide mail order services, money-lending services or provide confidential information, can protect themselves from false orders or acceptance of false identification.
At Home
Residential customers can protect themselves from unwanted calls.
How Does the Caller ID Work?
The Caller ID Appears on the Display When Your Telephone Rings
As your telephone rings, the display shows you the caller's phone number and name if available. Once you pick up the handset, the caller's ID disappears. You will see up to the first 16 characters of the number and name if available on the display.

Note
If Out of Area appears on the display, it means that the call came from outside your caller ID service area. *
If Private Call appears on the display, it means the caller intentionally blocked the transmission of his/her ID. *
* Depends on network Function.
Viewing Caller ID List
Caller ID memory stores information for up to thirty calls; when the thirty-first call comes in, information about the first call is erased. You can scroll through Caller ID information to review those calls made to your machine.
1 Press Menu/Set, 2, 0, 3.
- Caller ID
2 Press ▲ or ▼ to select Display# and press Menu/Set.
If the name was not received, it will not be displayed.
3 Press ▲ or ▼ to scroll through the Caller ID memory to select the Caller ID you want to view and press Menu/Set.
The next screen shows the caller's telephone number and the date and time of the call.
4 Press Stop/Exit.
Printing Caller ID List
1 Press Menu/Set, 2, 0, 3.
2 Press ▲ or ▼ to select Print Report. Press Menu/Set.
3 Press Start.

If you use the Caller ID for Dial back...
■ Please be sure that you use appropriate dialling procedures for local and national call.
■ Please be sure that you make sure of the details of the exact number to be called back, and the need to insert prefix(es) for manual dialling.
■ Please understand that your machine may not display precisely the digits to be called.
Telephone Service for Some Countries
Distinctive Ringing (For Singapore and Hong Kong)
This machine feature lets you use the Distinctive Ringing subscriber service offered by some telephone companies, which allows you to have several telephone numbers on one phone line. Each phone number has its own Distinctive Ringing pattern, so you will know which phone number is ringing. This is one way you can have a separate phone number for your machine.
Your machine has a Distinctive Ringing function, allowing you to dedicate one phone number just for receiving faxes. You will need to set Distinctive Ringing to On.

You can switch it off temporarily, then turn it back on. When you get a new fax number, make sure you reset this function.
■ The machine will answer only calls to the Distinctive Ringing number.

After you have set the Distinctive Ring feature to On, the receive mode is set to Manual automatically. Unless you have a TAD or Voice Mail set up on the Distinctive Ring number, Manual mode means you must answer all the call yourself. You can not change the receive mode to the other mode while the Distinctive Ring is set to on.
Setting the Distinctive Ringing
1 Press Menu/Set, 2, 0, 2.
- Distinctive
2 Press ▲ or ▼ to select On (or Off).
Press Menu/Set.
3 Press Stop/Exit.
Caller ID (For Singapore and Hong Kong)
The Caller ID feature of this machine lets you use the Caller ID subscriber service offered by many local phone companies. This service provides you, by means of the screen display, the telephone number (or name) of your caller as the line rings. (See Printing Caller ID List on page A-12.)
After a few rings, the screen displays the telephone number of your caller (or name, if available). Once you pick up the handset, the Caller ID information disappears from the screen, but the call information remains stored in the Caller ID memory.
■ You will see the first 16 characters of the number or name.
■ Out of Area display means call originates outside your Caller ID service area.
■ Private Call display means the caller has intentionally blocked transmission of information.

Note
You can print a list of Caller ID information received by your machine.
Caller ID service varies with different carriers. Call your local phone company to determine the kind of service available in your area.
Viewing Caller ID List
Caller ID memory stores information for up to thirty calls; when the thirty-first call comes in, information about the first call is erased. You can scroll through Caller ID information to review those calls made to your machine.
1 Press Menu/Set, 2, 0, 3.
- Caller ID
2 Press ▲ or ▼ to select Display# and press Menu/Set.
If the name was not received, it will not be displayed.
3 Press ▲ or ▼ to scroll through the Caller ID memory to select the Caller ID you want to view and press Menu/Set.
The next screen shows the caller's telephone number and the date and time of the call.
4 Press Stop/Exit.
Printing Caller ID List
1 Press Menu/Set, 2, 0, 3.
2 Press ▲ or ▼ to select Print Report. Press Menu/Set.
3 Press Start.
Advanced receiving operations
Operation from extension telephones
If you answer a fax call on an extension, or an external telephone that is correctly connected to the machine, you can make your machine take the call by using the Fax Receive Code. When you press the Fax Receive Code 51, the machine starts to receive the fax.
If you answer a call and no one is on the line, you should assume that you're receiving a manual fax.
Press 51 and wait for the chirp or until the machine's LCD displays Receiving, and then hang up.

Note
You can also use the Fax Detect feature to make your machine automatically take the call. (See Fax Detect (Easy Receive for USA and Canada) on page 4-3.)
For Fax/Tel mode only
When the machine is in Fax/Tel mode, it will use the F/T Ring Time
(pseudo/double-ringing) to alert you to pick up a voice call.
(For USA and Canada only)
If you're at the machine, you can lift the handset to answer.
(For EU model only)
If you are at the machine with external telephone connected to the EXT jack of the machine, lift the external telephone's
handset, and then press Tel/R to answer.
(For Asia/Oceania model only)
If you are at the machine with external telephone connected to the EXT jack of the machine, lift the external telephone's handset, and then press Hook/Hold to answer.
If you're at an extension phone, you'll need to lift the handset during the F/T Ring Time and then press #51 between the pseudo/double rings.
After taking the call, if no one is on the line, or if someone wants to send you a fax, send the call back to the machine by pressing 51.
Using a cordless external handset
If the base unit of the cordless telephone is connected (see page A-14) and you typically carry the cordless handset elsewhere, it is easier to answer calls during the Ring Delay.

Note
Not all brands of cordless phones are compatible for use with your machine.
Changing the remote codes
If you want to use Remote Activation, you have to turn on the remote codes. The preset Fax Receive Code is 51. The preset Telephone Answer Code is #51. If you want to, you can replace them with your own codes.
1 If it is not illuminated in green, press

(Fax).
2 Press Menu/Set, 2, 1, 4.
4.Remote Code
3 Press ▲ or ▼ to select On (or Off).
Press Menu/Set.
4 Enter the new Fax Receive Code.
Press Menu/Set.
5 Enter the new Telephone Answer Code.
Press Menu/Set.
6 Press Stop/Exit.

Note
If you are always disconnected when accessing your external TAD remotely, try changing the Fax Receive Code and Telephone Answer Code to another three-digit code using the numbers 0-9, ✗, #.
■ Remote Codes might not work with some telephone systems.
Connecting an external device to your machine
Connecting an external telephone
You can connect a separate telephone to your machine as shown in the diagram below in accordance with your country.
Type A
For the countries such as USA, Canada, Spain, Netherlands, Portugal, Poland, Hungary, Czech, Norway, Asia, Oceania and etc.

Type B
For the countries such as UK, France, Italy, Belgium, Sweden, Denmark and Finland.

Type C
For Germany

Type D
For Switzerland

When you are using an external phone, the LCD shows Telephone.
Connecting an external telephone answering device (TAD)
Sequence
You may choose to connect an external answering device. However, when you have an external TAD on the same telephone line as the machine, the TAD answers all calls and the machine "listens" for fax calling (CNG) tones. If it hears them, the machine takes over the call and receives the fax. If it does not hear CNG tones, the machine lets the TAD continue playing your outgoing message so your caller can leave you a voice message.
The TAD must answer within four rings (the recommended setting is two rings). The machine cannot hear CNG tones until the TAD has answered the call, and with four rings there are only 8 to 10 seconds of CNG tones left for the fax “handshake”. Make sure you carefully follow the instructions in this guide for recording your outgoing message. We do not recommend using the toll saver feature on your external answering machine if it exceeds five rings.

Note
If you do not receive all your faxes, reduce the Ring Delay setting on your external TAD.
If You Subscribe to your Telephone Company's Distinctive Ring Service: You may connect an external TAD to a separate wall jack only if you subscribe to your telephone company's Distinctive Ring service, have registered the distinctive ring pattern on your machine, and use that number as a fax number. The recommended setting is at least four rings on the external TAD when you have the telephone company's Distinctive Ring Service. You cannot use the Toll Saver setting.
If You Do Not Subscribe to Distinctive Ring Service: You must plug your TAD into the EXT. jack of your machine. If your TAD is plugged into a wall jack, both your machine and the TAD will try to control the phone line. (See illustration below.)

Improper Setup
Unless you are using Distinctive Ring, do not connect a TAD elsewhere on the same phone line.
When the TAD answers a call, the LCD shows Telephone (for EU) or Ext. Tel in Use (for USA, Canada and Asia/Oceania).
Type A
For the countries such as USA, Canada, Spain, Netherlands, Portugal, Poland, Hungary, Czech, Norway, Asia, Oceania and etc.

Type B
For the countries such as UK, France, Italy, Belgium, Sweden, Denmark and Finland.

Type C
For Germany

Type D
For Switzerland

Connections
The external TAD must be connected as shown in the previous illustration.
1 Set your external TAD to one or two rings. (The machine's Ring Delay setting does not apply.)
2 Record the outgoing message on your external TAD.
3 Set the TAD to answer calls.
4 Set the Receive Mode to External TAD. (See Choosing the Receive Mode on page 4-1.)
Recording outgoing message (OGM) on an external TAD
Timing is important in recording this message.
1 Record 5 seconds of silence at the beginning of your message. (This allows your machine time to listen for the fax CNG tones of automatic transmissions before they stop.)
2 Limit your speaking to 20 seconds.

Note
We recommend beginning your OGM with an initial 5-second silence because the machine cannot hear fax tones over a resonant or loud voice. You may try omitting this pause, but if your machine has trouble receiving, then you must re-record the OGM to include it.
Special line considerations for U.K.
Using extension telephones (For U.K. only)
It may be that your premises are already wired with parallel extension telephones, or you intend to add extension telephones to your line, in addition to your machine. While the simplest arrangement is straightforward parallel connection, there are some reasons as to why this arrangement will cause unsatisfactory service, the most obvious of which is inadvertent interruption of a facsimile transmission by someone picking up an extension telephone in order to make an outgoing call. Additionally, Fax receive code may not operate reliably in such a simple configuration.
This machine may also be set to make a delayed transmission (i.e. a transmission at a pre-set time). This pre-set job may coincide with someone picking up an extension handset.
Such problems can easily be eliminated however, if you arrange modification of your extension wiring circuit, such that extension devices are connected “downstream” of your machine, in a master/slave configuration (see fig. 2 on next page). In such a configuration, this machine can always detect whether a telephone is in use, thus it will not attempt to seize the line during that time. This is known as “telephone off-hook detection.”
The inadvisable configuration is shown in figure 1 on the next page, and the recommended master/slave configuration is shown in figure 2.
This new connection configuration can be arranged by contacting BT, Kingston upon Hull Telecommunications, your PABX (PBX) maintainer or a qualified telephone installation company as appropriate. Simply explained, the extension telephone circuit should be terminated on a normal modular plug (BT 431A style), which in turn should be
inserted into the modular socket of the white "T"-shaped connector provided as part of the line cord assembly.

flowchart
graph TD
    A["INADVISABLE CONNECTION OF EXTENSION SOCKETS"] --> B["EXTENSION SOCKET"]
    B --> C["FAX"]
    D["INCOMING LINE"] --> E["MASTER SOCKET"]
    E --> F["EXTENSION SOCKET"]
    F --> G["EXTENSION SOCKET"]

flowchart
graph TD
    A["EXTENSION SOCKET"] --> B["FAX"]
    C["EXTENSION SOCKET"] --> D["FAX MACHINE MUST BE PLUGGED INTO MASTER SOCKET"]
    E["MASTER SOCKET"] --> F["INCOMING LINE"]
    G["DISCONNECT"] --> H["X"]
    style A fill:#f9f,stroke:#333
    style C fill:#f9f,stroke:#333
    style E fill:#f9f,stroke:#333
    style F fill:#ccf,stroke:#333
    style G fill:#ccf,stroke:#333
    style H fill:#cff,stroke:#333

Note
These phones are now connected as external devices as per page A-14, because they are connected to the fax machine via the T-connector.
Special line considerations for USA and Canada
Roll over phone lines
A roll over phone system is a group of two or more separate telephone lines that pass incoming calls to each other if they are busy. The calls are usually passed down or “rolled over” to the next available phone line in a preset order.
Your machine can work in a roll over system as long as it is the last number in the sequence, so the call cannot roll away. Do not put the machine on any of the other numbers; when the other lines are busy and a second fax call is received, the fax call would be transferred to a line that does not have a fax machine. Your machine will work best on a dedicated line.
Two-line phone system
A two-line phone system is nothing more than two separate phone numbers on the same wall outlet. The two phone numbers can be on separate jacks (RJ11) or combined into one jack (RJ14). Your machine must be plugged into an RJ11 jack. RJ11 and RJ14 jacks may be equal in size and appearance and both may contain four wires (black, red, green, yellow). To test the type of jack, plug in a two-line phone and see if it can access both lines. If it can, you must separate the line for your machine. (See Fax Detect (Easy Receive for USA and Canada) on page 4-3.)
Converting telephone wall outlets
There are three ways to convert to an RJ11 jack. The first two ways may require assistance from the telephone company. You can change the wall outlets from one RJ14 jack to two RJ11 jacks. Or, you can have an RJ11 wall outlet installed and slave or jump one of the phone numbers to it.
The third way is the easiest: Buy a triplex adapter. You can plug a triplex adapter into an RJ14 outlet. It separates the wires into two separate RJ11 jacks (Line 1, Line 2) and a third RJ14 jack (Lines 1 and 2). If your machine is on Line 1, plug the machine into L1 of the triplex adapter. If your machine is on Line 2, plug it into L2 of the triple adapter.

Installing machine, external two-line TAD and two-line telephone
When you are installing an external two-line telephone answering device (TAD) and a two-line telephone, your machine must be isolated on one line at both the wall jack and at the TAD. The most common connection is to put the machine on Line 2, which is explained in the following steps. The back of the two-line TAD must have two telephone jacks: one labeled L1 or L1/L2, and the other labeled L2. You will need at least three telephone line cords, the one that came with your machine and two for your external two-line TAD. You will need a fourth line cord if you add a two-line telephone.
1 Place the two-line TAD and the two-line telephone next to your machine.
2 Plug one end of the telephone line cord for your machine into the L2 jack of the triplex adapter. Plug the other end into the LINE jack on the back of the machine.
3 Plug one end of the first telephone line cord for your TAD into the L1 jack of the triplex adapter. Plug the other end into the L1 or L1/L2 jack of the two-line TAD.
4 Plug one end of the second telephone line cord for your TAD into the L2 jack of the two-line TAD. Plug the other end into the EXT. jack on the left side of the machine.
Triplex Adapter
Two Line Phone

flowchart
graph TD
    A["L1"] --> B["L1"]
    C["L2"] --> D["L2"]
    E["L1+L2"] --> F["L1+L2"]
    G["L1/L2"] --> H["Ext"]
    I["Line"] --> J["Line"]
External Two Line TAD machine
You can keep two-line telephones on other wall outlets as always. There are two ways to add a two-line telephone to the machine's wall outlet. You can plug the telephone line cord from the two-line telephone into the L1+L2 jack of the triplex adapter. Or, you can plug the two-line telephone into the TEL jack of the two-line TAD.
Multi-line connections (PBX)
Most offices use a central telephone system. While it is often relatively simple to connect the machine to a key system or a PBX (Private Branch Exchange), we suggest that you contact the company that installed your telephone system and ask them to connect the machine for you. It is advisable to have a separate line for the machine.
If the machine is to be connected to a multi-line system, ask your installer to connect the unit to the last line on the system. This prevents the unit from being activated each time a telephone call is received.
If you are installing the machine to work with a PBX
1 It is not guaranteed that the unit will operate properly under all circumstances with a PBX. Any cases of difficulty should be reported first to the company that handles your PBX.
2 If all incoming calls will be answered by a switchboard operator, it is recommended that the Receive Mode be set to Manual. All incoming calls should initially be regarded as telephone calls.
3 Make sure the Phone Line Type is set to PBX. (See Setting the Phone Line Type (For EU model only) on page 2-3.)
Custom features on your phone line
If you have Voice Mail, Call Waiting, Call Waiting/Caller ID, RingMaster, an answering service, an alarm system or other custom feature on one phone line it may create a problem with the operation of your machine. (See Custom features on a single line. on page 11-10.)
B
Appendix B
On-screen programming
Your machine is designed to be easy to use with LCD on-screen programming using the navigation keys. User-friendly programming helps you take full advantage of all the menu selections your machine has to offer.
Since your programming is done on the LCD, we have created step-by-step on-screen instructions to help you program your machine. All you need to do is follow the instructions as they guide you through the menu selections and programming options.
Menu table
The Menu table that begins on page B-3 will help you understand the menu selections and options that are found in the machine's programs. Once you become familiar with programming, you can use the Menu table as a quick reference when you want to change your settings.

Note
You can program your machine by pressing Menu/Set, followed by the menu numbers.
For example to set Beeper Volume to Low. Press Menu/Set, 1, 4, 2 and ▲ or ▼ to select Low.
Press Menu/Set.
Memory storage
If there is a power failure, you will not lose your menu settings because they are stored permanently. Temporary settings (such as Contrast, Overseas Mode, and so on) will be lost. You may also have to reset the date and time.

Note
This machine can store faxes up to 4 days if there is a power failure.
Navigation keys
 | |
 | Access the menuGo to the next menu levelAccept an option |
 | Scroll through the current menu level |
 | Go back to the previous menu level or forward to the next menu level |
 | Exit the menu |
You can access the menu mode by pressing Menu/Set.
When you enter the menu, the LCD scrolls.
Press 1 for General Setup menu
1.General Setup
—OR—
Press 2 for Fax menu
2.Fax
—OR—
Press 3 for Copy menu
- Copy
• • • •
Press 0 for Initial Setup
- Initial Setup
You can scroll more quickly through each menu level by pressing the arrow for the direction you want: ▲ or ▼.
Select an option by pressing Menu/Set when that option appears on the LCD.
The LCD will then show the next menu level.
Press ▲ or ▼ to scroll to your next menu selection.
Press Menu/Set.
When you finish setting an option, the LCD shows Accepted.

flowchart
graph LR
    A["Menu Set"] --> B["△"]
    B --> C["Menu Set"]
    C --> D["△"]
    D --> E["Menu Set"]

to exitSelect & Set Select & Se
| Main Menu | Submenu | Menu Selections | Options | Descriptions | Page |
| 1. General Setup | 1. Mode Timer | — | 5 Mins2 Mins1 Min30 Secs0 SecOff | Sets the time to return to Fax mode. | 2-4 |
| 2. Paper Type | — | ThinPlainThickThickerTransprncyRecycled | Sets the type of paper in the paper tray. | 2-4 | |
| 3. Paper Size — | A4 | LetterLegal(USA and Canada only)ExecutiveA5A6B5B6 | Sets the size of the paper in the paper tray. | 2-5 | |
| 4. Volume | 1. Ring | HighMedLowOff | Adjusts the ring volume. 2-5 | ||
| 2. Beeper High | MedLowOff | Adjusts the volume level of the beeper. | 2-6 | ||
| 3. Speaker High | MedLowOff | Adjusts the speaker volume. | 2-6 | ||
| 4. Handset(USA and Canada only) | HighLow | Adjusts the handset volume. | 2-6 | ||
| 5. Volume Amplify(USA and Canada only) | On(Permanent/ Temporary)Off | For the hearing-impaired, you can set the volume to the Vol Amplify: On setting on a permanent or temporary basis. | 2-7 |

Note
The factory settings are shown in Bold.

flowchart
graph LR
    A["Menu Set"] --> B["Select & Set"]
    B --> C["Menu Set"]
    C --> D["Select & Set"]
    D --> E["Menu Set to accept"]
    E --> F["to exit"]
| Main Menu | Submenu | Menu Selections | Options | Descriptions | Page |
| 1. General Setup(Continued) | 5. Auto Daylight(Clock change for Asia) | — On | Off | Changes for Daylight Savings Time automatically. | 2-8 |
| 6. Ecology | 1. Toner Save | On Off | Increases the life of the toner cartridge. | 2-8 | |
| 2. Sleep Time | (0-99) | Conserves power. | 2-8 | ||
| 7. LCD Contrast | — Light | Dark | Adjust the contrast of the LCD. | 2-9 | |
| 8. Security 1. Mem | Security | Prohibits most operations except receiving faxes into the memory. | 2-9 | ||
| 2. Setting Lock | Prohibits the settings for Date & Time, Station ID, Quick-Dial and General Setup. | 2-11 | |||
| 2. Fax 1. Setup | Receive | 1. Ring Delay | 00-0402-10 (For Asia/Oceania)(02 for EU and Asia/Oceania)(04 for USA and Canada) | Sets the number of rings before the machine answers in Fax Only or Fax/Tel mode. | 4-2 |
| 2. F/T Ring Time | 70 Sec40 Sec30 Sec20 Sec(20 Sec for USA and Canada) | Sets the pseudo/double-ring time in Fax/Tel mode. | 4-3 | ||
| 3. Fax Detect(for EU and Asia/Oceania) | On Off | Receives fax messages without pressing Start. | 4-3 | ||
| 3. Easy Receive(USA and Canada only) | On Semi Off | Receives fax messages without pressing Start. | 4-3 | ||
| 4. Remote Code | On(*51, #51) Off | You can answer all calls at an extension or external phone and use codes to turn the machine on or off. You can personalize these codes. | A-14 |

Note
The factory settings are shown in Bold.

flowchart
graph LR
    A["Menu Set"] --> B["△"]
    B --> C["Menu Set"]
    C --> D["△"]
    D --> E["Menu Set"]
    style A fill:#4CAF50,stroke:#333
    style E fill:#4CAF50,stroke:#333
    style C fill:#4CAF50,stroke:#333
    style B fill:#FFA500,stroke:#333
    style D fill:#FFA500,stroke:#333
    style E fill:#FFA500,stroke:#333

to exitSelect & Set Select & Se
| Main Menu | Submenu | Menu Selections | Options | Descriptions | Page |
| 2. Fax(Continued) | 1. SetupReceive(In Fax mode only)(Continued) | 5. AutoReduction | OnOff | Reduces the size of incoming faxes. | 4-4 |
| 6. MemoryReceive(for EU and Asia/Oceania) | OnOff | Automatically stores any incoming faxes in its memory if it runs out of paper. | 4-6 | ||
| 7. PrintDensity(for EU and Asia/Oceania)6. PrintDensity(USA and Canada only) | ▼ -□□□□■+ ▲▼ -□□□□□+ ▲▼ -□□□□□+ ▲▼ -□□□□□+ ▲▼ -■□□□□+ ▲ | Makes printouts darker or lighter. | 4-5 | ||
| 8. Polling RX(for EU and Asia/Oceania) | StandardSecureTimer | Sets up your machine to poll another fax machine. | 4-6 | ||
| 7. Polling RX(USA and Canada only) | — | ||||
| 2. Setup Send(In Fax mode only) | 1. Contrast Auto | LightDark | Changes the lightness or darkness of faxes you send. | 3-5 | |
| 2. FaxResolution | StandardFineS.FinePhoto | Sets the default resolution for outgoing faxes. | 3-5 | ||
| 3. Delayed Fax | — | Sets the time of day in 24 hour format that the delayed faxes will be sent. | 3-11 | ||
| 4. Batch TX On | Off | Combines delayed faxes to the same fax number at the same time of day into one transmission. | 3-11 | ||
| 5. Real Time TX | OffOnNext Fax:OnNext Fax:Off | You can send a fax without using the memory. | 3-6 |

Note
The factory settings are shown in Bold.

flowchart
graph LR
    A["Menu Set"] --> B["△"]
    B --> C["Menu Set"]
    C --> D["△"]
    D --> E["Menu Set"]

to exitSelect & Set Select 8
| Main Menu2. Fax(Continued) | Submenu | Menu Selections | Options | Descriptions | Page |
| 2. Setup Send(In Fax mode only)(Continued) | 6. Polled TX(for EU and Asia/Oceania) | StandardSecure | Sets up the document on your machine to be retrieved by another fax machine. | 3-12 | |
| 6. Polled TX(USA and Canada only) | — | ||||
| 7. Coverpg Setup | OffOnNext Fax:OnNext Fax:OffPrint Sample | Automatically sends a Cover Page you have programmed. | 3-10 | ||
| 8. Coverpage Note | — You can set up | your own comments for fax Cover Page. | 3-9 | ||
| 9. Overseas Mode | OnOff | If you are having difficulty sending faxes overseas, set this to On. | 3-10 | ||
| 3. Set Quick-Dial | 1. One-Touch Dial | Stores One-Touch Dial numbers, so you can dial by pressing one key (and Start). | 5-1 | ||
| 2. Speed-Dial — | Stores Speed-Dial | numbers, so you can dial by pressing only a few keys (and Start). | 5-2 | ||
| 3. Setup Groups | — Sets up a Group | number for Broadcasting. | 5-3 | ||
| 4. Report Setting | 1.XMIT Report(For EU)1. Transmission(For USA, Canada and Asia/Oceania) | OnOn+ImageOffOff+Image | Initial setup for Transmission Verification Report and Fax Journal. | 7-1 | |
| 2. Journal Period | Every 7 DaysEvery 2 DaysEvery 24 HoursEvery 12 HoursEvery 6 HoursEvery 50 Faxes Off | 7-2 |

Note
The factory settings are shown in Bold.

flowchart
graph LR
    A["Menu Set"] --> B["△"]
    B --> C["Menu Set"]
    C --> D["△"]
    D --> E["Menu Set"]
    style A fill:#4CAF50,stroke:#333
    style E fill:#4CAF50,stroke:#333
    style C fill:#4CAF50,stroke:#333
    style B fill:#FFA500,stroke:#333
    style D fill:#FFA500,stroke:#333
    style E fill:#FFA500,stroke:#333

to exitSelect & Set Select & Se
| Main Menu | Submenu | Menu Selections | Options | Descriptions | Page |
| 2. Fax(Continued) | 5. Remote Fax Opt | 1. Forward/Store | OffFax ForwardFax Storage(Backup Print) If you | Sets the machine to forward fax messages to store incoming faxes in the memory (so you can retrieve them while you are away from your machine).u selected FaxForward, you can turn on the safety feature Backup Print. | 6-1 |
| 2. Remote Access | ---You must set your own code for Remote Retrieval. | 6-3 | |||
| 3. Print Document | — Prints incoming taxes stored in the memory. | 4-5 | |||
| 6. Remaining Jobs | — — Checks which jobs are in | the memory and lets you cancel selected jobs. | 3-8 | ||
| 0.Miscellaneous | 1. Compatibility | HighNormalBasic | Adjust the Equalization for transmission problems. | 11-17 | |
| 2. BT Call Sign(For UK only) | OnOff | Use with BT Call Sign. A-1 | |||
| 2. Distinctive(For USA, Canada and Asia/Oceania) | OffSet (On) | Uses the Telephone Company's Distinctive Ring subscriber service to register the ring pattern with the machine. | A-1A-1 | ||
| 3. Caller ID(For USA, Canada and Asia/Oceania) | Display#Print Report | View or print a list of the last 30 Caller IDs stored in the memory. | A-4A-5 | ||
| 3. Copy | 1.Quality | — | TextAutoPhoto | Selects the Copy resolution for your type of document. | 8-7 |
| 2. Contrast — | ▼ -□□□□■+ ▲▼ -□□□□□+ ▲▼ -□□□□□+ ▲▼ -□□□□□+ ▲▼ -■□□□□+ ▲ | Adjusts the contrast for copies. | 8-7 | ||

Note
The factory settings are shown in Bold.

flowchart
graph LR
    A["Menu Set"] --> B["Arrow pointing down"]
    B --> C["Arrow pointing down"]
    C --> D["Menu Set"]
    D --> E["Arrow pointing down"]
    E --> F["Menu Set"]

to exitSelect & Set Select 8
| Main Menu | Submenu | Menu Selections | Options | Descriptions | Page |
| 4. Machine Info. | 1.Serial No. | — | — | Lets you check the serial number of your machine. | 11-26 |
| 2.Page Counter | — Total | Copy Print List/Fax | Lets you check the number of total pages the machine has printed during its life. | 11-26 | |
| 3.Drum Life — | — You can check the | percentage of drum life that remains available. | 11-27 | ||
| 0. Initial Setup (For EU) | 1.Receive Mode | — Fax Only | Fax/Tel External TAD Manual | You can choose the receive mode that best suits your needs. | 4-1 |
| 2.Date/Time | — | — | Puts the date and time on the LCD and in headings of faxes you send. | 2-1 | |
| 3.Station ID | — | Fax: Tel: Name: | Program your name and fax number to appear on each page you fax. | 2-2 | |
| 4.Tone/Pulse — | Tone | Pulse | Selects the dialing mode. 2-1 | 2-1 | |
| 5.Phone Line Set | — Normal | PBX ISDN | Select the phone line type. | 2-3 |

Note
The factory settings are shown in Bold.

flowchart
graph LR
    A["Menu Set"] --> B["△"]
    B --> C["Menu Set"]
    C --> D["△"]
    D --> E["Menu Set"]
    style A fill:#4CAF50,stroke:#333
    style E fill:#4CAF50,stroke:#333
    style C fill:#4CAF50,stroke:#333
    style B fill:#FFA500,stroke:#333
    style D fill:#FFA500,stroke:#333
    style E fill:#FFA500,stroke:#333

to exitSelect & Set Select & Set to
| Main Menu | Submenu | Menu Selections | Options | Descriptions | Page |
| 0. Initial Setup(For EU)(Continued) | 6. Country | — | UK/Germany/France/Italy/Spain/Netherlands/Belgium/Portugal/Switzerland/Sweden/Denmark/Norway/Finland/Hungary/Turkey/South Africa/Israel/General1/General2* | Select the county.* General2 is for future modification. (same to General1 at present) | |
| 0. Local Language | — English/ | Français/Deutsch/Italiano/Espanol/Português/Nederlands/Dansk/Norsk/Svenska/Suomi/POLSKI/Magyar/Cesky | Select the language. | ||
| 0. Initial Setup(For USA, Canada and Asia) | 1. Receive Mode | — Fax Only | Fax/Tel External TAD Manual | You can choose the receive mode that best suits your needs. | 4-1 |
| 2. Date/Time | — | — | Puts the date and time on the LCD and in headings of faxes you send. | 2-1 | |
| 3. Station ID | — | Fax:Tel:Name: | Program your name and fax number to appear on each page you fax. | 2-2 | |
| 4. Tone/Pulse(Not available in USA, Singapore and New Zealand) | — Tone | Pulse | Selects the dialing mode. 2-1 |

Note
The factory settings are shown in Bold.

flowchart
graph LR
    A["Menu Set"] --> B["△"]
    B --> C["Menu Set"]
    C --> D["△"]
    D --> E["Menu Set"]
    style A fill:#4CAF50,stroke:#333
    style E fill:#2196F3,stroke:#333

to exitSelect & Set Select 8
| Main Menu | Submenu | Menu Selections | Options | Descriptions | Page |
| 0. Initial Setup(For USA, Canada and Asia)(Continued) | 6. Country — (For USA and | Canada)United States/Canada(For Asia)Asia/Singapore/Others(For Oceania)Australia/New Zealand | Select the county. | ||
| 0. Local Language(Not available in Oceania) | — (For USA and | Canada)English/Français/Espanol/Português(For Asia)English/Espanol/Português | Allows you to change the LCD language for your country. | See Quick Setup Guide |

Note
The factory settings are shown in Bold.
Entering Text
When you are setting certain menu selections, such as the Station ID, you may need to type text into the machine. Most of the number keys have three or four letters printed on them. The keys for 0, # and * do not have printed letters because they are used for special characters.
By pressing the appropriate number key repeatedly, you can access the character you want.
| Press Key | one time | two times | three times | four times |
| 2 A | B | C | 2 | |
| 3 D | E | F | 3 | |
| 4 G | H | I | ||
| 5 J | K | L | 5 | |
| 6 M | N | O | 6 | |
| 7 P | Q | R | S | |
| 8 T | U | V | 8 | |
| 9 W | X | Y | Z |
Inserting spaces
To enter a space in the fax number, press ▶ once between numbers. To enter a space in the name, press ▶ twice between characters.
Making corrections
If you entered a letter incorrectly and want to change it, press 🔔 move the cursor under the incorrect character. Then press
©/c Stop/Exit. All letters above and to the right of the cursor will be deleted. Re-enter the correct character. You can also back up and type over incorrect letters.
Repeating letters
If you need to enter a character that is on the same key as the previous character, press ▶ to move the cursor to the right before you press the key again.
Special characters and symbols
Press *, # or 0, and then press ◀ or ▶ to move the cursor under the special character or symbol you want. Then press Menu/Set to select it.
Press for (space) ! " # \$ % & ' ( )
$$ * +, -. / \in $$
Press # for :; <= > ? @ [ ] ^ _
Press 0 for ÄËÖÜÀÇÈÉ0
4
G
Glossary
ADF (automatic document feeder)
The document can be placed in the ADF and scanned one page at a time automatically.
Auto Reduction
Reduces the size of incoming faxes.
Automatic fax transmission
Sending a fax without picking up the handset of an external phone.
Automatic Redial
A feature that enables your machine to redial the last fax number after five minutes if the fax did not go through because the line was busy.
Backup Print
Your machine prints a copy of every fax that is received and stored in memory. This is a safety feature so you will not lose messages during a power failure.
Batch Transmission
As a cost saving feature, all delayed faxes to the same fax number will be sent as one transmission.
Beeper Volume
Volume setting for the beep when you press a key or make an error.
Broadcasting
The ability to send the same fax message to more then one location.
BT Call Sign
A service which allows you to have at least two separate telephone numbers on one phone line.
Caller ID
A service purchased from the telephone company that lets you see the number (or name) of the party calling you.
Cancel Job
Cancels a programmed job, like Delayed Fax or Polling.
CNG tones
The special tones (beeps) sent by fax machines during automatic transmission to tell the receiving machine that a fax machine is calling.
Coding method
Method of coding the information contained in the document. All fax machines must use a minimum standard of Modified Huffman (MH). Your machine is capable of greater compression methods, Modified Read (MR), Modified Modified Read (MMR) and JBIG, if the receiving machine has the same capability.
Communication error (or Comm. Error)
An error during fax sending or receiving, usually caused by line noise or static.
Compatibility group
The ability of one fax unit to communicate with another. Compatibility is assured between ITU-T Groups.
Contrast
Setting to compensate for dark or light documents, by making faxes or copies of dark documents lighter and light documents darker.
Delayed Fax
Sends your fax at a specified time later that day.
Distinctive Ring
A subscriber service purchased from the telephone company that gives you another phone number on an existing phone line. This machine uses the new number to simulate a dedicated fax line.
Dual Access
Your machine can scan outgoing faxes or scheduled jobs into memory at the same time it is sending a fax from memory or receiving or printing an incoming fax.
Easy Receive
Enables your machine to respond to CNG tones if you interrupt a fax call by answering it.
ECM (Error Correction Mode)
Detects errors during fax transmission and resends the pages of the fax that had an error.
Extension phone
A telephone using the same line as your fax but plugged into a separate wall socket.
External phone
A TAD (telephone answering device) or telephone that is connected to your machine.
F/T Ring Time
The length of time that the machine rings (when the Receive Mode setting is Fax/Tel) to notify you to pick up a voice call that it answered.
Fax Detect
Enables your machine to respond to CNG tones if you interrupt a fax call by answering it.
Fax Forwarding
Sends a fax received into the memory to another pre-programmed fax number.
Fax Journal
Lists information about the last 200 incoming and outgoing faxes. TX means Transmit. RX means Receive.
Fax Receive Code
Press this code ( * 51) when you answer a fax call on an extension or external phone.
Fax Storage
You can store received faxes in memory.
Fax tones
The signals sent by sending and receiving fax machines while communicating information.
Fax/Tel
You can receive faxes and telephone calls. Do not use this mode if you are using a telephone answering device (TAD).
Fine resolution
Resolution is 203 x 196 dpi. It is used for small print and graphs.
Grey scale
The shades of grey available for copying and faxing photographs.
Group number
A combination of One-Touch and Speed-Dial numbers that are stored in a One-Touch key or Speed-Dial location for Broadcasting.
Help list
A printout of the complete Menu table that you can use to program your machine when you do not have the User's Guide with you.
Journal Period
The pre-programmed time period between automatically printed Fax Journal Reports. You can print the Fax Journal on demand without interrupting the cycle.
LCD (liquid crystal display)
The display screen on the machine that shows interactive messages during On-Screen Programming and shows the date and time when the machine is idle.
Manual fax (for EU and Asia/Oceania)
When you lift the handset of your external telephone or press Tel/R (or Hook/Hold) so you can hear the receiving fax machine answer before you press Start to begin sending.
Manual fax (for USA and Canada)
When you lift the handset or press Hook/Hold so you can hear the receiving fax machine answer before you press Start to begin sending.
Menu mode
Programming mode for changing your machine's settings.
One-Touch
Keys on the machine's control panel where you can store numbers for easy dialling.
You can store a second number on each key if you press Shift and the One-Touch key together.
Out of Paper Reception
Receives faxes into the machine's memory when the machine is out of paper.
Overseas Mode
Makes temporary changes to the fax tones to accommodate noise and static on overseas phone lines.
Pause
Allows you to place a 3.5 second delay in the dialling sequence stored on One-Touch keys and Speed-Dial numbers. Press Redial/Pause as many times as needed for longer pauses.
Photo resolution
A resolution setting that uses varying shades of grey for the best representation of photographs.
Polling
The process of a fax machine calling another fax machine to retrieve waiting fax messages.
Pulse
A form of rotary dialling on a telephone line.
Quick Dial List
A listing of names and numbers stored in One-Touch and Speed-Dial memory, in numerical order.
Real Time Transmission
When memory is full, you can send faxes in real time.
Remaining jobs
You can check which jobs are waiting in memory and cancel jobs individually.
Remote Access Code
Your own four-digit code (---) that allows you to call and access your machine from a remote location.
Remote Retrieval Access
The ability to access your machine remotely from a touch tone phone.
Resolution
The number of vertical and horizontal lines per inch. See: Standard, Fine, Super Fine and Photo.
Ring Delay
The number of rings before the machine answers in Fax Only and Fax/Tel mode.
Ring Volume
Volume setting for the machine's ring.
Search
An electronic, alphabetical listing of stored One-Touch, Speed-Dial and Group numbers.
Speed-Dial
A pre-programmed number for easy dialling. You must press the

Search/Speed Dial key, #, and the digit code, and Start to start the process.
Standard resolution
203 x 97 dpi. It is used for regular size text and quickest transmission.
Station ID
The stored information that appears on the top of faxed pages. It includes the sender's name and fax number.
Super Fine resolution
203 x 392 dpi. Best for very small print and line art.
TAD (telephone answering device)
You can connect an external TAD to your machine.
Telephone Answer Code (Fax/Tel mode only)
When the machine answers a voice call, it pseudo/double-rings. You can pick up at an extension phone by pressing this code (# 5 1).
Temporary settings
You can select certain options for each fax transmission and copy without changing the default settings.
Tone
A form of dialling on the telephone line used for Touch Tone telephones.
Transmission
The process of sending faxes over the phone lines from your machine to the receiving fax machine.
User Settings
A printed report that shows the current settings of the machine.
XMIT Verify (Transmission Verification Report)
A listing for each fax sent, that shows its date, time and number.
Volume Amplify (For USA and Canada)
Volume setting for the handset for a user who is hearing-impaired.
Product description
General
Memory Capacity 16 MB
Automatic Document Feeder Up to 20 pages (A4: 80 g/m², Letter: 20lb) (ADF)
Paper Tray 250 Sheets (80 g/m) ^2)
Printer Type Laser
Print Method Electrophotography by semiconductor laser beam scanning
LCD (Liquid Crystal Display) 16 characters × 1 line
Power Source 220 - 240V AC 50/60Hz (For EU and Asia/Oceania)
100 - 120V AC 50/60Hz (For USA and Canada)
Power Consumption Copying: Average 475 W
Standby: Average 80 W
Sleep: Average 10 W
Dimensions
(For EU and Asia/Oceania) (For USA and Canada)

Weight Without Drum/Toner Unit:
7.25 kg (For EU and Asia/Oceania)
16.2lb (7.35kg) (For USA and Canada)
Noise Operating: 53 dB A or less
Standby: 30 dB A or less
Temperature Operating: 10 - 32.5°C (50°F - 90.5°F)
Storage: 0 - 40°C (32°F - 104°F)
Humidity Operating: 20 to 80% (without condensation)
Storage: 10 to 90% (without condensation)
Print media
Paper Input Paper Tray
■ Paper type:
Plain paper, Recycled paper or Transparencies ^1
Paper size:
A4, Letter, Legal (USA and Canada) ^2 , Executive, A5, A6, B5 and B6
For more details, see About paper starting on page 1-9.
■ Paper Weight:
60 - 105 g/m² (16-28lb)
■ Maximum paper tray capacity: Up to 250 sheets of 80 g/m ^2 (20lb) plain paper or up to 10 transparencies
■ Paper type:
Plain paper, Recycled paper, Transparencies ^1 , Envelopes, Bond paper or Labels ^1
Paper size:
Width: 69.9 - 215.9 mm (2.75 - 8.5 in.)
Length: 116 - 406.4 mm (4.56 - 16 in.)
For more details, see About paper starting on page 1-9.
■ Paper Weight:
60 - 161 g/m² (16 - 43 lb)
■ Maximum paper tray capacity: One sheet at a time
Manual Feed Slot
Paper Output Up to 100 sheets of A4 size plain paper (Face-down print delivery to the output paper tray)
1 For transparency or label, we recommend removing printed pages from the output paper tray immediately after they exit the machine to avoid smudging.
2 Legal paper cannot be stacked on the output paper tray.
Copy
Color/Monochrome Monochrome
Document Size ADF Width: 147.3 to 215.9 mm (5.8 to 8.5 in.)
ADF Height: 100 to 356 mm (3.9 to 14 in.)
Multiple Copies Stacks or Sorts up to 99 pages
Reduce/Enlarge 50 % to 200% (in increments of 1%)
Resolution Max. Print: 600 x 300 dpi
Max. Scan: 200 x 300 dpi
Fax
Compatibility ITU-T Group 3
Coding System MH/MR/MMR/JBIG
Modem Speed Automatic Fallback: 33600bps
Document Size ADF Width: 147.3 to 215.9 mm (5.8 to 8.5 in.)
ADF Height: 100 to 356 mm (3.9 to 14 in.)
Scanning Width Max. 215.9 mm (8.2 in.)
Printing Width Max. 215.9 mm (8.2 in.)
Grey Scale 64 levels
Polling Types Standard, Secure, Timer, Sequential
Contrast Control Automatic/Light/Dark (manual setting)
Resolution • Horizontal 203 dot/inch (8 dot/mm)
- Vertical
Standard - 3.85 line/mm (98 line/inch)
Fine - 7.7 line/mm (196 line/inch)
Photo - 7.7 line/mm (196 line/inch)
Superfine - 15.4 line/mm (392 line/inch)
One-Touch Dial 20 (10 x 2)
Speed-Dial 200 stations
Broadcasting 270 stations
Automatic Redial 3 times at 5 minute intervals
Auto Answer 0, 1, 2, 3 or 4 rings (for EU, USA, and Canada)
2, 3...9, or 10 (for Australia)
0, 1...9, or 10 (for some countries)
Communication Source Public switched telephone network.
Memory Transmission Up to 600 / 500 ^1 pages
Out of Paper Reception Up to 600 / 500 ^1 pages
Printer
Emulation Windows
® GDI
Printer Driver Support for Windows
® 2000/XP/Vista/7
Resolution Up to 1200 x 600 dots per inch (dpi)
Print Quality Normal printing mode
Economy printing mode (save toner usage)
Print Speed up to 14 pages/minute A4 size
up to 15 pages/minute Letter size
Does not include the time it takes to feed the paper.
First Print Less than 10 seconds
Interfaces
Interface
Recommended
Cable
USB A USB cable that is not longer than 2.0 m (6 feet).

Note
Your machine has a USB 2.0 Full-speed interface. This interface is compatible with USB 2.0 Hi-Speed; however, the maximum data transfer rate will be 12 Mbits/s. This machine can also be connected to a computer that has a USB 1.1 interface.
Please make sure you use a USB 2.0 interface cable that is no longer than 2.0 m (6 feet).
You can download the latest printer driver from our Website
Computer requirements
| Minimum System Requirements | ||||||||
| Computer Platform & Operating System Version | Processor Minimum Speed | Minimum RAM | Recommended RAM | Hard Disk Space to install | Supported PC Software Functions | Supported PC Interface ^2 | ||
| For Drivers | For Applications | |||||||
| Windows®Operating System ^1 | Windows®2000Professional | Intel®Pentium®II or equivalent | 64 MB 128 | MB 90 MB | 130 MB Printing, | PC Fax ^3 | USB | |
| Windows®XPHomeWindows®XPProfessional | 128 MB 25 | 6 MB 150 MB | B 310 MB | |||||
| Windows® XPProfessionalx64 Edition | 64-bit (Intel®64 or AMD64)supported CPU | 256 MB 51 | 2 MB | |||||
| Windows Vista® | Intel® Pentium® 4 or equivalent64-bit (Intel®64 or AMD64)supported CPU | 512 MB 1 | GB | 500 MB 500 | MB | |||
| Windows® 7 | Intel® Pentium® 4 or equivalent64-bit (Intel®64 or AMD64)supported CPU | 1 GB(32-bit)2 GB(64-bit) | 1 GB(32-bit)2 GB(64-bit) | 650 MB 530 | MB | |||
| Note: All registered trademarks referenced herein are the property of their respective companies. | ||||||||
| You can download the latest printer driver from our Web site. | ||||||||
1 Internet Explorer® 5.5 or greater.
2 Third party USB ports are not supported.
3 PC Fax supports black and white only.
Consumable items
Toner Cartridge Life Standard Toner Cartridge: Up to 2,500 pages *
*(when printing letter or A4 size paper at 5% print coverage)

Note
Toner life expectancy will vary depending upon the type of average print job.
Drum Unit Life Expectancy Up to 12,000 pages

Note
There are many factors that determine the drum life, such as temperature, humidity, type of paper, toner you use and number of pages per print job.
[Non-Text]
Index
A
Access codes, storing and dialing ..... 5-4
ADF (automatic document feeder) ...... 1-8
ADF cover 11-4
Answering machine (TAD) ......A-15
connecting ......A-17
Automatic
fax receive 4-1
Fax Detect 4-3
fax redial 3-3
transmission 3-3
B
Broadcasting 3-7
setting up Groups for 5-3
C
Caller ID ......A-4, A-7, A-10, A-12
print list ......A-4
view list ......A-4
Canceling
Fax Forwarding 6-1
fax jobs in memory 3-8
jobs awaiting redial 3-8
Cleaning
corona wire 11-21
laser scanner window 11-20
CNG tones 1-14
Connecting
external TAD ......A-15
external telephone ......A-14
two-line external TAD or telephone ....A-19
Consumable items S-8
Control panel overview 1-4, 1-6
Copy
contrast 8-7
default settings 8-7
Enlarge/Reduce 8-3
enter Copy mode 8-1
multiple copies 8-2
Out of Memory 8-7
Page Layout 8-6
printable area 8-1
Quality key 8-5
quality setting 8-7
single copy 8-2
Cordless phone A-13
Cover page
custom comments 3-9
for all faxes 3-10
for next fax only 3-9
printed form 3-10
Credit card numbers 5-4
Custom telephone features on a single
line A-20
D
Date and Time 2-1
Delayed Batch Transmission ....3-11
Dialling
a pause 5-4
access codes and credit card
numbers 5-4
automatic fax redial 3-3
automatic transmission ....3-3
Groups 3-7
manual 3-1
manual transmission 3-3
One-Touch 3-1
Speed-Dial 3-2
Distinctive Ring ......A-2, A-5, A-7, A-11
setting ring pattern A-3
turning off A-3
Drum unit
cleaning 11-14, 11-21
replacing 11-24
Dual Access 3-6
E
ECM (Error Correction Mode) ......1-14
Equalization ....11-17
Error messages on LCD 11-1
Comm. Error 11-1
No Paper Fed 11-2
Not Registered 3-2
Out of Memory 11-3
while scanning a document .....8-7
Unable to Init. 11-3
Unable to Print 11-3
Unable to Scan 11-3
Extension telephone, using ......A-13, A-17
External telephone, connecting ......A-14
F
Fax
receiving 4-1
compatibility 11-17
Fax Forwarding 6-1
from extension phone ......A-13
reducing to fit on paper 4-4
retrieving from a remote site 6-6
Ring Delay, setting 4-2
sending 3-1
automatic 3-3
Broadcasting 3-7
canceling from memory 3-8
compatibility 11-17
contrast 3-5
enter Fax mode 3-1
from ADF 3-3
from memory (Dual Access) .....3-3, 3-6
overseas 3-10
Real Time Transmission 3-6
resolution 3-5
Fax codes
changing 6-3, A-14
Fax Receive Code ......A-13
Remote Access Code 6-3
Telephone Answer Code ......A-13
Fax Forwarding
changing remotely 6-5, 6-6
Fax Storage 6-1
printing from memory 4-5
turning on 6-1
Fax, stand-alone
receiving
at the end of a conversation 4-5
Paging 6-2
sending
at the end of a conversation 3-4
Fax/Tel mode
answering at extension phones ......A-13
double-ringing (voice calls) 4-3
Easy Receive 4-3
F/T Ring Time 4-3
Fax Receive Code ......A-13
receiving faxes ...... A-13
Ring Delay 4-2
Telephone Answer Code ...... A-13
FaxStream® Duet® A-6
FCC notices ....10-1
G
Gray scale S-4
Groups for Broadcasting ....5-3
H
handset 2-6
Handset Volume 2-6
HELP
Help List 7-2
LCD messages ...... B-1
using navigation keys ...... B-2
Menu Table ......B-1, B-3
J
Jacks
convert to RJ11 jack
triplex adapter A-18
EXT
external telephone ...... A-15
TAD (answering machine) ...... A-15
Jams
document 11-4
paper 11-4
L
LCD (liquid crystal display) ......B-1, B-2
M
Maintenance, routine 11-18
Manual
dialling 3-1
receive 4-1
transmission 3-3
Memory Storage B-1
Menu Selection Table B-1
Mode, entering
Copy 8-1
Fax 3-1
Multi-line connections (PBX) ...... A-20
0
One-Touch
changing 5-2
setting up 5-1
using 3-1
Out of Area (Caller ID) ......A-4
Out of Memory message 3-4
P
Paging 6-2
Paper 1-9, S-3
Size 2-5
size of document 1-8
Type 2-4
Phone line
connections ......A-17
difficulties 11-9
multi-line (PBX) ......A-20
roll over lines ......A-18
two-line phone system ......A-18
Power failure ......B-1
difficulties 11-9
drivers S-5
fax from memory 4-5
paper jams 11-5
report 7-2
resolution S-5
specifications ....S-5
Programming your machine ...... B-1, B-2
Q
Quick-Dial
Access codes and credit card numbers setting up 5-4
Broadcasting 3-7
using Groups 3-7
Group dial
changing 5-2
setting up Groups for Broadcasting .... 5-3
One-Touch dial
changing 5-2
setting up 5-1
using 3-1
Search 3-2
Speed-Dial
changing 5-2
setting up 5-2
using 3-2
R
Receive Mode 4-1
External TAD 4-1
Fax Only 4-1
Fax/Tel 4-1
Manual 4-1
Redial/Pause 3-3
Reducing
copies 8-4
incoming faxes 4-4
Remote Retrieval 6-4
access code 6-3, 6-4
getting your faxes 6-6
Reports 7-1
Caller ID List A-4
Fax Journal 7-2
Journal Period 7-2
Help List 7-2
how to print 7-2
Quick-Dial List 7-2
Transmission Verification 7-1
User Settings 7-2
Resolution
copy S-3
fax (Standard, Fine, SuperFine, Photo) S-4
print S-5
setting for next fax 3-5
Ring Delay, setting 4-2
S
Safety Instructions ......-i, 9-2, 10-4
Setting Lock 2-11
Setup
Date and Time 2-1
Station ID (fax header) entering text 2-2
Shipping the machine 11-17
Sleep Time 2-8
Speed-Dial
changing 5-2
dialling 3-2
storing 5-2
T
TAD (telephone answering device),
external 4-1, A-15, A-19
connecting ......A-15, A-17
receive mode 4-1
recording OGM ......A-17
with two-line jack ......A-19
Telstra® FaxStream® Duet® ......A-5
Text, entering ......B-11
special characters ......B-11
Toner cartridge
replacing 11-21, 11-22
Troubleshooting 11-1
document jam 11-4
error messages on LCD 11-1
if you are having difficulty
incoming calls 11-10
paper handling 11-12
phone line 11-17
printer difficulties 11-11
printing 11-9
paper jam 11-5
Two-line phone system ......A-18
V
Volume Amplify for the
hearing-impaired 2-7
Volume, setting 2-5
beeper 2-6
handset 2-6
Volume Amplify for the
hearing-impaired 2-7
ring 2-5
speaker 2-6
R
Remote Retrieval Access card
If you plan to receive fax messages while away from your machine, carrying the Remote Retrieval Access Card printed below will serve as a convenient reminder of the retrieval procedures. Simply cut out the card and fold it to fit your wallet or organizer. Keeping it handy will help you derive the full benefit of your machine's Fax Forwarding, and Remote Retrieval features.


This machine is approved for use in the country of purchase only.
- FAX 1190L
- User's Guide
- Safety precautions
- To use the machine safely
- CAUTION
- IMPORTANT SAFETY INSTRUCTIONS
- Certification
- Declaration of conformity
- CE
- Notice to Users in EU Countries
- Notice to Users Accessing Analog PSTN in EU Countries
- CE Marking Traceability Information (For EU Countries Only.)
- Manufacturer:
- Authorized representative:
- Symbols for the main power switch
- Quick Reference Guide
- Sending Faxes
- Automatic Transmission
- Storing numbers
- Storing One-Touch Dial numbers
- Note
- Storing Speed-Dial numbers
- Dialling operations
- One-Touch Dialling / Speed-Dialling
- Using Search
- Making copies
- Single copy
- Sorting copies using the ADF
- Table of Contents
- Introduction
- Getting started
- Setup Send
- Setup Receive
- Quick-Dial numbers and dialling options
- Remote Fax Options
- Printing reports
- Making copies
- Important information for EU
- Important information for USA and Canada
- Troubleshooting and routine maintenance
- A Appendix A
- B Appendix B
- G Glossary
- S Specifications
- Index
- R Remote Retrieval Access card
- Using this Guide
- Choosing a location
- IMPORTANT
- To view Documentation
- Control panel overview (For EU only)
- One-Touch Keys
- Fax and telephone keys:
- Redial/Pause
- Tel/R
- Resolution
- Navigation keys:
- Menu/Set
- Search/Speed Dial
- Dial Pad
- ◆ Start
- Control panel overview (For USA, Canada and Asia/Oceania)
- One-Touch Keys
- ② Fax and telephone keys:
- Hook/Hold
- ▼ Search/Speed Dial
- Start
- Stop/Exit
- Reports
- Mode keys:
- Liquid Crystal Display (LCD)
- Copy key (Temporary settings):
- Options
- Shift
- Load document
- Using the automatic document feeder (ADF)
- About paper
- Recommended paper
- Choosing acceptable paper
- Do not use:
- How to load paper
- To load paper or other media in the paper tray
- To load paper or other media in the manual feed slot
- About fax machines
- Custom features
- Do you have BT's Call Minder/Voice Mail on the phone line?
- Why should there be problems?
- How can you avoid possible problems?
- Fax tones and handshake
- ECM (Error Correction Mode)
- Initial setup
- Setting the Date and Time
- Setting Tone and Pulse dialling mode (Not available in some countries)
- Setting the Station ID
- NOTICE (For USA)
- Setting the Phone Line Type (For EU model only)
- PABX (PBX) and TRANSFER
- General Setup
- Setting the Mode Timer
- Setting the Paper Type
- Setting the Paper Size
- Setting the Ring Volume
- —OR—
- Setting the Beeper Volume
- Setting the Speaker Volume
- Setting the Handset Volume (For USA and Canada only)
- Choosing the Handset Volume (For Volume Amplify) (For USA and Canada only)
- Setting Volume Amplify (For USA and Canada only)
- Turning on Automatic Daylight Savings Time
- Toner Save
- Sleep Time
- Setting the LCD Contrast
- Security
- Memory Security
- Setting up the password
- Changing the Memory Security password
- Turning Memory Security on
- Turning Memory Security off
- Setting Lock
- Changing the Setting Lock password
- Turning Setting Lock on
- Turning Setting Lock off
- How to enter Fax mode
- How to dial
- Manual dialling
- One-Touch Dialling
- Speed-Dialling
- Search
- Fax Redial
- How to Fax
- Faxing from the ADF
- Manual transmission
- Sending a fax at the end of a conversation
- Out of Memory message
- Basic sending operations
- Sending faxes using multiple settings
- Contrast
- Fax Resolution
- Dual Access
- Real Time Transmission
- Broadcasting
- Checking job status
- Cancelling a fax in progress
- Cancelling a scheduled job
- Advanced sending operations
- Composing the electronic Cover Page
- Composing your own comments
- Cover page for the next fax only
- Send a cover page for all faxes
- Using a printed cover page
- Overseas Mode
- Delayed Fax
- Delayed Batch Transmission
- Setup for Polled Transmit (Standard)
- Setup for Polled Transmit with Secure Code (For EU and Asia/Oceania only)
- 4
- Setup Receive
- Basic receiving operations
- Choosing the Receive Mode
- To select or change your Receive Mode
- Setting the Ring Delay
- Setting the F/T Ring Time (Fax/Tel mode only)
- Fax Detect (Easy Receive for USA and Canada)
- Printing a reduced incoming fax (Auto Reduction)
- Receiving a fax at the end of a conversation
- Advanced receiving operations
- Printing a fax from the memory
- Setting the Print Density
- Reception into memory
- If Memory Receive is On at this time...
- If Memory Receive is Off at this time...
- Polling
- Setup for Polling Receive (Standard)
- Secure Polling (For EU and Asia/Oceania only)
- Setup for Polling Receive (Secure) (For EU and Asia/Oceania only)
- Setup for Polling Receive (Timer) (For EU and Asia/Oceania only)
- Sequential Polling
- 5
- Quick-Dial numbers and dialling options
- Storing numbers for easy dialling
- Storing One-Touch numbers
- Changing One-Touch / Speed-Dial numbers
- Setting up Groups for Broadcasting
- Dialling options
- Access codes and credit card numbers
- Pause
- Tone or Pulse
- 6
- Remote Fax Options
- Setting Remote Fax Options
- Setting up Fax Forwarding
- Setting Fax Storage
- Programming your pager number (For USA and Canada only)
- Turning off Remote Fax Options
- Changing Remote Fax Options
- Setting your Remote Access Code
- Remote Retrieval
- Using your Remote Access Code
- Remote commands
- Retrieving fax messages
- Changing your Fax Forwarding number
- 7
- Printing reports
- Fax settings and activity
- Customizing the Transmission Verification Report
- Setting the Journal Period
- How to print a report
- 8
- Using the machine as a copier
- Enter Copy mode
- Making a single copy
- Making multiple copies
- Stop copying
- Using the temporary Copy key
- Changing the temporary copy settings
- Enlarging or reducing the image copied
- Quality
- Making N in 1 copies (Page Layout)
- When using the ADF, place the document face down in the direction shown below.
- Changing the default copy settings
- Adjusting contrast
- 9
- Important information for EU
- IEC 60825-1 Specification
- Laser Diode
- Disconnect device
- Radio interference (220-240V Model only)
- Trademarks
- 10
- Important information for USA and Canada
- Standard telephone and FCC Notices
- These notices are in effect on models sold and used in the United States only.
- When programming emergency numbers or making test calls to emergency numbers:
- WARNING
- Federal Communications Commission (FCC) Declaration of Conformity (USA only)
- Important - about the interface cable
- Industry Canada Compliance Statement (Canada only)
- Laser safety
- FDA regulations
- Manufactured:
- 11
- Troubleshooting and routine maintenance
- Troubleshooting
- Error messages
- Checking if the machine has faxes in its memory
- Forwarding faxes to another fax machine
- Document jams
- Paper jams
- Paper is jammed inside the machine
- Chapter 11
- Paper is jammed at the back of the machine
- Paper is jammed inside the drum unit and toner cartridge assembly
- If you are having difficulty with your machine
- Examples of poor print quality Recommendation
- Cleaning the drum unit
- Compatibility
- Packing and shipping the machine
- Routine maintenance
- Cleaning the outside of the machine
- Cleaning the scanner
- Cleaning the laser scanner window
- Cleaning the corona wire
- Replacing the toner cartridge
- How to replace the toner cartridge
- Replacing the drum unit
- Machine Information
- Checking the Serial Numbers
- Checking the Page Counters
- Checking the Drum Life
- A
- Appendix A
- Telephone services for U.K.
- BT Call Sign (For U.K. Only)
- To enable the machine to work with BT Call Sign (Only with your external phone)
- Setting up telephone services (for USA and Canada)
- Distinctive Ring
- What does your telephone company's 'Distinctive Ring' do?
- What does 'Distinctive Ring' do?
- Do you have Voice Mail?
- Before you choose the ring pattern to register
- Registering the Distinctive Ring pattern
- Very important!
- Turning off the Distinctive Ring
- Caller ID
- Viewing Caller ID List
- Printing Caller ID List
- Call Waiting
- Telephone Service for Australia
- Telstra® FaxStream® Duet® (Distinctive Ringing)
- What is the Advantage of using Telstra® FaxStream® Duet® Function?
- How does Telstra® FaxStream® Duet® Work?
- Set the Distinctive Ringing to ON
- Caller ID (Caller IDentification)
- Advantages of Caller ID
- For Business
- At Home
- How Does the Caller ID Work?
- The Caller ID Appears on the Display When Your Telephone Rings
- The Caller ID is Stored in Your Machine Memory
- ■ Printing the Caller ID List.
- Telephone Service for New Zealand
- FaxAbility
- How Will the Fax Machine Treat All Other Numbers?
- What is the Advantage of Using the FaxAbility Function?
- How Does FaxAbility Work?
- How to Turn FaxAbility OFF or ON
- Telephone Service for Some Countries
- Distinctive Ringing (For Singapore and Hong Kong)
- Setting the Distinctive Ringing
- Caller ID (For Singapore and Hong Kong)
- Operation from extension telephones
- For Fax/Tel mode only
- Using a cordless external handset
- Changing the remote codes
- Connecting an external device to your machine
- Connecting an external telephone
- Type A
- Type B
- Type C
- Type D
- Connecting an external telephone answering device (TAD)
- Sequence
- Improper Setup
- Connections
- Recording outgoing message (OGM) on an external TAD
- Special line considerations for U.K.
- Using extension telephones (For U.K. only)
- Special line considerations for USA and Canada
- Roll over phone lines
- Two-line phone system
- Converting telephone wall outlets
- Installing machine, external two-line TAD and two-line telephone
- Multi-line connections (PBX)
- If you are installing the machine to work with a PBX
- Custom features on your phone line
- B
- Appendix B
- On-screen programming
- Menu table
- Memory storage
- Navigation keys
- Entering Text
- Inserting spaces
- Making corrections
- Repeating letters
- Special characters and symbols
- G
- Glossary
- ADF (automatic document feeder)
- Auto Reduction
- Automatic fax transmission
- Automatic Redial
- Backup Print
- Batch Transmission
- Beeper Volume
- BT Call Sign
- Cancel Job
- CNG tones
- Coding method
- Communication error (or Comm. Error)
- Compatibility group
- Easy Receive
- Extension phone
- External phone
- F/T Ring Time
- Fax Detect
- Fax Forwarding
- Fax Journal
- Fax Receive Code
- Fax Storage
- Fax tones
- Fax/Tel
- Fine resolution
- Grey scale
- Group number
- Help list
- Journal Period
- LCD (liquid crystal display)
- Manual fax (for EU and Asia/Oceania)
- Manual fax (for USA and Canada)
- Menu mode
- One-Touch
- Out of Paper Reception
- Photo resolution
- Pulse
- Quick Dial List
- Remaining jobs
- Remote Access Code
- Remote Retrieval Access
- Ring Delay
- Ring Volume
- Speed-Dial
- Standard resolution
- Station ID
- Super Fine resolution
- TAD (telephone answering device)
- Telephone Answer Code (Fax/Tel mode only)
- Temporary settings
- Tone
- Transmission
- User Settings
- XMIT Verify (Transmission Verification Report)
- Volume Amplify (For USA and Canada)
- Product description
- General
- Dimensions
- Print media
- Paper Input Paper Tray
- Manual Feed Slot
- Copy
- Fax
- Printer
- Interfaces
- You can download the latest printer driver from our Website
- Computer requirements
- Consumable items
- [Non-Text]
- C
- D
- E
- F
- Fax codes
- Fax, stand-alone
- receiving
- sending
- Fax/Tel mode
- H
- HELP
- J
- Jacks
- EXT
- Jams
- L
- M
- Manual
- Mode, entering
- 0
- P
- Q
- R
- S
- T
- V
- Remote Retrieval Access card
- ##
Brand : RICOH
Model : FAX 1190L
Category : Fax