
RDA975 - Home Theater ROTEL - Free user manual and instructions
Find the device manual for free RDA975 ROTEL in PDF.


| Product Type | Digital Surround Sound Adapter (Dolby Digital Decoder) |
| Brand | Rotel |
| Model | RDA975 |
| Category | Home Theater |
| Dimensions (W x H x D) | 440 × 104 × 310 mm (17.38 × 4.09 × 12.20 inches) |
| Weight | 5.2 kg (9.24 lb) |
| Power Consumption | 17 Watts |
| Power Requirements | 115V or 230V AC, 50/60 Hz (selectable) |
| Frequency Response | 5 – 20,000 Hz ± 1.0 dB |
| Signal-to-Noise Ratio | 100 dB (IHF A, 1 kHz) |
| Input Impedance | 75 ohms |
| Output Impedance | 1 k ohm |
| Total Harmonic Distortion | 0.006 % (1 kHz) |
| Output Level | 1.0 V (large speaker, 1 kHz, 0 dB FS) |
| Digital Inputs | 2 x Coaxial (RCA, 75 ohms), 1 x Toslink Optical |
| Analog Outputs | 5.1 channel via 6 RCA jacks or DB-25 connector |
| Decoding Processor | Zoran 38500 DSP; Burr-Brown PCM1710U DACs (8x oversampling) |
| Supported Audio Formats | Dolby Digital AC-3 (5.1 channel), Dolby Pro Logic (via Surround button), Stereo downmix |
| Speaker Configuration | Front, Center, Surround: LARGE/SMALL/NONE; Subwoofer: YES/NO (rear panel switches) |
| Delay Adjustment | Center: 0–5 ms; Surround: 0/5/10/15 ms (front panel controls) |
| Dynamic Range Control | 4 levels: BYPASS (0%), FULL (25%), NORMAL (50%), MINIMUM (75%) with dialogue normalization |
| Additional Features | TEST tone for channel balance; input selection (TOSLINK, Coax1, Coax2); THX® certified compatible |
| Safety & Maintenance | Do not open; use soft dry cloth; avoid moisture and heat; no user-serviceable parts |
Frequently Asked Questions - RDA975 ROTEL
User questions about RDA975 ROTEL
0 question about this device. Answer the ones you know or ask your own.
Ask a new question about this device
Download the instructions for your Home Theater in PDF format for free! Find your manual RDA975 - ROTEL and take your electronic device back in hand. On this page are published all the documents necessary for the use of your device. RDA975 by ROTEL.
USER MANUAL RDA975 ROTEL
Digital Surround Sound Adapter
OWNERS MANUAL
Please write the serial number, date of purchase and the name of ROTEL hi fi Authorized Dealer in the spaces provided for your future reference.
Serial number____. Purchase date____.
ROTELhi fi Authorized Dealer ____.
SAFETY INSTRUCTIONS
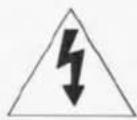
CAUTION
RISK OF ELECTRIC SHOCK DO NOT OPEN
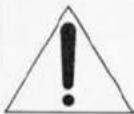
CAUTION: TO REDUCE THE RISK OF ELECTRIC SHOCK, DO NOT REMOVE COVER(OR BACK). NO USER-SERVICEABLE PARTS INSIDE. REFER SERVICING TO QUALIFIED SERVICE PERSONNEL.
• Explanation of Graphical Symbols
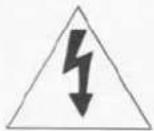
The lightning flash with arrowhead symbol, within an equilateral triangle, is intended to alert you to the presence of uninsulated "dangerous voltage" within the product's enclosure that may be of sufficient magnitude to constitute a risk of electric shock to persons.
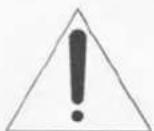
The exclamation point within an equilateral triangle is intended to alert you to the presence of important operating and maintenance (servicing) instructions in the literature accompanying the appliance.
- Read Instructions - All the safety and operating instructions should be read before the appliance is operated
- Retain Instructions - The safety and operating instructions should be retained four for future reference.
- Head Warnings - All warnings on the appliance and in the operating instructions should be adhered to.
- Follow Instructions - All operating and other instructions should be followed.
- Water and Moisture - The appliance should not be used near water - for example, near a bathtub, washbowl, kitchen sink, laundry tub, in a wet basement, or near a swimmingpool, etc.
- Carts and Stands - The appliance should be used only with a cart or stand that is recommended by the manufacturer.
PORTABLE CART WARNING
S3125A

natural_image
Symbolic illustration of a person climbing a ladder inside a circle (no text or symbols)- Wall or Ceiling Mounting - The appliance should be mounted to a wall or ceiling only as recommended by the manufacturer.
- Ventilation - The appliance should be situated so that its location or position does not interfere with its proper ventilation. For example, the appliance should not be situated on a bed, sofa, rug, or similar surface that may block the ventilation openings; or placed in a built-in installation, such as a bookcase or cabinet that may impede the flow of air through the ventilation openings.
- Heat - The appliance should be situated away from heat sources such as radiators, stoves, or other appliances that produce heat.
APPLICABLE FOR USA, CANADA OR WHERE APPROVED TO THE USAGE
CAUTION : TO PREVENT ELECTRIC SHOCK, MATCH WIDE BLADE PLUG TO WIDE SLOT, INSERT FULLY.
ATTENTION : POUR EVITER LES CHOCS ELECTRIQUES, INTRODUIRE LA LAME LA PLUS LARGE DE LA FICHE DANS LA BORNE CORRESPONDANTE DE LA PRISE ET POUSSER JUSQU AU FOND.
- Power Source - The appliance should be connected to a power supply only of the type described in the operating instructions or as marked on the appliance.
- Power-Cord Protection - Power-supply cords should be routed so that they are not likely to be walked on or pinched by items placed upon or against them, paying particular attention to cords at plugs, convenience receptacles, and the point where they exit from the appliance.
- Cleaning - The appliance should be cleaned only as recommended by the manufacturer.
- Nonuse Periods - The power cord of the appliance should be unplugged from the outlet when left unused for a long period of time.
- Object and Liquid Entry - Care should be taken so that objects do not fall into and liquids not spilled into the inside of the appliance.
- Damage Requiring Service - The appliance should be serviced by qualified service personnel when:
A. The power-supply cord or the plug has been damaged; or
B. Objects have fallen, or liquid has been spilled into the appliance; or
C. The appliance has been exposed to rain; or
D. The appliance does not appear to operate normally or exhibits a marked change in performance; or
E. The appliance has been dropped, or the cabinet damaged. - Servicing - The user should not attempt to service the appliance beyond those means described in the operating instructions. All other servicing should be referred to qualified service personnel.
- Grounding or Polarization - The precautions that should be taken so that the grounding or polarization means of an appliance is not defeated.
OWNER'S MANUAL INDEX
| SETTING the SPEAKER CONFIGURATION SWITCHES | PAGE 2, 3 |
| 5.1 CHANNEL OUTPUTS and REAR PANEL CONNECTIONS | PAGE 3, 4 |
| INFORMATION about DOLBY DIGITAL SOUND | PAGE 4 |
| FRONT PANEL CONTROLS | PAGE 5, 6 |
| THE TEST BUTTON and CHANNEL BALANCE CHECK | PAGE 6, 7 |
| *(Skip the Test Button and Channel Balance section if connected to a Rotel Surround Processor) | |
| PHYSICAL INSTALLATION and AC POWER REQUIREMENTS | PAGE 7 |
| TECHNICAL SPECIFICATIONS | PAGE 8 |
| TROUBLESHOOTING HINTS | PAGE 8 |
Thanks for buying a Rotel RDA 975 digital adapter for Dolby Digital® sound. Welcome to the fun and excitement of digital surround sound! Our engineers have been designing and manufacturing high quality, high performance audio electronics for more than 35 years. The RDA 975 has been designed to accurately recreate the original input signal or soundtrack. It will provide faithful reproduction of the information encoded in Laser Discs, DVD discs, or digital satellite TV broadcasts. This manual has tips for set up, audio/video/digital cables, trouble shooting and installation to help improve the sound of your system.
FEATURES OF THE RDA 975
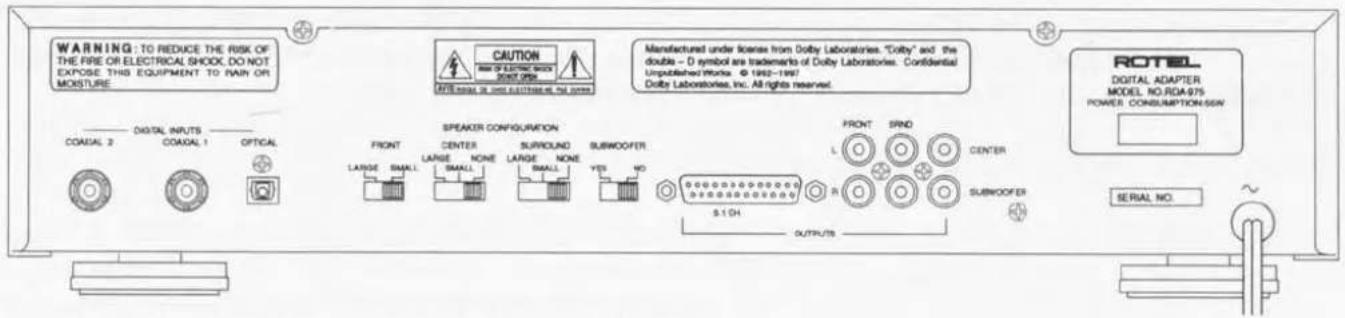
The RDA 975 includes high performance Burr-Brown PCM 1710U decoders, 8 x oversampling digital filters and 4 ^th order type (1 bit) digital to analog converters. The Zoran 38500 DSP IC chip ensures high performance decoding of the digital signal. The DSP chip decodes the Dolby Digital sound, controls the bass management and allows adjustment of the dynamic range and dialogue normalization of your system. We have 3 digital inputs on the back panel, two 75 coaxial RCA inputs and one Toslink optical cable input. The 5.1 channel output signal from the RDA 975 uses 6 RCA jacks or a single DB 25 cable to connect to your companion surround sound processor.
Because of our desire to offer future compatible audio components, we have rear panel DB 25 input connections on our present and future surround sound processors. Therefore, connecting a RDA 975 is easy to do. After connection and set up, push the front panel 5.1 or EPL input button on your surround sound processor to engage the RDA 975 for playback of Dolby Digital source material.
CONNECTIONS ON THE REAR PANEL
SETTING the SPEAKER CONFIGURATION SWITCHES
The SPEAKER CONFIGURATION SWITCHES on the back panel are labeled FRONT, CENTER, SURROUND and SUBWOOFER. We describe the speaker selections as LARGE, SMALL or NONE.
FRONT is defined as the main left and right speakers in the front of the room. CENTER is defined as the speaker for the dialog channel, usually positioned above or below the video monitor. SURROUND is defined as the speakers used to reproduce the time-delayed signals for ambient or special effects. SUBWOOFER is defined as a speaker specifically designed to play the bass frequencies or Low Frequency Effects (LFE) below 100 Hz.
A LARGE speaker is defined as a speaker with excellent low frequency bass response or a speaker capable of playing powerful bass notes (below 100 Hz) at high volume levels without damage. This position sends a full frequency range signal, including the bass, to the front or center channel speaker. Use this setting with a speaker that is THX® certified for use in a home theater system. Other high performance speakers capable of full frequency range response may also match these criteria.
A SMALL speaker is defined as a speaker that is not designed to play powerful bass notes below 100 Hz at high volume levels. This configuration switch setting turns on a crossover circuit that removes the bass below 100 Hz from the audio signal going to the front or center channel speaker. Many surround sound system speakers of medium or small size are designed for use with a companion subwoofer. These types of speakers are specifically designed to play mid-bass and the frequencies above 100 Hz. The SMALL setting is correct for speakers of this type. The subwoofer receives the low bass below 100 Hz while the mid-bass and the higher frequencies are played through the other speakers in the system.
The NONE setting is defined as the absence of a speaker. This setting is sometimes called PHANTOM mode operation when selected for the CENTER channel speaker. This setting equally shares the center channel dialogue information with the front left and front right speakers. This preserves all the dialogue information even though a center channel speaker is not present in the system. When NONE is chosen for the surround channel speakers, the time delayed surround sound information is mixed with the front speaker signals. If a center channel speaker is in use, this mode of operation is sometimes referred to as 3 CHANNEL SURROUND sound. If only the front left and right channel speakers are used, the signals for the center speaker and the surround sound speakers are mixed together with the signal for the front speakers. In this way all the information is preserved and reproduced through the stereo pair of speakers. We suggest that the best results will be obtained with a full set of speakers for all channels, including a subwoofer.
If you do not use CENTER or SURROUND speakers in your system, set the CENTER or SURROUND speaker switch to NONE. If you use CENTER or SURROUND speakers, choose the LARGE or SMALL speaker setting. The SUBWOOFER YES or NO switch should be set to YES if you have a subwoofer. Set the switch to NO if you don't have a subwoofer.
The actual physical size of each speaker is not as important as the frequency response and power handling capability of the speaker. Use of a subwoofer in your system is highly recommended for the best reproduction of LFE sound effects.
During installation set the speaker configuration switches for the speakers currently in your surround sound system. Read the owners manual for your speakers for help with these settings. If you change the speakers in your system later, study the owners' manual for the new speakers and consult this manual to see if changes are needed in the speaker switch settings. Careful listening should be the final judge for the correct setting of the speaker configuration switches. (See the diagrams on page 10 for speaker configuration switches, front panel controls and back panel connections.)
BACK PANEL CONNECTIONS ON THE RDA 975
The 5.1 OUTPUT connectors use a DB 25 connecting cable from the RDA 975 to the 5.1 CH INPUT on the back panel of compatible ROTEL surround sound controllers. If you use the RDA 975 with a brand of surround sound controller without a DB 25 cable input, the RCA output jacks should be used for connection. Please observe the correct channel designations to avoid incorrect channel layout in your surround sound system, when using the RCA connections.
The INPUT connections for TOSLINK, COAXIAL 1, and COAXIAL 2 on the rear panel will allow you to connect as many as three different digital components to the RDA 975.
The TOSLINK input is for the optical digital output connection from a Laser Disc, DVD player or other digital source. Input 1 and 2 connections are for digital signals using a 75 ohm RCA cable from a Laser Disc player, a DVD player, a digital satellite TV receiver or a future digital tape system. We suggest high quality shielded cables for these digital connections.
High quality video and audio patch cables will improve the sights and sounds of your system and we recommend them. Composite video or digital cables should be shielded and have characteristic impedance of 75Ω for the best video or digital performance. Audio/video cables and AC power cables should be separated from each other to avoid potential interference that will degrade the sound or picture quality. Ask your ROTELhi fi AUTHORIZED DEALER for advice about high quality cables for the audio, video and digital signals in your sound system. The quality of the cables does make a difference and high quality cables will yield the best results.
WHAT IS DOLBY DIGITAL SOUND?
Dolby Digital sound is a digital format designed to allow discrete signals for all of the channels in your surround sound system. Many movie industry people refer to discrete sound as 5.1 sound. This is because the sound stage in a movie studio is mixing 5 discrete channels of sound and uses the .1 channel for the low frequency sound effects. This has the advantage of offering stereo surround sound channels in addition to the discrete output for the low frequency effects or subwoofer channel. The Dolby Surround matrix encoded system has a mono surround sound signal, not stereo, even though two surround speakers are used.
PLAYBACK OF DOLBY DIGITAL SOUNDTRACKS
There are three different ways that a Dolby Digital soundtrack will be received and decoded:
1) A 5.1 channel program is Dolby AC-3 encoded and delivered by Laser Disc or DVD disc.
2) A 2 channel stereo or 2 channel Dolby Surround encoded program is Dolby AC-3 encoded and delivered by Laser Disc, DVD disc or broadcast medium, such as satellite TV. The Dolby AC-3 bitstream must be decoded to reproduce the 2-channel output signal. If this 2-channel signal is Dolby Surround matrix encoded it may be decoded by a Dolby Pro Logic decoder.
3) A 5.1 channel program is Dolby AC-3 encoded and delivered by DVD or broadcast medium, such as satellite TV. The receiving decoder is capable of only producing 2 output channels. In this case, the 5.1 channels are "downmixed" to produce the 2-channel output without losing any information. The downmixed 2-channel output may be stereo or it may be a Dolby Surround compatible output signal, capable of being decoded by a Pro Logic decoder to produce 4-channel surround sound. If your system is capable of reproducing all 5.1 channels, this case will not apply.
The RDA 975 offers 5.1 channel decoding of multi-channel Dolby Digital soundtracks. Please remember that some Dolby Digital soundtracks are stereo, not 5.1 encoded. They may be a 2 channel Dolby Digital signal with Dolby Surround matrix encoding, however. In such a case Dolby Pro Logic decoding of the Dolby Digital output should be performed by the companion surround sound decoder to reproduce all 4 channels of the Dolby Surround signal.
OPERATIONAL NOTE ABOUT DOLBY DIGITAL DECODING: Some control functions for Dolby Digital decoding are automatic and some may be controlled manually. Dolby Digital decoding turns on automatically when RDA 975 is turned on and a source signal with Dolby Digital AC 3 encoding is detected. 2-channel decoding engages when processing non-5.1 Dolby Digital signals by RDA 975. You may manually choose STEREO to decode or "downmix" 5.1 channel Dolby Digital encoded material as 2 channel stereo output. The choice between 5.1 and stereo may be selected while receiving a Dolby Digital encoded input signal from your Laser Disc or DVD player.
CONTROLS ON THE FRONT PANEL
FRONT PANEL CONTROLS
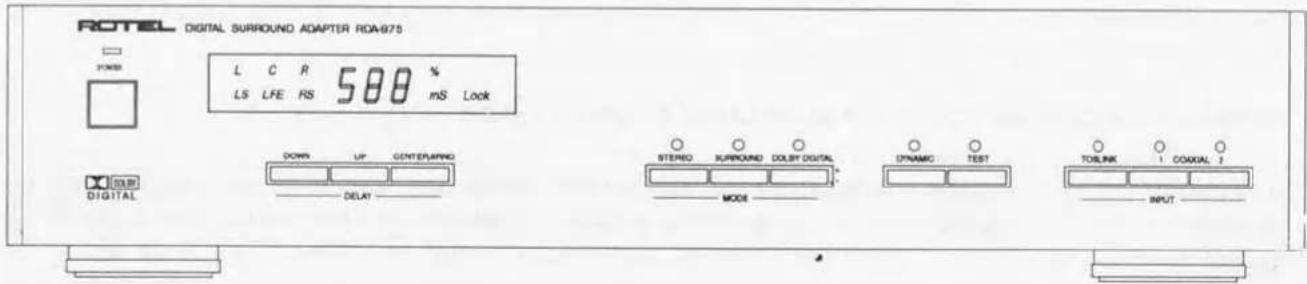
The POWER button is on the left side of the front panel. Push it to turn the power and indicator light ON. When you press it a second time, the power and the indicator light will turn OFF. If you connect the RDA 975 to the Rotel RLC 900 AC power switching control or a switched AC outlet on the companion surround sound processor we suggest setting the POWER switch to the ON position. When plugged into a switched outlet in this way the power on/off function is controlled by the other component. This is very convenient in a remote controlled system.
The Dolby Digital signal LOCK indicator light, in the display window, will illuminate constantly when a Dolby Digital stereo or 5.1 channel encoded signal is detected. The display shows the delay time for the center (C) or surround (S) channels in milliseconds. It displays which of the Left, Center or Right front speakers or the Left Surround, the Right Surround or the Low Frequency Effects channel is being used by TEST during set up mode of operation. To cycle through the channels is easy. Press the TEST button once each time you wish to change the channel receiving the test signal from the built in tone generator. The appropriate channel indicator lights will illuminate.
For stereo decoding or stereo "down-mixing" of 5.1 channel signals, press the STEREO button and the L and R lights will illuminate.
The SURROUND button is for Dolby Pro Logic decoding of 2 channel Dolby AC 3 encoded signals if the source is Dolby Surround matrix encoded. It may be used with TV broadcasts from cable or satellite TV in some locations. If you prefer to use your companion decoder for this purpose, this function may be ignored.
Press the DOLBY DIGITAL button for 5.1 channel decoding and all the channel indicators will illuminate. If no Dolby Digital encoded signal is detected the LOCK light will not illuminate. The LOCK light may go out during pause operation of your Laser Disc or DVD player.
DELAY times are adjusted using the front panel push button controls. The CENTER/SRND button is dual function, alternating between the CENTER and SURROUND speakers. When set to C for the CENTER channel, the DOWN/UP controls adjust for equivalent distance from your favorite chair to the center and front left and front right speakers. Center channel signal delay times from 0 to 5 milliseconds are available. Measure the distance from your favorite chair to the center, front left and front right speakers. (1ft = \~1ms = \~30cm) If the center channel speaker is 3 feet closer to you than the front left speaker/front right speaker, set C to read "03" in the display window. This adjusts the Time Alignment so that the arrival times of sounds from the all the front channel speakers are equal. This setting will make a positive difference in the quality of center channel sound and dialogue intelligibility. This needs no further adjustment unless the speakers are moved to new locations.
When the CENTER/SRND button is set to S, the SURROUND delay times are adjusted with the DOWN/UP buttons. Default setting is the "0" time setting in the display window. If you are equidistant from the FRONT and SURROUND speakers, please choose the "0" millisecond delay time for Dolby Digital. If you are sitting nearer to the surround speakers, choose a longer DELAY time. Add approximately 1 ms for every foot (\~30 cm) that you are closer to the surround speakers than to the front speakers. Longer delay time settings available will add 5, 10, and 15 milliseconds of delay to the surround channels. Because all 5.1 channels are
discrete in Dolby Digital sound no 15-millisecond delay is built in to the normal or default delay time setting, unlike Dolby Pro Logic decoding of Dolby Surround sound.
The delay time for the surround sound speakers is needed for Dolby Surround to establish the main and center speakers as the primary sound signals. Because the signal is delayed to the surround channels, you hear the front speakers first. This is called the "Haas precedence effect" and this effect is used to emphasize the front speakers. They take precedence and localize the sound images as coming from the front of the room.
A small amount of low level leakage signal from the front to the surround speakers is inherent in the Dolby Pro Logic matrix decoding system. The delay time "masks" this small amount of signal from the front appearing in the surround channels. This low-level sound leakage of front channel to surround channel information is not present with Dolby Digital 5.1 decoding. When Dolby Pro Logic decoding is used, delayed output from the surround speakers helps make the surround sound experience more believable and enjoyable.
The TEST switch activates the BALANCE CHECK mode. This should be done during initial set up or whenever a change is made in the components or speakers used in your system. The TEST signal can be used at any time to set up the channel balance in 5.1 systems with individual channel level input controls. (See the TEST BUTTON, below.)
The DYNAMIC range adjustment control will cycle the RDA 980 through four levels of digital signal level compression plus dialog normalization. When DYNAMIC is in use, the indicator light will be illuminated. The levels are FULL dynamic range plus dialog normalization (25%), NORMAL dynamic range (50%) plus dialog normalization, MINIMUM dynamic range (75%) plus dialog normalization, or BYPASS position (0%) without dialog normalization, respectively. The display window will return to showing the CENTER or SRND delay a few seconds after the DYNAMIC setting is chosen.
The 0% setting (BYPASS position) turns off the DYNAMIC indicator light, selects direct output and provides the full dynamic range that the Dolby Digital system is capable of producing. The 0% position defeats dialog normalization.
The 25% display setting (FULL dynamic range) chooses dialog normalization without added signal level compression. This gives the full dynamic range of Dolby Digital soundtracks plus dialog normalization.
The 50% display setting (NORMAL dynamic range) provides 6 dB of compression and is best for general viewing of your favorite video sources, with wide dynamic range plus dialog normalization.
The 75% display setting (MINIMUM dynamic range) should be chosen if you wish to greatly restrict the volume range of soft to loud sound in your system. MINIMUM provides 12 dB of high volume level compression, low volume level boost and dialog normalization, all of which are controlled by the Dolby AC 3 bitstream. This setting is great for late night viewing to avoid offending other family members or your neighbors. Even when the soundtrack is played quietly you will be able to hear the dialog and the special effects clearly.
The BYPASS position is capable of very large changes in apparent volume level from your system, from very quiet to very loud. The BYPASS setting is best when used with high performance, high power surround sound systems. We suggest using companion components from ROTEL, RSP 980 surround sound preamplifier, the RB 985 five channel power amplifier or the RMB 100 MOSFET mono power amplifier, all THX® certified for home use. Other excellent choices are the Rotel RB 971, RB 991 and RB 993 power amplifiers and the RSP 970 or RTC 970 surround sound processors.
The INPUT selector buttons have front panel indicator lights to indicate which one is chosen, and are labeled TOSLINK, Coaxial 1, and 2. They select the digital input source for playback.
If the RDA 975 is used with a ROTEL surround sound processor or a surround sound processor with fixed level inputs for an external digital adapter, SKIP THIS SECTION. In such an installation, use the channel balance test set up tones in the companion surround sound processor.
To use RDA 975 with a surround sound processor with individually variable channel inputs for an external digital adapter or a direct connection from the RDA 975 to a 5 or 6 channel power amplifier with variable volume controls, use the following set up method. Begin by choosing the 5.1 external processor INPUT on your surround sound processor. Next, press the TEST button on the RDA 975 front panel. The balance test signal will begin. This will allow you to manually cycle through all the speakers in your system, starting with the LEFT FRONT speaker.
Adjust the VOLUME buttons on the remote control for your surround sound processor or the individual channel level controls on the power amplifier to make the volume levels balance in all channels. The volume for each successive channel should be adjusted by using the remote control while sitting in your favorite chair or couch. If you are doing this set-up procedure direct to a five or six-channel power amplifier, you may need a friend to help you make these adjustments. All of the channels should be the same volume level reading from the main listening position. This does not mean that the volume setting will always be the same value for all the channels because there may be different distances from the main seating position to the location of the speakers. When you have properly adjusted all the channels to 75-dB sound pressure level, push the TEST button again to turn OFF the test signal. If a lower overall volume level is desired, adjust the speakers to a lower but equal volume level.
For best results, we suggest using a sound pressure level (SPL) meter when making the BALANCE CHECK settings. An analog sound level meter (from Radio Shack® for example) will be excellent for this purpose. Listening by ear will not be as accurate. The sound meter controls should be set to 70 dB, "slow" and "C-weighting." This adjustment should be made while you are seated in your regular listening location. Holding the sound level meter head high at arms' length, with the microphone aimed upward at a 45° toward the ceiling, set all channels to 75 dB SPL. The accurate setting of channel balance is important and will affect the potential for realistic playback from your system.
PHYSICAL INSTALLATION and ELECTRICAL REQUIREMENTS
Please place the unit on a DRY, level surface away from direct sunlight Avoid installing in a location where excessive heat, direct sunlight, humidity, vibration or moisture will be a problem. We recommend installation in furniture designed to house audio and video components. This will allow the RDA 975 to be installed on a separate shelf, not stacked with another component. This will minimize potential interference or heat build up from other components in your system.
The RDA 975 is designed to work on AC voltage and the correct voltage is displayed on the back panel. Please do not connect it to the wrong AC voltage, as this will damage the circuitry. Connect the power cord to your wall socket for AC power. When you disconnect the power cord from the wall, always grasp the plug firmly to pull the plug out of the wall socket. Please do not unplug the power cord from the wall by pulling the cord only. This may damage the power cord and thereby create a hazardous electrical condition.
There is no user serviceable part inside the RDA 975. Please do not open the cabinet, as this will expose you to the risk of potentially dangerous high voltage and the risk of electric shock.
CLEANING THE CABINET
If you wish to clean the cabinet, we suggest that you clean it with a soft, DRY cloth. Please don't use harsh cleaning compounds or solvents to clean the cabinet as they may damage the finish or remove the labels. If you believe that a cleaning solution is absolutely necessary, please use very small amounts of a non-residue liquid glass cleaner on a clean cloth. Using liquids near electricity is very dangerous, please be careful to avoid risk of shock or damage to the circuitry.
A FINAL THANK YOU FROM ROTEL
We designed RDA 975 for high performance using test equipment and our ears. We believe both are essential in the design of digital audio electronics. This is a time consuming process but we feel that the music and movie soundtracks benefit from this care and attention to detail. We hope that you thoroughly enjoy the latest soundtracks while listening through this Dolby Digital surround sound adapter. Enjoy the sights and sounds!
SPECIFICATIONS: RDA 975
| Frequency Response | 5-20,000 Hz, ± 1.0 dB |
| Signal to Noise Ratio (all channels) | 100 dB, IHFA @ 1 kHz |
| Input Impedance | 75 Ohm |
| Output Impedance | 1 k Ohm |
| Total Harmonic Distortion | 0.006 % (1 kHz) |
| Output | 1.0 volt, large speaker @ 1 kHz, 0 dB FS |
| Power Consumption | 17 watts |
| Power Requirements (AC) | 115 volts 50/60 Hz or |
| 230 volts 50/60 Hz | |
| Weight | 5.2 Kg, 9.24 Lb. |
| Dimensions | 440 × 104 × 310mm (W x H x D) |
| 17.38 × 4.09 × 12.20" (W x H x D) |
All specifications are accurate at the time of printing. Rotel reserves the right to make improvements without notice.
ROTEL®, and the ROTELhi fi logo are the registered trademarks of The Rotel Co., Ltd., Tokyo, Japan. All rights reserved.
THX® is a registered trademark of Lucasfilm Ltd.
Radio Shack is a registered trademark of Tandy Corp., Ft. Worth, Texas.
Manufactured under license from Dolby Laboratories Licensing Corporation. "Dolby", "Pro Logic" and the double-D symbol are trademarks of Dolby Laboratories. Confidential Unpublished Works. Copyright 1992-1997 Dolby Laboratories, Inc. All rights reserved.
TROUBLESHOOTING HINTS
| NO POWER | HAVE YOU CHECKED THE AC OUTLETIS THE AC CORD CONNECTED TO A SWITCHED OUTLET?IS THE SWITCHED AC OUTLET TURNED ON?IS THE AC CIRCUIT SAFETY FUSE BLOWN? |
| NO TEST SIGNAL(From RDA 975) | IS THE 5.1 INPUT SELECTED ON YOUR COMPANIONSURROUND SOUND PROCESSOR? TEST BUTTON ON RDA 975SET TO ON? CABLE TO SURROUND PROCESSOR LOOSE? |
| NO SOUND(Lock light on) | 5.1 INPUT SELECTED ON SURROUND PROCESSOR?IS THE POWER AMPLIFIER TURNED ON?CABLE FROM RDA 975 TO SURROUND PROCESSOR LOOSE?CORRECT INPUT CHOSEN FOR 5.1 DIGITAL INPUT SOURCE? |
| (Lock light off) | |
| NO BASS | SPEAKER CONFIGURATION SWITCHES SET CORRECTLY?IS THE SUBWOOFER AMPLIFIER TURNED ON?IS THE POWERED SUBWOOFER TURNED ON? |
| DISTORTED BASS | SPEAKER CONFIGURATION SWITCHES SET CORRECTLY? |
CONTINUED PROBLEMS? ASK YOUR AUTHORIZED ROTELHI FI DEALER FOR HELP.

- Digital Surround Sound Adapter
- OWNERS MANUAL
- SAFETY INSTRUCTIONS
- CAUTION
- • Explanation of Graphical Symbols
- APPLICABLE FOR USA, CANADA OR WHERE APPROVED TO THE USAGE
- OWNER'S MANUAL INDEX
- FEATURES OF THE RDA 975
- CONNECTIONS ON THE REAR PANEL
- SETTING the SPEAKER CONFIGURATION SWITCHES
- BACK PANEL CONNECTIONS ON THE RDA 975
- WHAT IS DOLBY DIGITAL SOUND?
- PLAYBACK OF DOLBY DIGITAL SOUNDTRACKS
- CONTROLS ON THE FRONT PANEL
- FRONT PANEL CONTROLS
- PHYSICAL INSTALLATION and ELECTRICAL REQUIREMENTS
- CLEANING THE CABINET
- A FINAL THANK YOU FROM ROTEL
Brand : ROTEL
Model : RDA975
Category : Home Theater