USER MANUAL HM-05CB03 HAIER
Mobile Air Conditioner
AM052ACNBA
(HM-05CB03/R1)
AM072ACMAA
(HM-07C03)
AM092ACMAA
(HM-09CA03)
AM072ACNBA
(HM-07C03/R1)
Operation Manual
Contents
- Outline ----1
● Description of the components - - - - - - 3
● Usage 6
● Maintenance 9
● Preservation 10
- Check on troubles by self - - - - - - - - - - 11
- Points of attention - - - - - - - - - - - - - - - - - - - - - - - - - - - - - - - - - - - - - - - - - - 12
● Operating principle 13
● Installation of the accessories - - - - - - - 13
- Please read this manual carefully before use.
- Please keep it attentively.
0010541140
F
Outline
The mobile air conditioner is a kind of multi-function miniature type mobile indoor air conditioner. It can be moved freely according to different usage site, with the functions like cooling, dehumidifying, independent ventilating and air-purifying, etc. It is adaptive for family and office usage, especially family with several rooms. The product has compact structure, exquisite craft, nice mould, convenient moving, low energy consumption and low noise. It is an ideal indoor air conditioner.
In using the dehumidifying function, you do not need to add the hot air exhaust duct.
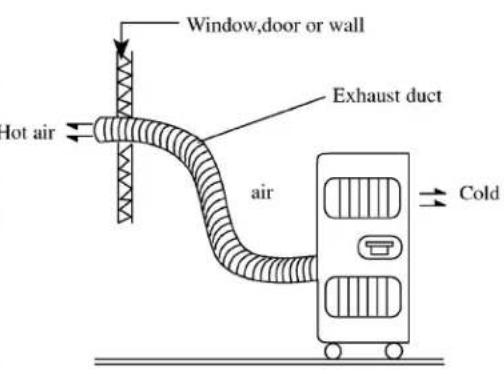
In using the cooling function, please install the hot air exhaust duct as indicated in the figure (refer to P13 for the detail installation method). As the exhaust duct discharges the hot air produced by the machine in working out of the room, the outdoor air may flow back into the room. Therefore the machine can only be used as packaged air conditioner offering partial cooling function, instead of reducing the temperature of the whole room significantly.
For AM072ACNBA(HM-07C03/R1), AM052ACNBA(HM-05CB03/R1) are CFC free mode, which adopt the R407c refrigerant.
● Remark per EMC Directive 89/336/EEC
To prevent flicker impression during the start of the compressor (Technical Process), the following installation conditions do apply:
- The power connection for the air conditioner has to be done at the main power distribution. This distribution has to be of a low impedance. Normally the required impedance is reached at a 32A fusing point.
- No other equipment has to be connected to this power line.
- For the detailed installation acceptance, please refer to your contract with the power supplier, if restrictions do apply for products like washing machines, air conditioners or electrical ovens.
- For the details of the power of the air conditioner, please refer to the rating plate of the product.
- For any questions, contact your local dealer.
The machine is adaptive in the following situations:
- Rooms with an area less than 20 m², and with good heat-insulation structure.
There's an ideal cooling effect in the whole area in front of the blowing wind (Fig. 1).
- If the area of the room is larger than 20 m², such as the workshop of the factory, and the partial working post requires cool air, the machine can offer a satisfying cooling effect in the sector area in front of the blowing wind. (Fig. 2)
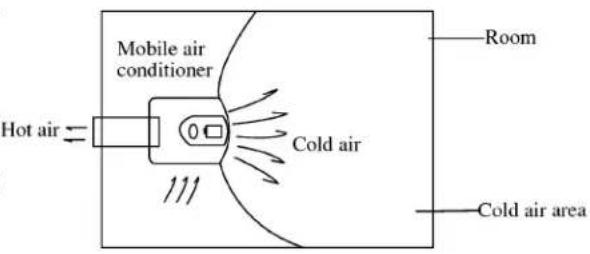
Fig.1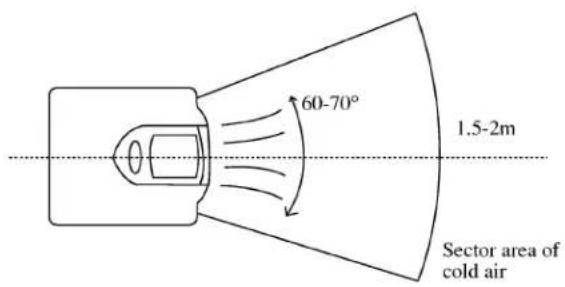
Fig.2
- Applicable temperature range:
max: D.B.T. 35°C W.B.T. 30°C
min: D.B.T. 18°C W.B.T. 14°C
Replaceable fuse: 3.15A
- The wiring method should be in line with the local wiring standard.
- If the fuse is broken or power cable damaged it should be replaced by the qualified person. If the fuse on PC board is broken, please change it with the type of T.3.15A/250V.
- Not intended to be used in laundry rooms.
Machine body
Front

Back
Hot air exhaust duct
Accessories of hot air exhaust duct

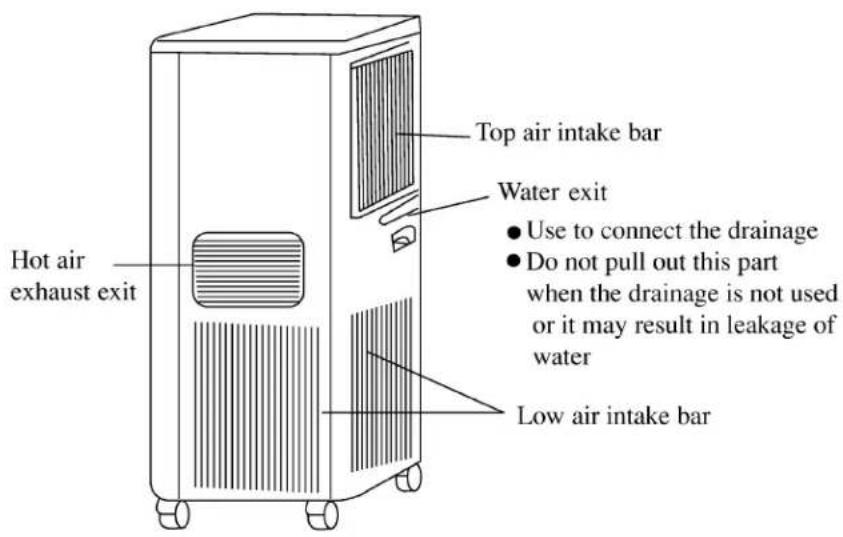
Control panel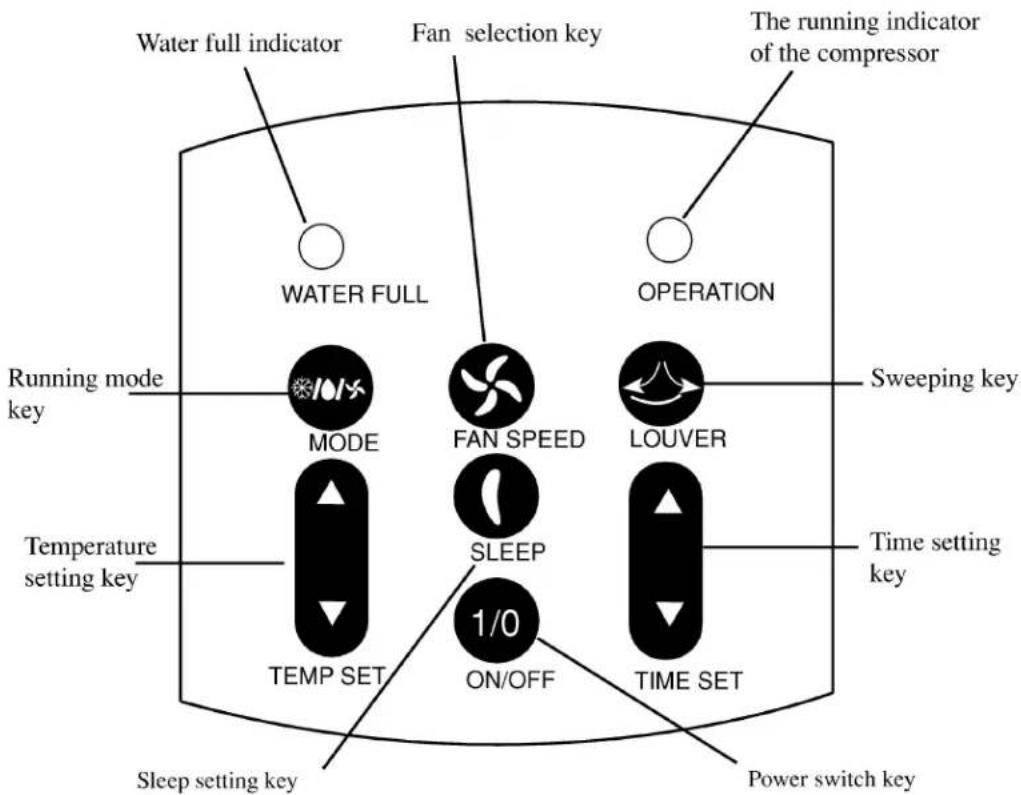
LCD window
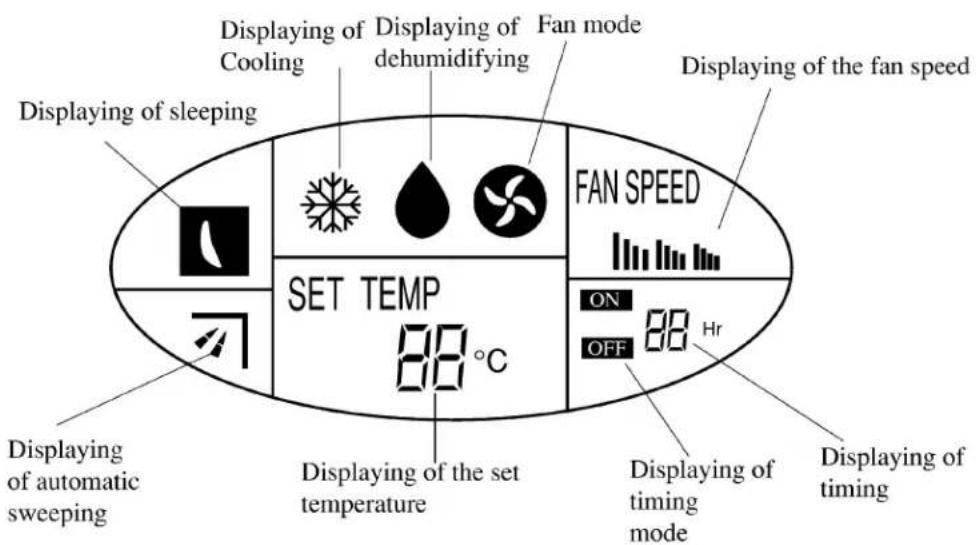
Description of the components
- Running Mode Key
Press the key to choose from three running modes: cooling → dehumidifying → fan. The LCD window displays correspondingly: ⚙→♠→♣
2. Fan Selection Key
Press the key to choose from three fan speeds: high → middle → low. The LCD window displays correspondingly: ||||||||||||→||||||||||→||||
3. Sweep key:
Press the key to enable automatic side-to-side sweeping of the indoor air. The LCD window displays ☐; press the key again to fix the indoor air at the present direction.
4. Temperature Setting key
Press the key to set the temperature between 15-30°C. Each press of the ⚠ part will increase the temperature by 1°C, and each press of the ⏰ part will decrease the temperature by 1°C. The temperature will be displayed in the LCD window.
5. Sleep Setting key
Press the key to set or cancel Sleep Mode. When the LCD window displays the air conditioner is under Sleep Mode. Press again to cancel the Sleep Mode, and the signal will disappear on the LCD window.
6. Power Switch key 1/0
Press the key to switch the air conditioner on or off.
7. Time Setting key:
Press the key to set or cancel the timer mode, or set the time between 1-24 hours. Each press of the + part will add one hour, which will be displayed on the LCD window; each press of the - part will reduce one hour. If it shows 1 hour, press once to cancel the timer.
- Water Full indicator:
When the water tank is full, the indicator will flash and an alarm will sound. The compressor stops working, and the air conditioner enters fan mode. Please remove the water tank, pour out the condensed water, and then replace it. The air conditioner will resume the mode it was in before the compressor stopped (the compressor can only restart after a 3-minute time-delay protection).
- Compressor run indicator:
In cooling or dehumidifying mode, the indicator will be on while the compressor is running.
Application of refrigerating and dehumidifying
The operating range for cooling is 15-35°C. The operating range for dehumidifying is 12-35°C.
Placement requirements
When in use, place the machine on a level surface and keep a distance of at least 50 cm from walls or other objects.

1. Cooling
1) Confirm that the water tank is properly placed.
2) Install the hot air exhaust duct (refer to P12 for installation details). Select a position near a door or window, and extend the exhaust duct outside. Note that the door and window should not be closed tightly. An air circulation inlet is necessary, such as opening a window or door to ensure proper indoor air circulation.
3) Press the Running Mode key to select cooling mode. The LCD window displays ✉️.
4) Press the Temperature setting key to set suitable indoor temperature 15-30°C.
5) Press the "Fan" key to select suitable fan speed: High, Middle, Low.
Notice: In cooling mode, to improve the cooling effect, please note the following:
(1) For windows exposed to sunlight, please use curtains to shade them. (2) Avoid using other heat sources in the room as much as possible.
2. Dehumidifying:
You can expect better dehumidifying effect by closing the door and window. The indoor temperature will rise a little.
1) Confirm that the water tank is well placed.
2) Press the Running Mode key to select dehumidifying mode. The LCD window displays ♦. The machine runs under Dehumidifying Mode. At that time, the fan speed is not adjustable.
3) If the machine is used as a dehumidifying device, the hot air exhaust duct is not needed.
3. Fan running:
1) Press the Running Mode key to select Fan run mode. The LCD window displays. 2) Press the Fan speed key to select fan speed: High, Middle, Low.

Usage
4. Timing function.
(1) Switch on the machine at set time: When the air conditioner is in Off mode but still electrified, press the up arrow of the Time Set key, the LCD window will display "1 Hr". Set the start time 1-24 hours. (2) Switch off the machine at set time: When the air conditioner is running, press the up arrow of the Time Set key, the LCD window will display "1 Hr". Set the start time 1-24 hours.
5. Automatic louver function:
1) Press the louver key, the LCD Window displays ↗. It starts automatic swing. 2) Press the key again, the ▶ on the LCD window disappears. The automatic swing stops.
6. Sleep function:
In running, press the Sleep key, the LCD window displays 📁. The air conditioner runs under Sleep Mode. After 1 hour running under Sleep Mode, the set temperature rises for 1°C. After another hour, the temperature will rise for 1°C again. After another 6 hours, the machine will be switched off automatically. In Sleep Mode the Time On function is invalid. Press the Sleep Set key, the LCD displaying “ ℜ” disappears, and the Sleep function is cancelled.
7. Drainage:
When using the functions of cooling and dehumidifying, the condensed water will be gathered in the tank. When the tank is filled with water, the water Full indicator begins flashing, and the buzzer will give eight beeping. At the same time the compress or stops working, and the complete appliance blows at the former set fan speed. After 3 minutes the complete appliance stops working. Please drain the water and replace the tank as indicated in the following figure.
(1) Do not take out the tank when the machine is running under Cooling or Dehumidifying mode, or the machine will alarm and stop working of the compressor, and convert the working mode to Fan mode.
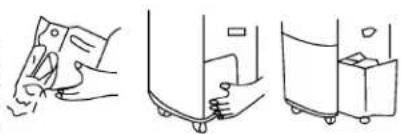
(2) If you drain the water when the tank is not filled with water, Please take out the tank after the power has been switched off for 3 minutes, so as to prevent the remained condensed water from dropping into the machine.
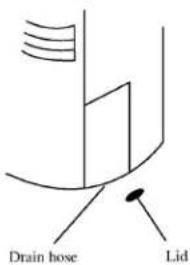
(3) There's a rubber tube inside the position where the tank is placed. It is used to cool the pipeline, so be sure not to pull off the rubber lid and drain the water inside when the machine is used.

8. Method of consecutive drainage
1) Take out the drain hose. 2) Pull out the Consecutive Drain Groove.
- Do not pull out the groove in case other than consecutive drain, so as to avoid moistening the carpet, etc.
Usage
3) Hold the drain groove, and plug the top of the hose into the drain mouth. Please insert the root reliably.
4) Drainage:
During drainage, especially when there are children nearby, do not apply force on the drain groove.
Do not bend the hose.
(1) If the machine is running or has just finished running, pulling out the drain groove may cause water to leak. Please hold the water with a linen cloth or similar, and connect the hose quickly.
(2) When dismantling the hose, hold the drain groove tightly and pull off the hose.

9. Air-purifying function
The machine has an active carbon screen at the air filter bar, which can remove smoke smell and odor, and filter dust in the air.
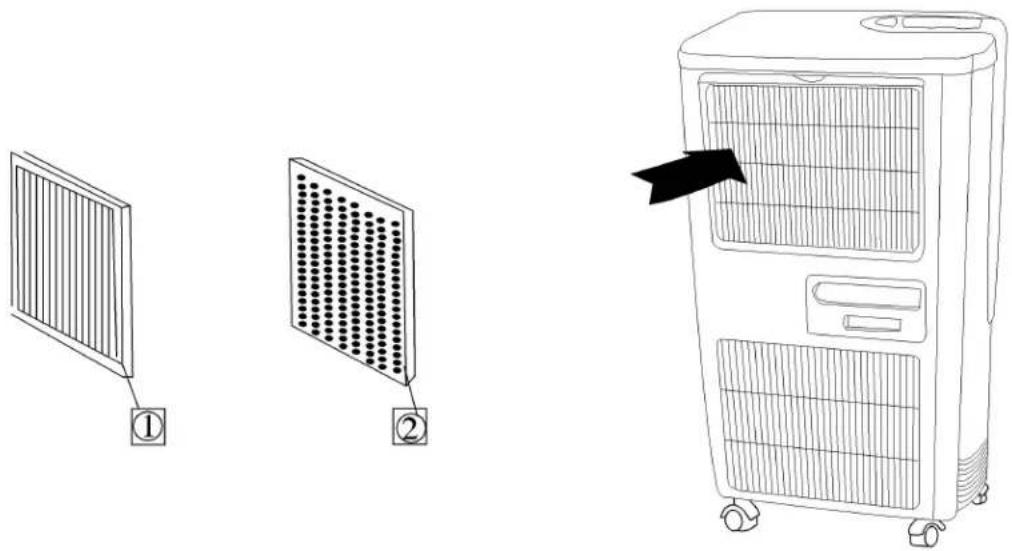
(1) Filter bar
(2) Active carbon screen: uses active carbon to absorb and dissolve smoke smell and odor.
Maintenance
· The power line should be pulled off before cleaning. - Maintenance should be performed after the machine stops running, that is, the power is switched off, to avoid electric shock accidents. · Do not use solvents like benzol, alcohol, glazing agent, etc., during cleaning, as they may cause fish tail, cracks, or color changes.


Air-purifying screen
- If the active carbon air screen gathers too much dust, the air rate will be weakened. Therefore, it should be cleaned at least every two weeks.
Dismantling the filter bar
1) Hold the handle of the filter bar, pull it open, and take out the bar upwards. 2) Take out the active carbon air screen from the protecting cover of the filter screen.
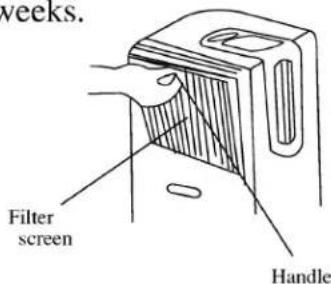
Clean the air filter screen
- Put the active carbon screen into warm water (about 40°C) with neutral detergent to clean it, then dry it in a ventilated, shaded place.
Install the air screen and filter bar
Fix the active carbon air screen at the clamp of the filter bar.
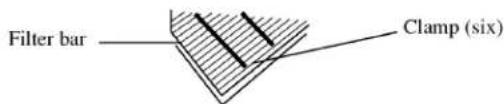
1) Put the clamp of the lower part of the screen protecting cover at the position of the corresponding clamp hole. Push the handle to position.
Clean the shell
Clean the dirt with a cloth soaked with neutral detergent, then wipe off the detergent with a clean cloth.
Clean the water tank
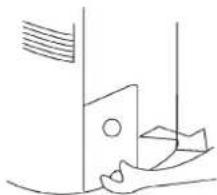
1) Hold the handle of the water tank, and pull it out gently. 2) After pouring out the water, clean the dirt with neutral detergent (about 40°C), wash and dry it completely, then push it back into the machine.
Preservation
- Do not use it in a narrow place, so as to avoid trouble.
- Do not use it in places with direct sunlight, so as to avoid discoloration.
- Do not use it in places that are wet or likely to come into contact with water, so as to avoid electric leakage.
- Do not use it in the following places:
- where there is gas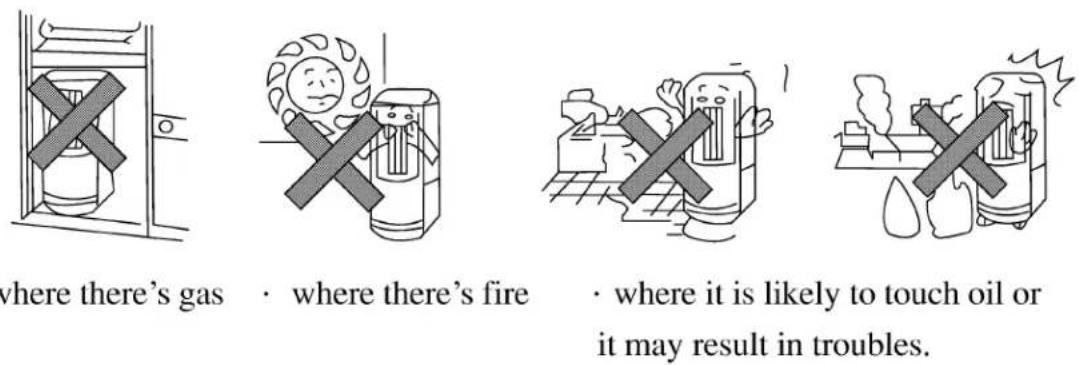
- Pour the water in the tank, pull off the lid of the rubber pipe inside the position where the tank is placed, and discharge the condensed water. After maintenance, dry the machine inside completely in Fan mode.
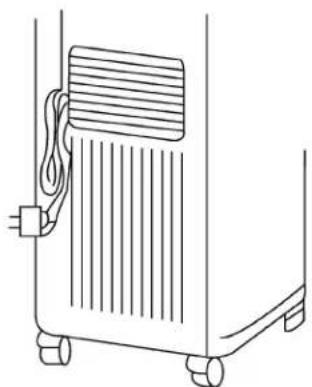
- Bind the power line with the line tying at the back. 3. Cover the machine with a rubber bag, and keep it in dry, ventilating places. 4. Do not put the machine horizontally.
Please check the following points before applying for repair or service. If the trouble is not solved, please contact the sellers.
| Phenomenon | Checking content | Measurements |
| Press “1/0”but cannot start the machine | 1.Is the power plug inserted into the outlet reliably? | Please insert the power plug into the outlet reliably. |
| 2.Does the Water Full indicator light up? | Pour out the water in the tank (refer to P7) |
| 3.Is the water tank placed well? | Please push the tank to right position. |
| The LCD window displays mode,but can not run it. | Is the Time On timer set? | It will automatically run when the set time is up. |
| Set to cool,but find no cold air (the LCD window displays the mode). | Is the indoor temperature below 15°C,or it is under 3 minutes delaying? | The indoor temperature is below 15°C.It is normal phenomenon. |
| If the indoor temperature is above 15°C, pull the filter bar open to see if there's frost on the surface of the evaporator. | It is in defrost mode. After defrosting the running indicator of the compressor will be on,and it will start running. |
| Set to Dehumidify,but find no cold air(the LCD wind-ow displays the mode) | Pull the filter bar open.There's frost on the surface of the evaporator. | It is running defrosting .After defrosting the running indicator of the compressor will be on,and it will start running. |
| The air rate is too low | Is the filter screen blocked with dust?Is there barrier at the wind gap? | Please clean the filter screen (refer to P9) |
| The power plug and outlet are too hot | Are the jacks of the outlet too loose?Is the filter screen too dirty? | If it is loose please send it to the department where you bought the machine to repair. |
| The noise and vibration in running are too large | Is the machine used in slanting place? | Please put it on horizontal ground. |
| There's abnormal sound | There's sound of running water in running or when the machine is just stopped. | It is the sound of the inner liquid (refrigerating medium),not abnormal phenomenon. |
| There's cracking sound in running | It is the sound of the components shrinking and expanding against changes of temperature,not abnormal phenomenon. |
Power source
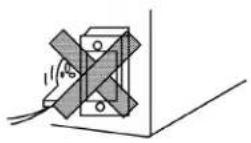
1) Please do not use a damaged or bad-contact outlet. It is dangerous if the outlet or power plug is too hot. At that time, please let the sales department check it.
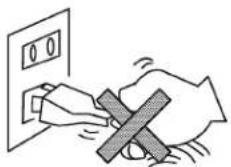
2) Please hold the plug tightly to pull it out. If you pull the wire, it may be broken.
Others
Safety should be considered for the following persons:
1) Children; patients 2) Unhealthy persons; those who cannot express themselves 3) Those who are very tired, seriously drunk, or using hypnotics.
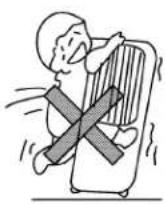
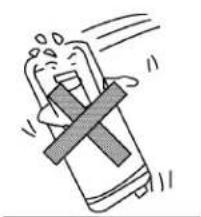
- Please do not climb on the product, or put things on it, or it may overturn and result in breakdown.
- Please do not let the wind blow directly on the human body for a long time, or it may damage the human body; please use the timer or louver.
- Please leave at least 1 m from the TV, or it may result in interference of electromagnetic waves.
- Please do not let the air outlet adhere to the wall, or cover the air outlet with cloth, or it may result in breakdown and deformation.
- Please do not use the front air outlet to dry clothes, or put fingers, needles, etc. into the air outlet, especially taking care of children, or it may result in electric shock.
Before moving the air conditioner, first pull off the power plug and pour out the water in the tank.
Do not slant or overturn the product. If you encounter a problem, first pull off the power plug and send it to the sales department for inspection and repair.
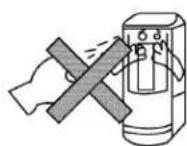
Do not spray it with pesticides or similar substances, as this may result in deformation or cracks.


Operating principle
1. Cooling cycle:
The operating principle of the machine is indicated in the figure. The refrigerating cycle is: the liquid refrigerant, after flowing through the capillary, evaporates into gas in the evaporator, then it turns into high-pressure gas under the action of the compressor, and condenses into high-pressure liquid in the condenser, forming the refrigerating cycle. The air cycle is: under the action of the fan, the indoor air 1 is cooled in the evaporator and then blown out from the front air exit, producing the cooling effect; the indoor air 2, under the action of fan 2, is blown out from the back air exit.
There is an ideal cooling effect in the total area in front of the front air exit.
2. Dehumidifying cycle:
After the power is switched on, fans 1 and 2 and the compressor start running. The low-temperature, low-pressure refrigerant vapor in the system is inhaled into the compressor, compressed to high-temperature, high-pressure gas, and discharged to the condenser. Under the action of centrifugal fan 2, it performs heat exchange with the outside air and is condensed to liquid refrigerant. After being throttled by the capillary, it enters the evaporator and performs heat exchange with the air outside the evaporator. The refrigerant absorbs heat and evaporates. When the temperature of the outside surface of the evaporator is lower than the dew-point temperature of the indoor air, some of the vapor in the air will be condensed and separated, and flows into the collecting box along the heat exchanger 1. The discharged low-humidity air performs humidity exchange with the indoor air so as to reduce the relative humidity of the indoor air. The cycle is repeated to do dehumidifying.
![graph TD A["Fan 1"] --> B["Motor 1"] B --> C["Cold air"] D["Hot air"] --> E["Compressor"] E --> F["Fan 2"] G["Heat exchanger 1"] --> H["Current 1"] I["Heat exchanger 2"] --> J["Current 2"] K["Current"] --> L["Current 1"] M["Current"] --> N["Current 2"]](/content/2026/05/846868/images/3cb832a08d4d243b2b0705103d390efb215c4d9e45e7800b8075536005ec9f5f.jpg)
Installation of the accessories:
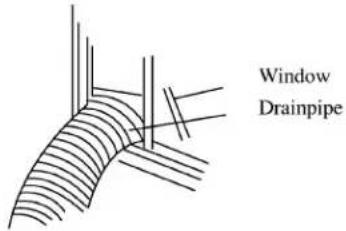
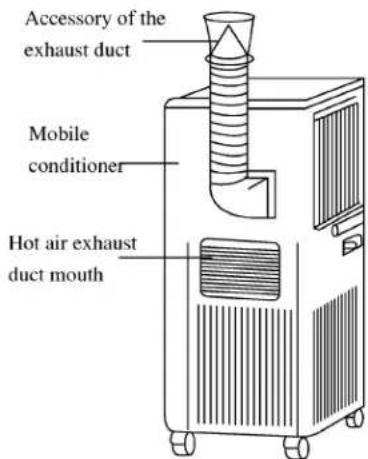
1) Wedge one end of the hot air exhaust duct into the connection end of the hot air exhaust exit. 2) Extend the other end (discharge end) to the nearest window.