
SDF 871 B - Digital photo frame SENCOR - Free user manual and instructions
Find the device manual for free SDF 871 B SENCOR in PDF.


| Product Type | Digital Photo Frame |
| Brand | Sencor |
| Model | SDF 871 B |
| Display Resolution | 800 x 600 pixels |
| Memory Card Support | SD / MMC / MS |
| Supported Image Formats | JPEG |
| Supported Audio Formats | MPEG1, MPEG2, MP3, AAC, OGG |
| Supported Video Formats | MPEG1, MPEG2, MPEG4-ASP, M-JPEG, Xvid, AVI |
| USB Port | USB 2.0 up to 480 Mbps |
| Power Adapter | DC 5V / 1.0A |
| Power Consumption | < 5 W |
| Built-in Speakers | 1 W x 2 |
| Remote Control | Yes (with dedicated buttons for photo, music, movie, setup, etc.) |
| Calendar Function | Yes (with clock display) |
| Alarm Function | Yes (auto power on/off and alarm with repeat options) |
| Slideshow Modes | Single, slideshow, multi-image, calendar with slide, calendar with single, calendar with clock, puzzle, multi round thumb |
| File Management | Copy, move, delete files via built-in wizard (supports memory card and USB) |
| Display Adjustments | Brightness, contrast, color saturation, backlight |
| Language Support | Multiple (including English, French, German, Spanish, Italian, Portuguese, Hungarian, Russian) |
| Package Contents | Digital photo frame, AC/DC adaptor, operate manual, warranty card |
Frequently Asked Questions - SDF 871 B SENCOR
User questions about SDF 871 B SENCOR
0 question about this device. Answer the ones you know or ask your own.
Ask a new question about this device
Download the instructions for your Digital photo frame in PDF format for free! Find your manual SDF 871 B - SENCOR and take your electronic device back in hand. On this page are published all the documents necessary for the use of your device. SDF 871 B by SENCOR.
USER MANUAL SDF 871 B SENCOR
Thank you for purchasing this Digital Photo Frame.
Before using the unit, please read this manual thoroughly, and retain it for future reference. This manual will help you use many of the useful features that will make using your Digital Photo Frame viewing more enjoyable.
Media
Inserting memory cards
Your multimedia photo frame is compatible with the memory cards of SD/MMC/MS:
And the file format support as:
Picture: JPEG
Music: MPEG1, MPEG 2, MP3, AAC, OGG
Movie: MPEG1, MPEG2, MPEG4-ASP, M-JPEG, Xvid, AVI
Digital panel resolution: 800* 600 pixels
USB 2.0 up to 480 Mbps
Power Adapter: DC 5V/1.0A
Power Consumption: <5W
Speakers: 1W*2
Package Contents
The following items are included in the received package:
1 Digital Photo Frame
1 AC/DC adaptor
1 Operate manual
1 Warranty card
If any item is missing, please contact the retail store you purchased the product from.
Quick Start Guide
1. Getting started: Checking the appearance:
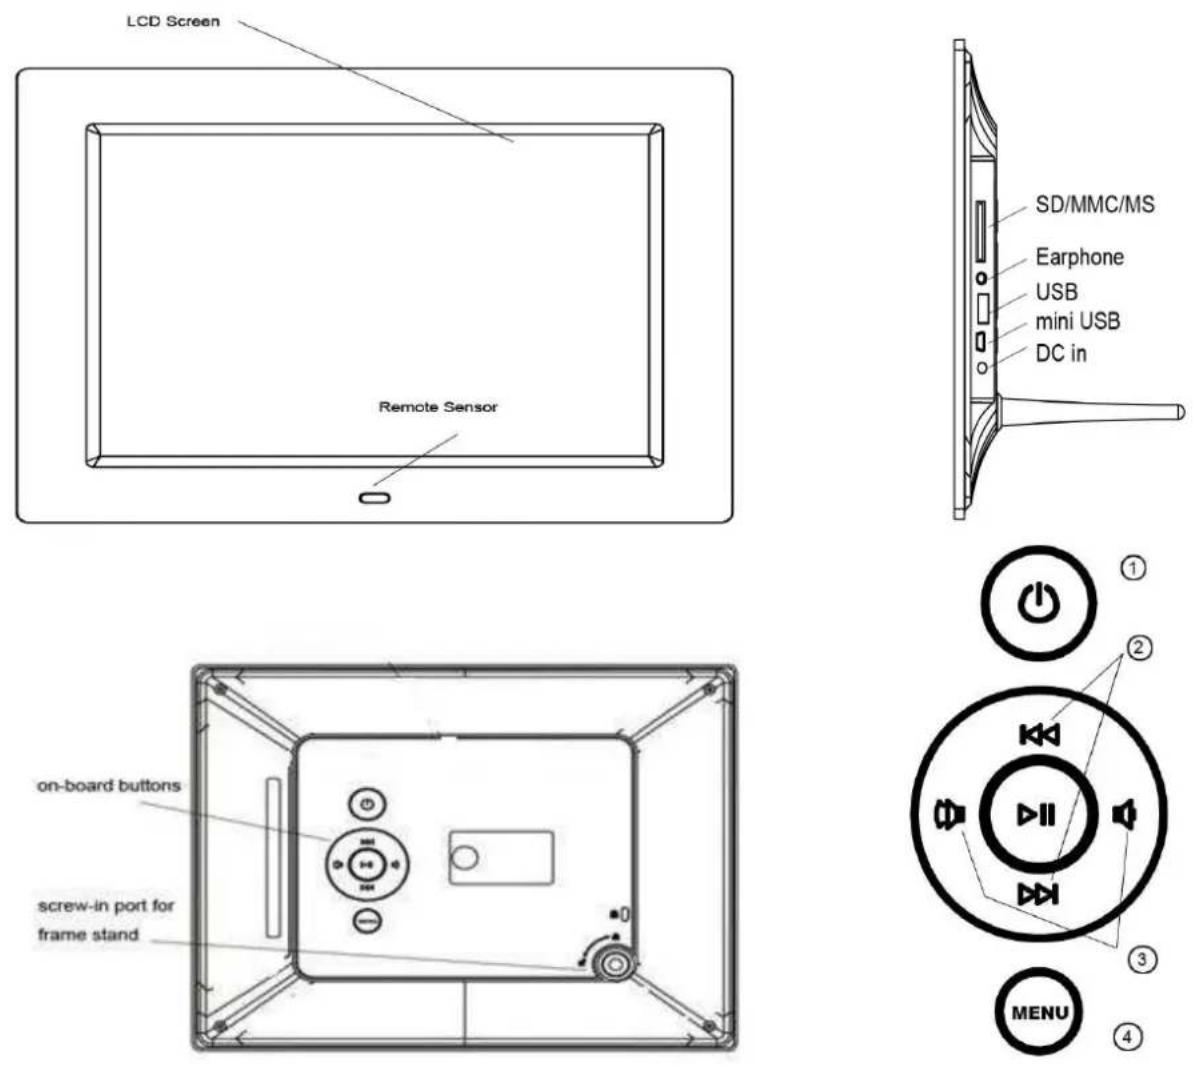
2. Understanding interface and on-board buttons:
- Power On/Off;
- Previous / Next;
- Turn volume up / down;
- Menu
3. Installing:
Open the package and remove the protective sleeve from the unit. Screw in the stand to the stand screw hole on the back of the photo frame, Adjust the frame position for vertical or horizontal placement, Plug in the AC adapter into power outlet. Plug the other end into the unit. Insert your memory card and the unit starts the slideshow digital photos automatically.
4. Understanding the remote:
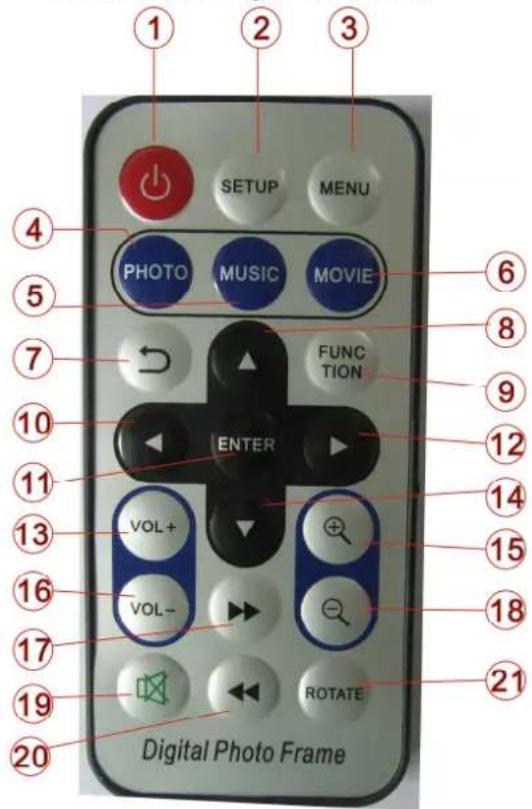
1, Power on/off
2, Setup
3, Menu
4, Photo mode
5, Music mode;
6, Movie mode;
7, Return to previous menu;
8, Go up, go to the previous sub-menu;
9, Function Key: special functions***
10, Left
11, Enter, confirm selection, play/pause function
12,Right
13, vol+
14, Go down;
15, Zoom in
16, vol-
17, Fast Forward
18, zoom out
19, Mute
20, Fast backward
21, Rotate -90 degrees
Note: Function button on remote:
The “FUNC” button on the remote delivers extra convenience to users, including photo slideshow mode selection and the file operation copy / move / delete in/between on-board memory.
5. MENU
When turn on will be show the Main Menu. (if insert the device will be going to read the video in the device first and press the key of "Menu" will be back to Main Menu)
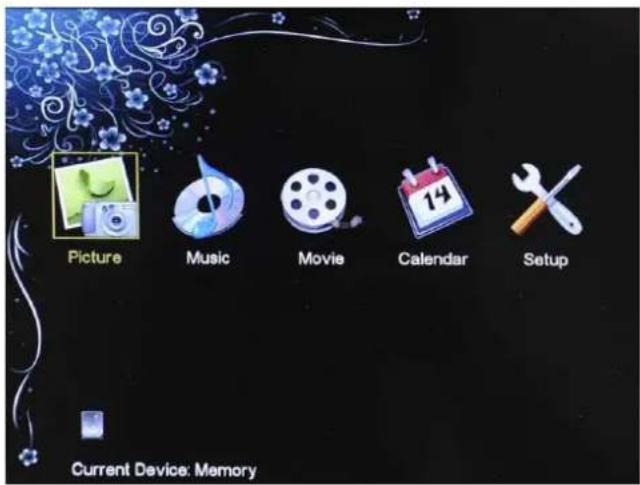
Figure 1: Main menu
Press “left/right” keys on the frame or remote to select the function mode you need, there are 5 function icons including Picture playback, Music playback, Movie playback, Calendar, Setup. The selected icon will be highlighted. Press “ENTER” on the remote to start the selected function.
5.1 Playback
The frame will play directly from the memory card or USB. And will display the main menu if without insert t device. (Start default as Movie, you can change to other modes from the settings)
Photo slideshow mode selection:
Press Function key during picture slideshow, a dropdown menu will display on the screen as below:
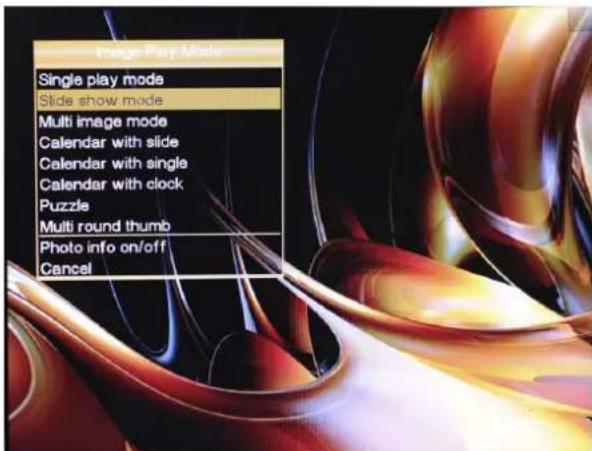
Figure 2: Function key dropdown menu
natural_image
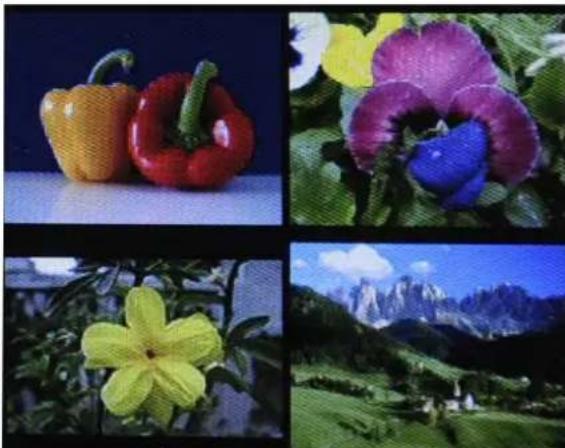
Four-panel collage showing colorful bell peppers, purple and blue flowers, a yellow flower, and a mountain landscape (no text or symbols)Figure 3: Multi-image split display
- Single image
- Slideshow mode
- Mult image display
- Calendar display with slideshow
- Calendar display with frame
- Calendar display with clock
- Puzzle (magic square)
- Rotating pictures
- Free rotating images
- Multi image slideshow
- Image information on / off
- Cancel
Use the "Up" and "down" buttons to select and confirm your selection by pressing "Enter". Press "Return to previous menu;" during playback to open the preview mode and show the thumbnail mode.. (Figure 4)
On the thumbnail mode can set the picture as 4*4 frames, 5*5.5 frames at setup(Figure 5) In preview mode you can use "Left" and "Right" buttons to select an image and view in full screen by pressing "Enter".
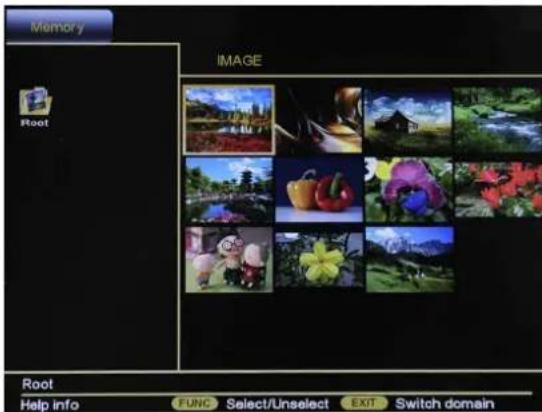
Figure 4: thumbnail mode
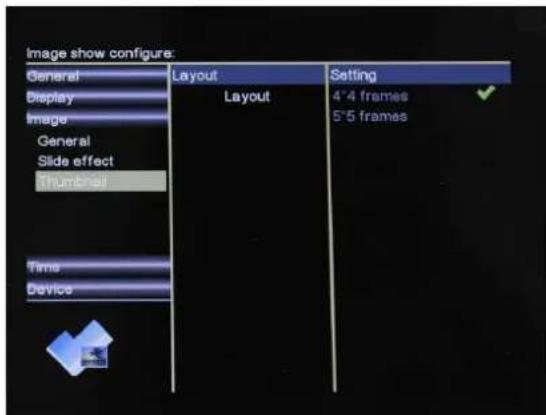
Figure 5: thumbnail settings
5.2 Music Playback
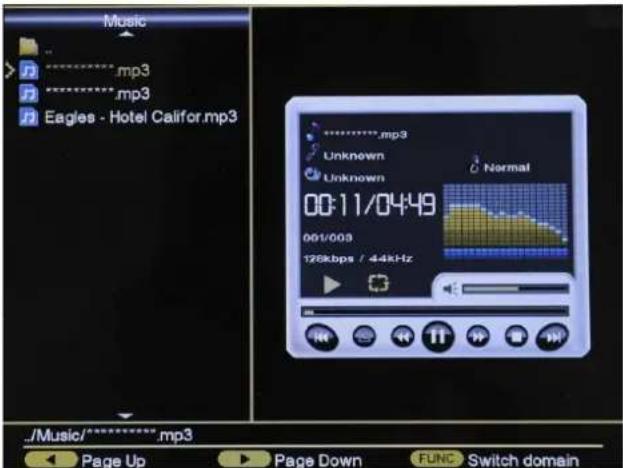
Figure 6: music play mode
Select “Music” from the main menu as Figure 1 and press “Enter” to start music playback (Figure 6), Use Up/Down buttons to select music files to play, the music player at right will play the selected music file (highlighted) at left.
Press the FUNCTION button display the page up and page down can select up or next song.
Press the FUNCTION button display the Repeat mode and EQ on the bottom can select repeat mode as:
Normal/Random/Repeat one/Repeat folder/ Repeat all
And select the EQ as:
Dance/Normal/Rock/Classic/Jazz/Pop/Studio/Ballad/Club/R&B
5.3 Video Playback
natural_image
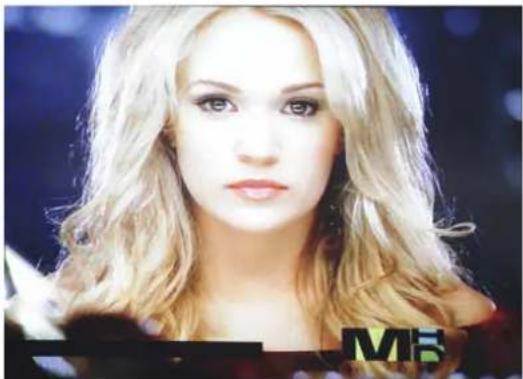
Portrait of a woman with blonde hair and makeup, wearing a dark top (no visible text or symbols)Figure 7: video play mode
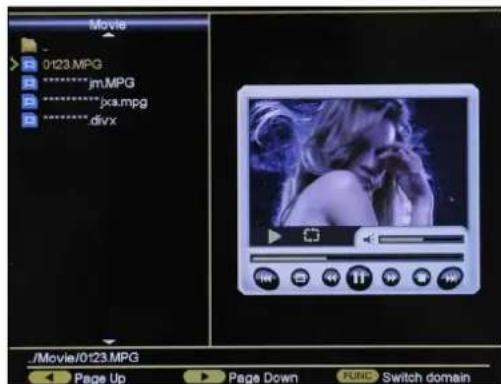
Figure 8:video preview mode
Video playback operations are very similar to those of music playback, in video play mode as shown in Figure 7, press “ Return to previous menu; ” to go to preview mode as shown in Figure 8;
5.4 Calendar
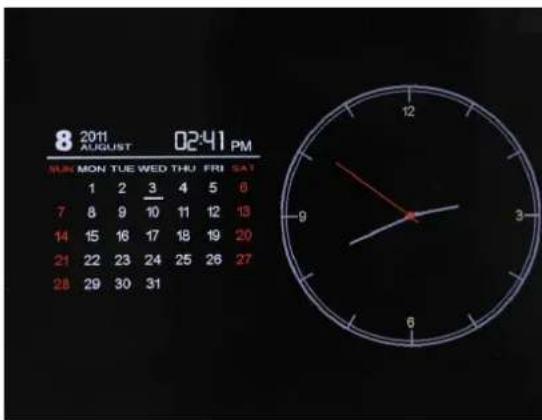
Figure 9: Calendar with clock;
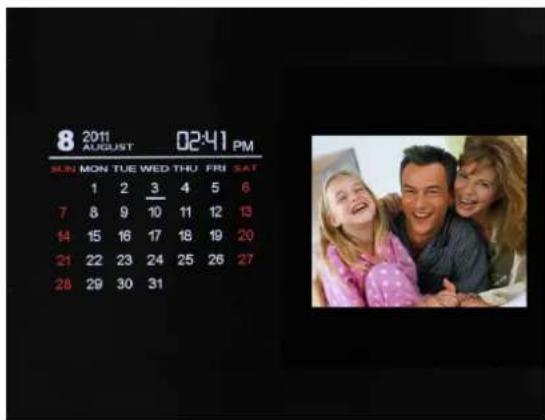
Figure 10: Calendar with slide/single picture
Go to Main Menu and choose Calendar to go to calendar display mode, use function key on remote to change the calendar display mode as shown in Figure 1, there are three options as shown in Figure 19 & Figure 10.
5.5 Settings
From the main menu, select "Setup" and confirm your selection by pressing "Enter". The setup menu appears. Now select the desired category in the left column with the "Up" and "down" buttons.
By pressing the "Right" button to access the sub-categories, which can be selected with "Up" and "Down" now.
Press "Right" to arrive in the middle column. Here you select the setting for which the values could be changed.
With another press of the button "Right" will lead you to the right column where the values
of the setting are displayed. The values of the selected function (middle column) are highlighted in white. Use "Up" and "Down" buttons to set the desired value and confirm your setup by pressing "Enter".
To get back into the individual columns, press the button "Left". They move back one step. Here are some categories and settings:
5.5.1 General Setup
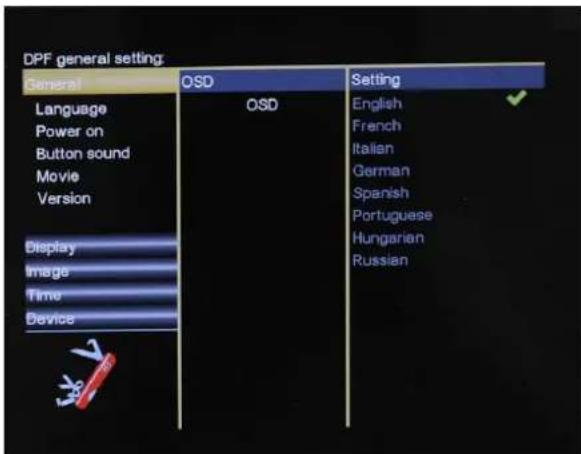
Figure 11: select your own Language
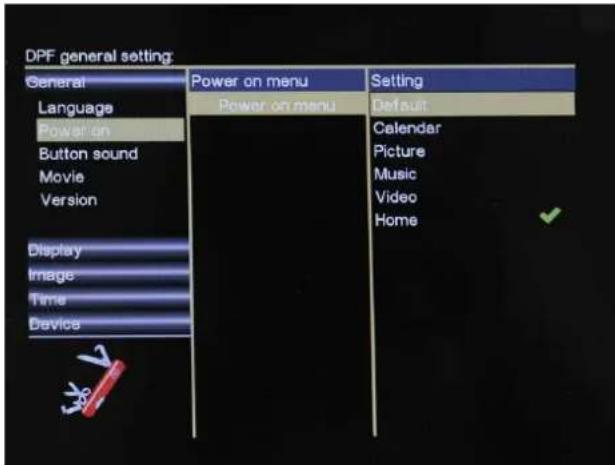
Figure 12: Configure your power on playback mode;
As shown in Figure 11, you can set power on playback mode from 6 options: Default (slideshow with background music), Calendar, Picture, Music, Video, Home(display main menu).
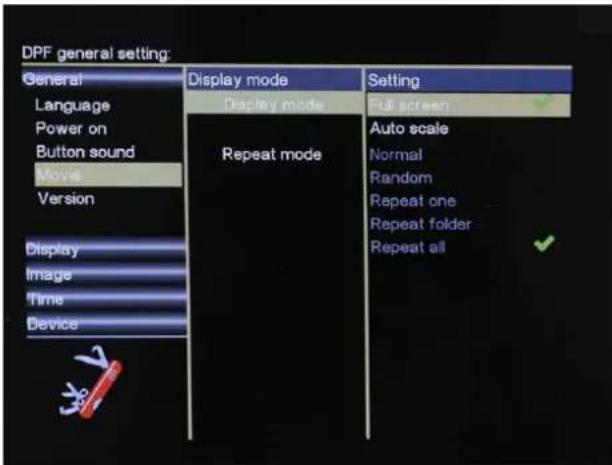
Figure 13: Configure movie display mode and repeat mode
5.5.2 Display Setting
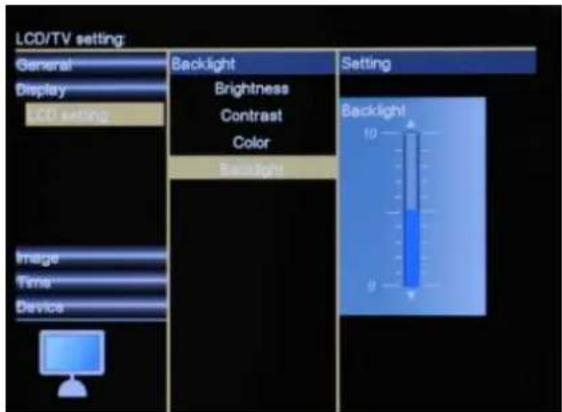
Figure 14: Configure LCD brightness, contract, color saturation and backlight
In the LCD setting you can change the brightness, chroma and contrast of the LCD screen. Press Up/Down button to selection and press Right button to enter it. Finally confirm your setting by Enter.
5.5.3 Image Setting
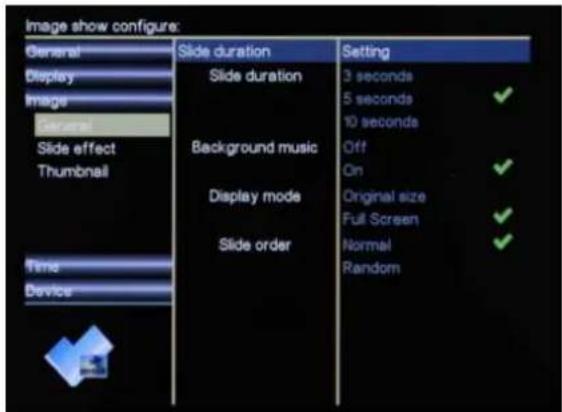
Figure 15: Configure picture playmode
You can set slideshow interval, background music on/off, display mode and slideshow transition effects.
5.5.4 Time Setting
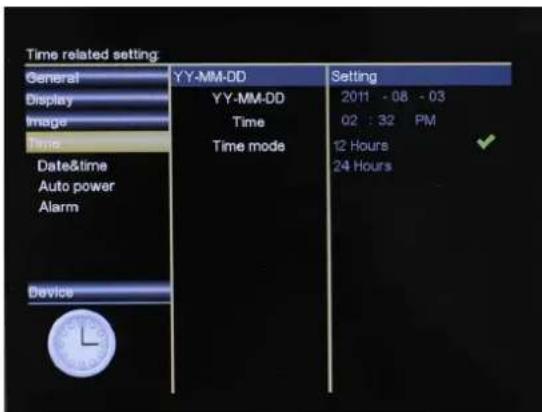
Figure 16: Date & Time settings
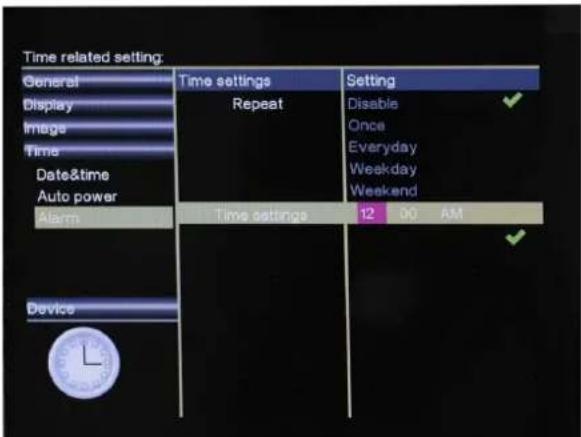
Figure 17: Alarm settings
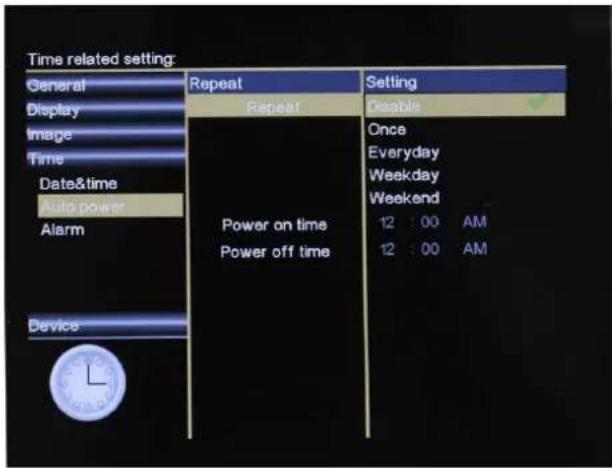
Figure 18: Auto power setting
You can not only set up the power on/off time for the frame, but also set up the Auto power types including Disable, Once, Everyday, Weekday, Weekend.
5.5.5 Device Setting
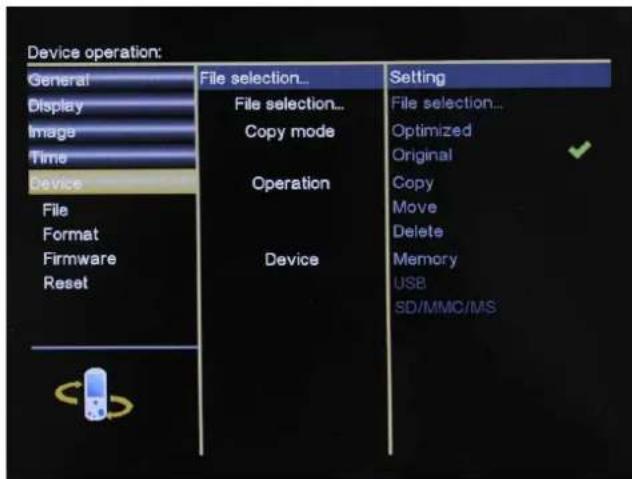
Figure 19: Device settings
In the Device setting, you can do some basic file operation, firmware upgrade as well as factory default reset. Press "Up/Down" button to select and "Right" button to enter. Finally confirm your setting by "Enter".
File operations: Copy / Move / Delete
The function key can help users to manage their photo/music/movie files without computer, with several clicks on function key, users can copy, move or delete their files easily by the automatic built-in wizard. Hereby it is an example of “copy” operations for the video:
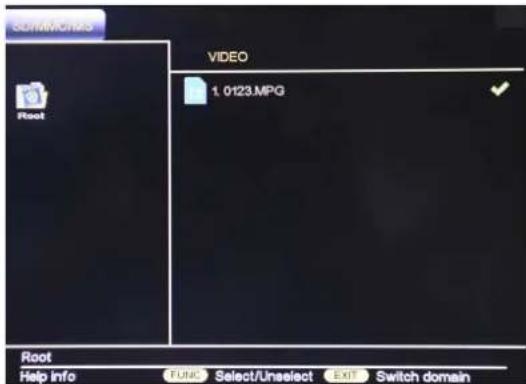
Figure 20: a tick icon displays on the screen
Copy/Move/Delete the video:
Select move on the remote control and enter it and press the button of “Return to previous menu” to the video preview mode and press “Return to previous menu” again to selection video.(as Figure 20).
As press "function" key to select the file required, a tick icon will be displayed on the screen once selected; Press "Setup" and go to below menu display.
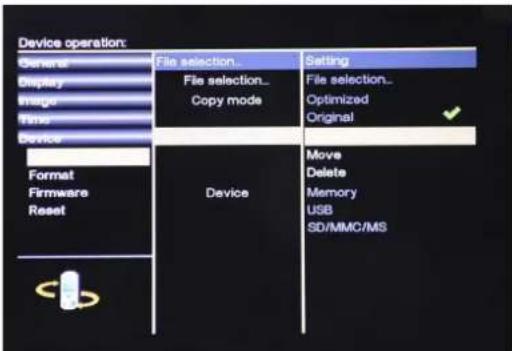
Figure 21: File operation setting
After you have chosen the desired files press SETUP button and select "Operation" to continue and select "COPY", you can also switch to "Move" or "Delete" if needed; A tick icon displays at the side of the selected item (as shown below);
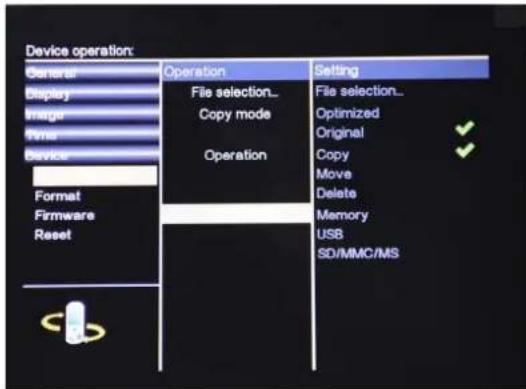
Figure 22: Built-in Wizard auto guides to device selection
If you select "Delete", a query opens to confirm the deletion. Select "OK" and press Enter. The selected file is permanently deleted. After selecting the option "Copy" or "move" the cursor jumps automatically to the Device. Select now the destination of the file and confirm your selection again by pressing Enter (Fig. 22). The memory just can copy 5-8pictures To cancel the function copy / move and delete repeatedly press the "Menu" button.
- Trouble-shooting:
| Symptom Cause Corrective Actions | ||
| Digital Picture Frame doesn’t power on | The POWER connector to the unit is not securely inserted. | Make sure you connect the AC adapter to the frame properly and make sure you have powered on the unit by using the On/Off button.When you connect the AC adapter to the frame and power up the unit, even without a memory card, you should see a blank screen. If you don’t see the lit screen, check if the power is connected to the Digital Picture Frame and make sure it is securely attached. |
| No Start-up screen Memory card is not inserted correctly. | Insert a supported memory card | |
| The File doesn’t play | Incompatible File Format Make sure there is at least one supported photo file on the memory card. Compatible Photo format: JPEG | |
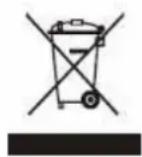
After the implementation of the European Directive 2002/96/EU in the national legal system, the following applies: Electrical and electronic devices may not be disposed of with domestic waste. Consumers are obliged by law to return electrical and electronic devices at the end of their service lives to the public collecting points set up for this purpose or point of sale. Details to this are defined by the national law of the respective country. This symbol on the product, the instruction manual or the package indicates that a product is subject to these regulations. By recycling, reusing the materials or other forms of utilizing old devices, you are making an important contribution to protecting our environment.



- Media
- Package Contents
- Quick Start Guide
- Getting started: Checking the appearance:
- Understanding interface and on-board buttons:
- Installing:
- Understanding the remote:
- Note: Function button on remote:
- MENU
- Playback
- Photo slideshow mode selection:
- Music Playback
- Video Playback
- Calendar
- Settings
- General Setup
- Display Setting
- Image Setting
- Time Setting
- Device Setting
- File operations: Copy / Move / Delete
- Copy/Move/Delete the video:
Brand : SENCOR
Model : SDF 871 B
Category : Digital photo frame