
FZR 4620-B - Lawn mower Fieldmann - Free user manual and instructions
Find the device manual for free FZR 4620-B Fieldmann in PDF.


| Product Type | Petrol Lawn Mower |
| Brand | Fieldmann |
| Model | FZR 4620-B |
| Engine Type | Briggs & Stratton 500 E Series OHV |
| Engine Power | 2.0 kW |
| Engine Speed | 2800 rpm |
| Displacement | 140 cm³ |
| Fuel Tank Capacity | 0.8 L (unleaded 95+) |
| Oil Capacity | 0.45 L (SAE 30 - 15W40) |
| Starting System | Pull start |
| Cutting Width | 46 cm |
| Cutting Height Adjustment | 25-75 mm (8 positions) |
| Height Adjustment Type | Central lever |
| Wheel Spacing (Front/Rear) | 178 mm / 254 mm |
| Wheel Width | 50 mm |
| Grass Collection Bag Capacity | 60 L |
| Mulching Function | Yes (with mulching blind flange) |
| Side Discharge | Yes (optional) |
| Rear Discharge | Yes |
| Noise Level | 96 dB(A) |
| Net Weight | 32 kg |
| Gross Weight | 34 kg |
| Frame Material | Steel bogie |
| Warranty | 24 months |
Frequently Asked Questions - FZR 4620-B Fieldmann
User questions about FZR 4620-B Fieldmann
0 question about this device. Answer the ones you know or ask your own.
Ask a new question about this device
Download the instructions for your Lawn mower in PDF format for free! Find your manual FZR 4620-B - Fieldmann and take your electronic device back in hand. On this page are published all the documents necessary for the use of your device. FZR 4620-B by Fieldmann.
USER MANUAL FZR 4620-B Fieldmann
natural_image
Abstract black-and-white spiral pattern with no text or symbolsFIELDMANN®
Home & Garden Performance

natural_image
Black-and-white photo of a Fieldmann lawn mower with visible branding and wheels (no text or symbols on the device itself)FZR 4620-B
English 7 - 17
Čeština 19-29
Slovenčina 31 - 41
Magyarul 43 - 54
Polski 55-66
Русский 67 - 79
1
natural_image
Technical line drawing of a mechanical housing or enclosure with internal components and mounting brackets (no text or symbols)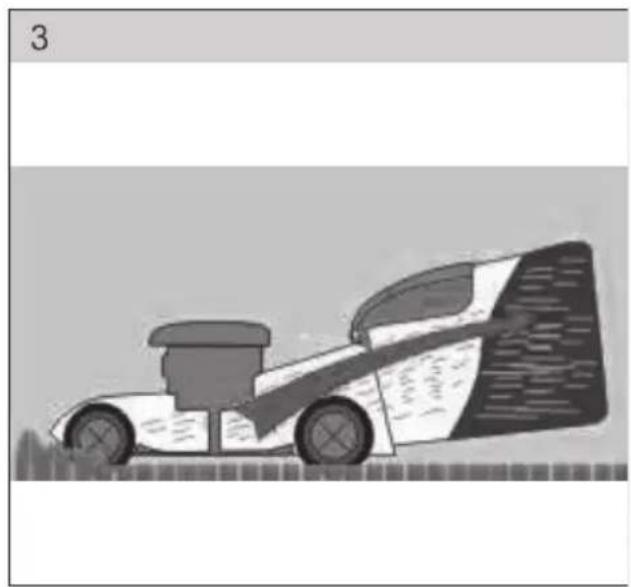
natural_image
Illustration of a futuristic race car in motion, no text or symbols present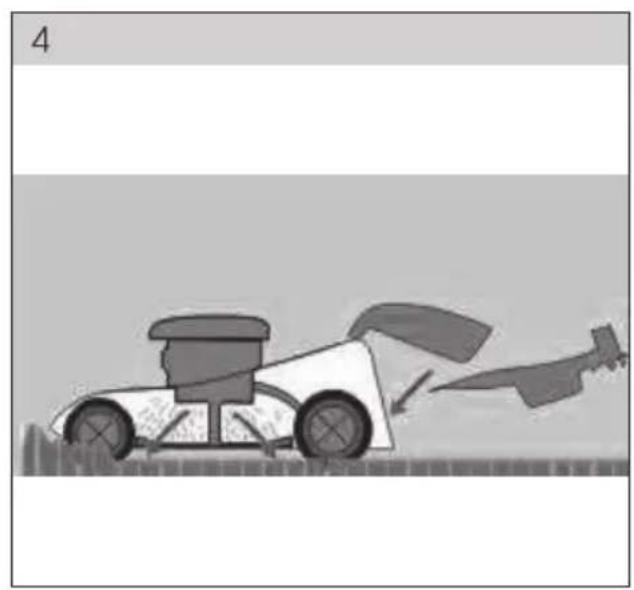
natural_image
Illustration of a tractor pulling a leafy vehicle, no text or symbols present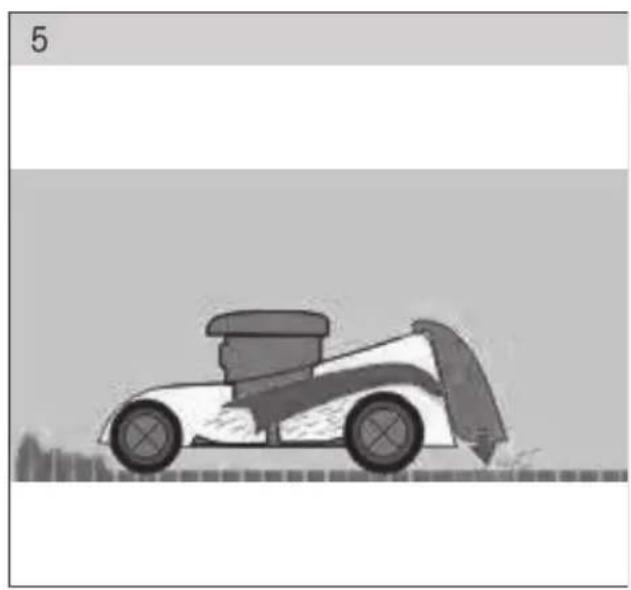
natural_image
Illustration of a racing car in motion, no text or symbols present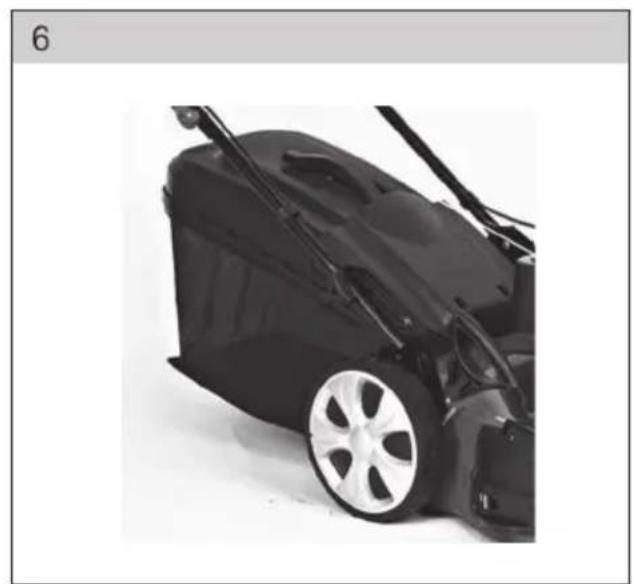
natural_image
Side view of a black lawn mower with silver alloy wheel and attached blade (no text or symbols visible)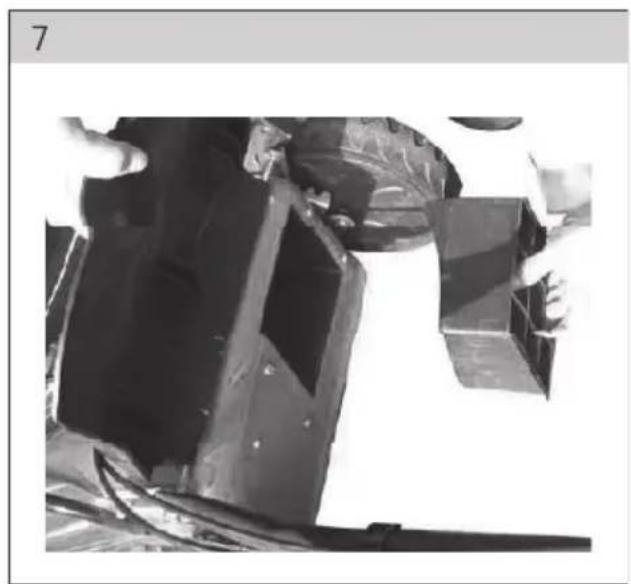
natural_image
Black-and-white photo of a mechanical assembly or assembly with no visible text or symbols8
natural_image
Technical line drawing of a mechanical linkage or frame structure (no text or symbols)9
natural_image
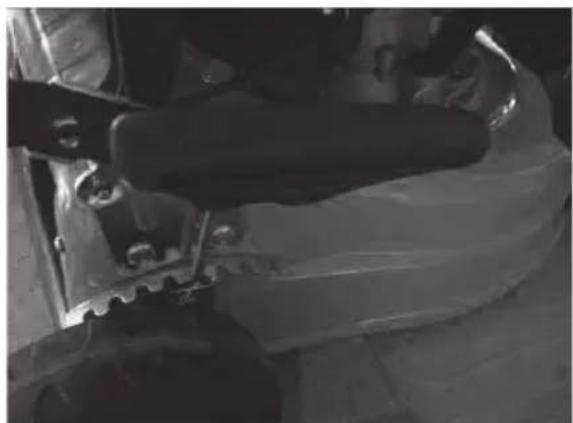
Close-up of a mechanical assembly with a cylindrical component inserted into a housing (no visible text or symbols)10
11
12
natural_image
Pure technical line drawing of a mechanical component or assembly without any text, numbers, or symbols14
natural_image
Technical line drawing of a mechanical assembly with no visible text or symbols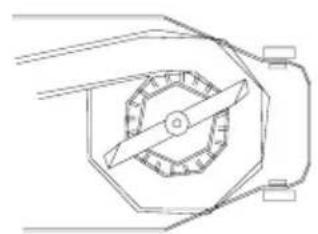
natural_image
Pure technical diagram of a mechanical component with no text, numbers, or symbols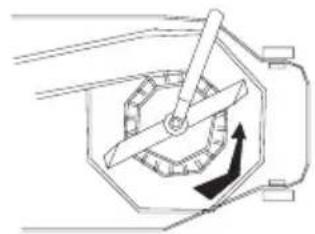
natural_image
Diagram of a mechanical device with a rotating shaft and directional arrow (no text or symbols)15
natural_image
Line drawing of a hand holding a tool with an arrow indicating direction (no text or symbols)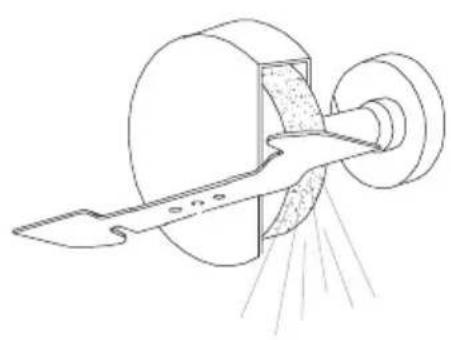
natural_image
Technical line drawing of a mechanical device with a cutting tool and shaft (no text or symbols)16
natural_image
Close-up of hands holding a black plastic seat cover, next to a car wheel (no visible text or symbols)17
Gasoline garden mower
OPERATION MANUAL
Thank you for your purchase of our garden gasoline rotational mower. Before beginning to use it, please, read this operation manual carefully and keep it for the case of a further use.
TABLE OF CONTENTS
APPENDIX OF FIGURES 2
- GENERAL SAFETY INSTRUCTIONS 8
Important safety warnings
Packaging
Instructions for use
-
EXPLANATION FOR INSTRUCTION PLATES ON THE MACHINE 9
-
MACHINE DESCRIPTION AND DELIVERY CONTENT 10
-
MACHINE ASSEMBLY 10
-
SAFETY INSTRUCTIONS .... 11
-
OPERATION 11
-
GEARBOX 12
-
SAFETY INSTRUCTIONS 12
-
MAINTENANCE 13
-
TECHNICAL DATA 16
-
DECLARATION OF CONFORMITY 16
-
DISPOSAL 17
WARRANTY CERTIFICATE 80
CONDITION OF GUARANTEE 81
1. GENERAL SAFETY INSTRUCTIONS
Important safety warnings
- Unpack the product carefully and be sure not to throw away any part of the package before having found all components of the product
- Keep the product in a dry place out of reach of children
Read all cautions and instructions. The failure to adhere to warning cautions and instructions may result in an accident, fire and/or a serious injury.
Packaging
The product is placed in a package preventing damage during transport. This package is a raw material therefore it can be handed-over for recycling.
Instructions for use
Before beginning to work with the machine, read the following safety rules and instructions for use. Familiarize with operating elements and the proper use of the device. Keep the manual in a safe place for future reference. We recommend keeping the original package including the inner packaging materials, cash voucher and guarantee card for a period of warranty at minimum. For a case of transportation, pack the machine into the original box from the manufacturer, thus ensuring a maximum protection of the product during a possible transport (e.g. moving or sending into a service station).

Note: If you hand the machine over to next persons, hand it over together with the manual. Adherence to the attached instructions for use is a precondition for the proper use of the machine. The operation manual includes also instructions for operation, maintenance and repairs.
The manufacturer does not take any responsibility for accidents or damages resulting from the failure to adhere to this manual.
2. EXPLANATION FOR INSTRUCTION PLATES ON THE MACHINE

Before putting into operation, please, read the operation manual carefully.

Keep other persons out of the working area.

Warning! Rotating knives! Protect yourself against risk of limb injury.

Toxic gases emissions. Do not use the gasoline mower in enclosed or unventilated areas.

Hot surfaces, danger of burn injury!

Before maintenance switch-off the engine and disconnect the spark plug.

Never fill up fuel while the engine is running.
3. MACHINE DESCRIPTION AND DELIVERY CONTENT
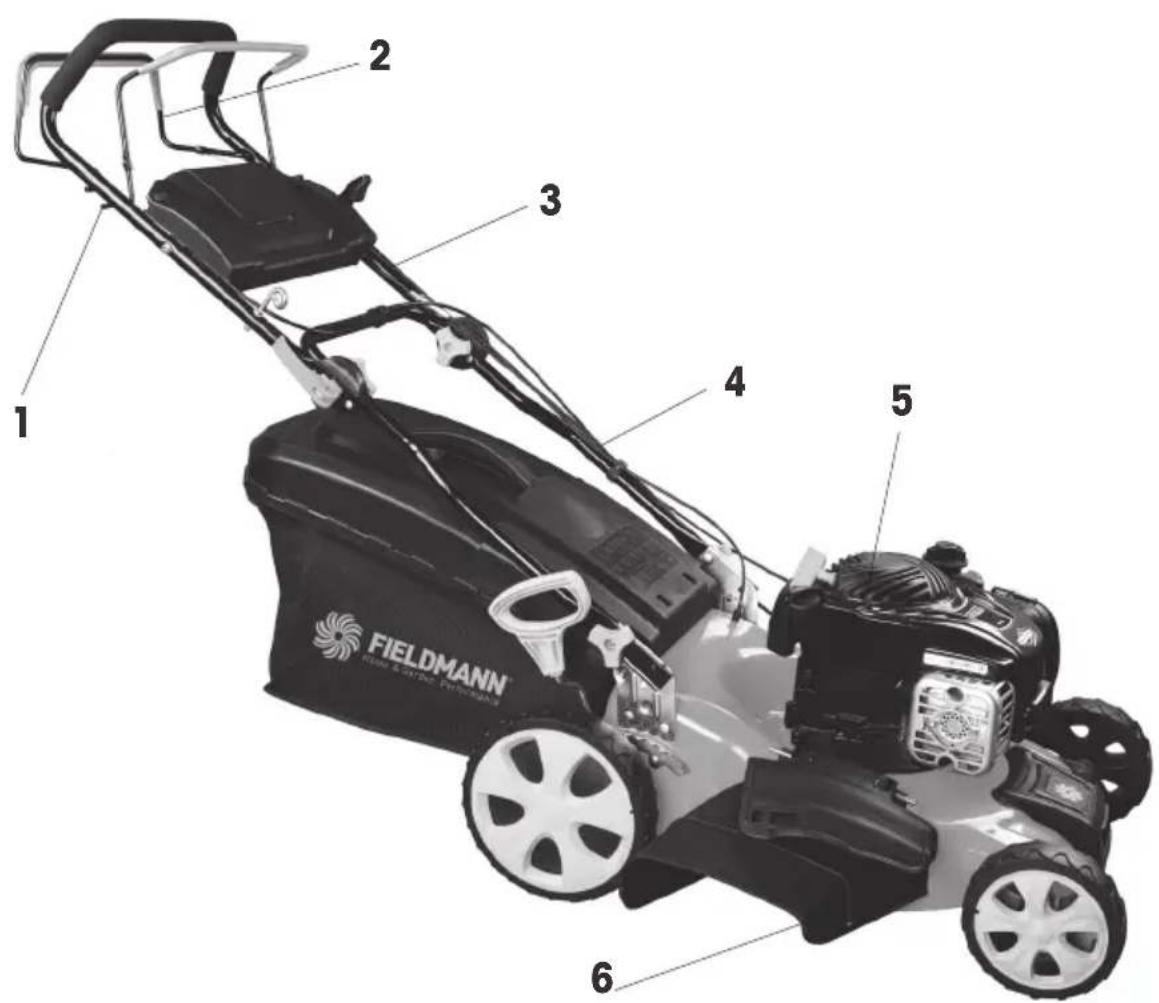
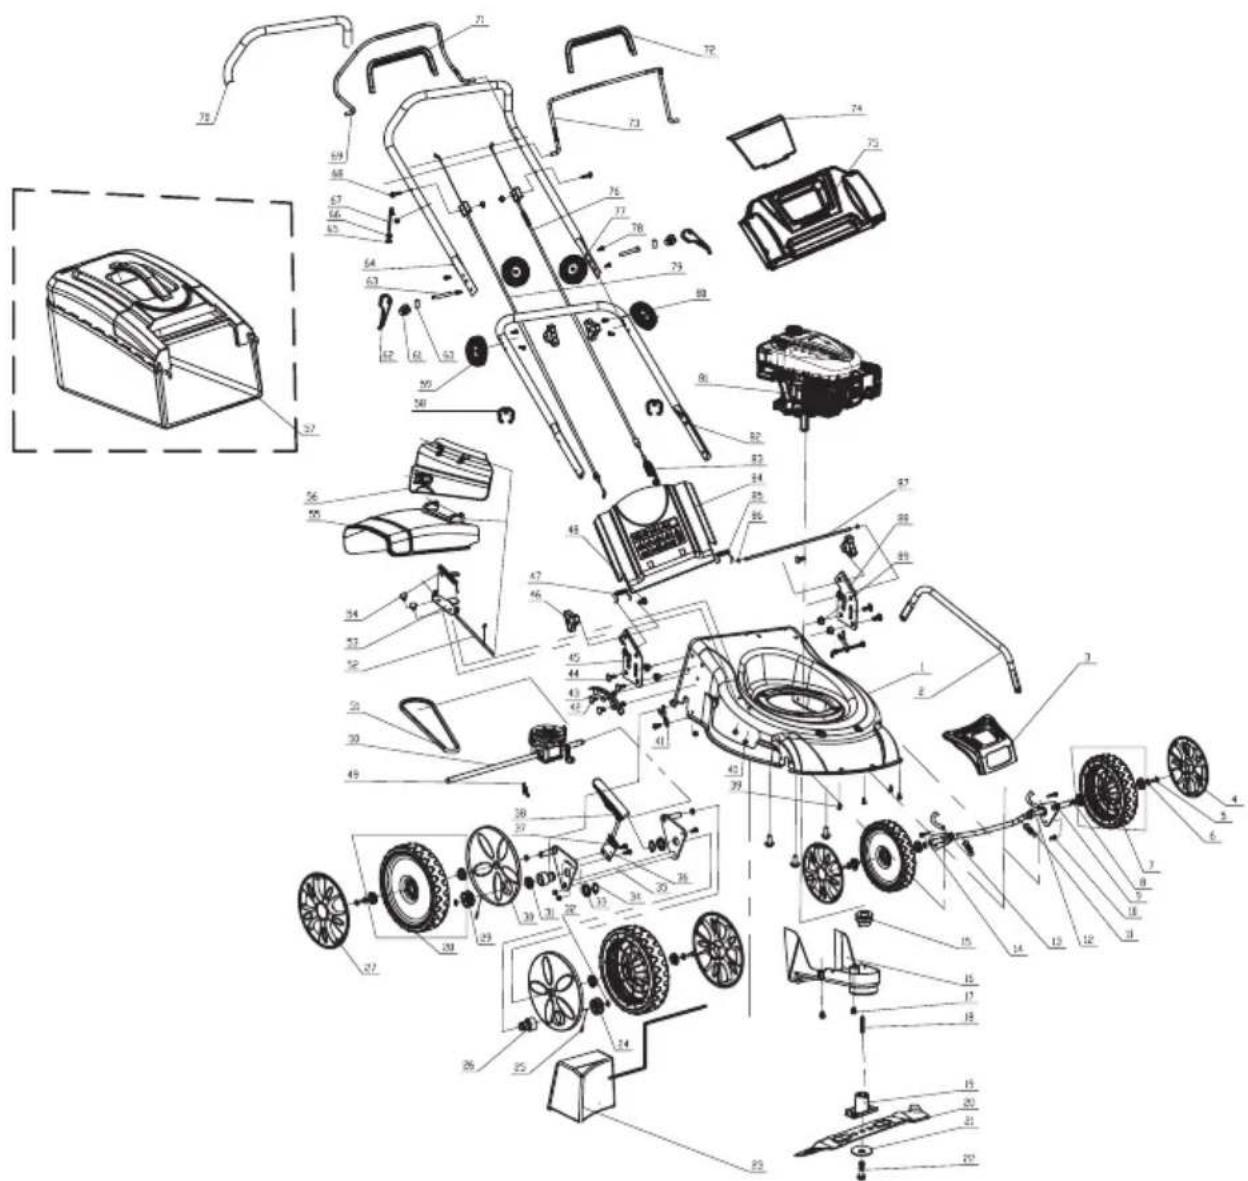
Machine description (see Fig.1)
7 - Mulching blind flange
1 - Brake lever
2 - Travel lever
3 - Upper handle
4 - Bottom handle
5 - Engine
6 - Bogie
Delivery content
Take the garden machine carefully out of the package and check whether the following parts are complete:
Rotational mower
Collection basket
* Upper and bottom part of the mower handle
4 wheels
Installation set
* Mulching blind flange
Operation manual
Warranty certificate
* Side discharge
In the case of some parts missing or damaged, please, contact the dealer where you've bought the machine.
4. MACHINE ASSEMBLY
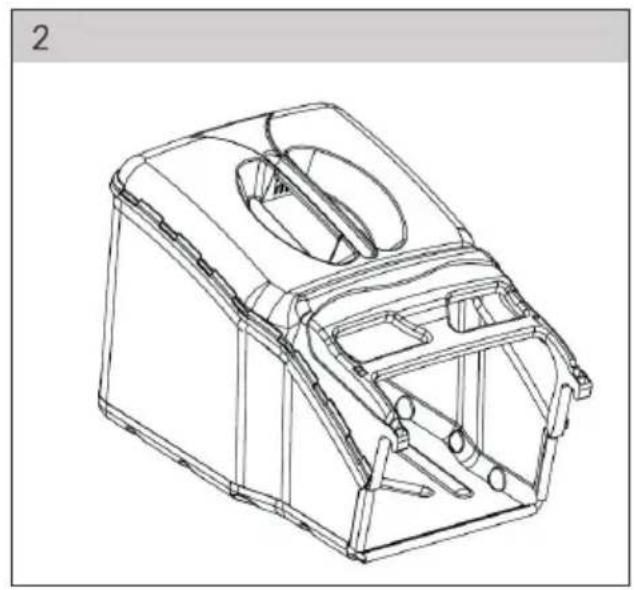
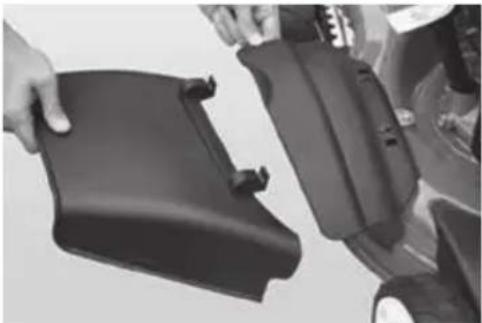
Collection basket installation (Fig.2)
* Insert the metal frame into the collection basket and fix (Fig. 2)
4 in 1 Introduction:
Rear spitting with grass collection (Fig. 3)
Remove the mulching blind flange (Fig. 7) and fasten the grass collection basket on its place (Fig. 6).
Mulching (Fig. 4)
When mulching is required, fix the mulching blind flange before starting-up the machine (Fig. 7)
Rear spitting without grass collection into the basket (Fig. 5)
Fix the mulching blind flange (Fig. 7) and close the cover plate on the side grass spitting. Mulching blind flange (Fig. 7)
Side discharge (Fig. 16)
Handle installation (Fig. 8)
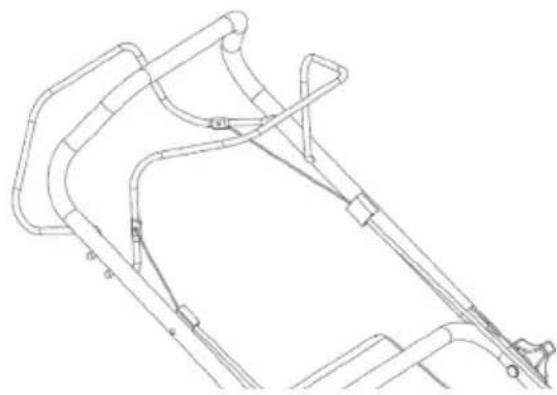
Mount the upper and bottom part of the handle with the help of two attached bolts and plastic nuts. Fit the starter lever on the right side of the handle and fasten the cable with the help of a plastic clamp. Anchor the starter lever cable into the supporting plastic clamps on the handle.
Setup of mowing height (Fig.9)
* Moving the lever of mowing height central setup you can opt for 8 mowing height positions.
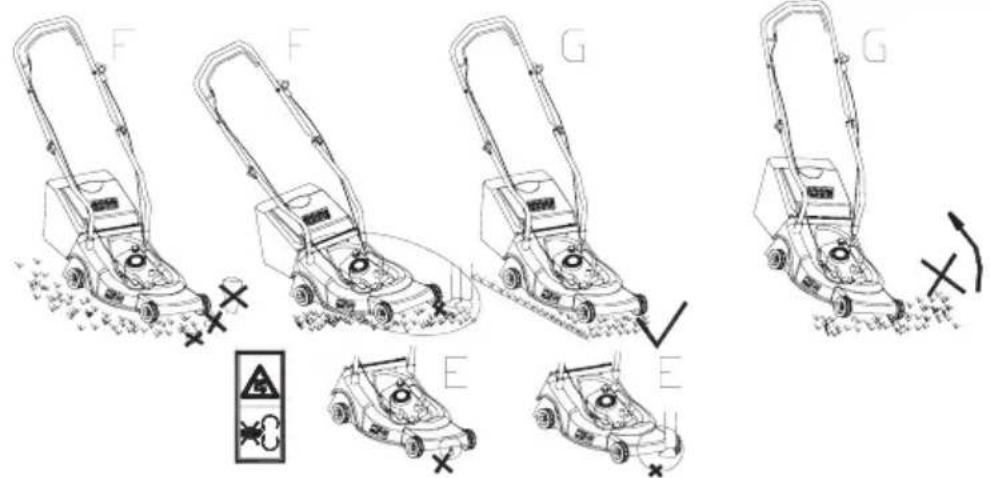
5. SAFETY INSTRUCTIONS (Fig. 10)
Use the mower always with the collection basket or the set deflector.
Switch-off the engine before emptying the collection basket or changing the mowing height.
* Never put your hands or legs under the mower or under the place of grass spitting-out while the engine is switched-on. (Fig. E)
Recheck the workspace before each use. Remove objects which may be flung away or get stuck into the machine. (Fig. F)
* Never use the mower if other persons, children or freely moving domestic animals are around.
Never lift the mower up while starting the engine. (Fig. G)
6. OPERATION
⚠ Warning: Before the first use of the mower, please, read carefully the engine operation manual!
⚠ Warning: The mower is delivered without engine oil! Before using the machine fill up 0.5 l of oil.
⚠ Warning: Change oil regularly following every 20 hours of service.
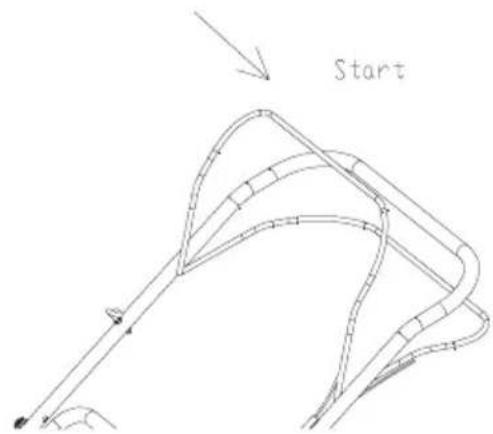
Mowing knives start to rotate immediately after starting-up the engine. While mowing, keep the brake lever in the working position. The engine stops as soon as you release the brake lever. (Fig. 11)
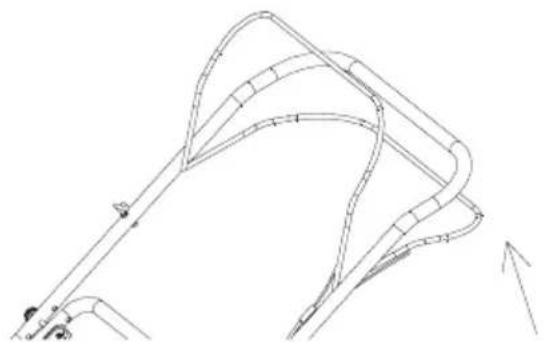
The travel is controlled by holding the drive lever towards the handle and by pushing the control drive lever together with the brake lever. (Fig. 12)
7. GEARBOX
Check the travel condition regularly: keep it clean, lubricate metal components, wheelwork and bearings.
8. SAFETY INSTRUCTIONS
General safety instructions
This product is intended exclusively for grass mowing. Do not use for any other purposes than that one it is intended for. In the opposite case there is a danger of its damage or injury.
* Never allow children or persons unfamiliar with these instructions for use to work with the device.
The person operating the mower is responsible for safety of persons in the working area. Never use the mower near other persons, children or freely moving animals.
Check the terrain on which the mower is to be used before beginning mowing and remove stones, wires, sticks, shatters, bones and other foreign objects which might be stuck or flung away and cause an injury.
Instructions for use
All nuts, pins and bolts must be tightened properly so that the device is in a safe and serviceable condition.
* Never use the mower without the collection basket or the protective cover.
* Never use the mower with loosened knife blades. Always make sure in advance that the respective bolts are tightened thoroughly. Blunt blades must be sharpened, and that must be done evenly. Knives with damaged blades need to be replaced.
When working with the mower, use trousers with long legs and safety shoes.
* Never start-up the mower in enclosed or badly ventilated areas where vapours may accumulate. Emissions coming out from the engine contain carbon monoxide which is dangerous to life.
* Work only when lighting is adequate (daylight or sufficient illumination).
Do not use the mower when raining or grass is wet.
Be extremely careful when mowing on a raising terrain (slope). Always mow across the slope, parallel with a contour line, never perpendicularly to it uphill/downhill.
* Never let the mower run without an operator; if you leave the mower, switch the engine off.
When starting, never lift the rear part of the mower up and never draw your limbs near the bogie or into the opening for rear grass spitting while the engine is running.
* Never change engine speed setup.
As for the mowers with a travel, release the travel before starting-up the engine.
* Never carry the mower over while the engine is running.
* Stop the engine and disconnect the spark plug in following cases:
- before performing any activity under the mowing cover or under the opening for rear grass spitting.
- before performing maintenance, repair or machine checkup.
- before carrying, lifting-up or displacing the mower.
- when leaving the mower without supervision or intending to adjust mowing height setup
- before disassembling and emptying the collection basket.
- If a collision with a foreign object occurred, stop the engine and check the mower carefully to exclude a possibility of damage. In a case of damage, transport the mower to a specialized service station in order to get it repaired.
⚠ WARNING! After switching-off the engine, the mowing knife is rotating on for several seconds.
- in a case of abnormal vibrations of the mower (find-out and ensure removal of the vibration cause immediately).
- in order to ensure safe operation, check proper tightening of pins, bolts and nuts in the mower regularly.
⚠ WARNING! FUEL IS HIGHLY COMBUSTIBLE LIQUID.
Store fuel in an approved jerry can.
Fill-up fuel only in open or well ventilated areas. When handling fuel, do not smoke or use a mobile phone.
Fill-up fuel only providing that the engine is switched-off. Never open the fuel tank and fill-up fuel while the engine is hot or running.
Do not start-up the engine if gasoline spillage occurred. Remove the mower from the place where the fuel was spilled and avoid possible ignition. Do not go on working until the spilled fuel is evaporated and fuel vapours are dispersed.
After fillig-up fuel, tighten the fuel tank lid as well as fuel jerry can cap thoroughly.
⚠ WARNING! Before performing maintenance or repair, switch-off the engine and disconnect the spark plug.
9. MAINTENANCE
Care for lawn
According to a kind of the grass surface, various ways of care are needed.
Therefore always read instructions printed on seed packages concerning mowing height with regard to growth conditions in a given region.
You need to have in your mind all the time that a larger part of grass consists of a grass-blade
and one or more leaves. If leaves were cut-off completely, grass damage occurs and growth restoration is much more difficult.
In general, following instructions apply:
– too low mowing causes disturbance of roots and follow-up "spotted" appearance;
– in summer, mowing has to be higher in order to prevent soil desiccation;
- mowing wet grass may cause knife efficiency reduction owing to grass sticking to the knife and pulling-out grass vegetation;
– in a case of extraordinarily high grass, it is advisable to carry out the first mowing with maximal allowed height and then to carry out the second mowing after two or three days.
A lawn will have a better appearance thanks to regular and full-area uniform height mowing and alternation of two directions
Maintenance
All nuts, pins and bolts must be tightened properly so that the Device is in a safe and serviceable condition. Regular maintenance is a basic precondition to ensure user's safety, to keep serviceability and high performance of the mower.
Never store the device with gasoline in the tank inside a building where vapours might reach open fire, sparks or a high temperature source.
Let the engine cool down before storing in any enclosed area.
To reduce fire risk make sure that the mower and especially the engine, exhaust muffler, batteries and also a place for storage of spare gasoline are cleaned from rests of grass, leaves or excessive amount of grease.
* Check the deflector and collection basket condition regularly; replace in a case of damage.
* Perform fuel draining in a well ventilated area while the engine is cooled-down.
* Wear thick working gloves when removing or installing the mowing knife.
After every sharpening of the mowing knife blade, its counterbalancing needs to be checked.
⚠ WARNING! Before performing maintenance or repair, switch-off the engine and disconnect the spark plug.
Before using the four-stroke engine, please, read the engine operation manual carefully. Check the oil level regularly, fill-up or change if needed.
* Check the mower regularly and make sure that all grass deposits in the bottom part of the bogie are removed.
* Lubricate the bogie shaft and bearings with suitable grease regularly.
Check the condition of the knives regularly, as they influence the mower output substantially. Knives should always be sharp and counterbalanced.
Check tightening of all bolts and nuts in regular intervals. Worn-down or improperly tightened nuts and bolts may cause serious damage to the engine or the frame.
If the knife hits an obstacle hardly, stop the mower and transport it to an authorized service station.
KNIFE: The knife is made of pressed steel. To achieve as good mowing as possible, grind
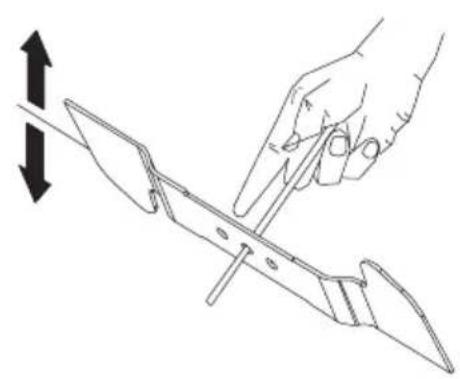
the knife regularly, approximately after every 25 hours of operation. Make sure the knife is always counterbalanced well. For this purpose, insert a small iron axis (of 2-3mm diameter) into the central opening of the knife. If the knife is balanced properly, the axis is maintained in the horizontal position.
If the knife is not maintained in the horizontal position, replace it.
When dismounting the knife, unscrew the bolt, check the carrying part of the knife. Replace, if parts are worn-down or damaged.
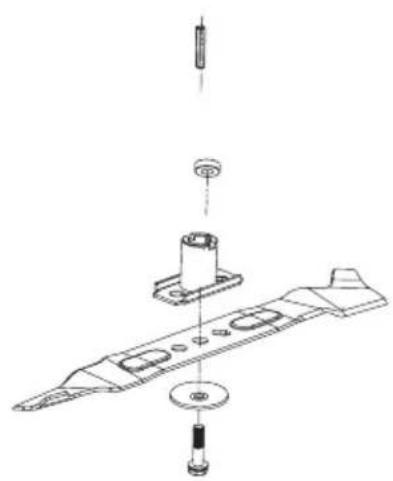
When installing the knives, make sure that cutting edges point to the direction of the engine rotation. The knife mounting screw must be tightened by 3.7 K gm (37Nm) torque with the help of a torque spanner.(Fig. 14)
⚠ WARNING! Use only genuine original spare parts. Low-quality spare parts may cause serious damage to the mower and endanger your safety.
Service
In the case you find-out any defect after having purchased the product, contact the service department. When using the product, observe instructions given in the attached operation manual.
Your claim will not be taken into consideration if you have modified the product or have not adhered to the instructions given in this operation manual.
Warranty does not cover
Natural wear of functional parts of the machine in consequence of its use
Service interventions relating to the standard maintenance of the machine (e.g. cleaning, lubricating, adjusting, etc.)
Faults caused by outer influences (e.g. climatic conditions, dustiness, unsuitable use, etc.)
* Mechanical damage resulting from a fall of the machine, shock, impact, etc.
Damages resulting from unskilled handling, overloading, the use of improper parts, unsuitable tools etc.
The risk of possible damage of claimed products which have not been secured against mechanical damage during the transport properly is born exclusively by the owner.
Storage
If not using the machine for a longer time, store it according to the following instructions. Thus you will prolong the service life of your machine.
Drain fuel from the fuel tank and the carburetor completely. Close the primer and pull the starter 3 – 5 times.
* Unscrew the spark plug and put a small amount of engine oil into the hole.
* Pull the starter 2 – 3 times gently.
- Clean outer surfaces by a clean cloth. Store the machine in a clean and dry place.
10. TECHNICAL DATA
Engine type: Briggs & Stratton 500 E series OHV
Nominal output: 2,0 kW
Engine speed: 2800rpm
Stroke volume: 140 cm ^3
Starting: By pulling
Fuel tank capacity (unleaded 95 or more): 0.8 liters
Oil tank capacity ( SAE 30 - 15W 40): 0.45 liters
Adjustable mowing height : 25-75mm with 8 positions
Height setup:....Central height setup
Mowing width: 46 cm
Wheel spacing: 178 mm (front wheel)
254 mm (rear wheel)
Wheel width: 50 mm
Collection basket capacity: 60 l
Bogie: ......steel
Declared noise level: 96dB(A)
Netto/brutto weight: 32kg/34kg
11. DECLARATION OF CONFORMITY
EC Declaration of Conformity
Fast ČR, a.s., Černokostelecká 251 01 Ríčany u Prahy, phone: 323204111, declares with binding effect, that petrol lawn mower Fieldmann FZR 4620-B (the year of manufacture is indicated on a type label and is followed by a serial number of the machine), complies with the requirements of DIRECTIVE OF THE COUNCIL:
No. 2006/42/EC, 2004/108/EC, (approval certificate no.: AM 50268730 0001, AE 50223979 0001)
No. 2004/26/EC, exhaust emission,
and has been tested in compliance with the following standards:
EN ISO 5395-1:2013, EN ISO 5395-2:2013
ZEK 01.04/11.11
EN ISO 14982:2009
The company FAST ČR, a.s. is entitled to act on behalf of the manufacturer.
CE label: 2014
Ríčany, 12.11.2014
name stamp signature
Petr Uher
quality manager
12. DISPOSAL
INSTRUCTIONS AND INFORMATION ON USED PACKAGE DISPOSAL
Put the used packaging material to the place designated for waste disposal by a municipality.

The machine and its accessories are made of various materials, e.g. of metal and plastics. Hand-over damaged components to sorted waste. Get yourselves informed at a respective authority.

This product meets all fundamental requirements of EU directives relating to it.
Changes of the text, design and technical specifications can be done without prior notice and we reserve the right for the changes.
Instructions Manual - language version only.
Petr Uher
manager kvality
12. LIKVIDACE
POKYNY A INFORMACE O NAKLÁDÁNÍ S POUŽITÝM OBALEM
Udržujte ostatné osoby mimo pracovnej oblasti.

KARTA GWARANCYJNA 80
WARUNKI GWARANCJI 81
1. OGÓLNE PRZEPISY BEZPIECZEŃSTWA
Петр Угер
Home & Garden Performance
| Cen | Deli | Mexico | Mexico | Rok : 20 |
| Cuy | Chev | Nap | North | North | Pte. | Year : Ex. |
Datum pfevezeti do opravy: Datum prezazia do opravy: Data przyjęcia do naprany: Date of accepting for repair: Jardáure átvétel is Spontja.
| Cay: (Day) | Mids: (Monday) | Pick: |
| Cay: (Day) / Nap. | Month: (June) / No. | Year: £x 20 |
Ośwos poruchy | Ośwod poruchy | Cause of defect | Przyczyna awari | Hiba oka
| Gen (Gel) | Macy (Macy) | Rok |
| Gen (Gel) (Nap) | North (Midcap) (No) | Year (By) |
| Day | DayA | | Méhic | Mesac | | Rok | |
| Day | DayE | Nap | Month | Music | Ho | Year | Ev |
| Day | Day | Day | Day | Day | Music | Music | Music | Music | Music | Rice | Year | Year |
Razitko servisu | Počiatka servisu | Stamp of the repair shop | Piečyč servisu | Szerviz pocsátja
servis.praha@faster.cz
www.fastcr.cz
FAST ČR, a. s.
Cejl 31
CZ 602 00 Brno
Česká republika
Tel.: +420/531 010 295
Fax: +420/531 010 296
servis.brno@fastcr.cz
www.lastcr.cz
Fast Plus, spol. s r. o.
Na Pántoch 18
SK 831 06 Bratislava
Slovenská republika
Tel.: +421/2/49 105 854
Fax: +421/2/49 105 859
servis@fastplus.sk
www.fas:plus.sk
Home & Garden Performance
revision 02/2011
Záruční podmínky
Conditions of guarantee
This product is warranted for the period of 24 months from the date of purchase to the end-user. Warranty is limited to the following conditions: Warranty is referred only to the customer goods using for common domestic use. The claim for service can be applied either at dealer's shop where the product was bought, or at below mentioned authorized service shops. The end-user is obligated to set up a claim immediately when the defects appeared but only till the end of warranty period. The end-user is obligated to cooperate to certify the claiming defects. Only completed and clean (according to hygienic standards) product will be accepted. In case of eligible warranty claim the warranty period will be prolonged by the period from the date of claim application till the date of taking over the product by end-user, or the date the end-user is obligated to take it over. To obtain the service under this warranty, end-user is obligated to certify his claim with duly completed following documents: receipt, certificate of warranty, certificate of installation.
This warranty is void especially if apply as follows: ■ Defects which were put on sale. ■ Wear-out or damage caused by common use.
■ The product was damaged by unprofessional or wrong installation, used in contrary to the applicable instruction manual, used in contrary to legal enactment and common process of use or used for another purpose which has been designed for. ■ The product was damaged by uncarred-for an insufficient maintenance. ■ The product was damaged by dirt, accident of force majeore (natural disaster, fire, flood, ...). ■ Defects on functionality caused by low duality of signal, electromagnetic field interference etc. ■ The product was mechanically damaged (e.g. broken button, fall ...). ■ Damage caused by use of unsuitable media, fillings, expendable supplies (batteries) or by unsuitable working conditions (e.g. high temperatures, high humidity, qualities...). ■ Repair, modification or other failure action to the product by unauthorized person. ■ End-user did not prove enough his right to claim (time and place of purchase). ■ Data on presented documents differs from data on products. ■ Cases when the claiming product can not be identified according to the presented documents (e.g. the serial number or the warranty seal has been damaged).
natural_image
Black and white photo of a Fieldmann lawn mower with visible branding (no text or symbols on the device itself)
- FIELDMANN®
- Gasoline garden mower
- OPERATION MANUAL
- TABLE OF CONTENTS
- GENERAL SAFETY INSTRUCTIONS
- Important safety warnings
- Packaging
- Instructions for use
- EXPLANATION FOR INSTRUCTION PLATES ON THE MACHINE
- MACHINE DESCRIPTION AND DELIVERY CONTENT
- Machine description (see Fig.1)
- Delivery content
- MACHINE ASSEMBLY
- Collection basket installation (Fig.2)
- in 1 Introduction:
- Mulching (Fig. 4)
- Rear spitting without grass collection into the basket (Fig. 5)
- Side discharge (Fig. 16)
- Handle installation (Fig. 8)
- Setup of mowing height (Fig.9)
- SAFETY INSTRUCTIONS (Fig. 10)
- OPERATION
- GEARBOX
- SAFETY INSTRUCTIONS
- General safety instructions
- MAINTENANCE
- Care for lawn
- Maintenance
- Service
- Warranty does not cover
- Storage
- TECHNICAL DATA
- DECLARATION OF CONFORMITY
- EC Declaration of Conformity
- DISPOSAL
- INSTRUCTIONS AND INFORMATION ON USED PACKAGE DISPOSAL
- LIKVIDACE
- POKYNY A INFORMACE O NAKLÁDÁNÍ S POUŽITÝM OBALEM
- OGÓLNE PRZEPISY BEZPIECZEŃSTWA
- Home & Garden Performance
- FAST ČR, a. s.
- Fast Plus, spol. s r. o.
- Záruční podmínky
- Conditions of guarantee
Brand : Fieldmann
Model : FZR 4620-B
Category : Lawn mower