
Lumix DMC-LC1PP - Camera PANASONIC - Free user manual and instructions
Find the device manual for free Lumix DMC-LC1PP PANASONIC in PDF.


| Product Type | Digital Camera |
| Brand | Panasonic |
| Model | Lumix DMC-LC1PP |
| Sensor Resolution | 5.0 Megapixels |
| Lens | Leica DC Vario-Summicron, 28-90mm equivalent (35mm format) |
| Optical Zoom | 3.2x |
| Aperture Range | f/2.0 - f/2.4 |
| LCD Screen | 2.5-inch TFT, 235,000 dots |
| Viewfinder | Electronic (0.44-inch, 235,000 dots) |
| Storage Media | SD/MMC card |
| Power Source | Lithium-ion battery (7.2V, 1400mAh) |
| Dimensions (W x H x D) | 135 x 80 x 139 mm |
| Weight (with battery) | Approx. 705 g |
| Image Stabilization | Optical (MEGA O.I.S.) |
| ISO Sensitivity | 100, 200, 400 |
| Shutter Speed | 8 - 1/2000 sec |
| Exposure Modes | Program AE, Aperture Priority, Shutter Priority, Manual |
| Video Recording | 320x240 at 30 fps (max 30 sec) |
| Connectivity | USB 1.1, A/V out, DC input |
| Cleaning and Maintenance | Use a soft, dry cloth to clean the body; lens cleaning with blower and lens tissue |
| Safety Precautions | Avoid exposing to extreme temperatures; use only specified battery and charger |
| Spare Parts and Repairability | Contact Panasonic service center for battery, charger, and other accessories |
Frequently Asked Questions - Lumix DMC-LC1PP PANASONIC
User questions about Lumix DMC-LC1PP PANASONIC
0 question about this device. Answer the ones you know or ask your own.
Ask a new question about this device
Download the instructions for your Camera in PDF format for free! Find your manual Lumix DMC-LC1PP - PANASONIC and take your electronic device back in hand. On this page are published all the documents necessary for the use of your device. Lumix DMC-LC1PP by PANASONIC.
USER MANUAL Lumix DMC-LC1PP PANASONIC
natural_image
Line drawing of a digital camera with lens and buttons (no text or symbols)Digital Camera
Operating Instructions
Model No. DMC-LC1PP

Before use, please read these instructions completely.
LEICA DC VARIO-SUMMICRON
For USA assistance, please call: 1-800-272-7033 or send e-mail to : digitalstillcam@panasonic.com
For Canadian assistance, please call: 1-800-561-5505 or visit us at www.panasonic.ca
Dear Customer,
We would like to take this opportunity to thank you for purchasing this Panasonic Digital Camera. Please read these Operating Instructions carefully and keep them handy for future reference.
Information for Your Safety
WARNING
TO REDUCE THE RISK OF FIRE OR SHOCK HAZARD AND ANNOYING INTERFERENCE, USE ONLY THE RECOMMENDED ACCESSORIES AND DO NOT EXPOSE THIS EQUIPMENT TO RAIN OR MOISTURE. DO NOT REMOVE THE COVER (OR BACK); THERE ARE NO USER SERVICEABLE PARTS INSIDE. REFER SERVICING TO QUALIFIED SERVICE PERSONNEL.
Notice:
This product has parts that contain a small amount of mercury. It also contains lead in some components. Disposal of these materials may be regulated in your community due to environmental considerations. For disposal or recycling information please contact your local authorities, or the Electronics Industries Alliance: http://www.eiae.org.
Carefully observe copyright laws. Recording of pre-recorded tapes or discs or other published or broadcast material for purposes other than your own private use may infringe copyright laws. Even for the purpose of private use, recording of certain material may be restricted.
- Please note that the actual controls and components, menu items, etc. of your Digital Camera may look somewhat different from those shown in the illustrations in these Operating Instructions.
- SD Logo is a trademark.
- Other names, company names, and product names printed in these instructions are trademarks or registered trademarks of the companies concerned.
THE SOCKET OUTLET SHALL BE INSTALLED NEAR THE EQUIPMENT AND SHALL BE EASILY ACCESSIBLE.
CAUTION
Danger of explosion if battery is incorrectly replaced. Replace only with the same or equivalent type recommended by the manufacturer. Dispose of used batteries according to the manufacturer's instructions.

A lithium ion/polymer battery that is recyclable powers the product you have purchased. Please call 1-800-8-BATTERY for information on how to recycle this battery.
FCC Note: (U.S. only)
This equipment has been tested and found to comply with the limits for a Class B digital device, pursuant to Part 15 of the FCC Rules. These limits are designed to provide reasonable protection against harmful interference in a residential installation. This equipment generates, uses, and can radiate radio frequency energy and, if not installed and used in accordance with the instructions, may cause harmful interference to radio communications. However, there is no guarantee that interference will not occur in a particular installation. If this equipment does cause harmful interference to radio or television reception, which can be determined by turning the equipment off and on, the user is encouraged to try to correct the interference by one or more of the following measures:
- Reorient or relocate the receiving antenna.
- Increase the separation between the equipment and receiver.
- Connect the equipment into an outlet on a circuit different from that to which the receiver is connected.
- Consult the dealer or an experienced radio/TV technician for help.
FCC Caution: To assure continued compliance, follow the attached installation instructions and use only shielded interface cables with ferrite core when connecting to computer or peripheral devices.
Any changes or modifications not expressly approved by the party responsible for compliance could void the user's authority to operate this equipment.
Trade Name: Panasonic
Model No.: DMC-LC1
Responsible party: Matsushita Electric
Corporation of
America
One Panasonic
Way, Secaucus, NJ
07094
Support Contact: Panasonic
Consumer
Electronics
Company
1-800-272-7033
This device complies with Part 15 of the FCC Rules. Operation is subject to the following two conditions: (1) This device may not cause harmful interference, and (2) this device must accept any interference received, including interference that may cause undesired operation.
This Class B digital apparatus complies with Canadian ICES-003
Panasonic
DMC-LC1

Tested To Comply
With FCC Standards
FOR HOME OR OFFICE USE
Extremely high precision technology is employed to produce the LCD monitor/Viewfinder screen. The result is more than 99.99% effective pixels with a mere 0.01% of the pixels inactive or always lit. However, this is not a malfunction and does not affect the recorded pictures.
Contents
Safety
Information for Your Safety ...... 2
Preparation
Standard Accessories 6
Names of the Components 8
Charging the Battery 10
About the Battery 11
Inserting the Battery.... 12
Removing the Battery.... 13
Using the AC Adaptor 14
About the Card.... 15
Inserting the Card.... 16
Removing the Card 17
Attaching the MC Protector/ Lens Cap/Lens Hood/Hood Cap.... 18
Attaching the Strap.... 20
Setting the Date/Time (Clock Set)..... 21
Date Printing 22
Setup Menu.... 23
Using the LCD Monitor/Viewfinder .... 27
About the Histogram 29
Operational Mode Dial and Metering Mode Dial 30
Setting the Exposure...... 31
Shutter Speed and Aperture Value ... 34
Recording pictures (basic)
Taking Pictures with Auto Focus..... 35
Taking Pictures with Manual Focus.... 41
Checking the Recorded Picture (Review) 43
Using the Optical Zoom...... 44
Taking Pictures Using the Built-in Flash.... 45
Compensating the Exposure...... 48
Taking Pictures Using Auto Bracket.... 49
Taking Pictures with the Self-timer.... 50
Taking Pictures using Burst Mode .... 51
Playback (basic)
Playing Back Pictures .... 52
9 Pictures Multi Playback 54
Using the Playback Zoom 55
Deleting Pictures 56
Recording pictures (advanced)
Recording Motion Images 59
FUNCTION Menu.... 61
Setting the White Balance.... 62
Setting the White Balance manually (White set) 64
Finely Adjusting the White Balance... 65
Changing the Picture Size...... 66
Changing the Quality.... 67
Taking Pictures using the Spot AF.... 68
Setting ISO Sensitivity.... 69
Taking Pictures with Audio.... 70
Using the Digital Zoom.... 71
Setting to the 2nd Curtain Synchro ... 72
Adjusting the Quality of the Picture (Picture Adjustment) 73
Creating Flip Animation.... 74
Playback (advanced)
Playing Back Pictures with Audio ..... 77
Playing Back Motion Images.... 78
Rotating the Picture.... 79
Setting the Picture to be Printed and the Number of Prints (DPOF Print Setting).... 80
Preventing Accidental Erasure of the Picture.... 85
Playing Back with Slide Show ...... 87
Adding Audio to Recorded Pictures (Audio Dubbing).... 89
Resizing the Pictures.... 90
Trimming the Pictures 92
Formatting the Card 94
Playing Back Pictures with a TV Screen .... 95
Before Connecting with USB Connection Cable 96
Connecting to a PC (Mass Storage) 98
Connecting to a PC (PTP).... 99
Connecting to a Printer.... 101
Using a Printer (PictBridge)...... 102
Using a Printer (USB Direct-Print)... 104
Others
Using the External Flash...... 106
Using the Wide Conversion Lens/Close-up Lens.... 109
After Use 111
Screen Display.... 112
The Menu Items 114
Cautions for Use 116
Approximate number of recordable pictures and the size.... 120
Message Display.... 121
Troubleshooting 122
Specifications.... 124
Digital Camera Accessory System .... 126
Digital Camera Accessory Order Form (For USA Customers)...... 127
Request for Service Notice (For USA Only).... 128
Limited Warranty (For USA Only) ... 129
Customer Services Directory (For USA Only).... 131
Index 132
Standard Accessories
Before using your camera, check the contents.
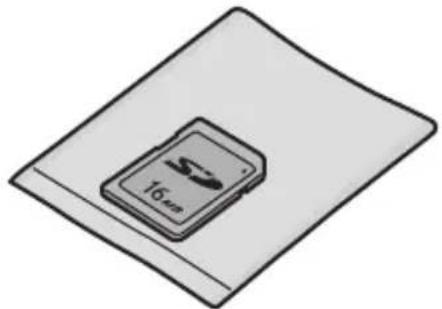
■ SD Memory Card (16 MB)
RP-SD016B
(In the text, it is indicated as "Card")
natural_image
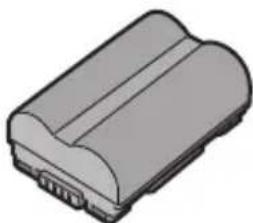
Illustration of a 16-inch 3D card placed on a flat surface (no text or symbols)Battery Pack
CGR-S602A
(In the text, it is indicated as "Battery")
natural_image
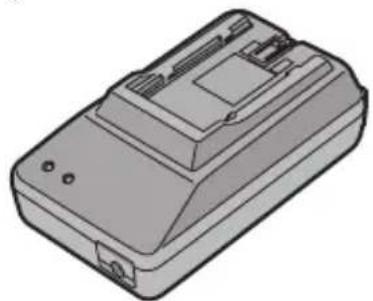
3D rendering of a gray battery pack with no visible text or symbols■ Battery Charger/AC Adaptor
DE-972A
(In the text, it is indicated as "AC Adaptor")
natural_image
Illustration of a gray rectangular electronic device with ports and connectors (no text or symbols)■ AC Cable
K2CA2EA00002
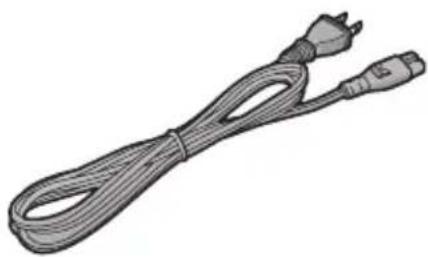
natural_image
Illustration of a coiled electrical plug with two connectors (no text or symbols)DC Cable
K2GH2DB00003
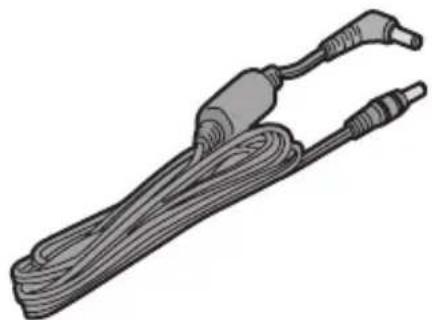
natural_image
Illustration of a coiled electrical sensor or probe with two connectors (no text or symbols)AV Cable
K1V204C10001
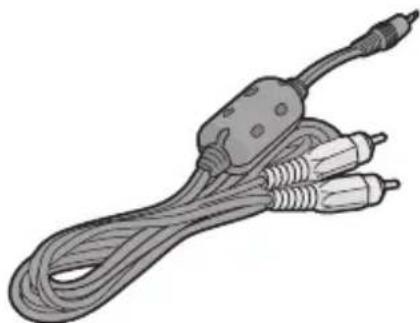
natural_image
Illustration of a coiled audio cable with three connected components (no text or symbols)■ USB Connection Cable
K1HA05CD0004
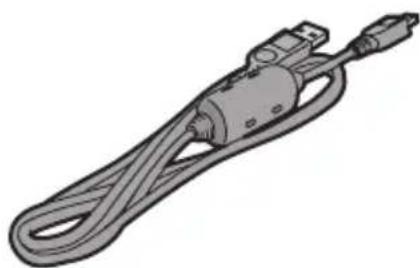
natural_image
Illustration of a coiled electrical sensor or probe device (no text or symbols visible)Preparation
■ Lens Cap VYK1F94

CD-ROM
■ Strap VFC4037
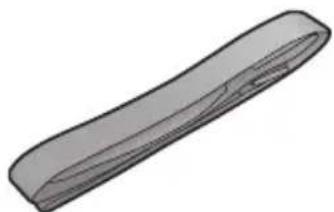
natural_image
3D rendered image of a smooth, elongated object with no visible text or symbols■ Lens Hood VYQ2884
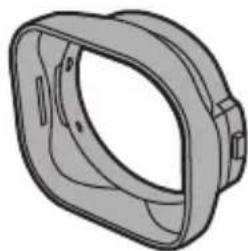
natural_image
Technical line drawing of a mechanical component with rounded corners and mounting holes (no text or symbols)■ Hood Cap VYK1C96
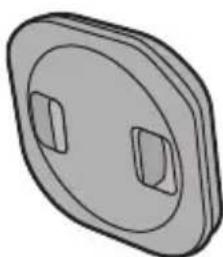
natural_image
Simple 3D illustration of a circular mechanical component with two side slots (no text or symbols)■ MC Protector (Filter diameter: 69 mm) DMW-LMC69

natural_image
Simple black-and-white line drawing of a circle (no text or symbols)- Please order VYC0917 as repair parts.
■ Remote Shutter DMW-RS1
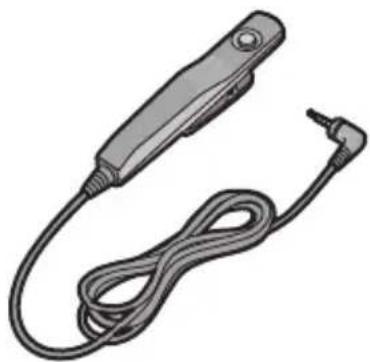
natural_image
Illustration of a handheld electronic device with coiled cable and terminal connector (no text or symbols)- Please order VYC0913 as repair parts.
Names of the Components
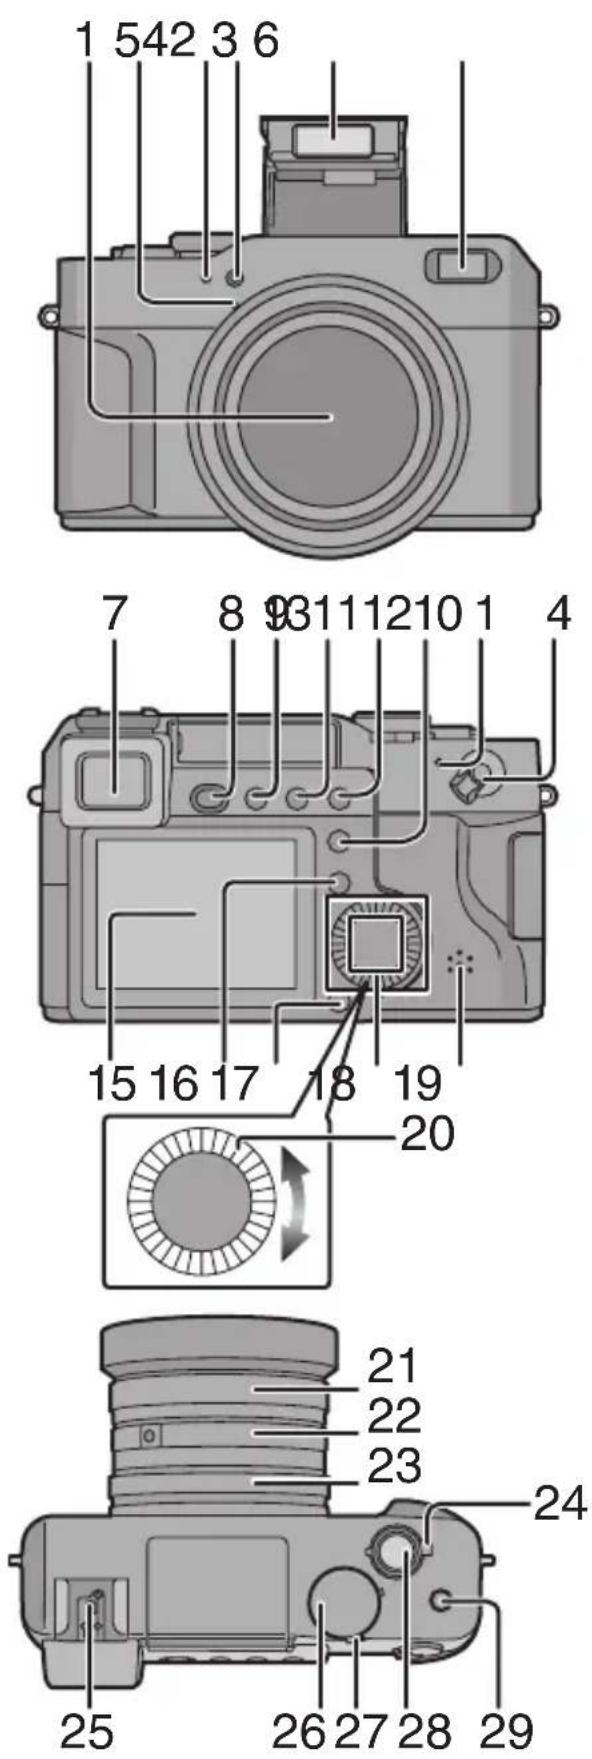
1 Lens
2 Microphone (P60, P70)
3 White Balance Sensor
4 Self-timer Indicator (P50)
5 Flash
6 AF Sensor
7 Viewfinder (P27)
8 Flash Open Button (P45)
9 [EVF/LCD] Button (P27)
10 [DISPLAY] Button (P27)
11 Exposure Compensation (P48)/Auto Bracket (P49)/Flash Output Adjustment (P46) Button
12 [FUNCTION] Button (P61)
13 Power Indicator (P23, P36)
14 Camera Switch (P23, P35)
15 LCD Monitor (P27, P112)
16 [MENU] Button (P23)
17 Delete Button (P56)
18 Cursor Buttons
▲/Self-timer Button (P50)
▼/[REVIEW] Button (P43)
◀ Button
▶ Button
19 Speaker (P77)
20 Command Dial
21 Zoom Ring (P44)
22 Focus Ring (P35, P41)
23 Aperture Ring (P31)
24 Metering Mode Dial (P30)
25 Hot Shoe (P106)
26 Shutter Speed Dial (P31)
27 Operational Mode Dial (P30)
28 Shutter Button (P35)
29 Flash Button (P45)
Preparation
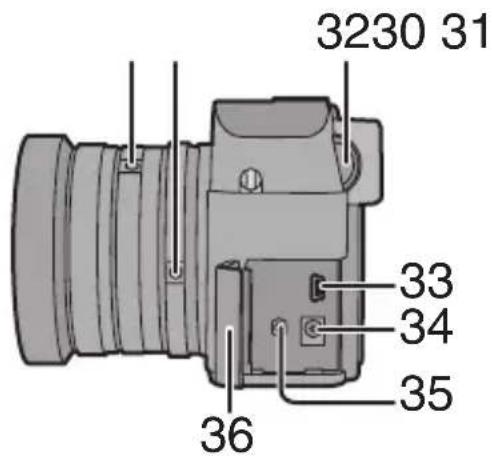
30 Focus Ring Button (P35, P41)
31 Aperture Ring Button (P31)
32 Diopter Adjustment Dial (P28)
33 [USB] Socket (5pin) (P98)
34 [DC IN] Socket (P14)
35 [AV OUT/REMOTE] Socket (P95)
36 Terminal Door
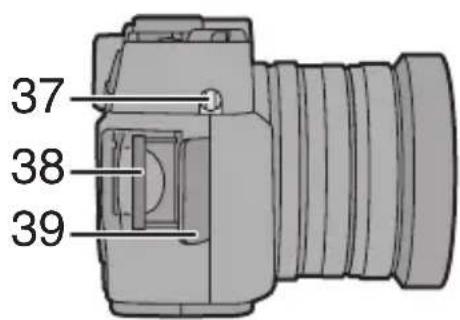
37 Strap Eyelet (P20)
38 Card Slot (P16)
39 Card Door (P16)
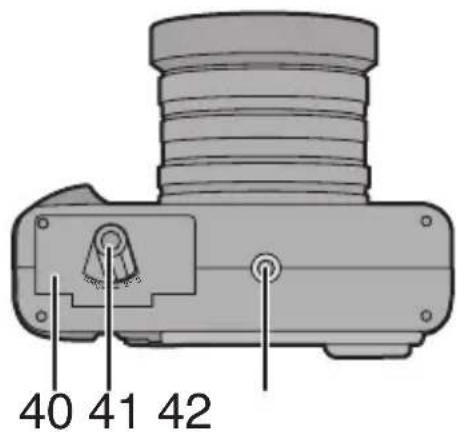
40 Battery Door (P12)
41 Battery Door Open/Close Lever (P12)
42 Tripod Receptacle
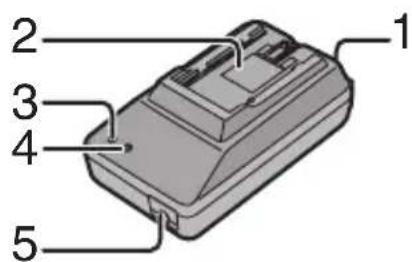
Battery Charger/AC Adaptor (P10, P14)
1 [AC IN] Terminal
2 Battery Attachment Part
3 [POWER] Indicator
4 [CHARGE] Indicator
5 [DC OUT] Terminal
Charging the Battery
Charge the battery before using.
1 Connect the AC cable.
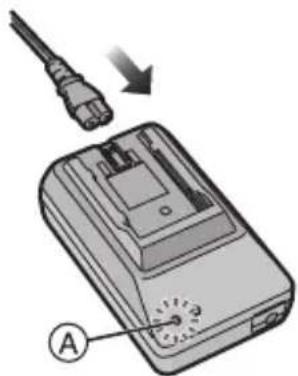
• The [POWER] indicator Ⓐ lights.
- The battery cannot be charged when the DC cable is connected to the AC adaptor.
2 Attach the battery to the AC adaptor.
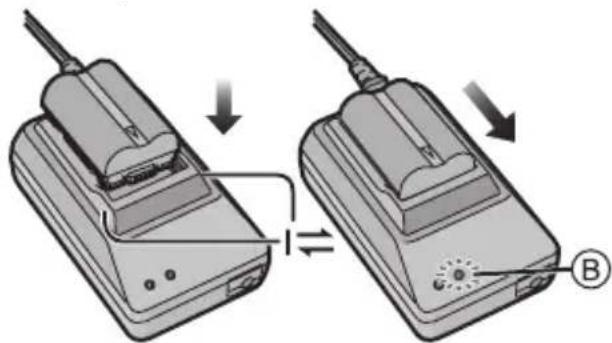
- Put the battery along the mark horizontally and slide the battery.
- When the [CHARGE] Indicator Ⓑ lights, charging starts.
- When the [CHARGE] indicator Ⓑ turns off (in about 110 minutes), charging is finished.
3 Detach the battery.
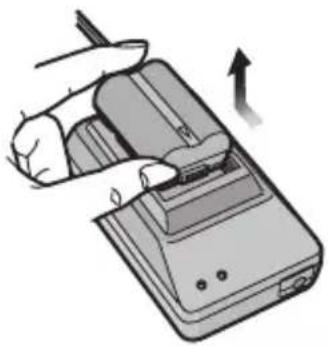
natural_image
Illustration of a hand using a handheld device to press or install a device, with an upward arrow indicating motion (no text or symbols present)◇ Suggestions/Tips ◇
• After use, be sure to disconnect the AC cable.
- The battery becomes warm after use/charge or during charge. The camera also becomes warm during use. However, it is not a malfunction.
- The battery and AC adaptor are designed only for this camera. Do not use them with any other equipment.
- Do not disassemble or alter the AC adaptor.
- The battery cannot be charged in the camera with the AC adaptor connected.
About the Battery
Battery indication
The remaining battery power appears on the screen.
(This does not appear when using AC adaptor)

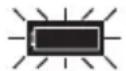
(The indication turns red and blinks): Recharge or replace the battery.
■ Charging time and available recording time
Measured under the following conditions:
• Temperature: 77°F (25°C)/Humidity: 60 %
- Recording once every 30 seconds, flash every other record.
- Using the battery (supplied) and 16 MB SD Memory Card (supplied) [Picture size: 2560 × 1920 /Quality: Fine (When deleting all pictures after full use)]
| Charging time | Continuous recording/playback time (recordable number) | |
| Supplied battery | Approx. 110 min. | Recording with LCD monitor Approx. 180 min. (equal to 360 still pictures) |
| Recording with Viewfinder Approx. 220 min. (equal to 440 still pictures) | ||
| Playback with LCD monitor Approx. 340 min. |
The recording time (recordable number) and playback time depend on the condition.
- Charging environment and charging error
- Charge the battery under temperature of 50^ - 95^ (10^ - 35^) .
(The battery should also be the same temperature.)
- When charging starts, the [CHARGE] indicator lights.
If the charging error occurs, the [CHARGE] indicator blinks at about 1 second cycles.
In this case, disconnect the AC adaptor from the electrical outlet, remove the battery and ensure both room and battery temperature are not too low or high and then charge it again.
If the problem persists, consult the dealer or your nearest servicenter.
- When the operating time of the camera becomes extremely short even if the battery is properly charged, the life of the battery may be expired. Buy a new battery.
- The performance of the battery may be temporarily deteriorated and the operating time may become shorter under low temperature such as skiing grounds.
Inserting the Battery
Preparation
- Check if the camera is turned off.
- Close the flash.
1 Slide the lever to open the battery door.
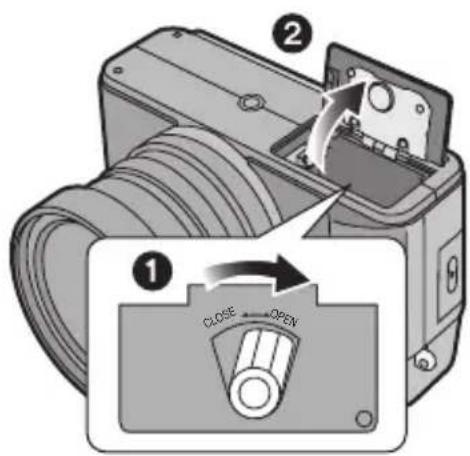
2 Insert the battery fully until the lock ① pops on the battery.
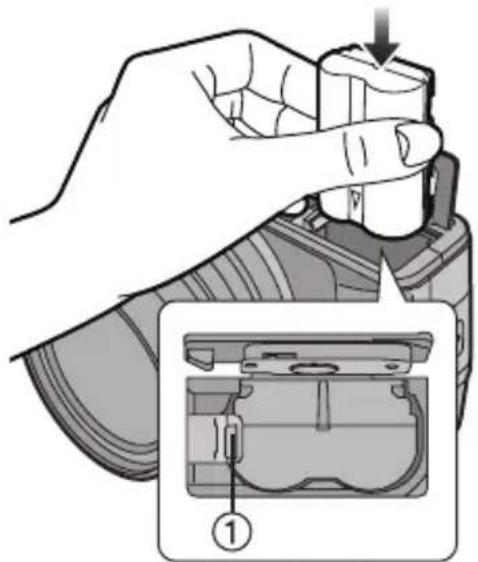
- Hold both sides of the battery when inserting.
3 Close the battery door and then slide the battery door open/close lever.
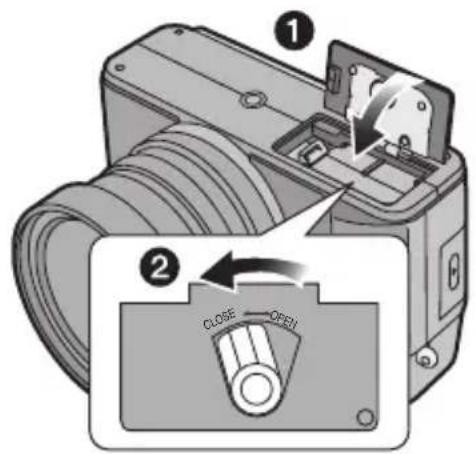
Removing the Battery
Preparation
- Check if the camera is turned off.
- Close the flash.
1 Slide the lever to open the battery door.
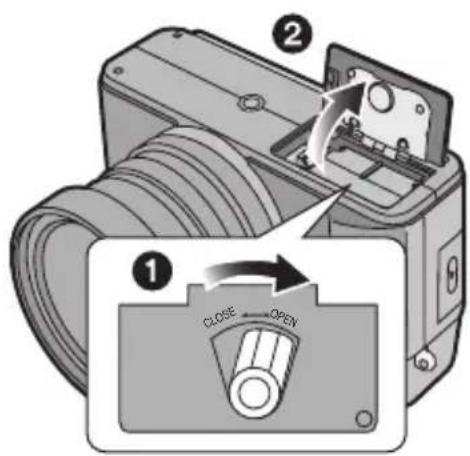
2 Push the lock ① to remove the battery.
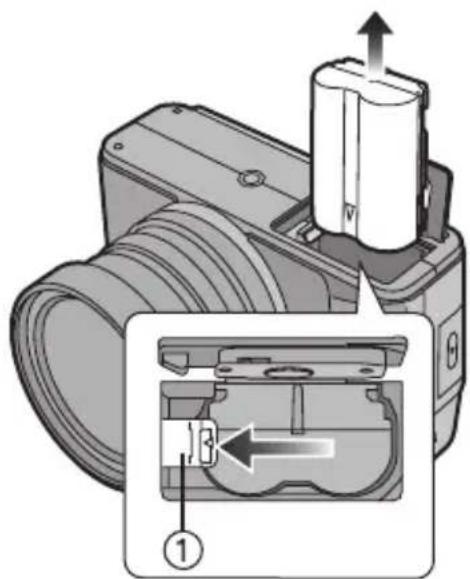
3 Close the battery door and then slide the battery door open/close lever.
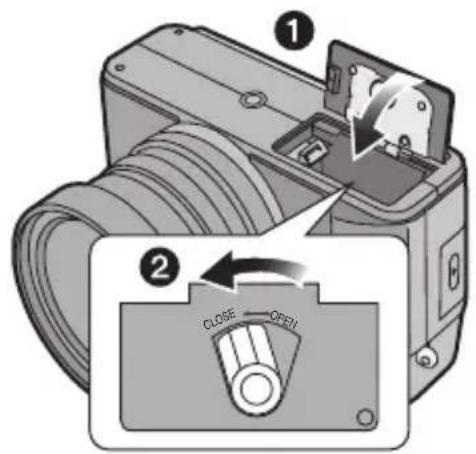
◇ Suggestions/Tips ◇
- If you will not be using the camera for a long time, remove the battery.
• After the fully charged battery has been inserted for more than 24 hours, the clock setting is stored (in the camera) for max. 3 months after the battery is removed, in accordance with the elapsed time after the battery is inserted. (The time may be shorter if the battery is not charged sufficiently.) If more than 3 months has passed, the clock setting will be lost. In this case, set the clock again. (P21) - The supplied battery is designed only for this camera. Do not use it with any other equipment.
Using the AC Adaptor
You can use the camera without worrying about battery discharge by connecting to an AC adaptor.
Preparation
- Check if the camera is turned off.
- Close the flash.
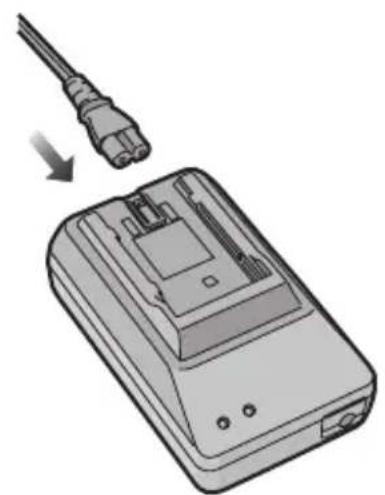
1 Connect the AC cable.
natural_image
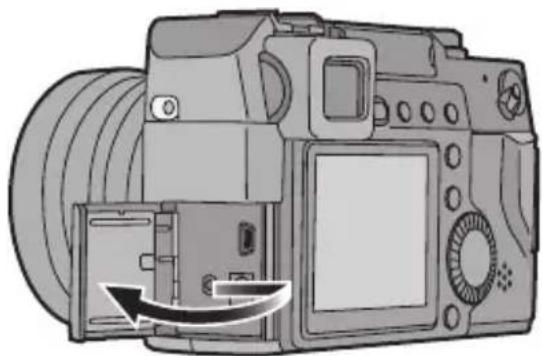
Illustration of a device with a cable and connector, showing an open rear panel (no text or symbols)2 Slide the terminal door to open.
natural_image
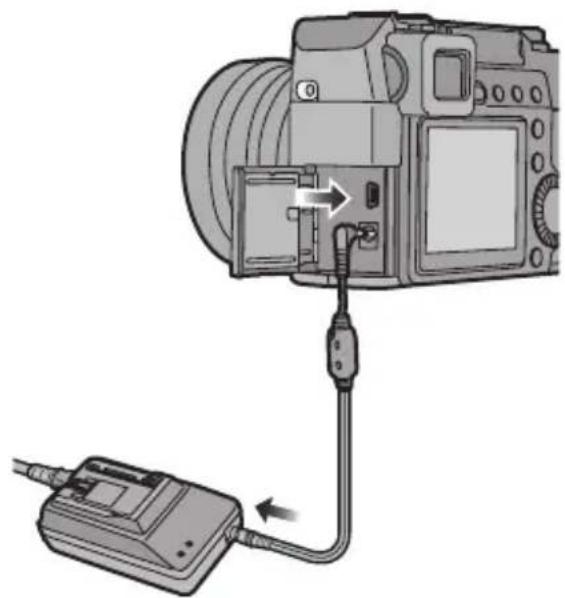
Diagram of a DSLR camera showing internal components and an arrow indicating rotation (no text or symbols present)3 Connect the DC cable.
natural_image
Diagram of a DSLR camera connected to a cable via cable outlet, showing internal components and cable routing (no text or symbols)◇ Suggestions/Tips ◇
- Use the supplied DC cable. If you use other DC cables, it may cause a malfunction.
- The camera becomes warm during use. This is not a malfunction.
- Disconnect the AC adaptor and DC cable when the camera is not in use.
- The battery cannot be charged in the camera even if the AC adaptor is connected.
Access to the card
When the card is being accessed, the card access indication ① lights.
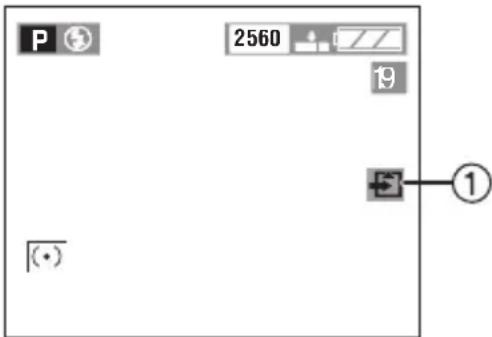
When the card access indication ① lights, do not:
- turn the camera off.
- remove the battery or the card.
- disconnect the DC cable if you use the AC adaptor.
The card and the data may be damaged and the camera may not operate normally.
It is possible that pictures stored on the card can be damaged due to accidental erasure, static electricity, electrical noise or a defective card. We recommend storing precious data to your PC's hard drive. (P98)
■ SD Memory Card (supplied) and MultiMediaCard (optional)
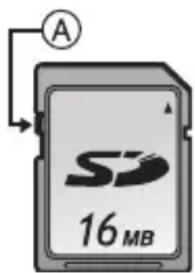
The SD Memory Card and MultiMediaCard are small, lightweight, removable external memory cards. The reading/writing speed of an SD Memory Card is fast. The SD Memory Card is equipped with a Write-Protect switch ① that can inhibit writing and formatting a card. (When the switch is slid to the [LOCK] side, it is not possible to write or delete data on the card and format it. When the switch is unlocked, these functions become available.)
SD Memory Card
MultiMediaCard

◇ Suggestions/Tips ◇
- The reading/writing speed of a MultiMediaCard is slower than an SD Memory Card. When a MultiMediaCard is used, the performance of certain features may be slightly slower than advertised.
- After recording motion images using the MultiMediaCard, the card access indication may appear for a while, but this is not a malfunction.
- Keep the Memory Card out of reach of children to prevent swallowing.
Inserting the Card
Preparation
- Check if the camera is turned off.
- Close the flash.
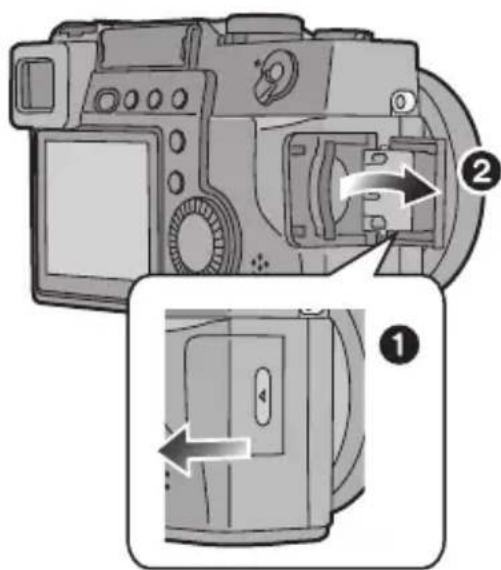
1 Slide the card door to open.
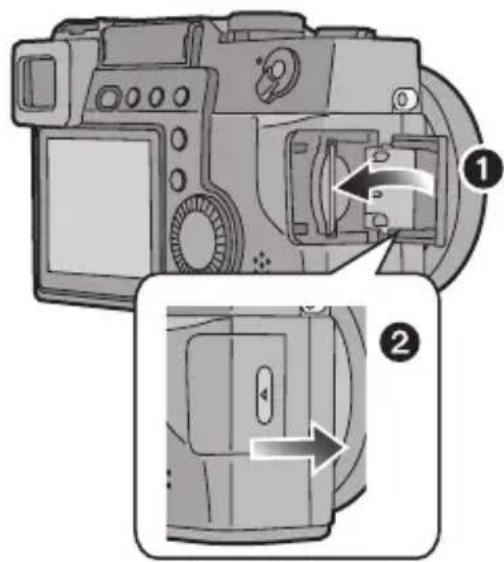
3 Close and slide the card door.
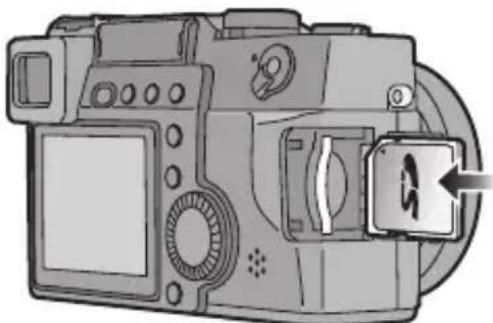
2 Insert the card with the label facing the rear of the camera until it clicks.
natural_image
Diagram of a DSLR camera with a scroll wheel and control panel (no text or symbols)- Insert the card, pressing gently until it locks in place. If the card will not insert freely, it may be reversed. Do not force the card.
- Do not touch the connection terminals on the back side of the card.
Removing the Card
Preparation
- Check if the camera is turned off.
- Close the flash.
1 Slide the card door to open.
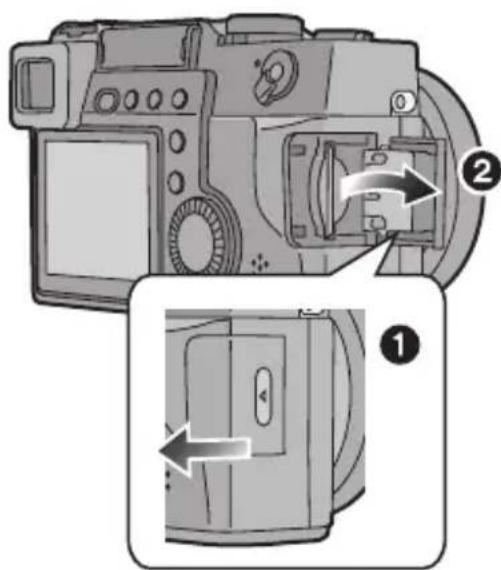
2 Push the card until it clicks then pull the card out upright.
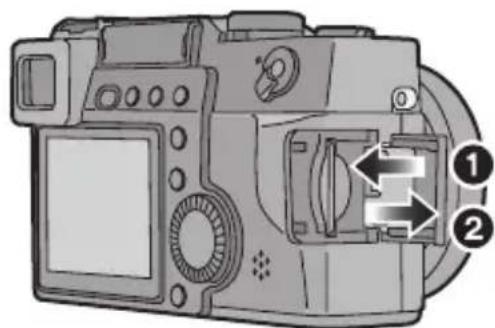
3 Close and slide the card door.
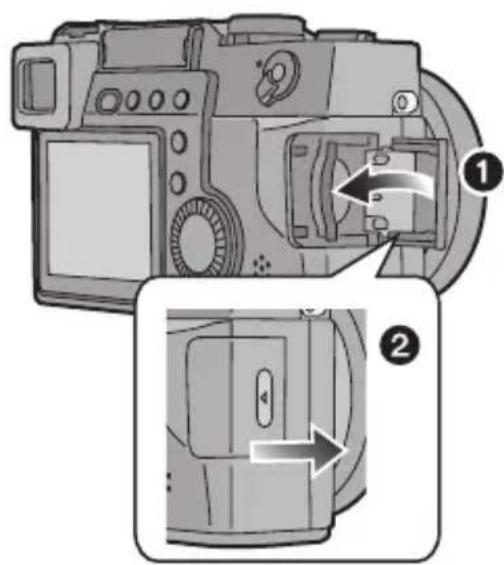
◇ Suggestions/Tips ◇
- The card and the data may be damaged if it is removed while the camera is on.
- If the card door cannot be completely closed, remove the card and insert it again.
- If the card cannot be fully inserted, check the direction of the card.
- We recommend using Panasonic's SD Memory Card. (Use only the genuine card.)
- The card may be damaged if it is not fully inserted.
- Do not open the card door during the access to the card. (P15)
Attaching the MC Protector/Lens Cap/ Lens Hood/Hood Cap
Preparation
- Check if the camera is turned off.
- Close the flash.
■ Attaching the MC Protector
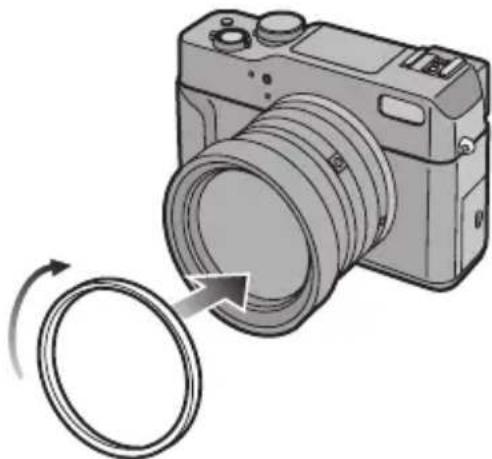
1 Attach the MC protector.
natural_image
Illustration of a digital camera with a rotating cable, no text or symbols present- The MC protector is a transparent filter which affects neither the colors nor the amount of light, so it can always be used to protect the camera's lens from scratches.
- You can also attach the lens hood.
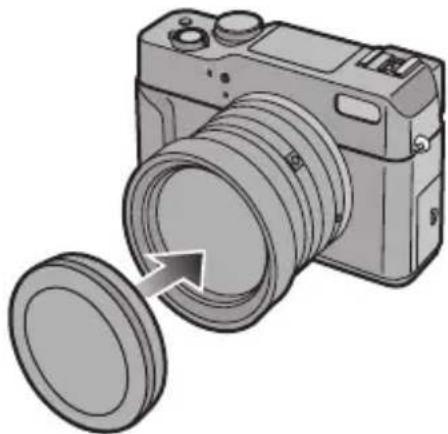
■ Attaching the lens cap
1 Attach the lens cap.
natural_image
Illustration of a camera with a lens and a circular base, showing no text or symbols.- When you turn the camera off, carry the camera or play back pictures, attach the lens cap to protect the surface of the lens.
- When using the MC protector, you can also attach the lens cap.
■ Attaching the lens hood/hood cap
1 ① Attach the lens hood. ② Attach the hood cap.
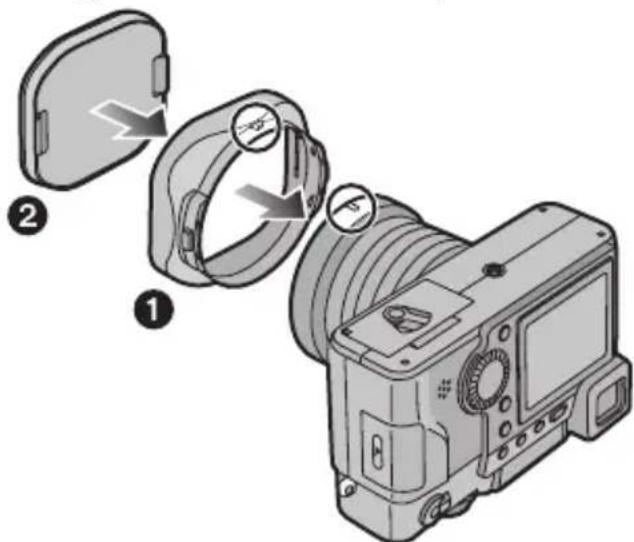
- The camera is turned upside down in the figure above.
- In bright sunlight or when there is backlight, the lens hood will minimize lens flare and ghosting.
- The lens hood cuts off excess lighting and improves the picture quality.
- When using the MC protector, you can also attach the lens hood.
- When detaching the lens hood, refer to P111.
- When taking pictures with flash, the photo flash may be obscured by the lens hood. This can result in the lower portion of the photo being dark. We recommend removing the lens hood.
- When attaching the lens hood, attach the supplied hood cap on it. The lens cap cannot be attached to it.
- If any of the accessories are lost, please contact Panasonic's parts department at 1 800 833-9626 (For USA) or 1 800 561-5505 (For Canada).
- M C = "Multi-coated" ND = "Neutral Density"
- Do not take direct pictures of the sun. The CCD will be damaged.
◇ Suggestions/Tips ◇
- If the MC protector is dropped, it may be damaged. Be careful not to drop it.
- You can also attach the ND filter (DMW-LND69; optional) by following the procedure for attaching the MC protector. The ND filter reduces the amount of light to approximately 1/8th (equal to 3 F-stops) without affecting the color balance.
- You cannot attach the MC protector and the ND filter at the same time.
- When attaching the lens hood, use the dedicated hood cap. You cannot use the lens cap.
Attaching the Strap
1 ① Pressing both sides of the cover.
② Pull out the black strap holder completely.
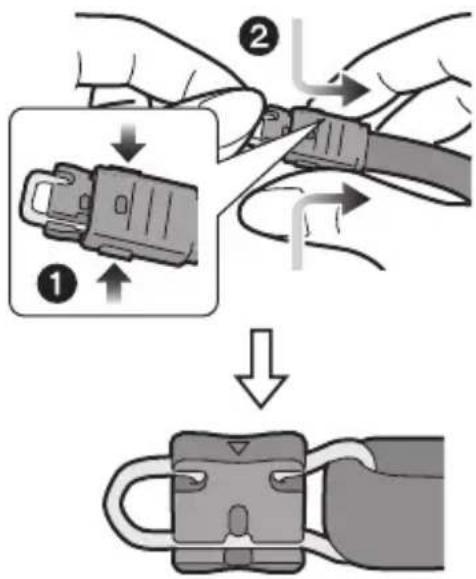
2 Detach the black strap holder from the metal fitting.
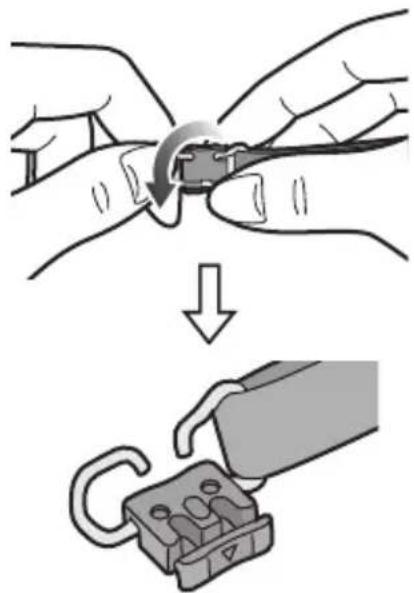
- When the black strap holder is completely detached, attach it again as above.
3 Pass the metal fitting through the eyelet of the camera.
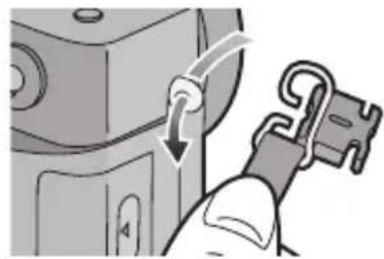
natural_image
Illustration of a hand inserting a plug into a device component (no text or symbols visible)4 Rotate the black strap holder in the opposite direction until it clicks.
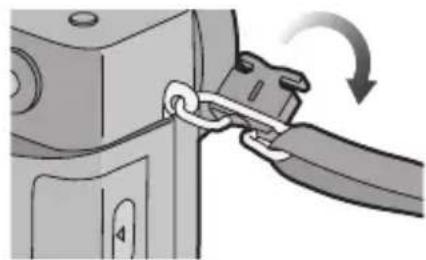
natural_image
Illustration of a hand securing a chain lock into a device (no text or symbols visible)5 Slide the cover until it is attached firmly.
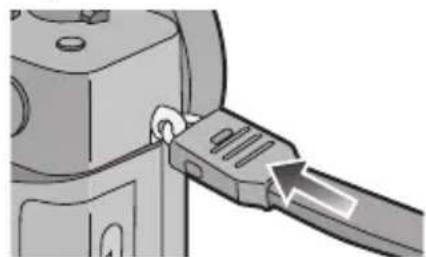
natural_image
Mechanical component with a lever and adjustment knob, no visible text or symbols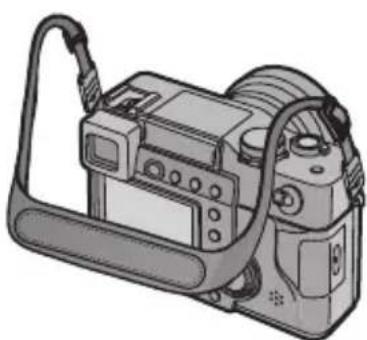
natural_image
Illustration of a digital camera with attached cable and control panel (no text or symbols)- Attach the strap to the other side of the camera being careful not to twist it.
- Attach the strap so that you can see "LUMIX" logo.
- Check if the strap is firmly attached to the camera.
Setting the Date/Time (Clock Set)
Initial Use
The clock is not set when the camera is shipped. When you turn the camera on, the clock setting screen appears.
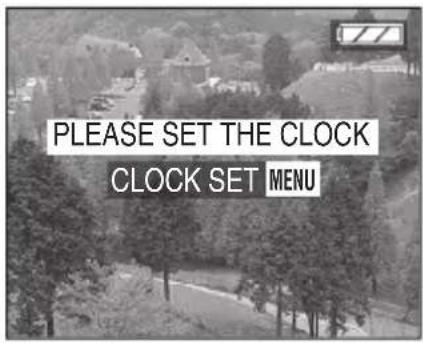
- When pressing the [MENU] button, the screen shown in step 2 appears. Set the clock on it.
- The above screen disappears in about 5 seconds. Start from step 1 to set the clock.
1 Select [CLOCK SET] from the [SETUP] menu. (P23)
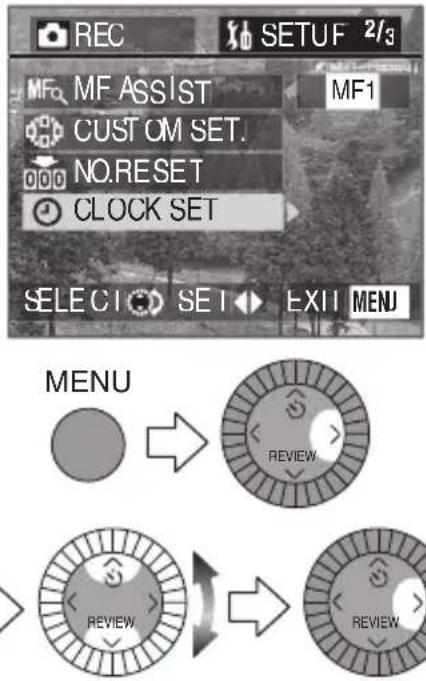
2 Set date and time.
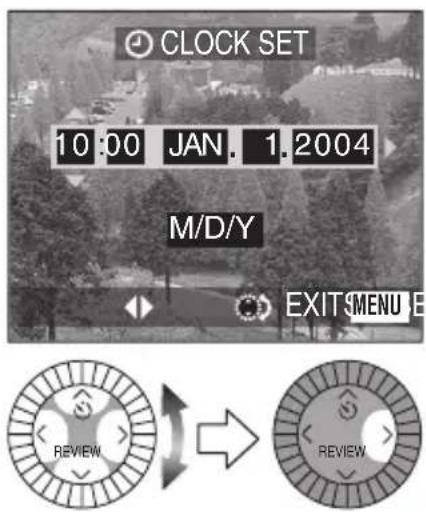
- ◀/▶: Select the desired item.
- ▲/▼: Set date and time.
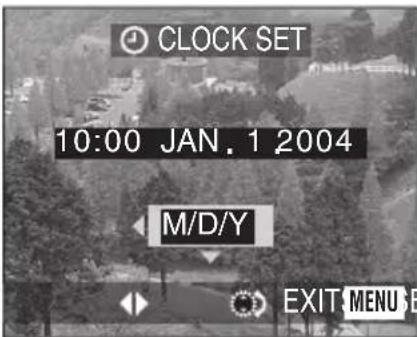
3 Select [M/D/Y], [D/M/Y] or [Y/M/D].
![PANASONIC Lumix DMC-LC1PP - Select [M/D/Y], [D/M/Y] or [Y/M/D]. - 2](/content/2026/05/843524/images/fa35186210e73d2aef8b0fa2f750c08d4764d66a80caf24439acacf324203c46.jpg)
- Close the menu by pressing the [MENU] button 2 times after finishing the setting.
Date Printing
- You can set the date printing in DPOF print setting on this camera. (P84)
- Using the supplied software, [SD Viewer for DSC], it is possible to have the date imprinted on the picture. For details, please read the supplied operating instructions for PC connection.
- When you ask photo studios for printing, be sure to order the printing of the date. For further information, ask a photo studio. Depending on the store, it may not be possible to print the date.
◇ Suggestions/Tips ◇
- You can set the year from 2000 to 2099. The 24-hour system is used. - After the fully charged battery has been inserted for more than 24 hours, the clock setting is stored (in the camera) for max. 3 months after the battery was removed, in accordance with the elapsed time after the battery is inserted. (The time may be shorter if the battery is not charged sufficiently.) If more than 3 months has passed, the clock setting will be lost. In this case, set the clock again.
Setup Menu
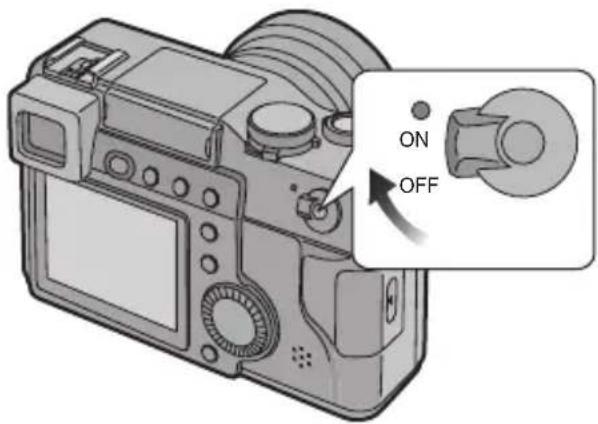
1 Turn the camera on.
2 Press the [MENU] button.
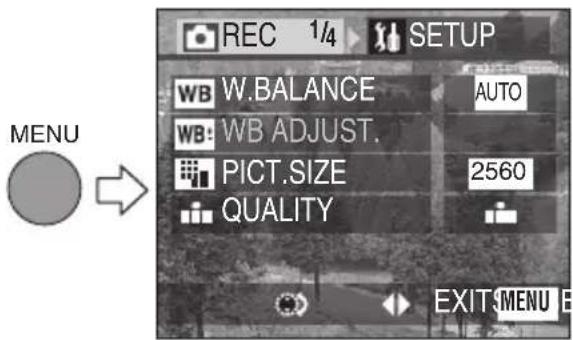
3 Select the [SETUP] Menu.
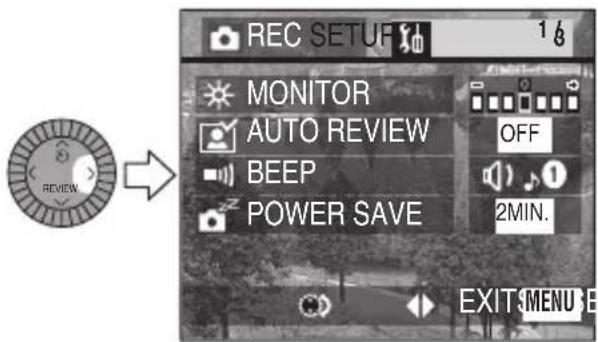
4 Select the desired item.
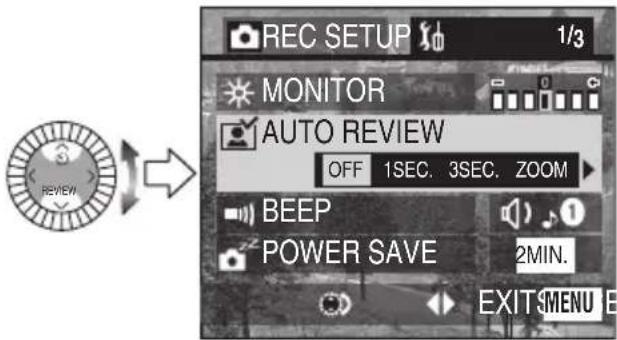
5 Set the desired value.
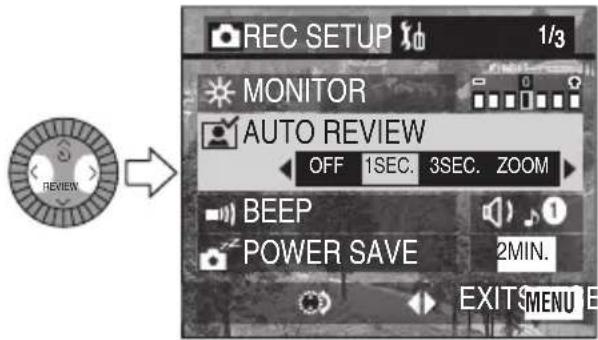
- Close the menu by pressing the [MENU] button after finishing the setting.
Preparation
You can control the following items on [SETUP] menu.
| Menu Functions | |
| MONITOR/FINDER | Adjust the brightness of the LCD monitor (when pictures appear on the LCD monitor) or Viewfinder (when pictures appear on the Viewfinder) in 7 steps. |
| AUTO REVIEW*1 | ·[OFF]: The recorded picture does not automatically appear.·[1SEC.]: The recorded picture automatically appears on the screen for about 1 second.·[3SEC.]: The recorded picture automatically appears on the screen for about 3 seconds.·[ZOOM]: The recorded picture automatically appears on the screen for about 1 second. Then it is enlarged 4 times and appears for about 1 second. Pictures in burst mode, auto bracket, pictures with audio and pictures with setting the quality to [RAW] re not enlarged even if [ZOOM] is selected.·In Motion image mode, auto review function is not activated.·When pictures are recorded in burst mode, with auto bracket or with setting the quality to [RAW] he auto review function works while the card is recorded regardless of the setting on the auto review function. (The picture is not enlarged.)·When using pictures with audio, the auto review function works while recording the audio or the data into the card regardless of the setting on the auto review function. (The picture is not enlarged.) |
*1 Recording mode only
| Menu Functions | ||
| ■■ | BEEP You can set [BEEP] and [SHUTTER] in the recording mode, and [BEEP] in playback mode.Setting on [BEEP] (Setting on [BEEP] in recording mode)[the operational sound turns high.[the operational sound turns low.[The operational sound turns off.Setting on the shutter soundYou can select the shutter sound from [1] and [3].When the shutter speed is slower than 1/8, the shutter sound beeps both times when the shutter is opened and closed in recording. | |
 | POWER SAVE | [2MIN.]/[5MIN.]/[10MIN.]:The camera is automatically turned off if it has not been used for a predetermined amount of time. (Press the shutter button or turn the camera off and on to cancel the power save mode.)[OFF]: The camera is not automatically turned off.When using the AC adaptor/connecting to a PC/connecting to a printer/recording motion images/playing back motion images/during Slide Show, the power save mode is not activated. |
 | MF ASSIST*1 | In manual focus, assistance screen appears on the screen to facilitate focusing on the subject. (P41) |
| [IMAGE] | CUSTOM SET.*1 | Use this to set the menus which you want to include in the FUNCTION menu. (P61) |
 | NO.RESET*1 | Set this when you want to start the file number of the next picture from 0001.(The folder number is renewed and the file number starts from 0001.)The folder number can be assigned from 100 to 999. When the folder number reaches to 999, it cannot be reset. We recommend formatting the card after saving the data on a PC or other. |
*1 Recording mode only
| Menu Functions | ||
 | CLOCK SET Change the date and time. (P21) | |
 | RESET^*1 | The camera is reset to the initial settings. However, the folder number and the clock settings are not changed. |
 | USB MODE Set before connecting to a PC or a printer. (P96) | |
 | LANGUAGE Set to the language on the menu screen from the following 7 languages.Set to the desired language with ◀/▶ and determine it with ▼/[REVIEW].[ENGLISH]: The menu screen in English[DEUTSCH]: The menu screen in German[FRANÇAIS]: The menu screen in French[ESPAÑOL]: The menu screen in Spanish[ITALIANO]: The menu screen in Italian[ ]The menu screen in Chinese (Simplified)[ ]The menu screen in JapaneseWhen you set to other language by mistake, select [ ]from the menu icons to set the desired language. | |
| [6xST] | PLAY ON LCD ^2 | When Viewfinder is selected in the recording mode, the picture automatically appears on the LCD monitor in review or playback. (P28) |
 | VOLUME^*2 | The volume of speakers can be adjusted in 7 steps.When you connect the camera to a TV, the volume of the speakers of the TV is not changed. |
 | VIDEO OUT ^2 | [NTSC]: Video output is set to NTSC system.[PAL]: Video output is set to PAL system. (P95) |
*1 Recording mode only * 2 Playback mode only
Using the LCD Monitor/Viewfinder
The LCD monitor of the camera is easily viewed outdoors because the LCD monitor reflects sunlight to use it as a backlight.
■ Switching the screen to be turned on
Press the [EVF/LCD] button to switch to the screen you would like to turn on.
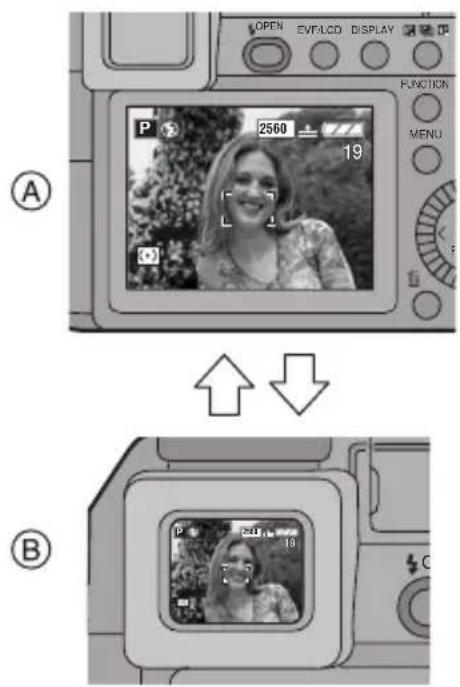
Ⓐ LCD monitor (LCD)
⑧ Viewfinder (EVF)
- When the LCD monitor turns on, the Viewfinder turns off. (and vice versa)
■ Selecting the screen to be used
Press the [DISPLAY] button to switch the screen to be used.
- When the menu screen appears, during multi playback or during playback zoom, the [DISPLAY] button is not activated.
In recording mode
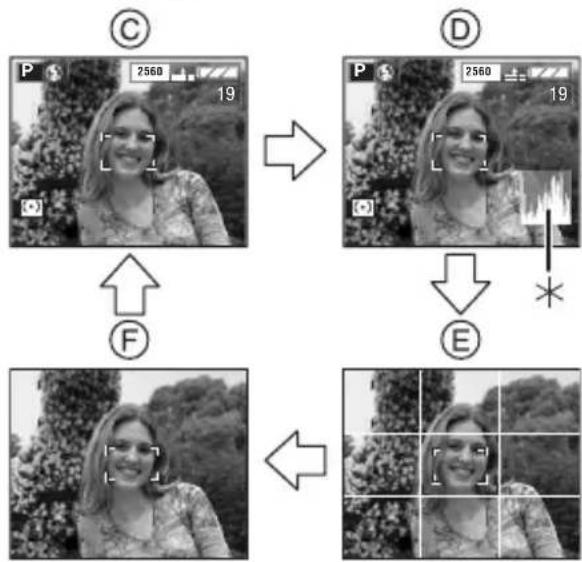
© Display
(D) Display with histogram
⑤ Non-display (Recording guide line)
⑤ Non-display
*Histogram
In playback mode
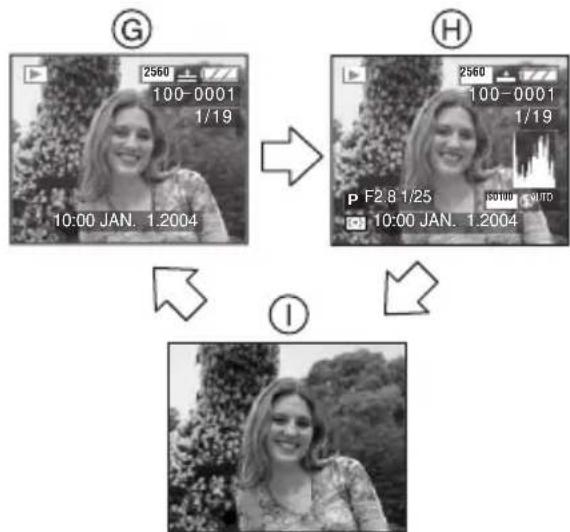
© Display
⑧ Display with recording information and histogram
① Non-display
■ Diopter adjustment
This feature is handy for users who wear corrective lenses and prefer to use the Viewfinder.
Preparation
- Press the [EVF/LCD] button to display the Viewfinder.
1 Adjust the diopter, rotating the diopter adjustment dial.
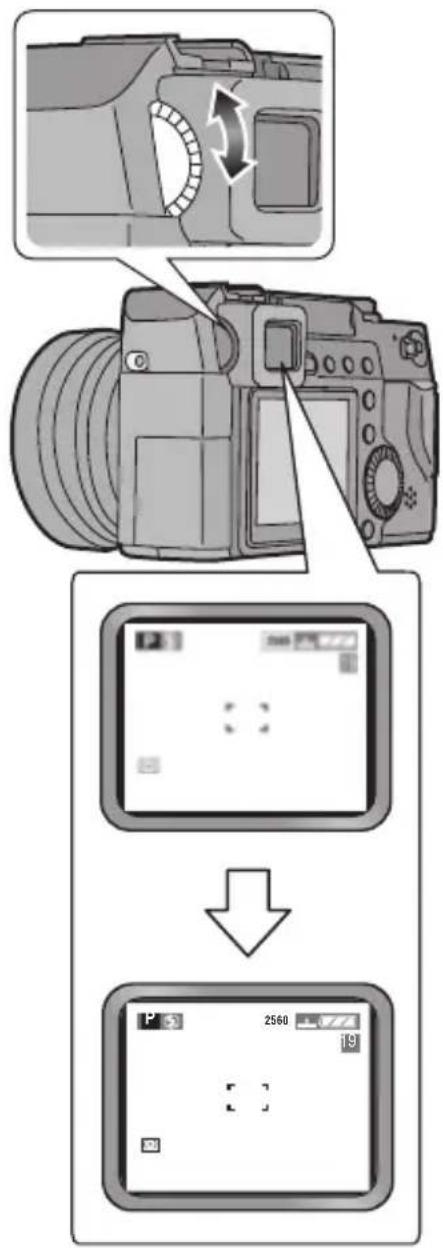
Monitor priority
When setting [PLAY ON LCD] (P26) to [ON] on the [SETUP] menu, the LCD monitor is turned on in the following cases.
You can save the time it takes to switch the display to the LCD monitor even when using the Viewfinder in recording.
- When the recording mode is switched to playback mode
- When reviewing pictures (P43)
- When turning the camera on in playback mode
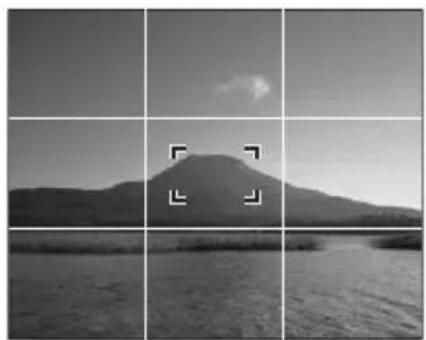
■ Recording guide line
You can achieve balanced pictures by aligning the subject on the cross point of the horizontal and vertical guide lines. You can also take pictures easily by adjusting the horizon to the guide line.
natural_image
Black-and-white landscape photo of a mountain on water with grid overlay and no visible text or symbolsYou can take pictures with well-designed composition by viewing the size and the balance of subjects.
About the Histogram
- A histogram is a graph that displays brightness along the horizontal axis (black to white) and the number of pixels at each brightness level on the vertical axis.
- It allows the camera user to easily check the way a picture is being exposed.
-
It is very useful if manual adjustments of the lens aperture and shutter speed are available, especially in those situations where automatic exposure may be difficult due to uneven lighting. Using the histogram feature will allow you to get the best performance from the camera.
-
When the values are concentrated to the left Ⓐ, the picture is under exposed.
- When the values in the histogram are distributed evenly Ⓑ, the exposure is adequate and the brightness is well-balanced.
- When the values are concentrated to the right ©, the picture is over exposed.
Example of histogram
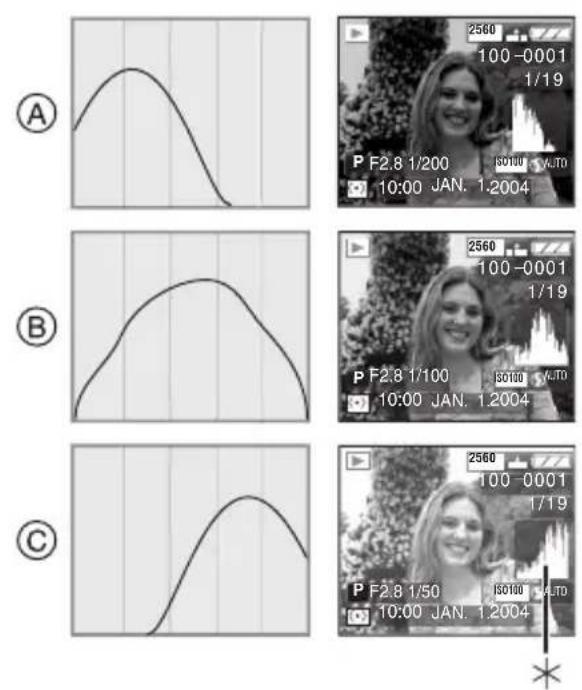
(A) Under Exposed
⑧ Properly Exposed
© Over Exposed
*Histogram
◇ Suggestions/Tips ◇
- When the recorded picture and the histogram do not match each other under the following conditions, the histogram is displayed in yellow.
- When the flash is activated
- When the flash is closed
- When the brightness of the screen is not correctly displayed in dark places
- When the exposure is not adequately adjusted in dark places
- The histogram does not appear when in Motion image mode, during multi playback and playback zoom.
• The histogram in recording and playback may not match each other. - The histogram in this camera does not match the one displayed in image editing software on PC, etc.
- The histogram in the recording mode is an approximation.
Operational Mode Dial and Metering Mode Dial
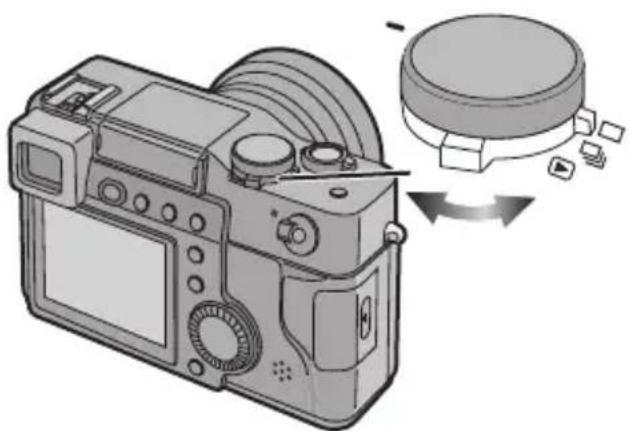
Operational mode dial
natural_image
Illustration of a digital camera with a circular button and directional arrows indicating motion (no text or symbols)Metering mode dial
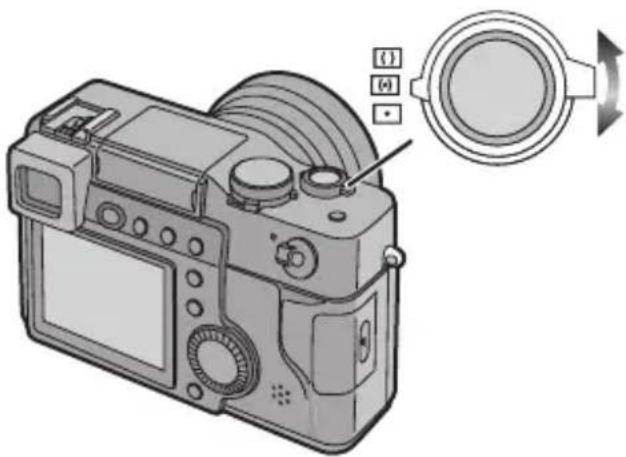
natural_image
Illustration of a DSLR camera with a circular dial indicator and control buttons (no text or symbols)You can switch to the recording mode (single/burst) and the playback mode.
□ : Single mode (P35)
: Burst mode (P51)
▶ : Playback mode (P52)
You can switch to the following metering methods.
| Metering mode | Details of setting |
| [☐]Multiple | The camera automatically evaluates the whole screen and optimizes the exposure. Usually, we recommend using this metering mode. |
| [☐]Center weighted | This evenly evaluates the whole of the screen pointing to the subject on the center of the screen. |
| [☐]Spot | This evaluates the subject on the spot metering target. |
Setting the Exposure
You can set the exposure by setting the aperture ring and the shutter speed dial.
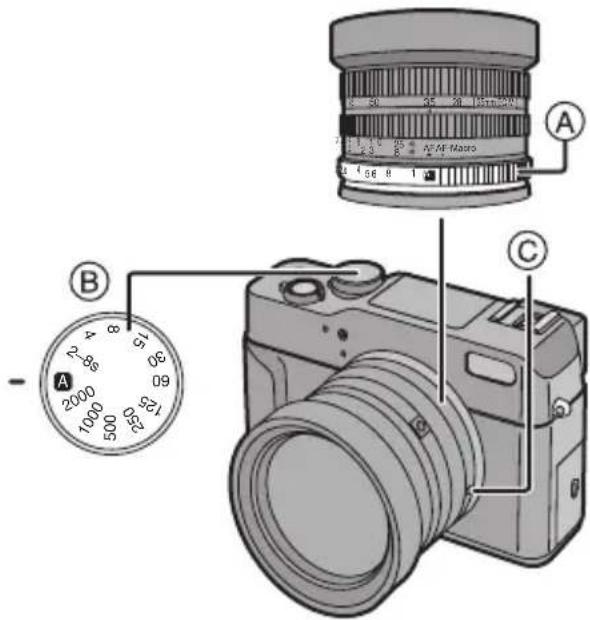
Ⓐ: the aperture ring
⑧: the shutter speed dial
©: the aperture ring button
- When adjusting the aperture ring to [A] or changing the position from [A] to other, rotate the aperture ring while pressing the aperture ring button ©.
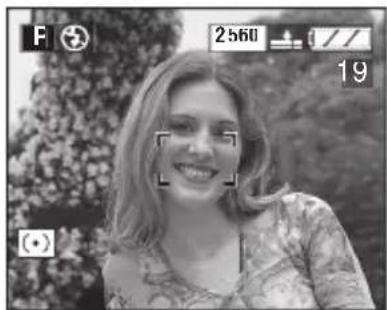
Program AE mode
The exposure is automatically set by the camera.
Adjust the aperture ring and the shutter speed dial to [A].
natural_image
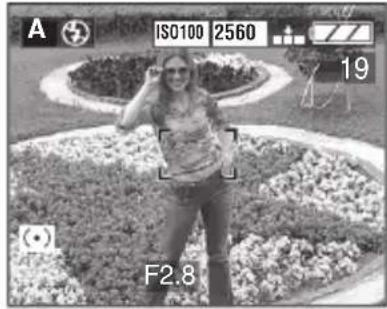
Black-and-white photo of a smiling woman outdoors, with camera interface overlays (no readable text or symbols)Aperture-priority AE mode A
If you would like the background to be sharp, manually set the lens to a higher F-stop. For soft focused backgrounds use a lower F-stop.
The shutter speed is changed according to the aperture value.
Adjust the aperture ring between 2 and 11, and the shutter speed dial to [A].
Shutter-priority AE mode
When recording fast moving action, select a faster shutter speed. If some motion blur is desired a slower shutter speed can be selected. Please note that as the shutter speed is increased, more light will be required.
The aperture value is changed according to the shutter speed.
Preparation
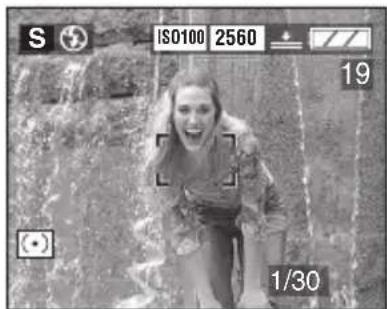
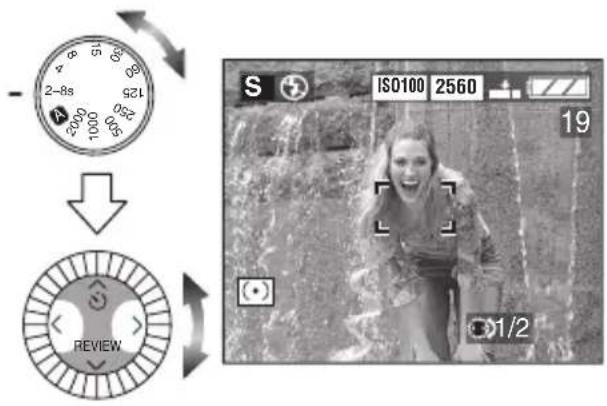
Adjust the aperture ring to [A] and the shutter speed dial between 2000 and 2–8s.
natural_image
Black-and-white photo of a person climbing a slope near water, captured with camera settings and UI controls (no readable text or symbols)- When adjusting the shutter speed dial to [2–8s], rotate the command dial or set the shutter speed with ◀/▶.
◇ Suggestions/Tips ◇
■ Aperture-priority AE mode A and Shutter-priority AE mode [S]
- Refer to P34 for the available range of the aperture value and the shutter speed.
- The focus range is 1.97 feet (60 cm)–∞ (AF). It is 0.98 feet (30 cm)–∞ (AF-Macro/MF).
- The brightness of the screen may differ from that of recorded pictures. Check the pictures with the review function or the playback mode.
• The ISO sensitivity cannot be set to [AUTO]. -
If the subject is too bright, set to larger aperture value, if too dim, set to smaller aperture value in the aperture-priority AE mode.
-
You cannot set Slow sync. [4S and Slow sync./Red-eye reduction [4B45] on built-in flash in the shutter-priority AE mode.
- When the shutter speed is slow in shutter-priority AE mode, we recommend using a tripod.
■ Manual exposure mode [M]
Decide the exposure by setting the aperture value and the shutter speed manually.
Adjust the aperture ring between 2 and 11, and the shutter speed dial between 2000 and 2–8s.
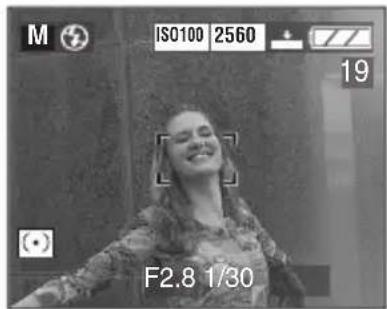
- When adjusting the shutter speed dial to [2–8s], rotate the command dial or set the shutter speed with
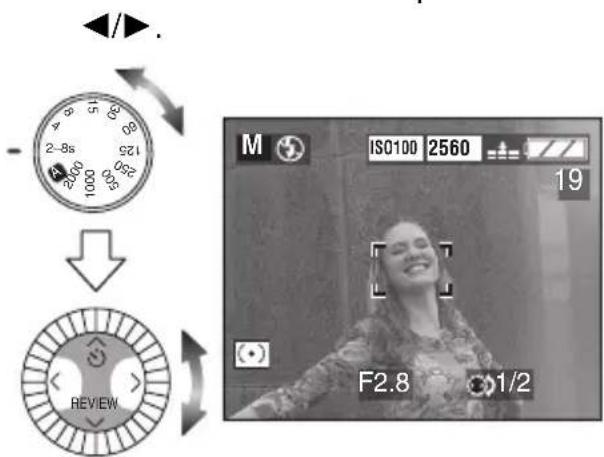
■ Manual Exposure Assistance
When you press the shutter button halfway, the indication for the condition of exposure (manual exposure assistance) appears for about 10 seconds.
 | The exposure is adequate. |
 | Set to faster shutter speed or larger aperture value. |
 | Set to slower shutter speed or smaller aperture value. |
- When the exposure is not adequate, set the aperture value and the shutter speed again.
Exposure
- If the exposure is not adequate, the aperture value and the shutter speed turn red when pressing the shutter button halfway. (However, the aperture value and the shutter speed do not turn red when the flash is activated or manual exposure mode is set.)
- The brightness of the screen may differ from that of recorded pictures. In particular, when taking pictures in dark places with slow shutter, the subject looks dark on the screen, but the actual picture is bright.
- When most of the subjects in the screen are bright (e.g. blue sky on a clear day, snowy field, etc.), the captured pictures may become dark. In this case, compensate the exposure. (P48)
◇ Suggestions/Tips ◇
■ Manual exposure mode [IM]
- Refer to P34 for the available range of the aperture value and the shutter speed.
- The focus range is 1.97 feet (60 cm)–∞ (AF), 0.98 feet (30 cm)–∞ (AF-Macro/MF).
- You cannot set the following items in manual exposure mode.
- AUTO [ ], AUTO/Red-eye reduction [ ] Slow sync.
[ ], Slow sync./Red-eye
reduction [or built-in flash (P45)
– [AUTO] of ISO sensitivity (P69)
– Exposure compensation (P48)
- The manual exposure assistance is an approximation. We recommend taking pictures and then checking them using the review function.
Shutter Speed and Aperture Value
■ Shutter-priority AE mode
| Available Shutter Speed (Sec.) (Per 1/3 EV) Aperture value | ||||
| 8 4 2 1 F2.0 * | ^1 -F11 | |||
| 1/2 1/4 1/8 1/15 | F2.0-F1 1 1/30 1/60 1/125 | |||
| 1/500 | 1/1000 | 1/2000 | ||
*1 The smaller aperture value is limited depending on the shutter speed or ISO sensitivity.
■ Aperture-priority AE mode
| Available Aperture value (Per 1/3 EV) Shutter $peed (Sec.) | ||||
| F11 | F10 | F9.0 | F8.0 | 2-1/4000 |
| F7.1 | F6.3 | F5.6 | F5.0 | |
| F4.5 | ||||
| F4.0 | F3.6 | 2-1/3200 | ||
| F3.2 | 2-1/2600 | |||
| F2.8 | F2.5 | F2.2 | F2.0 | 2-1/2000 |
■ Manual exposure mode
| Available Aperture value (Per 1/3 EV) | Available Shutter Speed (Sec.) (Per 1/3 EV) | ||||||
| F11 | F10 | F9.0 | F8.0 | 8 | 4 | 2 | 1 |
| F7.1 | F6.3 | F5.6 | F5.0 | 1/2 | 1/4 | 1/8 | 1/15 |
| F4.5 | F4.0 | F3.6 | F3.2 | 1/30 | 1/60 | 1/125 | 1/250 |
| F2.8 | F2.5 | F2.2 | F2.0 | 1/500 | 1/1000 | 1/2000 | |
◇ Suggestions/Tips ◇
In aperture-priority AE mode and manual exposure mode
- The aperture value can be set from F2.4 to F11 in Tele.
- The lower limit of the aperture range can be changed between F2.0 and F2.4 depending on the zoom position.
Taking Pictures with Auto Focus
Preparation
- Insert the charged battery (P12) or connect the AC adaptor (P14).
- Insert the card. (P16)
- Remove the lens cap.
1 ① Turn the camera on.
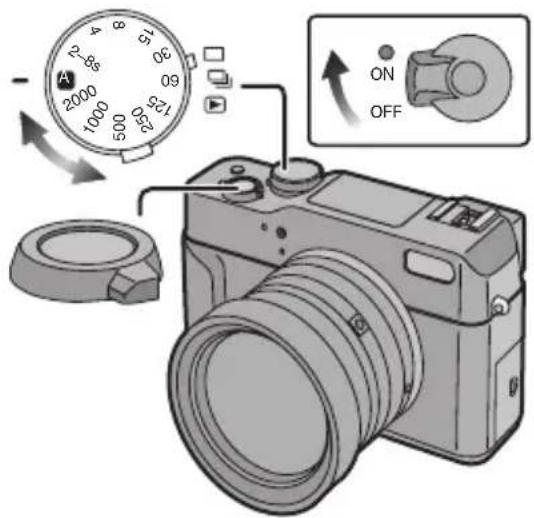
② Set the operational mode dial to single mode [ ]. (P30)
③ Set to the exposure. (P31–P33)
② Set the operational mode dial to single mode [ ]. (P30) ③ Set to the exposure. (P31–P33)
2 Rotate the focus ring Ⓐ to [AF].
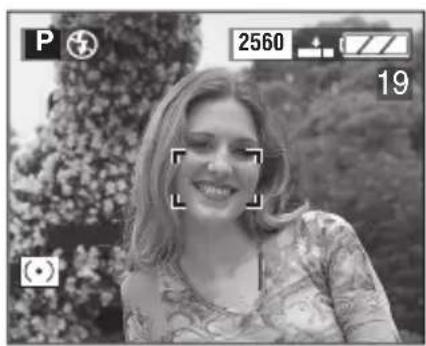
natural_image
Black-and-white photo of a smiling woman outdoors, with camera control buttons and frame indicators (no readable text or symbols)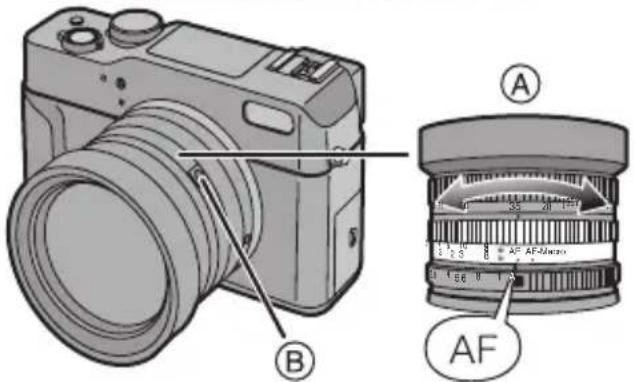
- When adjusting the focus ring Ⓐ to [AF], rotate the focus ring while pressing the focus ring button Ⓑ.
3 Aim the AF area © to the point you want to focus.
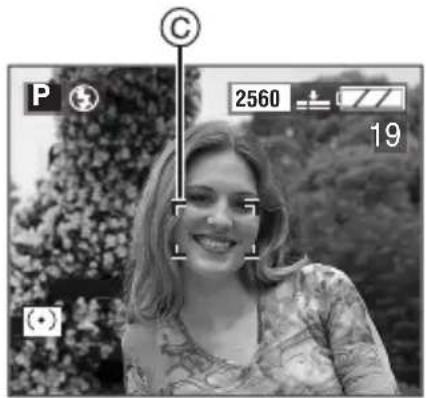
4 Focus on the subject to take the picture.
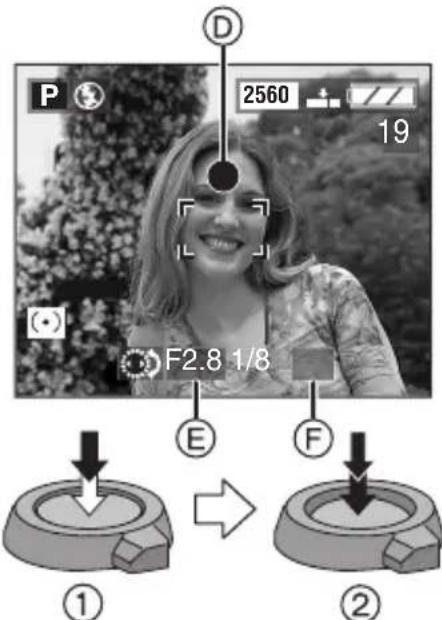
• ①: Press the shutter button halfway to focus.
• ②: Press the shutter button fully to take the picture.
Recording pictures (basic)
- The focus indication Ⓓ lights and then the aperture value Ⓔ and the shutter speed Ⓕ appear.
- When the focus indication Ⓓ is blinking, the subject is not focused. Press the shutter button halfway and focus on the subject again.
■ Using the remote shutter
The remote shutter works similar to the shutter button on the camera. You can avoid the jitter (camera shake) with it when using a tripod.
1 Connect the remote shutter to the [AV OUT/REMOTE] terminal on the camera firmly.
![PANASONIC Lumix DMC-LC1PP - Connect the remote shutter to the [AV OUT/REMOTE] terminal on the camera firmly. - 1](/content/2026/05/843524/images/8c4638923c67676e9896fb8a1a957b44d3072f797ffdb9f723695633fcfbbaa0.jpg)
natural_image
Line drawing of a DSLR camera with attached cable and connector (no text or symbols)2 Focus on the subject and take a picture.
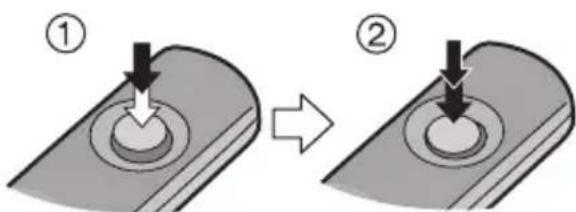
• ①: Press the shutter button halfway to focus.
• ②: Press the shutter button fully to take the picture.
◇ Suggestions/Tips ◇
• The power save cannot be canceled.
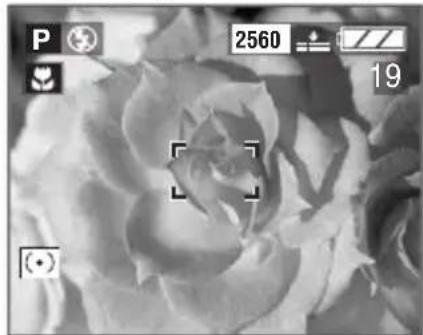
Taking pictures close to the subject (AF-Macro)
When adjusting the focus ring to [AF-Macro], you can take pictures moving the lens to a distance up to 0.98 feet (30 cm) from the subject.
natural_image
Black and white close-up of a rose flower with camera control buttons (no readable text or symbols)- When setting to [AF-Macro], we recommend using a tripod.
- The available flash range is about 1.64 feet (50 cm) to 15.8 feet (4.8 m). (When setting to ISO AUTO) (P46)
Power indicator
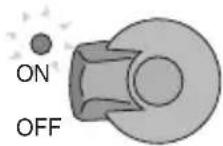
Lighting:
- When turning the camera on
Blinking:
- When the card door is open
- When the card is not inserted
- When there is no remaining capacity on the card
- When the card is locked in the recording mode
- When the remaining battery power is low (blinking slowly)
Focusing
- The focus range is 1.97 feet (60 cm)–∞ (AF). It is 0.98 feet (30 cm)–∞ (AF-Macro/MF).
- If you press the shutter button fully without prefocusing, pictures may be blurry or unfocused.
- When the focus indicator is blinking, the subject is not focused. Press the shutter button halfway and focus on the subject again.
- When the subject is focused, the camera beeps 2 times. If not, it beeps 4 times.
- If the camera will not focus after a few tries, turn it off and on and try again.
• Refer to P25 if you want to turn the operational sound off. -
In the following cases, you cannot focus on the subject with auto focus adequately.
-
When including both near and distant subjects in a scene
- When there is dirt on the glass between the lens and the subject
- When there are illuminated or glittering objects around the subject
- When taking a picture in a dark place
- When the subject is moving fast
- When the scene is poor in contrast
- When jitter (camera shake) occurs
- When recording a very bright subject
We recommend taking pictures using manual focus (P41) or AF/AE lock (P39).
- Even if the focus indication appears and the subject is focused, it is canceled when you press the shutter button. Press the shutter button halfway again.
Jitter (Camera shake)
• ① appears when jitter (camera shake) occurs.
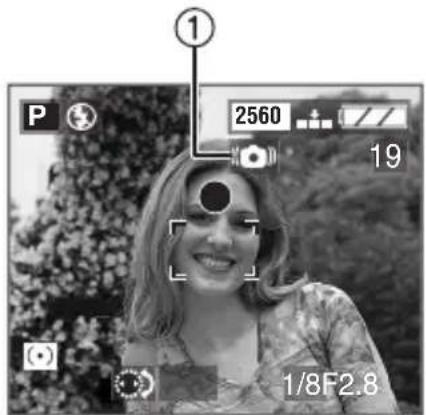
- If the jitter (camera shake) alert appears it is usually caused by using a long exposure time. In these situations we recommend either using a tripod or shortening the exposure time.
- If a long exposure time is required, and a tripod can support the camera, we suggest using the self-timer feature (P50) to avoid movement while pressing the shutter button.
Care for the camera
- Check to make sure there is no stain or dirt on the lens.
- Do not touch the lens directly.
- Do not cause impact to the lens.
• Take care not to touch or stain the surface of the lens. When the lens becomes dirty or dust attaches to the lens, use a commercial blower brush to remove dust or dirt and wipe the lens with a dry, soft cloth. If you use solvents such as benzine, alcohol or thinner, the camera may be discolored or broken. - When using the camera in a sandy or dusty place, be careful not to let dirt, grit or seawater enter the camera.
◇ Suggestions/Tips ◇
- When pressing the shutter button halfway, the screen may become dark or bright for a moment; this is not a malfunction. This is caused by adjusting the aperture value.
- When you slow the shutter speed, the shutter may be kept closed after recording due to the signal conditioning. This is not a malfunction.
• We recommend setting the clock again before taking pictures. (P21) - When the time for power save is set (P25), the camera is automatically turned off if you do not operate within the set time. When operating the camera again, press the shutter button or turn the camera off and on.
■ Posture to take good pictures
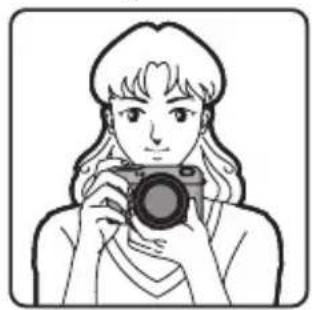
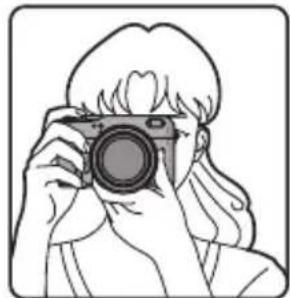
To take pictures without blurring:
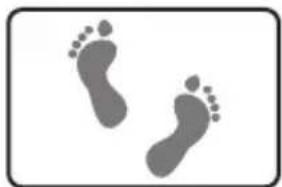
- Hold the camera gently with your both hands, keep arms stationary at your side and stand with your feet slightly apart.
- Check that the camera is not shaken when pressing the shutter button halfway.
• After pressing the shutter button, keep the camera stationary until the picture appears on the screen.
• In the following cases, keep the camera stationary for a long time.
- In Slow sync. [] or Slow
sync./Red-eye reduction (P45)
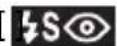
- When you set the shutter speed slower (P31, P32)
When recording with LCD Monitor
natural_image
Illustration of a person holding a camera (no text or symbols present)When recording with Viewfinder
natural_image
Line drawing of a person holding a camera, no text or symbols present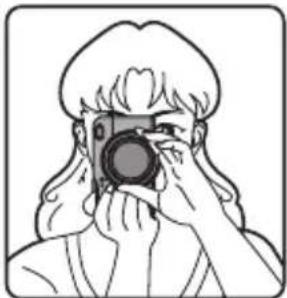
natural_image
Line drawing of a person holding a camera, no text or symbols presentPosition of feet
natural_image
Two gray footprints on a white background, enclosed in a rounded rectangular border (no text or symbols)- Hold the camera firmly with your right hand.
• Fix your left hand by attaching your hand to the lens ring. - Do not cover the AF Sensor, the white balance sensor or the microphone with your finger.
Recording pictures (basic)
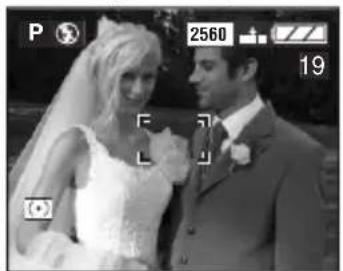
■ AF/AE Lock (AF: Auto Focus/AE: Auto Exposure)
natural_image
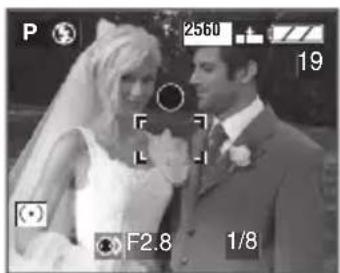
Black-and-white wedding photo of a bride and groom in formal attire, no visible text or symbolsWhen recording a picture of people with a composition as the above picture, you cannot focus on the subject because it is out of AF area in usual operation.
In this case,
- Aim the AF area at the subject.
- Press the shutter button halfway to fix the focus and the exposure.
-
When the subject is focused, the focus indication lights.
-
While pressing the shutter button halfway, move the camera as you compose the picture.
-
Press the shutter button fully.
- You can repeatedly retry AF/AE lock before pressing the shutter button.
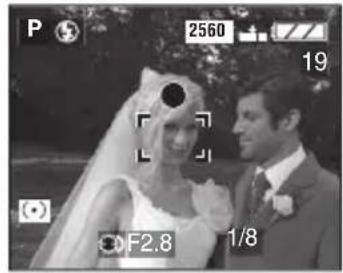

Program shift
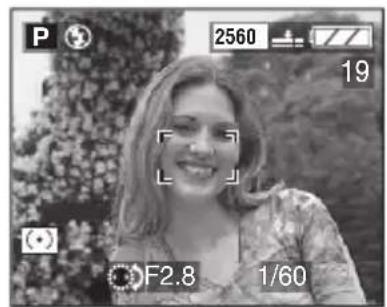
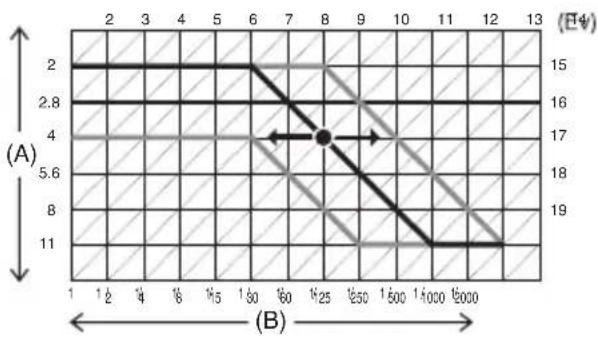
In Program AE mode, you can change the preset aperture value and the shutter speed under the same exposure. This is called Program shift. With this function, you can make the background more blurred (by decreasing the aperture value) or record the moving subject more clearly (by setting to slow shutter speed) in Program AE mode.
- Press the shutter button halfway and then rotate the command dial or press ◀/▶ to shift the program while the aperture value and the shutter speed are displayed on the screen (for 10 seconds).

natural_image
Simple left-pointing arrow outline with no text or symbols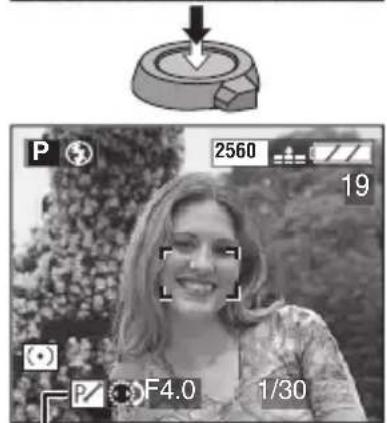

- When the Program shift is activated, the Program shift indication ① appears on the screen.
line
| X | Y | |---|---| | 1 | 2 | | 2 | 2 | | 3 | 2 | | 4 | 2 | | 5 | 2 | | 6 | 2 | | 7 | 2 | | 8 | 2 | | 9 | 2 | | 10 | 2 | | 11 | 2 | | 12 | 2 | | 13 | 2 | | 14 | 2 | | 15 | 2 | | 16 | 2 | | 17 | 2 | | 18 | 2 | | 19 | 2 | | 20 | 2 | | 21 | 2 | | 22 | 2 | | 23 | 2 | | 24 | 2 | | 25 | 2 | | 26 | 2 | | 27 | 2 | | 28 | 2 | | 29 | 2 | | 30 | 2 | | 31 | 2 | | 32 | 2 | | 33 | 2 | | 34 | 2 | | 35 | 2 | | 36 | 2 | | 37 | 2 | | 38 | 2 | | 39 | 2 | | 40 | 2 | | 41 | 2 | | 42 | 2 | | 43 | 2 | | 44 | 2 | | 45 | 2 | | 46 | 2 | | 47 | 2 | | 48 | 2 | | 49 | 2 | | 50 | 2 | | 51 | 2 | | 52 | 2 | | 53 | 2 | | 54 | 2 | | 55 | 2 | | 56 | 2 | | 57 | 2 | | 58 | 2 | | 59 | 2 | | 60 | 2 | | 61 | 2 | | 62 | 2 | | 63 | 2 | | 64 | 2 | | 65 | 2 | | 66 | 2 | | 67 | 2 | | 68 | 2 | | 69 | 2 | | 70 | 2 | | 71 | 2 | | 72 | 2 | | 73 | 2 | | 74 | 2 | | 75 | 2 | | 76 | 2 | | 77 | 2 | | 78 | 2 | | 79 | 2 | | 80 | 2 | | 81 | 2 | | 82 | 2 | | 83 | 2 | | 84 | 2 | | 85 | 2 | | 86 | 2 | | 87 | 2 | | 88 | 2 | | 89 | 2 | | 90 | 2 | | 91 | 2 | | 92 | 2 | | 93 | 2 | | 94 | 2 | | 95 | 2 | | 96 | 2 | | 97 | 2 | | 98 | 2 | | 99 | 2 | |10000000000000000000000000000000000000000000000000000000000000000000000000000000000000000000000000000. The chart displays a single horizontal line segment connecting points to the left of the horizontal axis. The right-side axis is labeled (E4V). The left side includes a vertical line at X=1/3 and X=1/3, and a horizontal line at Y=1/3. The right side contains a shaded triangular region between lines. The left side has an arrow pointing from point (X=1/3) to (X=1/3) to (X=1/3) to (X=1/3) to (X=1/3).(A): Aperture value
(B): Shutter speed
◇ Suggestions/Tips ◇
- If the exposure is not adequate when pressing the shutter button halfway, the shutter speed turns red.
- When 10 or more seconds have passed after the Program shift becomes effective, the status to activate the Program shift is canceled and returned to the Program AE mode. However, the setting on the Program shift is memorized.
- Program shift is canceled when turning the camera off.
- The Program shift may not be activated depending on the brightness of the subject.
Taking Pictures with Manual Focus
Use this function when you want to fix the focus or when the distance between the lens and the subject is determined and you do not want to activate the auto focus.
Preparation
- Set the operational mode dial except for [P30]
1 Select [MF ASSIST] from the [SETUP] menu (in the recording mode) (P23) and then set it to [MF1] or [MF2].
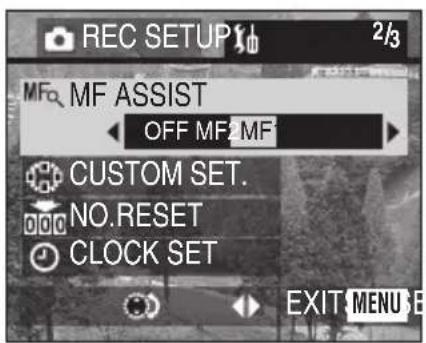
![PANASONIC Lumix DMC-LC1PP - Select [MF ASSIST] from the [SETUP] menu (in the recording mode) (P23) and then set it to [MF1] or [MF2]. - 2](/content/2026/05/843524/images/570076647b5e12cb25d4658d5a280983e32f00bfe3bc3b66d496754d18ccbf7e.jpg)
flowchart
graph TD
    A["MENU"] --> B["REVIEW"]
    B --> C["REVIEW"]
    C --> D["REVIEW"]
    D --> E["REVIEW"]
- Close the menu by pressing the [MENU] button after finishing the setting.
2 Rotate the focus ring to focus on the subject.
- When rotating it from [AF], rotate it while pressing the focus ring button ①.
natural_image
Black-and-white photo of a building with large windows and surrounding trees, no visible text or symbols.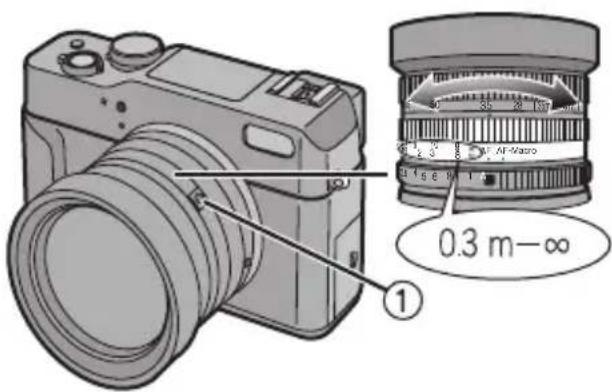
- The values on the focus ring [0.98 feet (0.3 m)–∞] are approximations of the range of distance from the lens to focus on the subject adequately.
MF ASSIST
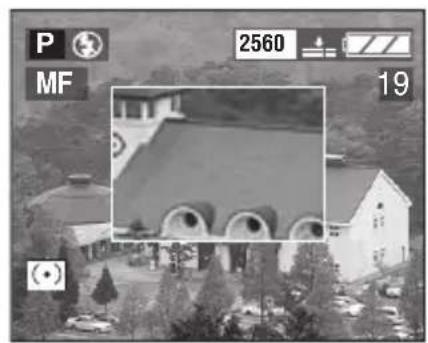
When you rotate the focus ring while setting [MF ASSIST] to [MF1] or [MF2], the MF assistance is activated and the screen is enlarged. It allows you to focus on the subject more easily.
• [MF1]: The center of the screen is enlarged. You can adjust the focus while determining composition of the whole of the screen.
• [MF2]: The whole of the screen is enlarged. It is convenient for adjusting the focus in Wide.
• [OFF]: The screen is not enlarged.
- The MF assistance disappears in the following conditions.
- When 2 seconds have passed after you stop rotating the focus ring
- When pressing the shutter button halfway
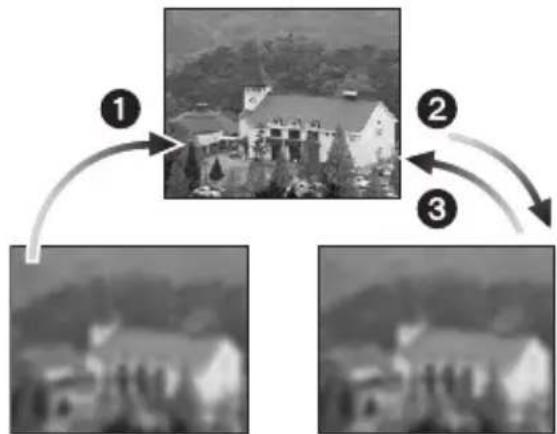
■ Technique for Manual focus
The subject is focused.
flowchart
graph TD
    A["1: Castle with mountainous background"] --> B["2: House with trees and hills"]
    B --> C["3: Two buildings with trees and hills"]
The subject is unfocused.
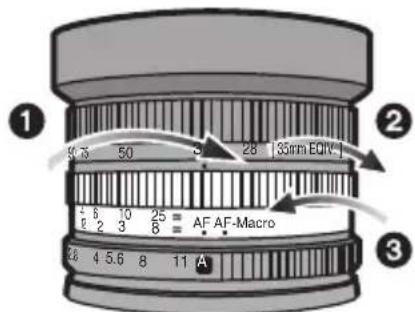
1 Rotate the focus ring.
② Rotate it little more.
③ Finely focus on the subject with rotating the focus ring reversely.
◇ Suggestions/Tips ◇
- You can also record with manual focus in Motion image mode. When starting the recording, the focus is fixed.
- When you focus on the subject in Wide, the focus may not be adequate in Tele. In this case, focus on the subject again.
- The focus range is 0.98 feet (30 cm)– ∞.
Checking the Recorded Picture (Review)
Preparation
- In Motion image mode, review function is not activated.
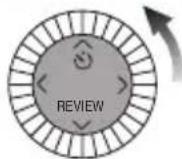
1 Press ▼/[REVIEW].
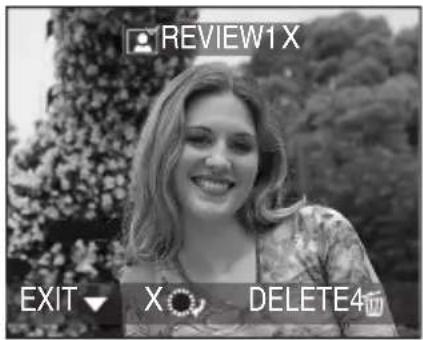
![PANASONIC Lumix DMC-LC1PP - Press ▼/[REVIEW]. - 2](/content/2026/05/843524/images/5b254281e25ba9342c7558597a2ef3890e3e2c76682275c6b4c069c382721595.jpg)
• The last recorded picture appears for about 10 seconds.
- Press the shutter button halfway or ▼/[REVIEW] to cancel the review.
- You can check the previous or following picture with ◀/▶.
- When the recorded pictures are too bright or dim, compensate the exposure. (P48)
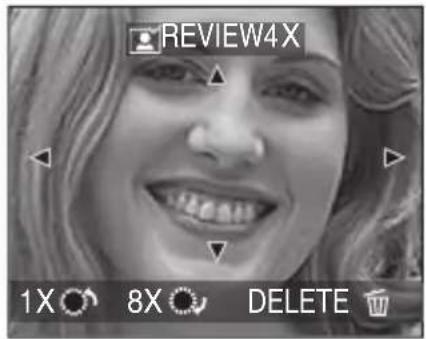
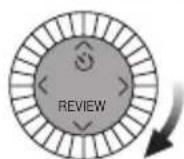
2 Enlarge and shift the picture.
A
B

©
• A: 1 ×→4×→8×
• Ⓑ: 8 ×→4×→1×
• ©: It moves the position.
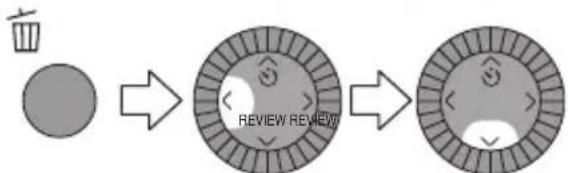
■ Deleting the recorded picture during the review
flowchart
graph LR
    A["Trash Bin"] --> B["Review Review"]
    B --> C["Review Review"]
- Once deleted, pictures cannot be recovered.
- Multi pictures or all pictures can be deleted. Read P57 or P58 to operate them.
Using the Optical Zoom
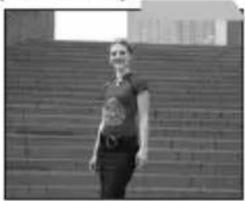
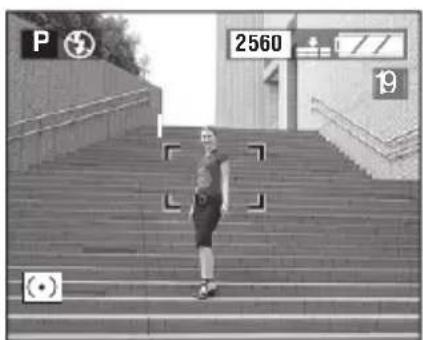
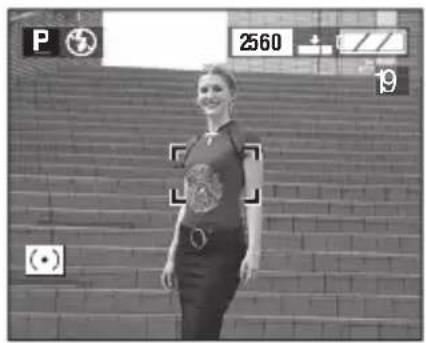
You can record people and objects at a wide angle with 1× of optical zoom (35 mm-camera equivalent: 28 mm), or you can zoom in on landscapes up to 3.2× of optical zoom (35 mm-camera equivalent: 90 mm) by rotating the zoom ring.
Preparation
- Set the operational mode dial except for [▶(P30)
1×(28 mm)
natural_image
Person standing on stone stairs in an outdoor setting (no visible text or symbols)3.2×(90 mm)
natural_image
Black-and-white photo of a person standing in front of a brick wall (no visible text or symbols)■ To make subjects appear further away (Wide)
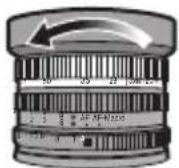
■ To make subjects appear closer (Tele)
natural_image
Black-and-white photo of a woman standing in front of a brick wall, wearing a patterned top (no visible text or symbols)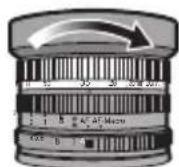
◇ Suggestions/Tips ◇
- The picture may be slightly distorted according to the lens. Barrel distortion may occur as zoom is increased.
- When using the zoom lens at high magnification, the quality of the picture can be enhanced if a tripod is used. At high magnification, even small movements can cause a slight decrease in picture sharpness.
- You can zoom closer to or further from a subject by setting the AF/AE lock and rotating the zoom ring.
Taking Pictures Using the Built-in Flash
Preparation
- Set the operational mode dial except for [▶(P30)
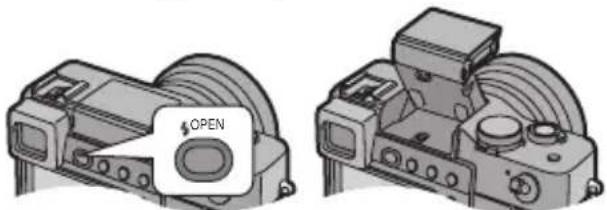
To open the flash
Press the [OPEN] button.
natural_image
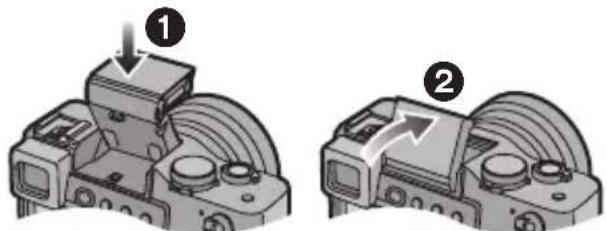
Two technical diagrams of a mechanical device with labeled 'OPEN' and no visible text or symbolsTo close the flash
Press the flash until it clicks.
natural_image
Mechanical assembly diagrams showing two views of a device with labeled parts (no text or symbols present)- Be sure to close the flash when not in use.
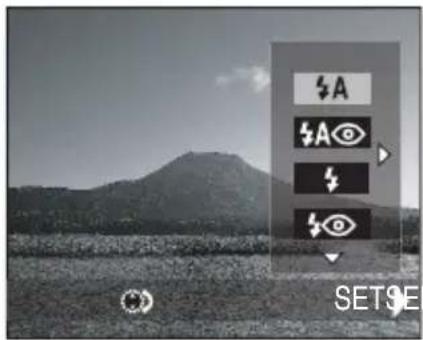
■ Switching to the appropriate flash setting
flowchart
graph LR
    A["Start"] --> B["Review Review"]
    B --> C["Review Review"]
    style A fill:#ccc,stroke:#333
    style B fill:#ccc,stroke:#333
    style C fill:#ccc,stroke:#333
A: AUTO
The flash is automatically activated according to the recording condition.
: AUTO/Red-eye reduction The flash is automatically activated according to the recording condition. It reduces the red-eye phenomenon (eyes of the subject appear red in
photo flash) by lighting the flash before the actual recording of the picture.
Use this when you take pictures of people in low lighting conditions.
: Forced ON
The flash is activated every time a picture is recorded.
Use this when your subject is back-lit or under fluorescent light.
: Forced ON/Red-eye reduction The flash is activated every time a picture is recorded.
Simultaneously it reduces the red-eye phenomenon. Use this when your subject is back-lit or under fluorescent light.
4S : Slow sync.
When you take a picture with a dark background landscape, it makes the shutter speed slow when the flash is activated, so that the dark background landscape will become bright.
4S: Slow sync./Red-eye reduction When you take a picture with a dark background landscape, this feature makes the shutter speed slow when the flash is activated, so that the dark background landscape will become bright. Simultaneously it reduces the red-eye phenomenon.
Use this when taking pictures of people with a dark background.

: Forced OFF
Even in dark places, the flash is not activated.
Use this when taking pictures in places where use of the flash is not allowed.
• Refer to P72 for setting the 1st and 2nd curtain.
Available flash settings
*When setting to the 2nd Curtain Synchro, flash setting is not available.
The available flash range to take pictures
| ISO sensitivity | Available flash range |
| ISO AUTO | 1.64 feet(50 cm) –15.8 feet(4.8 m) (Wide) |
| 1.64 feet(50 cm) –13.1 feet(4 m) (Tele) | |
| ISO100 | 1.64 feet(50 cm) –15.8 feet(4.8 m) (Wide) |
| 1.64 feet(50 cm) –13.1 feet(4 m) (Tele) |
| ISO200 | 2.3 feet(70 cm) – 22 feet(6.7 m) (Wide) |
| 2.3 feet(70 cm) – 18.4 feet(5.6 m) (Tele) | |
| ISO400 | 3.3 feet (1 m) – 31.2 feet(9.5 m) (Wide) |
| 3.3 feet (1 m) – 26.3 feet(8 m) (Tele) |
• Refer to P37 for the focus range.
Adjusting flash output
Adjust the flash output when the subject is small or reflection ratio is extremely high or low.
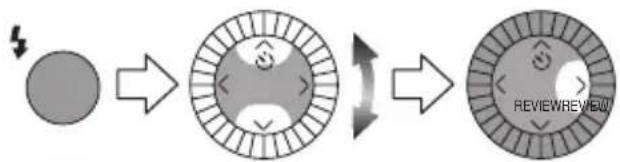
1 Press
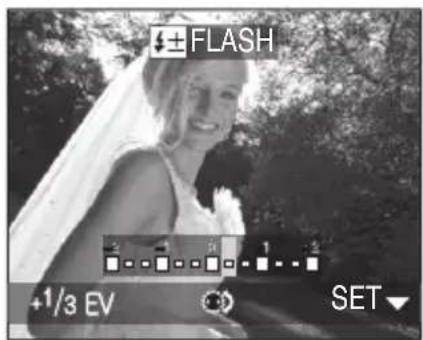
[FLASH] appears on the screen to set the flash output.
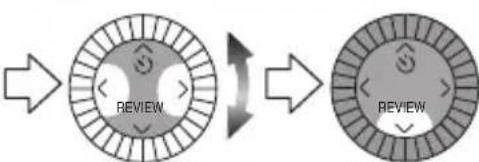
flowchart
graph LR
    A["REVIEW"] --> B["→"]
    B --> C["REVIEW"]
- You can adjust this from -2 E V to +2 EV in steps of 1/3 EV.
- The determined flash output is memorized even if the camera is turned off.

Bounce Flash
Bounce flash is a technique which reflects the light from the flash to ceiling or a wall.
When you directly illuminate the front of the subject, dark shadows may appear
Recording pictures (basic)
on the subject or the skin color of the subject may be turned white. In this case, you can defuse the shadows and take pictures naturally by using bounce flash.
You can slant the flash at a 65^ angle. (Bounce flash lock)
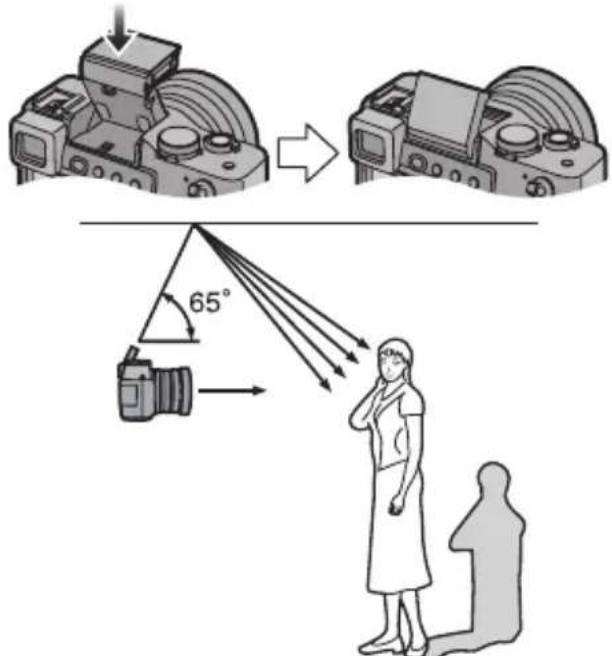
Aim the flash at the ceiling and take the picture.
• We recommend setting the white balance to [AUTO] (P62).
◇ Suggestions/Tips ◇
- In Motion image mode or when the flash is closed, flash setting is fixed to the Forced OFF [ ]
- Do not stare at the photo flash from close proximity when using the flash.
- If you bring the flash too close to the subjects, they may be distorted or discolored by its heat and lighting.
- Do not cover the photo flash with your fingers or any other items.
- When you take pictures out of the range of the flash control, the picture may be over exposed.
- When the jitter alert appears, we recommend using the flash.
- When you set to burst mode or auto bracket, only 1 picture is recorded for every flash activated.
- The flash icon turns red when activating the flash and pressing the shutter button halfway.
- When the flash is being charged, the flash icon blinks red, and you cannot take a picture even when you press the shutter button fully.
- When taking a picture with the flash, we recommend removing the lens hood. In some cases it may not allow the scene to be illuminated properly.
- When taking a picture with the flash, the white balance will be automatically adjusted [except for [ * daylight) and [ * BLash)] (P62), but the white balance may not be properly adjusted if the photo flash is insufficient.
- When the shutter speed is fast, the flash effect may not be sufficient.
- To avoid noises, we recommend setting each item on [PICT.ADJ.] to [LOW]. (P73)
• Refer to P69 for the ISO sensitivity.
• Refer to P106 for the external flash.
- In the bounce flash
- Select a whitish ceiling with high reflection ratio, otherwise, the color or the pattern may be reflected to the picture.
- The available flash range becomes shorter than usual.
- When you select too high a ceiling, the reflected light may not reach to the subject.
- Using the flash for bounce flash at a position other than specified (about 65°) may cause a malfunction.
- When you repeatedly take pictures using the flash, recording may be impossible if the flash is activated. Try recording after the card access indicator turns off.
Compensating the Exposure
Use this function when you cannot achieve appropriate exposure due to the difference of brightness between the subject and the background.
Preparation
- Set the operational mode dial except for [▶(P30)
1 Press [ ] until [ EXPOSURE] appears on the screen to compensate the exposure.
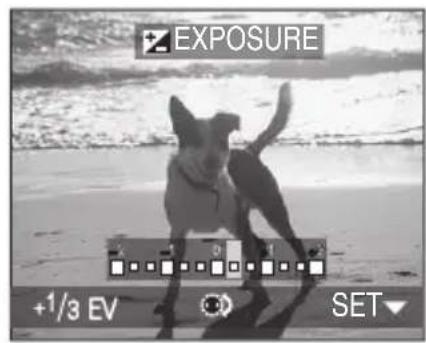
![PANASONIC Lumix DMC-LC1PP - Press [ ] until [ EXPOSURE] appears on the screen to compensate the exposure. - 2](/content/2026/05/843524/images/ebb56a3bd83e7c56a4ac895ffdde0a5877e197ee433c5afa53604e7d1ca8305f.jpg)
flowchart
graph LR
    A["Input Image"] --> B["Review"]
    B --> C["Review"]
- You can compensate from -2 E V to +2 EV in steps of 1/3 EV.
◇ Suggestions/Tips ◇
- EV is an abbreviation of Exposure Value, and it is the amount of light given to the CCD by the aperture value and the shutter speed.
- The compensation range of the exposure will be limited depending on the brightness of the subject.
- The exposure compensation value appears on the lower left of the screen.
- The exposure value is memorized even if the camera is turned off.
- You cannot compensate the exposure in manual exposure.
Taking Pictures Using Auto Bracket
This mode allows you to take pictures automatically according to the compensation range of the exposure by pressing the shutter button only once.
You can select the picture with the desired exposure among different exposures.
Preparation
- Set the operational mode dial except for [▶(P30)
1 Press [ ] until [AUTO BRACKET] appears on the screen to set the compensation range of the exposure.
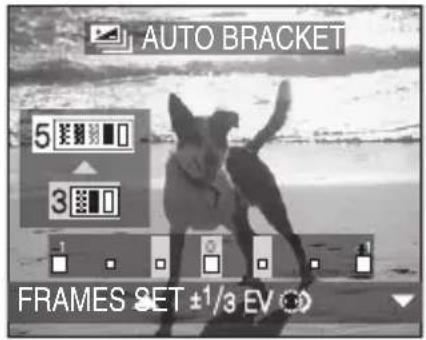
flowchart
graph LR
    A["Circle Icon"] --> B["REVIEW"]
    B --> C["REVIEW"]
- You can select the auto bracket from 0 (OFF), ±1/3 EV, ±2/3 EV and ±1 EV.
- You can set the number of the recording to 3 or 5 by pressing ▲.
◇ Suggestions/Tips ◇
- The auto bracket icon appears on the lower left of the screen.
- When taking pictures using auto bracket after the exposure compensation, the pictures are based on the compensated exposure. When the exposure is compensated, the compensated exposure value appears on the lower left of the screen.
- When the flash is activated, you can take only 1 picture. Auto bracket setting cannot be canceled.
- When setting auto bracket, you cannot take a picture with audio.
- When setting auto bracket and the burst mode simultaneously, auto bracket will be performed.
- The exposure may not be compensated with auto bracket depending on the brightness of the subject.
- When setting the quality to [RAW] you cannot take pictures with the auto bracket.
- You cannot set the number of the recording to 5 when the picture size is set to 2560 × 1920 pixels and the quality is set to [ (Super Fine).
Taking Pictures with the Self-timer
Preparation
- Set the operational mode dial except for [▶(P30)
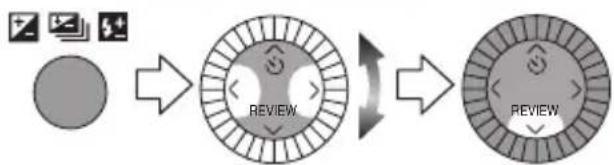
1 Switch the self-timer setting.
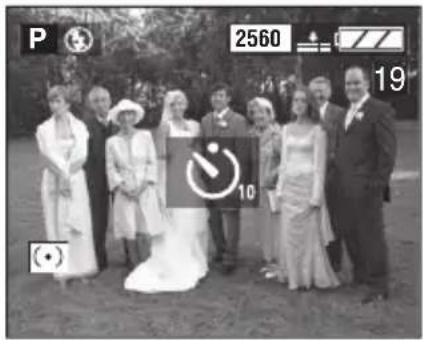

Self-timer set to 10 seconds
Self-timer set to 2 seconds
No display (canceled)
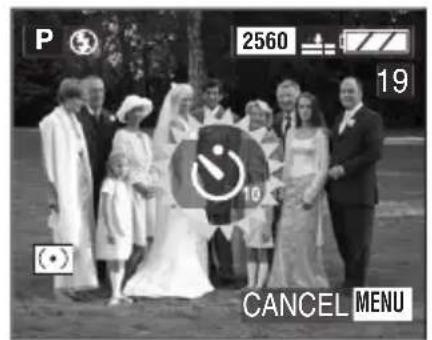
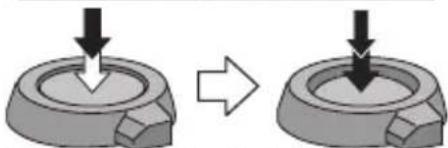
2 Focus on the subject to take the picture.
natural_image
Diagram showing a mechanical component before and after change, with no visible text or symbols.- If you press the [MENU] button when the self-timer is set, the self-timer setting is canceled.
◇ Suggestions/Tips ◇
- When using a tripod or in other cases, setting the self-timer to 2 seconds is a convenient way to stabilize the jitter (camera shake) caused by pressing the shutter button.
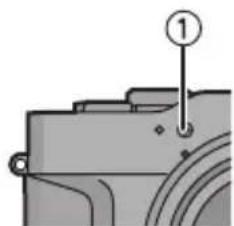
- The self-timer indicator ① blinks and the shutter is activated after 10 seconds (or 2 seconds).
- When pressing the button fully at a stroke, the subject is automatically focused after the self-timer indicator turns off.
- When setting the self-timer in the burst mode, you can take only 1 picture.
- We recommend using a tripod when setting the self-timer.
natural_image
Mechanical component diagram showing a bracket with a numbered callout (no text or symbols present)Taking Pictures using Burst Mode
Preparation
- Set the operational mode dial to burst mode [ ] (P30)
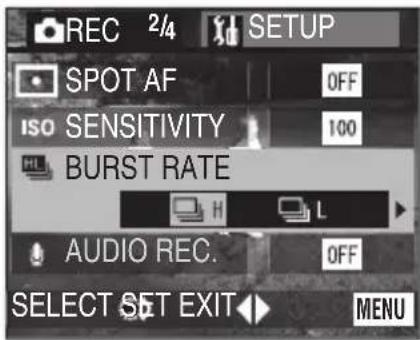
1 Select [BURST RATE], set [ ] or [ ] then take pictures.
![PANASONIC Lumix DMC-LC1PP - Select [BURST RATE], set [ ] or [ ] then take pictures. - 2](/content/2026/05/843524/images/7591a0c2e7b0850f9938cbd457be6d7c2d042e4531a73d48a7784c979b3db37d.jpg)
flowchart
graph LR
    A["MENU"] --> B["REVIEW"]
    B --> C["REVIEW"]
- Keep pressing the shutter button fully to activate the burst mode.
- Close the menu by pressing the [MENU] button after finishing the setting.
◇ Suggestions/Tips ◇
Burst speed
 |  | |
| Burst speed | 2.7 frames/second | 1 frame/second |
■ Number of pictures recorded in burst mode
| Picture size |  |  |  |
| 2560 | max. 3 frames | max. 5 frames | max. 9 frames |
| 2048 | max. 5 frames | max. 8 frames | max. 15 frames |
| 1600 | max. 8 frames | max. 15 frames | max. 28 frames |
| 1280 | max. 12 frames | max. 23 frames | max. 44 frames |
| 640 | max. 44 frames | max. 80 frames | max. 137 frames |
| HDTV | max. 8 frames | max. 14 frames | max. 27 frames |
- When the flash is not activated, it is possible to record 2.7 frames in 1 second in burst mode at a shutter speed higher than 1/60th.
- If the flash is activated, you can record only 1 frame.
- You cannot take pictures with audio in the burst mode.
- When setting auto bracket and the burst mode simultaneously, auto bracket will be performed.
- Burst mode will not perform as described if a MultiMediaCard is used in place of an SD Memory Card. The reading/writing speed of a MultiMediaCard is slower than that of an SD Memory Card.
- When setting the quality to [RAW ou cannot take pictures in the burst mode.
- When you slow the shutter speed, the shutter may be kept closed after recording due to the signal conditioning. This is not a malfunction. The burst interval also becomes longer and the limit on the burst frames is released.
- The number of remaining frames may not correspond with recorded frames.
- If you rotate the zoom ring while taking pictures in the burst mode, recorded pictures may not be correctly focused on the subject.
Playing Back Pictures
Preparation
- Set the operational mode dial to playback mode [▶(P30)
1 Select the picture.
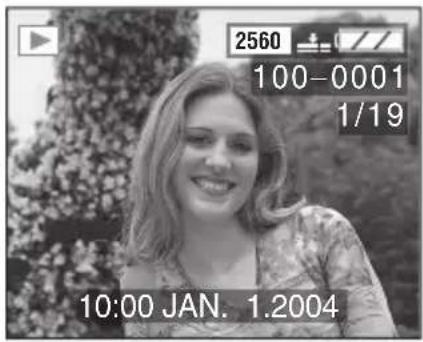

- Press ◀ to play back the previous picture.
-
Press ▶ to play back the next picture.
• The picture following the last one is the first picture. -
When releasing ◀/▶, the number of file forwarded begins from 1.
- While forwarding or rewinding a large number of pictures by holding down ◀/▶, once release ◀/▶ before reaching the picture to be played back, then press ◀/▶ to forward/rewind pictures until the desired picture appears.
- In review playback in the recording mode or multi playback, the picture can only be forwarded or rewound one by one.
■ Fast forwarding/Fast rewinding
When you keep pressing ◀/▶ during playback, the file number and the page number are updated. If you release
◀/▶ when the number of the desired picture appears, you can play back the picture.
▶: Fast forward
◀: Fast rewind
- The number of files forwarded/rewound at a time depends on how long you hold down ◀/▶.
- The longer you hold down ◀/▶, the more pictures you can forward/rewind at a time.
- The setting of the number of files forwarded/rewound at a time varies depending on the total number of the recorded pictures.
◇ Suggestions/Tips ◇
- This camera is based on the DCF standards (Design rule for Camera File system) which were established by the Japan Electronics and Information Technology Industries Association (JEITA).
- When changing the folder name or file name on PC, the pictures may not be played back.
- The file format that can be played back with this camera is JPEG. (There are also pictures that cannot be played back in JPEG format.)
- When playing back pictures that have been recorded with other equipment, the picture quality may be deteriorated and pictures may not be played back.
- When playing back a file out of standard, the folder/file number is indicated by [—] and the screen may turn black.
- The interference fringe may appear on the screen depending on the subject. This is called moire. This is not a malfunction.
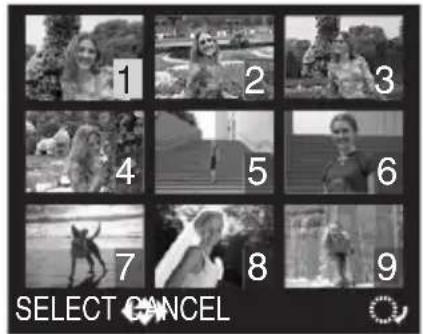
9 Pictures Multi Playback
Preparation
- Set the operational mode dial to playback mode [▶(P30)
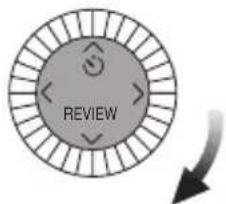
1 Switch to multi screen.
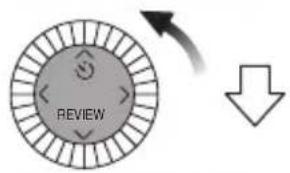
flowchart
graph TD
    A["Start"] --> B{Decision}
    B -->|Yes| C["Process Step 1"]
    B -->|No| D["Process Step 2"]
    C --> E["End"]
    D --> F["Down"]
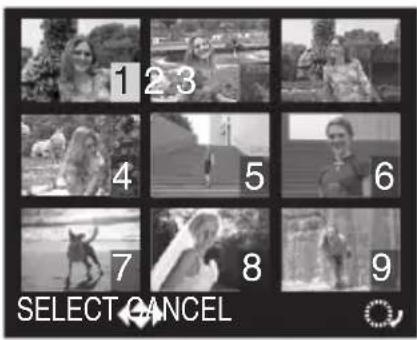
2 Select the pictures.
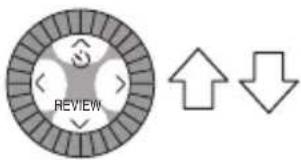
flowchart
graph LR
    A["REVIEW"] --> B["↑"]
    B --> C["↓"]
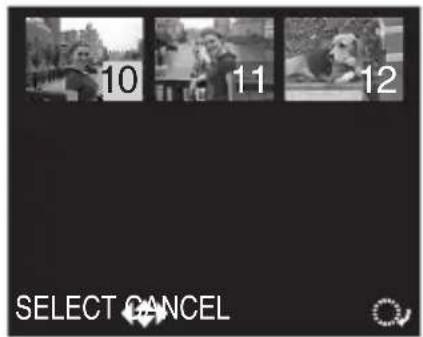
■ To return to the normal indication
Rotate the command dial clockwise.
- The picture with the number colored in yellow appears.
Using the Playback Zoom
Preparation
- Set the operational mode dial to playback mode [▶(P30)
1 Enlarge the picture.
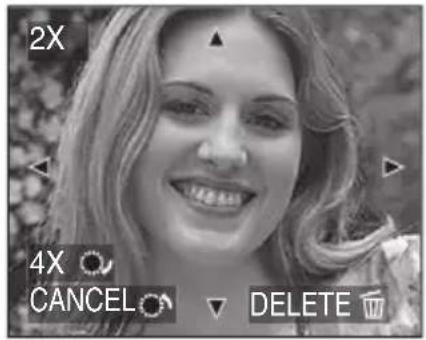
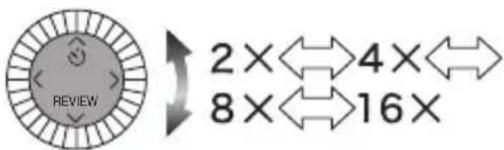
2 Shift the picture.
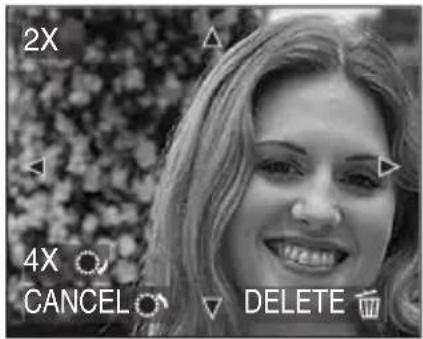

■ To delete a picture during the playback zoom
Press the [ ] button.
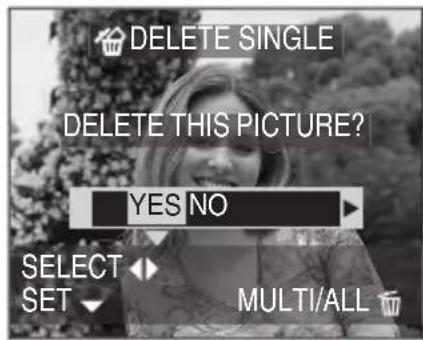
When the confirmation screen appears, press ◀ to select [YES], and press
▼/[REVIEW]. (P56)
◇ Suggestions/Tips ◇
- The more the picture is enlarged, the more its quality deteriorates.
- The playback zoom may not operate if pictures have been recorded with other equipment.
Deleting Pictures
Preparation
- Set the operational mode dial to playback mode [▶(P30)
■ To delete a single picture
1 Select the picture to be deleted.
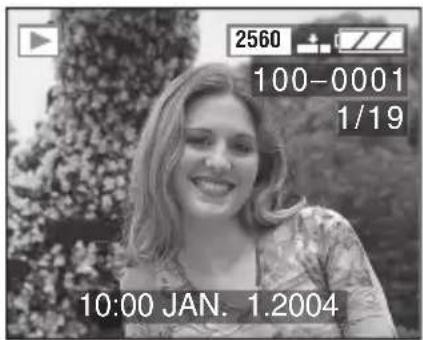

- Press ◀ to play back the previous picture.
- Press ▶ to play back the next picture.
2 Delete the picture.
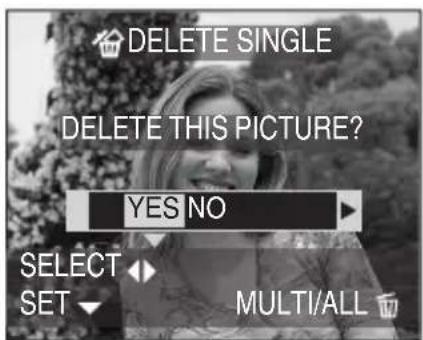
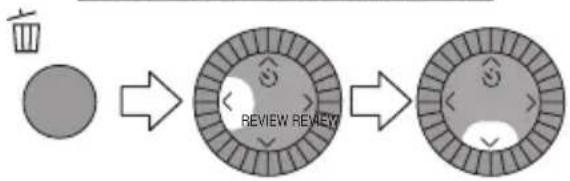
flowchart
graph LR
    A["Trash Bin"] --> B["Review Review"]
    B --> C["Review Review"]
■ To delete multi pictures
1 Select [MULTI DELETE].
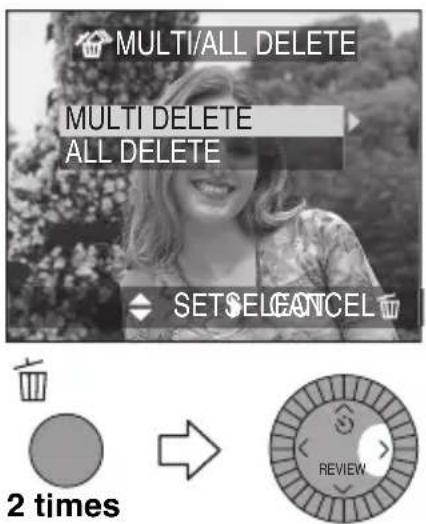
2 Select the pictures to be deleted.
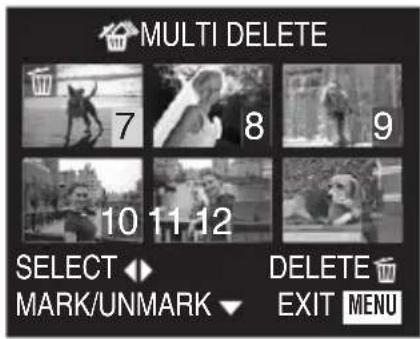

- The selected pictures appear with [When ▼/[REVIEW] is pressed again, the setting is canceled.
- The icon [ ] links red if the selected picture cannot be deleted. Cancel the protect setting. (P85)
3 Delete the pictures.
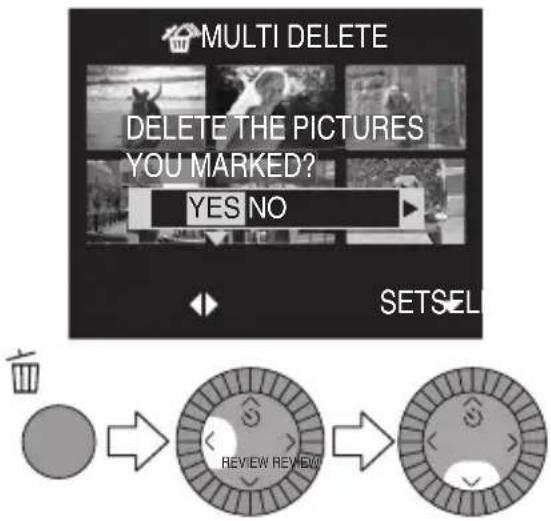
- It is possible to delete up to 50 pictures all at once.
■ To delete all pictures
1 Select [ALL DELETE].
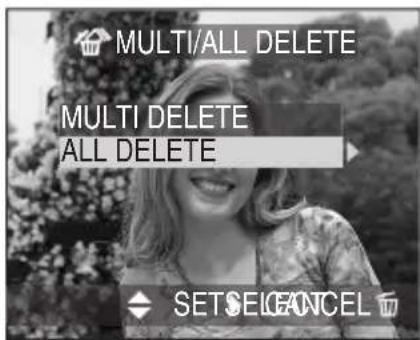
![PANASONIC Lumix DMC-LC1PP - Select [ALL DELETE]. - 2](/content/2026/05/843524/images/87426cfc74723437ea4eccb7392ad2fb8d4ff22c6c477c7323e374bcc7d9e1c4.jpg)
flowchart
graph LR
    A["Trash Bin Icon"] --> B["Review Review"]
    B --> C["Review Review"]
    style A fill:#f9f,stroke:#333
    style B fill:#ccf,stroke:#333
    style C fill:#cfc,stroke:#333
2 Delete all of the pictures.
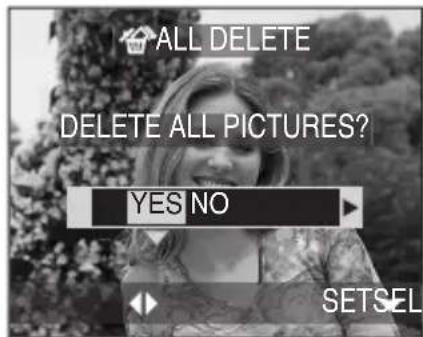
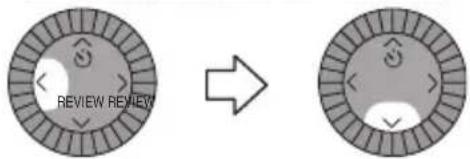
◇ Suggestions/Tips ◇
- Once deleted, pictures cannot be recovered. Please double-check before deleting pictures.
• Pictures that are protected (P85) or not of DCF standards (P53) will not be deleted. - Do not turn off the camera while deleting.
- When the remaining battery power (P11) is low, use the AC adaptor.
Recording Motion Images
You can record motion images with audio.
Preparation
- Set the operational mode dial except for [J▶(P30)
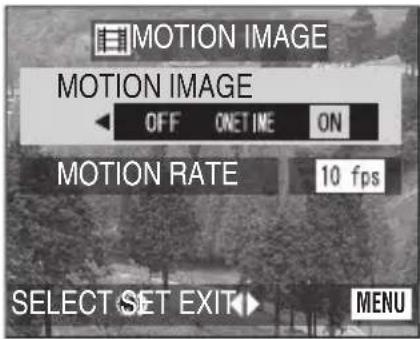
1 Select [MOTION IMAGE] and set the desirable mode.
![PANASONIC Lumix DMC-LC1PP - Select [MOTION IMAGE] and set the desirable mode. - 2](/content/2026/05/843524/images/c0cf2aebf812ce28d5721b951df9a7ba8e1e11be64f6571645b5a9dd8823a63e.jpg)
flowchart
graph LR
    A["MENU"] --> B["REVIEW"]
    B --> C["REVIEW/REVIEW"]
• [OFF]: Sets to the still picture recording mode.
• [ONE TIME]:
Sets to the still picture recording mode when you finish the motion image recording or turn the camera off.
• [ON]: Sets to the motion image recording mode.
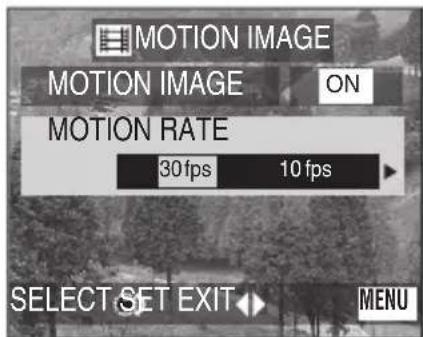
2 Select [MOTION RATE] and set the motion rate.
![PANASONIC Lumix DMC-LC1PP - Select [MOTION RATE] and set the motion rate. - 2](/content/2026/05/843524/images/c4aef81417bbda8d87331f3f20da933ba43979336b523159e21e5ed0ebb5367c.jpg)
flowchart
graph TD
    A["Circle icon with 'REVIEW' label"] --> B["Arrow pointing right"]
    B --> C["Circle icon with 'REVIEW' label"]
• [30fps]:
The motion of recorded image is smooth, but the file size is large.
• [10fps]:
The file size is smaller so you can record motion images for a longer time.
- fps (frame per second): This means the number of frames used in 1 second.
- Close the menu by pressing the [MENU] button 2 times after finishing the setting.
3 Press the shutter button halfway.
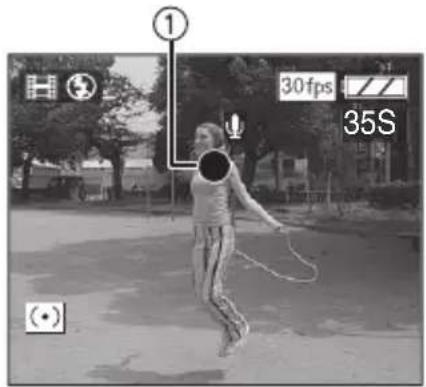
- When the subject is focused, the focus indication ① lights.
4 Press the shutter button fully to start the recording.
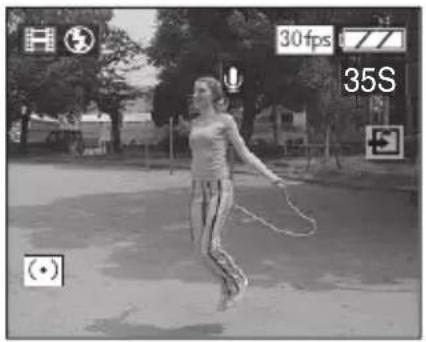
• The audio recording starts simultaneously from the built-in microphone of the camera.
- By pressing the shutter button fully again, the recording stops.
- If the memory of the card becomes full during recording, the recording stops automatically.
Available recording time
| SD Memory Card Capacity | Motion rate | |
| 10 fps 30 | fps | |
| 16 MB 83 | sec. 26 sec. | |
| 32 MB 177 | sec. 59 sec. | |
| 64 MB 365 | sec. 123 sec. | |
| 128 MB 742 | sec. 253 sec. | |
| 256 MB 148 | 2 sec. 508 sec. | |
| 512 MB 298 | 9 sec. 1027 | sec. |
- The remaining recording time appears on the screen. (It is an approximation.)
• The recordable time is an approximation.
◇ Suggestions/Tips ◇
- The picture size is fixed to 320 × 240 pixels.
• The motion images cannot be recorded without audio. - If you rotate the zoom ring, the focus ring or the aperture ring when recording audio (when recording motion images, pictures with audio, etc.), the rustling of the lens barrel is also recorded.
- If using the MultiMediaCard, after recording motion images, the card access indication may appear for a while, but this is not a malfunction.
• After recording starts, the auto focus/aperture values are fixed (with the first frame). - Recording could suddenly stop depending on the type of the card when recording motion images.
- When the motion images recorded with this camera is played back on other equipment, the quality of pictures and sounds may be deteriorated or they may not be played back.
- The motion images recorded with setting [MOTION RATE] to [30 fps] cannot be played on the camera which does not support [30 fps] of motion rate.
• The review function cannot be used. - Keep the camera away from magnetized equipment (such as a microwave oven, TV, cell phone or video game equipment, etc.). Pictures and sounds may be disturbed due to electromagnetic wave radiation.
FUNCTION Menu
You can select 4 menus which you frequently use from the menus in the recording mode (P114, P115).
This allows you to select the menu and save the time to operate it at the minimum.
- The white balance, the white balance fine adjustment, the ISO sensitivity and the spot AF are included in FUNCTION menu in initial setting.
1 Select [SETUP].
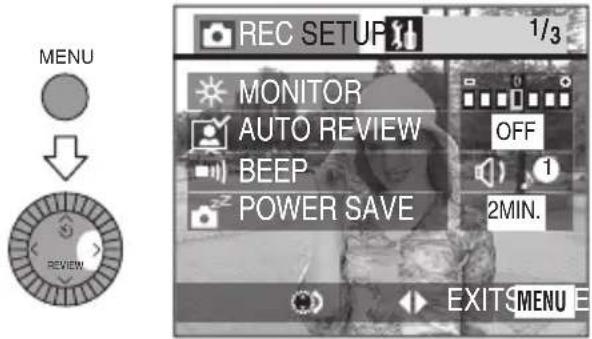
2 Select [CUSTOM SET.].
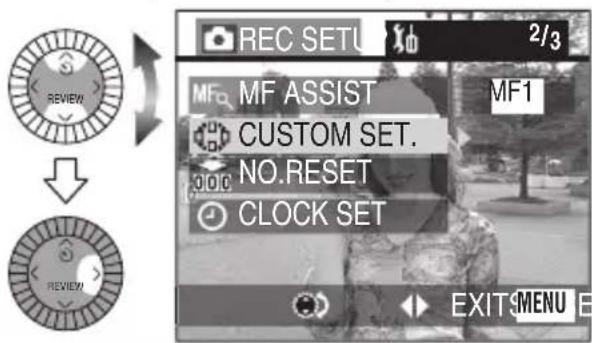
3 Select the menu to be replaced from [FUNCTION] menu.
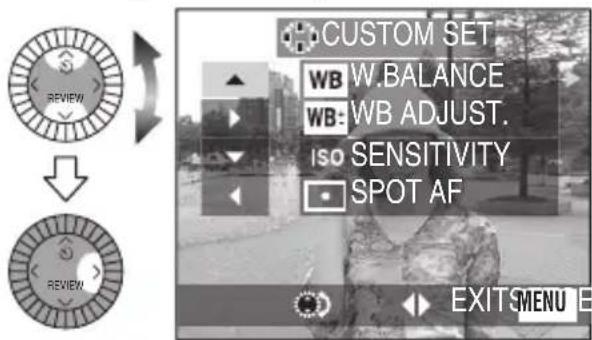
4 Select the menu to be added to [FUNCTION] menu.
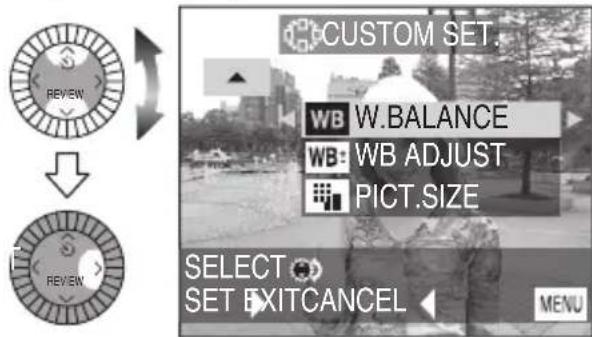
- Press ◀ to cancel.
- Press the [MENU] button 2 times to replace the menu.
5 Select the menu from [FUNCTION] menu.
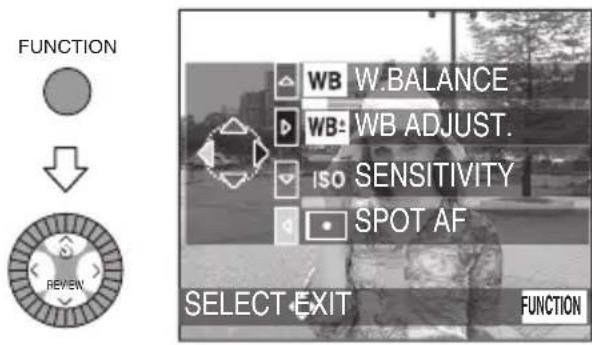
6 Set the item.
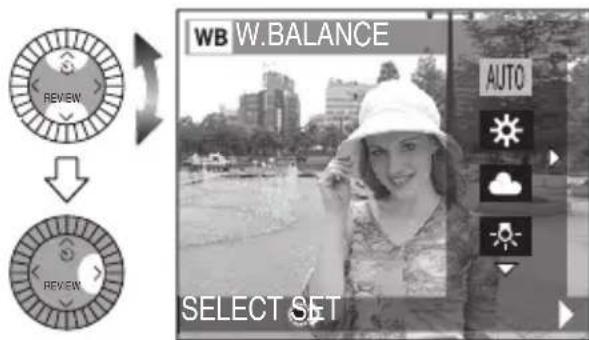
- Press the [FUNCTION] button after finishing the setting.
Setting the White Balance
In certain situations, the color white may appear slightly reddish or bluish. This can occur when shooting under early or late day sunlight, on a cloudy day, or under halogen lighting. By using the manual White Balance feature you can achieve a more accurate reproduction of the color white.
Preparation
- Set the operational mode dial except for [ ]▶(P30)
1 Select [W.BALANCE] and set the desirable mode.
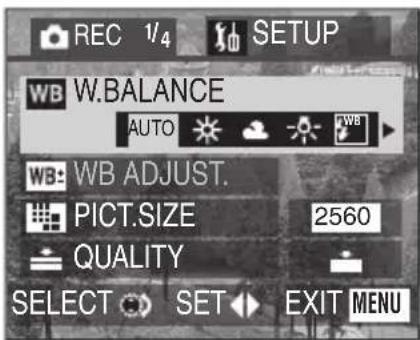
![PANASONIC Lumix DMC-LC1PP - Select [W.BALANCE] and set the desirable mode. - 2](/content/2026/05/843524/images/538bf73181b284dcb6954643e82cf7d6c9cf1c76b79269533d49ed4421c5d0ba.jpg)
flowchart
graph LR
    A["MENU"] --> B["REVIEW"]
    B --> C["REVIEW"]
• [AUTO]:
for setting the white balance
automatically (auto white balance)
• [★(Daylight): for recording outdoors on a bright day
• [Cloudy): for recording under a cloudy and shady sky
• [ ] (alogen):
for recording under halogen lighting
• [ flash):
for taking a picture with photo flash only
• [B/Whonochrome): for recording pictures in monochrome
• [ White set): for manual setting (Read the following page where the manual setting is explained in detail.)
- Close the menu by pressing the [MENU] button after finishing the setting.
Recording pictures (advanced)
Use of auto white balance adjustment in inappropriate lighting conditions may result in reddish or bluish pictures.
Where the subject is surrounded by many light sources, auto white balance adjustment may not operate properly. In this case, set the white balance to a mode except [AUTO] manually.
1 The range that is controlled by the auto white balance adjustment mode of this camera
2 Blue sky
3 Cloudy sky (Rain)
4 TV screen
5 Sunlight
6 White fluorescent light
7 Incandescent light bulb
8 Sunrise and sunset
9 Candlelight
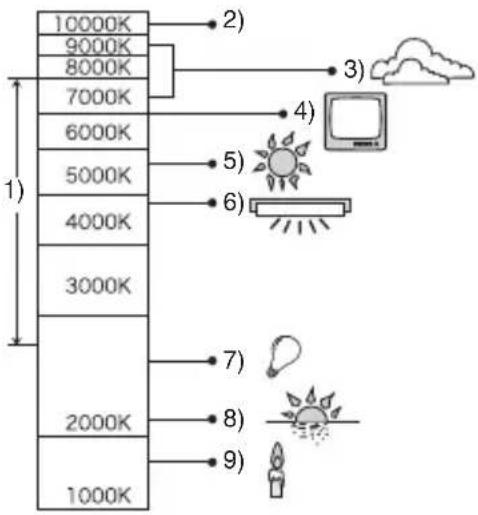
K=Kelvin Color Temperature
Setting the White Balance manually (White set)
Preparation
- Set the operational mode dial except for [▶(P30)
1 Select [W.BALANCE] and set to [☐].
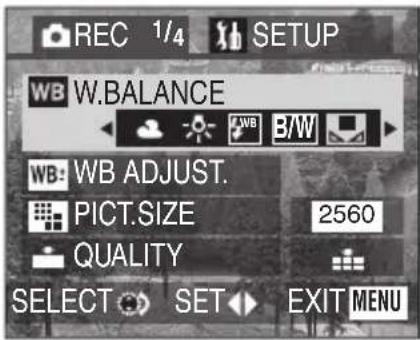
![PANASONIC Lumix DMC-LC1PP - Select [W.BALANCE] and set to [☐]. - 2](/content/2026/05/843524/images/bc0b901d7866431177773760f5302149df764eed414000c22eedd6d932e084c3.jpg)
flowchart
graph LR
    A["MENU"] --> B["REVIEW"]
    B --> C["REVIEW"]
2 (Only when setting the white balance again) Press ▶.
3 Aim the camera at a sheet of white paper ① or a similar white object so that it completely fills the frame to white on the screen and press the shutter button fully.
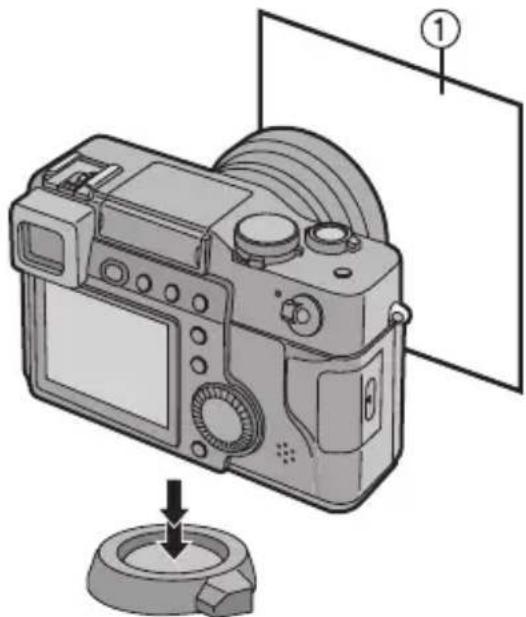
natural_image
Diagram of a digital camera with a base mount and control panel, no text or symbols present- Close the menu by pressing the [MENU] button after finishing the setting.
◇ Suggestions/Tips ◇
- When setting the white balance to the mode except for [AUTO] or [BW monochrome), you can finely adjust the white balance. (P65)
- The setting of the white balance is applied to the other recording modes.
- In Motion image mode, the white balance is fixed to [AUTO].
- When the white balance is set to [AUTO], the adequate white balance is automatically set by taking a picture with the flash, but the white balance may not be properly adjusted when the photo flash does not sufficiently reach to the subject.
Finely Adjusting the White Balance
If you cannot acquire the desirable hue with white balance because of too many different light sources, etc., adjust the fine white balance as follows.
Preparation
- Set the operational mode dial except for [▶(P30)
- Set the white balance to [ * / [ ] . *62) WB
1 Select [WB ADJUST.].
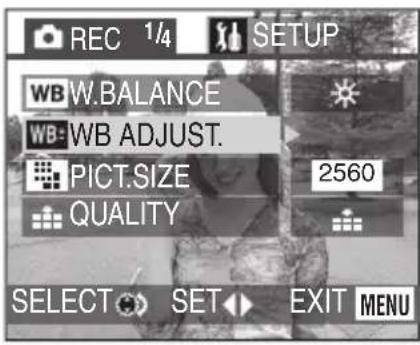
![PANASONIC Lumix DMC-LC1PP - Select [WB ADJUST.]. - 2](/content/2026/05/843524/images/26ffb2c31a59ec2b3aacad778143ae4e9248d1d988539eb935457830777447d5.jpg)
flowchart
graph LR
    A["MENU"] --> B["REVIEW"]
    B --> C["REVIEW"]
2 Adjust the white balance.
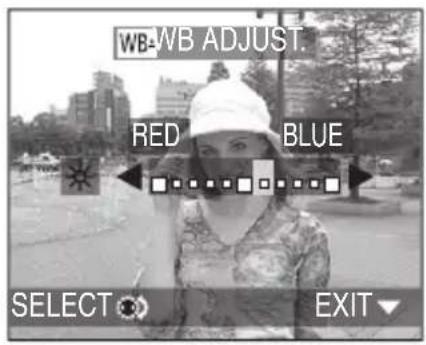

- [BLUE]: Press when the hue is reddish.
- ◀ [RED]: Press when the hue is bluish.
- Close the function by pressing ▼/[REVIEW] after finishing the adjustment.
◇Suggestions/Tips ◇
- The white balance icon turns red or blue.
- You can set the value independently for each of the modes in white balance.
- When you set the white balance using the White set [the adjustment level is set to "0".
- The adjusted picture will be close, though may not be identical to the actual picture.
Changing the Picture Size
Preparation
- Set the operational mode dial except for [▶(P30)
1 Select [PICT.SIZE] and set the picture size.
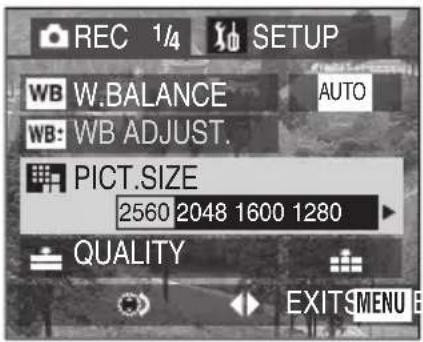
![PANASONIC Lumix DMC-LC1PP - Select [PICT.SIZE] and set the picture size. - 2](/content/2026/05/843524/images/537768522bbd6c366f7ae9230c220bb5b911b474e8025d0a9fd35d90f86b126c.jpg)
flowchart
graph LR
    A["MENU"] --> B["REVIEW"]
    B --> C["REVIEW"]
• [2560]: 2560×1920 pixels
• [2048]: 2048×1536 pixels
• [1600]: 1600×1200 pixels
• [1280]: 1280×960 pixels
• [640]: 640×480 pixels
• [HDTV]: 1920×1080 pixels
- Close the menu by pressing the [MENU] button after finishing the setting.
◇ Suggestions/Tips ◇
- In Motion image mode, the picture size is fixed to 320×240 pixels.
- If you playback pictures recorded using [HDTV] mode on a High-Definition TV, (HDTV has a 16:9 aspect) the picture quality will be higher. An SD Memory Card can be played on TVs with an SD Memory Card slot.
Changing the Quality
"Quality" refers to the amount each image is compressed. Lower compression results in superior picture quality. Higher compression allows you to store more images on your SD Memory card.
Preparation
- Set the operational mode dial except for [▶(P30)
1 Select [QUALITY] and set the quality.
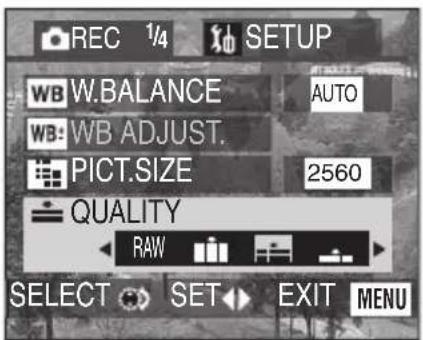
![PANASONIC Lumix DMC-LC1PP - Select [QUALITY] and set the quality. - 2](/content/2026/05/843524/images/3f4824a63899568c96cfa9bd3e47bbf294e29361b1d8bb3d1c8ffd1f098fef29.jpg)
flowchart
graph LR
    A["MENU"] --> B["REVIEW"]
    B --> C["REVIEW"]
- RAWAW file
Set this when altering the pictures on a PC.
• Super Fine (Lower compression) Set this when recording the pictures with higher quality than that of Fine.
• Fine (Low compression) It gives priority to picture quality to record high quality pictures. - Standard (High compression) It gives priority to the number of recordable pictures and records standard quality pictures.
- Close the menu by pressing the [MENU] button after finishing the setting.
◇ Suggestions/Tips ◇
- It may happen that pictures appear like a mosaic depending on the subject or recording condition.
• Refer to P120 for the number of recordable pictures. -
When the quality is set to [RAW]
-
A JPEG file is also created simultaneously. Its quality is equal to FINE and its size is fixed to 2560 × 1920 pixels.
- When the RAW file is deleted, the created JPEG file is also deleted.
- The digital zoom is fixed to [OFF].
- When you take pictures in program AE mode, aperture-priority AE mode and shutter-priority AE mode, the JPEG picture is underexposed a little.
- The picture cannot be recorded on the card with low capacity.
- The number of remaining frames may not correspond with recorded frames.
- RAW file format is designed for use in digital imaging applications, sold separately, that can support direct manipulation of the data captured by the camera sensor. At the time of this writing, support for the Panasonic RAW file format is included in the latest version of the Camera Raw plug-in for Adobe Photoshop CS. For more information, access http://www.adobe.com/
- If you take pictures when the quality is set to [RAW]ou can open RAW files with ArcSoft PhotoImpression in the supplied CD-ROM.
Taking Pictures using the Spot AF
The focus is adjusted within the limited range.
Preparation
- Set the operational mode dial except for [▶(P30)
1 Select [SPOT AF] and set it to [ON].
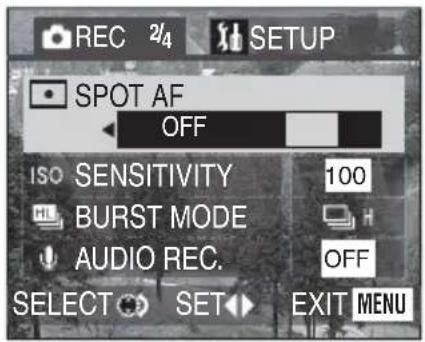
![PANASONIC Lumix DMC-LC1PP - Select [SPOT AF] and set it to [ON]. - 2](/content/2026/05/843524/images/4c25d0a514658a625d3f1ea29ce879d175c2d5e435d2a2e96a135172cdb76341.jpg)
flowchart
graph LR
    A["MENU"] --> B["REVIEW"]
    B --> C["REVIEW"]
- Close the menu by pressing the [MENU] button after finishing the setting.
2 Aim the spot AF area to the subject to be recorded and press the shutter button halfway for the AF/AE lock.
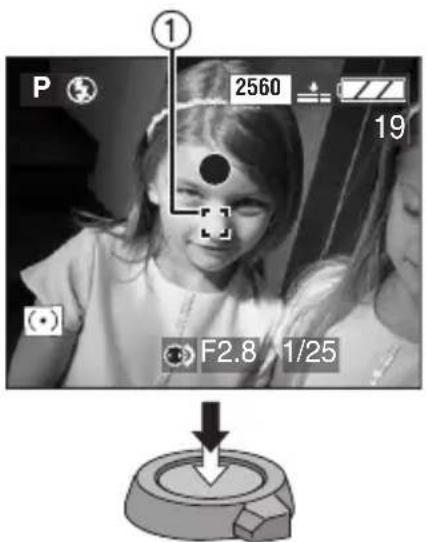
• The spot AF area ① appears.
3 Move the camera to compose the picture fixing the focus on the subject and take the picture.
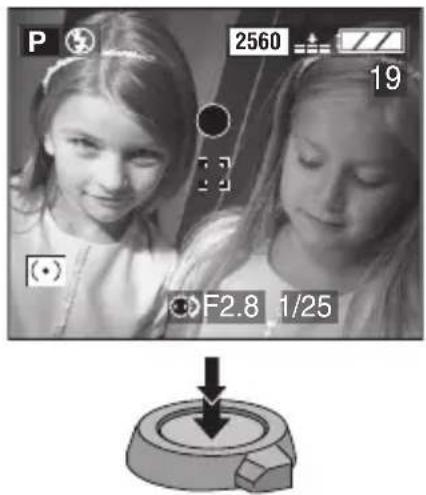
◇ Suggestions/Tips ◇
- When the subject is dark, it may not be focused properly.
Setting ISO Sensitivity
The ISO setting sets the cameras sensitivity to light. The ISO setting can be increased when you need to take pictures in places where a flash may not be allowed. The overall picture quality will decrease slightly as the ISO setting is increased.
| ISO sensitivity 100 | 400 |
| Use in bright places (e.g. outdoors) | Suitable Not suitable |
| Use in dark places Not | suitable Suitable |
| Shutter speed Slow Fast | |
| Noises Less Increase |
Preparation
- Set the operational mode dial except for [▶(P30)
1 Select [SENSITIVITY] and set the ISO sensitivity.
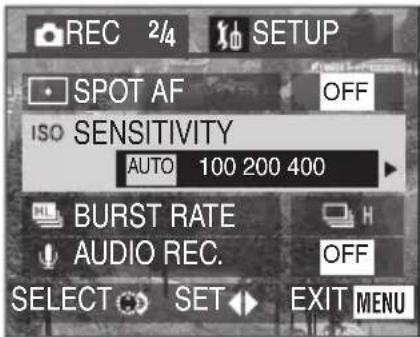
![PANASONIC Lumix DMC-LC1PP - Select [SENSITIVITY] and set the ISO sensitivity. - 2](/content/2026/05/843524/images/23097ef4b338ba7b7a4edd339c8163fadde69580d59d79cee6b43a8bed210675.jpg)
flowchart
graph LR
    A["MENU"] --> B["REVIEW"]
    B --> C["REVIEW"]
- When the ISO sensitivity is set to [AUTO], it is automatically adjusted from ISO100 to ISO200 according to the brightness.
- Close the menu by pressing the [MENU] button after finishing the setting.
◇ Suggestions/Tips ◇
- In Motion image mode, ISO sensitivity is fixed to [AUTO].
• To avoid noises, we recommend decreasing the ISO sensitivity or setting each item on [PICT.ADJ.] to [LOW]. (P73)
Taking Pictures with Audio
Preparation
- Set the operational mode dial except for [▶]. (P30)
1 Select [AUDIO REC.] and set it to [ON].
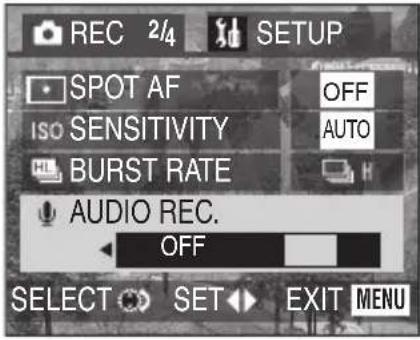
![PANASONIC Lumix DMC-LC1PP - Select [AUDIO REC.] and set it to [ON]. - 2](/content/2026/05/843524/images/f1c685dc1a640ab8716c9cd0c3653c6b775599e1987d88c472965521d46d5ced.jpg)
flowchart
graph LR
    A["MENU"] --> B["REVIEW"]
    B --> C["REVIEW"]
- Close the menu by pressing the [MENU] button after finishing the setting.
2 Take the picture.
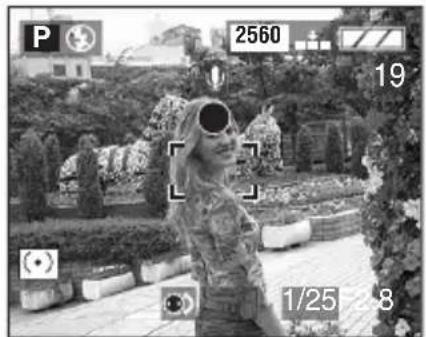
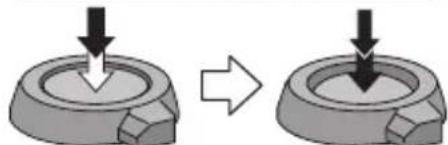
natural_image
Diagram showing a mechanical component before and after transformation, with no visible text or symbols.- 5 seconds later, the audio recording is stopped automatically.
- If you press the [MENU] button during the audio recording, it will be canceled. The audio cannot be recorded.
◇ Suggestions/Tips ◇
- It is not necessary to keep pressing the shutter button.
- Audio is recorded from the built-in microphone ① of the camera.
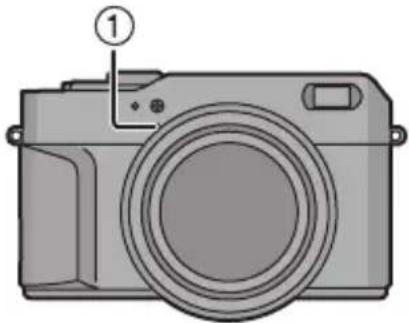
natural_image
Illustration of a camera with no text or symbols on the body, showing front view and control buttons (no text labels)- When audio is recorded with each picture the total number of pictures that can be stored on each card will be slightly decreased.
-
You cannot take pictures with audio in the following condition.
-
When using the auto bracket
- In burst mode
- When setting the quality to [RAW]
- If you rotate the zoom ring, the focus ring or the aperture ring when recording audio (when recording motion images, pictures with audio, etc.), the rustling of the lens barrel is also recorded.
Using the Digital Zoom
Preparation
- Set the operational mode dial except for [▶(P30)
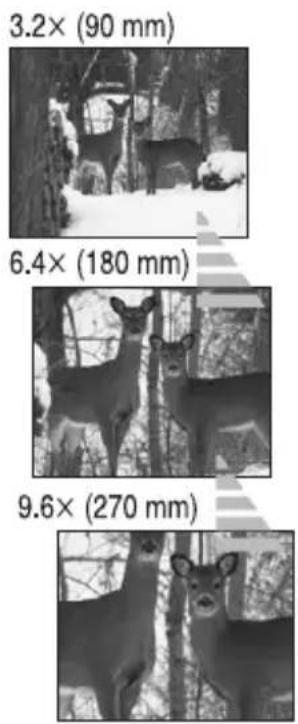
1 Select [D.ZOOM] and set it to [2×] or [3×] .
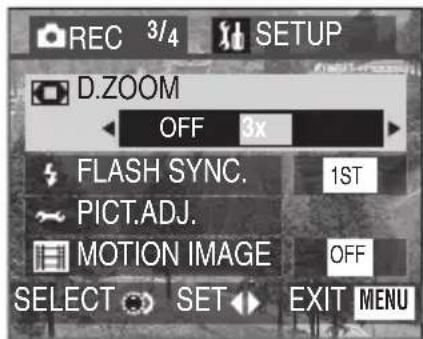
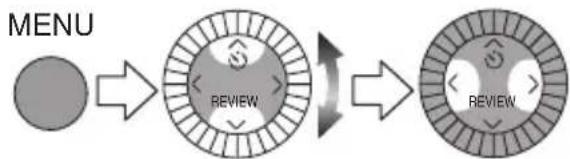
flowchart
graph LR
    A["●"] --> B["REVIEW"]
    B --> C["→"]
    C --> D["REVIEW"]
- Close the menu by pressing the [MENU] button after finishing the setting.
◇ Suggestions/Tips ◇
- It is possible to further magnify a subject already magnified 3.2 times with the optical zoom by 3 more times, with the digital zoom, thereby reaching a maximum of 9.6 times (35 mm-camera equivalent: 90–270 mm).
- When using the digital zoom the picture quality becomes deteriorated.
• We recommend using a tripod when setting the digital zoom.
• The indicated zoom magnification is an approximation. - When the quality is set to [RAW] digital zoom is fixed to [OFF].
Setting to the 2nd Curtain Synchro
The 2nd curtain synchro is the method that the photo flash activates just before the shutter is released when you take pictures of the subject with motion using slow shutter and the photo flash.
The light source appears at the back of the subject and the picture becomes dynamic.
Preparation
- Set the operational mode dial except for [J▶(P30)
1st curtain synchro
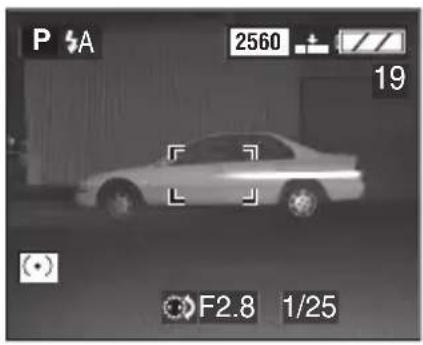
natural_image
Black and white photo of a sedan parked indoors with camera settings visible (no readable text or symbols on the car or background)2nd curtain synchro
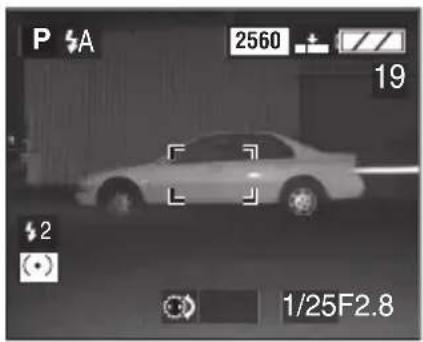
1 Select [FLASH SYNC.] and set it to [2ND].
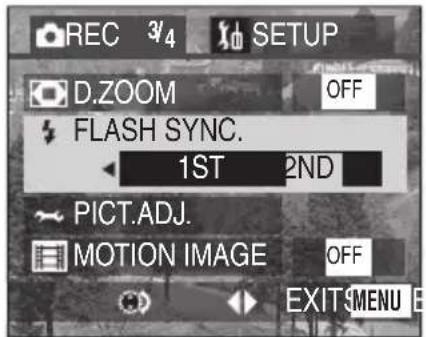
![PANASONIC Lumix DMC-LC1PP - Select [FLASH SYNC.] and set it to [2ND]. - 2](/content/2026/05/843524/images/19e81fdc3d3632f1d956623ad44350567627a71a9c6cb2912931398a05557f87.jpg)
flowchart
graph LR
    A["MENU"] --> B["REVIEW"]
    B --> C["REVIEW"]
- Set it to [1ST] normally.
- Close the menu by pressing the [MENU] button after finishing the setting.
◇ Suggestions/Tips ◇
- When the shutter speed is fast, the 2nd curtain synchro may not be effective.
Adjusting the Quality of the Picture (Picture Adjustment)
Preparation
- Set the operational mode dial except for [▶(P30)
1 Select [PICT.ADJ.] .
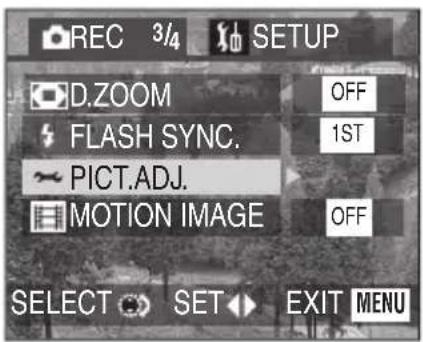
![PANASONIC Lumix DMC-LC1PP - Select [PICT.ADJ.] . - 2](/content/2026/05/843524/images/5d1eb2f350929789109c0054e499725e3c53ebd243d9330c71bdb22b7ea285dd.jpg)
flowchart
graph LR
    A["●"] --> B["REVIEW"]
    B --> C["→"]
    C --> D["REVIEW"]
2 Select [CONTRAST], [SHARPNESS] and [SATURATION] respectively.
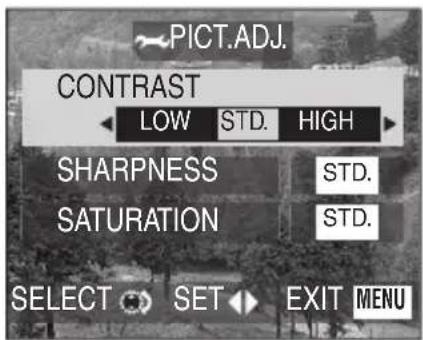
![PANASONIC Lumix DMC-LC1PP - Select [CONTRAST], [SHARPNESS] and [SATURATION] respectively. - 2](/content/2026/05/843524/images/fd6c89448be7193b45abd9f65ff9f00111777ce585f74760d70835e8464dbc02.jpg)
• [CONTRAST]:
HIGH: Increases the difference between the brightness and the darkness in the picture.
LOW: Decreases the difference between the brightness and the darkness in the picture.
• [SHARPNESS]:
HIGH: The picture is sharply defined.
LOW: The picture is softly focused.
• [SATURATION]:
HIGH: The colors in the picture become vivid.
LOW: The colors in the picture become natural.
- Close the menu by pressing the [MENU] button 2 times after finishing the setting.
◇ Suggestions/Tips ◇
- When you take pictures in dark places, noises may become visible. To avoid noises, we recommend setting each item on [PICT.ADJ.] to [LOW].
Creating Flip Animation
This camera allows you to create motion picture files up to 20 seconds by connecting images recorded in flip animation mode.
Preparation
- Set the operational mode dial except for [▶(P30)
Example:
When capturing images of the subject in sequence moving it little by little and aligning the images, the subject looks as if it were moving.
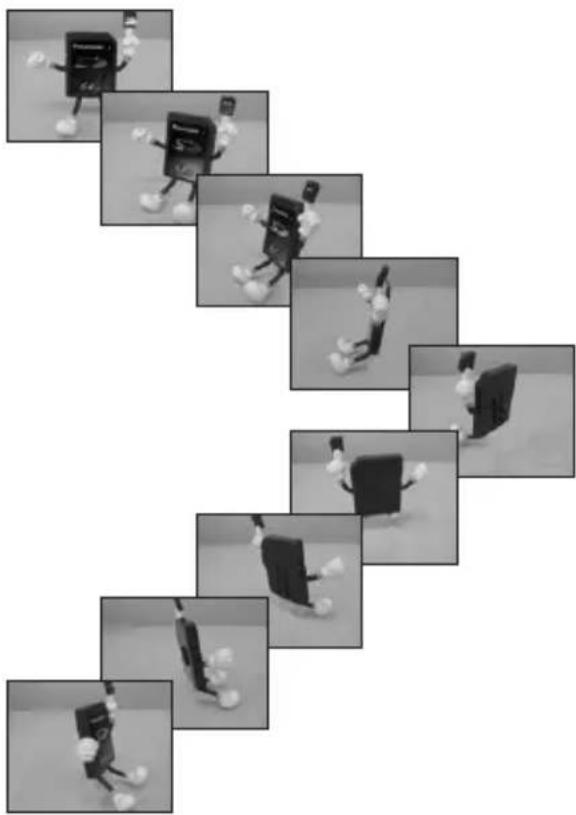
natural_image
Sequence of 3D-rendered robot figures in motion poses, no text or symbols presentCapturing images
1 Select [FLIP ANIM.].
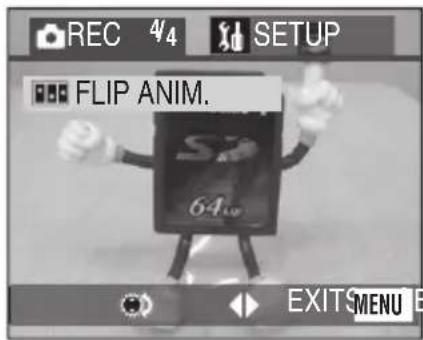
![PANASONIC Lumix DMC-LC1PP - Select [FLIP ANIM.]. - 2](/content/2026/05/843524/images/ebbae7059678ca0596c7ec29380aaa6a9c19a4937b1a3fd20d48263c8e8a92bb.jpg)
flowchart
graph LR
    A["MENU"] --> B["REVIEW"]
    B --> C["REVIEW"]
2 Select [IMAGE CAPTURE].
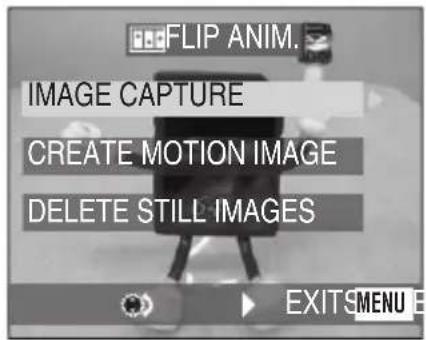
![PANASONIC Lumix DMC-LC1PP - Select [IMAGE CAPTURE]. - 2](/content/2026/05/843524/images/f10cfe000d29243f402826f17363652157f90347c2471f89ac16ed7c59413cb6.jpg)
3 Capture images for flip animation.
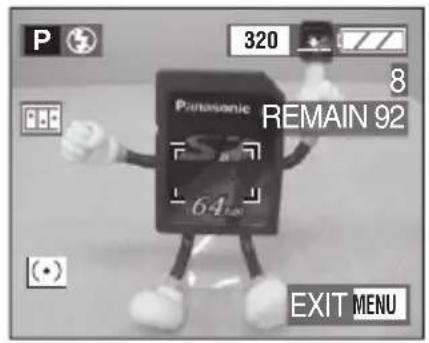
natural_image
Diagram showing a mechanical component before and after transformation, with no text or symbols present.- You can take up to 100 pictures.
4 Check the image.
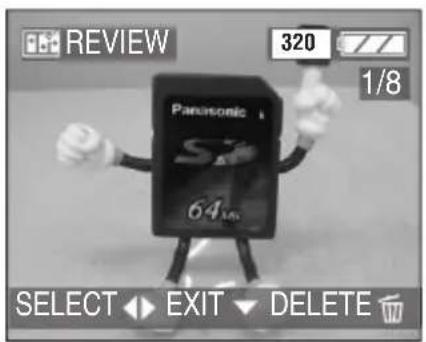

- You can check the previous or following image with ◀/▶.
- Delete unnecessary images with [button.
Creating motion images
5 Select [CREATE MOTION IMAGE].
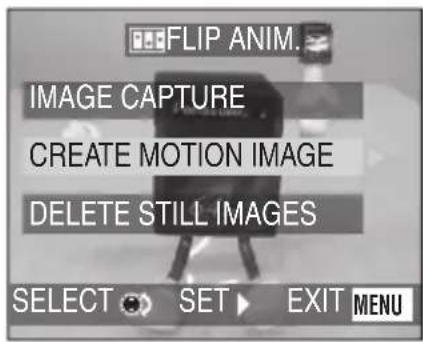
![PANASONIC Lumix DMC-LC1PP - Select [CREATE MOTION IMAGE]. - 2](/content/2026/05/843524/images/70759af8995b6ee612118cb046adecadd93bdd82160b0bc9ddbe6f7e726d635c.jpg)
flowchart
graph LR
    A["MENU"] --> B["REVIEW"]
    B --> C["REVIEW"]
6 Select [FRAME RATE] and set the number of frames.
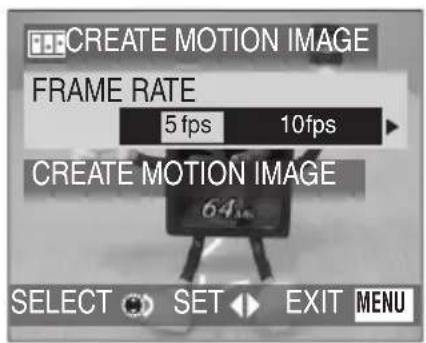
![PANASONIC Lumix DMC-LC1PP - Select [FRAME RATE] and set the number of frames. - 2](/content/2026/05/843524/images/3871a2a60460e0e0344503608ca1d5d6f32303d289da224e6cccfa1ef11214e1.jpg)
• [5fps]: 5frames/sec.
• [10 fps]: 10 frames/sec.
7 Select [CREATE MOTION IMAGE] and create a flip animation.
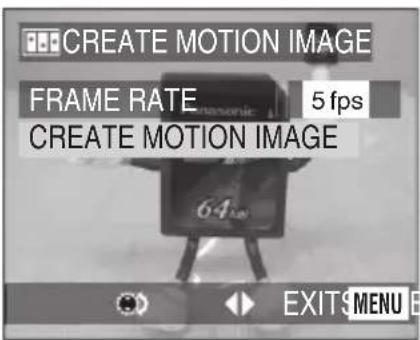
![PANASONIC Lumix DMC-LC1PP - Select [CREATE MOTION IMAGE] and create a flip animation. - 2](/content/2026/05/843524/images/55b3a15ad197b7631e01ce1c7823cc928ca81a1d139eccf54e82f7f78215d5ce.jpg)
flowchart
graph TD
    A["Start"] --> B["Review"]
    B --> C["Next Step"]
- The file number appears for about 1 second after creating a flip animation.
- Including the created images, the flip animation is counted as 1 animation image.
- Close the menu by pressing the [MENU] button 3 times after finishing the setting.
■ Playing back a created flip animation
Follow the same procedure as you play back motion images. (P78)
■ Deleting all the still pictures used to create flip animation
When selecting [DELETE STILL IMAGES] in flip animation screen, a confirmation screen appears. Select [YES] and then press ▼/[REVIEW].
◇ Suggestions/Tips ◇
- Flip animations are created as motion image files. (Extension: .MOV)
• The number of pixel is 320 × 240 . - You cannot use pictures with audio, burst mode and auto bracket.
• The images in each frame do not appear in normal review. (P43) - Flip animations may not be played back by other equipment.
- Audio cannot be recorded on flip animations, however, you may hear noises when playing back with other equipment without a mute function.
- The number of recordable images is an approximation.
Playing Back Pictures with Audio
Preparation
- Set the operational mode dial to playback mode [▶(P30)
1 Select the picture with audio icon [☐].
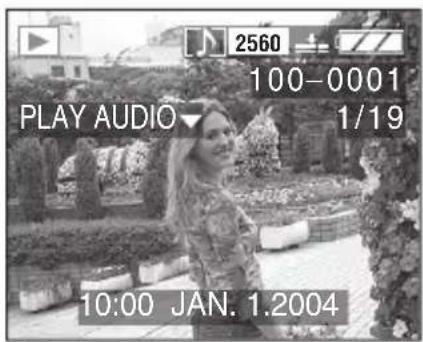
![PANASONIC Lumix DMC-LC1PP - Select the picture with audio icon [☐]. - 2](/content/2026/05/843524/images/10f7d78297bef34a726e749447edaf196cbea63d5b6589ecaf1f93de7b4a8027.jpg)
◇ Suggestions/Tips ◇
- The picture with audio cannot be resized (P90) or trimmed (P92).
2 Play back the audio.
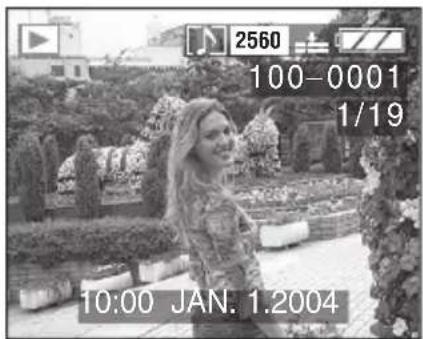

- You can hear audio from the speaker.
• To adjust the sound volume, refer to P26.
Playing Back Motion Images
Preparation
- Set the operational mode dial to playback mode [▶(P30)
1 Select the picture with the motion image icon [ ]
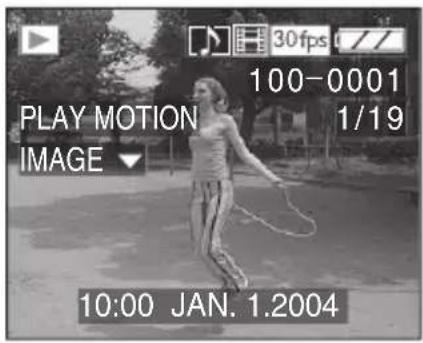
![PANASONIC Lumix DMC-LC1PP - Select the picture with the motion image icon [ ] - 2](/content/2026/05/843524/images/798c9c703898e3e4800abf04da89c21a81abd9af2867d787ed334b514d19db12.jpg)
2 Play back the motion images.
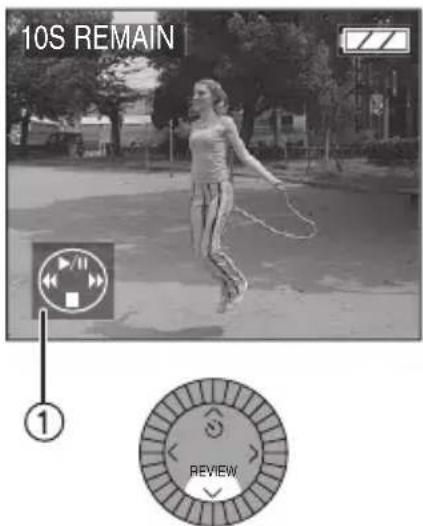
- Motion image playback stops and the normal playback is restored by pressing ▼/[REVIEW].
- The icon ① is corresponding to the ▲/▼/◄/►.
■ Fast forwarding/Fast rewinding
During motion image playback, continue pressing ◀/▶.
▶: Fast forward
◀: Fast rewind
- When releasing the button, it turns to normal motion image playback.
To pause
Press ▲ during motion image playback.
- Press ▲ again to cancel pause.
• To adjust the sound volume, refer to P26.
◇ Suggestions/Tips ◇
- You cannot use the zoom function while playing back or pausing motion images.
- The file format that can be played back with this camera is QuickTime Motion JPEG.
- Some QuickTime Motion JPEG files recorded by a PC or other equipment may not be played back with this camera.
- When playing back motion images that have been recorded with other equipment, the quality of images may be deteriorated or the images may not be able to be played back.
- When using a high capacity card, it is possible that fast rewinding may be slower than usual.
Rotating the Picture
You can rotate the recorded pictures in increments of 90^ .
This is a convenient function to play back pictures on TV.
Preparation
- Set the operational mode dial to playback mode [▶(P30)
1 Select [ROTATE].
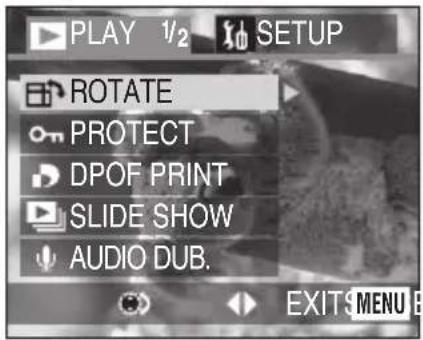
![PANASONIC Lumix DMC-LC1PP - Select [ROTATE]. - 2](/content/2026/05/843524/images/31393faec32f75c472a46dd4dd20dfa6d986217490cf11a2dbb025c6a58b9724.jpg)
flowchart
graph LR
    A["MENU"] --> B["REVIEW"]
    B --> C["REVIEW"]
2 Select the direction to rotate the picture.
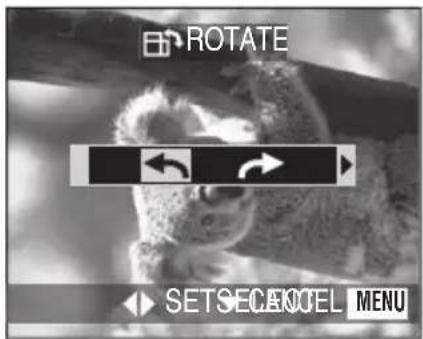

• [ ]: The picture rotates counterclockwise in increments of 90°.
• [ ]: The picture rotates clockwise in increments of 90°.
- Close the menu by pressing the [MENU] button after finishing the setting.
Example
When rotating clockwise
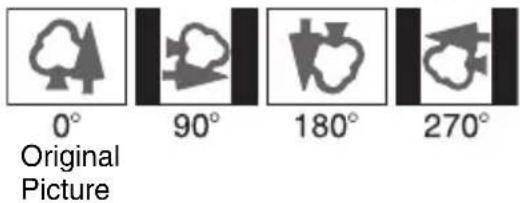
◇ Suggestions/Tips ◇
- Still pictures can only be rotated in normal playback. When playing back rotated pictures in zoom playback or multi playback, pictures appear in original angle.
- The recording date and time of the picture is changed to the date when you rotate the picture.
- Rotated pictures appear on a PC only when an OS or a software compatible with Exif is installed in the PC.
- Exif is the file format for still pictures, to which can be added recording information and other, established by JEITA [Japan Electronics and Information Technology Industries Association].
- Pictures taken after setting the quality to [RAW] and protected pictures cannot be rotated.
Setting the Picture to be Printed and the Number of Prints (DPOF Print Setting)
DPOF (Digital Print Order Format) is a system that allows the user to select which pictures are to be printed on compatible photo printers. DPOF also allows the user to set how many copies of each picture will be printed. Many commercial photo printing services now use DPOF. For more information please visit:
http://panasonic.jp/dc/dpof_110/white_e.htm
Preparation
- Set the operational mode dial to playback mode [▶(P30)
Single setting/cancel
1 Select [DPOF PRINT].
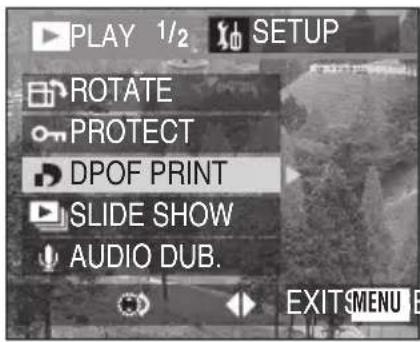
![PANASONIC Lumix DMC-LC1PP - Select [DPOF PRINT]. - 2](/content/2026/05/843524/images/3ebacab9cfc1c9bb7ecbd3bad0150815674ad622954aa9f90309e97f41d571e6.jpg)
flowchart
graph LR
    A["MENU"] --> B["REVIEW"]
    B --> C["REVIEW"]
2 Select [SINGLE].
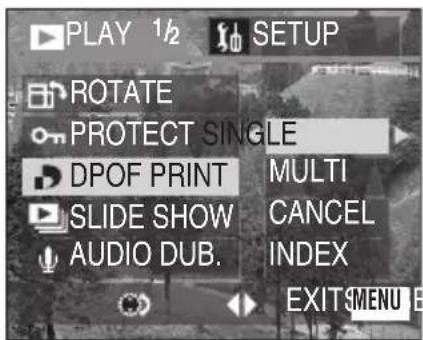
![PANASONIC Lumix DMC-LC1PP - Select [SINGLE]. - 2](/content/2026/05/843524/images/e32310142476e6f4da34fe79eca02cb87820d23f74c4e6c7f1ea7225c1d70f4a.jpg)
3 Select the picture and set the number of prints.
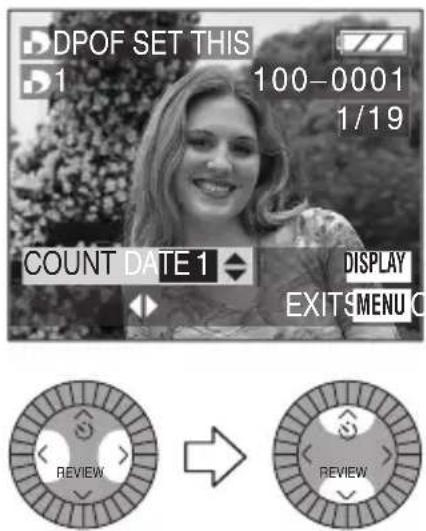
- The number of prints can be set from 0 to 999.
- The number of prints icon [ ] appears.
- When the number of prints is set to "0", DPOF print setting is canceled.
- Close the menu by pressing the [MENU] button 2 times after finishing the setting.

Multi setting/cancel
1 Select [DPOF PRINT].
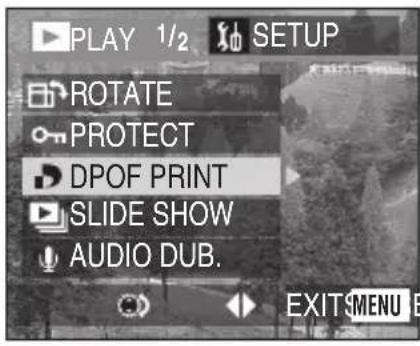
![PANASONIC Lumix DMC-LC1PP - Select [DPOF PRINT]. - 2](/content/2026/05/843524/images/17a311bf98b62e5c718f0d52a24bb3fe96cbefba493040f59cd5e15ec6b99811.jpg)
flowchart
graph LR
    A["MENU"] --> B["REVIEW"]
    B --> C["REVIEW"]
2 Select [MULTI].
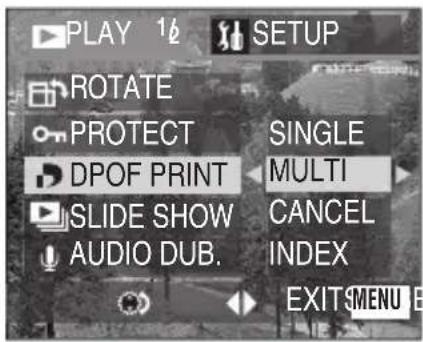
![PANASONIC Lumix DMC-LC1PP - Select [MULTI]. - 2](/content/2026/05/843524/images/eefe58422190c02ecc0a6bc7e777fda9cbcc75031ef1ec1aef95078c2eee2388.jpg)
flowchart
graph LR
    A["Circle icon with 'REVIEW' label"] --> B["Square icon with 'REVIEW' label"]
3 Select the pictures and set the number of prints.
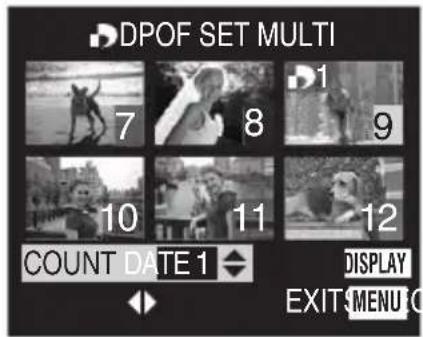
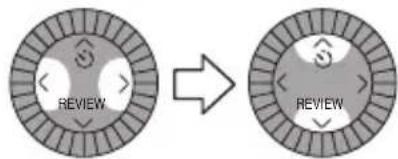
flowchart
graph LR
    A["Circle Diagram with Review icon"] --> B["Arrow pointing to the simplified circle"]
    style A fill:#f9f,stroke:#333
    style B fill:#bbf,stroke:#333
- The number of prints can be set from 0 to 999.
- The number of prints icon [ ] appears.
- Repeat step 3.
- When the number of prints is set to "0", DPOF print setting is canceled.
- Close the menu by pressing the [MENU] button 2 times after finishing the setting.
To cancel all settings
1 Select [DPOF PRINT].
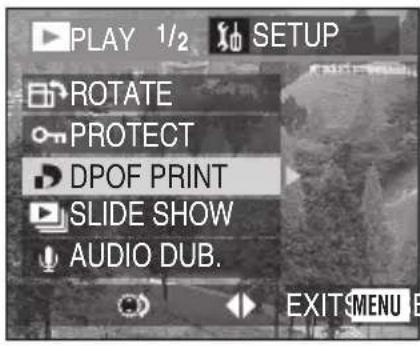
![PANASONIC Lumix DMC-LC1PP - Select [DPOF PRINT]. - 2](/content/2026/05/843524/images/f03430a633963d1770bb74a8d46fcf5237c3ba51de9399bb2bd6a6a6a2b5ce37.jpg)
flowchart
graph LR
    A["MENU"] --> B["REVIEW"]
    B --> C["REVIEW"]
2 Select [CANCEL].
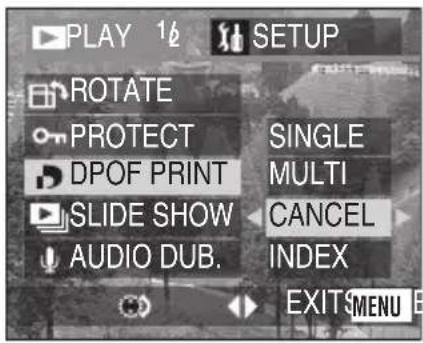
![PANASONIC Lumix DMC-LC1PP - Select [CANCEL]. - 2](/content/2026/05/843524/images/991fa34f4fd6fa5c2966c93234380b55d2b7932c8896f3a4378f97ddf2ed826d.jpg)
flowchart
graph LR
    A["REVIEW"] --> B["REVIEW"]
3 Select [YES] to cancel all settings.
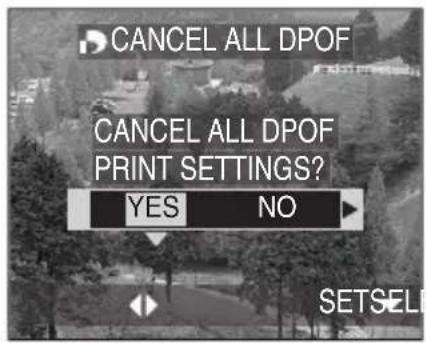
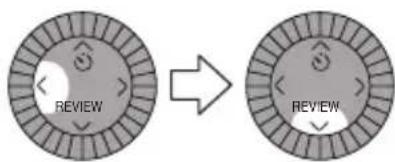
- Close the menu by pressing the [MENU] button after cancelling the setting.
Index setting/cancel
1 Select [DPOF PRINT].
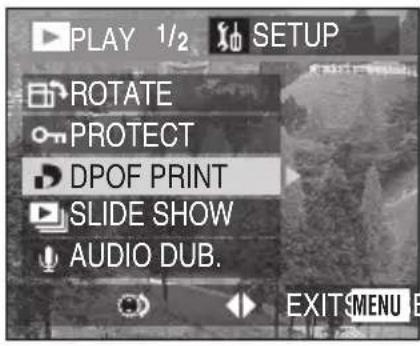
![PANASONIC Lumix DMC-LC1PP - Select [DPOF PRINT]. - 2](/content/2026/05/843524/images/a8c06eaf6e355499b4db70c48f5bceee1e2d92200cf0e146fa3e32cc1a65ea1b.jpg)
flowchart
graph LR
    A["MENU"] --> B["REVIEW"]
    B --> C["REVIEW"]
2 Select [INDEX].
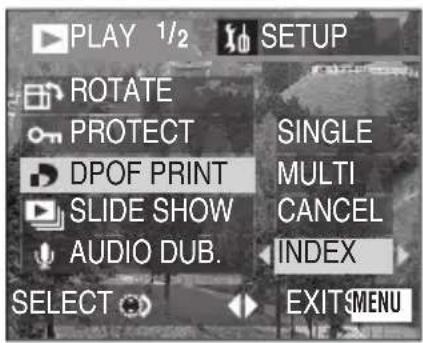
![PANASONIC Lumix DMC-LC1PP - Select [INDEX]. - 2](/content/2026/05/843524/images/be4897282da6dba2d53c1e491601c26437037a6a21fea4503c1755abbc0f76cb.jpg)
flowchart
graph LR
    A["Circular icon with 'REVIEW' label"] --> B["Arrow pointing right"]
    B --> C["Circular icon with 'REVIEW' label"]
3 Select [YES] to index setting.
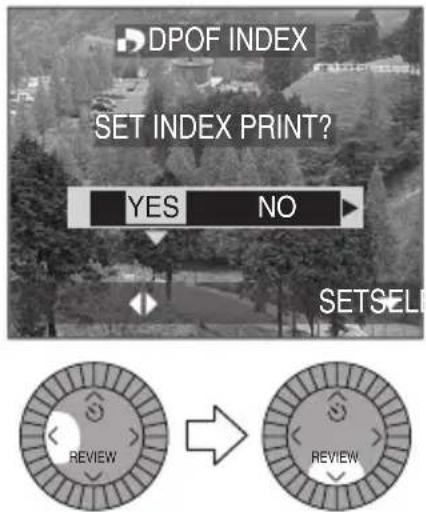
- Close the menu by pressing the [MENU] button after finishing the setting.
When the index is already set
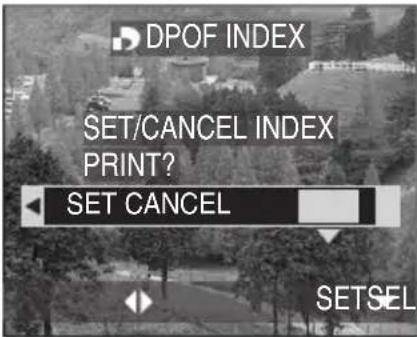

- Close the menu by pressing the [MENU] button after finishing the setting.
To print the date
You can set/cancel the printing with the recorded date each press of the [DISPLAY] button when setting the number of prints.
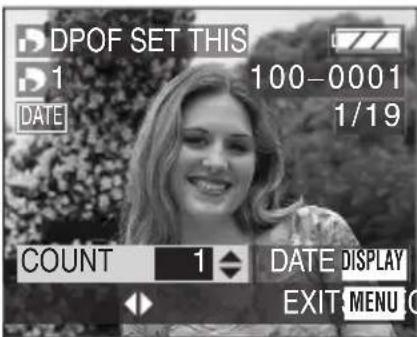
- The date print icon [DATE]pears.
- When you ask photo studios for printing, be sure to order the printing of the date.
- The date may not be printed depending on photo studios or printers even if you set the date print. For further information, ask the photo studios or refer to the operating instructions of the printer.
◇ Suggestions/Tips ◇
- DPOF print setting is a convenient function when you print pictures with printers supporting DPOF printing.
- DPOF is the abbreviation for Digital Print Order Format. This feature allows you to designate which pictures will be printed.
- The setting of DPOF print will not be applied to the DPOF setting of Slide Show.
- If the file is not based on the DCF standard, the DPOF print setting cannot be set. DCF is an abbreviation of [Design rule for Camera File system], stipulated by JEITA [Japan Electronics and Information Technology Industries Association].
- When setting the DPOF print, this camera will overwrite any previous DPOF print settings made by other equipment.
Preventing Accidental Erasure of the Picture
Preparation
- Set the operational mode dial to playback mode [▶(P30)
■ Single setting/cancel
1 Select [PROTECT].
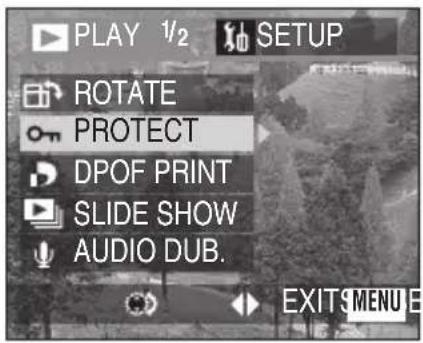
![PANASONIC Lumix DMC-LC1PP - Select [PROTECT]. - 2](/content/2026/05/843524/images/5ade2a107727edd430c1dbb5c1b548d0e10368dd2323168299da61a2bec1a86b.jpg)
flowchart
graph LR
    A["MENU"] --> B["REVIEW"]
    B --> C["REVIEW"]
2 Select [SINGLE].
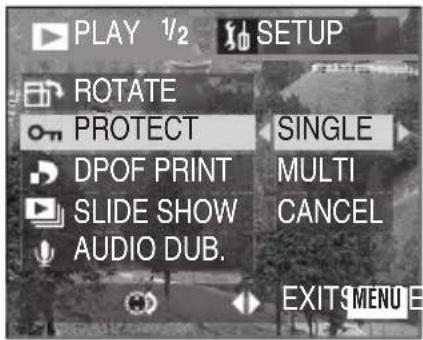
![PANASONIC Lumix DMC-LC1PP - Select [SINGLE]. - 2](/content/2026/05/843524/images/7e4ec5eb6e43a31adbfac851032f71cfd13ad6b1aa0f93a5fde1cbaff05258ac.jpg)
3 Select the picture and set/cancel the protection.
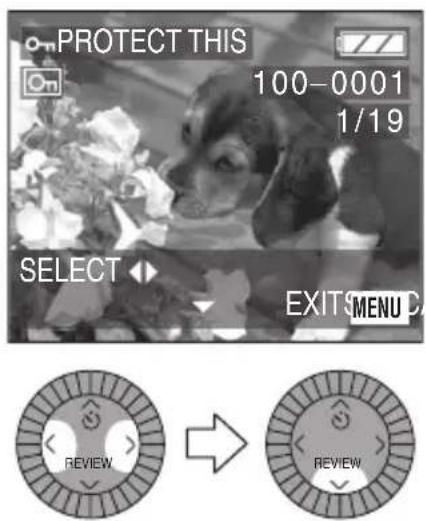
- [SET]: The protect icon [ ] appears.
- [CANCEL]: The protect icon [ ] disappears.
- Close the menu by pressing the [MENU] button 2 times after finishing the setting.
■ Multi setting/To cancel all settings
Perform the same operation as in [Setting the Picture to be Printed and the Number of Prints (DPOF Print Setting)]. (P80–P82)
◇ Suggestions/Tips ◇
- While this feature protects the pictures from accidental erasure, formatting the card will permanently delete all data. (P94)
- If you want to delete protected pictures, cancel the protect setting first.
- The protect setting may not be effective in other equipment.
- Sliding the SD Memory Card Write-Protect switch to [LOCK] (P15) prevents the picture from deletion even if the protection is not set.
- You cannot rotate or use the audio dubbing (P89) for protected pictures.
Playing Back with Slide Show
Preparation
- Set the operational mode dial to playback mode [▶(P30)
1 Select [SLIDE SHOW].
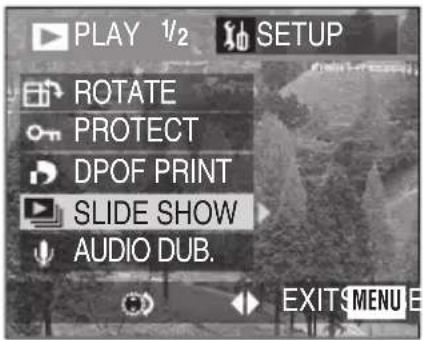
![PANASONIC Lumix DMC-LC1PP - Select [SLIDE SHOW]. - 2](/content/2026/05/843524/images/b43bb442b4a4e3d5c65393e1326bd609e425c348487bccd210decb9500fdb1ec.jpg)
flowchart
graph LR
    A["MENU"] --> B["REVIEW"]
    B --> C["REVIEW"]
2 Select the type of pictures to play back.
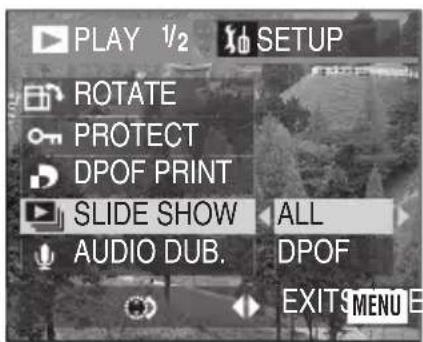

flowchart
graph LR
    A["REVIEW"] --> B["→"]
    B --> C["REVIEW"]
• [ALL]: for playing back all pictures
• [ D P O F ] : for playing back the pictures for which DPOF Slide Show was set
3 Select the following items.
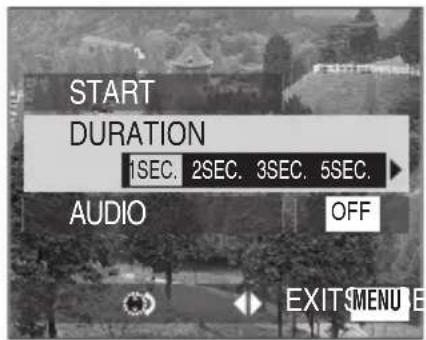
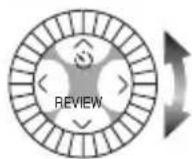
• [DURATION]: It can be set among 1, 2, 3 and 5 seconds.
• [AUDIO]:
By setting it to [ON], the audio of the pictures with audio can be played back during Slide Show.
• [DPOF SET] (Only when setting to [DPOF]):
You can select the pictures you want to set to the Slide Show.
- [CANCEL ALL] (Only when setting to [DPOF]):
You can cancel the DPOF Slide Show setting.
4 Select [START].
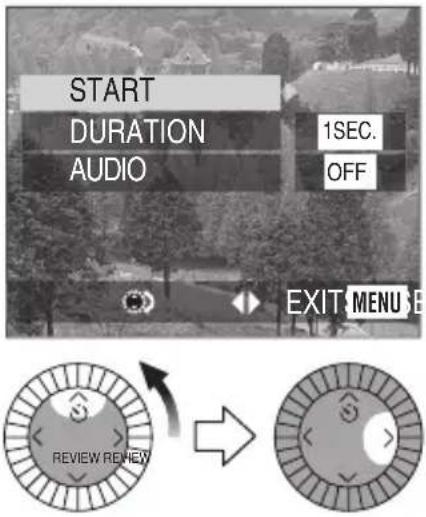
5 By pressing the [MENU] button, the Slide Show stops.
SD Slide Show
If setting the SD Slide Show with the [SD Viewer for DSC] which is in the supplied CD-ROM, when playing back, the confirmation screen appears. Select [YES] and press ▼/[REVIEW] to start the SD Slide Show. Select [NO] and press ▼/[REVIEW] to start normal playback.
◇ Suggestions/Tips ◇
- When setting the DPOF Slide Show, DPOF icon ① appears on the picture in green.
- When setting the DPOF Slide Show to the picture with DPOF printing, both of DPOF icon ① and the number of prints appear on the picture in green.
- When only the DPOF printing is set on the picture, the DPOF icon ① and the number of prints appear in white.
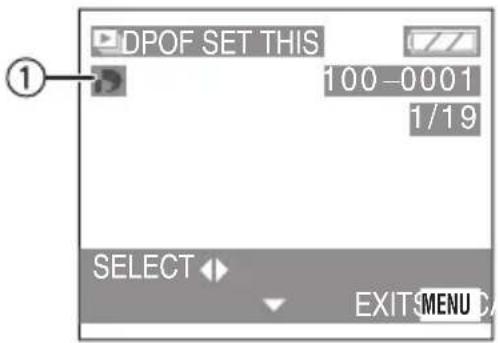
- In motion image playback, Slide Show is not available.
- The DPOF setting of Slide Show will not be applied to the DPOF printing.
- DPOF Slide Show cannot be performed without the DPOF setting of Slide Show.
- DPOF setting with the [SD Viewer for DSC] in the supplied CD-ROM is only for printing. Please set DPOF Slide Show with this camera to play back pictures in DPOF Slide Show.
- When setting the DPOF Slide Show, this camera will overwrite any previous DPOF settings made by other equipment.
Adding Audio to Recorded Pictures (Audio Dubbing)
Preparation
- Set the operational mode dial to playback mode [▶(P30)
1 Select [AUDIO DUB.].
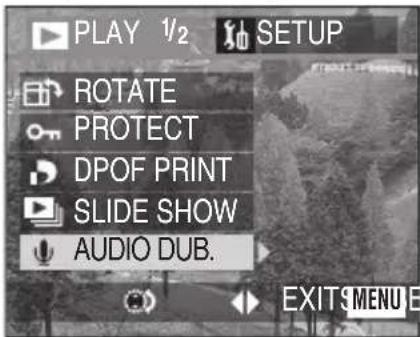
![PANASONIC Lumix DMC-LC1PP - Select [AUDIO DUB.]. - 2](/content/2026/05/843524/images/2116980398fc9ebae2828131ef07bcfb62137553bb5e556397e954b5938cdb78.jpg)
flowchart
graph LR
    A["MENU"] --> B["REVIEW"]
    B --> C["REVIEW"]
2 Select the picture and start audio recording.
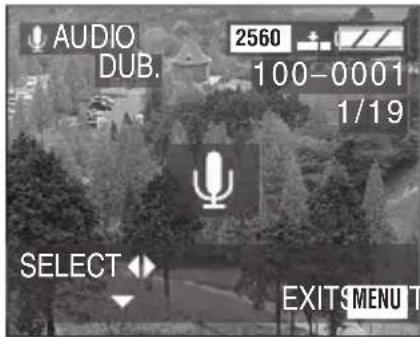

- When audio has already been recorded, the confirmation screen appears. Press ◀ to select [YES], and press ▼/[REVIEW] to start audio recording. (The original audio is overwritten.)
- The audio dubbing cannot be used with motion images, pictures taken after setting the quality to [RAW] protected pictures.
3 Stop audio recording.
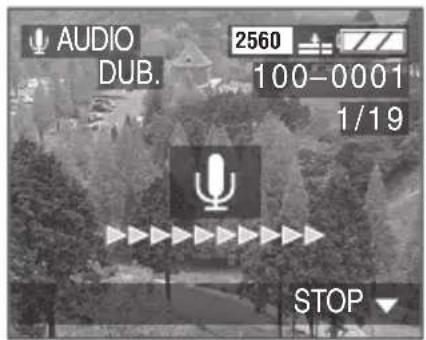

- Even if you do not press ▼/[REVIEW], after about 10 seconds the audio recording stops automatically. - Close the menu by pressing the [MENU] button 2 times after finishing the setting.
Resizing the Pictures
This function is useful if you want to reduce the file size of the picture, in cases when it needs to be attached to an e-mail or uploaded to a website.
Preparation
- Set the operational mode dial to playback mode [▶(P30)
1 Select [RESIZE].
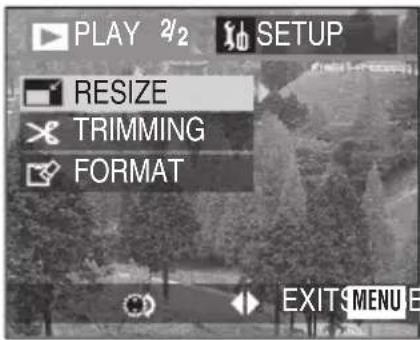
![PANASONIC Lumix DMC-LC1PP - Select [RESIZE]. - 2](/content/2026/05/843524/images/64028908ac5d1739153765235c9b64837dd720536f97e2e3956ccc8e8bafddb0.jpg)
flowchart
graph LR
    A["MENU"] --> B["REVIEW"]
    B --> C["REVIEW"]
2 Select the picture and set it.
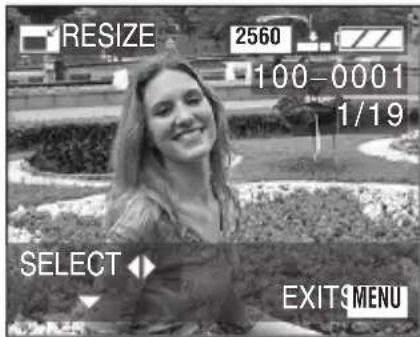

flowchart
graph LR
    A["REVIEW"] --> B["REVIEW"]
3 Select the size and set it.
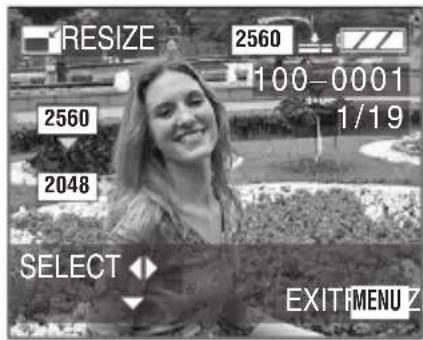

• [2048]: 2048×1536 pixels
• [1600]: 1600×1200 pixels
• [1280]: 1280×960 pixels
• [640]: 640×480 pixels
4 Select [YES] or [NO] and set it.
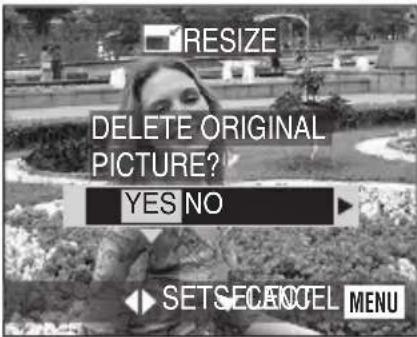

- When you select [YES], the picture is overwritten.
- When the original picture is protected, you cannot overwrite the resized picture.
- When resized pictures are overwritten, they cannot be restored.
- Close the menu by pressing the [MENU] button 2 times after finishing the resizing.
◇ Suggestions/Tips ◇
- The following pictures cannot be resized.
- Pictures not over 640×480 pixels
– Pictures recorded after setting the picture size to [HDTV] - Pictures taken after setting the quality to [RAW]
- Motion images
- Flip animation
– Pictures with audio - Rotated pictures (You can resize them if you turn them back.)
- It may not be possible to resize pictures recorded with other equipment.
Trimming the Pictures
Preparation
- Set the operational mode dial to playback mode [▶(P30)
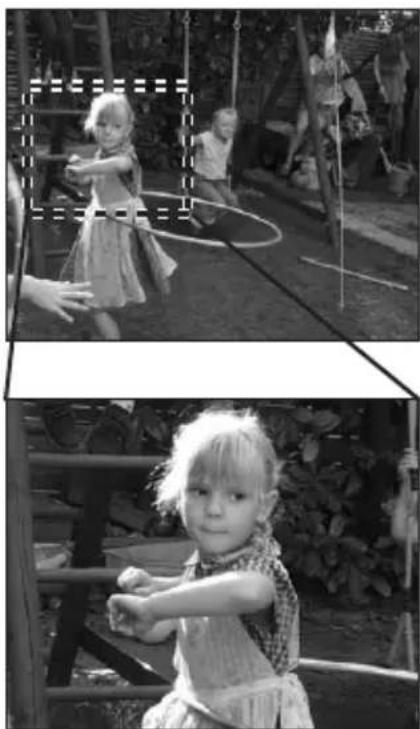
natural_image
Black-and-white photo collage showing two children playing with hula hoops in a playground (no text or symbols visible)1 Select [TRIMMING].
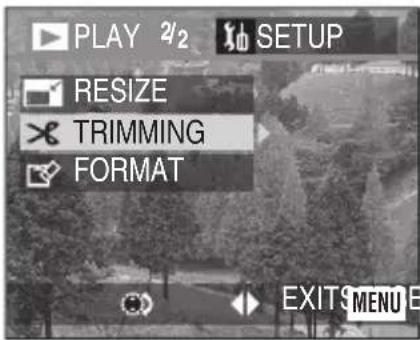
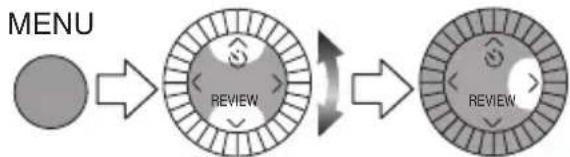
flowchart
graph LR
    A["MENU"] --> B["REVIEW"]
    B --> C["REVIEW"]
2 Select the picture to trim.
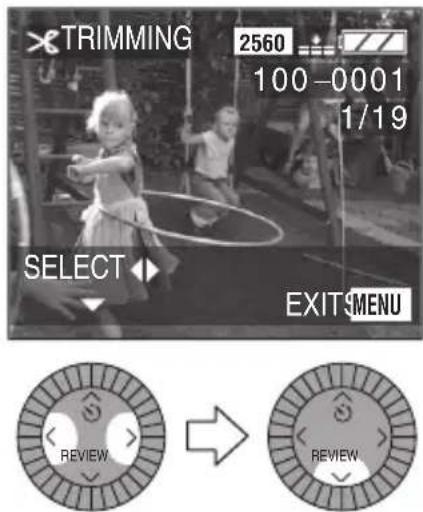
3 Enlarge/decrease or shift the picture.
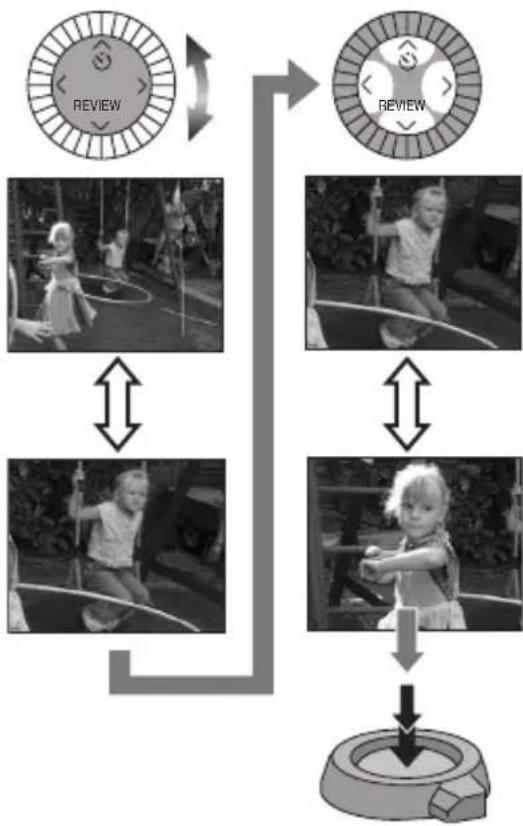
flowchart
graph TD
    A["Children playing waterwheel"] --> B{Review?}
    B --> C["Re reviews"]
    C --> D["Children playing waterwheel"]
    D --> E["Re reviews"]
    E --> F["Re reviews"]
    F --> G["Re reviews"]
    G --> H["Re reviews"]
    H --> I["Re reviews"]
    I --> J["Re reviews"]
    J --> K["Re reviews"]
    K --> L["Re reviews"]
    L --> M["Re reviews"]
    M --> N["Re reviews"]
    N --> O["Re reviews"]
    O --> P["Re reviews"]
    P --> Q["Re reviews"]
    Q --> R["Re reviews"]
    R --> S["Re reviews"]
    S --> T["Re reviews"]
    T --> U["Re reviews"]
    U --> V["Re reviews"]
    V --> W["Re reviews"]
    W --> X["Re reviews"]
    X --> Y["Re reviews"]
    Y --> Z["Re reviews"]
    Z --> AA["Re reviews"]
    AA --> AB["Re reviews"]
    AB --> AC["Re reviews"]
    AC --> AD["Re reviews"]
    AD --> AE["Re reviews"]
    AE --> AF["Re reviews"]
    AF --> AG["Re reviews"]
    AG --> AH["Re reviews"]
    AH --> AI["Re reviews"]
    AI --> AJ["Re reviews"]
    AJ --> AK["Re reviews"]
    AK --> AL["Re reviews"]
    AL --> AM["Re reviews"]
    AM --> AN["Re reviews"]
    AN --> AO["Re reviews"]
    AO --> AP["Re reviews"]
    AP --> AQ["Re reviews"]
    AQ --> AR["Re reviews"]
    AR --> AS["Re reviews"]
    AS --> AT["Re reviews"]
    AT --> AU["Re reviews"]
    AU --> AV["Re reviews"]
    AV --> AW["Re reviews"]
    AW --> AX["Re reviews"]
    AX --> AY["Re reviews"]
4 Select [YES] or [NO] and set it.
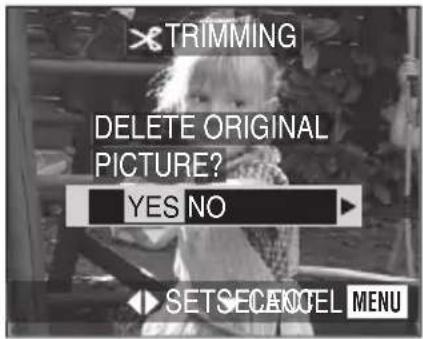

- When you select [YES], the picture is overwritten.
- When the original picture is protected, you cannot overwrite the resized picture.
- When trimmed pictures are overwritten, they cannot be restored.
- Close the menu by pressing the [MENU] button 2 times after finishing the trimming.
◇ Suggestions/Tips ◇
- The following pictures cannot be trimmed.
- Pictures smaller than 640×480 pixels
– Pictures recorded after setting the picture size to [HDTV] - Pictures taken after setting the quality to [RAW]
- Motion images
- Flip animation
– Pictures with audio - Rotated pictures (You can trim them if you rotate them back.)
- It may not be possible to trim pictures recorded with other equipment.
- The picture size of the trimmed pictures may become smaller than that of the original one depending on the cut size.
- The picture quality of the trimmed picture may be deteriorated.
- You cannot use the remote shutter when setting the trimming parts.
Formatting the Card
Preparation
- Set the operational mode dial to playback mode [▶(P30)
1 Select [FORMAT].
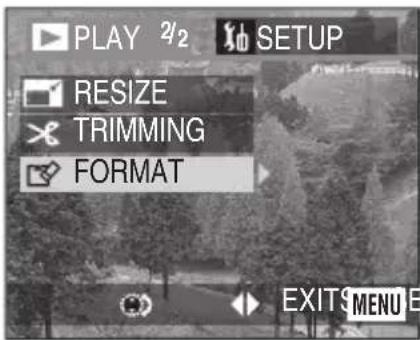
![PANASONIC Lumix DMC-LC1PP - Select [FORMAT]. - 2](/content/2026/05/843524/images/fcafa3b23e58b70536147a92e09f2069ea4301335b9be5fdf30a88b8e8b406a6.jpg)
flowchart
graph LR
    A["MENU"] --> B["REVIEW"]
    B --> C["REVIEW"]
2 Select [YES] to format.
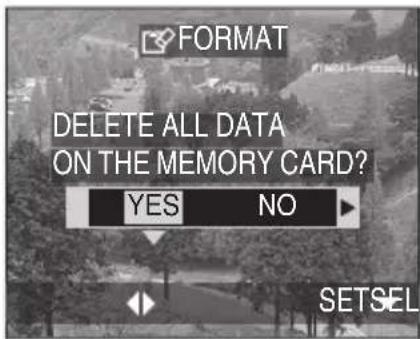

◇ Suggestions/Tips ◇
• Usually, it is not necessary to format the card (initializing). Format the card when the message [MEMORY CARD ERROR] appears.
- If the card has been formatted by a PC or other equipment, format the card on the camera again.
• After formatting, recorded pictures and any other data cannot be recovered.
- If the card is formatted all images and data will be permanently erased. They cannot be reclaimed. If any important pictures are on the card, please copy them to your PC before proceeding.
- During formatting, do not turn the camera off.
- When the remaining battery power (P11) is low, use the AC adaptor.
- If the card is protected, you cannot format the card.
- If the card cannot be formatted, consult your nearest servicenter.
For USA assistance, please call: 1-800-272-7033 or send e-mail to : digitalstillcam@panasonic.com
For Canadian assistance, please call: 1-800-561-5505 or visit us at www.panasonic.ca
Playing Back Pictures with a TV Screen
■ Playing back pictures with AV cable (supplied)
- Turn the camera and the TV off.
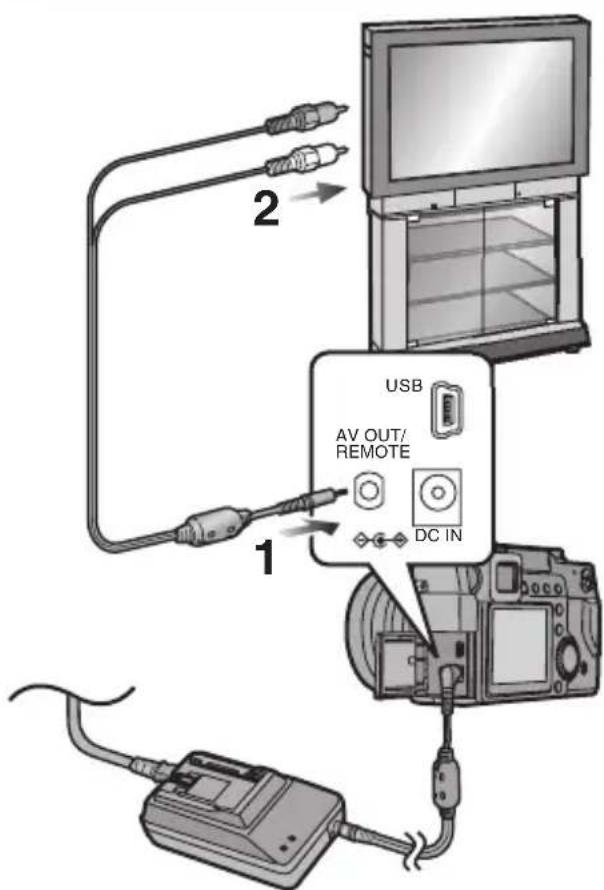
1 Connect the AV cable to the [AV OUT/REMOTE] socket of the camera.
2 Connect the AV cable to the video input and the audio input sockets of the TV.
- Yellow: to the video input socket
- White: to the audio input socket
3 Turn the TV on and select external input.
4 Turn the camera on and then set to playback mode [▶]
4 Turn the camera on and then set to playback mode [▶]
■ Viewing pictures in other countries
When setting [VIDEO OUT] on the menu (P26), you can view pictures on a TV in other countries (regions) which use the NTSC or PAL system.
- Even if you set menu selection for [VIDEO OUT] to [PAL], the output signal is still NTSC in the recording mode.
■ Playback pictures on TV with SD Memory Card slot
An SD Memory Card can be played back on TVs with an SD Memory Card slot.
If you play back pictures recorded using [HDTV] mode on a High-Definition TV, (HDTV has 16:9 aspect) the picture quality will be higher.
◇ Suggestions/Tips ◇
- When connecting to a TV, we recommend using the AC adaptor as the power source.
- Use the supplied AV cable only.
- The image is displayed on the TV only in playback mode.
- Read the TV operating instructions too.
- When you set the video output to [PAL], if connecting/disconnecting the AV cable in playback mode, the following occur.
—The screen becomes dark for a moment.
—During playing back of motion images, images and sounds are interrupted.
Before Connecting with USB Connection Cable
Select the USB communication system according to the OS of your PC or your printer before connecting them to the camera with the USB connection cable (supplied).
Set the items on [USB MODE] in the [SETUP] menu. (P26)
1 Select [USB MODE].
(In the recording mode)
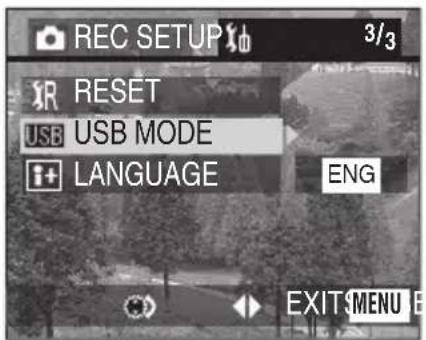
![PANASONIC Lumix DMC-LC1PP - Select [USB MODE]. - 2](/content/2026/05/843524/images/7a4bb4cc11b09d09da23f6f82dd582090bb280b0ae586b41281d37e609783141.jpg)
flowchart
graph TD
    A["MENU"] --> B["REVIEW"]
    B --> C["REVIEW"]
    C --> D["REVIEW"]
2 Select [Mass Storage] or [PTP].
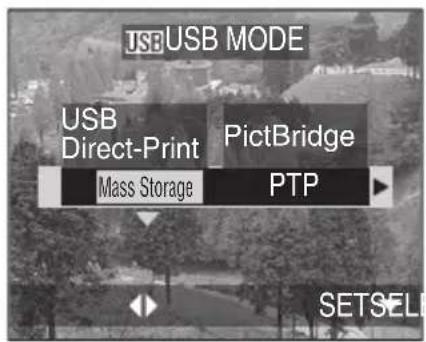
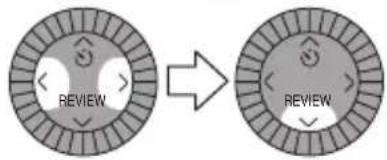
| USB mode PC to be connected Printer to be | connected | |
| Mass Storage(USB Direct-Print) | Windows® XP Home Edition, Windows XP Professional, Windows 2000 Professional, Windows Me, Windows 98/98 SE or Mac OS X (10.1 or above), Mac OS 9.x | Printers supporting USB Direct-Print |
| PTP(PictBridge) | Windows XP Home Edition, Windows XP Professional or Mac OS X | Printers supporting PictBridge |
When using Windows 2000 Professional, Windows Me, Windows 98/98 SE or Mac OS 9.x
- When connecting the camera to a PC, do not set [USB MODE] to [PTP]. (When the camera is shipped, [Mass Storage] is selected.)
- When using [Mass Storage] on Windows 98/98 SE, install the USB driver before connecting. (When using Windows Me/2000/XP, Mac OS 9.x and Mac OS X, you do not have to install the USB driver.)
- When connecting to a PC which includes the above-mentioned OS and when setting the [USB MODE] to [PTP], the messages shown on the right appear on the LCD monitor of the camera.
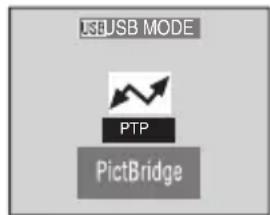
The following messages appear for each OS on the display of the PC. Select [Cancel] to close the window and disconnect the USB connection cable.
| OS Message | |
| Windows 2000 Professional [Welcome to the Found New Hardware Wizard] | |
| Windows MeWindows 98/98 SE | [New Hardware Found]→[Add New Hardware Wizard](When you connect to the PC more than 2 times, only [Add New Hardware Wizard] appears.) |
| Mac OS 9.x [Software needed for the USB device“DMC-LC1” is not available. Would you like to look for the software on the Internet?] | |
Connecting to a PC (Mass Storage)
When you connect to the camera to a PC supporting USB 2.0 (High Speed), you can transfer the data with higher speed in a shorter period of time.
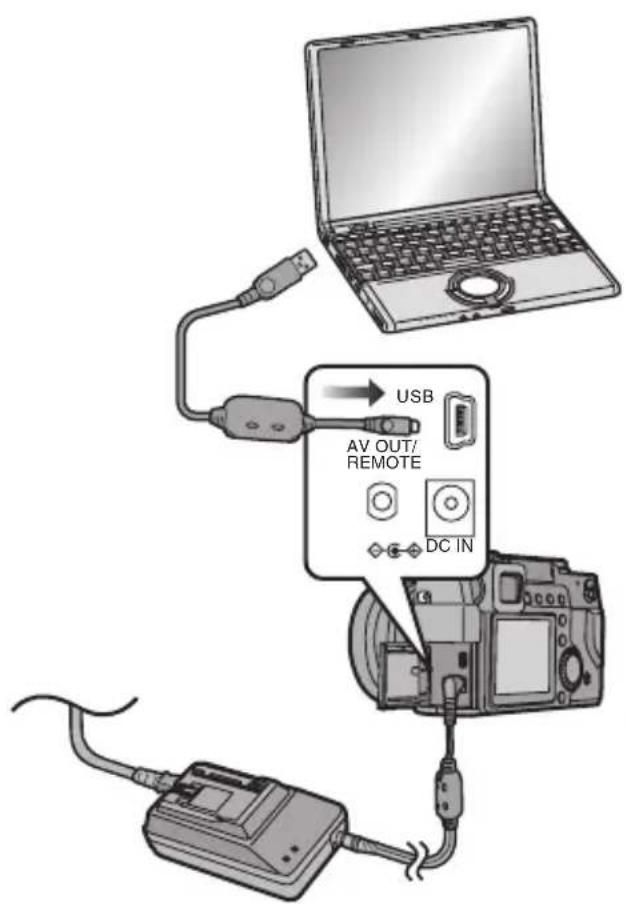
1 Turn the camera on and then set [USB MODE] to [Mass Storage]. (P96)
2 Connect the camera to a PC via the USB connection cable (supplied).
[Windows]
The drive appears on the [My Computer] folder.
- If it is the first time that you are connecting the camera to a PC, the required driver is installed automatically so that the camera can be recognized by the Windows Plug and Play, then it appears on the [My Computer] folder.
[Macintosh]
The drive is shown on the screen.
◇ Suggestions/Tips ◇
- When connecting to a PC, we recommend using the AC adaptor as the power source.
- If the remaining battery power becomes low during communication, the power indicator blinks and the alarm beeps. In this case, stop the communication. Then turn the camera off and charge the battery.
- When connecting to a PC, pictures and sounds are not output from the [AV OUT/REMOTE] socket.
- Use the supplied USB connection cable only.
-
When you connect the camera to a PC supporting USB 2.0 (High Speed), be careful of the followings.
-
When you connect 2 or more USB devices to a PC, or you connect the camera with a USB hub or USB extension cables, normal operation is not guaranteed.
- When you connect the camera to the USB terminal on a key board, it may not be operated properly.
- Also refer to the operating instructions of a PC.
Connecting to a PC (PTP)
Do not follow the setting below on the OS except for Windows XP and Mac OS X.
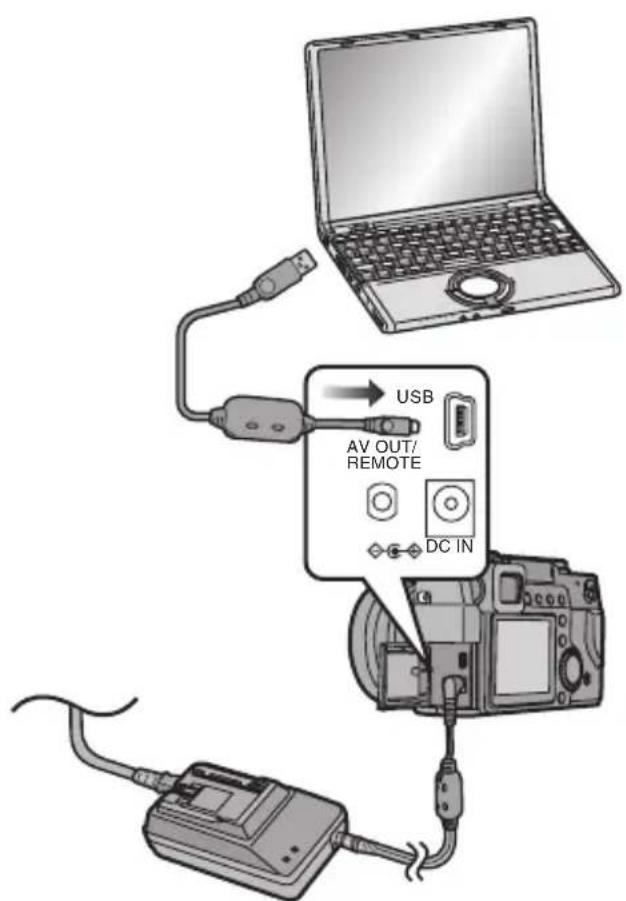
- If it is the first time that you are connecting the camera to a PC, the required driver is installed automatically so that the camera can be recognized by the Windows Plug and Play, then the camera icon appears on the [My Computer] folder.
[Macintosh]
You can read pictures with image capture or iPhoto.
1 Turn the camera on and then set [USB MODE] to [PTP]. (P96)
2 Connect the camera to a PC via the USB connection cable (supplied).
[Windows]
The camera icon appears on the
[My Computer] folder.
◇ Suggestions/Tips ◇
- Refer to P97 carefully when connecting to the OS except for Windows XP and Mac OS X while setting [USB MODE] to [PTP].
- When connecting to a PC, we recommend using the AC adaptor as the power source.
- If the remaining battery power becomes low during communication, the power indicator blinks and the alarm beeps. In this case, stop the communication. Then turn the camera off and charge the battery.
- When connecting to a PC, pictures and sounds are not output from the [AV OUT/REMOTE] socket.
- It may take time to display the communication screen depending on the PC.
- You can only load pictures from the camera and cannot write them on the card or delete them.
- Use the supplied USB connection cable only.
- When there are 1000 or more pictures on the card, the pictures may not be imported.
- When the PC recovers from the standby mode while connecting it to a camera with USB connection cables, they may not properly communicate with each other.
Connecting to a Printer
By connecting the camera directly to a printer supporting PictBridge or USB Direct-Print via the USB connection cable (supplied), you can select the pictures to be printed or start printing.
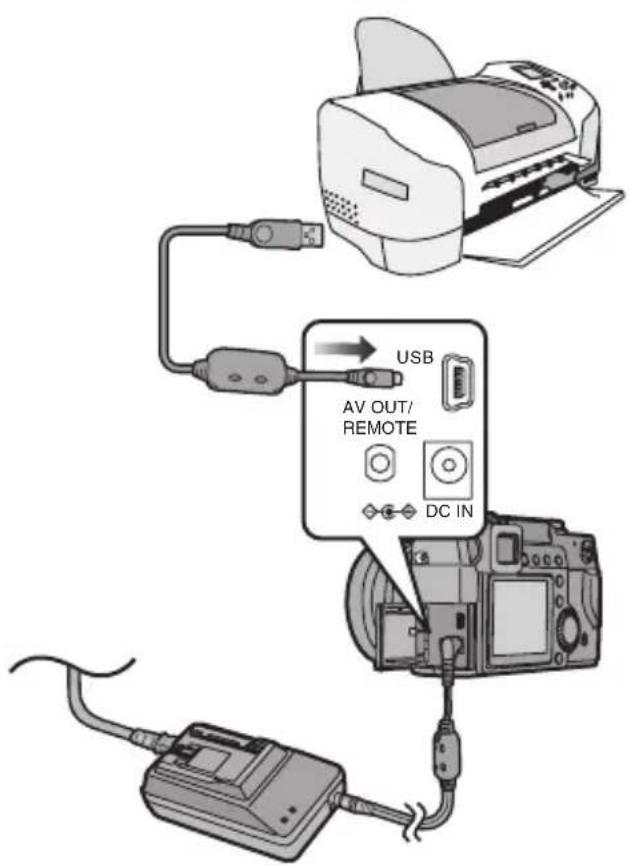
1 Turn the camera on and then set the [USB MODE] to [Mass Storage] (USB Direct-Print) or [PTP] (PictBridge). (P96)
2 Turn on a printer.
3 Connect the camera to a printer via the USB connection cable (supplied).
◇ Suggestions/Tips ◇
- Ask the manufacturer of the printer about the corresponding models. (Read the printer operating instructions too.)
- If the remaining battery power becomes low during communication, the power indicator blinks and the alarm beeps. In this case, stop the communication. Then turn the camera off and charge the battery.
- When connecting to a printer, we recommend using the AC adaptor as the power source.
- Disconnect the USB connection cable and DC cable after printing.
- Use the supplied USB connection cable only.
Using a Printer (PictBridge)
Preparation
- Connect the camera to a printer. (P101)
- The paper size cannot be changed depending on the printer. For details, refer to the operating instructions of the printer.
Single picture
1 Select [SINGLE PICTURE].
![PANASONIC Lumix DMC-LC1PP - Select [SINGLE PICTURE]. - 1](/content/2026/05/843524/images/1f228b54783587ffb09ed88b840895dede5a82d7992162a8a0288de838c22048.jpg)
flowchart
graph TD
    A["PictBridge"] --> B["SINGLE PICTURE"]
    A --> C["DPOF PICTURE"]
    B --> D["SETSEL Review"]
    C --> D
    D --> E["REVIEW"]
- The screen shown in step 2 appears when DPOF print is not set or the printer does not support DPOF print.
2 Select the picture to print.
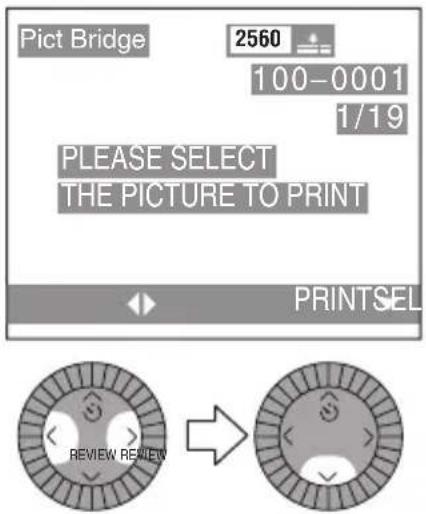
3 Select [YES] and print.
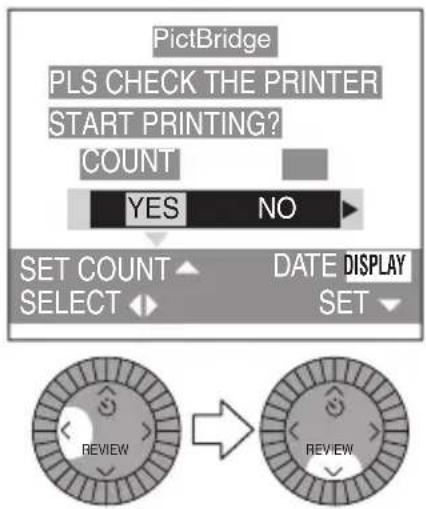
- Press the [DISPLAY] button to print the date. (Only when connecting to a printer which supports printing the date.)
- Press ▲ and then press ◀/▶ to set the number of prints. Press ▼/[REVIEW] to print pictures.
- Press the [MENU] button to cancel printing.
Preparation
- Connect the camera to a printer. (P101)
- Set the DPOF print with this camera in advance. (P80)
- The paper size cannot be changed depending on the printer. For details, refer to the operating instructions of the printer.
DPOF picture
1 Select [DPOF PICTURE].
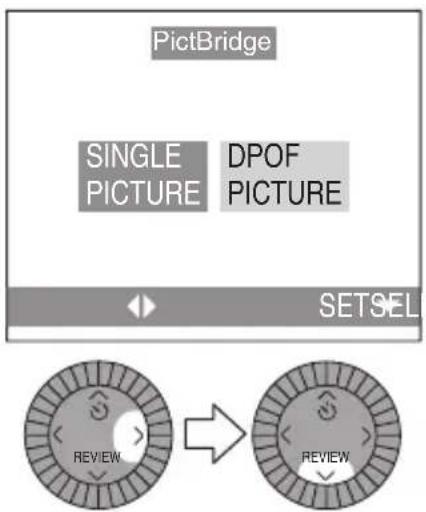
- Press the [MENU] button, and you can change the DPOF print setting. (P80)
2 Select [YES] and print.
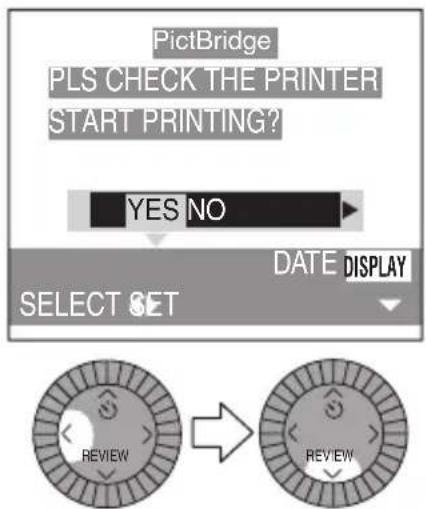
- Press the [DISPLAY] button to print the date. (Only when connecting to the printer supporting to printing the date.)
- Press the [MENU] button to cancel printing.
◇ Suggestions/Tips ◇
- When the total number of prints becomes 1000 or more, the number of remaining pictures may appear as [---] on the screen.
- When connecting to a printer not supporting DPOF, DPOF printing cannot be set. (The DPOF print selecting screen does not appear.)
- Do not disconnect the USB connection cable when the cable disconnection warning icon [1] is indicated.
- When the [●] indication lights in yellow during printing, the camera receives an error message from the printer. Check that there is no malfunction on the printer after printing is completed.
- If the printer does not support the date printing by DPOF setting, the date may not be printed as it is on date setting in DPOF setting.
- The setting on the printer may have priority over the setting on the camera in the date print. Also check the date print setting on the printer.
Using a Printer (USB Direct-Print)
- Connect the camera to a printer. (P101)
- Set the paper size and print quality. (Read the printer operating instructions.)
Single picture
1 Select [SINGLE PICTURE].
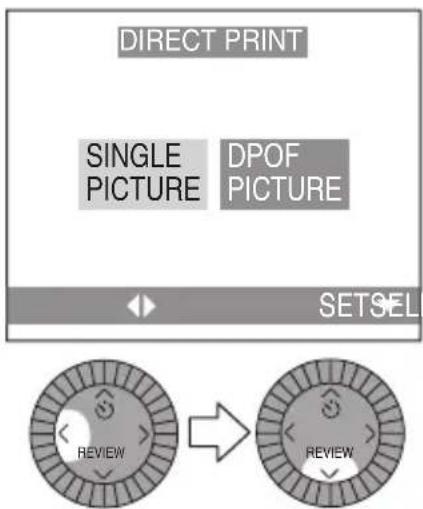
- The screen shown in step 2 appears when DPOF print is not set.
2 Select the picture to print.
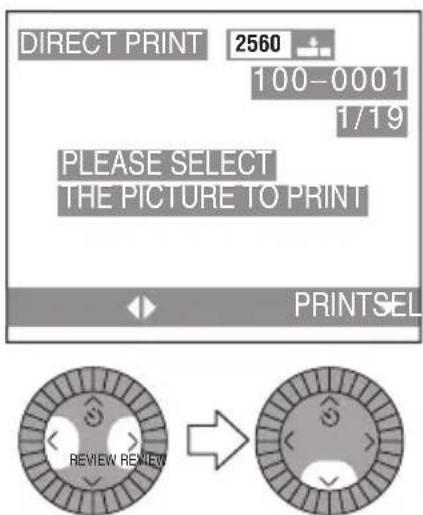
3 Select [YES] and print.
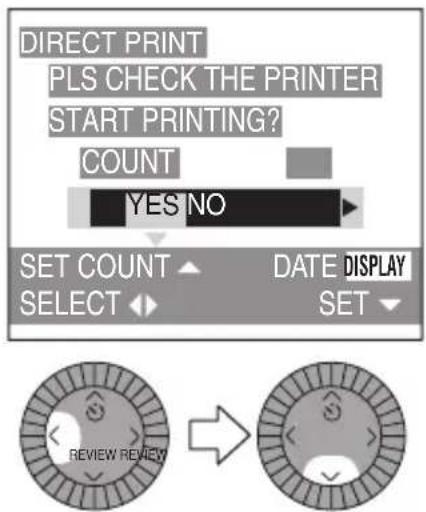
- Press the [DISPLAY] button to print the date.
- Press ▲ and then press ◀/▶ to set the number of prints. Press ▼/[REVIEW] to print pictures.
- Press the [MENU] button to cancel printing.
Preparation
- Connect the camera to a printer. (P101)
- Set the DPOF print with this camera in advance. (P80)
- Set the paper size and print quality. (Read the printer operating instructions.)
DPOF picture
1 Select [DPOF PICTURE].
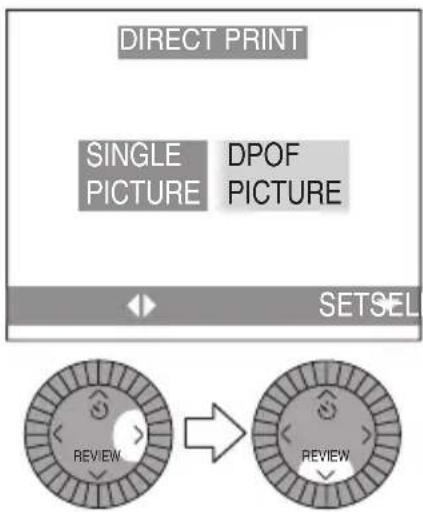
- Press the [MENU] button, and you can change the DPOF print setting. (P80)
- When printing under the new settings, disconnect the USB connection cable and connect it to the printer again.
2 Select [YES] and print.
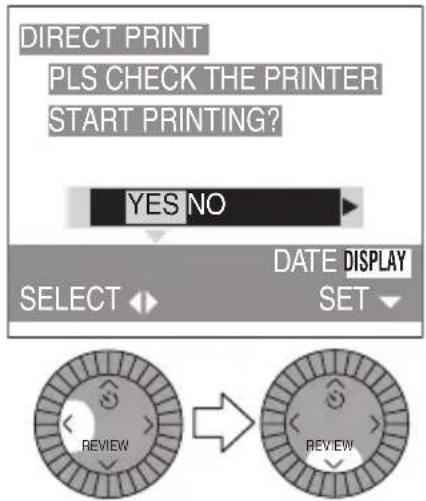
- Press the [DISPLAY] button to print the date.
- Press the [MENU] button to cancel printing.
◇ Suggestions/Tips ◇
- When the total number of prints becomes 255 or more, the number of remaining pictures appears as [---] on the screen.
- When you set the date print setting by pressing the [DISPLAY] button, the date is printed regardless of the date print setting on DPOF setting. (P84)
- When the printer does not support the date printing by DPOF setting, the date may not be printed as it is on date setting in DPOF setting.
- The setting on the printer may have priority over the setting on the camera in the date print. Also check the date print setting on the printer.
Using the External Flash
After installing the optional flash, DMW-FL28, the effective range will be increased when compared to the camera's built in flash.
Preparation
- Set the operational mode dial except for [▶(P30)
1 Attach the external flash to the hot shoe ①.
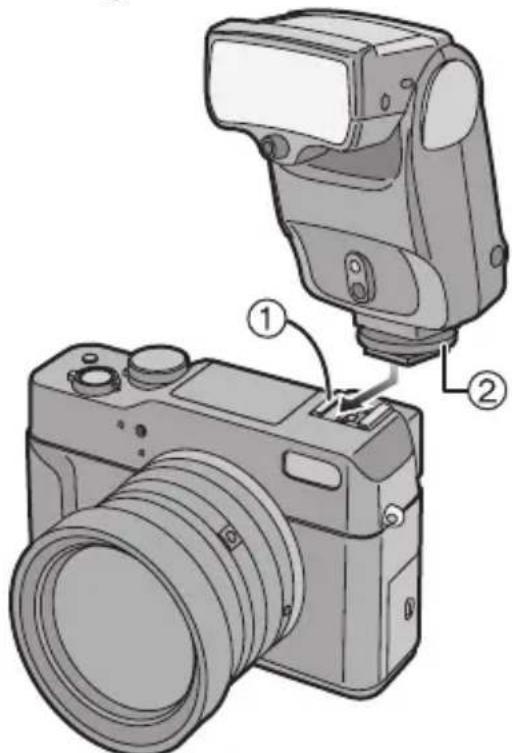
- Tighten the lock screw ② of the external flash firmly.
- Be sure to turn on the external flash after attaching to the camera.
■ Switch the external flash setting
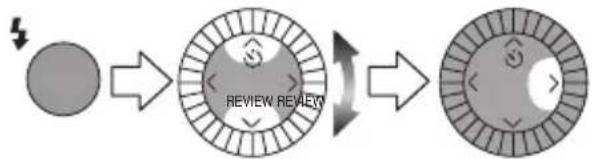
flowchart
graph LR
    A["Start"] --> B["Review Review"]
    B --> C["Final State"]
| Icon Setting | |
| External flash Auto | |
| External flash Forced ON | |
| External flash Slow sync. | |
| External flash Forced OFF |
Available external flash settings
| A | M | |
| ○ | - | |
| ○ | ○ | |
| ○ | - | |
| ○ | ○ |
- Set to the aperture-priority AE mode [A] or the manual exposure mode [on the camera and then set the same aperture value and ISO sensitivity on the external flash. (The exposure cannot be compensated adequately due to the change on the aperture value in the shutter-priority AE mode [and the external flash cannot control the light adequately in program AE mode [because the aperture value cannot be fixed.)
- The available flash range is 45.9 feet (14 m) in DMW-FL28. (When setting to ISO100)
■ Using the specified external flashes
- When you use the following external flashes, the information about the ISO sensitivity, the aperture value or other on the camera is transferred to the flash and then you can use various functions of the flash such as the adjustment of the range of the light control according to the aperture value or the display of the range of the light control.
| Flashes Adaptor Conditions | ||
| Metz54MZ-3 | SCA3502 AUTO | |
| Metz44MZ-2 | SCA3502 AUTO | |
| Metz70MZ-5 | SCA3502 AUTO | |
| LEICASF-20 | Notneeded | AUTO |
| LEICASF-24D | Notneeded | AUTO,TTL-GNC |
Available external flash settings
- Set the mode on the external flash to either of Auto or Manual. (The [TTL] mode cannot be activated properly. However, TTL/GNC mode can be also used for SF-24D only.)
- Any exposure mode can be set on the camera.
- Different aperture values may be displayed between the camera and the external flash, but flash can be activated properly.
Others
◇ Suggestions/Tips ◇
- You can set the aperture value, the shutter speed and the ISO sensitivity on the camera even when attaching the external flash.
- Some commercial external flashes have synchro terminals with high-voltage or reversed polarity. Using such external flashes may cause a malfunction or the camera may not operate normally. Be sure to use Panasonic's external flash (DMW-FL28) or specified external flash (Metz 54MZ-3, 44MZ-2, 70MZ-5, LEICA SF-20, SF-24D).
- If using other external flash units, please make sure the flash is designed for use with a digital camera and the trigger voltage is based on ISO 10330 (less than 24 volts).
- When attaching the external flash, the shutter speed becomes 1/60th to 1/250th in normal mode, 1 to 1/250th in Slow sync. [ ]
- External flash mode is selected when attaching the external flash to the camera even if the external flash is turned off. Detach the external flash when you are not using it.
- When attaching the external flash, the built-in flash cannot be activated.
- When attaching the external flash, the camera will become unstable.
- Detach the external flash when carrying the camera.
- When attaching the external flash, do not hold only the external flash because it may detach from the camera.
- When using the external flash and setting the white balance to [ (Flash), finely adjust the white balance. (P65)
- If you take pictures close to the subject in Wide, the vignetting effect may appear on the bottom of the recorded picture.
- Pictures may be overexposed with the external flash in [AF-Macro]. In this case, use the built-in flash.
- Read the operating instructions of the external flash for details.
Using the Wide Conversion Lens/Close-up Lens
The wide conversion lens (DMW-LW69, optional) allows you to take pictures with a wider range of focus than usual (0.82 times, 35 mm-camera equivalent: 23 mm). The close-up lens (DMW-LC69, optional), if fitted onto the camera, will give a sharper close-up image. Its multi-coated lens provides a clearer picture. If you use the built-in flash when using the wide conversion lens, take pictures with bounce flash. (P46)
Preparation
- Set the operational mode dial except for [▶(P30)
- Check if the camera is turned off.
■ Using the wide conversion lens
1 Attach the wide conversion lens.
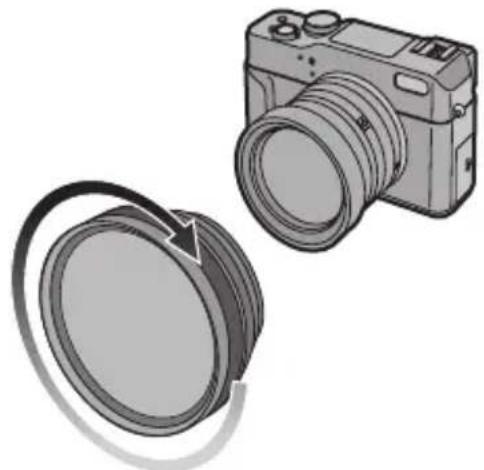
natural_image
Illustration of a camera and a circular mechanical component (no text or symbols)- Rotate the lens slowly and carefully.
Recordable range when using the wide conversion lens
- AF: 1.44 feet (44 cm) -
- MF/AF-Macro: 0.66 feet (20 cm)–∞
■ Using the close-up lens
1 Attach the close-up lens.
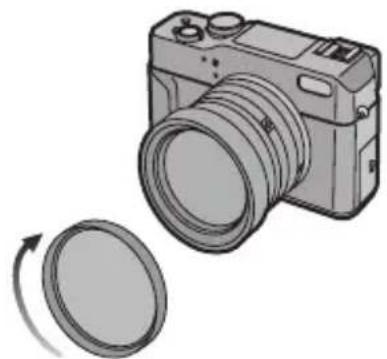
natural_image
Illustration of a camera with a circular lens and an arrow indicating rotation (no text or symbols)- Rotate the lens slowly and carefully.
Recordable range when using the close-up lens
- AF: 0.72 feet (22 cm)– 1.08 feet (33 cm)
- MF/AF-Macro: 0.52 feet (16 cm) - 1.08 feet (33 cm)
◇ Suggestions/Tips ◇
- When using the wide conversion lens, rotate the zoom ring to Wide (35 mm-camera equivalent: 28 mm). If you rotate the zoom ring to another position, the high performance of the lens may not be achieved.
- Check if the lens cap is removed before attaching the wide conversion lens.
- Read the operating instructions of the wide conversion lens or close-up lens for details.
- When using the close-up lens, you cannot use the MC protector, the lens cap and the lens hood.
- When using the wide conversion lens or close-up lens, it may take longer than usual to focus on the subject.
After using the camera, it is recommended that you complete the following steps:
1 Turn the camera off and close the flash.
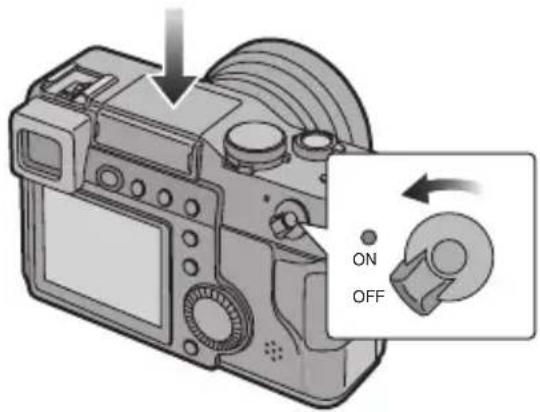
2 Remove the card and the battery. (P13, P17)
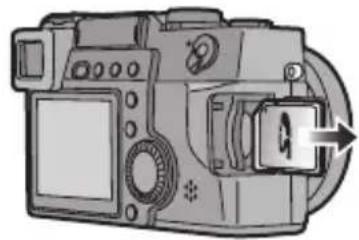
natural_image
Diagram of a DSLR camera showing internal components and a directional arrow (no text or symbols)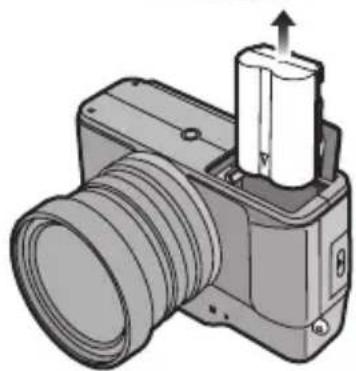
natural_image
3D illustration of a camera with threaded body and cylindrical top (no text or symbols)3 Remove the hood cap and the lens hood (if using it) and then attach the lens cap.
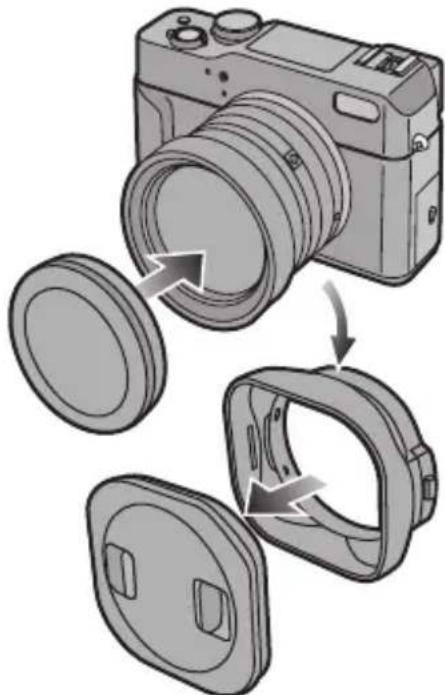
natural_image
Diagram of a camera with three views showing internal components (no text or symbols)- When removing the lens hood, push the knob on the lens hood and then slide it to the front.
◇ Suggestions/Tips ◇
- If you will not be using the camera for a long time,
-Remove the battery. (When you insert the battery again, set the clock.)
- Do not keep the camera in a place where it will be subjected to high temperatures, high humidity or soot. Fungus may be attached to the lens and the camera or condensation may occur.
- Keep the camera in a cool, dry and well-ventilated place and avoid storing near dust or chemicals.
- We recommend keeping it in a closed case with the desiccant.
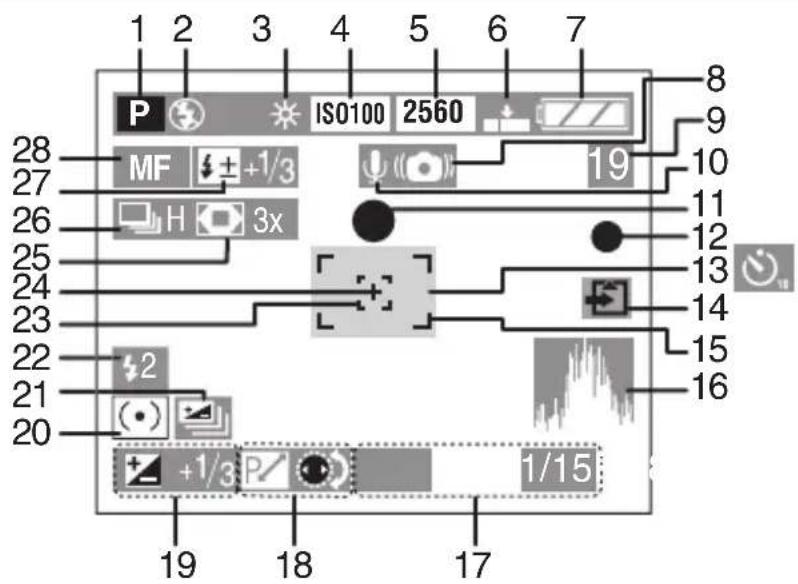
In recording
1 Exposure mode (P31)
2 Flash (P45)
3 White balance (P62)
4 ISO sensitivity (P69)
5 Picture size (P66)
6 Quality (P67)
7 Battery indication (P11)
8 Jitter alert indication (P37)
9 Frame/Time remain
In Motion image mode: e.g. 11S
10 Audio recording (P70)
11 Focus indication (P35)
12 Recording indication
13 Self-timer (P50)
14 Card access indication (P15)
15 AF area (P35)
16 Histogram (P29)
17 Aperture indication/Shutter speed indication (P35)
18 Program shift indication (P39)
19 Exposure compensation (P48)
20 Metering mode (P30)
21 Auto bracket (P49)
22 2nd curtain synchro indication (P72)
23 Spot AF area (P68)
24 Spot metering target (P30)
25 Digital zoom (P71)
26 Burst (P51)
27 Flash output adjustment (P46)/External flash (P106)
28 MF/AF-Macro indication (P41)
- Current date and time appear for about 5 seconds after turning the camera on or setting the clock. (P21)
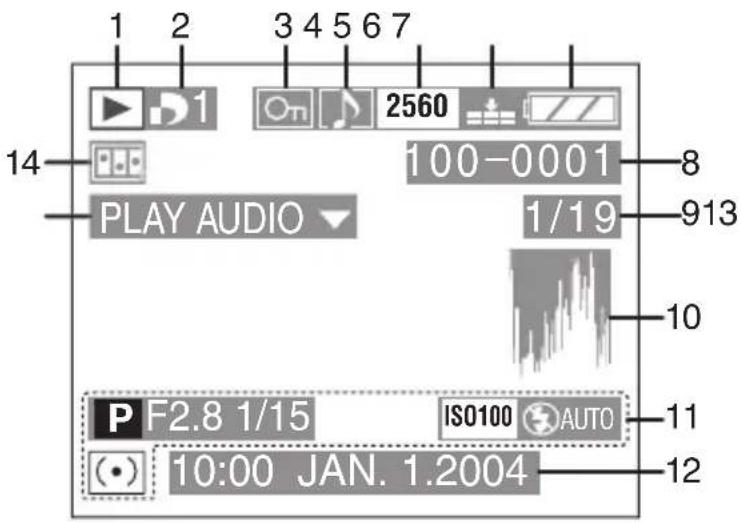
In playback
1 : Playback mode
2 DPOF [ ] (P80, P87)
(White):
DPOF setting for printing
(Green):
DPOF setting for Slide Show
(Green with number of prints):
DPOF setting for printing and Slide Show
3 Protected picture (P85)
4 Picture with audio (P77)
5 Picture size (P66)
: In Motion image mode
6 Quality (P67)
5 fps / 70 fps Motion image mode
7 Battery indication (P11)
8 Folder/File number
9 Page number/Total pictures
10 Histogram (P29)
11 Recording information
12 Recorded date and time
13 Audio playback (P77)
PLAY MOTION
IMAGE
: In Motion image mode (P78)
14 Flip animation (P74)
[REC] mode menu
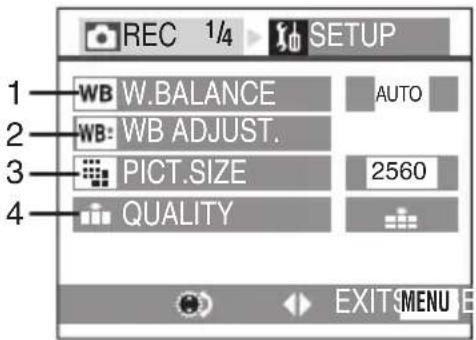
1 W.BALANCE (P62)
2 WB ADJUST. (P65)
3 PICT.SIZE (P66)
4 QUALITY (P67)
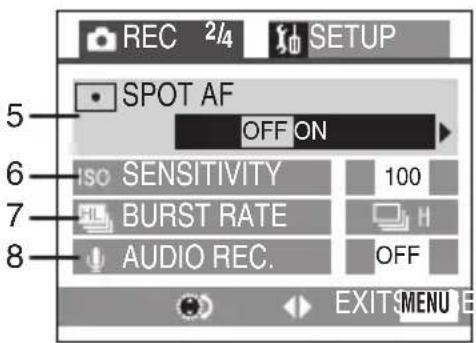
5 SPOT AF (P68)
6 SENSITIVITY (P69)
7 BURST RATE (P51)
8 AUDIO REC. (P70)
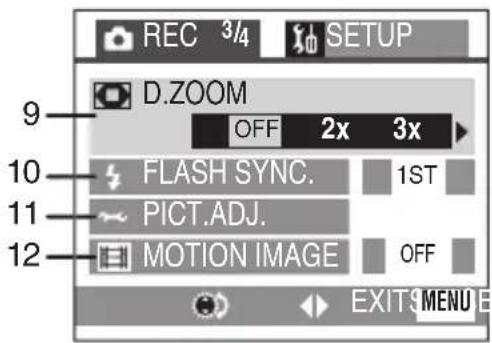
9 D.ZOOM (P71)
10 FLASH SYNC. (P72)
11 PICT.ADJ. (P73)
12 MOTION IMAGE (P59)
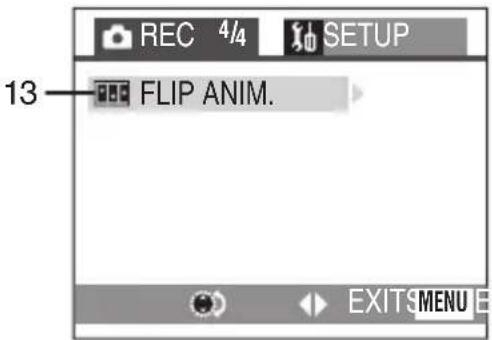
13 FLIP ANIM. (P74)
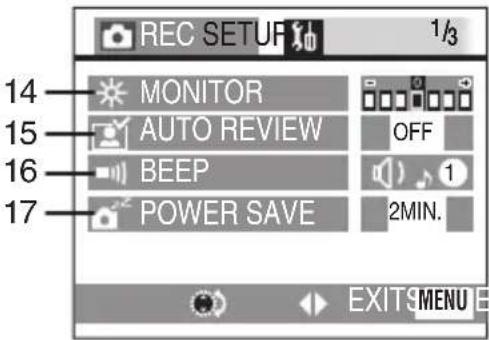
14 MONITOR/FINDER (P24)
- The screen (LCD monitor or Viewfinder) you select appears as a menu item.
15 AUTO REVIEW (P24)
16 BEEP (P25)
17 POWER SAVE (P25)
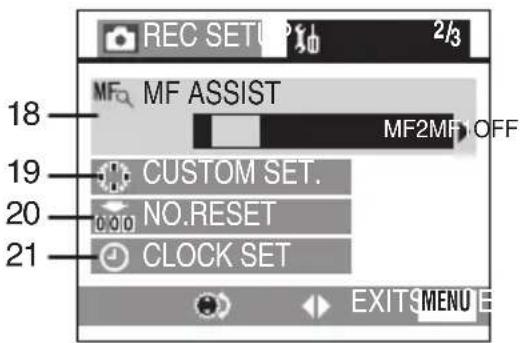
18 MF ASSIST (P41)
19 CUSTOM SET. (P61)
20 NO.RESET (P25)
21 CLOCK SET (P21)
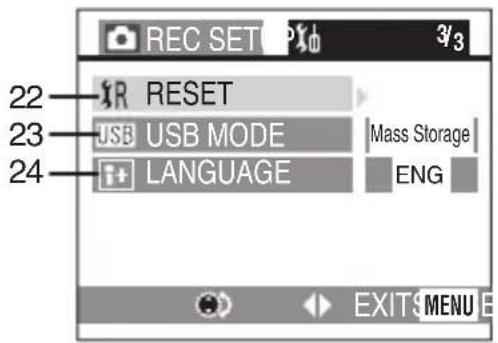
22 RESET (P26)
23 USB MODE (P96)
24 LANGUAGE (P26)
[PLAY] mode menu
- For items without numbers, refer to those with the same name in [REC] mode menu.
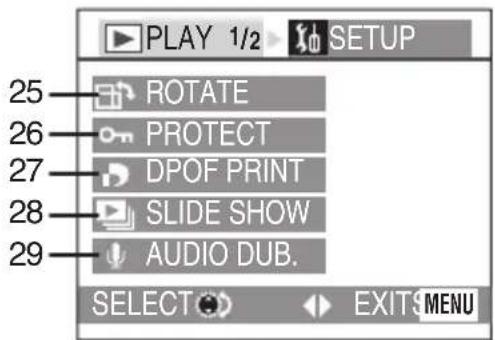
25 ROTATE (P79)
26 PROTECT (P85)
27 DPOF PRINT (P80)
28 SLIDE SHOW (P87)
29 AUDIO DUB. (P89)
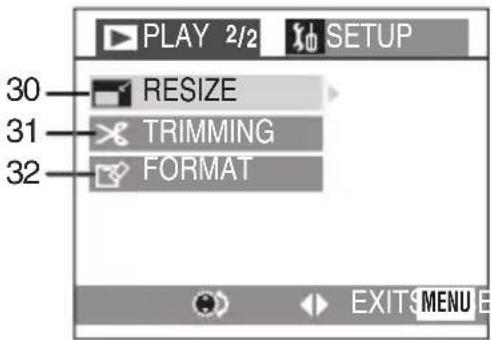
30 RESIZE (P90)
31 TRIMMING (P92)
32 FORMAT (P94)
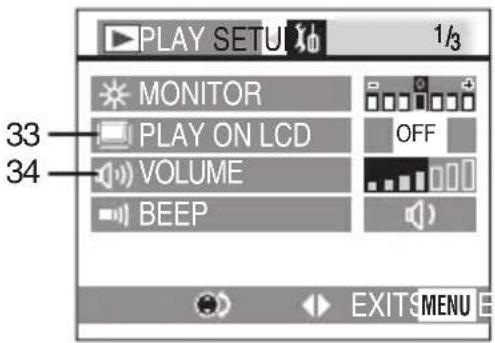
33 PLAY ON LCD (P26)
34 VOLUME (P26)
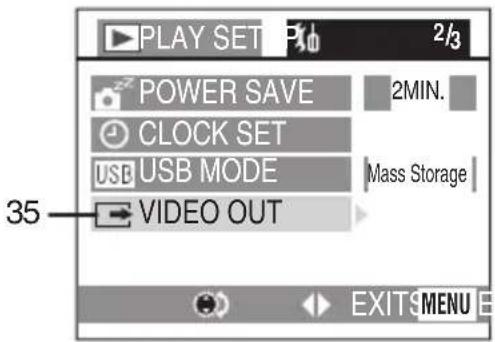
35 VIDEO OUT (P26, P95)
■ Optimal Use of the Camera
Keep the camera away from magnetized equipment (such as a microwave oven, TV, cell phone, video game equipment, etc.).
- If you use the camera on or near a TV, pictures and sounds may be disturbed due to electromagnetic wave radiation.
- Do not use the camera near a cell phone because doing so may cause noise to adversely affect the pictures and sounds.
- Recorded data may be damaged, or pictures may be distorted by strong magnetic fields created by speakers or large motors.
• Electromagnetic wave radiation generated by a microprocessor may adversely affect the camera, causing the disturbance of pictures and sounds. - If the camera is affected by magnetically charged equipment and does not function properly, turn the camera off and remove the battery or disconnect the AC adaptor and then insert the battery or connect the AC adaptor again. Thereafter, turn the camera on.
Do not use the camera near radio transmitters or high-voltage lines.
- If you record near radio transmitters or high-voltage lines, recorded pictures or sounds may be adversely affected.
Do not spray insecticides or volatile chemicals onto the camera.
- If the camera is sprayed with such chemicals, the camera body may be damaged and the surface finish may peel off.
- Do not keep rubber or plastic products in contact with the camera for a long period of time.
When you use the camera on a rainy or snowy day or on a beach or similar place, do not let grit, fine dust or seawater get into the camera.
• Grit or dust may damage the camera or card. (Care should be taken when inserting and removing the card.)
- If seawater splashes onto the camera, wet a soft cloth with tap water, wring it well, and use it to wipe the camera body carefully. Then, wipe it again thoroughly with a soft, dry cloth.
When carrying this camera, take care not to drop or hit it.
- The outer case may be destroyed by the strong shock, and it may cause malfunction of this camera.
- For storing or transporting the camera, place it in a bag or case lined with soft pads to prevent the coating on the camera body from being worn.
- Do not take direct pictures of the sun. The CCD will be damaged.
Do not use benzine, thinner or alcohol for cleaning the camera.
- Before cleaning the camera, remove the battery or disconnect the AC adaptor from the electrical outlet.
- The camera body may be deformed and the surface finish may peel off.
- Wipe the camera with a soft, dry cloth. To remove stubborn stains, wipe with a cloth that is soaked in a detergent diluted with water and afterward finish wiping with a dry cloth.
If you will not be using the camera for a long time, be careful of the fungus.
- Do not keep the camera in a place where it will be subjected to high temperatures, high humidity or soot.
Fungus may be attached to the lens and the camera or condensation may occur. - Keep the camera in a cool, dry and well-ventilated place and avoid storing near dust or chemicals.
- We recommend keeping it in a closed case with the desiccant.
Condensation
When using the camera outdoors during very cold weather, condensation can form on the camera and lens when you return to a warm place.
When condensation has taken place: Turn the camera off and leave the camera in this condition for about 2 hours. When the camera becomes close to the ambient temperature, the condensation disappears naturally.
■ Optimal Use of the Battery
The battery is a rechargeable lithium ion battery. Its ability to generate power is based upon the chemical reaction that takes place inside it. This reaction is susceptible to the surrounding temperature and humidity, and, if the temperature is too high or too low, the operating time of the battery will be shorter.
If you drop the battery accidentally, check to see if the battery body and terminals are damaged.
Inserting a damaged battery in the camera may damage the camera.
Be sure to remove the battery when you do not intend to use the camera for a long period of time.
If it is left inserted in the camera, a minute amount of current is consumed even when the camera is turned off. If the battery is left inserted in the camera for a long time, discharge takes place. The battery may become unusable even after it is charged.
Dispose of an unusable battery.
• The battery has a limited life.
- Do not throw the battery into fire because it may cause an explosion.
- An unusable battery should be discarded in accordance with battery recycling laws.
For information you can call the RBRC hotline at 1-800-822-8837.
■ Cautions for Storage
Before storing the camera, remove the card and the battery.
Store all the components in a dry place with a relatively stable temperature.
(Recommended temperature:
59^ F to 77^ F ( 15^ C to 25^ C),
Recommended humidity: 40% to 60%)
Battery
- Do not leave the camera and the battery in a place where the temperature is too high, such as inside a car during the summer.
- Extremely high or low temperatures will shorten the life of the battery.
- If the battery is kept in smoky or dusty places, the terminals may rust and cause malfunctions.
- Do not allow the battery terminals to come in contact with metal objects (such as necklaces, hairpins, etc.). This can result in a short circuit or heat generation and, if you touch the battery in this condition, you may be badly burned.
- Store the battery in a completely discharged state. To store the battery for a long period of time, we recommend charging it once every year and storing it again after you completely use up the charged capacity.
Card
- Do not leave the card in places where there is high temperature or direct sunlight, or where electromagnetic waves or static electricity are easily generated.
- Do not bend or drop the card. The card or the recorded content may be damaged.
• After use, be sure to remove the card from the camera.
- Do not touch the terminals on the back of the card with your fingers. Do not allow dirt, dust or water to enter it.
AC adaptor
- If you use the AC adaptor near a radio, radio reception may be disturbed. Keep the AC adaptor 3.3 feet (1 m) or more away from radio.
- When the AC adaptor is in use, it may generate whirring sounds. However, this is not a malfunction.
- After use, be sure to disconnect the AC cable. (If it is left connected, a minute amount of current is consumed.)
- Keep the terminal of the AC adaptor and battery clean.
Screen
LCD monitor
- In a place with drastic temperature changes, condensation may form on the LCD monitor. Wipe it with a soft, dry cloth.
- If the camera is extremely cold when you turn the camera on, the image on the LCD monitor is slightly darker than usual at first. However, as the internal temperature increases, it goes back to the normal brightness.
Viewfinder
- Do not direct the Viewfinder or lens to the sun. Internal components may be seriously damaged.
Folder Composition
When a Memory Card with data recorded on it is inserted into a PC, the folders shown below will appear.
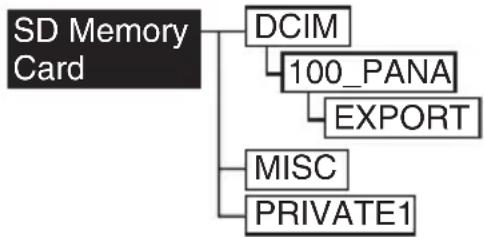
flowchart
graph TD
    A["SD Memory Card"] --> B["DCIM"]
    A --> C["100_PANA"]
    A --> D["EXPORT"]
    A --> E["MISC"]
    A --> F["PRIVATE1"]
- In the [100_PANA] folder it is possible to record up to 999 pictures.
- In the [MISC] folder it is possible to record the files that have been set with DPOF settings.
- The files recorded in flip animation function are stored in [PRIVATE1] folder.
- The motion images created by flip animation function are stored in [100_PANA] or other folder.
■ Printing pictures recorded with HDTV mode
When you print pictures recorded by setting the picture size to [HDTV] (1920×1080 pixels), both ends of the pictures may be cut out.
To print pictures with ends:
When you order photo studios to print pictures:
- Ask the photo studio if the pictures can be printed with both ends.
When you print pictures with your printer:
- When using the printer with a trimming feature or a feature which cuts out both edges of the pictures, cancel the feature for printing.
- The feature depends on the printer used. Refer to the operating instructions of the printer for details.
Motion Image
The auto focus and the aperture value are fixed to the value set when you start the recording (the value set on the first frame). Therefore, the following phenomena may appear.
| Conditions Phenomena | |
| When the subject is changed from the far one to the close one with activating the auto focus. | The subject is not focused properly. |
| When you take a picture in the place where you have to change the aperture value after starting recording. | The recorded picture is overexposed or underexposed. |
| When you start recording soon after changing the field angle. | |
| Immediately after you finished recording motion images | The brightness of the LCD monitor is temporarily changed. |
Approximate number of recordable pictures and the size
| Picture size | 2560×1920 2048×1536 | ||||||
| Quality RAW | |||||||
| 16 MB | 1 | 3 | 5 | 1 | 1 | 4 | 9 |
| 32 MB | 2712 | 24919 | 37 | ||||
| 64 MB | 5 | 1 | 5 | 2 | 5 | 0 | |
| 128 MB | 1130 | 511014 | 079156 | ||||
| 256 MB | 2361 | 102202 | 801593 | 12 | |||
| 512 MB | 46123 | 206408 | 161320 | 628 | |||
| Picture size | 1600×1200 | 1280×960 | 640×480 | ||||||
| Quality | |||||||||
| 16 MB | 7 | 14 | 29 | 11 | 22 | 43 | 37 | 69 | 129 |
| 32 MB | 15 | 31 | 61 | 24 | 47 | 90 | 78 | 145 | 270 |
| 64 MB | 32 63 | 125 49 96 | 184 161 | 298 553 | |||||
| 128 MB | 65 128 | 252 100 | 195 372 | 326 602 | 1118 | ||||
| 256 MB | 131 255 | 503 200 | 390 743 | 650 | 1200 | 2229 | |||
| 512 MB | 264 | 515 | 1014 | 403 | 785 | 1497 | 1309 | 2418 | 4491 |
| Picture size | 1920×1080 (HDTV) | ||
| Quality | |||
| 16 MB | 6 | 13 | 26 |
| 32 MB | 14 28 | 55 | |
| 64 MB | 29 58 | 113 | |
| 128 MB | 60 118 | 230 | |
| 256 MB | 120 | 236 | 459 |
| 512 MB | 241 | 476 | 924 |
- If you mix and, the number of recordable pictures changes.
• The number of recordable pictures changes depending on the subject. - The number of remaining frames may not correspond with recorded frames.
Message Display
[NO MEMORY CARD]
Insert the card.
[THIS MEMORY CARD IS PROTECTED]
Cancel the card lock.
[NO VALID IMAGE TO PLAY]
Play back after recording or after inserting a card with a recorded picture.
[MEMORY CARD FULL] / [NOT ENOUGH MEMORY IN THE CARD]
Insert a new card or delete the unnecessary data.
[PLEASE CLOSE THE FLASH]
Be sure to close the flash after use.
[MEMORY CARD DOOR OPEN]
Close the card door.
[PLEASE SET THE CLOCK]
This message appears when you use the camera for the first time or you do not use the camera for a long time. Set the clock.
[THIS PICTURE IS PROTECTED]
After cancelling the protect setting, you can delete or overwrite the picture.
[THIS PICTURE CAN'T BE DELETED] / [SOME PICTURES CAN'T BE DELETED]
The pictures not based on the DCF standard cannot be deleted.
[CAN'T BE SET ON THIS PICTURE] / [CAN'T BE SET ON SOME PICTURES]
If the pictures are not based on the DCF standard, the DPOF print cannot be set.
[NO ADDITIONAL DELETE SELECTIONS CAN BE MADE]
You have exceeded the number of pictures that can be set at once with multi-delete setting.
[MEMORY CARD ERROR FORMAT THIS CARD?]
The format of the card cannot be recognized by this camera. Format the card again with this camera.
[SYSTEM ERROR]
This message appears when a malfunction occurs on the operation of the lens. Turn the camera off and on. If the message persists, contact the dealer or your nearest servicenter.
[MEMORY CARD ERROR]
(It may take time to display this message depending on the card.) Failed access to the card. Insert the card again.
[READ ERROR]
Data reading error. Play it back again.
[WRITE ERROR]
Data writing error.
Turn the camera off and remove the card. Then insert the card and turn the camera on again. Be sure that the camera is turned off before removing or inserting the card to avoid damage.
[PLEASE WAIT]
This message appears when shutter speed is slow or the camera becomes warm.
Troubleshooting
1: The camera is not turned on.
1-1: Is the battery inserted or the AC adaptor correctly connected? Check the connection.
1-2: Is the battery sufficiently charged? Use a battery that has been sufficiently charged.
2: As the camera is turned on, it turns off immediately.
2: Is the battery charge insufficient to operate the camera? Use a battery that has been sufficiently charged.
3: The brightness of the screen changes dark or bright for a moment.
3: This phenomenon appears when pressing the shutter button halfway to set the aperture value and does not affect the recorded pictures.
4: The picture cannot be recorded.
4-1: Is the card inserted?
4-2: Is the operational mode dial correctly set? Check it.
4-3: There is no memory capacity left on the card. Before recording, delete some pictures.
5: The picture is not displayed on the screen.
5: Is the lens cap attached? Detach it before turning on the camera in recording mode.
6: The screen is too bright or dark.
6: Adjust the brightness of the screen.
7: The color of the screen is unusual.
7: Color around a subject with high luminance may look different while
you press the shutter button halfway. This is not a malfunction. This is caused by adjusting the aperture value.
8: Flash is not activated.
8: Is the flash closed? Press the [OPEN] button to open the flash.
9: Unreadable language was selected by mistake.
9: Select [] icon on the [SETUP] menu to set the desired language.
10: The indication of the aperture value and the shutter speed are not changed though we take pictures with auto bracket.
10: When the compensation range of the exposure is reduced, the indications are not changed. However, the actual aperture value and the shutter speed are different from the indicated values.
11: The subject is not focused properly.
11-1: Is the subject out of the focus range? (P37)
11-2: When you cannot focus on the subject even if you tried many times, once turn the camera off and turn it on again.
12: The picture is not played back.
12-1: Is the card inserted?
12-2: Is there a picture in the card?
12-3: Is the operational mode dial set to playback [ ]?
Others
13: The picture does not appear on the television.
13-1: Is the camera connected to the TV correctly? Check it.
13-2: Set the TV to video input mode.
14: When connecting to a PC, pictures cannot be transferred.
14-1: Is the camera connected to the PC correctly? Check it.
14-2: Is the camera recognized by the PC correctly?
14-3: Is the USB mode set correctly?
15: The clock setting is reset.
15-1: If you do not use the camera for a long time, the clock setting may be reset. When the message [PLEASE SET THE CLOCK] appears, set the clock again.
15-2: When you take a picture before setting the clock, [0:00 0. 0. 0] is recorded.
16: Some pixels are inactive or always lit on the LCD monitor.
16: This is not a malfunction. These pixels do not affect the recorded pictures.
17: The pictures cannot be printed with printers supporting USB Direct-Print or PictBridge.
17: Is the USB mode set correctly?
18: When there are bright parts on the subject, a vertical red spectrum may appear on the screen.
18: This is called smear. It is specific to CCD, not a malfunction. It is recorded on motion images, but not recorded on still pictures.
19: The stripe is displayed on the screen.
19: It does not affect the recorded pictures.
20: The camera may chatter when it is turned on or off.
20: This is not a malfunction. This is caused by opening or closing the aperture.
Specifications
Digital Camera Information for your safety
| Power Source: | DC 8.4 V |
| Power Consumption: | 3.0 W (When recording with LCD Monitor)2.5 W (When recording with Viewfinder)1.7 W (When playing back with LCD Monitor)1.2 W (When playing back with Viewfinder) |
| Camera Effective pixels 5,000,000 pixels | |
| Image sensor | 2/3" CCD, total pixel number 5,240,000 pixels, Primary color filter |
| Lens | Optical 3.2× zoom, f=7.0-22.5 mm (35 mm film camera equivalent: 28 - 90 mm)/F2.0-2.4 |
| Digital zoom | Single: 3×, Burst: 3× |
| Focus Contrast sensor combined use Auto/Macro/Manual/Spot AF | |
| Focus range AF: 1.97 feet (60 cm) -∞MF/AF-Macro: 0.98 feet (30 cm) -∞ | |
| Shutter system Electronic shutter+Mechanical shutter | |
| Burst recording 2.7 frames/second (high speed burst), max. 9 frames (standard)/max. 5 frames (fine)/max. 3 frames (super fine) (When setting to 2560×1920 pixels) (Performance is only with SD Memory Card. MultiMediaCard performance will be less.) | |
| Motion image recording | 320×240 pixels(30 or 10 frames/second with audio. The maximum recording time depends on the capacity of the card.) |
| ISO sensitivity AUTO/100/200/400 | |
| Shutter speed | Program AE (P)/Aperture-priority AE (A):2-1/4,000 sec.Shutter-priority AE (S)/Manual exposure (M):8-1/2,000 sec.Motion image mode: 1/30 sec. -1/4,000 sec. |
| Metering range | EV 1-EV 19 |
| White balance AUTO/Daylight/Cloudy/Halogen/Flash/Monochrome/White set | |
| Exposure (AE) | Program AE (P)/Aperture-priority AE (A)/Shutter-priority AE (S)/Manual exposure (M)Exposure compensation (1/3 EV Step, -2-+2 EV) |
| Metering mode Multiple/Center weighted/Spot | |
| LCD monitor | 2.5" low-temperature polysilicon TFT transflective LCD (210,000 pixels) (field of view: Approx. 100%) |
| Viewfinder | Color electrical Viewfinder (235,000 pixels)(field of view: Approx. 100%)(with diopter adjustment -4-+4 diopter) |
Others
Flash Built-in pop up flash
Flash range: (ISO AUTO)
Approx. 1.64 feet (50 cm) - 15.8 feet (4.8 m) (Wide)/
Approx. 1.64 feet (50 cm) - 13.1 feet (4 m) (Tele)
AUTO, AUTO/Red-eye reduction, Forced ON, Forced
ON/Red-eye reduction, Slow sync., Slow sync./Red-eye reduction, Forced OFF
Microphone Monaural
Speaker Monaural
Recording media SD Memory Card/MultiMediaCard
| Picture size | 2560×1920 pixels, 2048×1536 pixels, 1600×1200 pixels, 1280×960 pixels, 640×480 pixels, 1920×1080 pixels (Still picture) 320×240 pixels (Motion image) |
Quality RAW/Super Fine/Fine/Standard
Recording file format
Still Picture JPEG (Design rule for Camera File system, based on
Exif 2.2 standard), DPOF corresponding
Picture with audio JPEG (Design rule for Camera File system, based on
Exif 2.2 standard)/QuickTime (picture with audio)
Motion images QuickTime Motion JPEG (motion images with audio)
Interface
Digital Supporting USB 2.0 (High Speed)
Analog video/audio NTSC/PAL Composite/Audio line output (monaural)
Terminal
USB 5 pin Mini USB
AV OUT/REMOTE 2.5 mm jack
DC IN Type 3 jack
Dimensions (W×H×D) 52/5"×31/5"×4" (134.7×81.5×101.5 mm)
(excluding the projection part)
Weight Approx. 22.1 oz/627 g
(excluding Memory Card and battery)
Approx. 24.8 oz/702 g (with Memory Card and battery)
Operating Temperature 32^ F - 104°F ( 0^ C - 40°C)
Operating Humidity 10% –80%
Battery Charger/AC Adaptor
(Panasonic DE-972A) Information for your safety
Input 110–240 V ∼ 50/60 Hz, 0.3 A
Output DIGITAL CAMERA 8.4 V=1.2 A
CHARGE 8.4 V = 1.2 A
Battery Pack (lithium-ion)
(Panasonic CGR-S602A) Information for your safety
Voltage/capacity 7.2 V, 1400 mAh
Digital Camera Accessory System
| Accessory# | Figure | Description |
CGR-S602A Lithium Ion Bat  | ||
| DMW-FL28 | 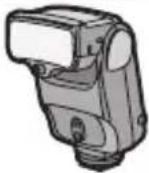 | External Flash*1 |
| DMW-LW69 | 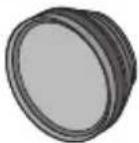 | Wide Conversion Lens |
| DMW-LND69 |  | ND Filter |
| DMW-LC69 |  | Close-up Lens |
| RP-SDH512U1A RP-SDH256U1A RP-SD128BU1A RP-SD064BPPA RP-SD032BPPA | 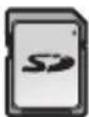 | 512 MB SD Memory Card 256 MB SD Memory Card 128 MB SD Memory Card 64 MB SD Memory Card 32 MB SD Memory Card |
| BN-SDCAPU/1B |  | SD USB Reader/Writer (compatible with MultiMediaCard) |
| BN-SDABPU/1B |  | SD PC Card Adaptor (compatible with MultiMediaCard) |
*1 Slave function equipped with DMW-FL28 can not be used with DMC-LC1's built-in flash.
* Please refer to page 11, for details on charging time and available recording time.
* NOTE: Accessories and/or model numbers may vary by country. Please consult your local dealer.
Digital Camera Accessory Order Form
(For USA Customers)
Please photocopy this form when placing an order.
- Digital Camera Model #
- Items Ordered
| Accessory # | Description | Price Each | Quantity | Total Price |
| SubtotalYour State & Local Sales TaxShipping & HandlingTotal Enclosed | ||||
| 6.95 | ||||
- Method of payment (check one)
☐ Check of Money Order enclosed (NO C.O.D.SHIPMENTS)
□ VISA Credit Card # ____
□ MasterCard Expiration Date ____
□ Discover Customer Signature ____
Make Check or Money Order to: PANASONIC ACCESSORIES
(Please do not send cash)
- Shipping information (UPS delivery requires complete street address)
Ship To:
Mr.
Mrs.
Ms.
First Last
Phone#:
Day ( )
Street Address
Night ( )
City State Zip
TO OBTAIN ANY OF OUR DIGITAL CAMERA ACCESSORIES YOU CAN DO ANY OF THE FOLLOWING:
20421 84th Avenue South Kent, WA. 98032
In CANADA, please contact your local Dealer for more information on Accessories.
Request for Service Notice (For USA Only)
Please photocopy this form when making a request for service notice.
In the unlikely event this product needs service.
Request for Service Notice:
(USA Only)
- Please include your proof of purchase. (Failure to do so will delay your repair.)
- To further speed your repair, please provide an explanation of what wrong with the unit and any symptom it is exhibiting.
Mail this completed form and your Proof of Purchase along with your unit to:
Panasonic Services Company
1705 N. Randall Road
Elgin, IL. 60123-7847
Attn: Digital Camera Repair
Limited Warranty (For USA Only)
PANASONIC CONSUMER ELECTRONICS COMPANY, DIVISION OF MATSUSHITA ELECTRIC CORPORATION OF AMERICA, One Panasonic Way Secaucus, New Jersey 07094
PANASONIC SALES COMPANY, DIVISION OF MATSUSHITA ELECTRIC OF PUERTO RICO, INC. Ave. 65 de Infanteria, Km. 9.5, San Gabriel Industrial Park, Carolina, Puerto Rico 00985
Panasonic Digital Still Camera Limited Warranty
Limited Warranty Coverage
If your product does not work properly because of a defect in materials or workmanship, Panasonic Consumer Electronics Company or Panasonic Sales Company (collectively referred to as “the warrantor”) will, for the length of the period indicated on the chart below, which starts with the date of original purchase (“warranty period”), at its option either (a) repair your product with new or refurbished parts, or (b) replace it with a new or refurbished product. The decision to repair or replace will be made by the warrantor.
| PRODUCT OR PART NAME PARTS LABOR | ||
| DIGITAL STILL CAMERA(EXCEPT ITEMS LISTED BELOW) | 1 (ONE) YEAR 90 | (NINETY) DAYS |
| CCD 6 (SIX) MONTHS 90 (NINETY) DAYS | ||
| RECHARGEABLE BATTERYPACK (IN EXCHANGE FOR DEFECTIVE BATTERY PACK) | 90 (NINETY) DAYS | NOT APPLICABLE |
| SD MEMORY CARD(IN EXCHANGE FOR DEFECTIVE SD CARD) | 90 (NINETY) DAYS | NOT APPLICABLE |
During the “Labor” warranty period there will be no charge for labor. During the “Parts” warranty period, there will be no charge for parts. You must carry-in or mail-in your product during the warranty period. If non-rechargeable batteries are included, they are not warranted. This warranty only applies to products purchased and serviced in the United States or Puerto Rico. This warranty is extended only to the original purchaser of a new product which was not sold “as is”. A purchase receipt or other proof of the original purchase date is required for warranty service.
Carry-In or Mail-In Service
For Carry-In or Mail-In Service in the United States call 1-800-272-7033.
For assistance in Puerto Rico call Panasonic Sales Company (787)-750-4300 or fax (787)-768-2910.
This warranty ONLY COVERS failures due to defects in materials or workmanship, and DOES NOT COVER normal wear and tear or cosmetic damage. The warranty ALSO DOES NOT COVER damages which occurred in shipment, or failures which are caused by products not supplied by the warrantor, or failures which result from accidents, misuse, abuse, neglect, mishandling, misapplication, alteration, faulty installation, set-up adjustments, misadjustment of consumer controls, improper maintenance, power line surge, lightning damage, modification, or commercial use (such as in a hotel, office, restaurant, or other business), rental use of the product, service by anyone other than a Factory Servicenter or other Authorized Servicer, or damage that is attributable to acts of God.
THERE ARE NO EXPRESS WARRANTIES EXCEPT AS LISTED UNDER “LIMITED WARRANTY COVERAGE”. THE WARRANTOR IS NOT LIABLE FOR INCIDENTAL OR CONSEQUENTIAL DAMAGES RESULTING FROM THE USE OF THIS PRODUCT, OR ARISING OUT OF ANY BREACH OF THIS WARRANTY. (As examples, this excludes damages for lost time, travel to and from the servicer, loss of media or images, data or other memory content. The items listed are not exclusive, but are for illustration only.) ALL EXPRESS AND IMPLIED WARRANTIES, INCLUDING THE WARRANTY OF MERCHANTABILITY, ARE LIMITED TO THE PERIOD OF THE LIMITED WARRANTY.
Some states do not allow the exclusion or limitation of incidental or consequential damages, or limitations on how long an implied warranty lasts, so the exclusions may not apply to you.
This warranty gives you specific legal rights and you may also have other rights which vary from state to state. If a problem with this product develops during or after the warranty period, you may contact your dealer or Servicenter. If the problem is not handled to your satisfaction, then write to the warrantor's Consumer Affairs Department at the addresses listed for the warrantor.
PARTS AND SERVICE WHICH ARE NOT COVERED BY THIS LIMITED WARRANTY ARE YOUR RESPONSIBILITY.
For Product Information, Operating Assistance, Literature Request, Dealer Locations, and all Customer Service inquiries please contact:
1-800-272-7033, Monday-Friday 8:30am-8pm EST.
Web Site: http://www.panasonic.com/support
You can purchase parts, accessories or locate your nearest servicenter by visiting our Web Site.
Accessory Purchases:
Purchase Parts, Accessories and Instruction Books online for all Panasonic Products by visiting our Web Site at:
http://www.pasc.panasonic.com
or, send your request by E-mail to:
npcparts@panasonic.com
You may also contact us directly at:
1-800-332-5368 (Customer Orders Only)
Panasonic Services Company 20421 84th Avenue South, Kent, WA 98032
(6 am to 5 pm Monday - Friday; 6 am to 10:30 am Saturday; PST)
(Visa, MasterCard, Discover Card, American Express, Check)
Product Repairs
MAIL TO :
Centralized Factory Servicenter
Panasonic Services Company
1705 N. Randall Road,
Elgin, IL 60123-7847
Attention: Digital Camera Repair
Please carefully pack and ship, prepaid and insured, to the Elgin Centralized Factory Servicenter.
Customer's in Puerto Rico, please ship or carry in to location below ("Service in Puerto Rico").
Service in Puerto Rico
Matsushita Electric of Puerto Rico, Inc. Panasonic Sales Company/ Factory Servicenter:
Ave. 65 de Infanteria, Km. 9.5, San Gabriel Industrial Park, Carolina, Puerto Rico 00985
Phone (787) 750-4300 Fax (787) 768-2910
As of November 2003
Index
A
AC Adaptor 14
Adjusting Flash Output 46
AF-Macro 36
AF/AE Lock 39
Aperture-priority AE 31
Audio Dubbing 89
Auto Bracket 49
AUTO REVIEW 24
B
Beep 25
Bounce Flash 46
Brightness of the LCD Monitor/Viewfinder 24
Built-in Flash 45
Burst Mode 51
C
Camera Shake 37
Card 15
Card Access Indication 15
Clock Set 21, 26
Close-up Lens 109
Command Dial 8
Condensation 117
D
Date Printing 22,84
Deleting Pictures .... 56, 57, 58
Digital Zoom 71
DPOF Print Setting 80
E
Exposure 33
Exposure Compensation 48
External Flash 106
F
Flash Synchro 72
Flip Animation 74
Focus 37
Formatting 94
FUNCTION Menu 61
H
HDTV 66, 95, 119
Histogram 29
|
ISO Sensitivity 69
J
Jitter 37
L
Language Setting 26
LCD Monitor 27, 112, 118
Lens Cap 18
Lens Hood 19
M
Manual Exposure 32
Manual Exposure Assistance ..... 33
Manual Focus 41
Mass Storage 96, 98
MC Protector 18
Metering Mode 30
MF ASSIST 25
Monitor Priority 26, 28
Motion Images 59
Multi Playback 54
MultiMediaCard 15
N
ND Filter 19
NO.RESET 25
NTSC 26
Others
0
Operational Mode Dial 30
Operational Sound 25
Optical Zoom 44
P
PAL 26
PictBridge 101, 102
Picture Size 66
Playback 52
Playback Pictures on TV 95
Playback Zoom 55
Playing Back Motion Images ..... 78
Playing Back Pictures with Audio 77
Power Indicator 36
POWER SAVE 25
Program AE 31
Program Shift 39
Protect 85
PTP 96, 99
Q
Quality 67
R
Recording Guide Line 28
Remote Shutter 36
RESET 26
Resizing 90
Review 43
Rotate 79
S
SD Memory Card 15
Self-timer 50
Setup Menu 23
Shutter-priority AE 31
Slide Show 87
Spot AF 68
Strap 20
T
Trimming 92
U
USB Connection Cable 96
USB Direct-Print 101, 104
USB Mode 26
V
Video Output 26
Viewfinder 27,112,118
VOLUME 26
W
White Balance 62
Wide Conversion Lens 109
natural_image
Diagram of a DSLR camera showing the mode dial and control panel (no text or symbols)Grabación
Panasonic Consumer Electronics Company, Division of Matsushita Electric Corporation of America
One Panasonic Way, Secaucus, NJ 07094
Panasonic Sales Company ("PSC")
Division of Matsushita Electric of Puerto Rico, Inc.
Ave. 65 de Infanteria, Km. 9.5, San Gabriel Industrial Park, Carolina, Puerto Rico 00985
Panasonic Canada Inc.
5770 Ambler Drive, Mississauga, Ontario, L4W 2T3
© 2004 Matsushita Electric Industrial Co., Ltd.

VQT0G87
F0104Mn0(500Ⓐ)

- Dear Customer,
- Information for Your Safety
- WARNING
- Notice:
- CAUTION
- FCC Note: (U.S. only)
- Panasonic
- Contents
- Safety
- Preparation
- Recording pictures (basic)
- Playback (basic)
- Recording pictures (advanced)
- Playback (advanced)
- Others
- Standard Accessories
- ■ SD Memory Card (16 MB)
- Battery Pack
- ■ Battery Charger/AC Adaptor
- ■ AC Cable
- DC Cable
- AV Cable
- ■ USB Connection Cable
- Names of the Components
- Battery Charger/AC Adaptor (P10, P14)
- Charging the Battery
- Connect the AC cable.
- Attach the battery to the AC adaptor.
- Detach the battery.
- ◇ Suggestions/Tips ◇
- About the Battery
- Battery indication
- ■ Charging time and available recording time
- - Charging environment and charging error
- Inserting the Battery
- Removing the Battery
- Using the AC Adaptor
- Access to the card
- ■ SD Memory Card (supplied) and MultiMediaCard (optional)
- SD Memory Card
- MultiMediaCard
- Inserting the Card
- Removing the Card
- Attaching the MC Protector/Lens Cap/ Lens Hood/Hood Cap
- ■ Attaching the MC Protector
- Attach the MC protector.
- ■ Attaching the lens cap
- Attach the lens cap.
- ■ Attaching the lens hood/hood cap
- Attaching the Strap
- Setting the Date/Time (Clock Set)
- Initial Use
- Select [M/D/Y], [D/M/Y] or [Y/M/D].
- Date Printing
- Setup Menu
- Using the LCD Monitor/Viewfinder
- ■ Switching the screen to be turned on
- ■ Selecting the screen to be used
- ■ Diopter adjustment
- Adjust the diopter, rotating the diopter adjustment dial.
- Monitor priority
- ■ Recording guide line
- About the Histogram
- Operational Mode Dial and Metering Mode Dial
- Setting the Exposure
- Program AE mode
- Aperture-priority AE mode A
- Shutter-priority AE mode
- ■ Aperture-priority AE mode A and Shutter-priority AE mode [S]
- ■ Manual exposure mode [M]
- ■ Manual Exposure Assistance
- Exposure
- ■ Manual exposure mode [IM]
- Shutter Speed and Aperture Value
- ■ Shutter-priority AE mode
- ■ Aperture-priority AE mode
- ■ Manual exposure mode
- In aperture-priority AE mode and manual exposure mode
- Taking Pictures with Auto Focus
- ■ Using the remote shutter
- Connect the remote shutter to the [AV OUT/REMOTE] terminal on the camera firmly.
- Focus on the subject and take a picture.
- Taking pictures close to the subject (AF-Macro)
- Power indicator
- Lighting:
- Blinking:
- Focusing
- Jitter (Camera shake)
- Care for the camera
- ■ Posture to take good pictures
- When recording with LCD Monitor
- ■ AF/AE Lock (AF: Auto Focus/AE: Auto Exposure)
- Program shift
- Taking Pictures with Manual Focus
- Select [MF ASSIST] from the [SETUP] menu (in the recording mode) (P23) and then set it to [MF1] or [MF2].
- Rotate the focus ring to focus on the subject.
- MF ASSIST
- ■ Technique for Manual focus
- Checking the Recorded Picture (Review)
- Press ▼/[REVIEW].
- Enlarge and shift the picture.
- ■ Deleting the recorded picture during the review
- Using the Optical Zoom
- Taking Pictures Using the Built-in Flash
- To open the flash
- To close the flash
- ■ Switching to the appropriate flash setting
- A: AUTO
- : Forced ON
- : Forced ON/Red-eye reduction The flash is activated every time a picture is recorded.
- 4S : Slow sync.
- 4S: Slow sync./Red-eye reduction When you take a picture with a dark background landscape, this feature makes the shutter speed slow when the flash is activated, so that the dark background landscape will become bright. Simultaneously it reduces the red-eye phenomenon.
- : Forced OFF
- Adjusting flash output
- Press
- Bounce Flash
- Aim the flash at the ceiling and take the picture.
- Compensating the Exposure
- Press [ ] until [ EXPOSURE] appears on the screen to compensate the exposure.
- Taking Pictures Using Auto Bracket
- Taking Pictures with the Self-timer
- Switch the self-timer setting.
- Focus on the subject to take the picture.
- Taking Pictures using Burst Mode
- Select [BURST RATE], set [ ] or [ ] then take pictures.
- Burst speed
- ■ Number of pictures recorded in burst mode
- Playing Back Pictures
- Select the picture.
- ■ Fast forwarding/Fast rewinding
- Pictures Multi Playback
- Switch to multi screen.
- Select the pictures.
- ■ To return to the normal indication
- Using the Playback Zoom
- Enlarge the picture.
- Shift the picture.
- ■ To delete a picture during the playback zoom
- Deleting Pictures
- ■ To delete a single picture
- Select the picture to be deleted.
- Delete the picture.
- ■ To delete multi pictures
- Select [MULTI DELETE].
- Select the pictures to be deleted.
- Delete the pictures.
- ■ To delete all pictures
- Select [ALL DELETE].
- Delete all of the pictures.
- Recording Motion Images
- Select [MOTION IMAGE] and set the desirable mode.
- Select [MOTION RATE] and set the motion rate.
- Press the shutter button halfway.
- Press the shutter button fully to start the recording.
- Available recording time
- FUNCTION Menu
- Setting the White Balance
- Select [W.BALANCE] and set the desirable mode.
- Setting the White Balance manually (White set)
- Select [W.BALANCE] and set to [☐].
- (Only when setting the white balance again) Press ▶.
- Aim the camera at a sheet of white paper ① or a similar white object so that it completely fills the frame to white on the screen and press the shutter button fully.
- Finely Adjusting the White Balance
- Select [WB ADJUST.].
- Adjust the white balance.
- ◇Suggestions/Tips ◇
- Changing the Picture Size
- Select [PICT.SIZE] and set the picture size.
- Changing the Quality
- Select [QUALITY] and set the quality.
- Taking Pictures using the Spot AF
- Select [SPOT AF] and set it to [ON].
- Aim the spot AF area to the subject to be recorded and press the shutter button halfway for the AF/AE lock.
- Move the camera to compose the picture fixing the focus on the subject and take the picture.
- Setting ISO Sensitivity
- Select [SENSITIVITY] and set the ISO sensitivity.
- Taking Pictures with Audio
- Select [AUDIO REC.] and set it to [ON].
- Take the picture.
- Using the Digital Zoom
- Setting to the 2nd Curtain Synchro
- 1st curtain synchro
- 2nd curtain synchro
- Select [FLASH SYNC.] and set it to [2ND].
- Adjusting the Quality of the Picture (Picture Adjustment)
- Select [PICT.ADJ.] .
- Select [CONTRAST], [SHARPNESS] and [SATURATION] respectively.
- Creating Flip Animation
- Example:
- Capturing images
- Select [FLIP ANIM.].
- Select [IMAGE CAPTURE].
- Capture images for flip animation.
- Check the image.
- Creating motion images
- Select [CREATE MOTION IMAGE].
- Select [FRAME RATE] and set the number of frames.
- Select [CREATE MOTION IMAGE] and create a flip animation.
- ■ Playing back a created flip animation
- ■ Deleting all the still pictures used to create flip animation
- Playing Back Pictures with Audio
- Select the picture with audio icon [☐].
- Play back the audio.
- Playing Back Motion Images
- Select the picture with the motion image icon [ ]
- Play back the motion images.
- To pause
- Rotating the Picture
- Select [ROTATE].
- Select the direction to rotate the picture.
- Example
- Setting the Picture to be Printed and the Number of Prints (DPOF Print Setting)
- Single setting/cancel
- Select [DPOF PRINT].
- Select [SINGLE].
- Select the picture and set the number of prints.
- Multi setting/cancel
- Select [MULTI].
- Select the pictures and set the number of prints.
- To cancel all settings
- Select [CANCEL].
- Select [YES] to cancel all settings.
- Index setting/cancel
- Select [INDEX].
- Select [YES] to index setting.
- When the index is already set
- To print the date
- Preventing Accidental Erasure of the Picture
- ■ Single setting/cancel
- Select [PROTECT].
- Select the picture and set/cancel the protection.
- ■ Multi setting/To cancel all settings
- Playing Back with Slide Show
- Select [SLIDE SHOW].
- Select the type of pictures to play back.
- Select the following items.
- Select [START].
- By pressing the [MENU] button, the Slide Show stops.
- SD Slide Show
- Adding Audio to Recorded Pictures (Audio Dubbing)
- Select [AUDIO DUB.].
- Select the picture and start audio recording.
- Stop audio recording.
- Resizing the Pictures
- Select [RESIZE].
- Select the picture and set it.
- Select the size and set it.
- Select [YES] or [NO] and set it.
- Trimming the Pictures
- Formatting the Card
- Select [FORMAT].
- Select [YES] to format.
- Playing Back Pictures with a TV Screen
- ■ Playing back pictures with AV cable (supplied)
- ■ Viewing pictures in other countries
- ■ Playback pictures on TV with SD Memory Card slot
- Before Connecting with USB Connection Cable
- Select [USB MODE].
- Select [Mass Storage] or [PTP].
- When using Windows 2000 Professional, Windows Me, Windows 98/98 SE or Mac OS 9.x
- Connecting to a PC (Mass Storage)
- Connecting to a PC (PTP)
- Connecting to a Printer
- Using a Printer (PictBridge)
- Single picture
- Select [SINGLE PICTURE].
- Select the picture to print.
- Select [YES] and print.
- DPOF picture
- Select [DPOF PICTURE].
- Select [YES] and print.
- Using a Printer (USB Direct-Print)
- Using the External Flash
- Attach the external flash to the hot shoe ①.
- ■ Switch the external flash setting
- Available external flash settings
- ■ Using the specified external flashes
- Using the Wide Conversion Lens/Close-up Lens
- ■ Using the wide conversion lens
- Attach the wide conversion lens.
- Recordable range when using the wide conversion lens
- ■ Using the close-up lens
- Attach the close-up lens.
- Recordable range when using the close-up lens
- In recording
- In playback
- [REC] mode menu
- [PLAY] mode menu
- ■ Optimal Use of the Camera
- Do not use the camera near radio transmitters or high-voltage lines.
- Do not spray insecticides or volatile chemicals onto the camera.
- When carrying this camera, take care not to drop or hit it.
- Do not use benzine, thinner or alcohol for cleaning the camera.
- If you will not be using the camera for a long time, be careful of the fungus.
- Condensation
- ■ Optimal Use of the Battery
- If you drop the battery accidentally, check to see if the battery body and terminals are damaged.
- Be sure to remove the battery when you do not intend to use the camera for a long period of time.
- Dispose of an unusable battery.
- ■ Cautions for Storage
- Battery
- Card
- AC adaptor
- Screen
- LCD monitor
- Viewfinder
- Folder Composition
- ■ Printing pictures recorded with HDTV mode
- To print pictures with ends:
- Motion Image
- Approximate number of recordable pictures and the size
- Message Display
- [NO MEMORY CARD]
- [THIS MEMORY CARD IS PROTECTED]
- [NO VALID IMAGE TO PLAY]
- [MEMORY CARD FULL] / [NOT ENOUGH MEMORY IN THE CARD]
- [PLEASE CLOSE THE FLASH]
- [MEMORY CARD DOOR OPEN]
- [PLEASE SET THE CLOCK]
- [THIS PICTURE IS PROTECTED]
- [THIS PICTURE CAN'T BE DELETED] / [SOME PICTURES CAN'T BE DELETED]
- [CAN'T BE SET ON THIS PICTURE] / [CAN'T BE SET ON SOME PICTURES]
- [NO ADDITIONAL DELETE SELECTIONS CAN BE MADE]
- [MEMORY CARD ERROR FORMAT THIS CARD?]
- [SYSTEM ERROR]
- [MEMORY CARD ERROR]
- [READ ERROR]
- [WRITE ERROR]
- [PLEASE WAIT]
- Troubleshooting
- 1: The camera is not turned on.
- 2: As the camera is turned on, it turns off immediately.
- 3: The brightness of the screen changes dark or bright for a moment.
- 4: The picture cannot be recorded.
- 5: The picture is not displayed on the screen.
- 6: The screen is too bright or dark.
- 7: The color of the screen is unusual.
- 8: Flash is not activated.
- 9: Unreadable language was selected by mistake.
- 10: The indication of the aperture value and the shutter speed are not changed though we take pictures with auto bracket.
- 11: The subject is not focused properly.
- 12: The picture is not played back.
- Specifications
- Battery Charger/AC Adaptor
- Battery Pack (lithium-ion)
- Digital Camera Accessory System
- Digital Camera Accessory Order Form
- (For USA Customers)
- Request for Service Notice (For USA Only)
- Request for Service Notice:
- (USA Only)
- Limited Warranty (For USA Only)
- Panasonic Digital Still Camera Limited Warranty
- Limited Warranty Coverage
- Carry-In or Mail-In Service
- Accessory Purchases:
- Product Repairs
- Centralized Factory Servicenter
- Service in Puerto Rico
- Index
- A
- B
- C
- D
- E
- F
- H
- |
- J
- L
- M
- N
- 0
- P
- Q
- R
- S
- T
- U
- V
- W
- Grabación
Brand : PANASONIC
Model : Lumix DMC-LC1PP
Category : Camera