
DPU-414 - Printer SEIKO - Free user manual and instructions
Find the device manual for free DPU-414 SEIKO in PDF.


| Product Type | Thermal Printer |
| Model | DPU-414 |
| Brand | Seiko Instruments Inc. |
| Printing Method | Thermal serial dot |
| Character Matrix | 9 high × 7 wide dots |
| Columns | 40 (normal), 80 (condensed) |
| Printing Speed | Max. 52.5 cps (normal), Max. 80 cps (condensed) |
| Printing Width | 89.6 mm |
| Resolution | 9 × 320 dots/line (character), 8 × 320 dots/line (graphics) |
| External Dimensions (W×D×H) | 160 mm × 170 mm × 66.5 mm |
| Weight (mainframe without battery) | Approx. 580 g |
| Power Supply | AC adapter (option) or rechargeable battery pack BP-4005-E (option) |
| Input Voltage (AC adapter) | 100-240 VAC (depending on adapter model) |
| Battery Type | Ni-MH, 4.8 V |
| Battery Life (fully charged) | Approx. 3000 lines (40 columns of '8') |
| Charging Time | Approx. 10 hours |
| Interface | Parallel (Centronics) or Serial (RS-232C) |
| Buffer Memory | Approx. 28 KB |
| Thermal Paper Specification | TP-411L, width 112 mm, outer diameter 48 mm, roll length approx. 28 m |
| Operating Temperature | 0 to 40 °C (32 to 104 °F) |
| Operating Humidity | 30 to 80% RH (non-condensing) |
| Printer Life | Approx. 500,000 lines (continuous printing, 40 columns of '8', 100% density) |
| Supported Functions | Bit-image graphics, multiple character sets, software DIP switches, self-test, HEX dump |
| Compliance | FCC Class B, IC, CE, RoHS, China RoHS |
Frequently Asked Questions - DPU-414 SEIKO
User questions about DPU-414 SEIKO
0 question about this device. Answer the ones you know or ask your own.
Ask a new question about this device
Download the instructions for your Printer in PDF format for free! Find your manual DPU-414 - SEIKO and take your electronic device back in hand. On this page are published all the documents necessary for the use of your device. DPU-414 by SEIKO.
USER MANUAL DPU-414 SEIKO
Read this manual carefully before using the printer.
Keep this manual in a place where it can be accessed quickly.
Seiko Instruments Inc.
DPU-414 THERMAL PRINTER USER'S GUIDE
Document Number U00120592100
First Edition June 2010
Copyright ©2010 by Seiko Instruments Inc.
All rights reserved.
Seiko Instruments Inc. (SII) has prepared this manual for use by SII personnel, licensees, and customers. The information contained herein is the property of SII and shall not be reproduced in whole or in part without the prior written approval of SII.
SII reserves the right to make changes without notice to the specifications and materials contained herein and shall not be responsible for any damages (including consequential) caused by reliance on the materials presented, including but not limited to typographical, arithmetic, or listing errors.
SII ● is a trademark of Seiko Instruments Inc.
This product complies with EU RoHS Directive(2002/95/EC).
Please refer to the page in Chinese for the information of the hazardous substances under China RoHS (Management Methods for Controlling Pollution by Electronic Information Products).
For use in Turkey
Complies with Electrical and Electronic Equipment Directive.
Applicable EC Directive and Standards
Product: Thermal Printer DPU-414-40B-E, DPU-414-41B-E
| Directive: | Title |
| 2004/108/EC | EC Electromagnetic Compatibility Directive |
| 2009/125/EC | Directive on Eco-Design of Energy-related Products |
| Standards | |
| EN 55022 Class B | |
| EN | 61000-3-2 |
| EN | 61000-3-3 |
| EN | 55024 |
Product: AC adapter PW-4007-EC-E
| Directive: Title | |
| 2004/108/EC EC Electromagnetic Compatibility Directive | |
| 2006/95/EC EC Low Voltage Directive | |
| 2009/125/EC Directive on Eco-Design of Energy-related Products Standards | |
| EN 55022 Class B | |
| EN | 61000-3-2 |
| EN | 61000-3-3 |
| EN | 55024 |
| EN | 60950-1 |
Product: AC adapter PW-C0725-W1-E
| Product: AC adapter PW-C0725-W1-B | |
| Directive: | Title |
| 2004/108/EC | EC Electromagnetic Compatibility Directive |
| 2006/95/EC | EC Low Voltage Directive |
| 2009/125/EC | Directive on Eco-Design of Energy-related Products Standards |
| EN 55022 Class B | |
| EN | 61000-3-2 |
| EN | 61000-3-3 |
| EN | 55024 |
| EN | 60950-1 |
Federal Communications Commission (FCC) compliance statement
This equipment has been tested and found to comply with the limits for a Class B digital device, pursuant to part 15 of the FCC Rules. These limits are designed to provide reasonable protection against harmful interference in a residential installation. This equipment generates, uses and can radiate radio frequency energy and, if not installed and used in accordance with the instructions, may cause harmful interference to radio communications. However, there is no guarantee that interference will not occur in a particular installation. If this equipment does cause harmful interference to radio or television reception, which can be determined by turning the equipment off and on, the user is encouraged to try to correct the interference by one or more of the following measures:
- Reorient or relocate the receiving antenna.
- Increase the separation between the equipment and receiver.
- Connect the equipment into an outlet on a circuit different from that to which the receiver is connected.
- Consult the dealer or an experienced radio/TV technician for help.
Any changes in this certified device could void your legal right to operate it.
Industry Canada (IC) compliance statement
Operation is subject to the following two conditions: (1) this device may not cause interference, and (2) this device must accept any interference, including interference that may cause undesired operation of the device.
INTRODUCTION
Thank you for purchasing the DPU-414 thermal printer.
This USER'S GUIDE explains how to handle DPU-414 thermal printer (hereinafter referred to as printer), specified AC adapter, specified battery pack and specified AC cable (hereinafter, omit "specified").
This USER'S GUIDE applies to the following product.
- DPU-414-40B-E
Read through the Safety Precautions on Page 2 to 6 carefully before using the printer.
This manual consists of the following sections.
INTRODUCTION.... 1
SAFETY PRECAUTIONS.... 2
OPERATING PRECAUTIONS 9
NOTATIONS USED IN THIS MANUAL.... 11
-
PREPARATION.... 12
-
OPERATION 16
-
PRINTING FUNCTION.... 32
-
CONTROL CODE.... 34
-
CHARACTER CODE TABLE.... 36
-
SPECIFICATIONS.... 38
-
TROUBLESHOOTING 46
-
CARING FOR THE DPU-414 PRINTER 49
SAFETY PRECAUTIONS
The following symbols are used in this manual in order to make use of the printer properly and prevent the printer from being damaged.
Follow the instructions marked with the symbol.
 | WARNING | Severe Personal Injury or DeathFailure to follow the guidelines marked with this symbol could result in severe personal injury or death. |
 | CAUTION | Minor Personal Injury or Product and/or Peripheral Damage.Failure to follow the guidelines marked with this symbol could result in minor personal injury or product and/or peripheral damage. |
Symbol Examples

The symbol indicates caution (including danger and warning).
The example on the left indicates warning or caution.

The symbol Ⓧ indicates prohibition.
The example on the left means prohibition of disassembling.
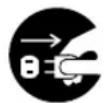
The symbol ● indicates requirement or what must be done.
The example on the left means "pull the power plug out of the outlet."
WARNING

DO NOT use the printer, the AC adapter and the AC cable in countries where these items do not comply with the regulations.
Doing so, we do not assure the safety of these products and you will be responsible for violation of regulations.
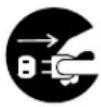
POWER OFF the printer, unplug the power cable from the power outlet, and remove the battery pack in any of the following cases:
_ The printer does not recover from an error.
Smoke, strange noise, overheat or smells erupt from the printer.
A piece of metal or any liquid touches the internal parts or slot of the printer.
_ Case is broken.
Doing so may cause fire or electric shock. Please contact your vender to repair the products.

DO NOT insert any foreign objects such as a piece of metal or any liquid in the internal parts or slot of the printer.
Doing so may cause fire or electric shock.
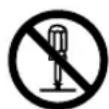
DO NOT disassemble or remodel the printer. DO NOT REPAIR THE PRINTER YOURSELF.
Doing so may cause fire, a failure or other accidents.

DO NOT use an AC adapter, AC cable or battery pack other than that which is specified.
Doing so may cause explosion, overheating or fire leading to serious accidents.

DO NOT use any power supply of the AC adapter other than specified range of one.
Doing so may cause fire, a failure or other accidents.

DO NOT touch the output terminal or metallic area of the connector to avoid short-circuiting.
Doing so may cause fire, a failure or other accidents.

DO NOT put the printer into water in a place where it could get wet.
Doing so may cause fire, a failure or other accidents.

DO NOT touch the printer by wet hand.
If not, it might cause electric shock.

POWER OFF the printer before removing/inserting the battery pack.
If not, it might cause electric shock.
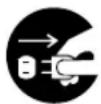
UNPLUG the AC plug from the outlet when there is the AC cable of the
AC adapter damaged.
Doing so may cause fire, a failure or electric shock.
Please contact your vender to repair the products.

Keep the AC plug of the AC adapter away from dust and metallic
materials.
If not, it might cause fire or electric shock.

Plug the AC plug of the AC adapter completely.
If not, it might cause fire or electric shock.

DO NOT destroy the AC cable or plug of the AC adapter. Moreover, DO
NOT bend, pull or twist the AC cable forcibly, or place heavy object on the cable.
Doing so may cause fire, a failure or electric shock.

UNPLUG the AC adapter from the outlet, do not pull on the cable but hold
onto the plug.
Exposure or disconnection of the cable might cause fire or electric shock.

CAUTION

If the printer is not used for a long time, unplug the AC plug from the outlet and remove the battery pack from the printer.
If not, it might cause fire or electric shock.
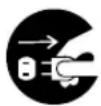
When cleaning the printer, unplug the AC plug from the outlet and remove the battery pack from the printer.
If not, it might cause fire or electric shock.

Keep the printer out of the reach of children.
If not, it might cause injury.

DO NOT subject the printer to the following places as it may lead to fire, a failure or injury.
Places of direct sunlight or high temperature.
Places of extreme humidity or any place where it can possibly be splashed by any liquids.
Places with strong vibration or is inclined.

DO NOT cover the printer with any clothes.
Doing so may cause fire or a failure.

NEVER touch the thermal head immediately after printing because it becomes very hot. Make sure that the thermal head is cool before clearing a paper jam or cleaning the thermal head.
Doing so may cause injury.

NEVER touch the portions such as the thermal head or the paper sensor or the platen roller directly while opening the paper cover to install the thermal paper for example.
Doing so may cause injury or other accidents.

Be sure to hold the battery cover to the printer when the battery pack is inserted in the printer.
Fall of the battery pack due to the battery cover slid off may cause injury or any damages.

DO NOT make your hair, etc. which are easily entangled in the printer approach to the printer during the operation
Doing so may cause injury.

WARNING

If you find any of the following abnormalities in the battery pack, remove the battery pack from the printer and keep away from fire.
_ When the battery pack gave out a nasty smell, reached an extraordinarily high temperature or showed any unusual sign.
_ When the battery pack case was broken.
_ When leakage was found.
Doing so may cause liquid leakage, explosion, overheating or fire leading to fire or injury.

NEVER disassemble, remodel, or solder the battery pack.
Doing so may cause liquid leakage, explosion, overheating or fire leading to fire or injury.

DO NOT touch the metallic area of the battery pack to avoid shortcircuiting.
Doing so may cause overheating, fire or electric shock leading to fire or injury.

DO NOT throw the battery pack into fire and DO NOT heat it.
Doing so may cause liquid leakage, explosion, overheating or fire leading to fire or injury.

DO NOT charge the battery pack in a place at 35 °C / 95 °F or more under burning scorching or in the close vicinity of fire.
Doing so may cause liquid leakage, explosion, overheating or fire leading to fire or injury.

DO NOT apply strong impact to the battery pack with a hammer or a nail, and DO NOT crush it.
Doing so may cause liquid leakage, explosion, overheating or fire leading to fire or injury.

DO NOT put the battery pack into water. Always keep it away from rain and water.
Doing so may cause liquid leakage, explosion, overheating or fire leading to fire or injury.

DO NOT touch the battery pack by wet hand.
Doing so may cause electric shock or a failure.

CAUTION

If liquid inside the battery pack reaches the eyes, immediately wash it away with clean water and take a physician's medical treatment.
If not, the eyesight might be damaged.

Keep the battery pack away from children.
If not, it might cause injury.

DO NOT subject the battery pack to the following places as it may lead to liquid leakage, explosion, overheating or fire leading to fire or injury.
Places of direct sunlight or high temperature where such as in a car.
Places of extreme humidity or any place where it can possibly be splashed by any liquids.
_ Places with strong vibration or is inclined.
OPERATING PRECAUTIONS
Please follow the precautions below to enjoy and maintain the full performance of the printer.
Using the printer
◆ Be careful not to drop or bump the printer.
DO NOT place the printer in any place where it will be subjected to direct sunlight or the corrosive gas will generate. Install the printer in a location with the following conditions:
• Ambient temperature: 0 to 40 °C (32 to 104 °F)
• Relative humidity: 30 to 80% RH (non-condensing)
◆ DO NOT connect the power cables of the AC adapter to the same outlet as devices that generate electromagnetic fields.
◆ DO NOT power off while printing.
◆ Switch the power off when not in use.
When not using the printer for extended periods of time, remove the battery pack from the printer. Disconnect the power cable of the AC adapter from the outlet.
◆ Clean the printer using soft, lint-free cloth. Do not use alcohol or other solvent.
◆ Before use, always clean the terminals using a dry, soft, lint-free cloth. If the terminals are dirty, it may not be possible to obtain proper contact.
◆ The AC adapter and the battery pack become warm when in use. This is normal and is not a malfunction.
◆ The length of time the printer can be used may be shortened when using a battery pack at low temperature.
◆ For assistance with obtaining an exchange battery for this product in the USA, please contact:
tpdrecycleinfo@siu-la.com
Seiko Instruments USA inc.
Thermal Printer Div.
Thermal Paper Handling
◆ Store the thermal paper in a cool, dry, and dark place.
◆ Do not rub the thermal paper with hard objects.
◆ Do not leave the thermal paper near organic solvents.
◆ Do not allow plastic film, erasers, or adhesive tape to touch the thermal paper for long periods.
◆ Do not stack copies made by the Diazo or wet process on top of the thermal paper.
◆ Do not use chemical glue.
◆ Always use the specified thermal paper TP-411L.
Installation
◆ Install the printer in a flat, stable place.
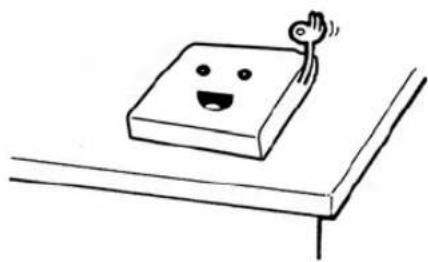
natural_image
Simple line drawing of a smiling book with a tail, resting on a surface (no text or symbols)◆ Do not install the printer in the following places:
- Places with strong vibration
- Places with oily or iron dust
- Hot or cold places
- Humid places
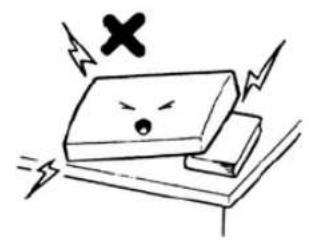
natural_image
Cartoon illustration of a broken electronic device with a sad face and lightning bolts, no text or symbols present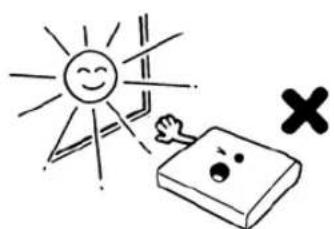
natural_image
Simple line drawing of a smiling sun and a book with a cross symbol (no text or labels)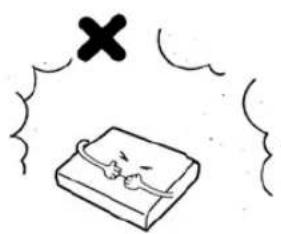
natural_image
Simple line drawing of a book with a cross symbol above it, surrounded by clouds (no text or symbols)Less than 0^ C (32°F)
More than 40^ (104°F)
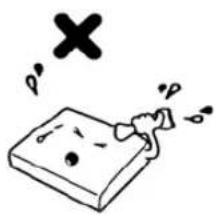
natural_image
Simple line drawing of a book with a hand holding a magnifying glass, emitting exhaust smoke (no text or symbols)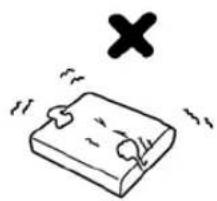
natural_image
Simple line drawing of a closed book with a cross symbol above it, no text or labels present.More than 80 % RH
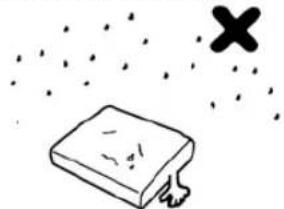
natural_image
Simple line drawing of a closed book with scattered dots and a black X symbol (no text or labels)NOTATIONS USED IN THIS MANUAL
The following two types of notations are used throughout this manual to denote items of caution and items to remember:
NOTE
◆ This box contains items that when not followed may lead to a malfunction or to a deterioration of performance.
HINT
- This box contains helpful hints to remember when using the printer.
1 PREPARATION
1.1 Unpacking
Once you have opened the carton, make sure it contains the printer and all accessories.
The standard configuration contains the following items:
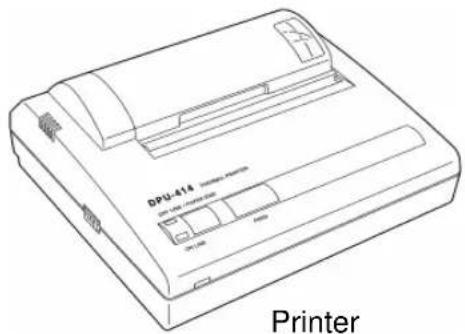
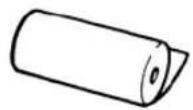
Thermal paper
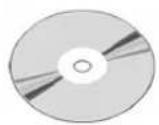
USER'S GUIDE/ SAFETY PRECAUTIONS (CD-ROM)
The option configuration contains the following items:
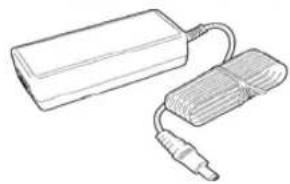
natural_image
Line drawing of a rectangular battery connected to a coiled cable with a separate connector (no text or symbols)Specified AC Adapter ^*1
PW-4007-EC-E
PW-4007-JU1-E
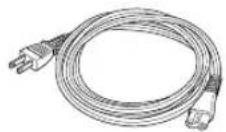
CB-CE01-18B-E
CB-AU01-20A-E
CB-UK01-20A-E
Specified AC Cable (for PW-4007-EC-E only)
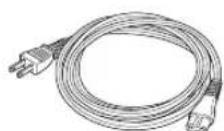
CB-US04-18A-E
Specified AC Cable (for PW-4007-JU1-E only)
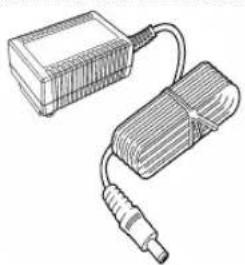
natural_image
Line drawing of a rectangular electronic device connected to a coiled cable (no text or symbols)Specified AC Adapter
PW-C0725-W1-x*2
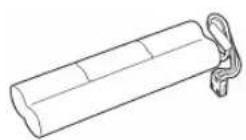
Specified Battery pack
BP-4005-E
*1: The AC adapter does not include the AC cable. Please be sure to purchase SII specified options.
*2: Applicable product models differ in respective countries. See "List of Compliance with Regulation" for proper use.
1.2 Part Names
Front
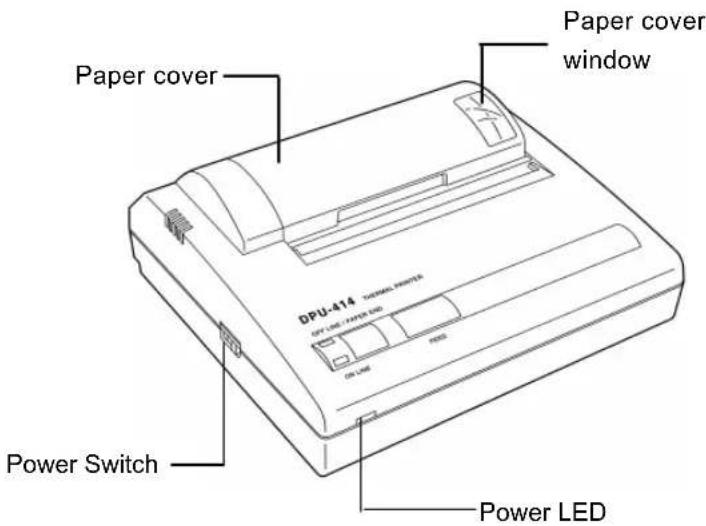
Back
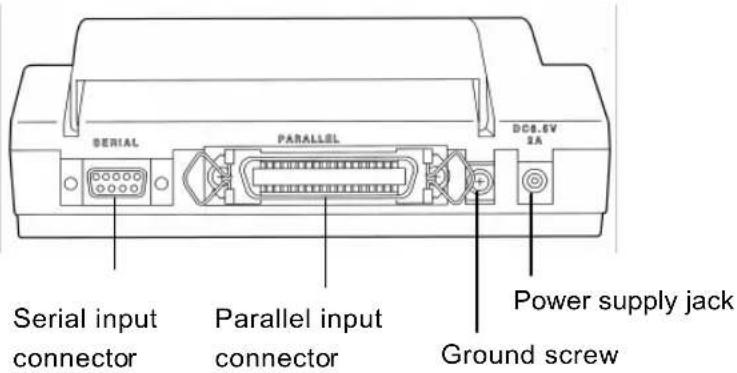
Bottom
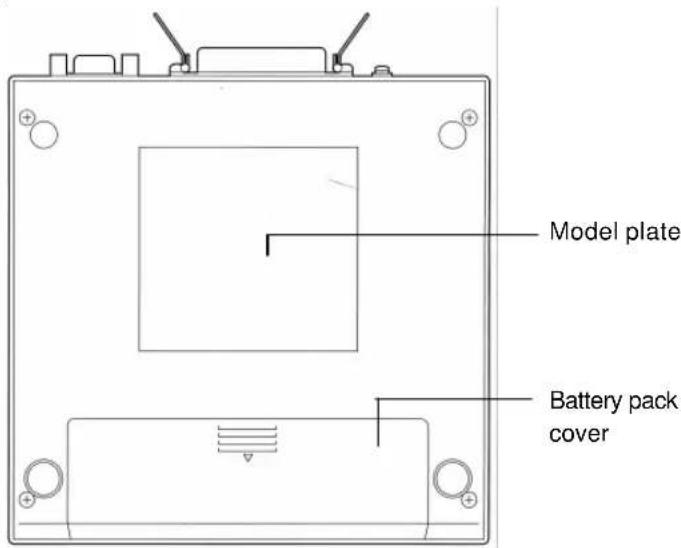
1.3 Operation Panel
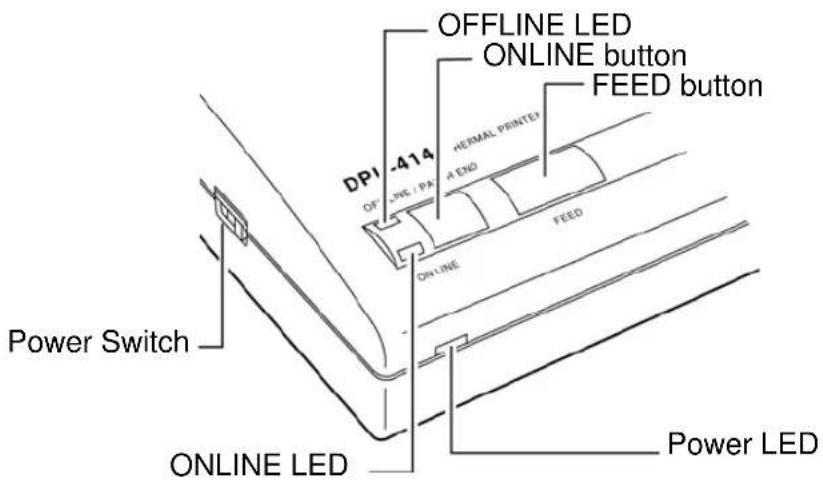
1 Power Switch Slide the Power Switch to turn the power on (ONLINE) or off.
2 FEED button Feeds the thermal paper when pressed in OFFLINE mode. (See the Hint on the next page).
3 ONLINE button Press to toggle between OFFLINE and ONLINE.
4 Power LED Indicates the power is on.
Blinks once every second to indicate the battery is being charged.
Blinks once every 1/2 second to indicate the battery is low.
5 ONLINE LED Indicates the printer is ONLINE.
Blinks to indicate there is data in the buffer memory when the printer is OFFLINE.
6 OFFLINE LED Indicates the printer is OFFLINE.
If the thermal paper is not set or has run out, the LED flashes. When an error occurs, both the ONLINE and off-line LEDs light.
NOTE
DO NOT press and hold the ONLINE button and FEED button for 30 seconds or more, because it will cause the Software DIP switches to reset and you will not be able to use the printer.
◆ Be sure the thermal head is in the home position (at the far left) before turning off the Power Switch. If left away from the home position for a long period, the print quality might deteriorate.
HINT
• ONLINE : Set the printer ONLINE to print from the computer.
- OFFLINE : Set the printer OFFLINE to feed the thermal paper with the FEED button or to stop printing.
(Print data and commands cannot be input in OFFLINE mode.)
2 OPERATION
2.1 Connecting AC Adapter
- Turn off the power.
- Plug the DC plug on the AC adapter into the power supply jack on the printer.
- Plug the AC adapter into an outlet.
- Turn on the power.
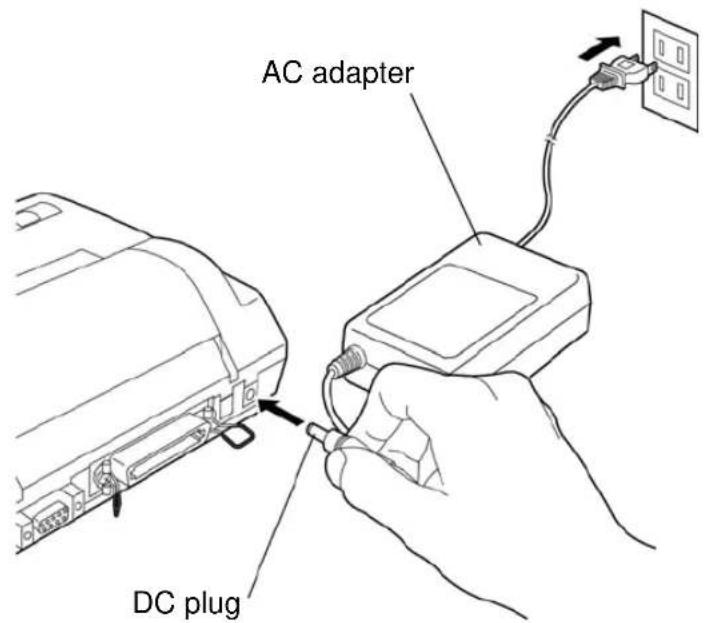
NOTE
◆ Always use an SII specified adapter.
◆ DO NOT touch the pins of the DC plug.
◆ To remove the AC adapter, turn off the Power Switch first, then unplug the AC adapter and the DC plug.
2.2 Loading the Thermal Paper
Opening and Closing the Paper Cover
- Lightly push up on the front of the paper cover with your thumb and rotate it toward the back of the printer.
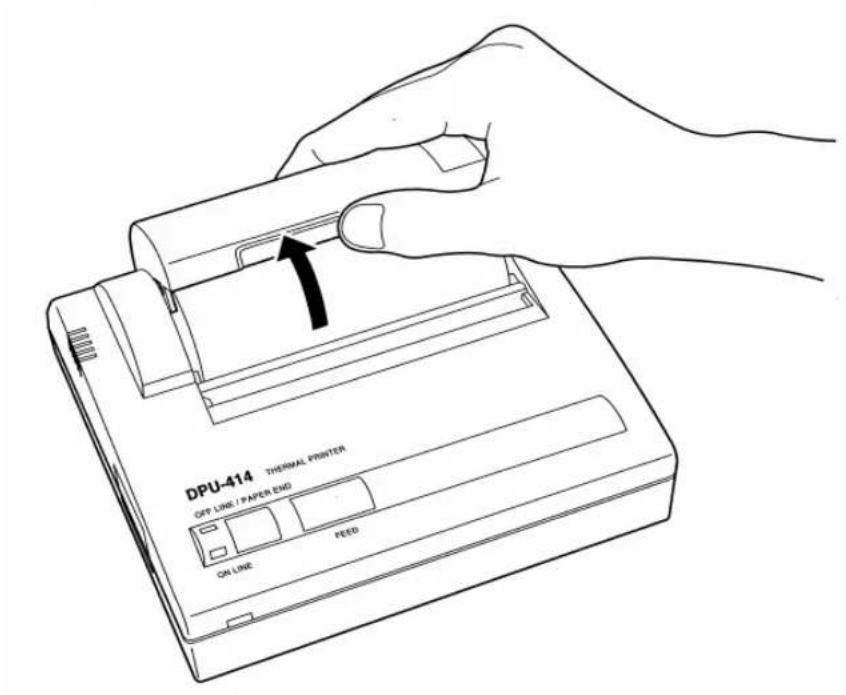
- Close the paper cover and push down on it to lock it into place.
Loading the Thermal Paper
- Turn on the power.
- Cut the tip of the thermal paper straight across. New paper can be inserted as is. (See figure on right)
- Open the paper cover.
- Push the tip of the thermal paper into the inlet at the bottom of the paper holder, until the auto-loader catches it and feeds about 10cm of it through the paper cutter.
NOTE
◆ Load the thermal paper in an area protected from direct sunlight.
HINT
- Place the thermal paper on the cover to make feeding easier.
The printing surface is the outside of the thermal paper roll.
Insertion Slot
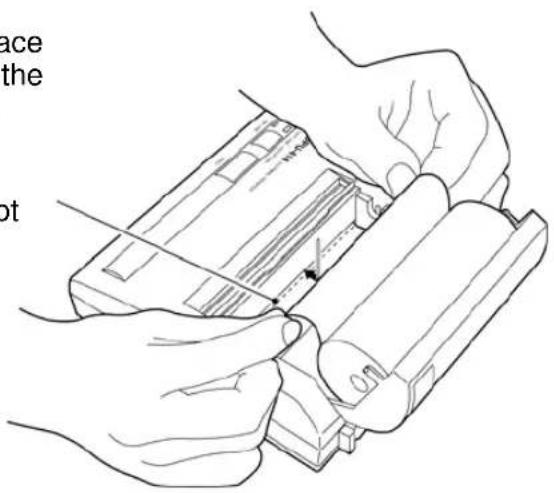
- Keep pressing the FEED button until the thermal paper feeds straight and smoothly.
HINT
- When the thermal paper is set correctly, the OFFLINE LED stops blinking and stays on to indicate the printer is still in OFFLINE mode.
- When the thermal paper is about to run out, red lines appear on both sides of the thermal paper.
2.3 Setting the Software DIP Switches (SWDIP switch)
The startup settings and input method can be set by the Software DIP switches (SWDIP switch). Refer to section 2.4, SWDIP Switch Settings, for details on the different settings.
- Slide the Power Switch to OFF.
- Slide the Power Switch to ON while pressing the ONLINE button. Release the ONLINE button after a list of the current settings starts printing out.
-
The print out of the current settings is followed by the prompt: "Continue? :Push 'On-line SW' ",
"Write?: Push 'Paper feed SW' "
To change the SWDIP switch settings, push the ONLINE button, and move onto step 4.
To leave the SWDIP switch settings unchanged, push the FEED button, and move onto step 5. -
'Dip SW1' is printed prompting the input of new settings for switch number 1 through 8 of SWDIP switch 1.
NOTE
◆ Always input either “ON” or “OFF” for every setting in order for switch number 1 through 8 because SWDIP Switch Set Mode can not be canceled once it is initiated.
“ON” can be set by pushing the ONLINE button once and “OFF” by pushing the FEED button once.
The setting is printed out after the ONLINE or FEED button is pushed to allow to confirm the new setting.
As soon as switch number 8 is set, the printer once again prompts with “Continue?” or “Write?”, and step 3 is repeated for SWDIP switch 2 and 3.
HINT
- The ONLINE LED lights when the ONLINE button is pressed and the OFFLINE LED when the FEED button is pressed to allow confirmation of the button operation.
- After the FEED button is pushed, the ONLINE and OFFLINE LED alternately blink and the new settings are written to memory. When the printer finishes writing everything to memory, "Dip SW setting
complete!!" is printed out and the printer returns to ONLINE mode.
- As soon as switch number 8 of SWDIP switch 3 is set, the printer writes the settings to memory regardless of which button (ONLINE or FEED) is pushed.
CAUTION
◆ NEVER turn the printer off while it writing the new settings to memory. Always wait until “Dip SW setting complete!!” is printed, then turn the power off.
2.4 SWDIP Switch Settings
(1) SWDIP switch 1
indicates factory default setting.
| Switch No. | Function ON OFF | ||
| 1 | Input Method | Parallel Serial | |
| 2 | Printing speed | High Low | |
| 3 | Auto loading | ON | OFF |
| 4 | CR function | Carriage return and line feed | Carriage return |
| 5 | SWDIP switch Setting Command | Enable | Disable |
| 6 to 8 | Print density See the table below | ||
| Switch No.PrintDensity (%) | 6 | 7 | 8 |
| 72 | ON | ON | |
| 79 | ON | ON | |
| 86 | ON | OFF | |
| 93 | ON | OFF | |
| 100 | OFF | ON | ON |
| 107 | OFF | ON | OFF |
| 114 | OFF | OFF | ON |
| 121 | OFF | OFF | OFF |
HINT
- Set switch number 5 to "ON" when you want to enable SWDIP switch setting via command.
(2) SWDIP switch 2
| Switch No. | Function ON OFF | ||
| 1 Print mode | Normal printing (40 columns) | Condensed printing (80 columns) | |
| 2 | User-defined characters back-up | ON | OFF |
| 3 Character type | Ordinary characters | Special characters | |
| 4 Zero font 0 | 0 | / | |
| 5 to 8 | International character set | See the table below | |
| Switch No.Characterset | 5 | 6 | 7 | |
| Japanese ON ON | ON ON | |||
| American | ON | ON | ON | |
| German | ON | ON | OFF | |
| English | ON | ON | OFF | OFF |
| French | ON | OFF | ON | ON |
| Spanish 1 | ON | OFF | ON | OFF |
| Italian | ON | OFF | OFF | ON |
| Swedish | ON | OFF | OFF | OFF |
| Danish 1 | OFF | ON ON | ON | |
| Danish 2 | OFF | ON ON | OFF | |
| Norwegian | OFF | ON | OFF | ON |
| Spanish 2 | OFF | ON | OFF | OFF |
| Latin American | OFF | OFF | ON ON | |
8 OFF ON
CAUTION
DO NOT set switches 5 to 8 a setting other than that shown in the table.
(3) SWDIP switch 3
| Switch No. | Function ON OFF | ||
| 1 | Data bit length | 8 bits 7 bits | |
| 2 Parity | permission Without | With | |
| 3 | Parity condition | Odd | Even |
| 4 | Flow control | H/W BUSY | XON/XOFF |
| 5 to 8 | Baud rate | See the table below | |
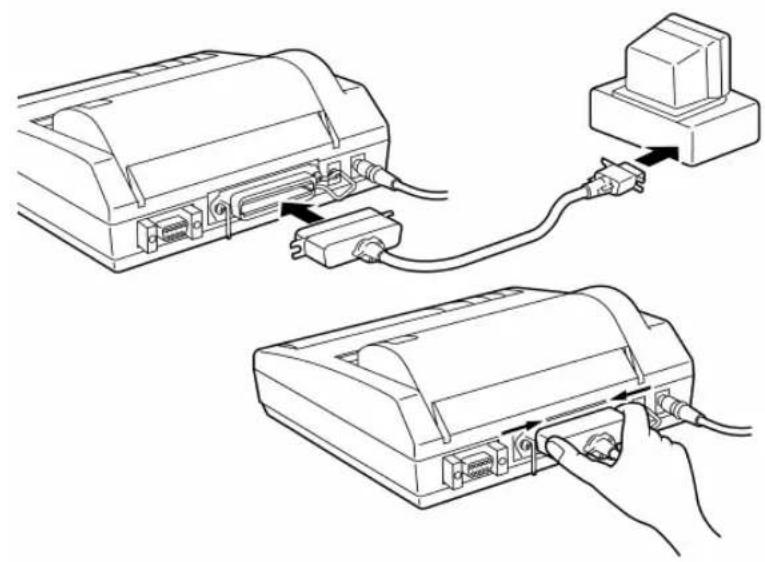
2.5 Connecting the Printer
Connection
- Turn off the printer and computer.
- Connect the printer to the computer with an interface cable.
Parallel : Secure with veil lock.
Serial : Secure with screws.
-
Set the printer SWDIP switches to match the input method.
-
Turn on the printer and the computer.
NOTE
◆ Select the correct interface cable for the type of input (parallel or serial).
Connectors :
Parallel : Anphenol 36-pin Equipped connector : 57LE-40360-7700(D29)(DDK) or
equivalent
Serial : D-Subminiature type connector with 9-pin
Equipped connector
:(M2.6 type) RDED-9SE-LN(05) (HIROSE)
or equivalent
◆ Use a shielded cable no more than 1.5m long.
Confirmation
Follow the instructions in section 2.8, Printing, to confirm that the printer is connected properly.
Parallel
natural_image
Line drawing showing two connected electronic devices with cable and connectors, no text or symbols presentSerial
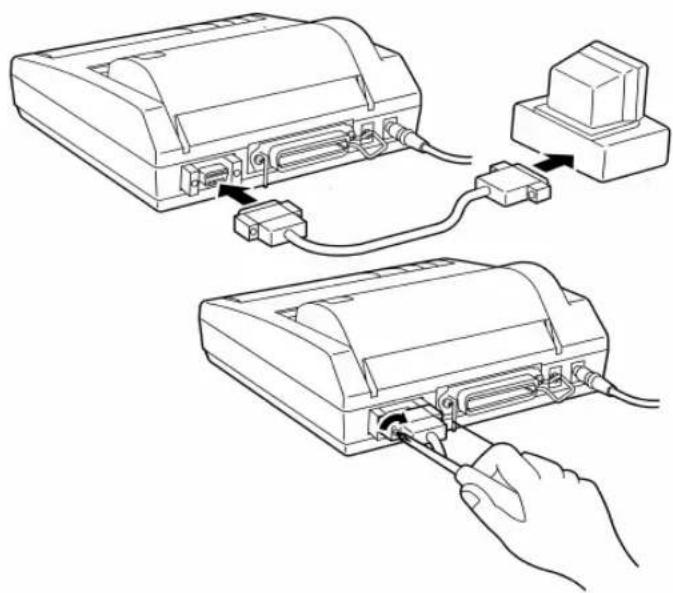
natural_image
Line drawing showing two devices connected to a power adapter, with a hand inserting the adapter into one device (no text or symbols present)2.6 Test Print
In a test print, characters 20H to FEH are printed in condensed, ordinary and double-width modes according to the international, special character and zero font settings of the SWDIP switches. This is followed by a small checkered pattern and solid black pattern printed dot by dot, after which the current settings are printed. To execute a test print follow this procedure:
- Turn off the power.
- Make sure the thermal paper is inserted correctly.
- Turn on the power while pressing the FEED button to start the self-test.
- Release the FEED button as soon as the self-test starts.
Print Sample
!["#$%&'()*#,.-/0123456789;:(=>?@ABCDEFGHIJKLMNOPQRSTUVWXYZ[¥]*_`abcdefghijklmnopqrstuvwxyz!)*_ !"#$%&'()*+,.-/0123456789;:(=>)?@ABCDEFGHIJKLMNOPQRSTUVWXYZ[¥]^_^*_`abcdefghijklmnopqrstuvwxyz(!)^_ !"#$%&'()*+,.-/0123456789;:(=>)?@ABCDEFGHIJKLMNOPQRSTUVWXYZ[¥]^_^*_`abcdefghijklmnopqrstuvwxyz(!)^_ !"#$%&'()*+,.-/0123456789;:(=>)?@ABCDEFGHIJKLMNOPQRSTUVWXYZ[¥]^_^*_`abcdefghijklmnopqrstuvwxyz(!)^_ !"#$%&'()*+,.-/0123456789;:(=>)?@ABCDEFGHIJKLMNOPQRSTUVWXYZ [¥]^_^*_`abcdefghijklmnopqrstuvwxyz(!)^_ !"#$%&'()*+,.-/0123456789;:(=>)?@ABCDEFGHIJKLMNOPQRSTUVWXYZ [¥]^_^*_`abcdefghijklmnopqrstuvwxyz(!)^_ !"#$%&'()*+,.-/0123456789;:(=>)?@ABCDEFGHIJKLMNOPQRSTUVWXYZ [¥]^_^*_`abcdefghijklmnopqrstuvwxyz(!)^_ !"#$%&'()*+,.-/0123456779;:(=>)?@ABCDEFGHIJKLMNOPQRSTUVWXYZ [¥]^_^*_`abcdefghijklmnopqrstuvwxyz(!)^_ !"#$%&'()*+,.-/0123456779;:(=>)?@ABCDEFGHIJKLMNOPQRSTUVWXYZ [¥]^_^*_`abcdefghijklmnopqrstuvwxyz(!)^_ !"#$%&'()*+,.-/0123456779;:(=>)?@ABCDEFGHIJKLMNOPQRSTUVWXYZ [¥]^_^*_`abcdefghijklmnopqrstuvwxyz(!)^_ !"#$%&'()*+,.-/ 0123456789;:(=>)?@ABCDEFGHIJKLMNOPQRSTUVWXYZ [¥]^_^*_`abcdefghijklmnopqrstuvwxyz(!)^_ !"#$%&'()*+,.-/0123456789;:(=>)?@ABCDEFGHIJKLMNOPQRSTUVWXYZ [¥]^_^*_`abcdefghijklmnopqrstuvwxyz(!)^_ !"#$%&'()*+,.-/0123456789;:(=>)?@ABCDEFGHIJKLMNOPQRSTUVWXYZ [¥]^_^*_`abcdefghijklmnopqrstuvwxyz(!)^_ !"# !'"# !'"# !'"# !'"# !'"# !'"# !'"# !'"# !'"# !'"# !'"# !'"# !'"# !'"# !'"# !'"# !'"# !'"# !'"# !'"# !'"# !'"# !'"# !'"# !'"# !'"# !'"# !'"# !'"# !'"# !'"# !'"# !'"# !'"#o/∧×円年月日時分秋千市区助村人団 !"#$%&'()*+,.-/0123456789;:(=>)?@ABCDEFGHIJKLMNOPQRSTUVWXYZ [¥]^_^*_`abcdefghijklmnopqrstuvwxyz(!)^_ !"#$%&'()*+,.-/0123456789;:(=>)?@ABCDEFGHIJKLMNOPQRSTUVWXYZ [¥]^_^*_`abcdefghijklmnopqrstuvwxyz(!)^_ !"#$%&'()*+,.-/0123456789;:(=>)?@ABCDEFGHIJKLMNOPQRSTUVWXYZ [¥]^_^}_`abcdefghijklmnopqrstuvwxyz(!)^_ !"#$%&'()*+,.-/0123456789;:(=>)?@ABCDEFGHIJKLMNOPQRSTUVWXYZ [¥]^_^*_`abcdefghijklmnopqrstuvwxyz(!)^_ !"#$%&'()*+,.-/0123456789;:(=>)?@ABCDEFGHIJKLMNOPQRSTUVWXYZ [¥]^_^*_`abcdefghijklmnopqrstuvwxyz(!)^_ !"#$%&'()*+,.-/0123456789;:(><=>?@ABCDEFGHIJKLMNOPQRSTUVWXYZ [¥]^_^*_`abcdefghijklmnopqrstuvwxyz(!)^_ !"#$%&'()*+,.-/0123456789;:(><=>?@ABCDEFGHIJKLMNOPQRSTUVWXYZ [¥]^_^*_`abcdefghijklmnopqrstuvwxyz(!)^_ !"#$%&'()*+,.-/0123456789;:(><=>?@ABCDEFGHIJKLMNOPQRSTUVWXYZ [¥]^_^*_`abcdefghijklmnopqrstuvwxyz(!)^_ !"#$%&'()*+,.-/012 456789;:(><=>?@ABCDEFGHIJKLMNOPQRSTUVWXYZ [¥]^_^*_`abcdefghijklmnopqrstuvwxyz(!)^_ !"#$%&'()*+,.-/0123456789;:(><=>?@ABCDEFGHIJKLMNOPQRSTUVWXYZ [¥]^_^*_`abcdefghijklmnopqrstuvwxyz(!)^_ !"#$%&'()*+,.-/0123456789;:(><=>?@ABCDEFGHIJKLMNOPQRSTUVWXYZ [¥]^_^*_`abcdefghijklmnopqrstuvwxyz(!)^_ !"#s*% !'"# !'"# !'"# !'"# !'"# !'"# !'"# !'"# !'"# !'"# !'"# !'"# !'"# !'"# !'"# !'"# !'"# !'"# !'"# !'"# !'"# !'"# !'"# !'"# !'"# !'"# !'"# !'"# !'"# !'"# !'"# !'"# !'"# ! !'#$%&'()*+,.-/0123456789;:(=>)?@ABCDEFGHIJKLMNOPQRSTUVWXYZ [¥]^_^*_`abcdefghijklmnopqrstuvwxyz(!)^_ !'#s*% !'"# !'"# !'S*# !'S*# !'S*# !'S*# !'S*# !'S*# !'S*# !'S*# !'S*# !'S*# !'S*# !'S*# !'S*# !'S*# !'S*# !'S*# !'S*# !'S*# !'S*# !'S*# !'S*# !'S*# !'S*# !'S*# !'S*# !'S* !'#$%&'()*+,.-/0123456789;:(=>)?@ABCDEFGHIJKLMNOPQRSTUVWXYZ [¥]^_^*_`abcdefghijklmnopqrstuvwxyz(!)^_ !'#s*% !'"# !'S*# !'S*# !'S*# !'S*# !'S*# !'S*# !'S*# !'S*# !'S*# !'S*# !'S*# !'S*# !'S*# !'S*# !'S*# !'S*# !'S*# !'S*# !'S*# !'S*# !'S*# !'S*# !'S*# !'S*# ! !'#$%&'()*+,.-/0123456789;:(=>)?@ABCDEFGHIJKLMNOPQRSTUVWXYZ [¥]^_^*_`abcdefghijklmnopqrstuvwxyz(!)^_ !'#s*% !'"# !'S*# !'S*# !'S*# !'S*# !'S*# !'S*# !'S*# !'S*# !'S*# !'S*# !'S*# !'S*# !'S*# !'S*# !' !'#$%&'()*+,.-/0123456789;:(=>)?@ABCDEFGHIJKLMNOPQRSTUVWXYZ [¥]^_^*_`abcdefghijklmnopqrstuvwxyz(!)^_ !'#s*% !'"# !'S*# !'S*# !'S*# !'S*# !'S*# !'S*# !'S*# !'S*# !'S*# !'S*# !'S*# !'S*# !'S*# ! !'#$%&'()*+,.-/0123456789;:(=>)?@ABCDEFGHIJKLMNOPQRSTUVWXYZ [¥]^_^*_`abcdefghijklmnopqrstuvwxyz(!)^_ !'#s*% !'"# !'S+^_`abcdefghijklmnopqrstuvwxyz(!)^_ !'#s*% :? !'#/ !'#/ !'#/ !'#/ !'#/ !'#/ !'#/ !'#/ !'#/ !'#/ !'#/ !'#/ !'#/ !'#/ !'#/ !'#/ !'#/ !'#/ !'#/ !'#/ !'#/ !'#/ !'#/ !'#/ !'#/ !'#/ !'#/ !'#/ !'#/ !'#/ !'#/ !'#/ !'#/ !'#/ !\n\n\n\n\n\n\n\n\n\n\n\n\n\n\n\n\n\n\n\n\n\n\n\n\n\n\n\n\n\n\n\n\n\n\n\n\n\n\n\n\n\n\n\n\n\n\n\n\n\n\n\n\n\n\n\n\n\n\n\n\n\n\n\n\n\n\n\n\n\n\n\n\n\n\n\n\n\n\n\n\n\n\n\n\n\n\n\n\n\n\n\n\n\n\n\n\n\n\n\n\n](/content/2026/05/843522/images/2556d1429f8b5a98e427a089cafe83d167126b32cbae30d8ee854c55fadffaea.jpg)
NOTE
◆ The printer stops automatically after the test print. DO NOT turn off the power to the printer while it is printing.
2.7 HEX Dump Print
Data input from the computer is printed in hexadecimal codes and in characters to allow you to check if data has been input correctly from the computer.
- Turn off the power.
- Turn the power on while pressing the FEED button.
- Push the ONLINE button when the OFFLINE LED lights (this can be done even if the test print has started).
The printer enters HEX dump mode indicated by the printing of "[HEX DUMP MODE]". - Start inputting data. When 16 bytes or more of data have been input, the data is printed as shown below:
Print sample
![[HEX DUMP MODE] 00000000 00 01 02 03 04 05 06 07 08 09 0A 0B 0C 0D 0E 0F ...... 00000010 10 11 12 13 14 15 16 17 18 19 1A 1B 1C 1D 1E 1F ...... 00000020 20 21 22 23 24 25 26 27 28 29 2A 2B 2C 2D 2E 2F !##$%&() *+, -. / 00000030 30 31 32 33 34 35 36 37 38 39 3A 3B 3C 3D 3E 3F 0123456789; :<=>? Number of input code (Hex.) Character code (Hex.) Corresponding (characters)](/content/2026/05/843522/images/a8e1b5af92316a0a4943e570c0f13706f724cf86f602b0da853d0461895c71c1.jpg)
- Turn the power off to exit HEX dump mode.
HINT
- If you switch the printer to OFFLINE when there is less than 16 bytes per line, the printer goes to OFFLINE after a print-dump. HEX DUMP MODE is reinitiated when the printer is put in ONLINE mode.
- The ONLINE LED blinks when there is still data in the buffer memory in OFFLINE mode.
2.8 Printing
- Turn on the power to the printer and the computer.
- Check that the ONLINE LED lights.
When the thermal paper is not set, the OFFLINE LED blinks. When the thermal paper is loaded, the OFFLINE LED lights. Press the ONLINE button so put the printer ONLINE.
- Send a print command from the computer to the printer.
Example:
Printing ABC in parallel input using BASIC
- Set SWDIP switch 1-1 to ON.
- Input LPRINT "ABC" on the computer, then press the return key. The printer should print ABC.
If the printer does not print, see Section 6, Troubleshooting.
HINT
- Some forms of BASIC use the PRINT# statement or the PR# instead of the LPRINT statement.
2.9 Buffer Memory
The buffer memory, which has a capacity of about 28000 characters (approx. 28KB), receives and stores data at high speed, greatly reducing the time that the computer cannot be used while it outputs to the printer. When the printer is ONLINE, data can be input during printing until the buffer memory becomes full.
If the printer is turned OFFLINE when there is still data in the buffer memory, the ONLINE LED will blink. Printing resumes when the printer is turned ONLINE.
2.10 Handling the Battery Pack
A fully charged battery pack can print about 3000 lines (40 columns of the number "8"). The battery discharges when it is not used for a long time, therefore, immediately recharge the battery after purchase or after long periods of storage.
NOTE
◆ Always use an SII specified battery pack.
Inserting the Battery Pack
- Turn the printer over and open the battery cover as shown in Figure 1.
- Connect the battery pack as shown in Figure 2, turn it so the label is visible, insert it into the printer, and close the battery cover.
- Close the battery cover.
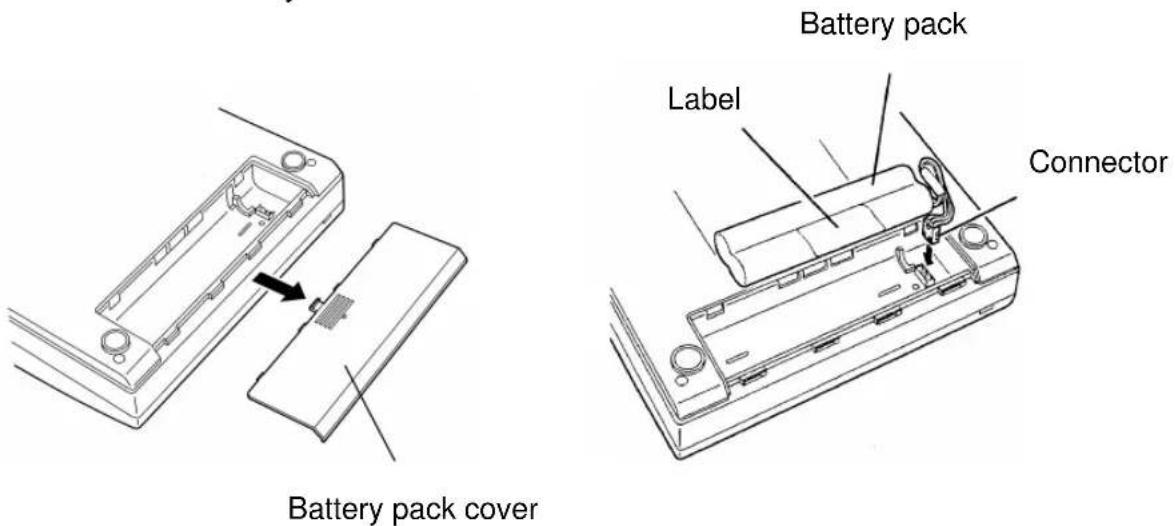
Figure 1 Figure 2
Removing the Battery Pack
- Remove the battery cover as shown in Figure 1.
- Pull out the battery pack, grab the connector with your thumb and index finger, and remove it by pulling up on it.
- Close the battery cover.
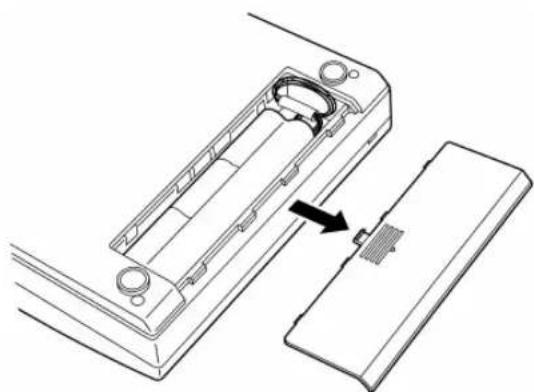
natural_image
Diagram of a device's internal structure showing a component being inserted into a housing (no text or symbols present)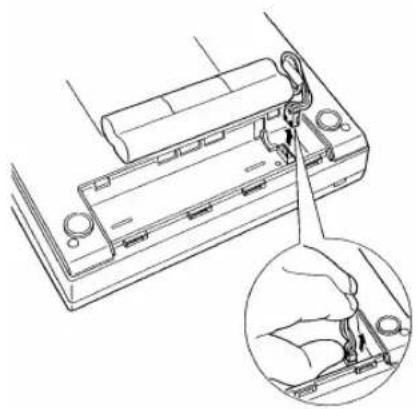
natural_image
Technical line drawing of a mechanical assembly with a magnified inset showing a hand holding a small component (no text or symbols present)Figure 1 Figure 2
Charging the Battery pack
-
Connect the AC adapter to the printer.
-
Turn on the printer. The Power LED will blink once every second indicating the battery pack is charging.
It takes about 10 hours to fully charge the battery pack.
When the battery pack is fully charged, the Power LED stops blinking and goes on.
- Disconnect the AC adapter.
NOTE
◆ Always charge the battery pack in a location that is from 5 °C (41 °F) to 40 °C (104 °F) otherwise it may lead to a degradation of the battery pack.
◆ The printer does not charge the battery pack when the power is in OFF state.
HINT
- Battery charging is temporarily disrupted while the printer is printing and resumed automatically when printing is completed.
When the Battery pack Gets Low During Printing
When the Power LED starts blinking about once every 0.5 seconds and the printer goes OFFLINE, connect the AC adapter.
The ONLINE LED will blink if there is data left in the memory buffer. In order to print the remaining data, connect the AC adapter as quickly as possible and push the ONLINE button.
NOTE
◆ Battery pack efficiency will decrease if battery pack is recharged more than necessary. Confirm whether Power LED is blinking and battery charge has decreased before recharging battery pack.
◆ When using the rechargeable battery pack:
Turn off the Power Switch after use.
Leaving Power Switch ON will consume battery pack and eventually run battery pack out, leading to low performance and malfunction.
◆ When using the AC adapter:
If you are not using the printer, turn off Power Switch, and unplug the AC adapter.
3 PRINTER FUNCTION
3.1 Buffer Full Printing
The DPU-414 has a line buffer to receive data in one-line units. If data with more columns than one line is received, printing will start, even if there is no print command.
This is called "Buffer full printing".
3.2 Interval Home Return
To protect the printer, the head returns to the home position (the leftmost position) automatically when;
● data is not sent from the computer
● the ONLINE button is pressed to set the printer OFFLINE
● the printer runs out of the thermal paper
3.3 Errors
Both the ONLINE and OFFLINE LEDs and data input and paper feed are disabled when one of the following four errors occurs:
A The head does not return to the home position even when the power is turned on;
B The head does not return to the home position at interval home return;
C Printing is attempted at extremely low or high ambient temperatures;
D The battery runs out;
If an error occurs:
A or B:
- Turn off the Power Switch.
- Remove the foreign material.
- Turn on the Power Switch.
C:
Use the printer at 0 to 40 °C (32 to 104 °F).
D:
Connect the AC adapter and turn on the Power Switch to charge the battery pack.
3.4 Out-of-Paper Detection
When the thermal paper runs out, the printer goes OFFLINE and the OFFLINE LED flashes. The printer cannot be set ONLINE while the OFFLINE LED is flashing. When the thermal paper has been loaded, the OFFLINE LED stops flashing, and stays lit. Press the ONLINE button to print.
If the thermal paper runs out during printing, the printer will go OFFLINE. Load new paper and press the ONLINE button to resume printing.
4 CONTROL CODE
The DPU-414 uses control codes to change forms and characters. The control codes are not printed. There are two types of function codes: basic function codes that can be used independently and extended function codes used with the ESC Sequence.
Basic codes
| Code | Function |
| BS | Back space |
| HT | Horizontal tab |
| LF | Line feed |
| FF | Form feed |
| CR | Carriage return |
| SO Set | double-width printing by line |
| SI Set | condensed printing |
| DC2 | Reset condensed printing |
| DC4 | Reset double-width printing by line |
| CAN | Cancel |
| DEL | Delete |
ESC sequence codes
| Code | Function |
| ESC+ "%" +n Select user-definable characters | |
| ESC+ "&" +s+n Register user-definable characters | |
| ESC+ ":" +s+SP+SP Delete user-definable characters | |
| ESC+ "0" Set 11-dot line feed | |
| ESC+ "2" Set 15-dot line feed | |
| ESC+ "3" Set line feed length in half dots | |
| ESC+ "." +n1+n2+n3 Function settings | |
| ESC+ ":" +s+n+m Font copy | |
| ESC+ "; +n+s User-defined characters back-up | |
| ESC+ "@" Reset | |
| ESC+ "A" +n Set line feed length in dots | |
| ESC+ "C" +n Set page length | |
| ESC+ "E" Set emphasized printing | |
| ESC+ "F" Reset emphasized printing | |
| ESC+ "G" Set double-strike printing | |
| ESC+ "H" Reset double-strike printing | |
| ESC+ "J" +n Line feed in half dots | |
| ESC+ "K" +n1+n2 Set single-density bit -image graphics mode | |
| ESC+ "L" +n1+n2 Set horizontal double-density bit-image graphics mode | |
| ESC+ "N" +n Set skip length | |
| ESC+ "O" Reset skip length | |
| ESC+ "Q" +n Set right margin | |
| ESC+ "R" +n Select international characters | |
| ESC+ "S" +n Set superscript or subscript printing | |
| ESC+ "T" Reset superscript or subscript printing | |
| ESC+ "U" +n Select printing direction | |
| ESC+ "W" +n Select double-width printing | |
| ESC + "^" +m+n1+n2 Set vertical double-, or quadruple-density bit-image graphics mode | |
| ESC + "c" +n Select special characters | |
| ESC + "l" +n Set left margin | |
| ESC + "z" +n Select zero font | |
5 CHARACTER CODE TABLE
● Japanese Character Set
The following table is the Japanese character set when 0 is set to normal 0.
- SP denotes space.
- Blank codes are ignored.
• Function codes are enclosed in thick lines.
- IBM Character Set
The following table is the English character set when 0 is set to normal 0.
| E | F |
| 1110 | 1111 |
| IJ | |
| ij | |
| CE | § |
| No | |
| 'n | |
| c | * |
| p | |
| G | |
| 34 | |
| %_00 | |
| ^ | |
| Lower 4 bits\Upper | 0 | 1 | 2 | 3 | 4 | 5 | 6 | 7 | 8 | 9 | A | B | C | D | E | F | |
| 0000 | 0001 | 0010 | 0011 | 0100 | 0101 | 0110 | 0111 | 1000 | 1001 | 1010 | 1011 | 1100 | 1101 | 1110 | 1111 | ||
| 0 | 0000 | SP | 0 | @ | P | ' | p | C | É | á | L | ⊥ | ≡ | ||||
| 1 | 0001 | ! | 1 | A | Q | a | q | ü | æ | í | ⊥ | 〒 | ± | ||||
| 2 | 0010 | DC2 | " | 2 | B | R | b | r | é | Æ | ó | 〒 | ≥ | ||||
| 3 | 0011 | # | 3 | C | S | c | s | ú | | | 〒 | ≤ | ||||||
| 4 | 0100 | DC4 | 4 | D | T | d | t | ä | ö | \bar{n} | - | — | \pm | \Sigma | \uparrow | ||
| 5 | 0101 | % | 5 | E | U | e | u | à | ò | \bar{N} | = | + | F | \sigma | J | ||
| 6 | 0110 | & | 6 | F | V | f | v | \hat{a} | \hat{u} | \underline{a} | -|| | 〒 | \pi | \mu | ÷ | ||
| 7 | 0111 | ' | 7 | G | W | g | w | \varsigma | ù | \underline{o} | \pi | \parallel | \parallel | \tau | ≈ | ||
| 8 | 1000 | BS | CAN | ( | 8 | H | X | h | x | \hat{e} | \ddot{y} | ¿ | ≡ | \pm | \Phi | * | |
| 9 | 1001 | HT | ) | 9 | I | Y | i | y | \ddot{e} | \ddot{O} | — | \parallel | \overline{F} | \downarrow | \theta | • | |
| A | 1010 | LF | * | : | J | Z | j | z | è | \ddot{U} | — | || | \pm | \Gamma | \Omega | - | |
| B | 1011 | ESC | + | ; | K | [ | k | \ddot{i} | \varsigma | \frac{1}{2} | \overline{\tau} | \overline{\tau} | ■ | \delta | \overline{f} | ||
| C | 1100 | FF | , | < | L | \ | l | ! | \hat{i} | £ | \frac{1}{4} | \pm | \parallel | ■ | \infty | n | |
| D | 1101 | CR | - | = | M | ] | m | i | ¥ | i | \pm | = | ■ | \phi | ^{2} | ||
| E | 1110 | SO | > | N | ^ | n | ~ | \ddot{A} | Pt | 〈 | = | \pm | ■ | \epsilon | ■ | ||
| F | 1111 | SI | / | ? | O | _ | o | DEL | \ddot{A} | ʃ | 〉 | \neg | \pm | ■ | \cap$ | ||
- SP denotes space.
- Blank codes are ignored.
• Function codes are enclosed in thick lines.
6 SPECIFICATIONS
6.1 General Specifications
Printer specifications
Printing method : Thermal serial dot
Character mode
Total number of dots : 9 × 320 dots / line
Character matrix : 9 dot high × 7 dot wide
Space between
characters : 1dot
Columns : 40 column (normal), 80 column (condensed)
Printing direction : Unidirectional or bidirectional logical seek
Bit-image graphics mode
Total number of dots : 8 × 320 dots / line
Printing direction : Unidirectional logical seek
Printing width : 89.6mm
Printing speed : Max. 52.5cps (normal), Max. 80cps (condensed)
External dimensions : W160mm × D170mm × H66.5mm
Mainframe mass : Approx. 580g (excluding battery)
Life : Approx. 500,000 lines
(continuous printing of 40 columns of "8")
(when print density is 100%)
Regulation : The printer complies with regulation in following countries ^*1 :
USA, Canada, EU, Japan, China, Taiwan, Korea and Australia
*1: Please ask if the printer can use in other than countries above to our sales representative.
Operating conditions
Temperature : 0 to 40 °C (32 to 104 °F)
Humidity : 30 to 80% RH (non-condensing)
Thermal paper specifications
Product No. : TP-411L
Width : 112mm
Outer diameter : 48mm
Roll length : Approx. 28m
Specifications of Specified AC Adapter (Option)
| Item | Specifications |
| Product No. PW-4007-JU1-E | |
| Input 100VAC to 120VAC 50Hz to 60Hz | |
| Output 7.0VDC | 2.0A |
| Dimensions | W104mm × D43mm × H32mmCable length : 1.85m |
| Mass | Approx. 160g |
| Regulation *1 | USA, Canada, Japan, Taiwan |
*1: Please ask if the AC adapter can use in other than countries above to our sales representative.
| Item | Specifications |
| Product No. PW | -4007-EC-E |
| Input 230VAC | 50/60Hz |
| Output 6.5VDC | 2.0A |
| Dimensions | W89mm × D51mm × H28mmCable length : 1.83m |
| Mass | Approx. 160g |
| Regulation *1 | EU, China, Republic of Korea, Australia |
*1: Please ask if the AC adapter can use in other than countries above to our sales representative.
| Item | Specifications |
| Product No. PW-C0725-W1-x*1 | |
| Input 100VAC to 240VAC 50Hz to 60Hz | |
| Output 7.0VDC | 2.5A |
| Dimensions *2 | W77.5mm × D51.8mm × H39.2mmCable length : 1.5m |
| Mass | Approx. 165g |
| Regulation *3 | USA, Canada, Japan, EU, China, Republic of Korea,Taiwan, Australia |
*1: Product models differ in respective countries. See "List of Compliance with Regulation" for proper use.
*2: Excluding convex part such as the plug.
*3: Please ask if the AC adapter can use in other than countries above to our sales representative.
Specifications of the AC Cable (Option PW-4007-JU1-E only)
| Item | Specifications |
| Product No. CB-US04-18A-E | |
| Cable length Approx. 1.75m | |
| Regulation *1 | USA, Canada |
^* Please ask if the AC cable can use in other than countries above to our sales representative.
Specifications of the AC Cable (Option PW-4007-EC-E only)
| Item | Specifications |
| Product No. CB-C | E01-18B-E |
| Cable length Approx. 1.8m | |
| Regulation *1 | EU |
^* Please ask if the AC cable can use in other than countries above to our sales representative.
| Item | Specifications |
| Product No. CB-A | U01-20A-E |
| Cable length Approx. 2.0m | |
| Regulation *1 | Australia |
^ Please ask if the AC cable can use in other than countries above to our sales representative.
| Item | Specifications |
| Product No. CB-UK01-20A-E | |
| Cable length Approx. 2.0m | |
| Regulation *1 | United Kingdom |
^ Please ask if the AC cable can use in other than countries above to our sales representative.
Specifications of the Battery pack (Option)
| Item | Specifications |
| Product No. BP-4005-E | |
| Cell type Ni-MH | |
| Rated Voltage 4.8V | |
| Mass | Approx. 120g |
□ List of Compliance with Regulation
Please check the list below to see if the printer and its accessories can be operated in destination countries and comply with the regulations.
√: Compliance with regulation
| countries^*1 SpecifiedAC adapter | USA | Canada | Japan | Taiwan | Republicof Korea | EU(exceptUnitedKingdom) | UnitedKingdom | Australia | China |
| PW-4007-JU1-E*2 | √ | √ | √ | √ | - | - | - | - | - |
| PW-4007-EC-E*2 | - | - | - | - | √ | √ | √ | √ | √ |
| PW-C0725-W1-U | √ | √ | √ | √ | - | - | - | - | - |
| PW-C0725-W1-K | - | - | - | - | √ | - | - | - | - |
| PW-C0725-W1-E | - | - | - | - | - | √ | - | - | - |
| PW-C0725-W1-B | - | - | - | - | - | - | √ | - | - |
| PW-C0725-W1-A | - | - | - | - | - | - | - | √ | - |
| PW-C0725-W1-C | - | - | - | - | - | - | - | - | √ |
*1: Please ask SII sales representative if you want to use the products in other countries than listed above.
*2: The compliant AC cables differ in respective countries. See the list below to find out which cable you need to connect in destination countries.
□ List of Specified AC cable
- For Specified AC Adapter (PW-4007-JU1-E)
| Countries | Model ^1 | Maker |
| USA, Canada | CB-US04-18A-E | SII |
| Japan | CB-JP04-18A-E | SII |
| Taiwan ^2 |
* 1: Use the model only in countries listed above.
* 2: Use 2.0 meters long AC cable that complies with Taiwan safety standards.
· For Specified AC Adapter (PW-4007-EC-E)
| Countries | Model *1 | Maker |
| EU | CB-CE01-18B-E | SII |
| Australia | CB-AU01-20A-E | SII |
| United Kingdom | CB-UK01-20A-E | SII |
| China | CB-CH01-20A-E | SII |
* 1: Use the model only in countries listed above.
6.2 Interface Specifications
Parallel
(1) Specifications
Data input : 8 bits parallel (Centronics)
Handshake: STROBE, BUSY, and ACK
(2) Connector signal description
| Pin no. | Signal I/O Function | ||
| 1 | STROBE Input Data strobe | ||
| 2 to 9 | DATA0 to 7 | Input | Carries the input data 1 when high and 0 when low |
| 10 | ACK | Output | Signal showing that data is received |
| 11 | BUSY Output Signal showing that data cannot be received | ||
| 12 | PE Output Signal showing that there is no paper | ||
| 13 | SLCT | Output Signal showing that the printer is ONLINE | |
| 14 | AUTO·LF | Input | When this signal is low at power-on, one line feed is performed at carriage return |
| 15 | N.C. | — | No connection |
| 16 | GND | — | Ground |
| 17 | FG | — | Frame Ground |
| 18 | N.C. | — | No connection |
| 19 to 30 | GND | — | Twist, pair, and ground for return signal |
| 31 | INIT | Input | Initialize |
| 32 | ERROR | Output | Signal showing that there is an error |
| 33 | GND | — | Ground |
| 34 | N.C. | — | No connection |
| 35 and 36 | +5V | — | Normally, pulled up at 4.7kΩ at high |
(3) Data Input Timing
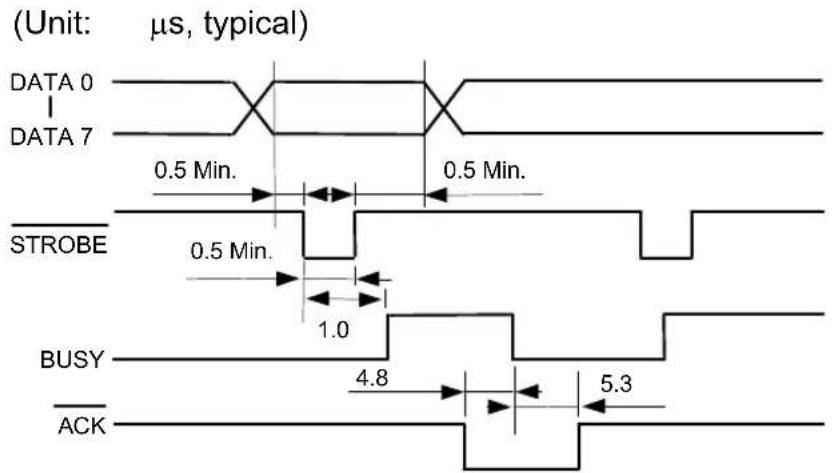
other
| Signal | Time (μs) | |------------|-----------| | DATA 0 | 0.5 Min. | | DATA 7 | 0.5 Min. | | STROBE | 0.5 Min. | | BUSY | 1.0 | | ACK | 4.8 | | Current | 5.3 |(4) Signal Conditions
| Item | Standard | Unit | ||
| Min. | Typ. | Max. | ||
| Input: Low Level Voltage 0.0 | — | 0.9 | V | |
| Input: High Level Voltage 3.5 | — | 5.0 | V | |
| Output: Low Level Voltage | — — | 0.5 | V | |
| Output: High Level Voltage 3.5 | — — | V | ||
Serial
(1) Specifications
Data input : RS-232C
Data control : H/W BUSY, XON/XOFF
(2) Connector signal description
| Pin no. S | gnal I/O | Function | |
| 1 | N.C. | — | No connection |
| 2 | TxD | Output | XON/XOFF |
| 3 | RxD | Input | Data req |
| 4 | — — | Connected to pin 6 | |
| 5 | GND | — | Ground |
| 6 | — — | Connected to pin 4 | |
| 7 | N.C. | — | No connection |
| 8 RTS | Output Data send request | ||
| 9 | N.C. | — | No connection |
Output
ception
Computer connections
| Computer | DPU-414 |
| RxD | 2 TxD |
| TxD | 3 RxD |
| DTR | 4 Connected to pin 6 |
| GND | 5 GND |
| DSR | 6 Connected to pin 4 |
| RTS | 7 N.C. |
| CTS | 8 RTS |
(3) Error processing
The following characters are printed when an error occurs.
? (3FH) : Framing error
! (21H) : Parity error
* (2AH) : Overrun error
Turn the power off and check computer and DPU-414 SWDIP switch settings.
NOTE
◆ Always power OFF the printer before the host computer. Powering OFF the computer before the printer may cause the printer to print several lines of "?" due to a FLAMING ERROR triggered by an unstable signal output from the computer at power OFF. It does not imply a printer malfunction.
(4) Signal Conditions
| Item | Standard | Unit | ||
| Min. | Typ. | Max. | ||
| Input: Low Level Voltage -15.0 | — | -3.0 | V | |
| Input: High Level Voltage 3.0 | — | 15.0 | V | |
| Output: Low Level Voltage | — | -12.0 | — | V |
| Output: High Level Voltage | — | 12.0 | — | V |
7 TROUBLESHOOTING
Check the following points if the printer has malfunctioned or does not operate at all. If it has still problems, call SII representative or the branch office.
If the power does not turn on (the Power LED is off)
| Checkpoint | Action | Reference page |
| Is the Power Switch on? Turn | on Power Switch. — | |
| Is the AC adapter connected correctly? | See Section 2.1. 16 | |
| Is the battery recharged? (When using a battery) | See Section 2.10. 29 | |
| Is power being supplied from the outlet? | Plug other electrical appliances into the outlet to check that it is working. | — |
If the thermal paper does not feed
| Checkpoint | Action | Reference page |
| Is the thermal paper loaded correctly? | See Section 2.2. 17 | |
| Is there foreign matter in the paper inlet? | Remove any foreign objects. — | |
| Are the ONLINE and OFFLINE LEDs on? | An error has occurred. See Section 3.3. | 32 |
| Is the ONLINE LED off? Set the printer OFFLINE. 14 | ||
If the printer does not print or stops during printing
| Checkpoint | Action | Reference page |
| Is the OFFLINE LED flashing? | The thermal paper has run out. Load more paper. | 18 |
| Are the ONLINE and OFFLINE LEDs on? | An error has occurred. See Section 3.3. | 32 |
| Is the OFFLINE LED on? Set | printer ONLINE. 14 | |
| Is the ONLINE LED ON and the Power LED blinking? | If you cannot set it ONLINE, the battery has discharged. Connect the AC adapter. | — |
| Is the ONLINE LED flashing? | Connect the AC adapter and set the printer ONLINE. | — |
| Are the SWDIP switches set correctly? | Set them according to the input method. | 19 |
| Is the interface cable connected correctly? | See Section 2.5. 24 | |
| Are you using specified paper?:TP411L? | Use the specified paper — | |
| Are you using back of paper? | The outside is the front. See Section 2.2. | 17 |
| Is the program correct? Check | the program. The LPRINT statement in BASIC is usually used, but some machines use the PRINT# or the PR# statement. | — |
| Does the printer execute a self-test? | If it does not execute a self-test, contact SII representative or local branch office. | 26 |
If the printer prints wrong characters
| Checkpoint | Action | Reference page |
| Is interface cable connected correctly? | See Section 2.5. 24 | |
| Are the SWDIP switches set correctly? | Set the SWDIP switches according to the input method.In serial input, “!”, “?”, “*” is printed for the incorrect set at SWDIP switch 3.Set them according to the computer communications method. | 19 |
| Is the program correct? Check | the program.Unless “;” is input following the LPRINT Statement in BASIC, usually CR and LF are automatically output. | — |
If the printing is light or dark
| Checkpoint | Action | Reference page |
| Is the temperature very high or low? | Use the printer at 0 to 40 °C.(32 to 104 °F) | — |
| Are you using the specified paper : TP411L? | Use the specified paper. — | |
| Are the SWDIP switches set correctly? | Check the print density SWDIP switch settings. | 21 |
8 CARING FOR THE DPU-414 PRINTER
If the outside of your printer gets dirty, wipe it with a soft, dry cloth. If it gets very dirty, wet a soft cloth with mild detergent diluted with water, squeeze it well, and clean the printer.
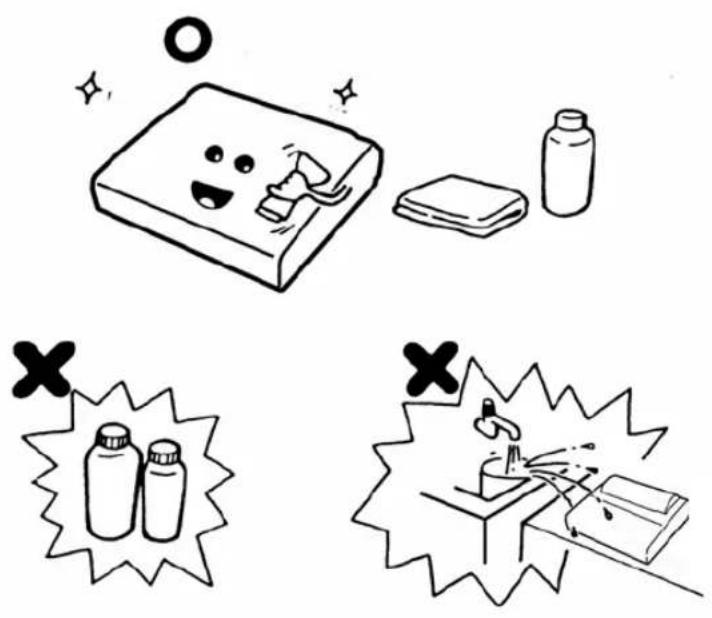
NOTE
◆ DO NOT use thinner, benzine, or other volatile chemicals.
◆ DO NOT allow water to get inside the printer.
SII

Seiko Instruments Inc.
1-8, Nakase, Mihama-ku, Chiba-shi,
Chiba 261-8507, Japan
Print System Division
Telephone:+81-43-211-1106
Facsimile:+81-43-211-8037
Seiko Instruments USA Inc.
Thermal Printer Div.
- Lomita Blvd., Torrance, CA 90505, USA
Telephone:+1-310-517-7778 Facsimile:+1-310-517-8154
Seiko Instruments GmbH
Siemensstrasse 9, D-63263 Neu-Isenburg, Germany
Telephone:+49-6102-297-0 Facsimile:+49-6102-297-222
Seiko Instruments (H.K.) Ltd.
4-5/F, Wyler Centre 2,200 Tai Lin Pai Road, Kwai Chung, N.T., Kowloon, Hong Kong
Telephone:+852-2494-5160 Facsimile:+852-2424-0901
(Specifications are subject to change without notice.)
- Applicable EC Directive and Standards
- Federal Communications Commission (FCC) compliance statement
- Industry Canada (IC) compliance statement
- INTRODUCTION
- SAFETY PRECAUTIONS
- Symbol Examples
- WARNING
- CAUTION
- OPERATING PRECAUTIONS
- Using the printer
- Thermal Paper Handling
- Installation
- NOTATIONS USED IN THIS MANUAL
- NOTE
- HINT
- PREPARATION
- Unpacking
- Part Names
- Operation Panel
- OPERATION
- Connecting AC Adapter
- Loading the Thermal Paper
- Opening and Closing the Paper Cover
- Loading the Thermal Paper
- Setting the Software DIP Switches (SWDIP switch)
- SWDIP Switch Settings
- SWDIP switch 1
- Connecting the Printer
- Connection
- Confirmation
- Parallel
- Serial
- Test Print
- Print Sample
- HEX Dump Print
- Printing
- Example:
- Buffer Memory
- Handling the Battery Pack
- Inserting the Battery Pack
- Removing the Battery Pack
- Charging the Battery pack
- When the Battery pack Gets Low During Printing
- PRINTER FUNCTION
- Buffer Full Printing
- Interval Home Return
- Errors
- If an error occurs:
- A or B:
- C:
- D:
- Out-of-Paper Detection
- CONTROL CODE
- CHARACTER CODE TABLE
- ● Japanese Character Set
- - IBM Character Set
- SPECIFICATIONS
- General Specifications
- Printer specifications
- Operating conditions
- Thermal paper specifications
- □ List of Compliance with Regulation
- □ List of Specified AC cable
- Interface Specifications
- Specifications
- Connector signal description
- Data Input Timing
- Signal Conditions
- Computer connections
- Error processing
- TROUBLESHOOTING
- CARING FOR THE DPU-414 PRINTER
- SII
Brand : SEIKO
Model : DPU-414
Category : Printer