
GH600 - Camera BENQ - Free user manual and instructions
Find the device manual for free GH600 BENQ in PDF.


| Type | Digital camera |
| Model | GH600 |
| Brand | BenQ |
| Effective pixels | 16.1 megapixels |
| Optical zoom | 21x |
| Digital zoom | Up to 5x |
| Sensor type | CCD |
| Display size | 3.0 inches |
| Display resolution | 460,000 dots |
| Storage media | SD/SDHC card |
| Battery type | 4x AA alkaline or NiMH |
| Dimensions (W x H x D) | 112.5 x 75.9 x 102.6 mm |
| Weight | Approx. 400 g (with batteries) |
| Video recording | 720p HD |
| Scene modes | Multiple including portrait, landscape, night |
| ISO range | 100 – 6400 |
| Focus range (wide) | 5 cm to infinity |
| Interface | USB 2.0, AV out |
| Cleaning instructions | Clean lens with soft, dry cloth; avoid solvents |
| Safety warnings | Do not point lens directly at sun; keep away from water |
| Spare parts availability | Contact BenQ support for replacement |
Frequently Asked Questions - GH600 BENQ
User questions about GH600 BENQ
0 question about this device. Answer the ones you know or ask your own.
Ask a new question about this device
Download the instructions for your Camera in PDF format for free! Find your manual GH600 - BENQ and take your electronic device back in hand. On this page are published all the documents necessary for the use of your device. GH600 by BENQ.
USER MANUAL GH600 BENQ
natural_image
Abstract wavy pattern with gradient dots and a central dark shape (no text or symbols)Copyright
Copyright 2011 by BenQ Corporation. All rights reserved. No part of this publication may be reproduced, transmitted, transcribed, stored in a retrieval system or translated into any language or computer language, in any form or by any means, electronic, mechanical, magnetic, optical, chemical, manual or otherwise, without the prior written permission of BenQ Corporation.
All other logos, products, or company names mentioned in this manual may be the registered trademarks or copyrights of their respective companies, and are used for informational purposes only.
Disclaimer
BenQ Corporation makes no representations or warranties, either expressed or implied, with respect to the contents hereof and specifically disclaims any warranties, merchantability or fitness for any particular purpose. Further, BenQ Corporation reserves the right to revise this publication and to make changes from time to time in the contents hereof without obligation of BenQ Corporation to notify any person of such revision or changes.
This user manual aims to provide the most updated and accurate information to customers, and thus all contents may be modified from time to time without prior notice. Please visit http://www.benq.com for the latest version of this manual.
BenQ ecoFACTS
BenQ has been dedicated to the design and development of greener product as part of its aspiration to realize the ideal of the "Bringing Enjoyment 'N Quality to Life" corporate vision with the ultimate goal to achieve a low-carbon society. Besides meeting international regulatory requirement and standards pertaining to environmental management, BenQ has spared no efforts in pushing our initiatives further to incorporate life cycle design in the aspects of material selection, manufacturing, packaging, transportation, using and disposal of the products. BenQ ecoFACTS label lists key eco-friendly design highlights of each product, hoping to ensure that consumers make informed green choices at purchase. Check out BenQ's CSR Website at http://csr.BenQ.com/ for more details on BenQ's environmental commitments and achievements.

WEEE directive
WEEE
Disposal of Waste Electrical and Electronic Equipment and/or Battery by users in private households in the European Union.
This symbol on the product or on the packaging indicates that this can not be disposed of as household waste. You must dispose of your waste equipment and/or battery by handling it over to the applicable take-back scheme for the recycling of electrical and electronic equipment and/or battery. For more information about recycling of this equipment and/or battery, please contact your city office, the shop where you purchased the equipment or your household waste disposal service. The recycling of materials will help to conserve natural resources and ensure that it is recycled in a manner that protects human health and environment.
Battery
Recycling information: See http://www.benq.com/support/recycle for details.
CE Regulatory Notice
This devise is herewith confirmed to comply with the requirements set out in the Council Directives on the Approximation of the Laws of the Member States relating Electromagnetic Compatibility (2004/108/EC); the Low Voltage Directive (2006/95/EC); the Restriction of The Use of Certain Hazardous Substances in Electrical And Electronic Equipment Directive (2002/95/EC), Turkish EEE Directive; the Commission Regulation (EC) No 1275/2008 implementing Directive 2005/32/EC of the European Parliament and of the Council with regard to eco-design requirements for standby and off mode electric power consumption of electrical and electronic household and office equipment, and the Directive 2009/125/EC of the European parliament and of the council establishing a framework for the setting of eco-design requirements for energy-related products.
FCC Statement
This equipment has been tested and found to comply with the limits for a Class B digital device, pursuant to Part 15 of the FCC Rules. These limits are designed to provide reasonable protection against harmful interference in a residential installation. This equipment generates, uses and can radiate radio frequency energy and, if not installed and used in accordance with the instructions, may cause harmful interference to radio communications. However, there is no guarantee that interference will not occur in a particular installation. If this equipment does cause harmful interference to radio or television reception, which can be determined by turning the equipment off and on, the user is encouraged to try to correct the interference by one or more of the following measures:
- Reorient or relocate the receiving antenna.
-
Increase the separation between the equipment and receiver.
-
Connect the equipment into an outlet on a circuit different from that to which the receiver is connected.
- Consult the dealer or an experienced radio/TV technician for help.
This device complies with Part 15 of the FCC Rules. Operation is subject to the following two conditions: (1) This device may not cause harmful interference, and (2) this device must accept any interference received, including interference that may cause undesired operation.
FCC Caution: Any changes or modifications not expressly approved by the party responsible for compliance could void the user's authority to operate this equipment.
Safety warning and notice
Before operating the camera, please make sure that you read and fully understand the content in this section. If you ignore and violate all safety warning notices indicated in this section, the camera warranty may be void. Meanwhile, not only the camera but also you and all other people and things around you may be severely damaged, injured, or even placed in danger of death.
For your safety
- Keep the camera and its accessories out of the reach of babies, toddlers, and children. In particular, small parts such as memory cards and batteries could be easily dismantled and swallowed by them.
- Use only the original accessories to avoid possible risks to health and property, and thus meet all related legal regulations.
- Do not dismantle the camera under any circumstances.
- When using the flash, do not go too close to human eyes (particularly for babies, toddlers, and children) or animal eyes. Otherwise, when the flash fires, the light may cause damage to human eyes or irritate animals.
- Batteries could explode, for instance. All batteries can cause property damage, injury or burns if a conductive material such as jewelry, keys or beaded chains touch exposed terminals. The material may complete an electrical circuit and become quite hot. Exercise care in handling any batteries, particularly when placing it inside your pocket, purse, or other container with metal objects. Do not dispose of batteries in fire as they may explode.
- To prevent electric shock, do not attempt to disassemble or repair your camera by yourself.
- Some camera models accept non-rechargeable batteries. When using these batteries, do not charge them. Otherwise, dangers such as explosion and fire may occur.
- Risk of explosion if battery is replaced by an incorrect type. Dispose of used batteries according to the instructions.
Warranty
- Warranty is void if damage or system failure occurred due to outside factors such as collision, fire, flood, dirt, sewage, earthquake, and other force majeure events as well as incorrect usage of electricity or use of non-original accessories.
- It is the sole responsibility of the user if problems (such as data loss and system failure) occurred due to non-factory installed software, parts, and/or non-original accessories.
- Do not change the camera. Any changes to the camera invalidate the warranty.
Taking care of your camera
• Always keep the camera in the accompanying leather case or pouch for better
protection against splashes, dust, and collision.
- The only way of replacing the battery and the memory card is to open the battery/card cover.
- Dispose of unwanted batteries and cameras as permitted by the laws in your countries.
- Water may cause a fire or electric shock. Therefore, store your camera in a dry place.
- If your camera becomes wet, wipe it with a dry cloth as soon as possible.
- Salt or seawater may cause severe camera damage.
- Do not drop, knock, or shake the camera. A rude behavior of using the camera may damage the internal electronic circuit board, deform the lens shape, or make the lens unretractable.
- Do not use harsh chemicals, cleaning solvents, or strong detergents to clean the camera.
- Finger grease may be left on the camera lens and will result in unclear images or videos. To avoid this problem, be sure to clean the camera lens before taking pictures or recording videos. You should also clean the camera lens on a regular basis.
- If the lens is dirty, use a lens brush or soft cloth to clean the lens.
- Do not touch the lens with your fingers.
- If a foreign substance or water gets in your camera, please turn the power off immediately and disconnect the batteries. Next, remove the foreign substance or water and send it to the maintenance center.
- Whenever there is data in the internal memory or the external memory card, you should make a backup copy to a computer or disc. So, you can have a backup solution if data loss occurs.
- If the lens cannot retract into the camera, please replace the batteries first (usually this is because of drained batteries). Then the lens should retract automatically. If the lens still cannot retract, please contact your dealer.
- Under no circumstances should you push the lens back manually as this may damage the camera.
- All original accessories are designed only for use with this camera model you purchased. Do not use these accessories with other camera models or cameras of other brands to avoid unpredictable danger or damage.
- Before initial use of a memory card, always use the camera to format the card first.
- Remember to slide the write-protect tab (if available) to the unlock position. Otherwise, all data (if any) on the memory card is protected and the card cannot be edited or formatted.
Operating environment
- Do not use or store your camera in the environments listed below:
- Direct sunlight
- Dusty places
- Next to an air conditioner, electric heater or other heat sources
• In a closed car that is in direct sunlight - Unstable locations
- Do not use your camera outdoors when it is raining or snowing.
- Do not use your camera in or near water.
- The camera operating temperature is between 0 and 40 degrees Celsius. It is normal for the operating time to be shortened when the temperature is low.
- Storage at too high or low temperatures will also result in a gradual capacity loss. As a result, the operating time of your camera may be considerably reduced.
- It is normal for the camera to become warm during operation, because the camera casing might conduct heat.
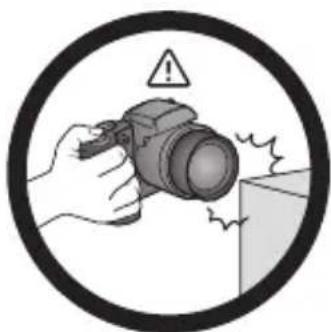
natural_image
Illustration of a hand holding a camera with warning symbol (no text or labels)Do not hold the camera by excessive force. Plus, be sure to protect the camera from strong impacts.
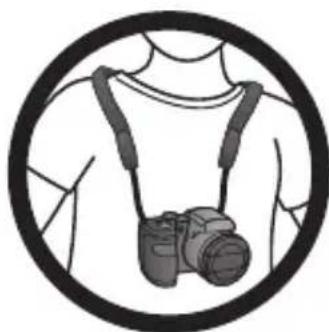
natural_image
Illustration of a person wearing a camera with straps, enclosed in a circular frame (no text or symbols)To avoid accidental falling, please attach the neck strap to the camera and always put the camera around your neck.
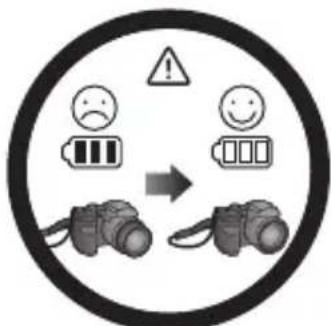
If the batteries suddenly depleted and caused the lens fail to retract, please carefully protect the lens to avoid collision and insert batteries with full power ASAP..
natural_image
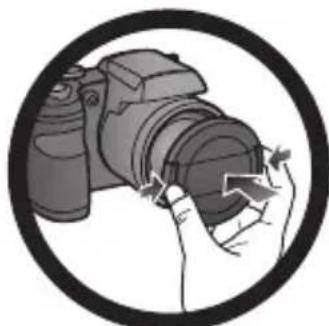
Illustration of a hand holding a camera lens inside a circular frame (no text or symbols)When the camera is not in use, always turn the power off. Plus, before storing the camera in its case, make sure the lens has retracted successfully and you put the lens cover back. If you do not intend to use the camera for a long time, please remove the batteries from the camera and store the batteries carefully.
natural_image
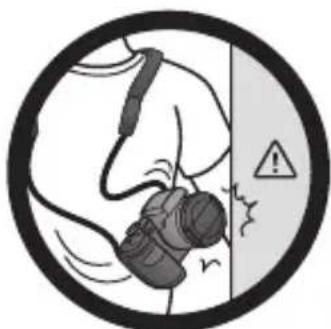
Illustration of a person inside a circular frame with an exclamation mark and explosion symbol (no text or labels)Keep your camera away from sharp objects and avoid collision.
natural_image
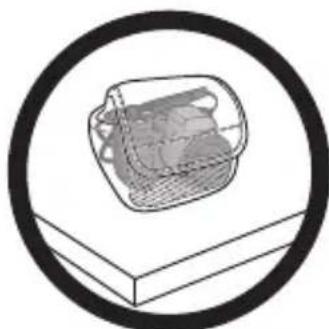
Simple line drawing of a box with a mesh pattern inside, enclosed in a circle (no text or symbols)When the camera is not in use, please place it in the pouch and a steady place. Plus, always keep your camera away from pressure to avoid possible damage.
Table of Contents
Touring the camera 12
Checking the package contents 12
Camera 13
Front and bottom views ....13
Rear view 14
Multifunctional buttons ....15
Preparing the camera for use 16
Attaching the strap ....16
Installing the batteries ....17
Installing an SD card ....19
Turning the Power On and Off 20
Opening the Flash 20
Initial setting 21
Setting language ......21
Setting date and time 21
Operating the camera 22
Capture mode 24
Flash mode 25
Face Tracking 26
Focus mode 27
Selecting the Shooting Mode ....28
Using Aperture Priority mode 29
Using Shutter Priority mode 29
Using Manual mode 29
Using Continuous Shooting mode ....30
Using Panorama mode 30
Using Smart Scene mode 32
Setting the Scene mode 32
Smile Catch 36
Blink Detector 37
Love Portrait ....37
Fisheye 37
Pre-composition 38
Web Auction 38
Using the Function menu 39
Image size 40
Image quality 40
Movie size 41
Setting EV 41
White Balance 41
ISO 42
Metering 43
Effect Mode 43
Recording Videos 45
Using the Capture Menu 45
Setting the Drive Mode 46
Setting the AF Area 46
Using AF Assist Lamp 46
Setting Sharpness, Saturation and Contrast 47
Digital Zoom 47
Date Stamp 47
Instant Review 47
Stabilizer 48
Battery status 48
Other settings 49
Playback mode 51
Options for playback and editing 52
Enlarging an image 52
Rotating an image 52
Viewing multiple files at a time 52
Playing back video clips 53
Adjusting the playback volume 53
Slideshow 54
Deleting files 54
Protecting files 55
Red-eye Removal 55
Voice memo 55
Photo Effect 56
Trimming 57
Resizing 57
Startup image 58
DPOF 58
Radial Blur 59
Working with computer and AV system 59
Bundled software 59
Connecting the camera to a computer 59
Connecting the camera to an AV system 60
Printing images 60
Printing with PictBridge 60
Troubleshooting and service information 62
Technical support 64
Specifications 65
Touring the camera
Checking the package contents
Carefully unpack your kit box and ensure that you have the following items.
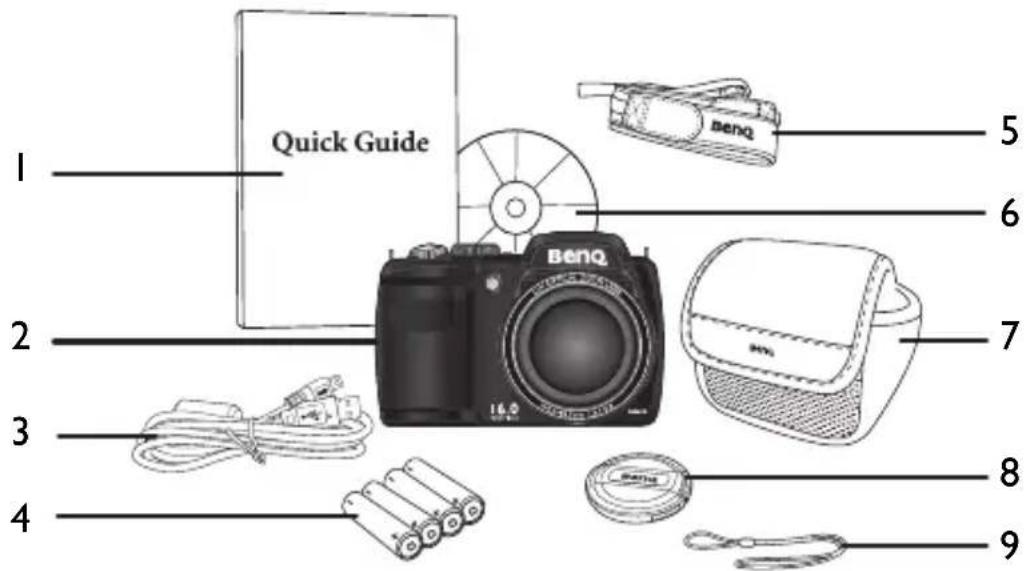
I. Quick Guide
2. Digital camera
3. USB cable
4. AA battery x 4
5. Neck strap
6. Software & User Manual CD
7. Pouch (optional)
8. Lens cover
9. Lens strap

- All pictures, screen captures, and icons used in this manual are for illustration only. Actual and available products, accessories, as well as their appearance may vary depending on sales region.
- If any items are missing or damaged, contact your dealer.
- Save the packaging for future shipment or storage.
Camera
Front and bottom views
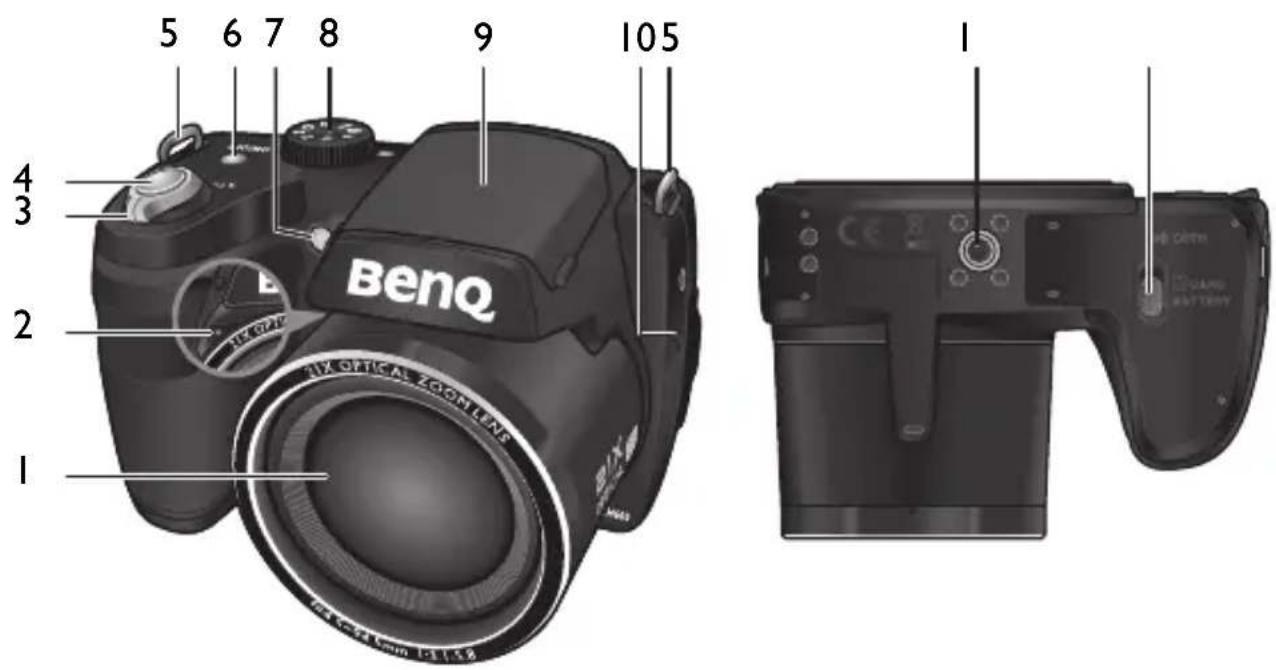
I. Lens
2. Microphone
3. Zoom lever
4. Shutter button
5. Strap eyelet
6. Power button
7. AF Assist Lamp / Self-timer LED indicator
8. Mode dial
9. Flash
10.Speaker
II.Tripod mount
12.Battery/card cover
Rear view
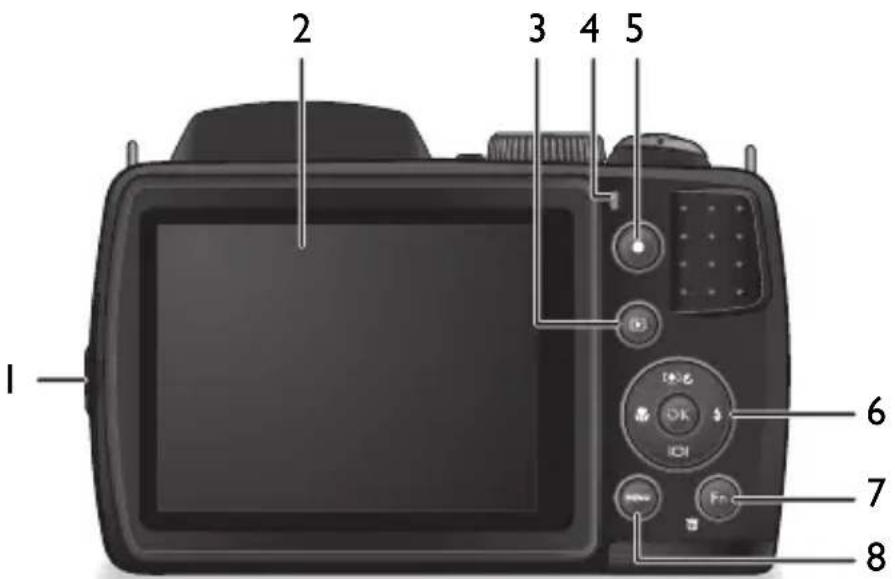
I. USB / AV port
2. LCD display
3. PLAYBACK button
4. Status LED
5. RECORD button ●
6. Multifunctional buttons (including a 4-way control and an Ⓞkton)
7. Function / Delete button Fn·
8. MENU button MENU
LED Indicator
| Indicator State Description | ||
| Status LED No | ight The digital camera is off. | |
| Solid green • The digital camera is ready to capture images.• The digital camera is powering on, or is in the power-saving mode. | ||
| Status LED Blinking green • The digital camera cannot focus.• The digital camera is capturing a video clip.• The flash is charging, or the USB communication/transfer is in progress. | ||
| Self-timer LED Blinking red The self-timer function is activated. | ||

- It is normal for the camera to become warm during operation, because the camera casing might conduct heat.
- The LCD display on this camera is manufactured with sophisticated technology, and more than 99.99% of the pixels on the LCD display meet standard specifications. Yet, it is possible that less than 0.01% of the pixels on the LCD display may have some light spots or show unusual colors. This is normal and does not indicate display malfunction, nor will this affect the pictures you take with the camera.
- The LCD monitor looks darker in strong sunlight or bright light. This is not a malfunction.
- To prevent your images from being blurred while pressing the Shutter button, always hold the camera steady. This is especially important when you are shooting under low lighting conditions, under which your camera may reduce the shutter speed to ensure your images are properly exposed.
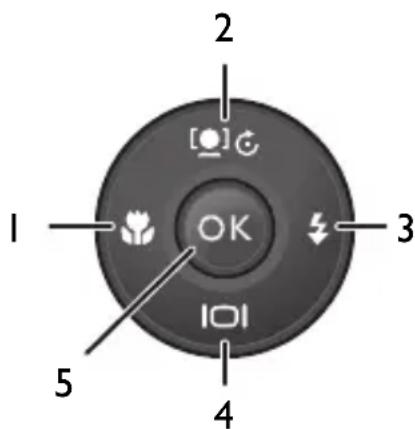
Multifunctional buttons
You can choose camera settings by pressing the 4-way control or OK
I. Left/Focus:
- Scrolls left in menus.
- Toggles between different focus modes.
2. Up/Face Tracking:
- Scrolls up in menus.
- Turns on/off Face Tracking. See "Face Tracking" on page 26 for details.
- Rotates an image. See "Rotating an image" on page 52 for details.
3. Right/Flash:
- Scrolls right in menus.
- Selects a flash mode.
4. Down/Display:
- Scrolls down in menus
-
Toggles between different display modes.
-
: confirms a chosen setting.
Preparing the camera for use
This section will guide you on how to prepare the camera before its initial use.
Attaching the strap
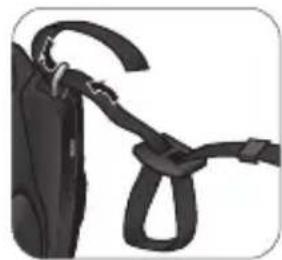
To attach the lens and neck straps to your camera, do the following:
I. Insert one end of the neck strap through the strap eyelet.
-
Route it through the buckle as the inner loop.
-
Route the other end of the neck strap to the other strap buckle to secure it.
Follow the above steps to attach the other side of the neck strap.
-
Insert one end of the lens strap through the strap eyelet. Make a loop to secure it.
-
Attach the other end of the lens strap on the lens cover.
natural_image
Close-up of a black athletic harness with straps and straps (no text or symbols visible)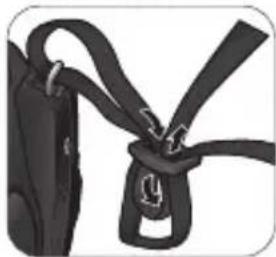
natural_image
Close-up of a black leather buckle strap and belt (no text or symbols visible)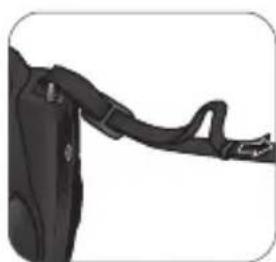
natural_image
Close-up of a black athletic jacket with a strap and handle (no text or symbols visible)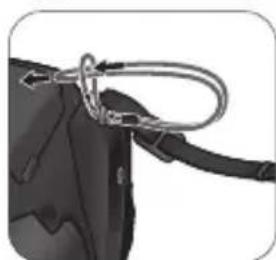
natural_image
Close-up of a black object with a metallic chain and rope, no visible text or symbols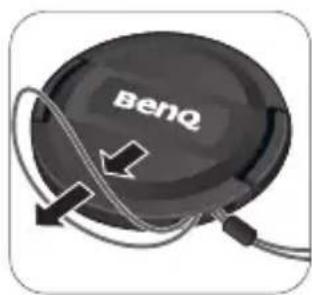
natural_image
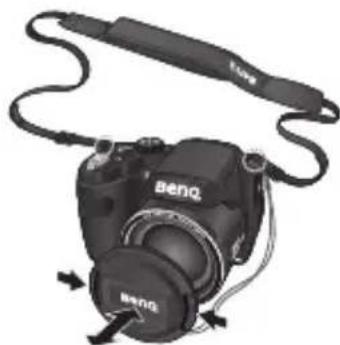
Close-up of a black BenQ ear cap with cable and directional arrows indicating movement (no text or symbols on the cap itself)- Once complete, make sure the straps are tight.
natural_image
Black BenQ DSLR camera with attached strap and cable, no visible text or symbols on body
- Wrapping the strap around your neck is dangerous. Refrain children from playing with the strap.
- Remove the lens cover before using the camera.
Installing the batteries
Use only the specified batteries for the camera, and always turn off the camera before removing the batteries.
To install the batteries:
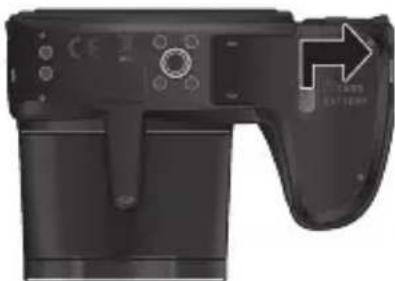
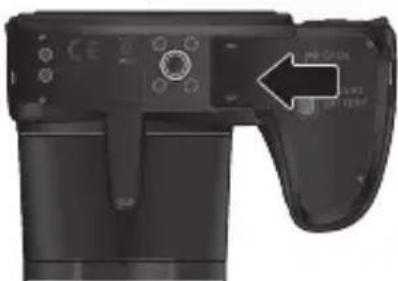
I. Push the button up and then slide the battery/card cover to the right to release and open it.
natural_image
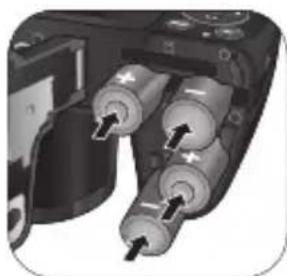
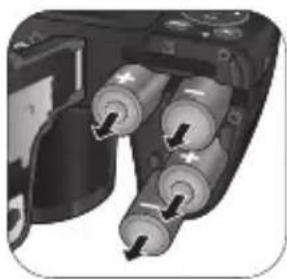
Close-up of a black digital camera with control buttons and a right-pointing arrow indicating a component (no text or symbols visible)- Insert the batteries in the correct direction by matching the + - label on the battery slot.
natural_image
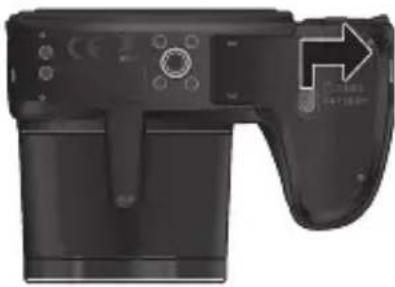
Close-up of a camera module with multiple batteries and an open socket (no visible text or symbols)- Close the battery/card cover and then slide it to the left to lock it in place.
natural_image
Close-up of a black DSLR camera with control buttons and an arrow pointing to the left side (no visible text or symbols)To remove the batteries:
I. Push the button up and then slide the battery/card cover to the right to release and open it.
2. Remove the batteries.
3. Close the battery/card cover and then slide it to the left to lock it in place.
natural_image
Close-up of a battery pack with multiple cylindrical batteries and a terminal block (no visible text or symbols)
- Turn off the camera before removing the batteries.
- Use only the specified battery type. Using other types of batteries may damage the camera and invalidate the warranty.
- Ensure that the batteries are inserted into the product with correct polarity. Incorrect polarity may damage the camera or cause fire.
- Download all pictures and remove the batteries from the camera if you are going to store the camera for a long time.
- The batteries may be warm after being used. This is normal and not a malfunction.
- When using the camera in a cold environment, keep the camera and its batteries warm by holding it inside your jacket or another warm protective environment.
- Please select the correct battery type before use (see "Battery Type" on page 50 for details).
• High-capacity (such as 2500 mAh) rechargeable batteries are recommended.
• Carbon-zinc batteries are not recommended.
• The AA batteries that came with the camera are not rechargeable. - Do not combine old and new batteries or batteries of different makes or types.
- Performance of alkaline batteries may vary greatly depending on the manufacturer. Choose a reliable brand.
Installing an SD card
The camera comes with internal memory for storing captured images, video clips, or audio files. You can also add an SD card to store more files.
To install an SD card:
I. Push the button up and then slide the battery/card cover to the right to release and open it.
natural_image
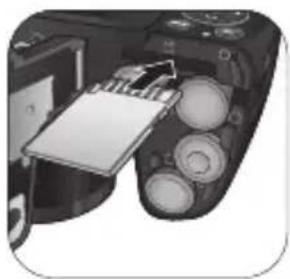
Close-up of a black digital camera with control buttons and an arrow pointing to the right side (no visible text or symbols)- Insert an SD card in the correct direction.
natural_image
Close-up of a camera module with a clip inserted into the lens (no visible text or symbols)- Close the battery/card cover and then slide it to the left to lock it in place.
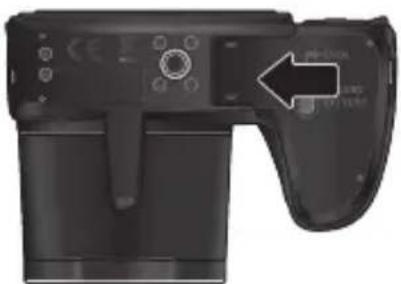
natural_image
Close-up of a black digital camera with a left-pointing arrow indicating the camera's left side (no text or symbols on the device body)To remove an SD card:
I. Push the button up and then slide the battery/card cover to the right to release and open it.
-
Lightly press the edge of the memory card to eject.
-
Close the battery/card cover and then slide it to the left to lock it in place.

Before initial use of an SD card, please format the card first by pressing MENU

Manage Memory > OK / ↩ > Format > OK > Yes.
Turning the Power On and Off

Before turning on the camera, be sure to remove the lens cover. Otherwise, the lens will not be extended and the camera will beep three times.
There are two ways to turn on the camera:
- Press the Power button.
The zoom lens extends and the camera is turned on in Record mode. - Press and hold
The camera is turned on in Playback mode, and the lens is not extended.
Opening the Flash
You need to manually open the flash before switching the flash mode.
To open the flash:
Use hands to lift the flash to open it.
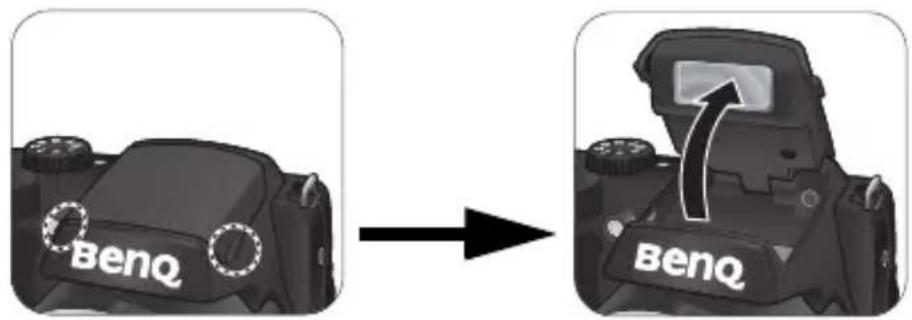
To close the flash:
Push down the flash to close it.
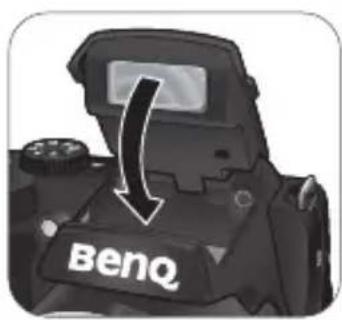

When the flash is closed, flash mode is automatically set to flash off.
Initial setting
You will be prompted to set up the language and the date and time when the camera is turned on for the first time.
Setting language
Selects the language version shown on the screen.
To select a language:
I. Press MEN(Step 1 is needed only after the initial setting is complete.)
- Press or to locate
Language / 語言 / 语言, and then press OK

- Press , , or [ ] to locate the language you want.
- Press ⓊKset the language.
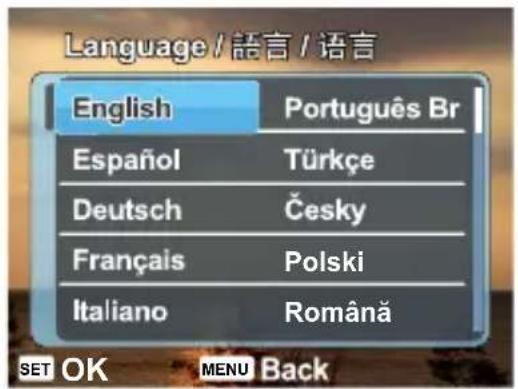
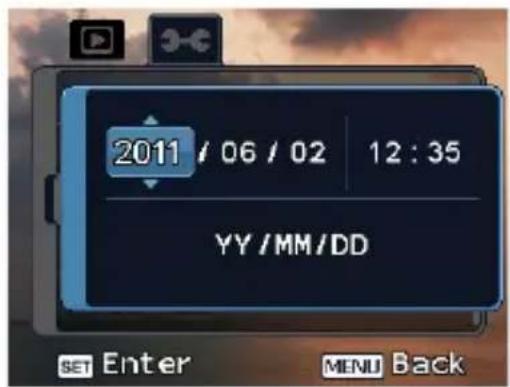
Setting date and time
When using the camera for the first time or when the battery has been removed from the camera for a long time, you need to set the date and time. The date and time is recorded when a video or image is captured.
To set date and time:
I. Press MEN (Step 1 is needed only after the initial setting is complete.)
- Press or to locate Date/
Time, and then press OK.
- Press or to select date, time
and date format. Press or to move to another column as needed.
- Press OK set the date and time.
Operating the camera
The procedure below is a general guideline for basic operation. It is particularly useful if you are new to the camera.
I. Press the Power button to turn the power on.
Be sure that you have removed the lens cover before turning on the camera.
2. Set the mode dial to per other desired shooting mode. See "Selecting the Shooting Mode" on page 28 for details.

Remember to follow the on-screen display or slide the Zoom lever to for instructions (wherever available). Next, press the corresponding buttons to access and set more options. At any time, you can cancel the current operation by pressing MENU to return to your previous step.
-
If you need to use the flash for shooting, open the flash.
-
Use the Zoom lever to zoom-in/zoom-out on the subject.
-
Press the Shutter button halfway to set automatic focus.
-
If you need to use the flash for shooting, open the flash.
- Use the Zoom lever to zoom-in/zoom-out on the subject.
- Press the Shutter button halfway to set automatic focus.
- Once the focus is set, the focus frame color will turn from white (unfocused) to green (focused). If the focus frame color is red and you press the Shutter button down, it might result in a blurred photo.
-
Press the Shutter button down fully to capture the image.
-
To switch to Movie mode, press ●. The video recording automatically starts.
-
Press the Shutter button down fully to capture the image.
- To switch to Movie mode, press ●. The video recording automatically starts.
- While recording, use the Zoom lever to zoom-in/zoom-out on the subject. Press again to stop video recording.
- Press to pause/resume the video recording.
- To switch to Playback mode, press ▶. In Playback mode, you can view captured images or recorded videos.
- You can press your view to view other images/videos, slide the Zoom lever to zoom-in on a captured image, or slide the Zoom lever to side to view 9-thumbail images on the screen.
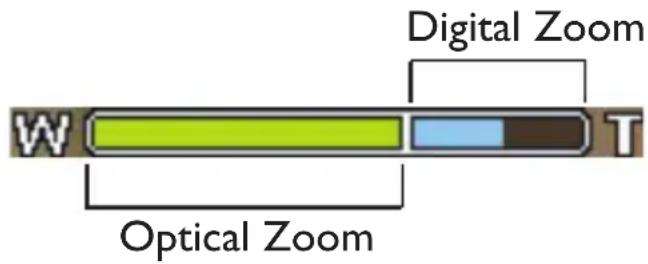

- During zoom-in/out, there is a separator in the zoom bar between and . W For best image quality, it is recommended to use optical zoom only by keeping the magnification within and the separator.
- Flash is automatically turned off in the Movie mode.
- In Movie mode, the camera records both sound and video. The recording time is continuous, but recording will stop once the memory card space is full.
- In Movie mode, sound is temporarily muted during zoom-in/out.
- At any time, you can press the Power button to turn off the camera.
- In Capture or Playback mode, press to decide what information to show on the screen.
Capture mode
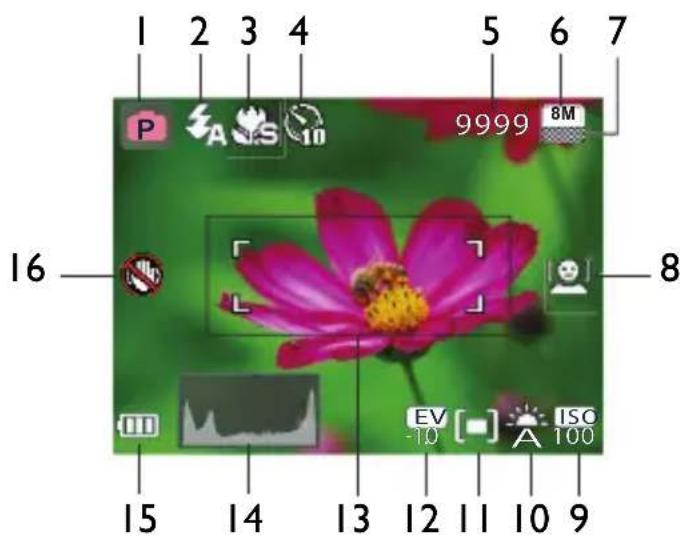
| Item Description Page reference | ||
| 1 Shooting mode 28 | ||
| 2 | F I a s h | m o d e |
| 3 Focus mode 27 | ||
| 4 | D r i v e | m o d e |
| 5 Number of shots available -- | ||
| 6 Image size 40 | ||
| 7 Image quality 40 | ||
| 8 Face Tracking 26 | ||
| 9 | I S O | 4 |
| 10 | White Balance | 41 |
| 11 | AE metering | 43 |
| 12 | Exposure value (EV) | 41 |
| 13 | AF area | 46 |
| 14 | Histogram | -- |
| 15 | Battery status | 48 |
| 16 | Camera shake warning | -- |

- In Capture mode, press |0| to toggle among the 4 display modes (standard, complete, none, and rule of thirds).
- Use the rule of thirds display mode to improve your composition by placing subjects on at least one of the intersections of these 4 imaginary lines.
- While the shutter is pressed down halfway, the AF area color changes to green, camera shake warning (appears only if the camera itself detects possible shaking), aperture, shutter speed and ISO setting are also shown on the screen.
Flash mode
The flash offers additional light source (usually used in a low-light environment). You can capture an image using one of the following flash modes.
| Icon Mode Description | |
 | Auto Flash The flash fires automatically based on the photographic conditions. |
 | Auto Anti Red-eye Reduces the red-eye phenomenon when capturing natural-looking images of people and animals in low-light conditions. Be sure to ask the subject to look at the camera lens or get as close to the camera as possible. The flash fires automatically based on the photographic conditions. |
 | Force On The flash always fires regardless of the surrounding lighting conditions. Select this mode when capturing images with high contrast (backlighting) and deep shadows. |
 | Slow Sync Fires the flash immediately at the beginning of exposure with a longer shutter speed, so balanced ambient lighting of the foreground subject and background scene can be reached in a low-light environment. |
 | Force Off The flash does not fire. Select this mode when flash photography is prohibited, or when the distance to the subject is beyond the effective range of the flash. |
To select a flash mode:
I. Set the mode dial to the desired shooting mode. See "Selecting the Shooting Mode" on page 28 for details.
2. Open the flash. See "Opening the Flash" on page 20 for details.
3. Press repeatedly until your desired flash mode is displayed on the LCD monitor.

- The flash mode is not available in Continuous Shooting and Panorama modes.
- The flash mode will remain at "Flash Off" if the flash does not open.
- When the flash is closed, flash mode is automatically set to flash off.
Face Tracking
Focuses on the position of faces (max. 10 faces) simultaneously. While using the Face Tracking function, point the camera to where the people (your subjects) are located. Focus frames of Face Tracking will automatically detect faces (maximum 10) and show on the LCD screen.
To enable face tracking:
I. Set the mode dial to the desired shooting mode. See "Selecting the Shooting Mode" on page 28 for details.
- To enable this function, press
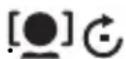
A icon appears on the LCD monitor.

- To disable face tracking function, press [again].
- This function is not available on most of capture modes. The camera will automatically determine the availability of this function.
- Due to environmental factors such as lighting, the number of detected faces might be different from that of the actual faces.
- To achieve the best result, ask your subjects not to turn their faces partially away from the lens.
Focus mode
| Icon Mode Description | |
 | Auto focus Adjusts focus automatically. |
 | Macro Used when capturing images at a close distance. |
 | Super Macro Used when capturing images at a very close distance. |
 | Pan Focus Used when you want to capture the subjects in a certain focus range. |
 | Infinity Used when capturing images at long distance. |
To select the focus mode:
I. Set the mode dial to the desired shooting mode. See "Selecting the Shooting Mode" on page 28 for details.
- Press repeatedly to toggle between Auto focus and focus modes.
Selecting the Shooting Mode
Rotate the mode dial to select one of the eight shooting modes:
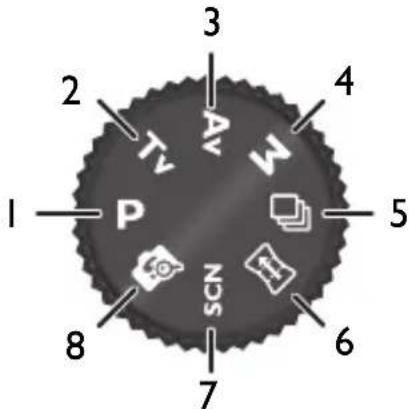
| No. | Icon Mode Description | ||
| 1. | Pro. | The camera automatically configures the appropriate settings, so you can capture images with ease. | |
| 2. | Shu' | Priority | You can choose a shutter speed, while the aperture value is automatically determined by the lighting condition of the subject. See "Using Shutter Priority mode" on page 29 for details. |
| 3. | Ape | Priority | You can choose an aperture value, while the shutter speed is automatically determined by the lighting condition of the subject. See "Using Aperture Priority mode" on page 29 for details. |
| 4. | Mar | Lets you set both aperture and shutter speed manually. See "Using Manual mode" on page 29 for details. | |
| 5. | Cor | Shooting | Lets you capture a series of shots with a single press of the Shutter button. See "Using Continuous Shooting mode" on page 30 for details. |
| 6. | Pan | Lets you create a panoramic photo from three shots. See "Using Panorama mode" on page 30 for details. | |
| 7. | Scen | Mode | Lets you select the desired scene mode that suits your shooting environment. See "Setting the Scene mode" on page 32 for details. |
| No. | Icon Mode Description | ||
| 8. | Sma | Scene | The camera detects the shooting condition and automatically switches to the appropriate scene mode. See "Using Smart Scene mode" on page 32 for details. |
Using Aperture Priority mode
Aperture priority is often used when shooting static subjects or emphasizing the depth of field. In general, use a smaller aperture if a greater depth of field is needed.
To adjust aperture value:
I. Set the mode dial to

-
PreOK
-
Press or to adjust the aperture value.
-
Press ⓊKconfirm setting.
Using Shutter Priority mode
Shutter priority is often used when shooting moving subjects. In general, use a shorter shutter speed to catch a fast-moving object.
To adjust shutter speed in Shutter Priority:
I. Set the mode dial to .Tv
-
PreSK
-
Press to adjust the shutter speed.
-
Press ⓊKconfirm setting.
Using Manual mode
You can choose the aperture value and shutter speed in Manual mode.
To adjust values in Manual mode:
I. Set the mode dial to M
-
PreSK
-
Adjust the settings.
- Press [or] to adjust the aperture value.
- Press pr to adjust the shutter speed.
- Press ⓊKconfirm setting.
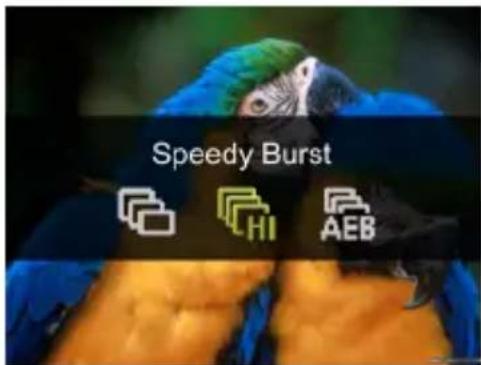
Using Continuous Shooting mode
In this mode, you can take consecutive shots.
| Icon Mode Description | |
 | Burst Continuously takes pictures as long as you keep pressing the Shutter button. The flash is always off in this mode. |
 | Speedy Burst Press and release the Shutter button. When the photo size you select is VGA, Speedy Burst will shoot continuously at the speed of 30 shots per second. This will stop after 1 second or when the memory card is full. |
 | AEB (Auto Exposure Bracketing) Automatically takes 3 pictures with slightly different settings in the shutter speed or the aperture value. |
To select a continuous mode:
I. Set the mode dial to

-
Press to enter the select mode.
-
Press 🤒 to select a desired option.
-
Press to confirm.
Using Panorama mode
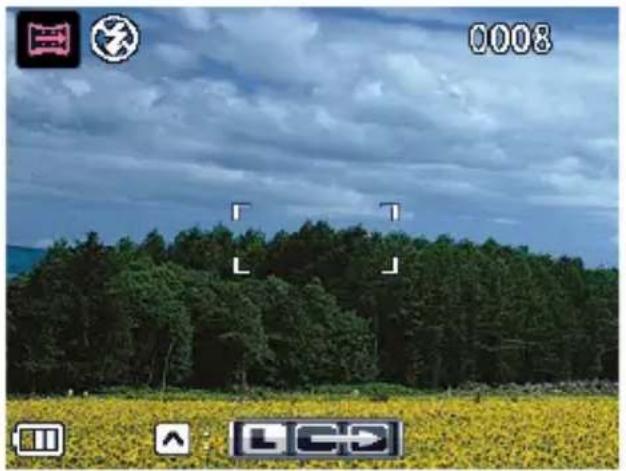
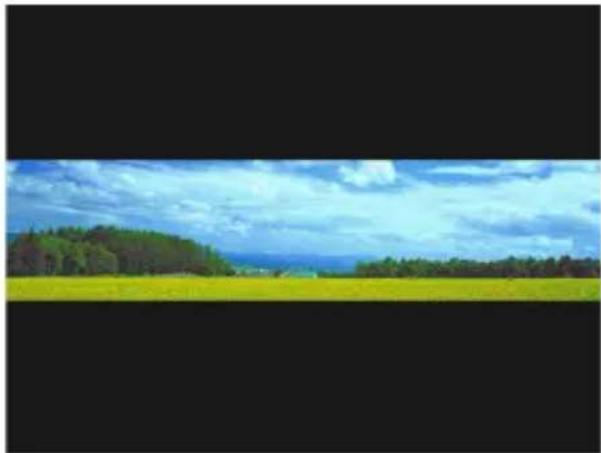
Creates a panoramic photo from multiple shots. Two to three shots are stitched into one single and seamless large picture. For optimized performance, the image resolution is automatically set at IM (1024 x 768) when this mode is selected.
I. Set the mode dial to
-
Press to select how shots will be stitched.
-
Press the Shutter button to capture the first shot.
natural_image
Landscape photo of a forested field under cloudy sky, no visible text or symbols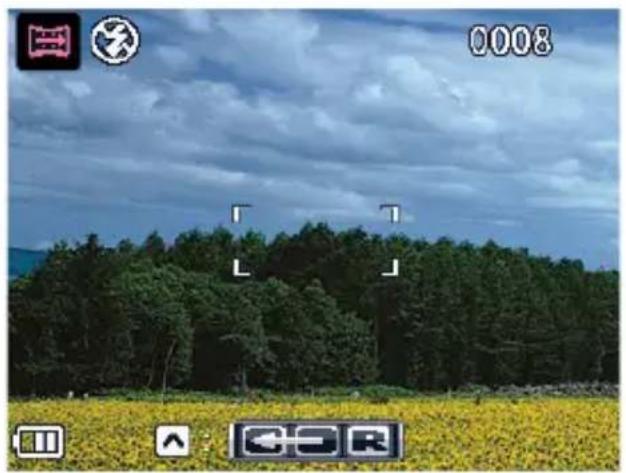
natural_image
Landscape photo of a forested field under cloudy sky, no visible text or symbols| Icon Mode Description | |
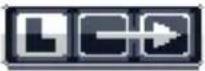 | Left-to-Right The direction of the succeeding shots will be to the right of the first shot. |
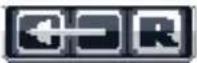 | Right-to-Left The direction of the succeeding shots will be to the left of the first shot. |
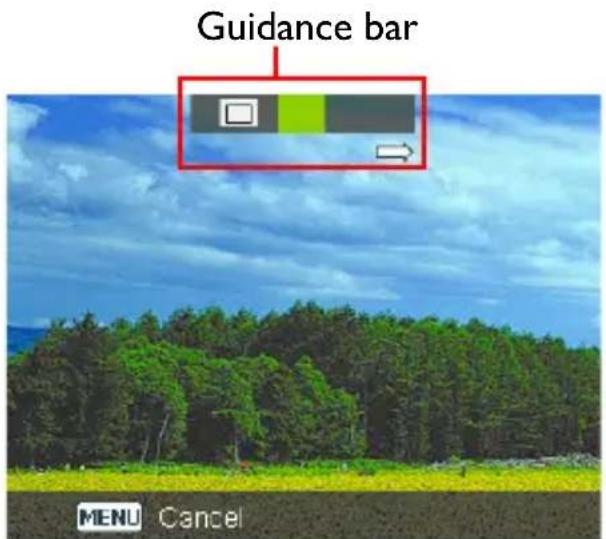
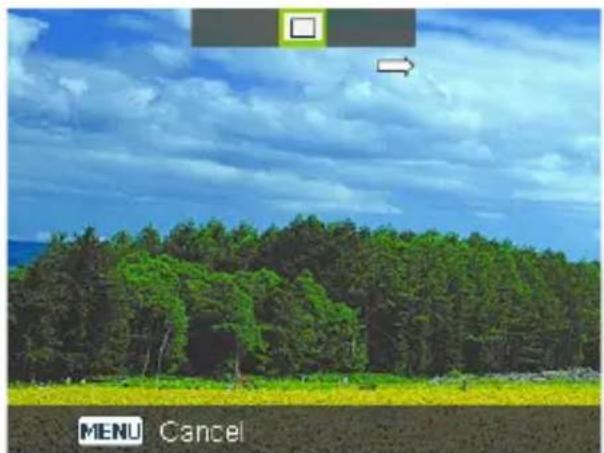
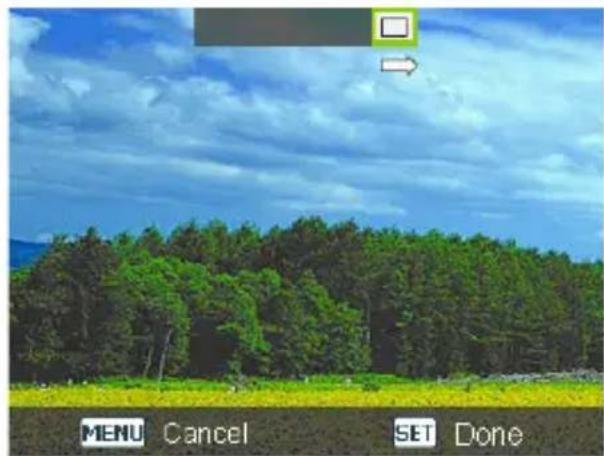
- A guidance bar appears on top of the screen. The screen icon 🌐 indicates the location of the current screen. Pan the camera following the guidance arrow.
natural_image
Landscape photo of a forested area under a cloudy sky, with no visible text or symbols.-
Once the screen icon □ overlaps the green block, the camera will automatically take the second shot. If you will only stitch two shots, press OK to complete the panoramic picture. Otherwise, proceed to the next step.
-
To take the third shot, pan the camera to the direction of the guidance arrow. Once the screen icon overlaps the green block, the camera will automatically take the third shot.
natural_image
Landscape photo of a forested field under a blue sky with clouds, no visible text or symbolsthe screen icon overlaps the block
natural_image
Panoramic view of a vast yellow flower field with green trees and a blue sky with scattered clouds (no text or symbols)Panoramic picture previewThe camer
Using Smart Scene mode
Automatically selects the best scene mode from Portrait landscape , Sunset AUTO, Backlight AUTO, Backlight Portrait AUTO, Night Portrait AUTO, Night Scene AUTO Show , Text , and Fluige , and Macr AUTO AUTO
I. Set the mode dial to
2. Press the Shutter button halfway to set automatic focus. The selected shooting mode is displayed in the top left corner of the screen.
3. Press the Shutter button to capture an image.
Setting the Scene mode
Select one of the following scene modes to fit your shooting condition.
| Icon Mode Description | |
 | Smile Catch Automatically takes a shot when a smile is detected. |
 | Pre-composition Captures the background first, so the helper can use it to take the final shot. |
 | HDR Increases the dynamic range and enhances the details of dark areas. |
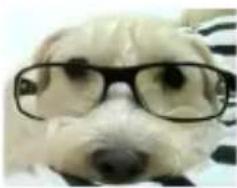 | Fisheye Simulates a fisheye lens effect and creates a distorted hemisphere-like image. |
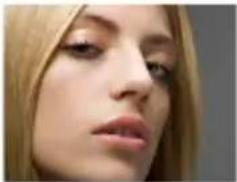 | Beauty Enhancer Enhances the tone of skin so that the facial skin appears smooth. |
 | Portrait Makes the subject (usually a person) stand out with smooth and natural-looking skin tones. |
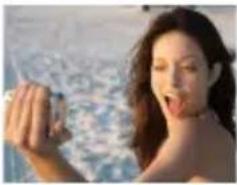 | Self Portrait Takes a self portrait with at least one face in a confined area. |
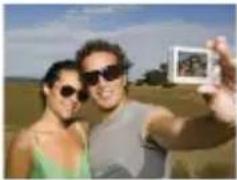 | Love Portrait Takes a self portrait with at least two faces in a confined area. |
 | Blink Detector Warns of eye blinks if detected and lets you decide whether to save the image file. |
 | Night Portrait Shoots night scenes and portraits clearly. Please keep the camera steady or use a tripod while using this mode. |
 | Child Increases sensitivity and emphasizes children's skin tones. |
 | Sports Uses a high shutter speed to capture objects in motion. |
 | Food Captures food by enhancing color brightness and giving more vivid colors. |
 | Party Captures the party atmosphere usually under indoor light source. |
 | Candle Light Makes a picture look warm, and thus captures the mood under candle light source. Flash is always off. |
 | Back Light Increases exposure (by turning on the flash) when light illuminates the subject from behind. |
 | Night Scene Captures photos in a low-light environment, such as in the evening or at night. |
  | Fireworks Adds exposure time to shoot firework trails. Please keep the camera steady or use a tripod while using this mode.Landscape Captures a scene in the distance with the focus area set to infinity and a lower aperture value. The maximum depth of view can also be achieved. |
 | Foliage Takes a clear and vivid picture of flowers or plant leaves by emphasizing their saturation and sharpness. |
 | Soft Flowing WaterUses a low shutter speed for motion blur. Please keep the camera steady or use a tripod while using this mode. |
 | Sunset Captures the warmth and atmosphere (represented by hue) of sunrise or sunset. |
 | Snow Used under a very bright light environment such as snow scenes. |
 | Building Enhances lines & contracts to highlight the sense of the three dimensions (3D) for a building. |
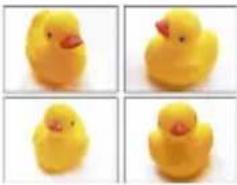 | Web Auction Reduces the file size for faster internet upload. |
 | Text Improves clarity & contrast when taking a close-up picture of documents. |
| Icon | Mode | Description |
| Voice Rec. (Voice Recording) | Captures background sound only (no images or videos). When listening to the captured audio file later, you can see a unique icon that appears on the screen and indicates that this is an audio file. |
To select a scene mode:
I. Set the mode dial to SCN
2. Press The last selected scene mode is highlighted on the menu option.
3. Press [●] to select the desired scene mode.
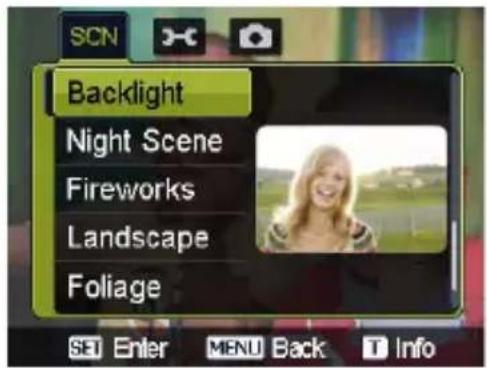

When you are selecting from different scene modes, slide the Zoom lever to Q T for detailed explanation of each scene mode. Slide the Zoom lever to W0 close the scene mode description when you are done.
4. Press ⓊKconfirm setting.
Smile Catch
Captures an image when the subject smiles.
I. Set the mode dial to SCN
2. Pressu Smide Catchselect
3. The camera is tracking the face of your subject (a white frame shows).
4. Once a smile is detected, the camera instantly takes a picture.
5. The camera continues to detect smiles and takes more pictures (Step 3 is repeated).

Face tracking (one face only) is always on in the Smile Catch mode.
Blink Detector
Automatically detects blinking when you capture an image.
I. Set the mode dial to SCN
2. Press and select Blink Detector.
3. Press the shutter to capture an image. If blinking is detected, a warning message appears on the screen.
4. Press or to save or discard the image, and then press to confirm.
Love Portrait
Takes a self portrait of at least two faces.
I. Set the mode dial to SCN
2. Press and select Love Portrait.
- Once faces are detected, the camera will automatically take a picture after a two-second countdown.

During the countdown, you can press the shutter to cancel the countdown. The camera will then start detecting faces again.
- The camera continues to detect faces and takes more pictures by repeating Step 2. This face tracking will automatically stop if no faces are detected.
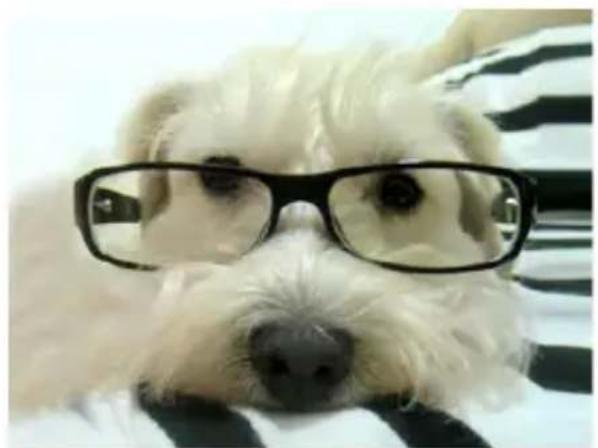
Fisheye
Simulates a fisheye lens effect and creates a distorted hemisphere-like image.
I. Set the mode dial to SCN
2. Press and select Fisheye.
- Take a picture. (The Fisheye effect will be applied to this picture immediately.
natural_image
Close-up of a small white dog wearing glasses, resting on a striped fabric surface (no text or symbols visible)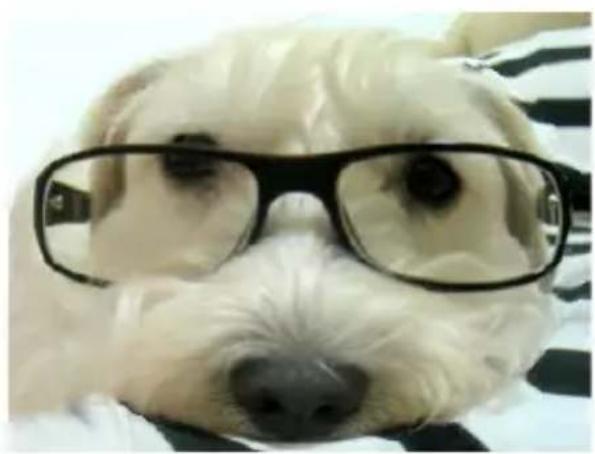
natural_image
Close-up of a small white dog wearing glasses, with no visible text or symbols.Before After
Pre-composition
Captures the background first for positioning the final image. Ideal for asking others to take your photo.
I. Set the mode dial to SCN
-
Press Precomposition.
-
Press the shutter to capture the background. The bottom section of the screen displays the captured background image in a semi-transparent region.
-
Use the captured background image to frame the composition, and press the shutter to capture the final image.
Web Auction
Combines a maximum of 4 shots into one single image on a VGA (640 x 480) size, so it can be quickly used in situations such as Internet auctions. Each picture can have different color effects.
I. Set the mode dial to SCN
-
Press Web Auctionelect
-
Press to move to the number of shots you want to take, and then press OK.
| Icon Mode Description | ||
 | I shot Takes one picture only. |  |
 | 2 shots Takes two pictures based on the numeric order shown below: |  |
 | 3 shots Takes three pictures based on the numeric order shown below: | 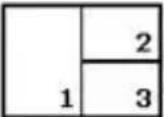 |
| Icon Mode Description | |
 | 4 shots Takes four pictures based on the numeric order shown below: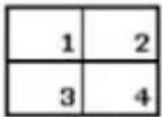 |
- Press the shutter to take one picture.
-
If you are satisfied with the picture, press OK take the next one.
-
You can change another color effect (if needed). See "Effect Mode" on page 43 for details.
-
If you want to re-take the previous picture, press and repeat Step 3.
-
Once you have finished taking all pictures, the camera will automatically combine these images into one.
Using the Function menu
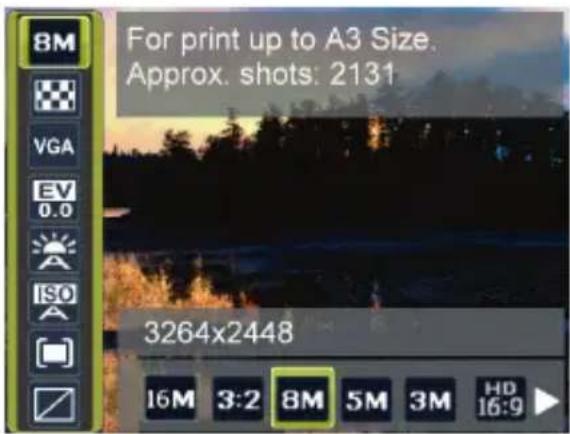
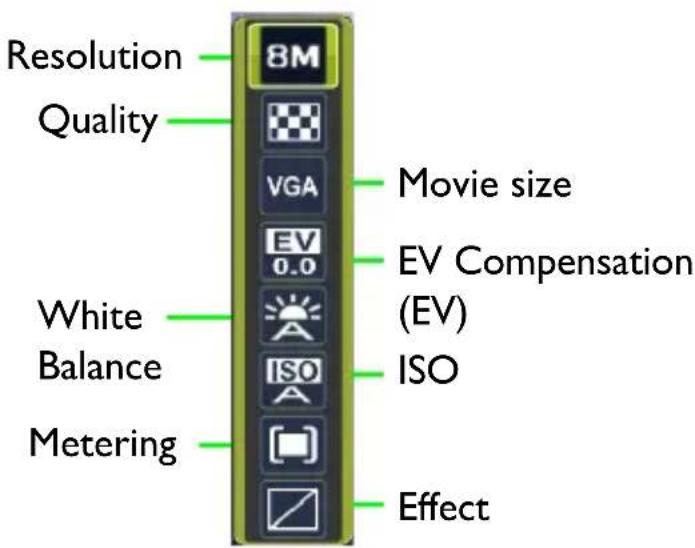
Press the Function button to access more capture options. Depending on your settings, the displayed option icons in the Function menu may vary.
To use the Function menu:
I. Press to enter the Function menu, the currently selected settings are shown.
2. Press or to select a menu item.
3. Press or to select a setting.
- Press ⓄKconfirm the setting.
Image size
| Icon Description Icon Description | |||
 | 16 megapixels (4608 x 3456) | 3 pixels (2048 x 1536) | |
 | 3:2 (14 megapixels; 4608 x 3072) |  | HD 16:9(1920 x 1080 in full HD format) |
 | 8 megapixels (3264 x 2448) | VGA (140 x 480) | |
 | 5 megapixels (2592 x 1944) -- | -- | |
To select an image size:
I. Press > Resolution.
I. Press or to select a setting.
2. Press ⓄKconfirm setting.
Image quality
| Icon Mode | Description | |
 | Super Fine | Best image quality with the lowest compression rate. File size is the largest. |
 | Fine | Better image quality with medium compression rate. File size is medium. |
 | Normal | Good image quality with the highest compression rate. File size is the smallest. |
To select an image quality level:
I. Press > Quality.
- Press to select a setting.
- Press ⓄKconfirm setting.
Movie size
| Icon Description Icon Description | |||
 | HD 720p (16:9; 1280 × 720) | QVGA (320 × 240) | |
 | VGA (640 × 480) Web (640 × 480) | Web | |
To select a movie size:
I. Press > Video Format.
- Press or to select a setting.
- Press OK confirm setting.
Setting EV
EV (Exposure Value) lightens or darkens the entire image. Adjust EV when the brightness between the subject and the background is not balanced, or when the subject occupies only a small part of the picture.
To select an EV:
I. Press > EV Compensation.
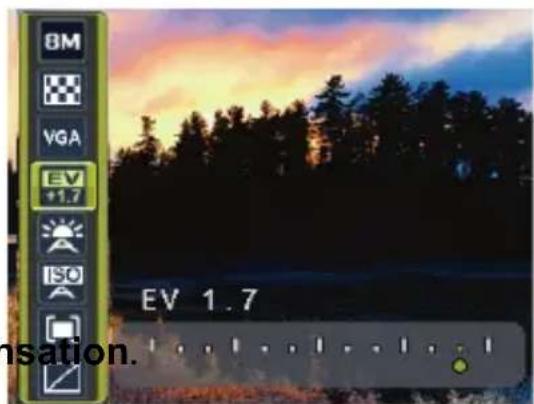
- Press on to select an EV from the EV bar.
- Press OK confirm setting.
White Balance
Compensates for color temperatures in different lighting conditions, so white and other colors can display properly when you capture images.
| Icon Mode Description | ||
 | Auto Adjusts white balance automatically. | |
 | Daylight | Used in bright daylight conditions. |
 | Cloudy | Used in twilight or shady conditions. |
 | Tungsten Used when subjects lit by tungsten (incandescent) lighting. | |
 | Fluorescent H Adjusts for fluorescent lighting. Corrects the green hue of fluorescent lighting. Ideal for indoor photos under fluorescent lighting without a flash. | |
 | Fluorescent L | |
 | Manual Used when you want to manually adjust white balance in a particular lighting condition. | |
To select White Balance:
I. Press > White Balance.
-
Press to select a white balance option. The preview result based on the currently selected white balance is shown on the screen. (When selecting the manual mode, you must first point the camera at a blank sheet of white paper or something similar and press the Shutter button for the camera to detect proper colors.)
-
Press OK confirm setting.
ISO
ISO configures the camera's sensitivity to light. The higher the ISO value, the brighter picture you can take in a low-light environment. Yet, you may see more noise in the picture as you increase the ISO value.
| Icon Description | |
 | Automatically sets the ISO value. |
 | Equivalent to color ISO 100/200 film. Used for outdoor photography in bright sunlight. |
 | Equivalent to color ISO 400/800/1600/3200/6400 film. Used it in a low-light environment or where the flash light is not allowed. |
 | • ISO 6400/3200 for resolution of 3M/16:9/VGA under only |
To select an ISO value:
I. Press > ISO.
- Press for to select an ISO Value.
- Press ⓊKconfirm setting.
Metering
| Icon Mode Description | |
 | Matrix Detects the exposure based on multiple points in the subject area. |
 | Cen. Weight Detects the exposure of the entire shooting screen, but gives more importance to the values near the center. |
 | Spot Detects the exposure based on the center spot in the subject area. |
To select a metering option:
I. Press > Metering.
- Press or to select a metering option.
- Press ⓊKconfirm setting.
Effect Mode
Adds color filter effects to the image or video you want to capture.
| Icon Mode Description | ||
 | Normal No effects are added. | |
 | LOMO Creates a lomo-like effect by adding over saturated colors, dark corners, and so on. | |
 | Vivid | Adds an effect with very clear and bright color tones. |
 | Sepia | Adds an effect with dark reddish brown color tones, so the image or video looks as if it is old. |
 | Color Accent (Red) | Highlights the subjects by keeping the red color domain of an image only while making other regions black and white. |
 | Color Accent (Green) | Highlights the subjects by keeping the green color domain of an image only while making other regions black and white. |
 | Color Accent (Blue) | Highlights the subjects by keeping the blue color domain of an image only while making other regions black and white. |
 | B&W (Black and White) | Adds an effect with monochromatic color tones. |
 | Vivid Red The image becomes reddish. | |
| [B4D2] | Vivid Green The image becomes greenish. | |
 | Vivid Blue The image becomes bluish. | |
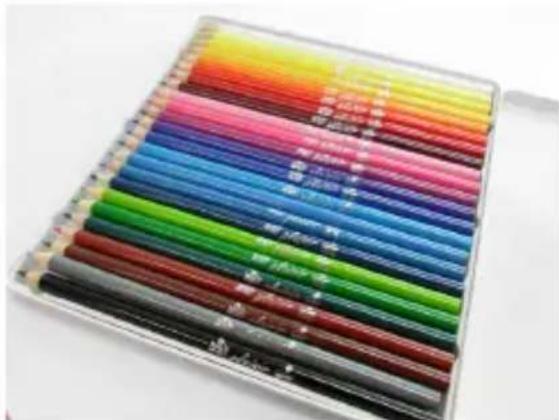
natural_image
Colorful pencil spines arranged in a grid, no visible text or symbols on the spines themselves.Before
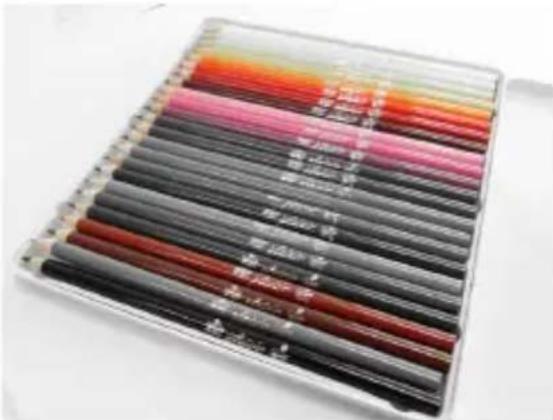
After - when Color Accent (Red) is applied
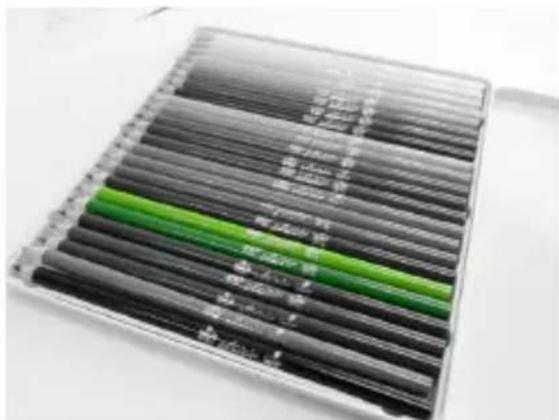
After - when Color Accent (Green) is applied
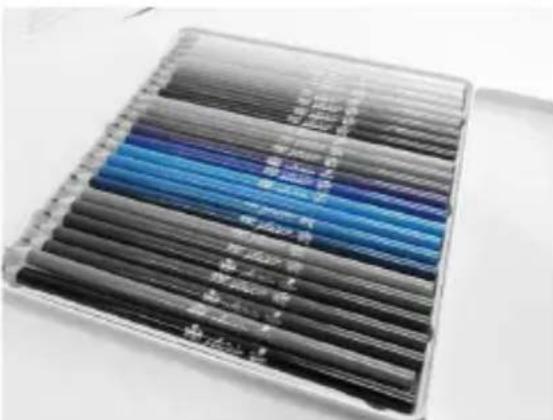
After - when Color Accent (Blue) is applied
To select an effect:
I. Press > Effect.
2. Press or to select a color mode option.
3. Press OK confirm setting.
Recording Videos
You can record video with this camera. Set the movie size before you start recording a video. See "Movie size" on page 41 for details.
To record the video clip:
I. Press to start recording.
2. Use the Zoom lever to zoom in/out on the subject.
3. Press to pause the recording. Press again to resume.
4. Press to stop the recording.

• Video recording will automatically stop when the video file size reaches 4 GB.
- Video recording at HD 720p (16:9; 1280 x 720) will automatically stop when the video file size reaches 4 GB or the total recording time is near 29 minutes.
- Recording a video at HD 720p (16:9; 1280 x 720) requires a Class 6 or above SDHC card.
- Videos captured in Web mode are stored under the XXXUTUBE directory (XXX are numbers) with the file size limited to 1 GB or 10 minutes per video file (video recording will automatically stop).
Using the Capture Menu
Press to access the Capture Menu. In this menu, you can change the drive mode and set up other capture settings.
I. PressU > .
- Press or to select a menu item.
- Press OK to enter the submenu.
- Press to select the settings.
- Press OK to save the setting and exit the menu mode.
Setting the Drive Mode
This feature allows you to set the self-timer settings.
| Icon Mode Description | ||
 | 10-sec./2-sec. self-timer | Automatically takes a picture after 2 or 10-second delay. This mode is useful when you want to be part of the picture. |
 | Double Performs | delay and capture twice:Performs a 10-second delay, then captures the image.Performs another 2-second delay then captures the image again. |
 | Off (Single) | Takes one picture at a time. |
To select a drive mode:
I. Press > > Drive Mode.
2. Press OK, and then select a desired option.
3. PreSK MENU>
Setting the AF Area
This feature determines the area on which the camera focuses.
To set the AF Area:
I. Press > > AF Area.
2. Press OK, and then select Wide or Center.
3. PreSK MENO
Using AF Assist Lamp
This feature allows you to add extra light when the lighting is insufficient while capturing images.
To enable the AF Assist Lamp:
I. PressU > > AF Assist Lamp.
2. Press OK, and then select.
3. Press MENO
Setting Sharpness, Saturation and Contrast
Adjusts how colors appear in the pictures by setting sharpness, saturation, and contrast.
To set sharpness, saturation, or contrast:
I. Press MENU > 📷, and then select Sharpness, Saturation, or Contrast.
2. Press OK, and then select High, Normal, or Low.
3. Press MENU>
Digital Zoom
The digital zoom enlarges or shrinks the image using a software process.
| Icon Mode Description | ||
 | Wise Zoom | Reduces the image size, and thus increases the effective zoom length without sacrificing image quality. |
 | Digital Zoom | Turns on the digital zoom feature. |
 | Off | Turns off the digital zoom feature. |
To select a digital zoom:
I. Press U > > Digital Zoom.
2. Press OK, and then select a digital zoom type or .
3. Press MENU> .
Date Stamp
Imprints the date when a picture was taken on the picture itself.
To set the date stamp:
I. PressU Date Stamp. >
2. Press OK, and then select Date, Date & Time, or OFF.
3. Press MENU
Instant Review
This feature displays the still image that just recorded for 1 second.
To set the Instant Review:
I. PressU > > Instant Review.
2. Press OK, and then select or . ON OFF
3. Press MEN> .

During instant review, half press the shutter to return to the capture mode.
Stabilizer
Reduces blur caused by camera vibration, and thus improves image quality and clearness.
To set the Stabilizer:
I. PressU > > O.I.S..
2. Press OK, and then select or . ON OFF
3. Press OK MENO

When the battery power is low, the Stabilizer will be turned off automatically.
Battery status
| Icon Description | |
| Battery power is full. | |
| Battery power remains adequate. | |
| Battery power is low. | |
| Battery power is very low. You should replace the battery ASAP. |
Other settings
Press MENU and then select an option.
| Icon Mode | Description | |
| Sounds [Startup] Sets | Sets a type of the start | startup sound. |
| [Shutter] Sets the | shutter sound on and off. | |
| [Operation] Sets | the button (excluding shutter) sound on and off. | |
| [Beep Volume] A | Adjusts the volume of the shutter sound, startup sound, operation sound and playback sound. | |
| Power Saving |  [1 min.] [1 min.] | For power conservation, the camera automatically enters the standby mode after it has been idle for a period of time. (Press any key to resume.) |
 [3 min.] [3 min.] | ||
 [5 min.] [5 min.] | ||
 [Off] [Off] | The camera remains on when idle. | |
| LCD Saving |  [On] [On] | For power conservation, the LCD screen is automatically dimmed after the camera has been idle for 20 seconds. (Press any key to resume.) |
 [Off] [Off] | The LCD screen remains bright when the camera is idle. | |
| Date & Time Sets the date and time. | ||
| Language Select a language for display menus and other information. | ||
| File Numbering |  [Series] [Series] | Stores the most recently used file number regardless of deleted files or a change of memory card. This is useful for avoiding the file name duplication when images are downloaded to a computer. |
| [BT7Y] [Reset] | Resets file numbering each time the memory card is changed. | |
| TV Out You can review images on a television with an AV cable. | ||
| LCD Brightness |  [Auto] [Auto] | The LCD brightness is automatically set based on the surrounding environment. |
 [High] [High] | The LCD brightness is increased. | |
 [Normal] [Normal] | The LCD brightness remains at the default value. | |
| Battery Type To ensure the camera displays battery level correctly, set the type to match the batteries used. Carbon-Zinc batteries are not recommended. | ||
| Manage Memory | [GSCK] [Format] | Formats the internal memory or the memory card. |
 [Copy to Card] [Copy to Card]  | Copies files from the internal memory to the memory card. | |
| Reset All Resets the entire menu and button operation settings to initial default.The following settings do not change after Reset All: Date & Time settingLanguage settingTV Out setting | ||
Playback mode
Press to switch to Playback mode.
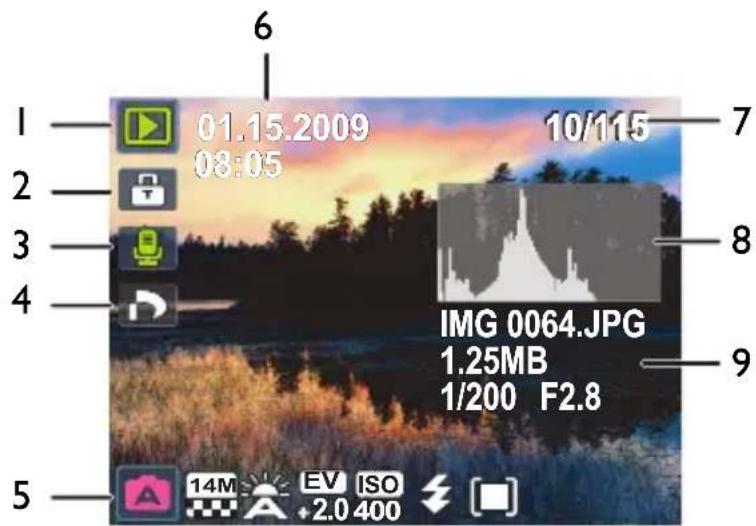

- If the camera is turned off, you can directly switch to Playback mode by pressing and holding ▶
- While pausing video playback, you can press the Shutter button to capture the video frame as a still image in the VGA format.
| Item Description Page | reference | |
| 1 Indicates that the camera is in Playback mode. -- | ||
| 2 Indicates that the file is protected and cannot be deleted. | 55 | |
| 3 Indicates this file has a voice memo or the file is an audio file. | 55 | |
| 4 Indicates the file is marked for printing. -- | ||
| 5 Displays the shooting parameters when you took the picture or playback controls. Press to toggle between different displayed information. | -- | |
| 6 Date and time when the file was created. -- | ||
| 7 File number -- | ||
| 8 H i s t o g r a m - | - | |
| Item Description | Page | reference |
| 9 File | name, file size, shutter speed, and aperture value -- | |
Options for playback and editing
When the camera is in Playback mode, press 🎨 or ↩ to view the next/previous recorded files. You can also select any of the following options.
Enlarging an image
Magnifies an image, so more details can be seen.
To enlarge an image:
I. Press to switch to Playback mode.
2. Press to select the image you want to enlarge.
3. Use the Zoom lever to zoom-in/out on the image.
4. Press , [●] or to move to the area you want to see.
5. Press to return to the normal viewing size.
Rotating an image
You can press [●] to change the orientation of an image at 90 degrees clockwise at a time.

For each rotation, the image file in the new orientation is automatically saved.
Viewing multiple files at a time
Shows up to 9 files at a time on the screen.
To view multiple files:
I. Press to switch to Playback mode.
2. Slide the Zoom lever to .In this mode, maximum 9 files (shown in
thumbnails) are displayed on the screen. Press [●], or to select a file, and then press OK to view it in its normal viewing size.

- Slide the Zoom lever to .With this mode, all files are arranged by dates.
Press [●] or to select a file, and then press or to view it in its normal viewing size.
OK MENU

If there are more than 9 thumbnails, you can press repeatedly until the scroll bar is highlighted. Then you can press [O] to move to the previous 9 thumbnails or [O] to move to the next 9 thumbnails. To cancel highlighting the scroll bar, just press 🎨.
Playing back video clips
View recorded video clips in the playback mode.
To view a video clip:
I. Press 📋 switch to Playback mode.
2. Press 🤒 to select the video clip you want to view.
3. Press OKstart playing the video clip.
- Press |0| to stop the video clip, or press [●] to pause it. Press [●] again to resume.

- During video playback, press to fast forward or press to rewind.
- While pausing video playback, you can press the shutter to capture the video frame as a still image in the VGA format.
- While pausing video playback, you can view the video frame by frame. Press to fast forward one frame, or press to rewind one frame. Press and hold to
fast forward frame by frame continuously, or press and hold 🏠 rewind frame by frame continuously.
Adjusting the playback volume
Increase or decrease the volume of video clips, audio clips, or voice memos.
To adjust the playback volume:
I. Press to switch to Playback mode.
2. Press or to select a video clip, audio clip, or voice memo that you want to play.
-
Adjust the volume.
-
To increase the volume, slide the Zoom lever to Q T
- To decrease the volume, slide the Zoom lever to W

The volume can be set during playback, but not during rewind, fast forward, or pause.
Slideshow
Sets the time interval for presenting a series of captured image and video files (first frame only).
To play a slideshow:
I. Press to switch to Playback mode.
-
Press > OK > Slideshow > or .
-
Change the slideshow settings.
- Use the four-way control to set one of the following slideshow effects:
• Applies a transition effect from left to right.
- Applies a transition effect from upper-left side to lower-right side.
• Applies a horizontal transition effect.
• Applies a vertical transition effect.
- Applies a horizontal transition effect by intersecting an image.
- You can set the interval between 1/3/5/10 seconds.
-
Select whether you want to repeat the slideshow.
-
Select Start and press OK play the slideshow.

If you want to pause it at any time, press OKess again OKo resume playback. To stop the slideshow, press MENU
Deleting files
Removes selected or all files.
To delete files:
I. Press to switch to Playback mode.
-
PressU Delete > OK .
-
Select whether to delete this selected file, voice memo only, other selected file, or all files, and then press OK
Protecting files
Prevents selected files from accidental removal.
To protect files:
I. Press to switch to Playback mode.
-
Press Protect > OK .
-
Select whether to protect this selected file, other selected file, or all files, and then press OKou will then see the icon indicating the file is protected.

You can remove the protection anytime by following the same procedure as shown above. Note that in Step 2 the on-screen instruction will ask you how you want to remove the protection.
Red-eye Removal
The Red Eye Correction function is used to reduce red eye in captured images. This function is only available for still images. Red eye correction can be applied to an image several times, but the quality may gradually deteriorate.
I. Press to switch to Playback mode.
-
Press 🤒 to select the image you want to apply Red-eye Removal.
-
Press U Red-eye Removal >> OK .
-
Press OK confirm the change and save the image file.

You cannot use this function on images captured in Panorama mode.
Voice memo
Inserts a voice annotation to an image file.
To record a voice memo:
I. Press to switch to Playback mode.
-
Press to select the image you want to add a voice memo.
-
Press Voice Memo > Off.
-
Select Start > OK to start your voice recording.
-
Select Stop > ☐Kstop recording.
To play back a voice memo:
I. Press OK to play the voice memo.
- Press to pause the playback.
- Press to resume the playback.
- Press to exit playback.
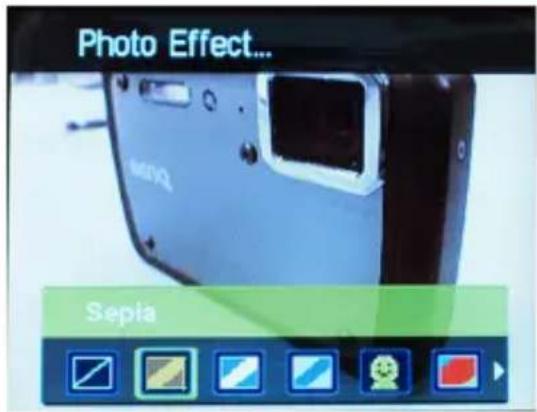
Photo Effect
You can add special effects to your images.
| Icon Mode Description | ||
 | Normal | No effect is added to the image. |
 | Sepia | Recorded image will be stored in a sepia tone. |
 | B/W | Convert image to black & white. |
 | Negative | Colors become the opposite of what they were in the original image. |
 | Mosaic | Applies a mosaic tile effect to the image. |
 | Vivid Red | The image becomes reddish. |
 | Vivid Green | The image becomes greenish. |
 | Vivid Blue | The image becomes bluish. |
To add a special effect to an image:
I. Press to switch to Playback mode.
2. Press 🤒 to select the image you want to add an effect to.
3. Pressu Photo Effect > OK .
4. Press or to select the effect.
- Press OK confirm the change and save the image file.

You cannot use this function on images captured in Panorama mode.
Trimming
Crops part of an image file, reduces the image size, and overwrites the image file or saves it as another new file.
To trim an image:
I. Press to switch to Playback mode.
-
Press 🎯 to select the image you want to trim.
-
PressU Trim > OK.
-
Use the Zoom lever to select the target image size (8M, 5M, 3M, VGA) to which you want to reduce.
-
Press , [●] or to locate the area to trim.
-
Press OK confirm the change and save the image file.

You cannot trim images in the size of 3:2, 16:9, or VGA, or images captured in Panorama mode.
Resizing
Changes an image file to a smaller size, and overwrites the image file or saves it as another new file.
To resize an image:
I. Press to switch to Playback mode.
-
Press 🎨 to select the image you want to resize.
-
Press U Reize > OK .
-
Press or to select the target image size to which you want to reduce.
- Press OK confirm the change and save the image file.

You cannot resize images in the size of 3:2, 16:9, or VGA, or images captured in Panorama mode.
Startup image
Sets the welcome screen when the camera is powering on.
To select a startup image:
I. Press to switch to Playback mode.
2. Press MENU > ▶ > Startup Image > OK or ↘.
- To use the default startup image, selectDefault.
- To use a custom image, select My Photos and press 🎨 or ↓ to select an image.
-
To disable the startup image, select Off.
-
PreOK .
DPOF
The Digital Print Order Format (DPOF) setting allows you to select images on the memory card for printing and specify the number of print copies in advance using the camera. This is extremely convenient for sending the images to a photo developing service or for printing on a direct print function compatible printer.
To set up DPOF:
I. Press to switch to Playback mode.
2. PressU DPOF. >
3. Press [●] to select one of the following options.
- To set the DPOF setting for one image in a time, select One. Press 🖱
to select an image.
- To set the DPOF setting for all images in a time, selectAll.
-
To clear all DPOF settings to initial default, select Reset.
-
Press or to specify the number of copies.
-
Press to decide whether you want to turn the date stamp on.
-
Press
Radial Blur
Applies a rotating motion effect to give a feel of speed.
To apply a Radial Blur effect:
I. Press to switch to Playback mode.
-
Press > OK> Radial Blur > or .
-
Press [●] to select a degree of Radial Blur.
-
Press OK confirm the change and save the image file.

You cannot use this function on images captured in Panorama mode.
Working with computer and AV system
Bundled software
The camera offers the following programs on a CD.
| ArcSoftPhotoImpression 5 | Combines photo editing with creative enhancement and sharing tools that maximize your digital media experience. |
| ArcSoftVideolmpression 2 | Creates multimedia presentations by combining photos and video clips with audio, text and scene transitions. |
To install these programs, see the information supplied with the CD.
Connecting the camera to a computer
You can connect the camera to a PC or notebook to transfer, view, print, or edit files.
To connect the camera to a computer:
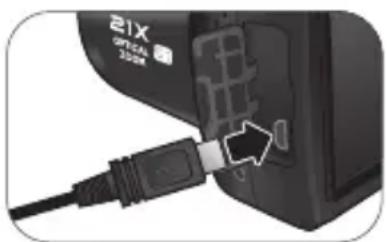
I. Open the USB/AV port cover.
2. Connect the end of the smaller plug of the USB cable to the camera.
3. Turn on the camera.
natural_image
Close-up of a black USB cable inserted into a device labeled '21X Optical 3G8M' (no additional text or symbols visible)- Connect the other end of the USB cable to an available USB port on your computer.
- Select Computer and wait for the connection.
- A Removable Disk icon appears in My Computer. Click this icon to access the files in your camera.

- When connecting the camera to a computer, it is necessary to install a battery into the camera.
- When connecting the camera to a computer, please use the original accessory of the USB cable to avoid possible system conflicts and damage to the camera.
Connecting the camera to an AV system
You can play files in your camera from an AV system such as TV or projector.
To connect the camera to an AV system:
I. Open the USB/AV port cover.
2. Connect the end of the smaller plug of an AV cable to the camera.
3. Connect the yellow video plug and the white audio plug of the AV cable to a video-input jack and an audio-input jack (left channel) on your AV system.
4. Turn on the AV system, and then switch to the AV source connecting to the camera.
5. Turn on the camera.
6. Follow the on-screen instructions to operate the camera via the TV or projector screen.
Printing images
In addition to printing images by connecting the camera to a printer via a computer or bringing the memory card (if available) to a photo-processing center, you can choose to print using PictBridge.
Printing with PictBridge
You can directly print images by connecting your camera to a PictBridge-compatible printer without using a computer.
To print images from a PictBridge-compatible printer:
I. Open the USB/AV port cover.
2. Connect the end of the smaller plug of the USB cable to the camera.
3. Connect the other end of the USB cable to an available USB port on your printer.
- Turn on the printer. Wait for a while until it finishes starting up and is ready to print.
- Turn on the camera.
- Select Printer and wait for the connection.
- Select one of the following options:
- To print one image at a time, select Print Select, and press select an image.


- To print all images at a time, select Print All.
- To print all images (shown by thumbnails) at a time, selectPrint Index.
8. PreOK

- The above procedure may vary depending on the printer type you are using.
- If you connect the camera to your printer while the printer is still starting up, the camera will be automatically turned off.
- Failure to follow the above procedure will make the camera show an error message. Please disconnect the camera and the camera will be automatically turned off.
Troubleshooting and service information
If your camera cannot operate normally, see the frequently encountered problems and solutions listed below. If the problem persists, contact your nearest service center or technical support.
| Problem Cause Solution | ||
| The camera cannot power up. | There is no battery or the batteries are not inserted correctly. | Insert the batteries correctly. |
| The batteries have no power. | Replace the batteries. | |
| The battery power is draining quickly. | The external temperature is extremely low. | -- |
| Many shots are being captured in dark places, requiring a flash. | -- | |
| The batteries or camera is warm. | The camera or flash was used continuously over a long period of time. | -- |
| The LCD screen is black. | The lens cover is on. Remove the lens cover. | |
| No image is displayed on the screen and the camera beeped three times. | The lens cover is on. Remove the lens cover. | |
| I cannot adjust the flash mode. | The flash is closed. Open the flash. | |
| The flash does not fire. | The camera flash is turned off. | Set the flash to Auto Flash. |
| The light source is sufficient. | -- | |
| Even though the flash fired, the image is dark. | The distance to the subject is greater than the flash's effective range. | Get closer to the subject and shoot. |
| The image is too bright or too dark. | The exposure is excessive or inadequate. | Reset exposure compensation. |
| I cannot format a memory card. | The memory card is write-protected. | Remove the write protection. |
| End of the memory card life. | Insert a new memory card. | |
| I cannot download images from the camera to my computer. | The free space on the hard disk of your computer is insufficient. | Ensure that the hard disk has enough space for running Windows and that the drive for loading image files has free space equal to or greater than the memory card in the camera. |
| There is no power being supplied to the camera. | Replace the batteries. | |
| The camera does not shoot even when pressing the Shutter button. | The batteries are running low. | Replace the batteries. |
| The camera is not in Capture mode. | Switch to Capture mode. | |
| The Shutter button was not pressed all the way down. | Press the Shutter button all the way down. | |
| The internal memory or memory card does not have any free space. | Load a new card or delete unwanted files. | |
| The flash is recharging. Wait | until the flash mode icon, indicated on the screen, stops flashing. | |
| The camera does not recognize the memory card. | Format the memory card before the initial use or before using with another camera. | |
| I cannot print images with PictBridge-compliant printers. | The camera is connected to the printer when the camera is powered off. | Connect the camera to the printer, turn on the camera, and then select Printer. |
Technical support
For technical assistance, free driver updates, product information, and news releases, visit the following web site:
http://www.BenQ.com
Specifications
| Sensor Sony 16 Mega Pixels, 1/2.3 inch CCD | |
| Zoom Optical: 21X | Digital: Up to 5X (Preview) / Up to 12X (Playback) |
| Lens f = 4.5 (W) ~ 9 | 4.5 (T) mmF= 3.1 (W) ~ 5.8 (T)(f = 25 mm ~ 525 mm, 35 mm equivalent) |
| Focus Range Normal | W = 50 cm ~ Infinity; T = 500 cm ~ InfinityMacro: W = 2 cm ~ Infinity; T = 60 cm ~ InfinitySuper Macro: 1 cm (M) ~ Infinity |
| LCD 3.0" LCD 460k | pixels |
| Image Resolution 16 | M / 3:2 / 8M / 5M / 3M / 16:9 / VGA |
| Movie Mode HD 720 | p (1280 x 720) / VGA (640 x 480) / QVGA (320 x 240) / Web (640 x 480)30 fps, Continuous recording with sound |
| Shutter Speed Auto | 1/2000 ~ 1 sec.Manual mode: 1/2000 ~ 15 sec.(Fireworks 2 sec.; Night Scene 1/2000 ~ 15 sec.) |
| White Balance Auto | / Daylight / Cloudy / Tungsten / Fluorescent H / Fluorescent L / Manual |
| Exposure -2.0 ~ +2.0 | EV (0.3EV / step) |
| ISO Auto / 100 / 200 | / 400 / 800 / 1600 / 3200 (3M or lower) / 6400 (3M or lower) |
| Flash Auto Flash / A | Auto Anti Red-eye / Forced On / Slow Sync / Forced Off |
| Drive mode Off / 10 | sec. / 2 sec. / Double |
| Power Source CIPA | approximately 330 (based on bundled AA Alkaline batteries); 500 based on NiMH batteries; 850 based on Lithium batteries) |
| Storage Type | Built-in approx. 108MB (+-5%)SD (up to 4GB) / SDHC (up to 32GB) / SDXC (> 32GB) |
| File Format Still Image | JPEG (EXIF 2.3 compatible); DCF compatible;Support DPOFVideo: MJPEGAudio: WAV |
| Dimensions / Weight | 112.5 x 75.9 x 63.4 mm355g (w/o batteries & SD card) |
| Interface Digital output | USB 2.0 compatibleAudio / Video output (NTSC/PAL)PictBridge compatible |
| Accessories USB Cable | Software & User Manual CD / Quick Guide / Lens Cover / Lens Strap / Neck Strap / Non-rechargeable AA Batteries / Pouch (optional)Available accessories depend on the actual items shipped and may vary from the list above. |

All information, designs, and specifications are subject to change without prior notice.

- Copyright
- Disclaimer
- BenQ ecoFACTS
- WEEE directive
- CE Regulatory Notice
- FCC Statement
- Safety warning and notice
- For your safety
- Warranty
- Taking care of your camera
- Operating environment
- Table of Contents
- Touring the camera
- Checking the package contents
- Camera
- Rear view
- Multifunctional buttons
- Left/Focus:
- Up/Face Tracking:
- Right/Flash:
- Down/Display:
- Preparing the camera for use
- Attaching the strap
- Installing the batteries
- To remove the batteries:
- Installing an SD card
- Turning the Power On and Off
- Opening the Flash
- Initial setting
- Setting language
- Setting date and time
- Operating the camera
- Capture mode
- Flash mode
- To select a flash mode:
- Face Tracking
- To enable face tracking:
- Focus mode
- Selecting the Shooting Mode
- Using Aperture Priority mode
- Using Shutter Priority mode
- Using Manual mode
- Using Continuous Shooting mode
- Using Panorama mode
- Using Smart Scene mode
- Setting the Scene mode
- To select a scene mode:
- Press ⓊKconfirm setting.
- Smile Catch
- Blink Detector
- Love Portrait
- Fisheye
- Pre-composition
- Web Auction
- Using the Function menu
- Movie size
- Setting EV
- White Balance
- ISO
- Effect Mode
- To select an effect:
- Recording Videos
- Using the Capture Menu
- Setting the Drive Mode
- Setting the AF Area
- Using AF Assist Lamp
- Setting Sharpness, Saturation and Contrast
- Digital Zoom
- Date Stamp
- Instant Review
- Stabilizer
- Other settings
- Playback mode
- Options for playback and editing
- Enlarging an image
- Rotating an image
- Viewing multiple files at a time
- Playing back video clips
- Adjusting the playback volume
- Slideshow
- Deleting files
- To delete files:
- Protecting files
- To protect files:
- Red-eye Removal
- Voice memo
- Photo Effect
- Trimming
- Resizing
- Startup image
- DPOF
- Radial Blur
- Working with computer and AV system
- Bundled software
- Connecting the camera to a computer
- Connecting the camera to an AV system
- Printing images
- Printing with PictBridge
- PreOK
- Troubleshooting and service information
- Technical support
Brand : BENQ
Model : GH600
Category : Camera