
Artisan Espressomachine - Coffee maker KITCHENAID - Free user manual and instructions
Find the device manual for free Artisan Espressomachine KITCHENAID in PDF.


| Product Type | Semi-automatic espresso machine |
| Brand | KitchenAid |
| Model | Artisan Espressomachine |
| Dimensions (W x D x H) | 12.5 x 10.5 x 14.2 inches |
| Weight | 21 lbs |
| Power | 1200 W |
| Voltage | 120 V, 60 Hz |
| Water Tank Capacity | 40 oz (1.2 L) |
| Pump Pressure | 15 bar |
| Heating System | Thermoblock |
| Portafilter Size | 58 mm |
| Programmable Functions | Single and double shot volume |
| Steam Wand | Commercial-style, adjustable |
| Drip Tray | Removable, adjustable height |
| Warming Plate | On top of machine |
| Materials | Stainless steel and die-cast metal |
| Cleaning and Descaling | Automatic descaler indicator and cleaning cycle |
| Removable Parts | Water tank, drip tray, portafilter, steam wand tip |
| Safety Features | Auto shut-off, boil-dry protection |
| Warranty | 1 year limited |
Frequently Asked Questions - Artisan Espressomachine KITCHENAID
User questions about Artisan Espressomachine KITCHENAID
0 question about this device. Answer the ones you know or ask your own.
Ask a new question about this device
Download the instructions for your Coffee maker in PDF format for free! Find your manual Artisan Espressomachine - KITCHENAID and take your electronic device back in hand. On this page are published all the documents necessary for the use of your device. Artisan Espressomachine by KITCHENAID.
USER MANUAL Artisan Espressomachine KITCHENAID
ARTISAN™-ESPRESSOMACHINE
GIDS VOOR HET BESTE RESULTAAT
ARTISAN™ ESPRESSO MACHINE
GUIDE TO EXPERT RESULTS
MACHINE À ESPRESSO ARTISAN™
GUIDE DU CONNAISSEUR
ARTISAN™ ESPRESSOMASCHINE
GUIDE FÖR BÄSTA RESULTAT
ARTISAN® ESPRESSOMASKIN
OPPNÅ BEST MULIG RESULTATER
ARTISAN™ ESPRESSOKEITIN
OPAS PARHAISIIN TULOKSIIN
ARTISAN™ ESPRESSOMASKINEN
VEJLEDNING FOR EKSPERT-RESULTATER
MÁQUINA EXPRESSO ARTISAN™
GUIA PARA RESULTADOS PROFISSIONAIS
ARTISAN™ EXPRESSÓ VÉLARINNAR
NOTKUNARLEIIDBEININGAR
ARTISAN™ ESPRESSO MACHINE
natural_image
Exterior view of a modern kitchen stand mixer (no signage or text visible)Model 5KES100
Espresso Machine
Table of Contents
Espresso Machine Safety....2
Important Safeguards....3
Electrical Requirements....3
Model 5KES100....4
Espresso Machine Features ....4
Preparing the Espresso Machine for Use 6
Attach the Cup Rail....6
Remove and Wash the Water Tank....6
Fill and Rinse the Boilers....6
Brewing Espresso....7
Frothing and Steaming Milk 9
Preparing Cappuccino 9
Dispensing Hot Water....10
Care & Cleaning....10
Before Cleaning the Espresso Machine ....10
Cleaning the Frothing Arm and Nozzle .....10
Cleaning the Housing and Accessories....10
Cleaning the Shower Screen....11
Priming After Long Periods of Non-Use 11
Descaling 11
Troubleshooting Problems 11
What is Espresso?......12
Overextraction and Underextraction 12
Before Brewing: The Elements of a Great Espresso......12
Fresh Coffee Beans....12
Great Tasting Water 12
The Right Grind – and Grinder ......12
Espresso Brewing Technique ....13
Brewing Temperature 13
Grinding 13
Dosing 13
Leveling 13
Tamping....14
Volume 14
Extraction Rate....14
The Golden Crema 14
Troubleshooting Espresso as it Brews 15
A Glossary of Espresso Drinks 15
Household KitchenAid® Espresso Machine Warranty .....16
Service Centers 16
Customer Service 16
Espresso Machine Safety
Your safety and the safety of others are very important.
We have provided many important safety messages in this manual and on your appliance. Always read and obey all safety messages.

This is the safety alert symbol.
This symbol alerts you to potential hazards that can kill or hurt you and others.
All safety messages will follow the safety alert symbol and either the word “DANGER” or “WARNING.” These words mean:
DANGER
You can be killed or seriously injured if you don't immediately follow instructions.
WARNING
You can be killed or seriously injured if you don't follow instructions.
All safety messages will tell you what the potential hazard is, tell you how to reduce the chance of injury, and tell you what can happen if the instructions are not followed.
When using electrical appliances, basic safety precautions should always be followed, including the following:
- Read all instructions.
- Do not touch hot surfaces. Use handles or knobs.
- To protect against fire, electric shock and personal injury do not immerse cord, plugs, or appliance in water or other liquids.
- The appliance is not intended for use by young children or infirm persons without supervision.
- Unplug from outlet when not in use and before cleaning. Allow to cool before putting on or taking off parts, and before cleaning.
- Do not operate any appliance with a damaged cord or plug, or after appliance malfunctions or has been damaged in any manner. Return the appliance to the nearest authorized service center for examination, repair or adjustment.
- The use of accessory attachments not recommended by the appliance manufacturer may result in fire, electric shock, or personal injury.
- Do not use outdoors.
- Do not let cord hang over edge of table or counter, or touch hot surfaces.
- Do not place on or near a hot gas or electric burner, or in a heated oven.
- Always switch the appliance off, then plug cord into the wall outlet. To disconnect, turn the appliance off, then remove plug from wall outlet.
- Do not use appliance for other than intended household use.
- Use extreme caution when using hot steam.
SAVE THESE INSTRUCTIONS
This appliance is marked according to the European directive 2002/96/EC on Waste Electrical and Electronic Equipment (WEEE).
By ensuring this product is disposed of correctly, you will help prevent potential negative consequences for the environment and human health, which could otherwise be caused by inappropriate waste handling of this product.

The symbol ☐ the product, or on the documents accompanying the product, indicates that this appliance may not be treated as household waste. Instead it shall be handed over to the applicable collection point for the recycling of electrical and electronic equipment.
Disposal must be carried out in accordance with local environmental regulations for waste disposal.
For more detailed information about treatment, recovery and recycling of this product, please contact your local city office, your household waste disposal service or the shop where you purchased the product.
Electrical Requirements
Volts: 220–240 Volts A.C.
Hertz: 50/60 Hz
NOTE: To reduce the risk of electrical shock, the plug will fit in an outlet only one way. If the plug does not fit in the outlet, contact a qualified electrician. Do not modify the plug in any way.
A short power-supply cord is provided to reduce the risk resulting from becoming entangled in or tripping over a longer cord. Do not use an extension cord. If the power supply cord is too short, have a qualified electrician or serviceman install an outlet near the appliance.
WARNING

Electrical Shock Hazard
Plug into a grounded outlet.
Do not remove ground prong.
Do not use an adapter.
Do not use an extension cord.
Failure to follow these instructions can result in death, fire or electrical shock.
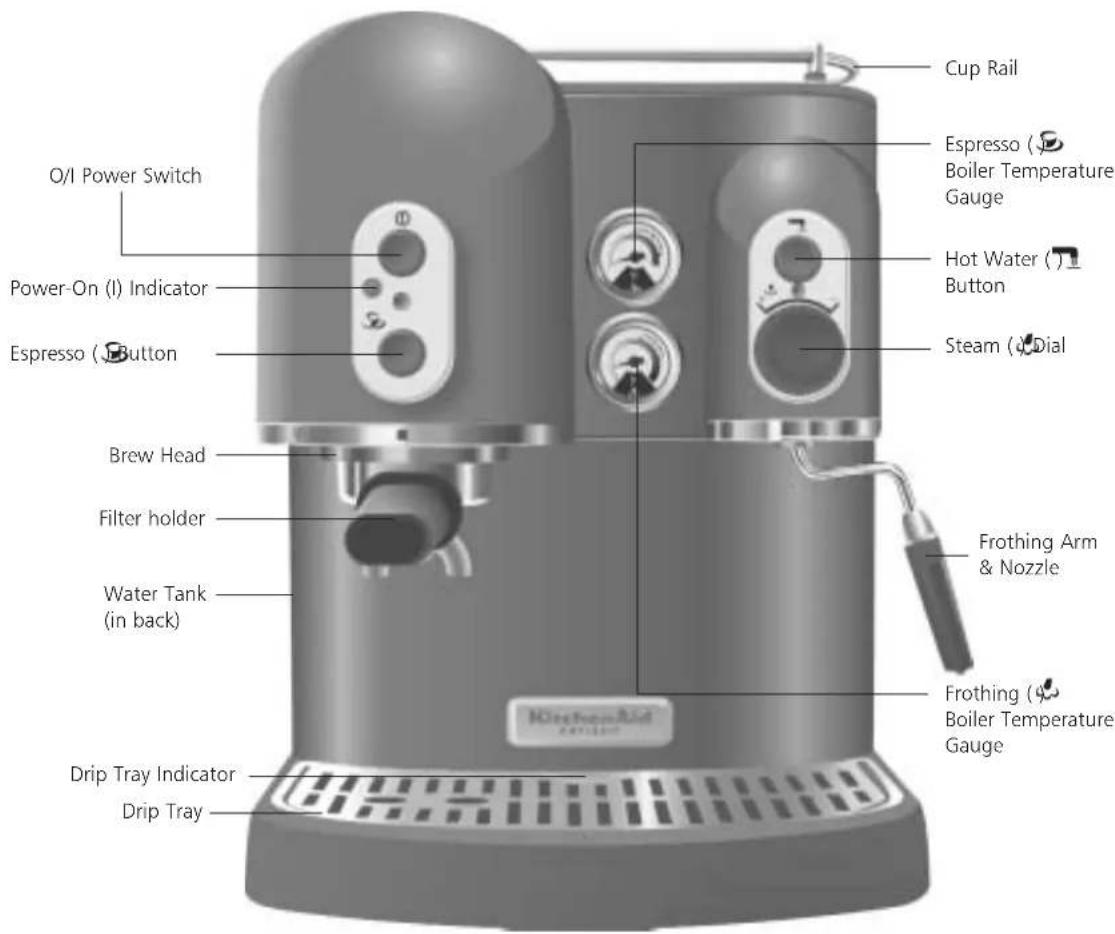
Model 5KES100 Espresso Machine
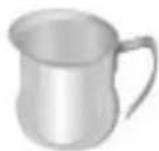
Frothing Jug
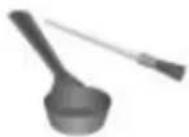
Coffee Scoop and Shower-Screen Brush
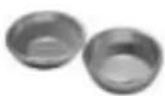
Filter Baskets
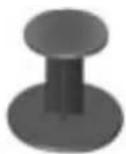
Tamper
Espresso Machine Features
O/I Power Switch
Press once to turn the espresso machine on, press again to turn off. When on, the dual boilers begin heating and the "S" and " " buttons will function.
Power-On (I) Indicator
When the espresso machine is on, the indicator light will be illuminated.
Espresso (Button
Press the "button to activate the water pump for brewing espresso. To stop brewing, press the "button a second time.
Hot Water ( ) Button
When the "idial is open, press and hold the " " button to activate the water pump and dispense hot water from the frothing arm. Pump shuts off automatically when the button is released.
Steam ( )Dial
To dispense steam or hot water through the frothing arm, open the "dial by turning it counter-clockwise. The volume of steam is controlled by the dial position: rotate the dial counter-clockwise for more steam, clockwise for less. To turn off steam, close the dial by rotating it clockwise until it stops.
Brew Head
Commercial-size brew head is chrome-plated brass for exceptional durability and brew temperature stability. Brewing boiler is bolted directly to group head, so brew group heats quickly and thoroughly.
Frothing Arm & Nozzle
Dispense steam or hot water through the frothing arm. Arm pivots horizontally and vertically to provide a convenient position. Nozzle enhances frothing and is removable for cleaning.
Drip Tray
Large, removable drip tray catches spills and is dishwasher-safe if placed in the top rack. Tray features a removable stainless steel drip plate.
Drip Tray Full Indicator
The indicator tip rises above the drip plate when the drip tray is nearly full.
Water Tank
The removable water tank slides left or right for easy filling, and features easy-to-see "max" (1.8 liters) and "min" fill lines. Translucent tank shows the water level at a glance. Tank can be washed in the top rack of a dishwasher.
Cup Rail
Top of unit accommodates 4 to 6 espresso cups for warming. Stainless steel cup rail helps prevent breakage.
Espresso (Boiler Temperature Gauge
Dial gauge indicates when espresso boiler has reached optimum brewing temperature.
Frothing (Boiler Temperature Gauge
Dial gauge indicates when frothing boiler has reached optimum steaming temperature.
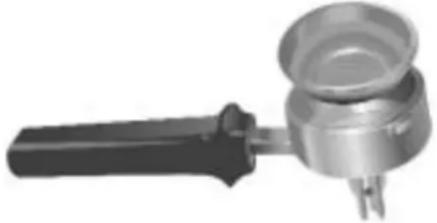
Filter holder
Commercial-size filter holder features chrome-plated brass construction and an easy-to-grip flared handle. Attaches to the brew head with a firm twist to the right.
Filter Baskets
Stainless steel filter baskets snap into filter holder. Use the small capacity basket for a single cup (30 ml) of espresso, and the large capacity basket for two cups (60 ml). The small basket also accommodates paper coffee pods.
Frothing Jug
The 255 ml capacity stainless steel jug is invaluable for frothing.
Tamper
Evenly tamps coffee into the filter basket.
Coffee Scoop and Shower-Screen Brush
Use one level scoop of coffee for each cup (30 ml) of espresso. The shower-screen brush will help keep the brew head and shower screen free of grounds.
Not Shown:
Dual Boilers
Separate boilers eliminate the wait single-boiler machines require when switching between frothing and brewing. Boiler heating elements never touch water: they are located on the outside of the boiler for superb brew temperature consistency and burnout-resistance. Quick heating boilers reach operating temperatures in at least 6 minutes.
Drip-Free System with 3-Way Solenoid Valve
A 3-way solenoid valve virtually eliminates drips by instantly reducing pressure in the brew group when the pump is switched off. The filter holder can be removed immediately after brewing without a messy spray of coffee grounds.
15 Bar Pump
Self-priming water pump comfortably supplies the 9 bars of pressure that perfect espresso demands.
Attach the Cup Rail
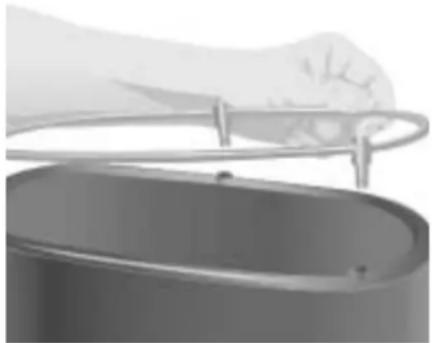
Align the three rail posts with the holes on top of the espresso machine. Then press the rail posts firmly into the holes.
natural_image
Illustration of a hand gripping a metal tray over a cylindrical container (no text or symbols visible)Remove and Wash the Water Tank
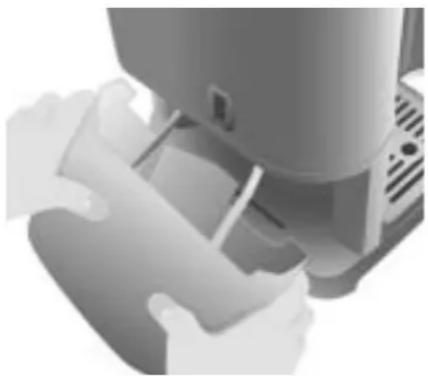
- Lift the tank slightly, then remove by pulling the bottom of the tank from the espresso machine.
natural_image
Close-up of hands operating a kitchen appliance (no visible text or symbols)- Wash the tank in hot, soapy water and rinse with clean water. The tank can also be washed in the top rack of the dishwasher.
- Place the tank back into the espresso machine, making sure the siphon hoses are placed inside the tank. The ribs on the bottom of the tank fit into the grooves on the base of the housing.
WARNING

Electrical Shock Hazard
Plug into a grounded outlet.
Do not remove ground prong.
Do not use an adapter.
Do not use an extension cord.
Failure to follow these instructions can result in death, fire or electrical shock.
Fill and Rinse the Boilers
The boilers need to be filled and rinsed before the espresso machine is used for the first time. The boilers will also need to be filled when:
- the espresso machine is not used for a prolonged period
- the water tank runs dry during use (this can damage the espresso machine)
-
multiple beverages are steamed without brewing espresso or dispensing hot water
-
Slide the water tank left or right to expose the top, and fill with fresh cold water to the max fill line.
NOTE: Distilled water or mineral water can damage the espresso machine. Do not use either to brew espresso.
- Insert the end of the electrical cord without prongs into the cord receptacle in the back of the espresso machine.
- Plug the other end of the cord into a grounded outlet.
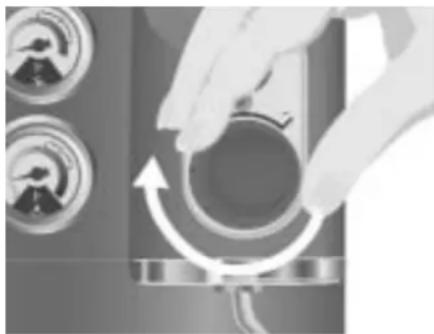
- Make certain the "Dial is closed by rotating it clockwise as far as possible.
natural_image
Close-up of hands operating a circular device with directional arrows indicating rotation (no text or symbols visible)- Press the "①" Button to turn the espresso machine on. When the espresso machine is on, the power-on (I) indicator will illuminate, the dual boilers will begin heating, and the "Band" Buttons will operate.
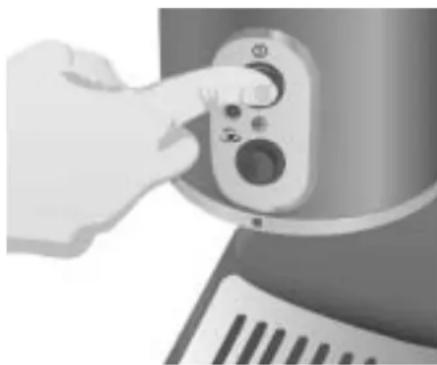
natural_image
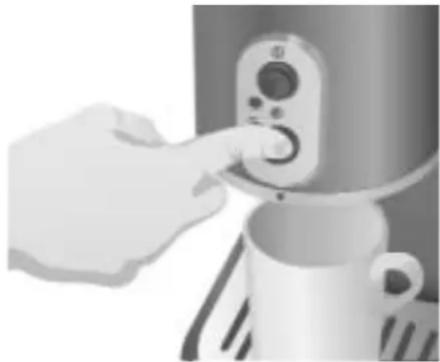
Hand pressing a button on a device (no visible text or symbols)-
Place a coffee cup underneath the brew head. Do not attach the filter holder to the brew head.
-
Press the "Button – it is not necessary to wait for the boiler to heat. This activates the water pump and fills the brewing boiler with water. After a few seconds, water will flow from the brew head. When the cup is full, press the "Button again to stop the water pump. The brewing boiler is now ready for use.
natural_image
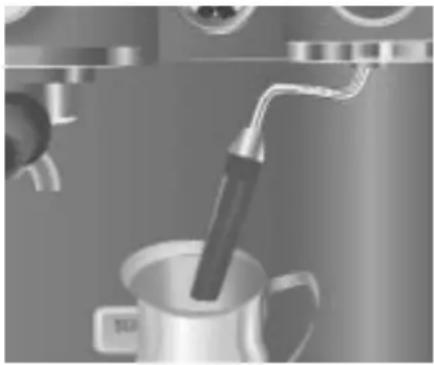
Close-up of a hand pressing a button on a kitchen blender (no text or symbols visible)-
Place the frothing jug under the nozzle of the frothing arm.
-
Slowly open the "Dial by turning it counterclockwise, then press and hold the Button. This activates the water pump and fills the frothing boiler with water. After a few seconds, water will start flowing from the nozzle.
natural_image
Close-up of a coffee machine with a mug and spool, no visible text or symbols-
When the jug is about half full, release the "Button and close the "Dial by rotating it clockwise until it stops. The frothing boiler is now ready for use.
-
If no espresso is desired at this time, press the "① Button to turn the espresso machine off.
NOTE: Do not press the "Sor" "buttons without water in the tank. Damage to the water pump may occur.
Brewing Espresso
For the finest results when brewing espresso, see pages 12–15.
- Make certain the water tank has an adequate supply of water (the water level should be between the "max" and "min" fill lines).
- Select the small or large capacity filter basket. Use the small capacity basket for one cup (30 ml) of espresso, and the large capacity basket for two cups (60 ml). The small capacity basket can be used with paper coffee pods.
- Press the filter basket into the filter holder until it snaps into place. Do not fill the filter holder with coffee at this time.
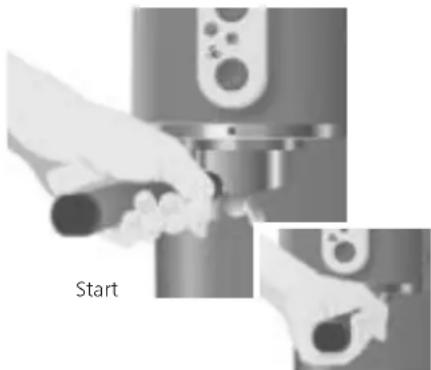
- Position the filter holder underneath the brew head and
natural_image
Close-up of a metallic mechanical device with a handle and spout (no visible text or symbols)align the filter holder handle with the "▼ on the left side of the metal trim ring. Raise the filter holder into the brew head, then move the filter holder handle to the right so that it aligns with the "■ on the metal trim ring.
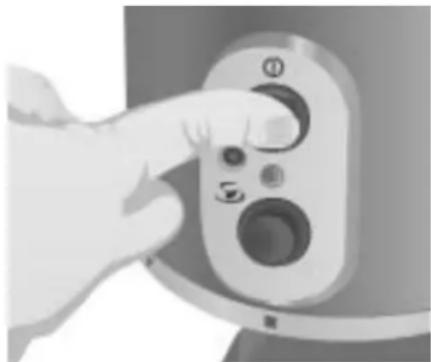
- Press the "Button to turn the espresso machine on.
natural_image
Close-up of hands operating a mechanical device with a labeled 'Start' (no other text or symbols visible)Finish
- Wait until the espresso machine has reached operating temperature; this will take approximately 6 minutes.
natural_image
Hand pointing at a device control panel with buttons (no text or symbols visible)When the espresso boiler temperature gauge needle climbs into the "zone, the espresso machine is ready to brew.
- Remove the filter holder from the brew head by moving the handle to the left. Place one level measure of ground coffee (or a paper coffee pod) in the small filter basket, or two measures of ground coffee in the large basket. Be sure to use a fine espresso-style grind for your coffee.
- Using the tamper, tamp the coffee down firmly with a twisting motion. Make sure the surface of the coffee is as level as possible. See "Leveling" and "Tamping" on pages 13 and 14 for details.
- Sweep any excess grinds from the rim of the filter holder, and insert the filter holder into the brew head.
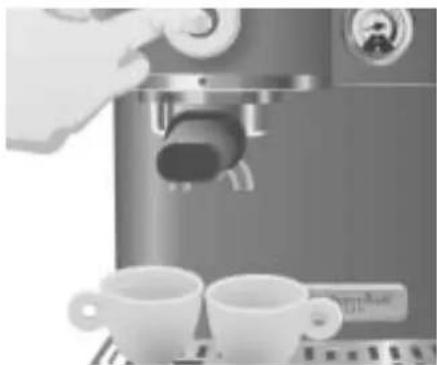
- Place one or two espresso cups on the drip plate under the spouts of the filter holder. Press the "Button, and espresso will start to flow into cups. When the desired amount of espresso has been brewed, press the "Button to stop brewing."
NOTE: Do not remove the filter holder when brewing.
- The espresso machine is equipped with a 3-way
natural_image
Close-up of a hand using a espresso machine with two cups on a tray (no visible text or symbols)solenoid valve that instantly releases pressure in the brew group when the water pump is switched off, so the filter holder can be removed immediately after brewing. Remove the filter holder by moving the handle to the left. When knocking coffee grounds from the filter basket, avoid striking the filter holder handle.
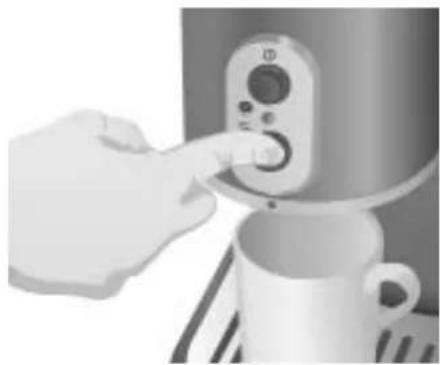
- After removing the filter holder, place a cup under the brew head and press the "Button for a second or
two. This cleans the shower screen and flushes any coffee oils and grounds that have migrated into the brew head.
- To brew more espresso, repeat steps 6 through 12, but see the barista tips below.
natural_image
Hand pressing a button on a kitchen grater (no visible text or symbols)Barista Tips
When brewing multiple cups:
- Use a towel to clean and dry the filter basket before filling with coffee. This will help insure even coffee extraction.
- To maintain the proper brewing temperature, it is important to keep the brew group warm, so:
- Do not rinse the filter holder with tap water – doing so will cool the filter. It's best to wipe leftover grounds from the filter with a towel.
- When you're busy with other tasks, like grinding coffee or frothing milk, keep the empty filter holder warm by attaching it to the brew head.
Frothing and steaming milk requires a bit of practice, but you'll be surprised how quickly your skills will develop. The Artisan™ Espresso Machine gives you all the tools you need: a stainless steel jug shaped especially for frothing, a frothing arm that adjusts horizontally and vertically for a comfortable working position, a frothing nozzle designed to enhance frothing, and a "Dial that lets you precisely control the volume of frothing steam.
- Press the "Button to turn the espresso machine on."
- Wait until the espresso machine has reached operating temperature; this will take approximately 6 minutes. When the frothing boiler temperature gauge needle climbs into the “zone, the espresso machine is ready to froth.
- Fill the frothing jug 13 full with cold milk.
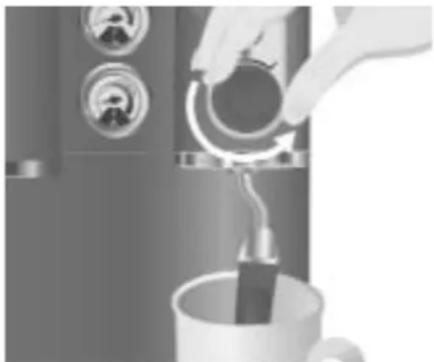
- With the frothing arm pointed into an empty cup, open the "Dial for a moment to purge excess water from the line. To open the "Dial, turn it slowly counter-clockwise; to close the "Dial, rotate it clockwise until it stops.
natural_image
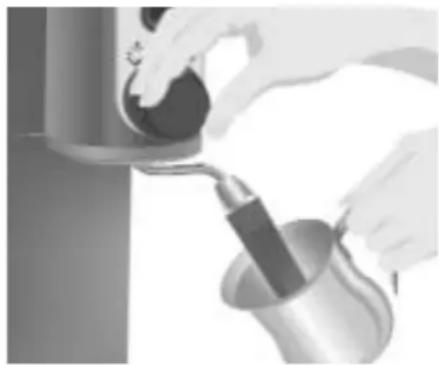
Person pouring liquid into a cup using a stand mixer (no visible text or symbols)- With the "Dial closed, adjust the frothing arm so it's in a comfortable working position, and submerse the tip of the frothing nozzle just below the surface of the milk in the frothing jug.
natural_image
Close-up of hands pouring liquid from a container into a metal bowl (no visible text or symbols)- Slowly open the "Dial by turning it counterclockwise. The farther the "Dial is rotated, the greater the volume of steam that will be released. Tilt the jug to one side to create a whirling motion in the milk, keeping the tip of the frothing nozzle about 5 mm below the milk's surface. If large bubbles are being created or if the milk spatters, the nozzle is being held too high.
- As the froth expands, it will be necessary to lower the jug.
- When the frothed milk has expanded to about 14 the volume of the jug, lower the frothing nozzle into the jug to finish steaming (heating) the milk. Keep the jug tilted to maintain a whirling motion in the milk. Steam the milk until it's between 60 and 74 degrees Celsius. (At these temperatures, the jug will be very warm to the touch.) Avoid scalding the milk, which occurs at 80 degrees.
- Before removing the frothing arm from the milk, close the "Dial by turning it clockwise until it stops. This prevents splattering.
Barista Tips
- Clean the frothing arm and nozzle immediately after use. See "Care and Cleaning" beginning on page 10.
- Lower fat milks are generally easier to froth. Skim milk can be tricky because it froths very easily, with a tendency to form large bubbles and dry peaks that mar its texture. Ultimately, the choice of milk is a matter of experimentation and taste. The most important factors in producing a superior froth are experience and good refrigeration: the colder the milk you use, the better.
Preparing Cappuccino
The Italian word "cappuccino" is derived from "Capuchin," an order of monks who wear garments the color of this most popular espresso drink. A standard cappuccino is a combination of steamed milk and espresso that's capped with a layer of frothed milk; it's usually served in a bowl-shaped cup of 180–210 ml capacity.
To prepare cappuccino, froth and steam the milk before brewing the espresso. This allows the froth to jell slightly and fully separate from the milk. Once the milk is prepared, brew one cup (30 ml) of espresso into a cappuccino cup, then pour the frothed and steamed milk into the cup with a gentle shaking motion. For a show-stopping flourish, top your cappuccino with chocolate shavings.
Hot water can also be dispensed from the frothing arm. This provides a convenient way to make Americanos, tea, or hot chocolate. Filling a demitasse with hot water is also a great way to warm it before brewing espresso.
NOTE: Always dispense hot water into an empty container – dispensing into a cup or jug containing other ingredients may cause splattering.
- Press the "Button to turn the espresso machine on."
- Wait until the espresso machine has reached operating temperature; this will take about
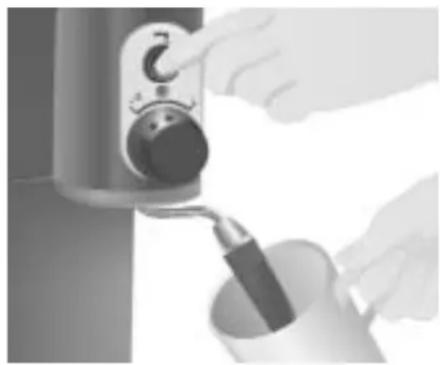
6 minutes. When the frothing boiler temperature gauge needle climbs into the “zone, the espresso machine is ready to dispense hot water. - With the frothing arm pointed into an empty cup, open the "☐Dial by turning it slowly counter-clockwise. Then press and hold the "☐Button to dispense water.
natural_image
Close-up of hands using a coffee maker to press coffee into a cup (no visible text or symbols)NOTE: Residual frothing steam may exit the nozzle before water dispenses. It may take several seconds for water to begin flowing from the nozzle.
- When the desired amount of water has been dispensed, release the "Button and close the "Dial by turning it clockwise until it stops.
Care and Cleaning
Keeping the Artisan™ Espresso Machine clean is vital to brewing the best espresso possible. Stale coffee oils on the filter holder, filter baskets, and shower screen will ruin the flavor of the most expertly prepared coffee, and any milk left on the frothing arm should be removed.
Before Cleaning the Espresso Machine
- Turn off the espresso machine.
- Unplug the espresso machine from the wall outlet, or disconnect power.
- Let the espresso machine, and any attached parts or accessories, cool.
Cleaning the Frothing Arm and Nozzle
The frothing arm and nozzle should always be cleaned after milk is frothed.
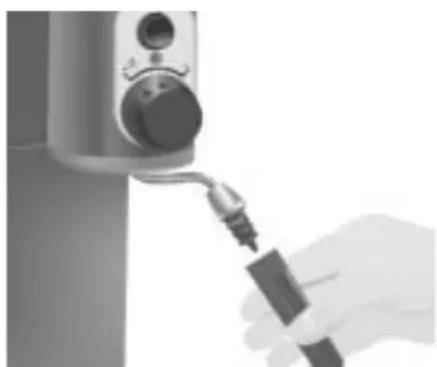
- Remove the frothing sleeve from the frothing nozzle by pulling it downward. The frothing sleeve can be washed in warm, soapy water. Make sure any openings in the sleeve are free of residue.
natural_image
Close-up of a hand holding a small object with a tool, next to a mounted device (no visible text or symbols)- Wipe the frothing arm and nozzle with a clean damp cloth. Do not use an abrasive scouring pad.
- Plug into a grounded outlet.
- Turn the espresso machine on, and let the boilers reach operating temperature. Point the frothing arm into an empty cup and open the “sidial momentarily to run steam through the frothing nozzle. This will clean the nozzle tip.
Cleaning the Housing and Accessories
Do not use abrasive cleansers or scouring pads when cleaning the espresso machine, or any espresso machine part or accessory.
- Wipe the espresso machine housing with a clean damp cloth and dry with a soft cloth.
- Wash the filter holder in warm, soapy water and rinse with clean water. Dry with a soft cloth. Do not wash the filter holder in a dishwasher.
- The filter baskets, drip tray, drip plate, water tank, and frothing jug can be washed in the top rack of a dishwasher, or by hand in warm, soapy water. If washing by hand, be sure to rinse with clean water and dry with a soft cloth.
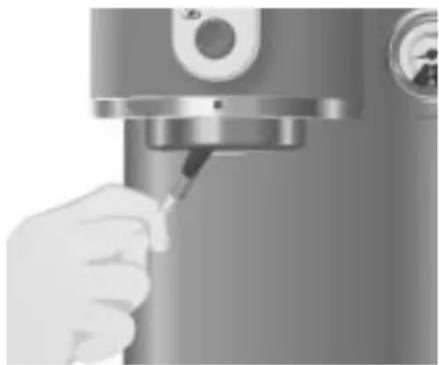
- Use the shower screen brush or a damp cloth to brush or wipe coffee grounds from the brew head gasket and shower screen.
natural_image
Close-up of a hand using a handheld tool to press or inspect a mechanical component (no visible text or symbols)Cleaning the Shower Screen
Once every 75 to 100 cups of espresso, the shower screen should be removed from the brew head to clean thoroughly.
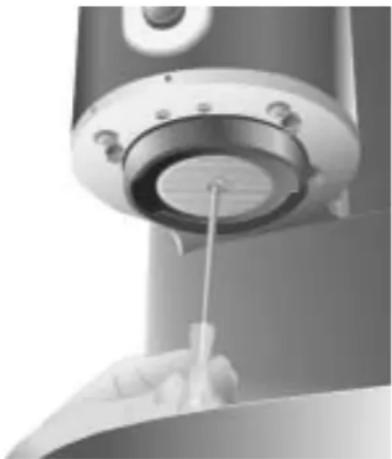
- Using a short screwdriver, remove the screw at the center of the shower screen by turning it counterclockwise. Once the screw is free, the shower screen should drop from the brew head.
natural_image
Close-up of a kitchen brush applying liquid into a bowl (no text or symbols visible)- Wash the shower screen in warm, soapy water, and rinse with clean water.
- Place the shower screen into the brew head with the smooth side facing down, and attach with the shower screen screw. Turn the screw clockwise until snug.
NOTE: When the shower screen is attached, the center screw should be flush with the surface of the screen. If it is not, remove the screen, turn it over, and re-attach.
Priming After Long Periods of Non-Use
For the best tasting espresso, prime the espresso machine with fresh water after a long period of non-use. Priming will also ensure that the boilers are filled and the espresso machine is ready to operate.
- Remove the tank, empty any stale water, replace, and fill the tank with fresh water to the max fill line.
- Fill the boilers with the fresh water. For instructions, see "Fill and Rinse the Boilers" on page 6.
Descaling
Calcium deposits ("scale") from water will build up in the espresso machine over time and may impair espresso quality. Scale should be removed every four months; local hard-water conditions may require more frequent descalings. Use a packaged descaling agent or appropriate decalcification tablets to remove scale.
- Remove the shower screen from the brew head. See "Cleaning the Shower Screen" to the left for instructions.
- Make certain the water tank is empty. Following the directions on the descaling agent packet, mix the descaling solution and add it to the tank.
- To catch the cleaning solution, place a large cup under the brew head (do not attach the filter holder), and another under the frothing nozzle.
- Press the "Button to turn the espresso machine on. It is not necessary for the boilers to heat before proceeding to the next step.
- Press the "Button and dispense cleaning agent through brew head for 15 seconds; press the Button again to shut off.
- Open the "Dial by turning it counter-clockwise, then press and hold the Button for 15 seconds to dispense cleaning agent through the frothing arm and nozzle.
- Press the "①" Button to turn the espresso machine off.
- Wait 20 minutes, then repeat steps 4–7. Every 20 minutes, keep repeating steps 4–7 until nearly all the solution in the tank has been run through the espresso machine. Do not allow the tank to run completely dry.
- Remove the water tank and rinse with fresh water, then replace and fill with fresh water to the max fill line. Press the "①" Button to turn the espresso machine on, and flush the espresso machine by quickly dispensing the contents of the tank, alternating between the brew head and frothing arm. Do not allow the water tank to run completely dry.
- Attach the shower screen to the brew head. See "Cleaning the Shower Screen" on this page for instructions. Be sure to add additional fresh water to the tank for brewing.
Troubleshooting Problems
If the power-on (I) indicator remains off and the boilers fail to heat when the "Button is pressed:
Check to see if the espresso machine is plugged in; if it is, unplug the espresso machine, plug it back in, and press the "①" Button again. If the espresso machine still does not operate, check the fuse or circuit breaker on the electrical circuit the espresso machine is connected to and make certain the circuit is closed.
If coffee does not flow from the filter holder, the...
– water tank may be empty, or the brewing boiler may not be filled
– water tank siphon hoses may be kinked or improperly placed
– shower screen may require cleaning
- espresso machine may need to be descaled
– coffee may be too finely ground
– coffee may be too firmly tamped
If the water pump is noisy, the...
– water tank may be empty
– water tank siphon hoses may be kinked or improperly placed
– boilers may not be filled
If water leaks from the filter holder...
– the filter holder may not be properly attached to the brew head
– coffee grinds may be clinging to rim of filter holder or brew head gasket
– the brew head gasket may be dirty or worn
If little steam or froth is being produced, the...
- frothing boiler may not be at operating temperature
- " 🔊 " Dial may not be completely open
- frothing nozzle may be need to be cleaned
– water tank may be empty, or the frothing boiler may not be filled
If the problem cannot be fixed with the steps above, see the KitchenAid® Espresso Machine Warranty on page 16.*
Espresso began as an attempt in the 1800s to quickly brew coffee on demand, by the cup. The goal was to serve the freshest, most flavorful coffee possible and avoid the burned, stale taste of coffee kept warm on a stovetop. To speed the brewing process, coffee pioneers struck upon the idea of forcing water through the grounds under pressure. Steam was initially used to supply the pressure, followed by compressed air, lever operated pistons, and finally, the electric water pump.
Through the decades, the elements of espresso brewing were tested and refined to produce the standards we have today: one cup (30 ml) of true espresso comes from exposing 7 grams of finely ground and packed coffee to 90–96°C water under 9 bars of pressure. In a brief 25 seconds, most of the highly flavorful coffee aromas and oils are extracted, while the more bitter compounds and off-tastes are left behind.
When the ground coffee is fresh and the brewing is done well, the pressurized brew water emulsifies the coffee oils into the golden foam called crema, which crowns the espresso with ultimate flavor and aroma.
Overextraction and Underextraction
Brewing great espresso takes an understanding of what actually winds up in the cup when coffee is exposed to water. Roughly 30% of a roasted coffee bean is made of water soluble compounds. 20% of those compounds dissolve fairly easily, while the remaining 10% take a little more work – which is a good thing, because that less-soluble 10% is acidic, bitter, and generally unpleasant. The goal of all coffee making is to extract the easily dissolved oils and compounds while leaving the rest in the grounds.
If ground coffee steeps in water too long, all the soluble compounds will be extracted, which makes for a very bitter brew. This is called overextraction. The opposite of overextraction is underextraction, which occurs when coffee is not exposed to the brew water long enough, leaving the essential flavors and aromas locked in the grounds. Underextraction results in coffee that is weak in taste.
Whether brewed coffee is overextracted, underextracted, or just right depends on several factors, including the ratio of coffee to brew water, the fineness of the grind, the brewing temperature, and the length of time the water is in contact with the coffee. All these factors are either directly or indirectly affected by the barista's technique.
Before Brewing: The Elements of a Great Espresso
Before the espresso machine is even plugged in, you'll need several elements to produce great coffee.
Fresh Coffee Beans
Great coffee can only come from fresh coffee beans, properly roasted. Many baristas recommend buying beans roasted no darker than a medium roast, the color of which appears as an even chocolate brown. This roast preserves the natural sugars and flavor of the bean, which sets the stage for excellent espresso. A medium roast is the darkest a bean can be roasted without oils developing on the surface.
Darkly roasted beans – which appear dark brown or nearly black – look great, but the extra roasting overwhelms the more delicate coffee flavors and caramelizes any sugars. A heavy "roasted" coffee flavor, often bitter and sharp, will predominate with a dark roast.
To preserve the freshness of coffee beans:
Keep beans in an opaque, air-tight container and store them in a cool, dry place. Refrigeration is not recommended, as condensation tends to form on the beans whenever the container is opened. Freezing can help preserve beans stored for an extended period, but it will also impair flavor.
Great Tasting Water
An often overlooked element of great espresso is the brew water. If you don't enjoy the flavor of your tap water, don't use it to brew espresso – use bottled, purified water instead. Since it doesn't take long for fresh water to acquire a "flat" quality and taste, it's also a good idea to change the water in the tank often and refill the boilers after a long period of non-use.
Do not use mineral water or distilled water – they can damage the espresso machine.
The Right Grind – and Grinder
Espresso demands a very fine, very consistent grind. Blade grinders and inexpensive burr grinders usually fall short when it comes to producing the grinds needed for outstanding espresso.
The best espresso requires a quality burr grinder, like the Artisan™ Burr Grinder. A good burr grinder will maximize the flavor and aroma of espresso by producing an extremely consistent grind with very little frictional heating.
Brewing Temperature
Water temperature and temperature consistency have a direct impact on the flavor of espresso. Great espresso comes from brewing at an optimum temperature, ideally between 90^-96^ C. Modern boilers and thermostats excel at producing and maintaining the right temperature, but there is a complicating factor that is a major concern for baristas: maintaining heat in the brew group.
If water is pumped from the boiler at a near perfect 93^ C, but flows into a filter holder that's at room temperature, the water will cool dramatically – and the actual brewing temperature will be far less than what the best espresso requires. If the water temperature drops below 90^ C, the espresso might still exhibit good crema, but it will acquire a distinctly bitter or sour note.
To Insure Proper Brewing Temperature:
- A lways attach the filter holder (with filter basket) to the brew head when the espresso machine is heating. This warms the filter.
- Always wait until the boilers are fully heated before brewing – at least 6 minutes.
- Dose and tamp your coffee quickly, and brew immediately. This prevents the filter holder from cooling significantly.
- Never rinse the filter holder with cool water if you are brewing additional cups. After knocking the old grounds from the filter, wipe leftover grounds from the basket with a clean towel. Make sure the filter basket is dry before adding more coffee.
- Keep the empty filter holder attached to the brew head when you're engaged in other tasks, like grinding or frothing.
- Warm a cup or demitasse by placing it on top of the espresso machine before brewing. Cups can also be heated instantly with steam from the frothing arm.
The Artisan™ Espresso Machine is designed to provide an optimum brewing temperature. Dedicated dual boilers eliminate the temperature fluctuations common with single boiler designs when alternating between brewing and frothing. The chrome-plated brass brew group heats quickly, and is commercial-size for a very good reason: commercial-size groups retain heat better than smaller groups.
The Espresso Machine does it's part to provide the right brewing temperature. The rest is up to the barista!
Grinding
Great espresso demands the freshest coffee, and the freshest coffee is always ground immediately before brewing. The most delicate aromatic compounds in coffee go stale within a few minutes of grinding, so grind only as much as you intend to brew immediately.
Dosing
Dosing is the process of measuring ground coffee into the filter basket. A single cup (30 ml) of espresso requires 7 grams of coffee – two cups, twice that. If filled level with finely ground coffee, the scoop included with the Artisan™ Espresso Machine is a near perfect measure for one cup of espresso.
Accomplished baristas usually don't bother making precise measurements when dosing: they simply fill the basket nearly to the brim and sweep any excess coffee from the filter with their fingers, leaving exactly what they need. After you've had some experience dosing, leveling, and tamping your coffee, you'll be able to consistently dose your coffee by sight, just like the pros.
If you're dosing coffee without the aid of a measuring scoop, it is important not to overfill the filter basket. Coffee needs room to expand when brewing. If the coffee is crushed against the shower screen, it will prevent an even dispersion of water across the filter, leading to uneven extraction and poor espresso. Here's how to tell if you're overfilling the filter basket:
- Fill the basket, level the coffee, and apply a good tamp (see the section, "Tamping").
- Attach the filter holder to the brew head, then remove it immediately.
- If the coffee in the filter holder has an imprint of the shower screen or the shower screen screw, there is too much coffee in the filter basket!
Leveling
Leveling the coffee after it has been dosed into the filter is a critical technique for great espresso. If the coffee isn't evenly distributed in the filter, tamping the coffee will create areas of high and low density. The high pressure brew water will inevitably follow the path of least resistance, flowing heavily through the low density coffee – overextracting the bitter coffee compounds – and flowing lightly through the higher density coffee, underextracting the flavorful essences. This uneven extraction results in thin, weak, bitter espresso.
To Level Coffee In the
Filter Basket:
- Make sure the filter basket is dry before adding coffee; moisture in the basket will create a path of least resistance for the brew water.
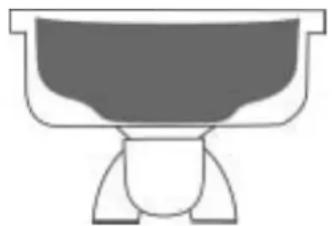
- After dosing the filter with coffee, level the coffee by sweeping a finger back and forth over the filter. Do not sweep in one direction only – this will cause the coffee to pile up on one side of the basket and produce uneven extraction. Try to impart a slight bowl shape to the coffee, with the center lower than the sides.
- Make certain there are no gaps between the coffee and the sides of the filter.
Properly Leveled Coffee
natural_image
Simple line drawing of a bowl-like object with a lid, no text or symbols presentTamping
Tamping compresses the coffee into a level disc that provides uniform resistance to the high-pressure brew water. Properly leveled and tamped coffee will produce an even extraction of coffee compounds – and great espresso. Coffee that is tamped too softly will be deformed by the brew water, resulting in uneven extraction, a fast brewing time, and mediocre espresso. Coffee tamped too firmly will slow the brewing time, making for a bitter, overextracted beverage.
Proper Tamping Technique
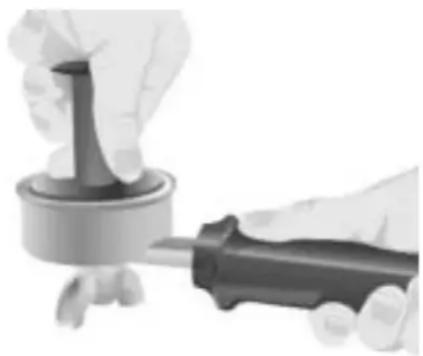
- The tamper handle should be grasped like a doorknob, with the base of the handle firmly against the palm. When tamping, try to keep the tamper, wrist, and elbow in a straight line.
- With the bottom of the filter holder resting on a solid surface, gently press the tamper into the coffee with the goal of creating a level surface. Remove the tamper from the filter basket with a slight twisting motion – this will help prevent the tamper from pulling up chunks of coffee.
natural_image
Close-up of hands using a power tool to adjust a mechanical component (no text or symbols visible)- After removing the tamper, some grinds may stick to the side of the filter basket. Tap the filter holder gently on the table to jostle the grinds onto the tamped coffee disc. Do not tap too hard, or the tamped coffee will dislodge or fracture.
- Apply a second, finishing tamp (also called a polishing tamp). Press straight down on the coffee with about 15 kilograms of pressure, then relax the force slightly (to about 9 kilograms) and polish the coffee by turning the tamper completely around twice.
- Inspect your tamp. The coffee disc should be smooth and level with no gaps between the side of the filter basket and the coffee.
natural_image
3D rendered image of a fluted ceramic vessel with four legs (no text or symbols visible)Measuring Tamping Pressure
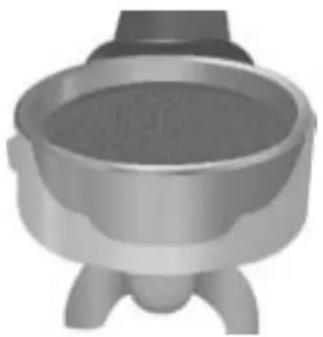
9 kilograms, 15 kilograms – how do you know how much tamping force you are actually using? Do what the baristas do: use a bathroom scale! Place a scale on a table or countertop, and tamp your coffee on top of it. Pretty soon, you will develop a feel for how much 9 or 15 kilograms of force is.
Volume
The brew group and boilers are heated. The fresh coffee has been ground, dosed into the filter holder, expertly leveled, and precisely tamped. Now comes the moment of truth: brewing!
For the best espresso, never extract more than one cup (30 ml) using the small filter basket or two cups (60 ml) using the large one. Brewing more will overextract the coffee and result in thin, bitter espresso.
As it pours, perfect espresso is a deep reddish brown with a thick texture like honey running off a spoon. It often forms what are called mouse-tails, or thin syrupy streams. As increasingly bitter and acidic compounds are extracted, the espresso pour will begin to lighten; in some cases, the pour will become almost white. Expert baristas will watch the pour carefully and quickly stop brewing if it starts to lighten.
Espresso Ristretto is espresso brewed with less than normal volume. Prepare the espresso machine to brew two cups, but stop brewing when only 45 ml have been extracted. What you've done is restrict the pour to include only the most flavorful and least bitter coffee oils and essences.
Extraction Rate
Decades of experience have shown that the best espresso – whether a single or a double cup – takes about 20–25 seconds to brew.
If your espresso is brewing much faster or slower than 20–25 seconds, and your tamping technique is good, adjust the grind! Grind finer for a slower extraction rate, and coarser for a faster one. Keep the dose and tamp the same.
Coffee is sensitive to the ambient humidity and will absorb moisture readily. This will affect the extraction rate. In a humid environment, the extraction rate will slow down; in dry conditions, the extraction rate will speed up. You may find yourself adjusting the grind according to the season – or the day's weather.
Some grinders do not allow the fine adjustments necessary to correct the extraction rate. The best solution is to invest in the KitchenAid® Artisan™ Burr Grinder. If this isn't possible, experiment with the tamping pressure. Tamp with less force for a faster pour, and more force for a slower one.
The Golden Crema
A mark of fine espresso is crema, the dense golden foam of emulsified coffee oils that captures the essence of coffee flavor. Good crema should be thick and cling to the side of the cup when it's tilted; the best crema should be able to support a sprinkling of sugar for nearly 30 seconds.
Troubleshooting Espresso as it Brews
As it pours, if your espresso...
...has more of a cinnamon color, instead of being deep brown:
- make sure your brew group and boilers are fully heated
- use a less acidic blend of coffee
...is whitish with thin brown streaks:
- review your tamping technique – the tamped coffee has fractured, or a gap has developed between the coffee and the side of the filter basket
...is thin and fast-flowing:
- review your tamping technique – the tamp may not be firm enough to provide an even resistance to the brew water
- use a finer grind
- check coffee freshness
...barely dribbles out the filter holder:
- review your tamping technique – the tamp could be too firm
- use a coarser grind
A Glossary of Espresso Drinks
Americano
180–240 ml of hot water added to a single cup (30 ml) of espresso. This makes a superb cup of coffee.
Café Latte
250 to 300 ml of steamed milk added to a single cup (30 ml) of espresso. Lattes are often flavored with syrup.
Café Mocha
A café latte with chocolate syrup added, and usually topped with whipped cream and chocolate flakes. It can also be prepared without syrup using steamed chocolate milk.
Cappuccino
A standard cappuccino is a combination of steamed milk and espresso that's capped with a layer of frothed milk; it's usually served in a bowl-shaped cup of 180–210 ml capacity. Powdered cocoa or cinnamon may be sprinkled on top as a garnish.
Classic Cappuccino
Classic cappuccino is common in Italy, and is simply espresso topped with frothed milk.
Doppio
A double cup of espresso.
Espresso Breve
Espresso with steamed half & half poured on top.
Espresso Con Panna
Espresso topped with a dollop of whipped cream.
Espresso Lungo
Espresso "pulled long" – that is, brewed with a greater than normal volume. This technique produces caffeine-heavy espresso which is thinner, lighter-colored, and less full-bodied than normal. To make espresso lungo, brew 45 ml using the small filter basket, or 90 ml using the large filter basket. Use a slightly coarser grind to keep the brewing time between 20–25 seconds; extending the brewing time beyond 30 seconds will make the espresso lungo excessively bitter.
Espresso lungo is often used to make stronger-tasting Americanos or lattes.
Espresso Macchiato
Espresso with a dab of steamed milk added to the top.
Espresso Ristretto
An espresso "pulled short" – that is, brewed with less than normal volume to maximize flavor and minimize bitterness. For ristretto, simply brew about 22 ml using the small filter basket or 45 ml using the large basket.
Household KitchenAid® Espresso Machine Warranty
| Length of Warranty: | KitchenAid Will Pay For: | KitchenAid Will Not Pay For: |
| Europe, Australia and New Zealand:Two year Full Warranty from date of purchase.Other:One Year Full Warranty from date of purchase. | Replacement parts and repair labor costs to correct defects in materials or workmanship. Service must be provided by an Authorized KitchenAid Service Center. | A. Repairs when Espresso Machine is used for operations other than normal household food preparation.B. Damage resulting from accident, alterations, misuse, abuse, or installation/ operation not in accordance with local electrical codes. |
KITCHENAID DOES NOT ASSUME ANY RESPONSIBILITY FOR INDIRECT DAMAGES.
Service Centers
All service should be handled locally by an authorized KitchenAid Service Center. Contact the dealer from whom the unit was purchased to obtain the name of the nearest authorized KitchenAid service facility.
In the U.K.:
Call 0845 6011 287
In Ireland:
M.X. ELECTRIC
Service Department
25 Alymer Crescent
Kilcock, CO.KILDARE
Call: 1 6792398/87 2581574
Fax: 1 6284368
In Australia:
Call 1800 990 990
In New Zealand:
Call 0800 881 200
Customer Service
In U.K. & Ireland: Tollfree number 00800 38104026
Address: KitchenAid Europa, Inc.
PO BOX 19
B-2018 ANTWERP 11
BELGIUM
www.KitchenAid.com
®Registered Trademark of KitchenAid, U.S.A.
^™ Trademark of KitchenAid, U.S.A.
© 2005. All rights reserved.
Specifications subject to change without notice.

- Table of Contents
- Espresso Machine Safety
- Your safety and the safety of others are very important.
- DANGER
- WARNING
- SAVE THESE INSTRUCTIONS
- Electrical Requirements
- Electrical Shock Hazard
- Espresso Machine Features
- O/I Power Switch
- Power-On (I) Indicator
- Espresso (Button
- Hot Water ( ) Button
- Steam ( )Dial
- Brew Head
- Frothing Arm & Nozzle
- Drip Tray
- Drip Tray Full Indicator
- Water Tank
- Cup Rail
- Espresso (Boiler Temperature Gauge
- Frothing (Boiler Temperature Gauge
- Filter holder
- Filter Baskets
- Frothing Jug
- Tamper
- Coffee Scoop and Shower-Screen Brush
- Not Shown:
- Dual Boilers
- Drip-Free System with 3-Way Solenoid Valve
- Bar Pump
- Attach the Cup Rail
- Remove and Wash the Water Tank
- Fill and Rinse the Boilers
- Brewing Espresso
- Barista Tips
- Preparing Cappuccino
- Care and Cleaning
- Before Cleaning the Espresso Machine
- Cleaning the Frothing Arm and Nozzle
- Cleaning the Housing and Accessories
- Cleaning the Shower Screen
- Priming After Long Periods of Non-Use
- Descaling
- Troubleshooting Problems
- If the power-on (I) indicator remains off and the boilers fail to heat when the "Button is pressed:
- If coffee does not flow from the filter holder, the...
- If the water pump is noisy, the...
- If water leaks from the filter holder...
- If little steam or froth is being produced, the...
- Overextraction and Underextraction
- Before Brewing: The Elements of a Great Espresso
- Fresh Coffee Beans
- To preserve the freshness of coffee beans:
- Great Tasting Water
- The Right Grind – and Grinder
- Brewing Temperature
- To Insure Proper Brewing Temperature:
- Grinding
- Dosing
- Leveling
- To Level Coffee In the
- Filter Basket:
- Tamping
- Proper Tamping Technique
- Measuring Tamping Pressure
- Volume
- Extraction Rate
- The Golden Crema
- Troubleshooting Espresso as it Brews
- A Glossary of Espresso Drinks
- Americano
- Café Latte
- Café Mocha
- Cappuccino
- Classic Cappuccino
- Doppio
- Espresso Breve
- Espresso Con Panna
- Espresso Lungo
- Espresso Macchiato
- Espresso Ristretto
- Household KitchenAid® Espresso Machine Warranty
- Service Centers
- Customer Service
Brand : KITCHENAID
Model : Artisan Espressomachine
Category : Coffee maker