
T700 - Treadmills York Fitness - Free user manual and instructions
Find the device manual for free T700 York Fitness in PDF.


| Product Type | Motorized Treadmill |
| Dimensions (L x W x H) | 1670 x 750 x 1340 mm |
| Running Surface | 1250 x 440 mm |
| Speed Range | 1.0 - 16 km/h |
| Incline Range | 0 - 12% |
| Motor Power | Not specified, but includes motor belt and controller |
| Display | LCD dot-matrix with blue backlight + 3 LED windows |
| Programs | P0 (User), P1-P36 (Preset), U01-U03 (User custom), HRC (optional), Body Fat test |
| Safety Features | Safety key tether, emergency stop, over-voltage protection (optional) |
| Folding | Yes, with hydraulic cylinder lock for storage |
| Transport Wheels | Yes, for easy moving when folded |
| Power Requirements | 10A grounded dedicated circuit, 220-240V (assumed) |
| Heart Rate Monitoring | Handlebar pulse sensors; optional wireless HRC |
| Lubrication | Factory lubricated; check every 3 months or after 500 hours; use silicone spray |
| Belt Adjustment | Rear roller bolts for tension and centering; 8mm wrench |
| Warranty | 1 year for home use; excludes wear parts and professional use |
| Maximum User Weight | Approximately 120 kg (estimated typical) |
Frequently Asked Questions - T700 York Fitness
User questions about T700 York Fitness
0 question about this device. Answer the ones you know or ask your own.
Ask a new question about this device
Download the instructions for your Treadmills in PDF format for free! Find your manual T700 - York Fitness and take your electronic device back in hand. On this page are published all the documents necessary for the use of your device. T700 by York Fitness.
USER MANUAL T700 York Fitness
MOTORIZED TREADMILL OWNER'S MANUAL
natural_image
Technical line drawing of a mechanical component on a grid background (no text or symbols)Retain this owner's manual for future reference Read and follow all instructions in this owner's manual
Version A
Thank you
- hanks for purchasing this product. -he product will help you exercise your muscles in the correct way and to improve your fitness – and all this in a familiar environment.
Implied Warranty
- he importer of this machine assures that this device was manufactured from high quality materials.
Prerequisite for the implied warranty is the proper setup in accordance with the operating instructions. Improper use and /or incorrect transportation can render the warranty void.
- he implied warranty is for 1 years, beginning with the date of purchase. If the device you acquired is defective, please contact our Customer —ervice (Inset page) within the guarantee period of 12 months as of purchase date. -he warranty applies to the following parts (as far as included in the scope of delivery): Frame, cable, electronic devices, foam, wheels. -he guarantee does not cover:
-
Damage effected by outer force
-
Intervention by unauthorized parties
-
Incorrect handling of the product
-
Non-compliance of the operating instructions
Wear parts and expendable items are also not covered(such as running belt).
- he device is only intended for private use. -he warranty does not apply to professional usage.
—pare parts can be ordered from Customer —ervices (Inset page) as needed.
Please make sure you have the following information on hand when ordering spare parts.
-
Operating instructions
-
Model number (located on the cover sheet of these instructions)
-
Description of attachments
-
Attachment number
-
Proof of purchase with purchase date
Please do not send the device to our firm without being requested to do so by our —ervi team. •he costs of unsolicited shipments will be borne by the sender.
General safety instructions
A great deal of emphasis was placed on safety in the design and manufacture of this fitness device. —till, it is very important that you strictly adhere to the following safety instructions. We cannot be held liable for accidents that were caused due to disregard.
- o ensure your safety and to avoid accidents, please read through the operating instructions thoroughly and attentively before you use the sports device for the first time.
1) Consult your GP before starting to exercise on this device. —hould you want to exercise regularly and intensively, the approval of your GP would be advisable. •his is especially true for users with health problems.
2) We recommend that handicapped people should only use the device when a qualified care is present.
3) When using the fitness device, wear comfortable clothing and preferably sports or aerobic shoes. Avoid wearing loose clothing which could get caught in the moving parts of the device.
4) —top exercising immediately should you feel unwell or if you feel pain in your joints or muscles. In particular, keep an eye on how your body is responding to the exercise program. Dizziness is a sign that you are exercising too intensively with the device. At the first signs of dizziness, lay down on the ground until you feel better.
5) Ensure there are no children nearby when you are exercising on the device. In addition, the device should be stowed in a place that children or house pets cannot reach.
6) Ensure that only one person at a time uses the fitness device.
7) After the sports device has been set up according to operating instructions, make sure all screws, bolts and nuts are correctly fitted and tightened. Use only attachments recommended and/or supplied by the importer.
8) Do not use a device that is damaged or unserviceable.
9) Always place the device on a smooth, clean and sturdy surface. Never use near water and make sure there are no pointed objects in the direct vicinity of the fitness device. If necessary, place a protective mat (not included in scope of delivery) to protect your floor underneath the device and keep a free space of at least 0.5 m around the device for safety reasons.
10) -ake care not to put your arms and legs near moving parts. Do not place any material in openings in the device.
11) Use the device only for the purposes described in these operating instructions. Use only attachments recommended by the manufacturer
12) If the supply cord is damaged, it must be replaced by the manufacturer, its service agent or similarly persons in order to avoid a hazard.
Special Safety Precautions
●Power source:
- Choose a place in reach of a socket when placing the treadmill.
●Always connect the appliance to a socket with a grounded circuit and no other appliances connected to it. It is recommended not to use any extension cords. - A faulty grounding of the appliance can cause the risk of electrical shocks. Ask a qualified electrician to check the socket in case you do not know if the appliance is grounded appropriately. do not modify the plug provided with the appliance if it is not compatible with your socket. ask a qualified electrician to install a suitable socket.
- —udden voltage fluctuations can seriously damage the treadmill. Weather changes or switching on and off other appliances can cause peak voltages, over-voltage or interference voltage. To limit the danger of damage to the treadmill, it should be equipped with an over-voltage protective device (not included).
- Keep power cord away from the carrying roller. Do not leave the power cord below the striding belt. Do not use the treadmill with a damaged or worn out power cord.
- Unplug before cleaning or engaging in maintenance work. Maintenance should only be done by authorized service technicians, unless otherwise stated by the manufacturer. Ignoring those instructions would automatically void the warranty.
- Inspect the treadmill before every use to make sure that every part is operational.
- Do not use the treadmill outdoors, in a garage or under any kind of canopy. Do not expose the treadmill to high humidity or direct sunlight.
●Never leave the treadmill unattended.
Make sure the striding belt is always tense. —tart the striding belt before stepping on it.
If the supply cord is damaged, it must be replaced by the manufacturer, its service agent or similarly qualified persons in order to avoid a hazard.
This appliance is not intended for use by persons (including children) with reduced physical, sensory or mental capabi. If the supply cord is damaged, it must be replaced by the
Assembly
- Before starting with the assembly of this fitness device, carefully read through the set up steps as of page 8 We also recommend that you view the assembly drawing prior to assembly.
- Remove all packaging material and place the individual parts on a free surface. This will provide you with an overview and will simplify assembly.
- Please consider that there is always the risk of injury when using tools and carrying out technical activities. Please proceed with care when assembling the device.
- Make sure you have a hazard-free working environment and do not, for example, leave tools lying around. Deposit the packaging material in such a way that it does not pose a danger. Foil/plastic bags are a potential risk of suffocation for children!
- Take your time when viewing the drawings and then assemble the device according to the series of illustrations.
- The device must be carefully assembled by an adult person. If necessary, request aid from another technically talented person.
Unpacking & Assembly
WARNING: Use extreme caution when assembling this treadmill. Failure to do so could result in injury.
NOTE: Each step number in the assembly instructions tells you what you will be doing. Read and understand all instructions thoroughly before assembling the treadmill.
UNPACK AND VERIFY THE CONTENTS OF THE BOX:
●Lift up and remove the box that surrounds the •readmill.
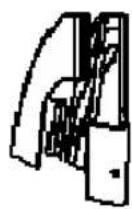
- Check the following items are present. If any of the parts are missing, contact with the dealer.
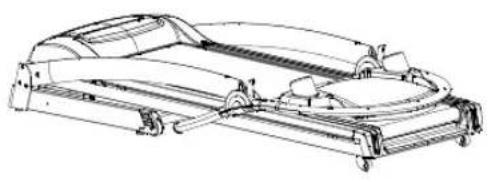
natural_image
Technical line drawing of a car chassis frame with no visible text or symbolsMain body
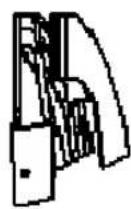
Lateral cover
User's Manual
natural_image
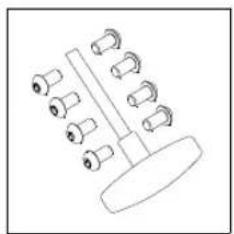
Simple line drawing of a mechanical component with multiple cylindrical pins and a base (no text or symbols)Hardware pack
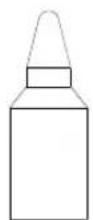
—ilicon oil bottle
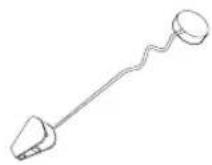
—afety key
Main parts
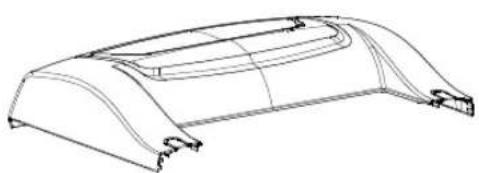
natural_image
Technical line drawing of a curved mechanical component or housing (no text or symbols)Motor cover
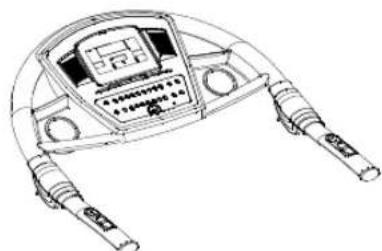
natural_image
Line drawing of a mechanical device with dual connectors and a central display (no text or symbols)Console
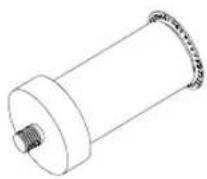
Motor
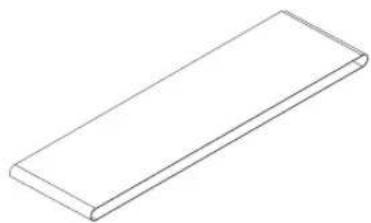
natural_image
Simple line drawing of a rectangular object with no text or symbolsRunning belt
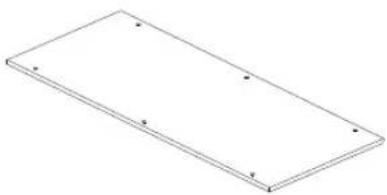
natural_image
Simple 3D rectangular block diagram with no text, numbers, or symbolsRunning deck
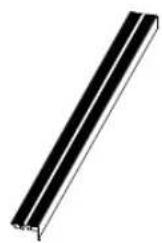
natural_image
Pure diagonal black line on white background (no text or symbols)Side rail
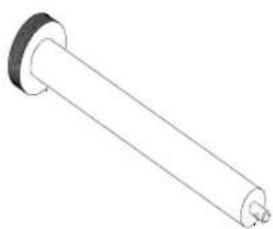
natural_image
Simple line drawing of a cylindrical mechanical part with a flanged end and a small protrusion at the end (no text or symbols)Front roller
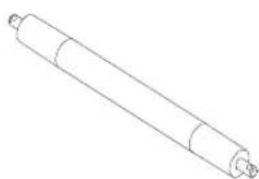
natural_image
Line drawing of a cylindrical mechanical component with flanges and end caps (no text or symbols)Rear roller
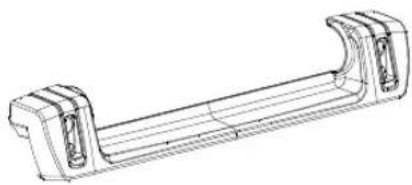
natural_image
Technical line drawing of a mechanical component with symmetrical supports and end caps (no text or symbols)Rear cover
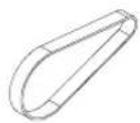
Motor belt
Hardware bag
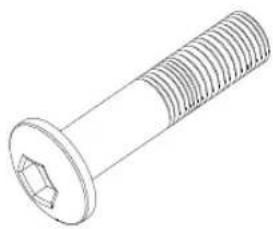
natural_image
Technical line drawing of a bolt with threaded shaft and hexagonal end (no text or symbols)Allen C.K.S half thread screw (M8*50*20) 4pcs
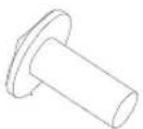
Allen C.K.S full thread screw (M8*15) 2pcs
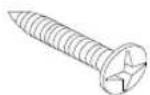
Philips C.K.S.self-tapping screw (ST4*20) 4pcs
natural_image
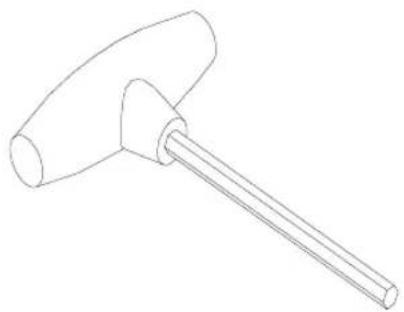
Line drawing of a hammer with a cylindrical head and handle (no text or symbols)T shape wrench 1pc
natural_image
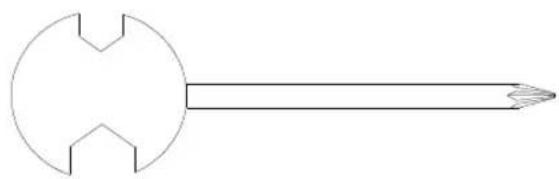
Simple line drawing of a stylized tool or tool with a circular head and arrowhead (no text or symbols)Cross wrench 1pc
Treadmill instruction
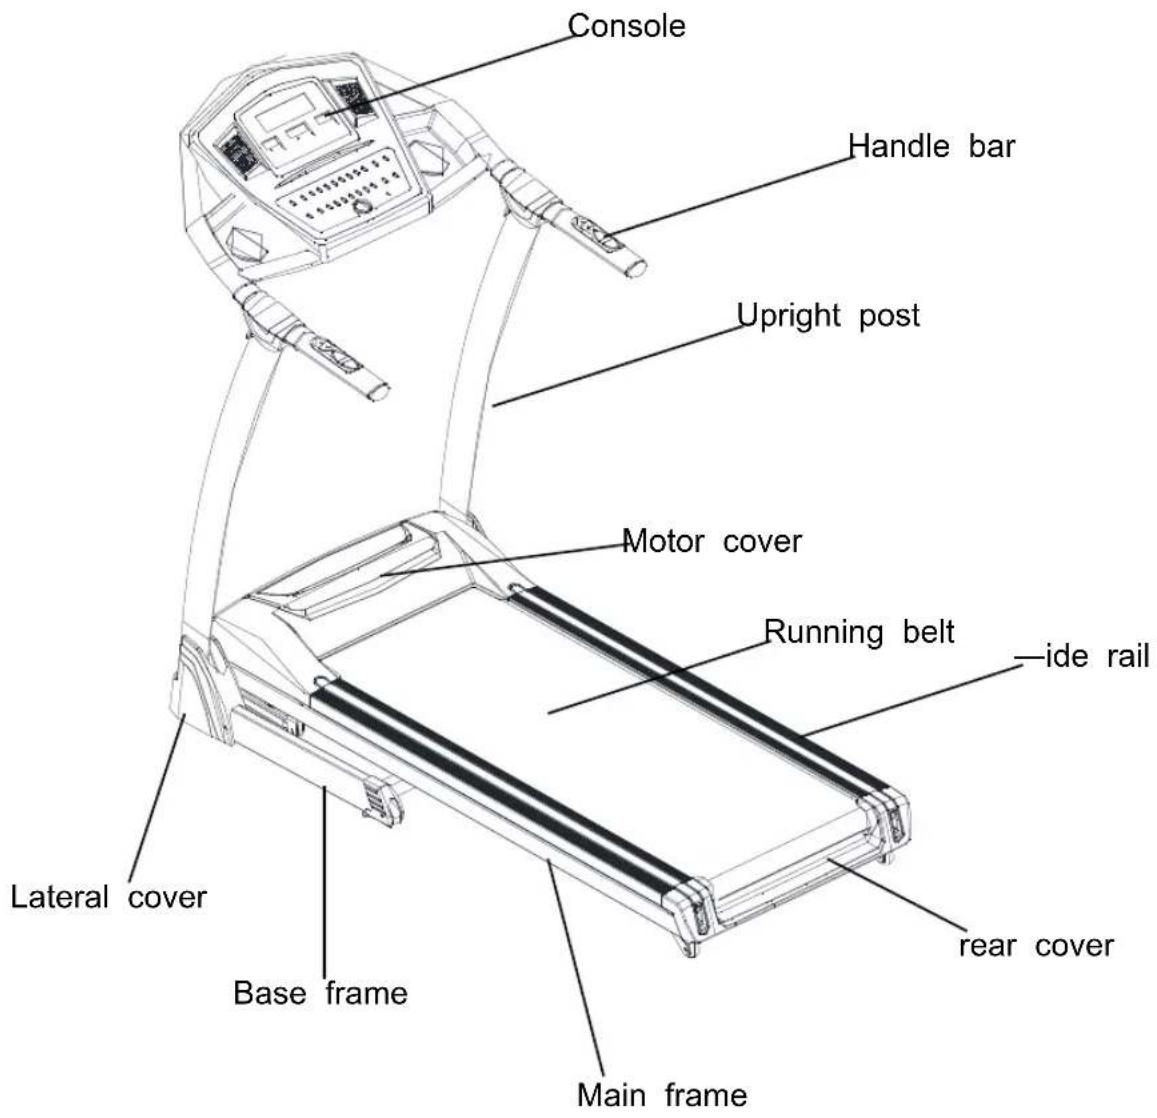
Technical information
| PRODUC·—IZE | 1670*750*1340mm |
| RUNNING BOARD | 1250*440mm |
| S-PEED | 1.0-16Km/h |
*WE RE—ERE THEIRIGH·O AMENDIEHRODUC·WI·HOU·PRIOR NO·ICE.
ASSEMBLY INSTRUCTIONS
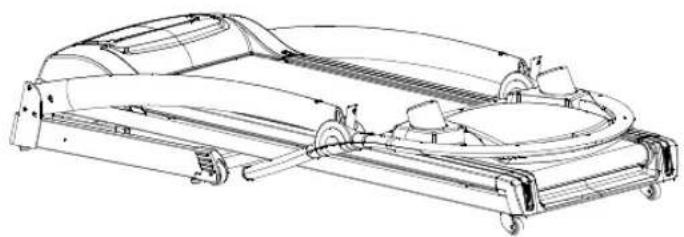
Step 1: -ake out the machine from the package on the flat floor
natural_image
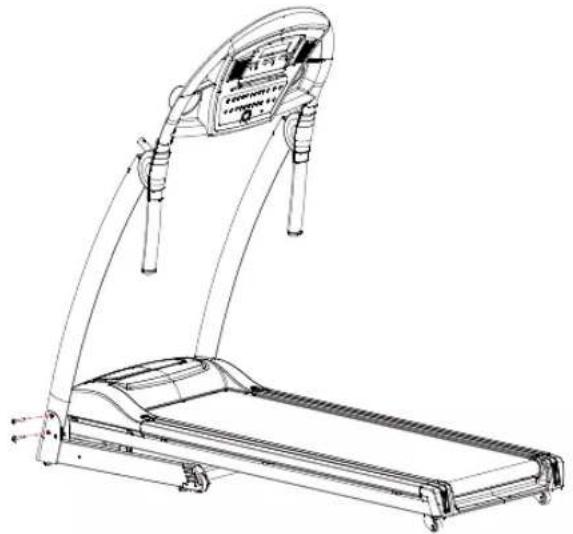
Technical line drawing of a mechanical device with wheels and internal components (no text or symbols)Step 2:. .Lift up the upright post as below pictures ,fix the upright post and base frame with screw M8×50×20.Do not tighten the screw in this step.
natural_image
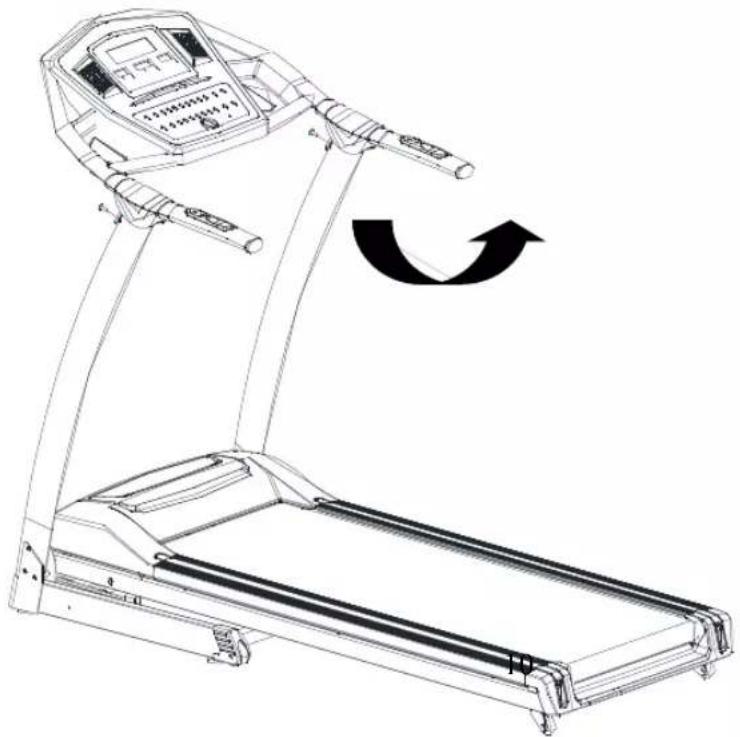
Line drawing of a treadmill with adjustable arms and control panel (no text or symbols)Step 3: Lift up the console as below picture, locking the console and upright post with screw M8×15, then ,tighten all the screws of the treadmill.
natural_image
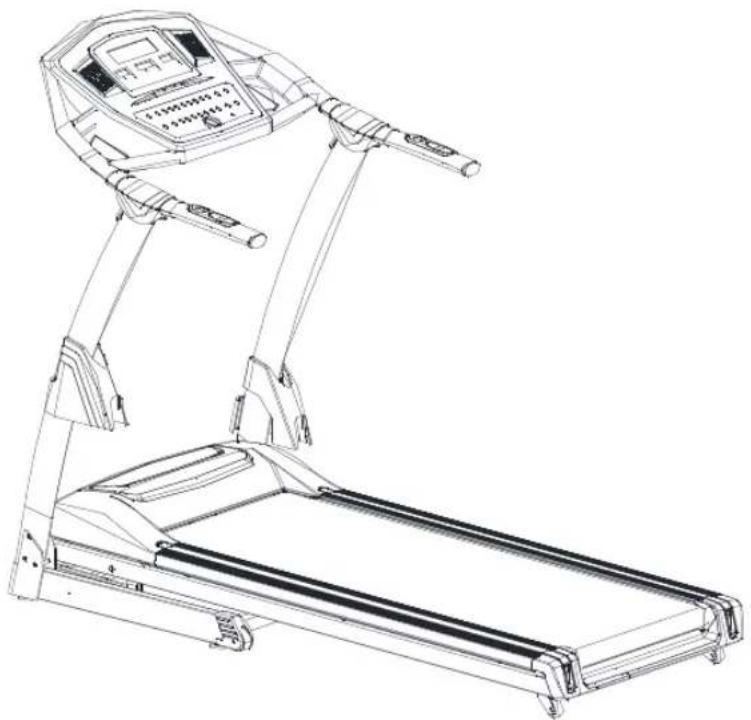
Line drawing of a treadmill with a curved arrow indicating rotational motion (no text or symbols)Step 4: Insert the lateral cover into the upright post, as below picture
natural_image
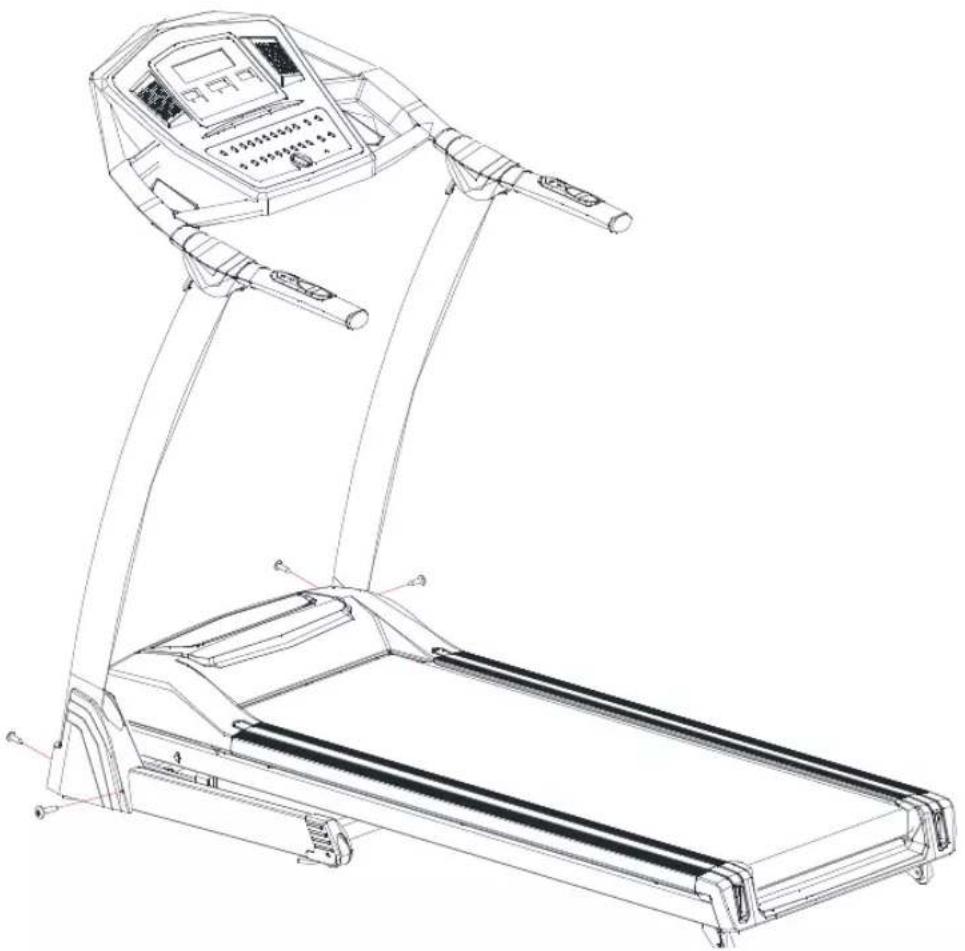
Line drawing of a treadmill with control panel and side-mounted legs (no text or symbols)Step 5: Fix the lateral cover on the base frame with 4pcs screws(—•4*20), then tighten all the screw .Assembly is finished.
natural_image
Line drawing of a treadmill with control panel and display screen (no text or symbols)SETTING UP YOUR TREADMILL
PLACEMENT IN YOUR HOME
- o make exercise a desirable daily activity for you, the treadmill should be placed in a comfortable and convenient setting. -his treadmill is designed to use minimal floor space and to go nicely in your home.
- Do not place the treadmill outdoors.
- Do not place the treadmill near water or in high moisture content environment.
● Make sure power cord is not in the path of heavy traffic. - If your room is carpeted, check the clearance to make sure there is enough space between the carpet fiber and the treadmill deck. If you are uncertain, it is best to place a mat beneath your treadmill.
- Locate the treadmill at least 4 feet from walls or furniture.
- Allow a safety area of 2m X 1m behind the treadmill so that you can easily get on and off the treadmill without getting trapped during an emergency.
Occasionally after extended use you will find a fine black dust below your treadmill. •his is normal wear and DOE— NO• mean there is anything wrong with your treadmill. •his dust can be easily removed with a vacuum cleaner. If you wish to prevent this dust from getting on your floor or carpet, place a mat beneath your treadmill.
USE DEDICATED CIRCUIT
- he outlet selected should be a dedicated circuit. It is particularly important that No sensitive electrical equipment, such as computer or -V, share the same circuit.
CAUTION!
Make sure the running deck is level to the ground. If the deck is positioned on uneven surface, it would cause premature damage to the electronic system.
Read this manual before operating this treadmill.
GETTING STARTED
TURN POWER ON
Put the power cord into the electrical outlet with 10A. Flip this switch to the "ON" position.
▪he screen shine with prompt sound.
SAFETY KEY AND CLIP
- he safety key is designed to cut the main power to the treadmill should your fall.
- therefore, the safety key is designed to bring the treadmill to an immediate stop. At high speeds, it may be uncomfortable and somewhat dangerous to come to a complete stop immediately. —o, use the safety key as emergency top only. -o bring the treadmill to a complete stop safely and comfortably, use the red stop button.
Your treadmill will not start unless the safety key is properly inserted into the key holder in the middle of the console. -he other end of the safety key should be securely clipped to your clothing so that in the case that you fall, you will pull the safety key from the consol which will stop the treadmill immediately to minimize injury. For your safety, never use the treadmill without securing the safety key clipped to your clothing. Pull on the safety key clip to make turn it will not come off your clothing.
GETTING ON AND OFF THE TREADMILL
Handle with care when getting on or off the treadmill. -ry to use the handlebars while getting on or off. While you are preparing to use the treadmill, do not stand on the running belt. —traddle the running belt by placing your feet on both side rails of the treadmill deck. Place your foot on the belt only after the belt has begun to move at a consistent slow speed.
During exercise, keep your body and head facing forward at all times. Never attempt to turn around on the treadmill when the running belt is still moving. When you have finished exercising, stop the treadmill by pressing the red stop button. Wait until the treadmill comes to a complete stop before attempting to get off the treadmill.
WARNING•
Never use this treadmill without first securing the safety tether clip to our clothing.
CAUTION•
For your safety, step onto the belt when the speed more than 3km/h.
FOLDING THE TREADMILL
- Restore the incline to flat (0) position .
- Unplug from power point before folding
- Lift deck until it's parallel to the upright post and cylinder locks into position
- Caution: check to ensure cylinder locking device has engaged
UNFOLDING THE TREADMILL
- Place one hand on handle bar, use the other to push top of the running deck forward
- Press one foot on the middle section of the cylinder to dis-engage the locking mechanism
- Allow deck to begin slowly dropping before releasing hands
MOVING THE TREADMILL
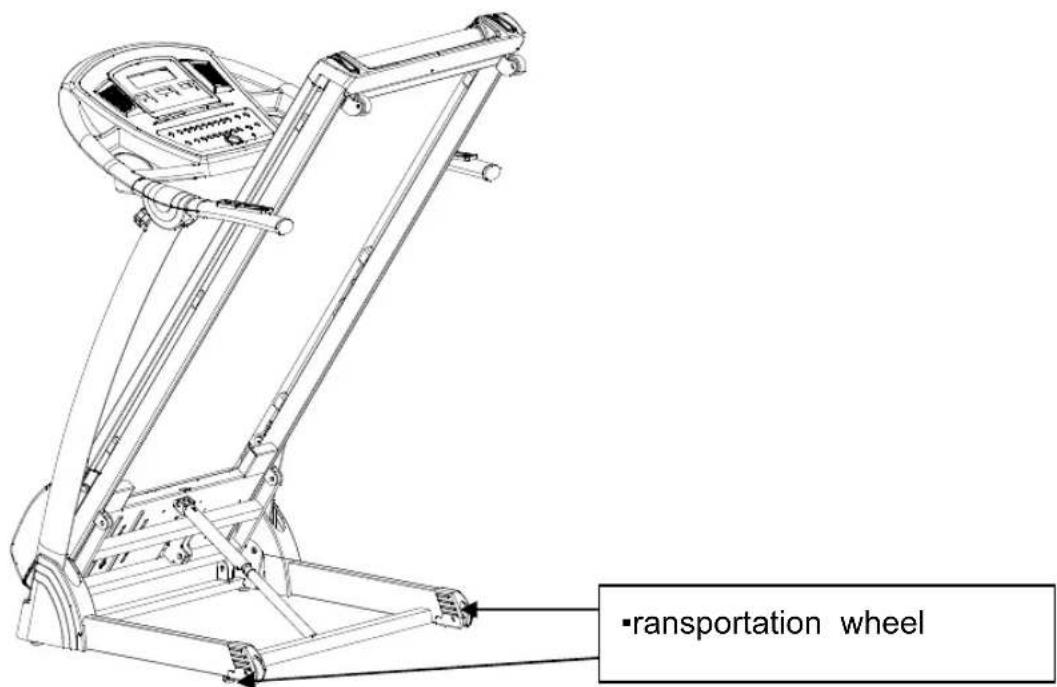
- he treadmill can be moved around in house safely in its fold-up position by using the transport wheels
Firmly hold onto handle bars with both hands, pull the treadmill towards you, then portable on wheels, drag or push slowly
Key Definition
(I): Computer function Instruction:
1.1: P0: U—ER training program; P1-P36 the preset auto program;U01-U03:user's manual program, HRC(for option) ;FA▪:body fat function.
1.2 :1 LCD dot-matrix window with blue backlight + 3 LED windows and 23 keys; Easily operation with speed button and incline button on handle bar
1.3 :Mp3 player with dual track function
1.4: —peed Range :1.0\~16.0KM/H
1.5: Incline Range:0\~12%
1.6: Prevent over loading, over voltage, explosion proof, anti speed and electromagnetic interference
1.7: —elf check and warning sound function.
(II): LLCD window instruction
2.1 : “—PEED/PROGRAM” window: When it stopped ,“PROGRAM”LED indicator lights lit, it will display the program number(P0\~P36,HRC(option),FA•);when it running ,”—PEED” LED indicator light lit ,it will display the speed data;
2.2 : "DI—/■IME/CAL" window : "DI—■ANCE" LED indicator light lit , it will display the distance data, "■IME" LED indicator light lit , in will display the time data, "CALORIE—"LED indicator light lit .
2.3 : "PUL—E/INCLINE" window: when it test the heart rate, "PUL—E"LED indicator light lit, it will display the heart rate data; or else "INCLINE"LED indicator light lit, it will display the inclination data.
2.4 : -he LCD display window: during the training program ,if the user set(P0),it will display training mode ;during the automatic training program(P1\~P36),it will display the speed wave drawing inner set ;during the body fat test program, it will display the first letter of the setting program: —(sex),A(age),H(height),W(weight),B(BMI),which corresponding with the item F1-F5.When press the speed key ,it will show the speed data within 3 seconds; when the machine paused it will display “PAU—”; when take off the safety key ,it will display “E-07”;when in abnormality state ,it will show “ERR” clue on information.
(III)Button instruction :
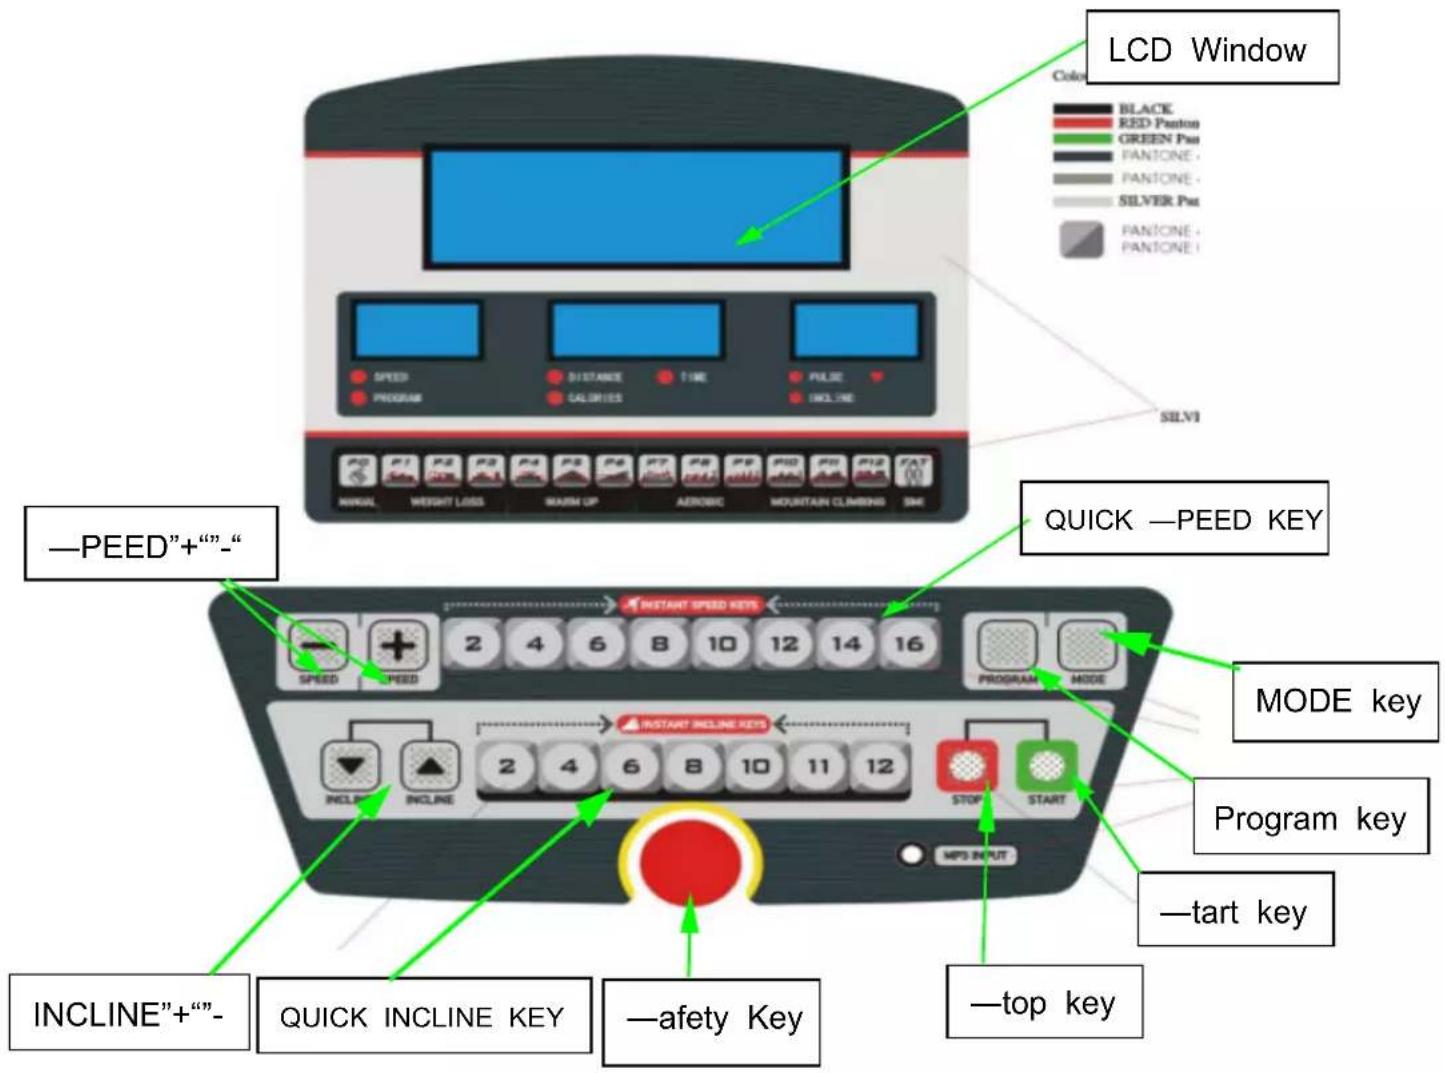
3.1: “PROG”: program select key: when the treadmill is stopped, cycle select the program "P0-P36-U01\~U03 HRC(option) FAT "as you prefer."
3.2: “MODE” : mode select key When the treadmill is running, you can cycle select the Distance-Calories—6 second auto switching when the treadmill is stopped, set the Mode as you prefer.
In the program P0, you can cycle select the ·ime countdown·distance countdown→calories countdown → Normal mode.
- he reposition of default is 30 minutes when in P1-P36.
You can cycle select the FA- item when in in FA-mode.
3.3: “—AR-/PAU—E’ key ::when the treadmill is stopped, press the —AR· key to turn on the treadmill. Press“—AR·” key when running, it will pause.
3.4: “—•OP” key, when the treadmill is running, stop the treadmill by pressing the —•OP key. when the LCD window show the ERR massage. Press the stop key to clear the err massage. When the treadmill stop, press the “—•OP” key, it can return to the default display status
3.5: “+” KEY : increase the speed when running. Increase the parameter under the body fat testing.
3.6: “—” KEY: decrease the speed when running. Decrease the parameter under the body fat testing.
3.7 : “QUICK —PEED” key : when the treadmill is running ,—peed up directly by by pressing the quick speed key ,24, 6, 8, 10, 12, 14, 16
3.8: “ ” KEY : Decrease the incline by pressing this key .
3.9: “▲” KEY : Increase the incline by pressing this key .
3.10: "QUICK INCLINE KEY: Increase the incline directly by pressing the quick incline key 2, 4, 6, 8, 10, 11, 12
3.11:"Incline + "on handle bar left n Increase the inclination by pressing this key .—ame function as the button "Incline +"on console.
3.12: "Incline - "on handle bar left :Decrease the inclination by pressing this key .—ame function as the button "Incline -"on console.
3.13::”—peed + “on handle bar right :increase the speed when running.—ame function as the button “—peed +”on console.
3.13:"—peed - "on handle bar right :increase the speed when running.—ame function as the button "—peed -"on console.
(V):—afety key function :
In any state, pull-out safety locks, window displays: Er-7 and sound buzzer BIBI-BI. -hen put well the safety lock, all show that the full light for 2 seconds, then go to manual start mode (the equivalent of clearing reset).
(VI) MMP3 player function (for option):
Computer has built-in dual-channel MP3 player, switching mode power
supply (SMPS). Use the distributive audio adapter MP3 wire to connect the MP3 input and computer music input, it will play.
(VI)—ttart instruction :
5.1: Put the power cord into the electrical outlet with 10A. Flip this switch to the "ON" position. -he screen shine with prompt sound.
5.2: Put the safety key on the correct position, then turn on the power, the LCD window light is shining, and sound "beee", the treadmill enter in to the P0 Normal Mode.
5.3: Press "PROG" key to cycle select the programP1-P36,U01,U02,U03,HRC(option)FAT.
a) “P0” User program. Press “MODE” cycle select four training mode. User can select the speed and inclination. —peed default is 1.0km/h, inclination default is 0%.
- raining mode 1: Counting. -ime ,distance, calorie is plus. -he select function is closed.
- raining mode 2: -ime Countdown. Under selecting, time window flicker, press "+" -" to select the value. -he range is 5-99 minute. Default is 30:00.
- raining mode 3: Distance Countdown. Under selecting, Distance window flicker, press "+" - " to select the value. - he range is1.0-99.0km. Default is1.0KM.
- raining mode 4: Calories Countdown. Under selecting, calories window flicker, press “+”-“ to select. -he range Is 20-990CAL. Default is 50CAL.
b) "P1—P36" Preset program. Only for -ime Countdown mode. Under selecting, time window flicker, press "+"-" to select.-he range is 5-99 minute. Default is 30:00. Press "MODE" key to return to Defaults.
c) FA▪:body fat testing,unde FA▪ mode ,the treadmill must be in stop state
5.4:Press “—•AR•” after setting up training mode, —creen display 5 seconds into the countdown, accompanied by five hint sound, after the countdown to 1, treadmill start gently, speed up slowly to the display, then the constant speed operation smoothly.
a) When running, press the “+”, “-” or “quick speed key” to adjust the speed you want.
b) For P1—P36, —peed and inclination is divided into 16 segments. Each segment have same time. -he speed after selecting will be avail in current segment. When run to next segment., it will sound 3 times in advance. When finish 16 segments, the motor will stop with a long prompt sound.
c) Press “—•AR•” key when running, it will pause. Press “—•AR•” key again, it will running, the record data will keep on.
5.5: Press “—•OP” key when running, the treadmill will slowly till stop. All will return to the default state.
5.6: Press “” KEY or “QUICK INCLINE KEY” adjust the incline you want.
5.7: In any state, pull-out safety locks, window displays: Er-7 and sound buzzer. •he treadmill stop.
5.8: -he controller always under the inspection. -readmill will stop once the abnormal case happen. Window will show the ERR message and sound.
5.9: When the window showing the ERR message, press "stop" key, the ERR message will be deleted.
5.10 BODY FA·FUNCION
When the treadmill is stopped, press the "PROG" key until select"FA▪ "and enter into body fat function..then press "MODE" key to set the parameter .
“DIS/CAL” window which in the left of the screen showing the item serial number, you can press "MODE" key to adjust. "PULSE" window which in the right of the screen displays the setting parameter, press press" "—" key to set the data.
A)Sexo, means —exo, the 1(male), 2(female). If the window displays 1, which shows you select "Male", -he original is Male
B)Age, means Age, the range is -99, the original is 25.
C) Height, means Height, the range is 100-220CM, the original is 170CM
D) Weight, means Weight, the range is 20-150KG, the original is 70KG
E) BMI, mean BMI, show you have finished the set item, and enter into body fat function. Put two hands on the handle bar, wait for 8 seconds, and the item window will show the BMI. -ake the Asian people for example,
BMI under 18 is too thin;
between 18-23 is standard;
between 23-28 is fat; and over 29 is too fat.
VII.U—ER program: •readmill have three user mode:U—ER01 ,U—ER02 ,U—ER03 which can be adjusted by the user themselves.
Press “PROG” key to cycle select the program U01\~U02. Press “MODE” to set the parameters ,user can set your own exclusive 16 segment of speed and inclination . After setting the parameters to press “—•AR•” to start the treadmill .the user own exclusive program will be saved automatically which can be used next time.
VIII HRC Function(optional):
a) Press "PROG" key and choose HRC function when the treadmill is stopped, the CAL window will show: "HRC"
b) -he DI— window shows "25" years normally with flickering, press"—PEED+/-" key can set the age of the user, ranging from 13 to 80.
c) Press "MODE" key, the DI—window will show the -HR figure, it's calculated by system based on the age you set.
d) Press "MODE" key again, the -IME window will show "30:00"minutes with flickering, press"—PEED+/-" key can set time, ranging from 5 to 99 minutes.
e) Press "—•AR" key, the treadmill starts working, •IME window will show countdown. Press "—•OP" key or when the countdown shows "0", the treadmill will stop working automatically.
f) -he user must use wireless heart rate detection system to start the HRC function to do exercises. Only when there is no wireless heart rate signal, the treadmill will detect handle pulse signal. If there is not any heart rate signal, the treadmill will keep working with the current speed, until the treadmill detects signal of heart rate.
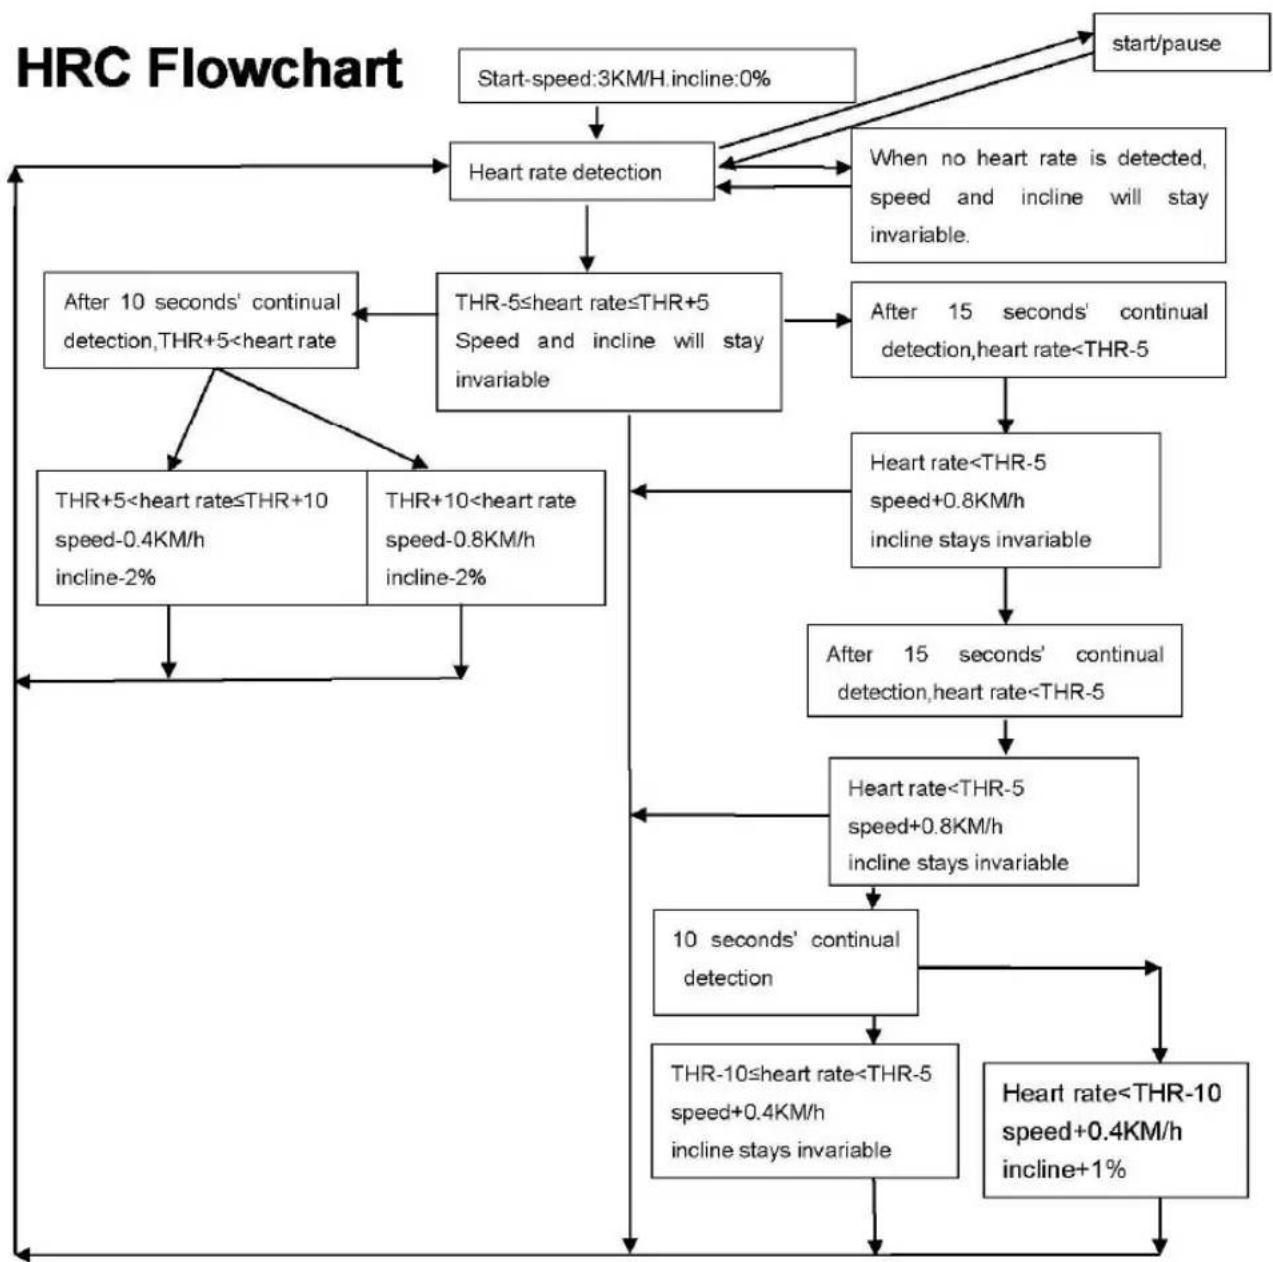
g) After the treadmill starts working, the original speed is 3KM/H, incline is 0%, in 10 seconds's time, the treadmill will be out of the control of HRC, but you can still control the speed and incline with buttons.
h) After working for 10 seconds, if any heart rate signal is detected, HRC function will detect the heart rate of the user according to the flowchart below. •he treadmill will control the speed and incline automatically to keep the heart rate in a certain range.
flowchart
graph TD
    A["Start-speed:3KM/H incline:0%"] --> B["Heart rate detection"]
    C["When no heart rate is detected, speed and incline will stay invariable."] --> B
    B --> D["After 10 seconds' continual detection,THR+5<heart rate"]
    B --> E["After 15 seconds' continual detection,heart rate<THR-5"]
    D --> F["THR+5<heart rate≤THR+10 speed-0.4KM/h incline-2%"]
    D --> G["THR+10<heart rate speed-0.8KM/h incline-2%"]
    E --> H["After 15 seconds' continual detection,heart rate<THR-5"]
    H --> I["Heart rate<THR-5 speed+0.8KM/h incline stays invariable"]
    I --> J["10 seconds' continual detection"]
    J --> K["THR-10≤heart rate<THR-5 speed+0.4KM/h incline stays invariable"]
    K --> L["Heart rate<THR-10 speed+0.4KM/h incline+1%"]
    L --> M["start/pause"]
    B --> N["THR-5≤heart rate≤THR+5 Speed and incline will stay invariable"]
    E --> O["Heart rate<THR-5 speed+0.8KM/h incline stays invariable"]
    I --> P["Heart rate<THR-5 speed+0.8KM/h incline stays invariable"]
    J --> Q["THR-10≤heart rate<THR-5 speed+0.4KM/h incline stays invariable"]
Program speed Table
| PRO. | SCL.S | 1 | 2 | 3 | 4 | 5 | 6 | 7 | 8 | 9 | 10 | 11 | 12 | 13 | 14 | 15 | 16 |
| P1 | SPEED | 1.0 | 3.0 | 3.0 | 7.0 | 7.0 | 5.0 | 5.0 | 5.0 | 7.0 | 7.0 | 5.0 | 5.0 | 5.0 | 5.0 | 3.0 | 2.0 |
| INCLINE | 2 | 2 | 6 | 6 | 8 | 8 | 6 | 6 | 4 | 4 | 4 | 6 | 6 | 2 | 2 | 2 | |
| P2 | SPEED | 2.0 | 3.0 | 3.0 | 6.0 | 5.0 | 5.0 | 8.0 | 5.0 | 5.0 | 6.0 | 8.0 | 8.0 | 8.0 | 5.0 | 4.0 | 3.0 |
| INCLINE | 3 | 3 | 9 | 9 | 9 | 2 | 2 | 8 | 8 | 4 | 1 | 1 | 4 | 4 | 4 | 4 | |
| P3 | SPEED | 2.0 | 3.0 | 5.0 | 5.0 | 7.0 | 7.0 | 8.0 | 5.0 | 5.0 | 6.0 | 8.0 | 8.0 | 8.0 | 5.0 | 4.0 | 3.0 |
| INCLINE | 1 | 2 | 3 | 4 | 5 | 5 | 7 | 7 | 4 | 4 | 4 | 4 | 6 | 3 | 2 | 2 | |
| P4 | SPEED | 2.0 | 2.0 | 3.0 | 5.0 | 5.0 | 5.0 | 8.0 | 8.0 | 8.0 | 8.0 | 5.0 | 5.0 | 5.0 | 3.0 | 3.0 | 2.0 |
| INCLINE | 3 | 3 | 6 | 6 | 6 | 9 | 9 | 9 | 9 | 9 | 9 | 6 | 6 | 6 | 2 | 2 | |
| P5 | SPEED | 3.0 | 4.0 | 5.0 | 6.0 | 7.0 | 8.0 | 9.0 | 10.0 | 10.0 | 10.0 | 9.0 | 8.0 | 7.0 | 5.0 | 4.0 | 3.0 |
| INCLINE | 2 | 2 | 4 | 4 | 8 | 8 | 6 | 6 | 6 | 6 | 8 | 7 | 6 | 5 | 1 | 1 | |
| P6 | SPEED | 3.0 | 4.0 | 5.0 | 5.0 | 6.0 | 6.0 | 7.0 | 7.0 | 7.0 | 9.0 | 9.0 | 10.0 | 10.0 | 11.0 | 5.0 | 3.0 |
| INCLINE | 1 | 8 | 8 | 8 | 8 | 8 | 7 | 7 | 7 | 7 | 7 | 5 | 5 | 3 | 3 | 1 | |
| P7 | SPEED | 3.0 | 4.0 | 9.0 | 4.0 | 11.0 | 4.0 | 10.0 | 4.0 | 9.0 | 4.0 | 8.0 | 4.0 | 11.0 | 5.0 | 3.0 | 2.0 |
| INCLINE | 1 | 1 | 4 | 4 | 4 | 6 | 6 | 6 | 8 | 8 | 8 | 10 | 10 | 10 | 6 | 2 | |
| P8 | SPEED | 3.0 | 5.0 | 8.0 | 3.0 | 5.0 | 7.0 | 9.0 | 3.0 | 5.0 | 7.0 | 10.0 | 3.0 | 5.0 | 7.0 | 11.0 | 5.0 |
| INCLINE | 3 | 3 | 8 | 8 | 3 | 3 | 7 | 7 | 3 | 3 | 6 | 6 | 3 | 3 | 5 | 5 | |
| P9 | SPEED | 3.0 | 7.0 | 9.0 | 4.0 | 7.0 | 10.0 | 4.0 | 7.0 | 11.0 | 5.0 | 7.0 | 12.0 | 4.0 | 7.0 | 12.0 | 6.0 |
| INCLINE | 3 | 6 | 6 | 3 | 7 | 7 | 3 | 8 | 8 | 3 | 9 | 9 | 3 | 3 | 7 | 7 | |
| P10 | SPEED | 3.0 | 5.0 | 6.0 | 6.0 | 6.0 | 9.0 | 10.0 | 6.0 | 6.0 | 9.0 | 10.0 | 6.0 | 6.0 | 6.0 | 11.0 | 3.0 |
| INCLINE | 2 | 7 | 7 | 7 | 5 | 5 | 5 | 8 | 8 | 8 | 8 | 8 | 8 | 4 | 4 | 4 | |
| P11 | SPEED | 4.0 | 5.0 | 7.0 | 9.0 | 10.0 | 11.0 | 9.0 | 6.0 | 8.0 | 9.0 | 10.0 | 10.0 | 11.0 | 9.0 | 6.0 | 5.0 |
| INCLINE | 1 | 6 | 6 | 6 | 3 | 3 | 3 | 7 | 7 | 4 | 4 | 4 | 4 | 6 | 6 | 6 | |
| P12 | SPEED | 4.0 | 6.0 | 10.0 | 10.0 | 7.0 | 10.0 | 10.0 | 10.0 | 7.0 | 7.0 | 10.0 | 10.0 | 10.0 | 10.0 | 6.0 | 5.0 |
| INCLINE | 3 | 8 | 8 | 6 | 9 | 9 | 5 | 5 | 8 | 8 | 8 | 4 | 4 | 4 | 4 | 4 | |
| P13 | SPEED | 4.0 | 12.0 | 4.0 | 12.0 | 4.0 | 12.0 | 4.0 | 12.0 | 4.0 | 12.0 | 4.0 | 12.0 | 4.0 | 12.0 | 4.0 | 12.0 |
| INCLINE | 4 | 8 | 10 | 12 | 4 | 8 | 10 | 12 | 4 | 8 | 10 | 12 | 4 | 8 | 10 | 12 | |
| P14 | SPEED | 2.0 | 3.0 | 3.0 | 6.0 | 9.0 | 11.0 | 3.0 | 6.0 | 9.0 | 11.0 | 3.0 | 6.0 | 9.0 | 11.0 | 3.0 | 6.0 |
| INCLINE | 5 | 9 | 11 | 12 | 5 | 9 | 11 | 12 | 5 | 9 | 11 | 12 | 5 | 9 | 11 | 12 | |
| P15 | SPEED | 4.0 | 6.0 | 11.0 | 11.0 | 9.0 | 6.0 | 11.0 | 11.0 | 9.0 | 6.0 | 11.0 | 11.0 | 9.0 | 6.0 | 11.0 | 11.0 |
| INCLINE | 2 | 3 | 4 | 5 | 6 | 8 | 7 | 8 | 8 | 7 | 7 | 6 | 5 | 4 | 3 | 2 | |
| P16 | SPEED | 2.0 | 4.0 | 4.0 | 12.0 | 4.0 | 12.0 | 4.0 | 12.0 | 4.0 | 12.0 | 4.0 | 12.0 | 4.0 | 12.0 | 4.0 | 12.0 |
| INCLINE | 2 | 4 | 5 | 6 | 2 | 4 | 5 | 6 | 2 | 4 | 5 | 6 | 2 | 4 | 5 | 6 | |
| P17 | SPEED | 2.0 | 2.0 | 2.0 | 4.0 | 6.0 | 6.0 | 9.0 | 11.0 | 11.0 | 2.0 | 4.0 | 6.0 | 6.0 | 11.0 | 11.0 | 9.0 |
| INCLINE | 2 | 4 | 6 | 8 | 10 | 12 | 12 | 12 | 12 | 12 | 12 | 10 | 8 | 6 | 4 | 2 | |
| P18 | SPEED | 3.0 | 6.0 | 3.0 | 6.0 | 6.0 | 3.0 | 6.0 | 6.0 | 3.0 | 6.0 | 6.0 | 3.0 | 6.0 | 6.0 | 3.0 | 6.0 |
| INCLINE | 2 | 6 | 8 | 2 | 6 | 8 | 2 | 6 | 8 | 2 | 6 | 8 | 2 | 6 | 8 | 2 | |
| P19 | SPEED | 4.0 | 12.0 | 4.0 | 12.0 | 4.0 | 12.0 | 4.0 | 12.0 | 4.0 | 12.0 | 4.0 | 12.0 | 4.0 | 12.0 | 4.0 | 12.0 |
| INCLINE | 10 | 8 | 6 | 4 | 10 | 8 | 6 | 4 | 10 | 8 | 6 | 4 | 10 | 8 | 6 | 4 | |
| P20 | SPEED | 5.0 | 13.0 | 5.0 | 13.0 | 5.0 | 13.0 | 5.0 | 13.0 | 5.0 | 13.0 | 5.0 | 13.0 | 5.0 | 13.0 | 5.0 | 13.0 |
| INCLINE | 12 | 8 | 2 | 12 | 8 | 2 | 12 | 8 | 2 | 12 | 8 | 2 | 12 | 8 | 2 | 2 | |
| P21 | SPEED | 2.0 | 6.0 | 2.0 | 6.0 | 11.0 | 2.0 | 6.0 | 11.0 | 2.0 | 6.0 | 11.0 | 2.0 | 6.0 | 11.0 | 2.0 | 6.0 |
| INCLINE | 12 | 9 | 3 | 12 | 9 | 3 | 12 | 9 | 3 | 12 | 9 | 3 | 12 | 9 | 3 | 3 | |
| P22 | SPEED | 4.0 | 6.0 | 11.0 | 6.0 | 2.0 | 11.0 | 6.0 | 2.0 | 11.0 | 6.0 | 2.0 | 11.0 | 6.0 | 2.0 | 11.0 | 6.0 |
| INCLINE | 2 | 4 | 10 | 2 | 4 | 10 | 2 | 6 | 12 | 6 | 8 | 12 | 6 | 8 | 12 | 2 | |
| P23 | SPEED | 4.0 | 6.0 | 11.0 | 6.0 | 6.0 | 2.0 | 11.0 | 6.0 | 6.0 | 2.0 | 11.0 | 6.0 | 6.0 | 2.0 | 11.0 | 6.0 |
| INCLINE | 2 | 3 | 4 | 5 | 6 | 6 | 7 | 8 | 10 | 11 | 12 | 12 | 12 | 12 | 10 | 2 | |
| P24 | SPEED | 4.0 | 6.0 | 11.0 | 6.0 | 4.0 | 11.0 | 6.0 | 4.0 | 11.0 | 6.0 | 4.0 | 11.0 | 6.0 | 4.0 | 11.0 | 6.0 |
| INCLINE | 4 | 4 | 5 | 6 | 7 | 8 | 10 | 10 | 12 | 12 | 12 | 12 | 12 | 12 | 10 | 2 | |
| P25 | SPEED | 5.0 | 13.0 | 5.0 | 13.0 | 5.0 | 13.0 | 5.0 | 13.0 | 5.0 | 13.0 | 5.0 | 13.0 | 5.0 | 13.0 | 5.0 | 13.0 |
| INCLINE | 5 | 9 | 11 | 12 | 5 | 9 | 11 | 12 | 5 | 9 | 11 | 12 | 5 | 9 | 11 | 12 | |
| P26 | SPEED | 3.0 | 4.0 | 4.0 | 7.0 | 10.0 | 12.0 | 4.0 | 7.0 | 10.0 | 12.0 | 4.0 | 7.0 | 10.0 | 12.0 | 4.0 | 7.0 |
| INCLINE | 6 | 10 | 12 | 12 | 6 | 10 | 11 | 12 | 6 | 10 | 12 | 12 | 6 | 10 | 12 | 12 | |
| P27 | SPEED | 5.0 | 7.0 | 12.0 | 12.0 | 10.0 | 7.0 | 12.0 | 12.0 | 10.0 | 7.0 | 12.0 | 12.0 | 10.0 | 7.0 | 12.0 | 12.0 |
| INCLINE | 3 | 4 | 5 | 6 | 7 | 9 | 8 | 9 | 9 | 8 | 8 | 7 | 6 | 5 | 4 | 3 | |
| P28 | SPEED | 3.0 | 5.0 | 5.0 | 13.0 | 5.0 | 13.0 | 5.0 | 13.0 | 5.0 | 13.0 | 5.0 | 13.0 | 5.0 | 13.0 | 5.0 | 13.0 |
| INCLINE | 3 | 5 | 6 | 7 | 3 | 5 | 6 | 7 | 3 | 5 | 6 | 7 | 3 | 5 | 6 | 7 | |
| P29 | SPEED | 3.0 | 3.0 | 3.0 | 5.0 | 7.0 | 7.0 | 10.0 | 12.0 | 12.0 | 3.0 | 5.0 | 7.0 | 7.0 | 12.0 | 12.0 | 10.0 |
| INCLINE | 3 | 5 | 7 | 9 | 11 | 12 | 12 | 12 | 12 | 12 | 12 | 11 | 9 | 7 | 5 | 3 | |
| P30 | SPEED | 4.0 | 7.0 | 4.0 | 7.0 | 7.0 | 4.0 | 7.0 | 7.0 | 4.0 | 7.0 | 7.0 | 4.0 | 7.0 | 7.0 | 4.0 | 7.0 |
| INCLINE | 3 | 7 | 9 | 3 | 7 | 9 | 3 | 7 | 9 | 3 | 7 | 9 | 3 | 7 | 9 | 3 | |
| P31 | SPEED | 5.0 | 13.0 | 5.0 | 13.0 | 5.0 | 13.0 | 5.0 | 13.0 | 5.0 | 13.0 | 5.0 | 13.0 | 5.0 | 13.0 | 5.0 | 13.0 |
| INCLINE | 11 | 9 | 7 | 5 | 11 | 9 | 7 | 5 | 11 | 9 | 7 | 5 | 11 | 9 | 7 | 5 | |
| P32 | SPEED | 6.0 | 14.0 | 6.0 | 14.0 | 6.0 | 14.0 | 6.0 | 14.0 | 6.0 | 14.0 | 6.0 | 14.0 | 6.0 | 14.0 | 6.0 | 14.0 |
| INCLINE | 12 | 9 | 3 | 12 | 9 | 3 | 12 | 9 | 3 | 12 | 9 | 3 | 12 | 9 | 3 | 3 | |
| P33 | SPEED | 3.0 | 7.0 | 3.0 | 7.0 | 12.0 | 3.0 | 7.0 | 12.0 | 3.0 | 7.0 | 12.0 | 7.0 | 7.0 | 12.0 | 3.0 | 7.0 |
| INCLINE | 12 | 10 | 4 | 12 | 10 | 4 | 12 | 10 | 4 | 12 | 10 | 4 | 12 | 10 | 4 | 4 | |
| P34 | SPEED | 5.0 | 7.0 | 12.0 | 7.0 | 3.0 | 12.0 | 7.0 | 3.0 | 12.0 | 7.0 | 3.0 | 12.0 | 7.0 | 3.0 | 12.0 | 7.0 |
| INCLINE | 3 | 5 | 11 | 3 | 5 | 11 | 3 | 7 | 12 | 7 | 9 | 12 | 7 | 9 | 12 | 3 | |
| P35 | SPEED | 5.0 | 7.0 | 12.0 | 7.0 | 7.0 | 3.0 | 12.0 | 7.0 | 7.0 | 3.0 | 12.0 | 7.0 | 7.0 | 3.0 | 12.0 | 7.0 |
| INCLINE | 3 | 4 | 5 | 6 | 7 | 7 | 8 | 9 | 11 | 12 | 12 | 12 | 12 | 12 | 11 | 3 | |
| P36 | SPEED | 5.0 | 7.0 | 12.0 | 7.0 | 5.0 | 12.0 | 7.0 | 5.0 | 12.0 | 7.0 | 5.0 | 12.0 | 7.0 | 5.0 | 12.0 | 7.0 |
| INCLINE | 5 | 5 | 6 | 7 | 8 | 9 | 11 | 11 | 12 | 12 | 12 | 12 | 12 | 12 | 11 | 3 |
Trouble Shooting
| Problem | Possible cause | Corrective action |
| ·readmill does not work | a .no connect to power supply | Plug into socket |
| b. safety switch not insert | Insert safety switch in monitor | |
| c .cut off the signal circuit system | Check control panel and signal cable | |
| d. treadmill is not switch on | —witch on | |
| Belt does not run properly | a .running belt not lubricate well | Adjust running belt by silicon |
| b . belt too tight | Adjust running belt | |
| Belt is slipping | a. belt is too loose | Adjust running belt |
| b .Motor belt is too loose | Adjust the motor belt |
ERROR MESSAGE AND SOLUTION:
| Problem Reason | How to settle the problem | |
| ·readmill can not work | A: Did not connect the power supply | Connect the power supply |
| B: —afety key did not put well | Well put the safety key on the correct position | |
| C: transformer did not fix well or transformer defected. | Fix well the transformer or change the transformer | |
| D: electrocircuit interrupt | Check the connect wire and the terminal of the connect wire ,and well connect . | |
| ·readmill stop suddenly | A:safety key fall off Put well the safety key . | |
| B: the electronic system problem | Ask for the after sale service | |
| Key defected | Key is damaged | Change key |
| Key can not work | Change key board and wire. Change pcb board. Change computer. | |
| E1 | A: Connect wire loose or defected | Well connect the wire or Change the wire |
| B: computer defected Change the compuer | |
| C: •-transformer defected Change the transformer | |
| D: Controller defected Change the controller | |
| E2 | A: Motor connect wire or motor defected Change the motor wire or change the motor |
| B: •he connect wire between the motor and controller is loose or controller defected Well connect the wire or change the controller | |
| E3 | A: speed sensor not well put Well put the speed sensor |
| B: speed sensor defected Change the speed sensor | |
| C: •he connect wire between the speed sensor and the controller did not connect well Well connect the wire, | |
| D: controller defected Change the controller | |
| E5 | Controller defected Change the controller |
| Motor defected Change the motor | |
| E7 | Computer can not test the safety key signal Check the safety key ,and well put . |
| No pulse | Handle pulse wire did not connect well or wire defected Well connect the wire or change the wire |
| Console circuitry defected Change the console | |
| Console short of display | •he screw on the pcb is loose •ight well the screw |
| Console defected Change the console |
General fitness tips
—tart your exercise program slowly, i.e. one exercise unit every 2 days. Increase your exercise session week by week. Begin with short periods per exercise and then increase these continually. —tart slowly with the exercise sessions and don’t set yourself impossible targets. In addition to these exercises, do other forms of exercise such as jogging, swimming, dancing and/or cycling.
Always warm up thoroughly before exercising. -o do so, carry out at least five minutes of stretching or gymnastic exercises to avoid muscle strains and injuries.
Check your pulse regularly. If you do not have a pulse measuring instrument, ask your GF how you can measure your heart rate effectively. Determine your personal exercise frequency range to achieve optimal training success. -ake into account both your age and your level of fitness. -he table on page 16 will give you a reference point for determining the optimal exercise pulse.
Make sure you breathe regularly and calmly when exercising.
- 'ake care to drink enough while exercising. -his ensures that the liquid requirement of your body is satisfied. Consider that the recommended drinking amount of 2-3 litres per day is strongly increased through physical strain. -he fluid you drink should be at room temperature.
When exercising on the device always wear light and comfortable clothing as well as sports shoes. Do not wear any loose clothing that could tear or become caught in the device whilst exercising.
Exercises for your personal work-out
Warm-up / stretching exercises
A successful exercise session begins with warming up exercises and ends with exercises for cooling down and relaxing. •these warming up exercises prepare your body for the subsequent demands made upon it. •he cooling down / relaxation period after the exercise session ensures that you do not experience any muscular problems. In the following you will find stretching exercise instructions for warming up and cooling down.
Please pay attention to the following points:
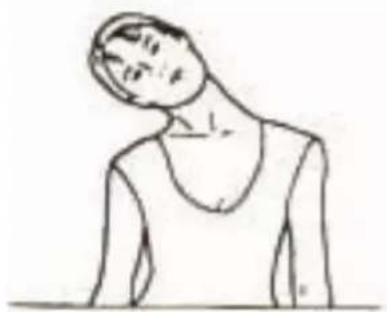
NECK EXERCISES
- ilt your head to the right and feel the tension in your neck. —lowly drop your head down to your chest in a semi-circle and then turn your head to the left. You will feel a comfortable tension in your neck again.
You can repeat this exercise alternately several times.
natural_image
Simple line drawing of a person in profile view, no text or symbols present1
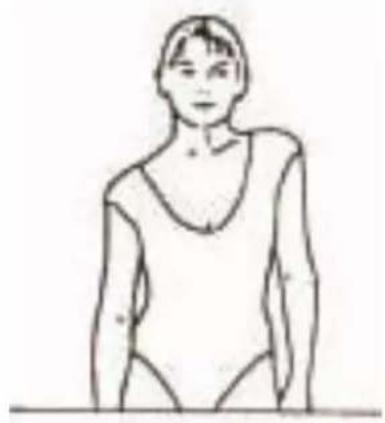
EXERCISES FOR THE SHOULDER AREA
Lift the left and right shoulders alternately, or lift both shoulders simultaneously.
natural_image
Simple line drawing of a person standing with hands on hips (no text or symbols)2
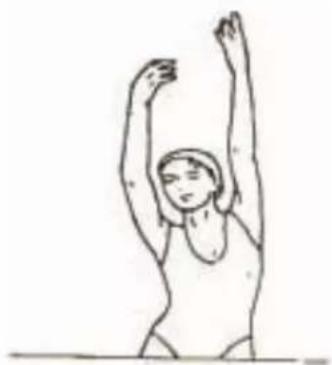
ARM STRETCHING EXERCISES
—tretch the left and right arms alternately towards the ceiling. Feel the tension in your left and right side. Repeat this exercise several times.
natural_image
Simple line drawing of a person performing a stretching or dance pose (no text or symbols)3
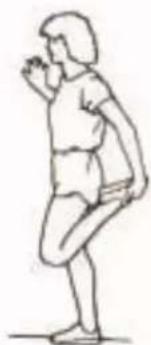
EXERCISES FOR THE UPPER THIGH
—upport yourself by placing your hand on the wall, then reach down behind you and lift up your right or left foot as close to your buttocks as possible. Feel a comfortable tension in your front upper thigh. Maintain this position for 30 seconds if possible and repeat this exercise 2 times for each leg.
natural_image
Line drawing of a person in motion, possibly dancing or performing a gesture (no text or symbols)4
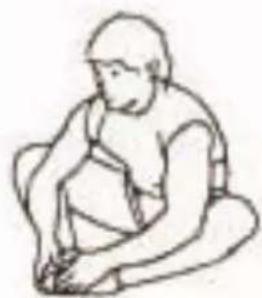
INSIDE UPPER THIGH
—it on the floor and place your feet in such a way that your knees are facing outwards. If your feet as close as possible to your groin. Now press your knees carefully downwards. Maintain this position for 30-40 seconds if possible.
natural_image
Simple line drawing of a seated person with hands on hips (no text or symbols)5
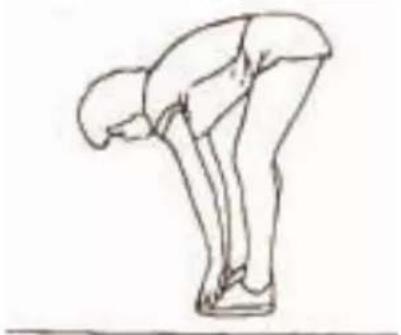
TOUCH TOES
Bend your trunk slowly forwards and try to touch your feet with your hands. Reach down as far as possible to your toes. Maintain this position for 20-30 seconds if possible.
natural_image
Line drawing of a person bending forward with legs raised (no text or symbols)6
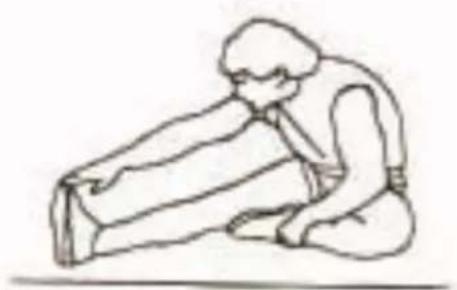
EXERCISES FOR THE KNEES
—it on the floor and stretch out your right leg. Bend your left leg and place your foot on your right upper thigh. Now try to reach your right foot with your right arm. Maintain this position for 30-40 seconds if possible.
natural_image
Simple line drawing of a person kneeling to lift a large object (no text or symbols)7
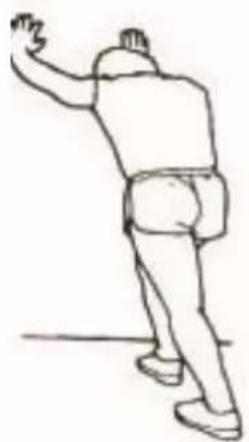
EXERCISES FOR THE CALVES/ACHILLES TENDON
Place both hands on the wall and support your full body weight. •hen move your left leg backwards and alternate it with your right leg. •his stretches the back of the leg. Maintain this position for 30-40 seconds if possible.
natural_image
Line drawing of a person in motion, possibly dancing or gesturing (no text or symbols)8
EXPLODED DRAWING
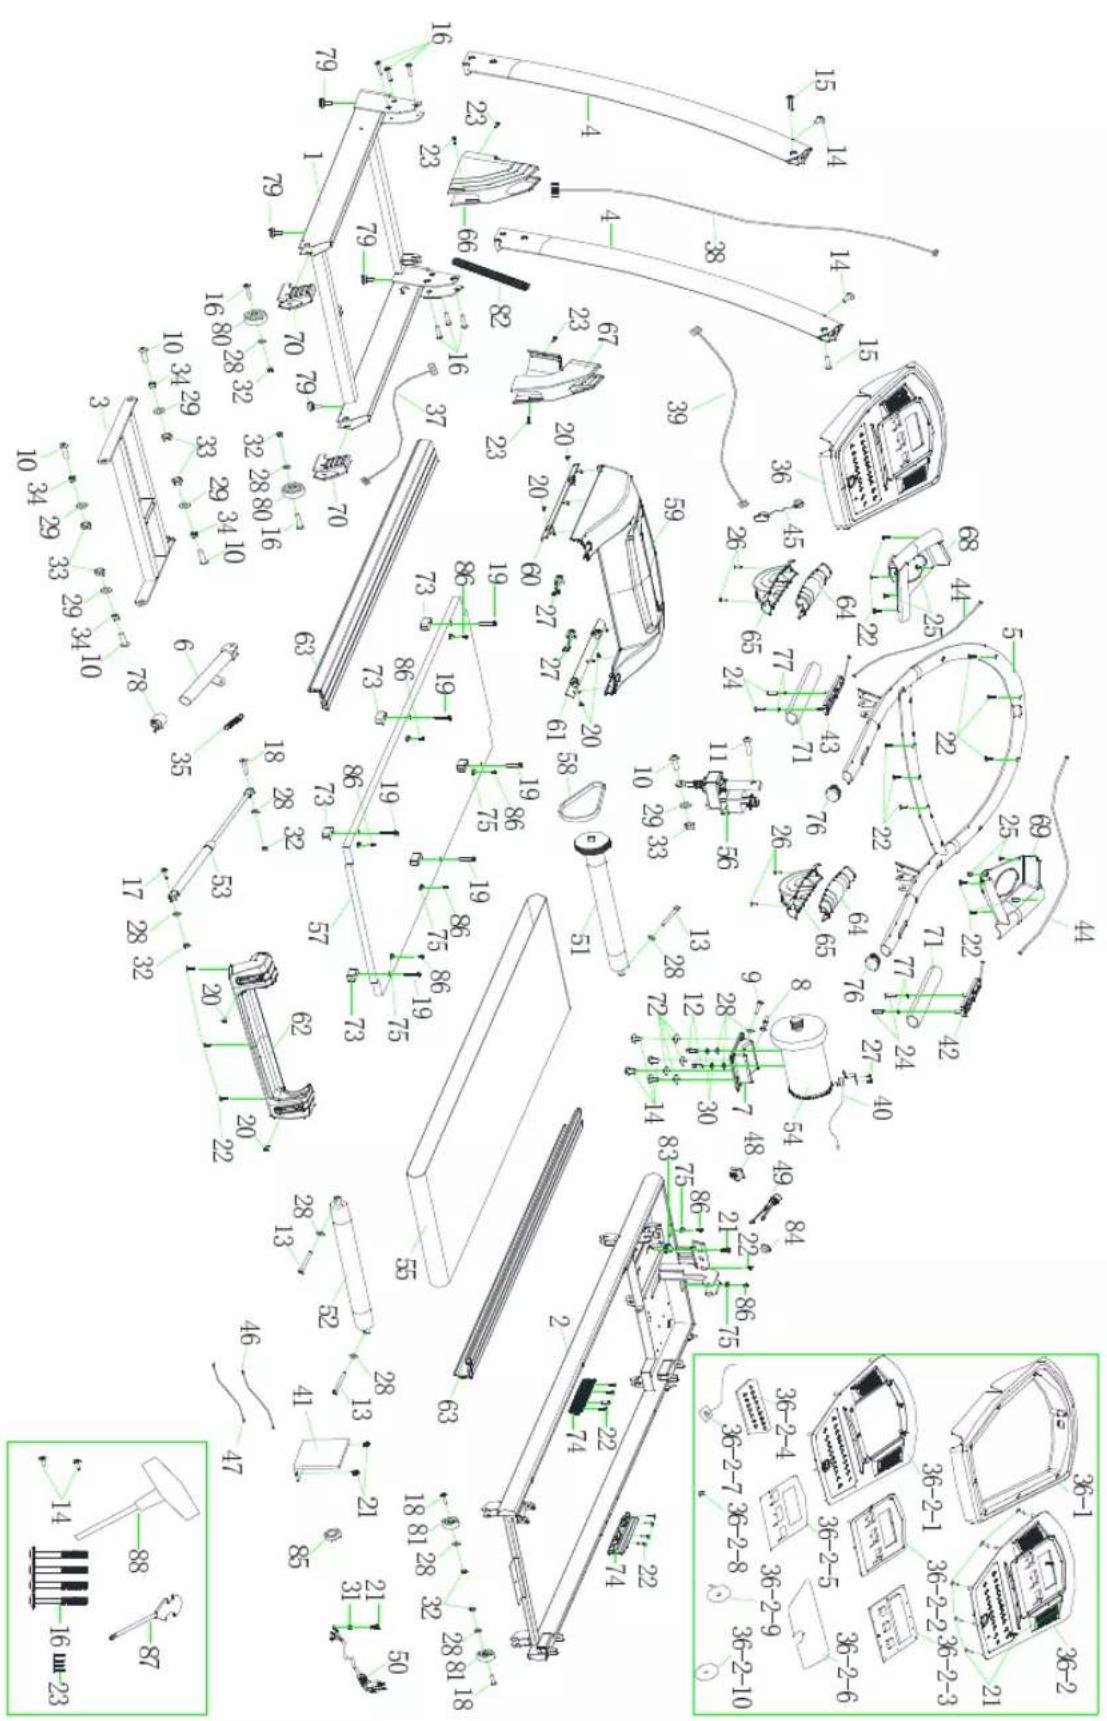
| Part No. | Description Qty | |
| 1 | Base frame 1 | |
| 2 | Main frame 1 | |
| 3 | Incline frame 1 | |
| 4 | Upright post frame 2 | |
| 5 | Handle bar frame 1 | |
| 6 | Ezfit linking parts 1 | |
| 7 | Motor base frame 1 | |
| 8 | Motor board welding 1 | |
| 9 | Hex full thread screw M8×75 1 | |
| 10 | Allen C.K.S half thread screw M10×35×20 4 | |
| 11 | Allen C.K.S half thread screw M10×45×20 2 | |
| 12 | Allen socket head full thread screw M8×15 | 2 |
| 13 | Allen socket head full thread screw M8×75 | 3 |
| 14 | Allen C.K.S full thread screw M8×15 | 6 |
| 15 | Allen C.K.S half thread screw M8×45×20 | 2 |
| 16 | Allen C.K.S half thread screw M8×50×20 | 8 |
| 17 | Allen C.K.S half thread screw M8×30×20 | 1 |
| 18 | Allen C.K.S half thread screw M8×40×20 | 3 |
| 19 | Allen countersunk head full thread screw M6×50×Φ16 | 6 |
| 20 | Philips C.K.S. full thread screw M5×10 6 | |
| 21 | Philips C.K.S. full thread screw M4×10 7 | |
| 22 | Philips C.K.S.self-tapping screw ST4×16 | 24 |
| 23 | Philips C.K.S.self-tapping screw ST4×20 | 4 |
| 24 | Philips C.K.S.self-tapping screw ST4×25 | 4 |
| 25 | Philips C.K.S.self-tapping screw ST4×12 | 4 |
| 26 | Philips panhead self-tapping screw ST4×15 | 4 |
| 27 | Philips countersunk head self-tapping screw ST3×10 | 6 |
| 28 | Flat washer Φ8 | 12 |
| 29 | Flat washer Φ10 | 5 |
| 30 | Spring washer Φ8 | 2 |
| 31 | Washer Φ5 | 3 |
| 32 | Hex self-fix nut M8 | 6 |
| 33 Hex self-fix nut M10 5 | |
| 34 Powder metallurgy plugΦ17×Φ10×12 4 | |
| 35 Spring 1 | |
| 36 Console 1 | |
| 37 Signal wire 1 | |
| 38 Signal wire 1 | |
| 39 Signal wire 1 | |
| 40 Speed sensor L-300 1 | |
| 41 Controller 1 | |
| 42 Handle pulse (Speed) 1 | |
| 43 Handle pulse (Incline) 1 | |
| 44 Handle pulse connection wire 2 | |
| 45 Safety key 1 | |
| 46 Power connect wire 1 | |
| 47 Power connect wire 1 | |
| 48 Switch 1 | |
| 49 Fuse holder with wire 1 | |
| 50 Power cord | 1 |
| 51 Front roller | 1 |
| 52 Rear roller | 1 |
| 53 Hydraulic | 1 |
| 54 Motor | 1 |
| 55 Running belt | 1 |
| 56 Incline motor | 1 |
| 57 Running deck | 1 |
| 58 Motor belt 1 | |
| 59 Motor cover | 1 |
| 60 Motor cover accessory(left) | 1 |
| 61 Motor cover accessory(right) | 1 |
| 62 Rear cover | 1 |
| 63 Side rail 2 | |
| 64 Handle bar cover(UP) | 2 |
| 65 Handle bar cover(LOWER) | 2 |
| 66 Lateral cover(left) 1 | |
| 67 Lateral cover(right) 1 | |
| 68 Accessory tray(left) 1 | |
| 69 Accessory tray(right) 1 | |
| 70 End cap for base frame 2 | |
| 71 Foam grip 2 | |
| 72 Square cushion 4 | |
| 73 Square cushion 6 | |
| 74 Cushion 2 | |
| 75 Side rail guider 8 | |
| 76 Ellipse end cap 2 | |
| 77 Flat washer Φ12×Φ4.5×t1.0 4 | |
| 78 Round end cap 1 | |
| 79 Taper feet pad 4 | |
| 80 Wheel 2 | |
| 81 Wheel 2 | |
| 82 Cable protector | 1 |
| 83 Cable guider | 1 |
| 84 Cable binder | 1 |
| 85 Magnetic ring Φ29×Φ17×t7.5 | 1 |
| 86 Philips C.K.S. self-tapping screw ST4×10 | 8 |
| 36 Console | 1 |
| 36--1 Console housing | 1 |
| 36--2 LED overlay (w/ PCB of monitor) | 1 |
| 36--2-1 Panel(big) 1 | |
| 36--2-2 Panel(small) | 1 |
| 36--2-3 PCB of LCD | 1 |
| 36--2-4 PCB of keyboard | 1 |
| 36--2-5 Overlay for LCD | 1 |
| 36--2-6 Overlay for keyboard | 1 |
| 36--2-7 PCB of safety key | 1 |
| 36--2-8 Safety pin | 1 |
| 36--2-9 Safety key plate | 1 |
| 36--2-10 Label for the safety key | 1 |
Proper maintenance is very important to ensure a faultless and operational condition of the treadmill. Improper maintenance can cause damage to the treadmill or shorten the life of the product.
All parts of the treadmill must be checked and tightened regularly. Worn out parts must be replaced immediately.
BELT ADJUSTMENT
You may need to adjust the running belt during the first few weeks of use. All running be are properly set at the factory. It may stretch of be off center after use. Stretching is normal during the break-in period.
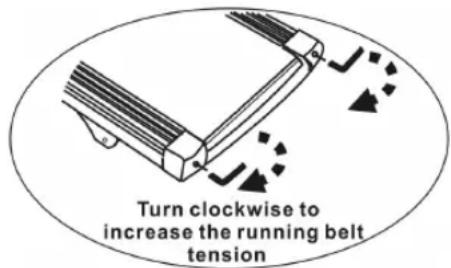
ADJUSTING THE BELT TENSION:
If the running belt feels as though it is —slipping or hesitating when you plant you foot during a run, the tension on the running belt may have to be increased.
TO INCREASE THE RUNNING BELT TENSION:
- Place 8mm wrench on the left belt tension bolt. Turn the wrench clockwise 1/4 turn to draw the rear roller and increase the belt tension.
- Repeat STEP 1 for the right belt tension bolt. You must be sure to turn both bolts the same number of turns, so the rear roller will stay square relative to the frame.
- Repeat STEP 1 and STEP 2 until the slipping is eliminated.
- Be careful not to tighten the running belt tension too much as you can create Excessive pressure on the front and rear roller bearings. An excessively tightened running belt may damage the roller bearings that would result in bearing noise from the front and rear rollers.
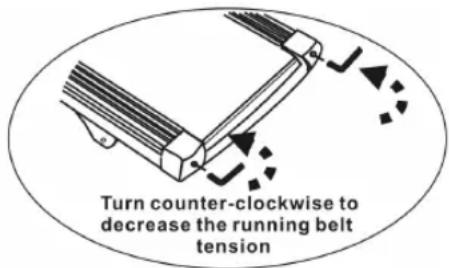
TO DECREASE THE TENSION ON THE RUNNING BELT, TURN BOTH BOLTS COUNTER-CLOCKWISE THE SAME NUMBER OF TRUNS.
CENTRING THE RUNNING BELT
When you run, you may push off harder with one foot than with another. The severity of the deflection depends on the amount of force4 that one foot exerts in the relation to the other. This deflection can cause the belt to move off-centre. This deflection is normal and the running belt will centre when no body is on the running belt. If the running belt remains consistently off-centre, you will need to centre the running belt manually.
Start the treadmill without anyone on the running belt, press FAST-key until speed reached 6kph.
-
Observe whether the running belt is toward the right or left side of the deck.
-
If toward the left side of the deck, using wrench, turn the left adjustment bolt clockwise 1/4 turn and the left adjustment bolt counter clockwise 1/4.
- If toward the right side of the deck, turn the right adjustment bolt clockwise 1/4 turn and the left adjustment bolt counter clockwise 1/4.
-
If the belt is still not centre, repeat the above step until the running belt is on centre.
-
After the belt is centre, increase the speed to 16kph and verify that it is running smoothly. Repeat the above steps if it is necessary.
If the above procedure is unsuccessful in resolving the off-centre, you may need to increase the belt tension.
LUBRICATION
The treadmill is factory-lubricated. However, it is recommended to check the lubrication of the treadmill regularly, to ensure an optimal operation of the treadmill. It is usually not necessary to lubricate the treadmill in the first year or the first 500 hours of operation. After every 3 months of operation, lift the sides of the treadmill and feel the surface of the belt, as far as possible. If traces of silicon spray are found, lubrication is not necessary. In case of a dry surface refer to the following instructions.
Only use oil free silicon spray.
Application of lubricant on the belt:
- Position the belt so that the seam is located in the middle of the plate.
- Insert the spray valve in the spray head of the lubricant container.
- Lift the belt at one side and hold the spray valve in a distance to the front end of strict belt and plate. —tart at the front end of the belt. Lead the spray valve in direction of the back end. Repeat this process on the other side of the belt. —pray each side for about 4 seconds.
- Wait 1 minute to let the silicon spray spread, before starting the machine.
CLEANING:
Regular cleaning of the striding belt ensures a long product life.
- Warning: The treadmill must be turned off to avoid electrical shocks. The power cord must be pulled out of the socket, before starting the cleaning or maintenance.
- After each training: Wipe the console and other surfaces with a clean soft and damp cloth to remove sweat residues.
Caution: Do not use any abrasives or solvents. To avoid damage to the computer, keep any liquids away. Do not expose the computer to direct sunlight.
- Weekly: To make the cleaning easier it is recommended to use a mat for the treadmill. —hoes can leave dirt on the striding belt that can fall beneath the treadmill. Clean the mat under the treadmill once a week.
STORAGE:
—tore you treadmill in a clean and dry environment. Ensure the master power switch is of and is un-plugged from the electrical wall outlet.
Important notes
- The device corresponds to current safety standards. The device is only suitable for home use. Any other use is impermissible and possibly even dangerous. We cannot be held liable for damages that were caused by improper usage.
- Please consult your GP before starting your exercise session to clarify whether you are in suitable physical health for exercising with this device. The doctor's diagnosis should be the basis for the structure of your exercise programme. Incorrect or excessive training
could be harmful to your health.
- Carefully read through the following general fitness tips and the exercise instructions. If you have pain, shortness of breath, feel unwell or have other physical complaints, break off the exercise immediately. Consult a doctor immediately if you have prolonged pain.
- This fitness device is not suitable for professional or medical use, nor may it be used for therapeutic purposes.
- The pulse sensor is not a medical device.it is meant for your information purposes only and is designed to give an average pulse rate.it is not intended to offer medical advice no will it measure pulse accurately every time, due to differing environmental and human conditioning factors.
WARRANTY
TERMS AND CONDITIONS
This warranty is valid only in accordance with the conditions set forth below. Warranty applies only while the followings three conditions are met.
- It remains in the possession of the original purchaser and proof of purchase is demonstrated.
- It has not been subject to accident, misuse, abuse, improper service or unauthorized modifications.
- Claims are made within the 12 months manufacturer's warranty period.
EXCLUSIONS AND LIMITATIONS
This warranty is for home use only. Under no circumstances is this treadmill warranted for semi-commercial or commercial use.
We warrant this product to be free from defects in material and workmanship.
This warranty is expressly limited to the replacement of a defective motor, electronic component, or defective part and is the sole remedy of the warranty. Labor for repair or replacement of defective parts is not covered by this warranty. The warranty does not cover normal wear and tear, improper assembly or maintenance or installation of parts or accessories not originally intended or compatible with the treadmill sold. The warranty does not apply to damage or failure due to accident, abuse, corrosion or neglect.
Manufacturer shall not be responsible for incidental or consequential damages.
WARRANTY REGISTRATION
The warranty registration must be completed in full. —end or fax this information along with a proof of purchase to your dealer to keep on file. Your dealer must have this information on file before a warranty claim can be processed.
WARRANTY REGISTRATION – Keep a copy for your records
Model #:
—erial #:
Date of purchase:
Your name:
Dealer name:
Address:
Dealer address:
- MOTORIZED TREADMILL OWNER'S MANUAL
- Thank you
- Implied Warranty
- General safety instructions
- Special Safety Precautions
- ●Power source:
- Assembly
- Unpacking & Assembly
- UNPACK AND VERIFY THE CONTENTS OF THE BOX:
- Main parts
- Hardware bag
- Treadmill instruction
- Technical information
- ASSEMBLY INSTRUCTIONS
- SETTING UP YOUR TREADMILL
- PLACEMENT IN YOUR HOME
- USE DEDICATED CIRCUIT
- CAUTION!
- GETTING STARTED
- TURN POWER ON
- SAFETY KEY AND CLIP
- GETTING ON AND OFF THE TREADMILL
- WARNING•
- CAUTION•
- FOLDING THE TREADMILL
- UNFOLDING THE TREADMILL
- MOVING THE TREADMILL
- Key Definition
- (III)Button instruction :
- General fitness tips
- Warm-up / stretching exercises
- NECK EXERCISES
- EXERCISES FOR THE SHOULDER AREA
- ARM STRETCHING EXERCISES
- EXERCISES FOR THE UPPER THIGH
- INSIDE UPPER THIGH
- TOUCH TOES
- EXERCISES FOR THE KNEES
- EXERCISES FOR THE CALVES/ACHILLES TENDON
- EXPLODED DRAWING
- BELT ADJUSTMENT
- ADJUSTING THE BELT TENSION:
- TO INCREASE THE RUNNING BELT TENSION:
- TO DECREASE THE TENSION ON THE RUNNING BELT, TURN BOTH BOLTS COUNTER-CLOCKWISE THE SAME NUMBER OF TRUNS.
- CENTRING THE RUNNING BELT
- LUBRICATION
- Application of lubricant on the belt:
- CLEANING:
- STORAGE:
- Important notes
- WARRANTY
- TERMS AND CONDITIONS
- EXCLUSIONS AND LIMITATIONS
- WARRANTY REGISTRATION
- WARRANTY REGISTRATION – Keep a copy for your records
Brand : York Fitness
Model : T700
Category : Treadmills